When a child learns to write letters, they are forming handwriting muscle memory that becomes instinctive. One important piece to the handwriting puzzle is fluid writing, or the motor planning in handwriting that makes writing letters natural, efficient, and fluid. Motor planning and the developmental skills that follow allow a child to copy the parts of letters. Part of handwriting practice is building the motor plan to make letters from memory!
One area of handwriting problems that impact legibility is the ability to automatically form letters without thinking about the formation of each letter.
Handwriting and Muscle Memory
At first, children learn the pre-writing strokes that are needed to copy shapes like lines, a plus sign, an “x”, a square, and more complex shapes and forms.
Then, as they learn to write letters, they use a form of letter construction to build a letter according to the sequential steps.
Over time, this becomes engrained in their muscle memory.
As they learn to use their “mind’s eye” to write the letters without copying, they are able to write the letters needed to write their first name. This is essentially muscle memory to write letters.
What follows, is an ability to write letters independently. When a motor plan in handwriting has been established, children can then write words and sentences without copying from a model.
Motor Planning and Handwriting
This post contains affiliate links.
There are a lot of pieces that play into motor planning related to handwriting. The body’s sensory systems, processing speed, and motor output are all important parts of the motor plan that allows us to write independently.
Our body is able to respond to sensory information and know what the arm or hand is doing without directly looking at it. We are able to instinctively process the information needed to move our hands to turn over the paper or open the book.
In most cases, we can do these tasks without looking at our hands. When motor planning is an issue, children might need to look at their hands, think through the actions, and perform the parts of the task slowly or laboriously.
Likewise, the typical student learns to write the letters in their name without thinking about the way the letters are formed. We are able to hold the paper with our non-dominant hand while manipulating, rotating, and shifting the pencil with our dominant hand.
These tasks and pieces that make up the skill of handwriting becomes automatic with practice. We use the skills that we know in order to perform tasks naturally.
Motor planning and handwriting uses sensory information that is registered, filtered, organized, and used appropriately in tasks like managing paper, pencils, and letter formation.
Muscle Memory in Handwriting
For children with slow processing speed, the sensory information that comes in during handwriting tasks can interfere with motor planning and written work.
Handwriting becomes slow, laborious, and illegible, especially as children are required to write more information and at faster speeds in the older grades.
Consider the child who has difficulty with motor planning and handwriting. The difficulties may not truly present until the student is required to write spelling words, complete writing prompts while thinking creatively, or use increasing speeds in order to take notes.
Proficient handwriting relies on the development of muscle memory for forming letters, an essential aspect of motor planning. This handwriting motor planning not only facilitates the writing speed at which one can output letters onto the paper, but also contributes significantly to the accuracy and legibility of the written text.
Slow processing speed- To take this even further, the individual may struggle with processing, which adds additional time onto the process.
Slow Processing Speed in Handwriting
When we see students who struggle with motor planning in writing, there can be several things going on.
One of those considerations is slow processing speed which impacts handwriting skills.
Processing speed refers to the ability, or time it takes to absorb and interpret information. This ability is needed for all motor tasks, and handwriting is included!
When we consider the aspect of writing, slow processing speed may impact:
Processing Speed in Handwriting can also pertain to visual elements like letters and numbers, auditory aspects like spoken language, or motor functions, as observed in tasks such as writing or fine motor activities like catching objects.
It’s important to mention that slow processing speed in handwriting has a huge impact on maintaining precision in handwriting and other cognitive tasks.
The child might not have a “plan” in place to form the letter. They might need to actively consider how each letter is properly formed by visualizing the letter in their mind’s eye. This processing task takes time!
It is important to note that slow letter formation, inaccurate line use or formation of letters, poor pencil stroke order, or other indications of motor planning concerns in written work are typical of the child who is learning to write.
Children will reverse letters, write an “h” when they intended to write an “n”, or other inaccuracies.
Motor planning and handwriting is just one important piece that makes up the complex skill of written work.
One way to support the motor plan needed for handwriting is to use specific strategies, adaptations, handwriting accommodations, and practice!
You might know that I have been working alongside several other pediatric Occupational Therapists and Physical Therapists to write The Handwriting Book.
In The Handwriting Book (digital e-book), you will find information relating to handwriting and:
The Developmental Progression of Pencil Grasp and Handwriting Strokes
Fine Motor Skills
Gross Motor Skills
Sensory Considerations
Visual Perceptual Skills
This resource is intended especially for parents who have a child who struggles with handwriting, teachers who want to find out more about why their students struggle with written work, and therapists who are looking for creative ways to address common handwriting struggles. Inside The Handwriting Book e-book, you will find:
Tips and Strategies for the Reluctant Writer
Ideas for Combining Handwriting and Play
Activities to Practice Handwriting Skills at Home
Tips for Sizing, Spacing, and Alignment in Written Work
Therapy providers will find all of the handwriting information, tips, and strategies they need right at their fingertips as they work with kids and write evaluations and goals for the students on their caseloads.
Teachers will find information and ideas to support handwriting development in the students in their classrooms.
Parents will find information on developmental progression of writing abilities and an understanding of the underlying components related to legible written work.
The Handwriting Book is a comprehensive resource created by experienced pediatric OTs and PTs.
The Handwriting Book covers everything you need to know about handwriting, guided by development and focused on function. This digital resource is is the ultimate resource for tips, strategies, suggestions, and information to support handwriting development in kids.
The Handwriting Book breaks down the functional skill of handwriting into developmental areas. These include developmental progression of pre-writing strokes, fine motor skills, gross motor development, sensory considerations, and visual perceptual skills. Each section includes strategies and tips to improve these underlying areas.
Strategies to address letter and number formation and reversals
Ideas for combining handwriting and play
Activities to practice handwriting skills at home
Tips and strategies for the reluctant writer
Tips to improve pencil grip
Tips for sizing, spacing, and alignment with overall improved legibility
Colleen Beck, OTR/L has been an occupational therapist since 2000, working in school-based, hand therapy, outpatient peds, EI, and SNF. Colleen created The OT Toolbox to inspire therapists, teachers, and parents with easy and fun tools to help children thrive. Read her story about going from an OT making $3/hour (after paying for kids’ childcare) to a full-time OT resource creator for millions of readers. Want to collaborate? Send an email to contact@theottoolbox.com.
When kids are learning to write, they often times form letters in “parts”. Accuracy with letter formation starts with correct training of how to write letters. The number one essential task for kids to proceed on with legible and speedy handwriting is correct letter formation.
That means starting at the top and pulling lines down to the bottom or forming a specific “part” of the letter first (as when writing a letter “a”). This handwriting quick tip is one way to ensure a child can form letters accurately using letter construction.
Building letters part-by-part and in correct sequence will help kids grasp accurate letter formation and legibility when writing.
As an Amazon Influencer, I earn from qualifying purchases.
Letter Construction to teach children to form letters.
Letter Construction
When we refer to the phrase “letter construction”, we mean to build a letter section by section, or pencil stroke by pencil stroke. This ability to construct a letter means that letters are formed at the top for uppercase letters and at the correct starting point for lowercase letters.
We can facilitate more fluent and efficient handwriting using the letter construction method because teaching children to learn how to write letters by using multisensory strategies, while integrating underlying skills like visual motor skills and pre-writing strokes, uses that information to create a handwriting motor plan for fluent letter formation.
In other words, handwriting is more fluid and legible because the student establishes muscle memory for writing letters that are formed with the most effective stroke sequence.
However: there’s a very important note we need to make here.
Using the “correct” pencil sequence to form letters does not mean functional handwriting can not exist when letters aren’t built the standard way. In other words, kids can definitely start letters at the bottom, use incorrect stroke sequence, or form letters inaccurately and still have functional writing.
Their handwriting can be legible and simply work!
Given that knowledge, this letter construction process is just one letter method to add to a toolbox of handwriting options!
Letter Construction Letter Method
This post contains affiliate links. As an Amazon Influencer, I earn from qualifying purchases.
What is “letter construction”? Just as explained above, letter construction is a letter method, or handwriting trick that teaches students to construct a letter part by part and in the correct order. Constructing a letter when teaching kids how to form letters in their initial handwriting training ensures accurate letter formation.
They might make the curve of a lower case letter “b” as a circle and then add a tall line. What happens when they accidentally place that tall line on the right side of their circle? They’ve got a “d” instead of a “b”.
When kids are taught proper letter formation, they are able to carryover the skills when they are challenged to write at increasing speeds or during independent writing tasks.
To “build” a letter with the strokes needed for proper letter formation, you sequentially add onto the lines.
For example, some letters are called “magic c” letters in the Handwriting Without Tears Program. That’s because the letter c is the base for the letter. Be sure to check out our post on Handwriting Without Tears letter order for information on building letters upon one another, as some letters contain parts or the same pencil strokes as others. This is a way to support a motor plan for letter formation.
Start with a letter c and then add on a line or a line and curve or continue around in a circle and you’ve got three different letters, depending on how the pencil moves.
Starting with our free Letter C worksheet is a great idea because this base letter supports development of other letters, sequentially.
To help kids understand the step-by-step process of building letters, try this easy trick that breaks down the construction of letters…
You’ll need a few materials to get started:
Lined paper
3 markers or colored pencils in different colors
That’s it! The process of constructing letters is pretty simple as well:
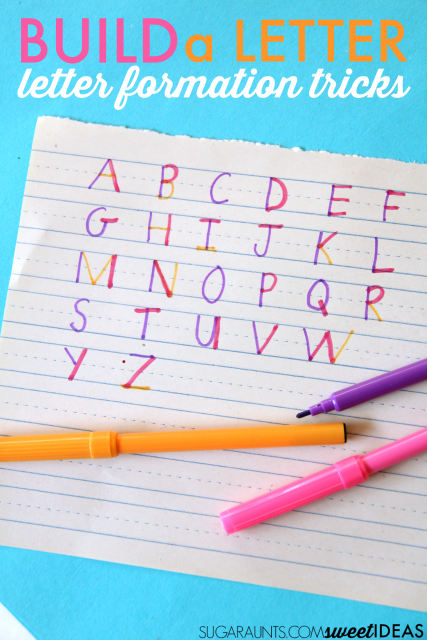
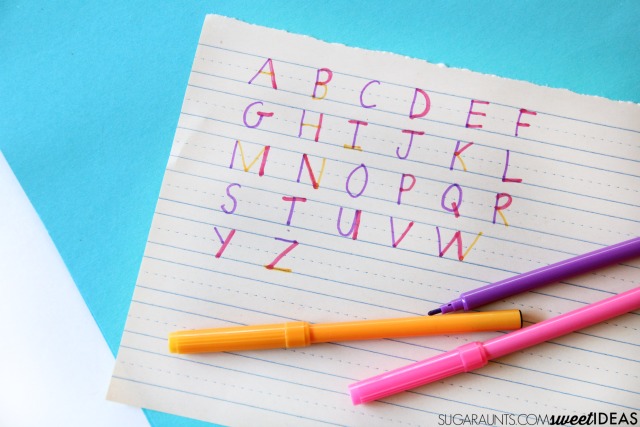
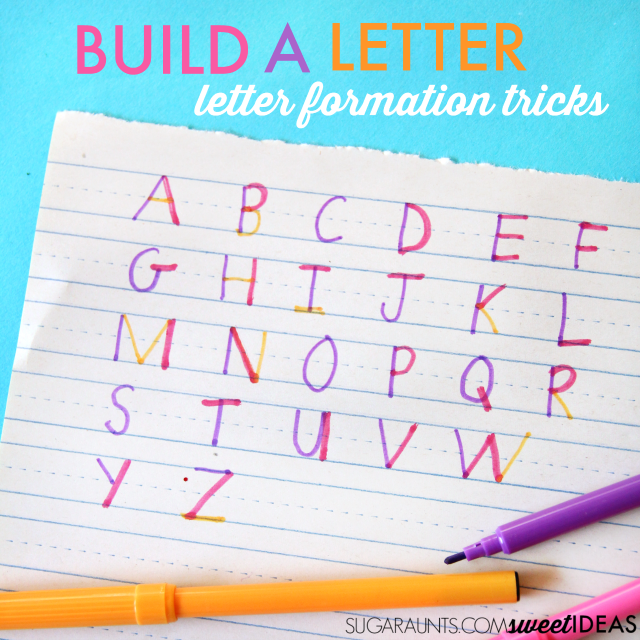
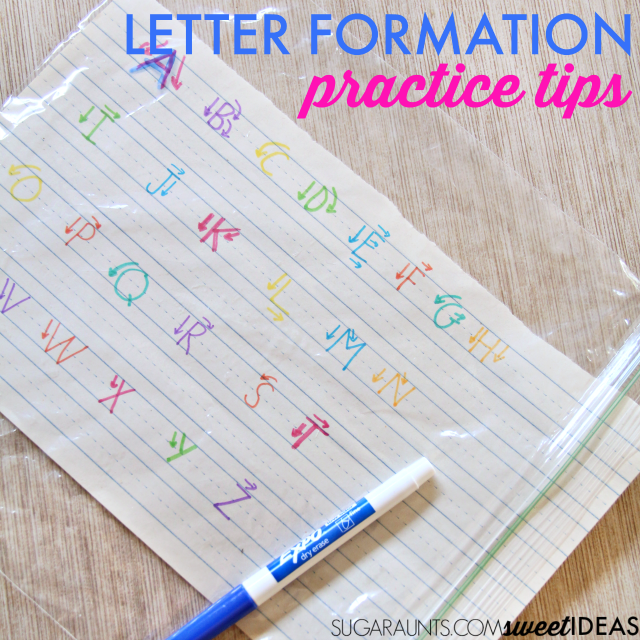
Grab three different colored markers (affiliate link) or colored pencils.
Assign each marker to a place. For us, we assigned purple marker to the first line, the pink marker to the second line, and the orange marker to the third line.
3. Next, show your kids how to “build” the letter by copying you as they form the letter part by part. Starting out with this handwriting activity, kids may need more visual and verbal cues to follow along with the color sequence with the markers (affiliate link). Making a visual key helps.
4. Then, kids can trace over the lines to practice letter construction. Try this for upper case letter formation and lower case letter formation.
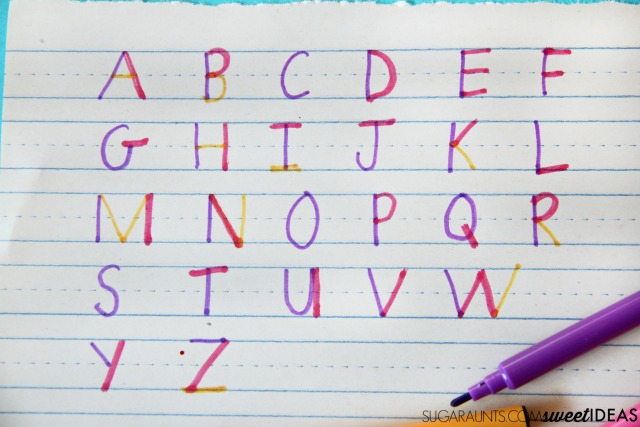
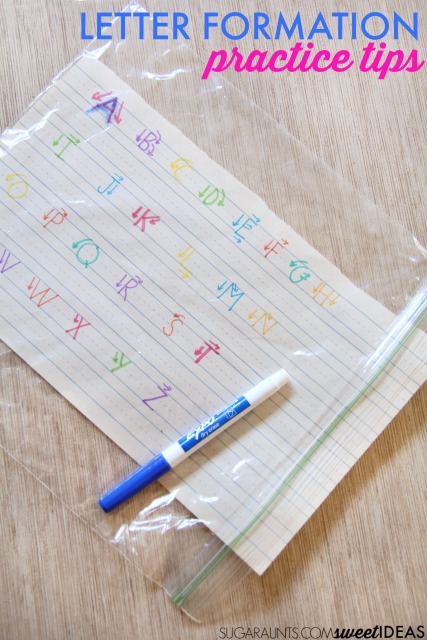
Wanting to practice correct letter formation even more? Use the color coded letter formation in a reusable handwriting activity.
To extend this activity, slide the paper into a gallon sized storage bag (affiliate link) or a page protector sleeve and use a dry erase marker to practice letter formation over and over again. Using dry erase markers that match the colors used above, is helpful.
Adding a visual cue of arrows can help, too.
More letter formation tips and tricks that can help with letter construction:
Moving through the alphabet, we are ready to learn how to teach the letter C with our free Letter C Worksheet! Keep an eye out for posts for all accurately forming all 26 letters! Each post will offer information on how to teach the highlighted letter, including a free download. Today’s post will address letter “C” and include a free printable Letter C Worksheet. All the alphabet posts will have tips to the teach the selected letter, review the prewriting skills needed, and highlight different letter rhymes and prompts that are helpful to teaching the letter.
You’ll also want to check out our letter formation worksheets resource, where we have other writing printables as well as a full list of these printable pages.
letter c worksheet
The Letter C Worksheet is designed for students to cut the page into sections, then staple all the pieces together to create little alphabet tracing books by grouping the dotted, tracing, playdough, and color sections together.
Today we are talking about the Letter C, both in its upper and lowercase form. There are many terrific ways to teach letter recognition and formation.
It is beneficial to find multiple different ways to teach each skill, as not all students learn the same way. Multisensory learning meets the needs of different types of learners
The Letter C Worksheet is divided into six sections:
Build Letter C
Tracing Letter C
Do-a-Dot Letter C
Write Letter C in Size Boxes
Write Letter C on Lines
Each section covers uppercase C and lowercase c for size awareness as well as the motor plan needed to form the letter. Motor planning in handwriting is a concept that ensures accurate formation of letters.
Play Dough letter C
This section of the worksheet is great for building a motor plan for making letter C. hands-on learners will love the building section of the letter C worksheet. You’ll fund a playdough uppercase C and lowercase c in the image.
Students can mold the letter C out of play dough, clay, sticks, or other manipulatives. Keep reading for more great ideas to build letters out of common items.
This section of the worksheet can be cut out and used as copy cards or as a mini play dough mat, if letters are formed right over the images.
The letter C has arrows for proper stroke sequence.
Tracing letter C
Kinesthetic learners learn by doing, and will benefit from all the sections in these handouts, especially this section on tracing letters. Kinesthetic learners like to touch and engage in order to learn and retain information. That’s where this Letter C tracing activity on the printable comes in.
Students can use their fingers, a wand, popsicle stick, or add a writing tool to trace the letters. You can also laminate the letter pages, place them on a tray covered with sand, salt, or shaving cream, and have students trace the letters this way.
Do a Dot Letter C
The Do a Dot Letter C printable section of the page is a mini version of a full Do a Dot worksheet. We created the page with this in mind so that a smaller version can be practiced, using broken cotton swabs or the end of an eraser dabbed in paint or a stamp pad.
Users can dab the dots to make the letter C by following the lines of the letters.
Then, copy the letter onto a larger piece of paper by using bingo type markers or dabber stampers to fill in the letters. Kids love the banging movement and sound of these dot markers. Students can also dip Q-tips or fingers into paint to make dots on the paper. There are all kinds of stampers available on the web. What else can kids use to make dots on paper?
Color letter C
The Color the Letter C and c section of the worksheet page encourages several areas of motor skills:
developmentally appropriate grasp patterns (broken crayons work wonders for developing a tripod grasp)
Explore different mediums for coloring including markers, gel pens, pencils, crayons (of all types), paint, glitter, or glue and small items to fill the space.
Write letter C
Next on the worksheet page are two sections for using a pencil to write uppercase C and lowercase c.
These two sections are for students to put their practice into letter formation. They will practice writing the letters on the lines with correct sizing, formation, line placement, and details. Students also practice fitting the letters inside the small boxes to improve letter sizing and accuracy.
As with the other sections, this section can also be laminated for reusability. Be mindful that some students do not write well with dry erase markers.
To print your copy of this Letter C/c PDF, you will need to enter your email address into the form at the bottom of this blog post. Then, click the button and check your email to get the FREE downloadable PDF letter C worksheet.
how to teach letter c
This letter C worksheet is a great start to teaching letter formation. Whether you are using the Handwriting (Learning) without Tears curriculum which teaches the letters by group, or teaching the letters in alphabetical order, these great worksheets provide a consistent method for teaching and tracking letter formation and understanding.
There are several sites online with different phrases available for teaching letters.
The HWT curriculum lowercase “c” narrative says: magic c. For the uppercase letter C, HWT says: big curve. While the HWT curriculum does not use cute poems and rhymes, the consistent language that is taught using straight and curved lines is beneficial to learning.
Songs for Teaching’s rhyme for lowercase c says, letter c’s like a circle, but it does not close up. C is for cotton candy and carrots and cups
Songs of Sounds UK, teaches lowercase c: Curl around the curled-up caterpillar. Uppercase C: From the top, curl around to the left to sit on the line.
Twinkl, teaches lowercase c: start drawing a circle and curve around slowly, stop before it has finished and you have made a c!
Uppercase C says: capitol C is easy, don’t you know? Just start like a little c and make it grow! A curved line from the start to the end, move your pencil slowly around the bend.
specific skills needed to learn letter c
In addition to the skills above, students will need to know how to form curves to make upper and lowercase C.
For forming a Letter C, a curved line is used. This is a beginner pre-writing skill, so the curve should be an earlier one that is achieved.
However, letter C requires pencil control in order to start and stop the lines of the curve.
Teach them about starting at the top, and pencil control to stop the curve before making a circle.
This is a good time to start demonstrating talking about the similarities between upper and lowercase C.
Because uppercase C and lowercase C are the same form, this is a good beginner letter to practice. However, targeting size awareness is a good idea for controlled use of the pencil as well as visual motor skills needed to differentiate between the upper case and lowercase forms.
There are dozens more additional skills children need to learn before they are truly ready for handwriting. Children who are missing these important skills may struggle with handwriting, along with other fine motor tasks. A lack of these foundational skills can lead to poor letter formation, fatigue, compensation strategies, and inefficient writing.
prewriting skills needed to learn to write letters
If forming a letter C is difficult, it might be wise to step back and take a look at the pre-writing skills.
As you are working on the Letter C Worksheet, be sure your students have the prewriting skills needed for writing letters. Here is a comprehensive post about the Prewriting Skills needed before letter formation.
Some of the prewriting skills for letter formation include:
grasping skills for holding the writing tool – it is preferable to work on forming a correct tripod grasp, but not essential for starting letter formation. Children begin to form a tripod grasp around age four. You can improve pencil grasp by working on hand strengthening activities
finger isolation is what is needed to be able to tuck fingers into the palm when writing
in hand manipulation – start working on training the intrinsic muscles of the hands
following directions – this is a key to learning any new skill and quite often the biggest barrier
hand strength needed hold pencil and manipulate objects. Students with weak hand strength often have shaky, lightly written letters, and hold the writing tool lightly
crossing midline is an essential skill for letter formation, otherwise letters like “t” are written in four pieces rather than two intersecting lines
beginning hand dominance – do not worry if it is not solidified by age four, just encourage fine motor tasks, and watch for signs that one hand is stronger than the other
imitating movements is important as many children do not respond to verbal directions only
visual perception is making sense of what is written or seen. These might include same/different, scanning, or discrimination
prewriting strokes – being able to write lines and circles is important, as these are the foundation for forming upper and lowercase letters
social function skills such as attending, work tolerance, controlling impulses and body, taking turns, waiting, sharing, and more are needed skills for effective learning.
Activities to teach letter c
In addition to the rhymes above, there are other great activities to teach letter formation and letter recognition for letter b/B:
Letter immersion: surround your students with letters. Use games, activities, books, gross motor games, and whole lesson plans to immerse students in learning the letters. Hang up letters, sing songs and rhymes, point out letters, and talk about them. The Dollar Store is a great place to buy all kinds of supplies
Letter I Spy: ask your child to identify and find letters as you go about your day together. Use the letter of the week as well as previously learned letters.
Making letters using nature: Take a nature walk and gather materials found on the ground. Use these supplies to form letters. Note: Rocks and leaves are easiest for forming rounded letters like letter C, and sticks are best for letters with straight lines (A, J, T). These rock letters are a fun way to practice letter C.
Guess the magnetic letter: Have your child close their eyes before handing them a single magnetic letter of your choice. See if your student can identify the letter in their hands by touch. For children who are still learning, provide choices for them to guess between (“Do you have a ‘T’ or a ‘B’ in your hands?”).
Letter matching cards: Start by cutting out rectangles of paper or cardboard for your cards (or use index cards), one for each uppercase and lowercase letter. Write a letter on each of the cards, or have your student practice writing it themselves.
Your child can decorate the cards, or glue an object that corresponds to each letter as a visual aide (like an apple on each of the “A” cards, a balloon for the “B” cards, and so forth).
When you are finished making the cards, mix them all up on the table and have your student select one. Their task is to find the matching upper or lowercase version of that letter from the pile. Here is a set of cursive letter flash cards.
Make a Letter C craft: Have your student form the letter using your chosen material. You can supply every student with the same material to work on copying from a model, or let them try their creativity. These will be great to try on the “build or trace” template included in the letter C worksheet.
Post it notes letter C: Write an uppercase letter C on several Post it notes. Then, use the remaining ones for lowercase letter c. Next, alternate placing uppercase and lowercase letters onto your wall or whiteboard. Point to the uppercase “C” and ask, “Can you find the lowercase letter that matches?” If your child correctly identifies the letter “c,” have them pick it up and stick it below the capital “C.”
Screen time: If your curriculum includes a bit of educational screen time, the HOMER Learn & Grow app is a great way to let them practice their letter identification skills.
If you set up a free trial, send us an email at contact@theottoolbox to let us know! We’ll email you a few accompanying resources to support letter formation activities!
Letter similarities and differences: Make or buy flash cards. Work with your student to help you sort them into two groups: those that look the same in upper and lowercase and those that look different.
You may need to model this for your child a few times. For example, hold up the capital “S” card and ask, “Do you see a lowercase letter that looks like this?”
Let your child examine both letters and highlight similarities and differences between the uppercase and lowercase versions.
Continue sorting, letter by letter. Once your child sorts all the letters, have them count the cards in each bowl and see if there are more that look alike or more that are different. This is a great visual perception activity for attending to details.
more tips to teaching letter c
surround your students with letters. Use games, activities, books, gross motor games, and whole lesson plans to immerse students in learning the letters
make letters in sand, shaving cream, chalk, sandpaper
teach the letter names and sounds before forming the letters so students understand what they are writing
use the whole body to teach letter formation
sing songs and rhymes about letters
practice prewriting skills through activities and play
encourage family to practice with their children at home
follow the same curriculum throughout the teaching for consistency. Whether you use Learning without Tears, Teaching Mama, Songs for Sounds, or another curriculum, being consistent helps students learn the language and follow the prompts
As described above, this free Letter C Worksheet, can be cut into sections and made into mini workbooks. There are many other great options for using these work pages:
Laminate the pages to make them reusable. Punch holes in them, and create a binder. This is especially helpful with the play dough cards
Take a photo of the letter made of playdough, rather than having students trying to keep their dough formations stuck in their books
Enlarge each section to make them full page sized. This might be helpful for younger learners who may need more room to write and color
Separate each kind of activity, and group them together to make an alphabet book. For example, make a book of all the “do a dot” letters. Keep going until your students have six mini alphabet books
Cut the pages into six sections, then staple together. Each book with have six pages, all relating to the same letter. For example, the Letter C Worksheet would be turned into a small booklet with a traced C, written C, colored C, dotted C, playdough C, etc.
Make your own modifications to some of the sections. Instead of tracing, students can fill the section with glue and glitter! In the coloring section, students can fill them with small manipulatives. Wikki sticks can be used instead of Playdough. Water color, paint, or any other creative medium you can find to fill in the spaces
Have bins of manipulatives ready for creative play with this Letter C Worksheet
Glue and bits of paper, or other findings are always handy to have around
Making an activity fun will hopefully encourage the reluctant learners
Add this letter C worksheet to part of your bigger lesson plan including gross motor, sensory, social, reading, math, or other daily fun activities
a final word on letter c
When you get excited about teaching, it will become contagious. Your students will feed off your positive energy. Teaching is not one size fits all, so it will take some trial and error to find something that works. Find something that you feel you can teach over and over again. Sometimes the lessons become repetitive, so you need to like what you are teaching.
Free Letter C Worksheet
Want a free printable letter C worksheet that you can use to work on learning the motor plan for letter C? We have a free worksheet that offers several multisensory letter formation strategies. Print off the page and use all of the sections to create uppercase letter C and lowercase letter c. Or, cut the worksheet into sections to create mini booklets to form the letter in a single sensory style.
Enter your email address into the form below to access your copy.
This printable is also available inside our membership club!
Victoria Wood, OTR/L is a contributor to The OT Toolbox and has been providing Occupational Therapy treatment in pediatrics for more than 25 years. She has practiced in hospital settings (inpatient, outpatient, NICU, PICU), school systems, and outpatient clinics in several states. She has treated hundreds of children with various sensory processing dysfunction in the areas of behavior, gross/fine motor skills, social skills and self-care. Ms. Wood has also been a featured speaker at seminars, webinars, and school staff development training. She is the author of Seeing your Home and Community with Sensory Eyes.
Want printable handwriting and sensory motor activities to target the visual motor skills needed for letter writing? Grab a copy of our Letters! Fine Motor Kit. The printable PDF contains 100 pages of hands-on letter writing practice for multisensory handwriting!
A-Z Multisensory Writing Pages: Roll a ball of dough letters, ASL sign language letters, gross motor movement, small-scale letter box writing task, finger isolation letter trace, and writing practice area
Alphabet Fine Motor Clip Cards– Clip clothespins or paper clips to match letters with various fonts to strengthen the hands and focusing on eye-hand coordination, bilateral coordination, visual processing skills, and more.
Cut and place Fine Motor Mazes– Cut out the letter pieces and trace the maze with a finger to work on eye-hand coordination and finger isolation. Place a small letter on the letter spots to address in-hand manipulation and dexterity skills.
A-Z Cotton Swab Cards– Includes upper case and lower case letters. Dot the cards using a cotton swab or laminate the cards and use them over and over again.
A-Z Pattern Block Cards– These cards include a section for tracing with a finger tip for separation of the sides of the hand, eye-hand coordination, and finger isolation during letter formation. There is also a space to “finger write” the letter using the fingertip. This multisensory letter formation activity can be a great brain break during handwriting or literacy tasks. Learners can then form the letter using parquetry blocks.
Fine Motor Letter Geo-Cards– These geo board cards include A-Z in upper case forms. Users can copy the letter forms in a variety of multi-sensory strategies.
A-Z Color and Cut Letter Memory Cards– These upper case and lower case letter cards can be used to color for letter formation. Then use them in fine motor matching tasks or in sensory bins.
Color By Size Sheets– Help learners discriminate between tall letters, small letters, and tail letters. This visual perception activity invites learners to color small areas, using hand muscles for strengthening and handwriting endurance.
A-Z Building Block Cards– These LEGO block cards invite users to copy the cards to form letters using small building blocks. Users can place the blocks on the cards or copy the letter to address visual shift and visual memory. This activity set comes in upper case and lowercase letter forms.
A-Z Play Dough Letter Formation Cards– Print off these cards and laminate them to create play dough mats. Learners can form the letters using the arrows to correctly form letters with play dough while strengthening their hands and visual motor skills. Each card includes a space for practicing the letter formation, using a dry erase marker if the cards are laminated.
Graded Lines Box Writing Sheets– Users can trace and form letters in boxes to work on formation of letters, line awareness, starting points, and letter size.
Alphabet Roll and Write Sheets– Roll a dice and form the letter associated with the number of dots on the dice. This is a great way to work on letter formation skills using motivation. Which letter will reach the top first? This activity is easily integrated with a rainbow writing task to increase number or repetitions for letter practice.
Pencil Control Letter Scan– Use the letter bubble tracks to scan for letters. Users can fill in the letters of the alphabet to work on pencil control skills.
Color and Cut Puzzles– Color the pictures to work on hand strength and letter formation skills. Then cut out the puzzles and build visual perceptual skills.
Today, we are covering one type of grasp called a hook grasp. If you saw my earlier post on grasp patterns, you may have noticed a grip you are unfamiliar with. The grip pattern called the Hook Grasp, is a functional grasping pattern that is used daily in various fine motor skills. Today we will take a moment to further explore the hook grasp, talk about its’ functional uses, and get resources for exercises and activities to strengthen this grip.
As an Amazon Influencer, I earn from qualifying purchases.
what is a hook grasp?
A Hook Grasp is a type of motor pattern in which the fingers are bent at all the joints in a slightly flexed pattern with the thumb either assisting to grasp an object with the hook pattern, or in opposition with an open thumb webspace.
In the hook grasp pattern, digits 2-5 (pointer finger, middle finger, ring finger, and pinkie fingers) are used in a hook position. The fingers bend as if carrying the handle of a briefcase. The thumb may or many not be used in the grip’s positioning.
The hook grasp is characterized by a flat hand, curled fingers, and thumb used passively to stabilize the load. The biomechanics of the hand for a hook grip use a stable wrist, finger flexion at the IP joints, and extension at the MCP joints.
When you think of “hook grasp” you are might be picturing Captain Hook. The hooking motion used in this grip is similar to the way Captain Hook holds onto items. The objects hang in the curve of the Captain’s hook. Similar to this idea, in the hook grasp, the tips of the fingers are bent into a curve to grab onto things.
A hook grip is used to hold objects with a small diameter. For objects with a diameter of 2″ the hook grip strength can achieve the strength of a power grip. Very narrow handles decreases hook grip strength by pressing deeply into the hand and fingers.
Check out the video which explains what a hook grasp is and what this type of grasp pattern looks line in daily functional activities. If you can not see this video due to blockers on your device, check out the video explanation over on our YouTube channel.
examples of the hook grasp
Some examples of a hook grasp in functional task include:
holding onto the overhead safety handle in the car
grasping the skinny edge of a container to lift it
carrying a jug
Holding the handle of a suitcase
Holding onto a ladder rung
In each of these tasks, the load, or the work of the grasp, is supported by fingers. This grip is most effective when the arms are down at the side of the body. For visual learners, here are some illustrations of the this grip in action.
Rigid handles can cause discomfort when carrying a heavy load for long periods of time. If you have ever tried to carry a grocery bag with skinny plastic handles for more than a couple of minutes, you know how quickly the pain sets in. Of course, someone invented a solution for carrying plastic bags. (affiliate link) This gadget uses the hook grip, but distributes the weight of the bags better.
hook grip in weightlifting
The hook grip is a method of gripping a barbell used in many strength-related sports such as Olympic weightlifting, CrossFit, and powerlifting. Here is an informative article on the benefits of using a hook grasp in weightlifting.
In weightlifting, the hook grip is further strengthened by placing the thumb on the bar and wrapping the fingers on top of it.
This takes practice and pushing through the pain, but according to the resources, the hook grasp becomes quite the power grip during heavy lifting.
Squeeze things whenever you can. Use tools, putty, games, playdough, a rolled up towel, tennis or stress balls
Use a (Amazon affiliate link) grip strength kit specifically designed to improve grasping. While this may be repetitive and boring to some, it is a measurable way to build grasping.
Prohands grip master (affiliate link) is a popular hand strengthening tool. It can be used to increase different grip patterns including the hook grip
Play with a squirt bottle or squeeze container
Classic ring toss game
Milk a cow (or pretend using the hand motions)
Carry a laundry basket that has side holes. Play a game of carrying the basket while gathering items
Hang from a trapeze swing or ladder swing
Climb a ladder practicing the hook grasp by not using the thumb
Tape the thumb out of the way for an exercise of picking items up without using the thumb to support it
Provide a small purse with a handle or a suitcase for your learner to carry around. This can be filled with treasures and collectibles. Kids love to carry things, and this will build their hand strength
Play a game of carrying buckets while filling it with items along the way
Easter egg hunt picking up eggs while carrying the basket
Fill buckets with water to dump them. This is a great beach activity as children carry water back and forth across the sand
Encourage heavy lifting, carrying, pushing and pulling to strengthen grip and improve function and independence.
final thoughts on the hook grasp
Next time you are using your hook grasp to carry grocery bags, or laundry basket, pay attention to the amount of work your fingertips are doing. There is a lot of force right on the ends of your digits. Imagine if you were missing a digit, or had an injury to one. Now the amount of force is only spread among three fingers instead of four. Finger injuries may seem small, but they effect the power of grasping, as well as fine motor precision.
Other types of grasps to consider when it comes to fine motor skills include:
Want to improve overall hand strength and finger dexterity with done-for-you, printable activities? Grab one or more of our Fine Motor Kits. Each one is full of fine motor tasks and activity pages designed to develop precision, dexterity, coordination, and fine motor skills!
Working on fine motor skills, visual perception, visual motor skills, sensory tolerance, handwriting, or scissor skills? Our Fine Motor Kits cover all of these areas and more.
Check out the seasonal Fine Motor Kits that kids love:
Victoria Wood, OTR/L is a contributor to The OT Toolbox and has been providing Occupational Therapy treatment in pediatrics for more than 25 years. She has practiced in hospital settings (inpatient, outpatient, NICU, PICU), school systems, and outpatient clinics in several states. She has treated hundreds of children with various sensory processing dysfunction in the areas of behavior, gross/fine motor skills, social skills and self-care. Ms. Wood has also been a featured speaker at seminars, webinars, and school staff development training. She is the author of Seeing your Home and Community with Sensory Eyes.