Winter Snowflake Stamp Art

snowflake art
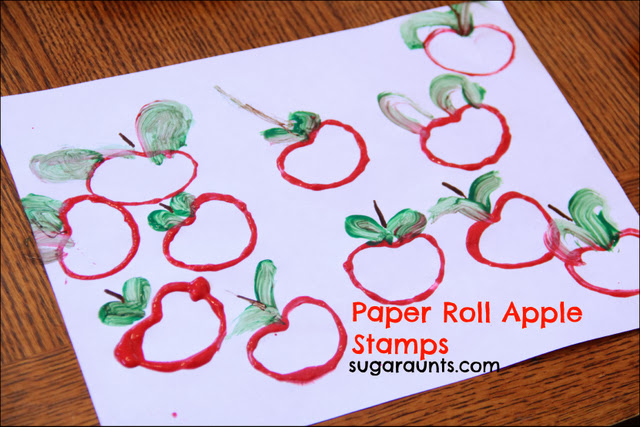
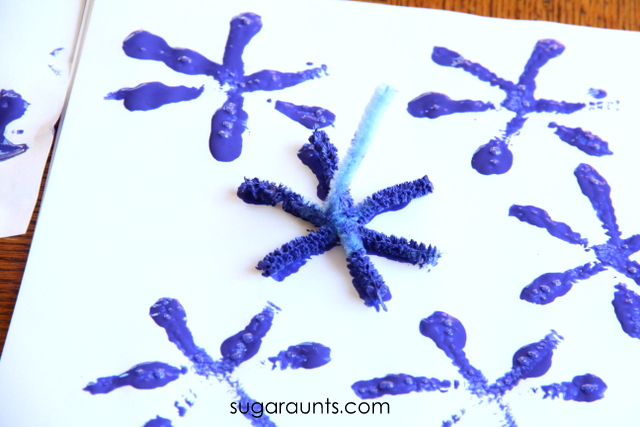
Kids love stamp art.  Using a tool to press paint onto a surface is therapeutic and creative.  You can press down hard or lightly, overlap stamps, add colors, or just make a simple stamp.  There’s a lot of process to creating with stamps and you can use so many objects!  We’ve stamped with potatoestoilet paper tubesstyrofoam, and even hair rollers.  These winter snowflakes use pipe cleaners and the result is wintry and beautiful!
 
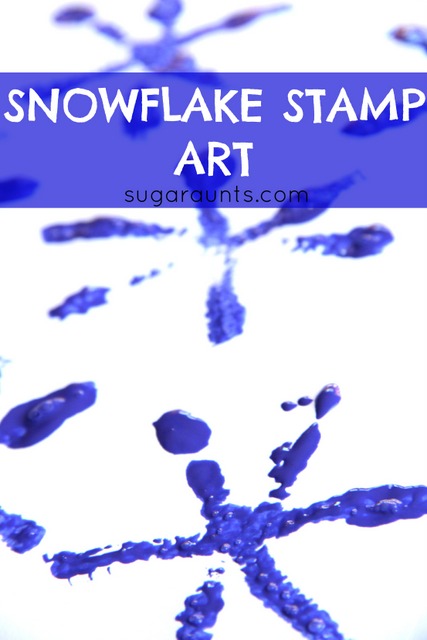
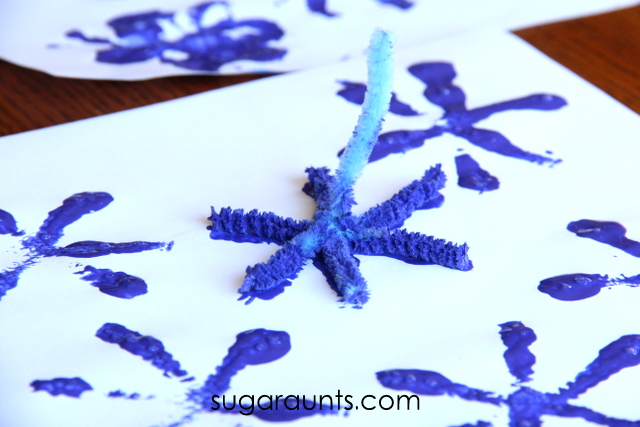
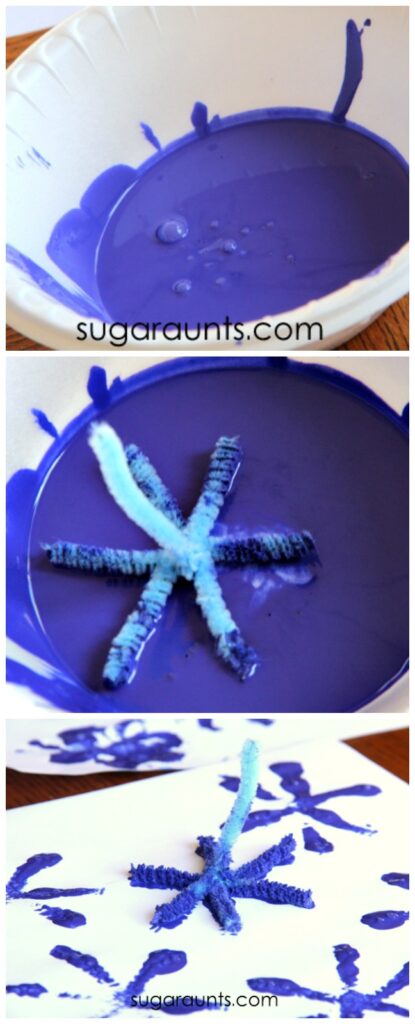
Snowflake stamp art with pipe cleaners and blue paint. This is a great winter craft!


Winter Snowflake Art with Pipe Cleaner Stampers

 This post contains affiliate links.  

 
This is a pretty easy set up for an art project.  We used just a few materials:
easel paper (this pad gives you a nice big surface for creating)
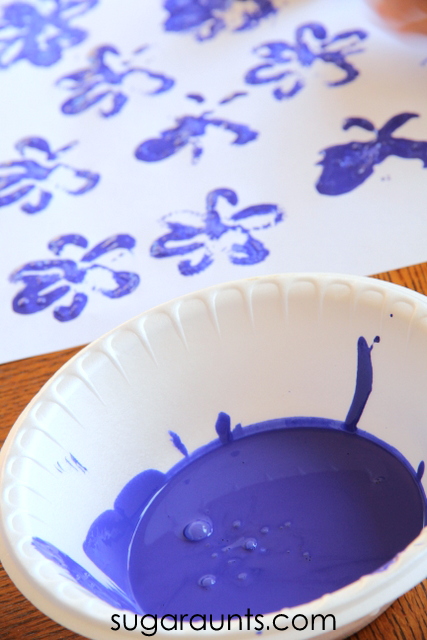
bowl for the paint
 
 
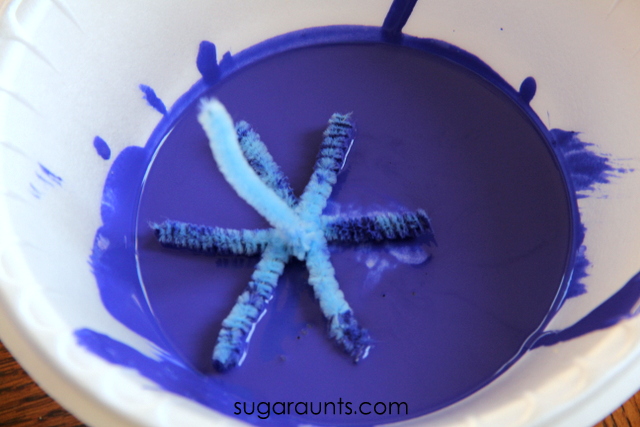
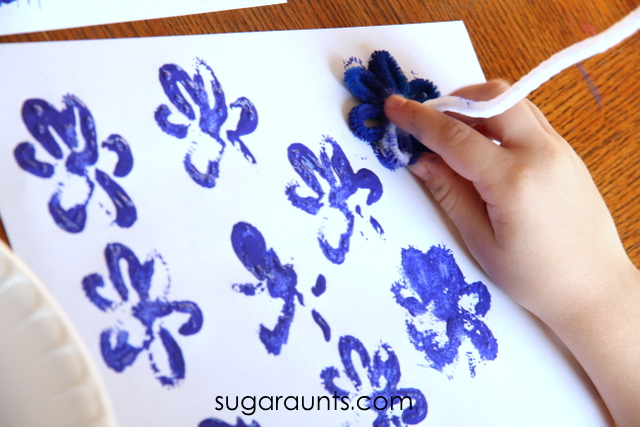
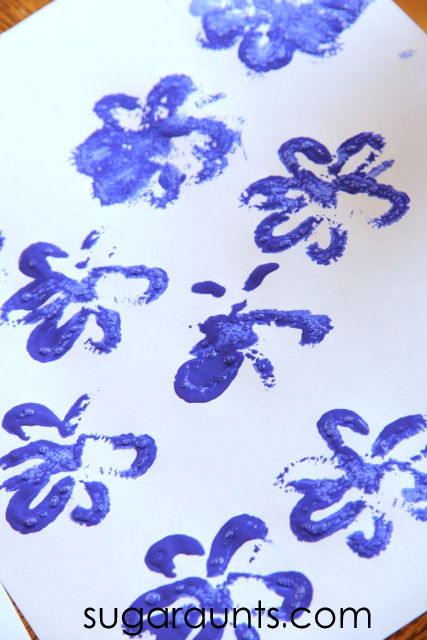
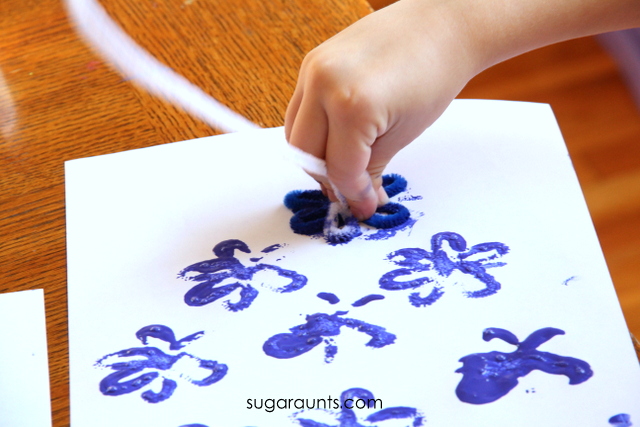
I twisted a couple of pipe cleaners into a snowflake shape with one piece sticking up for a handle.  You can experiment with the shapes.  We did a flowery shaped snowflake, too.  (This would also make a great spring craft in a few months!)
 
 
Pour the blue paint into a bowl.  I LOVE this paint for it’s bright colors that don’t fade or flake once they dry.  It’s a great paint for preserving little one’s works of art.
 

And now it’s time for stamping.


Big Sister was so happy that she had a day off from school and got to do a craft with us.  We need to do more after school art work as a wind down from full days at school.  She loved making this stamp art and did page after page after page…

Make snowflakes art with pipe cleaner stamps.


Be sure to let us know if you make this snowflake art project.  You might be interested in more stamping activities:


What to Do With the Kids in Winter

The cold weather is upon us!  If you’re in the freezing temps with scarves and gloves or in warmer environments, winter play and learning is fun for the kids!  We love the ideas shared in Share It Saturday this week, from snowman books to crafts, to science and art. This round up of ideas will keep you occupied all winter long!


winter learning and play activites for kids.

Winter Activities for Kids

Snowman Picnic from Growing Book by Book

Snowman Books from Planet Smarty Pants
Snowman Listening Game from Pre-K Pages
Non-Fiction Snowflake Books from Brain Power Boy
Marshmallow Snowman Craft from Krafts and Kiddos
Winter Craft ideas for Middle Schoolers from Tina’s Dynamic Homeschool Plus


Almond Scented Salt Dough Recipe

We love a fun salt dough recipe.  From orange zest salt dough to gingerbread salt dough…these are a fun way to play and create.  This time we wanted to try another scent in the salt dough arena  (okay, we actually experimented with TWO scents this time…)  and tried an Almond Scented Salt Dough AND a Peppermint Scented Salt Dough.  Christmas is the perfect time of year for salt dough.  This dough is great for molding and cutting ornaments from.  And the memories that you’ll have each year as you decorate the tree are well worth the salty hands and sticky counter tops you get from making these doughs!


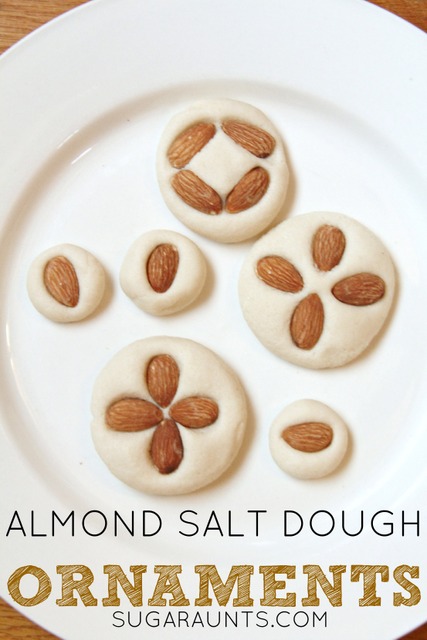
Almond scented salt dough recipe for Christmas ornaments.  These smell fantastic!


Almond Scented Salt Dough Recipe

 
This post contains affiliate links.  Read our full disclosure here.
 
It’s important to note that all doughs come together differently.  Different flour, slightly different measuring techniques, different kneading skills…all make a difference when it comes to mixing together doughs.  This recipe came together as described.  You may find slightly different results, but play around with your dough.  If it seems too sticky, knead it and add a bit more flour.  If it seems too dry, knead and add a small amount of water.  Always add additions in very small incriments and knead before adding more flour or more water.  Whatever your result, it will be a fun sensory experience with the kids!


Almond scented salt dough recipe


To make this almond salt dough, we started with our standard salt dough recipe.  Once the dough was mixed together, we poured in a shake or two of almond extract.  (Like those exact measurements?)  It was probably about a teaspoon of almond extract, but you can add what seems good.  You will need to add a bit of flour after adding the liquid almond extract, to take the stickiness away when kneading.  Be sure to flour the counter top surface before kneading in the extract and keep kneading until the dough becomes smooth.  Warning:  this dough smells AMAZING.  Like almond cookies that you will want to eat.  Refrain yourself and just enjoy the almond scent. 
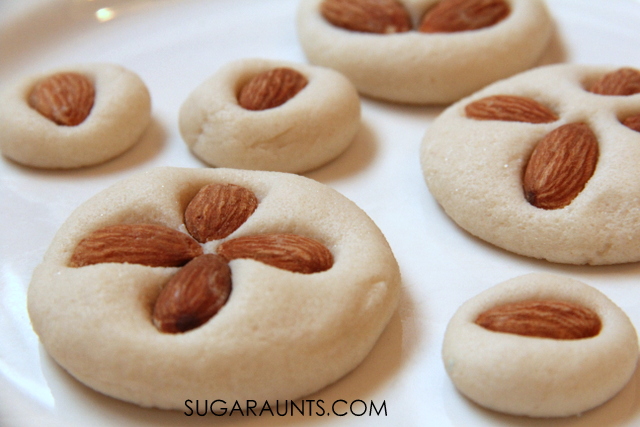


Next, we molded circles of salt dough with our hands and flattened them down a bit.  We pressed the almonds
into the dough in designs or just strait into the dough.  You certainly don’t need the almonds in these ornaments, but it was fun for us to add them in.

At this point, you’ll want to poke holes in your ornaments.  I used a chopstick to do this.  Bake the dough at 200 degrees F for about 20 minutes.  Then, turn off the oven and let the ornaments sit in the warm oven.  When it’s time to make dinner, or you need the oven for something else, pull them out and let them sit overnight.  It may take an extra day to completely dry, depending on how thick your ornaments are.

At this point, I sprayed our ornaments with glitter spray.  This glitter spray is permanent, so be sure to spray on a napkin or other surface.  I wanted to use the glitter paint to seal in the almond and keep the skins from flaking off.  So far, it’s holding up well on our tree.  We’ll see how they stand the test of attic storage by next Christmas.


Add a bit of string to hang your ornaments (We used embroidery thread provided to us by www.craftprojectideas.com).  
 
This was such a fun ornament to make that we had to try a different version with the same dough and a different scent that we had in our pantry.


Peppermint Scented Salt Dough Recipe

Peppermint scented salt dough recipe for Christmas ornaments


We made this dough with the same technique as above, only instead of adding the almond extract to our standard salt dough recipe, we added peppermint extract.  This dough smelled equally amazing and was such a fun sensory play material to just manipulate and explore.  Its a great activity for the Christmas season!


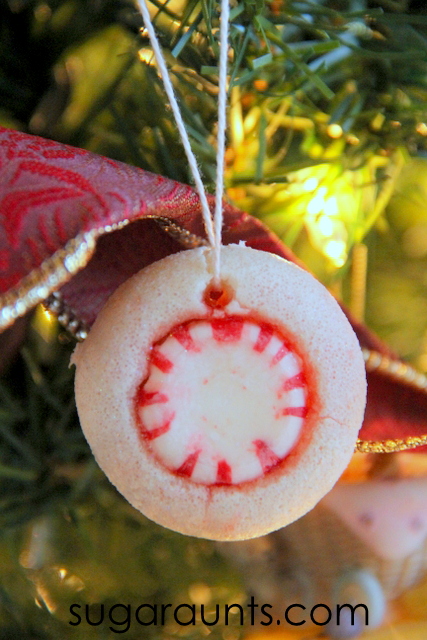
Of course we had to experiment with peppermint candies in our dough.  We used a sugar free version because that’s all we had in our house at the time, so I’m not sure how the regular peppermint candies would work in this ornament.  We did cook ours in the oven for about 20 minutes like we did in the recipe above, and it turned out melting the candy just slightly to keep it attached to the ornament.
 

Looking for more scented salt dough? More scented salt doughs you may like:


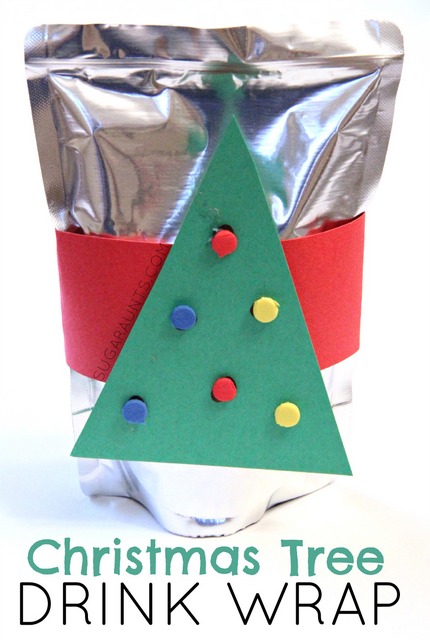
Christmas Tree Drink for Kids

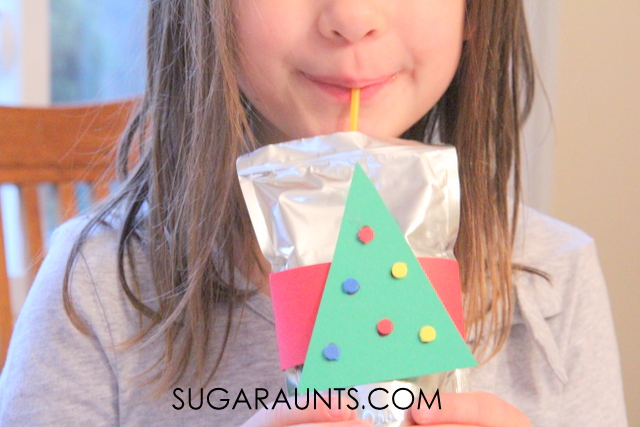
Sometimes, you just need to do something special and fun with the kids.  These Christmas Tree Drink Covers are just that…Something to craft with the kids and bring about smiles.  We made these drink bag wraps pretty quickly, and crafting with my daughter was part of the fun!

If you’ve got a child’s Christmas party at preschool or a play date to plan, this extra detail would be a huge hit!  We used juice pouches, but juice boxes or even cups would work for this craft, too.
DIY Christmas tree drink cover. These are easy to put together and would be a hit at a kid's party or for a special day leading up to Christmas!


This post contains affiliate links.  

To make a Christmas Tree Drink Wrap, you’ll need a few materials:

foam crafting sheets
in various colors 
glue
and of course a juice pouch (or juice box) to wrap!

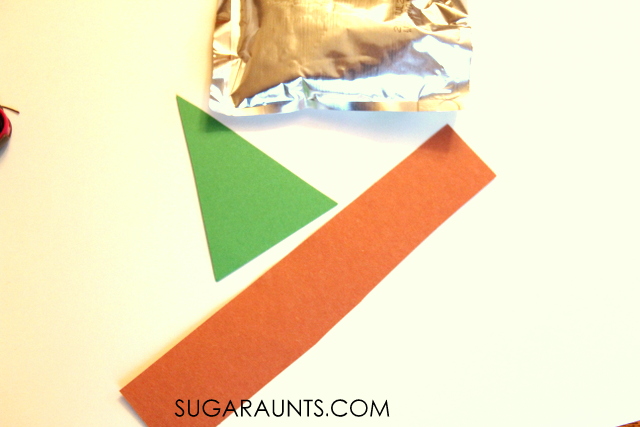
First, cut a triangle from the green card stock and a rectangle strip from the red card stock  The nice thing about this craft is that you don’t need to worry about accuracy.  Just snip up the card stock and quickly cut out the shapes you need.  

This is a great way to get the kids involved in crafting and practicing their scissor skills.

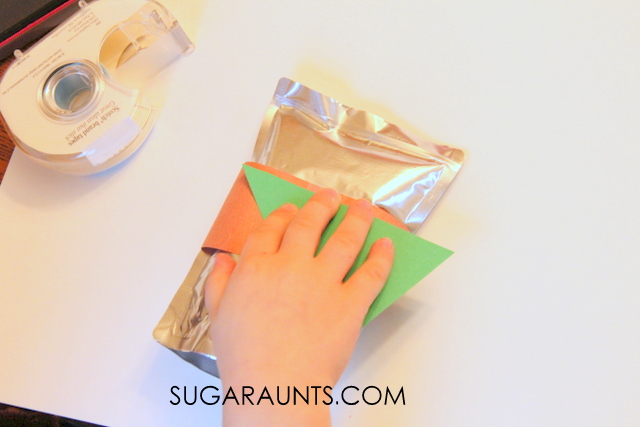
Use the tape to attach the red strip and tape around the back of the juice pouch.  Make a loop with the tape and attach the green triangle.


Use a hole punch to punch circles from the foam crafting sheets and glue these on the tree.  

Done!  Hand the Christmas Tree juice box to your favorite crafty helper, or make up a bunch for friends.  They are going to love it!

Pair this juice craft with our easy Santa snack cups for more Christmas-y fun:

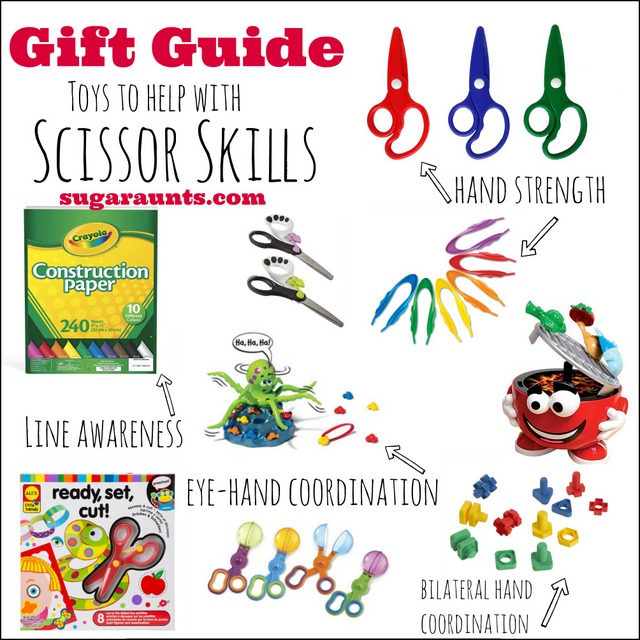
Easy Scissor Practice

 
Working on scissor skills can be tough for some kids!  There’s a lot that goes into cutting a shape from a piece of paper.  The grasping of the scissors, opening and closing the loops, holding and manipulating the paper, keeping the scissors on the line, maintaining endurance to keep on snipping…it can be a difficult task for little ones with hand weakness or difficulty with any of these parts of the scissor task.  
 
Cutting streamers is an inexpensive way to teach kids to snip paper.


Try these bilateral coordination activities to work on efficient use of the hands together in scissor activities.
 
This scissor practice activity is great for kids who are just starting out with scissor use or kids who need a little practice with managing scissors.
 
In-hand manipulation activities are a great way to boost fine motor skills needed for tasks like managing clothing fasteners, using a pencil when writing, manipulating items like coins or beads, and more. 
 
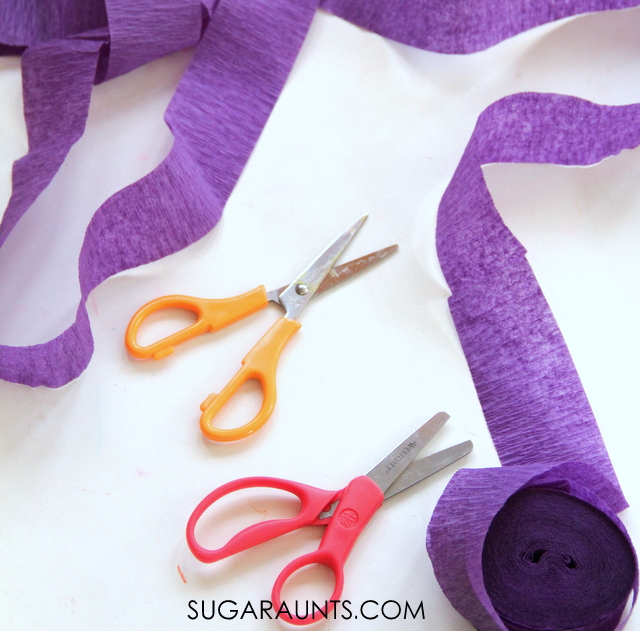
Practice scissor skills with a roll of crepe paper for an easy scissor activity.


Easy way to practice cutting with scissors:

This post contains affiliate links.  
 
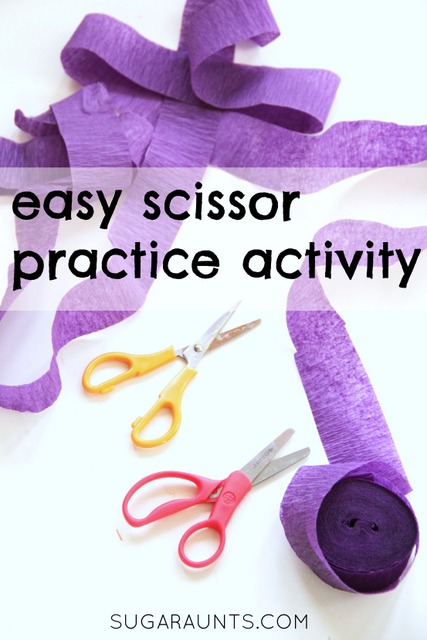
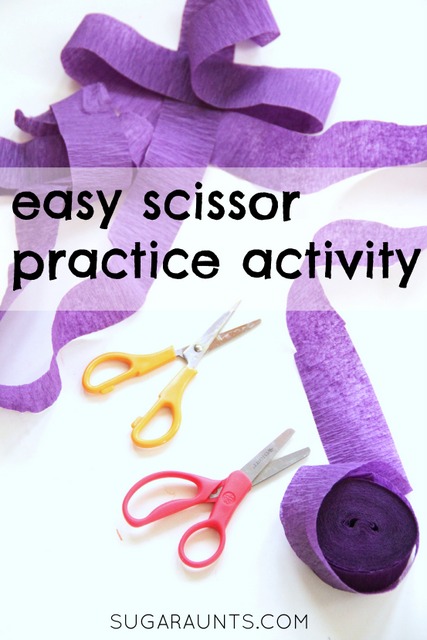
We started this easy activity with just a few items.  A roll of  crepe paper streamer and a pair of scissors are all that you need for this easy scissor activity.  I love Fiskars Blunt Tip Kid Scissors for new scissor users, but you can see more scissor options here.  
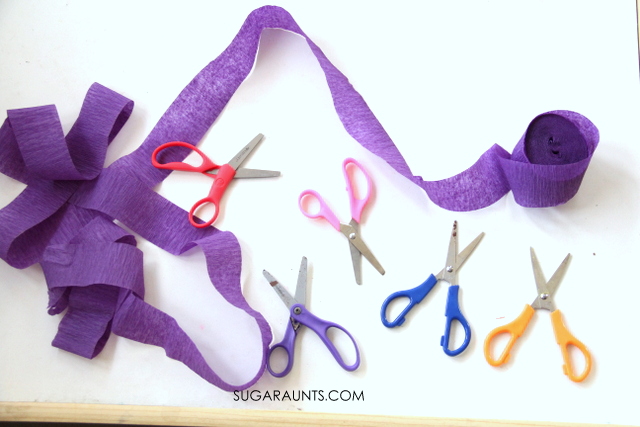
 
Kids will love this easy scissor skills practice activity using crepe paper streamers!

I pulled out a handful of scissor colors for my son, just to make it fun for him.  He’s a little reluctant with cutting, only because he needs more practice and he’s just not into it.  Activities like this are a good way to get him interested in practicing the skills needed for accuracy with cutting shapes.  

Practice Scissor Skills with Kids using Streamers!


I had my son snip the streamer into snips.  He first cut the whole way across the width of the streamer so we had a ton of little pieces.  Don’t worry about the mess.  Picking up the shreds is a good fine motor work out too.  Have your child grab up those pieces of streamer and tuck them into their hands, one at a time.

 
When they hold a few pieces in their palm as they gather up more little pieces using the pointer finger and thumb practices in-hand manipulation and the process of translation.  Manipulating items like this from the tips of the fingers into the palm is a good way to encourage dexterity of the hands and intrinsic muscle strength. 


Related Read: Use this scented scissor skills activity to help kids learn graded scissor use in a fun way! 

Kids will love this easy scissor skills practice activity using crepe paper streamers!


After he cut the width of the streamer, I had him snip only half way across the width of the streamer.  This made a fringe the length of the crepe paper.  

Cutting only half way encourages motor planning and controlled movements of the scissors.  What a great way to practice opening and closing those scissor blades with control. 

Managing the streamer with the assisting hand requires bilateral hand coordination to hold the streamer and move the fingers along as he continued snipping.  


To make this task even more difficult, have the child cut the length of the streamer.  Cutting a longer distance requires endurance of the hand muscles and controlled motor planning to manipulate the streamer with the helper hand as the child snips down the center of the streamer.  Older kids who need to work on eye-hand coordination would benefit from this task.


Unfortunately, the images of the process of cutting didn’t make the cut (see what I did there??) with fuzzy pictures.  I wouldn’t want to hurt your eyes with my bad photography skills.  We’ll be doing this task again with my Little Guy so I’m hoping to catch a few images and add them at some point.    Let us know if you try this activity with your child!


Looking for more scissor activities?  We’ve got a bunch to share:

New Baby Sensory Play for Siblings

We’ve had a new baby in our house for six months now.  Those six months have gone by in a blur. 
Just last week, my three year old asked, “Mom, are we keeping (the baby) for ever?”  I think it finally hit her that baby is here to stay.  Sometimes it’s difficult for kids to understand a new baby coming into the house and family and staying (forever!)  with all of it’s stuff, and cries, and messy diapers.  Life sure does change when a new baby is introduced to a family!  

We love sensory play for it’s simple ways to teach concepts, exploration, language development, and ideas that are developed.  We did this new baby sensory play activity a few months back…but maybe it’s time to play again with the new baby sensory bin, just to help the older siblings understand the new family dynamic we’ve got going on!


Sensory play for siblings of new babies.  This is a great way to introduce new big brothers and big sisters to a new baby.


Sensory Play for Siblings of a New Baby

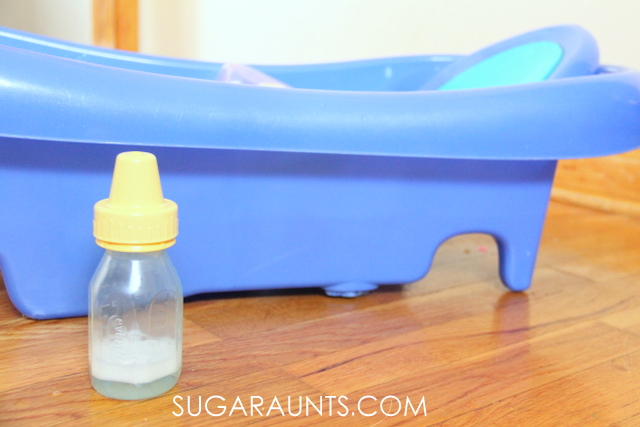
We needed to wash a bunch of baby supplies a few months ago, and anytime washing is involved, Little Sister (age 3) jumps at the chance to help out.  This sensory bin kind of just happened because of a job that needed done anyway, but it turned out to be a fun way to explore the new baby’s supplies and talk about things that a new baby needs.

This post contains affiliate links.

Using bottles and lids to develop fine motor skills

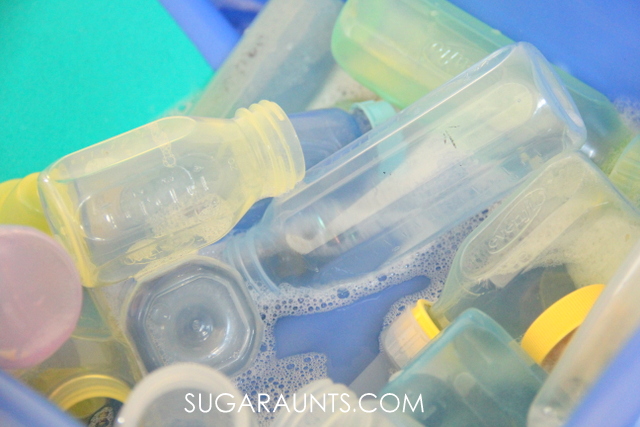
I pulled out a big box of bottles
and lids, bottle nipples
, and a few bottle brushes that all needed washing.  Instead of putting them in the sink, I put them in our baby bath tub right on the dining room floor.  Some warm soapy water and we were ready to clean and explore baby’s things.
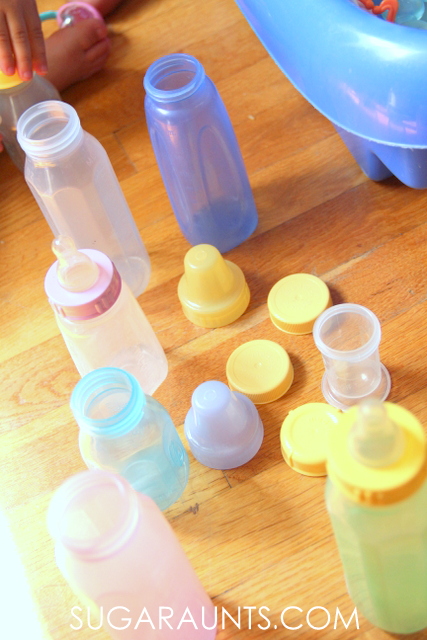


Little Sister had fun matching up the lids to the bottles.  Twisting them on and off was a fun way to work on many fine motor skills: bilateral hand coordination, hand-eye coordination skills, motor planning, and translation in the palm.

 Time goes by at lightning speed when you’re a parent…but at the same time, the days draaaaaag.  How can my sweet little baby already be six months old?  But certain hours of the day can seem to last twice as long.  This baby sensory bin was perfect for spending time with my three year old while doing a job that needed done anyway.  She liked talking about all the supplies, the lids that cover bottles, and the bottle brushes that are used to clean bottles. 

Cleaning the bottles was a hit for her!  She loved cleaning the bottles with the bottle brush and the warm soapy water was a great sensory experience for her.

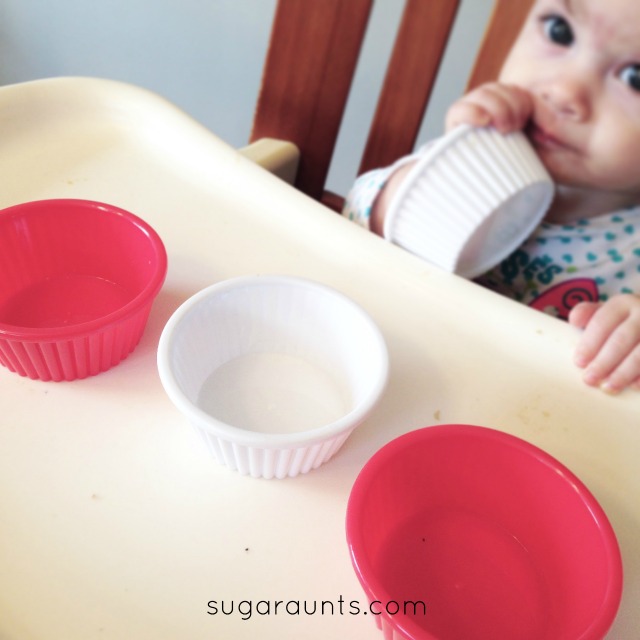
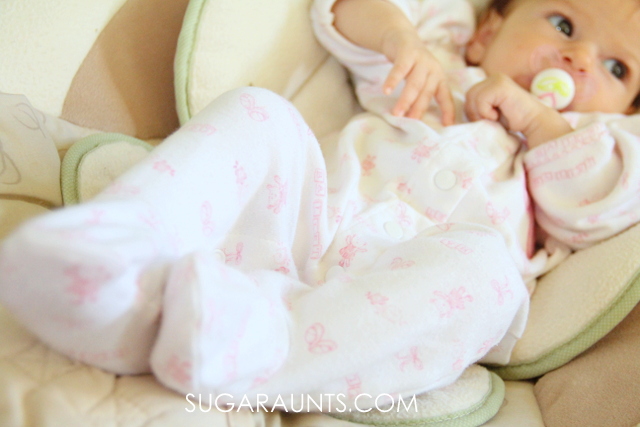
This little sweetie watched the fun from her infant seat.


It’s always a bonus when sensory play leads to cleaning rather than messes!  This one was a big hit and we’ll be pulling out all of the bottles again soon.  Let us know if you play and explore baby items with a big brother or big sister.  We would love to hear about it!


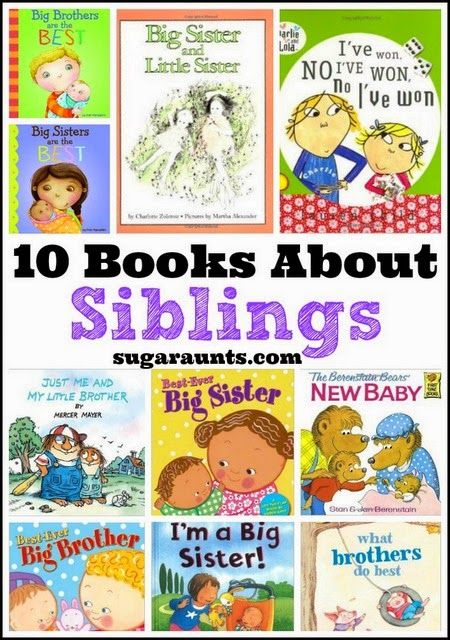
More New Baby ideas you may be interested in: 

Santa Snack Cups

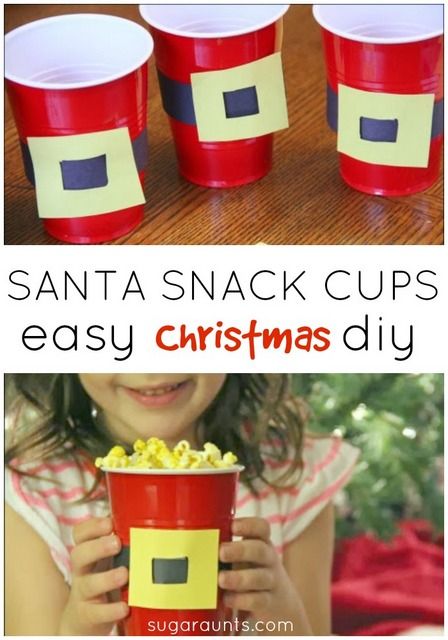
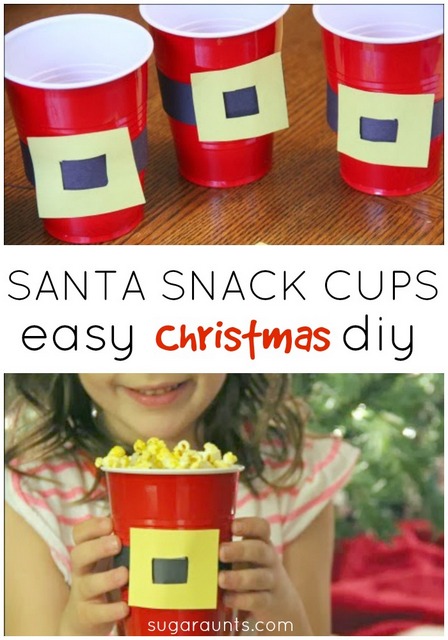
We made these Christmas snack cups last year and have them on our list of things to make again.  These treat cups are so easy to throw together that they are perfect for family movie night or just to make any day special.  We filled ours with popcorn, but they could hold anything from dry cereal to veggies and a bit of dip. 


Check out these Christmas Fine Motor Activities for more creative ways to work on fine motor skills and address development of skills this Christmas season. 

Santa snack cup DIY craft.  This is easy to make and perfect for family movie night!

To make Santa Snack Cups

You’ll need just a few items:
Yellow construction paper
Black construction paper
Red plastic cups
tape
scissors
Cut a strip of black construction paper.  Tape it around the cup.  


Cut a square from the yellow construction paper.  Snip a smaller square in the center.  This makes the buckle of the belt.  Attach it to the cup with a loop of tape.  You’re ready to fill the Santa cups with snacks for preschool parties, play dates, or family movie night.

This would be a fun (and easy) way to present a snack while doing a little Christmas craft with the kiddos.  Let us know if you make these snack cups here in the comments or on our Facebook page.  We would love to see them!

Christmas Handwriting Activities

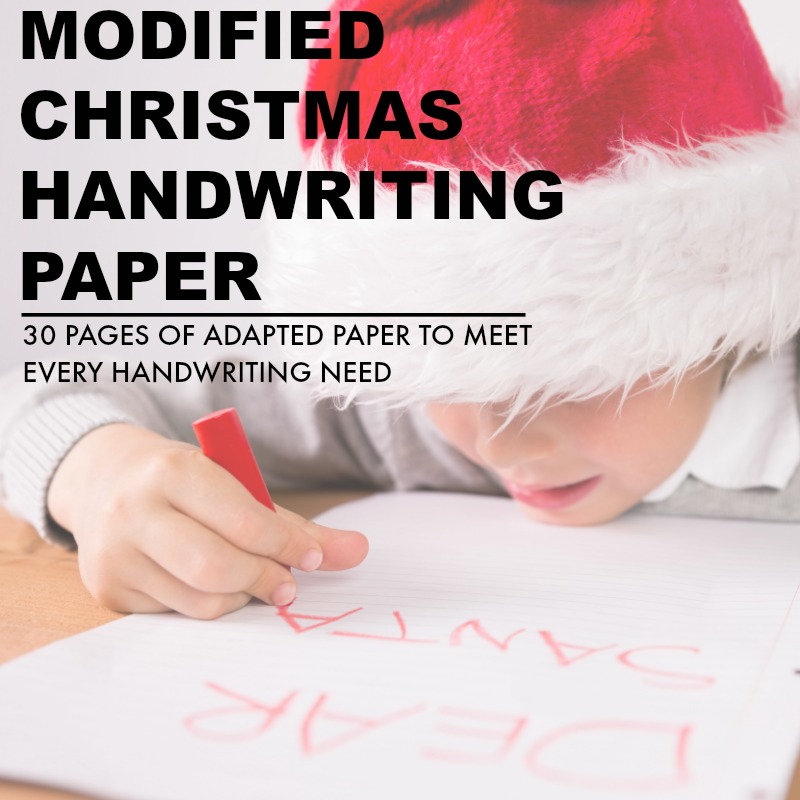
Writing out that Christmas wish list is a difficult task that brings out tears instead of holiday excitement.  I’ve got a solution for your kiddo with handwriting difficulties: a packet of modified paper for all of the Christmas handwriting tasks that come up each year.  Use this handwriting pack to help kids who struggle with handwriting to participate in holiday traditions while even working on and developing their handwriting skills!

Working on handwriting with kids this Christmas season? Grab your copy of the Christmas Modified Handwriting Packet. It’s got three types of adapted paper that kids can use to write letters to Santa, Thank You notes, holiday bucket lists and much more…all while working on handwriting skills in a motivating and fun way! Read more about the adapted Christmas Paper here

Olive The Other Reindeer Book Ornament

If you’ve visited our blog before, you know that we LOVE creating crafts and activities based on children’s books.  What could be better than combining a fun children’s book with a craft for the kids with a Christmas theme??  We made this antler Christmas ornament based on the book, Olive The Other Reindeer by Vivian Walsh.  This is a super cute book so we knew we had to come up with a super cute ornament.  


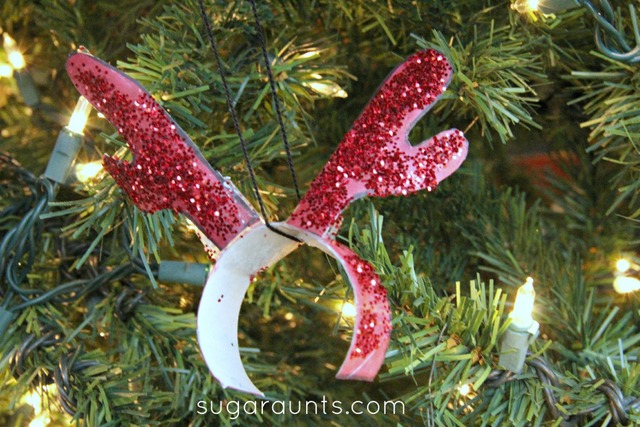
Antlers ornament to go with the book Olive The Other Reindeer


This post contains affiliate links.  See our full disclosure here.  


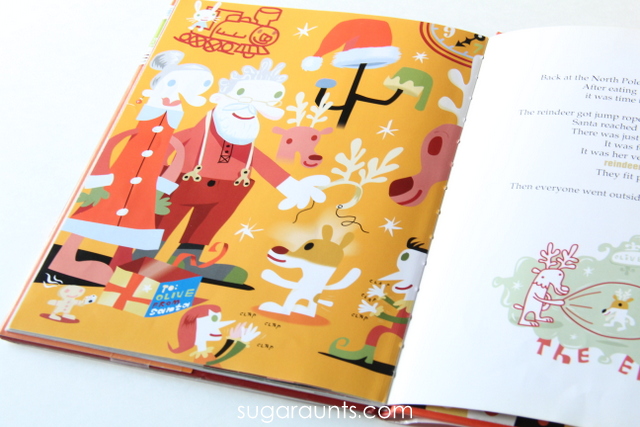
Olive, the Other Reindeer is a book about Olive, a dog who thinks she must be a reindeer after she hears a tune with the words, “All of the other reindeer”.  She heads off to the North Pole to help Santa and the reindeer on Christmas and surprises all of them with her reindeer skills.  At the end of the book, Santa gives Olive her very own pair of antlers.  This is a book we read every Christmas…for the fun story, the cute pictures, and the adorableness of Olive; She’s our favorite dog-reindeer!

 
Antlers ornament to go with the book Olive The Other Reindeer


Olive, the Other Reindeer antler ornament

Making this Olive, the Other Reindeer ornament was easy and fun.  We used a few materials that you probably already have at home.

toilet paper tube (you can use a paper towel roll as well)
black sharpie marker
red permanent marker
or you could use red paint.


Red glitter (that we received from our friends at 
www.craftprojectideas.com) and glue.
Clear tape

String for hanging in the tree


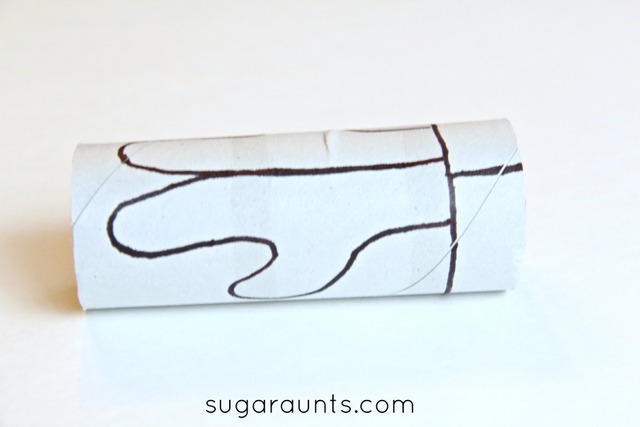
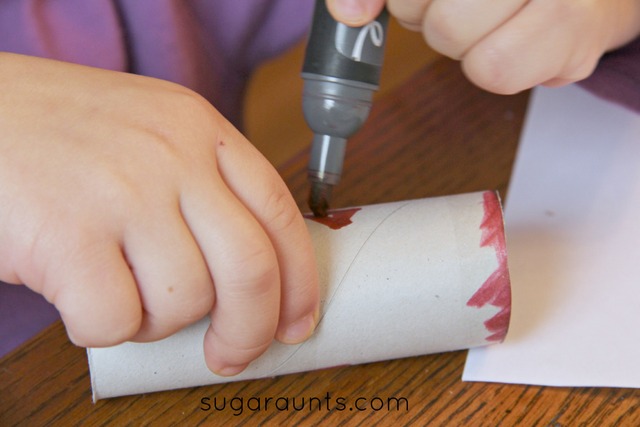
Draw lines like above on a paper tube.  You’ll need a 1/2 to 3/4 inch band, and a simple antler shape.
 
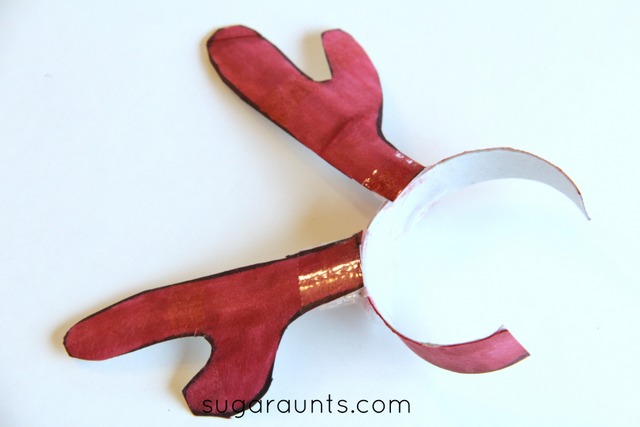
Cut them from the paper tube.  This is a great task for older children.  Adults will need to cut the shapes for the younger age range.
 
 
Use the marker to color in the shapes.  It’s easier for kids to do this part before cutting the shapes.


Tape the antlers onto the band.   Then cover the antlers with glue and shake red glitter all over.  
 

Hang with string and admire Olive’s antlers!  We went back and colored the inside of the headband red with the marker.  It made it look more like antlers and less like a cardboard tube 😉

Christmas Handwriting Activities

Writing out that Christmas wish list is a difficult task that brings out tears instead of holiday excitement.  I’ve got a solution for your kiddo with handwriting difficulties: a packet of modified paper for all of the Christmas handwriting tasks that come up each year.  Use this handwriting pack to help kids who struggle with handwriting to participate in holiday traditions while even working on and developing their handwriting skills!

Working on handwriting with kids this Christmas season? Grab your copy of the Christmas Modified Handwriting Packet. It’s got three types of adapted paper that kids can use to write letters to Santa, Thank You notes, holiday bucket lists and much more…all while working on handwriting skills in a motivating and fun way! Read more about the adapted Christmas Paper here


Check out the other kid bloggers sharing ornaments based on books today:

Felt Christmas Tree from Craft Ideas for Kids
Acorn and Pine Needle Ornament from Discovering the World Through My Son’s Eyes
Pine Cone Christmas Robin from My Little 3 and Me
Penguin Ornament from Preschool Powol Packets
How to Catch a Star ornament from In the Playroom
Christmas Tree ornament from I Heart Crafty Things

Looking for more ornament activities?  Try these: 


Pattern Christmas Tree Ornament

This is an ornament we made last Christmas, and I’m just getting around to sharing with you.  We love easy crafts and this ornament fits the bill.  When it’s possible to add learning into craft and play, it’s bonus for mom…and the kids don’t even mind.  We made Christmas tree ornament with basic crafting supplies and added a math pattern portion to the crafting.


Check out these Christmas Fine Motor Activities for more creative ways to work on fine motor skills and address development of skills this Christmas season. 


Pattern Christmas tree ornament for kids

This post contains affiliate links.  Read our full disclosure here.  
Unfortunaly, in the 11 months since these pictures were taken, I’ve misplaced the images of the actual making of the ornament….But, it’s pretty easy to make.


How to make a Pattern Christmas Tree ornament:

Start with a few basic supplies:

glitter green pipe cleaner 
red and white pony beads

Plastic star bead (we got ours from www.craftprojectideas.com)
string (also from craftprojectideas!)

Start by bending the pipe cleaner into a triangle shape.  Leave the base of the tree free of beads.  Thread the red and white beads onto the pipe cleaner on both sides of the tree.  We made our bead pattern in an ABAB pattern and with just a few beads.  You could add more beads to the sides or make more complex patterns if you like. 

Add the star bead to the top of one end of the pipe cleaner.  Twist the ends together.  Add string and hang from your Christmas tree.  Done!  

Let us know if you make this ornament.  We would love to see your version.  Stop by our Facebook page and share a picture.  

Christmas Handwriting Activities

Writing out that Christmas wish list is a difficult task that brings out tears instead of holiday excitement.  I’ve got a solution for your kiddo with handwriting difficulties: a packet of modified paper for all of the Christmas handwriting tasks that come up each year.  Use this handwriting pack to help kids who struggle with handwriting to participate in holiday traditions while even working on and developing their handwriting skills!

Working on handwriting with kids this Christmas season? Grab your copy of the Christmas Modified Handwriting Packet. It’s got three types of adapted paper that kids can use to write letters to Santa, Thank You notes, holiday bucket lists and much more…all while working on handwriting skills in a motivating and fun way! Read more about the adapted Christmas Paper here


Looking for more ornament activities?  Try these: