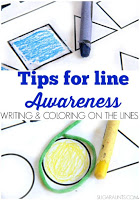
If you are looking for ways to work on handwriting legibility and pencil control, then you are in the right place. This Occupational Therapist loves to teach kids handwriting. Neatness counts when it comes to writing on the lines and being able to read that homework assignment a few hours into the nightly after-school ritual. Today, I’ve got one easy tip for helping kids to manage with pencil control in order to write on the lines at an age-appropriate speed. Add this pencil control activity to this list of pencil control exercises.
This activity is perfect for kids from Kindergarten on up through school-aged. Anyone who is writing with a pencil and trying to form letters on lines, copy written work, fill in worksheets, and take notes will love this handwriting exercise in pencil control.
Pencil Exercises
This post contains affiliate links.
Pencil exercises like this simple colored pencil activity are powerful ways to improve pencil control in handwriting.
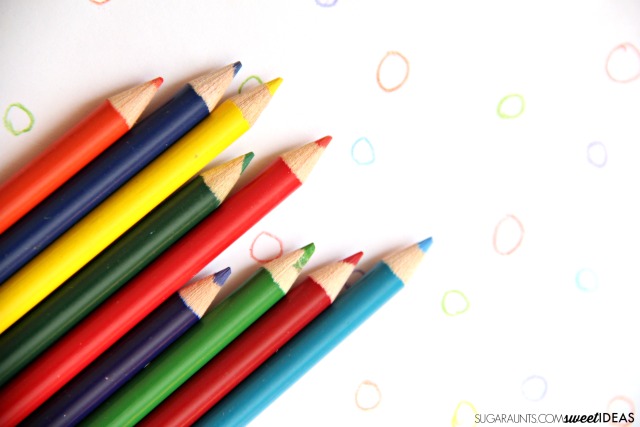
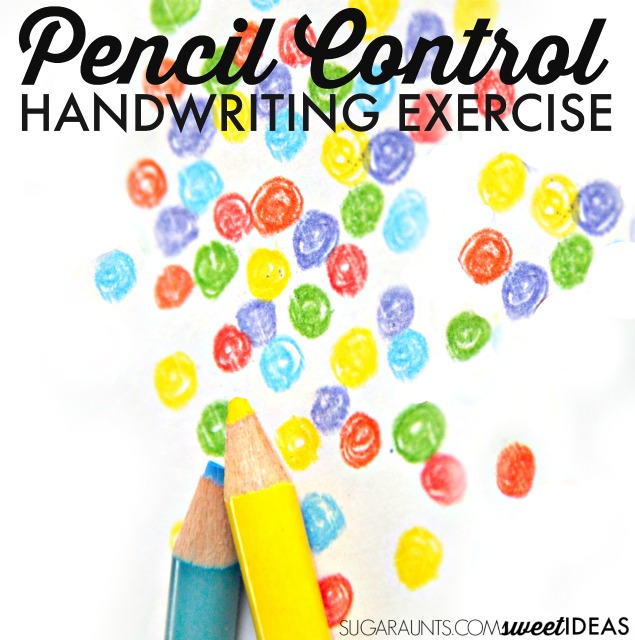
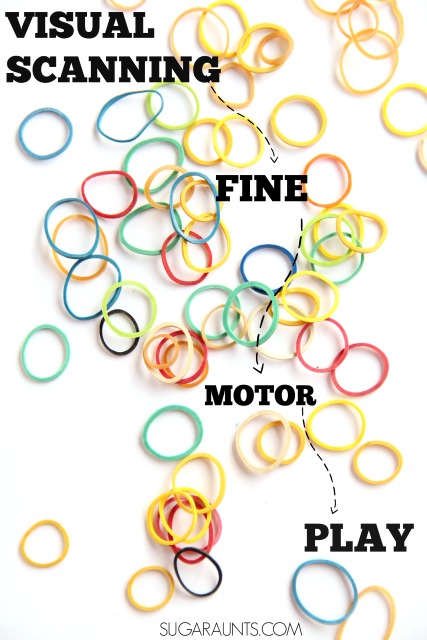
This activity is really, so simple. There is nothing you need more than a pencil and paper. We pulled out colored pencils to make our handwriting activity into a rainbow of color and to add a visual scanning component.
Rainbow Pencil Control Exercises
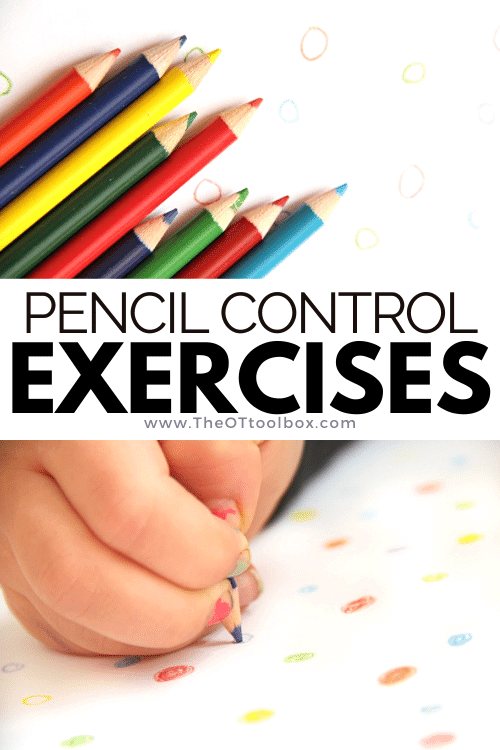
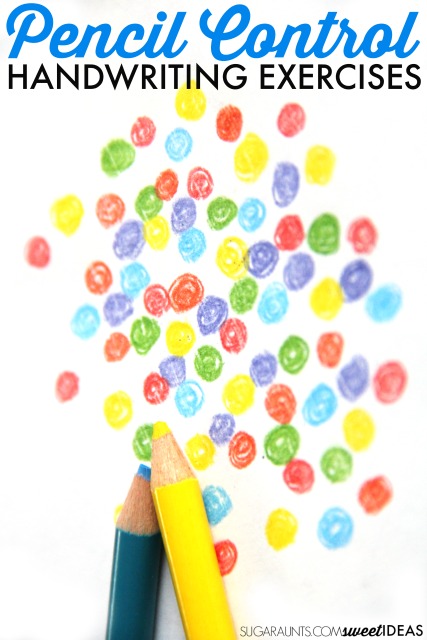
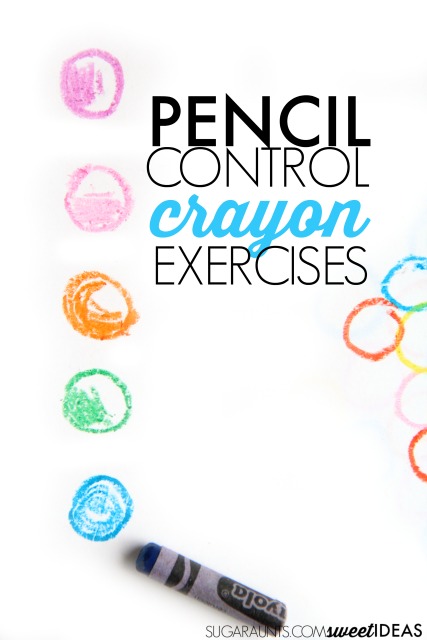
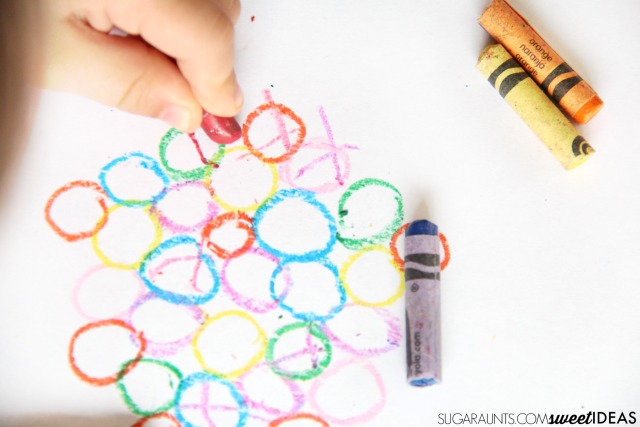
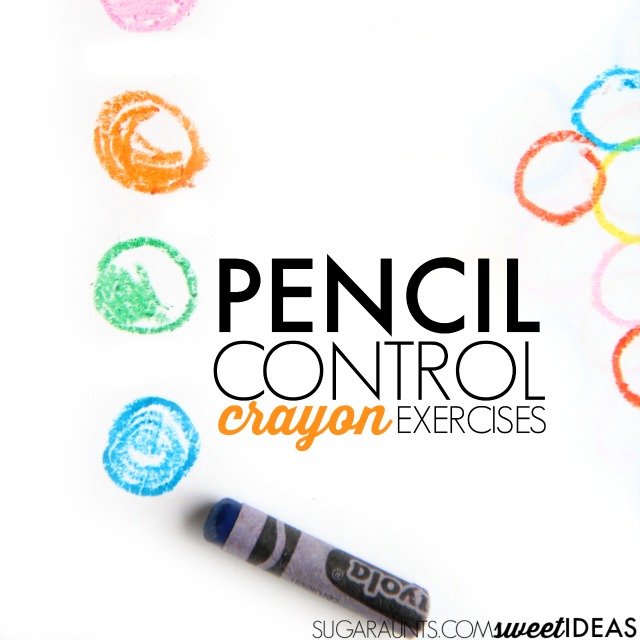
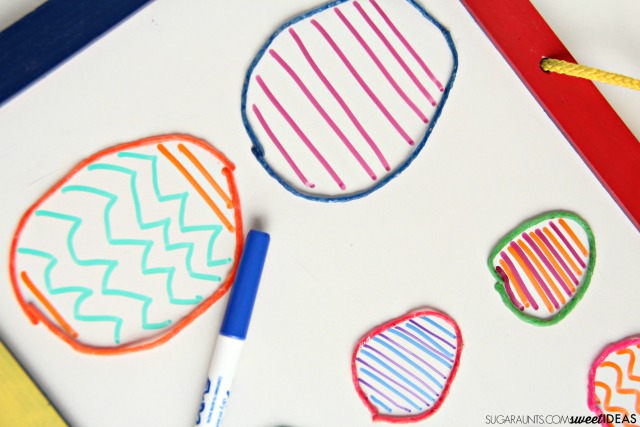
With this activity, we’re working on keeping the pencil strokes within the lines of a small circle.
First, draw a bunch of circles in different colors on a piece of paper. The circles should be 1/4 inch in diameter.
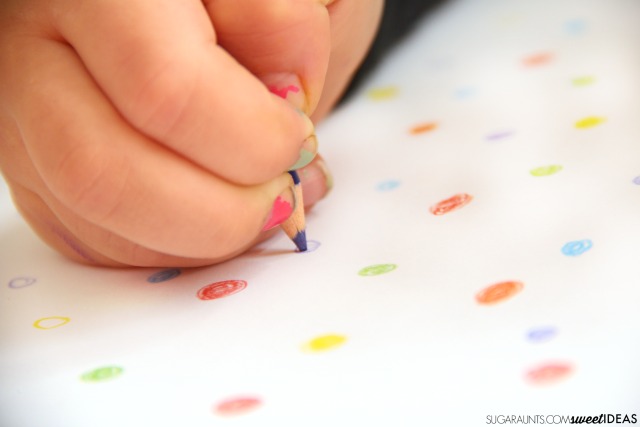
Ask your child to fill in the circle with the matching colored pencil. A red circle should be filled in with the red colored pencil.
The objective here is to fill in the whole circle without going over the lines. Because the circle is so small, filling it in with the colored pencil requires very small muscle movements of the fingers.
A child who uses their wrist or forearm to write (such as a child using a grasp such as the thumb wrap grasp, for example, are over compensating for weakness and lack of endurance of the intrinsic musculature in the hand and utilizing a stabilizing grasp. This rainbow pencil control exercise strengthens dexterity, including range of motion in the thumb IP joint. Read more about the thumb IP joint and handwriting in a previous post.
This overcompensation does not allow fluid motions of the fingers when moving the pencil in handwriting. Because the circles are so small, the child can focus more on using the small motor motions to fill in the color.
More Pencil Control Exercises
Extend this activity to further your child’s fine motor skills and pencil control in handwriting:
Ask your child to draw an “X” in each circle, without going over the lines.
Ask your child to draw horizontal or vertical lines within each circle, much like we did here.
Create a color coding activity: Match one circle color up with another pencil color. When you call out a color, your child can fill in that colored circle with a different, predetermined colored pencil. This is a test of visual scanning and quick thinking.
Draw larger circles and show your child how to fill them in with strait pencil strokes.
Rainbow Handwriting Kit– This resource pack includes handwriting sheets, write the room cards, color worksheets, visual motor activities, and so much more. The handwriting kit includes:
Write the Room, Color Names: Lowercase Letters
Write the Room, Color Names: Uppercase Letters
Write the Room, Color Names: Cursive Writing
Copy/Draw/Color/Cut Color Worksheets
Colors Roll & Write Page
Color Names Letter Size Puzzle Pages
Flip and Fill A-Z Letter Pages
Colors Pre-Writing Lines Pencil Control Mazes
This handwriting kit now includes a bonus pack of pencil control worksheets, 1-10 fine motor clip cards, visual discrimination maze for directionality, handwriting sheets, and working memory/direction following sheet! Valued at $5, this bonus kit triples the goal areas you can work on in each therapy session or home program.
Colleen Beck, OTR/L has been an occupational therapist since 2000, working in school-based, hand therapy, outpatient peds, EI, and SNF. Colleen created The OT Toolbox to inspire therapists, teachers, and parents with easy and fun tools to help children thrive. Read her story about going from an OT making $3/hour (after paying for kids’ childcare) to a full-time OT resource creator for millions of readers. Want to collaborate? Send an email to contact@theottoolbox.com.
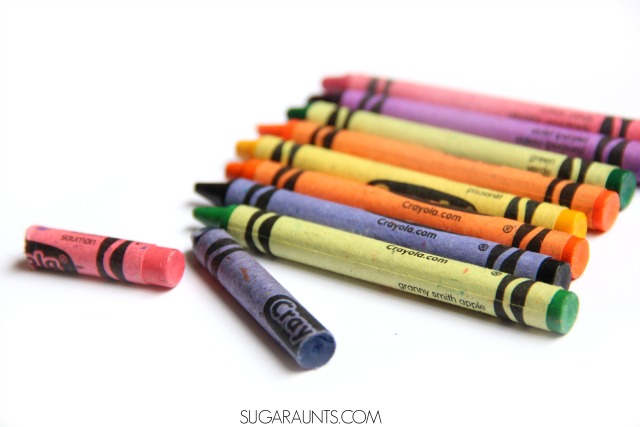
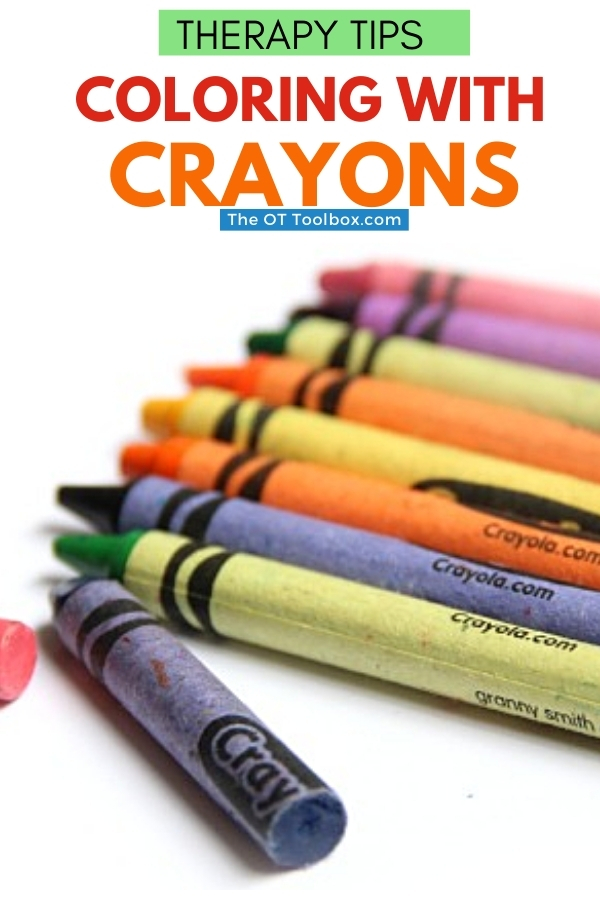
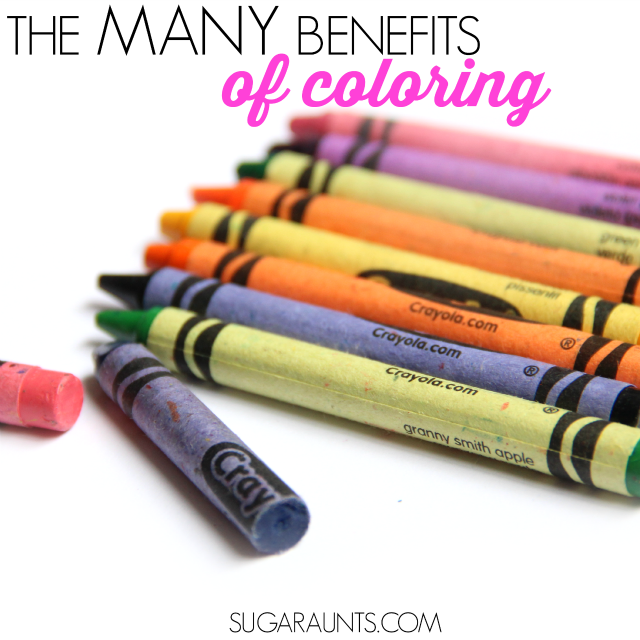
There are many benefits of coloring with crayons in occupational therapy interventions. Coloring with crayons is a fine motor skill that builds other skills. Did you know that the act of coloring with a crayon can help children develop fine motor strength, dexterity, grasp, and endurance in their hands? Be sure to check out this resource on the best crayons, based on development and fine motor skills.
And, coloring skills develop by more coloring. Here’s the thing: occupational therapists use crayons to help children develop fine motor skills, but they also work on the development of coloring skills as a functional task that is part of play, and typical child development. Let’s talk about all of the coloring skills that occupational therapy addresses with a simple box of crayons.
You know that smell, right? It’s kind of waxy and flaky (if that’s a smell…) and so distinctive! If you open a box of crayons that have the little marks of each crayon inside the cardboard box, it has an even stronger smell. Crayons smell like childhood! This post on coloring skills is part of my 31 Days of Occupational Therapy series, where each day is a creative activity using OT treatment materials that are free or almost free.
Fine Motor Skills with Crayons
Crayons are something that most homes have in a pencil box, in an old tin, or in a drawer somewhere. Did you know those childhood memory sticks (aka Crayons) can be used in SO many skill areas?
Consider fine and gross motor strength, tool use, sensory processing, pencil grasp, line awareness, hand-eye coordination, dexterity, endurance, self-confidence, creativity, task completion, and learning objectives like color identification, and color matching. Crayons develop the very skills needed for pencil grasp and carryover of that pencil grasp. Whew! No wonder crayons get worn down to nubs with all of those areas that they are working on!
One tool I love is our color by letter worksheet to support fine motor skills while coloring in a small space.
Benefits of Coloring for Children
There are so many developmental benefits to coloring! It’s more than creating a colorful preschool work of art.
Related Read: Read about how we worked on carryover of pencil grasp and strengthened fine motor skills and so many other areas with our 3 Crayon Challenge activity.
Coloring with crayons Improves Tool Use
Coloring with crayons improves a child’s ability to manipulate tools such as pencils, scissors, utensils, grooming and hygiene tools, and other functional tools with ease. By developing coloring skills, kids have a natural opportunity to explore a writing utensil in a way that is fun and creative.
They can use different colors by placing crayons back into the box with a coordinated manner. To further develop tool use with children, offer a crayon pencil sharpener, a small bin or zippered pouch that needs opening or closing, and a variety of crayon sizes and shapes. All of these can extend fine motor skills with more practice in tool use as well as dexterity.
Coloring with Crayons improves Bilateral Coordination
Bilateral Coordination is a fine motor skill needed for so many tasks. Using both hands together in a coordinated manner is a skill needed for handwriting, scissor use, and many functional tasks. When coloring, a child needs to hold the paper as they color. Using the assisting, non-dominant hand as a stabilizer allows a child to build strength and dexterity in their dominant hand. This skill will carry over to writing tasks, and makes coloring a great activity for kids who are switching hands in activities.
Coloring with Crayons Improves Endurance
Building on the fine motor skill areas, coloring can deepen a child’s endurance in completing writing tasks.
Many times, kids will complain of hand fatigue while coloring. They can build muscle endurance by coloring with the small muscles of their hands and allow for greater endurance when writing, too. To help a child develop hand strength, use coloring!
You can help kids improve hand strength with this simple coloring exercise: Instruct a child how to color in small circles to work on the strength and endurance of the intrinsic muscles. Ask them to fill in the complete circle. To extend the activity, create more circles. This exercise can be extended further by working on a vertical surface such as an easel or by taping the page to a wall. This develops proximal stability at the shoulder girdle as well as core strength, allowing for postural stability in written work.
If a child needs to work on this area, you can show the student how to color on a slanted surface like a slanted table surface or elevated surface. Here is an easy way to create a DIY slant board.
Broken Crayons help with hand strength!
Coloring develops Tripod Grasp
Coloring is a fine motor strengthening tool that many Occupational Therapists recommend and use in treatment sessions. Coloring is a resistive task that provides the small muscles in the hand to work the waxy crayon onto coloring sheets. When a child holds a crayon, they are working on the strength of the intrinsic muscles of the hand.
Using broken crayons requires more work and is a greater strengthening task for kids who need to work on their tripod grasp. For more strengthening, encourage your child to color more resistive surfaces such as construction paper, cardboard, or even sand paper.
Coloring offers sensory input
Coloring with a crayon can be an opportunity to add heavy work through the hands. This sensory feedback is proprioceptive input that “wakes up” the muscles of the hands and can be calming input.
Unlike a marker, children can color lightly or very dark by exerting more pressure. The proprioceptive system comes into play when a child attempts to vary the amount of pressure they are exerting through the crayon.
Coloring with markers just doesn’t provide that resistive feedback that coloring with a waxy crayon does. Markers are smooth and don’t give kids the sensory input that help with learning letters. For a fun twist on letter formation activities, grab a box of crayons!
To help kids write with heavier or lighter pencil pressure when writing, encourage children to shade and combine colors by being aware of how lightly or darkly they are coloring. There is also that crayon scent that children are aware of, either consciously or unconsciously. If you recall the scent of crayons from your childhood, then you know what I’m talking about here!
Coloring Skills Develop Spatial Awareness
Coloring skill development progresses as children gain experience in coloring. By developing coloring skills, kids can improve visual perceptual skills. Spatial awareness is an aspect of perceptual skills.
Visual perception is so important to many functional skills in handwriting: awareness of the body’s position as it moves through space, line awareness, using margins on a page, and writing within a given space. Coloring is a great tool in working on these areas as children color within lines and given spaces.
But sometimes, kids have trouble staying in the lines or coloring in areas without leaving large spaces uncolored. Verbal prompts, highlighted lines, bold lines, thick coloring lines, and physical prompts like raised lines can improve spatial awareness in coloring.
Coloring Skills and Eye Hand Coordination
One reason that coloring in occupational therapy sessions is so well-used as an intervention strategy is the development of eye-hand coordination skills. There are benefits of coloring with crayons when it comes to coordinating vision and motor skills. When writing or coloring, children must coordinate their physical movements with information received from their visual system.
Controlled movements are essential for handwriting, letter formation, and neatness in handwriting. Coloring helps with practicing coordination of the visual input with physical movements of the hands in very small spaces or large areas.
Providing smaller areas of coloring require more controlled movements and dexterity. For difficulties in this area, consider adding boundaries to coloring areas, with darkened and thicker lines or raised boundaries like using Wikki Stix around the coloring area.
Coloring Benefits Creativity and Self-Confidence
Another of the benefits of coloring with crayons involves self-confidence. Coloring inspires creativity in kids. A blank piece of paper and a box of crayons can inspire stories and pictures. Being creative allows a child to build their self-confidence in other areas, especially handwriting and pencil tasks. If you’ve ever received a coloring masterpiece from a child, then you know the pure delight they have when giving a creation they have made. That boost of self-confidence will entice them to complete other paper/pencil tasks.
Coloring helps with Color Identification and Color Matching
Crayons are color! Kids can be encouraged to practice color identification with the bright and vivid colors in a crayon box. Use a color by number activity to work on color matching skills.
These visual discrimination skills, visual scanning, visual attention, and visual memory needed to identify and match colors are part of the visual perceptual skills we talked about above. All of these are needed skills for reading, writing, math, and other higher level cognitive skills.
Coloring in occupational therapy teletherapy
All you need to develop the skills listed above is a simple box of crayons. This makes coloring a powerful tool in occupational therapy teletherapy, because many homes have crayons available.
Working on fine motor skills in teletherapy can be difficult because so many of an occupational therapist’s favorite fine motor tools might not be available. This is where using crayons to work on a variety of skills can be so powerful.
Try some of these teletherapy activities using crayons:
So, now you know the many benefits of coloring with crayons. How can you use crayons in developmental and functional tasks? Let’s explore crayons for various ages and stages.
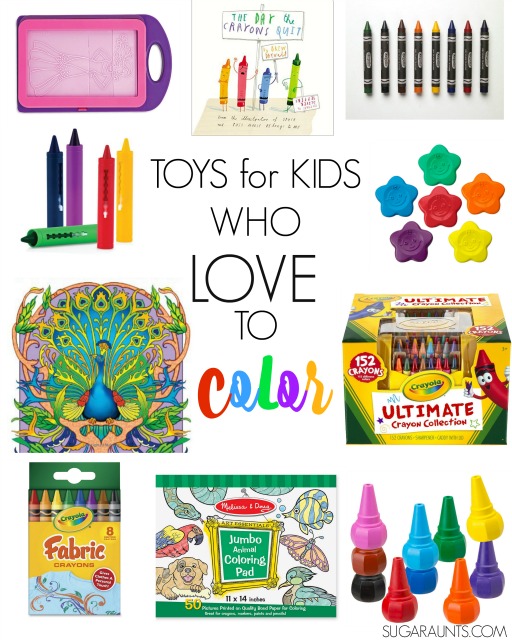
Toys for Coloring Skills
You’ll want to start by reading this article on the best crayons for toddlers. There, we cover crayons for building coloring skills from the youngest age, and highlight therapist-recommended crayons based on development.
First, start with our free President’s Day coloring pages (great for any US holiday!) and use the coloring therapy toys below.
Here are some creative learning and play ideas that kids will love. Some of these are more pricey than just a box of crayons, but your crayon fan will enjoy using these toys and games and won’t even realize they are working on so many skills!
(We’re including affiliate links.) One of our favorite books is The Day the Crayons Quit by Drew Dewalt. This is a book for crayon fans! We grab this book from the library anytime we see it, and it’s got a great message, too. Kids will be inspired to color after reading this book about crayons.
It’s no secret that crayons are a fine motor powerhouse when it comes to developing that tripod grasp! You can use larger crayons for smaller kids or children who need to work on other grasps, like a lateral key grasp, or children who need to work on thumb adduction in functional tasks like scissoring. These ALEX Jr. Tots First Crayons are just the thing to try!
Work on more fine motor skills, like finger isolation when using Finger Crayons.
Kids can get creative and explore sensory play while using crayons in the bathtub.
Do you remember rubbing crayons over fashion design kits as a kid? There is a reason to do this play activity with kids!
This Fashion Design Activity Kit provides proprioceptive input and strength to little hands in a fun and creative way.
With 152 colors, this Crayola Ultimate Crayon Case will give your kiddo a color for every creative whim. This looks so inviting!
There is a coloring book out there for everyone! Even adults can get in on the coloring fun with creative coloring like this Art Nouveau Animal Designs Coloring Book . Color alongside your child for calming and relaxing art time.
For more creative fun, try Dry Erase Crayons right on a dry erase surface. This is a great way to practice spelling words on a resistive surface.
Little artists will love to create their own t-shirt designs using Fabric Crayons . This is a fun way to work on fine motor strength and bilateral coordination. Holding down that cotton t-shirt is a bilateral coordination workout!
Colors Handwriting Kit
Working on handwriting skills in occupational therapy sessions?
Need to help your child with handwriting legibility, letter formation, spacing, and sizing in written work?
Working on handwriting in the classroom and need a fun colors of the rainbow theme for motivating handwriting tasks?
In the 60 page printable kit, you’ll find handwriting worksheets, fine motor activity pages for A-Z, colors “write the room” cards for uppercase letters, lowercase letters, and cursive letters. This kit has evertyhing you need for helpiing kindergarten-2nd grade students with handwriting skills.
Colleen Beck, OTR/L has been an occupational therapist since 2000, working in school-based, hand therapy, outpatient peds, EI, and SNF. Colleen created The OT Toolbox to inspire therapists, teachers, and parents with easy and fun tools to help children thrive. Read her story about going from an OT making $3/hour (after paying for kids’ childcare) to a full-time OT resource creator for millions of readers. Want to collaborate? Send an email to contact@theottoolbox.com.
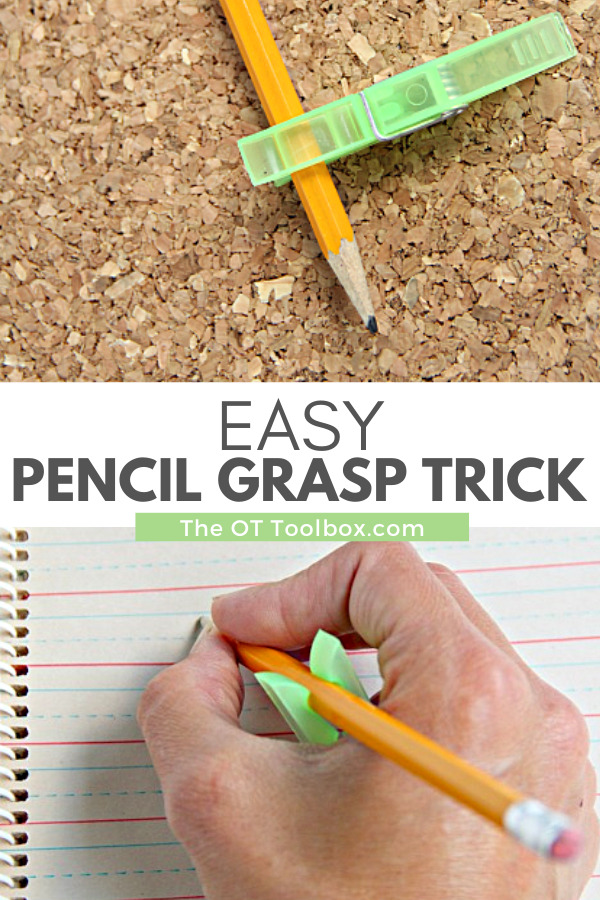
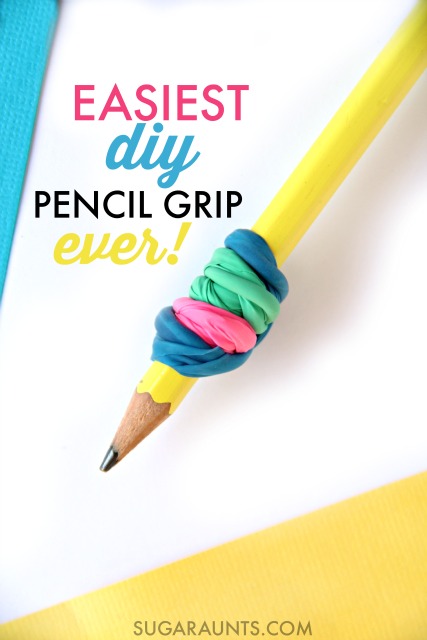
Pencil grips! It can be hard to find the perfect pencil grip. And then, once you find one that works just right, that perfect pencil grip gets lost in the expanse of a backpack or a messy desk. Today, I’ve got a pencil grasp hack for you. This clothespin pencil grip will help kids write with a better pencil grasp, and it’s an inexpensive way to offer cues to position fingers on the pencil correctly.
ClothesPin Pencil Grip
Pencil grasp is a tricky thing! You can remind kids over and over, try all of the pencil grasp tricks and tips, but if a child struggles with fine motor skills, they revert right back to the inefficient and non functional pencil grasp. This is especially true in handwriting problems when kids are rushing to write or holding their pencil inefficiently, and legibility suffers.
The easy pencil grasp trick described below is one that provides a frugal option for ensuring a functional pencil grasp and one that plays into the dexterity needed for letter formation and handwriting. Looking for more information on pencil grasp and fun ways to work on pencil grip?
Try these activities designed to boost pencil grasp in creative ways.
For this pencil grasp trick, you’ll need to understand why it works. The issue with many kids who hold a pencil with an inefficient grasp is the dexterity and limited motion that results. They are holding the pencil with their fingers wrapped in such a way that they can’t hold a pencil with dexterity. They lack pencil control needed for efficient handwriting speed.
Letter formation suffers and legibility lacks. When a child moves ahead in grade level or age and are required to write more quickly, they can’t keep up with written work requirements and legibility suffers. They then can’t read their class notes, handwritten work, homework lists, etc. Try these pencil control exercises for more fun ways to work on dexterity and pencil movement in letter formation.
why does the clothespin pencil grasp trick work?!
For the child who can’t maintain a proper pencil grasp because of inefficient separation of the sides of the hand, this easy pencil grasp trick can be just the way to ensure the stability side of the hand is separated motorically from the precision side of the hand. Read more about motoric separation of the sides of the hand and what that looks like in fine motor work (such as holding and writing with a pencil).
When kids hold the pencil with the clothespin “bar”, it provides a physical prompt that allows them to flex or close their pinkie finger and ring finger around the support of the clothespin. This allows the stability side of the hand, or the ulnar side, to provide support in writing.
The radial side of the hand, or the precision side, is then able to work independently of the other two fingers. This means the middle finger, ring finger, and thumb are free to manually move the pencil with precision. The precision side which primarily consist of the thumb and pointer finger movements in a tripod grasp can move the pencil with control and dexterity as the middle finger supports the pencil.
For the modified tripod grasp, the middle finger can be a helper digit where it is positioned on the pencil shaft and a worker in moving the pencil with control.
Both the tripod grasp and the modified tripod grasp are efficient pencil grasps. The primary concern is that the ulnar side is separate and supportive, allowing for endurance and dexterity in written work.
We created a video that shows how you can target different grasp patterns using just a clothes pin. This is another benefit of using a clothespin pencil gripper. It’s a built-in hand strengthening tool!
Video walks through various grasp patterns using a clothes pin.
Here is a fine motor activity that can be used to build and develop the separation of the sides of the hand.
Working on pencil grasp in handwriting? Why not start a handwriting club for kids? Kids can work on handwriting skills in a fun way. Here’s how to start a handwriting club kids will WANT to join!
Clothespin Pencil Grip
Affiliate links are included below.
For this pencil grip trick, you’ll need just a single clothespin. The clothes pin can be the standard wooden variety or a colorful plastic type. Why not make it a project and decorate the clothespins as a group to add a bit of fine motor play?
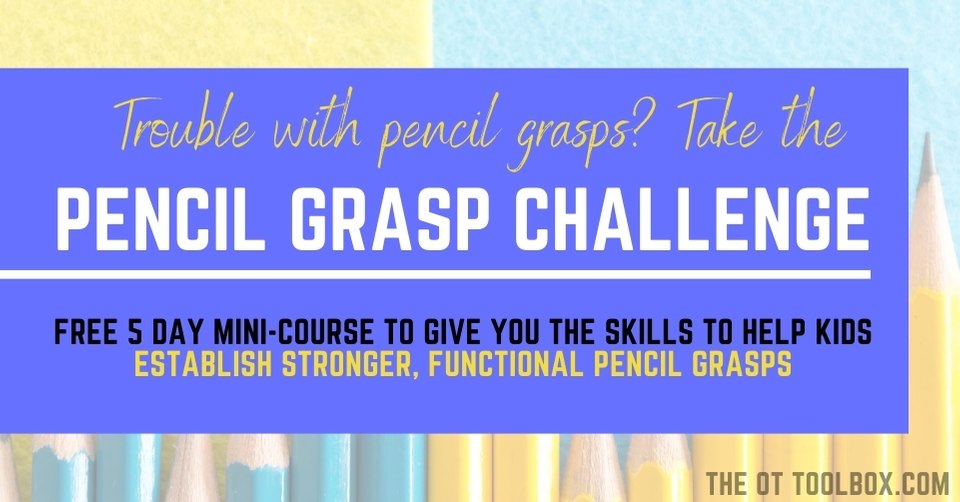
Need to know about the skills that make up a functional pencil grasp? The Pencil Grasp Challenge is open! In this free challenge, you’ll learn what’s going on behind the inefficient and just plain terrible pencil grasps you see everyday in the classroom, clinic, or home. Along with loads of information, you’ll gain quick, daily activities that you can do today with a kiddo you know and love. These are easy activities that use items you probably already have in your home right now.
Besides learning and gaining a handful (pun intended) of fun ideas to make quick wins in pencil grasp work, you’ll gain:
5 days of information related to pencil grasp, so you know how to help kids fix an immature pencil grasp.
Specific activities designed to build a functional pencil grasp.
Free printable handouts that you can use to share with your team or with a parent/fellow teachers.
You’ll get access to printable challenge sheets, and a few other fun surprises.
And, possibly the best of all, you’ll get access to a secret challengers Facebook group, where you can share wins, chat about all things pencil grasp, and join a community of other therapists, parents and teachers working on pencil grasp issues.
Colleen Beck, OTR/L has been an occupational therapist since 2000, working in school-based, hand therapy, outpatient peds, EI, and SNF. Colleen created The OT Toolbox to inspire therapists, teachers, and parents with easy and fun tools to help children thrive. Read her story about going from an OT making $3/hour (after paying for kids’ childcare) to a full-time OT resource creator for millions of readers. Want to collaborate? Send an email to contact@theottoolbox.com.
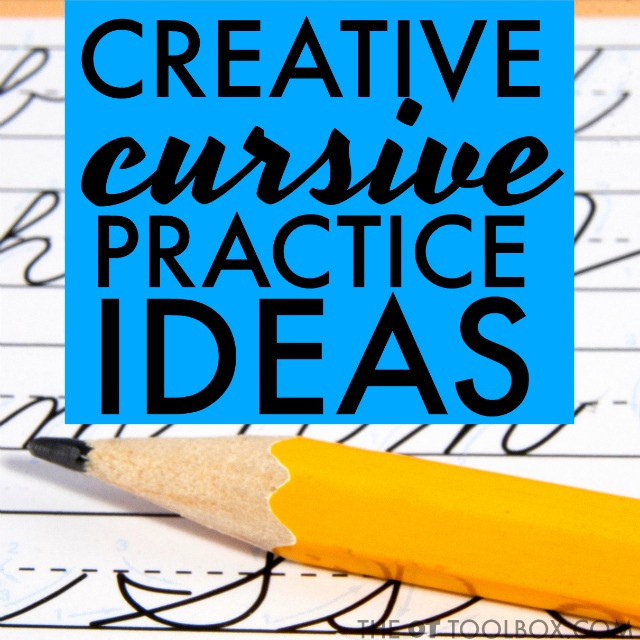
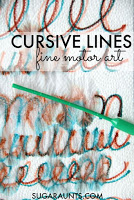
In this blog post, we’re covering how to teach cursive letter connections for the tow rope letters, or those cursive letters that connect at the middle line. Most letters connect to the next letter on the baseline, but these set of letters throw things off a bit! Let’s explore this set of cursive letters.
Tow Truck Letters
When teaching cursive writing, kids can recognize that cursive letters come in groups or letter families. These cursive letter families are how we can teach kids to write letters in chunks of similar pencil strokes.
Teaching cursive letters in this manner can be a helpful strategy for allowing kids success when learning the pencil strokes needed for forming cursive letters. Below, you’ll find a subcategory of cursive letter groups: How to write cursive tow rope letters!
As we previously discussed, a specific order a teaching cursive letters doesn’t matter as much is teaching a group of letter families together in a block. When students learn cursive letters it is beneficial to learn the pencil strokes associated with cursive letter families.
We have covered all of the different cursive letter families including wave letters letters loop letters bump letters. There is a subgroup of cursive letter families that have a slightly different connecting pattern to them. These are the cursive tow rope letters.
How to Teach Tow Rope Cursive Letter Connection
If you’ve been following The OT Toolbox over the last month, then you know that there’s been quite a lot of information related to cursive handwriting. We’ve talked about letter formation, cursive slant, cursive writing speed and rhythm, and even how pencil control is needed in cursive handwriting.
Today, we’re finishing up with a last cursive handwriting post in the series. Below you’ll find information on forming cursive letters that contain a “tow rope” connector to the letter following them.
Tow Rope letters are those lowercase cursive letters that connect to the next letter using a horizontal line at the middle line. Most cursive letters connect with a curved line from the baseline.
Tow Rope letters connect horizontally and can change formation of the letters that they connect to.
Tow Rope Letters include cursive letters b, o, v, and w.
How to teach cursive Tow Rope Letters
Teaching the cursive tow rope letters is not much different than teaching other letters of the alphabet.
Use of a cursive writing plan can help, as can kinesthetic methods and multi-sensory strategies. Using tools such as sand paper or writing trays can bring a textural aspect to learning these cursive tow rope letters.
You can read more about teaching each individual letter as they were broken down into cursive letter families:
Trick for teaching cursive letters with a tow rope connection
Teaching kids about the visual of a tow rope that connects a tow truck to it’s haul or a boat to a raft can be helpful in teaching children to write cursive letters with proper connection between these letters and the letter they connect.
If the tow rope sags or dips down, it can affect how the letters appear and result in inaccuracies.
To show kids how to recognize and recall use of tow rope connections, draw a small truck at the end of the tow rope connecting lines.
Practice cursive letter connections for tow rope letters
Practice the combinations of cursive letters that contain tow rope letters:
ba, be, bi, bl, bo, and by
vva, ve, vi, vo, and vy
wa, we, wi, wo, and wy
Letter o can be practiced with every letter of the alphabet as a vowel letter.
Use the verbal cues associated with each letters cursive family to formation of these letters.
However pencil stroke exercises can be influential in behind and horizontal line to connect. Additionally practice with commonly connecting letters can make a big impact.
In this way students with practice tow rope letters that connect to other letters as a group. These letter blends commonly and within minutes.
How to Teach Lowercase Cursive b
Teach students to practice be connected to letters that may occur within words. This includes ba, be, bo, bl, br, by.
How to Teach Lowercase Cursive o
Students can practice the commonly connected letters used in words as the letter connects to the second letter. As a vowel, the letter o may connect to every letter of the alphabet.
Because of this, students who are learning cursive can practice the formation of o to the individual pencil strokes that are part of different cursive families. That is, practice o connected to the bump of bump letters, the o connected to the wave that occurs wit wave family letters, the o connected to the spike of tree letters, the o connected to the bump of bump letters, and o as an ending letter.
How to Teach Lowercase Cursive w
Students can practice the connection of lowercase cursive w to vowel and some consonant letters:
Wa, we, wi, wh, wr, wl, wm, wn, wy.
How to Teach Lowercase Cursive v
Students can practice the connection of lowercase cursive v to vowels and commonly used consonant letter combinations. This includes: va, ve, vi, vo, vr, and vy.
Use strategies such as creative cursive to practice these letter combinations in innovative manners to prevent boredom.
Colleen Beck, OTR/L has been an occupational therapist since 2000, working in school-based, hand therapy, outpatient peds, EI, and SNF. Colleen created The OT Toolbox to inspire therapists, teachers, and parents with easy and fun tools to help children thrive. Read her story about going from an OT making $3/hour (after paying for kids’ childcare) to a full-time OT resource creator for millions of readers. Want to collaborate? Send an email to contact@theottoolbox.com.
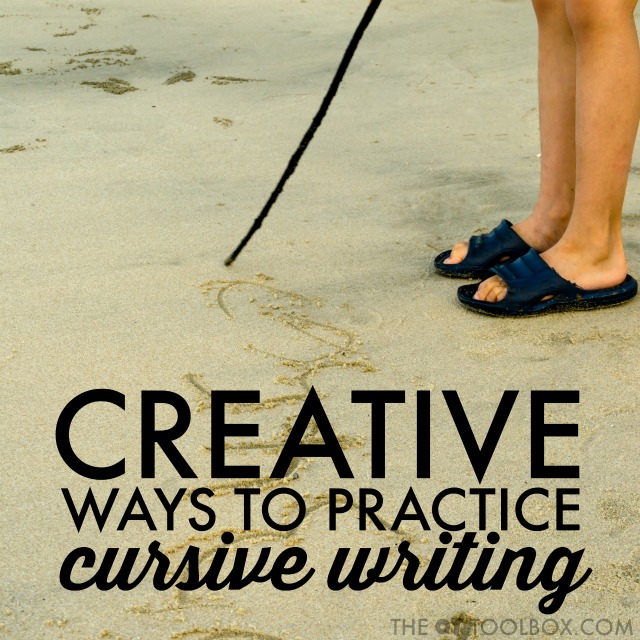
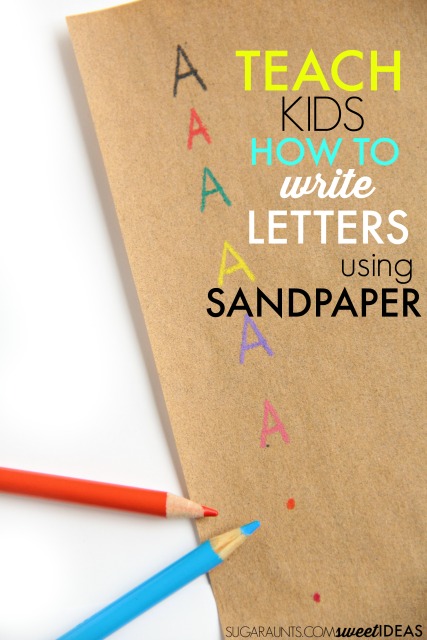
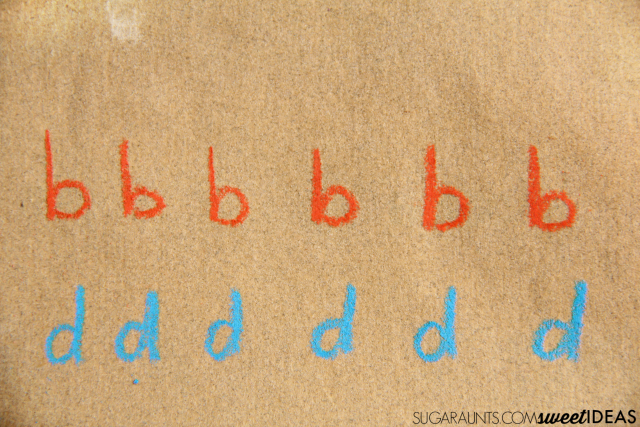
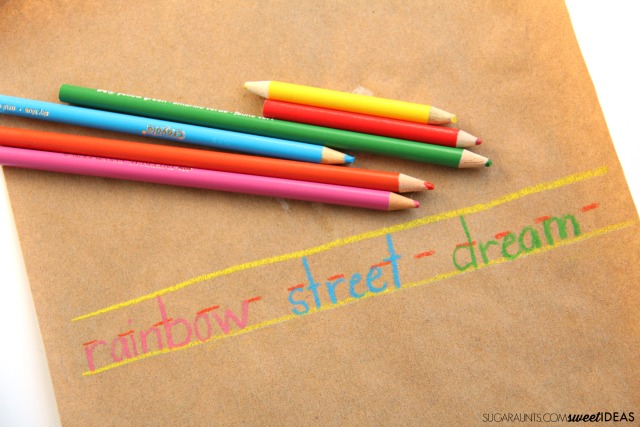
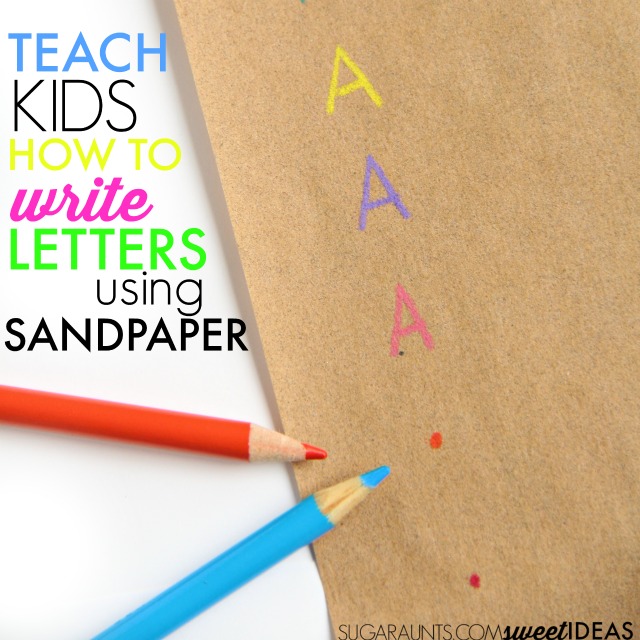
This easy handwriting trick uses an item you probably have in the workshop or garage of your house. Sometimes, a creative technique is all it takes to help kids work on letter formation and line awareness in their handwriting. We used sand paper to provide proprioceptive feedback through the pencil while working on handwriting skills that might be difficult for some kids on regular paper.
This trick is a fun pencil control activity that is helpful for improving handwriting.
Scroll to the bottom to watch this Sandpaper Handwriting Trick.
Sandpaper Writing Activity
This post contains affiliate links.
Sandpaper might be considered a super tool in the Occupational Therapist’s therapy bag. It’s a great medium for working on handwriting in several areas: Using sandpaper as a base sheet when writing provides a surface for feedback through the hand. This is one easy way to help kids who need to work on pencil pressure.
This is such an easy trick for helping kids to work on letter formation, number formation, letter reversals, and organizational issues such as line placement (aka writing on the lines and in the spaces on worksheets).
With kids, sometimes a small twist on what you’ve been doing is all that you need to get the hours of practice to finally “stick”. You might have been working on letter or number formation over and over again in a bunch of different ways. The chalkboard, the white board, the fun pencil, writing in the sand bin…but give the kiddo a piece of paper and the letters are choppy, poorly formed, and all over the lines.
What is a mom/teacher/OT to do?
Some kids respond well to repetition. Motor planning is a good thing when it comes to letter formation or number formation! However, other kids work well with all of the tricks but just can’t carryover the skills they’ve learned once they are required to write quickly or write an open-ended response (aka think while writing).
This sandpaper writing trick is one strategy that can help kids slow down, respond to tactile sensory input, and modify their pencil control given proprioceptive feedback.
Here’s how it works: Simply lay a piece of paper on top of a sheet of sandpaper. And then write.
The sandy grit of sandpaper provides feedback through the pencil and allows kids to slow down, write with better pencil pressure, and be more aware of how their pencil is moving in the space they have to write in.
Sandpaper provides a great proprioceptive strategy for handwriting. Different kids will respond to different grades of sandpaper. This pack comes in an assortment of grades so that you can try more or less “sandiness” to the paper. A coarse grit will provide more feedback and a fine grit will provide less sensory input.
Watch the video to get a better understanding of how to complete this activity. Show it to the kiddos, too!
This is a great trick to use with workbooks. Use several colors of colored pencils to practice letter or number formation with rainbow writing. Simply trace over the letters with different colors to practice letter formation.
Using a sheet of sandpaper under a worksheet can allow for improved placement in a writing space by encouraging the child to slow down while writing.
Try writing right on the sandpaper with colored pencils to really add a tactile strategy to letter formation. Try placing starting dots along with verbal or visual cues to form the letter correctly. The tactile feedback will add a “memory” to forming the letter.
This is a great strategy for helping kids to address letter reversals.
One last way to use sandpaper in handwriting is to draw lines on the sandpaper and ask the child to write on the lines with colored pencils. While this is not a practical strategy for written work, it’s a great way to practice line awareness and spatial organization skills. Once the sandpaper is filled up with writing, use it as a base for placing paper on top.
MORE ways to practice handwriting using sandpaper:
Like this handwriting tip? Try all of the strategies in our Easy Quick Fixes to Better Handwriting series. Be sure to check out all of the easy handwriting tips in this month’s series and stop back often to see them all.
Watch the video on this Sandpaper Handwriting Trick:
There are some kids out there who absolutely HATE handwriting. Let me re-phase that. There are a ton of kids who completely despise to their core the act of working neat handwriting, pencil grasp, slowing down so people can read their words, and writing on the lines. A ton. I’ve worked with many (many!) kids like this. I’ve recommended fun activities to about a zillion parents and teachers of these kiddos. It just isn’t fun and it is work for them. Poor handwriting can result from so many factors: fine motor development, motor planning, visual perceptual skills, and attention, are just a few of the areas that interfere with neatness in written work.
So how do you possibly get through to build those areas up when the child is resistant to pick up a pencil and copy written work?
You make it completely NOT handwriting practice.
I’ve got a super creative way to sneak in skills like pencil control, line awareness, spatial awareness, and letter formation. And kids won’t realize they are building their ability to write on lines, space between words, and form letters the correct size. And it all uses art!
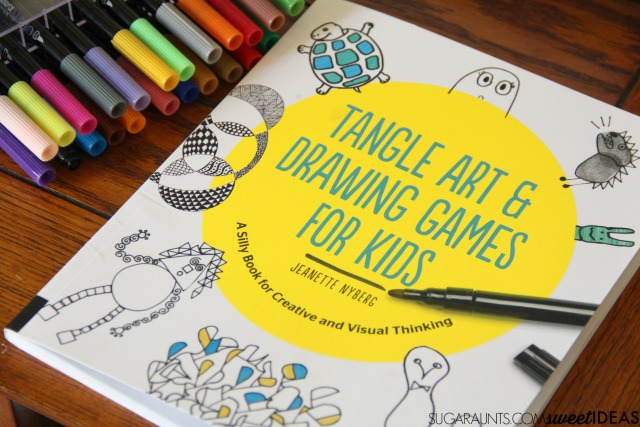
Work on Handwriting with Tangle Art
Affiliate links are present in this blog post.
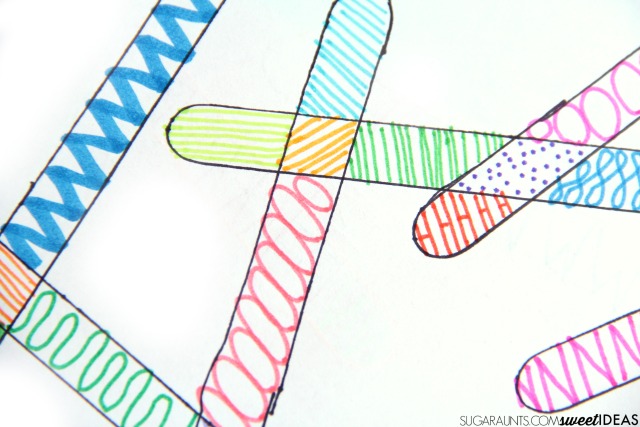
I was lucky enough to snag a copy of my friend Jeanette’s new art book, Tangle Art Drawing Games for Kids: A Silly Book for Creative and Visual Thinking. This book is completely creative with easy and fun ways to get arty. I flipped through the book and loved every single project. They are no-prep art ideas that require only a pen and paper for most of the ideas. You could do every project in the book and then go back to the beginning and re-do them all and still be inspired to create new and fun art.
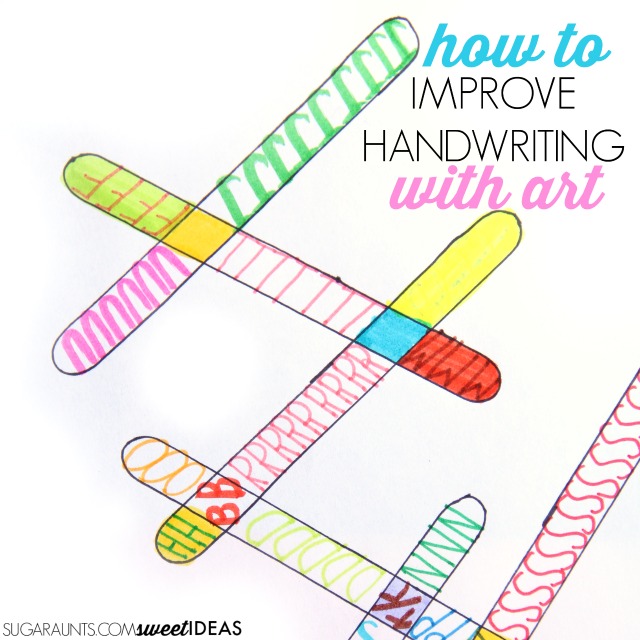
One project in the book drew me in when i saw it. Ice pop stick tangle art is the perfect workout to build the skills needed for neatness in handwriting while creating fun art.
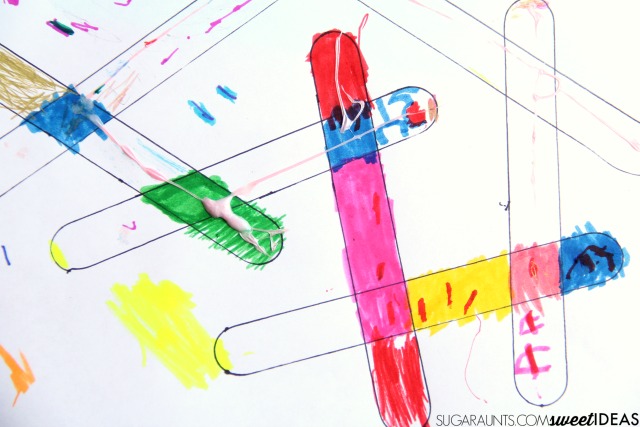
We followed the directions in the book to make shapes using craft sticks. Just tracing the craft sticks is a great way to work on bilateral coordination. When a child writes, it is essential that they hold the paper with their non-dominant hand. Then need to stabilize the paper in order for the pencil to glide across the page.
Just try writing without holding the pencil and you will notice a difference in neatness. This small task is often one that slides when kids loose attention in a handwriting task. You might see them slouch over at their desk and write without holding the paper.
Tracing those craft sticks is a nice way to physically attend to the bilateral coordination needed in handwriting tasks.
We used both the jumbo-sized craft sticks and the regular size to build more pencil control. Use a sharpie marker to get a thicker line for building line awareness.
It is fun for kids to make hidden messages in the shapes by spelling out a name or word with all of the letters.
If your kiddo is VERY anti-letters, try working on spatial awareness and pencil control by practicing the writing strokes needed for letter formation. Instruct them to make counter clockwise circles close to one another, diagonal lines, horizontal and vertical lines, and mountain shapes.
For the younger crowd, this activity is great for pre-writing skills, too. Coloring in the shapes encourages the motor skills needed to move the pencil in handwriting.
This is a quick and easy way to build the skills needed for improving handwriting through more controlled pencil strokes. Pencil control is something we’ve covered in depth before. Kids can pick up a pencil and write quickly with scratchy letter formation or press too hard to form very dark letters.
We covered the best crayons for toddlers (and other ages) in a recent blog post that addresses the developmental benefits of various types of crayons. This can be a great starting point to help kids progress with underlying skills such as hand strength as well as the functional output; coloring, based on developmental levels and age.
They can miss lines and form letters in various sizes or write letters on top of one another. There are many (MANY) various reasons for each of these handwriting concerns. From inefficient fine motor strength, to visual perceptual difficulties, to proprioception needs…handwriting is a complex task!
Sometimes, the issue with poor handwriting is the child’s lack of pencil control. They might over-extend lines and need to improve precision in handwriting.
These easy crayon exercises are one way to work on pencil control. We’ve shared a similar activity recently using colored pencils and smaller circles that worked on precision of pencil movements. Today’s crayon exercises are just a little different and designed to build the motor movements of letter formation.
Pencil Control Exercises with Crayons
This post contains affiliate links.
For the first activity, simply draw 1/2 inch circles with various colors of crayons. Make the circles touch. Kids can draw an “x” inside the colors. I gave the instruction to keep the “x” inside the lines and use a different color than the color of the circle. This direction allows the child to slow down as they check the color and gives them a chance to become more aware of the lines of the circles.
We also used small pieces of crayons for this activity. Using small pieces of crayons is a great way to build the muscles needed for coloring and writing with controlled moments. I touched on the benefits of coloring a bit here.
Another quick pencil control exercise is coloring in 1/2 inch circles. For this exercise, ask your child to color the circles in specific ways. Show them how to color some circles with various crayon strokes. Coloring small areas with vertical crayon strokes, horizontal strokes, semi circle motions, diagonal lines, and circular crayon strokes mimics the lines of letter formation. Coloring the semi circles within the circle’s boundaries promotes the curved lines of letters like “c” and “a”. Be sure to show them how to start at the top for each circle and retrace their lines until most of the circle is filled in.
Here are a few more ideas that you can incorporate to improve pencil control. In the video below, we used colored pencils. Do these exercises with crayons, colored pencils, markers, chalk or anything!
Try this activity before a handwriting task to warm up the hands.
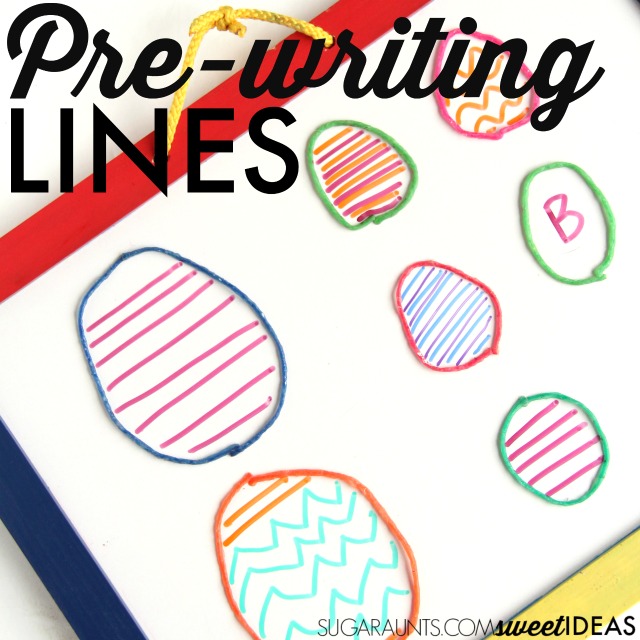
Working on the underlying pre-writing skills of handwriting is SO important in handwriting. This pre-writing lines activity is a fun Easter occupational therapy activity, but it’s also a powerful tool for building the foundation for handwriting. This is one of our favorite Wikki Stix activities to support pre-writing development.
You know we like to share handwriting activities around here, right? This Easter egg pre-writing activity is a fun way for young children to work on pre-writing skills in order to build a base for letter formation and pencil control. While we made this activity an Easter egg-ish shape, you could do this activity any time of year and use any shape to work on pencil control within a confined space.
Preschoolers and Toddlers will love this early handwriting activity! All of these skills are needed before a child can form letters and work on line awareness in Kindergarten. If a child is showing difficulty with forming diagonals in letters like “A” or “M”, this would be a fun way to work on building the skill for improved legibility in written work.
Using THIS Dry Erase Board worked out great for this activity, because we did the same writing activity on the reverse side, which has a chalkboard. Writing with small pieces of chalk is a fantastic fine motor and intrinsic muscle strengthening activity to work on the fine motor skills needed for endurance in drawing and coloring, as well as the tripod grasp needed for an appropriate grasp on the pencil. A chalkboard surface for drawing lines is much more resistant than a smooth dry erase surface, providing more feedback during line formation.
We used these Dry Erase Markers for their fine point and colorful selection, which made making these Easter eggs a creative activity, too. My preschooler loved picking out the colors to create patterns. The last item we needed for this handwriting precursor activity was (Amazon affiliate link) Wikki Stix. As an Occupational Therapist, I feel like I’m always pushing the benefits of Wikki Stix. The bendable and mold-able sticks are a great fine motor and handwriting tool. In this activity, I bent one or two wikki stix into an egg shape. You could also make circles, squares, or any shape for your handwriting task.
Developmental Progression of Pre-Writing Strokes
As a child develops, they are typically able to copy lines and shapes with increasing accuracy. Here are the general ages of development for pre-writing lines:
Age 2- Imitates a vertical line from top to bottom
Age 2-Imitates a Horizontal Line
Age 2-Imitates a Circle
Age 3- Copies (After being shown a model) a Vertical Line from top to bottom
Age 3 Copies a Horizontal Line from left to right
Age 3- Imitates a Cross
Age 4- Copies a Cross
Age 4- Copies a Right and Left Diagonal Line
Age 4- Copies a Square
Age 4- Copies an “X”
Age 5- Copies a Triangle
The developmental progression of these shapes allows for accuracy and success in letter formation.
Get a FREE Developmental Progression of Pre-Writing Strokes printable HERE.
Easter Egg Pre-Writing Strokes Activity
For this activity, we used the Wikki Stix to right on the dry erase board. I created egg shaped ovals with the wikki stix. I then showed my preschooler how to draw lines across the eggs to create patterns and designs.
We practiced horizontal lines (going from left to right) and vertical lines (going from top to bottom). We also added circles within the boundaries of the wikki stix and diagonal lines, too.
The physical border provided by the wikki stix gave a nice area and cue for pencil control. Try doing this activity with progressing level of developmental line skill. You can also work on writing letters inside the wikki stix to build spatial and size awareness in handwriting.
Extend the activity:
Use the wikki sticks to do this activity on paper or a chalkboard. Other ideas might be using crayons, markers, or a grease pencil for more feedback through resistance and proprioceptive input to the hands.
More Pre-writing Lines Activities
Some of my favorite Handwriting activities are multi-sensory and incorporate motor planning activities for building pre-writing lines as a foundation for handwriting:
Score Fine Motor Tools and resources and help kids build the skills they need to thrive!
Developing hand strength, dexterity, dexterity, precision skills, and eye-hand coordination skills that kids need for holding and writing with a pencil, coloring, and manipulating small objects in every day task doesn’t need to be difficult. The Spring Fine Motor Kit includes 100 pages of fine motor activities, worksheets, crafts, and more:
Colleen Beck, OTR/L has been an occupational therapist since 2000, working in school-based, hand therapy, outpatient peds, EI, and SNF. Colleen created The OT Toolbox to inspire therapists, teachers, and parents with easy and fun tools to help children thrive. Read her story about going from an OT making $3/hour (after paying for kids’ childcare) to a full-time OT resource creator for millions of readers. Want to collaborate? Send an email to contact@theottoolbox.com.
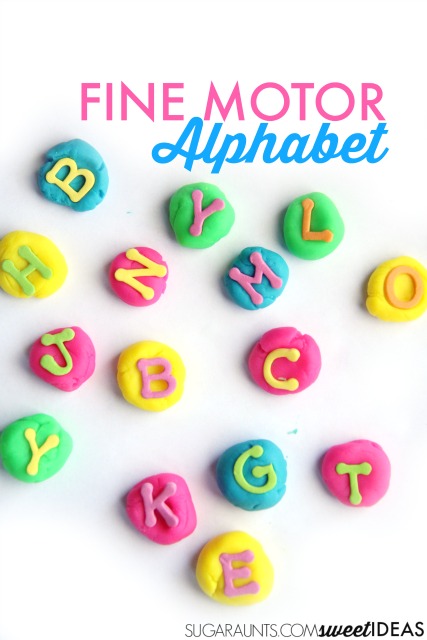
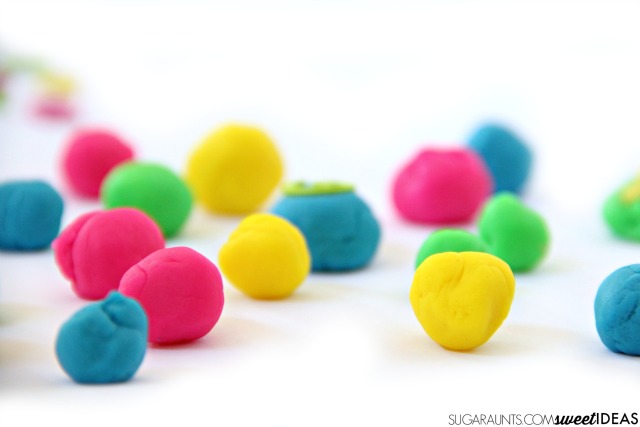
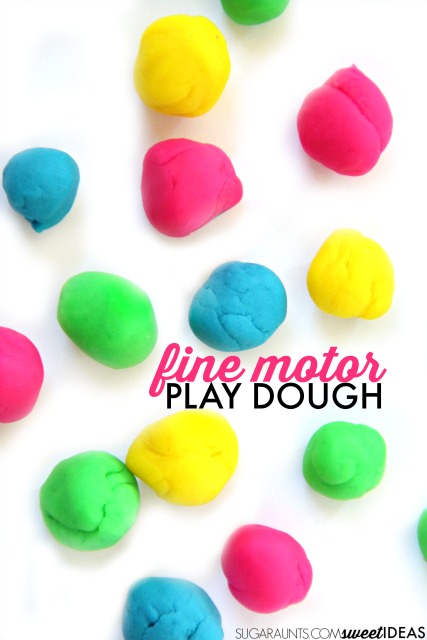
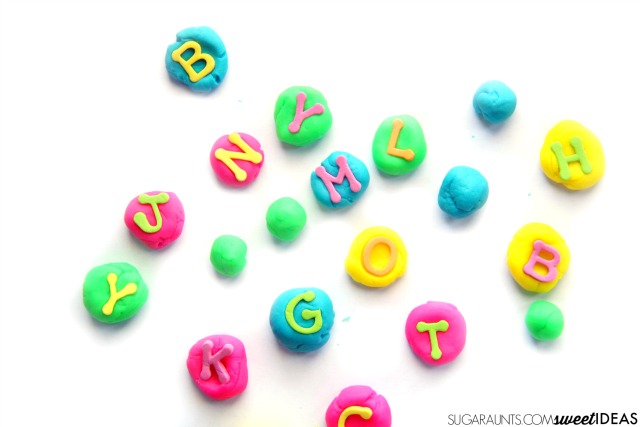
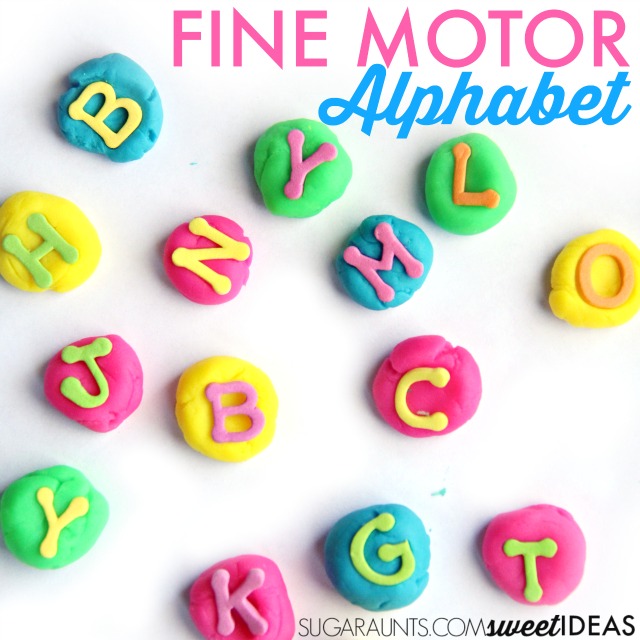
This ABC play dough activity is a fun way to build hand strength with letters of the alphabet. This Fine Motor Play Dough Alphabet activity combined a couple of our favorite things: Creative Play Dough ideas and Fine Motor Skills. We used a handful of foam alphabet stickers that we had in the house and store bought play dough to make letters that we used in spelling words, letter identification, and alphabetical ordering. And our play dough fun rating was 26 letters long!
ABC Play Dough Activity
Sometimes, you need play dough in your day. Other times, you need to turn up the play dough fun notch just a bit. (That’s a thing, right? The play dough fun scale? I think so.)
Full disclosure: This post contains affiliate links.
So, we received these foam letter stickers and have been using them in a bunch of fun ways. Today, we used them with plain old fashioned Play-Doh.
Fine Motor Skills and Play Dough
Every Occupational Therapist knows the benefits of play dough is so huge that they recommend it as a top-rated tool for fine motor development. We’ve shared a ton of fine motor activities using play dough and I absolutely love to play with play dough with my kids for it’s use in fine motor skill development and hand strengthening.
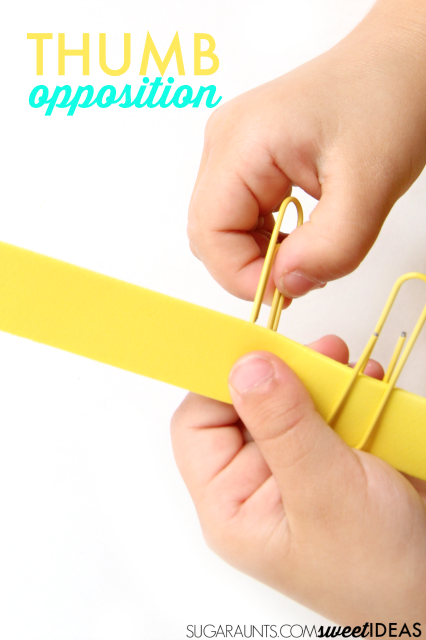
Play dough is perfect for refining skills like intrinsic muscles strength, finger isolation, tripod grasp development, thumb opposition, opening up the web space, bilateral hand coordination, and more. With this activity, we specifically hit developing the intrinsic muscle strength of the hands.
Intrinsic muscle strength and play dough
So, what is intrinsic muscle strength? There are seventeen muscles in the hand that are responsible for fine motor skills and precision grasp, among other things like moving the thumb and fingers. There are different groups of intrinsic muscles and they allow us to grasp items in a functional way. The muscles of the hands work in conjunction with the muscles that originate in the forearm. These extrinsic muscles end in your hand.
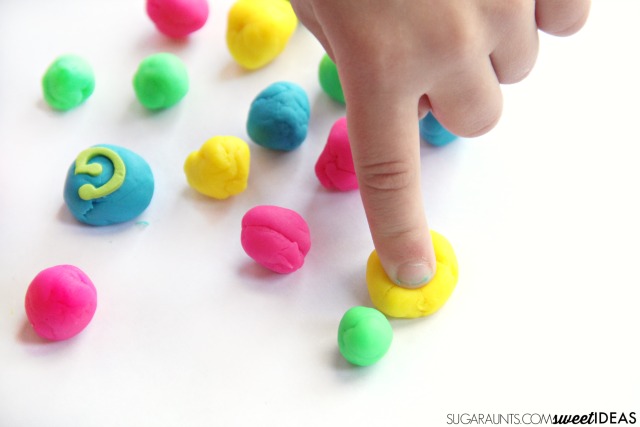
For this activity, we used different colors of play dough and created small round balls of dough. I asked my kids (and a niece and nephew who were over for the day) to roll small, dime-sized balls using just their thumb and fingers.
Rolling small balls of this size uses the intrinsic muscles that are responsible for moving the thumb (thenar muscles) and the muscles that bend the fingers at the knuckle (lumbricals). Also needed for a task like this are the palmer interossi muscles that work to move the fingers in a flexed position toward the thumb.
So, when a child is rolling a small ball of dough, with their thumb and fingers, they are working on strengthening the muscles that a child uses to write and color with a pencil or crayon.
Weakness in Writing the ABC’s
Sometimes kids complain of their hand hurting when coloring or you might see them switch crayons very often when coloring.
These are signs of a weakness of hand strength. Other signs of intrinsic muscle weakness are a weak grasp on the pencil or writing very lightly with a pencil.
After we rolled all of the play dough balls, we used our foam letter stickers to press letters into the Play-Doh. Pressing the letters with an extended finger (like in the picture) is a great way to work on finger isolation. It is important to note that using the finger in an extended “pointer” uses the extrinsic muscles that originate in the forearm.
We used these letters to practice spelling words with my second grader, identify sight words for my Kindergartner, practice letter identification and letter order with my preschooler, and practice not eating play dough with my toddler 😉


