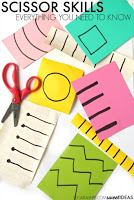
This is an old blog post that has been recovered to bring you: Today, I’ve got for you the Ultimate Guide to Scissor Skills! You’ll want to go to this blog post on Scissor Skills for all of our best tips, strategies, and supports to promote use of scissors, including how to hold scissors, how to snip paper with scissors, and which scissors are the best for kids. You’ll find all of that information in one place!
Kids usually interact with a pair of scissors early on in age. Sometimes, they get the hang of cutting paper into shapes quite easily. Other times however, children have difficulty with cutting on lines, holding and rotating the paper, determining how to open/close the scissor blades, or how to even hold the scissors effectively.
This month in the Functional Skills for Kids series, I’m joining nine other Occupational Therapists and Physical Therapists in discussing all things scissor skills. This is an ultimate guide to scissor skill development, fine and gross motor skills and sensory processing skills related to scissor use, tips for attention and behavior concerns, therapist-approved tips and tricks to build accuracy,
Read on for everything you need to know about teaching kids to use scissors:
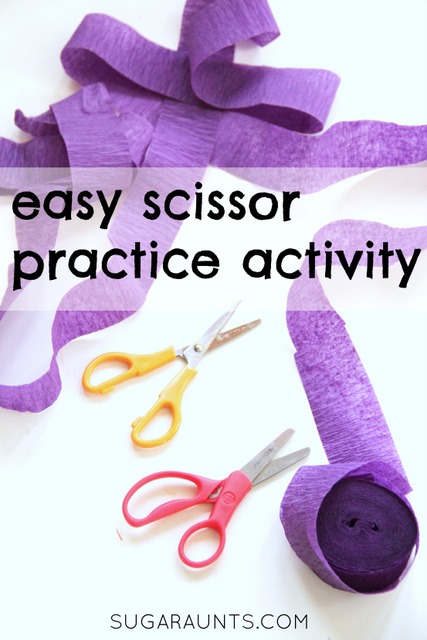
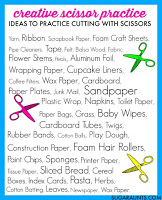
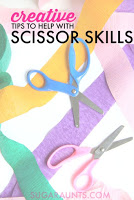
Looking for more ways to work on scissor skills? Try these creative tips and tricks:
I wanted to update this old Greek turkey burger recipe because it’s one of our favorite recipes that kids can help to make some of the steps. As an occupational therapist, I definitely love cooking with kids because of the developmental benefits. Plus, when kids are involved in making dinner, even more complex recipes like cooking this Greek turkey burger, they get a sense of autonomy and independence that they can carry over to other life skills.
This is a great cooking life skills recipe because it has different levels of tasks:
Our Greek Turkey Burger recipe has chopping, stirring, slicing, cooking the burger, spreading the ingredients. You can see how different steps require different levels of motor skill as well as safety and cognition. You could alter this recipe depending on the level and age of the kids who are helping you make it!
Greek Turkey Burger Recipe
Is there anything that says “Summer” more than a burger hot off the grill? Burgers, sun, and good times with friends and family are what summer is all about. When families go to Fourth of July picnics or grill out, it is fun to make delicious foods that help to celebrate summer. This Greek Turkey Burger recipe is a great addition to your summer grilling, and uses fresh ingredients.
Greek Turkey Burger Recipe
I love a good burger. There is no denying that. It’s my go-to meal when I need to get dinner on the table in a hurry. One of my favorite ways to add variety to burgers is by trying new combinations of toppings and mixed-in ingredients. These turkey burgers were a new spin on the classic hamburger and they were a huge hit in our house. (One that we’ll be making again very soon!)
It’s a Greek-style turkey burger with a juicy cucumber sauce topping and basil and tomato feta that is mixed right into the ground turkey.
Anytime cheese is mixed into the burger meat, it’s a win in my book! The flavored feta adds a nice pop of taste, but what really makes this turkey burger flavorful is the cucumber sauce. It’s an easy sauce to whip up. (So easy in fact, that my two year old helped me make it!).
Anytime a shopping trip is made easier when there are four kids aged 8 and under in tow, it makes this mama smile. When we hit the grocery store, I usually have all four attached in some variety to the shopping cart so it can be a bit of a spectacle to see us troop through the produce aisles.
This recipe is nice because it has a healthy addition of extra veggies.
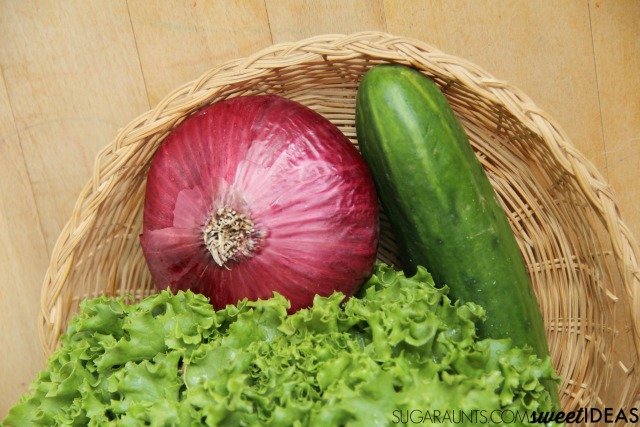
Ingredients for Greek Turkey Burger
Gather your ingredients:
1/2 cup yogurt (you can also replace the yogurt with a ranch dressing)
1/4 cup peeled and minced cucumber
1 lb ground turkey
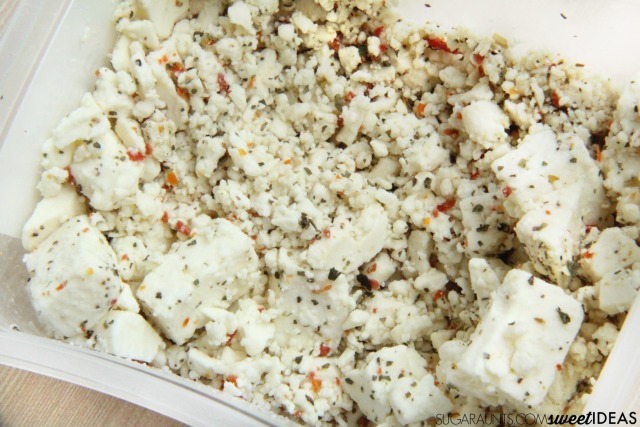
3/4 cup crumbled basil and tomato feta cheese, divided
1/4 tsp black pepper
4 onion rolls
It’s a place where you can save time and money while getting fresh ingredients to help you celebrate summer!
yogurt sauce for turkey burgers
The yogurt sauce for the Greek Turkey Burger is the main flavor ingredient. The sauce uses:
1/2 cup yogurt (you can also replace the yogurt with a ranch dressing)
1/4 cup peeled and minced cucumber
To make the yogurt sauce for the turkey burgers, you’ll need to:
Chop the cucumber into small pieces.
Mix the ranch dressing and chopped cucumber in a bowl and place to the side.
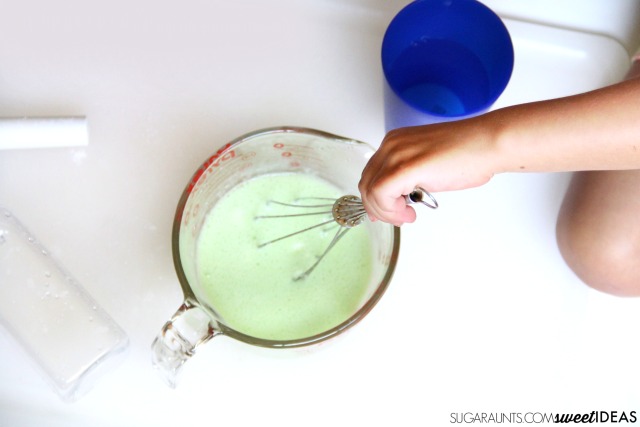
My two year old helped me mix up the cucumber sauce. We love cooking together. Cooking with kids is such a great way to add learning into the kitchen as they read and follow recipes, problem solve, motor plan, and build executive functioning skills. I think that getting the kids involved in making the foods that they eat really encourages them to try new things like these turkey burgers.
When kids scoop and stir with real ingredients, it develops the visual motor skills that they use in everyday tasks. It’s great to offer a task like this one to young kids because they can really get involved in making dinner. They are a huge help!
Prepare the turkey burger
Next, you’ll prepare the turkey burger.
Combine the ground turkey with 1/2 cup feta cheese and the black paper. Shape the ground turkey into 4 oz. patties and flatten them slightly.
2. Grill or broil the turkey burgers, using direct medium heat for 6-8 minutes per side or until the internal temperature reaches 165 degrees.
Get that feta cheese ready. We used a feta mixed with crumbled basil and tomato.
3. Meanwhile, heat the onion rolls only until they are warm. For each burger, spread 2 tablespoons of the cucumber and yogurt sauce onto each roll. Place the burgers on the rolls and top each burger with 1 tbsp of feta.
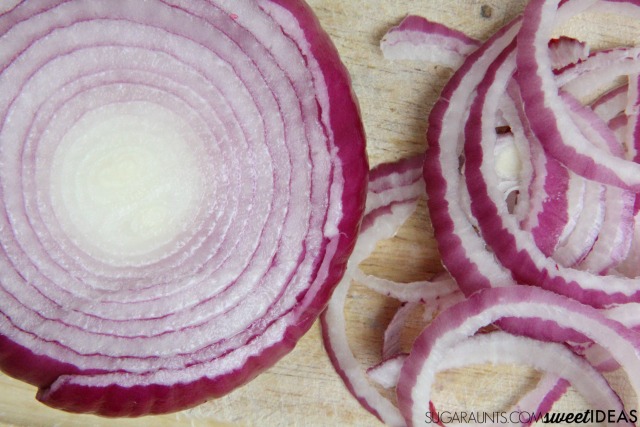
4. Add slivered onions and lettuce.
Enjoy!
This recipe has many tasks that require precision and fine motor control. You can have older kids slice the onions and chop the cucumbers. We covered how cooking improves fine motor skills in a previous post.
Let us know if you try this Greek Turkey Burger at your summer picnics this year. What are your favorite Fourth of July foods?
Colleen Beck, OTR/L has been an occupational therapist since 2000, working in school-based, hand therapy, outpatient peds, EI, and SNF. Colleen created The OT Toolbox to inspire therapists, teachers, and parents with easy and fun tools to help children thrive. Read her story about going from an OT making $3/hour (after paying for kids’ childcare) to a full-time OT resource creator for millions of readers. Want to collaborate? Send an email to contact@theottoolbox.com.
This glow in the dark chalk sensory bottle is one that is added to some of our favorite sensory bottles. SO, if you’ve seen sensory bottles before, you might be surprised to see this calming sensory tool is made with CHALK. Yep, chalk!
This post contains affiliate links.
But first,
Why use sensory bottles?
Sensory bottles are a tool for calming and self-regulation in kids with sensory needs. Some children (and adults) use them as a tool in their sensory diet. Just like kids with motor planning issues NEED modifications or children with visual motor integration concerns NEED to use certain accommodations in order to write legible, there are kids who NEED self-regulation in their sensory diet in order to function in their day. They are not just another blog post that you might see out there in your Facebook feed.
Self regulation is essential skill that allows us to keep emotions in check and think before acting.
Here are some of the benefits of using a sensory bottle as a self-regulation tool:
Calms
Helps with focusing
Helps with attention
Allows clear thinking
Keep calm under pressure
Provides proprioceptive feedback
Provides a “just right” level of sensory feedback
Relaxes the mind
Can you imagine a child with sensory processing issues or social emotional concerns who could not regulate their emotions on their own or step back and make the “right” response in situations because of their self-regulation needs? Can you imagine if this was your child who had these needs and there was a simple DIY (and often times quite inexpensive) tool that could help? Why not explore all of the sensory bottles out there on the internet to find one that meets your child’s interests? It’s a sensory bottle no-brainer!
Now that I’ve stepped off my soapbox, on to the glow in the dark chalk sensory bottle fun!
Glow in the Dark Chalk Sensory Bottle
We’ve been making a bunch of sensory bottles this year along with a team of bloggers. Each month, we’ve had a specific theme in mind. This month is all about Glow In The Dark. How fun is that? I don’t know a kid who doesn’t get excited about glow in the dark toys, shirts, or glow sticks, do you?
When I was trying to brainstorm materials to make our glow-in-the-dark sensory bottle, I remembered a set of glow in the dark chalk that I bought on clearance at the end of last summer. After a quick glow-check, I was excited to find that the chalk still glowed after 6 months in a storage bin. We used the chalk for a cool sensory bottle that could calm and regulate in the dark!
Materials you’ll need for a CHALK Glow in the Dark Sensory Bottle
To make the calming sensory tool: Place the chalk in a plastic baggie and use a kitchen mallet to pound the chalk. Try to get it as fine as possible. This is a GREAT proprioceptive workout for kids and a lot like our ice pounding activity, so get the kids involved in this step!
Next, mix together the chalk dust, one cup of liquid dish soap, and one cup of warm water.
Drop in the marbles (You will definitely need the marbles to break up the chalk dust as it will settle in the bottle of the bottle.) A benefit of the marbles is that it adds weight to the bottle, making this an even more effective sensory tool.
As an Occupational Therapist, function is the number one goal for working with clients. Whether in the school, clinic, acute setting, or home, all goals of an Occupational Therapist revolve and are based on functional skills.
One thing about occupational therapy professionals is that we love to be creative. I love to use my experience and knowledge to come up with creative ways to meet common goal areas. Take a look around this site and you will find everything from DIY pencil grips to a “egg-cellent” way to work on shoe tying.
Be sure to check out this massive shoe tying resource, too.
Whether there is a diagnosis or not, a developmental delay or not, or just an area of weakness or strength…Kids can build on their strengths to modify, adapt, and address goal areas with one thing in mind: Functional Independence.
This is a place to guide you to areas of functional skill with hopes to bring kids closer to confidence and independence.
This is the place where you will find all of activities designed to promote functional skills of kids. From handwriting to scissor skills, to dressing, and self-care: click around to find a lot of ideas to build independence, adapt, accommodate, and modify functional skills.
This post contains affiliate links.
Functional Skills for Kids and Childhood Independence
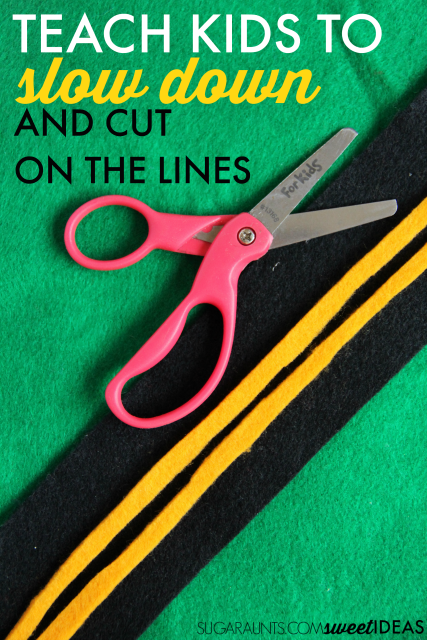
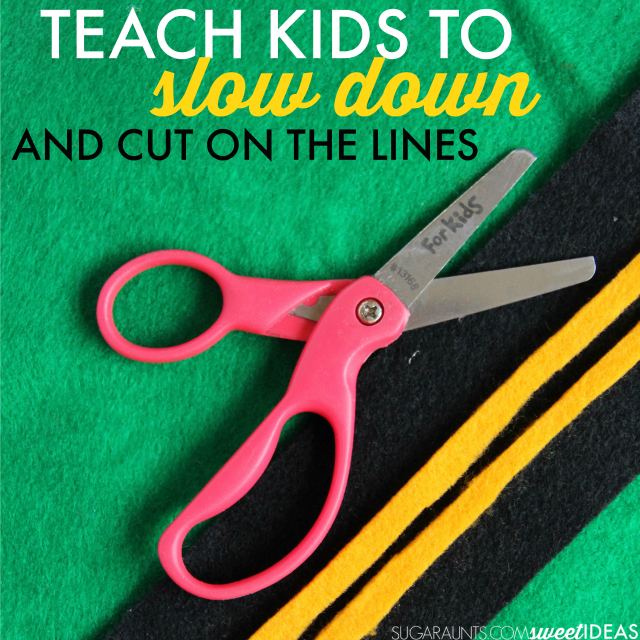
If you’ve ever tried to teach kids how to cut with scissors, you may have ended up with a snipped finger or two. Teaching kids how to cut on lines can be a tricky thing. When children with attention or behavior difficulties are learning to cut with scissors, it can be quite difficult to hand over a pair of scissors when there may be a safety concern.
Cutting with scissors can induce anxiety in the most calm of teachers, parents, and therapists when they turn over a pair of sharp scissors to a child with attention or behavioral concerns.
Below, you’ll find tricks and tools to teach kids with attention or behavioral concerns how to slow down to cut on lines with scissors. The tips in this post will enable children of all ages how to slow down and cut on the lines with scissors in order to complete classroom, art, and craft projects.
Attention, Behavior, and Cutting with Scissors
Scissor use and accuracy has a lot to do with visual perceptual skills. You’ll find easy and fun ways to work on visual perceptual skills through play here.
The attentive process helps us determine which sensations (cutting through a piece of paper) are relevant to an individual. Attention allows us to process information in order to complete functional tasks. When we attend to a task such as cutting on a line through the whole shape, we make a decision to pay attention and this effort and concentration allows us to process the task and make adjustments to the task at hand and to future processing of information.
By deciding what to pay attention to, a person decides what information is transferred from sensory input and sensory memories into meaningful information that is stored for future use.
Likewise, children who are not able to make decisions about behavior or attention levels due to sensory or physical difficulties will have trouble attending to the line, paper, scissor position, or seating position.
Attention requires an ability to respond to priority information while disregarding and inhibiting simultaneous sensory input. This concept of attentional ability coincides with an individual’s cognitive, sensory, and physical abilities.
How to Teach Kids to Cut on the Lines With Scissors
This post contains affiliate links.
Children are able to learn to hold and snip with scissors at an early age. Around two years old is a great time to hand over a pair of safety scissors. However, children with decreased attention or behavioral difficulties can affect that optimal age of introducing scissor activities.
Attention needs for using scissors
When kids use scissors, they need many skills in order to hold and use scissors appropriately. There is a safety concern as well, and attention has a lot to do with accuracy and ability to adequately use a pair of scissors to cut lines or shapes:
Visual Attention needed for cutting with scissors– The ability to attend to a line while focusing on cutting along the line with the hands moving in the appropriate way to open and close the scissors and manipulate the paper requires visual attention and visual motor integration skills. To hold the paper, and remember to open and close the scissor blades allow a child to cut a line that makes up a shape.
Bilateral hand use needed for cutting with scissors– A child who can not adequately use both hands together in a coordinated manner while each hand performs a different task will have trouble holding paper with their non-dominant hand as they manipulate a pair of scissors.
Visual Motor Integration needed for cutting with scissors– Visual Motor Integration allows the hands and eyes to work together in an effective way. Efficient coordination of the vision system and the motor system requires both of these parts to work well and to work well together. The visual system requires all aspects of visual perception to work well and the motor system requires positioning, strength, dexterity, and manipulation to work in coordination. If one of these parts is not functioning effectively, a child might exhibit difficulty managing paper, scissors, or body/scissor positioning in coordination with the visual stimuli of lines, shapes, and cutting tasks.
Oculomotor Control needed for cutting with scissors– When we move our eyes to look at items in our field of vision, we use the muscles surrounding the eyes in order to rotate, look up, down, left, and right. If there is a problem with development or use of these muscles, a person will exhibit poor control of eye movements. This problem will result in poor visual tracking skills. This leads to trouble with following scissors as they cut through paper, difficulty maintaining contact with a line, and difficulty with moving the eyes over the mid-line of the paper. An individual with poor oculomotor control may also show difficulty with convergence as they attempt to focus on scissors and paper close together in the mid-line area at a near distance.
Cutting with scissors requires an individual to look down and toward the middle as their eyes rotate inward. A child with oculomotor control will exhibit attention difficulties, poor visual attention, inaccurate eye-hand coordination, poor visual tracking, and loss of place while cutting with scissors.
Auditory Processing needed for cutting with scissors– A child with auditory processing disorder might shoe difficulty when cutting with scissors when given verbal prompts or directions. They might mishear information due to an inability to disregard background noise. This might lead to inattention during scissor tasks.
Visual Attention needed for cutting with scissors– Paying attention to the task at hand in front of a child can be difficult if that individual has difficulty focusing on the paper, scissors, and the lines while discerning important visual sensory input and disregarding background or peripheral information.
Intact kinesthetic, tactile, visual, proprioceptive sensory systems needed for cutting with scissors– Integration of these sensory systems and the ability to process sensory input appropriately enable a person to use scissors while attending to input. Kids who are seeking proprioceptive sensory input may exhibit
When attention or behavior difficulties occur, a child may present in many ways while cutting with scissors:
These problem areas will interfere with cutting on lines.
Impulsive, cutting very quickly
Cutting with disregard for the lines
Cutting and omitting the corners and curves of shapes
Cutting with choppy cuts
Tearing the paper
Cutting and tearing the paper as a result of frustration
When snipping paper, using scissors to cut a helping parent, teacher, or therapist
Demonstrating visual distraction (paying attention to visual distractions in the classroom or home environment)
Demonstrating auditory distraction (paying attention to auditory sensory input from the classroom or home environment)
Cutting alongside the line or crossing over the line as a result of difficulty focusing on the scissors position or cutting lines due to difficulty with oculomotor control
Difficulty maintaining scissor position
Difficulty holding and manipulating the paper with the assisting hand
Inappropriate seating position as a result of sensory needs
Difficulty stopping when cutting into a piece of paper to cut a fringe
Difficulty grading the opening and shutting of the scissor blades
How can a child with attentional or behavioral difficulties overcome deficits to complete a scissor activity given modifications or adjustments? There are many accommodations that can be made to meet the needs of these individuals to prevent impulsivity, choppy snips, and torn paper.
Accommodations and Modifications to Help Kids Cut on the Lines
Try these tips to teach kids to cut on lines. These strategies will help children with attention or behavior problems, or other underlying difficulties. These are also great tips and tools to help typically developing children learn to cut on lines when cutting shapes.
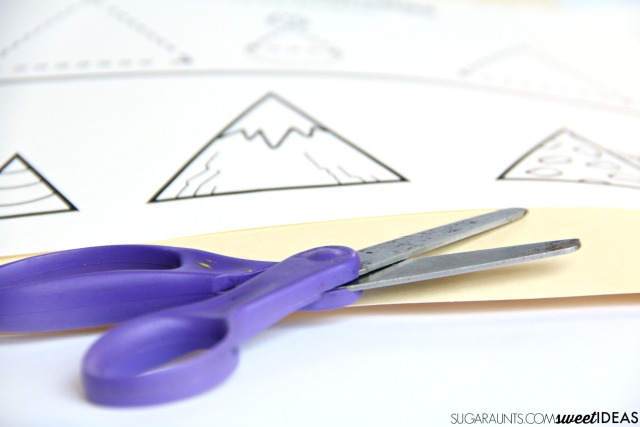
Use bright paper with dark lines for a high contrast cutting line to help with poor oculomotor control and visual distractions.
Explore different types of scissors based on the need of the individual. Spring action scissors to help children with difficulty attending to graded scissor motions or attention to opening and closing the scissor blades. This pair is great for kids.
Verbal cues to slow cutting speed
Provide concise and concrete directions.
Visual cues: Darkened lines, thick and bold cutting lines, stickers to show where to stop and turn the paper, stickers to follow when cutting and turning the paper. Read more about this trick here.
Provide a small movement break between tasks.
Hand over hand physical cues. These training scissors are a great way to practice with hand-over-hand assistance.
Reduce visual distractions: Provide a quiet space for scissor work, use desk dividers, reduce classroom decorations or distracting stimuli, and clear desk or table surface from all items. Find more information on attention in the classroom and home environments here.
place desk away from windows, doors, and the pencil sharpener.
Reduce auditory stimulation. Provide headphones or position desk away from noisy centers of the room.
Develop active listening skills and direction following through eye contact and and upright body position.
Provide thicker paper for increased resistance an more tactile and proprioceptive feedback while cutting. More resistive materials include oaktag, index cards, construction paper, and paper bags.
Try gluing worksheets and cutting pages to thicker paper like cardstock.
Trial graded and physical, verbal, and auditory prompts.
Ensure the cutting task is purposeful and meaningful in order to maintain motivation.
For the child with oculomotor convergence insufficiency, try holding the paper up higher or using a bold cutting line.
The Scissor Skills Book
Affiliate links are included in this post.
Ten Occupational Therapists and Physical Therapists have gotten together to write The Scissor Skills Book. It’s a book with resources for every underlying area needed for scissor use. It’s got tons of motor activities to address the areas needed for scissor skills. There are pages and pages of accommodations and creative ways to work on scissor use. This e-book is a giant resource for anyone who works with kids on cutting with scissors!
The therapists behind the Functional Skills for Kids series include a team of 10 pediatric physical and occupational therapists with years of experience in the field. Together, we have created the ultimate resource for tips, strategies, suggestions, and information to support scissor skill development in children. Read more about The Scissor Skills Book here.
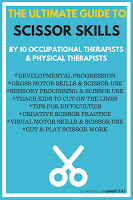
The Scissor Skills Book is an 81 page PDF document that is delivered electronically. The book includes the following chapters:
Chapter 1: Developmental Progression of Scissor Skills
Chapter 2: Teaching Your Child to Use Scissors
Chapter 3: Gross Motor and Scissor Skills
Chapter 4: Fine Motor and Scissor Skills
Chapter 5: Visual Perceptual and Scissor Skills
Chapter 6: Sensory Processing and Scissor Skills
Chapter 7: Attention Challenges and Scissor Skills
Chapter 8: Helping Kids who Struggle with Scissor Skills
Chapter 9: Creative Ways to Practice Scissor Skills with Kids
Resources for Typical and Adaptive Scissors, Cutting Materials, and Further Information
References
Resources: Zoltan, B. Vision, Perception, and Cognition: A Manual for the Evaluation and Treatment of the Neurologically Impaired Adult. Thorofare, New Jersey, Slack Inc.;1996.
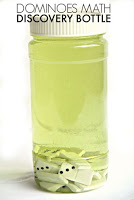
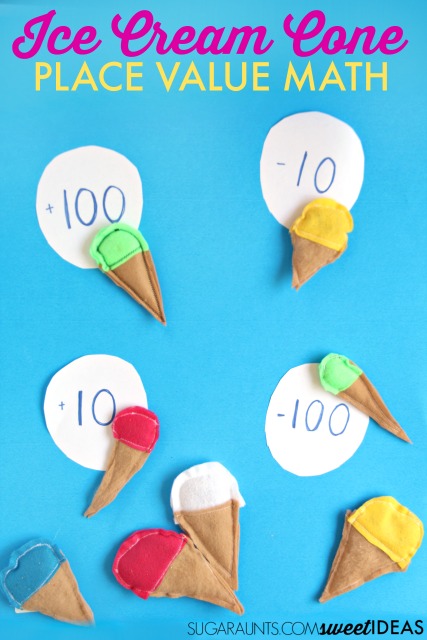
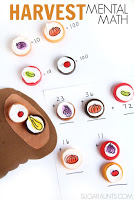
Remember these ice cream cones? We shared how to make them not very long ago. Besides being very cute and super easy to make, they are a learning tool, too. We used them in a creative summer activity to practice some second grade math skills, specifically adding place value to two and three digit numbers.
Place Value Lesson
Make your bean bags.
Grab a few pieces of paper and cut out circles. On them, write +10, -10, +100, and -100.
Next, spread the circles out on the floor. Position the kiddos around the circles and tell them that they are about to have some math fun, ice cream style!
You’ll want to tell the kids a number. It might be a single, double, or triple digit number. Then, kids can toss the bean bags onto the circles. When the bean bag hits a circle, they need to either add 10 or 100 to their number or subtract 10 or 100 from their number. This is a fun way tp practice place value and mental math of tens and hundreds place with two or three digit numbers.
There are infinite number of ways you could play this with an ice cream cone theme to work on math skills.
Add single or double numbers by writing different numbers on the circles.
Each color of the ice cream cones indicates a different number. Kids can add together numbers based on the color that hits a target.
Add near doubles with the bean bags.
Add 100’s up to 1,000.
How would you use these ice cream cone bean bags in playful math?
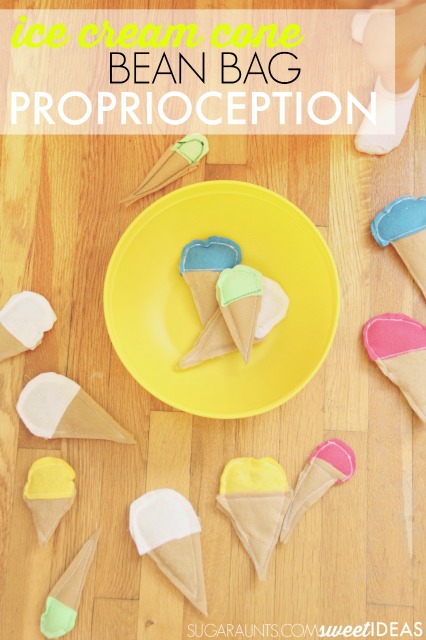
These ice cream bean bags are the perfect way to sneak in a little proprioceptive input this summer with an ice cream theme. We’ve shared the proprioception benefits of bean bags before and this summer activity is great for kids craving heavy work input of needing a bit of upper extremity strengthening.
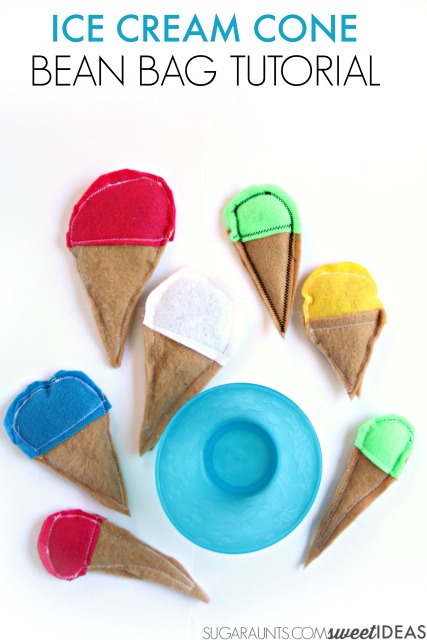
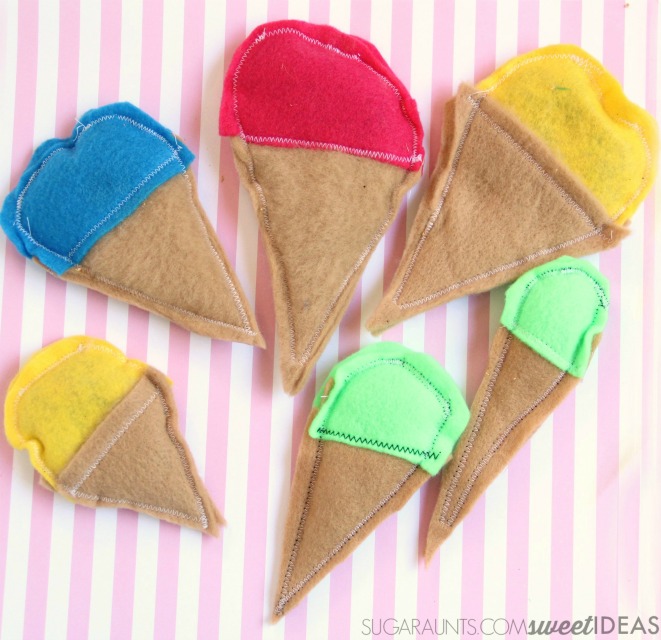
Today, I’m sharing how to make these ice cream cone bean bags with an ice cream bean bag tutorial. It’s super simple, (I promise!) and requires zero measuring of fabric. Use these bean bags in learning and play while having fun with an ice cream cone theme!
This post contains affiliate links.
Ice Cream Cone Bean Bag Tutorial
These ice cream cone bean bags are truly easy to make. I actually have had them in the house for a few years. They made their debut in our Candy Land party from a couple of years back and recently have been used as a fun proprioception activity with a learning twist.
How to Make Ice Cream Cone Bean Bags:
You’ll need fabric in different colors. We used fleece in brown, pink, blue, yellow, and green. Any fabric or felt would work well, I just used fleece because that’s what we had in the house. To make the ice cream cones, start snipping fabric.
Here’s the best part of these cones: There is NO need to measure. If you want totally perfect and uniform ice cream cone bean bags, then go ahead and create a cardboard template before cutting the fabric. I went with easy and therefore ended up with random sizes and crooked cones. And, those wacky ice cream cones were still fun to play with!
Cut the fabric into triangles and semi-circles.
Next, you’ll need a sewing machine that is hooked up with thread. Being the “sewing mama” that I am (sarcasm noted?) I have stitches that are wonky, over stitched, under-stitched, and completely unprofessional. These bean bags are still fun to play with!
Sew the strait part of the semi-circle to the triangle. Do this with all of the triangles and semi-circles.
Sew the triangles together and most of the semi-circles, leaving a small opening at the top to add the filler.
When the bean bags are full, stitch the hole closed.
Sewing tips from a total sewing novice:
Take your time, or speedy sew like I do and get the job done as fast as possible. Both methods work.
Use the zig zag stitch to keep the filler in place.
Be prepared to crazy-looking ice cream cone bean bags, but ones that are totally fun to play with.
Ice Cream Cone Bean Bag Proprioception Activity
Throwing bean bags is a great way to add in heavy work to the upper body. Read more about that here.
Find a large bowl and toss the bean bags from near, far, seated on the floor, sitting up on a chair. Drop them from a step stool, or toss them across the room. There are so many ways you could play with these ice cream cone bean bags while adding in proprioception to the play!
Why not try a learning activity with the ice cream cones? You’ll find out how we did that very soon!
Looking for more ice cream cone themed activities for kids? Try these:
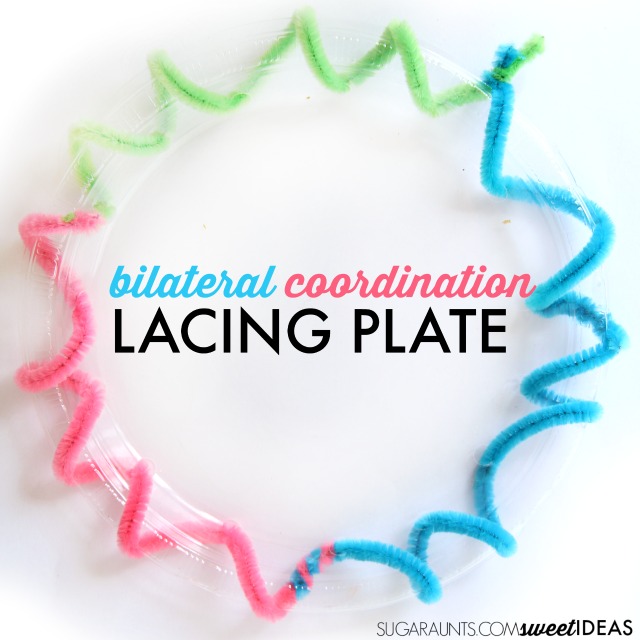
Bilateral coordination allows us to use both of our hands together in a coordinated manner. Coordination of our two hands enables a person to zipper up a jacket, hold a paper with one hand while writing and erasing with the other, and many (many) other functional skills throughout our day.
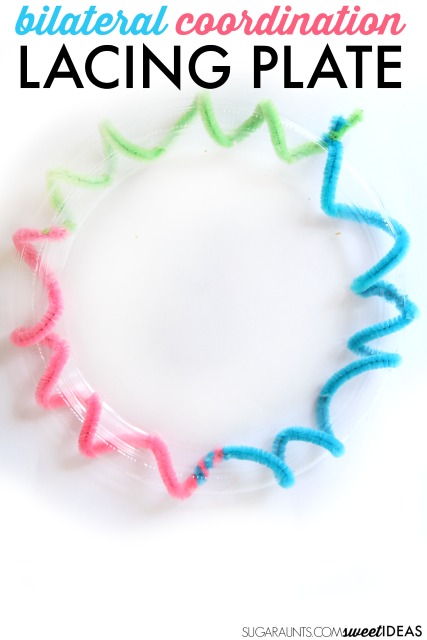
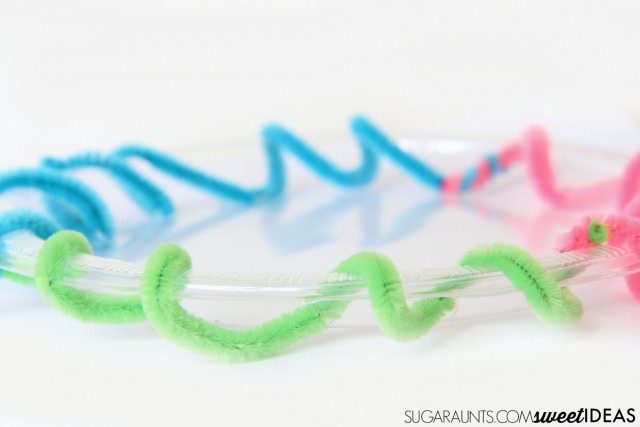
This simple plate lacing activity is a creative way to work on bilateral coordination in order to improve coordination in these areas. Find more lacing activities here.
This fine motor bilateral coordination activities covers a variety of underlying needs related to motor skills!
When bilateral coordination or bilateral integration is intact and progressing appropriately through development, it is an indicator that both sides of the brain are communicating effectively and sharing information during functional tasks.
Younger toddlers and babies can be observed using both hands in play as they pick up objects in their line of sight. However, they typically will pick up items with the hand that is closest to the object or toy.
As toddlers progress in development, they will begin to establish a dominant hand and crossing midline. This ability to utilize a dominant hand and a non-dominant hand in activities indicates a maturation of the brain and lateralization in functional tasks, which is very important for motor planning, directionality, and visual motor skills.
Related Therapy Activities: Looking for some indoor bilateral coordination activities like the one shared here? Try our list of Winter Bilateral Coordination Activities.
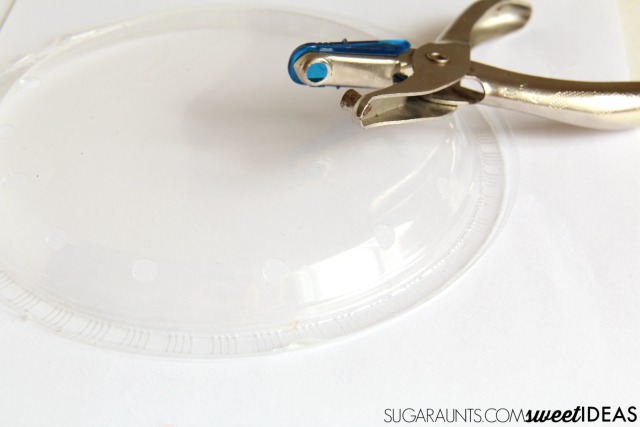
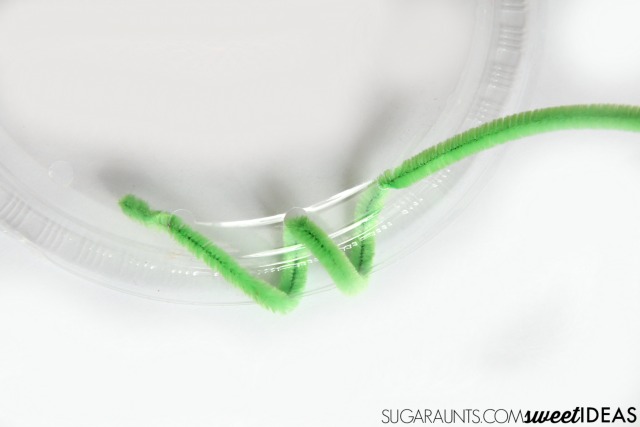
Twist several pipe cleaners together to create a long piece. Using the hole punch, punch holes around the outside edge of the plate, every two inches. Start threading. It’s that easy.
Lace the pipe cleaner in any way your child likes, as there is no right way or wrong way while working on bilateral coordination. Simply holding the plate and threading the pipe cleaner in and out of the holes requires the hands to work together while holding the pipe cleaner with the dominant hand, and moving the plate over and back again as the pipe cleaner is threaded through the holes.
Why Work on Bilateral Coordination?
Think about all of the daily tasks that you perform on a daily basis. Your brain’s two sides needs to communicate easily in order for both sides of the body to be coordinated effectively. Hand dominance and crossing the midline are key parts of coordinated and fluent movement with the hands in functional tasks. Read more about hand dominance here.
This plate lacing activity allows the child to build and strengthen a clear hand dominance by requiring the non-dominant hand to hold and maneuver the plate as the dominant or stronger hand performs the fine motor work.
Typically, a child with bilateral coordination concerns will show difficulty with crossing midline, delayed hand dominance, or switching hands between activities or within the same activity. They will have trouble discerning left from right and knowing which hand they prefer to write or color with. They might also have impaired or delayed kinesthetic sense.
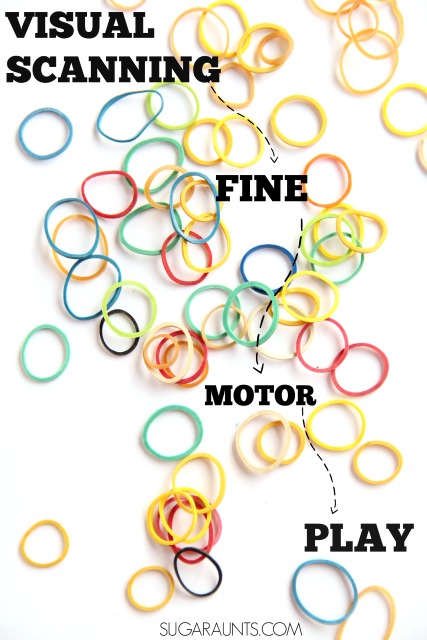
Visual Scanning is needed for looking in all directions with the eyes to locate an object or to avoid obstacles when walking in a crowded classroom. A visual scanning activity is one way to build visual perception needed for locating an item on a shelf, finding a matching sock in an overstuffed drawer, and finding a keyword in a reading activity. If you are wondering “What is Visual Scanning?” Or for MORE visual scanning activities that kids (and adults) will love, try these.
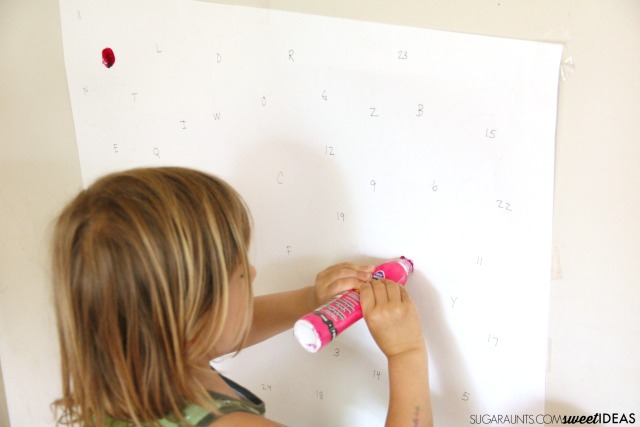
This Visual Scanning Dot Marker Activity is a super easy way to work on visual scanning needed for these tasks and many (many!) more. Read more about visual scanning and find many more ways to build this essential skill here.
Easy Visual Scanning Activity
This post contains affiliate links.
For this activity, we made our own scanning worksheet. Low-prep activities are great to have in your therapy back pocket when you are an Occupational Therapist, and as a busy mom, I know that easy activities are bonus when it comes to setting up the kids with a task. This visual scanning game is perfect for therapists and parents of kids who need to work on visual scanning tasks and I’m happy to share a stress-free activity!
To make your own visual scanning worksheet, randomly write letters A-Z and numbers 1-26 on a piece of paper. Scatter the letters and numbers around on the page. Show your child how to use a paint dobber to dot the letter “A”, followed by the number “1”. Next, ask the child to continue through the alphabet, dotting “B” and then “2” and then “C” and “3”. The letter-number pattern requires the child to slow down and think about what is next in the sequence while visually scanning the whole page.
Visual Scanning Activities
Extend and assist with visual scanning for kids with this activity by trying these modifications:
Prompt the child to look left to right and top to bottom, if they seem to omit sections of the page.
If the child is having trouble with this activity, try less letters and numbers.
Use a piece of paper to slide down the page as they scan.
Prompt the child to scan the whole left side of the paper before looking for letters to the right.
Make the visual scanning activity large-scale to add a gross motor component. Use posterboard and tape the page to the wall. Just be sure the child doesn’t push very hard on the paint dobber or drips of paint will fall down the posterboard.