Today we bring you a Recycled Cardboard Tube Zebra Craft. We love to make and create play ideas and crafts using recycled materials. Its a wonderful way to upcycle and save crafting supplies and use recycled materials in a greener and more sustainable manner. This cardboard tube zebra craft hits the mark!
Toilet Paper Tube Zebra Craft
We pulled out a cardboard tube to make this zebra, along with a few other items that we’ve used in other play activities. This post contains affiliate links for a few reusable items you may need.
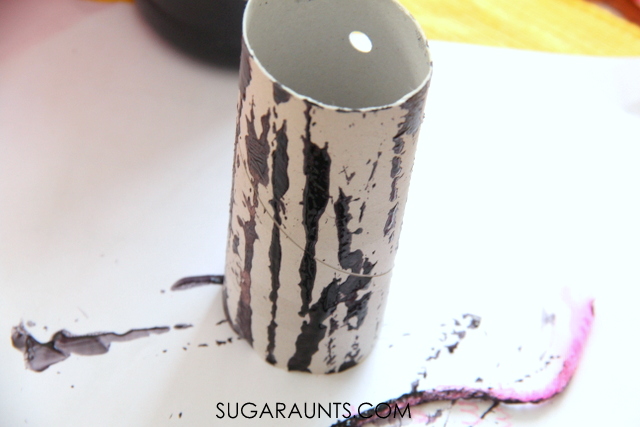
Use a hole punch to make four holes in the cardboard tube as shown in the picture above.
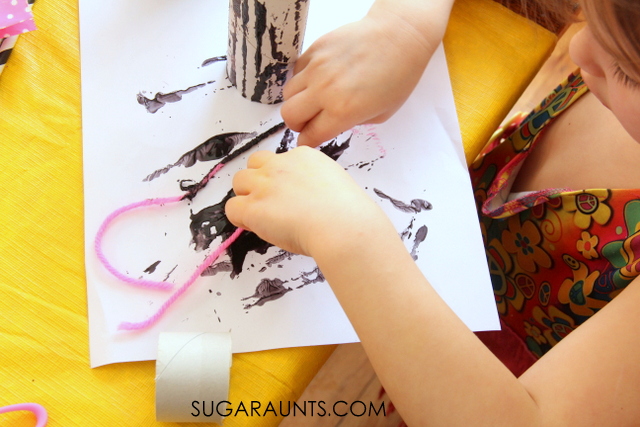
Use yarn draped in black paint to make stripes on the cardboard tube.
This is a messy painting activity, but oh, so fun!
Once the cardboard tube has dried, use black and white paper straws to make legs on the zebra. Push the straws into the holes in the cardboard tube to support the zebra.
Add a small section of straw and a smaller section of cardboard tube to make a zebra head. Snip two triangles from the tube to create zebra ears. Glue on or draw on eyes for the zebra. Have fun with your recycled zebra craft!
This post is part of the Natural Parenting and Earth Month series hosted by Allternative Learning.
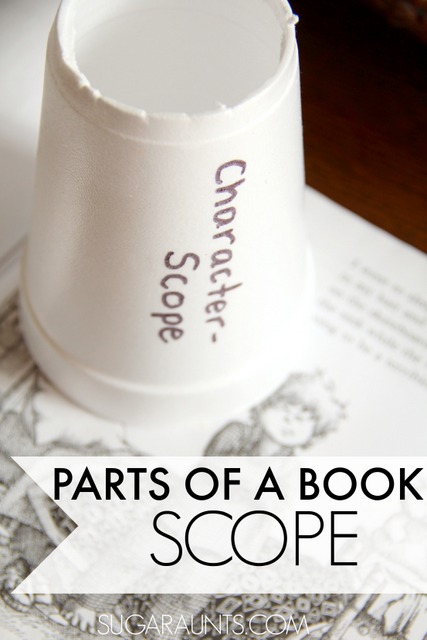
This parts of a book activity is a hands-on, multisensory learning activity for children. We loved adding a sensory motor component to learning the parts of a book while developing skills in visual motor and bilateral coordination areas of development.
Parts of a book activity
Big Sister is in first grade and one of the areas she had to learn in English Language Arts, is identifying parts of a book. We practiced identifying parts of a book with our very own Parts of a Book-Scope!
I love to create fun ways to practice testing areas and extend her homework a little with creative and playful learning.
She worked on book part identification terms earlier in the year (but I’m just getting around to sharing this with you!) but it was so much fun, that Big Sister still talks about our Parts of a Book-Scope!
This post contains affiliate links.
Parts of a Book Activity for Kids
Teaching kids parts of a book is part of English Language Arts in the primary school years. What makes this hands-on learning activity fun is that kids can get involved in the learning with motor skills.
Parts of a book include:
Title
Author
Illustrator
Spine
Cover/Jacket
Front cover/Back cover
Then, there are other parts, which are included inside the book:
Table of Contents
Title page
Index
Pictures/Illustrations
Diagrams
Glossary
Image descriptions
Graphs
Other parts of a book are included in the actual content of the book:
Characters
Events
Sequence
Setting
You can get as descriptive on these parts as you would like, depending on how detailed your parts of a book lesson plan is.
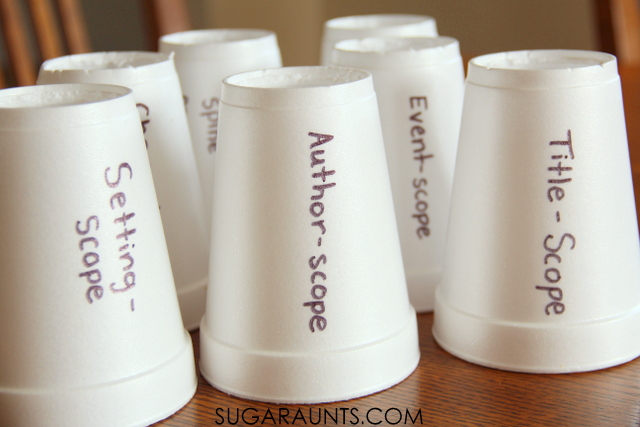
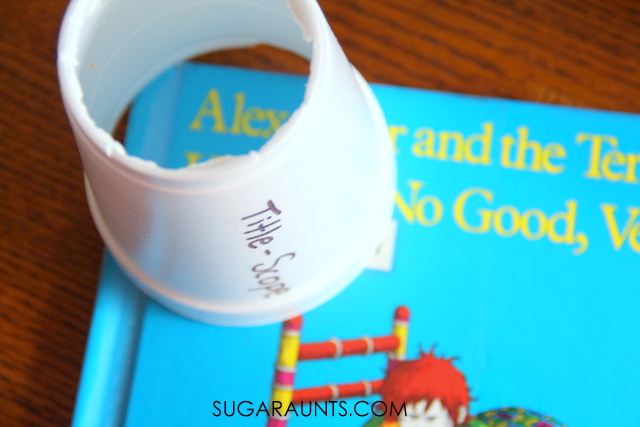
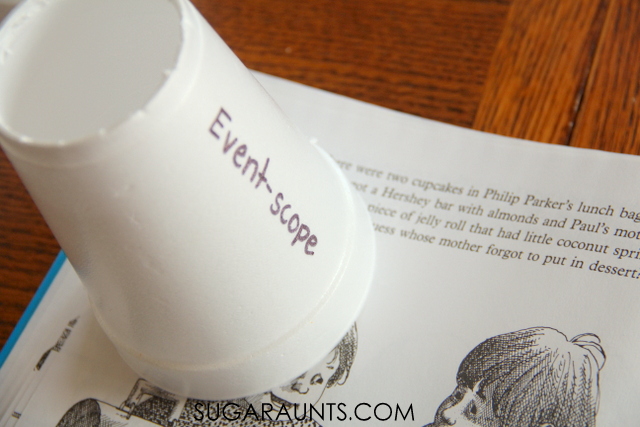
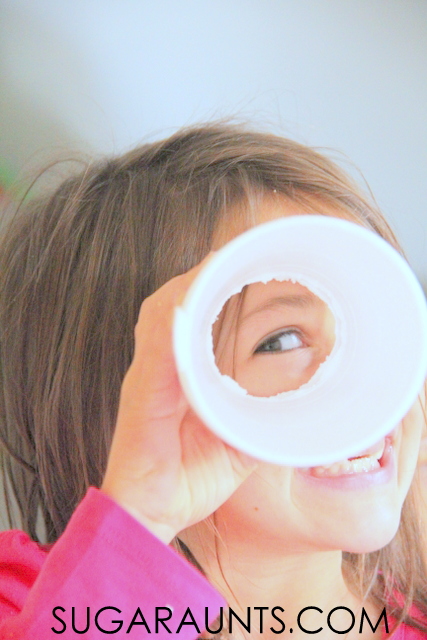
This activity is really so easy and a fun way to extend simple memorization of parts of a book. I grabbed a few styrofoam cups and wrote the parts of the book with -scope on each one. Cut out the bottom of the cups and you’ve got yourself parts-scopes.
I had Big Sister search and find the parts of the books, including Title, Author, Spine, as well as the parts within the book: Main Events, Characters, and Setting.
It was fun for her to read a book and as she found parts, she could use the event scopes to pinpoint the main parts.
One scope was all we used to locate the main parts of the outside of the books.
These Book Part-scopes were a huge hit in our house!
Colleen Beck, OTR/L has been an occupational therapist since 2000, working in school-based, hand therapy, outpatient peds, EI, and SNF. Colleen created The OT Toolbox to inspire therapists, teachers, and parents with easy and fun tools to help children thrive. Read her story about going from an OT making $3/hour (after paying for kids’ childcare) to a full-time OT resource creator for millions of readers. Want to collaborate? Send an email to contact@theottoolbox.com.
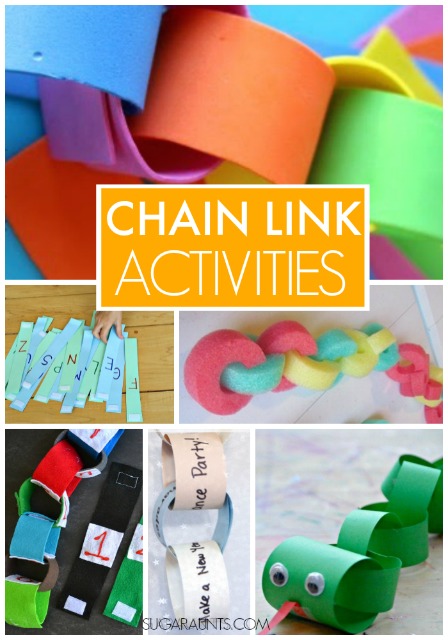
Fine Motor Skills are one of our favorite ways to play and functional development use of scissors, pencils, and independence in fasteners. On Share It Saturday this week, we’re featuring Chain Link Activities.
We love the fine motor work that is happening through play with this activity. When a child creates a chain using paper or other items, they work on so many fine motor skills. Using both hands together requires bilateral hand coordination and is a necessity for cutting with scissors, buttoning a coat, and writing on paper.
Linking the paper (or other materials) links together uses a tripod grasp, symmetrical movements, hand-eye coordination, dexterity, intrinsic muscle strength, an open web space, and endurance! Wow, what a workout from creating a simple paper chain! Now, think about the tape, velcro, or stapler that is used to fasten the chain links. Little hands are using small muscles with this task. When we started to think about all the benefits of creating a chain, we had to go looking for more chain link activities!
Chain Link Activities
Chain Link Crafts and Activities for Kids:
Use pool noodles to make chain links. {Teach Preschool} You can even encourage learning with paper chains! Practice letters {Hands On As We Grow} or numbers {Glued to My Crafts} using paper chains. Create a snake craft {Red Ted Art} using paper chain links. Count down to a holiday or event using a kid-made paper chain link with activities.
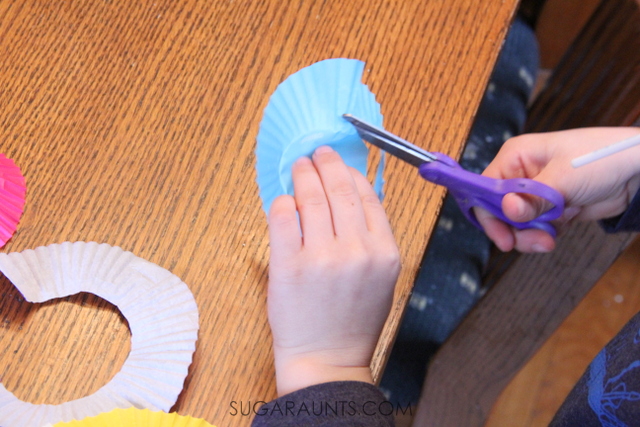
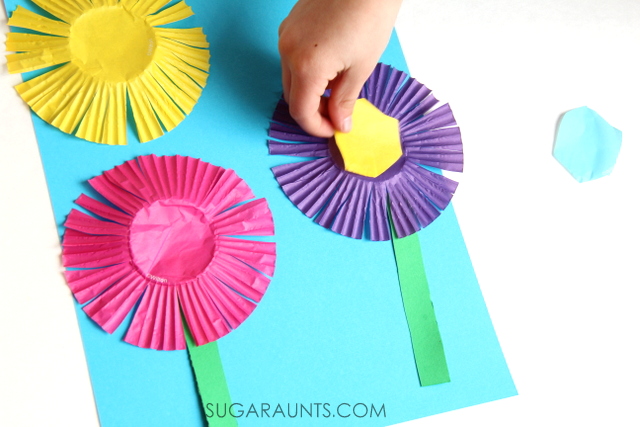
Spring is around the corner, and flower crafts are the sign that real flowers are about to pop up everywhere! We made this flower craft using cupcake liners while practicing scissor skills one afternoon. It’s an easy and quick craft that will brighten any room!
Start by cutting the center circle from the cupcake liners. Cutting a material like cupcake liners is more difficult than regular paper due to the thinner material and the texture of the liner. Kids will have to concentrate on cutting the center “line” which is really a fold. This is great line awareness work and a great way to work on visual motor skills.
Have your child snip other cupcake liners in to the center of the circle, but stopping at the fold. These liners will become the petals of the flowers and the sun’s rays. Cutting and stopping at a point requires hand-eye coordination and dexterity in scissor use. They have to be sure to open/shut the scissors effectively to stop at a certain point.
Are you looking for more ways to build and develop scissor skills? Here are some of our most popular ideas. You can always explore the Scissor Skills tab at the top of the blog, too. You’ll find it under the Occupational Therapy drop down list.
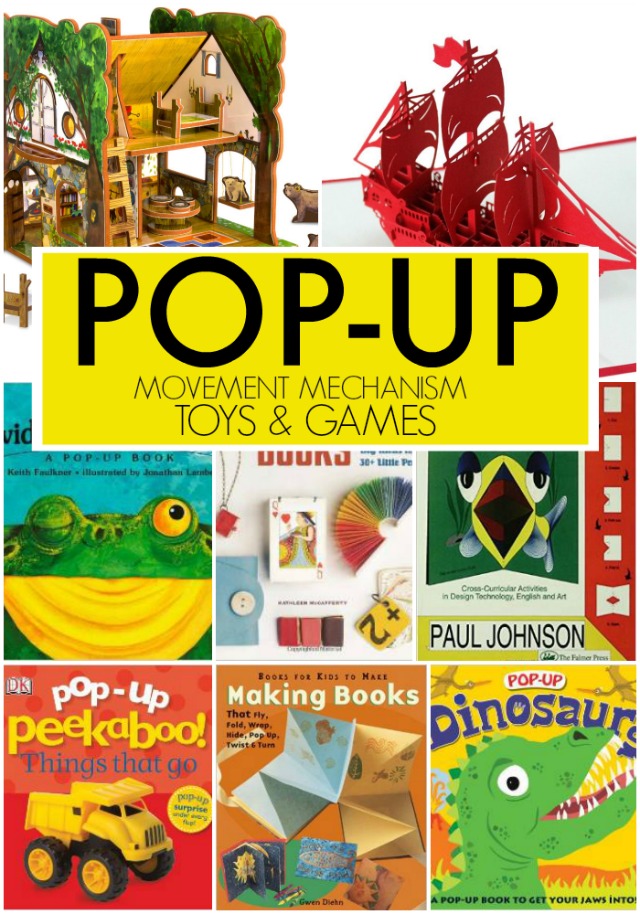
This week I’m excited to share a few fun Pop-Up crafts and cards ideas for kids to explore and create. Pop-up crafts are a great way to learn about basic movement mechanisms and levers through crafting. Mechanisms provide movement in books, cards, or crafts using a pop-up. We saw the History of Pop-Ups linked up by Tina’s Dynamic Homeschool Plus on Share It Saturday this week and HAD to click through! What a cool resource of art and engineering combined with a bit of history. So, off we went to find more creative ways to learn and play with pop-up crafts and cards. This is the perfect time of year to do a little homemade card making with a pop-up craft; Easter, Mother’s Day, and Spring are the best days for a DIY card and the added touch of a pop-up!
Disclosure: This post contains affiliate links. Read more about that here.
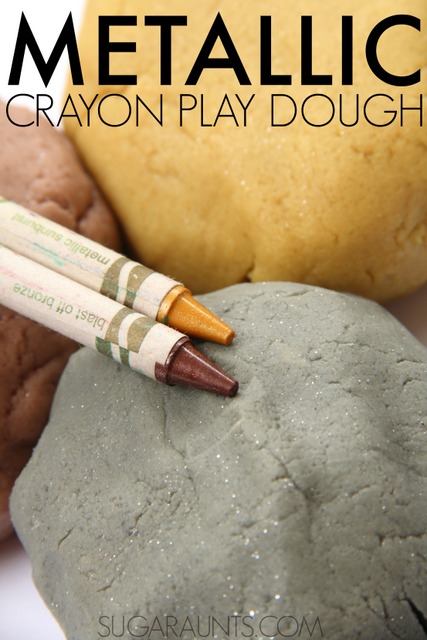
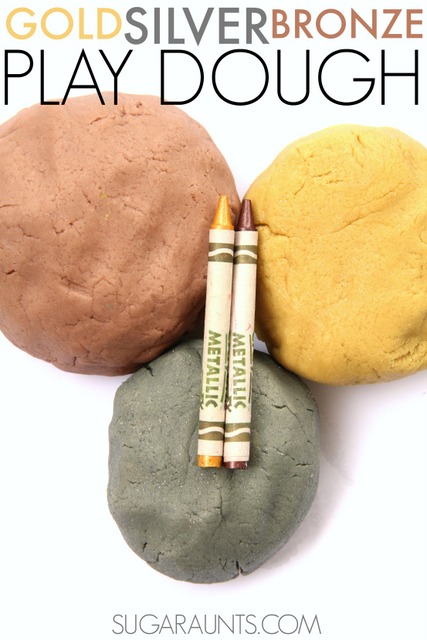
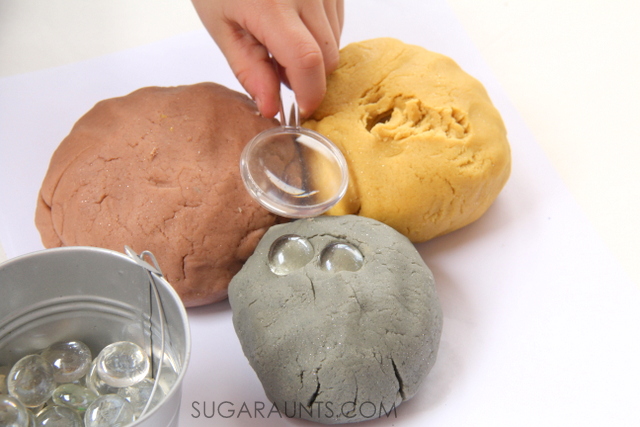
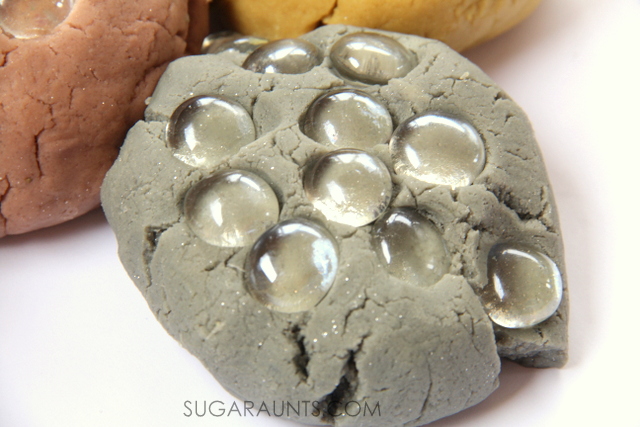
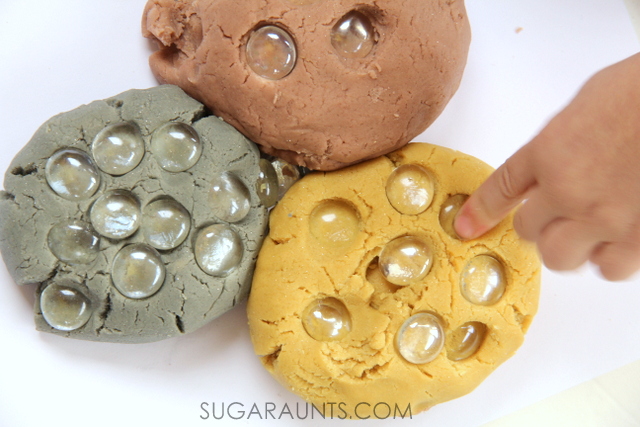
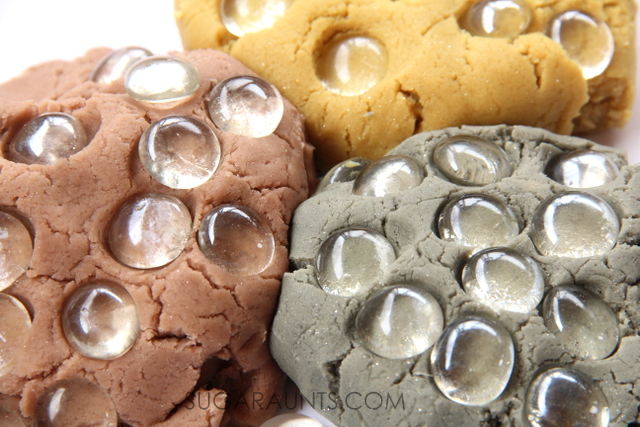
This metallic crayon play dough is just one of the hits in house! Use crayon pieces to make a sparkly play dough and then try one of the other crayon play dough recipes that we love!
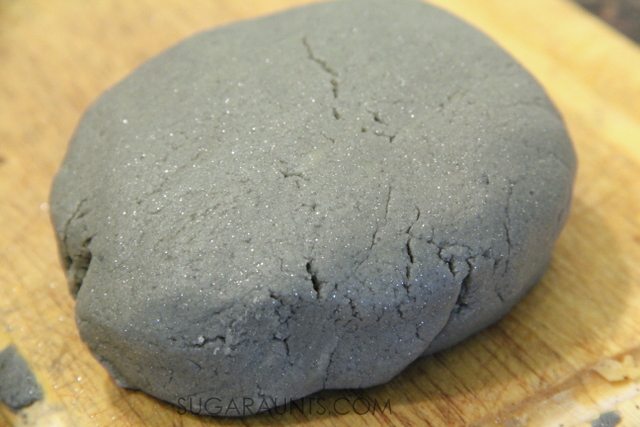
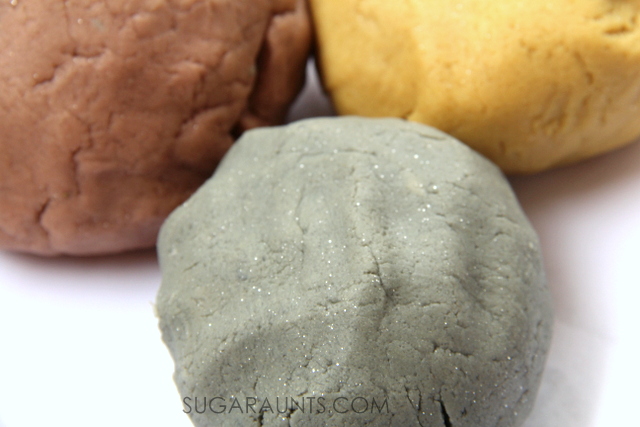
Homemade play dough is one of our favorite sensory ways to play! We’re playing our way though the year with sensory dough recipes and this month brings Metallic Crayon Play Dough. Now, if you’ve followed along with our blogging antics for long, you’ve seen a crayon play dough recipe or two. (Or three. Seriously, this stuff is amazing. And addicting.) With this month’s theme in the 12 Months of Sensory Dough series being Sparkly Dough, we had to bring the sparkle and shine out in our crayon dough recipe with Metallic Crayon Play Dough!
Look at that shine! We’ve said it before…making play dough with crayons brings out the bold, vivid hues of crayon pigment. And when you make a play dough using crayons, the colors are bright! The gold, silver, and bronze colors of our metallic dough are perfect shades and the sparkle in the crayons REALLY shines!
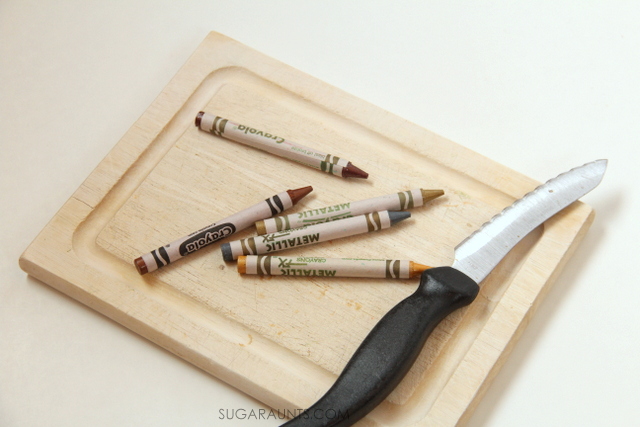
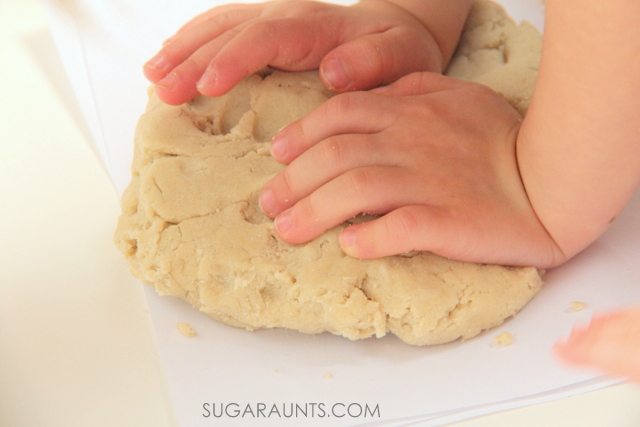
Choose your colors and peel off the labels. Chop crayons into small pieces.
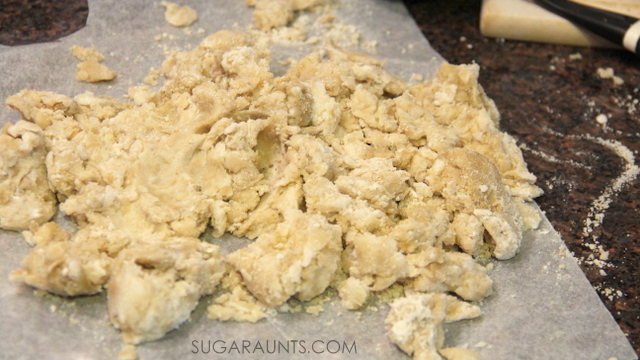
Follow the directions to make crayon dough. Dump it out on a clean surface and start kneading. The colors will be blotchy at first, but keep kneading!
Get the kids involved in kneading the dough. It’s such a great fine motor workout for the little muscles in the hands. Not only do the intrinsic muscles get a workout, but kneading dough is a fabulous proprioceptive workout. when you knead dough, pressure input is received through the joints all the way up through the shoulders. This sensory dough is a real sensory activity as you knead the color throughout the dough.
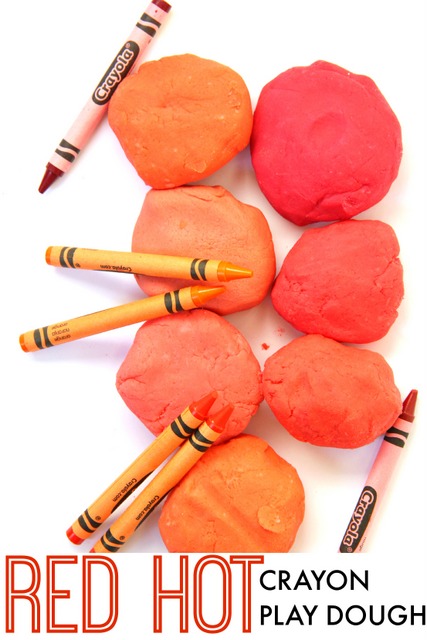
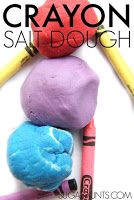
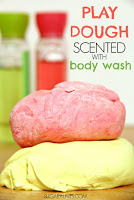
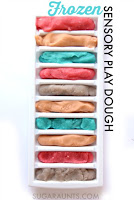
If you like the idea of using your broken crayon pieces in something as fun and creative as play dough, then you will love to try a few different ideas, too. We’ve given crayon play dough a run for it’s fun and tried a few different versions. Check them out and if you make a batch, let us know how you get creative with crayon play dough!
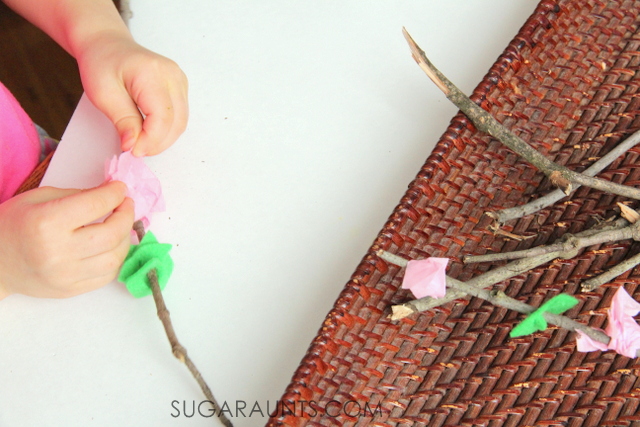
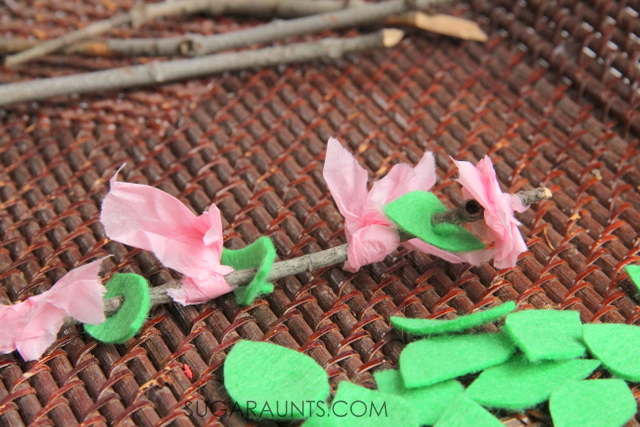
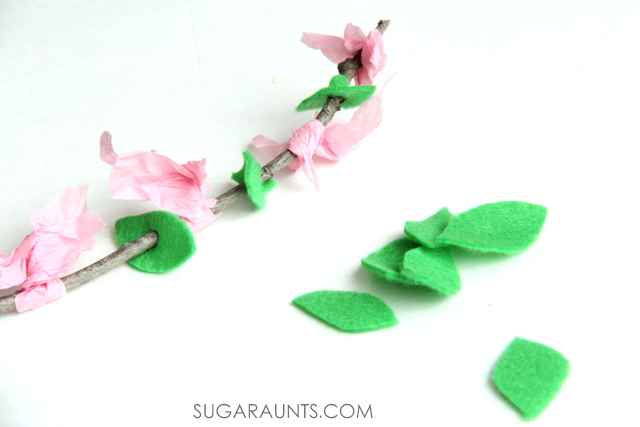
Spring is around the corner and one of my favorite signs of the season are cherry blossoms! We made this cherry blossom fine motor and pattern activity recently. Practice fine motor skills and pattern math abilities with this easy spring activity, and for more fun Spring activities, be sure to check out the other cherry blossom crafts here on the site.
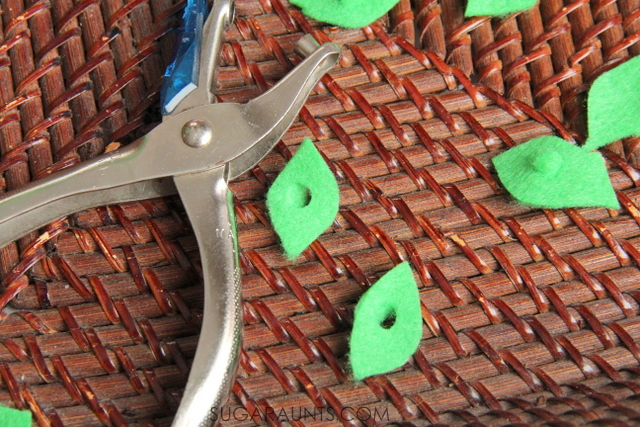
Start with a sheet of green felt. Cut small leaves from the felt and use a hole punch
to punch holes in each leaf. My oldest (age 7) was able to punch the holes, with effort. The felt material requires a lot of hand strength in order to punch a hole. The hole will not tear away from the felt leaf unless snipped with a pair of scissors.
Spring Fine Motor Activity
Gather a few twigs from the yard and a sheet of pink tissue paper. Tearing tissue paper is a great fine motor strengthening exercise. To tear paper, one needs to use the intrinsic muscles of the hand and a tripod grasp. Both hands are needed (bilateral hand coordination) in order to hold the paper and tear. Children need strength and endurance in the intrinsic muscles of their hands in order to maintain coloring and handwriting activities without fatigue.
Encourage your child to wrap the tissue paper pieces around the twigs. Manipulating the paper requires great fine motor dexterity in this Spring activity. Thread the felt leaves onto the twig using a tripod grasp.
Spring Math Activity
We used the leaves and tissue paper blossoms to create patterns on the twigs. Patterns are an important part of kindergarten and first grade math. Work on AB, ABA, ABBA, and ABAB patterns.
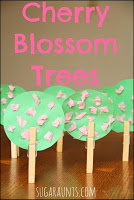
This was a fun way to bring in Spring in our house! Looking for more Cherry Blossom activities? Try making these cherry blossoms fine motor trees:
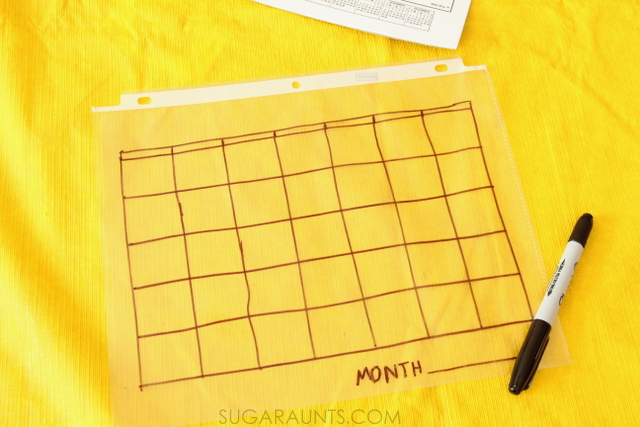
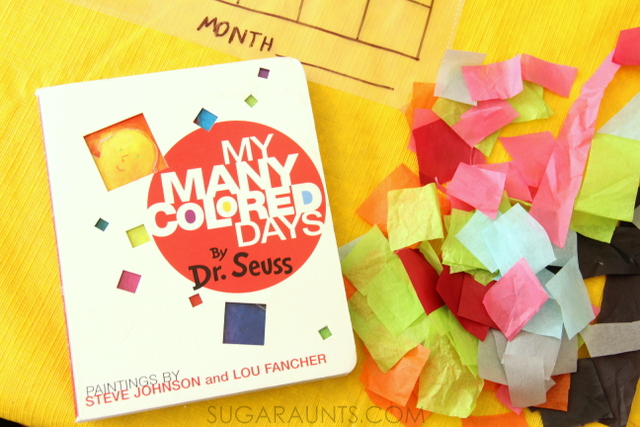
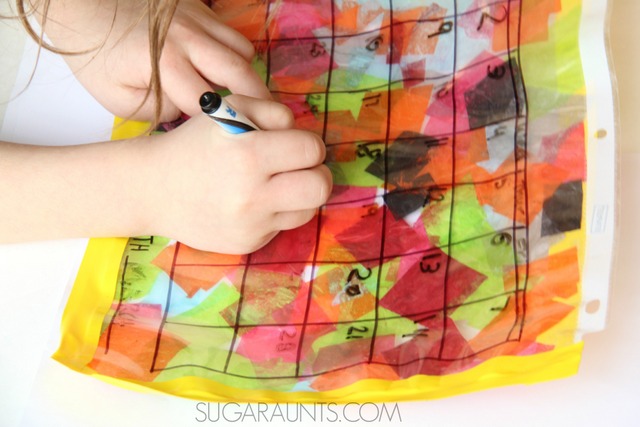
Today we bring you a Color Feelings Calendar craft based on Dr. Seuss’ book, “My Many Colored Days”. Celebrating Read Across America Day and Dr. Seuss’ birthday is fun with this book and we decided to create a colorful reusable calendar based on the book and the many feelings we feel. We’ve made an activity based on a Dr. Seuss book before, so this craft was just right for us!
This activity could be paired with a feelings check in activity to support emotional and self-regulation in the classroom.
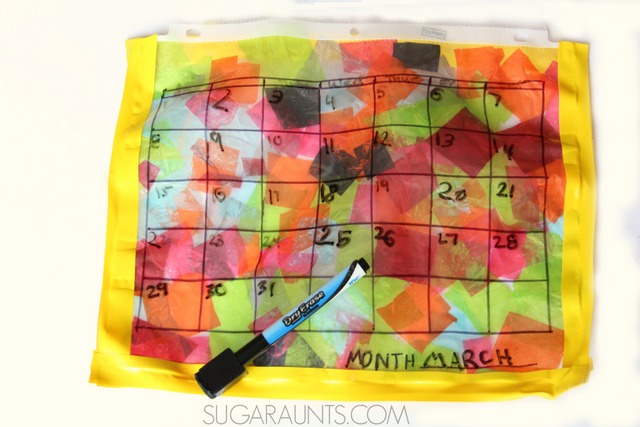
Reusable Calendar Craft
This post contains affiliate links.
My Many Colored Days is a fun book all about the colors we feel and how they are part of being “me”. Everyday is full of colors and so we decided to use those colors in our reusable calendar. We can see each day through the calendar and remember that we are always the same, no matter what color we feel.
We grabbed a few materials to create our calendar:
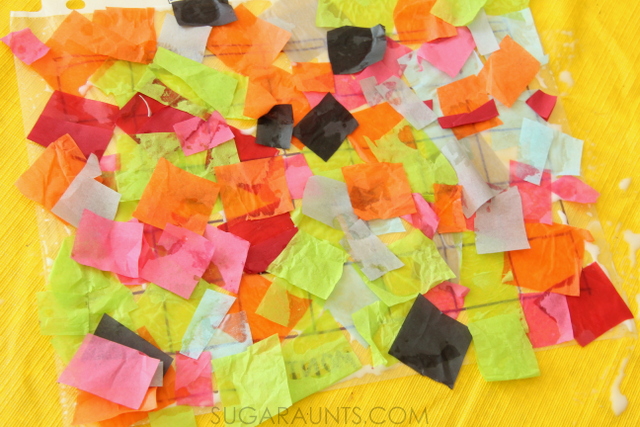
Use the blank calendar as a template to trace a calendar on the sheet protector with the marker.
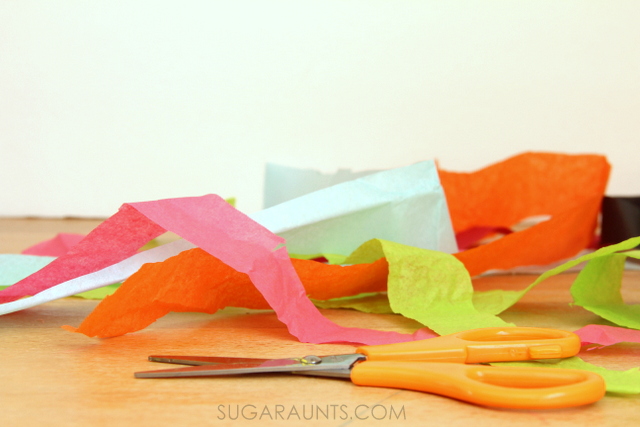
Snip the tissue paper into squares.
Spread a thin layer of DIY decoupage on the back of the sheet protector. Lay the tissue paper squares all over the decoupage. Be sure all of the sheet protector is filled in with tissue paper. Add a second layer of decoupage over the tissue paper once finished.
Allow the tissue paper and glue to dry completely. Add a border using tape. This will keep the tissue paper attached at the edges and prevent peeling.
Big Sister is loving this reusable calendar. We’ve been using a dry erase marker to write on the calendar and a paper towel to erase over and over again.
This post is part of the Read and Play series on The Pleasantest Thing.
Looking for more Dr. Seuss books and activities? Try these:
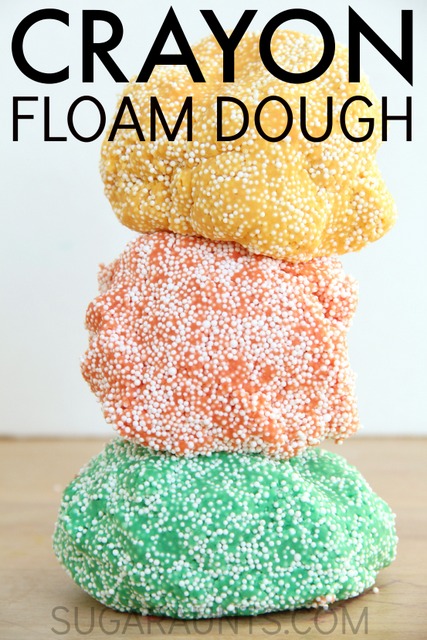
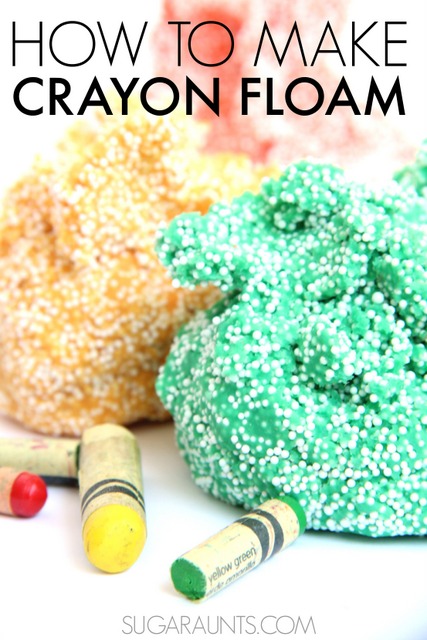
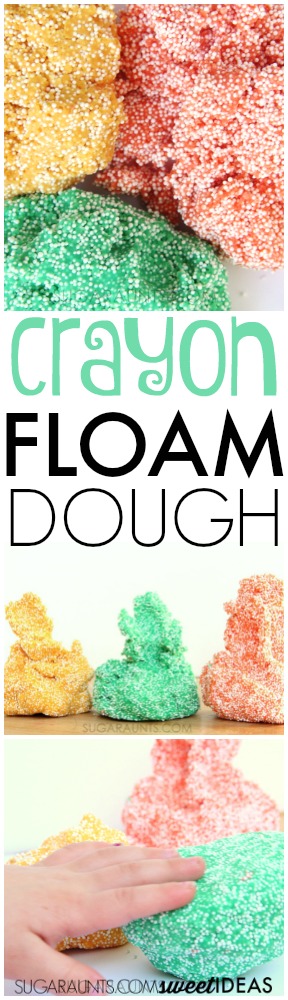
Play dough made with crayons are one of our favorite ways to play and this Crayon Floam Dough recipe was a HUGE hit in our house! We’ve love crayon dough since we experimented with how to make crayon play dough. We decided to give another sensory dough a twist on the crayon dying method and made our own homemade Crayon Floam Dough.
Maybe you’ve seen floam in stores or played with it in the past. This foamy, moldable dough is so light and cool to play with! It’s really a fun sensory material. We made our floam dough with ingredients we had on hand and this is how we did it:
Chop up two crayons in the same color family. To make the red dough, I used two different red crayon shades. The color isn’t important in this dough, (although you can make a big range of colored dough using our shades of crayon play dough idea.
Heat 2 tablespoons of oil on a stove. Mix in the chopped crayons and stir. Don’t let the oil heat up too much, and slowly stir in 2 cups of water. Add 2 and 1/2 cups of flour to the mixture and keep stirring over heat. This is less flour than our typical crayon dough recipe because we are omitting salt. The added foam makes up for this and holds the dough together. It seems like leaving the salt out of this dough recipe helps with the airy lightness of this floam.
Pour the lump of dough out onto a chopping board and knead when tolerable. You will want the dough to pull together. If the dough is too sticky, add flour by half cup. Mixing up the dough is very quick. It doesn’t need much kneading, but you will want to wait a few minutes until you can tolerate the heat. Overall, this dough pulls together in about fifteen minutes!
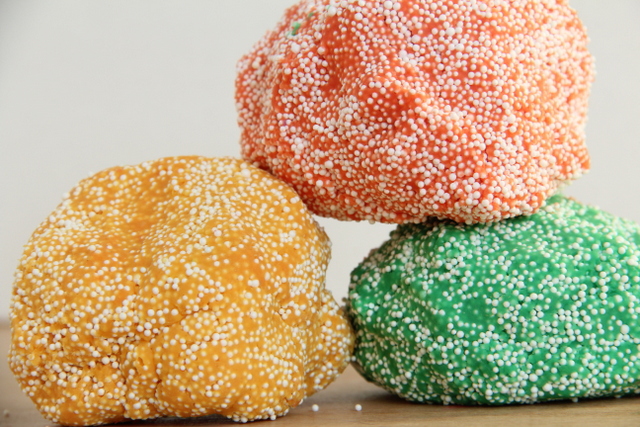
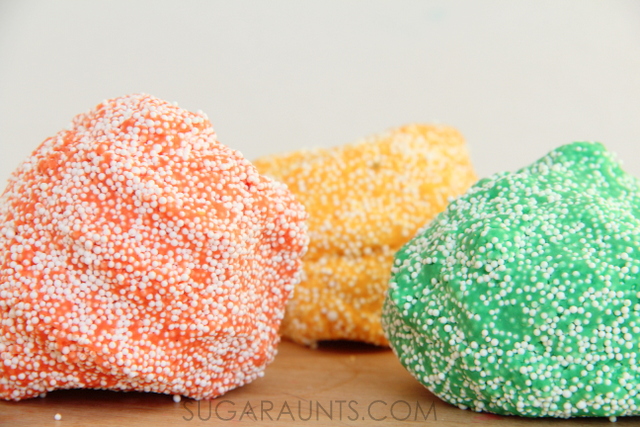
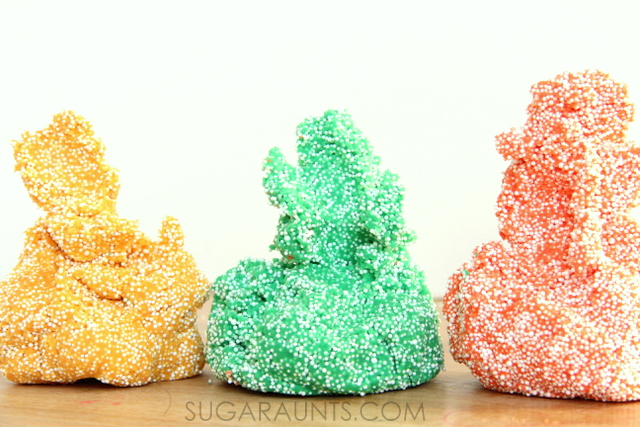
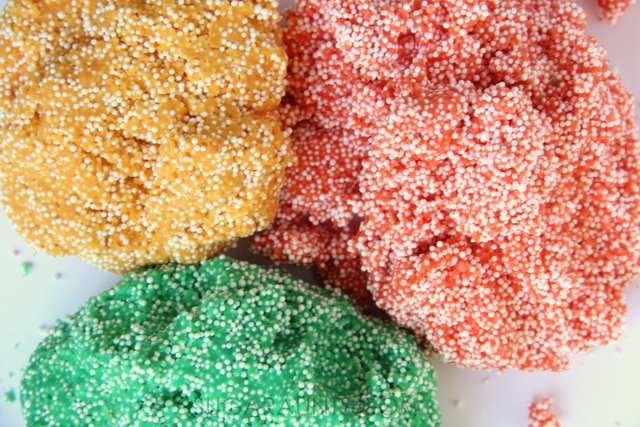
Once cool, fold in styrofoam filler. We used filler from a pillow that was torn for our dough, but you could use bean bag filler as well which can be purchased in craft stores. You will want to add a bunch of the filler so the dough is mainly made up of the filler and held together by dough. It’s amazing to feel the dough “lighten up” as more filler is added.
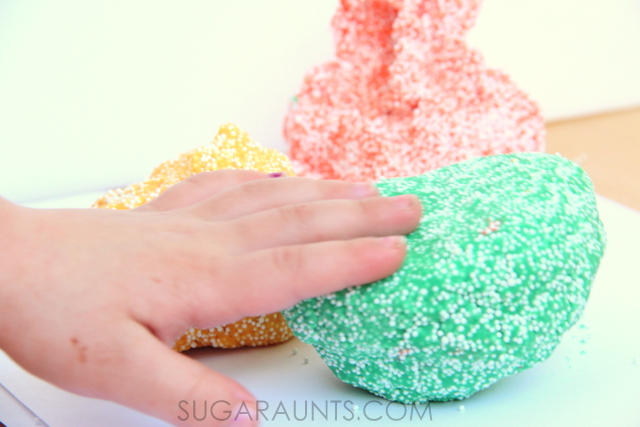
This floam dough is moldable and pretty much awesome! It’s crumbly, yet moldable.
Mess-warning: This dough is MESSY! Rather, the filler is the messy part. When you mold and play with this floam, the little filler bits will pull out of the dough. Play with this sensory activity in a large shallow bin or on a tablecloth spread out on the floor.
We had so much fun with our homemade floam! Watch the blog and our Facebook page for play and learning ideas with this homemade sensory dough!
If you like the idea of using your broken crayon pieces in something as fun and creative as play dough, then you will love to try a few different ideas, too. We’ve given crayon play dough a run for it’s fun and tried a few different versions. Check them out and if you make a batch, let us know how you get creative with crayon play dough!
Do you LOVE using play dough as a sensory and fine motor tool in therapy and in play? I have a subscriber-only play dough mat that is designed to work on the intrinsic hand muscles which are needed for pencil grasp and fine motor skills. Read more about the play dough mat and the areas it will help with HERE. This play dough mat is available for FREE only for our Play Dough is Awesome newsletter group. (This is a different email list than our regular subscribers. If you’re on our subscriber list, you’ll still need to sign up for this one to receive the play dough freebies coming your way!)
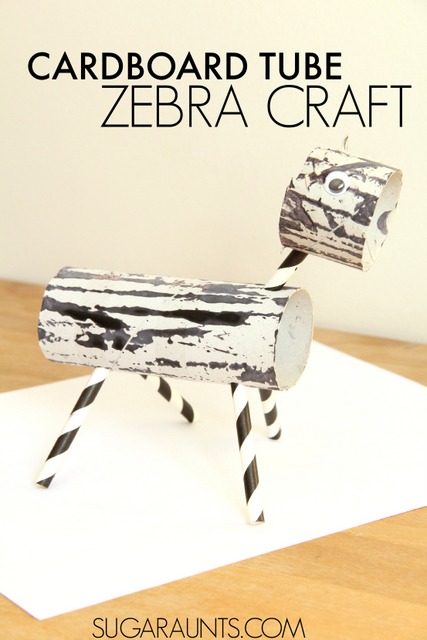


 to make four holes in the cardboard tube as shown in the picture above.
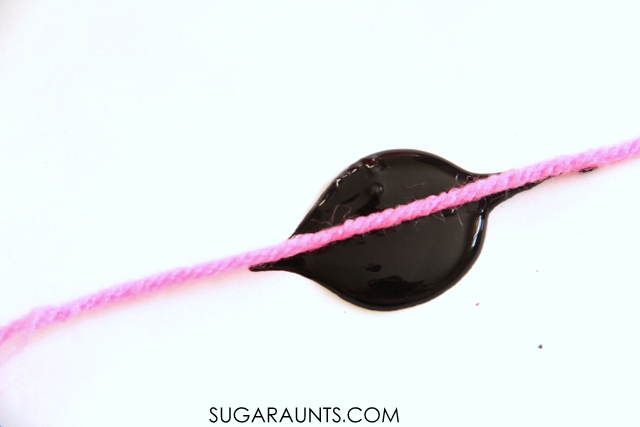
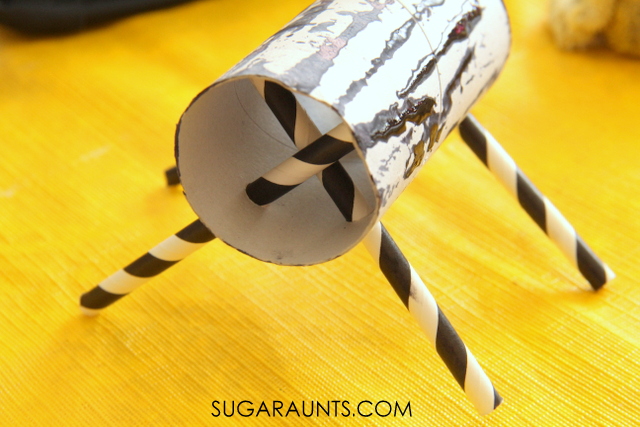
 to make legs on the zebra. Push the straws into the holes in the cardboard tube to support the zebra.