I Ain’t Gonna Paint No More Book Craft

It’s true that we are HUGE fans of activities and crafts based on children’s books.  Today we’re sharing a craft inspired by a new book to us, “I Ain’t Gonna Paint No More!” by Karen Beaumont.  This pretend play kid made craft is big fun for imagination, language, and acting out the book while learning to name body parts.  This would be a great craft to do at a play date, as it uses only a few items (easy set-up is bonus for a mom hosting a play date!) and these cup crafts are fun for acting out the story in a small group.  We had a blast making our pretend play story parts and using them in retelling the book “I Ain’t Gonna Paint No More!”


Use this Story telling craft for I Ain't Gonna Paint No More! to host a preschool play date book club with craft!

This post contains affiliate links.  See our full disclosure policy.


I Ain’t Gonna Paint No More book craft

If you haven’t read the book, I Ain’t Gonna Paint No More!, this is definitely a book you will want to check out.  It’s colors, rhyming text, and body part-learning story is not only fun and engaging, it’s funny!  My kids loved reading this book over and over again, and guessing the body parts that the little boy would paint next based on the rhyme of the text.  We loved the “Ya ain’t-a gonna paint no more!” that the mom in the story yells after her son paints the house. When the boy starts to paint his body part-by-part, we loved the bright colors and yelling out the next body part.  

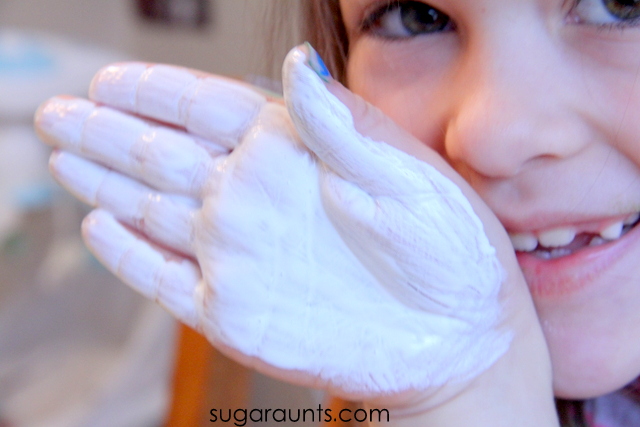
We had to make a painting body part craft to paint body parts!


Painting Craft Naming Body Parts

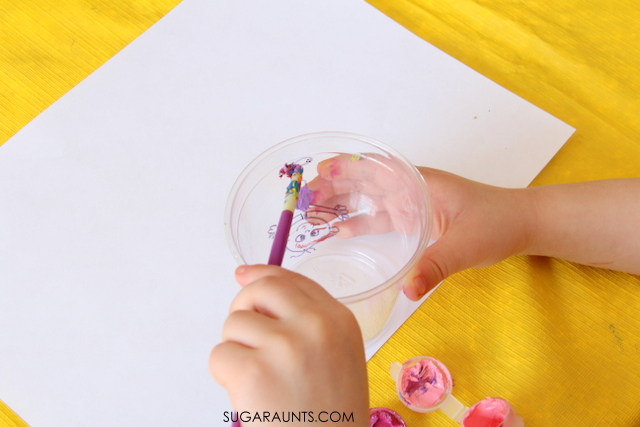
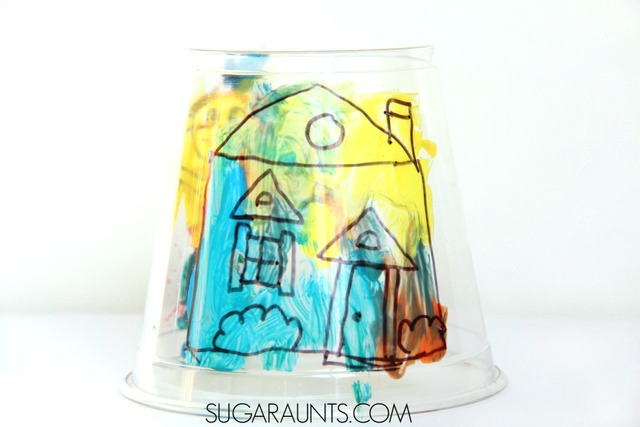
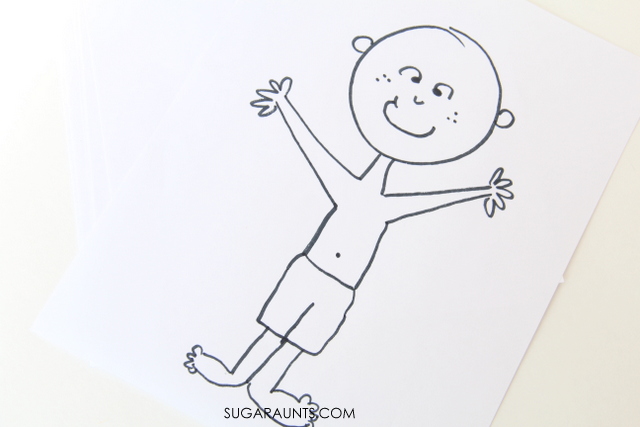
I started by drawing a picture of a boy on the outside of a clear plastic cup
using a black permanent marker.  My three year old was a particularly hug fan of the book and is also loves anything involving paint.  This craft was just right for her!

I showed her how to hold the cup with one hand and use a paintbrush to paint the body parts with paint.  We used acrylic paint that we had on hand from an old craft kit, but these acrylic paints are ones that we love for their bright colors and semi-washability.  

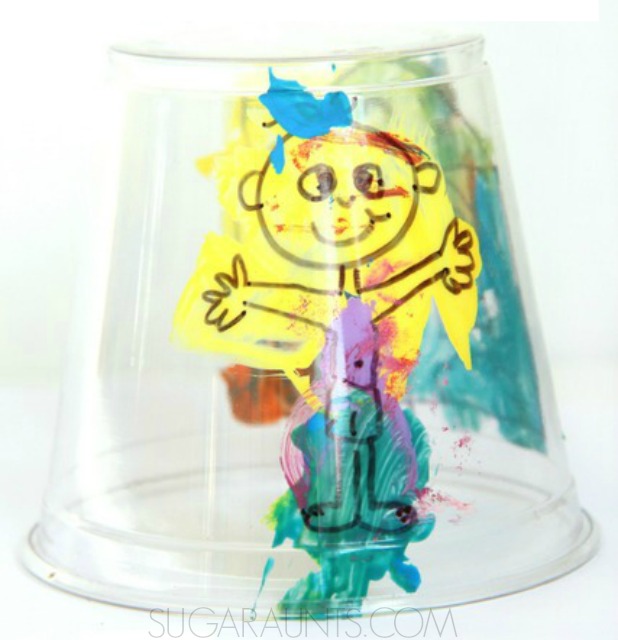
We made a colorful house too, just like the house was painted in the beginning of the book.

Body Part Identification craft

We made another painting craft to go along with I Ain’t Gonna Paint No More!
I Aint Gonna Paint No More craft for kids book club play date
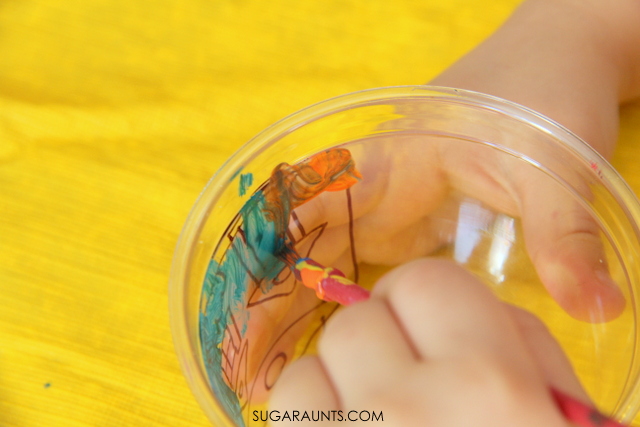
I drew a quick outline of a boy.
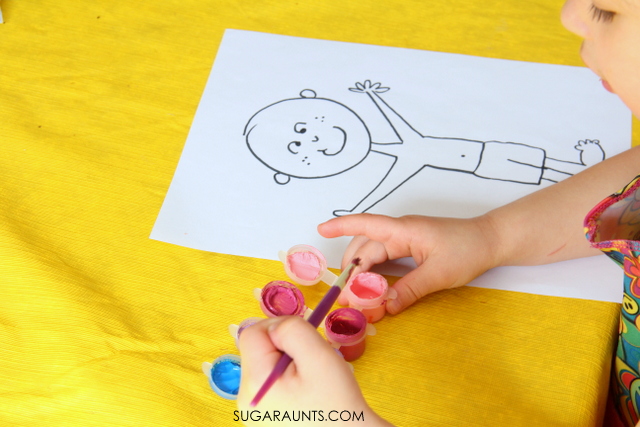
Little Sister painted in the body parts as she named them.
It was fun to see her paint the parts as she said “I’m going to paint his ARM!”  and “I’m going to paint his NECK!”
I Ain't Gonna Paint No More body naming and story retelling craft

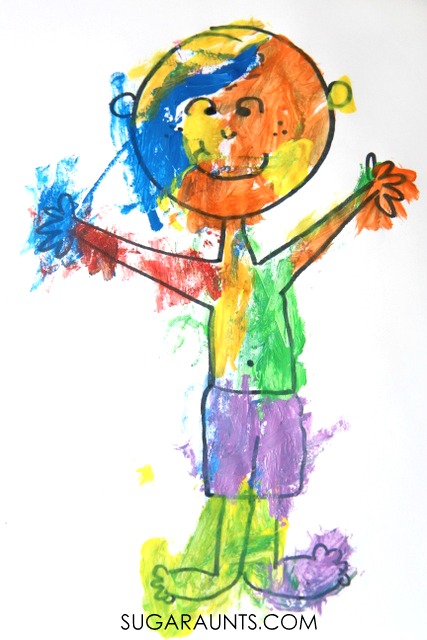
Our painting craft turned out very colorful, just like in the book!

This post is part of a new series we’re joining all about Book Themed Play Dates!  If you’ve ever thought of planning a play date based on a book, this is the series to follow to get great snacks, games, crafts, activities and more based on a great book each month.  Check out the bloggers below for fun activities for I Ain’t Gonna Paint No More!
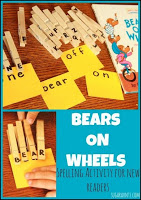
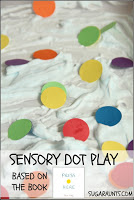
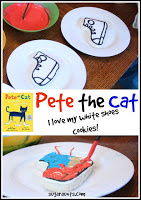
Painted Toast snack from Craftulate
Rainbow Writing Activity from Fun-A-Day
Body Part Game from Still Playing School
Body Part Identification Busy Bag from House of Burke
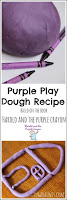
Looking for more crafts and activities based on books?  These are some of our favorites: 


Turtle Thumbprint Art

fingerprint turtle craft

Make a fingerprint turtle and work on fine motor skills! This turtle craft is a huge hit with kids.

We have a love for print crafts.  From creating with handprints to pipe cleaners, stamping art is fun for kids and a creative way to explore shapes, colors, and textures.  


Fingerprint Turtle


We made this turtle thumbprint art one day while playing with green paint.  They are so cute that you’ll want to make a whole turtle family!

 
Turtle thumbprint craft for kids


This post contains affiliate links.   
To make Turtle Thumbprint Art, you’ll need a few supplies: 
 
  1. our favorite green paint
  2. white paper
  3. orange paint
  4. Sharpie Permanent Marker


How to make fingerprint turtle art

This turtle fingerprint art is a simple craft that develops fine motor skills. Here are the instructions to make a fingerprint turtle, but you can modify the activity as meets the needs of the individual. 
 
  1. Paint your child’s thumb pad green with green paint
  2. Press the thumbprint onto paper.
  3. Add four legs and a head by pressing fingertips into the green paint.
  4. Lightly tap the fingertips onto the green turtle back on the paper.
  5. Once dry, use the Sharpie Permanent Marker to make smiling faces.
  6. You can also add details to the turtle’s shell by adding orange fingerprints onto the green shell. The orange paint on a fingertip can add details to the shells. 
 
 
 I loved that this craft was a collaboration between my kids, with Big Sister making the shells, Little Brother making the heads and feet, and Little Sister adding orange dots. Everyone had to get in on the fun.  They are just too cute to resist!
 
Try more thumbprint and fingerprint art:


Flip Flop Math Commutative Property of Addition

Big Sister is moving right along in math!  She says it’s her favorite subject in school and loves when she has math homework.  (Is this child mine?? 😉 )  Some of the things she is learning in first grade throws me off as a parent going through this for the first time.  Is my baby really learning these pre-algebraic concepts? In first grade??  It’s hard to believe she is growing up so fast and learning so much!  It’s just a little nervousness from this mom as her first baby grows.  She will always be my baby.  Even when she does algebra 😉

One of the concepts that Big Sister learned in math this year was the Commutative Property of Addition.  She had to learn the term and the meaning of the property, and use it in math worksheets.  One of the ways we practiced the Commutative Property was with this flip flop addition activity.  It was fun to extend the homework and practice some math facts with our flip flop game!


This post contains affiliate links.  See our full disclosure.
Flip flop math: This is a fun math activity for first graders to practice the Commutative Property of addition with flip flops!


What is the Commutative Property of Addition?

In the commutative property of addition, we can switch order of numbers and still get the same answer.  For example, 5+1=6 and 1+5=6.  Using the Commutative Property, 5+1=1+5.  


Flip Flop Math Activity

We made this Flip Flop Adding activity after we talked about how the numbers can “flip flop” and still add up to the same answer.  

Flip Flop math for adding in first grade.
I started by making flip flop sandal shapes on cardboard.  You could also do this activity on paper with flip flop shapes, but I wanted to make our Flip Flops actually flip!  


I wrote out some a + b=c math problems on the flip flops.  On the reverse side, I wrote the numbers using the Commutative Property (b+a=c).

Write addition problems on flip flop shapes.  Practice the commutative property of addition with a flip flop game!
Line the flip flops up on the edge of the table.  Practice the math facts.  You could have your child fill in the answers, flip the shape, and then fill in the answer on the opposite side.

This was a TON of fun!

We decided that our flip flop math equations needed some details.  We used plastic lacing cord to make straps on our flip flops.  Poke a hole in the cardboard with a pen.  Push the lacing cord through the hole, wrap it around the shape, and tie a knot in the back.

Have fun with your flip flop math!

Try more of our math activities:

I Love Ewe Sheep Handprint Art

We are new to hand print art, (but made a super cute “Olive You” fingerprint craft last week. Seriously cute.)  and we’re now addicted!  There’s something about cute little kid fingers and toes covered in paint that makes a mama go, “Awwwww!” and want to keep it forever in the scrapbook.
 
Or if you’re like this mama, in the forever-growing-someday-will-be-scrapbooked-pile.
 
These sheep hand prints and fingerprint crafts are perfect for homemade cards for moms, grandmothers, Aunts (hint, hint!) and make would make Valentine’s Day, Mother’s Day, birthdays, or any old day extra sweet!
I love Ewe Sheep handprint craft for Valentines Day or Mothers Day...any homemade card, really!


Sheep Handprint and Thumbprint Art 

This post contains affiliate links.  
 
We started by painting thumbs with white poster paint.  (Sidenote–I LOVE this paint for handprint art…and any kid art, really!  It is bright, thick, doesn’t flake when it dries, it’s washable, and cheap.  LOVE it!)


To make the I Love Ewe Sheep Thumbprint Art: 

Press white paint-coated thumbs on paper.  We did ours on bright blue card stock so it was ready for card making once the prints dried.  You could make these thumbprint crafts on any color paper and just cut out the prints afterwords and glue onto cards, wrapping paper, or pictures from kids.

 
Let the paint dry.  Once it’s dry, pull out a black Sharpie fine point marker and add details.  Put little legs, a cute sheep face, and puffy wool.
 
Cut them out and glue onto a card, or just keep them on the paper that they were printed on.
Will Ewe Be Mine? Valentine's Day Sheep finger print art. This is adorable for kid made cards!

Don’t stop there!  There’s more sheep handprint cuteness to be done!

To Make a Sheep Handprint Craft:

Use the same awesome white poster paint and paint cute little hands. 

Press flat and firmly on the paper surface.  Let the paint dry.
Use your Sharpie fine point marker again to add the details.  Done!
Sheep handprint and finger print art: Ewe + Me = Love
Add cute sheep sayings and start gifting these adorable sheep to everyone you know.  They will love you forever!
 
This post is part of a handprint and finger print series with a few other fun bloggers we know.  Check out these Valentine’s Day print art ideas for more crafting fun: 
 
Heart Tree Handprint Art  on Fun-A-Day!

 
You also might like our Olive You fingerprint art.

Olive You Fingerprint Valentines Art

Looking for a Valentine’s day activity that doubles as a sensory activity AND holiday craft? The cuteness factor of this Olive You thumbprint art is too much and I can’t wait to create (a ton) more handprint, footprint, and fingerprint crafts with the kids.  Print crafts are one of those mementos that are more than just cute, it’s something you want to pull out when the kids are grown and admire the smallness of their fingerprints.  This is one craft that we will definitely be saving until my little fingerprint monsters are grown!  
 
(Fingerprint monsters=any adorable kid that just so happens to put their fingerprints EVERYWHERE!  Fingerprints on windows, fridge, walls, cabinets, ceiling…HOW are there fingerprints on the ceiling??!!)


Olive You thumbprint art for Valentine's Day (or any day!)


Olive You Thumbprint Art

This post contains affiliate links.
 

We used green paint to make a whole page of green thumbprints.  Let them dry.  Once the green paint is dry, layer a smaller print of red paint right on top.  We had Big Sister make the larger green prints with her thumb and Little Sister use the tip of her finger to make the smaller red spot.  You could just have the child press harder with the whole pad of their thumb to get a bigger circle for the olive and use the tip of their pinkie finger to make a smaller red spot on the olive. 

 
Lots of olive cuteness!
 
I cut out the olives and we glued them onto paper to make Valentine’s Day cards.
 
Olive you thumbprint art for kids.  This is so cute for a homemade Valentines Day card!


The best part of this craft is the olive jokes that you get to say…all day.


Olive you a whole lot!

Olive you thumbprint craft for a Valentines Day card made by kids


Colleen Beck, OTR/L has been an occupational therapist since 2000, working in school-based, hand therapy, outpatient peds, EI, and SNF. Colleen created The OT Toolbox to inspire therapists, teachers, and parents with easy and fun tools to help children thrive. Read her story about going from an OT making $3/hour (after paying for kids’ childcare) to a full-time OT resource creator for millions of readers. Want to collaborate? Send an email to contact@theottoolbox.com.

One Zillion Valentines Heart Chocolates craft

Valentine’s Day crafts and activities are some of our favorite ways to play. This fun holiday is all about love and fun.  Ok, so it’s not a real holiday, and maybe you’re in the camp that it’s a made-up holiday but stores. Pair this chocolate activity with our hot chocolate craft for more fine motor fun.


Whatever your thoughts, you’ve got to admit, the pink and the hearts are a fun way to play after a month of cold wintery snowflakes and all of the red and green December brings.  This Valentine’s Day craft was a fun way to create based on one of our favorite Valentine’s Day books, One Zillion Valentines by Frank Modell.  And the message is perfect–Valentine’s don’t need to come from a store!


We love this book for it’s fun illustrations, great message, and it’s Valentine’s Day fun.  When we read the book recently, we found a few things in the pages that we wanted to craft.  We made this Valentine Heart Box of Chocolates on a miniature scale for the cuteness factor and a little imagination play.


Make a miniature heart Valentine chocolate box from a cardboard tube.  This is too cute!


Valentine’s Day Box of Chocolates Craft

This post contains affiliate links.

Reading the book, One Zillion Valentines
shows us the friendship of Martin and Melvin as they trek around town and notice a huge heart shaped chocolate heart in a store window.  They decide that Valentines are not just for girls (and that they don’t need to come from a store!)

 
When we saw that giant heart shaped valentine, we knew we had to make one just like it (only on a smaller scale!)
 

We started with a cardboard tube.  In case you didn’t know, we kind of like cardboard tube crafts.

Shape the tube into a heart shape.  Cut two red hearts from red cardstock.

Cut the cardboard tube into 1/2 inch thick heart shaped rings.  This is a job for an adult, as cutting through the cardboard takes a little muscle.

Cut one of the hearts at the point and snip off a small piece. You will want to tape the heart back together so it is smaller than the other cardboard tube heart and the larger one will fit on top of the smaller heart .  The larger heart will be the lid for the bottom heart.

Dip the edges of the hearts into glue and press onto the red cardstock
hearts.   Let these dry.

Once dry, you can decorate however you like!  We used a piece of ribbon to look like the chocolate heart box in One Zillion Valentines, but you could also draw on heats, flowers, or add bits of ribbon to decorate.


This isn’t the only craft we made based on the book, One Zillion Valentines.  We made another fun craft that will be coming your way soon!

This post is part of the Read and Play series where bloggers share crafts and activities based on books.  This months post is all about Valentine’s Day books for kids.  You can find more creative Valentine activities and crafts all in one place on The Pleasantest Thing.   

Looking for more Valentine’s Day crafts and activities?  Try some of our favorites: 


Marbled Milk Paper Towel Snowflakes

Have you seen the magic milk experiment?  This Marbled Milk painting is a little like the magic milk experiment, and such a neat activity for the kids (I think I loved it just as much!)  When the weather is cooler and the house is filled with paper snowflakes, a pop of color makes the winter season even brighter! Marbled milk paint is a creative painting activity with a bit of science mixed in.
 
We’ve done a similar milk and soap science and art project in our published book.  This is such a fun way to explore science and art! A true STEAM activity for kids!


make beautiful napkin snowflakes using a marbled milk dying process.


Snowflakes dyed with Marbled Milk

This post contains affiliate links.
 
We first saw the Magic Milk experiment over at Coffee Cups and Crayons.  Our process ended up being a bit different than theirs, so if you’ve never seen the full effects of the Magic Milk experiment, it’s definitely something you will want to check out.  
 
We omitted an ingredient in our dying process and skipped the “magic” I suppose…but this Marbled Milk dye is pretty magic in itself, I would say!


We started with a little milk poured onto a bread plate.  You will also need liquid food coloring in a few colors.

Drip the food coloring in different areas of the plate of milk.

Swirl the food coloring around with toothpicks.  It was fun to see the swirling of the food coloring in the milk.
 
At this point, we pulled out a handful of snowflakes we had snipped from paper towels.  Drape them into the milk and watch the colors creep across the paper towel.
It’s amazing how fast the colors creep across the towel and how they become marbled all on their own.  We were sure to keep the colors from being a brown mess in the milk and when we  swirled  the food coloring, were very gentle.
 
Drape the wet snowflakes across cooling racks with a dish towel below to catch any drips.  Let them snowflakes completely dry.  They will dry hard and a little crispy on the edges.
These marbled milk snowflakes decorated our window for a while (until a certain three year old pulled them down!) We’ll be making these again for sure.  Let us know if you do, too!
 
Looking for more creative painting activities?  Try some of these:
 
marbled milk snowflakes.  These brightly colored snowflakes are dyed with marbled milk!

Red Crayon Play Dough Recipe

We are slightly obsessed with making crayon play dough recipes.  It all started with our crayon play dough.  We were brainstorming for an activity to go along with the book, Harold and the Purple Crayon and we made homemade play dough using crayons as a main ingredient.  We love this dough so much because of it’s soft and smooth texture and it’s bright and bold color.  

We decided to try a new version of our crayon recipe and make shades of red crayon play dough.  This is perfect for Valentine’s Day, but we’ll be using this play dough long after February 14th!


Make a bunch of different shades of red crayon play dough using a pack of crayons!

(This post contains affiliate links)


Red Crayon Play Dough Recipe

Shades of red crayons. Use these to make red play dough!
We grabbed a couple of packs of these Red Hot crayons and knew they had to be used for all red play dough.  You can use broken crayons that are floating around the house, though.
Shades of red play dough using crayons! Save those broken crayon pieces!

This pack has some pretty red shades.  Red, maroon, brick red, mango tango…the bonus of using crayons for dying play dough is that you get a pure, bright, and bold color.  Even reds (which don’t always come out brightly colored with other play dough methods) are vivid.

Make a bunch of different shades of red crayon play dough using a pack of crayons!
Start by chopping the crayons into small pieces.  I used two crayons for each shade (so we ended up using two packs of the Red Hot crayons to make eight shades of red crayon play dough.

Make a bunch of different shades of red crayon play dough using a pack of crayons!

You can get the measurements on our how to make crayon play dough post. 


Once you chop up the crayons, melt into the oil over a stove.  After the crayons are melted, slowly stir in the water.  You can then add the dry ingredients and keep stirring until the dough pulls together.  Be sure to mix with a spoon or whisk as you slowly pour in the dry ingredients.Dump the play dough onto a floured surface and let it cool for a few minutes.  Once the dough has cooled enough to knead, you will want to knead until the dough is smooth and even in texture.  


You can get the measurements on our how to make crayon play dough post.

Make a bunch of different shades of red crayon play dough using a pack of crayons!

Troubleshooting crayon dough problems:

There are a few problems you might run into when you’re making crayon play dough.  If you have white spots in the dough after kneading, it means the flour wasn’t mixed in evenly.  Keep kneading the dough and it will eventually get all of the flour flecks mixed in.

If the dough seems too dry, you can add a bit of oil and knead some more.
If the dough seems too moist or oily, add a bit of flour and knead.
Always add small increments to get the right texture, with a lot of kneading in between.

Crayon play dough. This recipe will give you a bright and bold shade of color.

Make a bunch of different shades of red crayon play dough using a pack of crayons!

Make a bunch of different shades of red crayon play dough using a pack of crayons!
Crayon hearts for Valentine’s Day!

Make a bunch of different shades of red crayon play dough using a pack of crayons!

Little Sister loves play dough so all of these shades of red are making her happy!
Use Red Hot crayons from Crayola to make different shades of red play dough with bright and bold colors.  Very vivid red play dough!

Crayon Play dough Valentine treat bags that don't use candy!

We even made a few Valentine’s Day treat bags using sandwich bags and pink paper.  Pop the play dough into the baggie and fold over the opening.  Tape a strip of paper with a heart for a cute non-candy Valentine’s Day treat bag!

More crayon play dough colors:

If you like the idea of using your broken crayon pieces in something as fun and creative as play dough, then you will love to try a few different ideas, too.  We’ve given crayon play dough a run for it’s fun and tried a few different versions.  Check them out and if you make a batch, let us know how you get creative with crayon play dough!

Love Bug Craft

love bug craft

If you are searching for a Valentine’s Day occupational therapy activity, then a love bug craft ideas is it. These love bug Valentine crafts are beyond cute, but they are also powerful fine motor crafts that help kids develop, refine, and strengthen fine motor skills. Check out the craft ideas below and choose one that strengthens the skills you are specifically looking to improve.

Love bug craft ideas for kids that help to build fine motor skills with a love bug valentines craft theme.

Love Bug Craft

The hardest part about setting up these cute bug crafts is to decide which to make. I wanted to pull together some love bug craft ideas from around the net to help you find exactly the craft that helps kids develop specific fine motor skills.

When kids work on crafts like the ones described here, they have the opportunity to build many fine motor skills that are needed for tasks like handwriting, manipulating and managing clothing fasteners, coloring with endurance, manipulating toys and materials in play, and participating in daily tasks with coordination. Here are some fine motor skills that love bug crafts can help kids develop and refine:

  • Precision and dexterity
  • Eye-hand coordination
  • Pinch and grip strength
  • Separation of the sides of the hands
  • Arch development
  • Endurance and strength
  • Open thumb web space
  • Finger isolation

Is there anything cuter than a Love Bug craft for kids?  These Valentine’s Day love bug crafts would make a great activity for school parties, play dates, or any day leading up to Valentine’s Day!    

Love bug crafts for kids this Valentine's Day

Love Bug Valentine Crafts

This Sticky play love bugs from Best Toys 4 Toddlers pairs the fine motor power of stickers with a cute bug craft. When kids peel and place stickers, they are building precision and neat pincher grasp that is needed for dexterity in tasks. read more about the benefits of playing with stickers here.


This Pine Cone Love Bugs from Fireflies & Mudpies helps kids build hand strength and bilateral coordination. By manipulating and twisting pipe cleaners, children can develop the skills needed for handwriting, cutting with scissors, and manipulating clothing fasteners like shoe laces.

While this bee craft is considered an insect, it still works as a cute love bug! Use this bee craft idea to help kids work on precision, bilateral coordination, open thumb web space, and separation of the sides of the hand as they peel and stick bandages to make a bee.


An Egg carton love bugs craft from Kitchen Floor Crafts is a fun way to help children with precision and eye-hand coordination as they thread pipe cleaners into egg cartons and beads onto pipe cleaners. This precision task develops arch strength, separation of the sides of the hand, and an open thumb web space, all of which are needed for a functional pencil grasp.


There is power in play dough! This Play Dough Love Bugs from Fantastic Fun and Learning uses play dough to create love bug crafts in a fine motor activity that kids will love. When children play with play dough, and better yet, add manipulatives to play dough, they are building so many fine motor skills. Work on precision, eye-hand coordination, tripod grasp, and more with this fun love bug craft.

Love bug caterpillar craft made from a painted egg carton with string legs to help kids develop fine motor skills.

Make this caterpillar craft using an egg carton, and work on eye-hand coordination, hand strength, bilateral coordination skills, and much more.


These Cork Love Bugs from No Time For Flashcards are a cute way to work on neat pincer grasp as kids manipulating and place the small craft pieces. It’s a powerful eye-hand coordination activity, too.


These Fingerprint Love Bugs from I Heart Arts and Crafts help kids with scissor skills, bilateral coordination, and finger isolation. These fine motor skills carry over into many functional tasks.

Although ants are in the insect line, these ant crafts are great ways to build fine motor skills, too.

Extend the bug theme with this visual closure bug activity that helps kids develop visual perceptual skills needed for reading and writing.

And for more hands-on bug pretend play, make a quick bug sensory bin. This fine motor activity helps kids with pouring, scooping, and manipulating sensory bin materials with their hands. Pair the bug sensory bin with a Valentine’s sensory bin and you’ve got yourself a love bug theme!

Want more Valentine’s Day Activities that help build motor skills?

The Valentine’s Day Fine Motor Kit is here! This printable kit is 25 pages of hands-on activity sheets designed to build skills in pinch and grasp strength, endurance, eye-hand coordination, precision, dexterity, pencil control, handwriting, scissor skills, coloring, and more.

When you grab the Valentine’s Day Fine Motor Kit now, you’ll get a free BONUS activity: 1-10 clip cards so you can challenge hand strength and endurance with a counting eye-hand coordination activity.

Valentines Day fine motor kit

Colleen Beck, OTR/L has been an occupational therapist since 2000, working in school-based, hand therapy, outpatient peds, EI, and SNF. Colleen created The OT Toolbox to inspire therapists, teachers, and parents with easy and fun tools to help children thrive. Read her story about going from an OT making $3/hour (after paying for kids’ childcare) to a full-time OT resource creator for millions of readers. Want to collaborate? Send an email to contact@theottoolbox.com.