Blue Sensory Play for Toddlers

This was a fun activity that the toddlers around here loved.  I put a bunch of little objects out on a tray, all in shades of blue.  Different textures, shapes, and sizes were perfect for little exploring hands.  Baby Girl and my niece and nephew played with these for a while.
Once they had enough of that activity, I poured the whole tray into the sandbox and we had a ball covering everything with sand, finding little things, and starting all over again.  


We’ve been on a blue kick around here.  It started when we filled our bird feeder and had a Blue Jay in our front yard. 
We’ve been playing with blue, sorting blue, crafting blue, eating blue (berries), and even reading  about blue…

Toddler Sensory Tray

((I love the little knuckle dimples in these pictures!!))
Watch this space for more BLUE play and craft activities!

Scooping Ice

This was an easy play activity to set up one morning.  A few spoons, a bowl of ice, and a mini muffin tin made for an extra cup of coffee for momma!

I pulled this tray-of-fun out on a morning that my niece and nephew (18 months) was here with us and Baby Girl went to work scooping and grabbing at the ice.


Visual-Motor Activity for Toddlers

This is a great activity for toddlers.  At this age, they are getting the hang of the spoon and the slick ice cube is wobbly enough for great practice.  They scooped the ice up from the bowl and slid it into the mini muffin tin cups.  Scooping and moving the ice into the muffin tin is great visual-motor work.
Visual Motor Integration is the ability to control the movements of the hands in an activity as they are guided by vision.  Another term for this is eye-hand coordination.   It is the ability to plan, execute, and monitor a motor task given visual input.
You also Might like:

What are we working on with this PLAY activity?

Eye-hand coordination

Visual-Motor Integration

Spoon Control

Fine Motor Control

Self-Confidence

sensory play

Calming Waterbead Sensory Bin

We play a lot with water beads.  These blue water beads were part of a 3 pack I found at Walmart.  I wanted to try a calming sensory bin for a while, and the blue water bead pack was perfect!
 
…with three crazy kids, mom needs a little calming activity every now and then :)…

Calming Colors.

Blue is peaceful and relaxing, and produces calming chemicals in the body.  Purple is a color that promotes imagination and is associated with relaxing and calm colors.  It’s said that lighter shades of purple are calming, while deeper shades are stimulating as they pull in more red tones.
 
There is a lot of research out there telling us about how color affects mood and behavior.  Blue and Greens release neurotransmitters that relax and calm the body.  They lower body temperature, decrease perspiration, and suppress appetite.  Reds and Yellows encourage creativity.  (So, pull out those bright and stimulating color strips when you’re getting ready to paint the dramatic play/art/block area!) 


Calming Scents.

The sense of smell sends information directly to the brain.  Certain scents can increase our ability to learn, create, think  and attend. Peppermint, basil, lemon, and cinnamon are linked to mental alertness.  Lavender, chamomile, orange, and rose are linked to relaxation and calmness. 

Calming Sensory Bin.

I used our blue water beads and added purple food coloring to the water.  Just a few drops were needed, and the water turned a nice calming shade of purple.  I added a few drops of lavender extract for a nice relaxing scent.  
 
This really was a calming activity for the kids.  They played with the water beads and let them fall between their fingers.  They did go into the kitchen and grab my spatula and whisk.  
 
((They do this every time we pull out the water beads!))
 
Baby Girl played for a long time with this.  She loved it!
Have you done any calming sensory bins?  
 

Playing with purple (tripod grasp with Wikki Sticks)

We pulled out the Wikki Stix again!
The kids had a ball pushing them into a grated cheese shaker… and worked on their tripod grasp while they were at it!
Baby Girl and my niece and nephew (both 18 months) were really into this. There were a lot of little hands reaching in there at one point.  They liked to take the lid off of the container and twist it back on.

This kind of activity is great for cause and effect and their eye-hand coordination.

I stuck to one color to encourage them to say “purple” and not overwhelm them with 20 little Wikki Stix.  Sometimes it’s good to avoid flying Wikki Stix…and that’s when they seem to “walk off” and  you find them in random places.
…like stuck to the shower stall….
Big Sister had fun sporting her new purple frames…

Create Your Own Race Track…fine motor play with Wikki Stix

There are many ways that Wikki Stix are used for fine motor skills and this homemade floor race track is a favorite! We loved getting down on the floor…hello, core strength!) to make this DIY race track with wikki stix, but the fine motor benefits are even greater! Let’s break it down…

wikki stix for fine motor skills

If you aren’t familiar with wikki stix, then you should be because they are an occupational therapy prover’s favorite tool!

Wikki Stix are sticky strings that you can peel off and stick to things, but then they can re-stick. As an occupational therapist, this is one of my favorite OT tools! Build skills in:

  • Pincer grasp
  • Eye-hand coordination
  • Separation of the sides of the hand
  • Tactile defensiveness/discrimination (they have a sticky texture)
  • Motor planning
  • Range of motion
  • Hand strength
  • Visual motor skills
  • Core strength

Plus, you can use wikki stix on various surfaces:

  • Paper for tactile input to create borders around coloring areas
  • Lines on paper, chalkboards, dry erase boards for a bumpy baseline
  • The floor…like we did below!
  • Windows to create a fun suncatcher
  • Walls to work on the vertical plane
  • SO many more ways!

Wikki Sticks Fine Motor Activity

We had a ton of fun with this activity this past week.
Have you played with Wikki Stix (also called Bendaroos…) This set came in a book that Big Sister had, but Wikki Sticks are widely used by OT’s working on handwriting, line awareness, fine motor skills…
We used them for a little fine motor play, visual perceptual skills, and most importantly, fun play with some matchbox cars!
We lined them up on our dining room floor and made a super fun race track for Little Guy’s cars.  Pressing the sticky stings together requires a little pinch of fine motor strength, so this is excellent for working the little muscles in little hands.
Matching up the ends correctly, and creating two parallel lines is perfect for visual perceptual skills and line awareness.  Both of these skills are vital for letter placement in handwriting.
We had SO much fun making roads, gates, and even a little parking lot.
We will definitely be playing racetrack again…soon!

In-Hand Manipulation ~ 2 fine motor play ideas

In-hand manipulation

is the ability to move small objects around in your hand without using the other hand to help. There are three parts to In-hand manipulation…translation, shift, and rotation.
Translation is using your fingers to moving a little item from your palm to your finger tips (or your fingertips to squirrel the item into the palm). When you hold a coin in your palm and manipulate it to your finger tips to push it into a piggy bank or vending machine, you are demonstrating palm-to-finger translation.   
Shift is moving an object using the pads of your fingers…adjusting the pencil grip is demonstrating finger shift.  Another example might be manipulating a button or a zipper with the finger tips.
Rotation is rolling an object using the fingertips.  Examples of rotation are rolling a pencil in your fingertips, turning a pencil over to use the eraser, or opening a bottle top by rotating the lid on your finger tips.
In-Hand Manipulation is a high level fine motor skill and essential for activities like handwriting, buttons, snaps, zippers, cutting, and play.
If a child has difficulty with any three aspects of in-hand manipulation, you might see them struggling to perform these tasks, use two hands to do an activity or skill that normally would use just one, appear clumsy.  You may see them unnecessarily stabilize their arms against their chests and do a task very close to their bodies.
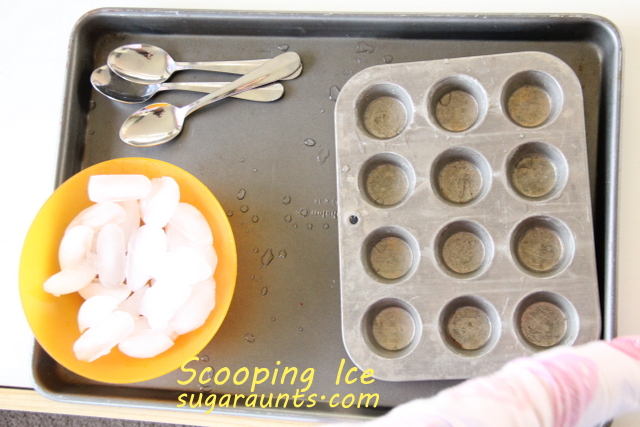
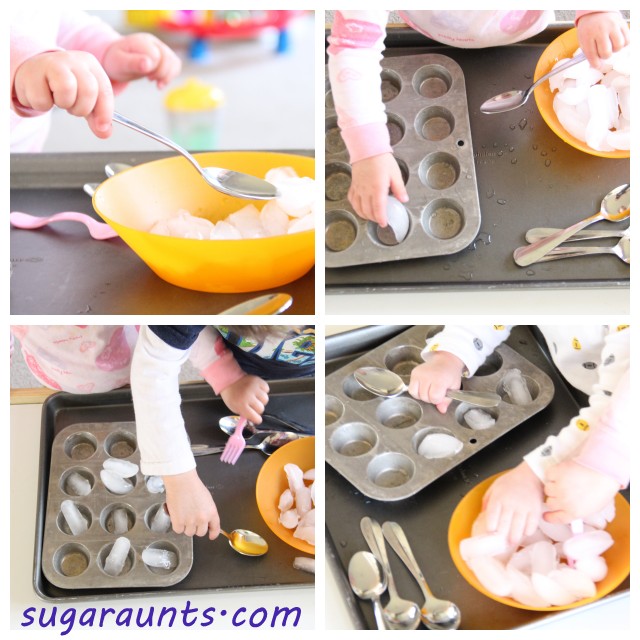
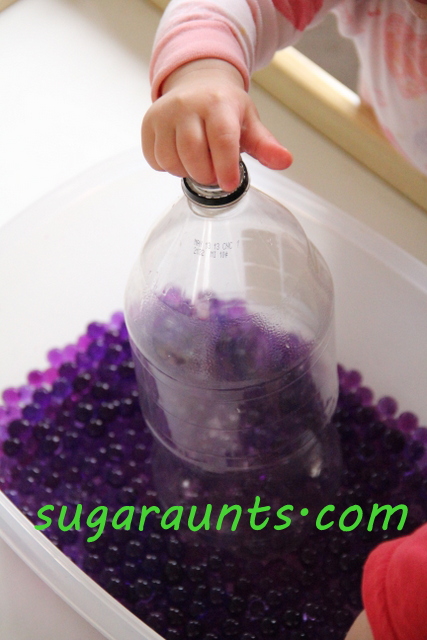
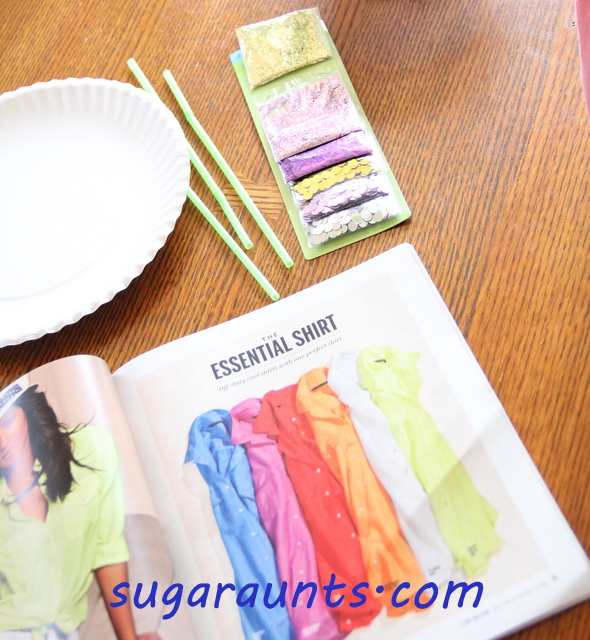
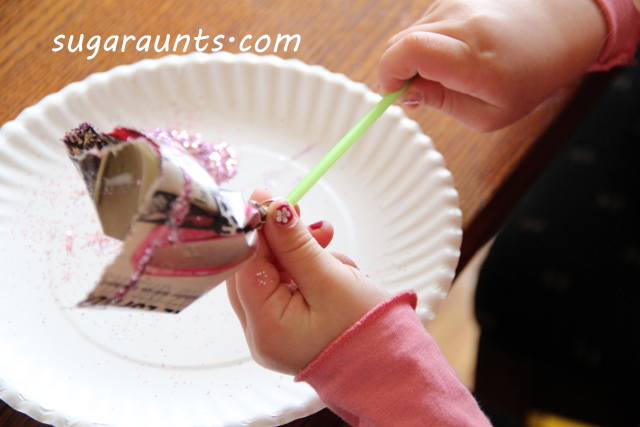
We have done two different (and FUN) play activities recently that work on in-hand manipulation.  This first one used our bin of water beads. 
I put an empty two liter bottle in the bin and the kids went crazy popping the water beads into the opening.  You can see Little Guy’s hand full of water beads in one of the pictures below.  He was able to hold the water beads in the palm of his hand and move them to the fingertips.  He used palm-to-finger in-hand manipulation skills to maneuver the water beads into the opening of the bottle.
Baby Girl had a lot of fun doing this activity too.
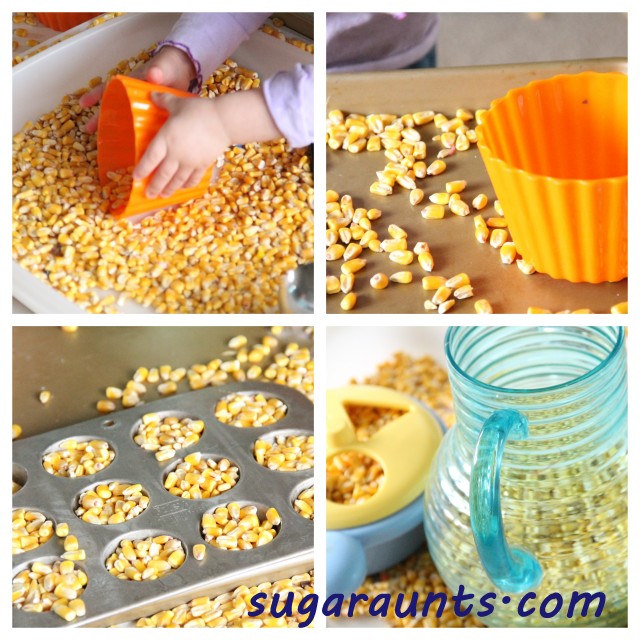
We’ve been playing with another activity recently that really works the in-hand manipulation skills.  We brought an empty grated cheese shaker bottle into our corn bin.  Big Sister held a handful of corn kernels in her palm and would place them, one by one, into the holes of the lid.  
Have your child pick up the kernels one at a time and squirrel them away in their hand before pushing them into the holes of the container.  This would be a one way to encourage finger-to-palm translation.
This is also a great activity for encouraging a tip to tip neat pincer grasp. (A Neat Pincer grasp is important for advanced fine motor dexterity like picking up very small objects from a table surface…very small beads, a strait pin, etc…)
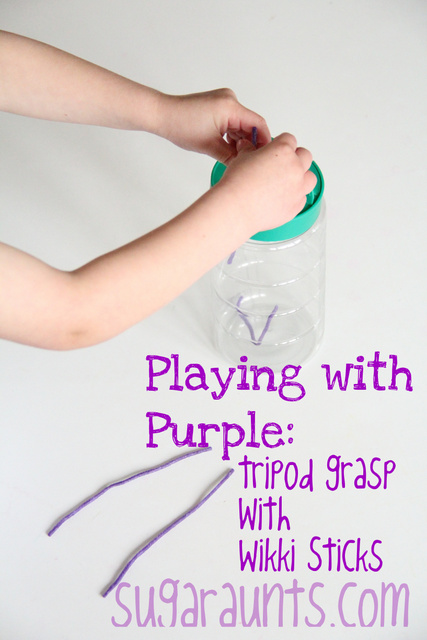
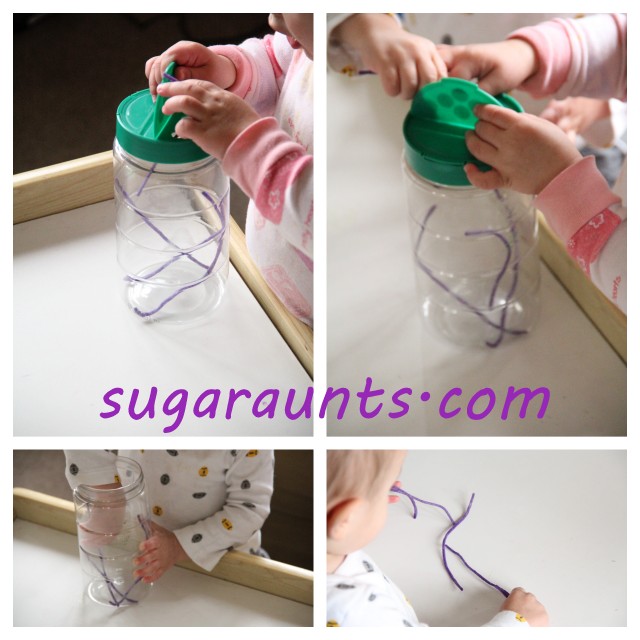
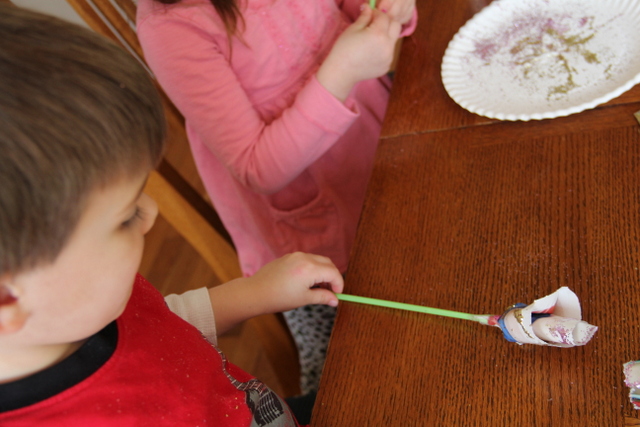
You could also encourage tripod grasp if you presented it with a little larger items, like small crafting pom poms, cut bits of straws, little pieces of pipe cleaners…the possibilities are endless!

What are some other ways that you can encourage in-hand manipulation? 

Push coins into a piggy bank (encourage your child to hold several coins in their palm as they push the coins in)
Push buttons into a slot cut in a plastic tub
Pick up beads and encourage your child to hold them in their palm as they pick up more.
Lite Brite with several colored pegs in the child’s hand
Games with small chips
Pegboards with small pegs
Beading
Twisting lids on/off water bottles

Purple Waterbead Sensory Bin

Purple water beads in a container with cookie cutters and hands reaching into the bin. Text reads purple sensory bin

This purple sensory bin is a fun way to explore the color purple using one of our favorite sensory play materials: a water bead sensory bin! While this is a very old post on our blog (circa 2013), we still love the mesmerizing impact of a color themed sensory play activity. Plus, if you are looking for more fun ways to extend the play, check out our water bead activities!

Purple sensory bin

Purple Sensory Bin

A purple themed sensory bin has many benefits beyond exploring the color purple. Of course, you could make a color themed sensory bin based around any color and gain so many benefits:

  1. Tactile sensory experience- Targeting tactile discrimination and tactile exploration is one of the main skills that are address with a sensory bin. You can address various aspects of tactile defensiveness through engaging and motivating play.
  2. Motor Skills- Using a scoop or spoon to move and manipulate the sensory bin items builds skills in motor planning, dexterity, crossing midline, bilateral coordination, hand-eye coordination, and more. Check out all of the benefits of scooping and pouring activities.
  3. Social Emotional Skills- Playing in a sensory bin like our purple sensory activity is an engaging activity that fosters group play (parallel play) and encouraging peer interaction by borrowing tools, working together. Engaging in a new situation is an excellent way to foster communication, cooperation, and other social emotional skills. Here are more social skills activities kids love.

How to set up a purple sensory bin

In our colorful sensory bin, we gathered just a few items from around the home:

  • Large storage bin
  • Purple water beads
  • Purple cookie cutters
  • Purple scoops and bowls

You could use other sensory bin base materials with a certain color theme such as:

  • Shredded paper
  • Colored sand
  • Dyed beans
  • Dyed rice

Add a few spoons, cups, and manipulative items, and you are ready to go!

purple sensory bin
 
This was a fun and easy little sensory bin to put together.  Someone (cough, Big Sister, cough) threw some bath water colors into the bin of blue water beads we had out.  They absorbed the color reeeeally fast.  And are VERY vivid in their new purple hue.
 
 
I found a few purple bracelets and cookie cutters, and a few other purple things, and voila!
 
Purple Sensory Bin fun!


I’m not sure why, but every time we do water bead or corn bin sensory play, Little Guy goes into the kitchen and grabs my whisk and whatever other utensils look right.  So, now Baby Girl does the same thing.  I guess it’s just fun to mix and stir when you’re playing with a sensory bin!
Have you done a water bead sensory bin? 

Invitation to Scoop and Pour

Scooping and Pouring for Toddlers and Preschoolers

is such a great fine motor and visual perceptual activity for little ones.  Not to mention the neat pinging sound you get when pouring grains of corn onto a metal tray 🙂
Toddlers who are learning to control the spoon during eating, scooping food with a spoon, and using  controlled motions to bring food to their mouth benefit from an activity like scooping corn.  A child with poor muscle control would benefit from different modifications to this activity: different sized scoops/spoons, lighter or heavier objects to scoop (sand, rice, beans, crafting pom poms, cotton balls…)

I had a set of these orange bowls and spoons sitting around and they worked great to scoop, pour, and dump corn.  Baby Girl was occupied with this activity for a looooong time.
Pouring from a pitcher with something like corn is perfect play practice for the real world task of pouring drinks from a water pitcher.  Preschoolers often do this in a preschool setting at snack time, and pouring drinks for their friends is fun!  I’ve seen Big Sister glow with excitement when I have her pour water for us at lunch time here.  You can see her self-confidence growing!
Pouring materials from a pitcher is also a great activity to work on bilateral coordination, visual perceptual skills (stop pouring before you overflow the cup!)
Baby Girl watched Big Sister fill the pitcher with corn and pour corn into the muffin tins.  (We were making “cupcakes” for Daddy!) Baby Girl then had to copy and pour the corn.
Of course.  This girl does EVERYTHING the big kids do!
If you are worried about the mess, lay down a blanket first and do all of the pouring and scooping on the middle of the blanket.  You could also play in a baby pool.  Or, just head outside now that we are having some warmer weather.

Why we love scooping and pouring:

Fine Motor skill development

Visual perceptual skills

Bilateral hand coordination

Self-confidence

Real-world practice

Sensory Play

Recycled Magazine Roses

We made these fun roses this week.
Materials:
Colorful magazine page torn in half
glue
straw
glitter
tape
Tear the magazine page in half lengthwise.  Tearing paper is a great hand strengthening exercise.  Holding the paper with both hands encourages bilateral coordination and whole arm movements, and a tripod grasp to pinch the paper while tearing.
Glue along one edge of the paper.
Roll up into a rose-ish shape.
Pinch and twist the base of the flower into a point and push it into the straw.  Pushing the flower into the straw encourages a tripod grasp and use of the non-dominant hand to hold the straw in a coordinated manner.
We taped around the straw to keep the flower in place, and put into a glass of water. Fun and pretty!
Little Guy had to (obviously) blow the straw flower…
…and bang the flowers like a drum 🙂
Big Sister said we needed to put water in the glass. And sand.
Of course.