Letter Formation Resistive Surface

Today I am SO excited to share our new favorite way to practice letter formation, handwriting, tripod grasp, strengthening, and up-cycling.  (Yep, up-cycling at it’s finest, here!)  We have been using foam vegetable trays for handwriting and letter practice a lot.  If you purchase any fruits or vegetables in foam trays, SAVE them!  They will come in handy for a fun handwriting activity! 
 

Work on handwriting and letter formation with a tripod grasp and hand strengthening with this activity.  A foam tray and a chop stick make a great handwriting activity for kids working on writing their name and letters.


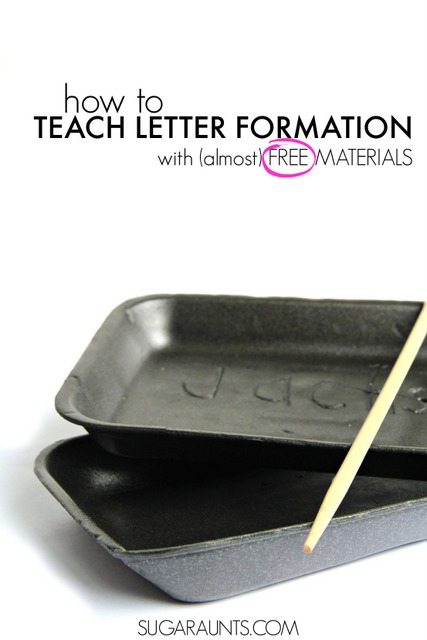
Teach letter formation and handwriting with a foam tray!

We are including affiliate links in this post, however you can find these items for free (well, after you purchase food).  We’re sharing this post as part of our 31 Days of Learning with Free (or almost Free) Materials series and joining 25 other bloggers in homeschooling and learning at home ideas and tips with the 31 Days of Homeschooling Tips series.


Work on handwriting and letter formation with a tripod grasp and hand strengthening with this activity.  A foam tray and a chop stick make a great handwriting activity for kids working on writing their name and letters.
 
Save those foam trays from fruits or vegetables.  These foam trays are primarily found holding meats, but even after a thorough washing, I would feel nervous about allowing my kiddo to write and play with a foam tray that held raw meat. You can purchase the foam trays here


if you are having trouble finding them in the produce department of your grocery store. SIDE NOTE- You can also use take-out containers. Wash and dry the lid and cut the flat part. You’re now ready to practice letter formation and handwriting. 

 
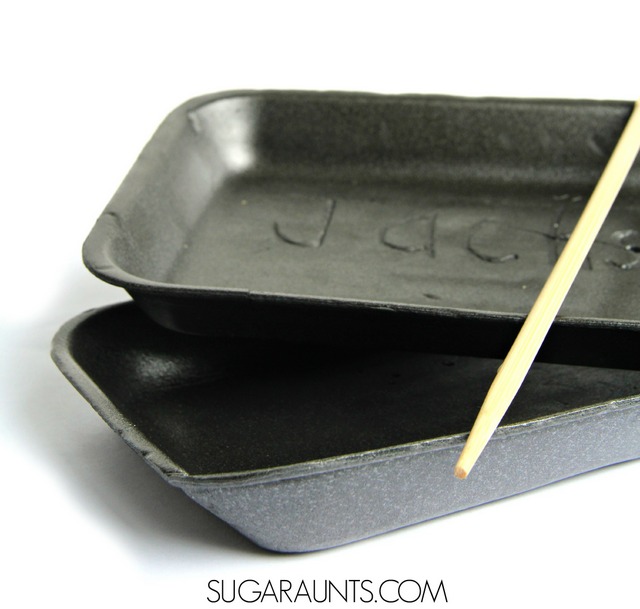
We asked for an extra set of chop sticks after a recent dinner of Chinese food take-out.  Use the chopsticks as a writing utensil on the foam tray.  
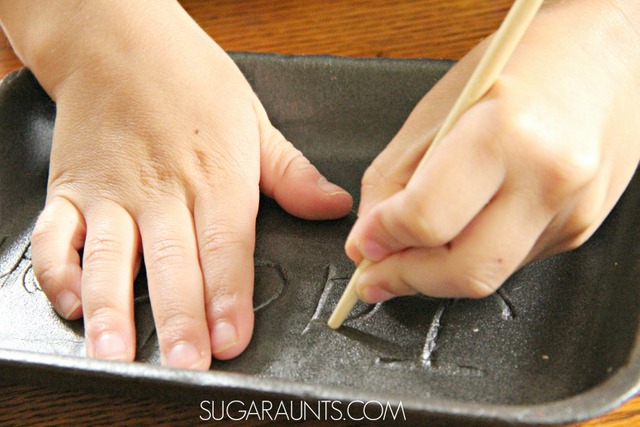
You can have the child write their name and letters for handwriting practice.  
 
Encourage appropriate letter formation by starting at the top and forming the letter appropriately.  The resistive surface of the foam tray will provide feedback through the hand as the child writes the letters. 
 
 This is a great name writing activity for young kids.  For younger kids, I would write the name or letters first lightly on the foam.  
 
Because of the surface of the foam tray, it can be easy for the chopstick to go off course when writing.  A “track” for them to trace would help with appropriate letter formation.
 

Tripod grasp and strengthening during handwriting

Using the chopsticks on the foam tray is excellent for fine motor strength and tripod grasp.  The small diameter of the chopstick requires a close and tight grip.  
 
It may be easy for a child to assume an ineffective grasp on the chopsticks, but encourage then to hold the tip of the chopstick with the thumb, pointer finger, and middle finger with an open thumb web space as they write.  
 
Maintaining this grasp while forming letters on the resistive foam will strengthen and encourage a memory of a motor plan as they form the letters.  
Work on handwriting and letter formation with a tripod grasp and hand strengthening with this activity.  A foam tray and a chop stick make a great handwriting activity for kids working on writing their name and letters.


Fun ways to work on Letter Formation:

Colleen Beck, OTR/L has been an occupational therapist since 2000, working in school-based, hand therapy, outpatient peds, EI, and SNF. Colleen created The OT Toolbox to inspire therapists, teachers, and parents with easy and fun tools to help children thrive. Read her story about going from an OT making $3/hour (after paying for kids’ childcare) to a full-time OT resource creator for millions of readers. Want to collaborate? Send an email to contact@theottoolbox.com.

Bow Stamp Art Flower Craft

Our recent Painting with Pinwheel art was such a hit that we had to try another stamp art activity.  We made this gift bow flower stamp art craft in honor of a special little one in our house who is celebrating her first birthday.  Using the gift bows as a stamp made the cutest flower art.  This craft is perfect for preschoolers (and kids of all ages) when making flower art!  I think it would make a pretty special DIY birthday paper wrapping too!
This is one of our favorite hand eye coordination activities for toddlers because there is no right or wrong way to make this toddler painting art!

Make flower art using a gift bow to stamp! Cute idea for a flower craft or DIY wrapping paper.


To make your Gift Bow Flower Art:

 
Pick up just a few materials.  We’re including affiliate links for your convience here.  You’ll need 

paint (LOVE this brand!) poured onto a plate or into bowls.  Grab a handful of gift bows and start stamping!

Preschoolers love this craft for it’s easy art creation and it’s such a fun and easy process art activity.  There is no right or wrong way to make the flowers.  When you’re satisfied with the flowers, take a swipe of green paint and make a few stems.  Our flower art decorated the dining room for a few days.   Maybe we’ll make a roll of DIY wrapping paper the next time around!
 
Let us know if you make this creative art project.  You’ll find lots more creative art painting ideas on our Creative Painting Pinterest board.  Be sure to follow us there! 
 
More creative stamp art you might enjoy:

Cherry Blossom Fine Motor Patterns

Spring is around the corner and one of my favorite signs of the season are cherry blossoms!  We made this cherry blossom fine motor and pattern activity recently. Practice fine motor skills and pattern math abilities with this easy spring activity, and for more fun Spring activities, be sure to check out the other cherry blossom crafts here on the site.
Cherry Blossom fine motor and pattern activity for Spring. This is a fun activity for Kindergarten and first grade math.
This post contains affiliate links.  See our full disclosure policy.


Cherry Blossom Activity

Start with a sheet of green felt. Cut small leaves from the felt and use a hole punch
to punch holes in each leaf. My oldest (age 7) was able to punch the holes, with effort. The felt material requires a lot of hand strength in order to punch a hole. The hole will not tear away from the felt leaf unless snipped with a pair of scissors.
cherry blossom fine motor activity for Spring.

Spring Fine Motor Activity

Gather a few twigs from the yard and a sheet of pink tissue paper.  Tearing tissue paper is a great fine motor strengthening exercise.  To tear paper, one needs to use the intrinsic muscles of the hand and a tripod grasp.  Both hands are needed (bilateral hand coordination) in order to hold the paper and tear.  Children need strength and endurance in the intrinsic muscles of their hands in order to maintain coloring and handwriting activities without fatigue.  
 
Encourage your child to wrap the tissue paper pieces around the twigs.  Manipulating the paper requires great fine motor dexterity in this Spring activity.  Thread the felt leaves onto the twig using a tripod grasp. 
cherry blossom pattern spring activity for kids

Spring Math Activity

We used the leaves and tissue paper blossoms to create patterns on the twigs.  Patterns are an important part of kindergarten and first grade math.  Work on AB, ABA, ABBA, and ABAB patterns.

cherry blossom fine motor pattern activity
This was a fun way to bring in Spring in our house!  Looking for more Cherry Blossom activities?  Try making these cherry blossoms fine motor trees:

Math Art Activities

These math art activities and math art projects are fun ways to explore and learn! We’ve shared previously, the fine motor benefits in math, so as OT professionals, we love these ideas! Explore the activities below for use in both math AND art!

Math Art

Mathmatics and art have gone together since early artists began creating.  Many great works of art contain mathematics, from buildings and pottery to paintings and statues.  

Today, we’re featuring projects that combine math and art into activities that kids can explore while learning through creative expression.  

Combining the learning aspect with hands-on, creative expression in kids’ activities can be a great way for children who do not enjoy being “artsy” or “crafty” to create.  

These activities are sure to get the kids creating and learning!


What is Math Art?

“Math art” refers to the intersection of mathematics and visual aesthetics, where mathematical concepts and principles are used to create artistic expressions.

It involves using mathematical principles, such as geometry, symmetry, patterns, and fractals, to create art projects or creations.

Art and math can take various forms:

  • Fraction art
  • Graph paper art
  • Sculptures
  • paintings
  • digital art
  • Geometry art
  • Origami art
  • Multiplication art
  • Geometry string art
  • Geoboards
  • More!


Math and Art Activities for Kids:

Try these creative learning projects for developing skills while learning.

Clockwise from the top image:

Concentric Circles activity
Mandala Segments from Highhill Education
Shell Mandalas Math from Nurturestore
Klee from Kids Activities Blog
Parabolic Curve from What Do We Do All Day
Fibonacci Art Project from What Do We Do All Day


What are your favorite ways to create using math and art?

The Day The Crayons Quit Crayon Shaving Art

Have you read the book, “The Day the Crayons Quit”?  This is SUCH a cute book from the crayons’ point of view.  They are TIRED of coloring the same old pictures the same old colors.  Why does the Yellow crayon have to color the sun?  And why can’t the Black crayon color a beach ball?   We loved reading this book over and over again and coming up with our own take on mixing up the colors in a sensory art project using crayon shavings!
And, while your in the crayon theme, be sure to check out our resource on crayons for toddlers and preschoolers to support development of coloring as well as underlying skills using age-appropriate crayons.

 
We are super duper excited to be back at the Preschool Book Club series where we’ll join a few of our favorite kids activity bloggers and explore a fun children’s book every two weeks!


The Day the Crayons Quit sensory art

Crayon shaving art craft for sensory play based on the book, The Day the Crayons Quit

This post contains affiliate links.  
 
We loved reading The Day the Crayons Quit
by Drew Daywalt so this sensory crayon shaving art was completely a hit in our house!
 
This sensory activity requires just a few items:
 

plastic sandwich bags
clear shampoo
crayons
permanent marker
 and a small pencil sharpener


Use the pencil sharpener to make crayon shavings in the colors you want.  This is a fantastic fine motor activity for little fingers.  Twisting the crayons in the small pencil sharpener really works the intrinsic muscles of the hands.  Not only are kids building the hand strength and endurance for writing and coloring tasks, they are using a tripod grasp to manage the pencil sharpener/crayon.  It’s a resistive task that might cause hand fatigue for little ones, but not much crayon shavings are needed for this sensory activity.

Use the permanent marker to draw a picture on one of the sandwich bags.  Fill the baggie with the shampoo and you are ready to get started!  
Have the kids pinch the crayon shavings into the plastic bag.  We tried to get the colors we wanted into the general area of the picture.  So, instead of a yellow sun, we made ours purple and tried to get the purple crayon shavings near the sun in the picture.  If they don’t land exactly near the part of the picture that you want them, it’s not a big problem, and actually a good sensory and fine motor activity to move the shavings around in the shampoo.
Crayon shaving art craft for sensory play based on the book, The Day the Crayons Quit
Press and push the colors into the part of the picture to make mixed up colors just like in “The Day the Crayons Quit” 
Crayon shaving art craft for sensory play based on the book, The Day the Crayons Quit

Be sure to see all of the amazing activities based on The Day the Crayons Quit

Writing Activity from Homegrown Friends
Crayon Box Craft from Buggy and Buddy
Follow Up Story from Mama. Papa. Bubba.
Paper Doll Crayons from Frogs and Snails and Puppy Dog Tails
 
 
Did you miss some of our other Preschool Book Club activities based on popular children’s books?  Check them out and see all of our Preschool books and activities
hands-on activities to explore social emotional development through children's books.

Love exploring books with hands-on play?  

Grab our NEW book, Exploring Books Through Play: 50 Activities based on Books About Friendship, Acceptance, and Empathy, that explores friendship, acceptance, and empathy through popular (and amazing) children’s books!  It’s 50 hands-on activities that use math, fine motor skills, movement, art, crafts, and creativity to support social emotional development.

Rainbow Color Sort Busy Bag

Our rainbow dyed lollipop sticks are making another appearance today with our rainbow color sort busy bag activity!  We’ve been loving the busy bag activities we’ve been doing lately as part of a series with a group of kid activity bloggers and this rainbow color sorting busy bag is a new favorite in our house! Add this activity to your fine motor skills therapy toolbox! It’s perfect for adding to your occupational therapy activities line up! 
 
Rainbow busy bag with DIY dyed lollipop sticks for fine motor color matching play


Rainbow Color Sort Busy Bag activity

This post contains affiliate links.
Rainbow lollipop color sorting busy bag
We started with our rainbow dyed lollipop sticks  (Seriously, these are awesome for so many play and learning activities!  Make them!) and a stack of construction paper
in matching colors. Cut the construction paper into rectangles and use clear tape to make small pockets. You want the lollipop sticks to fit in the pockets, but don’t want them to be too large either. 
Rainbow dyed lollipop sticks color sorting busy bag for kids.  This is perfect for a quiet time activity.
How pretty are those colors!  

My Little Guy really got into this busy bag activity.  He liked to mix the lollipop sticks around on the table.  “I have to shuffle them up, Mom!” and then sort the colors into the correct envelopes.  Other ideas to extend this activity would be adding numbers to count the correct number of sticks, sorting in rainbow order, only sorting certain colors, or sorting in a pattern order.  I love that this busy bag activity can be done in so many additional ways to keep the little one’s interested and busy!

Color sort busy bag activity using rainbow dyed lollipop sticks. This is such a fun idea!

Turtle Thumbprint Art

fingerprint turtle craft

Make a fingerprint turtle and work on fine motor skills! This turtle craft is a huge hit with kids.

We have a love for print crafts.  From creating with handprints to pipe cleaners, stamping art is fun for kids and a creative way to explore shapes, colors, and textures.  


Fingerprint Turtle


We made this turtle thumbprint art one day while playing with green paint.  They are so cute that you’ll want to make a whole turtle family!

 
Turtle thumbprint craft for kids


This post contains affiliate links.   
To make Turtle Thumbprint Art, you’ll need a few supplies: 
 
  1. our favorite green paint
  2. white paper
  3. orange paint
  4. Sharpie Permanent Marker


How to make fingerprint turtle art

This turtle fingerprint art is a simple craft that develops fine motor skills. Here are the instructions to make a fingerprint turtle, but you can modify the activity as meets the needs of the individual. 
 
  1. Paint your child’s thumb pad green with green paint
  2. Press the thumbprint onto paper.
  3. Add four legs and a head by pressing fingertips into the green paint.
  4. Lightly tap the fingertips onto the green turtle back on the paper.
  5. Once dry, use the Sharpie Permanent Marker to make smiling faces.
  6. You can also add details to the turtle’s shell by adding orange fingerprints onto the green shell. The orange paint on a fingertip can add details to the shells. 
 
 
 I loved that this craft was a collaboration between my kids, with Big Sister making the shells, Little Brother making the heads and feet, and Little Sister adding orange dots. Everyone had to get in on the fun.  They are just too cute to resist!
 
Try more thumbprint and fingerprint art:


I Love Ewe Sheep Handprint Art

We are new to hand print art, (but made a super cute “Olive You” fingerprint craft last week. Seriously cute.)  and we’re now addicted!  There’s something about cute little kid fingers and toes covered in paint that makes a mama go, “Awwwww!” and want to keep it forever in the scrapbook.
 
Or if you’re like this mama, in the forever-growing-someday-will-be-scrapbooked-pile.
 
These sheep hand prints and fingerprint crafts are perfect for homemade cards for moms, grandmothers, Aunts (hint, hint!) and make would make Valentine’s Day, Mother’s Day, birthdays, or any old day extra sweet!
I love Ewe Sheep handprint craft for Valentines Day or Mothers Day...any homemade card, really!


Sheep Handprint and Thumbprint Art 

This post contains affiliate links.  
 
We started by painting thumbs with white poster paint.  (Sidenote–I LOVE this paint for handprint art…and any kid art, really!  It is bright, thick, doesn’t flake when it dries, it’s washable, and cheap.  LOVE it!)


To make the I Love Ewe Sheep Thumbprint Art: 

Press white paint-coated thumbs on paper.  We did ours on bright blue card stock so it was ready for card making once the prints dried.  You could make these thumbprint crafts on any color paper and just cut out the prints afterwords and glue onto cards, wrapping paper, or pictures from kids.

 
Let the paint dry.  Once it’s dry, pull out a black Sharpie fine point marker and add details.  Put little legs, a cute sheep face, and puffy wool.
 
Cut them out and glue onto a card, or just keep them on the paper that they were printed on.
Will Ewe Be Mine? Valentine's Day Sheep finger print art. This is adorable for kid made cards!

Don’t stop there!  There’s more sheep handprint cuteness to be done!

To Make a Sheep Handprint Craft:

Use the same awesome white poster paint and paint cute little hands. 

Press flat and firmly on the paper surface.  Let the paint dry.
Use your Sharpie fine point marker again to add the details.  Done!
Sheep handprint and finger print art: Ewe + Me = Love
Add cute sheep sayings and start gifting these adorable sheep to everyone you know.  They will love you forever!
 
This post is part of a handprint and finger print series with a few other fun bloggers we know.  Check out these Valentine’s Day print art ideas for more crafting fun: 
 
Heart Tree Handprint Art  on Fun-A-Day!

 
You also might like our Olive You fingerprint art.

Winter Snowflake Stamp Art

snowflake art
Kids love stamp art.  Using a tool to press paint onto a surface is therapeutic and creative.  You can press down hard or lightly, overlap stamps, add colors, or just make a simple stamp.  There’s a lot of process to creating with stamps and you can use so many objects!  We’ve stamped with potatoestoilet paper tubesstyrofoam, and even hair rollers.  These winter snowflakes use pipe cleaners and the result is wintry and beautiful!
 
Snowflake stamp art with pipe cleaners and blue paint. This is a great winter craft!


Winter Snowflake Art with Pipe Cleaner Stampers

 This post contains affiliate links.  

 
This is a pretty easy set up for an art project.  We used just a few materials:
easel paper (this pad gives you a nice big surface for creating)
bowl for the paint
 
 
I twisted a couple of pipe cleaners into a snowflake shape with one piece sticking up for a handle.  You can experiment with the shapes.  We did a flowery shaped snowflake, too.  (This would also make a great spring craft in a few months!)
 
 
Pour the blue paint into a bowl.  I LOVE this paint for it’s bright colors that don’t fade or flake once they dry.  It’s a great paint for preserving little one’s works of art.
 

And now it’s time for stamping.


Big Sister was so happy that she had a day off from school and got to do a craft with us.  We need to do more after school art work as a wind down from full days at school.  She loved making this stamp art and did page after page after page…

Make snowflakes art with pipe cleaner stamps.


Be sure to let us know if you make this snowflake art project.  You might be interested in more stamping activities: