If you’ve ever walked into an occupational therapy gym, you may have seen a variety of sensory swings and wondered, “why does occupational therapy swing kids in their OT sessions?” There are many reasons why, and in this blog post, we’ll cover sensory swings, the best sensory swings to use for sensory needs, and why!
There are many types of sensory swings that we use as occupational therapy providers. This is one piece of sensory equipment that is worth the price. We recommend splurging for a swing of some type in our blog post on creating sensory rooms on a budget.
Sensory Swing Movements
Swings are simply a great tool for sensory input as well as sensory integration. The predictability of linear swinging can be calming and settling for the children who need that support. For more information on the theory and background on this concept, check out our blog post on Ayres Sensory Integration.
Having the swing perform unpredictable moves such as rocking, spinning, side to side movement, and even start and stop movements while suspended in air, can be very alerting and stimulating for the children who need that support.
In our blog post, Sensory Swings for Modulation you will read how powerful the swing can be when used as a sensory strategy for individual sensory processing needs and modulation.
There are many considerations when it comes to sensory swings, however. A swing can be a tool for modulation but it can also cause sensory dysregulation in users.
Dysregulation refers to internal needs of the sensory systems that result in meltdown because the sensory processing system is out of balance.
You might find that only 5 minutes of intense swinging leads to dysregulated sensory system with overstimulation. This state can require a long period of time and intervention to get the individual to reset or calm down.
When it comes to sensory swings, different types of movements can impact modulation or dysregulation. It’s important to be aware of these considerations before using a sensory swing as a tool in therapy.
Each individual will be different and it can be a delicate balance of movements that are stimulating verses calming. A swing for one child might spiral into dysregulation with a lengthy period of time and calming input required to regulate the sensory systems. Other individuals may crave intense movements and can benefit from that swing input for a longer period of time, allowing for functional participation.
Alerting sensory swing movements
In general, fast rotary vestibular input is often stimulating. Likewise, quick and sporadic movements on the swing are stimulating.
The vestibular sense which is utilized during swing use helps to activate more body awareness, muscle tone, balance, and coordination as well as providing a level of increased alertness. If you want to learn more about vestibular activities in general, you can read the blog post Vestibular Activities.
Calming sensory swing movements
Calming or regulating sensory swing movements may include gentle, linear movement to calm the vestibular system. These swing pushes should be rhythmical and linear movement as these are more calming swing movements.
The proprioceptive sense can be activated during swing use by reclining in a swing and rocking rhythmically in a swing providing deep pressure input to the body can help soothe strong emotions and decrease engine levels of high alertness. This helps with self-regulation and body control.
You can see that there are many different variables and each individual will require independent assessment from a qualified professional. This is why simply adding a sensory swing to a sensory room in a school can be a detriment to all of the students. School administrators and educators should always consult the occupational therapy professional before using a sensory swing in the school environment.
Occupational therapy Swings
Sensory processing is not the only area that can be addressed with the use of swings.
How you utilize a swing and even the type of swing you use, can help a child to work on core and upper extremity strengthening, balance, visual processing, bilateral coordination, motor planning, righting reactions, body awareness, position in space, gross motor coordination, neck extension, eye-hand or eye-foot coordination, and visual tracking.
When working with occupational therapy swings, each child is different in their needs and their preferences and it is up to you as the OT professional to determine what is needed and what needs to be worked on for skill development.
It is also your role as the OT practitioner to guide and educate other professionals and parents of children to ensure the child’s needs are being met properly and that safety measures are being utilized.
Now, two questions for you regarding those OT swings:
- Do you know what swing to use for the kiddos you see in therapy?
- Do you often ask what activity can I do while they are on this swing so they will continue to remain motivated?
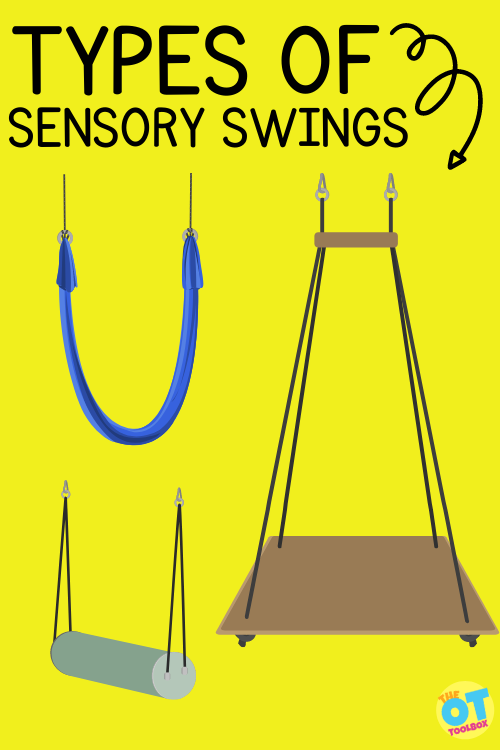
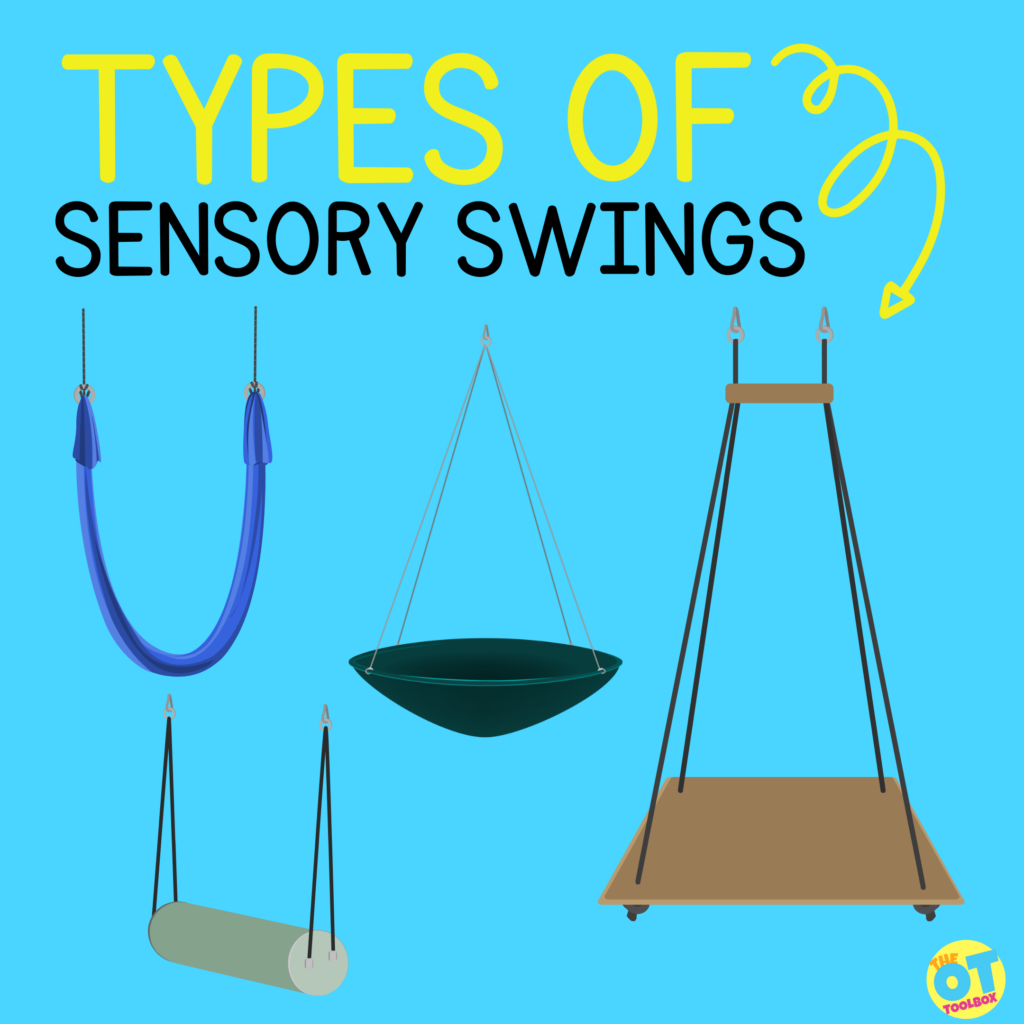
Types of Sensory Swings
Well, let’s take a look at six of the most common therapy swings utilized in occupational therapy clinics and therapy rooms in schools. These types of sensory swings can be used for various reasons and in a variety of sensory swing activities.
Also, there are swings that parents can use indoors or outdoors to address a child’s sensory needs. If you read our post Outdoor Sensory Swing you will learn how taking sensory play activities into the outdoors will provide children with many outdoor sensory experiences just by using the world around us.
If purchasing a sensory swing is just simply too expensive to think about, read all about how you can use the playground equipment to address Sensory Integration at the Playground with the guidance of the therapist to meet each child’s needs.
There is no best sensory swing of this list, rather, each type of sensory swing has it’s own specific uses and benefits to supporting the needs of the individual user.
Bolster Sensory Swing
A Bolster swing (affiliate link) is a type of sensory swing that challenges balance, vestibular processing, motor planning, cervical extension endurance, proximal control/stability, and core strengthening, The child can lie prone, inverted, kneel, sit or straddle the swing.
Bolster Swing Activities:
- Have a child work on hanging inverted like a koala bear and then time them to see if they can meet or beat their last best time.
- Have a child kneel on the bolster while hanging on and then attempt to toss bean bags into a basket.
- Have a child straddle the bolster swing like a horse and use a reacher to pick up bean bags from the floor and then try to toss them into a basket using the reacher to toss.
- Spread balls around on the floor under the swing and have the children lie prone on the swing and attempt to reach out to pick up the balls and place them in a basket. You will move the swing around as needed.
Ladder Sensory Swing
A Climbing ladder swing (affiliate link) provides the challenge of motor planning while simultaneously working on balance, strength, and body awareness. The child simply works to climb the ladder from the bottom to the top and then back down again. It adds the fun of swinging while providing a challenging workout.
Ladder Swing Activities:
- Place a bucket or basket filled with puzzle pieces, letters, shapes, or other items at the top of the ladder for a child to retrieve one at a time by climbing up and down the ladder swing. Then, have them either put the pieces into the puzzle base or practice writing the letter or drawing the shape before going back up the ladder to grab the next item.
- An adult can stabilize the bottom of the swing by holding it steady while the child climbs or an adult can slightly twist and turn the ladder swing while the child attempts to climb up and down. It’s called the ship on the rocky seas!
- Place two or three articles of clothing at the top of the ladder and have the child retrieve one at a time and when they get to the bottom they can work on zipping, buttoning, or snapping!
Hammock Swing
A Cuddle hammock swing (affiliate link) (also called a cocoon swing), is a calming type of sensory swing that provides proprioceptive input, assists with soothing strong emotions, and gives a nice deep pressure input which is calming and grounding for some children. This swing can be an easy first swing for children who need more gross motor support and are fearful of the movement other swings provide. The Lycra-type material allows children to sit, stand, or lie in the swing making it a highly versatile swing.
Hammock Swing/ Cocoon Swing Activities:
- Have a child lie prone with their head and arms positioned outside the swing. This position creates a form of weight bearing through their arms and works on full upper body strengthening. They will work to pull and push themselves using the floor while inside the swing.
- Place items around on the floor under the hammock just out of the reach of the child and then have them pull themselves along the floor to reach the items, such as bean bags, to toss into a basket.
- Have the child lie prone and then grasp and hold your hands while you are seated on the floor in front of them. They will pull themselves toward you to shift the swing back and forth.
- Have the child lie supine and reach up to remove clothespins that are clipped on the edge of the swing. The swing provides body support but works on building upper extremity strength and endurance as the child works against gravity to reach up. You can alternate activities and have the child place the clothespins instead.
- Have the child recline or lie within the swing and simply do deep breathing or mediation exercises while slowly swinging back and forth.
Pod Swing
A Hanging pod swing (affiliate link) provides vestibular input, assists with balance, and makes a nice cozy pod that gives children a sense of calm regulation and relaxation to just simply cool inside. This swing can serve as a good first swing as it allows for seated support while simply swinging slowly and provides more comfort to children who may be more fearful of the freedom of other types of swings.
Pod Swing Activities:
- Try turning off the lights, playing soft music, and have a child hold a small fidget or light-up toy while swinging slowly back and forth as they stay cuddled inside.
- Place a pillow inside of the pod swing and have the child climb inside to provide a cushy, deep pressure input while swinging slowly and rhythmically in a linear fashion.
- Blowing bubbles for the child to watch while seated in the swing provides a calming feel as the motion of the bubbles will be slow as they descend.
- Have the child sit in the swing and complete deep breathing or mediation exercises while slowly swinging back and forth.
Platform Swing
We covered specifics about platform swings on a related blog post.
A Platform swing (affiliate links) (or this version of a platform swing with net base or material platform base) is the most common swing found in therapy settings and provides the opportunity for calming and alerting to get the child’s engine right where it needs to be for a treatment or classroom session. It is highly versatile as it can help a child build upper body strengthening, core strengthening, balance, and motor planning.
Platform Swing Activities:
- Use this unstable surface swing to challenge a child’s body positioning to include side-lying, tummy time, tall kneeling, standing, criss-cross sitting, long sitting, and partial kneeling.
- Have the child lie prone with their head and arms positioned over the edge. Then have them walk with the upper extremities around the floor picking up puzzle pieces to place in the puzzle base located in a central location. Pieces are picked up one at a time.
- Place different colored bean bags in a circle on the floor around the swing. Call out different colors and have the child rotate themselves while lying prone on the swing and using their hands to walk around on the floor to stop at each color called out. Letters and shapes can be used for this activity too.
- Place cones on an elevated surface and while the child is either lying prone or in a quadruped position, have them reach out to drop rings onto the cones.
- Have the child sit criss-cross in the center and toss a beach ball to themselves.
Trapeze swing (affiliate link) provides a good opportunity to work on upper extremity strength and endurance, gross grasp skills, trunk strength, and motor planning. If you add lower extremity work also, then you address upper and lower body coordination.
Activities:
- While swinging or not, encourage a child to hold and lift their legs to kick a ball.
- While swinging, the child can simply jump over a therapy ball that is placed inside of a tire tube.
- Simply work with a child on grasping and swinging while pumping the swing with their own feet.
- While swinging or not, have a child hold on and lift their legs to kick a set of bowling pins or have them attempt to pick up each bowling pin with their feet and place them in a basket.
- While swinging the child, can work on timing and release to let go and crash into a crash pad.
Sensory Swing Tips
What do you do with all of this information and activity ideas? Go get onto a swing and try out some of these fun activities! That’s right, we as adults need to have some fun too!
But, after you’ve tried them, demonstrate them to the kiddos as they will most likely be more motivated to do the same activity after they see YOU do it. After all, you and I both know that the best way to teach a child is by setting a good example and you’ll get to have some fun in the process! It’s a win-win folks!
One tip for using a sensory swing in a therapy session can include a visual schedule with a plan that helps the individual with regulation needs. It can include swinging, then heavy work, music, blowing bubbles, dim lights, heavy rhythmic play, and deep breathing. All of these sensory tools regulate the system and can calm the system after the movement from the sensory swing. This is just one example and each individual will benefit from different strategies.
Be sure to take a look at the maximum pounds allowed for some swings as you’ll want to be sure that it will work for all of your kiddos before purchasing.
Always supervise children while on swings especially when rotary swinging as this can instigate seizure activity in some children.
sensory swing safety
There are important things to remember when it comes to sensory swing safety. Safety considerations for sensory swings relate to both in the clinic and, with the ready availability of purchasing a sensory swing online, in the home as well.
Remember these sensory swing safety tips:
- Installing a sensory swing- Always read the manufacturer’s instructions and follow them carefully. Different types of sensory swings may have different weight limits, installation requirements, and safety recommendations. You may need specific installation parts for sensory swings, especially considering the weight of the user and how the sensory swing will be used.
- Support structures for sensory swings- Make sure the swing is securely anchored to a strong support structure. The support structure should be able to handle the weight of the swing, the child, and any additional equipment or accessories.
- Monitor the sensory swing for signs of wear and tear- Check the condition of the swing and its components regularly. Look for any signs of wear and tear, such as frayed ropes, torn fabric, or rusted hardware. Replace any damaged parts immediately.
- Supervision during sensory swing use- Always supervise your child while they are using the swing. Never leave them unattended, even for a short time.
- Educate the user on how to get on and off the swing, and how to use a sensory swing- Teach your child how to use the swing safely. Show them how to sit or lie down properly, how to hold on to the ropes or chains, and how to get in and out of the swing safely. This is especially important for particular positioning such as laying in supine (on belly) or when spinning is used in the sensory swing. Teach your child and other children using the swing to watch for signs of overuse.
- Where to put a sensory swing- Make sure the swing is set up in a safe and open area. The area around the swing should be clear of any obstacles or hazards, such as furniture, sharp objects, or hard surfaces.
- Other safety equipment- Consider using a safety harness or seat belt to keep your child secure in the swing. This can be especially important for children who have difficulty sitting still or have balance or coordination issues. You can also consider padding around the swing area on walls using gymnastic pads or wall padding, or cushioning pillows of pads on the floor.
- Upkeep- Keep the swing clean and dry. Wipe down the fabric or other materials with a damp cloth and allow it to air dry between uses.
- Consider overuse and type of use- If your child has any medical or physical conditions, consult with their healthcare provider before using a sensory swing. They can provide guidance on whether the swing is appropriate and safe for your child’s needs.
- Lastly, trust your instincts. If something doesn’t feel right or safe, don’t use the swing until you can address the issue or seek guidance from a qualified professional.
Therapy Swings- What to watch for
When using a therapy swing of any kind, it is a must to watch for overuse or overstimulation. This is because the sensory input of a therapy swing/sensory swing can be very overwhelming.
Particularly with rotary input, a therapy swing (either at home or in the clinic setting or in a sensory room in the school setting) can lead to overstimulation, dizziness, agitation, hyperactivity, fatigue, or other considerations. For this reason, it’s very important to limit rotary input to a specific set of minutes which should be monitored throughout use of the therapy swing.
Also, it’s extremely important for therapy swings to be used under the guidance and recommendation of a pediatric occupational therapy professional.
While sensory swings can be beneficial for children with sensory processing issues, overuse or improper use can potentially cause harm. Here are some things to watch for with sensory swing overuse:
- Dizziness or nausea: Rapid or repetitive swinging can cause dizziness or nausea, especially in children who are sensitive to motion.
- Overstimulation: While sensory swings can be calming for some children, they can also be overstimulating for others. Overstimulation can cause anxiety, irritability, or difficulty with attention and focus.
- Fatigue: Prolonged use of a sensory swing can cause muscle fatigue or soreness, especially in children who have weak muscle tone or low endurance.
- Agitation or hyperactivity: Some children may become overly excited or hyperactive after using a sensory swing, which can make it difficult for them to transition to other activities or tasks.
- Risk-taking behavior: Children who become overly confident or adventurous on a sensory swing may engage in risky behavior, such as jumping off or swinging too high, which can lead to injuries.
- Increased dependence: Overuse of a sensory swing may cause a child to become overly reliant on the swing for sensory input or emotional regulation, which can interfere with their ability to develop coping skills or self-regulation strategies.
If you notice any of these symptoms or concerns with your child’s use of a sensory swing, it may be a sign of overuse or improper use. Consider reducing the amount of time your child spends on the swing, or consulting with a healthcare provider or occupational therapist for guidance on how to adjust or modify the use of the swing to better meet your child’s needs.
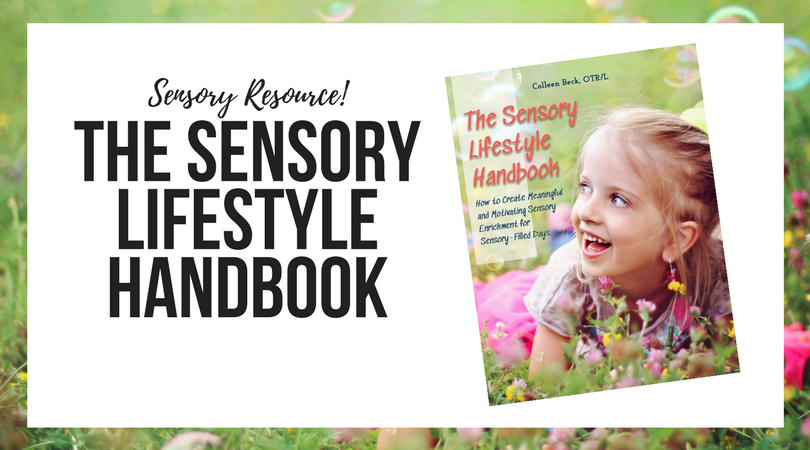
The Sensory Lifestyle Handbook walks you through sensory processing information, each step of creating a meaningful and motivating sensory diet, that is guided by the individual’s personal interests and preferences.
The Sensory Lifestyle Handbook is not just about creating a sensory diet to meet sensory processing needs. This handbook is your key to creating an active and thriving lifestyle based on a deep understanding of sensory processing.

Regina Parsons-Allen is a school-based certified occupational therapy assistant. She has a pediatrics practice area of emphasis from the NBCOT. She graduated from the OTA program at Caldwell Community College and Technical Institute in Hudson, North Carolina with an A.A.S degree in occupational therapy assistant. She has been practicing occupational therapy in the same school district for 20 years. She loves her children, husband, OT, working with children and teaching Sunday school. She is passionate about engaging, empowering, and enabling children to reach their maximum potential in ALL of their occupations as well assuring them that God loves them!