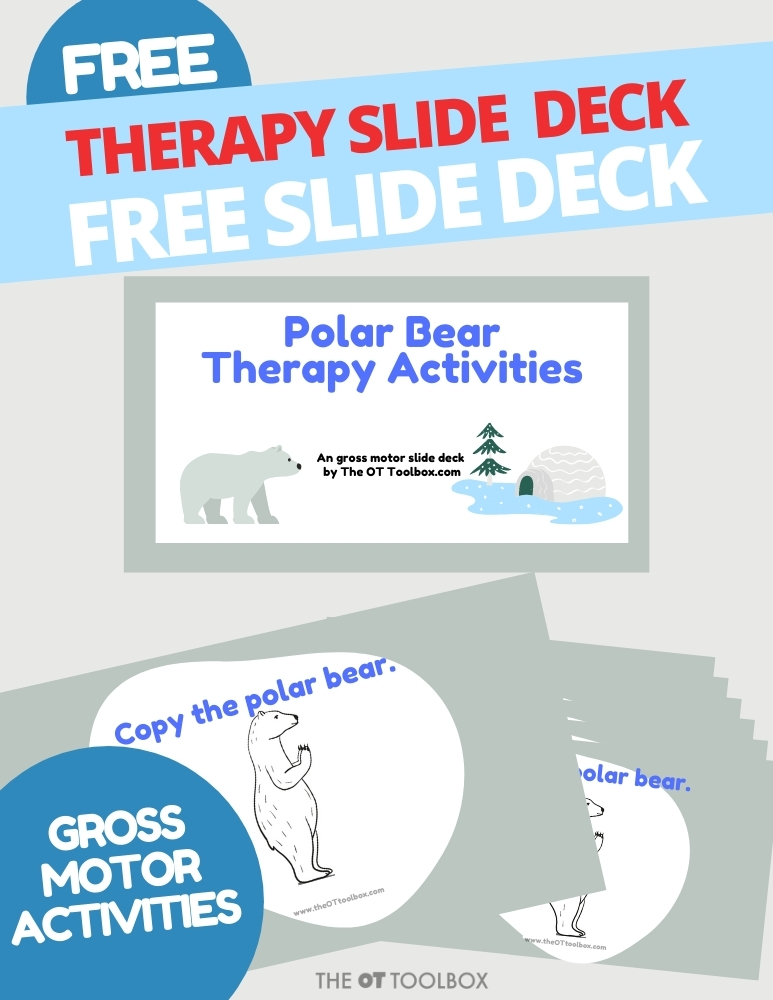
This week, we’re all about the polar bears. You’re going to love this polar bear therapy slide deck, and actually, my kids are loving it, too! The polar bear gross motor activities go well with an arctic animal theme. We’ve been using the gross motor activities as a warm-up for the Winter Fine Motor Kit and all of the winter activities in that resource. You’ll want to grab this therapy slide deck to get your new year off to a great start and get the kids moving with whole-body movements.
Why Use Polar Bear Gross Motor Activities in Therapy or the Classroom?
Polar bear–themed gross motor activities are a fun and motivating way to target developmental skills like balance, postural control, coordination, and core strength. These types of movement-based exercises engage the whole body while also fostering attention and focus.
Because the activities are winter-themed and playful, they are ideal for use during the colder months when outdoor movement breaks may not be possible. This makes the slide deck perfect for indoor recess, brain breaks, and OT sessions that need a high-engagement activity for younger learners.
Supports Direction Following and Body Awareness
This movement-based slide deck also encourages direction following, body awareness, and spatial orientation. These are key components of self-regulation and classroom participation. Children are challenged to move like a polar bear, crawl, stomp, or balance in ways that require them to think about where their body is in space.
These foundational skills are part of a child’s proprioceptive system, which plays an important role in coordination and calm behavior. Adding themed visuals and verbal prompts can help children improve motor planning while making learning fun.
Integrating the Slide Deck into the Daily Routine The polar bear gross motor activity slides can easily be incorporated into daily routines in the classroom, therapy clinic, or at home. Use the slides as a warm-up before handwriting or seated work, as a structured movement break between transitions, or as a full gross motor circuit during group therapy. These fun exercises promote active learning and help reset the nervous system after long periods of sitting. They also support core strength, which is critical for seated posture, attention, and fine motor control.
Winter-Themed Movement to Support Learning A winter-themed movement activity like this polar bear deck is a targeted tool to promote gross motor development in a way that’s engaging and meaningful. With classroom demands rising and kids sitting for longer stretches of time, intentional movement breaks are more important than ever. Movement with purpose, especially when tied to visual supports and themed play, can boost learning outcomes, reduce sensory overload, and improve participation.
Be sure to grab the free polar bear deep self-regulation activity. It’s a wintery breathing exercise that went up earlier today. You’ll find a bunch of other polar bear activities listed in that blog post, so that your therapy theme for the week is full of movement-based activities that help kids develop skills.
Included are some slides to incorporate propriocepetion and vestibular input as well.
Because incorporating gross motor skills in teletherapy is sometimes a challenge, this gross motor slide deck was designed for teletherapy in a way that instructs kids to copy various positions as they balance and strengthen their core. All of these skills can be addressed with this gross motor slide deck in teletherapy sessions:
Core strength
Stability
Balance and equilibrium skills
Coordination
Range of motion
Flexibility
Motor planning
Crossing midline
Movement patterns
Posture and postural control
Muscle tone
Proprioceptive input
Vestibular input
Polar Bear Resource: DON’T MISS IT:
Grab the Winter Fine Motor Kit, with 100 pages of done-for-you therapy activities, including polar bear themes. Grab it now before January 9th and you get a bonus of 3 fine motor slide deck activities.
Use this polar bear theme therapy slide deck in virtual therapy sessions or as a brain break.
Be sure to make a copy of this slide deck and not change the url to indicate “edit” at the end. When you make a copy of the slide deck onto your Google drive, you will end up with your own version that you are free to adjust in order to meet your student’s needs. By changing the url to “edit”, you can potentially mess up the original version that many other therapists and The OT Toolbox users are given.
You can grab a copy of this Google slide deck and use it to work on specific skills.
Enter your email address below and you will receive a PDF containing a link to copy the slide deck onto your Google drive. Save that PDF file, because you can come back to it again and again and send it to the kids on your caseload (or classroom) so they can make their own copy on their Google drive.
Please use the copy of the slide deck and do not change the url.
Colleen Beck, OTR/L has been an occupational therapist since 2000, working in school-based, hand therapy, outpatient peds, EI, and SNF. Colleen created The OT Toolbox to inspire therapists, teachers, and parents with easy and fun tools to help children thrive. Read her story about going from an OT making $3/hour (after paying for kids’ childcare) to a full-time OT resource creator for millions of readers. Want to collaborate? Send an email to contact@theottoolbox.com.
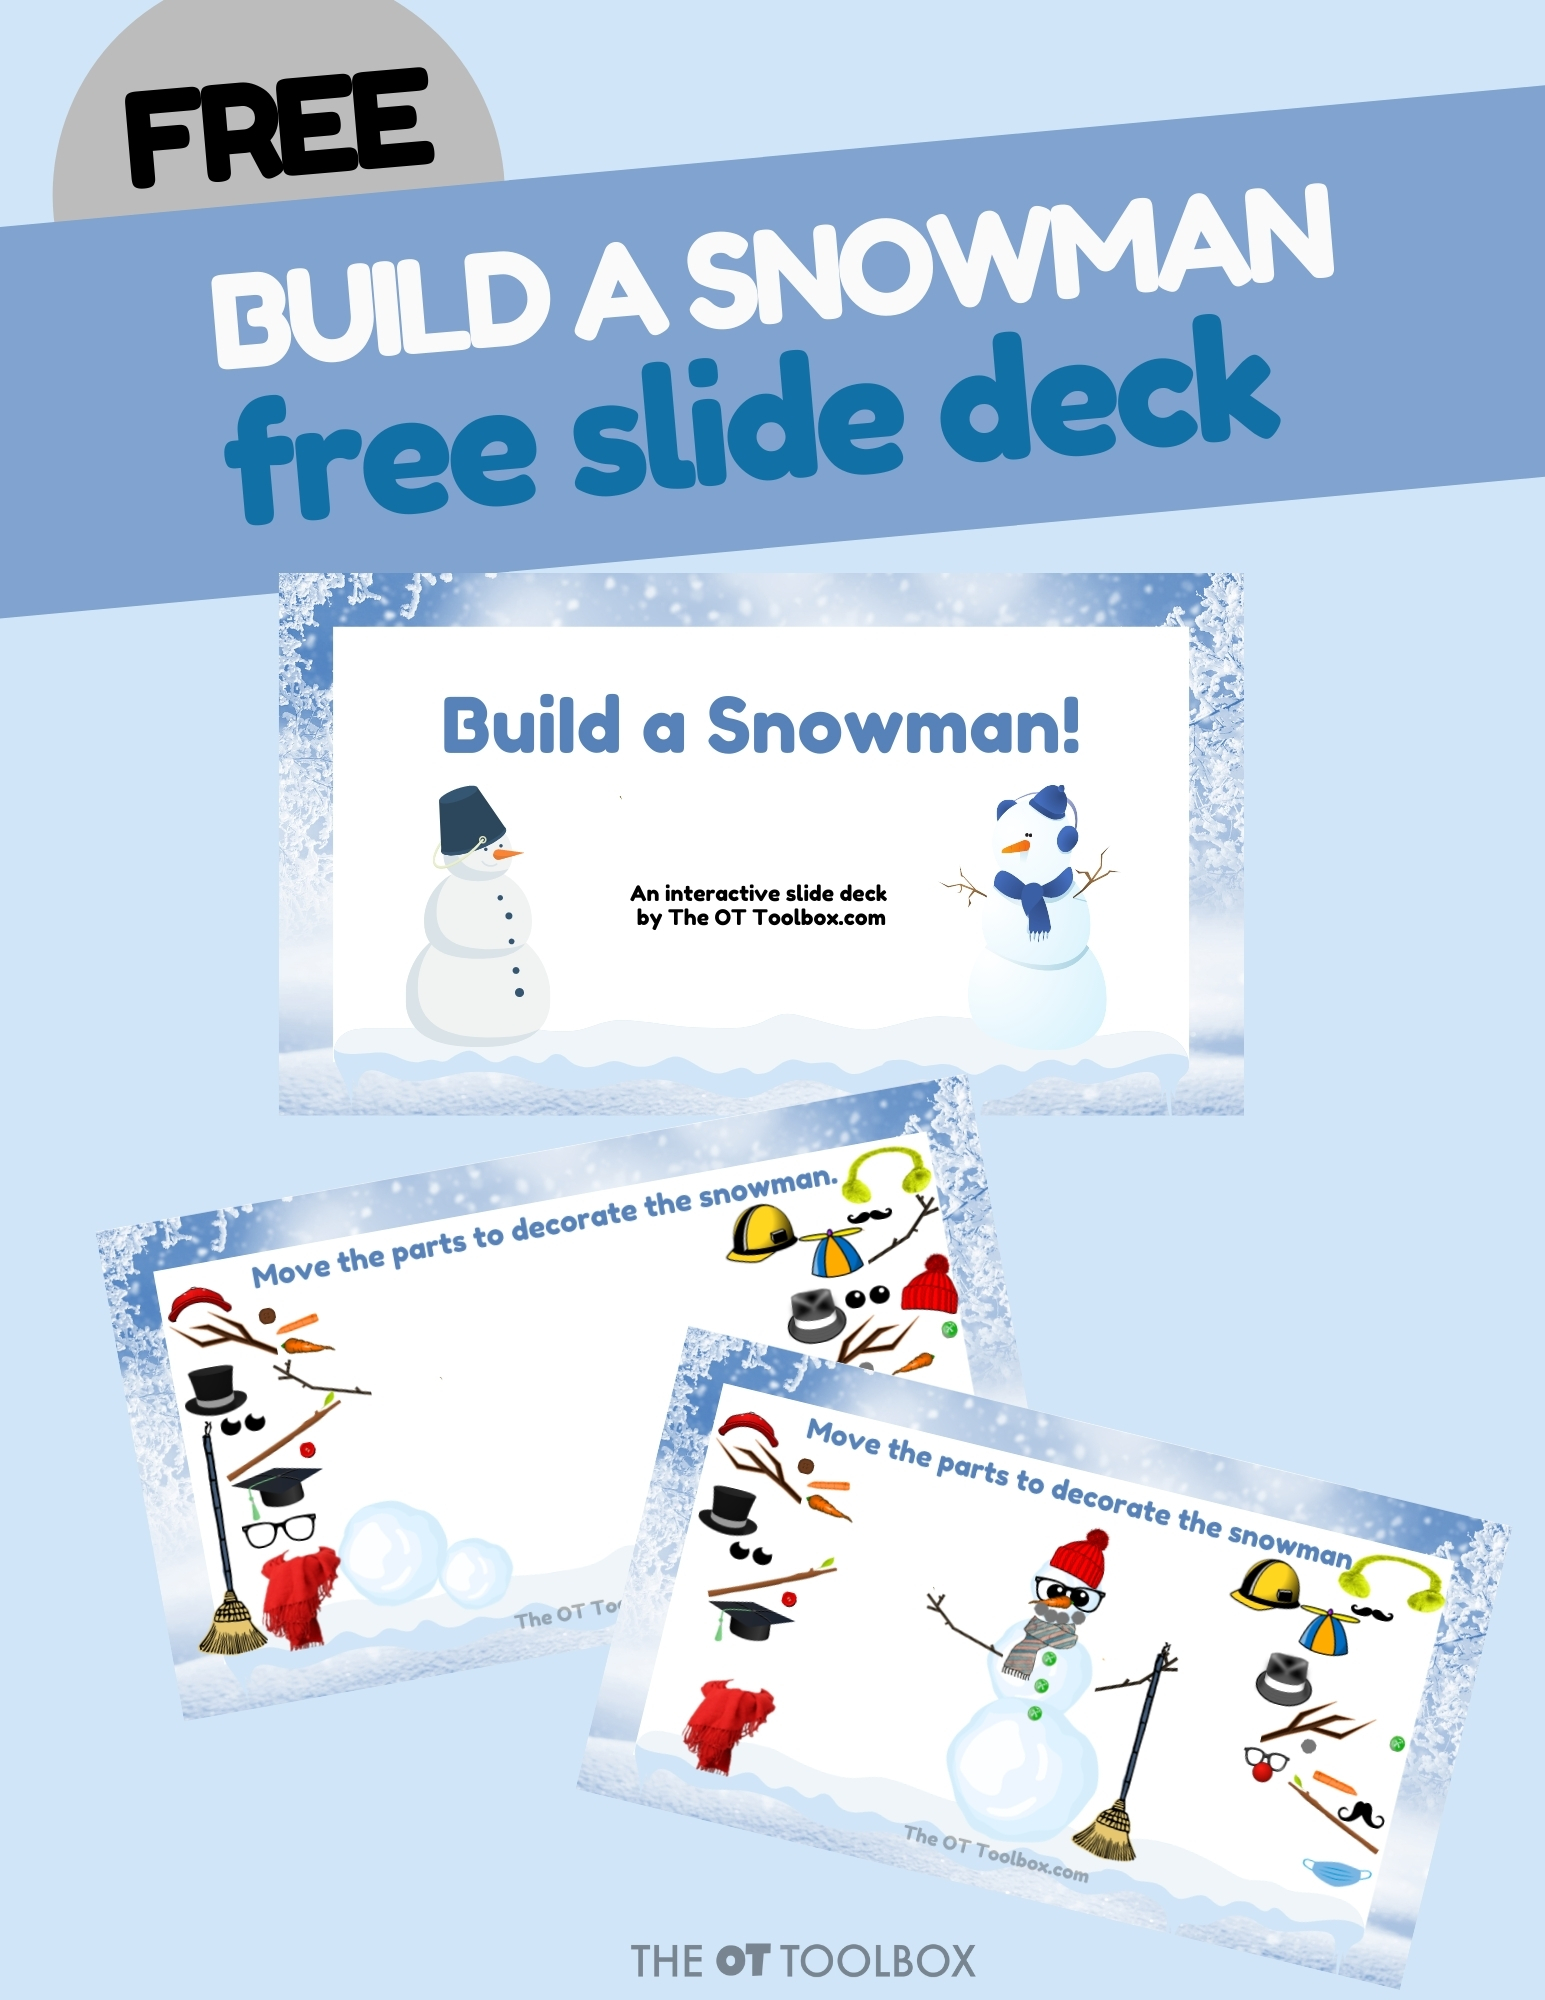
I have another free therapy slide deck to share today. This build a snowman activity is an interactive Google slide deck that kids can use to work on eye-hand coordination, spatial awareness concepts, visual scanning, and handwriting (or typing) skills. This snowman activity is based off our popular disguise a turkey slide deck and our decorate a gingerbread house slide decks from earlier this year. If these slide decks are helpful for your virtual occupational therapy interventions, grab this free resource at the bottom of this post and browse the other free slides there.
Build a Snowman Virtually!
Looking for a creative winter-themed activity that builds essential skills while keeping kids engaged? This interactive virtual snowman activity allows kids to make a snowman right on the screen using a Google Slides deck.
No mittens required! Whether you’re using it in a therapy session, classroom, or at home, this snowman building activity makes screen time meaningful. Children can drag and drop pieces to assemble their own snowperson, building a frosty friend AND they’re also strengthening developmental skills.
Why a Snowman Building Kit Supports Development
This digital snowman building kit includes a variety of hats, eyes, noses, arms, scarves, and accessories, allowing endless combinations for children to customize their snowman to make.
As they move items across the screen, kids practice mouse control, keyboard navigation, and visual-motor coordination. These are all essential components of classroom readiness. It’s a playful way to incorporate fine motor skills and eye-hand coordination into a virtual setting, especially when trying to target specific skills.
These perceptual skills are essential for handwriting, reading, and self-care tasks. For occupational therapy practitioners, educators, or caregivers, this snowperson activity can be used intentionally to target specific developmental goals in a motivating way.
Use in Virtual Therapy or In-Person Sessions
This interactive snowman deck is ideal for virtual therapy sessions, making it easier for OT providers to deliver engaging and goal-based treatment even through a screen. But it’s just as powerful for in-person use to let kids take turns to build a snowman as part of a winter-themed group activity or 1:1 skill-based intervention. Use it as a warm-up before handwriting practice or as a fun reward for task completion.
Adapt the Activity Across Ages and Skill Levels
Younger children in preschool or kindergarten can use the snowman slide deck to learn basic directional concepts (left, right, above, below), while older students can use it for more advanced visual memory or spatial planning tasks. Therapists and teachers can modify the directions: ask the child to copy a model, remember a sequence, or write a short story about their snowperson after building.
Make a Snowman That’s Uniquely Theirs
Kids love expressing creativity, and giving them the chance to create a snowperson that’s silly, fancy, sporty, or magical is a great way to build confidence. Add accessories like earmuffs, snowflakes, or pets to increase the challenge or fun factor. Use this snowman making activity in your next therapy plan, snow day learning schedule, or as part of your winter fine motor activities. It’s a no-prep, no-mess way to bring the magic of winter indoors while building essential skills.
Build a snowman activity
I love this slide deck for many reasons. One is that it’s a cute building a snowman activity that kids will love doing. It’s fun to move the pieces on the slide deck and can be a break from the normal virtual lessons or teletherapy.
Therapeutically, this snowman activity can help kids with several skill areas:
Eye-hand coordination
Visual scanning
Spatial relations
Size awareness
Handwriting
Typing
Visual memory
Kids can visually scan the slide to actually build the snowman using different sized snowballs. They can arrange the snowballs to make the snowman.
Then, users can scan the slide to find various pieces for the snowman. Depending on your goals for the child, they can independently build the snowman and decorate their snowman. Other students can be given verbal directions for scanning for eyes, carrot noses, arms, or other individual pieces. The items are scattered around the slide to challenge visual perceptual skills such as visual memory and visual attention.
NOTE– When you access the slide, you are prompted to make a copy onto your Google drive. Once you make that copy, it is yours to edit to meet the needs of your students. You can remove some of the items or make duplicates of some snowman decorations, depending on the needs of your client or student.
Once students are happy with their snowman creation, they can go to the next slide. There, they can type or write details about their snowman. This can challenge visual memory skills and be a great practice for handwriting or typing skills.
Get the Build a Snowman Slide Deck
Enter your email into the form below to access this free slide deck.
This is an older blog post on left-right discrimination, and includes left right discrimination activities, information, and even a free, hands-on slide deck activity you can use in right left discrimination occupational therapy activities to support these areas.
Working on left right discrimination with kids? It can be difficult to teach left right awareness because there’s so many areas of development that play into this awareness.
We’ve talked before about mixed dominance vs. ambidexterity, which is a concern that comes up when kids don’t use one hand or one side for motor tasks. You’ll want to start there to read more about this issue.
The thing is that the confusion between left and right becomes an issue in play or learning tasks, especially when children are asked to follow directions that require a knowledge of left and right. When children don’t have a strong awareness of left and right, you’ll see confusion and even embarrassment in a group setting.
This other post on hand dominance offers 3 activities to work on left right awareness, and can be a great way to expand this left right discrimination activity to hands-on activities that build motor skills.
Left Right Discrimination Activity
In left right discrimination activities, kids can gain more awareness of their body and how it moves during functional tasks.
As pediatric OTs we might try a variety of activities to support development of right left discrimination.
These strategies might be accommodations or modifications to functional tasks or it might be occupational therapy activities to help with these discrimination skills needed for handwriting or establishing a dominant side.
First, let’s talk about why an awareness of left and right is important.
Left right confusion can make functional tasks very challenging.
Why Worry about Left Right Awareness with Hands?
Left-right discrimination can be memory, attention, or visual perceptual. If left/right confusion is a memory problem, it is probably the easiest to remedy with a visual prompt like a sticker on the hand. A lot of the OT practitioners I know simply use pictures, labels, games, or the trick with the “L” in the left hand. What are some easy tricks you can think of to send reminders of left and right?
Often left-right discrimination difficulty is more than just attention or memory. It is a perceptual issue.
Visual perception is the way we “perceive” information that our eyes see. People with visual perceptual difficulties might perceive items backward, or different each time. The “L in the left hand” technique is not reliable for these people, because they can never be sure they have the L in the correct direction.
While you are working on improving visual perceptual skills, use the labels, or tricks listed above. These labels and hints may need to be used long term, because not all visual perceptual deficits will be remediated.
Once you have learned to identify which is the left and right side of the body, it gets trickier. What if you have discrimination issues and someone says to move your right arm forward, or your left leg to the right? Directionality is even more confusing than left/right discrimination.
Another difficulty with directionality is, it changes. If you are facing forward, the left might be toward the front of the class, but as soon as you turn around, the left is at the back of the class.
This translates into map reading and directionality, or following directions through space during movements. If you are facing north, east is to your right. But if you are facing south? I love when the car says “head west on elm street” What? West is left if I am facing north, but what if I am facing east? Is it behind me? Usually I pick one direction, and if it says “rerouting”, or “proceed to the route”, I know I guessed wrong.
Left/right is not always clear either. Is the left side of the stage when I am standing on it, or facing it. I am thinking the left side of the car is the one I am driving on, but if I look at it from the front, that is the right side.
We have an RV that usually requires me to help with the parking. My job is to tell my husband which way to turn. If I say left, is that my left or his? Should he move the RV to the right or left? Or the car? Which needs to go left, the front of the camper or the back? Do not get me started on trying to think which way he needs to turn the wheel to get the camper to go in reverse to the right. I end up pointing, but even that is not clear. Luckily, we find humor at these times in our lives, and are still married.
Left Right Confusion and Shoe Tying
Another example of left right confusion shows up during daily self care tasks like Tying shoes. You see the left right confusion as struggling to follow the motor directions when you are not clear which side is which. “Am I using my left hand, or my right hand?”
Not only are you trying to keep left/right straight, but then use this information to complete a challenging task.
Think of shoe tying for example. To teach a child to tie their shoes, we use one step directions all based on left or right. We might say, “Take the left lace and put it over the right. Now slip the left lace under the X that was formed by crossing the laces. Once you get that part sorted, you need to find one to make a bow (left for lefties, and right for righties).” Then, there are the nuances of shoe tying where right-handed kids loop the shoe lace counterclockwise, while lefties go clockwise around the loop.
Because shoe tying is such a struggle with directionality, we often provide visual examples such as colored laces, visual diagrams, or songs that do not use left/right.
Left Right Confusion and Cutting with Scissors
As if left/right discrimination was not hard enough, directions are often reversed for lefties.
For the student with left right confusion, this is a real challenge in the classroom, when things move quickly. The teacher might hand out papers, tell students to cut out sections of a worksheet and glue them onto the page in the right spaces. The rest of the class might be done with the activity by the time our student with left right confusion has even figured out which hand to use to hold their scissors.
Cutting with scissors requires an automatic awareness of how to hold the scissors and how to cut around shapes.
Did you realize that “righties” cut counterclockwise, while “lefties” cut clockwise?
The differences continue with reading. While we lefties scan left to right and read books from front to back, it is not natural. I prefer to flip through magazines from the back. It makes some articles confusing, but feels more natural.
I am on a line dance team, and as I am new to the team, there are some struggles I experience with body awareness and directions. Directionality and discrimination have been a challenge, even though I am sure of my left and right. We go one direction facing one wall, then another direction facing the next wall. I have to depend on my body direction, rather than using visual cues for help. When we are facing the front wall, I tend to center myself thinking about heading toward the door, or the mirror. Once we turn around, I am lost all over again. If I feel lost, I tend to look at my peers to see what they are doing. Sometimes we end up facing different directions, and I can not figure out who is wrong.
The good news for shoe tying, dancing, driving, parking an RV, and 100 other things we learn is muscle memory. We talked a bit about the muscle memory in tasks in our blog post on handwriting, because there is an automaticity piece to this puzzle.
After a while you no longer think of the left and right lace or stomping the right foot, your body takes over. As I was describing the shoe tying above, did you have to take your shoes out to figure out which side you make the loop on, or close your eyes and picture the movements? Me too. Fortunately, we do things so naturally after we learn them, we do not have to keep thinking of each direction as we do each task.
Our muscles build a plan with our brain to create a pattern. Imagine how tough touch typing would be if you never remembered where the keys were. How much of a challenge would it be to write a sentence if we needed to stop and think about which direction the lines in each letter go. It’s a motor plan that’s been established and marked into our brains.
People with sensory processing difficulties have difficulty with motor planning or creating muscle memory. They need to rely on directions for much longer. This can be especially difficult for the child with sensory processing difficulties, AND directionality struggles.
Just thinking about all these directions makes my brain hurt. I am realizing how much of a struggle this is in our lives every day. So much of our day includes some sort of direction. Next time you think someone is “cheating” doing an activity, take a moment to see if they are compensating rather than cheating. This may be their effort to get the task done and fit in. It is actually very clever to check the people around you for guidance. Use this as a clue to see where the struggle lies.
So what are some activities to support left right awareness?
left right discrimination Activities
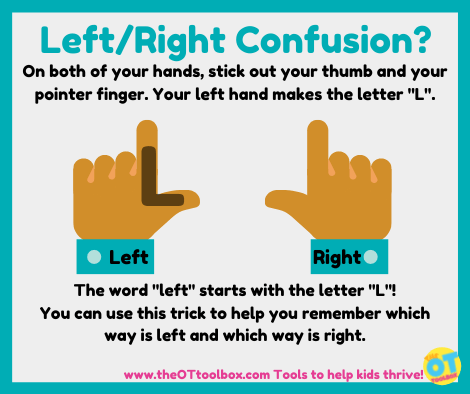
First up is a visual graphic that helps kids to understand their left and right hands using their left hand as a visual reminder.
On the slide deck (below), kids can look at the visual and follow the directions:
On both of your hands, stick out your thumb and your pointer finger.
Now look at what shape that made on each hand! One hand looks like the letter “L” and the other is a backwards “L.”
The word “left” starts with the letter “L!” This means that the hand with the “L” shape is your left hand!
Kids can use this trick to help them remember which way is left and which way is right.
Want to know the quickest way to determine who does not know their left from right? Play a group game of Simon Says or dance the Hokey Pokey. You can quickly see who not only knows their left and right, but who does it with confidence, versus following along.
Circling back to Simon Says. Be especially mindful of who is “cheating” or depending on others for information. Are they unsure which is the answer, or just relying on their peers? It is natural to check those around you to see what your peers are doing, but how can you be sure your peer is correct? What if you are the one that is correct? Or are both wrong?
You do not need to remember left and right, just one. If you know which left is, you will know the other one is automatically right
If your child knows what left/right means, but can not remember, start labeling things. Put an L inside of the left shoe for example. Check out these cute stickers (amazon link)! I like that these stickers do not specify left/right, but have puzzle pieces that fit together correctly to show which shoes go on which feet.
Wear a bracelet or watch on the same side each time. Memorize which side it is on. The watch is always on the left, this is my left side.
Learn which hand you write with. I write with my left hand, and I can easily raise that one.
Make a mark or label on your child’s arm/hand daily to give a visual reminder
We have put together a slide deck of activities to help with left right confusion.
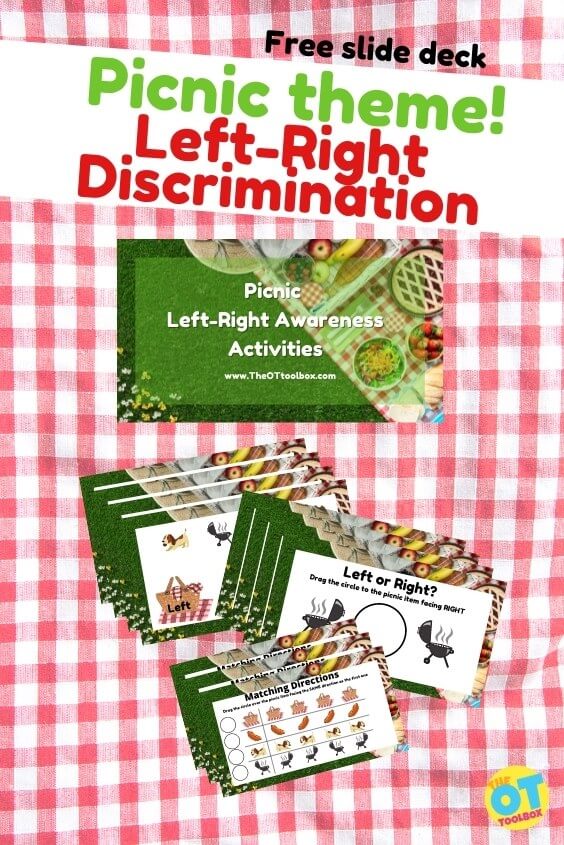
Left Right Direction Activity
The slide deck is an interactive tool that allows children to sort items that are directionally pointing to either the left or right sides on the screen. There are several left right discrimination activities to work through on this picnic themed slide deck
Today’s free therapy slide deck is a left right discrimination activity with a picnic theme, going perfectly with our virtual picnic therapy activities slide deck.
The slide decks in this post not only give practice to picking the item on the left or right, but ask which way the item is facing. The item may be on the right but facing left, or visa versa. Woah! That became tricky very quickly.
When using these slide decks, be sure your child has the basics before trying the more challenging cards. You may need to start at the beginning, labeling items left and right for a while before moving on to determining which item is on the left or facing that way.
After kids have a kinesthetic and visual approach to remembering left and right, there are slides that work on sorting images into categories of left vs. right.
This interactive portion allows kids to click on the images and sort them into left or right.
If the user needs prompts, remind them to use their hands to make the L with their fingers to recall which side is their left side. This can help to establish memory by using several sensory methods: visual, auditory, and kinesthetic within several repetitions.
Left Right Sorting Activity
Next, you’ll see several slide decks that ask the user to move a circle to cover the item facing either the left or the right. The directions are written at the top of each slide deck and changes on each slide. You can again remind users to use their hands to remember which side of the screen is their left and which is their right.
This can be helpful for teaching left right discrimination because through a screen like in teletherapy services, it can be difficult to address the left or right awareness (especially if there is a screen flipping issue that comes up with teletherapy services).
The picnic themed visuals are fun for a picnic theme and includes things like a grill, hot dog, picnic kids, backpackers, etc.
Left Right Discrimination Matching Activity
Finally, there are several slides that ask the user to move the circle to cover a matching image across the slide. This visual perception activity addresses several areas typically developed through therapy activities:
The user can also address eye-hand coordination as they move the mouse or click and drag to move the circles to cover each matching item.
Again, work on left right discrimination by asking the child to name the direction that the item is facing: Is it facing the left or is it facing the right?
All of these left right discrimination activities are powerful ways to help kids with directionality that is needed for functional tasks.
Free left right discrimination slide deck
Want this picnic themed therapy slide deck to work on left right discrimination? Enter your email address into the form below to grab this teletherapy activity.
When kids go through the slides, you can reset the movable items to their original state by clicking the history link at the top navigation bar. Simply click the “last edit” link and then go to the right side bar. You’ll see a link that says “reset slides”. Click this link and then go to the top navigation bar again and click the button that says “Restore this version”. Then, all of those movable pieces on the whole deck will reset to their original spots and you can restart the therapy activities.
Colleen Beck, OTR/L has been an occupational therapist since 2000, working in school-based, hand therapy, outpatient peds, EI, and SNF. Colleen created The OT Toolbox to inspire therapists, teachers, and parents with easy and fun tools to help children thrive. Read her story about going from an OT making $3/hour (after paying for kids’ childcare) to a full-time OT resource creator for millions of readers. Want to collaborate? Send an email to contact@theottoolbox.com.
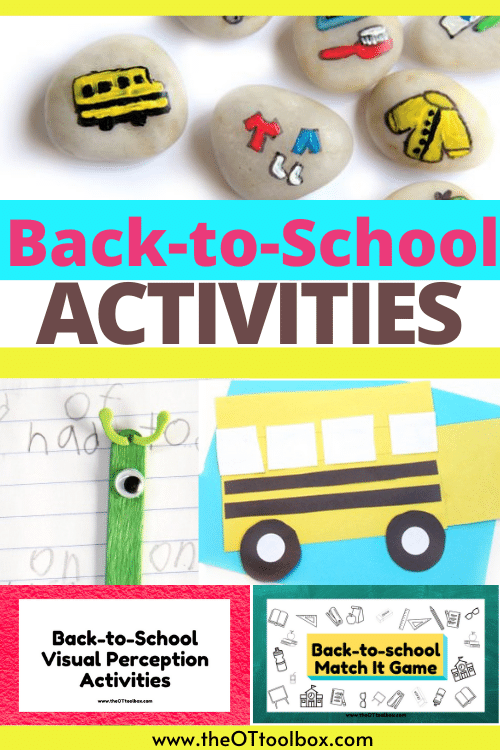
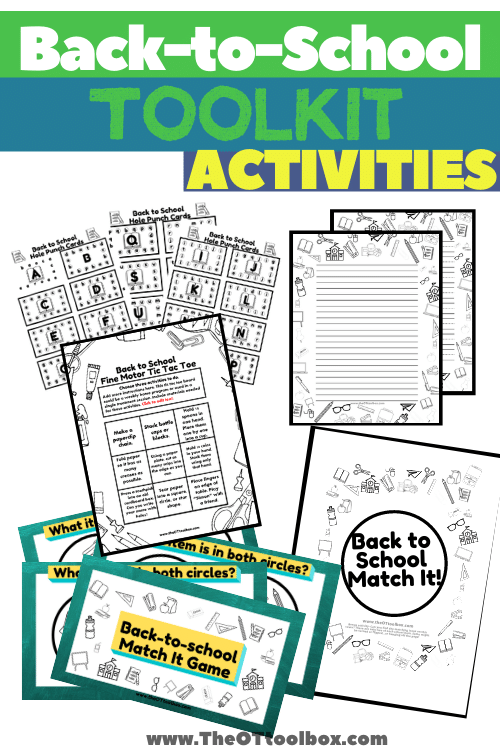
Occupational therapy practitioners working in school based occupational therapy know that collecting data, building rapport with students, and coming up with fun ways to support educational needs is a tricky, but fun challenge in OT sessions. We have pulled together some of our favorite activities to cover various aspects of the scope of school based OT. I’ve been busy behind the scenes here at The OT Toolbox building tools that you can use during the first weeks of school that will make your life easier. Here, you will find first day of school activities, first day of school printables, and back to school baseline screening activities, back to school crafts, and ideas to use in therapy or the classroom this week (and coming weeks).
Let’s get started with the back to school OT activities…
Back to School Activities
These activities should keep your students (virtual or in-person) busy the first few weeks of school. Some of these activities are great for online icebreaker activities and others are wonderful ways to build rapport while assessing baseline status in areas like pencil grasp, handwriting, math, scissor skills, or other learning/school tasks.
Back to School Slide Deck- This interactive back to school slide deck works with Google slides. Enter your email address and log into your Google account. You will receive an email with a prompt to access a file for your personal use. Click the button on that pdf and the interactive slide can be copied right into your Google drive. Then, make a copy for each student and they can work through the slides in edit mode. These slides are designed to address visual perceptual skills. Kids will enjoy the back to school supply activities and won’t even know they are building skills that will help them thrive in learning.
Back to school activities for kindergarten- (and first grade, second grade, etc.) These back to school fine motor activities are fun ways to quickly screen for fine motor skills needed at school while building rapport with the students. First day of school activities for kindergarten can involved fine motor activities that are fun and get children excited about their time in therapy sessions.
Visual Schedules- There is something about having a visual schedule that makes things easier when it comes to transitions. We made these back to school story stones a while back and used them to adjust to the new routine that back to school time brings. Visual schedules can be effective in virtual sessions or hybrid learning. Why not use a visual schedule as a tool to move students between group online activities?
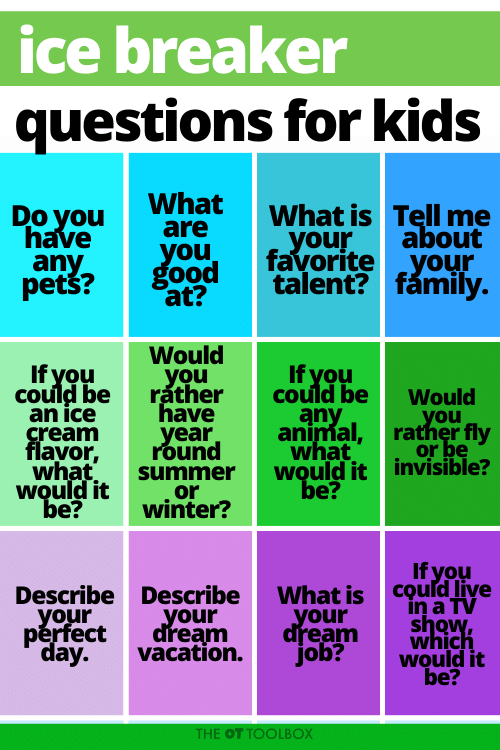
Online Icebreaker Activity
Back to School Writing and I Spy Slide Deck- Another interactive slide deck for back to school writing, this slide deck covers a variety of areas. Use the school supplies I Spy slide as a fun activity to get started with the school year. The icebreaker slide can be used to get to know students as they fill out an All About Me activity. The slides include handwriting tasks so students can write words and sentences while teachers or therapists assess baseline levels for each student.
Separation Anxiety Activity- After being out of the classroom for a much longer period of time this year, kids might have some worries or separation anxiety that leaves them anxious. Try this separation anxiety activity that uses a popular children’s book. Reading a book and doing a book-related activity a great icebreaker activity for kids.
Icebreaker Questions- Go through some icebreaker questions for kids. This is fun in person or in virtual settings. Use these questions as a writing prompt to work on handwriting, too.
Effective online learning
Heading back to the classroom means switching gears back to online learning. Having a productive and effective online learning experience can be hard for some kids, and the same is true for virual therapy sessions. Here are tips for parents to make the most of teletherapy and online learning sessions.
Having a toolbox of coping strategies for kids can make a big difference, too. Be sure to offer brain breaks, movement activities, and have a set of rules in place to make the most of online learning and virtual therapy sessions.
These back to school sensory activities can be effective movement strategies for kids to stay alert to online learning and pay attention during virtual classroom sessions.
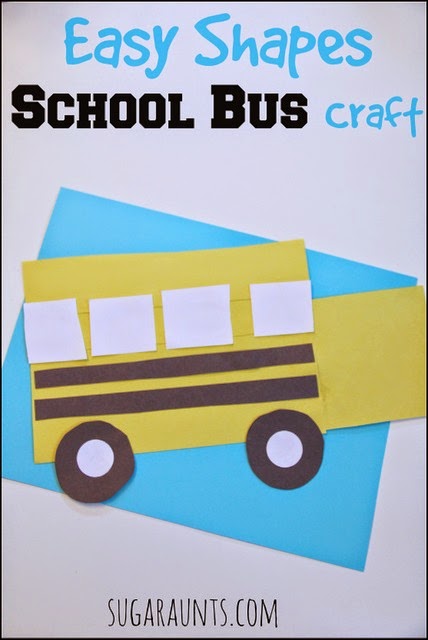
School Bus Craft- This school bus craft is a simple one to set up and can be done as a group online activity or in person. Record the activity for a recorded session, too. With the simple shapes, the bus craft is great for working on scissor skills, visual motor skills, eye-hand coordination, and problem solving.
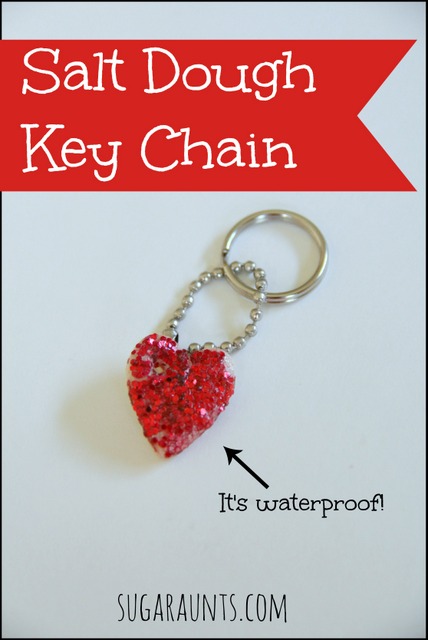
The Kissing Hand Craft- You’ve read the book The Kissing Hand, right? The book is a helpful tool to help kids with the transition to school. We made a The Kissing Hand craft that involved salt dough key chains (fine motor fun!) and be sure to check out the four other Kissing Hand crafts in the blog post, too.
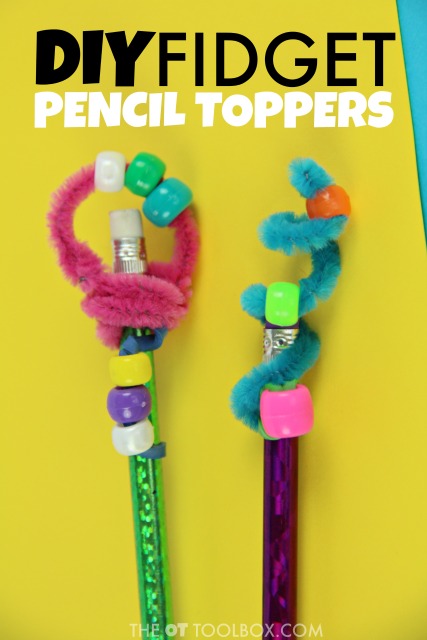
Pencil Fidget Tool Craft- This pencil topper fidget is a fun craft for kids but it can double as a fidget tool, too. Making this DIY fidget tool builds fine motor skills with sensory-related benefits.
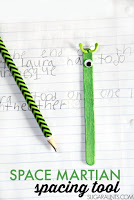
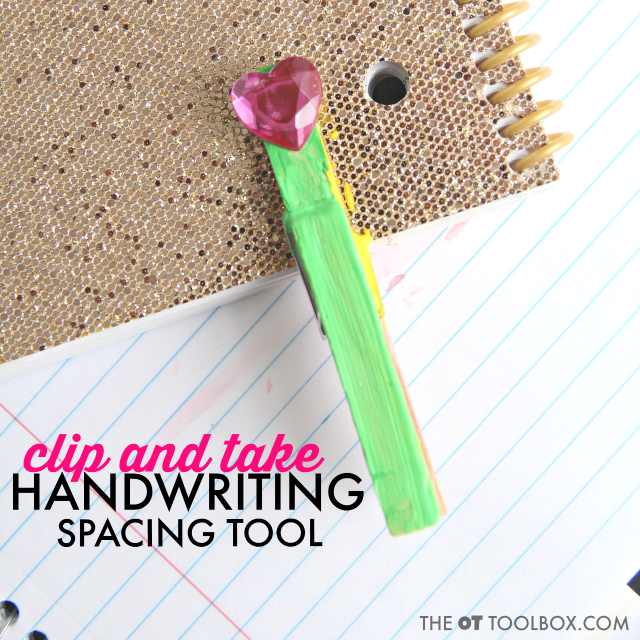
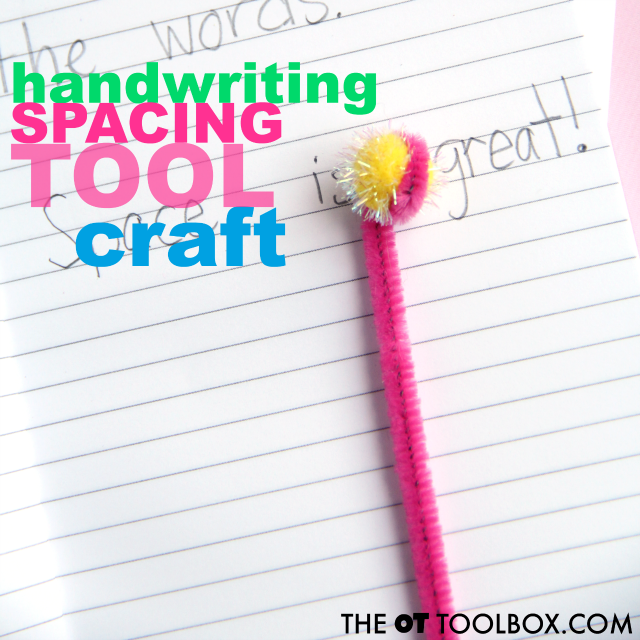
Make a Space Man spacing tool. Make a DIY spacing tool.Make a pipe cleaner spacing tool for handwriting.
First Day of School Printables
The first day of school is exciting! Having a set of printables ready for kids of different ages makes the teacher or therapist feel a little more organized and ready for back-to-school, too. Try these first day of school printables:
Back to school printable toolkit- This set of back to school printable activities is fun for the first day of school or the first weeks of school! There are book themed hole punch cards, school supplies I Spy printable page, school materials handwriting paper, an exclusive school supplies “spot it” matching game, and a printable PDF version of the school materials match-up game. Grab the toolkit here OR, get the free back to school writing slide deck listed for a special discount price 🙂
Emotions and Feelings Printable- Talking about feelings on the first day of school (or first weeks of school) is important, especially this year. Grab this social emotional learning worksheet to cover facial expressions and emotions with kids.
Deep Breathing Pencil– Use this printable to work on calming self regulation as a deep breathing strategy.
Deep Breathing School Bus– I love this calming self regulation tool because it’s a strategy that can be used on the school bus or just as a back to school themed activity.
Add this sensory strategy in school environment to the bus environment which can be unpredictable, full of loud sounds, vibration and unpredictable movements, and an opportunity for sensory overload.
More first day of school activities
What are your favorite ways to get kids excited about the first weeks of school or therapy?
Colleen Beck, OTR/L has been an occupational therapist since 2000, working in school-based, hand therapy, outpatient peds, EI, and SNF. Colleen created The OT Toolbox to inspire therapists, teachers, and parents with easy and fun tools to help children thrive. Read her story about going from an OT making $3/hour (after paying for kids’ childcare) to a full-time OT resource creator for millions of readers. Want to collaborate? Send an email to contact@theottoolbox.com.
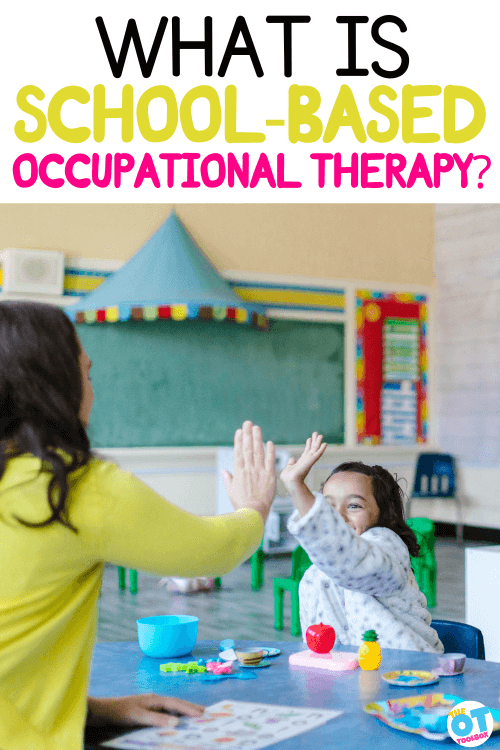
Occupational therapy in schools looks a lot different than it has in the past. With social distancing requirements, sanitizing needs, and changes to school schedules, therapists are looking for ways to meet the needs of their students. This year, school-based OT looks different than any other year, and occupational therapy activities will reflect those changes.
Here, you will find strategies that school-based OT practitioners can use in the classroom as part of push-in services, in small groups, or in an individual, pull-out model.
What is school based Occupational Therapy?
One thing that I love about the profession of occupational therapy is that there are many environments and areas to cover. It’s all about the individual and the functional performance areas can be drastically different simply based on the environment.
In school based OT, occupational therapy providers support students in their education. We might support fine motor, visual motor visual perceptual, sensory motor, executive functioning skills, cognitive skills, physical skills or other area which impacts the student’s ability to learn.
School-based occupational therapy practitioners are either occupational therapists (OTs) or occupational therapy assistants (OTAs) who use meaningful activities (occupations) to help children participate in the tasks they need to do in order to learn and participate in the school day. School based occupational therapy practitioners addresses the physical, cognitive, psychosocial and sensory components of performance which impacts learning.
This might look like supporting needs in academics, play at the playground or at recess, social participation, self-care skills (ADLs or Activities of Daily Living), and transition skills.
While OT in the medical model can cover similar areas in some ways (underlying developmental areas like fine motor skills and functional skills like self care or handwriting), there are big differences too.
A school based OT can work on many different areas in the school environment. It will all depend areas the student struggles with in their education. Basically, if a student’s developmental challenges impact their ability to participate in their education, then OT may be involved to support these areas of need.
Depending on the needs of the student, a school based OT can address:
Fine motor skills (impacting areas like holding a pencil, cutting with scissors, using school materials, managing clothing fasteners, manipulating materials like books and glue sticks, etc.)
Gross motor skills (impacting areas like moving throughout the school, using playground equipment, walking in the hallway, etc.)
Self-care and daily living skills- for toileting, clothing fasteners, shoe tying, managing coats or jackets for leaving the school building, washing hands, etc.
Feeding needs (in some cases)
Social skills
Play and leisure skills
Executive functioning- including organizing materials, attention and focus, problem solving, planning and prioritizing projects, etc.
Assistive technology use
Environmental modifications- for example, supporting needs like getting on and off the toilet for physically involved students
Mobility considerations- accessing areas of the school, bus, auditorium, cafeteria, hallways, etc.
Then, knowing that these are all of the areas that a school based OT provider can address in the school environment, there are different roles the OT plays as well.
Roles of a School Based OT
The school based OT has many roles in the school system. AOTA has a resource on this which describes roles like: educator and trainer, resource consultant, advocate, leader, and researcher. These roles typically happen all day long as a school based OT!
When it comes to actually intervening with students, a school based OT can support students in various models:
Direct OT Interventions
Consultation
Professional Development and Training
The typical school based OT will do all of these roles in a single day! Let’s cover each of these roles:
Direct OT Interventions
Direct treatment is done following the OT screen and evaluation, and completion of OT goals which are added to the student’s IEP. There will be a process which is followed, depending on the state requirements, which may include RTI, MTSS, etc.
Direct OT interventions can look like one on one therapy sessions, group OT sessions, or push-in therapy interventions. All of these models provide services to support at-risk students. The main thing to remember is that we always use the most appropriate intervention model to improve the academic outcomes and school conditions the individual student’s learning.
School Based OT Consultation
Consult refers to periodic “check ins” with educators that are involved with the student. The school based OT professional providing consult services will address specific needs and make recommendations that are carried out in the classroom. The consult process involves checking in with the teacher or teacher assistant on how the recommendations are being used and how it’s going.
For example, I’ve moved students from direct intervention into a consult model when the student has progressed to a certain point. I’ve used the consult model with students in middle school OT or high school OT who have had several years of direct interventions.
Another example of consultation is supporting teachers by setting up a calm down corner in the classroom. The teachers that I’ve worked with in this way have been very appreciative.
Professional development and training
This can be a tricky area of the school based OT provider’s job requirements, because if the OT provider is a contracted OT, time spent training and educating educators or other members of the staff may not be paid time. However, this time can roll into the consult model if specific and individualized training and education is provided. For example, in one situation, I ran a training to a group of educators and special educators on using the ALERT program with one student. The training session was individualized for the particular student and we went over recommendations for this one student that would be implemented into the classroom. We scheduled this time as a meeting and it was billed to the student because we were setting up the program for this one individual.
Another area of professional training is to support the entire school by setting up a sensory room. The school based OT professional is a valuable asset for the school in this regard.
Some admin will pay for this time in the way of a staff development training session. OT providers who are employed by the school district however, may have these requirements built into their contract. It’s just one more component of the school-based OT’s job description!
Group Occupational Therapy
Many OTs need to move from a push-in model to pulling each one of their students out of the classroom for therapy intervention. Other therapists will focus on pushing into the classroom for a small group activity with a couple of students who are in the same classroom.
Regardless of the model, occupational therapy activities will need to have social distancing practice in place and thoughtful use of supplies. Looking for group occupational therapy activities that can be completed with a small group?
Some recommendations for group OT can include:
Arranging the occupational therapy room so that students are well-spaced out. Using painters tape to create marked stations for each student can be used for social distancing, but also to help kids work on personal space, body awareness, and spatial awareness. Students can carry this skills over to functional tasks such as standing in lines in the hallway or getting on/off the school bus, or in the community.
Sensory coping strategies in the classroom can be adjusted to address social distancing requirements while meeting the child’s needs. Think about Simon Says, wall push-ups, I Spy games, etc. These therapy Simon Says commands can target many different skills through play.
Brain breaks can be used on an individual basis, in small groups, or in the whole classroom.
Pushing into the classroom to work with a small group might be something that some therapists have to do per school recommendations and wishes. When pushing in to the classroom, precautions can be taken to try a group activity without close interaction like “I Spy” or “What’s missing?” visual perception games. Add handwriting to these group activities to work on specific skills, too.
There are points for both push-in service and pull out model of school occupational therapy during a pandemic. For example, pushing into the classroom or using a consultation model can mean less equipment that needs to be sanitized between sessions.
School Occupational Therapy Tips
These suggestions can be used by school-based OT professionals in pull-out sessions or in push-in therapy in the classroom.
Plan ahead. Use this interactive school-based OT planner to plan out activities based on themes and come up with a plan for each week. This can help with accessing materials and using what student’s have in their desks to work on certain skills. (See below for how to use what the student has in their desk.)
Organize the OT space so that items can not be accessed by students. Keeping items out of reach of students will allow for less sanitation time between sessions.
Pull out items that will only be used during that session and place each used item into a designated bin or “sanitize zone”. These items can be sanitized after each session and allowed to dry after the use of sanitizer.
Washing hands before/after each session. When children come into the occupational therapy space as a small group, or when a small group is seen in push-in services, therapists can have each child wash and dry their hands or use hand sanitizer both before and after each session. Make it part of functional goals, if it is something that can be used to meet the goals of the child. Hand-washing offers opportunities to work on eye-hand coordination, fine motor skills, tactile sensory experience, attention, organization, motor planning, and more…all part of a functional activity of daily living. Add in the clean-up portion (throwing away paper towels) and you’ve got aspects of IADL work as well.
Allow time for washing hands/sanitizing. we know that as therapists, we have a FULL schedule. Some OT professionals juggle 60+ students and many different school districts. But, allowing time for sanitizing and hygiene is a must. It’s not going to be easy, but like everything else, we are going to be forced to slow down and take that necessary time. Try to add that cleaning/sanitizing time right into sessions. The student can do their last activity while the therapist sanitizes materials.
Incorporate outdoor recess as a therapy session. So many goal areas can be addressed through play and social interaction in outdoor recess. While this “down time” might look different than it has in years past, games and small group activities can be incorporated into occupational therapy sessions, in a “push-in” model that occurs outdoors. Here are sensory diet activities for outdoor recess.
Outdoor occupational therapy sessions.Sensory processing activities on the playground is an excellent way to work on sensory needs and regulation. What’s more, is that the outdoors offer the perfect environment to work on so many OT goal areas. Take students to the playground for sensory and motor work. Use a blacktop surface for fine motor and core strength activities. Use a shading lawn area to work on various coping strategies. Here are sensory diet activities for the playground.
Use teletherapy slide decks- Even though OT professionals may be in the schools (or virtual depending on the district and state), there are many free teletherapy resources like OT slide decks available that can be used in person, too. Try these teletherapy activities, specifically this alphabet slide deck that teaches letters with a handwriting, letter formation, and gross motor brain break activity.
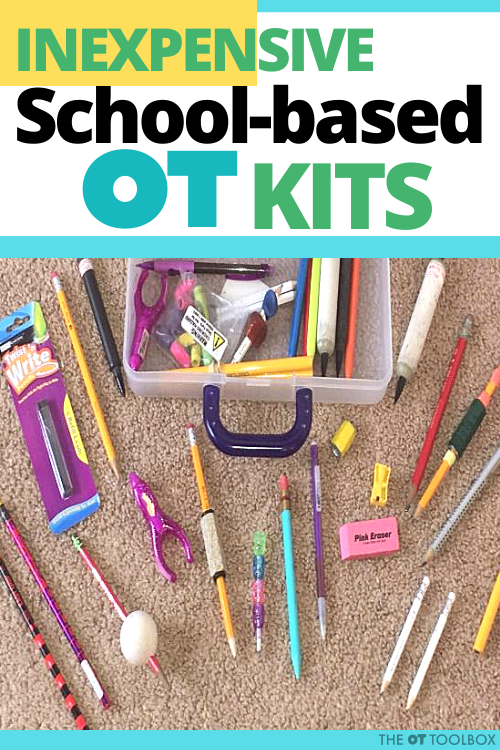
Using an inexpensive kit for each student can be an easy way to target a variety of goal areas with a few materials. Here, you will find suggestions on how to create a kit for each student. This is great for the school based OT who travels from building to building throughout their day.
Small occupational therapy kits can be created at a low cost. Here are some OT kits that we’ve covered:
A small kit for each student may be necessary. I tried to come up with a list of LOW cost materials and ones that can be spread across a caseload. For example, a $1 deck of cards can be split up among man students as they each get 5-6 cards. A pack of pipe cleaners or a pack of straws can be distributed among many students, especially if the pipe cleaners are cut into smaller sizes.
These kits can be organized into a plastic zip-lock baggie for each student. Write the child’s name on the bag and make sanitizing the outside of the bag part of the child’s session. Kids can participate in this aspect, too…an essential self-care ADL of hygiene!
School Based OT Materials
OTs working in schools cover a lot of different areas. But, the skilled therapy provider knows how to use a limited supply materials to support a variety of needs.
Piece of bubble wrap- A big sheet of bubble wrap can be cut into small sections and added to a toolkit. Use it for fine motor work, opening the thumb web-space, or a sensory fidget. You can even use bubble wrap in a visual perception exercise.
Pipe cleaners- These are great fidget tools! Here is just one way that pipe cleaners can be used for precision and dexterity.
Craft sticks- A handful of craft sticks can be used for fine motor work or visual perceptual activities. Here are pick-up sticks activities that can be modified with craft sticks.
Use the items students have in their desks. This year, they will be using more individual items that come from home and are separated from other students, so use those materials. Some items and occupational therapy activities include:
Scissors- Students will likely have their own set of scissors in their desk. Work through this scissor crash course to work on precision and dexterity.
Colored Pencils- If students have colored pencils, use them to work on handwriting, visual motor skills, and fine motor work. Here are colored pencil activities.
Ruler- If kids have a personal ruler in their desk, use that to work on bilateral coordination, eye-hand coordination, fine motor skills, pencil control. Here is one way to use a ruler to help with cursive writing.
Small pencil sharpener- This is a school supply item that is often times on the back to school supply list. But this year, it will be even more important for students to have their own pencil sharpener. Why not use it to work on arch strength, bilateral coordination, pinch and hand grasp, and endurance? Using a small pencil is effective in tripod grasp and hand strength, but kids can sharpen those pencils and work on skills, too.
Books- Books and workbooks can be used for proprioceptive input and heavy work.
Folders and papers- Kids can work on organization and executive functioning skills with the materials they have in their desks. Folders, papers, and all of the “stuff” can get overwhelming fast, especially for the child struggling with impulse control, focus, attention, and other executive functioning skills. Work on those areas with strategies.
School Occupational Therapy Activities
In other cases, it might look like recommendations for a routine or wellness. This wellness wheel can be helpful in addressing the balance of kids at home and at school.
As therapists, maybe we can offer movement-based activities or brain breaks that can be done as a whole group. Perhaps a consult with a teacher on one student leads to a deep breathing session for the whole class.
Educating parents, teachers, administrators, and even the students themselves on the connection between movement, coping tools, behavior, and cognitive processes will become more necessary.
While many students receiving OT in schools have handwriting goals, OT’s are definitely not handwriting teachers. It is a very common functional task that needs support. Here are handwriting activities to try.
Try some of these mindfulness and coping tools that can be used in school occupational therapy sessions or consultation:
Working on social emotional skillscan be helpful in identifying emotions as a result of reentering the classroom…and help kids come up with coping tools.
Colleen Beck, OTR/L has been an occupational therapist since 2000, working in school-based, hand therapy, outpatient peds, EI, and SNF. Colleen created The OT Toolbox to inspire therapists, teachers, and parents with easy and fun tools to help children thrive. Read her story about going from an OT making $3/hour (after paying for kids’ childcare) to a full-time OT resource creator for millions of readers. Want to collaborate? Send an email to contact@theottoolbox.com.
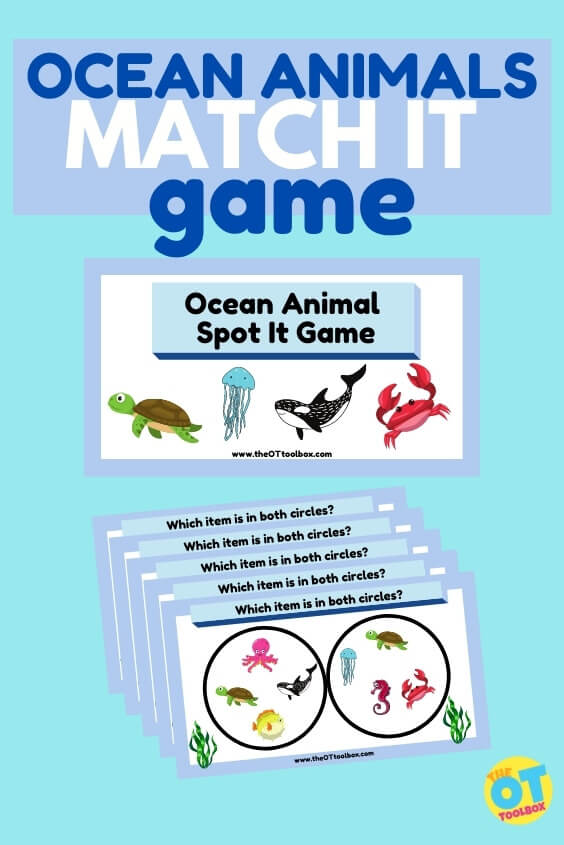
This ocean animals matching game was originally published when many OT professionals were conducting virtual therapy sessions a few years back. Now that therapy is back to in-person sessions, resources like this sea animals matching game slide deck are a useful tool for many reasons! It’s a great addition to a summer occupational therapy session or any sea animal theme.
Sea Animals Matching Game
Animals of the sea are a fun and engaging theme for kids, so this sea animals game is a motivating way to build on that.
Originally, this slide deck was a tool for targeting skills in visual memory, visual perceptual skills, attention, executive functioning skills, handwriting, and more. Therapy providers could access the slide deck and work on specific skills with kids over virtual therapy sessions.
Now, a few years later, the same therapy tool can still be used in several different ways:
Print off the slide decks and use them as Ocean animal “Spot It” worksheets.
Pull up the sea animal game on a tablet or computer in face-to-face therapy sessions to work on visual perceptual skills.
Use the slide deck on a larger screen such as a Smart board or TV. Add gross motor actions for each sea creature. Use the visuals as a prompt for various gross motor coordination tasks by acting out the sea creatures.
Use the slide deck as a prompt for sea animal yoga, ocean animal brain breaks, or in a Simon Says command.
Work on handwriting by writing down the names of the ocean animals that the user spots in the matching activity.
Print off the slide decks and ask the user to cut out the circles for each matching game. Then, they can clip a paper clip onto the edge of the circle when they find the match. This is a powerful hand strengthening activity that addresses bilateral coordination and motor planning. (Here are more paper clip activities to build fine motor skills.)
To really ramp up the gross motor skills and incorporate visual scanning skills, print off the pages as PDFs and then cut out the individual circles. Place them at greater distances around the room. This activity targets visual attention as well. It’s a great way to grade the task to foster near point copying skills and far point copying skills.
Incorporate the activity with other ocean animals games like “guess who” to identify features in the mind’s eye and work on executive functioning skills.
Matching games are such a great way to work on visual perceptual skills that are needed for hand writing and reading. This ocean animals matching game is a therapy activity that helps kids to work on several visual perceptual skills including visual discrimination form constancy visual scanning and other skills. Add this idea to your summer occupational therapy line-up!
Ocean animals Matching Game
This is a great activity for an ocean theme this summer.
Kids that love ocean animals like fish seahorses seahorses octopus and see turtles will get love working on this spotting game.
To play children can look at the two circles on the slide deck. They can visually scan to locate the identical ocean animal that is the same on each part of the slide. Then the interactive piece of this game is a movable seaweed option. They can click and drag on the seaweed icon and drag it over to cover up the matching animals. By doing this interactive piece kids can improve eye hand coordination and visual tracking skills as well.
Ocean animals writing prompts
Then after the students find the matching ocean animal there is a slide that is a self-checking exercise. The slide asks “did you find the missing item?” and then offers an ocean animals writing prompt.
On the handwriting portion of this ocean animals activity kids can copy the ocean animals word from the slide.
They can work on letter formation and copying skills from a near point or a distance point.
There’s also an open ended writing prompt where kids can copy a full sentence.
You can then expand the activity to an open ended writing prompt by asking that student to expand on that topic or ocean animal.
For example kids can copy the word octopus and work on letter formation letter size and spacing between letters. Then they can copy the octopus sentence. They can work on spacing between letters and words, letter formation, line use, punctuation, capitalization, and overall legibility.
Then finally expand on the activity and ask students to continue to write about an octopus they can either write a silly sentence or another fact if they know one. This slide deck includes many ocean animals that kids will have fun finding and writing about. Other ocean animals included in this slide deck include:
seahorse
sea turtle
crab
puffer fish
octopus
jellyfish
whale
shark
conch shell
school of fish
Sometimes kids will have difficulties copying or reading without losing their place on the paper. Convergence insufficiency can be one cause for this. Other reasons can be visual scanning or visual attention skills. This slide deck is one way to work on these skills.
Copying from a near point is a great way to work on visual shift visual attention and visual memory skills that are needed for kids to copy words from a workbook onto paper or from some other source like a book into a notebook.
By shifting the slides to an overhead screen such as a SmartBoard that is positioned across the room children can work on distance copying. This visual motor skill can be a challenge for some kids who struggle with visual attention and visual memory. In order to copy from a source children need to visually recall where they left off and then shift their vision while holding the visual information in there our minds eye and then realizing where to go back to on the board to copy from. That shift can be difficult for kids so this open ended and fun activity can help with visual motor skills and copying from near and far points.
This matching game is similar to others that we have here on the website so if a spotting and matching game is an interest and helpful for you and the children that you serve check out these other spotting and matching activities:
Would you like to access this free ocean animals activity to work on visual perceptual skills, eye-hand coordination, and handwriting? Enter your email into that form below and you can access this resource to use in teletherapy sessions in home programming in face-to-face therapy sessions or in homeschooling activities. Another option is to also use for hand writing prompts in the classroom.
Colleen Beck, OTR/L has been an occupational therapist since 2000, working in school-based, hand therapy, outpatient peds, EI, and SNF. Colleen created The OT Toolbox to inspire therapists, teachers, and parents with easy and fun tools to help children thrive. Read her story about going from an OT making $3/hour (after paying for kids’ childcare) to a full-time OT resource creator for millions of readers. Want to collaborate? Send an email to contact@theottoolbox.com.
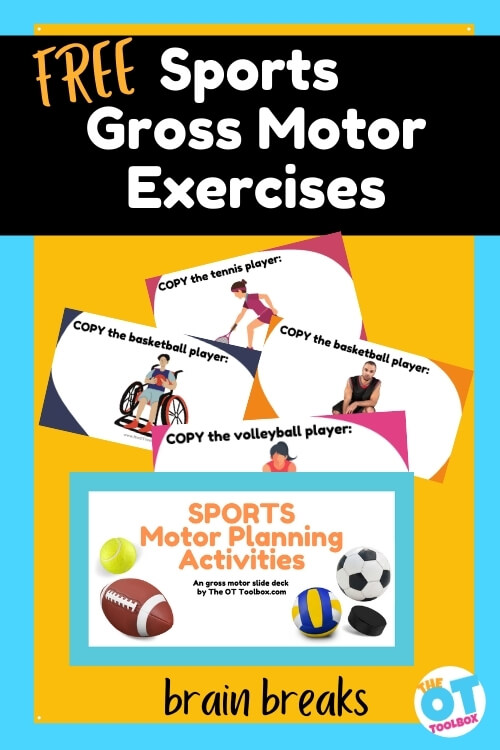
Working on gross motor skills, motor planning, or self-regulation? These sports gross motor exercises are perfect for kids that love all things sports! Use the football, baseball, hockey, and other sports activities to add athletic themed brain breaks and whole body movement.
Sports Gross Motor Exercises
These sports gross motor activities are a free therapy slide deck to use in virtual therapy sessions or in face-to-face sessions with an outline of activities.
There are so many ways you can use these sports movement activities to promote development of gross motor skills:
Copy the athlete to work on motor planning
Go through several slides to encourage sequencing and memory skills
Use the sports activities as heavy work in sports themed brain breaks
Copy the athletes on each slide to work on bilateral coordination, crossing midline, and segmenting the body.
Address posture, position changes, coordination, balance, and endurance
Use these sports exercises in a sports themed therapy session and encourage functional tasks like ball catching and throwing
Ask students to copy the words and work on handwriting with a sports related brain break between each word
How would you use these sports exercises in therapy?
Sports Exercises Slide Deck
This resource is a free Google slide deck that you can download and add to your Google drive. Open the slide deck in your Google classroom or right on your computer/device to encourage gross motor activities.
This is a great addition to other free slides that we’ve shared here on the website, and a fun weekly therapy theme when you’ve got a sports fan on your caseload.
To access this free therapy slide deck, enter your email address into the form below. You’ll receive an email containing a download. Save that PDF so you can use this again and again! Then click the link on the PDF and copy the exercises to your Google drive. Then get ready to lead therapy kiddos through motor planning and gross motor exercises that build skills!
Colleen Beck, OTR/L has been an occupational therapist since 2000, working in school-based, hand therapy, outpatient peds, EI, and SNF. Colleen created The OT Toolbox to inspire therapists, teachers, and parents with easy and fun tools to help children thrive. Read her story about going from an OT making $3/hour (after paying for kids’ childcare) to a full-time OT resource creator for millions of readers. Want to collaborate? Send an email to contact@theottoolbox.com.
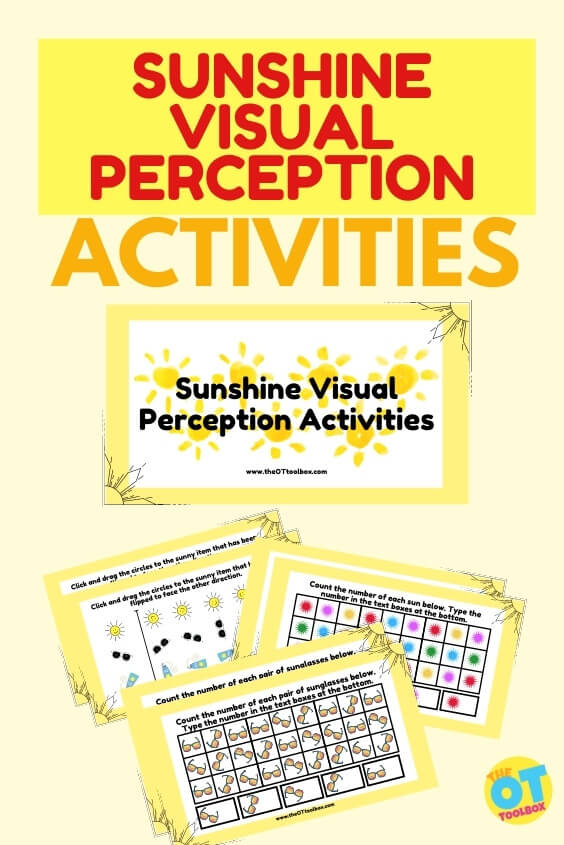
Working on visual perceptual skills with kids this summer? This sun visual perception activity is a fun way to build skills needed for handwriting and reading! It’s a free therapy slide deck that builds skills like visual discrimination, form constancy, and visual figure-ground.
Sun Visual Perception Activity
Summertime doesn’t have to mean not working on specific skills that help kids to improve functional hand writing and learning tasks. It also doesn’t mean building visual perceptual skills requires boring worksheets either.
This free visual perceptual activity has a sun and sunshine theme for summer days.
The visual perception sun activities include visual discrimination, form constancy, visual attention, and visual memory tasks.
Kids can work on form constancy as they recognize differences in the various sun images and activities.
You’ll love adding this these other visual perceptual activities too:
There are several visual perceptual activities with the sun theme on the slide decks.
This is also great if kids are heading off to vacation or taking a break from therapy for a while. They can use the activity as a fun way to work on specific visual perceptual skills.
Want to access this free therapy slide deck? Enter your email address into the form below and to receive this activity.
Colleen Beck, OTR/L has been an occupational therapist since 2000, working in school-based, hand therapy, outpatient peds, EI, and SNF. Colleen created The OT Toolbox to inspire therapists, teachers, and parents with easy and fun tools to help children thrive. Read her story about going from an OT making $3/hour (after paying for kids’ childcare) to a full-time OT resource creator for millions of readers. Want to collaborate? Send an email to contact@theottoolbox.com.
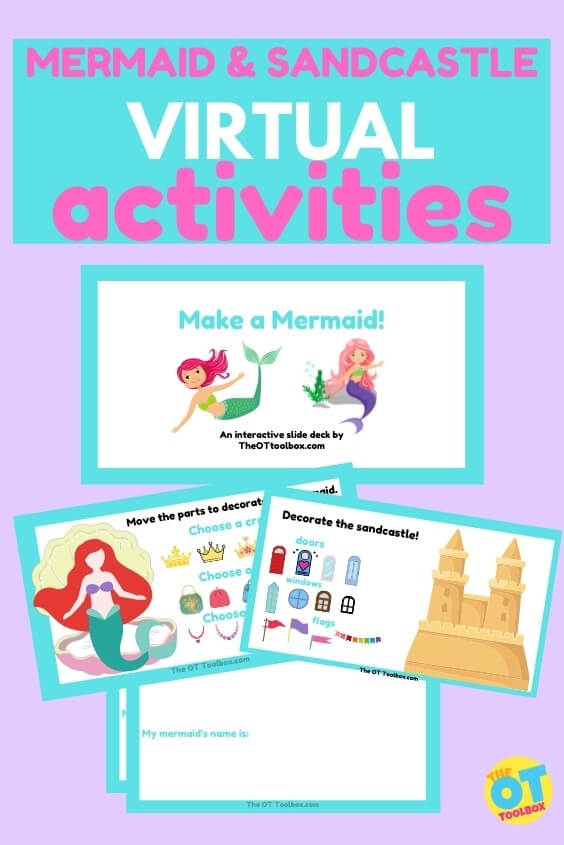
Do you know kids that love all things mermaids? Or, are you heading to the beach this summer and want to add a sandcastle activity to your skill building? This mermaid sandcastle is going to be a hit this summer! Kids can decorate the mermaid and build a sandcastle in an interactive slide deck for therapy goals!
Mermaid Sand Castle Activity
Did you ever see a kiddo or little girl who loves all things mermaids? Using mermaid themes in therapy activities can be a fun way to engage kids in something that interest them like mermaids.
In this interactive slide deck children can move the pieces to add accessories to create a decorated mermaid.
This mermaid slide deck is mirrored off of our popular disguise a turkey slide deck from Thanksgiving and our fun decorate a gingerbread house from Christmas time. Both free slide decks were really popular during the pandemic when all therapy was virtual. Just like those interactive slides, this mermaid sandcastle activity allows kids the freedom of expression and creativity to decorate a mermaid and a sandcastle with movable pieces right on the slides.
Skills like eye hand coordination, visual motor skills, visual memory, visual attention, and visual discrimination can be used to move the different necklaces and crowns for the mermaid.
On the first slide children can select accessories for the mermaid by clicking and dragging on different accessories. They have to work on mouse control or finger isolation to click and drag.
Mermaid Writing Prompts
Next the slides prompt kids to write about what they selected to create their mermaid.
Depending on the child’s individual goals or needs they can work on hand writing and write out the sentence prompts on paper or they can type right on this the scrub slide deck.
The slide asks kids about the accessories they used to decorate their mermaid, so the prompts work on using visual memory and working memory skills as part of executive functioning. Children can try to recall the specific details about the accessories that they selected like the color the shape the form and other details.
This helps with awareness skills and recognition as well as discrimination and visual memory. All of his skills are essential for hand writing when copying materials or writing from memory to form letters and numbers.
Decorate a sandcastle activity
Next the slide deck continues with the sea theme with an interactive decorate a Sandcastle slide. On this slide, children can decorate this the Sandcastle using features such as colorful and fun windows, doors, and flags.
Sandcastle Writing Prompts
Then the next slide continues with a handwriting or typing prompt and asks about details that they selected for their Sandcastle.
Children can again work on working memory skills and attention to detail.
Both of the slide decks both of these slides are fun ways to use a mermaid and sandcastle theme in therapy.
Free mermaid sandcastle slide deck
Would you like to add the slide deck to your therapy Toolbox? Enter your email address into the form below to access the slide deck. You will receive an email with a PDF that you can click to cook to connect the slides to your Google Drive. When used in the edit mode the clickable pieces on the interactive slide deck will be movable. Note please consider using a personal email address as school email addresses and work email addresses may block the delivery of this PDF via email.
Colleen Beck, OTR/L has been an occupational therapist since 2000, working in school-based, hand therapy, outpatient peds, EI, and SNF. Colleen created The OT Toolbox to inspire therapists, teachers, and parents with easy and fun tools to help children thrive. Read her story about going from an OT making $3/hour (after paying for kids’ childcare) to a full-time OT resource creator for millions of readers. Want to collaborate? Send an email to contact@theottoolbox.com.