What you need to know about Sensory Swings

Sensory swings

If you’ve ever walked into an occupational therapy gym, you may have seen a variety of sensory swings and wondered, “why does occupational therapy swing kids in their OT sessions?” There are many reasons why, and in this blog post, we’ll cover sensory swings, the best sensory swings to use for sensory needs, and why!

Sensory swings for sensory input and occupational therapy swings used in OT sessions

There are many types of sensory swings that we use as occupational therapy providers. This is one piece of sensory equipment that is worth the price. We recommend splurging for a swing of some type in our blog post on creating sensory rooms on a budget.

Sensory Swing Movements

Swings are simply a great tool for sensory input as well as sensory integration. The predictability of linear swinging can be calming and settling for the children who need that support.  For more information on the theory and background on this concept, check out our blog post on Ayres Sensory Integration.

Having the swing perform unpredictable moves such as rocking, spinning, side to side movement, and even start and stop movements while suspended in air, can be very alerting and stimulating for the children who need that support.

In our blog post, Sensory Swings for Modulation you will read how powerful the swing can be when used as a sensory strategy for individual sensory processing needs and modulation. 

There are many considerations when it comes to sensory swings, however. A swing can be a tool for modulation but it can also cause sensory dysregulation in users.

Dysregulation refers to internal needs of the sensory systems that result in meltdown because the sensory processing system is out of balance.

You might find that only 5 minutes of intense swinging leads to dysregulated sensory system with overstimulation. This state can require a long period of time and intervention to get the individual to reset or calm down.

When it comes to sensory swings, different types of movements can impact modulation or dysregulation. It’s important to be aware of these considerations before using a sensory swing as a tool in therapy.

Each individual will be different and it can be a delicate balance of movements that are stimulating verses calming. A swing for one child might spiral into dysregulation with a lengthy period of time and calming input required to regulate the sensory systems. Other individuals may crave intense movements and can benefit from that swing input for a longer period of time, allowing for functional participation.

Alerting sensory swing movements

In general, fast rotary vestibular input is often stimulating. Likewise, quick and sporadic movements on the swing are stimulating.

The vestibular sense which is utilized during swing use helps to activate more body awareness, muscle tone, balance, and coordination as well as providing a level of increased alertness. If you want to learn more about vestibular activities in general, you can read the blog post Vestibular Activities.

Calming sensory swing movements

Calming or regulating sensory swing movements may include gentle, linear movement to calm the vestibular system. These swing pushes should be rhythmical and linear movement as these are more calming swing movements.

The proprioceptive sense can be activated during swing use by reclining in a swing and rocking rhythmically in a swing providing deep pressure input to the body can help soothe strong emotions and decrease engine levels of high alertness. This helps with self-regulation and body control. 

You can see that there are many different variables and each individual will require independent assessment from a qualified professional. This is why simply adding a sensory swing to a sensory room in a school can be a detriment to all of the students. School administrators and educators should always consult the occupational therapy professional before using a sensory swing in the school environment.

Types of sensory swings in occupational therapy and activities to do with sensory swings

Occupational therapy Swings

Sensory processing is not the only area that can be addressed with the use of swings.

How you utilize a swing and even the type of swing you use, can help a child to work on core and upper extremity strengthening, balance, visual processing, bilateral coordination, motor planning, righting reactions, body awareness, position in space, gross motor coordination, neck extension, eye-hand or eye-foot coordination, and visual tracking.

When working with occupational therapy swings, each child is different in their needs and their preferences and it is up to you as the OT professional to determine what is needed and what needs to be worked on for skill development.

It is also your role as the OT practitioner to guide and educate other professionals and parents of children to ensure the child’s needs are being met properly and that safety measures are being utilized.

Now, two questions for you regarding those OT swings:

  1. Do you know what swing to use for the kiddos you see in therapy? 
  1. Do you often ask what activity can I do while they are on this swing so they will continue to remain motivated?

Types of Sensory Swings

Well, let’s take a look at six of the most common therapy swings utilized in occupational therapy clinics and therapy rooms in schools. These types of sensory swings can be used for various reasons and in a variety of sensory swing activities.

Also, there are swings that parents can use indoors or outdoors to address a child’s sensory needs.  If you read our post Outdoor Sensory Swing you will learn how taking sensory play activities into the outdoors will provide children with many outdoor sensory experiences just by using the world around us.

If purchasing a sensory swing is just simply too expensive to think about, read all about how you can use the playground equipment to address Sensory Integration at the Playground with the guidance of the therapist to meet each child’s needs.  

There is no best sensory swing of this list, rather, each type of sensory swing has it’s own specific uses and benefits to supporting the needs of the individual user.

Bolster Sensory Swing

A Bolster swing (affiliate link) is a type of sensory swing that challenges balance, vestibular processing, motor planning, cervical extension endurance, proximal control/stability, and core strengthening, The child can lie prone, inverted, kneel, sit or straddle the swing. 

Bolster Swing Activities:

  1. Have a child work on hanging inverted like a koala bear and then time them to see if they can meet or beat their last best time.
  2. Have a child kneel on the bolster while hanging on and then attempt to toss bean bags into a basket.  
  3. Have a child straddle the bolster swing like a horse and use a reacher to pick up bean bags from the floor and then try to toss them into a basket using the reacher to toss.
  4. Spread balls around on the floor under the swing and have the children lie prone on the swing and attempt to reach out to pick up the balls and place them in a basket. You will move the swing around as needed.

Ladder Sensory Swing

A Climbing ladder swing (affiliate link) provides the challenge of motor planning while simultaneously working on balance, strength, and body awareness. The child simply works to climb the ladder from the bottom to the top and then back down again. It adds the fun of swinging while providing a challenging workout.

Ladder Swing Activities:

  1. Place a bucket or basket filled with puzzle pieces, letters, shapes, or other items at the top of the ladder for a child to retrieve one at a time by climbing up and down the ladder swing. Then, have them either put the pieces into the puzzle base or practice writing the letter or drawing the shape before going back up the ladder to grab the next item. 
  2. An adult can stabilize the bottom of the swing by holding it steady while the child climbs or an adult can slightly twist and turn the ladder swing while the child attempts to climb up and down. It’s called the ship on the rocky seas! 
  3. Place two or three articles of clothing at the top of the ladder and have the child retrieve one at a time and when they get to the bottom they can work on zipping, buttoning, or snapping!

Hammock Swing

A Cuddle hammock swing (affiliate link) (also called a cocoon swing), is a calming type of sensory swing that provides proprioceptive input, assists with soothing strong emotions, and gives a nice deep pressure input which is calming and grounding for some children. This swing can be an easy first swing for children who need more gross motor support and are fearful of the movement other swings provide.  The Lycra-type material allows children to sit, stand, or lie in the swing making it a highly versatile swing. 

Hammock Swing/ Cocoon Swing Activities:

  1. Have a child lie prone with their head and arms positioned outside the swing. This position creates a form of weight bearing through their arms and works on full upper body strengthening. They will work to pull and push themselves using the floor while inside the swing. 
  2. Place items around on the floor under the hammock just out of the reach of the child and then have them pull themselves along the floor to reach the items, such as bean bags, to toss into a basket. 
  3. Have the child lie prone and then grasp and hold your hands while you are seated on the floor in front of them. They will pull themselves toward you to shift the swing back and forth. 
  4. Have the child lie supine and reach up to remove clothespins that are clipped on the edge of the swing. The swing provides body support but works on building upper extremity strength and endurance as the child works against gravity to reach up. You can alternate activities and have the child place the clothespins instead.
  5. Have the child recline or lie within the swing and simply do deep breathing or mediation exercises while slowly swinging back and forth. 

Pod Swing

A Hanging pod swing (affiliate link) provides vestibular input, assists with balance, and makes a nice cozy pod that gives children a sense of calm regulation and relaxation to just simply cool inside. This swing can serve as a good first swing as it allows for seated support while simply swinging slowly and provides more comfort to children who may be more fearful of the freedom of other types of swings. 

Pod Swing Activities:

  1. Try turning off the lights, playing soft music, and have a child hold a small fidget or light-up toy while swinging slowly back and forth as they stay cuddled inside. 
  2. Place a pillow inside of the pod swing and have the child climb inside to provide a cushy, deep pressure input while swinging slowly and rhythmically in a linear fashion.
  3. Blowing bubbles for the child to watch while seated in the swing provides a calming feel as the motion of the bubbles will be slow as they descend. 
  4. Have the child sit in the swing and complete deep breathing or mediation exercises while slowly swinging back and forth. 

Platform Swing

We covered specifics about platform swings on a related blog post.

A Platform swing (affiliate links) (or this version of a platform swing with net base or material platform base) is the most common swing found in therapy settings and provides the opportunity for calming and alerting to get the child’s engine right where it needs to be for a treatment or classroom session. It is highly versatile as it can help a child build upper body strengthening, core strengthening, balance, and motor planning. 

Platform Swing Activities: 

  1. Use this unstable surface swing to challenge a child’s body positioning to include side-lying, tummy time, tall kneeling, standing, criss-cross sitting, long sitting, and partial kneeling. 
  2. Have the child lie prone with their head and arms positioned over the edge. Then have them walk with the upper extremities around the floor picking up puzzle pieces to place in the puzzle base located in a central location. Pieces are picked up one at a time. 
  3. Place different colored bean bags in a circle on the floor around the swing. Call out different colors and have the child rotate themselves while lying prone on the swing and using their hands to walk around on the floor to stop at each color called out.  Letters and shapes can be used for this activity too.
  4. Place cones on an elevated surface and while the child is either lying prone or in a quadruped position, have them reach out to drop rings onto the cones. 
  5. Have the child sit criss-cross in the center and toss a beach ball to themselves.

Trapeze swing (affiliate link) provides a good opportunity to work on upper extremity strength and endurance, gross grasp skills, trunk strength, and motor planning. If you add lower extremity work also, then you address upper and lower body coordination. 

Activities:

  1. While swinging or not, encourage a child to hold and lift their legs to kick a ball.
  2. While swinging, the child can simply jump over a therapy ball that is placed inside of a tire tube. 
  3. Simply work with a child on grasping and swinging while pumping the swing with their own feet. 
  4. While swinging or not, have a child hold on and lift their legs to kick a set of bowling pins or have them attempt to pick up each bowling pin with their feet and place them in a basket. 
  5. While swinging the child, can work on timing and release to let go and crash into a crash pad.

Sensory Swing Tips

What do you do with all of this information and activity ideas? Go get onto a swing and try out some of these fun activities! That’s right, we as adults need to have some fun too!

But, after you’ve tried them, demonstrate them to the kiddos as they will most likely be more motivated to do the same activity after they see YOU do it. After all, you and I both know that the best way to teach a child is by setting a good example and you’ll get to have some fun in the process! It’s a win-win folks! 

One tip for using a sensory swing in a therapy session can include a visual schedule with a plan that helps the individual with regulation needs. It can include swinging, then heavy work, music, blowing bubbles, dim lights, heavy rhythmic play, and deep breathing. All of these sensory tools regulate the system and can calm the system after the movement from the sensory swing. This is just one example and each individual will benefit from different strategies.

Be sure to take a look at the maximum pounds allowed for some swings as you’ll want to be sure that it will work for all of your kiddos before purchasing.

Always supervise children while on swings especially when rotary swinging as this can instigate seizure activity in some children.

sensory swing safety

There are important things to remember when it comes to sensory swing safety. Safety considerations for sensory swings relate to both in the clinic and, with the ready availability of purchasing a sensory swing online, in the home as well.

Remember these sensory swing safety tips:

  1. Installing a sensory swing- Always read the manufacturer’s instructions and follow them carefully. Different types of sensory swings may have different weight limits, installation requirements, and safety recommendations. You may need specific installation parts for sensory swings, especially considering the weight of the user and how the sensory swing will be used.
  2. Support structures for sensory swings- Make sure the swing is securely anchored to a strong support structure. The support structure should be able to handle the weight of the swing, the child, and any additional equipment or accessories.
  3. Monitor the sensory swing for signs of wear and tear- Check the condition of the swing and its components regularly. Look for any signs of wear and tear, such as frayed ropes, torn fabric, or rusted hardware. Replace any damaged parts immediately.
  4. Supervision during sensory swing use- Always supervise your child while they are using the swing. Never leave them unattended, even for a short time.
  5. Educate the user on how to get on and off the swing, and how to use a sensory swing- Teach your child how to use the swing safely. Show them how to sit or lie down properly, how to hold on to the ropes or chains, and how to get in and out of the swing safely. This is especially important for particular positioning such as laying in supine (on belly) or when spinning is used in the sensory swing. Teach your child and other children using the swing to watch for signs of overuse.
  6. Where to put a sensory swing- Make sure the swing is set up in a safe and open area. The area around the swing should be clear of any obstacles or hazards, such as furniture, sharp objects, or hard surfaces.
  7. Other safety equipment- Consider using a safety harness or seat belt to keep your child secure in the swing. This can be especially important for children who have difficulty sitting still or have balance or coordination issues. You can also consider padding around the swing area on walls using gymnastic pads or wall padding, or cushioning pillows of pads on the floor.
  8. Upkeep- Keep the swing clean and dry. Wipe down the fabric or other materials with a damp cloth and allow it to air dry between uses.
  9. Consider overuse and type of use- If your child has any medical or physical conditions, consult with their healthcare provider before using a sensory swing. They can provide guidance on whether the swing is appropriate and safe for your child’s needs.
  10. Lastly, trust your instincts. If something doesn’t feel right or safe, don’t use the swing until you can address the issue or seek guidance from a qualified professional.

Therapy Swings- What to watch for

When using a therapy swing of any kind, it is a must to watch for overuse or overstimulation. This is because the sensory input of a therapy swing/sensory swing can be very overwhelming.

Particularly with rotary input, a therapy swing (either at home or in the clinic setting or in a sensory room in the school setting) can lead to overstimulation, dizziness, agitation, hyperactivity, fatigue, or other considerations. For this reason, it’s very important to limit rotary input to a specific set of minutes which should be monitored throughout use of the therapy swing.

Also, it’s extremely important for therapy swings to be used under the guidance and recommendation of a pediatric occupational therapy professional.

While sensory swings can be beneficial for children with sensory processing issues, overuse or improper use can potentially cause harm. Here are some things to watch for with sensory swing overuse:

  1. Dizziness or nausea: Rapid or repetitive swinging can cause dizziness or nausea, especially in children who are sensitive to motion.
  2. Overstimulation: While sensory swings can be calming for some children, they can also be overstimulating for others. Overstimulation can cause anxiety, irritability, or difficulty with attention and focus.
  3. Fatigue: Prolonged use of a sensory swing can cause muscle fatigue or soreness, especially in children who have weak muscle tone or low endurance.
  4. Agitation or hyperactivity: Some children may become overly excited or hyperactive after using a sensory swing, which can make it difficult for them to transition to other activities or tasks.
  5. Risk-taking behavior: Children who become overly confident or adventurous on a sensory swing may engage in risky behavior, such as jumping off or swinging too high, which can lead to injuries.
  6. Increased dependence: Overuse of a sensory swing may cause a child to become overly reliant on the swing for sensory input or emotional regulation, which can interfere with their ability to develop coping skills or self-regulation strategies.

If you notice any of these symptoms or concerns with your child’s use of a sensory swing, it may be a sign of overuse or improper use. Consider reducing the amount of time your child spends on the swing, or consulting with a healthcare provider or occupational therapist for guidance on how to adjust or modify the use of the swing to better meet your child’s needs.

The Sensory Lifestyle Handbook walks you through sensory processing information, each step of creating a meaningful and motivating sensory diet, that is guided by the individual’s personal interests and preferences.

The Sensory Lifestyle Handbook is not just about creating a sensory diet to meet sensory processing needs. This handbook is your key to creating an active and thriving lifestyle based on a deep understanding of sensory processing.

Regina Allen

Regina Parsons-Allen is a school-based certified occupational therapy assistant. She has a pediatrics practice area of emphasis from the NBCOT. She graduated from the OTA program at Caldwell Community College and Technical Institute in Hudson, North Carolina with an A.A.S degree in occupational therapy assistant. She has been practicing occupational therapy in the same school district for 20 years. She loves her children, husband, OT, working with children and teaching Sunday school. She is passionate about engaging, empowering, and enabling children to reach their maximum potential in ALL of their occupations as well assuring them that God loves them!

Autism Acceptance Month

Autism acceptance

April is Autism Acceptance Month! For school based therapists, the end of the school year is in sight.  But the start of Spring brings forth a chance for new beginnings and new growth, even as we start to wind down the school year.  Every April, we celebrate Occupational Therapy Month.  It is a chance for us to celebrate our profession, inspire each other to remember the reasons why we chose a career in occupational therapy, and to show the world the gifts we have to offer in supporting individuals with the things that matter the most! 

Go for gold Autism acceptance month

Autism Acceptance Month

April is also Autism Acceptance Month. So, this is a perfect time to reflect on Occupational Therapy’s role in working with autistic individuals and how we can support neurodiversity acceptance in the places we work, with the clients and students we support, and in our world!

Not only in April, but all year long is a great time to support, advocate for, and help others understand, embrace, and connect with the unique qualities of autistic individuals.

Not sure where to start?  It can be overwhelming to take in all the information that comes at us each day through the news and social media, but occupational therapy practitioners can continue to do what we have always done…

  • listen to our clients and listen to the autistic voices that are in the media
  • use a strengths based approach
  • focus on environmental modifications
  • identify meaningful goals and work towards improving participation
  • use evidenced based practice
  • and advocate for our autistic clients

We can also take a look at what we have done in the past and what we should look to do in the future.  Like the old saying goes, “When you know better, DO BETTER!”  So let’s take a look at what we know and what steps we can take to support neurodiversity.

Autism Neurodiversity

The prevalence of autism has significantly increased over the last 20 years, with the most drastic changes happening in the last 10 years.  Currently,  The CDC reports the prevalence of autism as 1 in 44 children in the United States.  It is the most rapidly growing developmental disorder and is more common in boys than girls.  

Identity First Language

Historically, occupational therapy practitioners were trained to use “person first” language, so you may have heard us say things like “my students with autism”.  Kenny, L. et al (2015) found that medical professionals, family members, and friends preferred using person first language.  However, autistics report that person first language doesn’t recognize that autism is part of their identity. 

Although identity first language is preferred by many autistics, it is not the preference of all.  So, what can you do? 

To know better and do better, you can ask the individual. You can ask and honor the preferences of your students.  You can educate yourself on the neurodiversity movement which suggests that brain differences can be challenges, but they can also be strengths.

Going for gold in April instead of “lighting it up blue”

Autism Speaks is the largest organization that claims to support autistic individuals and their families.  They are also probably the most widely known and started the campaign to “light it up blue”.  However, the work they have done to bring awareness to autism, has come with criticism from autistic adults for their focus on finding a cure. 

Autistics are frustrated by the lack of representation within the Autism Speaks organization.  Much of the funding at Autism Speaks does not actually support autistic people. Most concerning is the lack of support for self-advocacy with a focus on the negative implications of living with autism.  

Light it up Gold instead of Light it up Blue.

The autistic community is trying to change the way we think about Autism awareness and acceptance.  While the color blue (seen as sad) or the puzzle piece symbol (seen as something is missing) has historically represented autism awareness, autistic adults have embraced using gold (whose chemical abbreviation is “Au”) to spread autism acceptance. 

Gold is regarded as having high value and represents authenticity.  

Here are some links to read more about promoting autism acceptance:

How can we use this information to improve our practices?

If you’re not sure what to do next, consider attending professional development opportunities or check out audiobooks for occupational therapists to learn how to support autistic clients and neurodivergent students. 

As you grow in your knowledge, don’t forget that the domain and process of occupational therapy will continue to frame your work.  

  • Evaluate your students using a top-down, strengths based approach.  Use what we know about sensory preferences and visual supports to highlight the strengths of our autistic students.  Check out this resource: Sensory Strategies for the School Based OT.
  • Listen to your autistic students as individuals in order to develop meaningful outcomes.  What are their goals?  What aspects of school are important for them?
  • Support neurodiversity- Don’t forget to assess the environment and make modifications to support neurodiversity using Sensory Diet Strategies for the Classroom.
  • Promote and educate on neurodiversity- Expand our inclusive practices to educate and promote acceptance in the school community about autism and neurodiversity.  Perspective taking goes both ways.
  • Embrace interests of the individual. Find out what interesting, meaningful for a shared connection. Integrating interests into therapy is exactly what occupational therapy is!

OT as an Autism Advocate

Lastly, we must use our occupational therapy voices to advocate for autistic students and neurodivergent learners. 

  • Talk to the administrators at your school about inclusion, acceptance, and perspective taking amongst all students. 
  • Educate families with autistic children about resources and supports that are available to them. 
  • Start conversations with coworkers who may not be as familiar with current trends related to autism and neurodiversity. 
  • Most importantly, teach and support your autistic students to share their perspectives and self advocate for their needs. 

Let’s honor autism and occupational therapy month by reflecting on the important work that we do and celebrate the amazing students we get to work with everyday!

References:
Kenny, L., Hattersley, C., Molins, B., Buckley, C., Povey, C. & Pellicano, E. (2015). Which terms should be used to describe autism? Perspectives from the UK Autism community. Autism: 1-21.

Katherine Cook is an occupational therapist with 20 years experience primarily working in schools with students from preschool through Grade 12.  Katherine graduated from Boston University in 2001 and completed her Master’s degree and Certificate of Advanced Graduate Study at Tufts University in 2010.  Katherine’s school based experience includes working in integrated preschool programs, supporting students in the inclusion setting, as well as program development and providing consultation to students in substantially separate programs.  Katherine has a passion for fostering the play skills of children and supporting their occupations in school. 

Sensory Tooth Brushing Tips for Brushing Teeth

Tooth brushing tips

Is toothbrushing a nightmare in your house? Sensory related toothbrushing issues can be! Need some sensory tooth brushing tips? For individuals with sensory difficulties, toothbrushing challenges mean more than cavities, plaque build up, and gum sensitivities. Sensory toothbrushing issues can lead to meltdowns, anxiety, and daily struggles with nightly and morning routines. Does your child cry when it’s time to brush their teeth? Do you know, or suspect, that they have some sensory challenge with brushing their teeth? 

sensory tooth brushing issues and tooth brushing tips by a pediatric occupational therapist

sensory tooth brushing tips for kids

Brushing teeth is an ADL that can be a challenge for many kids whether it’s from sensory processing challenges, challenges with routine, anxiety, or any other variety of reasons.

This is an area that an occupational therapist (OT) can help you with, by helping you set up a home program to make brushing your child’s teeth easier. Check out the tips below to help make tooth brushing easier for your family! 

These toothbrushing tips are interventions for making brushing teeth easier, or strategies for helping with sensory challenges that impact  tooth brushing.

Teaching dental hygiene to preschoolers or older learners addresses a daily occupation.  Incorporate these tips and recommendations daily to impact independence with tooth brushing.

Amazon affiliate links are included below.

Tip # 1: Use a Visual Schedule 

Adding a visual picture schedule can help reduce stress and anxiety during teeth brushing by providing clear expectations of what’s going to come next. It also helps to reduce the auditory input for following directions, helping your learner focus on the task at hand.

Another perk of using a tooth brushing visual schedule is that it ensures that the same routine is used every time that tooth brushing occurs. This can also help to reduce stress and anxiety by ensuring that the child knows what’s coming next. Which brings us to tip # 2! 

Tip # 2: Create and Use a Consistent Routine 

Create a routine that works for you and your family! It can evolve over time, so don’t worry if it’s not exactly what you want it to be right away. Having a routine helps take away anxiety around the unknown, and establishes what to expect during the situation. 

Once you determine what works, plan to utilize the same language, visuals, toothbrush and toothpaste every time you work on toothbrushing.

It will also be helpful to complete this toothbrushing routine around the same time every day. It doesn’t have to be rigid in that you brush teeth every night at 5pm, but should always follow an event like a meal, or when you first wake up in the morning.

Consistency and practice is key! 

Bonus Tip! Make sure that when you’re done with the toothbrushing routine, follow it up with a fun activity like play or a preferred game.

Tip # 3: Use a Timer 

Similar to creating a routine, using a timer helps to take fear of the unknown out of the picture. It also helps your child see that there is an end in sight to the activity. (Amazon affiliate link) Timers, or counting, are great to pair with a visual schedule. This nighttime toothbrush schedule offers more tips.

Tip # 4: Sing a Song 

If a timer causes too much stress or becomes an object of fixation, you can play a song or count to 10 for each side of mouth, top and bottom.

Brush to the tune of 1, 2, buckle my shoe or any other preferred tune or song that is easily broken into small chunks for brushing each quadrant of the mouth.

Tip # 5: Use a Vibrating Toothbrush 

For sensory seeking children, a vibrating toothbrush is a great way to engage them in toothbrushing! Not only do they get stimulation that they are seeking, they also get a thorough teeth cleaning with the vibration. 

Using a vibrating toothbrush does not need to be solely at toothbrushing time. It can be used anytime during the day.

There are cost-friendly options at most grocery stores and large box stores for families that are concerned with the cost of getting an electric toothbrush, or feel that their child won’t use it. 

Tip # 6: Flavored Toothpaste 

Flavored toothpaste brings an element of fun to a task that can feel like a chore. To add an extra layer of fun, and to encourage buy in from your child, go shopping together for new toothpaste. Get a few different flavors to try, and to have on hand in a pinch if the “preferred” flavor becomes boring or there is resistance to using it. 

Bonus Tip! Offering choices during an challenging activity such as brushing teeth, gives your child some sense of control of the situation. 

Tip # 7: Mouthwash that Shows the Plaque 

Like flavored toothpaste, mouthwash is another tactic to help get buy-in from your child. Listerine Smart Rinse or Plaque Disclosing Tablets are a couple of the many great products that help your child see where the plaque is.

Once they see where the plaque is, make a game out of cleaning all the “junk” out of their mouth. For kids that are older, you can use the visual the mouthwash gives to start talking about cavities, and the effects of not cleaning your teeth. 

Tip #8: Brush Only One Time Per Day 

The American Dental Association recommends tooth brushing twice a day. However, for kids that this task is extremely distressing, sometimes one REALLY good brushing a day is a success, and is a great start, and can be built upon.

The second time a day can, and should, still be attempted, but can have less focus on quality, as you build the child’s tolerance to the task.

The second time a day may have more focus on going through the motions, such as talking about the steps, doing a dry run, or if your child is emotionally regulated enough, attempting to brush their teeth. 

Tip # 9: Take Turns Brushing 

Helping your child with tooth brushing can take away stress over the motor component of coordinating hand to mouth, and challenges with completing multiple steps needed for toothbrushing. 

Taking turns during the tooth brushing process, your child brushing one time a day and you brushing their teeth the second time, can give back some control and insure at least one time a day is done thoroughly. This is a great way to incorporate turn taking lessons into functional performance of the essential life skill of brushing teeth!

Find what works for you and your child! 

Tip #10: Use a Water Pick 

If a toothbrush is still causing too much frustration, stress and anxiety, a good option is to change the tool completely, and try to reset the routine and behaviors. This is where a water pick is really great!

While the water jet can be overstimulating and noxious to some, others may find it less so than tooth brushing.

Implementing Tooth Brushing Tips 

These tips can help to break any negative behaviors or emotions that may surround your child’s tooth brushing routine, and give you a foundation to start a fresh routine. Start by trying one recommendation that you think will work for your child, give it a week and if it’s still not working try another. Working through toothbrushing challenges takes time and is a trial-and-error process. Hopefully you find these tips helpful!

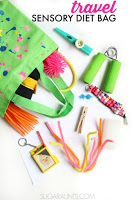
Using tools like a sensory brush or sensory diet tools can help depending on specific needs of the individual.

Related hygiene tasks:

Incorporate these hygiene and grooming tasks and recommendations:

For specific ways to integrate sensory needs into a daily lifestyle, check out the Sensory Lifestyle Handbook. This resource uses not only a sensory diet strategy into daily activities, but it offers tools and resources to create a sensory lifestyle that uses motivating and meaningful daily tasks to offer much-needed sensory input so individuals can function throughout their day.

Contributor: Kaylee is a pediatric occupational therapist with a bachelors in Health Science from Syracuse University at Utica College, and a Masters in Occupational Therapy from Utica College. Kaylee has been working with children with special needs for 8 years, and practicing occupational therapy for 4 years, primarily in a private clinic, but has home health experience as well. Kaylee has a passion for working with the areas of feeding, visual development, and motor integration.

31 Days of Occupational Therapy with Free Materials

Use these free and recycled items to work on occupational therapy goals

Coming up with fun ideas for occupational therapy activities for interventions can easily become nerve-wracking! It’s easy to fall into a routine and use the same old cookie cutter activities in OT treatment sessions. Here, you will find a challenge designed to change that recipe for burnout! Below is a strategy to use out-of-the-box occupational therapy activities using free materials, or items you probably already have! 


Occupational Therapy Activities


Below is a series I ran one October, in which I challenged myself to write 31 days of posts about my profession: Occupational Therapy!  You will find 31 days of Occupational Therapy with free materials provides treatment activities, tips, tools, and ideas for many developmental, sensory, fine motor, gross motor, and visual perceptual areas. 

I’ve bumped up the OT activities, though, to add more ideas to build fine motor skills or work on development, all with free items.

The best news is that these ideas are going to be creative fun that kids will love and (almost) all free.  The therapeutic modalities that I’ve outlined will provide you will a resource for frugal treatment of many Occupational Therapy goal areas.  

I strive to create crafts and activities that use mostly free items that are found around my home in the play and learning that we do here.  


Use these free and recycled items to work on occupational therapy goals

Occupational Therapy Activities with Free Materials

Scroll through the activities below for fun ways to work on development. But first, let’s discuss a few items you may want to have in your therapy toolbox. These are recycled items and household materials that can be used in various ways.

They are open-ended items to use in fine motor work, or in textured sensory play. Use the items to work on hand strength, scissor skills, motor planning, or other occupational therapy goal areas. 

Here are some free and recycled items to stock your therapy toolbox:

  • Cardboard
  • Cupcake liners
  • Sandpaper
  • Cardstock
  • Construction paper
  • Tissue paper
  • Index cards
  • Cookie cutters
  • Nuts and bolts
  • Plastic sandwich bags
  • Paper cups
  • Newspaper
  • Buttons
  • Tape
  • Craft sticks (popsicle sticks)
  • Craft pom poms or cotton balls
  • Recycled egg carton
  • Bread ties
  • String
  • Glue
  • Recycled bottle caps
  • Cardboard tubes
  • Rubber bands
  • Small containers
  • Crayons
  • Recycled bottles

occupational therapy items to add to your therapy bag

What would you add to this list?

Occupational Therapy treatment tips and tools for pediatrics and school-based therapy using mostly free or inexpensive materials and items you can find around the home.  Great resource and many ideas here!
 
Affiliate links are included in this post.
 
You can see a previous activity challenge, based on learning in the 31 days of learning with mostly free items challenge. I’m hoping that this series is just as helpful!
 

If you’ve been to this blog before, you might know that I’m an Occupational Therapist by trade, and love sharing helpful tips, tools and strategies that meet a variety of needs. It’s my hope that this OT Challenge will be an idea-generator for you!

More Occupational Therapy Activities

A few more resources on the site may be helpful for you. Below are some of our free courses, printable packets, and email courses that can be used in your practice. Let me know if there is another topic you are looking for information on. I would love to help out!


This Visual Processing Lab is an email series that delivers tons of content and information right into your email inbox. Expect to learn tons on visual perception, visual motor integration, and what that looks like in our kiddos who struggle with handwriting and eye-hand coordination. This email series is totally free! Join the lab here.

This visual processing lab is a series for occupational therapists looking for occupational therapy activities based on visual processing needs.


This Executive Function Mini-Course is a free email course on everything executive functioning. You will learn about executive functioning skills, how they develop, and what executive functioning challenges look like in our kids at home and at school. You’ll gain helpful tips that can be implemented right away. It’s a goldmine for any parent, teacher, or occupational therapist!


Take the Executive Function Mini-Course here. 

This executive function course is a helpful tool for occupational therapists, parents, or teachers working with kids on executive functioning skills.


Occupational Therapy Activity Ideas


In this Occupational Therapy with free materials series, you will find many of my favorite occupational therapy treatment activities for many developmental difficulties in pediatrics, all using items that you probably already have at home.  

The nice thing about this series is that you don’t have to be receiving OT services or have a diagnosis of anything to benefit from these 31 days of tips and tools.  Many, MANY kids out there are working on shoe tying. Or writing on the lines.  Or many other developmental areas.  All of the activities will be low-cost and inexpensive.


Here is a little video that we created based on this series. It’s my hope that the activities below hit on the needs you have on your caseload!

It is my hope that you will find the ideas shared here in the next 31 days to be helpful and and a valuable resource.  AND, not only will the tricks and tips use mostly free or low-cost items, I will also have lists of my recommendations for toys and tools that can help with each area.  

This is going to be a great month …but fun! Use these activities to guide interventions, using out-of-the-box ideas, while working on goal areas your clients need.


And now, without further ado:

31 Days of Occupational Therapy with Free Materials


https://www.theottoolbox.com/2015/10/visual-tracking-tips-and-tools-for.html  


 Motor Planning Fine Motor Maze hand strengthening activity


 Scooping and pouring fine motor and hand dominance with beads
 

Day 22 The Benefits of Coloring

Day 23 Clothes Pin Exercises and Pinch Grasp Types

Day 24 Homemade Pegboard Activities

Day 25 Creative Scissor Skills Practice

 
Neat Pincer Grasp Fine Motor Activity Buttoning Tips and Tricks


Day 30 Gross Grasp with Recycled Containers

Day 31 Finger Isolation Fingerprint Activities

 
Did you LOVE this series as much as I did?  Here are MORE ways to work on Occupational Therapy using mostly free or inexpensive materials:  
 
Try a few inexpensive treatment tools like kid-friendly tongs and tweezers.  They can be used in so many different ways.  A set of simple supplies can be tools for many different OT treatment goals.


 Sensory Processing and handwritinghttps://www.theottoolbox.com/2015/11/benefits-of-playing-with-stickers-occupational-therapy.html What is motor planning activity for kids


 Free letter building printables Sight word crayon rubbing activity


Even MORE great pages you where you will find tons of Occupational Therapy treatment ideas and info that can be incorporated into simple play at home, using frugal (mostly free) items that you already have:   Sensory Play IdeasVisual Perceptual SkillsFine Motor Skills

Occupational Therapy treatment tips and tools for pediatrics and school-based therapy using mostly free or inexpensive materials and items you can find around the home.  Great resource and many ideas here!
Occupational Therapy treatment ideas using free materials

Love these ideas shared in this series?  Try some of these: 

Occupational Therapy Activities for Scissor Skills

There are many scissor skills resources on the website. Some of our favorite ways to support use of scissors include:

Occupational Therapy Activities for Fine Motor Skills

Building fine motor skills in occupational therapy sessions occur typically in each therapy session. Here are more fun ways to build these essential skills:


Occupational Therapy Activities for Handwriting

We have many handwriting strategies here on the website. Some of our favorite ways to develop handwriting skills in OT include:

Working on fine motor skills, visual perception, visual motor skills, sensory tolerance, handwriting, or scissor skills? Our Fine Motor Kits cover all of these areas and more.

Check out the seasonal Fine Motor Kits that kids love:

Or, grab one of our themed Fine Motor Kits to target skills with fun themes:

Want access to all of these kits…and more being added each month? Join The OT Toolbox Member’s Club!

Colleen Beck, OTR/L has been an occupational therapist since 2000, working in school-based, hand therapy, outpatient peds, EI, and SNF. Colleen created The OT Toolbox to inspire therapists, teachers, and parents with easy and fun tools to help children thrive. Read her story about going from an OT making $3/hour (after paying for kids’ childcare) to a full-time OT resource creator for millions of readers. Want to collaborate? Send an email to contact@theottoolbox.com.