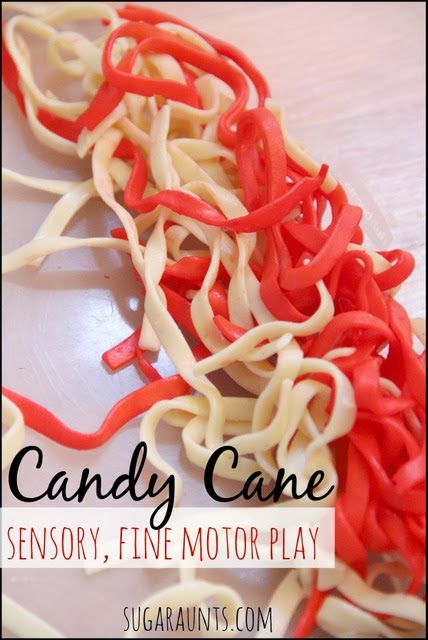
This was super easy to make, considering we used the Scented Snowman Play Doughthat we already had in the house…I do have to say though, that since somebody (cough, Little Guy, cough) put the bag of Dough into the freezer…it was a liiiitle dry after thawing out. Not too badly, though…nothing a tablespoon of vegetable oil didn’t fix!
I split the dough into halves and made a little well with my finger in one of the halves. After putting some red food dye in, and mixing up a bit, it started to look pretty neat!
A tip: Use a plastic shopping bag to mix the food coloring in. Unless you want reeeeally red hands!
Getting there:
Getting closer:
This is how I had it set up for the kids this morning. They were so excited to play with the Peppermint Dough! Oh, and also, mixing the dough around so much makes the scent pretty much non-existent. The scent just gets mixed in the more it is used. I do think it would be pretty cool to add some peppermint extract to this for an added sensory experience!
It has been so much fun coming up with fun play ideas and sharing them with our readers. We are truly having a blast with this! Thank you, readers, for all of your kind words and encouragement with this blog that has so far, been really fun and rewarding to do. We love knowing that our ideas have inspired you!
Looking for done-for you therapy activities this holiday season?
This print-and-go Christmas Therapy Kit includes no-prep, fine motor, gross motor, self-regulation, visual perceptual activities…and much more… to help kids develop functional grasp, dexterity, strength, and endurance. Use fun, Christmas-themed, motor activities so you can help children develop the skills they need.
This 100 page no-prep packet includes everything you need to guide fine motor skills in face-to-face AND virtual learning. You’ll find Christmas-themed activities for hand strength, pinch and grip, dexterity, eye-hand coordination, bilateral coordination, endurance, finger isolation, and more.
Colleen Beck, OTR/L has been an occupational therapist since 2000, working in school-based, hand therapy, outpatient peds, EI, and SNF. Colleen created The OT Toolbox to inspire therapists, teachers, and parents with easy and fun tools to help children thrive. Read her story about going from an OT making $3/hour (after paying for kids’ childcare) to a full-time OT resource creator for millions of readers. Want to collaborate? Send an email to contact@theottoolbox.com.
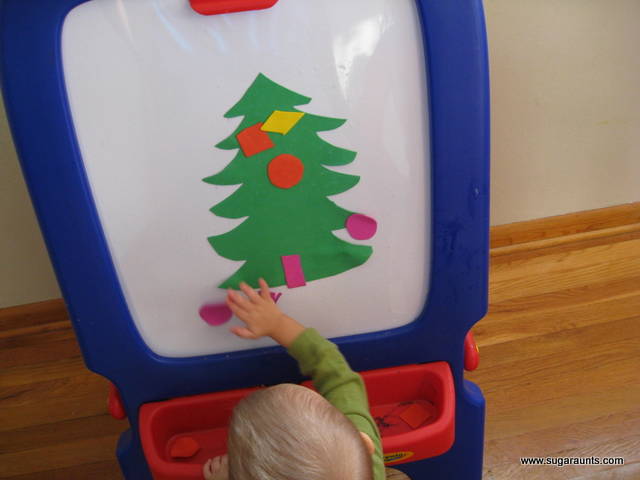
This Christmas Tree Sensory Play activity was fun for the senses, cutting, patterning, sorting, and even pre-handwriting!
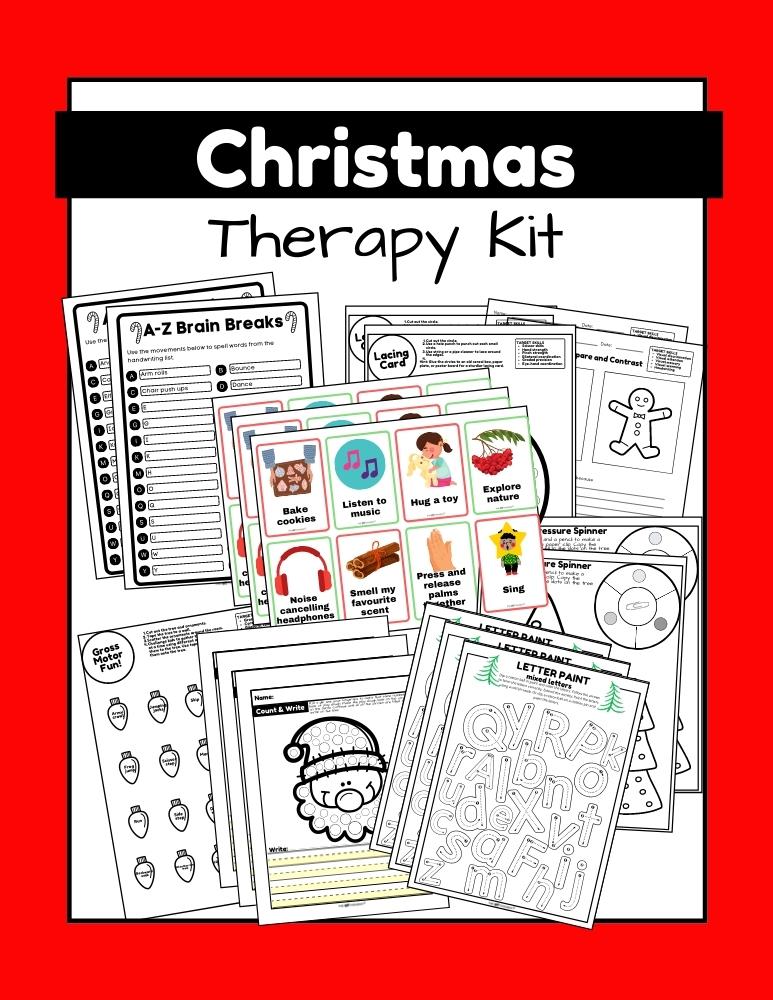
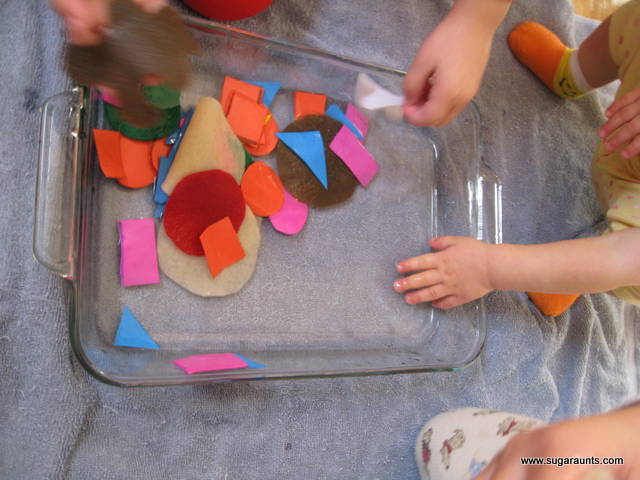
Big Sister showed Little Guy how to cut shapes from foam sheets. We had these in our crafting bin just waiting for some fun Christmas play…
Each color was a different shape so they could be sorted and used in patterns on the tree.
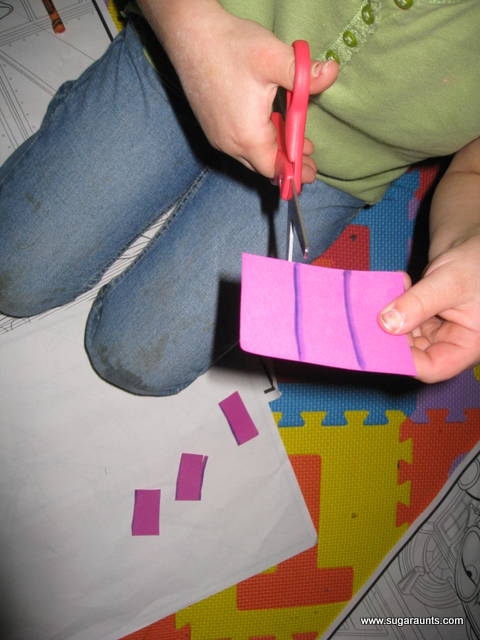
While the Big Kids worked on the cutting and sorting, the Babies had a fun time fighting playing with some coasters 😉
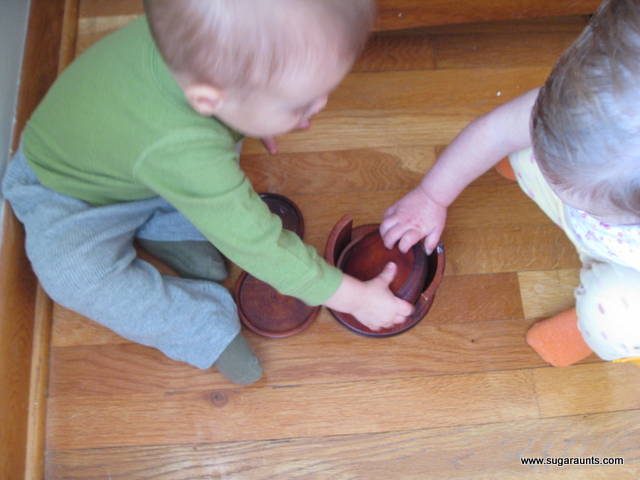
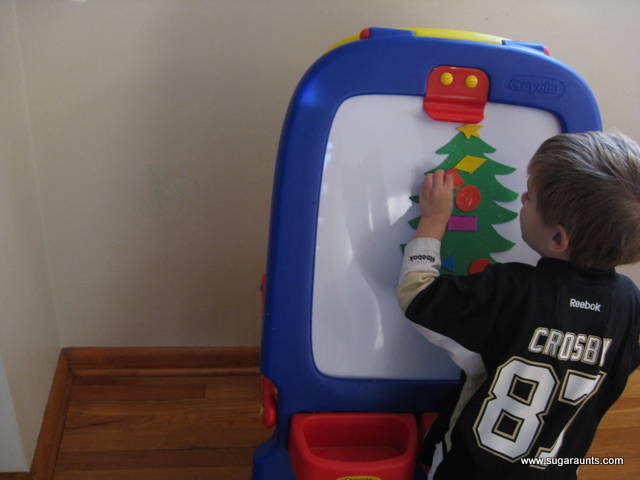
I stuck the tree shape in the water and when the foam sheets are wet, they stick really well to a white board.
Everyone was so excited when they realized the shapes would stick and had a blast decorating our little tree.
We started out with the tray of water on the table and did some patterns on the tree, putting the colors or shapes one at a time on the Christmas Tree.
I wanted them to use the easel white board to promote wrist extension (bending the wrist back). This is so important in controlled use of those little fingers when they write, cut, tie their shoes…any fine motor dexterity task.
If a child has a flexed wrist (bent forward), they don’t have the control to manage skills using the small muscles of the hand. Think about holding a pencil. If the wrist is bent forward, it is so much harder to write with smooth and controlled pencil strokes. A slightly extended wrist is much more efficient in any fine motor task.
Working on a vertical plane (like the easel) is perfect for promoting an extended wrist!
The Babies just had sooooo much fun with this!
After a bit, we decided to put the whole water tray on the floor…
Oh yeah, that was fun!
They had so much fun with this! The mess really was not bad, with the small amount of water that was in the pan. Even still, the point of our Christmas Play Series is to have fun with your little ones, enjoy a moment of play, and slow down during this hectic, crazy month. If you’re too busy worrying about the potential mess inany play activity, it’s not worth it…put it away and try something else. The kids will sense your stress level and that affects them!
One important thing to keep in mind when doing a (fun) messy play activity… is the sensory inputs, educational aspects, and unique experiences you’re exposing your kiddos to. Not to mention the bonding experience and LAUGHS that will without a doubt result!
Don’t Stress the Mess!
And, at least with this play activity, you can mop up the floor a bit afterwords and combine some cleaning into it 🙂
Look at all those happy little piggy toes!!
I think we are missing the swimming pool days of summer 😉
Have a Fun Day!
More Christmas Play activities you may be interested in:
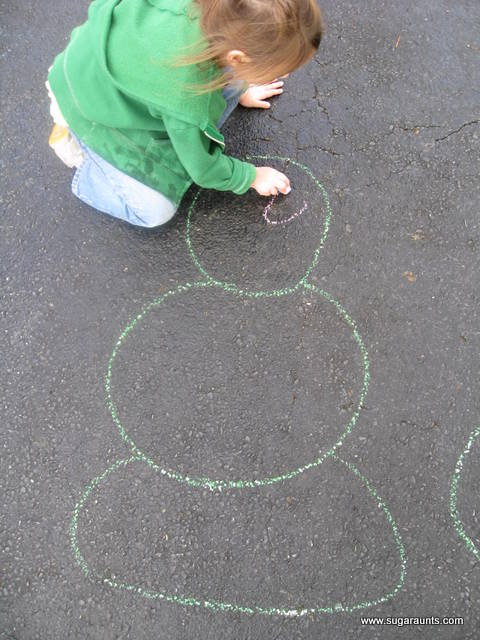
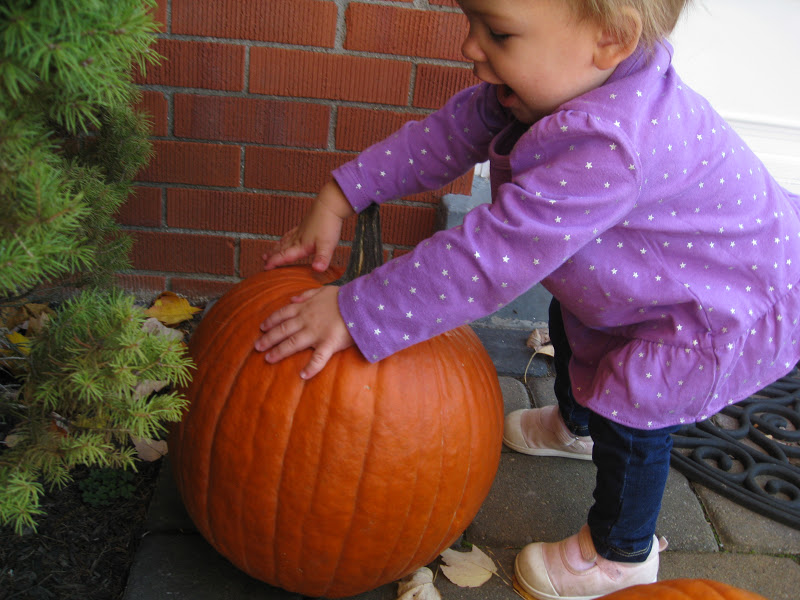
It was a beautiful 65 degree December day here…We spent it loving the outside this afternoon…Ate our lunch on the porch, played in the sandbox and backyard, did some sidewalk chalk…and decided to make a little Fake Snow!
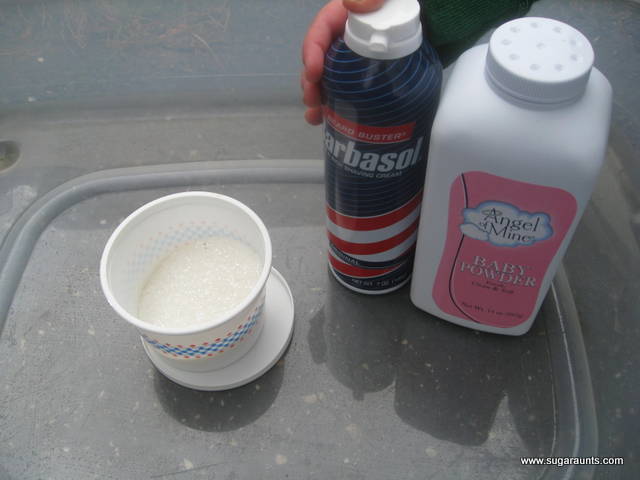
These are the ingredients…Shaving cream left over from our Summer Messy Play Date, baby powder from the Dollar Tree, and glitter!
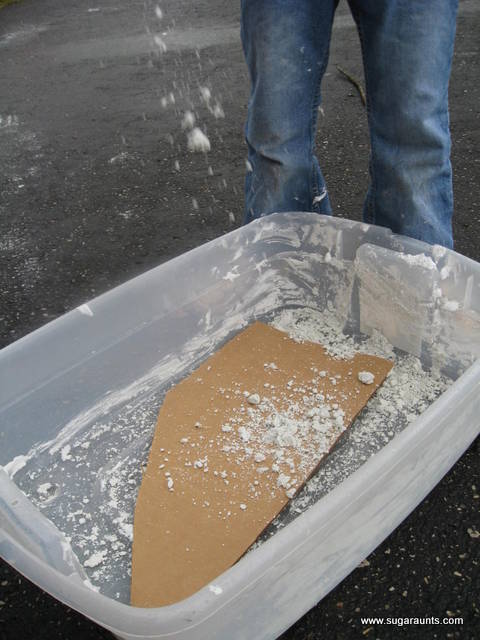
Big Sister and Little Guy were so excited to play in the shaving cream.
(Who wouldn’t be???)
We used about half of the bottle of shaving cream and half of the baby powder to get this consistency. It was pretty mold-able and Very Fun to play with!
Fake snow Snowman…
Big Sister had the idea to sprinkle the snow and sing “it’s snowing…it’s snowing…”
I enjoyed my coffee with Peppermint mocha creamer and a candy cane while the snow fell!
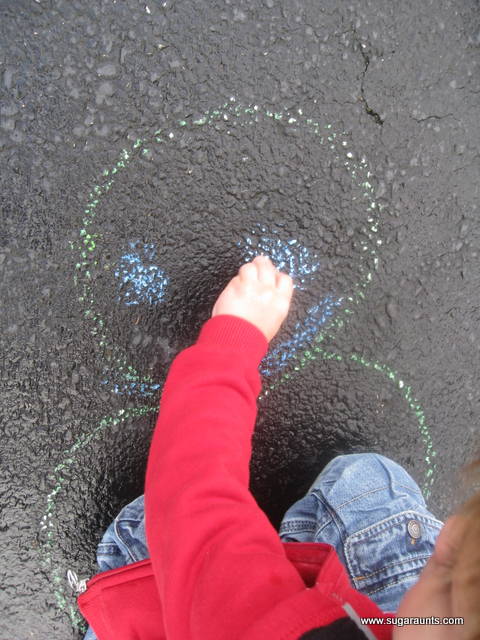
A few more pics of our other outdoor play today…Snowman Emotion Drawings: I drew the snowmen and asked for a happy snowman, a sad snowman, and a surprised snowman.
(They did a little Multi-step Direction Following, and Emotion Identification!)
Our Christmas Play series has been so much fun, so far! We have a lot more planned…Stop by tomorrow to see what we have been up to!
This is the first post in a series of Christmas-themed play ideas. It’s a season of rushing, big family meals, travel, shopping, wrapping…It’s easy to forget the real reason for this season.
Seeing my kid’s excitement for Christmas this year is so much fun! So contagious!
We wanted to come up with a gift for our readers for Christmas, and thought it would be appropriate to present you with loads of fun play ideas. One for each of the days leading up to Christmas…so you can slow down, enjoy this precious time with your children, and play!
This first Christmas play idea was a simple recipe for making homemade playdoh with a twist.
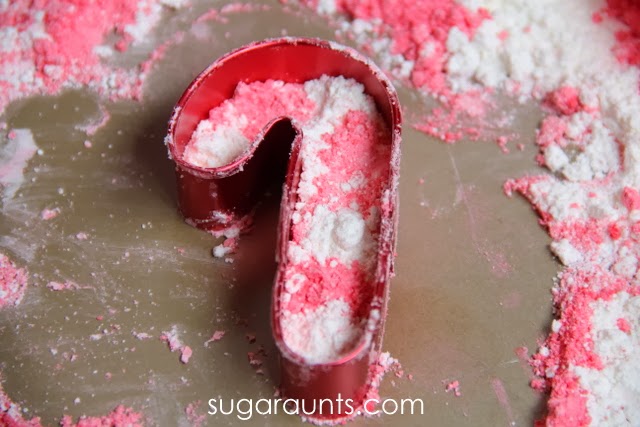
Scented Snowman Playdoh!
Take your basic ingredients, but instead of water, use scented TEA. I used Comfort time tea to promote the relaxing and soothing scent of chamomile.
1 cup flour
1/2 cup salt
2 tsp Cream of Tartar
2 Tbsp oil
1 cup of hot tea (any scent)–or you could use water instead of tea
Mix the dry ingredients together in a saucepan. Add the rest of the ingredients and stir over medium heat. Keep stirring until the mixture pulls together. Add more flour if it seems too gummy. When it forms a ball (like playdoh consistency), dump it out onto a cutting board or other clean surface. Let the dough cool, and then knead for a few minutes.
At this point, I mixed in glitter to make our snow playdoh. Little Guy loved helping with this part.
This is the play invitation that I set up for Big Sister and Little Guy…
snow playdoh, snowman cookie cutters, glass gems, black beads, brown pipe cleaners, orange plastic lacing cord cut into little bits, and white fuzz balls.
Of course the construction vehicles had to move some snow.
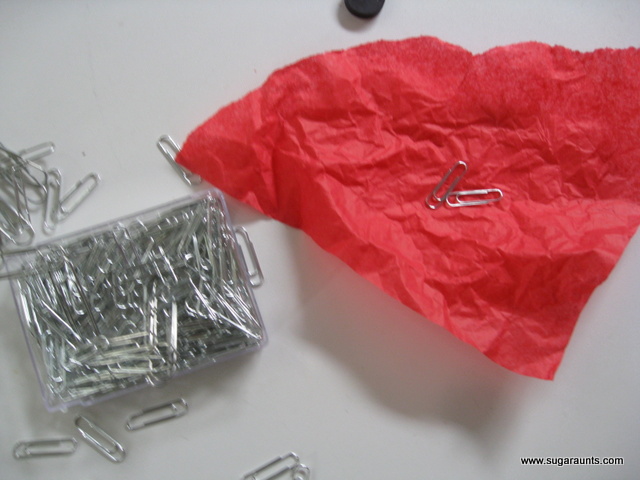
This was a play invitation I set up one day for Big Sister and Little Guy.
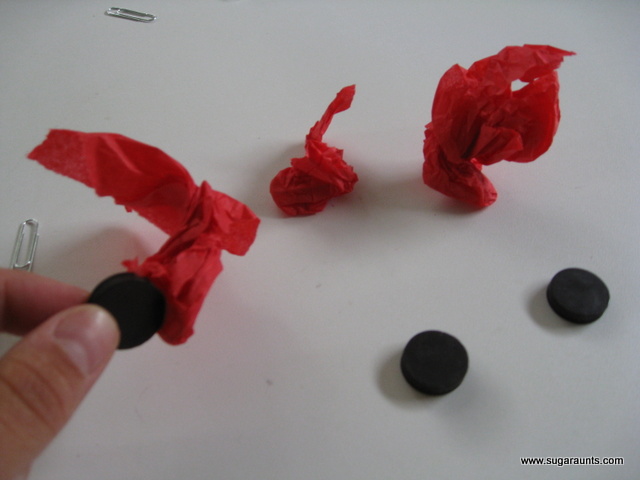
Paper clips, magnets, tissue paper, and the corn bin.
((The Babies were sleeping…tooooo many hazards with this one!))
The Big Kids had fun exploring with the magnets.
We tore the tissue paper into small squares (Tearing paper into little bits works on those small muscles in the hands). Put a couple of paper clips into the tissue paper.
And crumble it up into a ball
We were calling them “apples”.
Only requiring a small stretch of the imagination 🙂
Big Sister and Little Guy went on an Apple Hunt, raking the magnets through the corn to grab up the apples.
It felt pretty neat on the hands to rake through the corn…a great sensory play activity!
We love water bead activities and just like our water bead sensory bin, the activities in this blog post are fun ways to target fine motor skills through play. You’ll also find a list of fun water bead ideas to support sensory play and multisensory learning.
Have you ever experienced the unique fun and sensory experience that water beads provide? From creating colorful creations with your hands to exploring a squishy, mesmerizing texture between your fingers – there are plenty of incredible ways to explore the wonderful world of water beads. Let’s dive right in and explore some of the exciting possibilities of this activity!
What are Water Beads
Have you heard of water beads? Traditionally used as a vase filler, over the years, these expandable beads have been introduced as a sensory play medium.
Water beads, also known as non-edible beads, are composed of a water-absorbing polymer mixture. This polymer is comprised of minute particles that adhere to one another, forming elongated chains, which holds the form of the waterbead.
Dry water beads have the capacity to absorb water, expanding and filling up like a sponge when immersed in water. This is the form that is used in sensory play activities.
Benefits of Waterbead Activities
Water bead activities have become increasingly popular with children and adults alike as these activities offer a host of benefits. Not only are water bead activities fun and engaging, but they also help build physical and mental skills.
One of the best things about waterbead activities is that they help to develop hand-eye coordination. Children can use their hands to manipulate the beads into different shapes and patterns that require a certain amount of skill and concentration. This helps strengthen their motor skills, as well as their ability to think spatially and problem solve.
Waterbead activities also encourage creative thinking. When playing with the beads, children are encouraged to come up with new ways to use the beads and create unique designs. This helps to build their imagination and increase their confidence in their own creative abilities.
Finally, water bead activities are a great way to teach children about the properties of water. By playing with the beads, children learn about the properties of water, such as viscosity and surface tension. In addition, they can explore the different effects that different temperatures and amounts of pressure can have on the beads.
Before we get to our water bead activity below, think of all of the ideas you can do with water beads. These are activities to support several aspects of development:
Fine motor skills– pincer grasp, separation of the sides of the hand, thumb opposition
Benefits of playing with a sensory bin: self-confidence, problem solving, creativity, etc.
Learning opportunities
Beside the benefits of using this sensory material, water beads should be used with caution. They should only be used under the supervision of an adult and never with children who may put the water beads into their mouth.
Water Bead Activities
There are SO many creative ideas for using waterbeads! Some of our favorite fun ways to use water beads include:
Sensory play: Let your hands sink into a container filled with water beads and enjoy the unique tactile sensation.
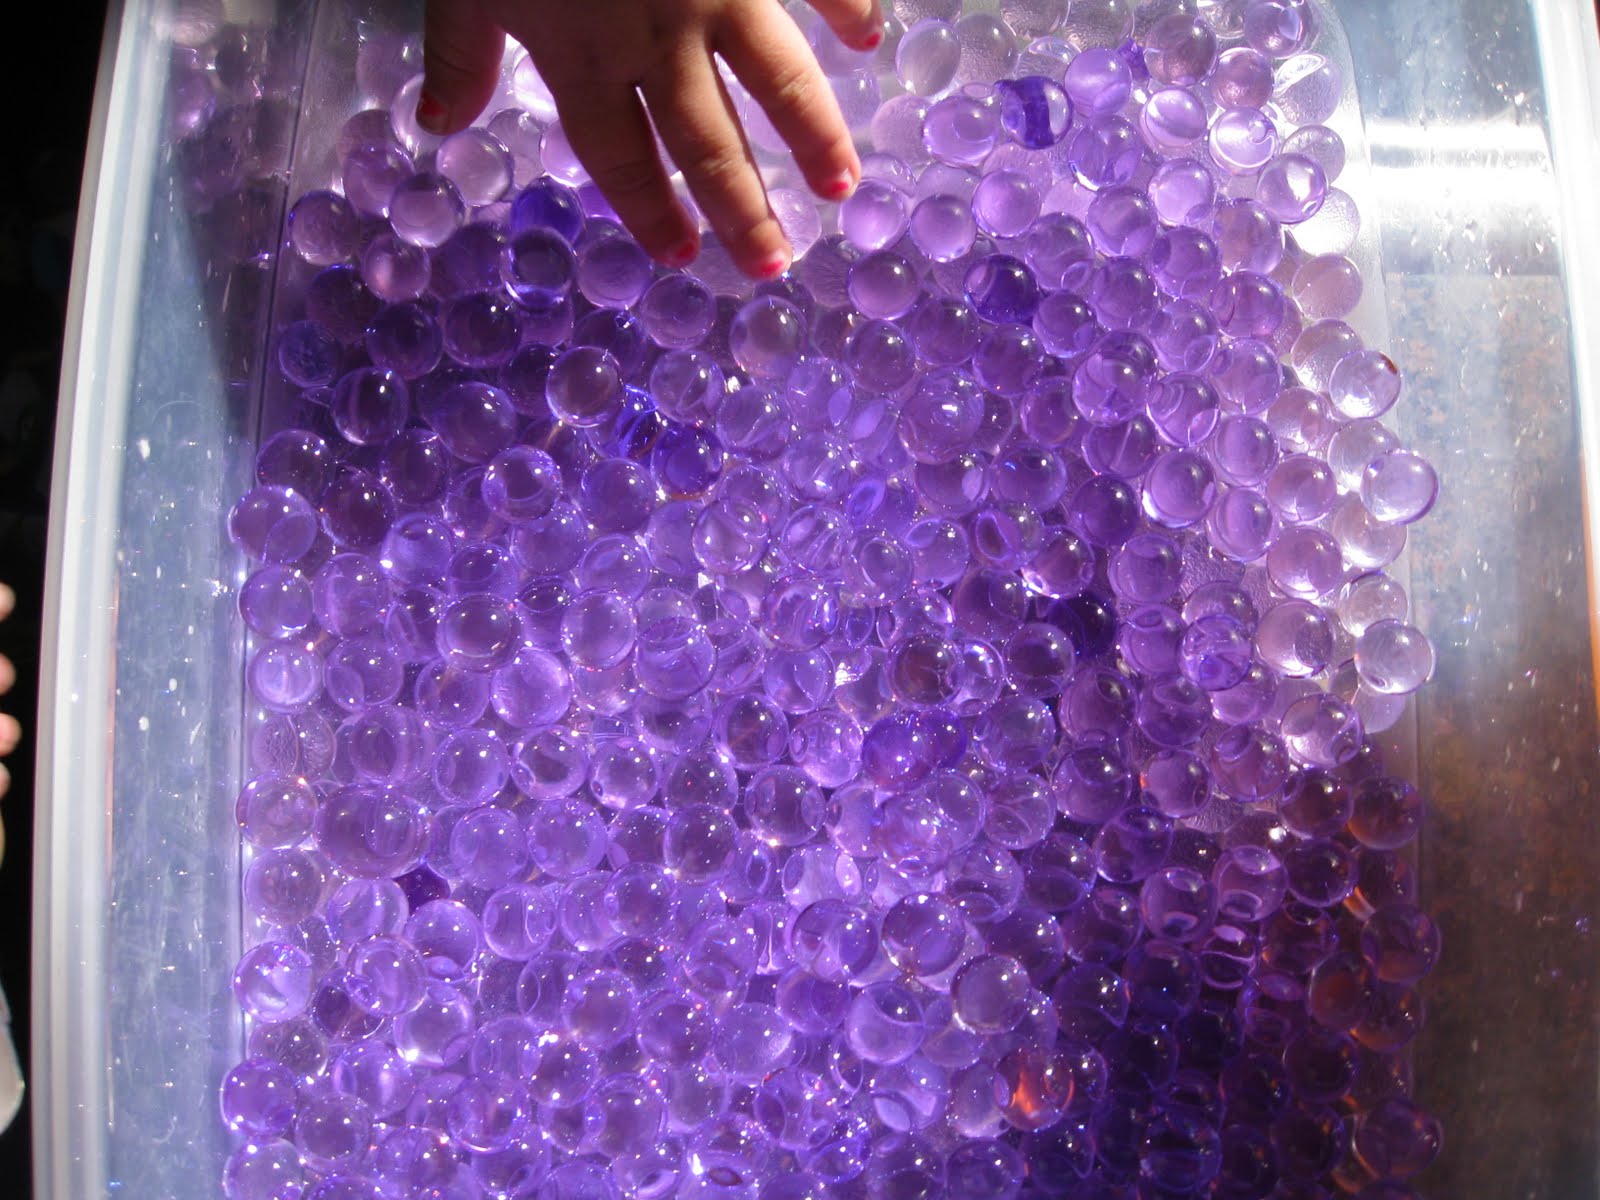
Water bead sensory bin: Create a large sensory bin filled with water beads and let children explore and play. After using them, they can be used for other sensory bins like in this purple sensory bin.
Make water bead shapes: Use the beads to form different shapes such as squares, circles, and triangles. Once the shape is complete, ask your children to draw the shape on a piece of paper. This activity is great for developing hand-eye coordination and spatial awareness.
Color mixing: Use water beads of different colors and mix them together to create new color combinations.
Water bead patterns: Give your children a handful of beads in different colors and ask them to arrange them in an interesting pattern. This activity encourages creativity and problem solving.
Sorting and counting: Sort water beads by color, size, or shape. Practice counting and organizing them into different groups. This activity is great for encouraging your children to think critically about the properties of the beads.
Water bead art: Glue water beads onto a canvas or paper to create unique textured art pieces.
Water bead ice: Freeze water beads in ice cube trays to create colorful, sensory ice cubes for water play.
Make a sensory mat- Fill a gallon sized baggie with water beads. Seal the edge and tape. Then tape to the floor or table surface to create a water bead sensory mat.
Water bead balloons: Fill balloons with water beads and then inflate them. Squishing and playing with these squishy balloons is lots of fun.
Water bead sensory bags: Fill resealable plastic bags with water beads and a little bit of water, then seal them tightly. Children can squeeze, squish, and explore the beads through the bag.
Water bead sensory bottles: Fill empty water bottles with water beads and water to create calming sensory bottles. Add glitter or other small objects for added visual interest.
Water bead bath: Add water beads to a bathtub filled with warm water for a unique sensory bath experience.
Fill a clear plastic container to make a water bead sensory box. Seal the edges and shake!
Water bead shooters: Use plastic syringes or turkey basters to shoot water beads across a table or into targets.
Water bead slime: Mix water beads into homemade slime or play dough to create a textured and colorful sensory experience.
Water bead excavation: Freeze water beads in a block of ice and let children excavate them using warm water or tools like spoons and small hammers.
Water bead planters: Fill small pots or vases with water beads and place small plants or flowers in them. The beads will help keep the plants hydrated.
Water bead sensory letters or numbers: Glue water beads onto large foam letters or numbers to create a tactile learning experience.
Water bead stress balls: Fill balloons with water beads and tie them off tightly. Squeeze and squish the stress balls to relieve stress and promote relaxation.
Water bead marbles: Use water beads as a substitute for traditional marbles in games or marble runs.
Water bead sensory jars: Fill clear jars or bottles with water beads of different colors and sizes. Children can shake, tilt, and observe the beads as they move and settle.
Water bead target practice: Set up targets or containers and try to toss or shoot water beads into them, testing your aim and coordination.
Remember to always supervise children during water bead play and ensure they do not put them in their mouths, as they can be a choking hazard.
I’ve seen Water Bead play all over Pinterest and the web. We had to try them! They are the beads you see in vases with flower arrangements and you can find them in the floral aisle of Walmart. I’ve even heard that Dollar Tree carries them. They are non-toxic and stay squishy long enough for fun sensory play once they are hydrated when out in the open air. If covered with a lid, they won’t dehydrate and will stay hydrated for much longer.
how to hydrate water beads
Hydrating water beads is easy to do (and fun for little hands). It’s a great motor skills activity in and of itself.
1. Pour the packet of water beads into a large container. Select a container that has a lid so you can keep your water beads hydrated for some time.
3. Allow the water beads to sit in the water for a few hours. You will see them start to expand as they soak up the water.
4. Drain the water beads into a colander to remove the excess water. Or, if there is just a small amount of water still in the container, you can keep the water in the bin for added sensory input.
5. Now it’s time to play!
Drain the water in a colander and PLAY!
We left them over night but they hydrate in about 6 hours.
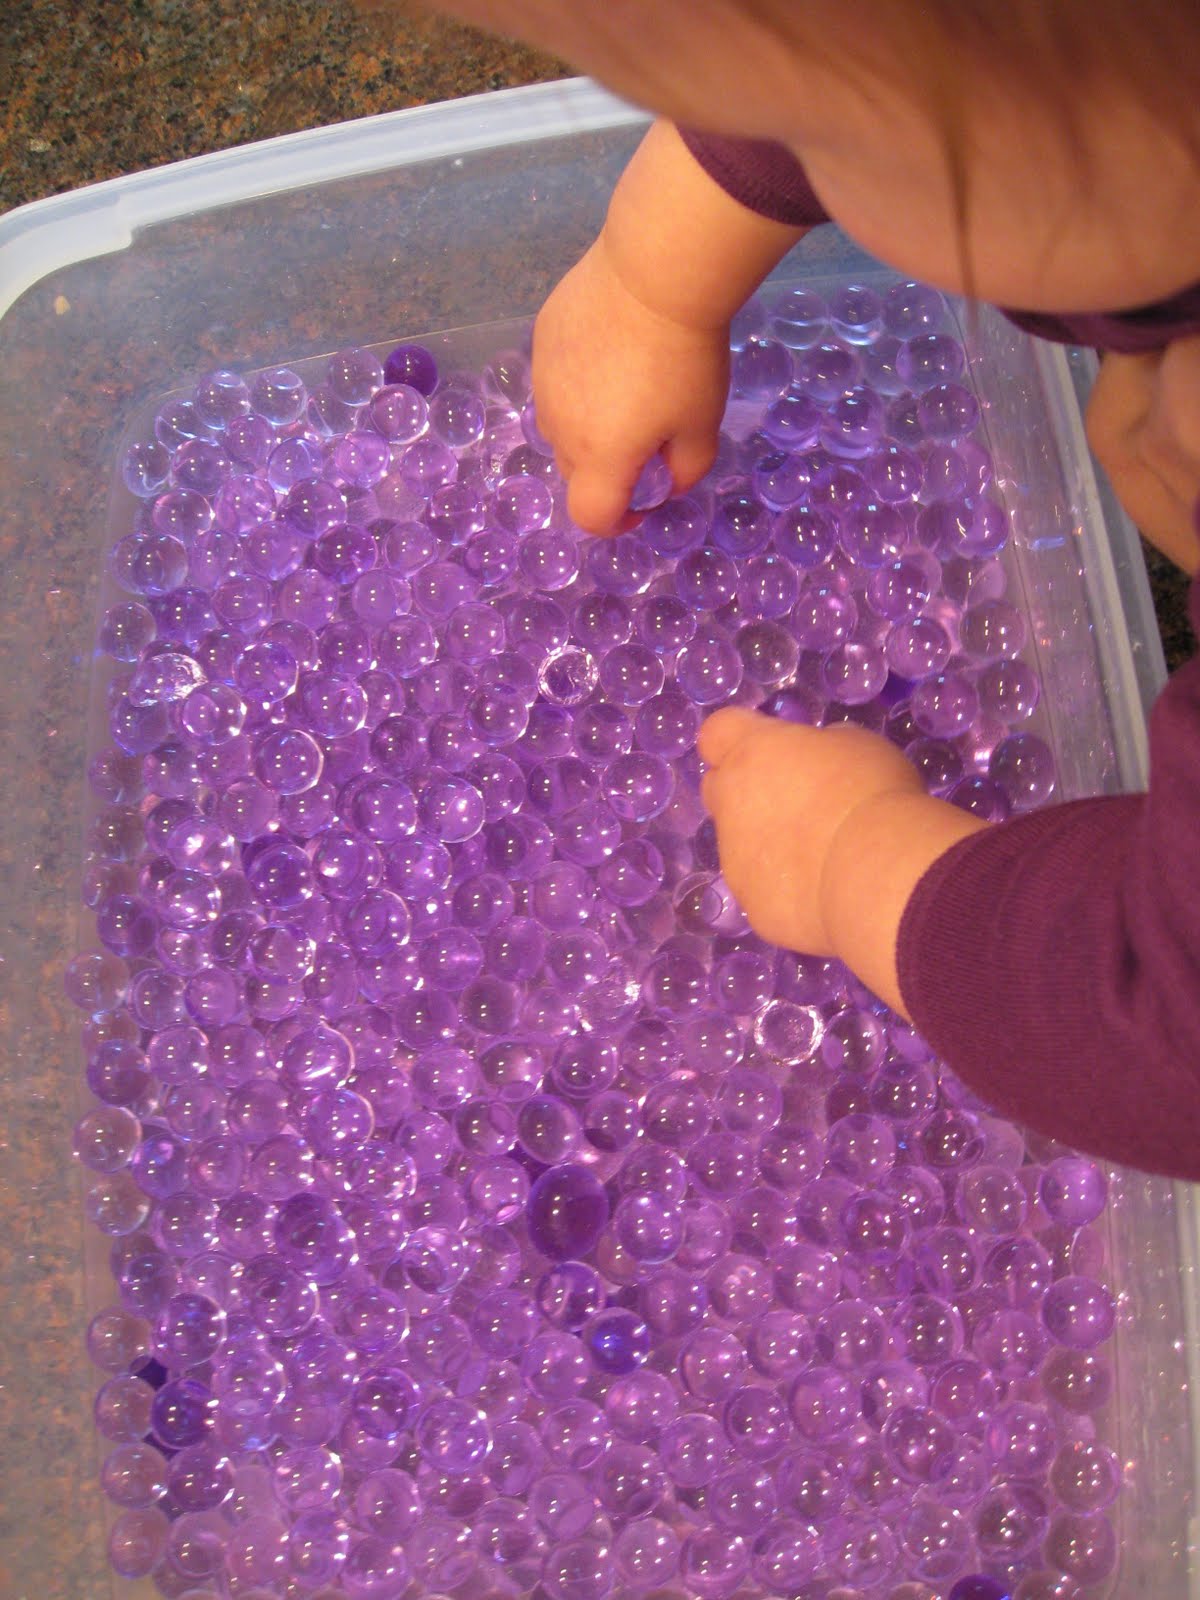
We LOOOOOVED playing with these things! We had them sitting in this bin on the counter the other day and every time she caught a glimpse, she got all excited and wanted to play.
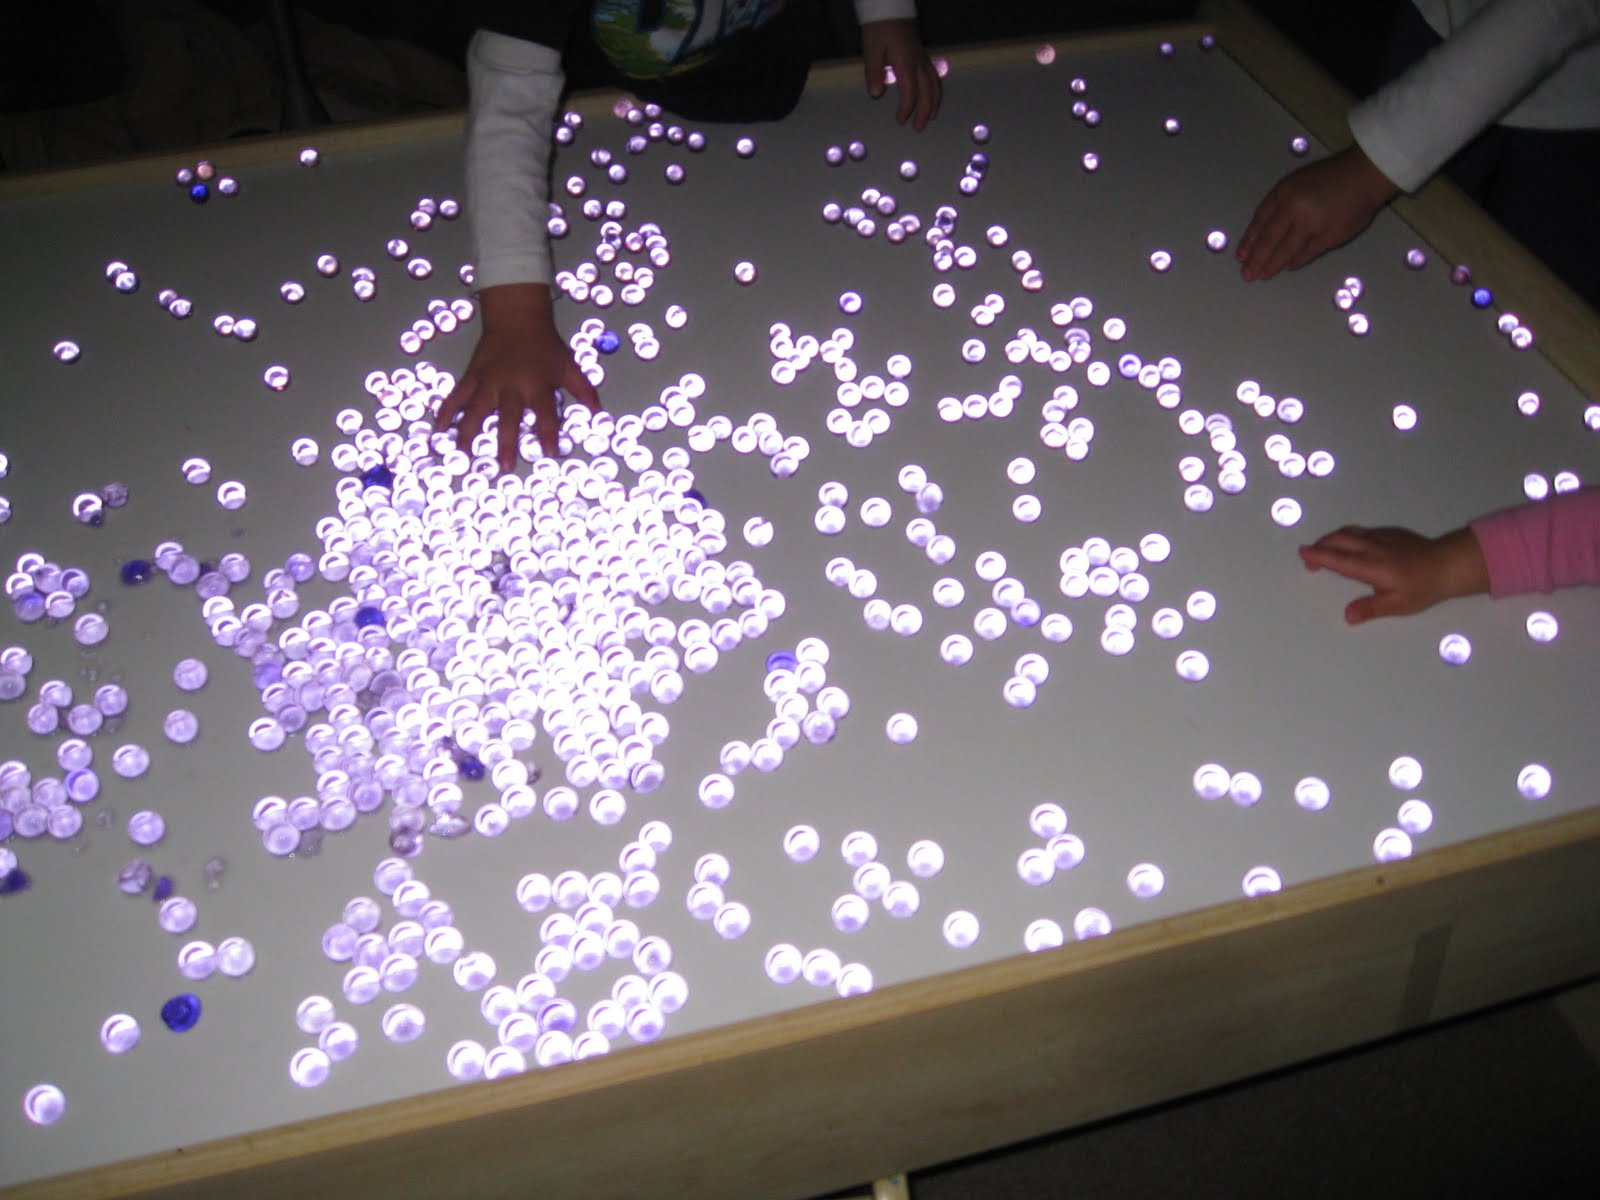
Use a flashlight and make them shine.
Dinosaurs MAY have been caught stomping, kicking, eating, and fighting the water beads…
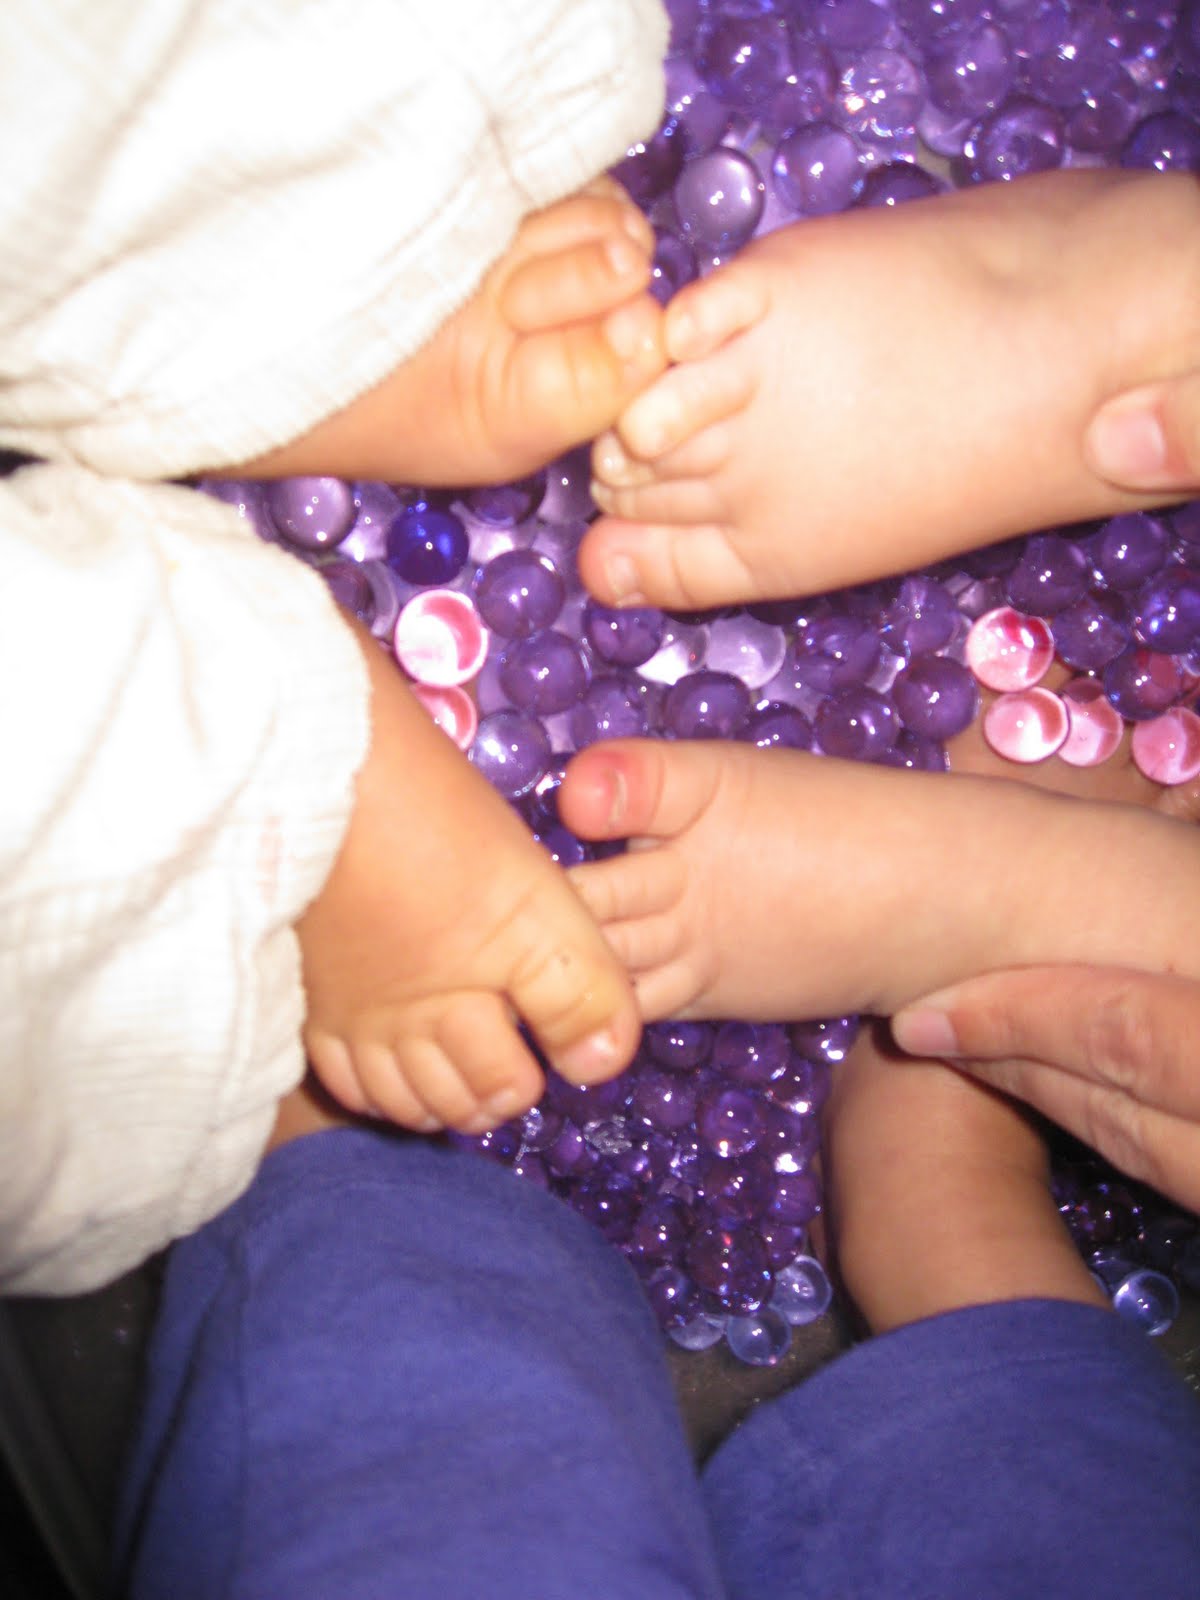
So squishy on bare toes! Our neighbor came over with her little guy to get in on the fun.
This was so fun and water beads are so cool to play with. The imagination really emerged when dinosaurs came onto the table. We have the water beads in a bin with a lid now. What to do with them next….hmmmm… 🙂
Working on fine motor skills, visual perception, visual motor skills, sensory tolerance, handwriting, or scissor skills? Our Fine Motor Kits cover all of these areas and more.
Check out the seasonal Fine Motor Kits that kids love:


