Water Bead Sensory Box

This is an OLD blog post. We do not recommend doing this activity or any activity that uses water beads as a sensory toy.
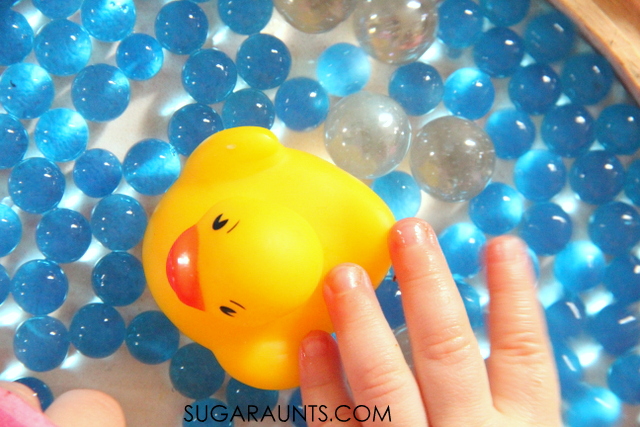
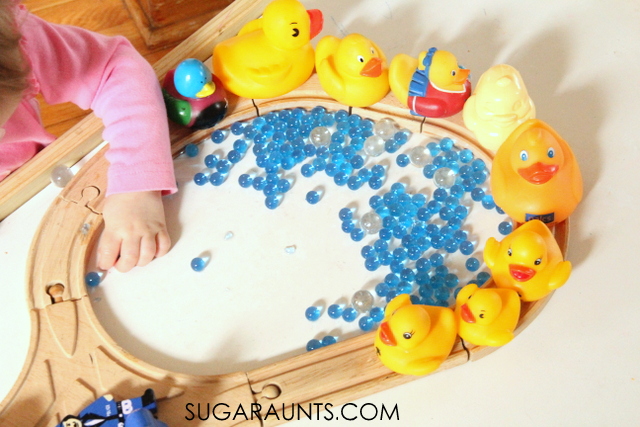
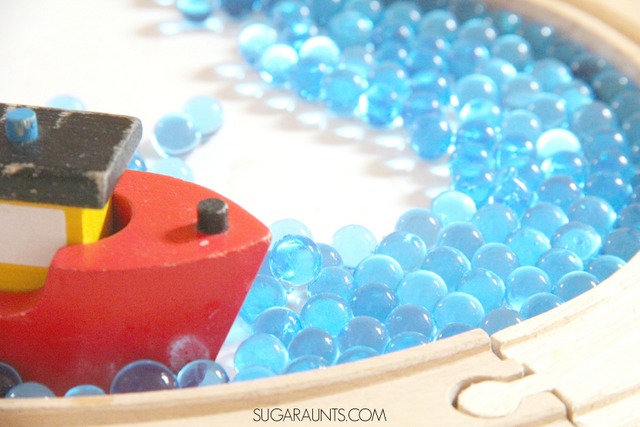
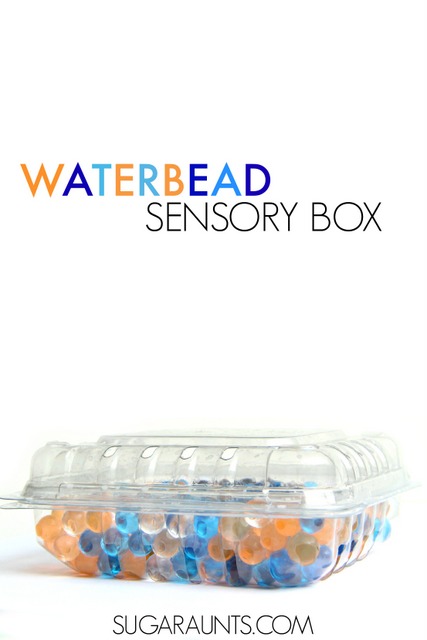
We do a ton of sensory play in our house and always have a pack of water beads ready to go for a water bead sensory activity.  So the inquiring little baby-sized hands want to get in on the sensory fun.  We made this Water Bead Sensory Box that is perfect for Toddlers and Babies.


Safety Note : ALWAYS supervise your children (of all ages) with activities such as these.  While we have made our sensory box safe for kids, please use your judgement when playing with and exploring with your kids.  This blog and it’s authors are not responsible for injury or harm that may occur as a result of this or any activity/craft that is found on this site.
Water bead sensory box

We’ve made a water bead sensory activity before, and this one is another to add to the sensory play.  (We’re including affiliate links in this post for items that you might need to make this activity.)
Water bead sensory box
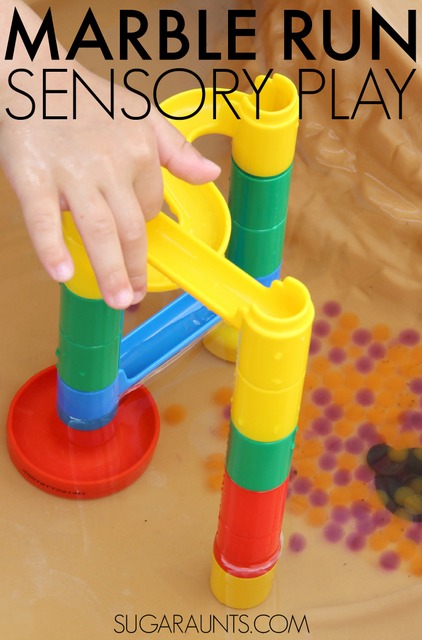
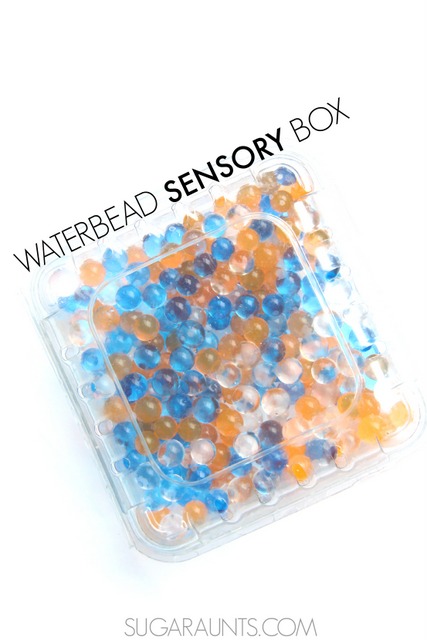
We started with just a few materials to make our water bead sensory box.  Grab a plastic fruit container with a lid from the recycle bin.  We used a blueberry container, and any berry container would be perfectly sized for the sensory box. 
The container should be on the thinner side and clear, with a lid.  You will need to enlarge water beads in water for 4-6 hours.  Once they have grown to full size, pour them into the plastic container.  Then, use super glue around the edges of the plastic container. Press firmly and allow the glue to fully dry before using the sensory box. We added a layer of hot glue using a hot glue gun (LOVE my hot glue gun!) to the edges of the plastic lid opening. You will need to allow time for the hot glue to fully dry as well.
 
Water bead sensory box
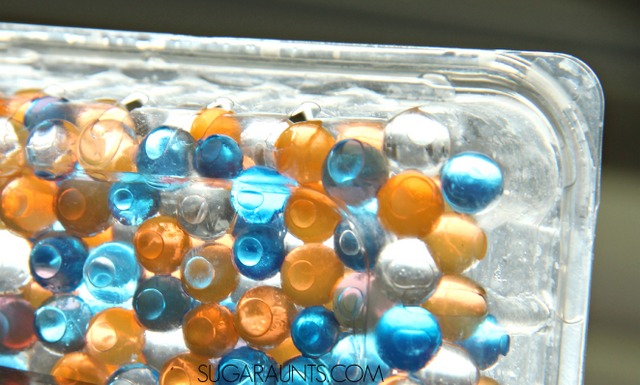
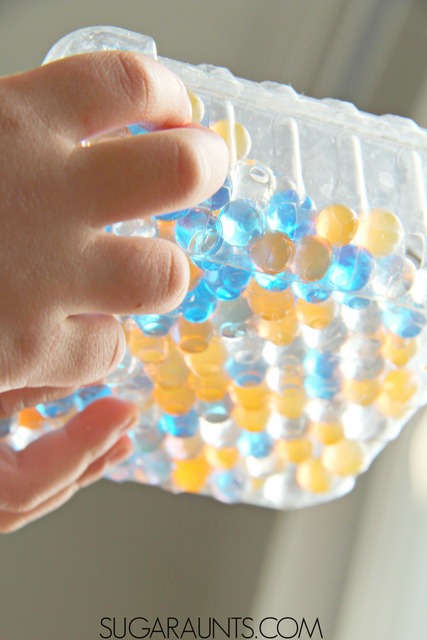
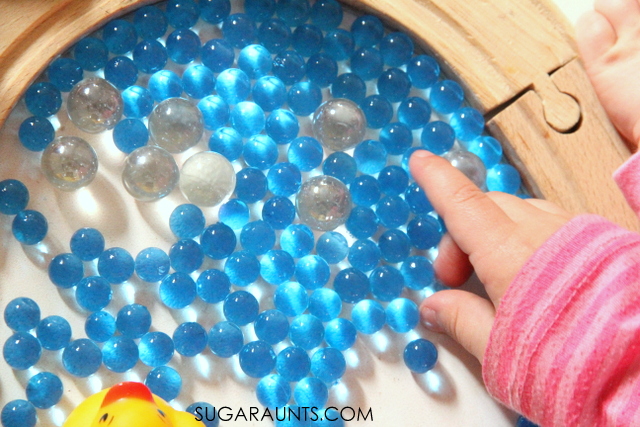
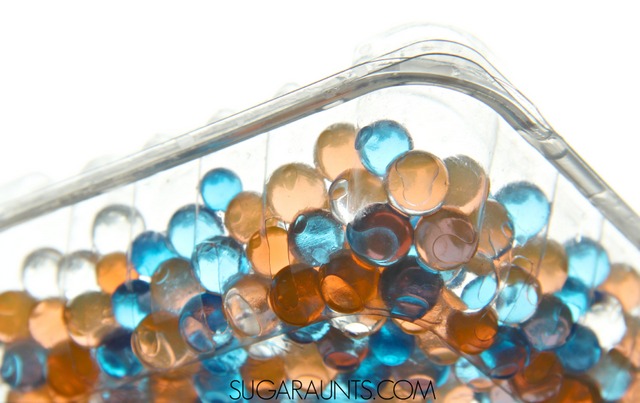
Once the glues have dried, you are ready to explore and play with the sensory box.  Play in a well lit area to explore the colors of the water beads.  This was such a fun way for the little one to explore a sensory material in a safe way.  As the box is tilted around and shaken, the beads move and create a great sound.  
 
Water bead sensory box
 
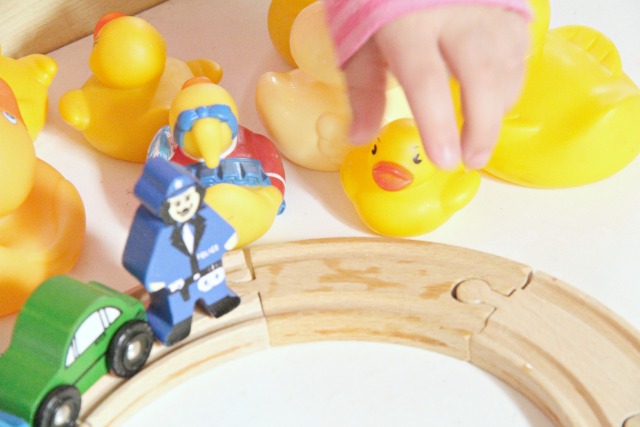
To extend this activity out, add learning to the sensory box.  Add words like we did in our sight words sensory bottle to practice spelling and sight words.  Before gluing add foam pieces with numbers to create a math activity.  Add letters or small items to create an I-Spy toy.  
 
The water beads will stay hydrated for longer than they usually do when exposed to air.  Even though there are holes in the recycled berry container, the water beads do not shrink as quickly as they normally do.  Have fun!
 
What ways would you play with this sensory box?
 

Fine Motor Workout Foam Sensory Bin

 
This foam sensory bin is a fine motor workout and SO much fun!  We actually did this activity (and took these pictures) last summer, but I’m just getting around to sharing them. 
 
 The secret to the foam is not what you might expect.  We used a common household item that you probably just throw away.  The hand strengthening that happens with this foam sensory bin is such a workout!   
 
Kids can get messy in the soapy foam and explore the senses, too.  This is a perfect outdoor summer activity, but could definitely be done indoors in a bin or sink.


Foam Fine Motor Strengthening Activity:

 
{This post contains affiliate links.}  To make our foamy soap, we used 

these soap dispensers. But don’t waste the bathroom soap! Save the containers after the bathroom/kitchen soap has been used up. Recycle the dispensers to create a foamy, soapy, sensory play activity that the kids will love!  You’ve probably seen this sensory foam activity.  We’ve never played with that version of sensory foam, but the colors and sensory fun of our activity reminded me of Fun at Home With Kids’ foamy fun.

Fine motor strengthening workout activity with foamy, soapy, sensory play!
 
It is so easy to make a soapy foam with these recycled dispensers.  Did you know you can re-use the dispensers?  Simply add a bit of liquid dish soap in the empty container and fill the rest of the container with water.  We added a squirt of liquid watercolors before putting the lid on and giving the dispenser a gently swirl.


Fine Motor Strengthening Workout:

Pressing the dispenser is really a great hand strengthening work out.  Not only that, if you position a bin on the ground, they are getting a workout to their whole upper extremity as they put weight through their arms.  They are moving around and shifting their upper body weight in a quadruped position while experiencing sensory input.  What an activity!
 
To extend this foamy sensory fine motor workout a bit more, try these ideas:
  • Add scents to the foam
  • Encourage your child to practice writing letters and numbers in the foam.
  • Hide animal figures or magnetic letters in the foam.
  • Continue the foamy play once the bubbles start to fade, by adding water at ta high pressure from the hose or kitchen sink.  The pressure of the water will bring the foam back to life for a second round!


 Sidenote: You can totally re-use these foam soap dispensers in the bathroom.  Just add a bit of scented liquid body wash and fill with water.  Instant scented hand soap for washing up at the sink.

Patriotic Crayon Salt Dough Recipe

This play dough recipe is a spin on the classic salt dough recipe.  Add a few broken crayons and you’ve got a crayon salt dough recipe that is sure to be a hit with the kids!  It’s just one of our crayon play dough recipes that are fun in so many ways! 


Memorial Day, Fourth of July, and all days patriotic (i.e. any day!) deserves a little red, white, and blue salt dough.  This Crayon Salt Dough is our current twist on our Crayon Dough series where we use melted crayons to color the doughs for vivid and bold colors with a soft texture.  This is a definite dough to make, and you’ll want to try them all! Using broken crayon pieces to make Crayon Play Dough is a fun way to reuse and recycle with a creative twist! 
Make patriotic salt dough with crayons this Memorial Day, Fourth of July, or any day! Use melted crayons to dye the salt dough for a bright and vivid color with a smooth texture.

Patriotic  Crayon Salt Dough


Our patriotic salt dough uses the same directions and ingredients as our regular salt dough recipe and a twist on our crayon play dough recipe. It’s an easy dough to throw together, which gives you more time for playing!
Make patriotic salt dough with crayons this Memorial Day, Fourth of July, or any day! Use melted crayons to dye the salt dough for a bright and vivid color with a smooth texture.
We divided the dough into three lumps and dyed one part with red crayons, one part with blue crayons, and left the last lump as is.  Instant red, white, and blue dough!  Play with the three individual colors or roll the lumps together for a swirled effect.
Make patriotic salt dough with crayons this Memorial Day, Fourth of July, or any day! Use melted crayons to dye the salt dough for a bright and vivid color with a smooth texture.
Part of the awesomeness of salt dough is it’s ability to harden and make long-lasting ornaments, paper weights, bowls, and all sorts of crafty items.  We used start cookie cutters to make multi-colored patriotic stars.  I wouldn’t bake these in the oven due to the wax content, but instead allow any creations to harden for several days in a dry place.  If you are making ornaments or hanging stars, be sure to poke a hole for a string with a skewer.
Make patriotic salt dough with crayons this Memorial Day, Fourth of July, or any day! Use melted crayons to dye the salt dough for a bright and vivid color with a smooth texture.

Make patriotic salt dough with crayons this Memorial Day, Fourth of July, or any day! Use melted crayons to dye the salt dough for a bright and vivid color with a smooth texture.
Enjoy your patriotic Crayon Salt Dough!

You can read all of our Crayon Dough recipes:


If you like the idea of using your broken crayon pieces in something as fun and creative as play dough, then you will love to try a few different ideas, too.  We’ve given crayon play dough a run for it’s fun and tried a few different versions.  Check them out and if you make a batch, let us know how you get creative with crayon play dough!

Crayon Salt Dough Recipe

crayon salt dough

This crayon salt dough recipe is an old one here on The OT Toolbox. It’s a dough recipe that is not only bright and vivid, it’s a great salt dough recipe that kids love to make. In fact, if you are wondering about how to color salt dough, we have the tips for you…it involves using crayons in the recipe! This salt dough recipe is a version of our crayon play dough that is tinted with the wax of crayons, giving it a bright and bold hue.

Crayon Salt Dough Recipe

 If you’ve been following us for a while, you know that we have a small love of homemade play dough.  (And by small, I mean huge).  

Not only that, we have a tendency to melt down crayons and create bold, bright, and beautifully soft crayon play dough.  We’ve made metallic sparkly crayon play dough and dough with every shade of red crayon that there is.  

We’ve even melted down crayons and made crayon floam dough for a super fun sensory dough.  Today, we’re sharing our latest crayon experiment:  

Crayon Salt Dough!   

So, HOW do you make salt dough with crayons?  Read on!


How do you make colored salt dough? Use melted crayons for the brightest and softed sensory play dough salt dough recipe there is! Kids will love to use this colored salt dough to make ornaments, manipulatives, and creative play items, all with crayon salt dough!


How to make salt dough dyed with bright and bold colors of Crayons?  

 
to make our Crayon Salt Dough, we used portions of our crayon play dough technique.  I’m including affiliate links for some items you may need to purchase to make this Crayon Salt Dough.  
 
We used a few materials in this sensory dough recipe:
 
  1. 2-3 chopped crayons crayons (This is the tried and true brand that works for all the crayon doughs that we’ve made.) I say 2-3 because we used broken crayons that have seen their days of coloring book fame gone.  In other words, they are the bits and pieces of crayons that are floating around the bottom of the crayon bin.  I’ve found that a difference of 2 or 3 crayons does not matter all that much when it comes to bright and vivid colors you will get from using crayons to dye play dough or salt dough.
  2. 1 teaspoon vegetable oil
  3. 1 cup salt
  4. 2 cups flour
  5. 1 cup water

Now, when we made our salt dough, we made a few different colors.  So, instead of using the measurements above, I had the kids measure out all of the ingredients and then divide the dry ingredients into three different bowls. 

If you are wondering what to do with old crayons, this is it!

I then made three batches of salt dough.  You could do the same to make a few different colors…and with a huge box of gorgeous crayons, you’ll probably want a few different bright and beautiful colors.  

I will describe the instructions on making just one batch of crayon salt dough so that measurements are not confused.

 
How do you make colored salt dough? Use melted crayons for the brightest and softed sensory play dough salt dough recipe there is! Kids will love to use this colored salt dough to make ornaments, manipulatives, and creative play items, all with crayon salt dough!


Crayon Salt Dough Crayon Play Dough Recipe

Once you have your ingredients for the crayon dough gathered, next you can get started:
 
  1. Prepare the dry ingredients:  Mix together in a bowl, the 1 cup salt and 2 cups flour.  
  2. Set the dry ingredients aside.  
  3. Peel the wrapper from and chop up the 2-3 crayons.  
  4. Pour the 1 teaspoon of vegetable oil into a sauce pan.  We found the cheapest sauce pan that we could and use it for all of our kitchen experiments.  (i.e. I would not use it for cooking actual food!)  
  5. Turn on the burner and add the chopped crayon to the oil.  Do not let the oil heat up too much!  
  6. Stir while adding 1 cup of water.  
  7. Continue stirring and slowly add in the dry mixture.  Stir until the dough begins to lump together.  
  8. Dump out onto parchment paper or other surface.  
  9. Allow the dough to cool to touch.  Knead the dough until smooth.  Then knead a little more.  If the dough is too sticky, add a bit more flour in 1/4 cup increments.


How do you make colored salt dough? Use melted crayons for the brightest and softed sensory play dough salt dough recipe there is! Kids will love to use this colored salt dough to make ornaments, manipulatives, and creative play items, all with crayon salt dough!
 
Start to play!
 
How do you make colored salt dough? Use melted crayons for the brightest and softed sensory play dough salt dough recipe there is! Kids will love to use this colored salt dough to make ornaments, manipulatives, and creative play items, all with crayon salt dough!
 
We used our dough to create number manipulatives using number cookie cutters.  They are still drying, but we have big plans for these cuties!  Be sure to stop back soon to see how we’re using them in all kinds of counting and ordering games.  
 
We let these cut outs dry for several days on wax paper.  I was hesitant to try slow heating them in the oven like a typical salt dough recipe because of the wax content.  I like my oven a little too much for that experiment!
 
You may want to see our other Crayon Dough Recipes:
 
If you like the idea of using your broken crayon pieces in something as fun and creative as play dough, then you will love to try a few different ideas, too.  We’ve given crayon play dough a run for it’s fun and tried a few different versions.  Check them out and if you make a batch, let us know how you get creative with crayon play dough!


Gold, Silver, & Bronze Metallic Crayon Play Dough

Patriotic Crayon Salt Dough Recipe

Crayon Salt Dough Recipe

Crayon Floam Dough Recipe

Crayon Shaving Art

Shades of Red Crayon Play Dough

Harold and the Purple Crayon Play Dough

Metallic Crayon Dough

Shades of red crayon play dough

Original Crayon Play Dough Recipe

Rainbow Crayon Play Dough

Bow Stamp Art Flower Craft

Our recent Painting with Pinwheel art was such a hit that we had to try another stamp art activity.  We made this gift bow flower stamp art craft in honor of a special little one in our house who is celebrating her first birthday.  Using the gift bows as a stamp made the cutest flower art.  This craft is perfect for preschoolers (and kids of all ages) when making flower art!  I think it would make a pretty special DIY birthday paper wrapping too!
This is one of our favorite hand eye coordination activities for toddlers because there is no right or wrong way to make this toddler painting art!

Make flower art using a gift bow to stamp! Cute idea for a flower craft or DIY wrapping paper.


To make your Gift Bow Flower Art:

 
Pick up just a few materials.  We’re including affiliate links for your convience here.  You’ll need 

paint (LOVE this brand!) poured onto a plate or into bowls.  Grab a handful of gift bows and start stamping!

Preschoolers love this craft for it’s easy art creation and it’s such a fun and easy process art activity.  There is no right or wrong way to make the flowers.  When you’re satisfied with the flowers, take a swipe of green paint and make a few stems.  Our flower art decorated the dining room for a few days.   Maybe we’ll make a roll of DIY wrapping paper the next time around!
 
Let us know if you make this creative art project.  You’ll find lots more creative art painting ideas on our Creative Painting Pinterest board.  Be sure to follow us there! 
 
More creative stamp art you might enjoy:

Use a Marble Run on the Water Table Sensory Play

Recently, we posted an image on our instagram page of an outdoor sensory play activity.  We pulled out our marble run toy and the water table for sensory and fine motor fun.  This was such a hit on a hot day that we have played with the marble run and the water table many more times since.  We wanted to share the fun with you!


Water table activity for kids: use a marble run and water beads for scooping and pouring fine motor and sensory fun this summer!


Use the marble run toy on the water table with waterbeads!

 We’re including affiliate links for our convenience.  We love our marble run (this is the one we have and I love it because it’s not too difficult that my kids can’t build runs themselves, but it does include a lot of different pieces.)  We pulled it out one hot day and placed it in our
water table
with water and some expanded water beads.  If you’ve never played with water beads before, these are a sensory must!  The small beads are perfect for sensory play and go right down the shoots of the water table.  We poured, scooped, and dumped water and water beads down the shoots and ramps and watched the beads pile up at the bottom of the marble run.


This sensory play activity was not only perfect summer fun on a hot day, it was a great fine motor and eye-hand coordination activity for preschoolers.  

Water table activity for kids: use a marble run and water beads for scooping and pouring fine motor and sensory fun this summer!

Looking for more water table activities?  Try these: 

Painting toys

Lowercase Letter Formation Baked Cotton Swabs

Have you ever made baked cotton balls?  Today we’re sharing one of our newest creative play ideas with baked cotton swabs!  These are a colorful manipulative for learning and fine motor play.  Today we’re sharing how we made baked cotton swabs and using them in a Kindergarten Preparation busy bag to build letters.  This is something you definitely need to make.  You and the kids will love it!
Building letters with baked cotton swabs

How to make baked cotton swabs for sensory play:

 
(This post contains affiliate links.)
Start with a batch of Cotton Swabs and food coloring.  Just like making baked cotton balls, you want to mix together flour and water in a 1:1 ratio.  I scooped a bit of the flour/water mixture into a water bottle ice cube tray.
Add a few drops of food coloring to each section.  
Dip the cotton swabs into the mixture and place on a sheet of aluminum foil.  Continue to dip all of the cotton swabs.  Position the aluminum foil on a baking sheet and place in the oven.
Baked Cotton swabs for sensory play, learning, and loose part play
 
Bake at 350 degrees F for 10-15 minutes.  Keep a close eye on the cotton swabs.  You’ll want to make sure the stick part of the swabs don’t start to turn brown.  Pull the cookie sheet out of the oven and let cool.
 
Now you are ready to play!

Getting Ready for Kindergarten: Writing Letters

 
So how can you use your baked cotton swabs in play and learning?  We used them to build letters, numbers, shapes, and pictures.  Kids can match and identify colors.  Use the cotton swabs to count, sort, and pattern.  Work on visual memory by coping shapes and asking your child to recreate letters, numbers, and shapes.  
 
All of these activities are a great way to prepare children for Kindergarten.  When a child goes off to kindergarten, they are often times presented with handwriting and letter formation for the first time.  You can work on a little Kindergarten prep work with making letters at home in a fun way.  Use the cotton swabs to make letters with your child, and then have them create letters on their own.  
 

Letter formation Busy Bag

letter-building-letter-formation-free-printable


We created a free printable for you to use as a busy bag activity using the baked cotton swabs.  Children can copy and build letters with the cotton swabs using an upper case and lower case letter form.  

 Build letters with cotton swabs, dyed lollipop sticks, play dough, pipe cleaners, string, or other manipulatives.
Just for our newsletter subscribers, we’re offering our FREE upper case and lower case letter builder printable.  

Use these printables to work on letter formation with your little ones.  An adult can write the letter on the left side and kids can trace the letter.  Use manipulatives to build the letters.  Print off the sheets as many times as you need: one for each letter or laminate the sheets and use them over and over again for all of the letters.  (If you laminate the sheets, you can use a white board marker to work on writing letters over and over again.  

Ducklings Sensory Play Kids Book

Books and activities are one of our favorite ways to play and explore books.  We recently read Make Way for Ducklings by Robert McCloskey.  This is a book written in 1941 that was totally new to us.  It quickly became a new favorite in our house!  As we read the book about Mr and Mrs. Mallard’s search for their new home, we became very excited to explore the story through sensory play.  We decided to create a sensory table based on Make Way for Ducklings and did we ever have fun!

Make Way for Ducklings book sensory play for kids
This post contains affiliate links.


Make Way for Ducklings Book and Sensory Play

 
We read Make Way for Ducklings a few times before we made this sensory table activity.  It is such a fun book with a sweet story about a pair of mallards that are looking for a new home for their growing family.  When the ducklings are born, the mama duck needs to get her large family through the busy streets of Boston to a beautiful and safe park.  We decided to make a sensory play activity right on our Train Table.  We use our train table almost everyday for creative play of some kind.  This sensory play was perfect on the train table as we acted out the story.  Three kids could reach, move, explore, and play as we re-told the story.
We used a few items for our sensory story play:

rubber ducks 
wooden train tracks to enclose our sensory play area and use as roads for the busy streets of Boston.
blue waterbeads (Have you played with these yet? SO cool!)
cars 
policeman figures 
green shredded paper 
clear glass gems 
Boat

We pulled out the book and started reading, playing, and re-telling the story.
Mr. and Mrs. Mallard love the pond in Boston Public Gardens.  It would be the perfect place to make a new home for their family!  There is even a boat in the pond full of people who feed the ducks peanuts.
The mallards travel a little ways to make a nice, safe nest.  Mrs. Mallard sits on her eggs until they hatch.  The glass gems made perfect “eggs” and we were able to count them just like Mrs. Mallard does.
Then the eggs hatched and seven ducklings were born.
Mrs. Mallard taught the ducklings to swim and waddle in a line.
The ducklings followed Mrs. mallard back to the pond along the busy streets.
The policemen stopped traffic to allow the ducklings to cross.
And the Mallard family lived at the pond!  
 
Exploring this book with sensory play was such a fun way to extend one of our newest (old)favorite books!
Make Way for Ducklings book sensory play activity. This is a fun way to re-tell a story through sensory play.
This post is part of a new series we’re joining all about Book Themed Play Dates!  If you’ve ever thought of planning a play date based on a book, this is the series to follow to get great snacks, games, crafts, activities and more based on a great book each month.  
Check out the bloggers below for fun activities for Make Way for Ducklings:
 
Duck Snack from Still Playing School
Preschool Math Game from Fun-A-Day
Ducklings Busy Bag from Craftulate
hands-on activities to explore social emotional development through children's books.

Love exploring books with hands-on play?  

Grab our NEW book, Exploring Books Through Play: 50 Activities based on Books About Friendship, Acceptance, and Empathy, that explores friendship, acceptance, and empathy through popular (and amazing) children’s books!  It’s 50 hands-on activities that use math, fine motor skills, movement, art, crafts, and creativity to support social emotional development.

Metallic Sparkly Crayon Play Dough

This metallic crayon play dough is just one of the hits in house! Use crayon pieces to make a sparkly play dough and then try one of the other crayon play dough recipes that we love! 

Homemade play dough is one of our favorite sensory ways to play!  We’re playing our way though the year with sensory dough recipes and this month brings Metallic Crayon Play Dough.  Now, if you’ve followed along with our blogging antics for long, you’ve seen a crayon play dough recipe  or two.  (Or three.  Seriously, this stuff is amazing.  And addicting.)  With this month’s theme in the 12 Months of Sensory Dough series being Sparkly Dough, we had to bring the sparkle and shine out in our crayon dough recipe with Metallic Crayon Play Dough!  


How to make crayon play dough with metallic sparkles! This is cool sensory dough for kids!


Look at that shine!  We’ve said it before…making play dough with crayons brings out the bold, vivid hues of crayon pigment.  And when you make a play dough using crayons, the colors are bright!  The gold, silver, and bronze colors of our metallic dough are perfect shades and the sparkle in the crayons REALLY shines!

This post contains affiliate links.
Gold, silver, and bronze play dough with sparkles! Made from metallic crayons.

Metallic Sparkle Play Dough

For this dough, we used our basic crayon dough recipe with Metallic FX Crayons.  Using this brand of crayon gives your dough a sparkle and great metallic hue.  
How to make crayon play dough
Choose your colors and peel off the labels.  Chop crayons into small pieces. 
Use gold, silver, and bronze crayons to make this metallic crayon play dough recipe.
Follow the directions to make crayon dough.  Dump it out on a clean surface and start kneading.  The colors will be blotchy at first, but keep kneading!
Use gold, silver, and bronze crayons to make this metallic crayon play dough recipe.

Get the kids involved in kneading the dough.  It’s such a great fine motor workout for the little muscles in the hands.  Not only do the intrinsic muscles get a workout, but kneading dough is a fabulous proprioceptive workout.  when you knead dough, pressure input is received through the joints all the way up through the shoulders.  This sensory dough is a real sensory activity as you knead the color throughout the dough.
Crayon Metallic sparkle play dough recipe
Use gold, silver, and bronze crayons to make this metallic crayon play dough recipe.
We made up a batch of gold, silver, and bronze doughs with our Metallic FX Crayons.  We decided to go on a gem expedition with some glass gems
and a magnifying glass.
Use gold, silver, and bronze crayons to make this metallic crayon play dough recipe.
We pinched, pulled, and inspected the gems from the metallic dough.  Fine motor sensory play with dough… It was another fun month of sensory dough!

Watch the live action here:


Want to see more ways to make sparkly dough?  Stop by and see what the other bloggers in the 12 Months of Sensory Dough series made this month:

Constellation Dough | It’s A Long Story
Sparkly Mermaid Slime | Study at Home Mama
Sparkly Shamrock Dough | Preschool Powol Packets
Taste Safe Strawberry Lemonade Sparkle Dough | Bare Feet on the Dashboard
Twilight Sparkle Dough | Creative World of Varya
Midnight Sparkle Dough | Wildflower Ramblings
Glitter Oobleck from Still Playing School
Sparkling Ocean Play Dough | Stir the Wonder
Shimmery Dough | In The Playroom
Sparkle Dough Eruptions | Little Bins for Little Hands
If you like the idea of using your broken crayon pieces in something as fun and creative as play dough, then you will love to try a few different ideas, too.  We’ve given crayon play dough a run for it’s fun and tried a few different versions.  Check them out and if you make a batch, let us know how you get creative with crayon play dough!