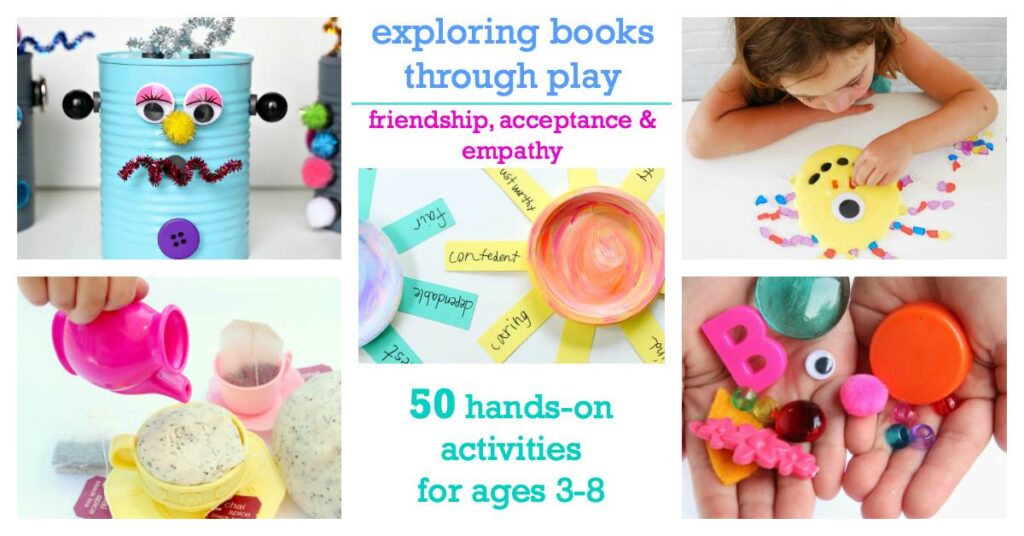
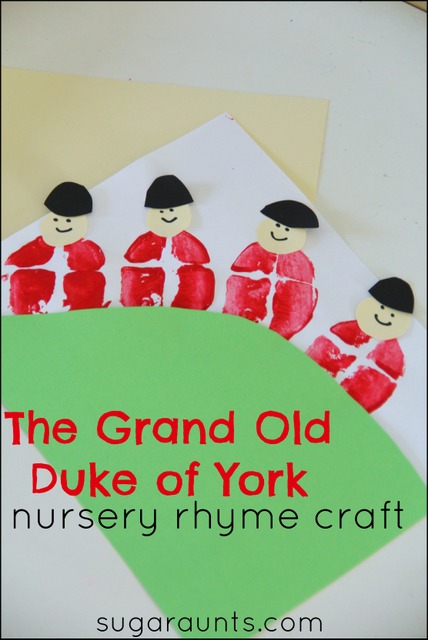
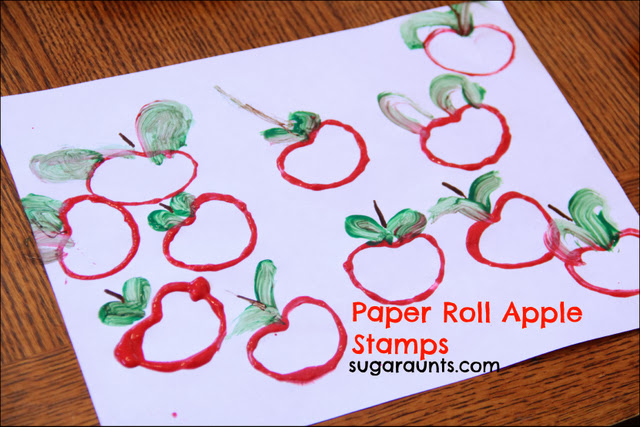
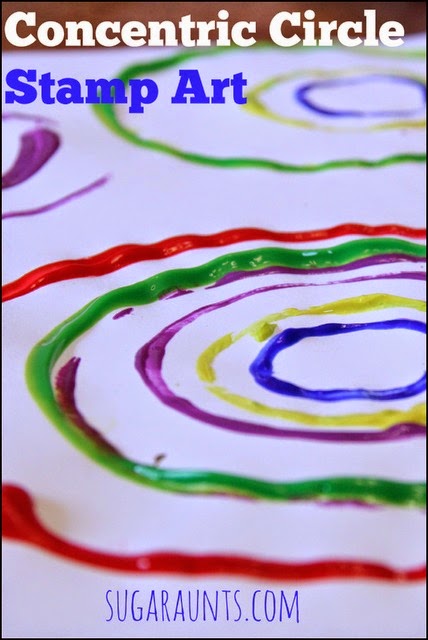
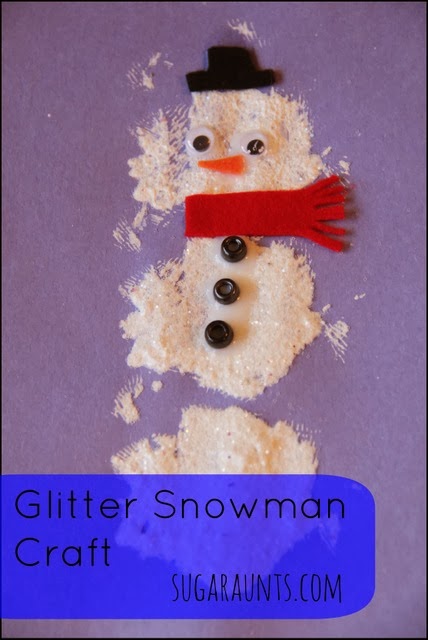
These math art activities and math art projects are fun ways to explore and learn! We’ve shared previously, the fine motor benefits in math, so as OT professionals, we love these ideas! Explore the activities below for use in both math AND art!
Math Art
Mathmatics and art have gone together since early artists began creating. Many great works of art contain mathematics, from buildings and pottery to paintings and statues.
Today, we’re featuring projects that combine math and art into activities that kids can explore while learning through creative expression.
Combining the learning aspect with hands-on, creative expression in kids’ activities can be a great way for children who do not enjoy being “artsy” or “crafty” to create.
These activities are sure to get the kids creating and learning!
What is Math Art?
“Math art” refers to the intersection of mathematics and visual aesthetics, where mathematical concepts and principles are used to create artistic expressions.
It involves using mathematical principles, such as geometry, symmetry, patterns, and fractals, to create art projects or creations.
Art and math can take various forms:
Fraction art
Graph paper art
Sculptures
paintings
digital art
Geometry art
Origami art
Multiplication art
Geometry string art
Geoboards
More!
Math and Art Activities for Kids:
Try these creative learning projects for developing skills while learning.
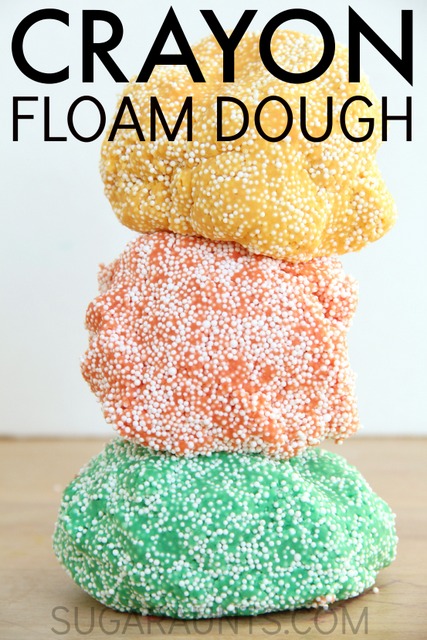
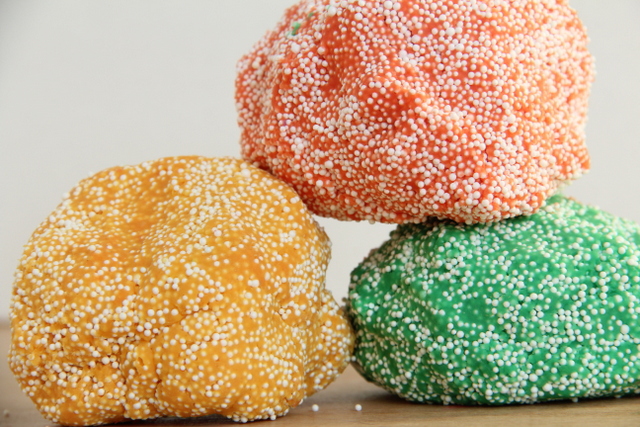
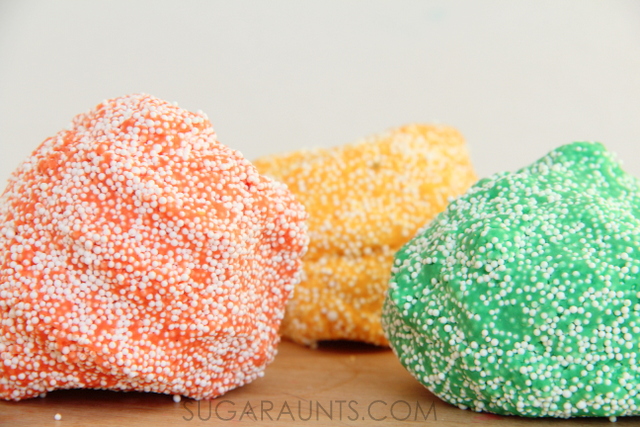
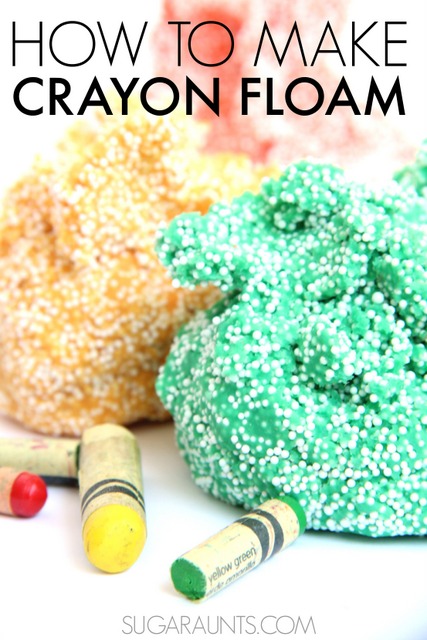
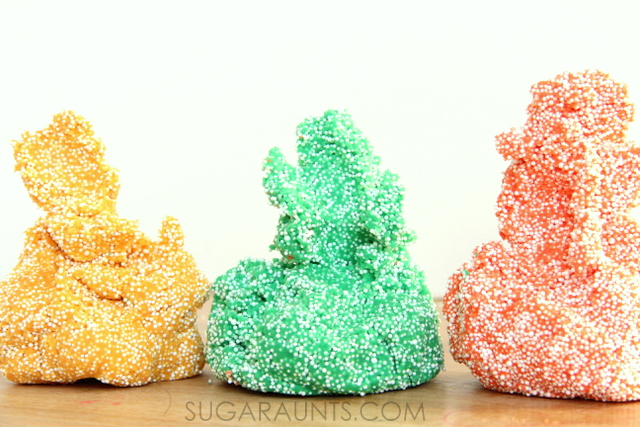
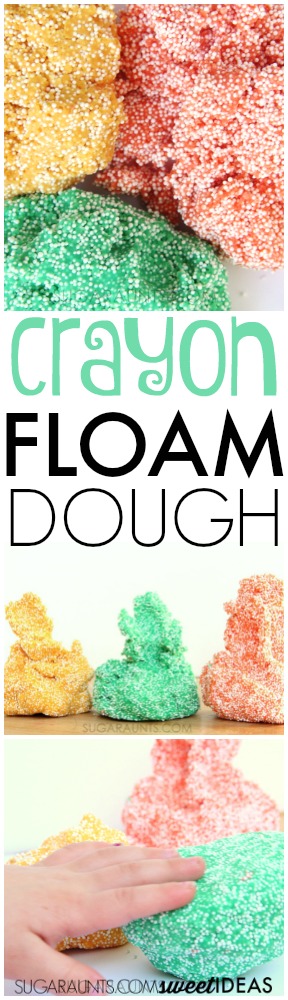
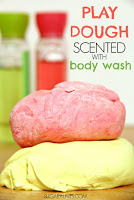
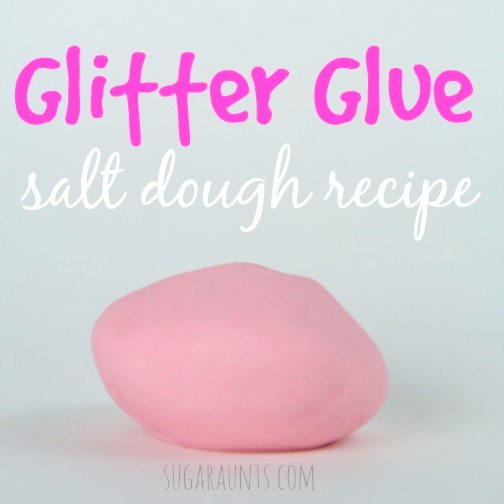
Play dough made with crayons are one of our favorite ways to play and this Crayon Floam Dough recipe was a HUGE hit in our house! We’ve love crayon dough since we experimented with how to make crayon play dough. We decided to give another sensory dough a twist on the crayon dying method and made our own homemade Crayon Floam Dough.
Maybe you’ve seen floam in stores or played with it in the past. This foamy, moldable dough is so light and cool to play with! It’s really a fun sensory material. We made our floam dough with ingredients we had on hand and this is how we did it:
Chop up two crayons in the same color family. To make the red dough, I used two different red crayon shades. The color isn’t important in this dough, (although you can make a big range of colored dough using our shades of crayon play dough idea.
Heat 2 tablespoons of oil on a stove. Mix in the chopped crayons and stir. Don’t let the oil heat up too much, and slowly stir in 2 cups of water. Add 2 and 1/2 cups of flour to the mixture and keep stirring over heat. This is less flour than our typical crayon dough recipe because we are omitting salt. The added foam makes up for this and holds the dough together. It seems like leaving the salt out of this dough recipe helps with the airy lightness of this floam.
Pour the lump of dough out onto a chopping board and knead when tolerable. You will want the dough to pull together. If the dough is too sticky, add flour by half cup. Mixing up the dough is very quick. It doesn’t need much kneading, but you will want to wait a few minutes until you can tolerate the heat. Overall, this dough pulls together in about fifteen minutes!
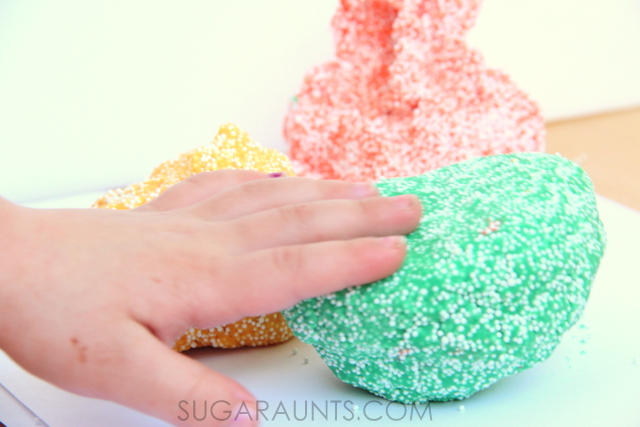
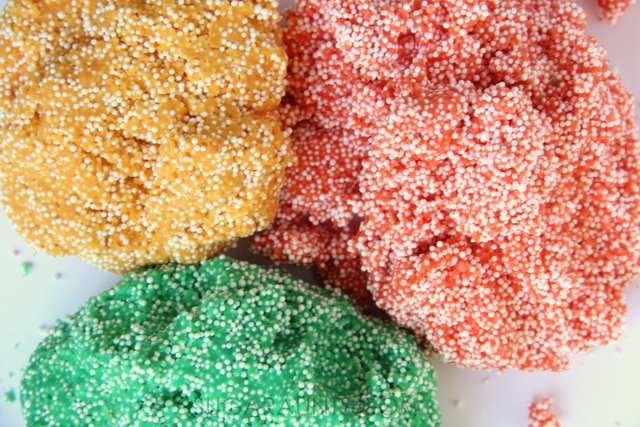
Once cool, fold in styrofoam filler. We used filler from a pillow that was torn for our dough, but you could use bean bag filler as well which can be purchased in craft stores. You will want to add a bunch of the filler so the dough is mainly made up of the filler and held together by dough. It’s amazing to feel the dough “lighten up” as more filler is added.
This floam dough is moldable and pretty much awesome! It’s crumbly, yet moldable.
Mess-warning: This dough is MESSY! Rather, the filler is the messy part. When you mold and play with this floam, the little filler bits will pull out of the dough. Play with this sensory activity in a large shallow bin or on a tablecloth spread out on the floor.
We had so much fun with our homemade floam! Watch the blog and our Facebook page for play and learning ideas with this homemade sensory dough!
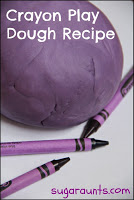
If you like the idea of using your broken crayon pieces in something as fun and creative as play dough, then you will love to try a few different ideas, too. We’ve given crayon play dough a run for it’s fun and tried a few different versions. Check them out and if you make a batch, let us know how you get creative with crayon play dough!
Do you LOVE using play dough as a sensory and fine motor tool in therapy and in play? I have a subscriber-only play dough mat that is designed to work on the intrinsic hand muscles which are needed for pencil grasp and fine motor skills. Read more about the play dough mat and the areas it will help with HERE. This play dough mat is available for FREE only for our Play Dough is Awesome newsletter group. (This is a different email list than our regular subscribers. If you’re on our subscriber list, you’ll still need to sign up for this one to receive the play dough freebies coming your way!)
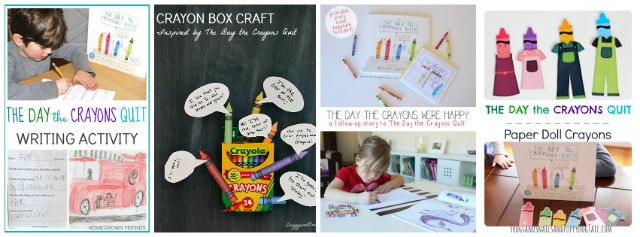
Have you read the book, “The Day the Crayons Quit”? This is SUCH a cute book from the crayons’ point of view. They are TIRED of coloring the same old pictures the same old colors. Why does the Yellow crayon have to color the sun? And why can’t the Black crayon color a beach ball? We loved reading this book over and over again and coming up with our own take on mixing up the colors in a sensory art project using crayon shavings!
And, while your in the crayon theme, be sure to check out our resource on crayons for toddlers and preschoolers to support development of coloring as well as underlying skills using age-appropriate crayons.
We are super duper excited to be back at the Preschool Book Club series where we’ll join a few of our favorite kids activity bloggers and explore a fun children’s book every two weeks!
The Day the Crayons Quit sensory art
This post contains affiliate links.
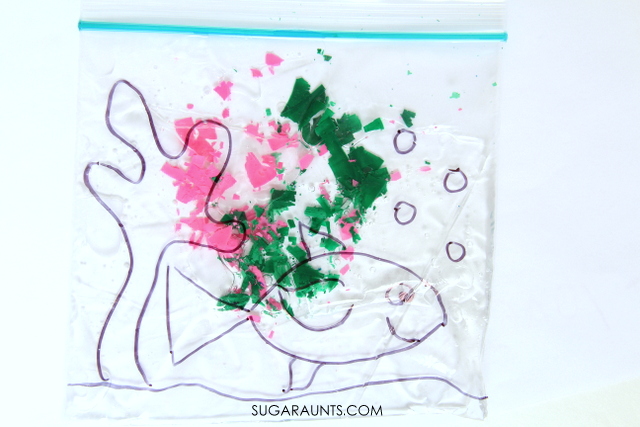
We loved reading The Day the Crayons Quit
by Drew Daywalt so this sensory crayon shaving art was completely a hit in our house!
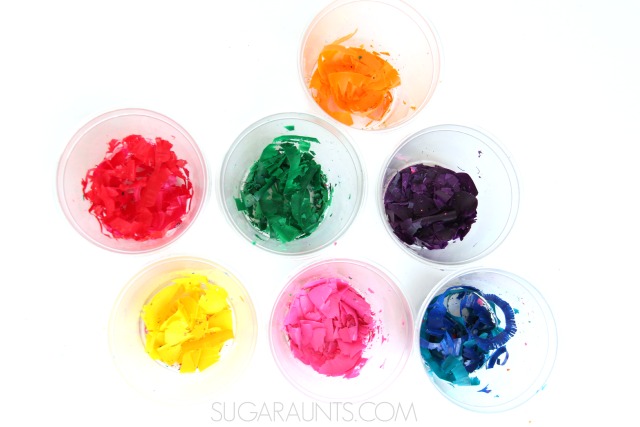
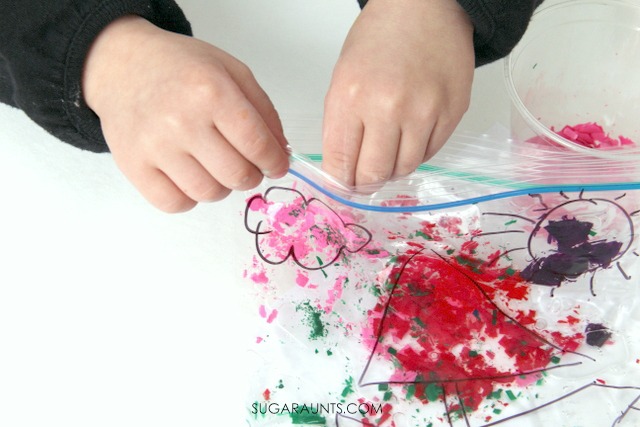
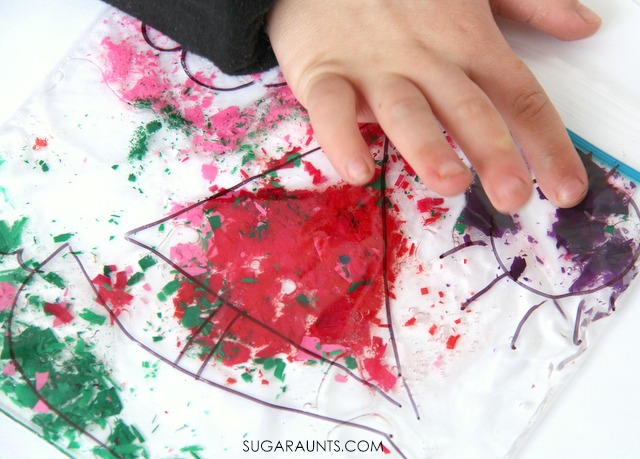
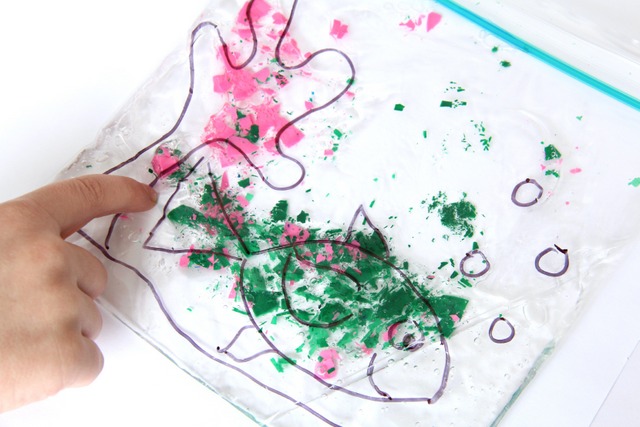
Use the pencil sharpener to make crayon shavings in the colors you want. This is a fantastic fine motor activity for little fingers. Twisting the crayons in the small pencil sharpener really works the intrinsic muscles of the hands. Not only are kids building the hand strength and endurance for writing and coloring tasks, they are using a tripod grasp to manage the pencil sharpener/crayon. It’s a resistive task that might cause hand fatigue for little ones, but not much crayon shavings are needed for this sensory activity.
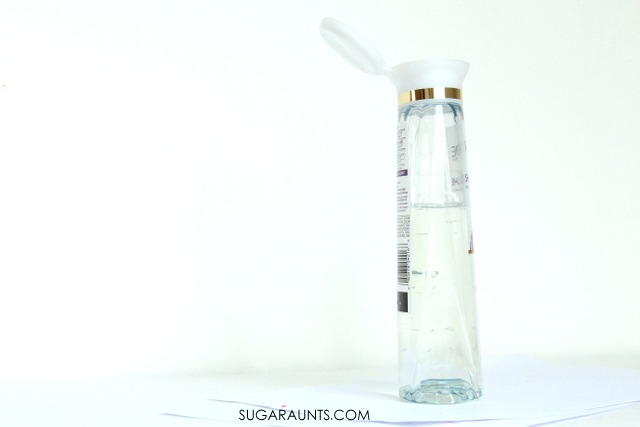
Use the permanent marker to draw a picture on one of the sandwich bags. Fill the baggie with the shampoo and you are ready to get started!
Have the kids pinch the crayon shavings into the plastic bag. We tried to get the colors we wanted into the general area of the picture. So, instead of a yellow sun, we made ours purple and tried to get the purple crayon shavings near the sun in the picture. If they don’t land exactly near the part of the picture that you want them, it’s not a big problem, and actually a good sensory and fine motor activity to move the shavings around in the shampoo.
Press and push the colors into the part of the picture to make mixed up colors just like in “The Day the Crayons Quit”
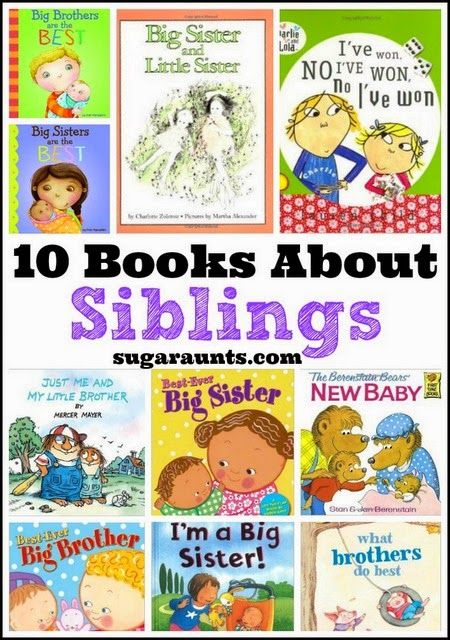
Did you miss some of our other Preschool Book Club activities based on popular children’s books? Check them out and see all of our Preschool books and activities:
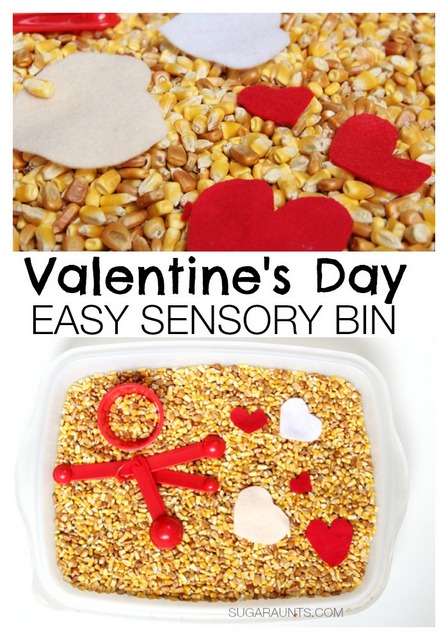
Today I have a Valentines sensory bin that is so easy to set up, and you can use the materials you have on hand, while helping kids develop fine motor skills, eye-hand coordination, crossing midline, and so much more. Sometimes simple play ideas are the best. A simple bin of corn (or dried beans/peas/lentils/sand/flour/rocks…) and a few spoons, scoops, and bowls are all a kid needs for imaginative sensory play, creative language development, fine motor skill work, and learning through play! These are the kind of Valentine’s Day activities that can be added to OT plans. We made this Easy Valentine’s Day Sensory Bin with just a few items and had a day of fun.
This is a Winter sensory bin that we love to use for Valentine’s Day therapy!
Valentines Sensory Bin
This post contains affiliate links.
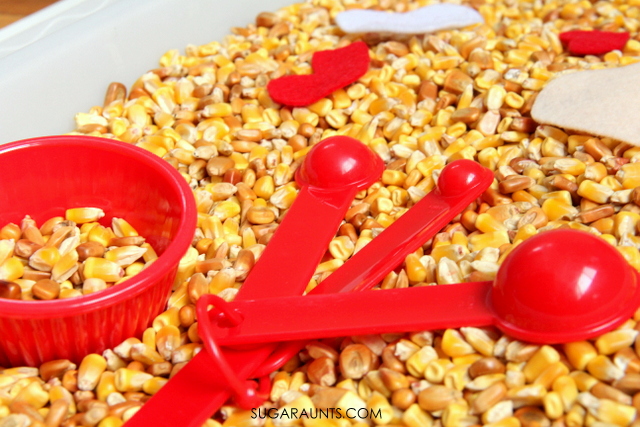
Pouring and scooping items into bowls with spoons works on eye-hand coordination, transferring, motor control to manage the spoons, and hand dominance as they scoop with the dominant hand and assist with the non-dominant hand. Encourage your child to use their dominant hand and to scoop from left to right as they transfer corn.
Scooping and pouring materials encourages left to right progression in reading and writing. Using two hands together in a coordinated manner is bilateral hand coordination and essential for so many functional tasks (tying shoes, buttoning, cutting with scissors).
How to make a valentine’s Day sensory Bin:
To make this Valentines sensory bin, you’ll need just a few materials:
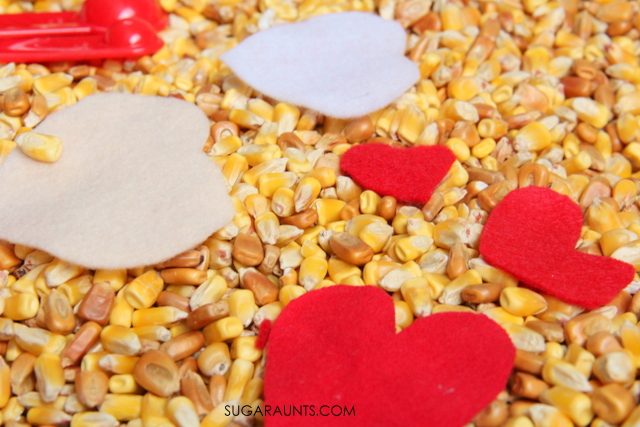
You can also add Valentine’s Day sensory bin materials like the ones found in our new Valentine’s Day Fine Motor Kit. The Kit contains 25 pages of hands-on materials designed to develop and refine fine motor skills in kids, but some of those items are perfect for adding to sensory bins like this one. Simply cut (or have the child cut out) the images of hearts and other Valentine items. Then, you can scatter the sensory bin items into the sensory material. Hide them and have the child find them.
While they are building motor skills through scooping and sorting, they are experiencing tactile sensory input.
For kids struggling with tactile discrimination, this can be one way to challenge and experience these skills in a safe manner.
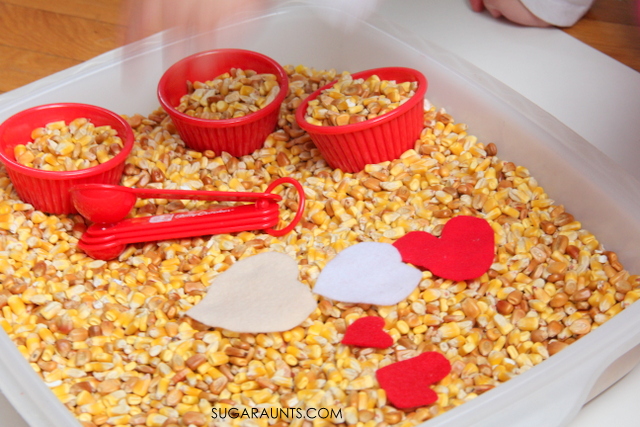
We have a big old bin of field corn always ready to go for sensory play fun. I threw a bunch of red measuring spoons and some red/white cups.
Add a few felt hearts for fun.
Scooping, pouring, and dumping the corn is such a fun way for preschoolers to play. Even the big kids got in on the fun. They love to pretend to serve up lunch in the little bowls, mix, and pour concoctions in their corn kitchen.
Looking for more EASY sensory bins? We’ve started a series covering easy sensory bins from A-Z (and are working our way through that series very slowly!) Here are some more easy sensory bin ideas:
Want to add more Valentine Fine Motor activities and movement tools to your skill-building?
The Valentine’s Day Fine Motor Kit is here! This printable kit is 25 pages of hands-on activity sheets designed to build skills in pinch and grasp strength, endurance, eye-hand coordination, precision, dexterity, pencil control, handwriting, scissor skills, coloring, and more.
When you grab the Valentine’s Day Fine Motor Kit now, you’ll get a free BONUS activity: 1-10 clip cards so you can challenge hand strength and endurance with a counting eye-hand coordination activity.
Colleen Beck, OTR/L has been an occupational therapist since 2000, working in school-based, hand therapy, outpatient peds, EI, and SNF. Colleen created The OT Toolbox to inspire therapists, teachers, and parents with easy and fun tools to help children thrive. Read her story about going from an OT making $3/hour (after paying for kids’ childcare) to a full-time OT resource creator for millions of readers. Want to collaborate? Send an email to contact@theottoolbox.com.
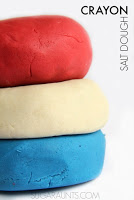
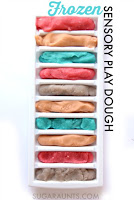
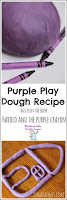
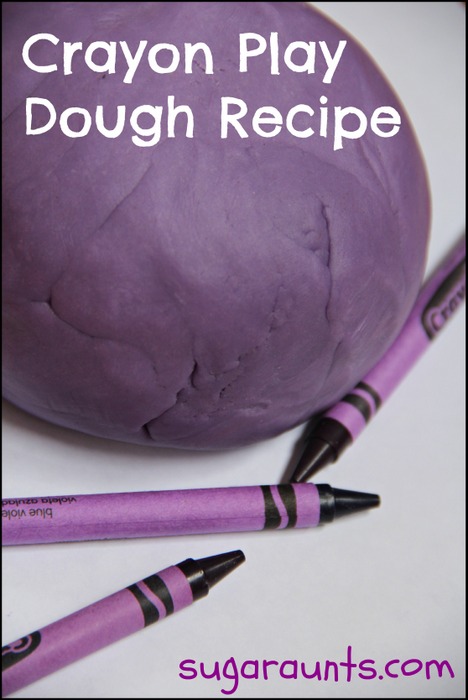
We are slightly obsessed with making crayon play dough recipes. It all started with our crayon play dough. We were brainstorming for an activity to go along with the book, Harold and the Purple Crayon and we made homemade play dough using crayons as a main ingredient. We love this dough so much because of it’s soft and smooth texture and it’s bright and bold color.
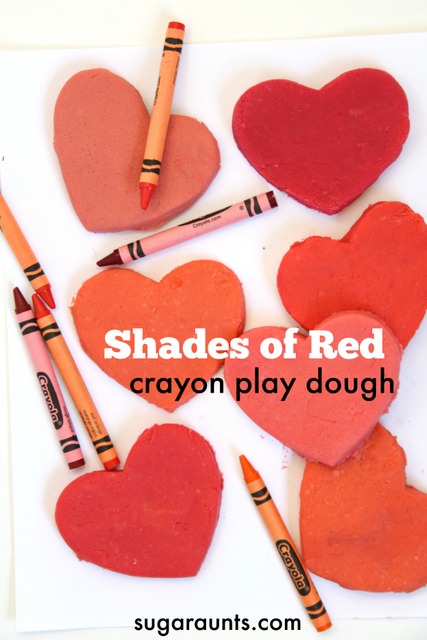
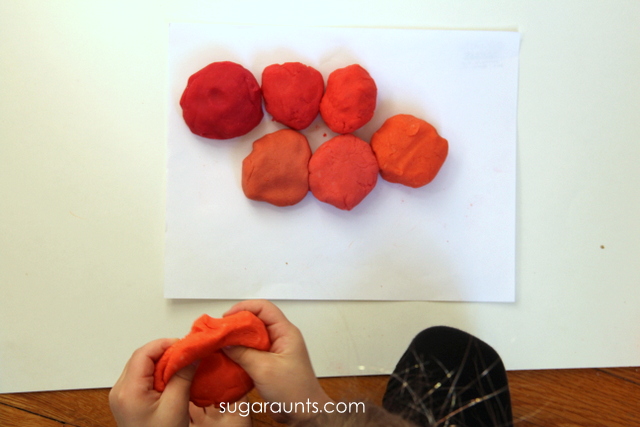
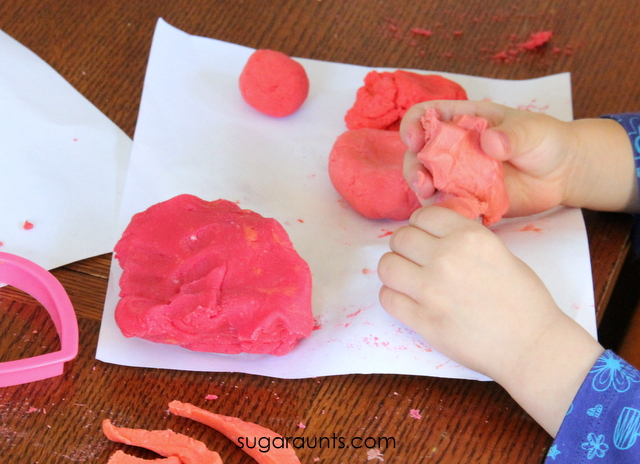
We decided to try a new version of our crayon recipe and make shades of red crayon play dough. This is perfect for Valentine’s Day, but we’ll be using this play dough long after February 14th!
(This post contains affiliate links)
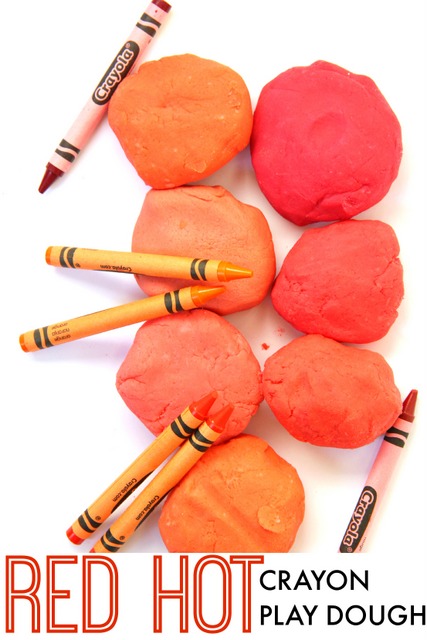
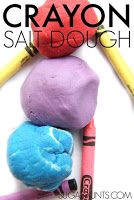
Red Crayon Play Dough Recipe
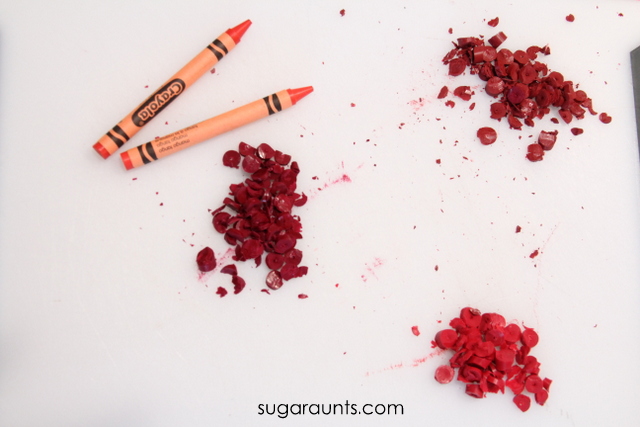
We grabbed a couple of packs of these Red Hot crayons and knew they had to be used for all red play dough. You can use broken crayons that are floating around the house, though.
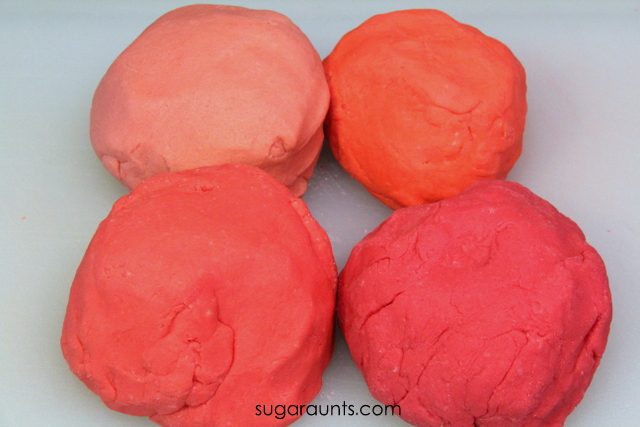
This pack has some pretty red shades. Red, maroon, brick red, mango tango…the bonus of using crayons for dying play dough is that you get a pure, bright, and bold color. Even reds (which don’t always come out brightly colored with other play dough methods) are vivid.
Start by chopping the crayons into small pieces. I used two crayons for each shade (so we ended up using two packs of the Red Hot crayons to make eight shades of red crayon play dough.
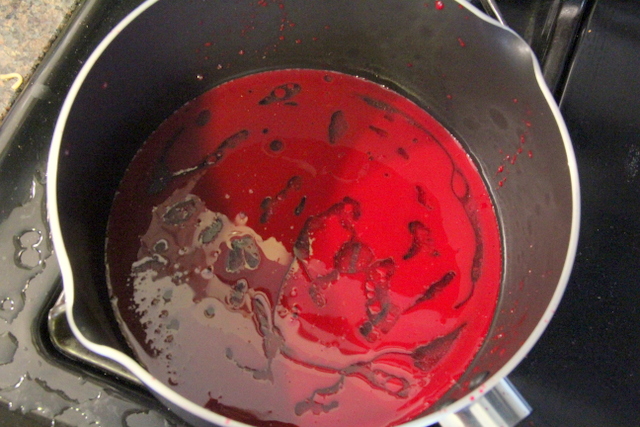
Once you chop up the crayons, melt into the oil over a stove. After the crayons are melted, slowly stir in the water. You can then add the dry ingredients and keep stirring until the dough pulls together. Be sure to mix with a spoon or whisk as you slowly pour in the dry ingredients.Dump the play dough onto a floured surface and let it cool for a few minutes. Once the dough has cooled enough to knead, you will want to knead until the dough is smooth and even in texture.
There are a few problems you might run into when you’re making crayon play dough. If you have white spots in the dough after kneading, it means the flour wasn’t mixed in evenly. Keep kneading the dough and it will eventually get all of the flour flecks mixed in.
If the dough seems too dry, you can add a bit of oil and knead some more.
If the dough seems too moist or oily, add a bit of flour and knead.
Always add small increments to get the right texture, with a lot of kneading in between.
Crayon hearts for Valentine’s Day!
Little Sister loves play dough so all of these shades of red are making her happy!
We even made a few Valentine’s Day treat bags using sandwich bags and pink paper. Pop the play dough into the baggie and fold over the opening. Tape a strip of paper with a heart for a cute non-candy Valentine’s Day treat bag!
If you like the idea of using your broken crayon pieces in something as fun and creative as play dough, then you will love to try a few different ideas, too. We’ve given crayon play dough a run for it’s fun and tried a few different versions. Check them out and if you make a batch, let us know how you get creative with crayon play dough!
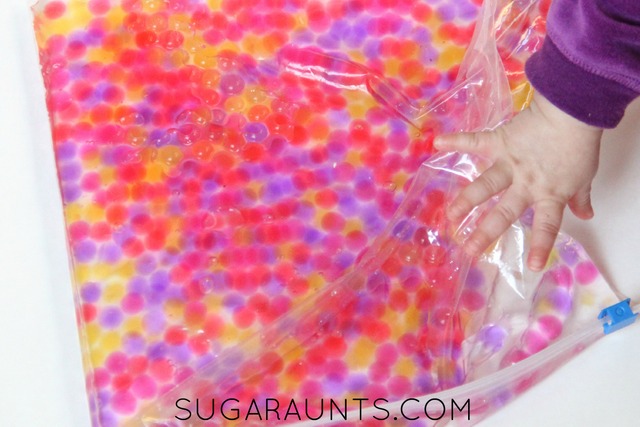
We are big fans of sensory play around here. When you’e got younger kids who see the big kids having fun in creative play, they want to get in on the action too! Now, I’m not saying that my 7 month old want so jump in the sensory bins…Ok, yes she does…but she wants to grab everything and explore and learn her environment. I put this sensory baby play activity together just for her in a baby-safe way so that she could explore a little sensory play. Baby-style!
Baby play is fun to put together and it’s even more fun to watch little ones explore and learn from new experiences. This water bead activity was no exception!
Baby Sensory Play Idea
This post contains affiliate links.
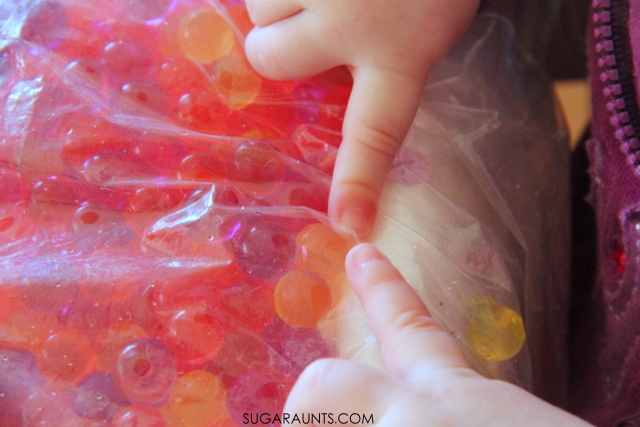
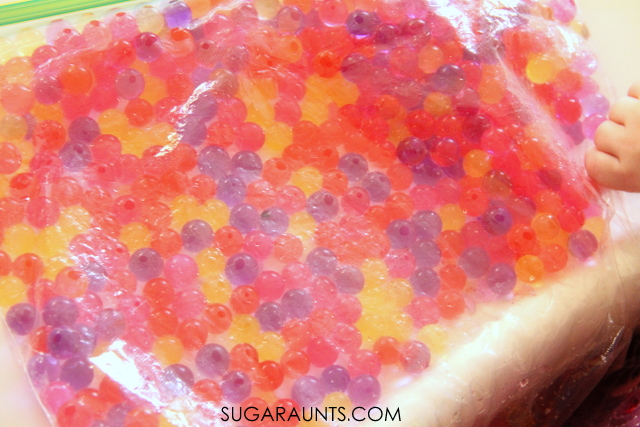
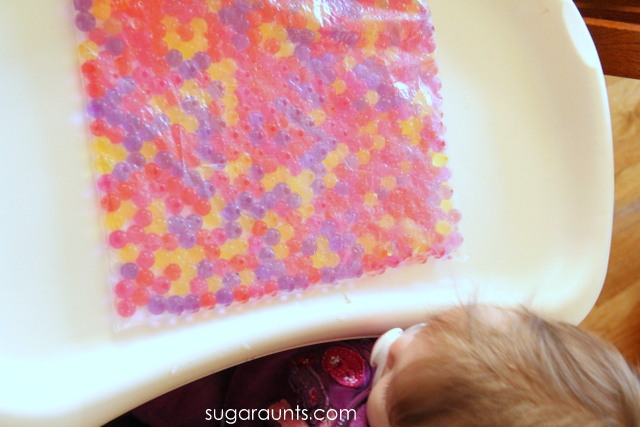
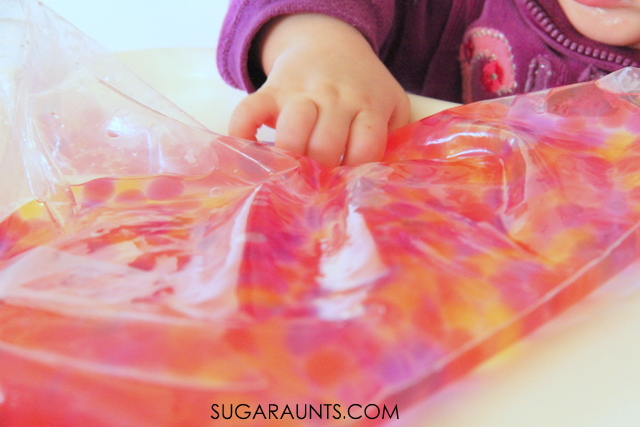
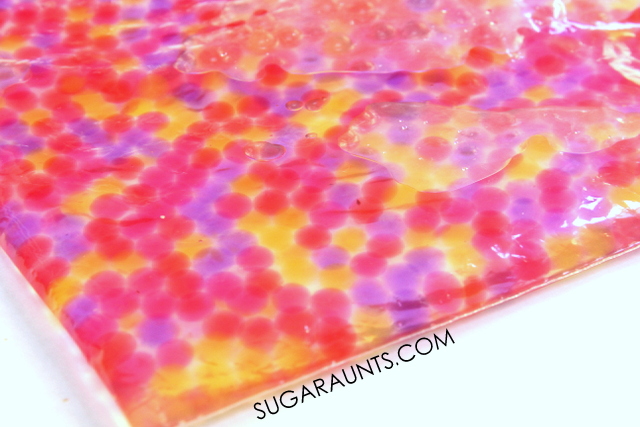
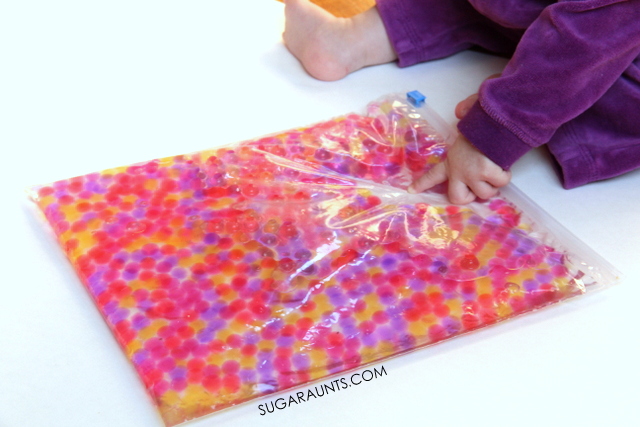
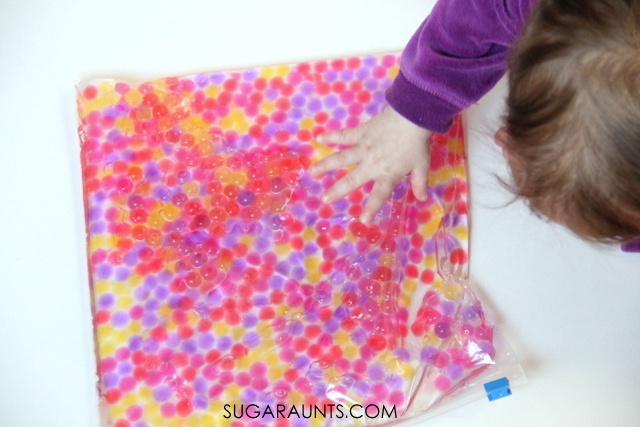
This activity was so easy to throw together. We had colorful water beads left over from another activity and I put them into a gallon size freezer bag. Seal it up tightly and you are ready to play. My daughter is 7 months old and loved exploring this water bead sensory experience. She grabbed the bag, poked the beads, pulled the bag…it was really fun watching her play!
When she got a little bored of the bag, I added a bit of water to the plastic bag. It became a whole new sensory experience for her. The colors seemed to pop more and they floated around a bit. I put her on the floor with the water beads and she started exploring all over again.
Safety Note: This is an activity that requires adult supervision. Never leave your small child alone while playing with water beads. You may want to seal up the bag with strong tape in order to further provide a safety measure. All activities that you see on this site are supervised. Be sure to use your judgement when doing these activities with your child. The OT Toolbox LLC is not at risk for any activity that you see on this web site. By reading this blog and doing the activities you see here, you are agreeing to this statement.
When we looked at our top ten posts of 2014, we noticed a funny thing. A few of our most popular blog posts were homemade play dough recipes. You must like play dough as much as we do! We had to put together a collection of our top play dough recipes of the year to put them all in one place and to have little look back at the year of fun we’ve had with homemade play dough!
The best homemade play dough recipes:
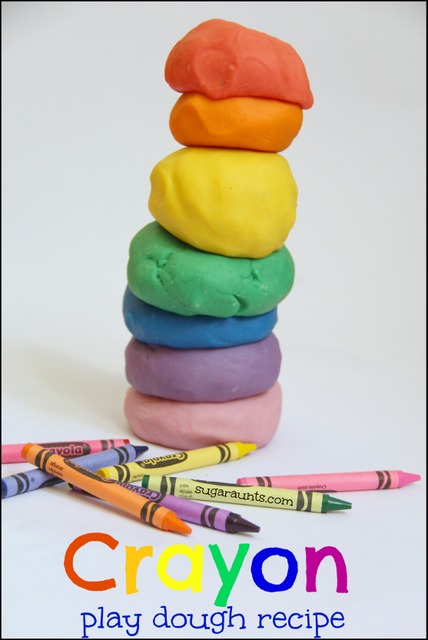
Our most popular post this year was our Make crayon play dough recipe and it was by far our favorite. If you haven’t tried this recipe yet, it’s a must-make! This dough is smooth, soft, and very bold in color. We’ve got plans to make a few more versions of this dough in 2015, so stay tuned!
Going through our list of play doughs from this year, these were most popular:
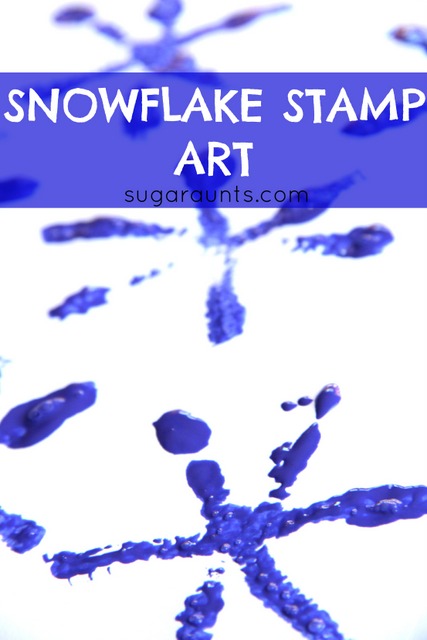
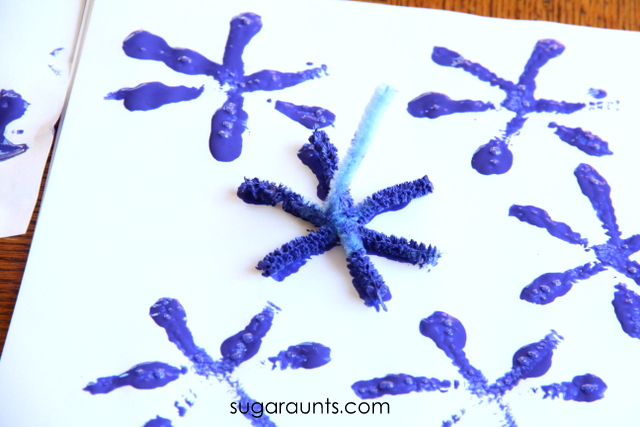
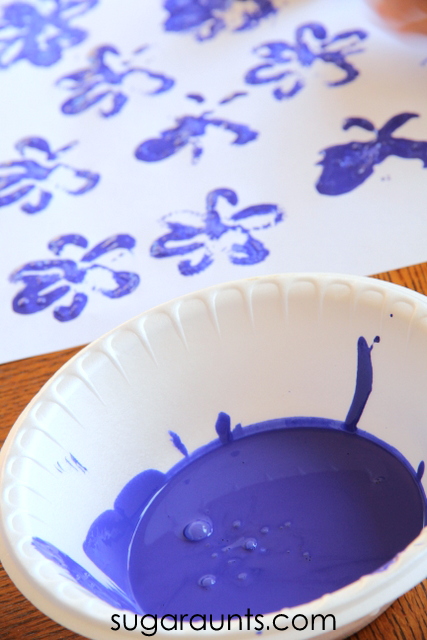
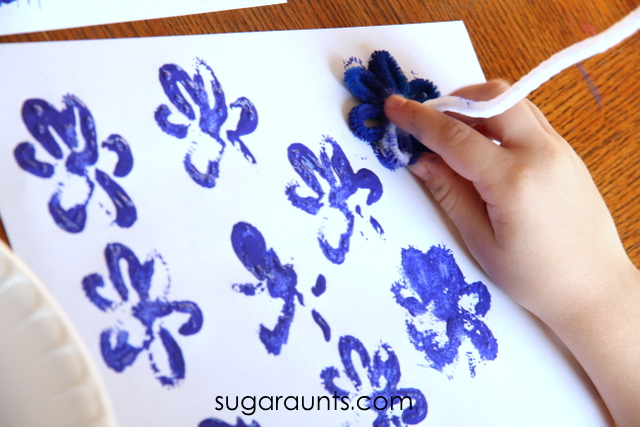
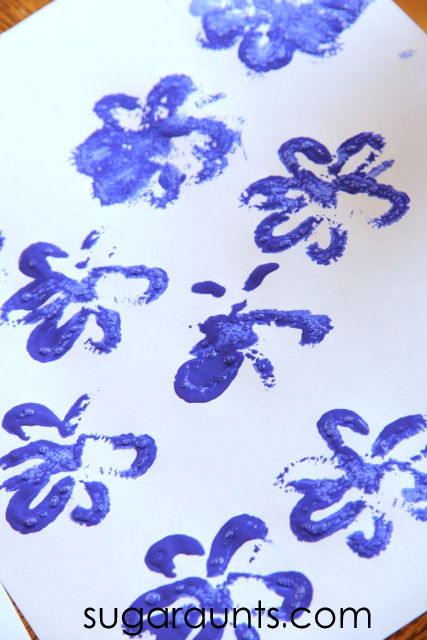
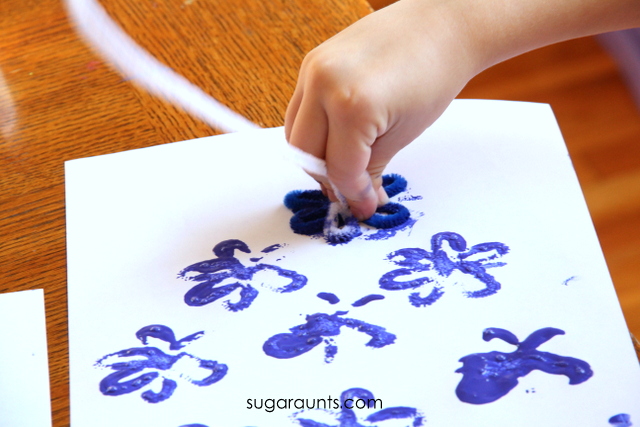
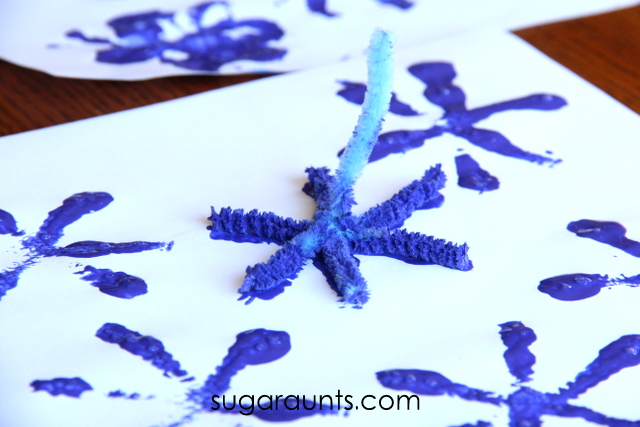
Kids love stamp art. Using a tool to press paint onto a surface is therapeutic and creative. You can press down hard or lightly, overlap stamps, add colors, or just make a simple stamp. There’s a lot of process to creating with stamps and you can use so many objects! We’ve stamped with potatoes, toilet paper tubes, styrofoam, and even hair rollers. These winter snowflakes use pipe cleaners and the result is wintry and beautiful!
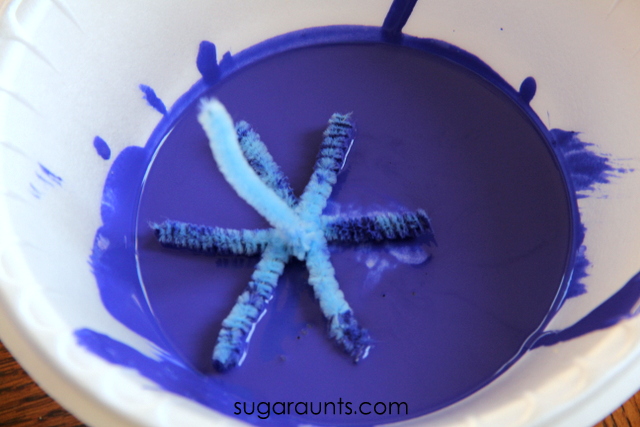
Winter Snowflake Art with Pipe Cleaner Stampers
This post contains affiliate links.
This is a pretty easy set up for an art project. We used just a few materials:
easel paper (this pad gives you a nice big surface for creating)
bowl for the paint
I twisted a couple of pipe cleaners into a snowflake shape with one piece sticking up for a handle. You can experiment with the shapes. We did a flowery shaped snowflake, too. (This would also make a great spring craft in a few months!)
Pour the blue paint into a bowl. I LOVE this paint for it’s bright colors that don’t fade or flake once they dry. It’s a great paint for preserving little one’s works of art.
And now it’s time for stamping.
Big Sister was so happy that she had a day off from school and got to do a craft with us. We need to do more after school art work as a wind down from full days at school. She loved making this stamp art and did page after page after page…
Be sure to let us know if you make this snowflake art project. You might be interested in more stamping activities:
We’ve had a new baby in our house for six months now. Those six months have gone by in a blur.
Just last week, my three year old asked, “Mom, are we keeping (the baby) for ever?” I think it finally hit her that baby is here to stay. Sometimes it’s difficult for kids to understand a new baby coming into the house and family and staying (forever!) with all of it’s stuff, and cries, and messy diapers. Life sure does change when a new baby is introduced to a family!
We love sensory play for it’s simple ways to teach concepts, exploration, language development, and ideas that are developed. We did this new baby sensory play activity a few months back…but maybe it’s time to play again with the new baby sensory bin, just to help the older siblings understand the new family dynamic we’ve got going on!
Sensory Play for Siblings of a New Baby
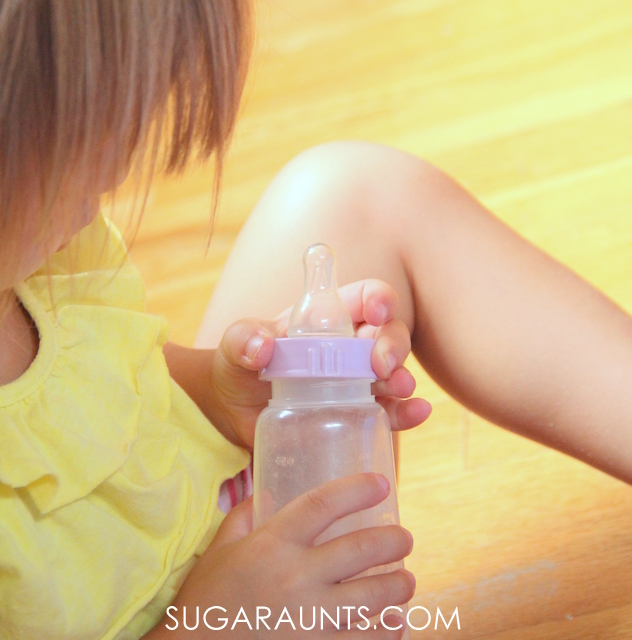
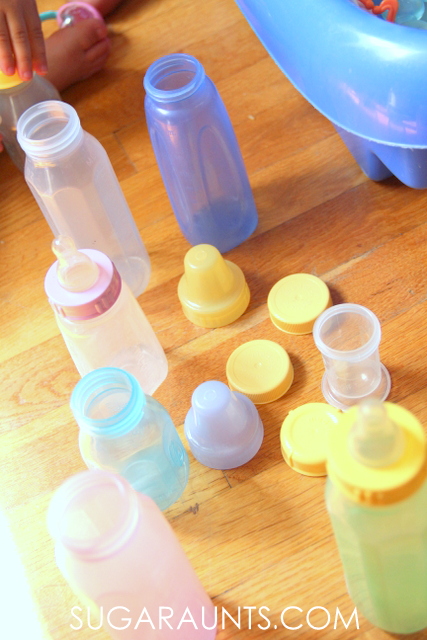
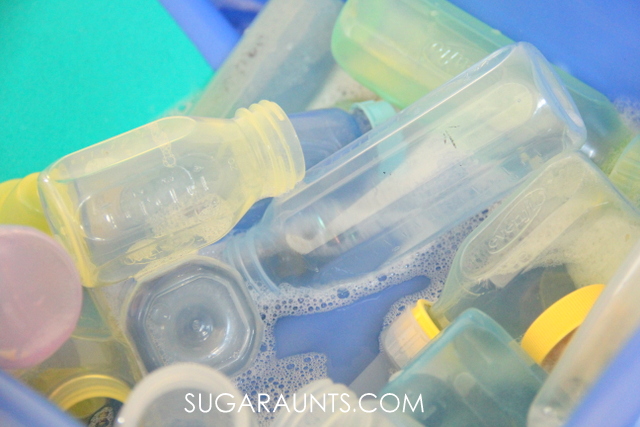
We needed to wash a bunch of baby supplies a few months ago, and anytime washing is involved, Little Sister (age 3) jumps at the chance to help out. This sensory bin kind of just happened because of a job that needed done anyway, but it turned out to be a fun way to explore the new baby’s supplies and talk about things that a new baby needs.
I pulled out a big box of bottles
and lids, bottle nipples
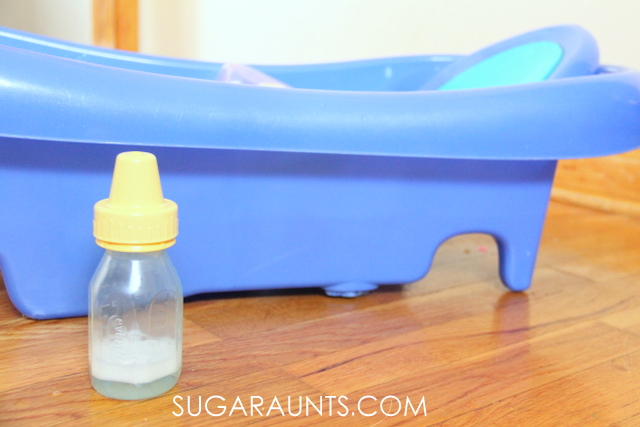
, and a few bottle brushes that all needed washing. Instead of putting them in the sink, I put them in our baby bath tub right on the dining room floor. Some warm soapy water and we were ready to clean and explore baby’s things.
Little Sister had fun matching up the lids to the bottles. Twisting them on and off was a fun way to work on many fine motor skills: bilateral hand coordination, hand-eye coordination skills, motor planning, and translation in the palm.
Time goes by at lightning speed when you’re a parent…but at the same time, the days draaaaaag. How can my sweet little baby already be six months old? But certain hours of the day can seem to last twice as long. This baby sensory bin was perfect for spending time with my three year old while doing a job that needed done anyway. She liked talking about all the supplies, the lids that cover bottles, and the bottle brushes that are used to clean bottles.
Cleaning the bottles was a hit for her! She loved cleaning the bottles with the bottle brush and the warm soapy water was a great sensory experience for her.
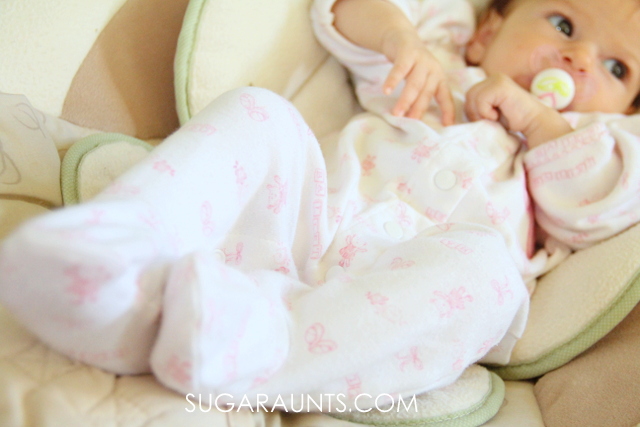
This little sweetie watched the fun from her infant seat.
It’s always a bonus when sensory play leads to cleaning rather than messes! This one was a big hit and we’ll be pulling out all of the bottles again soon. Let us know if you play and explore baby items with a big brother or big sister. We would love to hear about it!


.jpg)
