Proprioception Sensory Marshmallow Dough

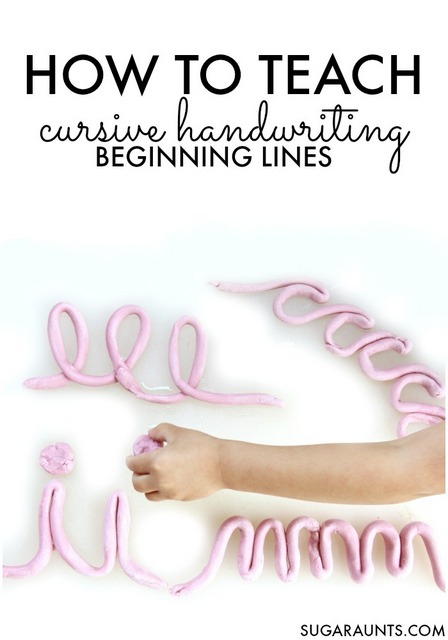
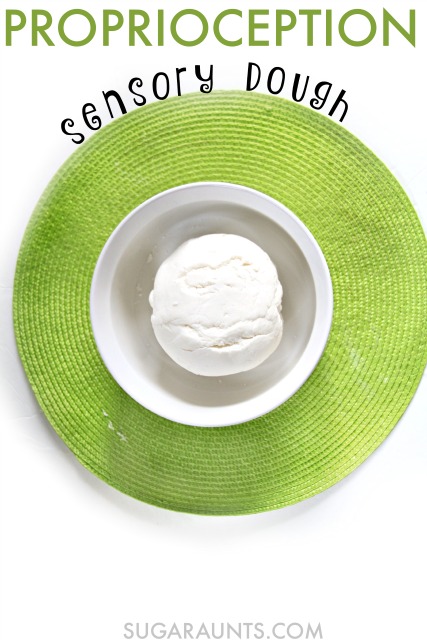
Play dough with kids can be a sensory experience.  Or, it can be a VERY sensory experience.

 
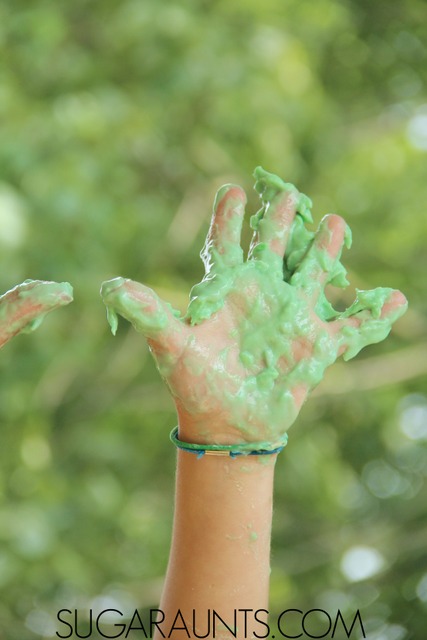
This Marshmallow Fondant dough is one of those VERY sensory dough play experiences. If you’re looking for a way to incorporate proprioception into play for its’ calming, relaxing, and heavy work to stimulate joint receptors and awareness of self, then this sensory dough is for you.  It’s perfect for proprioceptive input to the feet and whole body (with play dough! Really!), the small joints of the hands (Use it as a handwriting warm-up exercise.), and upper body heavy work.  


Who could have thought that a simple play dough could provide a whole-body heavy work workout? 


Make this marshmallow fondant dough recipe for a sensory play experience with kids.  The proprioceptive and strengthening input is unbelievable with this resistive and tough dough.  Sensory spectrum kids can get a calming and full body proprioception activity with this dough, from upper extremity to lower extremity for calming and relaxing heavy work.
Full disclosure: This post contains affiliate links.

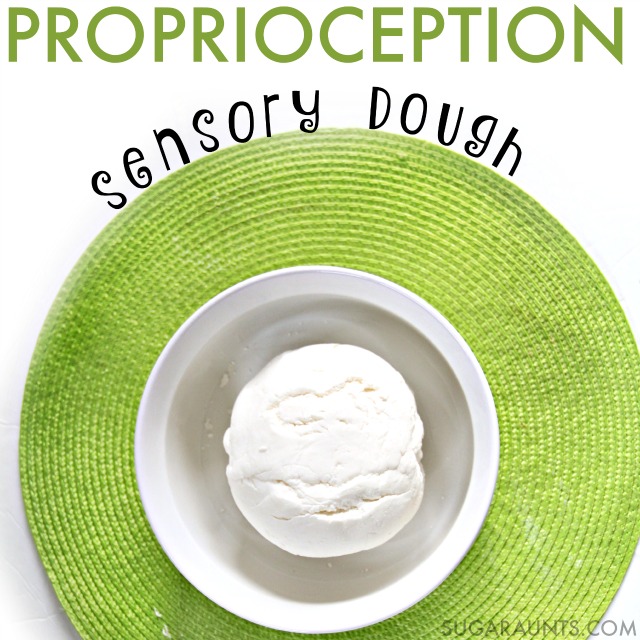
Marshmallow Sensory Dough Recipe

This recipe is one that I’ve used for fondant decorations on cakes. It requires heavy muscle work and is a great way to provide proprioceptive input to the whole body. It’s a recipe that I’ve used many times in baking and thought, “Phew! My arms are tired! This is a workout!” Why not use that muscle power with kids that crave proprioception?  


HINT: Using smaller pieces of the dough is perfect for muscle work with kids.
 
Ingredients
1/4 cup butter
1 (16 ounce) package marshmallows
1/4 cup water
 
  1. In a large pot, melt the butter and marshmallows, mixing constantly.  
  2. Stir in the water while stirring.  
  3. Pour the melted marshmallow mixture into a mixer
  4. Add confectioners sugar by the cup, mixing for 4-5 minutes until smooth and fluffy.
  5. Dump the dough onto a counter or cutting board that has been dusted with confectioners sugar.  The dough will be very tough and sticky.  You will need to knead the dough to get a smoother texture.
Kneading dough is an excellent way to incorporate proprioception to the upper body.  Encourage your child to pound and pull the dough.   However, we decided to take the proprioceptive input up a notch…
 

Proprioceptive input with sensory play dough

A while back we made a Cooking With Kids recipe for udon noodles.  In this traditional Japanese dish, noodles are kneaded with the feet.  Our marshmallow fondant sensory dough was SO tough, that we thought getting our feet in on the kneading action was a GREAT idea.


Kneading with Feet: Proprioceptive input to the lower body

Make this marshmallow fondant dough recipe for a sensory play experience with kids.  The proprioceptive and strengthening input is unbelievable with this resistive and tough dough.  Sensory spectrum kids can get a calming and full body proprioception activity with this dough, from upper extremity to lower extremity for calming and relaxing heavy work.

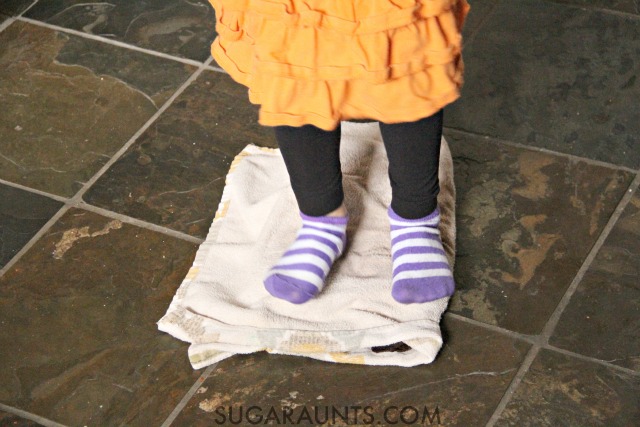
Sometimes, you see a child who is kicking constantly in their seat, moving those little legs, bumping into others, fidgeting at school or home, and just needing more awareness of their body in order to calm and focus on a task.  A proprioceptive task can help with this.  

How to make heavy resistance dough

  1. To use the marshmallow dough in a proprioception activity, place it and a little confectioners sugar into a gallon sized plastic freezer bags.  
  2. Saturate a kitchen dishtowel with hot water.  
  3. Squeeze the excess water from the dishtowel.  
  4. Fold the towel around the plastic bag.  
  5. Layer another (dry) dishtowel over the wet towel.  
  6. Place the towel/dough package on the kitchen floor.  
  7. Now, use those feet to stomp, jump, and knead the dough!
 
Kneading with your feet gives the dough much more pressure and stretch.  You can use the heels of your feet to really press into the dough.  
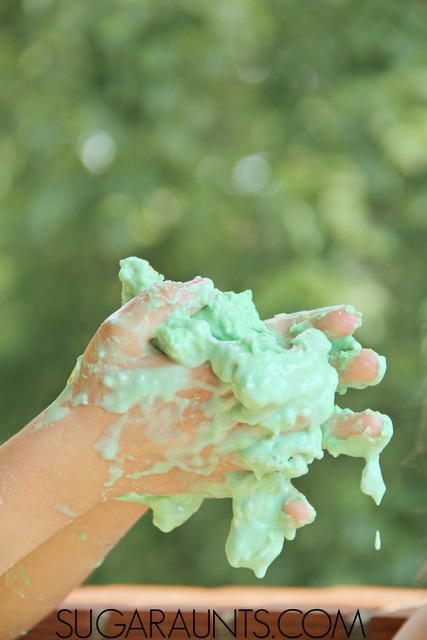
Kneading our fondant dough was very cool and sensory.  The warm towel could be felt through the dry towel, and squishing the dough provided an unsteady surface.  This proprioceptive activity was not just therapeutic.  It was FUN!
 

Marshmallow Sensory Dough

After kneading the dough for about 10 minutes (and with a lot of dancing, and jumping on the dough!) we pulled out our sensory dough and started playing.  It was amazing to see the difference in texture and pliability before kneading and after kneading the fondant with our feet.
 
Place the dough on a cutting board surface that has been lightly dusted with confectioners sugar.  Show your child how to pull of lumps of dough and roll them into balls.  
Use a rolling pin to roll out thin layers for an upper extremity strengthening and proprioception work out.  
While the dough was easier to manage, it still packed a tough and resistive punch!  We found that working with small amounts of dough at a time made rolling for my four year old easier.  

Make this marshmallow fondant dough recipe for a sensory play experience with kids.  The proprioceptive and strengthening input is unbelievable with this resistive and tough dough.  Sensory spectrum kids can get a calming and full body proprioception activity with this dough, from upper extremity to lower extremity for calming and relaxing heavy work.
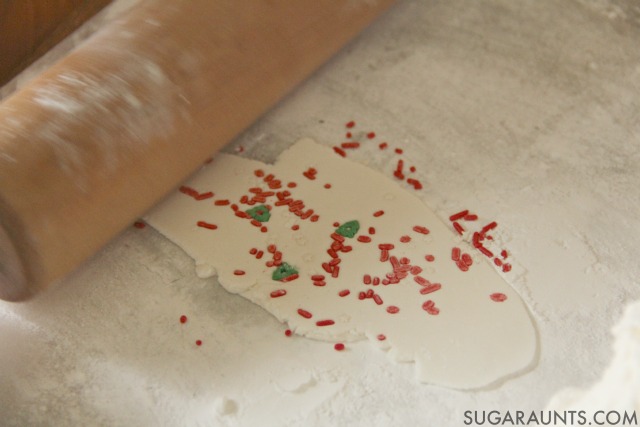
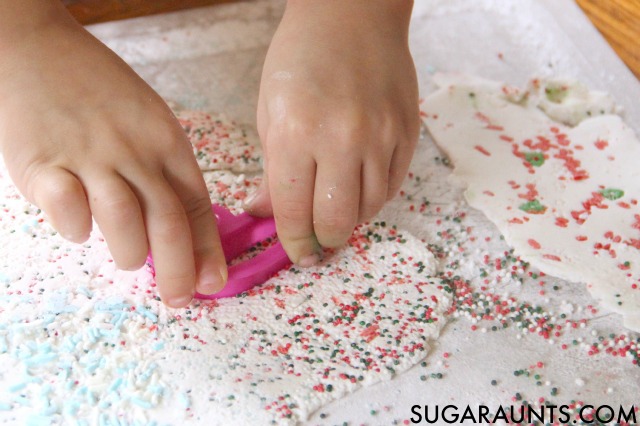
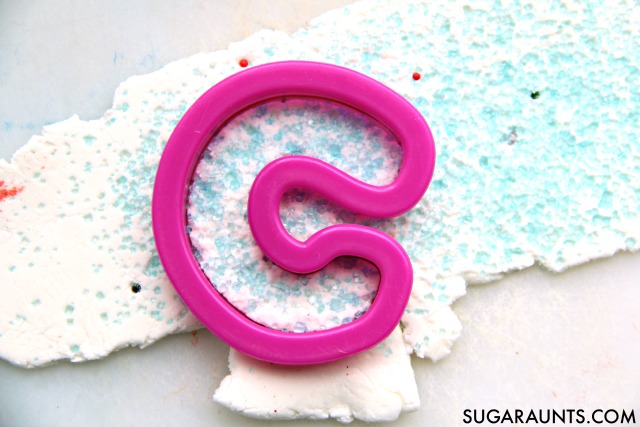
We decided to add sprinkles for a bit of teeny tiny fine motor precision work.  Sprinkle the candies onto the layer of fondant and give it another rolling pin roll or two to press the sprinkles into the dough.

Make this marshmallow fondant dough recipe for a sensory play experience with kids.  The proprioceptive and strengthening input is unbelievable with this resistive and tough dough.  Sensory spectrum kids can get a calming and full body proprioception activity with this dough, from upper extremity to lower extremity for calming and relaxing heavy work.
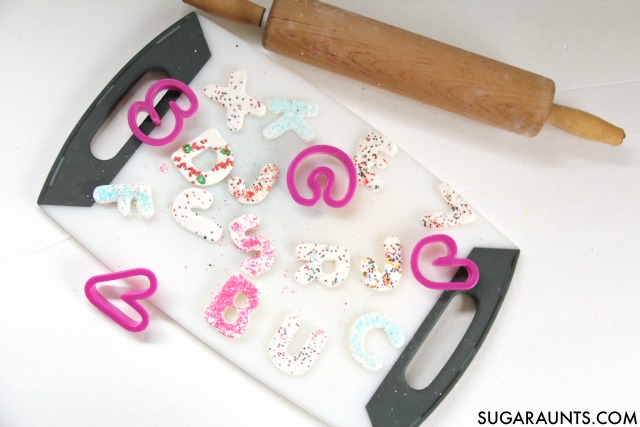
Then, we used our letter alphabet cookie cutters to press the marshmallow fondant sensory dough into candied letters.  
Pressing the cookie cutters through the tough fondant really puts a proprioceptive punch on the small joints of the hands.  This activity would be perfect as a fine motor handwriting activity by warming up and waking up the muscles of the hand and getting them ready for written work.  
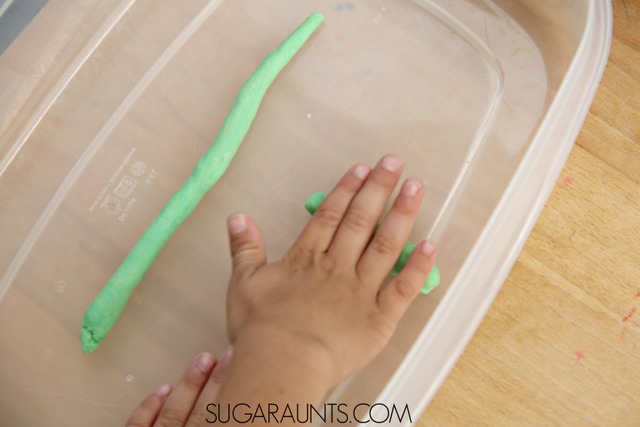
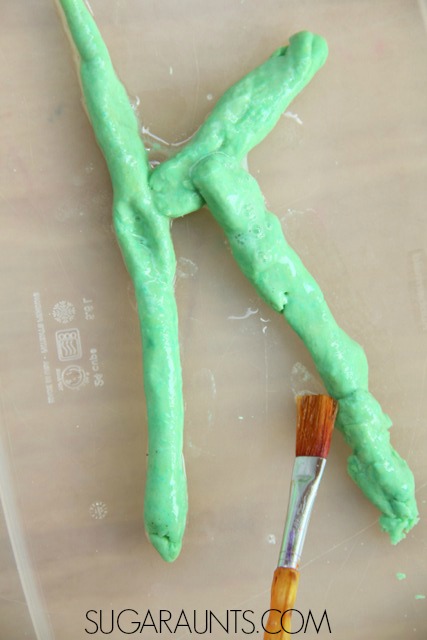
You can extend the activity further by cutting playdough with scissors. Using this heavy weighted dough, you really develop strength and add heavy work feedback through the hands. Try making play dough snakes and go from there.

Make this marshmallow fondant dough recipe for a sensory play experience with kids.  The proprioceptive and strengthening input is unbelievable with this resistive and tough dough.  Sensory spectrum kids can get a calming and full body proprioception activity with this dough, from upper extremity to lower extremity for calming and relaxing heavy work.


There was quite a bit of tasting of our sensory dough.  Which was perfectly fine with me.  While it is made entirely of sugar and a completely horrible for dietary intake, it sure did provide a taste sensation.  This sensory dough was fun in more ways than one!

Make this marshmallow fondant dough recipe for a sensory play experience with kids.  The proprioceptive and strengthening input is unbelievable with this resistive and tough dough.  Sensory spectrum kids can get a calming and full body proprioception activity with this dough, from upper extremity to lower extremity for calming and relaxing heavy work.
After you’ve made an alphabet of letters with the marshmallow fondant dough, leave them out to air dry and harden.  They can be added to cupcakes or a cake for a fun treat.  Wouldn’t it be nice to make fondant letters together with your child to decorate their own birthday cake or to make a cake for a loved one?
 
Add this proprioceptive sensory dough to your sensory diet!


Facebook sized sharing:

Make this marshmallow fondant dough recipe for a sensory play experience with kids.  The proprioceptive and strengthening input is unbelievable with this resistive and tough dough.  Sensory spectrum kids can get a calming and full body proprioception activity with this dough, from upper extremity to lower extremity for calming and relaxing heavy work.

Twitter Sized Sharing:

Make this marshmallow fondant dough recipe for a sensory play experience with kids.  The proprioceptive and strengthening input is unbelievable with this resistive and tough dough.  Sensory spectrum kids can get a calming and full body proprioception activity with this dough, from upper extremity to lower extremity for calming and relaxing heavy work.
 
 
Looking for more Proprioception activities for your child? Try these:


Away In A Manger Christmas Carol Sensory Bin (with Egg Cartons!)

This time of year, we love our Christmas carols. (Actually, we seem to sing them year-round.  During the Christmas season, though, they are on re-play!)  We joined bloggers from all over in creating a sensory bin based on Christmas carols.  You can see all of the bloggers and their Christmas carol-related sensory bins here. This is a Christmas sensory bin that kids love to use in holiday play activities. You can check out all of our Winter sensory bins as well.

 
We decided to create a sensory bin around one of our favorite Christmas carols, “Away in a Manger”.  It’s a song that my kids love to sing and one that brings memories of Christmas sing-a-longs and church pageants. This nativity sensory bin used something that we love to craft with: egg cartons!


Check out these Christmas Fine Motor Activities for more creative ways to work on fine motor skills and address development of skills this Christmas season. 

Away in a Manger Christmas Carol sensory bin. With egg cartons!

Egg Carton Nativity Sensory Bin

This post contains affiliate links.  
 
This sensory bin was easy to put together.  Pull out your paint
and glue and a few recycled egg cartons, because this was fun to make AND play with.


Away in a Manger Christmas Carol sensory bin. With egg cartons!
 
  Away in a Manger Christmas Carol sensory bin. With egg cartons!
My daughter helped me paint egg carton sections with different colored paints (I love these
for their bright colors.) and I added the face details.  We glued on parts to the people. like adding a gold pipe cleaner
halo to the angel, white crafting pom poms
to the lamb, and sparkly spangles to the three kings. 


Away in a Manger Christmas Carol sensory bin. With egg cartons!
 
Use a permanent marker
to add facial features.


Away in a Manger Christmas Carol sensory bin. With egg cartons!
 
We used another egg carton to build the stable, and a recycled paper tube to make the manger.

Away in a Manger Christmas Carol sensory bin. With egg cartons!
And it was time to play. (Turn on “Away in a Manger” while you play!)

Away in a Manger Christmas Carol Sensory Bin

We used corn and black beans to create a sensory bin filler.  It was a cool medium because we could create hills and mounds like the landscape that Mary and Joseph may have crossed to get to the stable.  

Away in a Manger Christmas Carol sensory bin. With egg cartons!
We scooped and smoothed the corn as we pretended our nativity scene (and sang Away in a Manger).  

Away in a Manger Christmas Carol sensory bin. With egg cartons!
 
This donkey looks a little more like a monkey…But it worked for us!  He was pals with the pig and the overly fluffy sheep.
We had so much fun playing with this Manger sensory bin.  It will be out for the rest of our Christmas season…and probably a bit longer after that!
 
Want to see more sensory bins based on Christmas Carols?  Check out what these bloggers have created! 

 
Away in a Manger Christmas Carol sensory bin. With egg cartons!
 

Christmas Handwriting Activities

Writing out that Christmas wish list is a difficult task that brings out tears instead of holiday excitement.  I’ve got a solution for your kiddo with handwriting difficulties: a packet of modified paper for all of the Christmas handwriting tasks that come up each year.  Use this handwriting pack to help kids who struggle with handwriting to participate in holiday traditions while even working on and developing their handwriting skills!

Working on handwriting with kids this Christmas season? Grab your copy of the Christmas Modified Handwriting Packet. It’s got three types of adapted paper that kids can use to write letters to Santa, Thank You notes, holiday bucket lists and much more…all while working on handwriting skills in a motivating and fun way! Read more about the adapted Christmas Paper here

Try these Christmas crafts and activities: 

Winter Crafts for Kids


Explore Christmas Carols Through Sensory Bins

I am so excited to share a collection of Christmas activities with you today!  If your kids are like mine, we are Christmas Carol maniacs.  We love to have them playing at all times from the day after Thanksgiving through New Years.  (And belt them out in the car!)  


Tomorrow, I’m hosting a few of the most creative kids’ activity bloggers as we share Christmas Carol sensory bins!  Each blogger is taking a Christmas carol and creating a sensory bin or sensory small world based on their carol.  Picture kids of bloggers all over the world playing in sensory bins, exploring a Christmas-y small world, and singing along to their favorite carols…and then you can re-create these sensory bins all season long!


Christmas Carol sensory bin ideas for play and learning along to popular Christmas carols.  Perfect for kids and family sensory play or even Advent activities.


Sensory Bins and Small World Imagination Play

Sensory bins are such a great way to explore the tactile sense through imagination and creative play.  Sensory bins can focus on any topic or theme and peak a child’s interest through the imagination.  While playing in a sensory bin, kids can work on so many skills!


Sensory bins help with:

  • Fine motor skills
  • Tactile defensiveness
  • Language development
  • Self-confidence
  • Taste exploration (with taste-safe sensory bins!)
  • Olfactory exploration
  • Arm strengthening (extending arms for a period of time during play works those arm muscles and core body strength.)
  • Learning through play (Add sight words, math, or literacy to sensory bins.)
  • Attention
  • Visual Perceptual skill development

Christmas Carol Sensory Bin Ideas

These are the most creative and fun ways to play and learn through Christmas carols and sensory bins this season.  Be sure to stop back tomorrow when I’ll be adding all of the sensory bins for the bloggers below!  You’ll want to play along (and sing along) with each one!
Still Playing School | Frosty the Snowman Sensory play
Teach Me Mommy | Oh Holy Night sensory bin
Modern Preschool | Jingle Bell Rock sensory bin
Best Toys 4 Toddlers | O Christmas Tree
Frogs and Snails and Puppy Dog Tails | Little Drummer Boy
Sun Hats and Wellie Boots | Walking in a Winter Wonderland
One Time Through | Silver Bells sensory bin
Perfect for Facebook:
Christmas Carol sensory bin ideas for play and learning along to popular Christmas carols.  Perfect for kids and family sensory play or even Advent activities.
 
Perfect for Tweeting:
Christmas Carol sensory bin ideas for play and learning along to popular Christmas carols.  Perfect for kids and family sensory play or even Advent activities.
 
Love it? Tweet it!
 
Looking for more sensory bin ideas?  Try these:

Jackson Pollock Inspired Tote Bag Art

Today, I’ve got such a fun and gorgeously simple art project to share.  This Jackson Pollock inspired tote bag art was just the creative outlet my second grader and I needed one rainy afternoon. Splatter paint is a creative painting tool that kids love.

 
As a Mama of four goofy/amazing/active/wild kids, Pollock’s balance of control and chance speaks to me.  I think Moms have the balance of control and chance pretty well managed…sometimes we have a little more control in situations and other times it’s more of a game of chance. The balance changes by the moment. And it’s all part of the job of being mom!
 
Flinging little drops of paint around sure was an act of balancing how hard we flung the paint and just accepting the chance of blue paint dripping onto bare ankles.  
 
Which happened.  
 
And lead to lots of giggles.
 
Jackson Pollock inspired tote bag art for second graders (or any age!) that wants to explore Pollock's use of movement, balance, and control in his painting technique.  Create a unique and creative art project, too!


This post contains affiliate links.

Jackson Pollock Inspired Tote Bag Art

 
You’ll need just a few materials to make this art project:

Tote Bag 
Poster Paints (THESE are my favorite brand! for their gorgeously bright colors.) 
A bit of water
Stick, paint stirrers, chopsticks, or paint brushes 

Drop cloth, old table cloth, or a large Storage Bin


We found this Jackson Pollock book
at our library and learned some interesting facts about the artist.  One thing that stood out to us was the fact that Jackson Pollack’s paint brush never touched his canvas.  When we painted out tote bag, we loved re-creating that fact!
RELATED: Get creative by Painting with Yarn!
 
To make the Tote Bag project: 
Spread out a drop cloth, old table cloth, plastic throwaway table cloth, or even an under the bed storage bin.  Anything that is going to protect your floors will work.  The mess with this project depends solely on how the art moves you and the kids.  And it might just end up being big old movements that paint the walls.
 
Jackson Pollock often times painted with items other than paint brushes.  We did use paint brushes for our tote bag but only because we got too excited about painting and forgot to dip the stick end of the brush into the paints.  Be sure to not touch the brush to the tote bag though!  Instead, swirl, tap, swing, and shake the paint onto your painting surface.


Let the paint dry and use your tote to carry essentials.  I’ll share how we’re using our tote in another post. Coming soon!
Jackson Pollock inspired tote bag art for second graders (or any age!) that wants to explore Pollock's use of movement, balance, and control in his painting technique.  Create a unique and creative art project, too!
Be sure to check out all of the great Famous Artist ideas from the 2nd grade blogging team! 
Piet Mondrian Suncatcher Art for Kids from School Time Snippets 
Van Gogh Inspired Sunflower Art Projects from Preschool Powol Packets 
Matisse Inspired Suncatchers from Creative Family Fun 
Warhol Inspired Art for Kids from Still Playing School 
 
Jackson Pollock inspired tote bag art for second graders (or any age!) that wants to explore Pollock's use of movement, balance, and control in his painting technique.  Create a unique and creative art project, too!
More creative art and painting you will love:
  

Ghost Craft Sensory Exploration

This Halloween Ghost craft was so beyond easy to throw together.  I tend to save a little bit of everything to use in play, crafts, and fine motor/sensory/movement activities and use them in occupational therapy halloween crafts to work on a variety of areas with a fun fall theme.  We have a pile of these plastic bread ties that I’ve been saving for a fun craft or learning activity.  Today, we made an easy ghost craft with them and used these cutie pie ghosts in a tactile sensory exploration play. For another ghost craft that can be used at Halloween parties for kids or in OT this season, try this easy ghost craft that works on scissor skills or this recycled container ghost craft.

Ghost sensory bin with cute bread tie ghost craft.  Lots of sensory bin tips and tools in this post, from an Occupational Therapist, including why sensory bins are so great for kids with and without sensory issues!

Ghost Craft for Kids

To make the bread tie ghosts, you’ll need just two items: (We’re including affiliate links in this post.)

These ghosts are just one way to use recycled materials in kids crafts.

Plastic Bread ties (you can save these from loaves of bread, bagels, and other grocery items.
A black permanent marker


Ghost sensory bin with cute bread tie ghost craft.  Lots of sensory bin tips and tools in this post, from an Occupational Therapist, including why sensory bins are so great for kids with and without sensory issues!

Simply draw on eyes for each ghost.  Done!  Kids will like making this simple ghost craft and using them in sensory or fine motor play.

Fill a bowl with a sensory bin filler.  We used dry black beans, but you could use any material.  Some ideas are shredded paper, dyed rice, pumpkin seeds, dry split peas, cotton balls, or sand.  The options are limitless.  Ask your child for ideas, too. They probably have some some ideas that you might not have thought of!

Sensory bins and sensory play is important in discovery of materials, tactile exploration, and learning how a child’s environment works together.  Not only that, but simple sensory bins like the one we made can encourage language development, self-confidence, and work on tactile defensiveness in kiddos.  (This post is part of our 31 Days of OT series where I’m sharing free or almost free materials in Occupational Therapy activities.)

Ghost sensory bin with cute bread tie ghost craft.  Lots of sensory bin tips and tools in this post, from an Occupational Therapist, including why sensory bins are so great for kids with and without sensory issues!


Start playing!  

Ghost Sensory Bin

Sensory bins allow a child to explore textures through play.  Discover, explore, and inspire creativity with a simple sensory bin like this ghost and bean bin.  In Occupational Therapy settings, therapists might use a sensory bin like this to provide a calming period in a sensory diet or lifestyle.  A sensory bin provides an opportunity for the body to slow down, much like a sensory bottle.  It can be relaxing for a child who is overstimulated or hypersensitive to his or her environment. Some kids do not prefer to touch materials that are sticky, squishy, scrapey, or tickly.  A sensory bin can allow a child to explore these textures and more in a confined area (a box, bin, bowl, or baby pool are some ideas.) Other kids who are easily overstimulated in their environment can benefit from a sensory play like a sensory bin be exploring the textures and getting a chance to calm down.  Sensory bins can be small and perfect for hand activities, or big enough to hold the whole child.  Another benefit of a sensory bin in therapy and play is that you can customize them to fit the needs of your child/children: Fine motor, visual motor, tool use, bilateral hand coordination, gross motor skills, and even learning objectives can be added to sensory bins. 

Sensory play in sensory bins is a great way to encourage a “just right” sensory level as part of a sensory diet. Kids can benefit from sensory bin play to challenge sensory processing, to fidget, more, or help with self-regulation. Here is more information on how to create a sensory diet.

For more information on tactile sensory play this time of year, try our list of Fall Tactile Activities.

Ghost sensory bin with cute bread tie ghost craft.  Lots of sensory bin tips and tools in this post, from an Occupational Therapist, including why sensory bins are so great for kids with and without sensory issues!
 
This cute ghost looks like he’s not feeling too well, doesn’t he??


Sensory Bin Items for Learning and Play

Ghost sensory bin with cute bread tie ghost craft.  Lots of sensory bin tips and tools in this post, from an Occupational Therapist, including why sensory bins are so great for kids with and without sensory issues!


These are some items you might want to include in your sensory bins for a filler, manipulation, leaning, and exploring.  These are just some ideas to get you started, and only the beginning of sensory bin play!  The awesome thing about sensory bins is that they can be customized according to the child’s needs and interests and so, there are limitless ways to set up and play with a sensory bin!

 
Waterbeads are an awesome sensory bin filler. Have you tried these yet? They are a fine motor powerhouse and great for tactile sensory fun. See how we played with them here


Sensory bins are a great way to practice fine motor skills. No matter what your learning objective is (or maybe it’s just simple play!), these fine motor tool set
can be used in so many sensory bins for scooping, tweezing, dropping, and dumping! 


 So what do you put your sensory bin IN? We love our Sand Table. Kids can stand and play with any sensory bin. We’ve used ours for sand, water, paint, water beads, bubbles, and more. You can also take the legs off and play right on the floor or ground. 


We use our sand and water tables often in sensory bin play, but many times we use a Under the bed storage bin (or really any plastic bin!). It’s so easy to use the bin as a storage area for all of our sensory tools and then use it in sensory bin play, too! 


Natural River Rocks are a creative sensory bin filler. Use them in bug sensory bins, proprioceptive play, and more. 


Shredded Paper is an easy sensory bin filler. Explore and play while searching for items. 


Animal figures are perfect for small world sensory play and can be used in pretend play sensory exploration in so many ways. Freeze them into ice cubes, play with them in flour, add to a bin of dry beans…How would you play with these animals? 


I love this Alphabet Puzzle for letter learning with sensory play. Put the letters into a sensory bin for literacy activities. Or, play with the puzzle itself, like we did here.
Sensory lifestyle handbook- How to create a sensory diet

Are you looking for more information on Sensory Processing, creating a sensory diet, or understanding the body’s sensory systems and how they affect functional skills and behavior?  This book, The Sensory Lifestyle Handbook, will explain it all.  Activities and Resources are included.  Get it today and never struggle to understand or explain Sensory Integration again.  Shop HERE.

 
Ghost sensory bin with cute bread tie ghost craft.  Lots of sensory bin tips and tools in this post, from an Occupational Therapist, including why sensory bins are so great for kids with and without sensory issues!Ghost sensory bin with cute bread tie ghost craft.  Lots of sensory bin tips and tools in this post, from an Occupational Therapist, including why sensory bins are so great for kids with and without sensory issues!


Pop! Squirt! Splash! Book for Activities with Soap, Water, Bubbles

 
These creative play activities use soap, water, bubble play with hands-on activities and creative play ideas for kids with the book, Pop! Squirt! Splash! Developed with an intention to create fun and creative hands-On activities for kids using Soap, Water, and Bubbles, this book shares fun ways to play!


Creative water play ideas for kids, using items from around the home. Great gift idea for kids, nieces, nephews, parents, teachers, therapists.


I am so excited to share the news of our latest book, Pop! Squirt! Splash! Hands-On Activities for Kids Using Soap, Water, & Bubbles.
 
This post contains affiliate links.

This book is a creative collection of activities for kids broken down into sections:  Arts, Crafts, and DIY Projects, Learning Activities and Games, and Sensory Play.  The activities all have one thing in common; They all use soap, water, or bubbles.  The activities are easy to set up (and clean-up, given that they are made up of soap!) and provide a unique way to play with inexpensive items and products typically found around the home.  Each activity contains directions and bright and vivid photographs with alternate variations and additional activities. Playing with soap, water, and bubbles was never so much fun!  


Pop! Squirt! Splash! is creative way to explore the senses while working on fine motor and gross motor development of the child in creative and unique ways.  This book is a must for your library and would make a great gift for children, nieces and nephews, families, teachers, and therapists.

Watch more from the book here:

Creative play and craft ideas using soap. great gift idea for kids, nieces, nephews, teachers, therapists

Gift idea for kids, nieces, nephews, therapists, and teachers:

How cool would a gift basket with the book, Pop! Squirt! Splash! be?? Add a few essentials, like scoops, animal figurines, dish soap, figurines, Ivory soap, kitchen utensils, chop sticks
, liquid watercolors, glitter, beads, and paint brushes.  Not only will the kids be prepared for hours of activities, they will have so many variations of the activities to continue play and learning with hands-on sensory, crafts, activities, and more!
Creative play and craft ideas for kids, using Bubbles
Get more of the inside scoop on Pop! Squirt! Splash! by checking out our co-authors, and get your copy today!

Deep Blue Sea Sensory Bin

There are so many books out there that are just fun to read.  The Deep Blue Sea is one of those books.  Sure you learn colors and prepositions with this book, but the simple phrases and fun pictures make this book one that we read over and over again.  In this month’s Book Club Play Date series, we made a simple sensory bin to go along with the simple phrases and vivid images in the 
book, The Deep Blue Sea by Audrey Wood.


The Deep Blue Sea book sensory bin idea


The Deep Blue Sea Book Sensory Bin Activity

This post contains affiliate links. The Deep Blue Sea‘s bright colors were represented in our sensory bin.  We used a bin of water colored with 

a few squirts of blue paint. (This is my favorite paint for painting and it turns out, coloring water, too!) Swirl the paint around and you’ll get a bright and boldly colored blue water.

 
The Deep Blue Sea book sensory bin idea


Grab a rock from outside and place it right in the middle of the water bin.  This is a fun stage to stop and play, and you can start reading the book as you play.  ((You an definitely paint the rock red so it goes along better with the book, but we just left ours it’s plain old rocky color and pretended it was red.))
 
The Deep Blue Sea book sensory bin idea
 
Add a plastic palm tree.  As you read the book, you can add each part with the kids.  We used a small purple balloon with details drawn on.  For the orange butterfly, we used a foam sticker from our friends at www.craftprojectideas.com.  Draw a black dot on the butterfly with a marker.  


The Deep Blue Sea book sensory bin idea
 
We made fish using pipe cleaners in different colors.  These were fun because they sink in the water, so we had to search for the fish in the water.  
The kids loved playing in this sensory bin and reading through the book as we played.
 
The Deep Blue Sea book sensory bin idea
 
Looking for more The Deep Blue Sea book and play ideas for a Preschool Play Date?  See what the Book Club Play Dates team have created: 
Deep Blue Sea Craft from Fun-a-Day

We are posting this idea as part of our month-long Learning with Free Materials series where we provide 31 days of learning using free or almost free materials in homeschooling or school-based extension learning like homework.  


hands-on activities to explore social emotional development through children's books.

Love exploring books with hands-on play?  

Grab our NEW book, Exploring Books Through Play: 50 Activities based on Books About Friendship, Acceptance, and Empathy, that explores friendship, acceptance, and empathy through popular (and amazing) children’s books!  It’s 50 hands-on activities that use math, fine motor skills, movement, art, crafts, and creativity to support social emotional development.

How to teach cursive writing with sensory textures

Cursive handwriting can be an incentive for kids to sit down and write.  Many times, kids see older children or adults writing in cursive handwriting, or see a card that comes in the mail with cursive writing.  They want to be able to read the writing and learn to write in cursive themselves.  
 
My daughter asked to learn how to write in cursive, so I was happy to get started with her.  I loved assisting my occupational therapy students in fine motor tasks like cursive handwriting and was so excited to share tips and hints with my daughter as she learned cursive letter formation.  
 
We’ve been doing a lot of practice and fun pre-cursive activities to learn the basics.  Today’s sensory cursive activity is another way to introduce cursive letter lines and beginning pencil strokes.

Practice cursive handwriting with sensory twist using grass seed!  So cool and the kids will love this!  Great tips in this post for teaching kids cursive handwriting.


How to teach cursive handwriting from the beginning:  Where to start with teaching cursive

 
This post contains affiliate links.
Practice cursive handwriting with sensory twist using grass seed!  So cool and the kids will love this!  Great tips in this post for teaching kids cursive handwriting.
When you start to teach a child how to write in cursive, do not teach letters alphabetically.  When a child learns printed letters, they do not learn how to write in alphabetical order.  Instead, you’ll teach letters based on formation.  Lower case cursive letters share similar pencil strokes and make teaching certain groupings together.  We talked about the c letter series a little bit with our fizzy dough cursive sensory activity.  Letters c, a, d, g, and q start with the cursive letter c and are typically the first letters taught. 
 
Today we practiced the l series of letters.  The lower case cursive letters l, e, b, f, h, and k begin with the letter l’s loop.  I had my daughters use 

a bottle of glue
(we go through a LOT of glue in our house!) to draw the loops of l across a page. At this point, do not worry about size. We are focusing on the formation of the “l”‘s loops and connecting the “l”‘s together. You’ll want to encourage your child to form skinny and tall “l”s and not wide loops formed haphazardly. Using the glue bottle really provides a proprioceptive feedback to your child as they squeezed the bottle and form the letter’s loops. You can read more about proprioception in handwriting here.

Practice cursive handwriting with sensory twist using grass seed!  So cool and the kids will love this!  Great tips in this post for teaching kids cursive handwriting.
Next, we used a tray of grass seed for a sensory and textured way to write our cursive letter loops.  Using grass seed over the glue is a great sensory addition to handwriting practice for it’s texture.  Little hands love to examine and explore the soft, yet pokey seed.  It’s small enough that the seeds stick well to the glue and the letters are still very legible.  A larger seed such as dyed pumpkin seeds (although equally as FUN!) makes the glue letters more difficult to distinguish, especially if a child writes the letters on the smaller side.  
 
The small size of grass seed requires a wonderful pad to pad grasp (the pads of the thumb and index finger touching together, pincer (or pad-to-pad) grasp, and neat pincer grasp where the tips of the thumb and index finger are manipulating very small items, and rotation of the grass seed between the pads of the thumb and index finger.  Rotation of items is important as a child rolls items, such as a pencil between the pads of the thumb and index finger.  Rotation of the grass seed happens as they pick up the seeds and manipulate them onto the glue letters.
Practice cursive handwriting with sensory twist using grass seed!  So cool and the kids will love this!  Great tips in this post for teaching kids cursive handwriting.
Form all of the basic beginning lines of cursive.  Practice the loops of “l”s, the curves of “c”s, and the re-tracing of “i”s.  Practice writing the glue and grass lines in connected letters and individual letters.
Practice cursive handwriting with sensory twist using grass seed!  So cool and the kids will love this!  Great tips in this post for teaching kids cursive handwriting.
Love it? Pin it!
 
More cursive handwriting activities you will Love: 
This post is part of our month-long Learning with Free Materials series, part of the 31 Days of Homeschooling Tips as we blog along with other bloggers with learning at home tips and tools.
 
Looking for more ideas to teach cursive? You’ll love our 31 day series on how to teach cursive handwriting:


Fizzy Dough Pre-Cursive Handwriting

This month’s sensory dough is Fizzy Dough!  This was a fun one for us, because we combined one of our favorite doughs (baking soda dough!) with sensory science AND cursive handwriting….Whaaaa? Yep! We got them all in here on this post for you, and it was a fizzy blast!
 
This is a great hands-on activity that can help with the letter formation portion of cursive handwriting. Getting the tactile sensory input can leave a lasting impact on the lines needed to form letters. It’s a great way to make learning cursive not so boring!
Make fizzy sensory dough with baking soda dough and vinegar for a wonderfully messy sensory play for kids
 

What is Fizzy Dough?

What is Fizzy Dough…was the first thing we thought when we saw this month’s sensory dough theme.  Apparently anything that fizzes and is moldable can be a fizzy dough.  SO, we decided to do a twist on our soda dough recipe.  We actually ran out of the corn starch needed for the recipe and added in flour so it became a new soda dough for us.
 

To make the soda dough:

Combine 1 cup flour, 2 cups baking soda, 1 cup water, and a few drops of food coloring in a sauce pan.  Cook over medium heat. Stir until it looks like mashed potatoes.  Remove from heat and place in a glass bowl.  Cover with a cloth until cool.
Make fizzy sensory dough with baking soda dough and vinegar for a wonderfully messy sensory play for kids
 
Next comes the fun part:  Making the fizzy dough into FIZZY dough!  Simply add vinegar for a bubbly reaction that is very fun to watch and play with.  We put our dough into a bin and poured and painted vinegar all over the dough.  It became a squishy sensory mess of a dough, but still squishy.  Add more vinegar for a thinner substance.  My kids loved squishing it between their fingers.
Make fizzy sensory dough with baking soda dough and vinegar for a wonderfully messy sensory play for kids
How gloriously messy!
Teach cursive handwriting to kids using sensory fizzy dough to learn pre-cursive line formation.

Teach letters with fizzy sensory dough

 
We extended the activity a bit by adding a pre-handwriting and cursive letter formation aspect to our sensory dough.  My 5 year old rolled out snakes and made lower case letters.  We fizzed them for the sensory fun of it.  Dip a paintbrush in a cup of vinegar and “paint” the letters for letter formation practice.  Be sure to encourage your child to paint the letters in the correct way to practice letter formation and handwriting.
Teach cursive handwriting to kids using sensory fizzy dough to learn pre-cursive line formation.

How to teach cursive letters with sensory dough

Teach cursive handwriting to kids using sensory fizzy dough to learn pre-cursive line formation.
 
When it comes to learning cursive, there is the whole, “Where do I start?”  My oldest daughter is asking to learn cursive and I’m excited to teach her.  
We used our fizzy dough as a starting point to learn the beginning lines and curves of cursive handwriting.  Learning the letters can be easy for kids, but the connecting lines can be a bit confusing for kids who are used to printing words.  Form a long “snake” with the fizzy dough by rolling it on a table surface.  You want the “snake” of dough to be long enough to form several cursive letters in a row.  Use the dough to form beginning cursive strokes:  a series of lower case letter “i”, letter “t”, letter “m”, letter “l”, letter “c”, and letter “u”.  Connect the letters like we did in the picture above to allow the child to get a handle on the flow of the cursive letter lines.  
 
You can draw a line on paper or wax paper to make a form for the child to place the dough over.  Then add vinegar for a fizzy and sensory reaction.  They will love to see their cursive letter lines fizz and the sensory fun of learning cursive handwriting.
Teach cursive handwriting to kids using sensory fizzy dough to learn pre-cursive line formation.


Then use a paintbrush to dip and paint the cursive letters and cursive forms with vinegar for a fizzy, sensory reaction.

See all of the Fizzy Dough in the series this month: 
 
Lemon-Lime Fizzy Dough | Lemon Lime Adventures
Fizzy Dough Cupcakes | Study at Home Mama
Fizzy Bath Dough | Still Playing School
Primordial Fizzy Dough | Peakle Pie
Fizzy Lemon Juice Dough | Creative World of Varya
Edible Fizzy Dough | Wildflower Ramblings
Fizzy Flower Sensory Dough! |  Preschool Powol Packets
Rainbow Fizzy Cloud Dough | Powerful Mothering
Fizzy Dough | In The Playroom
Looking for more ways to work on cursive handwriting? You’ll love our 31 day series on How to Teach Cursive Handwriting: