3 Handwriting Activities Using Colored Pencils

Handwriting practice doesn’t need to be boring! This handwriting activity uses colored pencils with bright and vivid colors to make a colorful activity that seems more like a game than working on handwriting skills like letter formation and pencil pressure.


If you’ve been following The OT Toolbox for long, then you know that creative handwriting activities are some of our favorite (and most popular) topics on the website.

We love to share fun ways to work on the areas that make up handwriting skill, like size awareness, spatial awareness, letter formation, pencil control, pencil pressure, and speed.

These are just some of the subareas that go into legible and functional handwriting, but each makes a big difference when it comes to self-confidence in the child who is learning to write with ease.


When you practice handwriting skills in a fun way using out of the box tools (like colored pencils), handwriting practice can boost the child’s skill and confidence so they are more likely to carryover individual skills into writing tasks.


Teaching kids handwriting at home can be a struggle for many children, but taking the time to make handwriting efforts fun and creative can really pay off. Self-confidence in handwriting shows in legibility and ease of written work, enabling students to complete classroom assignments while focusing on the task at hand and not how neat of sloppy their handwriting is.


That’s why we’re excited to share this handwriting activity that uses colored pencils to boost handwriting challenges like letter formation, pencil control, and pencil pressure!


Handwriting Activity Using Colored Pencils


This is a good way to introduce pencil control when it comes to line awareness. The soft core of the colored pencils also helps with creating a bright pencil stroke that really shows up when shading. This made a nice impact on a pencil pressure activity. You can check out all three of these handwriting activity ideas below in more detail.


This post contains affiliate links.


Handwriting Activity to Improve Letter Formation Using Colored Pencils 

Use colored pencils to work on handwriting with these three handwriting activities that address letter formation, pencil pressure, and pencil control.


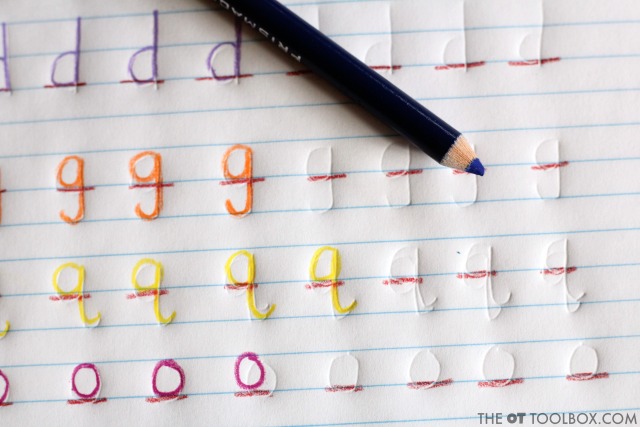
The first handwriting activity that we did was a letter formation task. When kids are learning to write letters, it can be easy to form letters in reverse. This is particularly true with commonly reversed letters like ‘b’ and ‘d’, ‘g’ and ‘q’.

Use colored pencils to work on handwriting with these three handwriting activities that address letter formation, pencil pressure, and pencil control.


When kids are learning letters, it can be helpful to break handwriting instruction up into teaching the various letter families. We’ve discussed cursive letter families here on the site before, but the printed letters are not much different.


There are groups of letters that contain the same pencil strokes, starting lines, and “parts” that allow letters to be divided up into letter families. For example, the letters b, h, m, n, p, and r all have a downward pencil stroke followed by a re-trace back up and a curve over to form the “bump” of the letter.

Use colored pencils to work on handwriting with these three handwriting activities that address letter formation, pencil pressure, and pencil control.


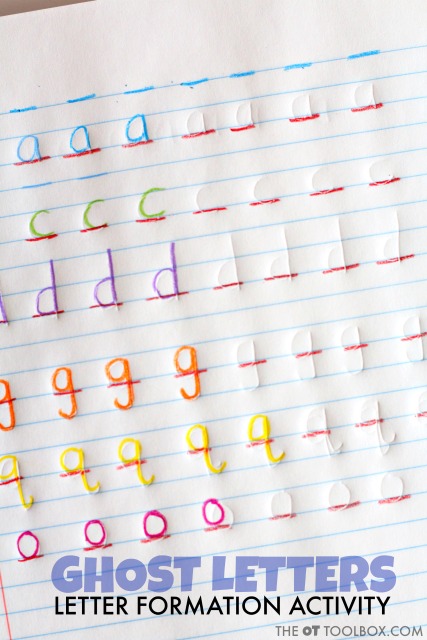
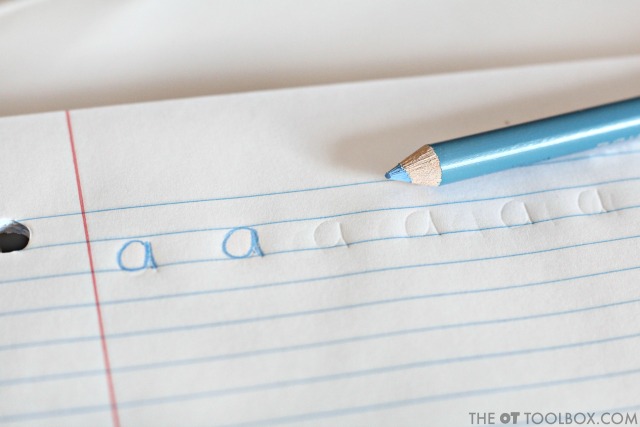
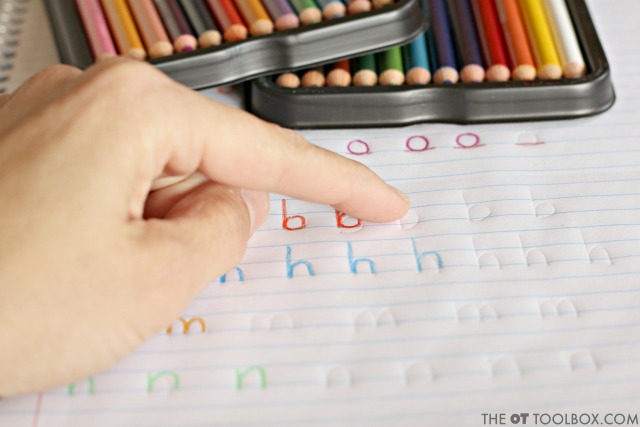
To address letter formation in our handwriting activity, we used a spiral notebook pad. First, I made sure the pages were lined up and then I used a ballpoint pen to write a letter by pressing down very hard. When the top notebook page was turned, I showed my kids how the impression of the letter was intact on the page underneath.


We then used our colored pencils to write the letter on the “ghost letter”. It was fun to feel the letter on the page and then to use the faint guide as a tool for letter formation. To illustrate letter formation and letter families, I grouped specific letters together in a group on the notebook page.


Watch the video below to see how these pencil activities using colored pencils can be used to work on pencil control, pencil pressure, and other handwriting challenges: 

Handwriting Activity to Improve Pencil Pressure Using Colored Pencils

Use colored pencils to work on handwriting with these three handwriting activities that address letter formation, pencil pressure, and pencil control.

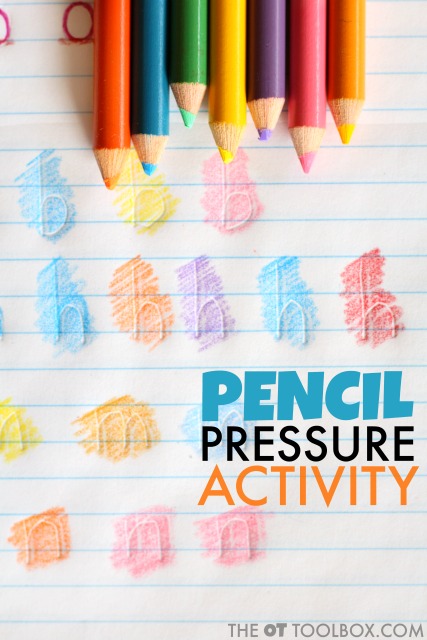
Our second handwriting activity used those same Ghost Letters to address pencil pressure. Pencil pressure is a big topic when it comes to legibility of written work. If a child presses too hard, the paper can tear, letters can become smudged, it’s hard to erase completely, and legibility suffers. 


If a child presses too lightly on the pencil, words can be written so lightly that it’s impossible to read. There are many reasons why a child may utilize too much or too little pressure on the pencil. You can read all about these underlying reasons for poor pencil pressure here.


To teach kids about pencil pressure, use the Ghost Letter technique of writing letters on a notebook page. When they turn the page of the notebook, they shouldn’t be able to see the Ghost Letter on the second page. If they do, they are using too much pencil pressure and are pressing too hard on the pencil. If they don’t see the Ghost Letter, they are using a lighter amount of pressure on the pencil.

Use colored pencils to work on handwriting with these three handwriting activities that address letter formation, pencil pressure, and pencil control.

We illustrated this by using our colored pencils to shade on the Ghost Letters that appeared on the second page of the notebook. The bright colors of the soft core colored pencils allowed for a bright color while enabling the Ghost Letter to show through.


You can also ask students to write the letters on the top page of the notebook to see if their letters show through to the following page. Typically, a child who writes with heavy pencil pressure will have letters showing through on the second page even when using a pencil (as opposed to a ballpoint pen).

Use colored pencils to work on handwriting with these three handwriting activities that address letter formation, pencil pressure, and pencil control.


*Note: This activity addresses only heavy pencil pressure. If a child is pressing too lightly on the pencil and writes with a light pencil pressure, the Ghost Letters will not show through on the second page of the notebook.


You can also address pencil pressure using colored pencils when shading. Instruct kids to shade darker or lighter and match an example color. This helps them to understand how hard to press when they recreate the same shade.


Handwriting Activity to Improve Pencil Control Using Colored Pencils

Use colored pencils to work on handwriting with these three handwriting activities that address letter formation, pencil pressure, and pencil control.

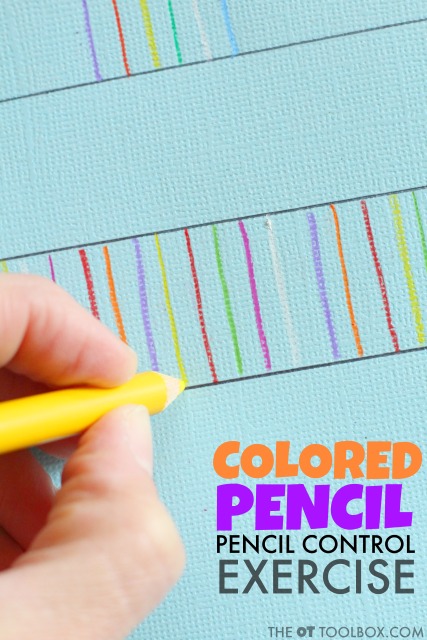
One final activity that uses colored pencils is one that can improve pencil control. Pencil control is needed to make the pencil start at the top line and stop at the baseline without overshooting line approximations. Pencil control requires use of visual motor skills. 


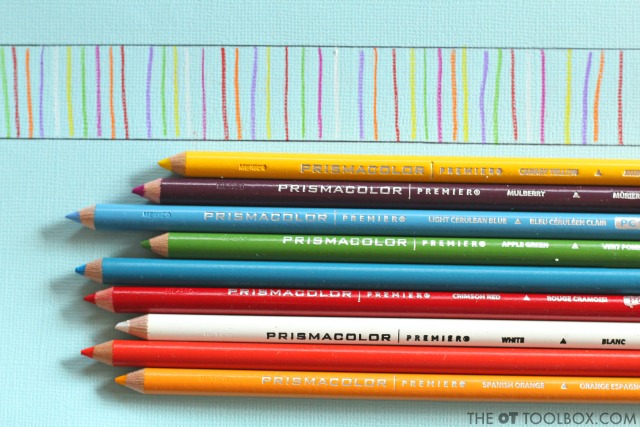
One way to practice line use and pencil control is by completing pencil exercises like this one:

Use colored pencils to work on handwriting with these three handwriting activities that address letter formation, pencil pressure, and pencil control.

Use a ruler to draw one inch spaces on a piece of paper. Using the colored pencils, ask students to draw random lines connecting the top and bottom lines.

Use colored pencils to work on handwriting with these three handwriting activities that address letter formation, pencil pressure, and pencil control.

Students can use a single color to form several lines spaced randomly within the writing area. They can then switch colors to add additional colored lines. Continue to draw lines, focusing on starting on the top line and stopping on the bottom line.

Use colored pencils to work on handwriting with these three handwriting activities that address letter formation, pencil pressure, and pencil control.

The soft core of the colored pencils allows for a slower pencil stroke. This can help with accuracy.

Use colored pencils to work on handwriting with these three handwriting activities that address letter formation, pencil pressure, and pencil control.


Add another component to this handwriting activity by drawing vertical lines so that students practice left to right pencil strokes while focusing on pencil control.


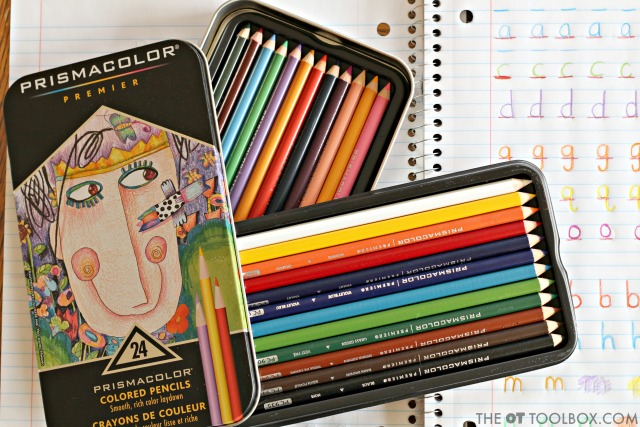
All of the activities that we did with our colored pencils were a big hit resulting from the bright and colorful selection of colored pencils in the set.


There’s just something about opening up a fresh set of colored pencils!

Use colored pencils like Prismacolor Premier colored pencils with a soft core to address handwriting needs.

Tips for Getting Sensory Kids to Wear Winter Clothes

You’ve probably seen the kids that wear shorts all winter long. Or those that go out into 20 degree weather with only a hoodie to keep them warm. What gives? In this article, we’re talking about sensory friendly winter clothing and tips for getting sensory kids to wear winter clothing. I know I can not stand the thought of wearing an itchy scarf or (shudder) a turtle neck during the frigid winter months. So how can we support kids during cold weather when sensory needs impact their ability to even stand to put on boots, pants, a hat, winter coats, or gloves? Let’s go over this…

Sensory Winter Clothes

Before we get to the tips for helping kids with sensory needs to not freeze out there in the cold temps, lets cover a few resources that will support your needs in this topic…

These resources will help many individuals who just can’t stand the thought of wearing winter clothes!

Below, you will find information on the tactile sensory system and how tactile challenges to the sensory system can result in difficulties tolerating clothing textures. The strategies below are helpful tips for getting sensory kids to wear winter clothes. You may want to use these strategies along with our fun winter clothes worksheet to pull the theme together.

Use these tips to help kids with sensory processing difficulties to wear winter clothes.

Tips for Getting Sensory Kids to Wear Winter Clothes

The Tactile Sensory System is one of the earliest developed senses of the body. The skin is the largest and the most prevalent organ. The skin performs unique duties for the body. Most importantly, the skin protects and alerts us to danger and discriminates sensation with regard to location and identification. The sense of touch alerts us to both discrimination and danger. These two levels of sensation work together yet are distinctively important.
 
Tactile discrimination allows us to sense where on our body and what is touching us. With discrimination, we are able to discern a fly that lands on our arm. The second level of the tactile system alerts us to danger. It allows us to jump in response to the “fight or flight” response when we perceive a spider crawling on our arm.
 
This system also allows us to have tactile defensiveness when it comes to certain clothing textures on various parts of the body (pants on the lower legs, for example)
 
When either of these levels of sensation are disrupted, tactile dysfunction can result. This presents in many ways, including hypersensitivity to tags in clothing, sensitivities to heat or cold, a dislike of messy play, difficulty with fine motor tasks, a fear of being touched by someone without seeing that touch, a high tolerance of pain, or a need to touch everything and everyone.


The information received from the tactile system includes light touch, pain, temperature, and pressure. When the tactile system is immature or impaired, the brain can become overly stimulated with resulting poor organization and regulation of input. Children can then experience difficulty with behavior and concentration as a result.

 
When children with tactile discrimination issues need to wear winter clothing, meltdowns can result. The heavy winter coat is just not tolerable. Use the tips below to help sensory kids wear winter clothes.
 

Winter Clothing Sensory Strategies

 
Affiliate links are included in this post.
1. Layer! Use a compression garment under clothing. A simple lycra sun shirt can be a big help for some students when worn under clothing. Tight stockings or bike shorts can be worn under pants. Other ideas include:
  • An Under Armour shirt (this one has a crew neck to reduce a tight feeling around the neck.)

2. Utilize seamless undergarments (for girls or boys), clothing or seamless socks, or clothing with flat seams. These can be added under a layer of heavier socks or used in isolation.

3. Tighten or loosen shoe laces as preferred. A tighter shoe lace can provide compression through the feet.


4. Becoming overheated can be a big cause for a sensory meltdown or refusal to wear winter coats. Consider trying a fleece or lined sweatshirt instead of a puffy winter coat.

 
5. Cut labels from clothing. Don’t forget the gloves, hats, jackets, and coats!
6. Wear two layers of socks or try wearing socks a size smaller for additional compression through the feet and ankles. Try using a knee-high length in isolation or under a second pair of socks. This can help the child who isn’t able to tolerate socks slouching down inside shoes or boots.
7. Wash new clothing in hot water several times to loosen clothing textures.
8. Rub a thick cream such as aloe gel or cocoa butter on the body before dressing. Dry skin can cause itchiness during the winter months where dry heat is prevalent.
9. Provide a blanket in the car if a winter coat isn’t an option.
 
10. Use fabrics such as cotton, fleece, and flannel. Avoid polyester blends.
11. Wear full body zipper pajamas (made for big kids!) with or without a compression layer underneath.
12. Use a winter vest or removable sleeves to quickly adjust for temperature changes.
 
13. Use a poncho or a car seat poncho instead of a winter coat.
 
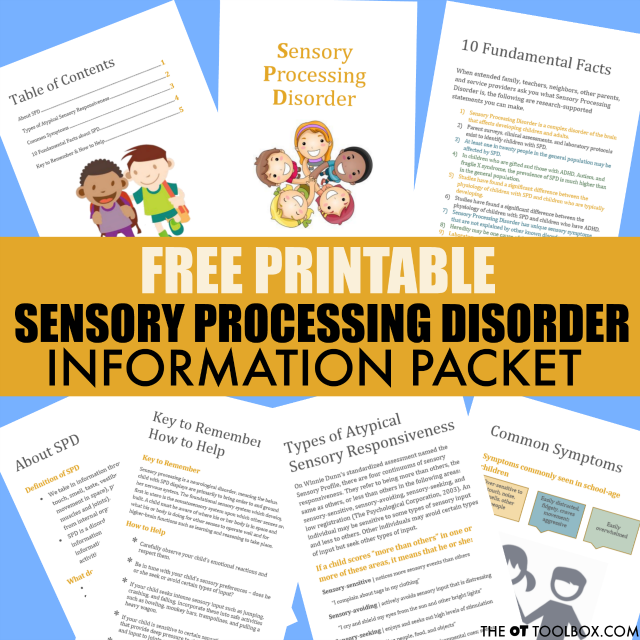
Looking for more information on sensory processing? Grab this free sensory processing booklet:
 
Parents and teachers will love to pass on this free sensory processing disorder information booklet.
 
Use these tips to help kids with sensory processing difficulties to wear winter clothes.
 

Colleen Beck, OTR/L has been an occupational therapist since 2000, working in school-based, hand therapy, outpatient peds, EI, and SNF. Colleen created The OT Toolbox to inspire therapists, teachers, and parents with easy and fun tools to help children thrive. Read her story about going from an OT making $3/hour (after paying for kids’ childcare) to a full-time OT resource creator for millions of readers. Want to collaborate? Send an email to contact@theottoolbox.com.

Easy Handwriting Accommodation Strategies for the Classroom

Many times kids who struggle with handwriting problems or challenges need some handwriting accommodations in order to complete written work with legible handwriting and efficient manner. The handwriting strategies listed below are handwriting accommodations that can be used in a variety of classroom settings or in the home. The compilation of instructional ideas and handwriting accommodations may be trialed and presented by therapists, teachers, or parents, or anyone who works with kids who struggle with handwriting


Handwriting accommodations ideas and strategies should be presented in a fun manner and as a tool for promoting independence.  


These handwriting accommodations can be used across the curriculum or in individual settings depending on the child’s particular needs. 


Remember that every child is different. What accommodation or strategy works with one child may not work successfully with another child who presents very similarly. The trick is to try the accommodations over a period of time. Don’t give up if the accommodation doesn’t immediately cure any handwriting struggles. Trial and keep track of responses. Then, move on to another accommodation after a period of trial. 


Use these handwriting accommodation strategies that can help kids with handwriting problems in the classroom.


Handwriting accommodation strategies


Fill in the blank worksheets- Fill in the blank form to limit the required hand writing tasks. 


Students can use an app to scan worksheets onto a tablet and type in the responses.  


Use adapted handwriting paper such as color coded paper


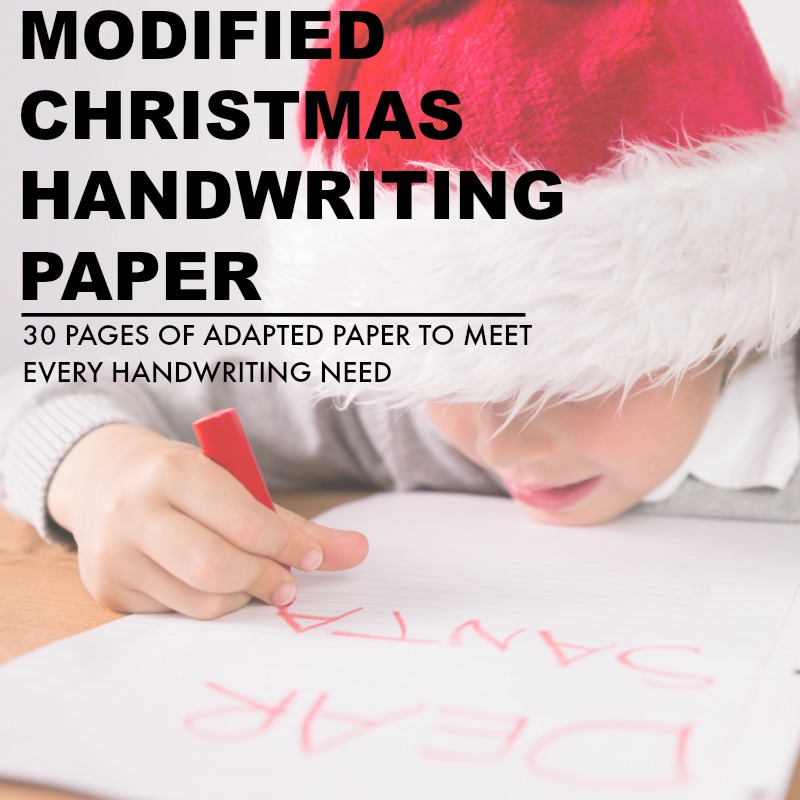
Trial use of bold lined paper. This Christmas modified Handwriting Paper can be a big help this time of year.


Practice and writing using color changeable markers to address letter formation and motor planning needed for letters. 


Use manipulatives such as magnets to write answers to problems and written responses. 


Use a dry erase marker and whiteboard for written responses. 


Modify a worksheet by using multiple choice answers rather than writing out lengthy responses.


Students can write using large graph paper with boxes for individual letters. 


Trial use of spacing accommodations such as highlighted margins. More spatial awareness tricks can be found here


Try using a sensory tray or writing manipulative tray for letters for students to respond to multiple choice problems. 

Ufe a sheet of his foam crafting paper under written work for feedback in letter formation and line awareness. 


Use a computer for spelling test and vocabulary test. 


Provide more space for the child to copy to: Provide larger spaced paper.

Teach students to use graph paper for copying one letter/number per square.

Position the child closer to the chalkboard or classroom homework station with less had turn needed for copying written work. 


When copying from a book, use a copying tool such as a folded piece of paper to line up with the work.  Can also try an index card with a cut out “window” for copying to reduce distracting information. You will find more strategies to address spatial awareness here. 


Require single word answers or use magnetic alphabet letters on a desk with a cookie sheet for single answer problems. 


Answer questions verbally or ask another student to transcribe written work.


Provide adapted spelling test and vocabulary test using multiple choice problems where students can correct the can choose the correct answer by circling a letter. 


Use a highlighter for tests and worksheets where students can highlight the correct answer. 


Use a dot apps which can adapt worksheets into tablet form. 


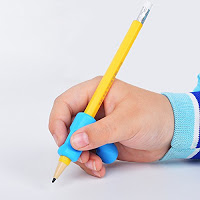
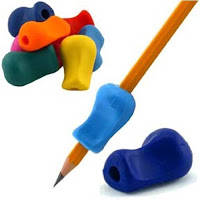
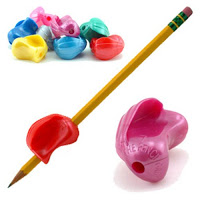
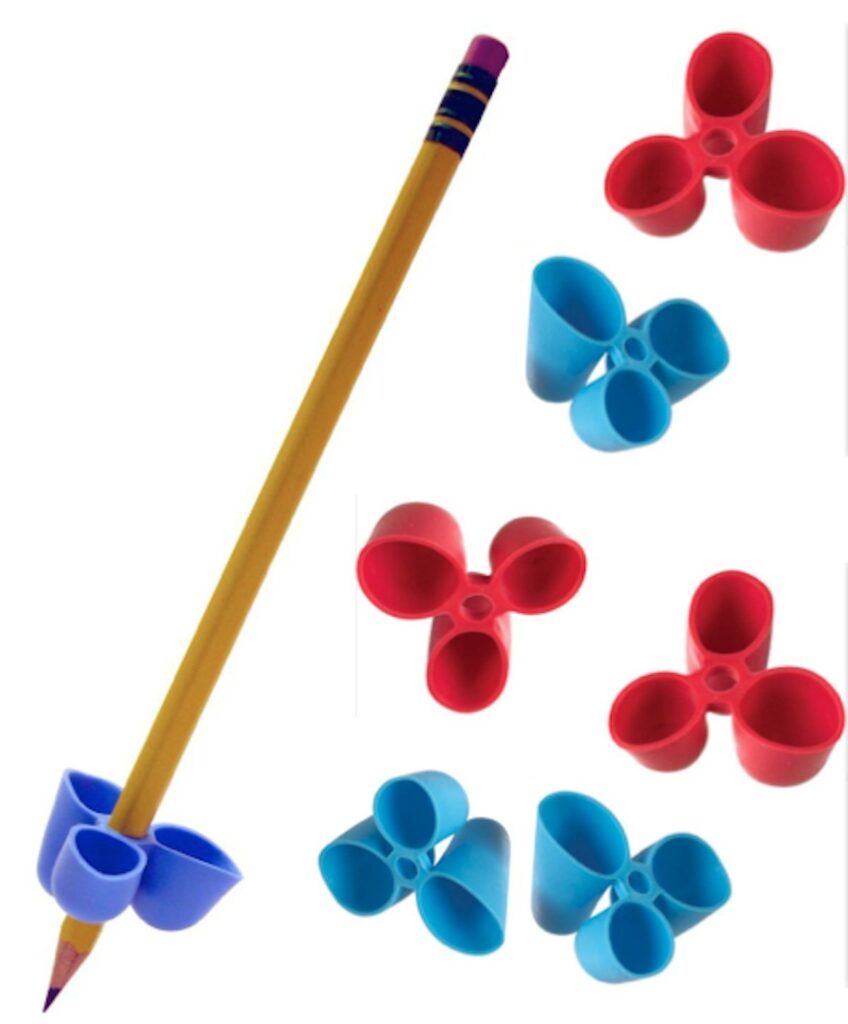
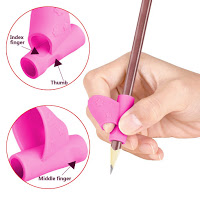
Explore several different pencil grips and pencil types to reduce the amount of pressure a student requires when writing. Here are a few options:


Pencil Holder Ergonomic Pen Writing Training Aid Grip

Add a red or green dot to margins to help students identify starting and stopping points for writing. 


Try using letter stamps for responses on worksheets. 


Use a handheld recorder to copy notes in older grades. 


Trial use of a gel pen to reduce friction on the paper with the traditional lead pencil.


Teach students to write into boxes formed for the size of individual letters. This is a strategy that works well for copy work.

Use these handwriting accommodation strategies that can help kids with handwriting problems in the classroom.


You may also be interested in the free printable packet, The Classroom Sensory Strategy Toolkit.
 
The Classroom Sensory Strategy Toolkit is a printable packet of resources and handouts that can be used by teachers, parents, and therapists. Whether you are looking for a handout to explain sensory strategies, or a tool for advocating for your child, the Classroom Sensory Strategy Toolkit has got you covered.
 
And it’s free for you to print off and use again and again.
 
In the Classroom Sensory Strategy Toolkit, you’ll find:
 
  • Fidgeting Tools for the Classroom
  • Adapted Seating Strategies for the Classroom
  • Self-Regulation in the Classroom
  • 105 Calm-down Strategies for the Classroom
  • Chewing Tools for Classroom Needs
  • 45 Organizing Tools for Classroom Needs
  • Indoor Recess Sensory Diet Cards


Sensory Strategies for the Classroom
 

Free Classroom Sensory Strategies Toolkit

    We respect your privacy. Unsubscribe at anytime.

    Colleen Beck, OTR/L has been an occupational therapist since 2000, working in school-based, hand therapy, outpatient peds, EI, and SNF. Colleen created The OT Toolbox to inspire therapists, teachers, and parents with easy and fun tools to help children thrive. Read her story about going from an OT making $3/hour (after paying for kids’ childcare) to a full-time OT resource creator for millions of readers. Want to collaborate? Send an email to contact@theottoolbox.com.

    How to Teach Tow Rope Cursive Letter Connection

    learn cursive tow rope letters

    In this blog post, we’re covering how to teach cursive letter connections for the tow rope letters, or those cursive letters that connect at the middle line. Most letters connect to the next letter on the baseline, but these set of letters throw things off a bit! Let’s explore this set of cursive letters.

    Tow Truck Letters

    When teaching cursive writing, kids can recognize that cursive letters come in groups or letter families. These cursive letter families are how we can teach kids to write letters in chunks of similar pencil strokes.

    Teaching cursive letters in this manner can be a helpful strategy for allowing kids success when learning the pencil strokes needed for forming cursive letters.  Below, you’ll find a subcategory of cursive letter groups: How to write cursive tow rope letters!

    As we previously discussed, a specific order a teaching cursive letters doesn’t matter as much is teaching a group of letter families together in a block. When students learn cursive letters it is beneficial to learn the pencil strokes associated with cursive letter families.

    We have covered all of the different cursive letter families including wave letters letters loop letters bump letters. There is a subgroup of cursive letter families that have a slightly different connecting pattern to them. These are the cursive tow rope letters.


    Use these tricks and strategies to to teach cursive letters that have a tow rope connection, this includes teaching lowercase cursive letters b, o, v, w.


    How to Teach Tow Rope Cursive Letter Connection


    If you’ve been following The OT Toolbox over the last month,
    then you know that there’s been quite a lot of information related to cursive
    handwriting. We’ve talked about letter formation, cursive slant, cursive writing speed and rhythm, and even how pencil control is needed in cursive
    handwriting.
     
    Today, we’re finishing up with a last cursive handwriting
    post in the series. Below you’ll find information on forming cursive letters
    that contain a “tow rope” connector to the letter following them.
     
    Tow Rope letters are those lowercase cursive letters that
    connect to the next letter using a horizontal line at the middle line. Most
    cursive letters connect with a curved line from the baseline.
     
    Tow Rope letters connect horizontally and can change formation of the letters that they connect
    to.
     

    Tow Rope Letters include cursive letters b, o, v, and w.


    How to teach cursive Tow Rope Letters

     
    Teaching the cursive tow rope letters is not much different
    than teaching other letters of the alphabet. 
     
    Use of a cursive writing plan can help, as can kinesthetic methods and multi-sensory strategies. Using tools such as sand paper or writing trays can bring a textural aspect to learning these cursive tow rope letters.
     
    You can read more about teaching each individual letter as they were broken down into cursive letter families:
     
     
    Use these tricks and strategies to to teach cursive letters that have a tow rope connection, this includes teaching lowercase cursive letters b, o, v, w.


    Trick for teaching cursive letters with a tow rope connection

     
    Teaching kids about the visual of a tow rope that connects a tow truck to it’s haul or a boat to a raft  can be helpful in teaching children to write cursive letters with proper connection between these letters and the letter they connect.
     
    If the tow rope sags or dips down, it can affect how the letters appear and result in inaccuracies.
     
    To show kids how to recognize and recall use of tow rope connections, draw a small truck at the end of the tow rope connecting lines.
     

    Practice cursive letter connections for tow rope letters

     
    Practice the combinations of cursive letters that contain
    tow rope letters:
    • ba, be, bi, bl, bo, and by
    • vva, ve, vi, vo, and vy
    • wa, we, wi, wo, and wy
    • Letter o can be practiced with every letter of the alphabet as a vowel letter.


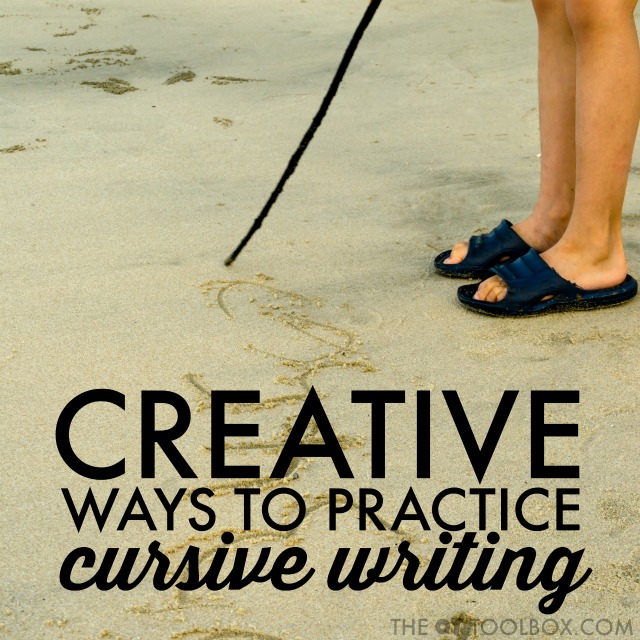
    Try these creative ways to practice cursive writing to help kids learn to write cursive letters and write legibly.Creative ways for kids to work on cursive writing including letter formation.


    Use the verbal cues associated with each letters cursive family to formation of these letters. 

    However pencil stroke exercises can be influential in behind and horizontal line to connect. Additionally practice with commonly connecting letters can make a big impact.

    In this way students with practice tow rope letters that connect to other letters as a group. These letter blends commonly and within minutes.

    How to Teach Lowercase Cursive b

    Teach students to practice be connected to letters that may occur within words. This includes ba, be, bo, bl, br, by.

    How to Teach Lowercase Cursive o

    Students can practice the commonly connected letters used in words as the letter connects to the second letter. As a vowel, the letter o may connect to every letter of the alphabet.

    Because of this, students who are learning cursive can practice the formation of o to the individual pencil strokes that are part of different cursive families. That is, practice o connected to the bump of bump letters, the o connected to the wave that occurs wit wave family letters, the o connected to the spike of tree letters, the o connected to the bump of bump letters, and o as an ending letter.

    How to Teach Lowercase Cursive w

    Students can practice the connection of lowercase cursive w to vowel and some consonant letters:

    Wa, we, wi, wh, wr, wl, wm, wn, wy.

    How to Teach Lowercase Cursive v

    Students can practice the connection of lowercase cursive v to vowels and commonly used consonant letter combinations. This includes: va, ve, vi, vo, vr, and vy.

    Use strategies such as creative cursive to practice these letter combinations in innovative manners to prevent boredom.

    Colleen Beck, OTR/L has been an occupational therapist since 2000, working in school-based, hand therapy, outpatient peds, EI, and SNF. Colleen created The OT Toolbox to inspire therapists, teachers, and parents with easy and fun tools to help children thrive. Read her story about going from an OT making $3/hour (after paying for kids’ childcare) to a full-time OT resource creator for millions of readers. Want to collaborate? Send an email to contact@theottoolbox.com.

    Christmas Fine Motor Activities

    Christmas Fine Motor activities

    If you work with kids, you might be thinking about Christmas activity ideas that promote the development of fine motor skills. These Christmas Fine Motor Activities are creative ideas that boost dexterity, build fine motor strength, promote precision of grasp, enhance separation of the two sides of the hand, and enhance tripod grasp with a Christmas theme. 

    Christmas Fine Motor Activities

    These fine motor activities can be used in the classroom as a Christmas craft that doubles also develops the underlying fine motor skills that are needed for so many functional tasks.


    Go through the activities below and find your favorite way to play and develop fine motor skills this holiday season!

    Use these Christmas fine motor activities to develop skills like hand strength, grasp, endurance, prehension, bilateral coordination, visual motor skills, and more in order to help kids with pencil grasp, handwriting, scissor use, and more.


    Christmas theme fine motor activities

    When kids make crafts or holiday decorations, they are using and developing many skills. Manipulating tools such as scissors, glue, hole punches, tape, glitter, etc, kids experience various tactile experiences.


    Creating with paper or other material requires visual motor skills (eye-hand coordination), fine motor manipulation and strength, dexterity,  bimanual coordination, visual perceptual skills, visual attention, prehension, midline crossing, and visual spatial awareness.


    By using tools such as scissors or a hole punch, children can gain proprioceptive input that can be calming within the classroom environment. 


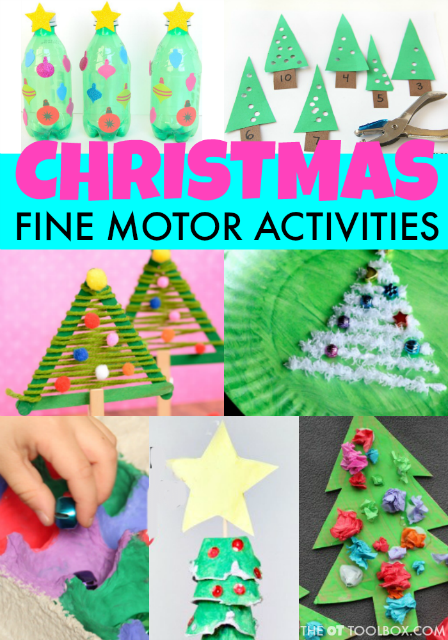
    Here are Christmas themed Fine Motor Activities that can be used in the classroom, home, or clinic this holiday season:


    Use this Christmas Tree Hole Punch activity to develop strength in the hands and more. This activity uses a hole punch to create lights for each Christmas tree. The bonus with this craft is the learning and math component. Add a colorful twist by adding colored tissue paper to the backs of the trees with glue. 
     
    Make a fine motor Christmas card that kids can make too, while working on hand strength, coordination, and eye-hand coordination skills…with a fun Christmas card that kids can make and gift to friends or family!


    Use crumbled tissue paper to create this Fine Motor Christmas Tree from Crafts on Sea. Crumbling paper develops the arches and builds strength in the hands. 

    Kids will love this Christmas Jingle Bell Sort activity and won’t even realize they are building skills they need for development. This activity can be used all season long to help kids develop in-hand manipulation and separation of the two sides of the hands as kids sort colored jingle bells.


    Make these Fine Motor Lacing Christmas Trees from Happy Hooligans to develop skills like visual motor integration, bilateral coordination, tripod grasp, and more. 

    Creating this Snowman Fine Motor Craft is a fun way to develop skills like bilateral coordination, pincer grasp and more. This craft is one that builds fine motor strength and precision while creating a fun holiday decoration. 


    Boost fine motor skills like grasp, strength, and more when making these Craft Stick Christmas Trees from Easy Peasy and Fun. 

    This Fine Motor Christmas Tree Craft addresses many skills needed for development and function. This craft has been very popular here on The OT Toolbox. It’s a way to recycle egg cartons while working on various skills: bilateral coordination, fine motor strength, visual attention, spatial awareness, arch development, wrist extension and stability, and more. 


    These Fine Motor Christmas Trees from Stir the Wonder are fun decorations that promote bilateral coordination skills. 

    Use recycled bottle caps to make this Bottle Cap Fine Motor Christmas Tree Craft. This fine motor activity can be a holiday decoration that boosts fine motor skills such as precision, in-hand manipulation, tip-to-tip pincer grasp, rotation and dexterity of the fingers needed for in-hand manipulation, and bilateral coordination.


    You can find more Christmas themed play and fine motor crafts and activities here on this 25 days of Christmas Play series that we shared a few years back. 


    Christmas Handwriting Activities

    Writing out that Christmas wish list is a difficult task that brings out tears instead of holiday excitement.  I’ve got a solution for your kiddo with handwriting difficulties: a packet of modified paper for all of the Christmas handwriting tasks that come up each year.  Use this handwriting pack to help kids who struggle with handwriting to participate in holiday traditions while even working on and developing their handwriting skills!


    Working on handwriting with kids this Christmas season? Grab your copy of the Christmas Modified Handwriting Packet. It’s got three types of adapted paper that kids can use to write letters to Santa, Thank You notes, holiday bucket lists and much more…all while working on handwriting skills in a motivating and fun way! Read more about the adapted Christmas Paper here


    Use these Christmas fine motor activities to develop skills like hand strength, grasp, endurance, prehension, bilateral coordination, visual motor skills, and more in order to help kids with pencil grasp, handwriting, scissor use, and more.


    Christmas Theme Handwriting

    For more Christmas fine motor work, try paringin the activities in this post with Christmas handwriting. Use the modified paper to work on areas such as line awareness, spacing, letter size, and legibility with bold lines, highlighted lines, and color-coded lines.

    Looking for done-for you therapy activities this holiday season?

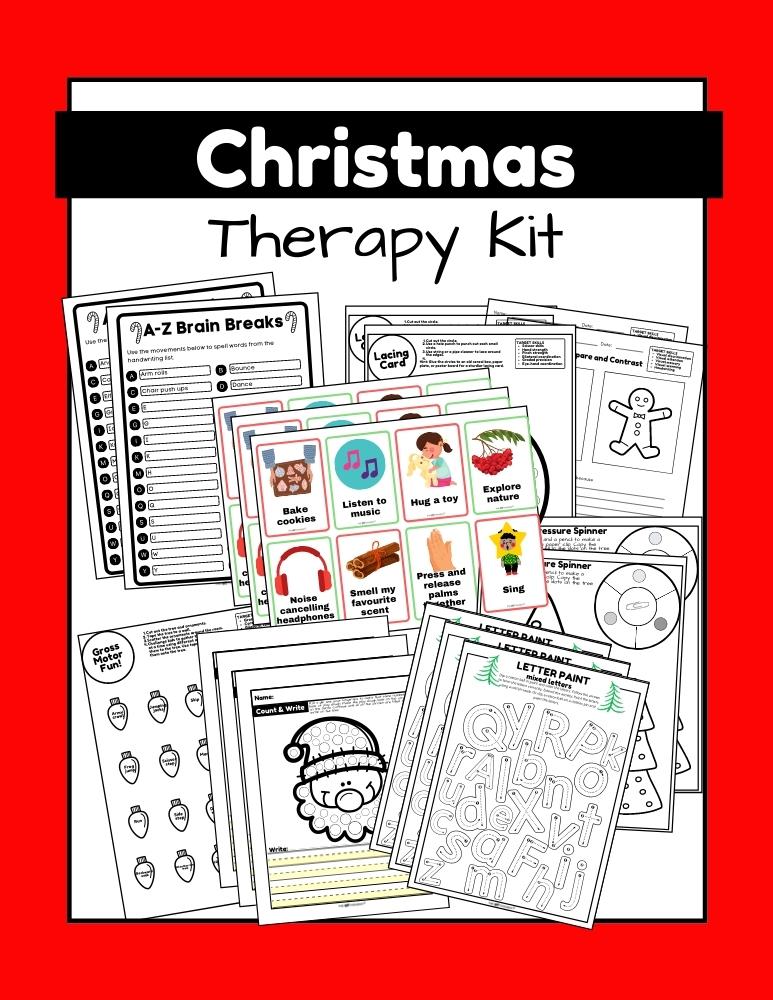
    This print-and-go Christmas Therapy Kit includes no-prep, fine motor, gross motor, self-regulation, visual perceptual activities…and much more… to help kids develop functional grasp, dexterity, strength, and endurance. Use fun, Christmas-themed, motor activities so you can help children develop the skills they need.

    This 100 page no-prep packet includes everything you need to guide fine motor skills in face-to-face AND virtual learning. You’ll find Christmas-themed activities for hand strength, pinch and grip, dexterity, eye-hand coordination, bilateral coordination, endurance, finger isolation, and more. 

    Colleen Beck, OTR/L has been an occupational therapist since 2000, working in school-based, hand therapy, outpatient peds, EI, and SNF. Colleen created The OT Toolbox to inspire therapists, teachers, and parents with easy and fun tools to help children thrive. Read her story about going from an OT making $3/hour (after paying for kids’ childcare) to a full-time OT resource creator for millions of readers. Want to collaborate? Send an email to contact@theottoolbox.com.

    Strategies to Address Visual Perception Needs and Handwriting

    When visual perceptual skills interfere with handwriting, students can be limited in copying skills, placing letters and words on lines, and in given spaces on worksheets. There are other red flags related to visual processing and handwriting. These challenges really impact legibility, letter reversals, letter size, and overall neatness of handwriting.


    While parents and teachers can be aware of these issues and the need for intervention in order to address underlying needs, it can be difficult to pinpoint exact strategies for improving problem areas.

    Use these strategies to address visual perception needs for better handwriting.


    Visual Perception Needs and Handwriting

    Visual Perceptual Skills consist of several abilities that allow us to utilize the information we see visually. We process and use that visual information to interpret what we see. Visual perceptual skills include the following skill areas: 

    Visual Memory
     
     
    Form Constancy
     
    Visual Spatial Relationships
     
     
    Visual Attention
     
    Visual Sequential Memory


    Each of these visual perceptual skills is described further in this post that shares helpful visual perceptual tools for improving on these skills. 


    Visual perceptual skills play an important role in letter formation, copying words and letters, spatial awareness, left-to-right orientation and organization on a page, line use, size awareness. 


    When visual perceptual skills coordinate and integrate with motor skills, a child demonstrates functional visual motor integration and is able to copy and form letters appropriately when writing.

    Strategies to Help with Visual Perceptual Needs and Handwriting

    Try these handwriting accommodation strategies to address a variety of handwriting challenges. 


    A common tool for therapists is to use modified paper when visual processing issues interfere with handwriting legibility and functional use.


    One way to work on handwriting legibility is to add bold lines to the paper.  This is just one easy way to help kids attend to the lines on the page, visualize a stopping point for letter formation, and draw attention to the writing space.  


    Adding bold lined paper into the classroom can be a struggle as well. Given a variety of worksheets, a simple marker can be one way to address this need for creating a bold baseline. 


    Adding a highlighted space to the lines can be a way for students to form letters of appropriate size. 


    Using color-coded lines as visual tools for starting and stopping points can be a valuable strategy to help kids with placement on lines accurately. One of the most impactful areas to address when working on overall legibility is to address letter size and spacing. When these two areas are addressed, written work can be much more legible handwriting overall. 


    Given these three strategies for improved legibility, can can be difficult to know what works best for each individual student.  


    Having options to trial with each student can make a big impact in success of the student and motivation to try handwriting tasks.


    Read about the Visual Perception, Tangrams, & Handwriting Workbook


    For the student who struggles with handwriting, practice can many times be a source for stress low confidence.


    Working on visual perception in handwriting? Why not start a handwriting club for kids? Kids can work on handwriting skills in a fun way. Here’s how to start a handwriting club kids will WANT to join!


    Use these strategies to address visual perception needs for better handwriting.

    Fine Motor Strength Piper Cleaner Activity

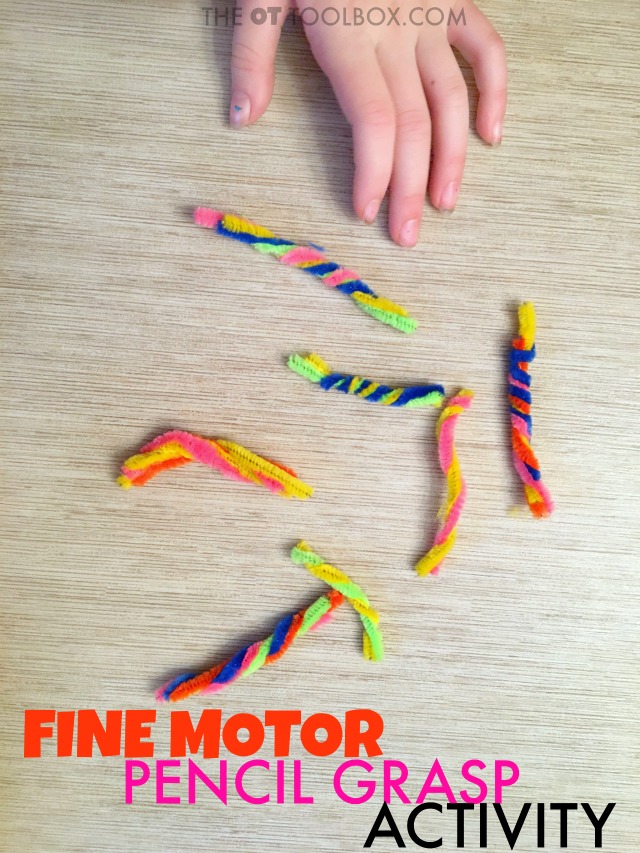
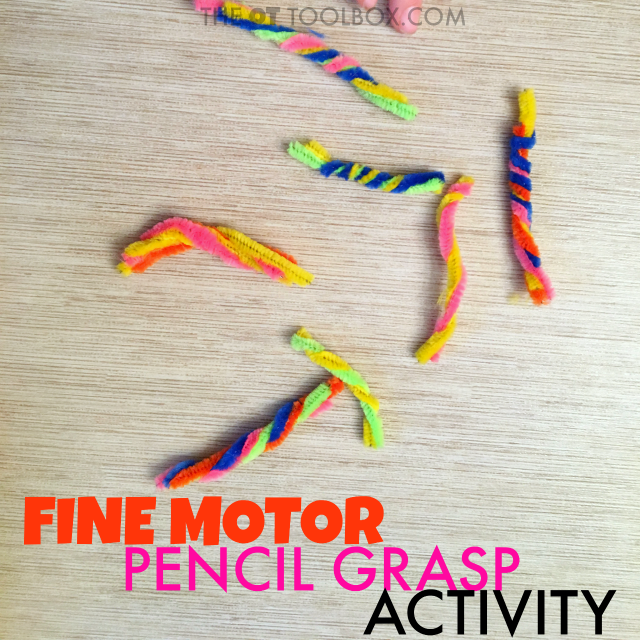
    This pipe cleaner activity is a quick and easy hand strengthening activity that can be beneficial for developing the muscles of the hands needed for small motor tasks like manipulating objects, clothing fasteners, and pencil grasp. Activities like this one can help with fine motor skills that are necessary for so many tasks. 


    Use this fine motor strengthening activity to develop the hand muscles, including the intrinsic muscles of the hands in order to promote a functional pencil grasp. The intrinsic muscles allow for a curved palm which is used for cupping the palm in order to hold items such as coins or beads. 

    The intrinsic muscles are needed for pencil grasp and arch development, as well as endurance in tasks like writing and coloring. This pipe cleaner fine motor activity is a fun way to develop the intrinsic hand muscles and improve fine motor strength

    This activity is perfect for addressing the underlying skills needed for a functional pencil grasp. It’s part of a new series we’ve got here on The OT Toolbox, all about pencil grasp. 


    Use this fine motor strength pipe cleaner activity to help kids develop hand strength and the skills needed for a functional pencil grasp.
    The Pencil Grasp Challenge will be debuting soon here on the website and on our Facebook page. Be sure to stop over there later today to see the video associated with this hand strengthening activity!

    Did you miss our last fine motor activity in the Pencil Grasp Challenge? Check out how we improved fine motor strength using foil.  Stay tuned for more information coming soon on the Pencil Grasp Challenge!

    Fine Motor Strength Activity

    This pipe cleaner activity is a fine motor strength activity that promotes several underlying skills and fine motor skills:
    Tripod grasp
    Arch development
    Wrist stabilization and strengthening
    You’ll need just one item for this activity: pipe cleaners.
    Use several different colored pipe cleaners for this activity. Cut the pipe cleaners into short 2-3 inch lengths. 
    Next, show students how to gather the sections of pipe cleaners and hold them tightly with the assisting hand.
    Then, use the dominant hand to tightly pinch and twist the pipe cleaners into a twisted unit. 
    Remind students to tightly twist and to re-position their hand in order to achieve a tight twist. 
    This activity promotes hand strength by twisting the pipe cleaners. Make it more difficult by adding more or thicker pipe cleaners.
    Re-positioning the hand to twist the pipe cleaners promotes in-hand manipulation. This is a skill needed in pencil grasp in order to reposition the pencil for adjustments when writing and for manipulating the pencil within the hand. 

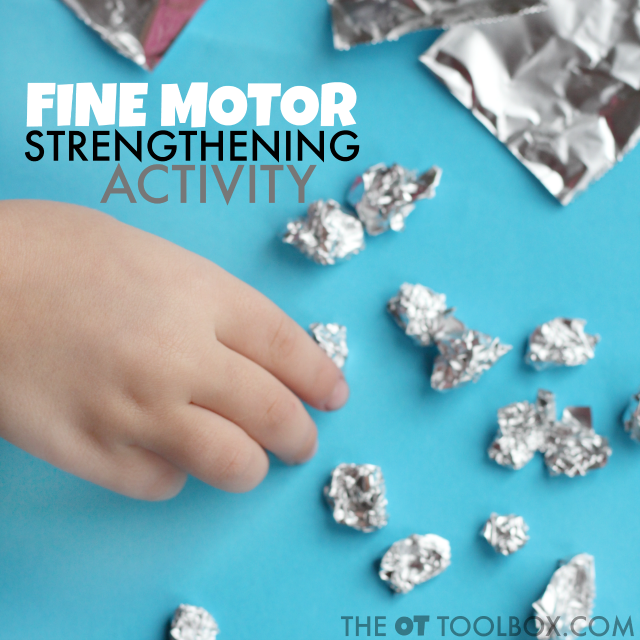
    Fine Motor Strength Foil Activity

    Strength in the hand muscles is a fine motor skill that is necessary for so many tasks. Strength in the intrinsic muscles of the hands allow for a curved palm which is used for cupping the palm in order to hold items such as coins or beads. 


    The intrinsic muscles are needed for pencil grasp and arch development, as well as endurance in tasks like writing and coloring. This foil activity is a fun way to develop the intrinsic hand muscles and improve fine motor strength

    Use foil to develop fine motor strength with this foil activity for kids, it's perfect for strengthening the hands for a better pencil grasp.

    Use what you’ve got around the house to develop and strengthen fine motor skills. Using foil is just one way to do so. 

    This activity is perfect for developing pencil grasp into a functional grasp by addressing the underlying skills. This is a new series we’ve got here on The OT Toolbox. 

    It’s all part of The Pencil Grasp Challenge that will be debuting soon here on the website and on our Facebook page. Be sure to stop over there later today to see the video associated with this hand strengthening activity!


    Fine Motor Strength Foil Activity


    Affiliate links are included in this post. 

    This activity is an easy one to set up. You’ll need just one material.

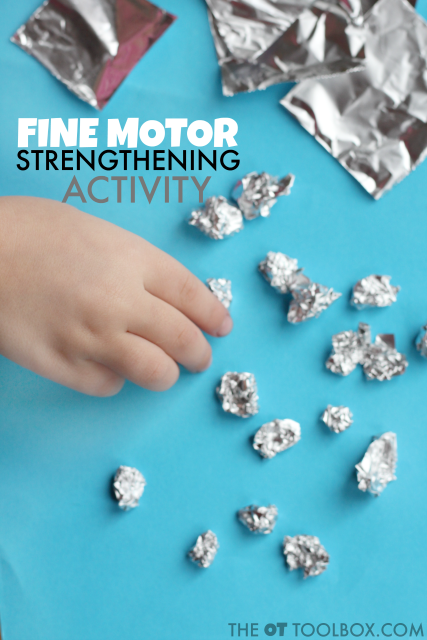
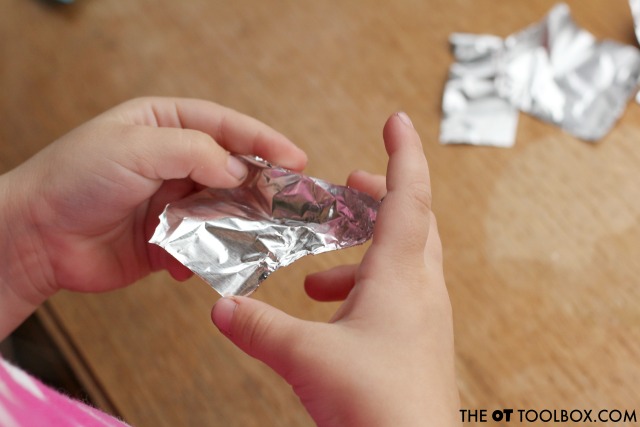
    A small sheet of aluminum foil is all it takes! 

    To make it easy, you could grab these pre-cut foil sheets and use them with the whole class or therapy caseload, using this activity as a fine motor warm-up.

    Use foil to develop fine motor strength with this foil activity for kids, it's perfect for strengthening the hands for a better pencil grasp.

    Next, cut the foil into small one inch squares. The student or client can do this job, addressing scissor skills. Simply draw lines using a permanent marker to create a cutting guide. The nature of the foil causes the marker to create a small groove in the surface of the foil, creating low guidelines for scissors to cut along.

    Other students may need the foil cut for them. Cutting foil is a unique scissor practice experience and students may tear through the foil, especially if they are working on graded grasp or graded scissor cuts.

    Use foil to develop fine motor strength with this foil activity for kids, it's perfect for strengthening the hands for a better pencil grasp.

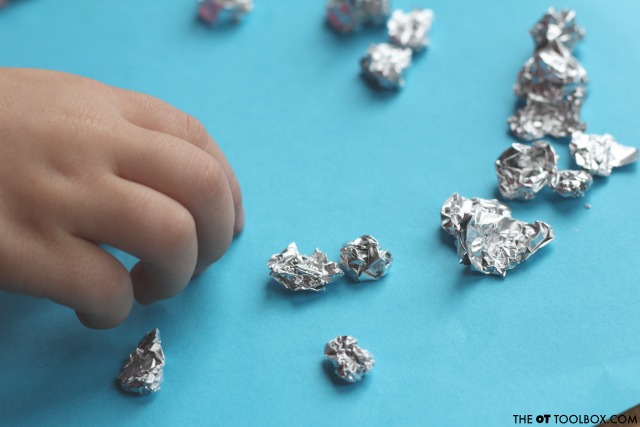
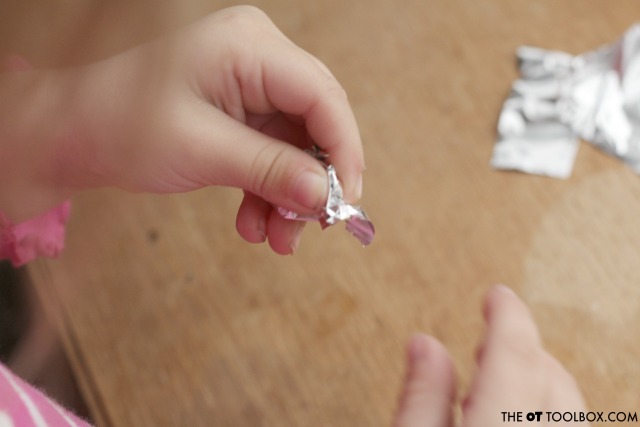
    Finally, show students how to crumble up the small pieces into balls of foil. They can use just the radial digits of the hand, rolling the foil into a small ball with the thumb, pointer finger, and middle finger. 

    This motion allows for strengthening of the intrinsic muscles while promoting arch development and a tripod grasp.

    Students may be challenged to create very small foil balls by pinching the foil into a tight ball. They can then wrap the foil in another layer, extending the activity.

    Use foil to develop fine motor strength with this foil activity for kids, it's perfect for strengthening the hands for a better pencil grasp.

    If students are having trouble using the two fingers and thumb to roll the foil into a ball, show them how to tuck a small craft pom pom under the ulnar digits. 

    Separation of the two sides of the hand can be beneficial for promoting a tripod grasp. 

    Looking for more fine motor activities to develop pencil grasp? You’ll love these ideas:
    Use foil to develop fine motor strength with this foil activity for kids, it's perfect for strengthening the hands for a better pencil grasp.

    Occupational Therapy Daily Professional Self-Reflection Journal

    There are a lot of free resources available online for Occupational Therapists. 
    Imagine if as therapists, we were able to use those online
    tools to advance our development and knowledge. 
     
    Using online searches and tools like The OT Toolbox Community, we can apply
    information to our practice of client’s, facilitating professional independent
    development. BUT, what if we could self-reflect on these various online sources
    using a tool that helps us to focus on
    our own  professional needs as therapists? 

     
    The Daily Professional Self-Reflection Journal for Occupational Therapists is just that tool. 
    Occupational Therapy Daily Professional Self-Reflection Journal pages for supporting and encouraging self-development of Occupational Therapists.

    Daily Professional Self-Reflection Journal Pages for Occupational Therapists

    The weekly self-reflection sheets can be used in combination
    with the monthly professional goal planner, or they can be used in
    isolation. 
     
    • Use them to acquire professional goals and to monitor progress on
      those goals. 
    • Use them to itemize strategies for development. 
    • Use them to fit
      self-learning into busy schedules that make up life.
    • Use them to identify small-wins and challenges. 
    • Use them as encouragement for those days that build on therapy burnout
    • Use them to identify moments of gratitude during your therapy day and as a tool for addressing emotional fatigue.
    • Use them as a way to get organized and promote self-development as a therapist. 
    • Use them to be the most effective therapist you can be.
    • Use them to decrease distractions.
    • Use them to schedule in self-care to make yourself the best therapist you can be.
    • Use them to stay positive in identifying areas of interest, and renewing your energy as a therapist.
    • Use them to celebrate small victories as a therapist who is striving for personal best.
    • Use them as a personal note keeping area to jot down gained knowledge.
    • Use them as space to acknowledge and recognize small victories and as a place for referring back to.
     
    Grab these self-reflection worksheets and print them
    off. Print as many as you need and place them in a binder. Use them as part of
    your planner or calendar. Slip them into page protector sleeves and keep them
    with your therapy bag.
     
    The Daily Professional Self-Reflection Journal includes 12 pages of printable schedules, daily trackers, note pages, gratitude sheets, and self-reflection pages. Some pages are included in color and others are in grayscale for easy printing. 
     
    The Daily Professional Self-Reflection Journal pages are just one tool that can be beneficial to the Occupational Therapist. 
     

    The OT Toolbox Community: A Space to Develop as an Occupational Therapist

     
    The OT Toolbox Community is a place to connect and to develop and refine skills through networking and collaborating with other occupational therapists. 
     
    The daily professional self-reflection journal pages are a tool to promote self-development as a therapist, and The OT Toolbox Community is a resource to fuel that development. 
     
    These are all ways that the quilt of your professional development becomes more rich and textured. The layers of development that can occur with simply writing down goals and how they can be met and then conversing with other professionals is vast. 
     
    The OT Toolbox Community is a space to connect and collaborate with other occupational therapists on goals and focused intentions, promoting development of self.
     
    The OT Toolbox Community will be opening it’s doors on Wednesday the 8th, and we are excited to have you join us! 


    For now, grab the free printable pages while you can!
     
     
    Occupational Therapy Daily Professional Self-Reflection Journal pages for supporting and encouraging self-development of Occupational Therapists.