Colleen Beck, OTR/L is a pediatric occupational therapist and the owner and author of The OT Toolbox website. She manages all of The OT Toolbox social media accounts and runs the popular newsletter.
Read about Colleen's experience and career as an occupational therapist, including how The OT Toolbox began on our About The OT Toolbox page: https://www.theottoolbox.com/about-us/
Colleen created The OT Toolbox in 2011 and since then has written thousands of blog posts designed to support therapy providers, educators, parents, counselors, admin, and caregivers in promoting the healthy development of kids.
Check out Colleen's blog posts below:
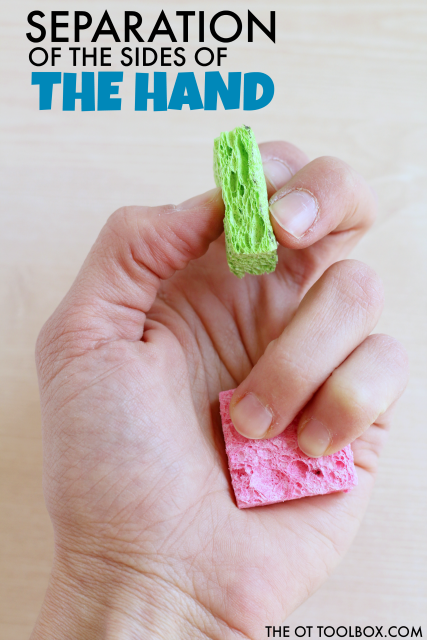
This simple activity is one that is designed to promote motoric hand separation. This is a skill that is necessary for so many tasks! From holding a pencil to cutting with scissors, to zippering a zipper, motoric separation of the two sides of the hand is an essential skill when it comes to fine motor skills!
You see this positioning of the hand during one of the steps of zippering a jacket where the thumb and finger hold the zipper pull in place at the bottom of the zipper while the ulnar side of the hand holds the bottom of the zipper.
Separation of the sides of the hand activity for kids
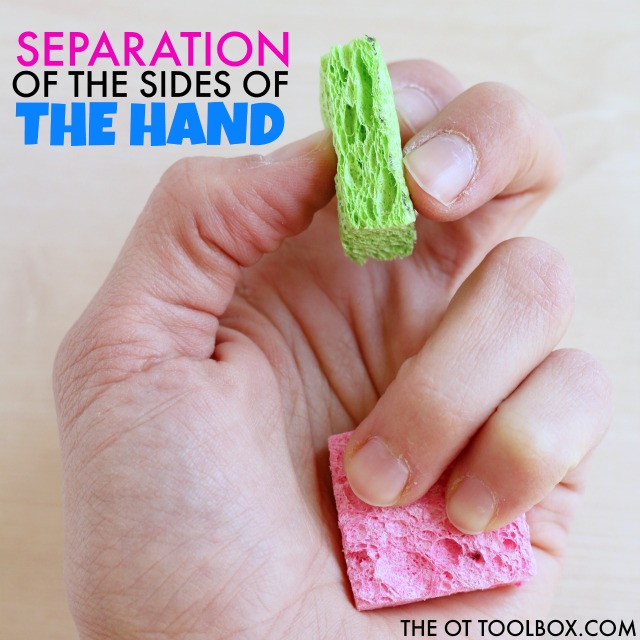
This activity is one that kids will love. The use of small sponge pieces promotes a tactile reminder to squeeze the individual fingers down into the palm, separating the ulnar side of the hand from the radial side.
When kids write with a pencil, they need to hold and move the pencil with the thumb, pointer finger, and middle finger. This precision side of the hand is used for fine motor movements and dexterity.
Activity to Improve Motoric Separation of the Two Sides of the Hand
This activity is such a fun one for kids! You’ll need just one material (and it can be used over and over again.)
(Affiliate links are included in this post.)
We used a kitchen sponge and cut it into small squares. We used two different colored sponges, but you could use the same sponge and the same color squares.
Simply cut the kitchen sponge into 1 inch x 1 inch pieces. Next, wet the sponges. Place one sponge square into the palm of the child’s hand. Ask them to close their pinkie finger and ring finger around the sponge to hold it in place. The sponge should not hold enough water so that it drips down the palm of the hand and wrist.
For kids that need more cues to hold the ulnar side of the hand with closed fingers, you can add more water to the sponge. When they squeeze the sponge down with the ring and pinkie fingers, the water will drip out of the sponge.
Next, use another sponge square in the remaining fingers (middle and pointer fingers and thumb). The child can squeeze the sponge to remove water with just the precision fingers.
To make this activity more difficult, add water to just one sponge while keeping the other sponge dry. Then, ask them to squeeze the water from the wet sponge with the appropriate fingers. This REALLY draws attention to the separation of the two sides of the hand!
Other ways to play with this activity while addressing separation of the sides of the hand:
Use a wet sponge to draw letters, numbers, or words on a large chalkboard.
Draw with chalk on a sidewalk and then erase it with a wet sponge.
Water seedlings by squeezing water from the sponge.
Drip water designs on colored paper.
For more precision and gross motor grasp development, try this precision building activity to separate the two sides of the hand.
Separation of the Sides of the Hand Activities and Resources
Want to know more about what’s going on with bad pencil grasps and how to incorporate separation of the sides of the hand into handwriting and pencil grasps? This is a big part of a functional pencil grasp and efficient handwriting.
The pencil grasp challenge is a free, 5 day mini course and challenge. During the course of five days, I’ll be teaching everything you need to know about the skills that make up a functional pencil grasp. You’ll learn what’s going on behind the inefficient and just plain terrible pencil grasps you see everyday in the classroom, clinic, or home. Along with loads of information, you’ll gain quick, daily activities that you can do today with a kiddo you know and love. These are easy activities that use items you probably already have in your home right now.
Besides learning and gaining a handful (pun intended) of fun ideas to make quick wins in pencil grasp work, you’ll gain:
5 days of information related to pencil grasp, so you know how to help kids fix an immature pencil grasp.
Specific activities designed to build a functional pencil grasp.
Free printable handouts that you can use to share with your team or with a parent/fellow teachers.
You’ll get access to printable challenge sheets, and a few other fun surprises.
And, possibly the best of all, you’ll get access to a secret challengers Facebook group, where you can share wins, chat about all things pencil grasp, and join a community of other therapists, parents and teachers working on pencil grasp issues.
Colleen Beck, OTR/L is an occupational therapist with 20 years experience, graduating from the University of Pittsburgh in 2000. Colleen created The OT Toolbox to inspire therapists, teachers, and parents with easy and fun tools to help children thrive. As the creator, author, and owner of the website and its social media channels, Colleen strives to empower those serving kids of all levels and needs. Want to collaborate? Send an email to contact@theottoolbox.com.
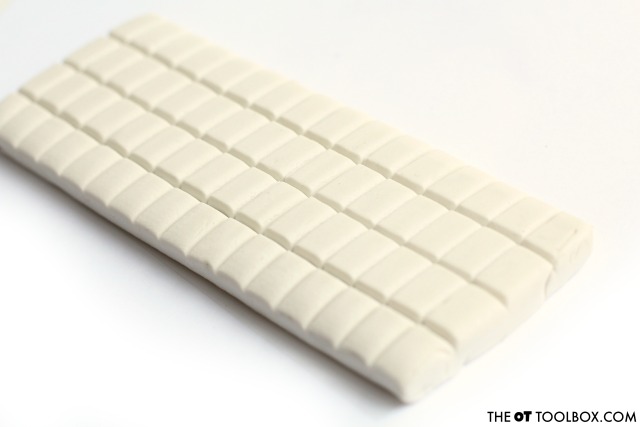
This fine motor activity uses a material you might have in your house right now. Finding easy ways to incorporate household items into developmental progression is important for therapists. Parents can easily use those items to help kids develop the skills they need for handwriting, clothing fasteners, tool use (scissors, staplers, forks, knives, rulers, screwdrivers) more easily, allowing for increased independence and success during activities. This pincer grasp fine motor activity improves many areas (described below) but is a great way to help kids improve pincer grasp.
Pincer Grasp Fine Motor Activity
You’ll need just a few materials for this fine motor activity:
This post contains affiliate links.
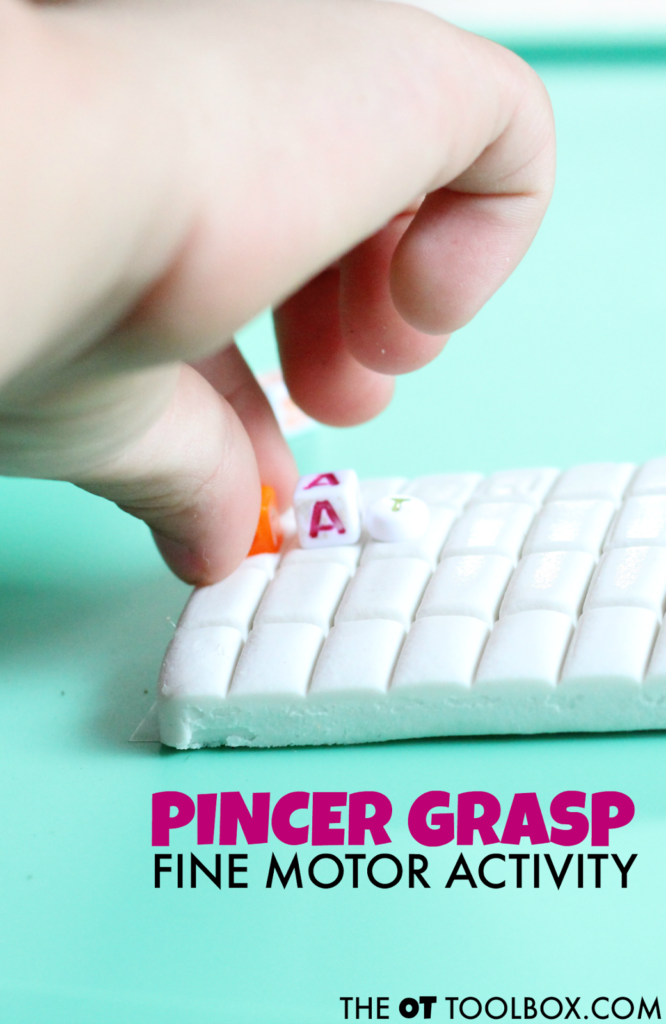
Pincer grasp is a skill that develops around 9-12 months of age. At this time, children are typically able to pick up small items such as cereal with the pads of the thumb and pointer finger. This pad-to-pad grip is called the pincer grasp.
Pincer grasp is important for many fine motor tasks. Any functional skill that involved holding items between the thumb and index finger are based on effective development of pincer grasp.
There are things that can impair pincer grasp. When a child holds their pencil or any small item such as beads with a squashed thumb web space, they are ineffective in in-hand manipulation, dexterity, and strength. Try these activities to work on an open thumb web space.
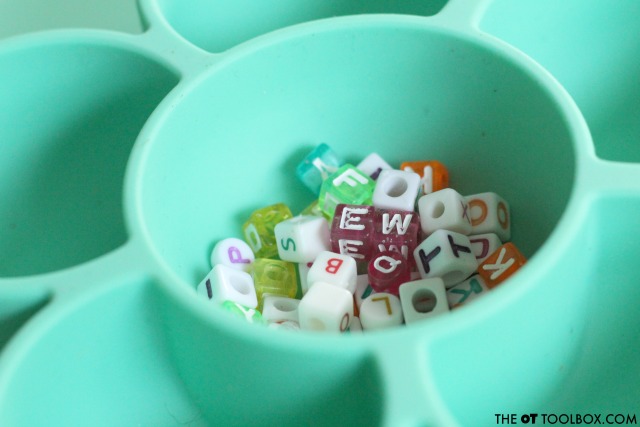
To complete this pincer grasp fine motor activity, you’ll need to place the beads in a small bowl. The partitions of the The Flower Play Mat are perfect for holding small beads. The wells of the mat are deep, which required children to cup their palm into a curved arch. This motion of the hand as they pick up beads with a pincer grasp allows them to use in-hand manipulation to squirrel beads away into their palm while strengthening the intrinsic muscles of the hand. What a powerhouse set of tasks with just one single task of picking up beads!
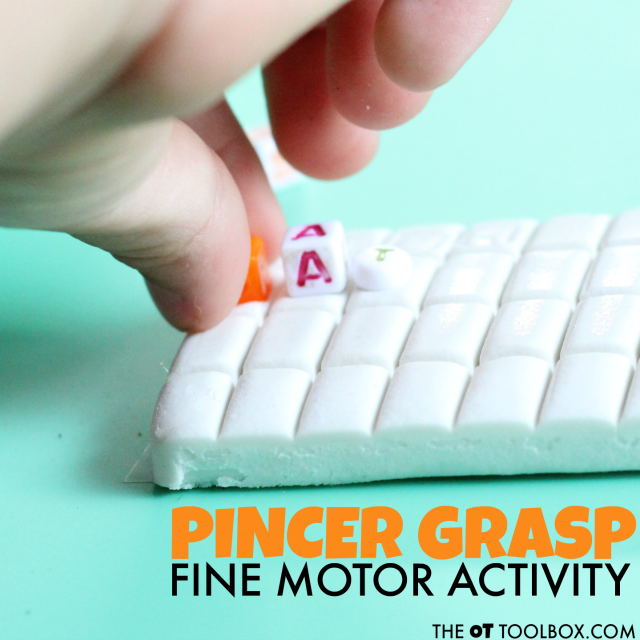
Next, use the beads to push into the sticky surface of the poster tack. Children can use a pincer grasp to hold the beads as they press them into the resistive dough.
This action further strengthens the intrinsic muscles of the hands, making those hands stronger for skills like pencil grasp, coloring, and manipulating items.
We used the letter beads to spell words. It was fun to see the impression of the letters in the sticky poster putty.
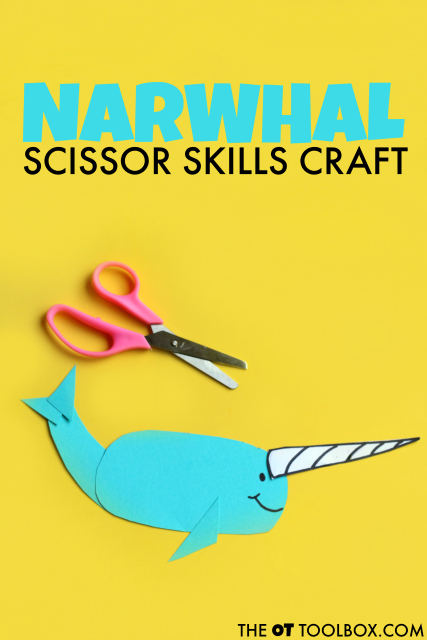
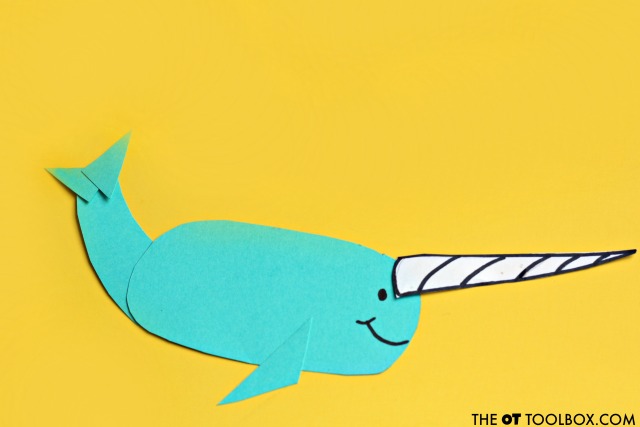
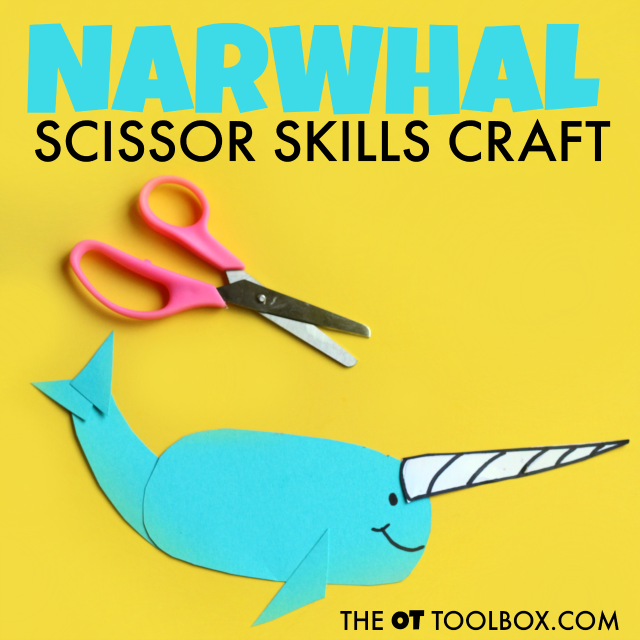
This narwhal craft is perfect for an ocean theme, or for kids who are heading off to the beach this summer. It’s a great narwhal craft for preschool, grade school or to go along with a fun narwhal book. Add this activity to your favorite kids crafts that build skills in OT or at home.
Narwhal craft
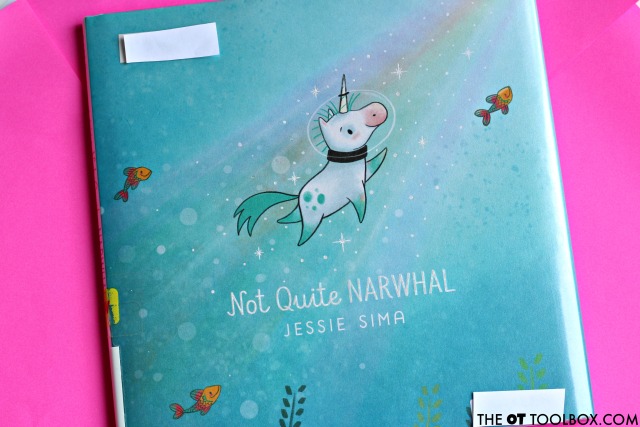
Sometimes, adding a themed craft to a favorite children’s book is just what kids need to get crafty while working on skills like scissor use and fine motor skills. We used one of our favorite new books, “Not Quite Narwhal” by Jessi Sima to come up with a fun narwhal craft that is heavy on the scissor skill practice. If you are looking to help a child with scissor use, we’ve got TONS of scissor skill activities here on the site.
Affiliate links are included in this post.
Narwhal Craft
This narwhal craft was a fun one for us! I have a few girls in the house who are crazy about all things mermaids, unicorns, and rainbows. While an actual narwhal has nothing to do with these things, there is just something fun and whimsical about narwhals!
When you read Sima’s Not Quite Narwhal, you definitely feel the fun and whimsy of unicorns and narwhals! We picked up the book in the new release section of our library and it has quickly become a hit in our house.
This book is a creative and fun story about Kelp, who is born among the narwhals but always thought he seemed a little different. One day, Kelp is carried by a current to meet mysterious creatures who seem more like him and make him wonder if he might not be a narwhal after all. This is a sweet library book find that we’ll definitely check out again!! You know those books that show up in your library bag again and again.
We’ve been reading Not Quite Narwhalover and over again and noticing new adorable details in the illustrations with each read-through! We decided to make a few narwhals of our own to join Kelp in his adventures!
Make a Narwhal Craft and work on Scissor Skills
This narwhal craft has double duty: It’s super cuteness goes along perfectly with the book AND it sneaks in scissor skills. Kids can work on cutting on lines with simple shapes in order to build a narwhal.
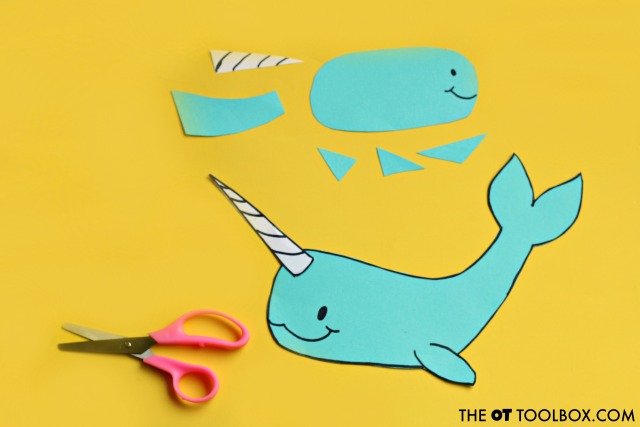
We made an easy version with simple geometric shapes and a more complex narwhal craft that would be perfect for older kids.
To make the narwhal craft, you’ll need just a few materials:
Blue cardstock (cardstock is thicker paper, so it’s excellent for slowing down scissors to ensure more accuracy when cutting along lines, especially for younger scissor users.)
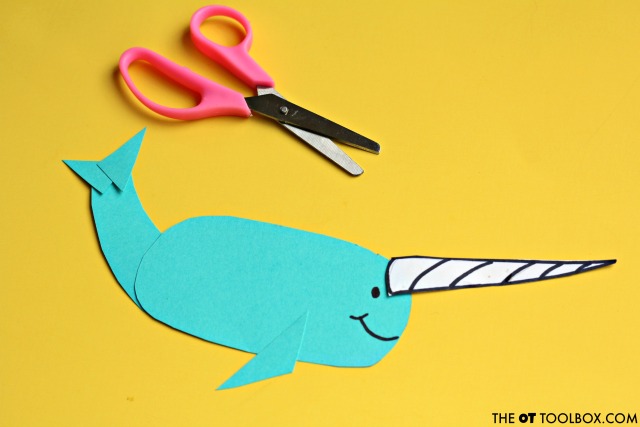
Draw simple shapes on the cardstock. For kids who are learning to cut, use thicker lines made with a marker. You’ll need:
One large oval for the narwhal’s body
One curved rectangle for the tail
One long triangle for the bottom fin
Two small triangles for the tail fin
One long white triangle for the narwhal’s tusk
Kids can cut on the lines and build a narwhal. Use the picture above to construct the narwhal.
You can also use this craft as an opportunity to develop visual perceptual skills like form copying and eye hand coordination.
It’s a lot like building pictures with tangrams!
For a more complex craft, draw the narwhal on the blue cardstock in one big, and curved shape. Cutting on lines with multiple turns is appropriate for young tweens and older kids.
Find more crafts that address skills like scissor skills, direction following, and fine motor development on our crafts for kids page.
More Narwhal and fish Crafts to Build Fine Motor Skills
You’ll find more fish and narwhal crafts in our Summer Fine Motor Kit. Check out all of our seasonal and themed fine motor kids below:
Working on fine motor skills, visual perception, visual motor skills, sensory tolerance, handwriting, or scissor skills? Our Fine Motor Kits cover all of these areas and more.
Check out the seasonal Fine Motor Kits that kids love:
A narwhal craft is a fun and educational activity for preschoolers and kindergarten students. This cute arctic whale is a fascinating animal, with its long tusk and unique adaptations for life in the frigid waters of the Arctic. By creating a narwhal craft, children can learn about this amazing creature and develop their artistic skills at the same time.
There are many different types of narwhal crafts for preschoolers and toddlers. Some popular options include using a narwhal craft template to cut out a paper narwhal, creating a narwhal drawing or painting, or using narwhal clipart to decorate a cardboard or foam narwhal cut-out. These crafts can be adapted to suit different skill levels and interests, and can be completed with a variety of materials, including paint, markers, glue, and glitter.
To make a narwhal craft for kids, start with some basic materials like construction paper, scissors, glue, and crayons or markers. Cut out a narwhal shape from the paper and then decorate it with your chosen art supplies. You can also use a narwhal craft template to create a more detailed design, or look for narwhal pictures online for inspiration.
For a more challenging narwhal art preschool project, consider creating a 3D narwhal using foam, felt, or other materials. You can also incorporate other arctic animals into the craft, such as a walrus craft, to create a diorama or display.
In addition to making a narwhal craft, there are many other narwhal activities and resources available for preschool and kindergarten students. These include not quite narwhal activities, narwhal worksheets, and narwhal information for kids. By exploring these resources, children can learn about the habits, habitat, and adaptations of narwhals in a fun and engaging way.
Whether you’re looking for an easy narwhal craft or a more challenging narwhal project, there are many options available for kids of all ages and skill levels. By creating a narwhal craft, children can develop their artistic skills, learn about a fascinating arctic animal, and have fun in the process. So why not dive into the world of narwhals today and create your own amazing narwhal craft!
Colleen Beck, OTR/L has been an occupational therapist since 2000, working in school-based, hand therapy, outpatient peds, EI, and SNF. Colleen created The OT Toolbox to inspire therapists, teachers, and parents with easy and fun tools to help children thrive. Read her story about going from an OT making $3/hour (after paying for kids’ childcare) to a full-time OT resource creator for millions of readers. Want to collaborate? Send an email to contact@theottoolbox.com.
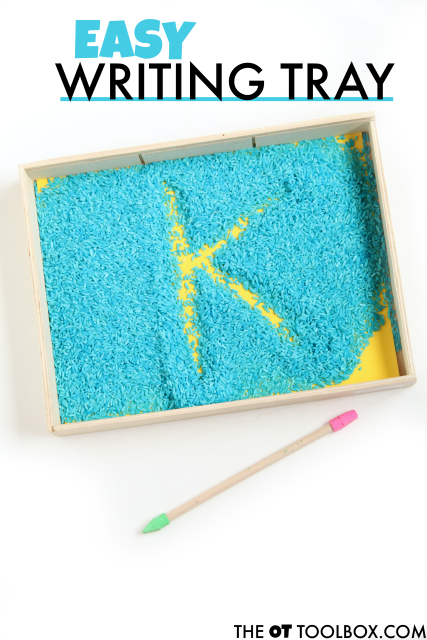
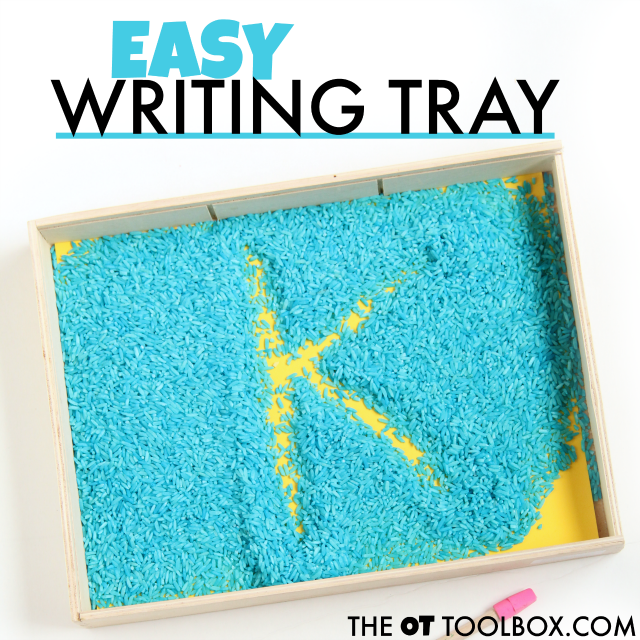
I have a super easy handwriting tool to try. This is a sensory-motor activity that adds a tactile sensory experience to handwriting practice in a colorful and fun way. You can read more about using writing trays in handwriting to encourage letter formation or check out the writing tray ideas below.
Easy Rice Writing Tray
This rice writing tray is very easy to throw together. You’ll need a couple of items (Affiliate links are included in this post):
Dye the rice. Here is a tutorial to dye rice. Warning-this is an old blog post from way back when this site just started out!
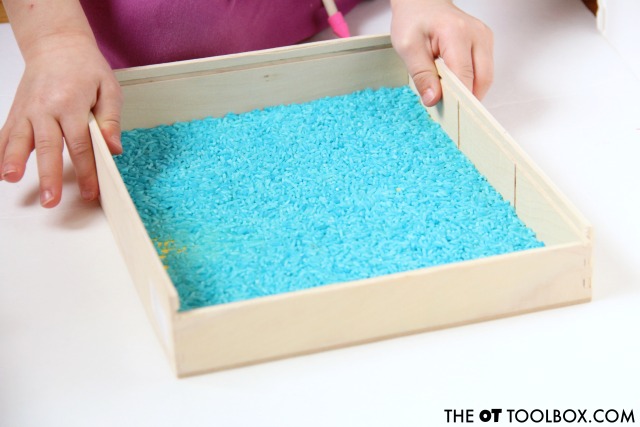
Next, place the cardstock in a low tray. The wooden tray from puzzles is perfect.
Pour the rice over the cardstock, and you are ready to write!
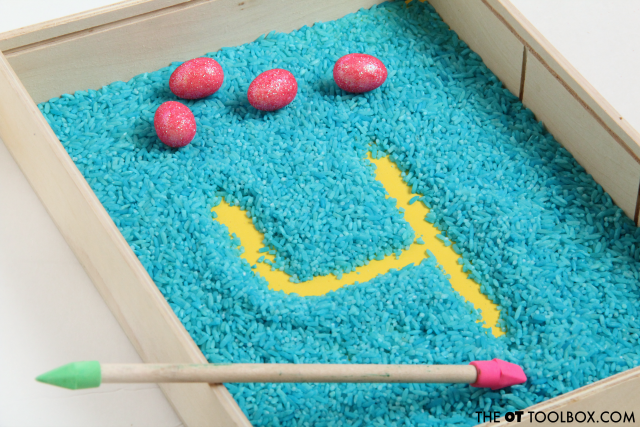
Try adding small items like erasers to the tray. Kids can count them and then work on number formation using large motor planning to address order of lines. Add verbal cues for the child who is first learning how to make numbers or letters.
After writing the letters or numbers in the writing tray, give it a gently swish with both hands to clear the form. This is a great way to get both hands working together in a way that encourages bilateral coordination at the midline. Read more about bilateral coordination activities on the site.
To make a writing tool, use an unsharpened pencil, sticking an eraser on the lead end. These erasers work very well to turn a pencil into a writing tray tool.
Thank you for grabbing the Free Brain Break printable page. This is a spot on the site where I will have many free brain break printable sheets available, very soon.
If you did not access this page by signing up with your email, you will want to do so HERE so that you gain access to emails related to brain break activities and receive free, subscriber only printable pages.
It can be hard to deal with the stress and anxiety caused by emotions. For the child who is developing in this area, coping with emotions can be hard! Kids with developmental delays in cognitive, emotional, physical, or sensory delays can especially suffer with impaired coping abilities to stress or anxiety. Sometimes, those big feelings get to be TOO MUCH and anger, frustrations result in major meltdowns.
The key to dealing with these situations is a toolkit of coping strategies.
What is a Coping Strategy?
Coping strategies are a mechanism for dealing with big emotions. These mechanisms for that can be used by kids and adults. Coping strategies are well-known, and used to manage stress or high-level emotions. When a person is feeling stressed out, a walk outside can help. Other coping strategies might include deep breaths, meditation, prayer, relaxation, exercise, or sensory-based coping strategies.
A coping strategy can be healthy and positive, or it can be negative and hurtful to an individual’s health (think: addiction, smoking, alcohol, or other ineffective strategies that may feel as though they help defeat stress or anxiety in the short term).
Super Easy Coping Strategy
This coping strategy is similar to taking 5 deep breaths or stopping and breathing before answering when in a stressful or high-emotion situation. An easy coping strategy is great for kids who have anxiety or big emotions when in school or environments like the school bus or in the community.
Sometimes, sensory issues cause the big emotions and require a child to stop and refresh before they can move on from the meltdowns.
This coping strategy requires no materials or tools other than your hands.
Ocean Sounds Coping Strategy
To use this easy coping strategy, you’ll only need your hands!
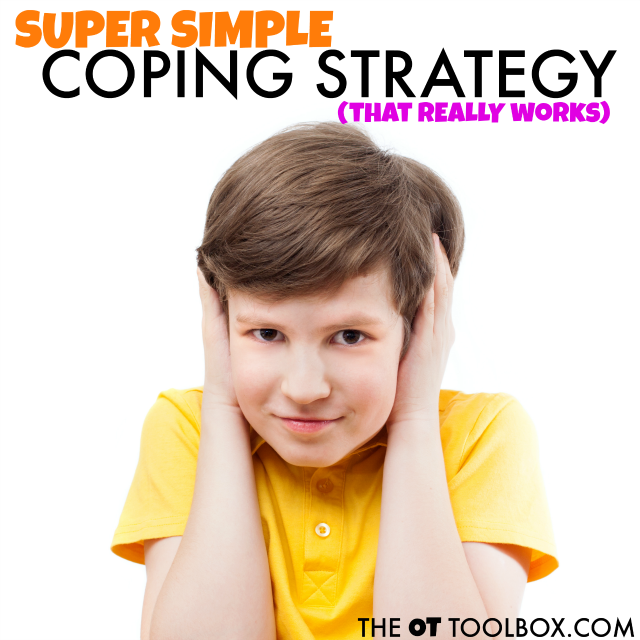
All you need to do is cup the palm of the hands and place them on your ears. What do you hear? Does it sound like ocean waves are lapping gently in the distance?
Listen to the sounds of the waves and imagine the beach or a shore line where the waves roll in and out. Listen for a count of 10 seconds or more. If more time is needed to step back from a stressful situation, repeat the steps.
Try moving the position of your hands to make the “wave” sound louder or quieter.
What is happening with this coping strategy?
It’s a lot like holding a seashell to your ear. It’s not really ocean waves you are hearing in a seashell or when you cup your hands over your ears. Rather, the sounds around you are resonating in the chamber you create with your cupped palms.
Did you try this coping strategy? How did it work with you?
Colleen Beck, OTR/L has been an occupational therapist since 2000, working in school-based, hand therapy, outpatient peds, EI, and SNF. Colleen created The OT Toolbox to inspire therapists, teachers, and parents with easy and fun tools to help children thrive. Read her story about going from an OT making $3/hour (after paying for kids’ childcare) to a full-time OT resource creator for millions of readers. Want to collaborate? Send an email to contact@theottoolbox.com.
Summer vacation can mean relaxing times of making memories with family and friends. Long, lazy days without routines, later bedtimes, and days without the daily grind of homework and school checklists are what make a childhood’s summer carefree. But, summer can also mean the “summer slump”. Those skills that were learned over the previous school year are quickly forgotten when pool time and planning the family vacation are priority.
For the child who struggles with handwriting, the summer months can be especially hard on retaining skills. Children often times, are not exposed to any handwriting work over the summer months. So how do you help kids maintain the handwriting skills they’ve worked so hard to accomplish over the summer?
When there are underlying skill areas that need attention in order to maintain legible handwriting, accurate letter formation, or spatial awareness in handwriting, how can you maintain or even improve these skills over the summer?
But, what about when travel, summer plans, and vacations are on the horizon? Here are easy ways to work on handwriting while traveling this summer. These are motivating, functional, and meaningful tasks that can sneak in handwriting practice.
Use these strategies and ideas to encourage handwriting tasks. Letter formation, line use, and margins don’t need to be perfect. The key here is to help kids feel important, needed, and handwriting-smart! The children who struggle with written work can get overwhelmed by interventions during the school year. Take the time summer break as a time to keep up on the skills they’ve learned in a low-key way!
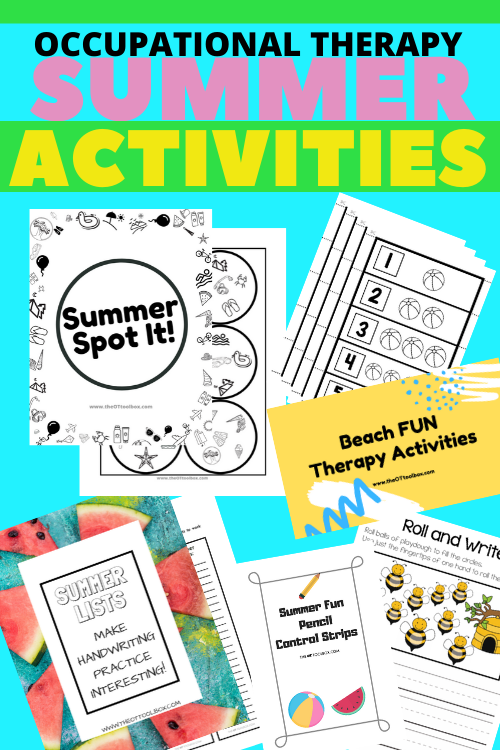
You’ll also be interested in our new Summer Occupational Therapy Activities Packet. It’s a collection of 14 items that guide summer programming at home, at school, and in therapy sessions. The summer activities bundle covers handwriting, visual perceptual skills and visual motor skills, fine motor skills, gross motor skills, regulation, and more.
n the Summer OT packet, you’ll find:
Beach Fun Google Slide Deck/PDF set
Summer Spot It! Printable Game
Hole Punch Cards for matching upper case and lower case letters
7 Roll and Write Play Dough Sheets – Apples, Bees, Bugs, Buttons, Donuts, Play Dough, and Unicorn themes
Summer Fun Pencil Control Strips
Summer Lists Writing Prompts
Summer Number Practice
Summer Visual Perception Pages
All of the Summer OT activities include ideas to promote various developmental areas with a Summer-theme. Activities guide and challenge development of handwriting, eye-hand coordination, bilateral coordination, body scheme, oculomotor control, visual perception, fine motor skills, self-regulation, gross motor skills, and more.
Use these activities as warm-ups to your therapy sessions, or add them to the homework page below to create a home program.
You’ll find ideas to use in virtual therapy sessions and to send home as home activities that build skills and power development with a fun, summer theme. Kids will love the Summer Spot It! game, the puzzles, handouts, and movement activities. Therapists will love the teletherapy slide deck and the easy, ready-to-go activities to slot into OT sessions. The packet is only $10.00 and can be used over and over again for every student/client!
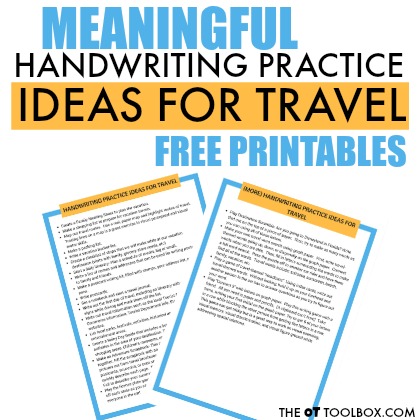
Use this list as a way to get students, OT clients, or your own child writing and moving that pencil this summer. Print off this list here. The printable version of this list is a great tool for the school-based Occupational Therapist. Add it to summer home exercise programs. Teachers can send this home at the end of school.
Going on vacation this summer? We need to prepare! Grab a handful of colorful pens and let’s get started.
Create a Family Meeting Sheet to plan the vacation.
Make a shopping list to prepare for vacation travels.
Map out travel routes. Use a real, paper map and highlight routes of travel. Tracing lines on a map is a great exercise in visual perceptual and visual motor skills.
Make a packing list.
Write a vacation bucket-list.
Create a checklist of stops that we will make while at our vacation destination (visits with family, grocery store needs, etc)
Start a daily itinerary- Plan a schedule of events, big or small.
Write a list of names and addresses that can be used for writing postcards to family and friends.
Make a postcard writing kit, filled with stamps, your address list, and fun pens.
Write postcards.
Get a notebook and start a travel journal.
Write out the first day of travel, including an itinerary with stops. Watch for signs while driving and mark them off the list.
Write out travel information such as the local Tourist Board, Chamber of Commerce information, Tourist Department info, State websites, and County websites.
List local parks, festivals, activities, historical areas, museums, zoos, and entertainment areas.
Create a Rainy Day Guide that includes a list and phone numbers of indoor activities in the area of your destination. This might include: cinemas, shopping areas, Children’s museums, or aquariums.
Make an Adventure Scrapbook- This can be as simple as paper stapled together. Fill the scrapbook with an outline of daily activities, and paste pictures cut from travel brochures onto the pages. Add ticket stubs, postcards, souvenirs, or even stamped napkins from restaurants. Label and quickly describe each page. This is a great project to take into school in the Fall to describe your summer to classmates and new teachers!
Play the license plate game. List out states on a piece of paper and check off each state as you see a car with that license plate. Make it a game with everyone in the car!
Play Destination Scramble: Are you going to Disneyland in Florida? Write that out on the top of a piece of paper. Then, try to make as many words as you can using all of those letters.
Make your own travel word search using graph paper. First, write travel-themed words going up, down, or diagonally on the graph paper. Connect words when you are able. Then, fill in letters surrounding the words to make a full word search. Pass the puzzle off to another car rider and have them find all of the words. Travel words include: suitcase, sunscreen, beach, family, vacation, etc.
Play a game of travel-themed “Headbanz”. Using index cards, write out travel-themed words. Without looking, hold it up on your forehead and another person in the car has to answer questions as you try to figure out your word.
Play “Connect 5” with letters on graph paper. Play this writing game with a friend. All you need is paper and pencils. (A clipboard can’t hurt!) Take turns, writing your first initial on the graph paper. Try to get 5 of your letters in a row while blocking the other person from getting five letters in a row. This game can get tricky but is a great way to work on visual scanning, visual memory, visual discrimination, and visual figure ground while addressing spatial relations.
Colleen Beck, OTR/L has been an occupational therapist since 2000, working in school-based, hand therapy, outpatient peds, EI, and SNF. Colleen created The OT Toolbox to inspire therapists, teachers, and parents with easy and fun tools to help children thrive. Read her story about going from an OT making $3/hour (after paying for kids’ childcare) to a full-time OT resource creator for millions of readers. Want to collaborate? Send an email to contact@theottoolbox.com.
Visual perceptual skills are needed for so many functional tasks! Writing on lines, copying written work, reading without skipping words, walking in a crowded hallway, organizing materials, pouring water into a cup without spilling, searching for a paperclip in a junk drawer…everything done throughout the day requires the ability to visually process information. For the child with visual perceptual difficulties, struggles persist in many areas!
That’s why I wanted to share a series of free visual perception worksheets that can be used to address many visual perceptual skills. This visual perception free worksheet has a monkey theme. Find more visual perception worksheets like our free visual perception dinosaur worksheets and this space visual perception puzzle.
Visual perceptual skills are needed for so many functional skills. You’ll find easy and fun ways to work on visual perceptual skills through play here.
Free Visual Perception Worksheet
Print this free visual perception worksheet and laminate it or use it in a page protector sheet with a dry erase marker. You can use the page over and over again.
How would you use this visual perception worksheet?
Related read: These visual perception apple theme shape stamps are a perfect way to work on visual perceptual skills and fine motor skills with DIY stampers.
Visual Perception Worksheet Activity
Using a visual perception worksheet like this one and the others on this site addresses skills like the ones listed below. Click on each to find more creative, hands-on ways to address each skill. The activities are perfect additions to add to your OT Toolbox and can accompany the free worksheets we have here on the site:
Motor planning is a skill that is needed for every action that we do! The motor planning activities in this post are designed to promote motor movement development into play, using sidewalk chalk. These are the perfect activity for outdoor play with a sensory component. Find more information about motor planning and how to incorporate motor development into play by checking out the tab above under occupational therapy.
What does motor planning look like?
Let’s first talk about what you might see in the child with motor planning difficulties: The child that moves as if they can’t figure out where to put their arms and legs.
The child who is frustrated with movements.
The child who bumps into other students in the classroom or in crowded hallways.
The child who falls or stumbles way too often for their age.
The child who can’t figure out how to perform tasks if they are holding an object.
The child who avoids sports because they can’t move fast enough to catch a ball or perform several tasks at once (catch, run, throw).
“What is motor planning?” is a common question. Motor planning involves problem solving, planning, and action related to movement. This is a HUGE collection of skills and results in hugely different outward appearances in kids. One child who struggles with motor planning can present totally different than another.
Motor Planning Activities with Chalk
These activities use sidewalk chalk to address motor planning and movement. Work on these activities on a small scale or a big scale. That’s the benefit of using chalk- You can draw a small hopscotch board on a sidewalk step and use your fingers to “hop” through the course. OR, you can create a gigantic hopscotch board in an empty parking lot and leap from square to square!
All of the activities listed below can be modified in size. Think outside of the box of chalk so to speak!
Even drawing and creating the activities below involve motor planning. In fact, motor planning is a huge part of handwriting. Read more about motor planning and handwriting to see what I mean.
Sidewalk Chalk Motor Planning Ideas
Hopscotch
4 square
Balance Beam – Draw a line that involves lots of turns and bends!
Draw to the beat of music
Draw a game board – Think Monopoly, Candyland, Sorry, or Chutes and Ladders.
Draw a bowling alley
Draw a baseball field
Draw a ping pong table
Draw a bullseye – Throw pebbles or bean bags at the target
Draw a big road – Run or ride bikes/scooters on the road.
Draw a railroad track
Make a sidewalk maze
Obstacle courses- Use symbols to indicate “stop”, “jump”, and “turn around”, and arrows for directions.