Calm Down Corner

Child sitting in corner of a class room in a tent, other child sitting at a desk. Text reads "why all classrooms need a sensory corner"

For young (and old) children, a great calming classroom tool that supports learning, social participation, and school tasks is the calm down corner. A calming corner in the classroom can be a great sensory strategy to support emotional regulation needs in students. It’s a place to calm or re-organize in a personal bubble, meeting regulation needs so learning can happen. Let’s go over fun calm down corner ideas to support various regulation needs in the classroom.
Calm down corner ideas and tips

As an Amazon Influencer, I earn from qualifying purchases.

Calm Down Corner

A classroom calming area can include a variety of movement and sensory based activities or tools. 

  • A place to sit: A visual space for a child to sit in their calming area, that is large enough for one child only. This could be a bean bag chair, a cushion or a pillow. These soft spots will help make the cozy corner comfortable so children feel they can stay as long as they would like. There are so many options when it comes to Flexible Seating tools – bean bag chair, movement seat, deflated beach ball seat, couch, soft chair, floor mats, large pillows
  • Soft surfaces – yoga mat, gymnastics mat, or soft rug
  • Headphones – with or without music, sound machine
  • Visual schedule of sensory strategies
  • Emotions Playdough mats can be a great tool for a calm down corner.
  • Things to look at – books, magazines, pictures, lava lamp (refrain from electronics that have a screen, as they are alerting)
  • Calming corner printables and other visual calming strategies – Check out these calming sensory stations for Spring
  • Timer – visual timers with countdown options are great
  • Preferred sensory items such as tactile toys, chewing items, plushies, fidgets, etc.
  • Books: Looking through picture books of all kinds, helps to give children something to do, while keeping their minds calm. Most of the time that children are interested in using a cozy corner, is when they are feeling overwhelmed. These Zones of Regulation books that talk about different feelings and support regulation and processing through feelings such as sad, scared, angry and more. These empathy and friendship books are another tool to consider. Place the books in a basket or a shelf for easy access. 
  • Emotional Supports: Visual and tactile supports help people of all ages, but it is essential to have a visual space in the classroom for preschoolers to retreat to when they need time to calm down. Soothing Sammy makes creating this area simple and makes it a positive experience for children. This adorable golden retriever has his calm down house which can be placed in the cozy corner, with items that help children calm down using their sensory system. As they calm down, they can use the visuals included in the kit to explain to other children and adults how they are feeling and what they need support with.
  • Stuffed Animals or Baby Dolls: When feeling lonely, sad, scared or overwhelmed, having access to baby dolls or adorable stuffed animals makes the space less lonely. Additions such as baby doll blankets, bottles and other caretaking tools, allow children to comfort others as they work on comforting themselves. 
  • Personal space: Adding a privacy cover or even simply a boundary to the cozy corner space helps children not to be distracted by other aspects of the environment. Placing fabric, cloth or other child-safe covers over the cozy space allows children to feel like they are in charge of their own space. Some child care centers place the cozy areas in small tents, (Amazon affiliate links) canopies (affiliate link) or wooden privacy cube like this one. (affiliate link)
  • A feelings check in could be a great addition to this space. The child could enter the calm down area and identify how they are feeling and then use strategies to support those needs.

This list is just the beginning! A calm down corner can include any item from the list above or classroom sensory diet strategies, based on the needs of the individual student.

This article on supporting self regulation in preschoolers offers valuable information on this topic.

Calm down corners can be quiet soothing areas to decompress for certain learners, while others need a more active calm down area in classrooms.

How to Add movement to a calm down corner

There are many different ways that children can calm down. Movement is one of the most beneficial and complicated ways to manage feelings and emotions.

There are two different types of movement patterns that support the sensory system.

Both of these types of movement activities increase awareness of where a body is in space, calms the central nervous system and regulates emotions in an amazing way. Movement is complicated as it can be alerting and calming. Picking the right activity for the desired outcome is tricky, but effective.

Help your learner understand what they need for self regulation, rather than bouncing all over the calm down corner.

How is movement calming?

Have you noticed that children seem to pay attention longer after moving around for a while? This isn’t just because they are tired after completing an active task. Children and adults are able to attend for longer periods of time when movement breaks are embedded into their daily schedules due to the sensory benefits it provides.

For adults that have desk jobs, it is widely known that every 20 minutes, they should stand up. This not only helps blood flow, but also awakens the body. When children are engaged in circle time, implementing movement based activities within circle (like freeze dancing, jumping and marching) is beneficial to improving attention.

Movement has many benefits, including helping calm down when feeling overwhelmed with emotions. 

When the sensory system becomes overstimulated due to internal feelings and frustrations, some people are quick to seek out movement activities to calm down. Adults may go for a walk or run, chew gum, lift weights or kick a ball. This strategy directly affects proprioceptive input.

There are many ways the body processes movement. This impacts the central nervous system in different ways.

  • Proprioceptive inputs is one of the ways the body processes movement. It tells the brain where the body is in space. Proprioception is guided by skin, muscle, and joint receptors in the body, to connect to the brain through the nervous system. In this way, a person knows where their body is in space, and what the body is doing, without needing to watch the body parts move. A great example of proprioception, is being able to walk down the stairs without looking at ones legs or feet
  • Heavy work, or tasks that involve heavy resistance, offers input to the muscles, joints, and connective tissue, and is essential to regulating the sensory system
  • In this article on neuroplasticity, evidence suggests the sensorimotor cortex that governs proprioception is not fixed, and can be changed through external manipulation.
  • Vestibular movement, like proprioception, also helps alert us where our body is in space. This system operates through the inner ear, passing information to the brainstem, affecting many areas of the body. If a person starts jumping, rocking to music, or dancing to calm the body, it activates the vestibular system. This article on vestibular activities does a great job explaining this system.

more about the vestibular system

Receptors in the inner ear, found in two structures (the otolith organs and the semicircular canals), respond to linear/angular/rotational movement, gravity, head tilt, and quick movement changes. 

The receptors in the ear, provide information to the central nervous system about the body’s position in space. Information is used to:

  • control posture, eye, and head movements
  • correct the eyes with head and body movements
  • muscle tone and postural adjustments
  • perceive motion and spatial orientation, and integrates somatosensory information

Through the vestibular and proprioceptive systems, the body processes information about where it is space, interprets movement patterns, and recognizes touch and joint pressure. These senses greatly impact the ability to calm down by triggering pressure points through movement (such as rocking or swinging). 

When a child (or adult) becomes upset or overwhelmed, it is helpful to utilize the vestibular and proprioceptive systems as intervention tools. This helps a person calm and self regulate, in order to process their feelings and problem solve. 

Because children often need sensory strategies to self regulate, having a designated calm down area set up in the home/classroom makes redirecting children to the appropriate calming activities much easier.

The Soothing Sammy program is a great way to encourage children to take part in creating their own calm down corner through a story about a dog, Sammy, a golden retriever. As children help build Sammy’s calm down area to use when overwhelmed, they are gently taught that it is okay to have a variety of feelings. As children look through the book, they learn how to use objects in their calm down corner when needed, including drinking water, wiping their face with a cloth, jumping on a small mat (proprioceptive and vestibular input) and much more. 

There are so many items that we can add to a calm down corner and every calm down corner will be different based on individual children’s needs. In the Soothing Sammy curriculum, there are recipes for lavender bubbles, slime, tactile fidgets, paint, and others.

Proprioception Calm Down Corner Ideas

Here are some great proprioceptive strategies to include in a calm down corner:

  • Calming Corner Printables- Print off the sensory stations listed below. These support heavy work needs (and vestibular input)
  • Jumping mat or small trampoline. When children jump, they put pressure on their joints 
  • Weighted blanket. Weighted blankets provide deep pressure over the entire body, making this activity one of the an effective whole-body proprioceptive strategies to help children calm down
  • Watering plants. Lifting a watering can, can impact joints all over the body. As children stoop down to pick up the watering can, moving it over plants of different heights, they are getting great input
  • Weighted ball. Lifting and rolling over a weighted ball increases proprioceptive input in the hands, arms, shoulders, and core. 
  • Play Dough. Squishing, squeezing and pulling apart playdough or clay, increases proprioceptive input in hands and small joints. 

Some of these activities can be alerting or calming, therefore some trial and error may be needed.

Vestibular Calm Down Corner Ideas

Movement with changes in positioning can be calming as well. Think slow, rocking movements. Here are some Vestibular strategies to include in a calm down area:

  • Farm Brain Breaks These simple, yet fun activities, provide visual ways to complete vestibular activities
  • Calming Corner Printables- Movement like yoga poses or those offering brain breaks can be just the calming input needed.
  • Swinging – Help your child move and sway in different directions with an indoor or outdoor swing. A Sensory Swing for modulation is an amazing way to provide an option to swing in a home or preschool setting
  • Trampoline – Provide a small trampoline for your child to jump on. (Amazon affiliate link:) This toddler trampoline with handle is perfect for indoors spaces
  • Dancing – Any type of movement to music, including freeze dancing or shaking instruments (such as a tambourine, bells, maracas) or using scarves, are wonderful additions to a calm down corner
  • Yoga Poses – There are several themed yoga poses perfect for children. Add a yoga book or cards like these Unicorn Yoga Poses to any calm down area

calming corner printables

One tool to add to a calming corner or calming space is a printable that offers a visual designed to promote calming and organizing self-regulation. These calming corner printables are easy to print off and start using right away.

Over the years, we’ve created seasonal sensory paths, or sensory stations that support regulation needs. We’ve received wonderful words of thanks and feedback letting us know how loved these sensory stations have been.

Check out each of these seasonal calming corner printable packets. Pick and choose the ones that support your needs in the classroom, therapy clinic, or home:

  1. Summer Sensory Stations
  2. Fall Sensory Stations
  3. Winter Sensory Stations
  4. Christmas Sensory Stations
  5. Spring Sensory Stations

Additionally, other calming corner printables might include deep breathing posters. We have many free deep breathing exercises on the website, including:

Finally, a brain beak printable like our popular alphabet exercises makes a great wall poster for a calming corner of the classroom.

Keep in mInd about setting up a calming corner in classroom

Calm down areas should incorporate all the senses, as every mood, trigger, situation and response is different. Equally important is the co-regulation aspect, which relates to responding to the mood and behavior of those around us, or the peers that may be present in a classroom or home setting.

By utilizing a variety of calming tools in a calming corner, or calm down space within the classroom, children will be able to identify what they need, the moment they need it, while still engaging in active learning.

It can be daunting and complicated providing for the needs of all of your different learners, however, by incorporating vestibular and proprioceptive materials in a calm down corner, children are able to use these powerful movement strategies when they need them the most, all while taking a multisensory approach to academics.

Sensory Corner

We’ve covered ways to set up a calming area, but what if you really want to feature the cozy aspect of a sensory space in a classroom or home? A sensory corner is very much the same concept, with different terminology. The key to a calm down space is incorporating sensory components within these areas.

Research shows that having a designated space for children to have alone time in, during their school day, is a way to support emotional development and independence, while also teaching children that it is okay for their friends to take a break.

When combining visual, tactile and other sensory components into the design of a cozy area, children will independently seek it out when they need a break from their peers. 

in the classroom is a cozy or quiet space for one child to spend time independently when they feel like they need a break from the regular commotion of a preschool day. This area can be used to take a sensory break, to calm down when they are feeling upset or overwhelmed, or to just take a break. 

This area should be accessible for all children at any time of the school day. This area is best used when it is at the child’s level, is situated in an area of the classroom that is far away from the busier/louder areas of the classroom, and includes sensory supports to encourage calming and peaceful experiences. 

Whatever you call your safe space, and however you set it up, what matters most is your intention.
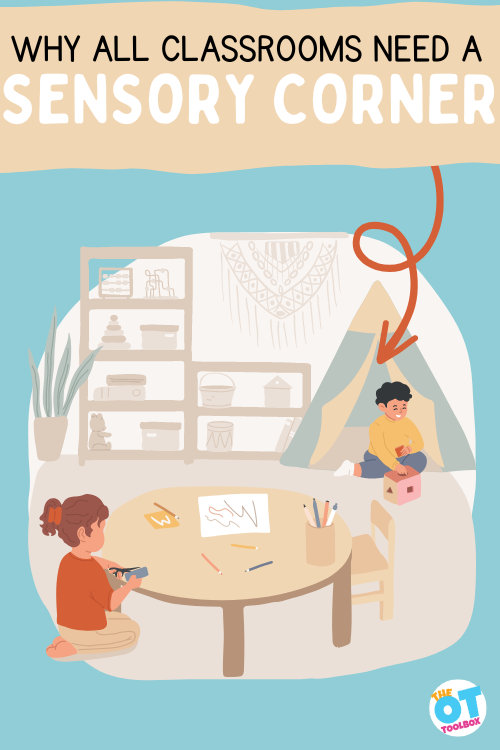
Sensory corners

Why Use a Sensory Corner?

A calming corner or a sensory corner may be used for many various reasons.

There are hundreds of reasons why children might need to take a break from other children in the classroom. They may feel sad, overstimulated or just need time to recharge.

This may include:

  • Feeling overstimulated in the classroom
  • Overwhelming feelings
  • Needing to recharge or refocus
  • Having a bad day
  • Changes in routines
  • Feeling “out of sorts”
  • Worried about a home situation
  • Worried about a friend situation or social situation
  • Worried about a test or project in the classroom
  • Sadness about home situations
  • Missing family or pets
  • Not sure what to expect or what is expected of them

Remember that the goal of the sensory corner is to offer a safe space, or to give children a place to calm down, feel safe, and regroup when they are overcome with big emotions at school.

One thing to consider is that a calm down area of the classroom can be effective at the start of the school year due to transitions in the classroom when a new classroom may mean a lot of unexpected sensory input. This is a great addition to back-to-school sensory activities that support students of all abilities.

Where to put a cozy area:

When looking at an indoor preschool classroom set up, there are many centers that are utilized by children throughout the day. The key is to avoid adding visual noise, or visual clutter when adding a cozy area to the classroom.

Some of the busiest areas include the circle time/gross motor area, the block area and the art areas. These areas tend to attract groups of children at once and aren’t the best spaces to put next to a calming area. 

The library, dramatic play and animal/science areas, tend to be more quiet spaces in the classroom. Each of these spaces will support a calmer environment to build a calm down area. When deciding what wall or area to place the calm down spot, keep in mind the following environmental components:

  • Is there a window nearby that will give off too much light?
  • Are there large gross motor/sensory spots that are noisy?
  • How many pictures are on the wall, and are they soothing?
  • What are the colors of the walls by the calming area, and are they overstimulating? 
  • Is the space adequate for one child, or will more children try to encroach on their alone time? 
  • Can this space be easily visible by a teacher doing active supervision?
  • Is this space near high traffic areas, like the entry door or bathroom?

Many spaces may feel like the perfect spot for a calm down space inside the classroom. You know your kids the best and where they spend most of their time. As the school year progresses, there may be times where you want to move your calm down area to a better spot, and that’s okay! 
Outdoor sensory corner ideas

Outdoor Sensory corner Ideas

Don’t forget about the outside as an option for a calm down space! We know the many benefits of outdoors as a calming area, so simply going outside is a great option for calming the mind and body while organizing (or regulating) the sensory motor systems. The outdoors is one way to add free sensory motor options to the classroom.

We’ve covered outdoor sensory diets before, and this is a great article to start with when considering an outdoor sensory space for home or classroom use. In fact, we love to select specifics for the home too, when it comes to sensory diets in the backyard. Even the playground or recess is a sensory calm down space for some kids.

Kids need quiet spaces while they are playing outdoors also. When setting up an outdoor learning environment, make sure to incorporate some independent areas in a shady area of the playground. These spaces could be near the garden, near a book reading area, under a nice shade tree or near a swing. You can even add an outdoor sensory swing as a calming option.

When setting up an outdoor area as a sensory corner for classroom breaks, consider what science says: Research on outdoor sensory play tells us that playing outdoors supports development, but there are emotional benefits as well as benefits to learning.

Some components to think about when setting up your outdoor calm down area include:

  • Is it sunny or shady?
  • Is it near an area where children will be running quickly?
  • Is it near a highly trafficked area, like a parking lot, walkway or door?

Quiet cozy areas should be available for children at all times. It isn’t a punishment corner, rather a space that children can “take a break” when they need it.

Here are 5 simple ways to incorporate cozy spaces outdoors so children have the opportunity to play on their own when needed. 

1.Place to Sit: The first step to creating a safe space is for children to have a space to be on their own. You can create this in a similar way with an area rug or cushion like the indoors, or you can create something with more of a visual “splash” like these calming spaces in children’s swimming pools. 

2. Gardens: Nature is a great accessory to a cozy nook area outside. Consider creating a cozy nook with a variety of plants. Adding trellis’s and arches where different vegetables and flowers and grow over a child’s safe space, incorporates natural colors and healthy foods into the safe space that children will spend their time. Sensory gardening is also a great option for a sensory break from the classroom that fosters learning!

3. Swings: Attaching a child safe swing to a tree provides a sensory rich safe space where children have the opportunity to have quiet time and self soothe. There are so many sensory swing options including a hammock swing and a platform swing

4. Individual Art Space: Child initiated process art in nature can be a calming and essential experience that supports children when they are overwhelmed or overstimulated. A simple way to create this individualized space is by attaching an easel to a fence and offering different mediums to use with the easel (markers, paint, chalk.) Some of these creative painting ideas are fun to try in a sensory calm down space.

5. Sensory Table: A small sensory table or a sensory bucket is a wonderful way to encourage individual calming time while outside. You can add a variety of different materials to the sensory tub, or offer options of 5 or six sensory buckets. This could include bubbles and wands, sand, goop or some more of these sensory bin ideas. Another idea is to set up a nature table. You could even use a picnic table with a sand writing tray on top where users draw in the sand on the table surface.

Best Practice for Calm Down Corners

No matter what you call them: calm down corners, cozy corners, or sensory corners…and no matter where they are located: indoors or outdoors, in the home, or in the classroom, these sensory spaces are a valuable tool for promoting self-regulation and emotional well-being.

They provide a dedicated space for students to practice calming techniques and engage in activities that help them manage their emotions. Calming corners may include tools such as breathing exercises, visual aids with coping strategies, mindfulness activities, and calming sensory items like stress balls or visual timers…or any item that offers a sense of peace.

The key is to create an environment that is quiet, comfortable, and free from distractions, allowing students to recharge and regain focus when needed!

If you are setting up a calm down corner for your classroom as you gear up for a new school year, be sure to check out our resource on back-to-school sensory activities as an addition to your classroom calming area.

Jeana Kinne is a veteran preschool teacher and director. She has over 20 years of experience in the Early Childhood Education field. Her Bachelors Degree is in Child Development and her Masters Degree is in Early Childhood Education. She has spent over 10 years as a coach, working with Parents and Preschool Teachers, and another 10 years working with infants and toddlers with special needs. She is also the author of the “Sammy the Golden Dog” series, teaching children important skills through play.

Co-regulation

In this blog, you will learn how the environment, and the feelings of those around us, directly affects behavior. You will learn simple ways to support children in calming down, while in our care, through co-regulation. This important skill is part of our emotional intelligence and one that takes fostering and nurturing. Let’s go over what coregulation means, how this skill develops, and how we can support co-regulation through practical strategies.

Co-regulation information, facts, and references for developing this emotional intelligence skill in children and peers.

CoRegulation

The feelings and behavior of people in close proximity to us, directly impact how we feel, and respond to our own emotions. When children become upset, if those areound them stay calm, demonstrating how to calm down, the child can calm down quicker.

How would you feel if your neighbor was yelling at the mailman for stepping on their freshly cut grass?  Do you feel annoyed? Can you feel the fear the mail man is feeling?

How would you feel while walking past someone doing yoga in the park? Do you feel calm?

In the same way adults are impacted by others actions, children pick up the moods of others around them. When people around us are behaving a certain way, we can be directly affected, responding both internally and externally. 

When witnessing an uncomfortable event such as the confrontation at the mailbox, internally you might feel your heart start to pound, or clench your teeth as nervousness sets in. You might run and hide behind the window curtain to try and separate from yourself from what is making you feel uneasy (while still peeking in horror). 

Once separated, you are often able to calm down using strategies to regulate your sensory system. I like to sip water and take breaths of lavender. My husband likes to go for a run and lift weights to decompress. As adults, we have learned how to adapt and overcome these intense feelings through different strategies. Children need support to separate themselves from stressful situations, and regulate their emotions.  They are not able to understand the triggers and determine an acceptable calming mechanism.

Co-regulation definition and terms

What is co-regulation?

The definition of co-regulation is– the ability to regulate emotions and behaviors to soothe and manage stressing internal sensory input or external situations, with the support and direction of a connecting individual. Co-regulation is nurturing connection of another individual that supports regulation needs through the use of strategies, tools, and calming techniques in order to self-soothe or respond in times of stress.

Co-regulation and self-regulation are part of the developmental process. In order to move from a co-existing place to a place of independence, the child needs to develop emotional intelligence and social emotional learning. All of this is part of typical development.

Development of co-regulation

Co-regulation is a part of development. Before one can self-regulate, they need to co-regulate.

  • Co-regulation begins in infancy. Before a young child can self-soothe, they need a parent to help them. When an infant is crying a parent picks them up, holds them close, rocks, and wraps them up in a tight swaddle, and offers a pacifier. All of these strategies are tools to provide correct sensory input that calms and regulates the baby’s system. This is co-regulation; the parent is offering tools and strategies to support the infant’s needs. 

As caregivers we play a huge role in helping children calm down. When children are upset or overwhelmed, they look to us for help with regulating their emotions. This article explains how to support co regulation in infants through three year olds. A caregiver needs to project calmness in order to soothe their infant. This is very difficult for an anxious or upset parent.

  • Co-regulation in toddlers might look similar, but with more input from the child. The toddler prefers to be active and jump, run, roll, or move, rather than be held and cuddled all the time. The caregiver offers toys and activities to get the child moving in the way they enjoy. If the toddler only does these alerting activities, they might run themselves down, and move into a meltdown state. The parent then offers a calming tool such as a cool sip of water, a slow walk, singing a song, a break from the action, or a moment to stop and look at something interesting (also known as mindfulness). All of these are co-regulation strategies for toddlers. The parent offers strategies to the young child, and hopefully, the child accepts them. 

As children grow into toddlers, the most successful way to support their feelings is to calmly use words and gestures to redirect them when they are upset. When adults are feeling anxious or upset when trying to redirect the child, children respond with increased adrenaline, becoming more upset and dysregulated.

They match or mirror the energy of their caregivers. When adults stay calm, children can become calm. When children become or stay calm, they are able to listen and problem solve. 

  • Co-regulation in preschoolers can be similar to that of a toddler. As they develop, preschoolers are able to offer more input as to their preferences, interests, and dislikes. For example; the young child can request a certain sippy cup they like. They may not know why they like certain activities or items like the long straw on their favorite cup, or the weight of a plush toy, but they know that it feels good. Similarly, adults often do not understand why they choose to run or listen calming music, they just know it helps. Parents can help young children co-regulate sensory and emotional needs through providing ideas for strategies and activities. 
  • Co-regulation in older children– Preschoolers, kindergarteners, elementary aged children and teens are able to self-regulate using skills taught to them while being supported through co-regulation at a younger age. As children grow, they have more autonomy. They have more ability to move from co-regulation to self-regulation. 

The ability to self-regulate occurs through co-regulation with parents, teachers, and older peers. Typically, it’s through the first 7 years of life that children need support to regulate emotions, sensory input, and external stressors.  Even after the age of 7, most kids need help! 

Self-regulation development continues over time, but the ability to co-regulate begins to move from a supported mechanism, to an individual and independent ability.

Co-regulation parenting tips and strategies to support emotional development.

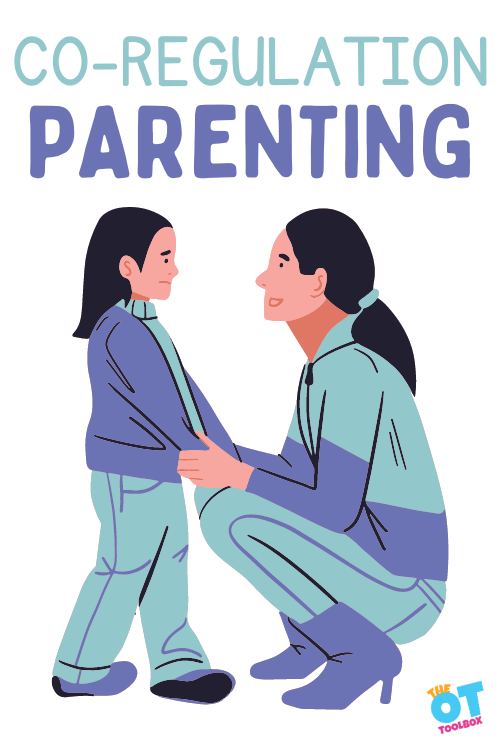
Co-regulation Parenting

The above paragraph should help explain what coregulation means in young children, but how can we help support kids with co-regulation, so they can develop these self-soothing skills?

We can focus on co-regulation parenting as a tool and a means to support our children.

Many adults struggle with self-regulation. This is where we see additional problems. When young children need support to co-regulate, sometimes the adults in their lives are not offering the tools and strategies as a support person.

If a parent responds to a young child’s meltdowns or behaviors with emotional outbursts, anger, stress, and anxiety, the young child cannot soothe themselves.

It is important for adults to take a look at stressors, internal anxiety, and emotional state so they can support the young child. 

  • How many times have you witnessed frustrated teachers/parents/caregivers yelling at children?
  • Does it calm them, or make them afraid and shut down?

This is why it is important for caregivers to step away from a situation where the toddler is “pushing their buttons”. Take a deep breath, get a date night out, go for a run, or some other mechanism of self-regulation.  I often said, “Mommy needs a time out.”

self regulation

You have probably heard the term “self-regulation” which refers to the ability to control oneself in any given situation by balancing and calming internal sensory systems within the world around us. 

Before young children can self-regulate, they need the support of adults around them to teach and help them develop the abilities to regulate on their own. They need to co-regulate, or co-exist with parents, teachers, and others, who can “show them the ropes” and learn to balance and calm their internal and external systems. Co-regulation comes before self-regulation developmentally.

Neuroscience of Co-regulation

What does co-regulation look like in the brain?

Brains are amazing machines, capable of processing the environment, including the feelings of others. Dr. Caroline Leaf, neuroscientist has stated “As you co-regulate with someone, the mirror neurons in their brain are activated, and this enables the person in the deregulated state to literally ‘mirror’ your calmness,” For long-term benefits and effective results, Johnson recommends practicing co-regulation often. “It will effectively rewire the brain so that over time, things that once were triggering or set off alarms no longer have the same effect and happen less often.” 

Wow! The brain can process the feelings of others in milliseconds, directly affecting our our own moods and behaviors. No wonder all of the children in a preschool class feel overwhelmed, as soon as one child becomes dysregulated. 

How do you prevent the whole room from becoming overwhelmed, when only one person is stressed? Co-regulation is the first step for a person to learn self-regulation. 

According to this research article by Howard Beth, “Neuroscience shows that humans develop their abilities for emotional self-regulation through connections with reliable caregivers who soothe and model in a process called “co-regulation.” … In time, the child internalizes the expectation of a soothing response which provides a foundation for learning self-regulation. “

It is the responsibility of caregivers to support co-regulation, which directly impacts a child’s ability to self soothe as they grow. When children are upset, the most important thing for caregivers to do, is remain calm.

If caregivers become upset or overwhelmed in response to another person’s behaviors or actions, everyone will continue to feel stressed, and the situation will explode.

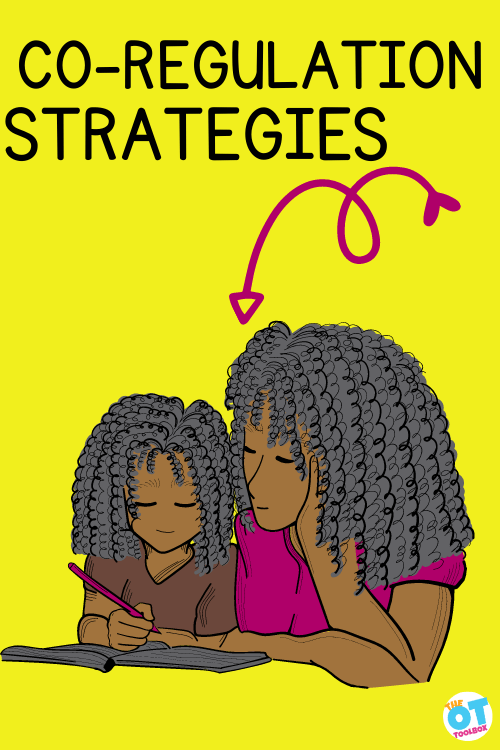
Co-regulation activities and strategies to help kids with emotional development of cooregulation skills.

How to help kids with co-regulation

My own regulation techniques were put to the test once, when I was teaching at a preschool that backed up to a farm. The children (all 2-5 year olds) were inside eating lunch and I was setting up their nap mats. We had a futon in the classroom for children to relax and read books on.

Out of nowhere, a humongous snake slithered out from under the futon! The initial shock wore off quickly, and my nerves set in. The snake was coming towards me, and I had 24 preschoolers eating lunch only ten feet away! I calmly helped the children walk out the door to the playground with the aide, breathing and saying “It will be okay. No need to worry.” 

The kids walked out of the room curious, but not frightened. I raced to the phone and called for help (my voice was much more panicked as I talked to the janitor about the huge snake in the room)! I knew nothing about snakes, and I wasn’t about to get in its’ way. Luckily it ended up being a garter snake, removed quickly by a specialist and relocated, far away from my classroom!

At that moment, I knew that I had to “keep my cool”, so the children wouldn’t become scared. They co-regulated off of my calmness, and were able to safely follow directions and watch the situation unfold from outside.

Children learn new skills through hands-on activities. Regulation skills are learned the same way.

Regulation Strategies:

There are many more self regulation strategies than just the ones listed below. This should give you a good idea for where to start.

  1. Deep Breathing- Deep breathing exercises for kids teaches young children how to calm down through pausing, and taking large breaths. Relaxation breathing is a great strategy for adults and kids to do together. The ones on this site use a fun and engaging strategy that introduces breathing techniques using visuals and imitation. The printables in this resource form the OT Toolbox teach kids all about breath control using fun pictures, arrows, and places to pause, and hold their breath. Print out the free PDFs, show the child the picture and the arrows, and practice deep breaths. When your child becomes upset, immediately start to “breathe like a polar bear”, or “do rainbow breaths” and watch as your preschooler starts to calm down too!

Some of the most commonly used deep breathing tools include on the OT Toolbox include: 

  1. Toys and stuffed animals- Using a preferred toy or stuffed animal integrates strategies from DIR Floortime therapy strategies.  Kids gain the emotional vocabulary, and strategies to use in co-regulation, through play. I developed the Soothing Sammy (affiliate link) learning system. It is a great tool for co-regulation, because of the picture books and activities included with the emotional regulation toy. 

In my book, Soothing Sammy, a golden retriever puppy, teaches children how to calm down using a variety of sensory strategies (such as jumping in place, blowing bubbles, sipping water, singing a song and squeezing a ball or play dough). First, read the Soothing Sammy story, where children visit Sammy in his dog house. He provides them with all of the tools needed to calm down. Once calm, the children are ready to play again. Use the stickers and shipping container to have your own preschoolers create a space for their own calm down items and place Sammy, the plush dog, inside! This is your child’s very own Sammy house to visit, just like the children did in the story.  When children are overwhelmed, experiencing big feelings, they are easily redirected to these activities by saying “Sammy Time.” Help children co-regulate by creating your own Sammy House and using items to calm down when they are upset, modeling calm and soothing behaviors.

  1. Go outdoors and co-regulate!

Sometimes all we need is a little bit of fresh air to help feel better. Use these outdoor sensory diet cards to discover calm down strategies to use outside with children. These cards contain outdoor play challenges to get kids moving, experiencing various sensory systems, and receiving calming input from the great outdoors. Included, are over 180 ideas on how to calm the bod through movement. The outdoors is a great place for a sensory diet. In the backyard there is a variety of movement opportunities. A playground is another great space for calming and regulating play. Check out this blog post on sensory input at the playground

Children, especially toddlers and preschoolers, depend on adults to show them how to calm down or self-regulate.

tools for adults to learn self regulation

Being that co-regulation requires the ability to support another individual with regulation needs, it’s important to address emotional and coping needs as the adult in a parent/child (or other adult/child, peer/peer relationship). As a support person, regulating ones’ own needs can go a long way in modeling appropriate reactions, coping strategies, and following through with regulation needs.

Below are some great tools for adults to learn, or improve self-regulation so they can be models and important roles in the co-regulation relationship include:

If you’ve ever flown on a plane, taken a cruise ship, you’ve heard the safety information: In the event of an emergency, adults should place the breathing mask over their faces before they attend to their child.

Parents should put on their life jacket before they put the life jacket on their children. This seems backwards and selfish, however these life-saving mechanisms are of no use if the adult is struggling.

If they don’t put on their own face mask or life preserver first, there is no chance to support and help the child. The same is true for regulation; parents must first self-regulate in order to help co-regulate their children’s internal and external needs.

Empathy versus Empath

Empathy is being able to understand a person’s feelings, or realize why someone might be angry or sad. It is an important social skill, especially if you are the one causing the upset. Young children do not have the capacity to understand the complexity of empathy.

An empath is a person highly attuned to the feelings and emotions of those around them. Their ability to discern what others are feeling goes beyond empathy (defined simply as the ability to understand the feelings of others) and extends to actually taking those feelings on; feeling what another person is feeling at a deep emotional level.

Try this empathy activity to teach these concepts to children.

According to this article, What we do know is that researchers have discovered what they’ve dubbed “mirror neurons” in the brain which may help us to mirror the emotions of those we come in contact with.1 And it appears some people may have more mirror neurons than others; suggesting that empaths may exist.

The positives of being an empath are being able to offer support to others, knowing when someone is in need of assistance, and reading a person’s energy to see if they are a good fit for you.

The cons of this “ability” are that it is draining taking on the emotions of others around you, it feels like you are too sensitive, and you feel burdened taking on so much.

Being an empath can be described as feeling like a vacuum cleaner, sucking up the emotions of those around you, often before they realize how upset they are.

Empaths need to be experts at co-regulation because of the amount of sensory and emotional input they are “sucking in”.

A final note on co-regulation

Children aren’t born knowing how to manage their feelings in a positive way. As infants, they depend on their caregivers to soothe. As they grow into toddlers and preschoolers, children continue to depend on caregivers to teach them new strategies to calm down. When they sense how calm their caregiver is, they calm down also.

The best way for caregivers to help children develop their self-regulation skills, is to support them in co-regulation, by showing them calming activities they can learn to use on their own.

To learn more about sensory processing disorder and strategies, check out The Sensory Lifestyle Handbook and this resource on sensory processing disorder chart to understand all aspects of SPD.

Additionally, targeting parent and family education on co-regulation as an intervention strategy is highly effective in meeting self-regulation IEP goals so the individual can function in daily tasks.

*Note: The term caregiver has often been used instead of parent. This is to be inclusive. Caregivers can be parents, older siblings, grandparents, teachers, daycare workers, bus drivers, coaches, and many more.

Another great resource is our blog post on becoming a tech wise family.

Jeana Kinne is a veteran preschool teacher and director. She has over 20 years of experience in the Early Childhood Education field. Her Bachelors Degree is in Child Development and her Masters Degree is in Early Childhood Education. She has spent over 10 years as a coach, working with Parents and Preschool Teachers, and another 10 years working with infants and toddlers with special needs. She is also the author of the “Sammy the Golden Dog” series, teaching children important skills through play.
Trauma Informed Occupational Therapy

trauma informed occupational therapy

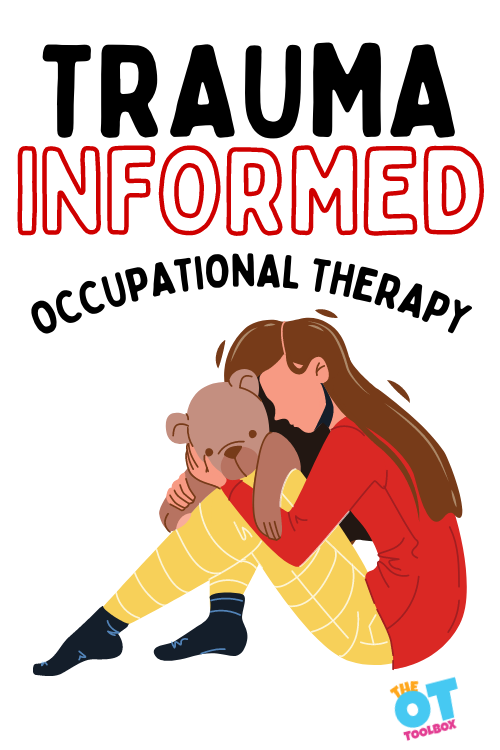
In this blog post, we are addressing trauma informed occupational therapy, including trauma informed interventions and how to take a trauma informed approach in occupational therapy.

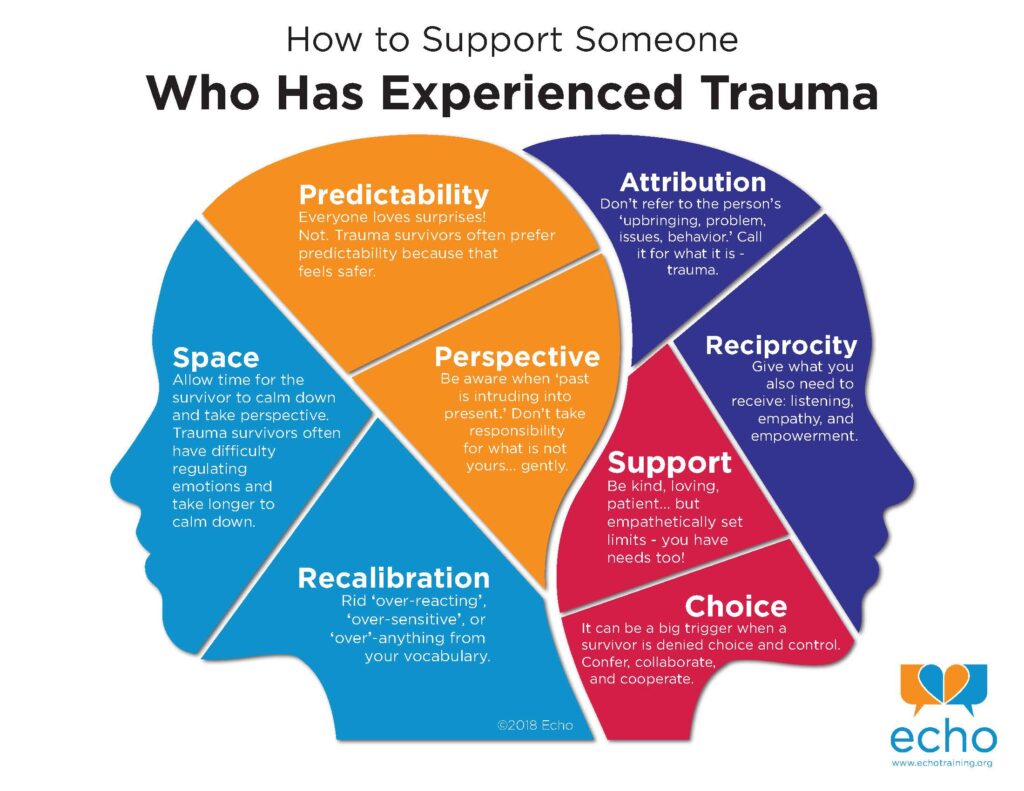
Trauma informed occupational therapy is based on the 6 principles of trauma informed care in OT interventions.

Imagine your mental, physical, and emotional health as a backpack. Some days, that backpack may be really heavy, full, and wear you down. Other days, it may be a bit lighter, and you are quicker on your feet, but the backpack is always there. This is the visualization of health that I think is just perfect when discussing trauma-informed occupational therapy practice

Trauma Informed Care: the hypothical backpack

Everyone wears this hypothetical “backpack”; young and old, rich and poor. It’s up to us as health care professionals, to do our best to consider what we know about what load a person is carrying, while knowing that we won’t ever fully understand someone’s story. 

Included in this “loaded backpack” is the connection between emotional regulation and executive functioning skills, where both emotions and the ability to self regulate, impacts cognitive actions.

Having an awareness of this emotional health, allows one to shift perspectives on how one behaves, acts, speaks, and functions. Cognitive and emotional health can be a large factor of someone’s overall health.

trauma informed occupational therapy

WHAT IS TRAUMA-INFORMED PRACTICE?

It’s important to understand the definition of trauma informed practice.

The effects trauma and adverse childhood experiences have on a person have been understood for some time now. Infant, child, and adolescent mental health is still a growing field.

The “backpack” visual helps to remember that even though occupational therapists may not work in a mental health setting, an individual still carries their traumatic history, anxiety, or depression as they walk into your office. 

Trauma informed care is different than trauma-specific interventions. Where trauma informed refers to the awareness and recognition of various traumas and the impact of organizations or systems impact individuals, families, groups, communities, etc. the specific interventions address assessments, treatments, and specific recovery supports to impact trauma.

Example of Trauma Informed occupational therapy

Take 5-year-old ‘Thomas’ as an example. His aunt brings him to therapy at your outpatient clinic, and you notice that he is really shy and resistant to join you in a treatment room.

Thomas was referred to OT for delayed fine motor skills, but you are unable to convince him to do much with his hands at all. He won’t even look at you for more than one second.

After a few sessions pass, and there are no improvements in his participation, you ask the aunt how things are going at home, and learn a new perspective about Thomas’ overall health. You still must provide services for his fine motor skills, but now you do so through a new lens that respects, and includes his needs as a child with a traumatic history. 

An individual’s traumatic history may not be the reason they are seeking services, but it should always be considered, and assess for. Traumatic experiences shape the way we perform our occupations.

The trauma response and/or triggers should be considered in all aspects of practice; when writing treatment plans, speaking to the individual and their family, and designing the treatment environment. 

This is trauma-informed occupational therapy practice in a nutshell.

GUIDELINES FOR TRAUMA-INFORMED Occupational Therapy

How will you adjust your services to meet the unique needs of an individual who has experienced trauma?

 “Given the long-term effects of adverse experiences in childhood, it is particularly important that all disciplines working in health care assess trauma; address safety in schools and the community; build strengths and resilience; and provide opportunities for educational, economic, and social successes” (AOTA, 2019).

Evidenced-based practice is always the best place to start. The AOTA’s guidelines from the May 2019 continuing education article Understanding and Applying Trauma Informed Approaches across Occupational Therapy Settings, breaks down trauma-informed practice in occupational therapy. This resource highlights best-practice standards from the Substance Abuse and Mental Health Services Administration (SAMSHA).

6 Trauma-informed Principles:    

The 6 principles of trauma informed care are as follows:

1. Safety 

2. Trustworthiness and transparency 

3. Peer support and mutual self-help 

4. Collaboration and mutuality 

5. Empowerment, voice, and choice 

6. Cultural, historical, and gender issues.

The table below is a modifed version of Figure 1 from the AOTA (2019) article. It provides examples of what to do and what not to do in accordance with the principles above. 

Trauma Informed Occupational Therapy Do’s and Don’ts

Table Adapted From Figure 1, AOTA (2019)

Do Don’tPrinciple
Ask permission before doing anything. Assume an individual’s comfort level.#1 Safety 
#4 Collaboration and mutuality 
#5 Empowerment, voice, and choice 
Acknowledge what you cannot change Ignore things over which you cannot control#2 Trustworthiness and transparency
Always ask preferred pronounsAssume based on appearance, etc. #6 Cultural, historical, and gender issues
Recognize that trauma manifests in many different ways.Automatically attribute challenging behaviors to personality #1 Safety

Becoming a trauma-informed provider is not an easy shift for everyone. Considering the current pressures that healthcare professional face, having to adapt towards trauma-informed care is not always supported by staff or administration.

The AOTA provides resources and valuable information for occupational therapists based on the setting they work in. 

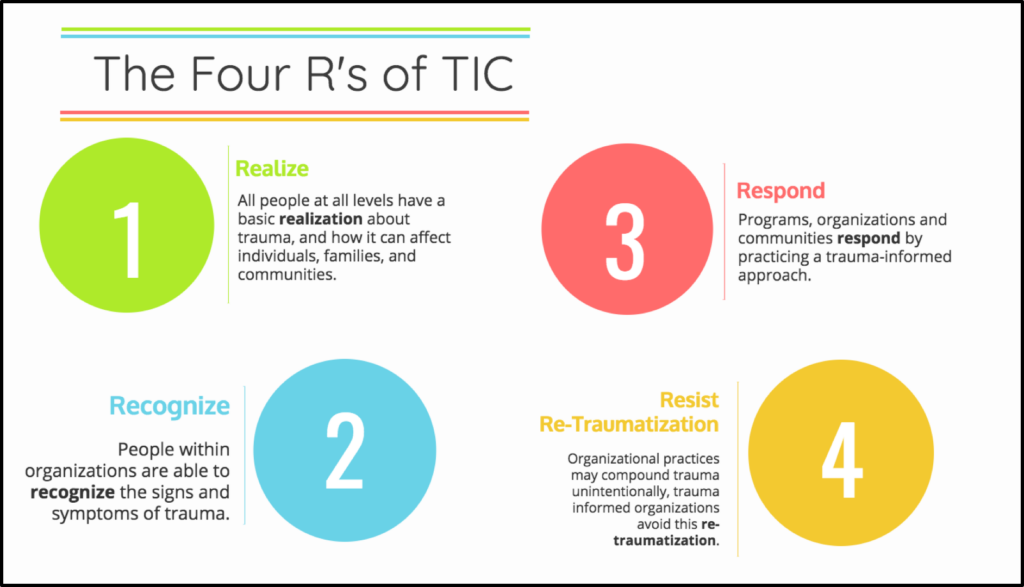
The table above takes into consideration, the Four R’s of Trauma Informed Care: realize, recognize, respond, and resist re-traumatization.

Four R's of trauma informed care

Trauma Informed Strategies for Occupational Therapy

Many of the following guidelines will assist all healthcare providers, educators, and caregivers in learning trauma-informed practices. 

Early Childhood Settings: Increase Collaboration to Promote Prevention 

  • Promote early bonding through skin-to-skin, kangaroo care, private rooms, and opportunities for parent decision-making
  • Increase the amount of collaboration with all involved, and identify the barriers to involving family members in the care of their child
  • Celebrate family advocates
  • More ideas and resources are available at Zero to Three, The Center of Excellence for Infant and Early Childhood Mental Health Consultation, and Think Babies

School Settings: Recognizing Common Trrauma-based Responses

  • Trauma has negative effects on learning, and should be addressed school-wide (not just for students who receive special education)
  • AOTA suggests that OTs frame school behaviors through a lens that recognizes potential triggers and responses
  • Common traumatic stress behaviors include: “intrusive thoughts, irritability, arousal, anxiety, fear, difficulty concentrating, sensory dysregulation, aggression against self and others, dissociative symptoms, somatization, and character issues” (AOTA, 2019)
  • Trauma-Sensitive Schools Training Package 
    • Online training offered by the National Center for Safe, Supportive Learning Environments. 
    • AOTA reports using this training as a Tier 1 intervention, educating the staff and ensuring common understanding. 
  • Cognitive Behavioral Intervention for Trauma in Schools (CBITS) intervention
    • Created by Wong and colleagues specifically to target children subjected to community violence
    • Suggested use as a Tier 2 or targeted intervention
  • Trauma-Focused Cognitive Behavioral Intervention (TF-CBT) 
    • Similar to the above, but suggested practice in Tier 3 intervention, including students and their families, in collaboration with community mental health providers. 

The AOTA (2019) offers more information about occupational therapy’s role in trauma-informed care in various settings, including primary care, community, residential, and foster care settings.

Regardless of the setting, location, or age group you may work with, trauma-informed practice is necessary.

We hope this article gave you some insight on a very important topic, and ideas on how to incorporate trauma informed care it in your practice – wherever you are. What will you do to move towards a trauma-informed practice? 


Sydney Thorson, OTR/L, is a new occupational therapist working in school-based therapy. Her
background is in Human Development and Family Studies, and she is passionate about
providing individualized and meaningful treatment for each child and their family. Sydney is also
a children’s author and illustrator and is always working on new and exciting projects.

How to Hold Scissors

Scissor grasp activities and strategies to teach kids how to hold scissors.

Part of teaching scissor skills is knowing how to hold scissors. Holding scissors correctly is a skill that some children struggle with achieving.  You can walk into any classroom and see multiple ways children grasp scissors. This impacts the way they are able to cut with good hand and finger control. If bad habits are learned early, these can be difficult to correct, but not impossible. Check out the Steps of Scissor Development for a more detailed development of how to hold scissors, and learning scissor skills.

How to hold scissors

How to Hold Scissors

For the purpose of this post, we are focusing on the proper and effective grasp of scissors and how this can be achieved. Think of it as a basic pyramid or hierarchy of skill building that begins with pre-scissor skills and advances to scissor skills. You could consider this the hierarchy of holding scissors.

This post will address each step in learning to hold scissors, and provide information/activities to help at whatever stage your learner is stuck.

Take a look at each level related to holding scissors correctly:

a. Pinch and release finger movements

b. Scissor grasp

c. Open and close hand and finger movements while snipping paper

d. Repetitive open and close hand and finger movements while cutting

When teaching how to hold scissors correctly, first observe their current skill level. If they have learned some bad habits or techniques, back track to an earlier stage of scissor skill development, moving forward from there.

It is best to catch a child while they are first learning a skill, but we all know that may not be possible. 

The OT Toolbox has a great Cutting with Scissors Program. You’ll find some fun ideas and strategies for every stage of scissor skill learning. There is a great Scissor Skills Book in the shop section of the website.

how to hold scissors: Pre-scissor skills Pinch and release

Before scissor skills can be mastered, young children need to establish the pre-scissor skills of pinch and release. These are preschool scissor skills that are established through play. Similar to the preschool pre-writing skills established in the preschool years, learning to hold scissors starts with grasp and release of small objects in play.

Step one focuses on pre-scissor skills with the use of fun, inexpensive tools that are wonderful for hand strengthening. These teach the hand/finger actions of pinch, squeeze, and release to help learners get ready for being successful holding scissors. 

Tearing or ripping materials is a great way to work on pinch and release. Be sure your learner is not using a gross grasp to twist and rip. Have them work on pinching and tearing with use of the tips of the fingers. If this is too difficult, give a little help by making a slight tear to start with, then encourage them to finish.

Tearing teaches children how to use two hands together in a coordinated manner. Try these activities:

  • tear small squares and other shapes from strips of paper to create a paper salad or pizza 
  • tear small pieces of tape from a roll and stick on an outline
  • tear tissue paper or crepe paper into small squares and pinch up into small balls to make a picture craft
  • tear small pieces from leaves as part of a nature tray
  • rip cotton balls into smaller pieces to create an art piece or stuff a baggie
  • pull apart strips of Velcro to separate the hook side from the loop side

You’ll want to check out this blog post to discover how to tear paper with specific activities that are developed and activities to work on this fine motor skill using just paper and the hands.

Pinching and squeezing can build hand and finger strength, while releasing objects with precision (in hand manipulation) works on the beginning stages of open and close hand actions. 

  • pinch and release small play dough balls into flat pieces called ‘mini-pies’
  • pinch along a play dough log from left to right to make small indentations 
  • pinch clothes pins (this blog post shares several pinch exercises and activities using clothes pins)
  • pinch bubble wrap bubbles to make them pop
  • pinch and squeeze small sponge squares to wring out water
  • pinch the end of a craft stick and play tug-o-war with a partner
  • pinch and release coins into a bank, change it up and alternate with coins, buttons, and game chips
  • pinch and stack blocks or mini-erasers
  • blow bubbles and attempt to pinch and pop small bubbles in the air

Also check out this blog post on pincer grasp activities for precision of pinching activities.

This resource on hand strengthening activities covers additional scissor skills for preschoolers to develop for holding scissors correctly.

Scissor grasp strategies and activities to teach kids how to hold scissors.

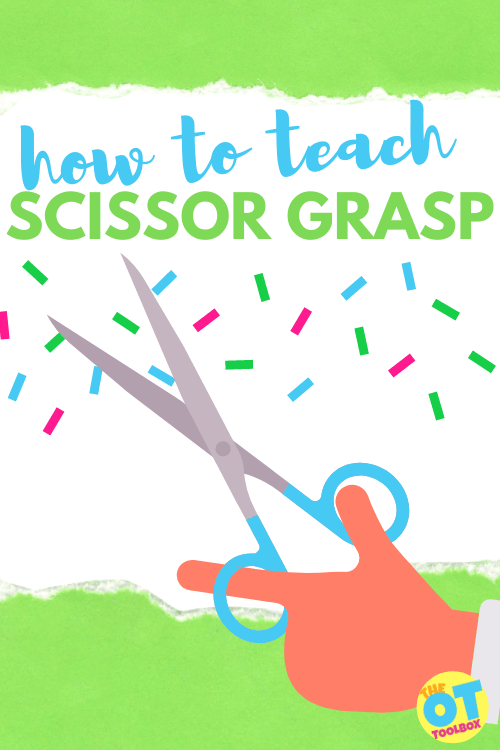
Scissor Grasp

Teaching kids how to hold scissors can be difficult. Placing scissors in the loops can be a test of visual perceptual skills and fine motor skills. To help with holding scissors, you can break the process down into several areas: thumb positioning, placement of the other fingers in the loops, and wrist positioning.

When it comes to scissor grasp, you can use additional supports to ensure proper, or functional, finger placement on the scissors.

First, let’s go over a point about functional scissor grasp.

Functional Scissor Grasp

Much like a functional pencil grasp, scissor grasp should be functional as well. What is meant by this is that not all scissor grasps may look the same. One child may hold the scissors with the pointer finger, or index finger through the guiding loop and others may place both the index finger and the middle finger through the guiding loop of the scissors. What is most important is that the child is able to cut age-appropriate shapes, materials in an effective, efficient, and safe manner.

A functional scissor grasp might look differently for each individual. But if a middle school student is able to cut worksheet items, coupons on the lines, cut gift wrap, or other materials in order to learn, function at an age-appropriate level, with safe use of the scissors, then you have functional scissor grasp. Focusing on precise placement of the fingers on the scissors isn’t necessarily an important area of focus.

However, when teaching scissor grasp, there are important things to keep in mind.

How to Teach a Thumbs Up Scissor Grasp

When it comes to grasping the scissors, your learner should use a thumbs-up approach to grasp scissors or the paper being cut.

There are several strategies for teaching kids to hold scissors with “thumbs up”:

  • You can simply just use a verbal cue.
  • Place a sticker or draw a smiley face on the thumbnail to provide a visual cue.
  • Place a sticker or tape on the scissors to visually remind learners of proper scissor placement in the hands.
  • Add a “shark fin” to the thumb scissor loop. The fin should be up when cutting.
  • Playing thumbs-up games, like thumb wars, can help to encourage use of this position with more automaticity.
  • Try these open thumb web space activities to strengthen and mobilize the thumb.

Finger Placement for Scissor Grasp

Let’s look at the other fingers needed for correct scissor grip.

The skill fingers of the hand need to be used to open and close tools, and are essential when working on scissor skill development. Skill fingers are the thumb, index, and middle fingers and they are responsible for grasping, and manipulation of tools.

We covered the thumb positioning on the scissors above, but the placement of the other fingers can be where holding scissors correctly gets a little sticky.

Pointer Finger Placement- Most often the first finger stays out of the scissors’ loops. It is used to “point the way.” When the pointer finger is positioned around the bottom loop rather than inside the loop, it helps to guide the scissors. This opens up the arches of the hand, especially for your learners with small hands. This may feel awkward at first, but will soon become a habit.

Middle, Ring, and Pinky Finger Placement- Placement of the remaining fingers depends on the type of scissors used. Some scissors have a small circle loop that require only the middle finger to go through the loop while the ring and pinky finger are tucked into the palm. Other scissors have a larger bottom loop that allow the middle, ring, and pinky fingers to all fit in the loop.

The main job of the ring and pinky fingers are to stabilize the scissors. They curl into the hand to help stabilize, supporting the arch of the hand, much like in a pencil grasp. This is where motoric separation of the sides of the hand is important, much like in holding a pencil or crayon. To encourage your learner to keep the stability fingers curled into the palm, give the child a small pom-pom ball to hold in their palm with the ring and pinky fingers while the skill fingers work.

When teaching young children to hold scissors, it is best to use a pair of scissors and stick to that scissor type to reduce confusion between holding patterns.

Wrist Position when Holding Scissors- A stable wrist is needed to ensure a functional grasp on the scissors. If the wrist is bent, the scissor blades will not be able to open/close effectively and line accuracy will suffer. The wrist should be positioned in a neutral position, and not flexed (bent forward) or extended (bent backward). This blog post on wrist stability covers activities to address this motor skill.

Elbow and Forearm Position- Always check the child’s elbow position when using scissors to cut.  Their elbows should be by their sides and not winging outward.  You can use a hack trick by having the child hold a piece of paper under their cutting arm while cutting.  Tell the child to be careful and not let the paper fall!

Activities for holding scissors: addressing open-close

Next, we’ll look at the scissor skill for the open and close hand movements necessary for correct scissor grip. There are various tools that can be used to promote open and close hand and finger movements while maintaining a grasp and positioning of the scissors.

Tongs or clothespins – Learners can use a variety of tongs to help learn open-close actions. These can be simple kitchen tongs, toaster tongs, (Amazon affiliate link) strawberry huller, clothespins, or something as fun as scissor tongs or bubble tongs.

Show learners how to open and then close tongs to pick up and place small objects such as cotton balls, marshmallows, or pom-poms.  Play a game to race and fill a small container. Learners can use clothespins to hang up socks or washcloths on a clothesline. These activities will help them understand and learn the concept of open and close before transitioning to actual scissors.

Pickle Picker– A (Amazon affiliate link) pickle picker is a therapist favorite when it comes to building strength and stability in the thumb and arches of the hand. To use a pickle picker as a therapy tool, one needs to maintain a stable wrist, isolate the thumb to slowly press down on the plunger of the tool. To lower the claws of the pickle picker, you need to add force through the thumb with a stable hand in order to grab a small object. Then, to grasp the item, you need to slowly release force through the thumb allowing for graded release. We use pickle pickers to grab and sort craft pom poms, mini erasers, and other small objects (not just pickles!) Pickle pickers are a great eye-hand coordination and strengthening tool to use with our craft pom pom activity sets.

Hole punch – Children can use a hand-held hole punch to punch holes in paper. You can use a regular hole punch or you can use festive hole punchers that have different shapes like hearts, stars, and raindrops. Use the hole shapes to paste on paper and create fun bugs, snow scenes, or fireworks. This activity will help build hand strength and work on the open-close hand action.

Water squirters/Spray Bottles– Practice grasping and releasing the trigger on water squirters using the skill fingers to pull the trigger.  Show them how to make the water come out to spray on objects such as dirty toys, chalkboards, pavement, and sidewalks. This helps to strengthen the fingers and hand and teach grading their movement patterns. Be mindful how parents feel about squirters that resemble weapons. Choose animal shaped squirters or spray bottles instead.

Mini staplers – Use mini-staplers to work on similar movements needed with scissor use – grasp, squeeze, and release. Color the staples with a permanent marker or buy the staples in different colors to make the activity more fun! This works on hand and finger strength as well as open and close.

Eyedroppers – Play with eyedroppers to squeeze water drops onto coins, or colored water onto coffee filters or paper towels. This works on finger strength, grading their movement through proprioception, and finger movements.

Wind-up toys – Try wind-up toys to work on bilateral hand use with one hand holding the toy while the other hand twists the crank. Bilateral hand use is needed for cutting with scissors.

Finger game songs – Play finger game songs to work on separation of the two sides of then hand. Try The Itsy-Bitsy Spider, Two Little Blackbirds, Where is Thumbkin, and Open Shut Them. Want other finger rhyme ideas? Grab the free Favorite Finger Play Rhymes and Songs at Your Kids OT website. These work on finger and hand movements needed for holding scissors.

holding scissors with open-close for snipping

Next, let’s look at holding scissors and working on open-close motion with snipping movements. This is a good how to hold scissors preschool activity to use when teaching young children to cut and maintain a functional hold on the scissors. At the preschool and Pre-K age, snipping with scissors is age appropriate.

You can first approach snipping by performing some fun warm-ups using the correct hand position and motion without scissors in hand. Then move to doing these same movements while holding the scissors, without cutting anything yet. Focus on having them learn to hold scissors correctly.

When first introducing the scissors to your learners, start with correct finger placement and orientation of the scissors. A mature way to hold scissors looks like this:

  1. The thumb goes inside the top loop of the scissors.
  2. The middle finger goes into the bottom loop of the scissors. 
  3. The index finger goes on the outside of the bottom loop to stabilize and provide directional control of the scissors. (As a visual cue, you can place a sticker or dot on the exterior of the bottom loop for where the index finger holds the loop.)
  4. The ring and pinky fingers go curled into the palm.
  5. The wrist is slightly rotated inward as the thumb is up.
  6. The assisting hand holds and manipulates the paper. 

If the learner is a beginner cutter, the index and middle finger can go into the bottom loop at the same time, until their grasp becomes more mature and the index finger can shift to the exterior of the bottom loop. 

Keep in mind leaving the first finger out of the loop will open up the hand arches for easier cutting. A tip for the placement of the middle finger in the bottom hole: rest the scissor handles on the middle knuckle of the middle finger (the one closest to the fingertip).

Prevent the child from shoving their fingers into the loops all the way down to bottom knuckle as this makes it very difficult for the child to open and close the scissors skillfully.

Poem to Teach Scissor Grasp

Here’s a fun poem to help a child remember where their fingers go in the scissor loops:

Thumb on top,

two below,

two get curled,

and away you go!

  • Don’t forget that a visual cue with use of a sticker or smiley face drawn on the thumbnail, along with a pom-pom ball curled into the palm with the ring and pinky fingers, can be used to assist with correct scissor grasp.

Here are some fun activities for holding scissors:

  • Pretend their fingers or scissors are: a train using “choo-choo” as open and close verbal cues.
  • How about a car using “beep, beep” as open and close verbal cues (you can draw headlights on the tips of the scissor blades and play an open-close game).
  • Or a crocodile and use “chomp, chomp” as open and close verbal cues (you can draw teeth and an eye on a pair of scissors and play an open-close game)
  • Exercise those scissor holding fingers by doing open and close movements like the ASL (American Sign Language) hand sign for scissors

Snipping activities for learning to cut with scissors

This involves the use of scissors and singular snipping of objects to work on initial development.  Snipping movements begin as random snips with simple open and close of the blades, and as skill improves advancing to snipping with more control.

Snipping Activities:

  • Pretend the scissors are a crocodile, train, or car and work on random snipping
  • Snip play dough that is rolled into a log or snake form, Playdoh barbershop is a great tool for snipping!
  • Cut straws, yarn, tape, packing peanuts, small strips of paper into pieces, small bands of paper can be snipped to rescue an item in a box
  • Go outside and trim the grass by snipping it with the scissors
  • Paper or yarn can be cut, that is part of a fun craft such as haircut, pizza, snowman, critter rescue
  • Try thicker paper (cardstock, construction) or thinner copy paper around the edge to create fringe while working on the helper hand holding and manipulating the paper. This resource covers the progression of paper grades to support cutting skills.
  • Snip on lines drawn around the edge of a paper plate or on small strips of paper to begin snipping with more control and precision of the scissors
  • Place stickers along the edge of paper or index cards and have the child chomp through the stickers with snipping action

If you are look for even more cutting ideas, activities, and strategies, explore these other blog posts here at The OT Toolbox: Scissor Skills, Creative & Fun Ways to Help Kids Cut with Scissors, and The Ultimate Guide to Scissors Skills.

how to hold scissors with repetitive open-close for cutting

The final skill is the repetitive open and close hand and finger movements, moving forward with the scissors to cut with control and precision on cutting lines.

This begins with straight lines, advancing to curved lines, circle shapes, to angled lines and shapes with corners. All of these require good bilateral hand use with the assisting hand to advance and turn the paper. 

Thicker lines are the easiest for early scissor learners to manage, while thinner lines are for more advanced learners, who have developed more control and precision with scissor use. 

The OT Toolbox has you covered with a Printable Pack for Practicing Scissor Skills!

  • Consider the paper and materials used while teaching scissor skills as thicker paper such as cardstock and construction paper may have more stability, while copy and tissue paper is flimsier making it harder for a younger kiddo to manage.  

Below is a progressive list of lines and shapes to work on cutting. They are ordered easiest to most difficult, as the child gains more skill. 

  • Short straight lines
  • Long straight lines
  • Short curved lines
  • Long curved lines
  • Short angled lines
  • Long angled lines
  • Simple shapes
  • Complex shapes

Modifications to help correct scissor grip

Modifications and adaptations sometimes cannot be avoided, often becoming necessary to achieve a consistent and functional grasp.

There are many modifications that can be made to help learners be successful with finger placement, keeping bad habits from forming. Try these before jumping into adaptive scissors:

  1. Draw a smiley face on the thumbnail or the thumb to provide a visual cue for thumbs-up.
  2. Glue googly eyes, draw a face, place a sticker, or wrap a piece of tape on the exterior of the thumb hole to cue the child to orient the scissors properly and for correct thumb placement.
  3. Use permanent marker to draw a line on the exterior of the scissor blade that needs to be on top, which is the thumb hole side. They should see this line while cutting.
  4. If the bottom loop is too large and encourages the child to place many fingers in the loop, you can tape up part of the loop providing a blocker for the other fingers. 
  5. Wrap a rubber band around the base of the blades to prevent the child from ‘chomping’ the paper and instead promote a snipping movement as the band prevents full opening of the scissor blades. 
  6. With the same idea as above, you can wrap just the bottom handle with a rubber band and this prevents complete closure of the blades to also work on snipping. 
  7. Create a sock glove that has holes in it for the thumb, index and middle fingers while the ring and pinky fingers must stay curled inside the sock.

One last thing, PLEASE use left-handed scissors with left-handed kiddos. Do not force these children to cut with right-handed scissors.  It is easy to purchase left-handed scissors for kids.  Yes, it matters!  So, get some for your clinic or your classroom and please use them!! 

*Editors note: Left handed children can and will learn to adapt to right handed scissors. Unfortunately it is a right handed world, and lefty scissors are not always available. Unless they are going to carry lefty scissors around with them forever, it is easier to learn with something more mainstream.

Regina Allen

Regina Parsons-Allen is a school-based certified occupational therapy assistant. She has a pediatrics practice area of emphasis from the NBCOT. She graduated from the OTA program at Caldwell Community College and Technical Institute in Hudson, North Carolina with an A.A.S degree in occupational therapy assistant. She has been practicing occupational therapy in the same school district for 20 years. She loves her children, husband, OT, working with children and teaching Sunday school. She is passionate about engaging, empowering, and enabling children to reach their maximum potential in ALL of their occupations as well assuring them that God loves them!

*The term, “learner” is used throughout this post for readability, however this information is relevant for students, patients, clients, children of all ages and stages or whomever could benefit from these resources. The term “they” is used instead of he/she to be inclusive.

Looking for tips and tools from pediatric occupational therapists and physical therapists to help with all things scissor skills? The Scissor Skills Book is a comprehensive resource that covers all aspects of development related to cutting with scissors.

If you’re a parent who is reluctant to let your child cut with scissors…

If you’re a teacher who is tired of watching students snip their crafts and worksheets into tiny pieces…

If you’re a therapist looking for creative ways to promote scissor skills in your treatment sessions…

This book is for you!

Written by a team of 10 pediatric physical and occupational therapists with years of experience in the field, The Scissor Skills Book is the ultimate resource for tips, strategies, suggestions, and information to support scissor use by kids.

Click here for your copy of The Scissor Skills Book!