Development of Oral Motor Skills

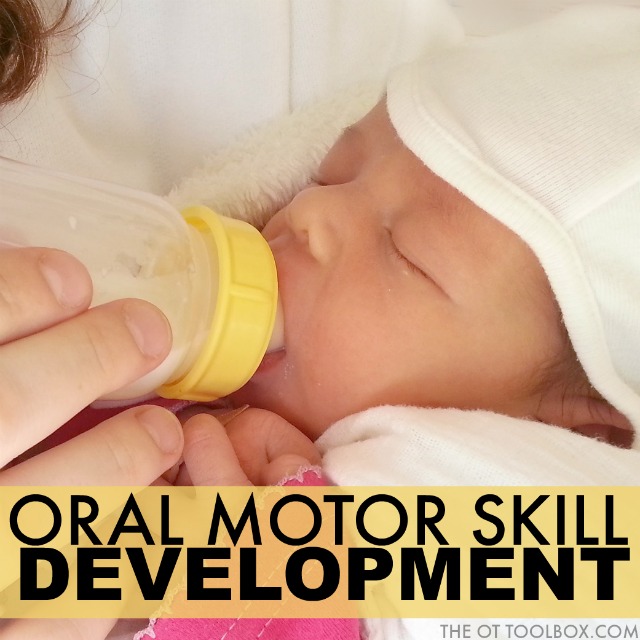
Wondering about oral motor skills development or where to start with oral motor therapy? Below you will find information related to the development of oral motor skills. This oral motor development information can be used to guide oral motor exercises and oral motor skills for feeding. If you are looking for resources in infant feeding therapy, having an understanding of the development of the motor skills needed for this functional task is pivotal!

 
Use this guide on development of oral motor skills to address oral motor skill therapy and as a guideline to develop oral motor exercises in oral motor therapy.

Development of Oral Motor Skills

Oral motor skills are the finest of the fine motor skills we develop as human beings. It begins in the womb, and is fully developed and established by 3 years of age. Like many other skills we learn, oral motor development is supported by primitive reflexes, postural control and other physiological milestones developing in synchrony. When the synchrony is broken, problems arise.

Oral Motor Skills: Where it all Begins

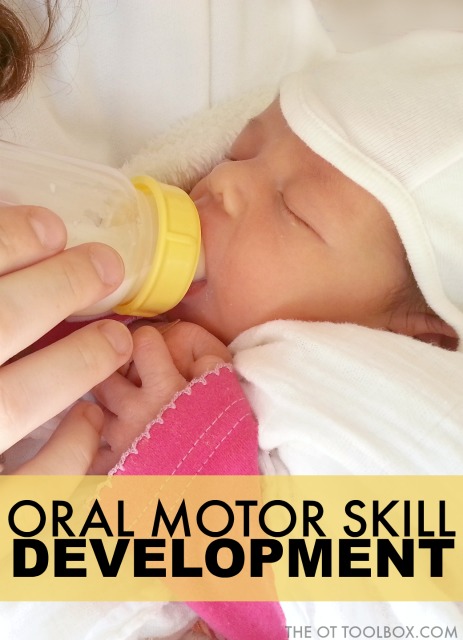
Oral motor skills start in the womb with the development of primitive reflexes that support feeding at full term. It is important to note that these reflexes develop in the 3rd trimester between the 28th week and the 37th week gestation. When working with a pre-term baby, these reflexes have not developed and successful feeding will require higher levels of support from an outside source.

Reflexes Established by Term:

* Gag reflex
* Rooting reflex
* Transverse Tongue Reflex
* Non-nutritive sucking
* Nutritive sucking
* Coordinated suck/swallow/breath
* Swallow reflex
* Phasic bite reflex
* Palmomental reflex
* Sucking patterns are non-volitional

A full term infant is ready to breast or bottle feed with the above supports in place.

Oral Motor Skills Birth to 3 Months of Age

As reflexes begin to integrate, feeding becomes more and more voluntary, and less of a non-voluntary response to stimuli from the breast or bottle. This occurs in a full term infant around 6 weeks of age. This is important to note, as unsuccessful feeding in the first 6 weeks of life, can set the tone for developing eating patterns throughout life.

Oral Motor Skills and Feeding at 3 – 7 Months of Age

By 4 months of age, most infants have gained fair head control and are able to remain in an upright position with support, and parents are beginning to introduce puréed foods. As they have grown, the anatomical structure of their jaws and tongues have dropped forward to support munching patterns. They also may open their mouth when a spoon is presented and are able to manage thin purees with minimal difficulties.

Oral Motor Pattern 3-7 Months

* Munching patterns
* Lateral jaw movement
* Diagonal jaw movement
* Lateral tongue movement

The development of these patterns allow infants to be successful with thin and thick purees, meltables and soft foods such as banana and avocado.

Oral Motor Skills and Feeding at 7-9 Months of Age

Between 7 and 9 months of age, infants are now moving into unsupported sitting, quadroped and crawling. This development supports jaw stability, breath support and fine motor development for self feeding skills. Infants at this age now begin to be able to successfully manage “lumpy” purees, bite and munch meltables and softer foods with assistance and the development of rotary chewing begins.

Oral Motor Patterns 7-9 Months of Age

* Lip closure
* Scraping food off spoon with upper lip
* Emerging tongue lateralization
* Movement of food from side to side

The above skills are clearly noted during the 7-9 month age range. If these skills are missing, eating a larger variety of textures will become difficult.

Rotary Chewing

Rotary chewing is broken into stages. The first stage being diagonal rotary chewing, and the second being circular rotary chewing.

Diagonal Rotary Chew

Diagonal rotary chewing is when the jaw moves across the midline in a diagonal pattern and comes back. This type of chewing often looks like an X from a frontal view.

Circular Rotary Chew

As the child develops, a circular rotary pattern emerges. In this pattern, the child’s jaws line up, slide across, jaws line up, and slide across again, looking like a circle from a frontal view.

Rotary Chewing Supports

Rotary patterns begin emerging around 10 months of age. The child at this time is also developing dissociation of his head from his body. This supports increased independence with biting pieces of food, lateralization of a bolus across the midline, and decreased spillage from the lateral sides of the mouth.

Oral Motor Skills at 12-15 Months of Age

By 12 months of age, the child has developed the oral motor basics to support feeding. As time goes on, the child will practice these skills resulting in less messy eating and the ability to handle more challenging foods. At this age, a child is able to manage foods with juice, and chew and swallow firmer foods such as cheese, soft fruits, vegetables, pasta and some meats.

Oral Motor Skills at 16-36 Months of Age

Between 16 and 36 months of age, the child continues to develop their jaw strength, management of a bolus, chewing with a closed mouth, sweeping of small pieces of food into a bolus, and chewing ‘harder’ textured foods such as raw vegetables and meat. A full circular rotary chew should also be developed at this time to support eating all varieties of foods.

Impact of Delayed Oral Motor Skills

Oral motor skills play a large role in a child being a successful eater and having a positive experience with food. When a skill is missing, feeding becomes difficult and stressful for everyone involved. By assessing where the delay in skill is, new skills can be developed successfully, leading to an efficient eater.

Read here about oral motor skills and the sensory components that play into picky eating and problematic feeding.

Looking for more information on oral motor problems? You’ll love these oral motor skill resources: 


Oral motor skill development in kids and how development of oral motor skills translates to feeding problems

Play Dough Hand Strength Astronaut Activity

Today I’ve got a fun astronaut theme play dough hand strength activity. There are so many fine motor benefits to using play dough mats in occupational therapy. And, actually, there are documented benefits of play dough itself as a therapy tool. We’ve had an intrinsic hand strengthening play dough mat on the website for a long time. It’s been one of our most popular fine motor resources ever since it was uploaded! There is a reason why: Kids need to strengthen fine motor skills, badly! It seems like there are more and more students who struggle with the necessary fine motor skills needed for a functional pencil grasp and other skills. They need hand strength!

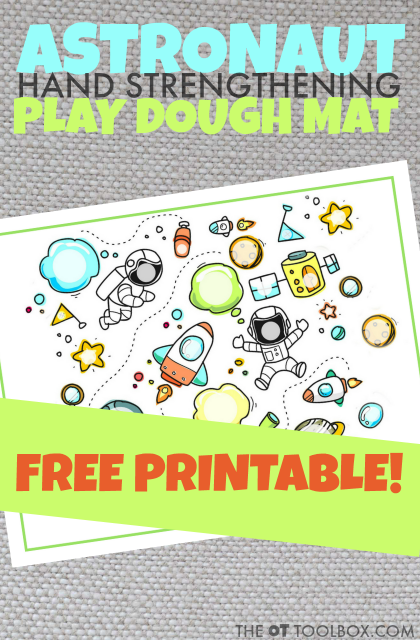
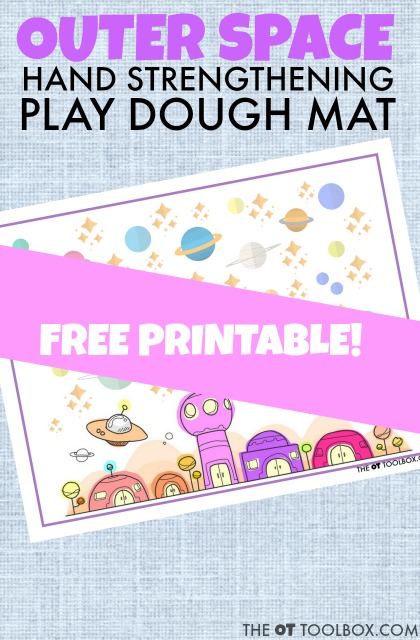
Use this astronaut play dough mat to work on intrinsic hand strength with play dough to build hand strength kids need for fine motor activities, all with a fun play dough activity!

Intrinsic Hand Strength with Play Dough

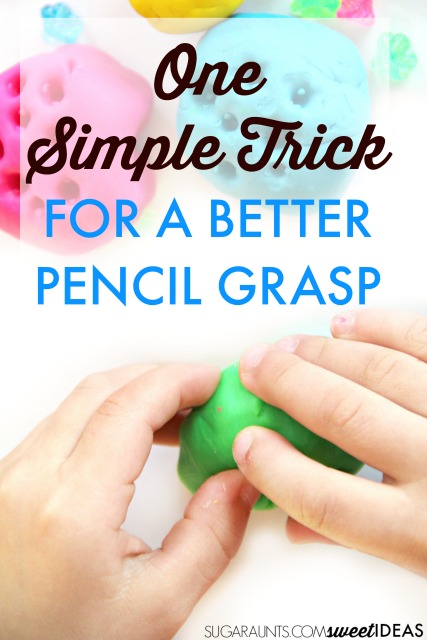
Using play dough, show the child how to roll a ball of play dough within one hand, using only the fingertips and thumbs.

This promotes development in a variety of areas: 

  • It strengthens the arches of the hands, helps awareness and coordination in separation of the two sides of the hand (finger strengthen exercises through play!)
  • Promotes finger isolation for improved control and dexterity
  • Encourages dexterity and coordination of the thumb and index finger which are important in pencil grasp,
  • Strengthens the intrinsic muscles for improved endurance in fine motor tasks such as maintaining hold on a pencil, manipulating clothing fasteners, managing and using scissors, coloring, and many other tasks.

Because the simple play dough mat offered on this site has been such a need and so successful, We wanted to share a few other play dough mats that can also be used to encourage and develop these fine motor skills.  

A the bottom of this post, you’ll find more ways to improve hand strength with play dough using free playdough mats.

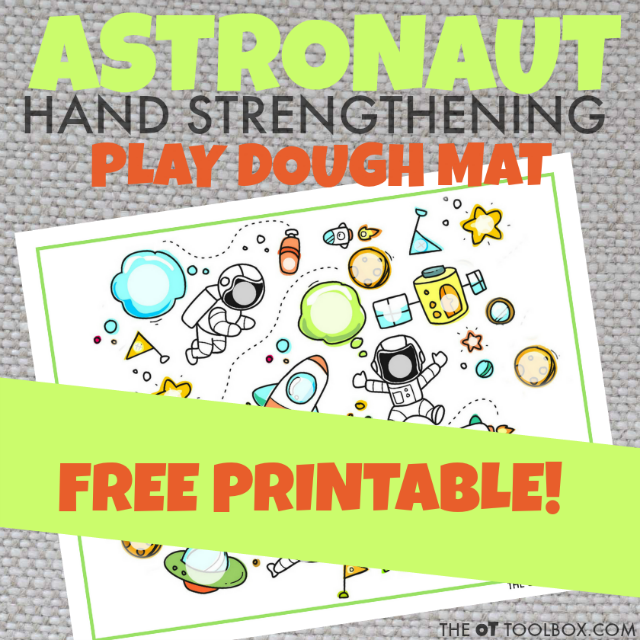
Today we’ve got an Astronaut themed play mat. This mat is nice for incorporating into a space theme or for any child that just loves all things space!  

 For this play dough mat, you can ask children to pull off a small piece of play dough and roll it in their hand using only the fingers and thumb of one hand. To encourage intrinsic hand strength, dexterity, coordination, and endurance of the intrinsics, it’s important to use just that one hand. It’s part of the challenge!  

Other uses for the play mat can include rolling the playdough with the palms of two hands. That’s a great activity too and fits perfectly with many children’s fine motor needs.

Play Dough Mat for Intrinsic Hand Strength

To use this play dough mat over and over again, add a layer of reusability by laminating the paper or slipping it into a sheet protector sleeve. There are different sizes of circles on the mat all with an astronaut theme. Each sized circle , requires the child to roll small or large play dough balls.  This encourages more refined intrinsic muscle use and improved dexterity of the hands.

You can use the mat in several ways:

  • Allow the child to fill the circles with play dough with random colors of play dough
  • Assign different sized circles to different colors of play dough.  This provides a visual scanning component to the activity
  • Write numbers or letters in the circles, providing a visual scanning and letter order cognitive component

Need more hand strength ideas? 

It’s my hope that these resources are a huge help for you! Here are a few more topics related to strength in the hands that you may need in your therapy toolbox: 
Graded Precision in Grasp 


Occupation-Centered Neat Pincer Grasp Activities 


Strengthen Tripod Grasp with Every Day Items 


DIY Clothespin Busy Bags to Strengthen Pinch 


Clay Strengthening Exercises 


Handwriting Warm-Up Exercises 


The Ultimate Guide to Fine Motor Strength

More themed Play Dough Mats

Here are more free play dough mats available:

Here are more free play dough mats that you can print off and use to work on hand strength endurance, and fine motor skills:

Free Ice Cream Play Dough Mat

Free Bird Play Dough Mat

Free Toys Play Dough Mat

Free Astronaut Play Dough Mat

Free City Skyline Play Dough Mat

Astronaut Play Dough Mat

Want to print off this astronaut play dough mat? Enter your email in the form below. You’ll receive an email with a link to access the file.

FREE printable Astronaut themed play dough mat to help kids strengthen the intrinsic muscles of the hands!

    We won’t send you spam. Unsubscribe at any time.
    Kids will love this astronaut play dough mat for building hand strength of the intrinsic muscles using play dough and this astronaut theme play dough mat, perfect for play dough activities and astronaut activities!


    Colleen Beck, OTR/L has been an occupational therapist since 2000, working in school-based, hand therapy, outpatient peds, EI, and SNF. Colleen created The OT Toolbox to inspire therapists, teachers, and parents with easy and fun tools to help children thrive. Read her story about going from an OT making $3/hour (after paying for kids’ childcare) to a full-time OT resource creator for millions of readers. Want to collaborate? Send an email to contact@theottoolbox.com.
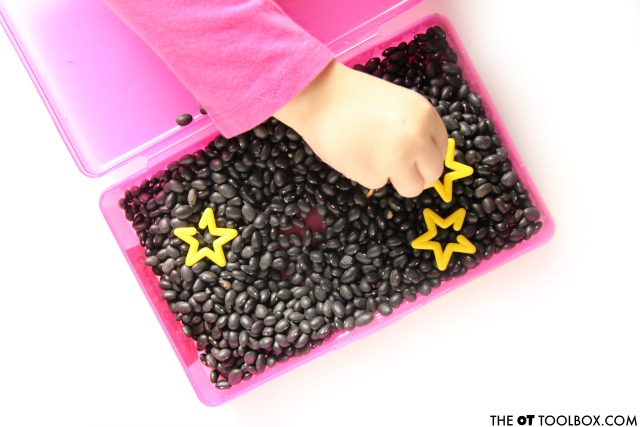
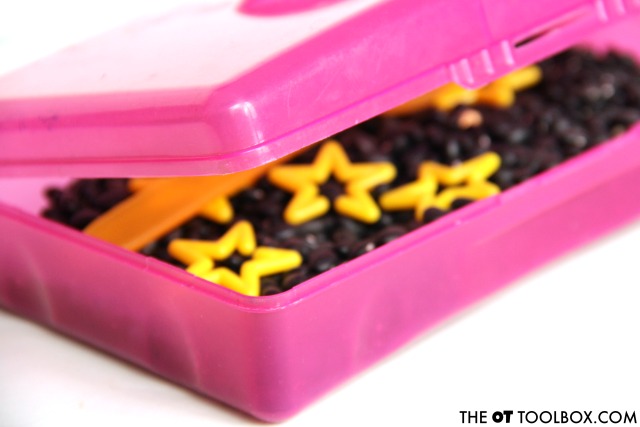
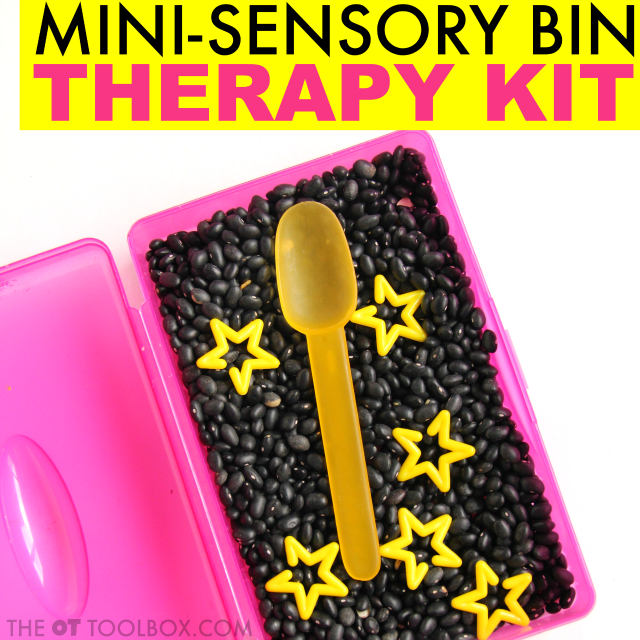
    Mini Star Sensory Bin

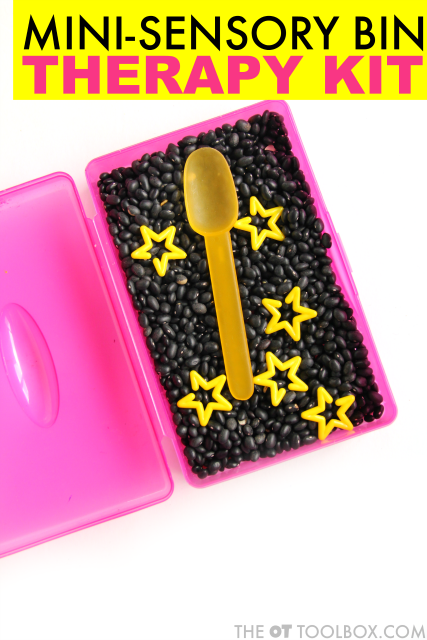
    A themed sensory bin can be just the item needed to address fine motor skills through tactile sensory play and tactile exploration with a themed twist. This mini sensory bin does just that with a starry night theme. This miniature version of a sensory bin can be tossed into a therapy bag for a fresh sensory activity!
    Make a mini star sensory bin and use it to address fine motor skills, bilateral coordination, eye-hand coordination, and other skills as part of an occupational therapy activity kit bin rotation system while addressing therapy goals with kids.

    Mini Sensory Bin Activity 

    Affiliate links are included in this post. 
    We’ve done plenty of sensory bins here on The OT Toolbox. From water sensory bin play to tactile play using mediums like rocks, sand, or even clay…exploring various sensations through pretend play and exploration is fun in a way that encourages fine motor skills, eye-hand coordination, bilateral coordination, graded grasp and release, crossing midline and much more!
    Check out this sensory bin we made that is perfect for addressing stress and self-regulation.
    Use star chain links to work on therapy goals like fine motor skills and sensory needs with a mini star sensory bin.

    This mini sensory bin can be used for so many underlying goal areas: 

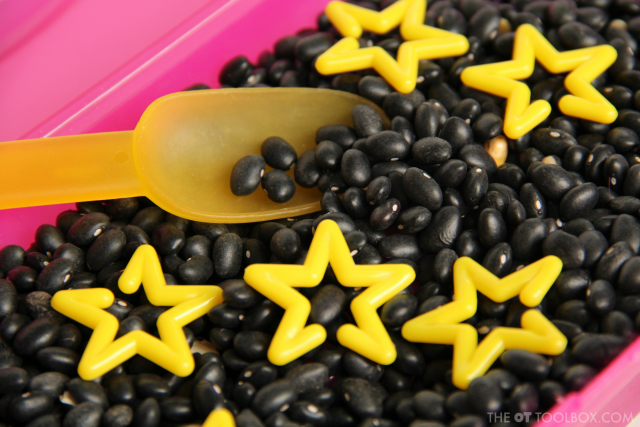
    Pincer grasp- We used dry black beans as a sensory bin medium. Kids can explore and move the beans within the bin while building a pincer grasp as they hold and manipulate individual beans. Ask the child to pick up a single bean to count or to place within the star-shaped chain links.
    In-Hand Manipulation- Use the black beans to boost the essential skill of in-hand manipulation as they hold and move a small handful of beans with in the hand. Ask the child to hold beans in their hand as they slowly drop one or a few beans at a time into the lid section of the bin. They can fill in the star chain links while working on this skill. 
    Bilateral Coordination- Connect the star chain links together while addressing and improving tripod grasp, arch development, while allowing both hands to work together in a coordinated manner. 
    Scooping and precision- Use a spoon or other utensil to refine the skills needed to move, scoop, transfer, and pour the beans into the lid section of the bin. Read more about developing and refining scooping, pouring, and transferring here.
    Use star chain links to work on therapy goals like fine motor skills and sensory needs with a mini star sensory bin.

    How to Make a Mini Star Sensory Bin

    We used just a few materials to make this mini star sensory bin for tactile sensory input and fine motor play:
    Spoon
    This is such a versatile and easy sensory bin to put together. Just pour 1-2 cups of dry black beans into a bin. Add the chain links…and play! 
    Add this sensory bin into a therapy bag or add it to a therapy bin rotation
    Use star chain links to work on therapy goals like fine motor skills and sensory needs with a mini star sensory bin.
    Looking for more sensory play that boosts underlying skills? Try these ideas:
     S Themed sensory bins sticks and stones sensory play Water Bead Pretend Tea Party Liquid Chalk Driveway Sensory Play Circus Sensory Bin


    Looking for more occupational therapy kits that can be used in a bin rotation in therapy? Here are lots of ideas:

    Make a mini star sensory bin and use it to address fine motor skills, bilateral coordination, eye-hand coordination, and other skills as part of an occupational therapy activity kit bin rotation system while addressing therapy goals with kids.

    Toy Theme Play Dough Mat Thank You

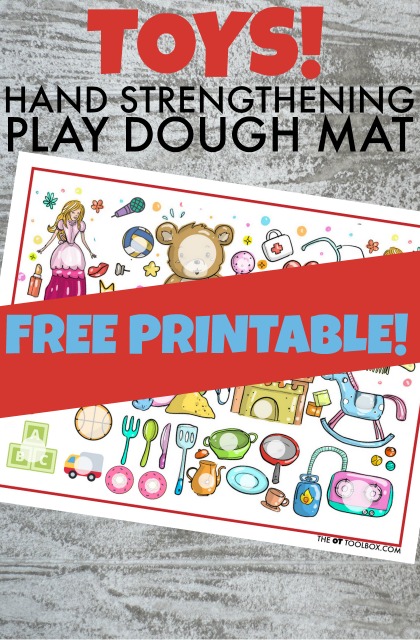
    Thank you for grabbing our Toy Themed Play Dough Mat! You should have an email in your inbox right now with a link to access the file. 

    Did you find this page accidentally and want to get your free copy of our city themed playdough mat? Go to our toy play dough mat page to get your free toy theme play dough mat!

    The email also includes some instructions and the “why” behind play dough mats like this one. There is a lot of development going on when a little one uses a play dough mat like the one you just accessed! Scroll below to to find some additional instructions to best use the play dough mat to increase hand strength of the intrinsic muscles of the hands.


    You will love this Free Play Dough Mat with a Toy Theme to build fine motor skills!


    How to use your free printable play dough mat and General Housekeeping Information on your Free Printable:


    If you do not see the email right away, check back within 30 minutes. Be sure to check your SPAM folder.  Other subscribers using an email hosted on a school system’s email provider may have security restrictions in place that block the email. If you still don’t see the email, shoot me a message at contact@www.theottoolbox.com and I will send the file to you directly.

    If you arrived here by accident and would like to receive a free toy themed play dough mat to improve hand strength, check out this post that shares information on the Toy Themed Play Dough Mat.


    You are going to build so many small muscles of the hand with this activity!

    1. To use this play dough mat, you will first want to cover it with a plastic surface so you can use it over and over again. Some ideas to do this include (Amazon affiliate links are included below):


    • Cover it with clear contact paper. Click the link to purchase a large roll of clear contact paper.
    • Slide the play dough mat into a clear plastic page protector sleeve. Add it to a folder workbook or binder booklet of play dough mats for quiet time or a busy bag-type of activity.
    • Use a laminator to cover the play dough mat with a laminated surface that can be used over and over again. This is a great price on a quick laminator and laminating pouches.
    • Use pocket sleeves to create a quiet time or fine motor center activity.


    2. Once the play dough mat is covered, provide the child with play dough, clay, foam dough, or other moldable material.


    3. Ask the child to roll small balls of play dough using just the fingers and thumb of one hand. They should use their dominant hand to roll small balls of play dough with the tips of the fingers and thumb. This is an AWESOME hand strengthening exercise for kids. 

    4. Ask the child or children to roll various sizes of play dough so the balls of dough fit into the various circle sizes on the play dough mat. 

    Play Dough Mats Can Be Used to Improve Fine Motor Skills

    Kids love play dough! This toy play dough mat is a fun way to build so many small muscles of the hand with this activity! Follow the directions below to maximize intrinsic muscle strengthening. Start with play dough of any kind and the printable playdough mat.

    Rolling play dough within one hand promotes development of a variety of areas: 

    Strengthens the arches of the hands, helps awareness and coordination in separation of the two sides of the hand

    Promotes finger isolation for improved control and dexterity

    Encourages dexterity and coordination of the thumb and index finger which are important in pencil grasp

    Strengthens the intrinsic muscles for improved endurance in fine motor tasks such as maintaining hold on a pencil, manipulating clothing fasteners, managing and using scissors, coloring, and many other tasks.


    Looking for more play dough activities to boost fine motor strengthening? Use these play dough recipes with your toy theme printable play dough mat:

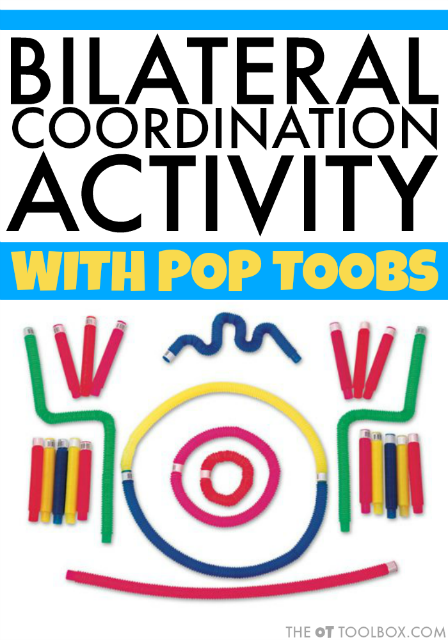
    Bilateral Coordination Activity Using Pop Toobs

    Below, you will find a blog post on a bilateral coordination activity using Pop Toobs. This fine motor bilateral coordination activity can address a variety of fine motor skills in kids including those bilateral coordination skills needed for tasks like handwriting, scissor use, shoe tying, and much more. This article was written by The OT Toolbox contributor author, Christina Komaniecki, OTR.

    Work on bilateral coordination activity using pop toob toys to improve fine motor skills.

    Bilateral Coordination Activity

    This post contains affiliate links.

    Sometimes when I am working with the students at school I have limited resources and have to be creative with what I have (as most OT’s are really good at). One really fun simple activity that I have used with students of all ages includes using tongs, a pop toob and small objects (pom poms, little erasers, tiny plastic animals etc.). Since using tongs can get boring for children fast, there is always ways to make it more enjoyable. Check out these other fun Occupational Therapy Activities Using Tongs.

    Being able to perform bilateral coordination tasks is important in everything we do! Think about a child writing, cutting with scissors, completing fasteners, washing their hair, even making cookies requires bilateral coordination.

    Components of Bilateral Coordination

    There are three components to bilateral coordination which include reciprocal movements, symmetrical movements and using a dominant hand and a helper/supporting hand to complete tasks.

    Bilateral Coordination Activity Using Pop Toobs

    Working in the school lots of children I work with have a difficult time using their helper/supporting hand to stabilize paper when handwriting. Or when using scissors to cut with they won’t bring their other hand to hold the paper. This is why this activity is great to work on
    to target a variety of skills, eye hand coordination, bilateral coordination and fine motor skills.

    This activity works on using a helper/supporting hand to hold the pop toob while the other hand holds the tongs. This is great for children who have a hard time with stabilizing paper when cutting or handwriting, because it has them use both hands for the activity and it cannot be done with just one.

    Materials needed for bilateral coordination activity with Pop Toobs

    • Pop toob
    • Containers, ice tray, bucket
    • Tongs-varying sizes depending on the size the child’s hand and size of object being picked up
    • Here are some tongs that vary in size:
    • Wooden tongs- works on finger position and grasp
    • Jumbo tweezers-facilitate an open web space and proper grasp
    • Mini alligator tongs and Teeny weenie tongs-perfect for little hands, to help build intrinsic muscles and proper grasp.
    • Small objects
    • Tiny plastic animals
    • Pom poms
    • Coins
    • Beans
    • Small erasers
    • Noodles

    Work on bilateral coordination using pop toobs toy.

    Directions for Bilateral Coordination Activity

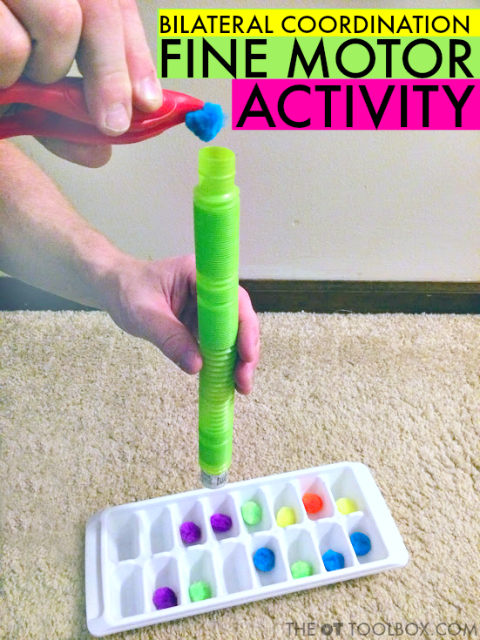
    Start by having the child hold the pop toob in one hand. Then using tongs, they will pick up an item with the other hand and have to place it over the top on the tube, open the tong and let the item travel down the tube. This activity is great to also work on the fine motor development of the hand.

    More bilateral coordination activities using a Pop Toob

    • An ice tray- use pom poms and have the child move the tube so that the pomp om can fall into a designated space.
    • A bucket of water- use small erasers or small plastic toys and let them travel down the tube into the water and make a splash!
    • A container of beans- a fun way to have noodles travel down the tube fall into the beans and then shake up the container and let the child find the items in the hidden noodles.

    How to grade this bilateral coordination activity:

    To make this activity more difficult use a smaller tube, smaller tongs and smaller objects.

    To decrease the activity, use a bigger tube, large tongs and bigger objects.

    You can also have the child sit or stand when participating in this activity. From what I have seen children really like to stand when doing this.

    About Christina:

    Christina Komaniecki is a school based Occupational
    Therapist. I graduated from Governors State University with a master’s in
    occupational therapy.   I have been
    working in the pediatric setting for almost 6 years and have worked in early
    intervention, outpatient pediatrics, inpatient pediatrics, day rehab, private
    clinic and schools. My passion is working with children and I love to see them
    learn new things and grow. I love my two little girls, family, yoga and going
    on long walks.  

    Love this activity? Here are more bilateral coordination activities that you will enjoy:

     Scooping and pouring fine motor and hand dominance with beads 


    Outdoor Sensory Swing

    outdoor sensory swing

    Today, we have a fun blog post on outdoor sensory swings. Did you ever look at the swings at the park and think about the sensory impact? Sensory swings are typically used in the therapy clinic, a sensory calm down space in schools, or even in homes. But, taking them outdoors to incorporate all of the benefits of nature is a must! Let’s break it down…

    Outdoor Sensory Swings

    Taking sensory diet activities and other sensory play activities into the outdoors is as easy as walking outside! There are so many opportunities for outdoor sensory experiences using the world around us.

    Add a few key components like water, chalk, playground equipment, toys, and tools and you’ve got a sensory gym right in your backyard. While we’ve shared a lot of outdoor sensory diet activities here on The OT Toolbox, there are so many sensory experiences that are just plain fun right outside.

    Using outdoor sensory activities in occupational therapy is a great strategy to support sensory and emotional regulation needs.  

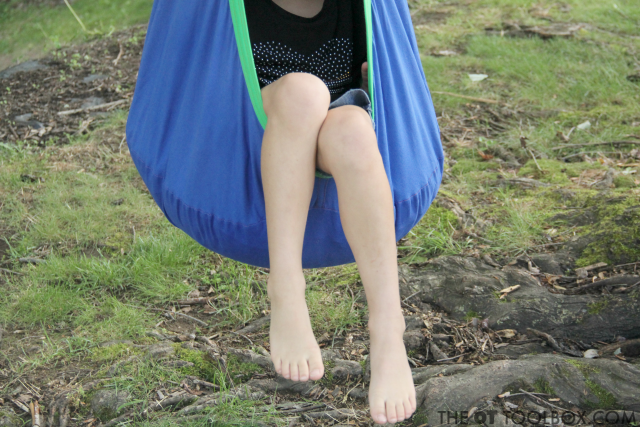
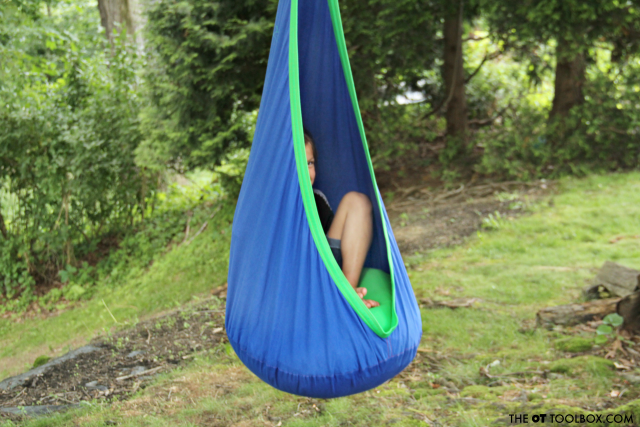
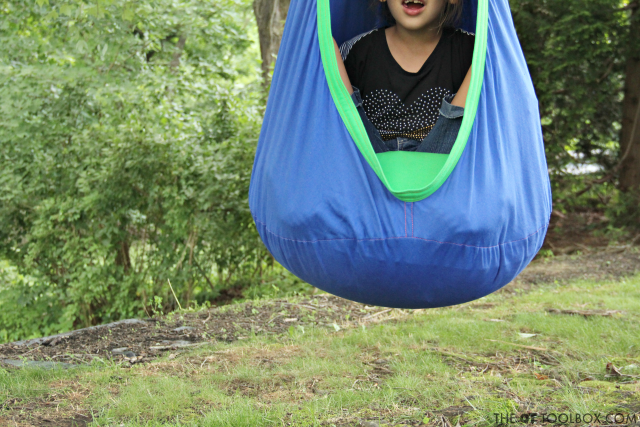
    Today, we’re talking about taking the sensory processing experiences up a notch using an outdoor sensory swing!   We were lucky to try out the (Amazon affiliate link) Harkla Sensory Pod Swing, and it has been a huge hit with my own children.

    The Occupational Therapist in me can’t help but see how awesome this sensory swing is for addressing sensory needs right in the home…and in the backyard!


    Use an outdoor sensory swing for the ultimate sensory experience for kids with sensory processing needs, self-regulation challenges, attention, and more.

    Add an Outdoor Sensory Swing to your Child’s Sensory Diet

    Sensory diets play a huge part in the lives of so many children. Kids with sensory processing needs, attention issues, self-regulation challenges, and other areas. Read more about the goals of a sensory diet looks like in kids and how a tool like a sensory swing can play a part in addressing sensory needs.
     
    In fact, there is much research on outdoor sensory play.

    The fact is, research shows us that some of the developmental and primary tasks that children must achieve can be effectively improved through outdoor play. These include: exploring, risk-taking, fine and gross motor development, absorption of basic knowledge, social skills, self-confidence, attention, language skills, among others.   

    So knowing the benefits of being outdoors when it comes to addressing sensory needs, taking the sensory tools used in a sensory diet outdoors can be the obvious next step.   

    Use an outdoor sensory swing like the Harkla pod swing for calming sensory input when outside.

    Why take a sensory swing outdoors? 

    The outdoors offers so much to our senses naturally. Sights, sounds, tactile experiences, and even air pressure can have a bountiful sensory impact!   

    A bright day can be alerting to the child who struggles with alertness. A warm and sunny day can have a calming effect.  

    A slight breeze can offer a brush with the nerve endings on the skin, alerting the child. It can be a calming change from indoor air.   The feel of grass on a child’s toes can bring awareness and body perception.   

    Background noises can be an opportunity to develop auditory processing skills. In fact, there are many ways to address auditory processing needs through backyard auditory processing activities.   

    Ambulating to a sensory swing area is an opportunity to address balance and stability in a natural and functional environment.   

    Swinging provides an opportunity for improved body awareness as a child learns how their body moves and responds to movement. Taking an indoor sensory swing into the outdoors provides a change in routine that can “wake up” the child’s awareness about certain movements.   

    The outdoors offers a vast tactile play box!

    From the feel of a tree’s bark to pebbles and stones, playing outside combined with needed sensory input a sensory swing offers can promote skills like:

    • Fine motor strength
    • Precision
    • Graded grasp
    • Separation of the sides of the hand
    • Bilateral coordination
    • Crossing midline
    • Balance
    • Endurance
    • Core stability and strength
    • And so many other skill areas!   
    Use this outdoor sensory swing for outdoor calming sensory input in kids with sensory processing needs.

    Outdoor Sensory Swing 

    When we received our Harkla pod sensory swing, the kids were eager to put it up in our home.

    After some time waiting for this to actually happen, because as we adults know, making changes to the home can sometimes take longer than expected, we finally decided to try it out in the outdoors.   

    We took the sensory pod swing and the attachment components to a large tree in our backyard. After a quick installment, it was clear that the outdoor sensory swing was a success.   

    Use a sensory swing outside as part of a sensory diet for calming sensory input.

    What a calming experience this was!   

    For the mom of four kids, it can be overwhelming during summer days when the kids are free from routine. All four of the kids swung in the Harkla sensory pod swing and were noticeably more calm and relaxed.   

    The enclosed pod provides a calming nook where kids can relax or calm down.    For the child with sensory needs who thrives after use of a sensory swing in therapy, taking the sensory swing outdoors can be a beneficial and therapeutic experience.   

    I love that the swing can be used indoors or outdoors. Simple attachment mechanisms make this swing easy to install. The adjustable strap allow the swing to be attached at a preferred height for safety.   

    Use a sensory swing to help kids calm down and organize sensory input for improved self-regulation with an outdoor sensory swing.

     Since using the pod swing outdoors, we’ve used the swing several times outside on our big, shady tree. My older kids use the pod swing as a cozy reading nook. What a way to work on that summer reading list!  

    I did bring the swing in after we used it, just so it wouldn’t get soaked in the next summer rainstorm. Putting it back up was easy, using the installment belt and clip.   

    For those without a tree branch that would hold kids, a regular swing set can be an optimal placement for the sensory swing. Simply pull the regular swings to the side or remove the chains and attach the sensory pod using the belt and clip.  

    The price on the sensory pod swing is great for those looking for a sensory swing that can fit within a budget.   

    As a therapist whose seen many therapy equipment catalogues, this is a great price! There is a coupon on the website for saving 10% on your first purchase, along with free shipping in the US.  

    We will be using this outdoor sensory pod swing all summer and installing the swing indoors, too. When the swing is not in use, just unclip the belt!  

    Click here to purchase the Harkla Sensory Pod Swing.

    Click here for more outdoor sensory diet activities and ideas.

    Harkla sensory pod swing is great for calming sensory input at home.


    Disclaimer: The information presented here is for educational purposes only. It is not meant to diagnose or treat children with sensory needs, or other areas. Using a sensory swing can have a wide variety of responses on children. Also, recognize that every outdoor experience is different for each child as the environment is different in each experience. Consult your child’s occupational therapist for individualized recommendations. The OT Toolbox provides educational information only and is not responsible for any issues. Reading information found on this website acknowledges your consent to this disclaimer.   This post contains affiliate links.    

    The Sensory Lifestyle Handbook walks you through sensory processing information, each step of creating a meaningful and motivating sensory diet, that is guided by the individual’s personal interests and preferences.

    The Sensory Lifestyle Handbook is not just about creating a sensory diet to meet sensory processing needs. This handbook is your key to creating an active and thriving lifestyle based on a deep understanding of sensory processing.

    Colleen Beck, OTR/L has been an occupational therapist since 2000, working in school-based, hand therapy, outpatient peds, EI, and SNF. Colleen created The OT Toolbox to inspire therapists, teachers, and parents with easy and fun tools to help children thrive. Read her story about going from an OT making $3/hour (after paying for kids’ childcare) to a full-time OT resource creator for millions of readers. Want to collaborate? Send an email to contact@theottoolbox.com.
    Outer Space Printable Thank You

    Thank you for grabbing the Outer Space Play Dough Mat! You should have an email in your inbox right now with a link to access the file. 

    Did you find this page accidentally and want to know what the fuss is about? Go to our outer space play dough mat page to get your free outer space play dough mat!


    The email also includes some instructions and the “why” behind play dough mats like this one. There is a lot of development going on when a little one uses a play dough mat like the one you just accessed! Scroll below to to find some additional usage instructions.


    Outer space play dough mat for fine motor strengthening


    How to use your Outer Space Play Dough Mat and other Housekeeping Information:


    If you do not see the email right away, check back within 30 minutes. Be sure to check your SPAM folder.  Other subscribers using an email hosted on a school system’s email provider may have security restrictions in place that block the email. If you still don’t see the email, shoot me a message at contact@www.theottoolbox.com and I will send the file to you directly.

    If you arrived here by accident and would like to receive a free outer space themed play dough mat to improve hand strength, check out this post that shares information on the Outer Space Play Dough Mat.

    How to use Improve Intrinsic Hand Strength with a Play Dough Mat

    You are going to build so many small muscles of the hand with this activity!

    1. To use this play dough mat, you will first want to cover it with a plastic surface so you can use it over and over again. Some ideas to do this include (Amazon affiliate links are included below):


    • Cover it with clear contact paper. Click the link to purchase a large roll of clear contact paper.
    • Slide the play dough mat into a clear plastic page protector sleeve. Add it to a folder workbook or binder booklet of play dough mats for quiet time or a busy bag-type of activity.
    • Use a laminator to cover the play dough mat with a laminated surface that can be used over and over again. This is a great price on a quick laminator and laminating pouches.
    • Use pocket sleeves to create a quiet time or fine motor center activity.


    2. Once the play dough mat is covered, provide the child with play dough, clay, foam dough, or other moldable material.


    3. Ask the child to roll small balls of play dough using just the fingers and thumb of one hand. They should use their dominant hand to roll small balls of play dough with the tips of the fingers and thumb. This is an AWESOME hand strengthening exercise for kids. 

    4. Ask the child or children to roll various sizes of play dough so the balls of dough fit into the various circle sizes on the play dough mat. 


    Rolling play dough within one hand promotes development of a variety of areas: 

    • Strengthens the arches of the hands, helps awareness and coordination in separation of the two sides of the hand.
    • Promotes finger isolation for improved control and dexterity
    • Encourages dexterity and coordination of the thumb and index finger which are important in pencil grasp
    • Strengthens the intrinsic muscles for improved endurance in fine motor tasks such as maintaining hold on a pencil, manipulating clothing fasteners, managing and using scissors, coloring, and many other tasks.


    Be sure to check out some of these fun play dough activities for more fine motor strengthening:


    Play Dough Farm Activity | Play Dough Activity Color Match  | Play Dough Cupcakes

    Pediatric Feeding: Is it Sensory, Oral Motor or Both?

    Below, you will find a blog post on pediatric feeding therapy and answers to initial questions about feeding therapy such as “Are pediatric feeding issues related to sensory needs, oral motor problems or both?” and thoughts about where to begin with pediatric feeding therapy techniques. A question of sensory or oral motor concerns should be taken into consideration when feeding developmental milestones aren’t being achieved on target.

    Also check out our blog post on infant feeding therapy for supporting babies and newborns in feeding skills.

    Occupational therapists and parents often wonder if feeding problems are related to sensory issues or oral motor skills. This article on pediatric therapy addresses that question.

    Pediatric Feeding: Is it Sensory, Oral Motor or Both?

    When I was in grad school, we had one, three hour lab on feeding, and were told, Speech would handle feeding, so don’t worry.  Little did I know that what I thought was going to happen, was very far from reality.

    Feeding Therapy Evaluation

    When a child enters a therapy clinic for an OT feeding evaluation, we are prepared for sensory deficits to be present. What we are not prepared for in school, is the potential, and probable oral motor component. This is a skill that most of us learn on the job, in trial by fire, with limited guidance. Or, so was my experience.

    Due to the high level of overlap between Speech and OT when it comes to feeding, this often is a problem that OT’s face. Depending on the setting, and even the facility you are in, can determine whose job it is to handle feeding clients.

    A majority of professionals maintain that if it appears sensory based and the child has a limited diet, eats only certain textures or colors, it is for OT. If it appears oral motor in nature and the child cannot chew or manage a bolus well, it is for Speech to handle.

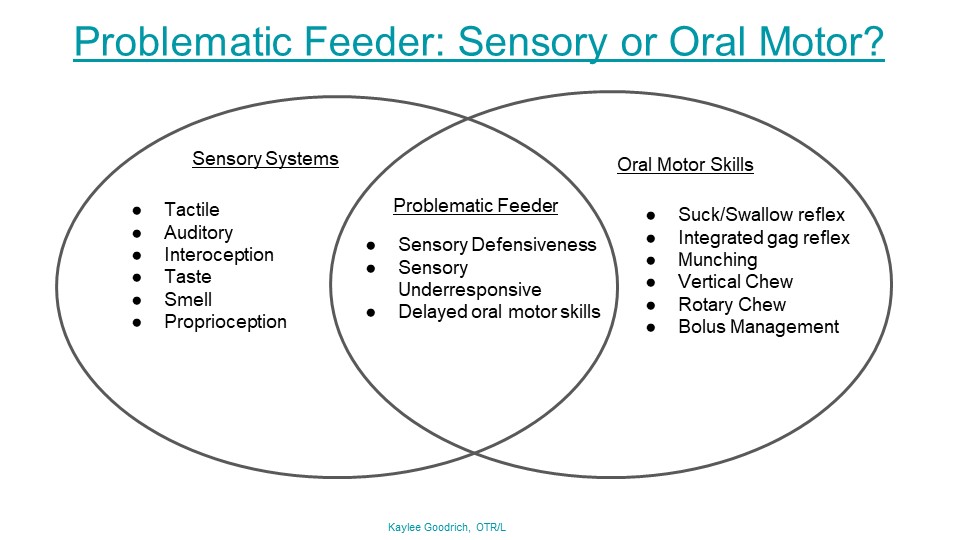
    Herein lies the problem and common misconception about problematic feeders. Feeding challenges are more than just sensory, or just oral motor.

    It is both sensory and oral motor based. This can lead to a very challenging, and complex situation for an OT who is new to feeding.

    Oral Motor Skills and Sensory Challenges in Feeding Therapy

    When a child limits the textures and variety of foods they eat, they limit the growth and development of their oral motor skills.

    Let’s take a child who eats only pureed foods, and refuses solids of any kind for an example.

    Oral motor skills needed to eat a thin puree off a spoon and to eat a carrot stick are vastly different.

    Puréed foods require minimal bolus management of a thin food that quickly runs down the esophagus with minimal effort. The puree is also smooth, eliminating any scary “texture” for the child to manage.

    The carrot stick, on the other hand requires the child to have awareness of his mouth, tongue, and bite pressure before even creating a bolus with the bite of carrot. The child also has to manage the bolus and break down of carrot efficiently while chewing and then swallowing.

    Add in the sensory component of crunchy, wet and constantly changing size of the pieces of the carrot, and the child can become easily overwhelmed.

    And so, the vicious cycle of a limited diet begins. Lack of confidence with oral motor skills and sensory deficits can lead to problematic feeders.

    Feeding Therapy Goals

    The above example is a frequent experience that many OT’s have faced when completing a therapy feeding session. With lack of exposure and continued refusal to attempt new foods, the child’s oral motor skills are never able to develop to support the trial of new foods continuing the cycle.

    As occupational therapists, it is our job to help these children become functional eaters through the use of sensory desensitization and remediation of delayed oral motor skills.

    Oral Motor Development in Feeding Therapy

    As oral motor development is a lengthy topic, the next post will address oral motor development and food pairings to determine gaps in skills and provide effective remediation of delayed skills.

    Check out the handout below to show parents and help explain the overlap of sensory processing and oral motor skills in problematic feeders.

    Would you like to print this visual guide? Click here to access the printable pdf in our free resources library. You will also receive weekly newsletters full of therapy resources, tips, strategies, and information. The OT Toolbox newsletter is perfect for therapists and those working with occupational therapists.

    Disclaimer: Feeding difficulties stem from a variety of difficulties including medical, structural, sensory deficits and skill deficits. The main discussion of this post is to examine the crossover of sensory and oral motor skills. Medical and structural concerns will be addressed in future posts.

    A little about Kaylee: 
    Hi Everyone! I am originally from Upstate N.Y., but now live in
    Texas, and am the Lead OTR in a pediatric clinic. I have a bachelors in Health Science from Syracuse University at
    Utica College, and a Masters in Occupational Therapy from Utica College. I have been working with children with special needs for 8 years,
    and practicing occupational therapy for 4 years. I practice primarily in a
    private clinic, but have experience with Medicaid and home health settings
    also. Feeding is a skill that I learned by default in my current
    position and have come to love and be knowledgeable in. Visual development and
    motor integration is another area of practice that I frequently address and see
    with my current population. Looking forward to sharing my knowledge with you all! ~Kaylee Goodrich, OTR

    Click on the images below to check out these related articles: 

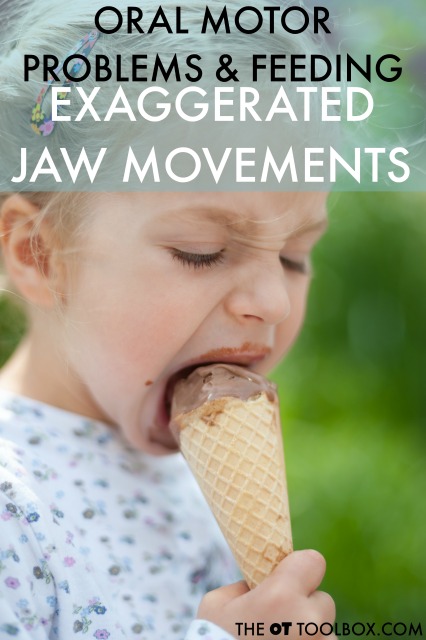
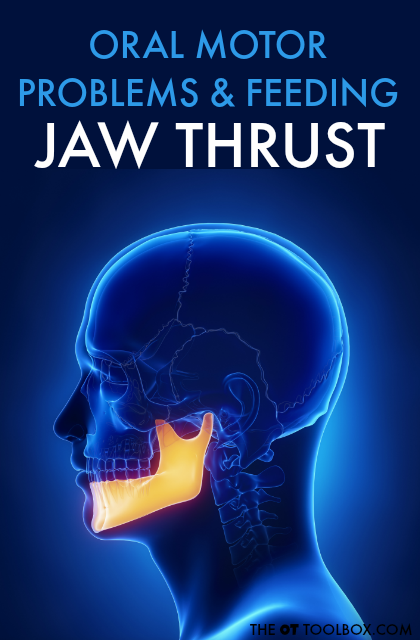
    Jaw instability is an oral motor problem that results in impaired eating and drinking skills.  Exaggerated jaw movements are an oral motor problem that interfere with feeding including eating and drinking. Here are reasons why this oral motor issue happen and how it relates to feeding in kids. Jaw clenching is an oral motor problem that interferes with feeding and eating. Help to understand jaw clenching and reasons it might occur. Jaw thrust is a common oral motor problem that interferes with feeding. Here are the underlying causes and how jaw thrust impacts feeding in kids.

    Therapy Band Exercise Program for Kids

    So often, we see kids with weakness. They struggle with climbing monkey bars, maintaining grasp on a pencil, coloring with endurance, maintaining posture with a strong core, manipulating snaps and buttons, and so much more. A consistent home strengthening program can help with these skills.
    A therapy band is such a power tool in providing needed and calming proprioceptive sensory input, too. Many times, therapists will add therapy band exercises to a sensory diet. There’s a reason why! Slowly pulling and maintaining a position on an expanded therapy band creates resistance, providing proprioceptive input that kids need.
    Use these tips for creating a therapy band exercise program that kids want to do!

    Why use a Therapy Band Exercise Programs with Kids?

    There are several motivating reasons to incorporate a therapy band exercise program into home programs and therapy regimens:
    • Use as a movement break for alerting input or calming input
    • Exercise for increased attention
    • A tool for coordination and strength
    • On-the-go therapy tool that can go anywhere a school-based OT or home therapist goes
    • Easily incorporated into home programs
    • Can be easily modified for use by a large caseload
    • Can be used with individuals or in a group setting
    THerapy band exercise program for kids to boost strength, core strength, and sensory needs.

    Therapy Band Exercise Program for Kids

    There are a few things that a great therapy band exercise program has when it comes to strengthening programs or exercises for kids.
    Here are a few MUST-Haves when it comes to a motivating therapy band exercise program for kids:
    FUN- A therapy exercise program for kids must be more than a simple handout copy of exercises. That exercise sheet is sure to land on the top of your therapy clients refrigerator. A therapy program that has bright colors, fun characters, games, and interactive components is a win!
    Creative- A therapy exercise program that uses animals, monsters, creatures, and fun characters is one way to get kids moving and coming back to try out those exercises again and again.
    Easy- A home program that kids can (and want) to do themselves is one way to ensure carryover.
    Engaging- A bright and colorful exercise program with fun fonts, hands-on flip cards, and creative characters who get in on the exercise action are all part of a exercise plan geared to create healthy habits.
    Motivating- Checklists that kids can mark, erase, and rewrite, fun stickers, and a game make therapy band exercise programs fun and not boring…a plan that kids want to do!
    The Handee Band therapy band exercise program is perfect for adding fun fitness for kids.

    Handee Band Therapy Band Exercise Program

    Affiliate links are included below.
    When Francesca Avelli, MS, OTR/L approached me about a therapy exercise program that she created, I was excited learn more. Handee Band is a therapist-created collection of fitness exercises for boosting core strength and upper body strength…and it meets all of the requirements listed above!
    We tried out the Handee Band Exercise Kit and the Handee Band Exercise Cards, and had an absolute BLAST. All while exercising!
    Make exercise a game for better carryover and excitement in kids when they use this therapy band exercise program, Handee Band.
    This exercise kit is definitely a product created by an occupational therapist. As my daughter was trying out the spinner board game and looking through the flip book for matching characters, that thought was on my mind.
    Make exercise a game for better carryover and excitement in kids when they use this therapy band exercise program, Handee Band.
    All of the underlying skill areas that go into using this kit and playing the game are such a boost for kids.
    Wen playing the game, kids spin a spinner board and need to match up characters to the exercise kit or flip cards. The visual scanning, form constancy, visual tracking, visual discrimination, visual memory, and visual closure was really being used for this game.
    Make exercise a game for better carryover and excitement in kids when they use this therapy band exercise program, Handee Band.
    Then, my four year old flipped through the cards, strengthening her finger isolation and other fine motor skills until she found the matching character. Once she did the exercise, she used more fine motor skills to peel off a sticker…but it had to be the matching sticker, resulting in more visual perceptual skills!
    Make exercise a game for better carryover and excitement in kids when they use this therapy band exercise program, Handee Band.
    THEN, I asked my daughter to mark off the exercise on our checklist, using more fine motor work while boosting pencil control skills and pre-writing strokes as she formed a vertical line in the given box, but not over the lines!
    What a workout!
    But, all of this doesn’t even tough on the real strengthening we did with the Handee Band.
    Make exercise a game for better carryover and excitement in kids when they use this therapy band exercise program, Handee Band.
    There are so many exercises in the Handee Band kit and exercise cards. There are 15 to be exact, and they each have a corresponding character showing how to do the therapy band exercise. These handheld cards are perfect for the therapist that needs to tote supplies from building to building!
    We left the Handee Band kit cards and band out on a table for a few days and there were countless times I saw my kids stopping over to do an exercise or two. The Handee Band program is just too irresistible!
    Make exercise a game for better carryover and excitement in kids when they use this therapy band exercise program, Handee Band.
    If you are a therapist in a clinic looking for a therapy band exercise program that kids WANT to do, then the Handee Band is for you.
    If you are a school-based therapist looking for strengthening exercises or proprioceptive input that calms, alerts, and adds to a sensory diet, then the Handee Band is for you.
    If you are a home therapists, working with kids (or adults!) in the home and need exercises that can tuck into a tote bag, then the Handee Band is for you.
    If you are a parent looking for creative and motivating ways to get the kids moving and focused on fitness, then the Handee Band is for you.
     
     
    Disclosure: We received a Handee Band exercise kit and exercise cards, but all opinions are our own.