Visual Perception Apple Activity

During the fall months, apple activities are a fun way to sneak in skills like visual perception development or fine motor strengthening.  This visual perception apple activity promotes both of those areas in a fun and creative way.  We used recycled pouch bottle caps to make DIY stamps that fit in with an apple theme.  If you are looking for more visual perception activities, there are a bunch on the site.  Check out the additional ideas at the bottom of this post.

The apple theme is perfect for the fall season and would fit in nicely with this apple theme gross motor activity.

Visual perceptual skills are needed for so many skills! Handwriting, reading, writing, math, spelling, shoe tying, cutting with scissors…everything! You’ll find easy and fun ways to work on visual perceptual skills through play here. 

Kids will love this visual perception apple activity using DIY apple stamps.

Visual Perception Apple Activity

This post contains affiliate links.
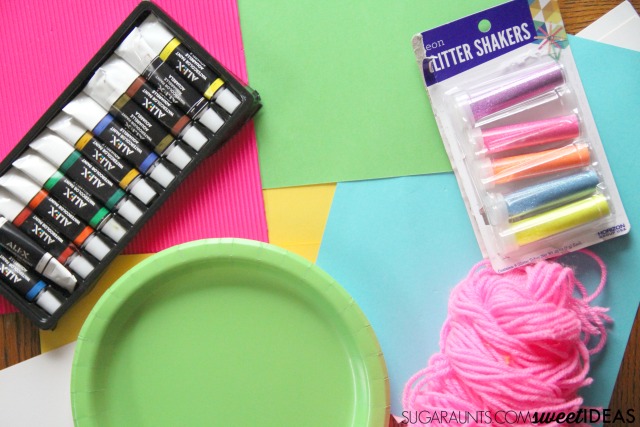
You’ll need just a couple of materials for this idea:
Scissors
Applesauce pouches (Eat the applesauce and then wash and dry the lid!)
Hot glue gun (I love this mini version for making quick projects like this one.)
Paper
Red paint

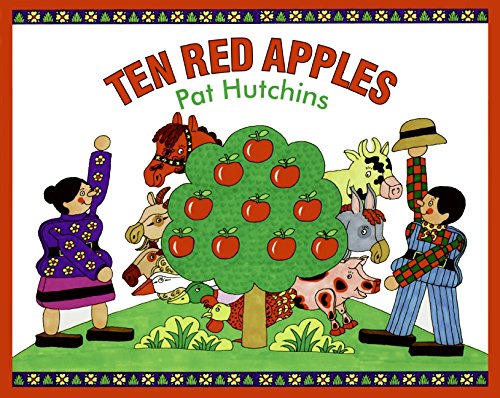
This activity goes along with the popular children’s book, Ten Red Apples. Grab the book and do this developmental activity with the kiddos.  You’ll love all of the book activities that combine children’s books with activities to promote development of functional skills and underlying skill areas here on The OT Toolbox.

Use DIY apple stamps to work on visual perception with an apple theme.
To make the apple stamps:
Cut the scrub pads into different shapes.  We made a square, circle, diamond, and heart.
Make your own foam stamps to work on visual perception and fine motor skills.
Use the hot glue gun to attach the shapes to the pouch lids. This is a job for an adult.

Kids can work on visual perception and fine motor skills using DIY stamps with an apple theme.
Once the foam shapes are attached and the glue is dry, you can start to work on those fine motor and visual perceptual skills.

Use these DIY stamps to work on visual perception and fine motor skills with kids.
This is a fun visual perception activity for kids to work on skills using DIY stamps.
Pour a small amount of red paint onto scrap paper.  Kids can use the stamps to make different shapes by pressing the foam side into the paint and then pressing paint onto paper. There are several fine motor skills being addressed with these stamps:

Apple Theme Fine Motor Activity

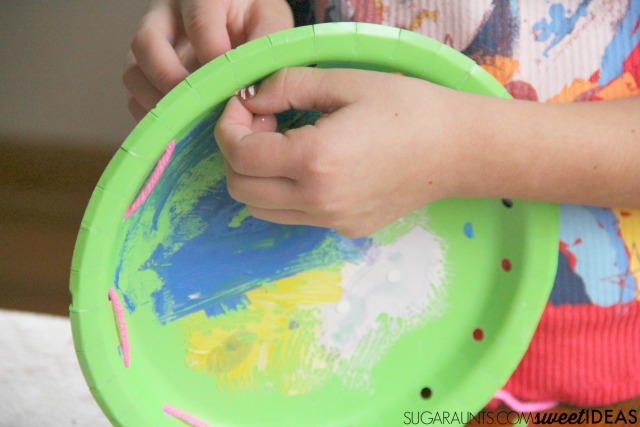
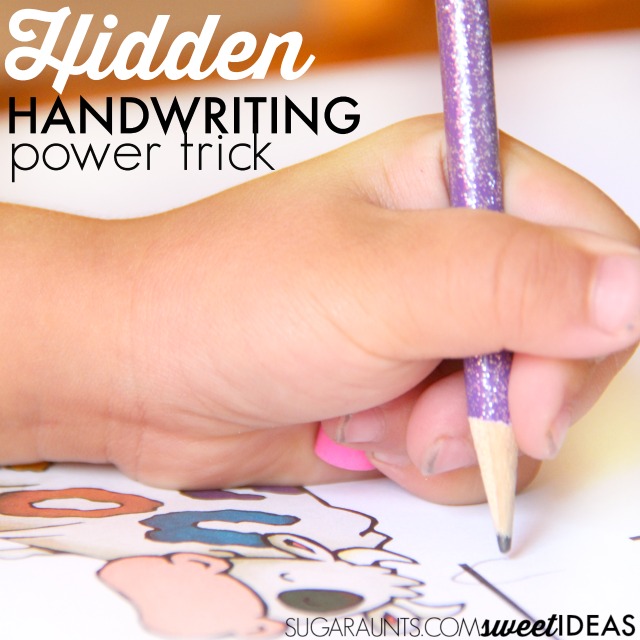
Show your child how to hold the stamp using their thumb, pointer finger, and middle finger.  This positioning on the pouch cap encourages a tripod grasp and separation of the two sides of the hand.
Ask the child to use the stamper with their dominant hand.  By holding the stamp with to paint, they are also developing and strengthening the arches of the hand.
Additionally, the size of the stamp encourages an open thumb web space which is perfect for a functional pencil grasp during handwriting tasks.
These stamps are quite the fine motor power tool!
Apple stamps for helping kids work on visual perception and fine motor skills.

Apple Stamps and Visual Perception Activity

Next, kids can turn those shapes into apples by copying the different parts that make an apple.  We used black and green markers to add a stem and leaves to each apple shape.
To encourage development of visual perceptual skills, show kids how to copy the stem and leaves. They can then copy those parts onto their apples.  Try adding one or two leaves or making the stems go into different directions or with different lengths to encourage visual memory, visual discrimination, and visual motor skills.
Use these apple stamps to help kids improve visual perception and fine motor skills needed for handwriting, reading, and more.

Visual Perception Apple Activities

There are so many ways you can use these apple stamps to address visual perceptual skills!
Make copying sheets where kids copy the apple shapes in the correct sequence to address visual memory.
Make visual discrimination sheets where kids can identify the difference in shapes.
Work on visual spatial relations by stamping apples in different positions on a page.  Kids can then tell where they see a specific shape in relation to another shape.
Address visual discrimination by making an “I Spy” type of sheet.
Work on form constancy by covering up part of an apple shape and asking kids to make the apple shape that matches that shape.

Apple theme visual perception activity for kids
How would you use these apple stamps to address visual perception?

Kids love these visual perception apple activities that also work on fine motor skills
These apple stamps is a fun apple activity to use in coordination with a book.  If you have been a reader of The OT Toolbox for long, you know that we love to combine favorite children’s books with developmental activities.  For this apple activity, we joined the bloggers in the Virtual Book Club for Kids group in creating an apple themed activity that fits with the book, 10 Red Apples by Pat Hutchins.
We loved reading this book as we counted the apples on each page.  The book, Ten Red Apples is a fun way to address visual perceptual skills like visual discrimination, visual memory, and form constancy as each page contains the animals that eat an apple from the apple tree.  To address visual perceptual skills with this book, ask your child to scan the group of animals and pick out individual characters or animals on each page.  It’s a visual perceptual challenge that carries over to skills like reading and writing.

For more creative ways to address visual perceptual needs, try some of these ideas by clicking on the images below.

Looking for more ways to add apple themes into learning and play? Try these creative ideas from the Virtual Book Club for Kids team:

Apple Tree Alphabet Letter Match  Still Playing School
Apple Piece Names  Preschool Powol Packets
Sea of Knowledge    Apple Addition within 5 Dough Strips
Fingerprint Apple Counting Activity   Messy Little Monster
Apple Math: Counting & Fractions   Teach Beside Me
Red apple number bonds to 10   Rainy Day Mum
Apple Tree Playdough  Clare’s Little Tots
Apple picking sticky wall  Views from a Step stool
Baked Apples  Witty Hoots
Apple Stack Game and Snack  Toddler Approved
Jumping Apple Seeds  JDaniel4’s Mom
Apple Theme STEM Activity for Preschoolers  The Educators’ Spin On It
Glitter Apple Stamping  My Bored Toddler
Apple Tree Tracing Page
Apple Farm Song with Movement  My Storytime Corner
Ten Red Apples: Number Words Activities  Growing Book by Book
Apple Tree Gross Motor Game  Inspiration Laboratories
Apple Sewing  CrArty Kids

Ideas to Incorporate Movement into the Classroom

Children today are experiencing less and less physical activity and more and more sedentary lifestyles that limit participation in many motor experiences. Children are spending more time in front of screens and less time climbing trees, rolling down hills, and in general less time outdoors.  Physical activity is a vital part of health but for the student, movement in the classroom can have a big impact on learning.  Gross motor games and activities can help. 


There is much evidence of the link between movement and learning.  For some students, movement breaks in the classroom are an essential part of regulation of sensory needs.  Most students need a quick energizer to beat lethargy in a long school day at some point and brain breaks are a great answer to meet that need.   


Below, you’ll find easy ways to incorporate movement into the classroom.  


These are easy strategies that can be added at little cost.  As much as most teachers and school based professionals would love extensive equipment or alternative seating and cushions in their classroom, these ideas are not always feasible.  For these and other reasons, I’ve put together this list of ideas to add movement into the classroom environment.

These are great ideas for how to incorporate movement into the classroom for movement and learning, perfect ideas for teachers to help kids with attention or sensory needs, and any student who needs more movement in the classroom and throughout the school day.


Easy Ideas to Add Movement into the Classroom


You may have seen this video depicting movement in the classroom floating around on Facebook. Check it out. Does this sound familiar?


Add movement into learning- Incorporate gross motor movement into math when repeating math facts by incorporating whole-body games such as Simon Says (Students can perform specific motions when math facts are true, and perform other motor tasks when math facts are false.)


Daily Stretches


Afternoon Yoga Stretches


Dance Party Breaks


Brain break videos- Here are the best brain break videos on YouTube.


Themed Brain Breaks- Some ideas are these Bear Brain Breaks or these Farm Brain Breaks


Role Play Activities for history, science, geometry, etc.


Large item manipulatives- Use creative items such as large cardboard boxes, printer paper boxes filled with newspapers, old phone books, etc.


Add in walks during the day.


Incorporate action rhymes into the morning routine or circle time. 


Try these sensory motor activities for the classroom.


As students to move around the room to learn about specific items.  Fall back on those places by asking the students to recall the part of the room they were in when they learned about that particular topic.


Move books or other items from the desk to a different part of the room so that students need to get up and walk to the back of the room to get their math workbook.


Try inexpensive seating tools such as this DIY sensory seating idea


Utilize extra recess as a reward.


Create a fidget toolbox in the classroom for movement needs while sitting at desks. 


Try a ball toss game with partners when working on learning facts or spelling. 


Ask students to perform jumping jacks, clapping, running in place, or hopping when spelling words as a group.


Add movement requirements within a multi-step project- Students can complete a worksheet, then get up and place it in a bin across the room, then walk to another center to gather materials needed for their next assignment, then return to their desk.


Ask students to assist in handing out materials and papers.


Place a math problem at each student’s desk.  Each child can copy the problem to another sheet of paper and complete the problem.  Then, they can move to the next desk and complete that problem.  Ask them to move to each desk until they have solved all of the problems.


Students can place their chairs on their desks at the end of each day and remove them at the beginning of each day.


When walking from classroom to classroom, students can all walk on their toes.  Other ideas: walk toe to heel (for short trips down the hall), penguin waddle, walk with extra large steps, or other creative movement ideas.


Students can carry bins of materials needed for each day from their cubby to their desk.


Borrow a swivel seat from the computer lab or office.  Use the seat as an alternative seat for different students throughout the day.


Try Indoor Ice Skating before a learning task- In the classroom, use a sheet of paper under each foot as students “skate” in the classroom for 5 minutes. 


Raise the desks and allow students to stand for reading/writing/worksheets/learning activities.


Use easels in the classroom.


Encourage wall writing by taking paper to the walls and asking students to write at the wall.


Allow prone writing and reading (lay on stomach on the floor).


Use a therapy ball as a seat or as a movement area in the classroom.


What are your favorite ways to add movement to the classroom?

You may also be interested in the free printable packet, The Classroom Sensory Strategy Toolkit.

The Classroom Sensory Strategy Toolkit is a printable packet of resources and handouts that can be used by teachers, parents, and therapists. Whether you are looking for a handout to explain sensory strategies, or a tool for advocating for your child, the Classroom Sensory Strategy Toolkit has got you covered.


And it’s free for you to print off and use again and again.


In the Classroom Sensory Strategy Toolkit, you’ll find:


  • Fidgeting Tools for the Classroom
  • Adapted Seating Strategies for the Classroom
  • Self-Regulation in the Classroom
  • 105 Calm-down Strategies for the Classroom
  • Chewing Tools for Classroom Needs
  • 45 Organizing Tools for Classroom Needs
  • Indoor Recess Sensory Diet Cards
 
Sensory Strategies for the Classroom
 

Free Classroom Sensory Strategies Toolkit

    We respect your privacy. Unsubscribe at anytime.

    Colleen Beck, OTR/L has been an occupational therapist since 2000, working in school-based, hand therapy, outpatient peds, EI, and SNF. Colleen created The OT Toolbox to inspire therapists, teachers, and parents with easy and fun tools to help children thrive. Read her story about going from an OT making $3/hour (after paying for kids’ childcare) to a full-time OT resource creator for millions of readers. Want to collaborate? Send an email to contact@theottoolbox.com.

    Clothespin Busy Bags for Fine Motor Strength

    This clothespin busy bag is a clothespin occupational therapy activity that we’ve had on our site for a long time (originally written June 19, 2017). We love to use busy bag activities in therapy to work on a variety of skill areas.

    When kids struggle with weak fine motor skills, they can have difficulty in so many areas!  This post includes ideas for using clothespins and busy bags to improve fine motor strength.  We love using clothes pin activities for fun and engaging finger strength exercises.

    Clothespin Busy Bag

    Developing hand strength is an important skill for kids who struggle with manipulation of small items like buttons or zippers.  A child who struggles with handwriting can many times present with weak hand strength.  

    Trouble maintaining a pencil grasp, very light handwriting, pencil pressure, switching hands when coloring or writing, using the whole arm to write, a closed thumb web space, and a distorted grip on the pencil are signs of weakness in the hands.  


    But the trouble with working on improving hand strength is that many times, kids just don’t want to correct their pencil grasp or work on tasks that are hard to do like practicing zippers over and over again. 


    Use busy bags to help kids develop and build fine motor skills like hand strength


    One simple strategy to fix these strength issues is making the work fun.  Here are creative ways to use clothespins to improve fine motor hand strength.


    Putting the activities together in a busy bag form can be helpful for therapists who need to quickly pull a strengthening activity from their therapy bag.  The fine motor busy bags below can be passed on to teachers to encourage development of fine motor strength in the classroom and at home.


    These fine motor strengthening activities are busy bag ideas that can be used in therapy home programs or as part of fine motor activities that the whole class can benefit from!


    Clothespin Busy Bags Fine Motor Strength Activities

    We talked before about the fine motor strength benefits of clothes pins.  There are SO many ways to develop the specific grips needed for functional tasks using clothes pins.  Work on lateral pinch, tip to tip pinch, three jaw chuck using clothes pins.  Read more about the different pinch grips and how clothes pins help with strengthening by clicking the link above or this image:

    Fine motor pinch grips and exercises to work on them using clothes pins, from an Occupational Therapist.

    These fine motor strength activities use clothes pins.  Clothes pins are something that you can grab at the dollar store and easily adapt to activities of all sorts.  Make a busy bag that builds on learning concepts like math, literacy, colors, or patterns with activities that can be done over and over again in a busy bag!

    Try these clothespin busy bag activities to strengthen the hands:

     
    This Math Clothes Pin Activity by Beauty in the Mess works on math skills while strengthening the hand muscles.  


    Talk about weather using this weather themed clothespin activity that strengthens writing skills AND hand strength! 
     
    Attach spiny plates to a stegosaurus using clothespins in this Clothespin Stegosaurus by No Time for Flashcards. 
     
    Match colors on a printable color wheel while strengthening the hand muscles with this printable color wheel by Frau Liebe.


    Work on place value with a 1-100 math activity that uses the muscles of the hands in a superhero hand strengthening activity.
     
    Match colored clothes pins to colored Mega Blocks in this color matching activity by LalyMom.


    Match colors with a neat pincer grasp using very small clothes pins in this super fine motor busy bag.


    Address letter recognition while building fine motor strength in a busy bag using letters like Learn Play Imagine.


    Making busy bags that work on specific skills WHILE addressing educational concepts such as math or reading are a powerhouse tool for therapists and teachers!  Make the busy bag ideas above and pass them on to teachers or parents who want to build hand strength.  Busy bag ideas like this are perfect for centers or home programs.


    Occupational Therapists are always looking for activities that build specific skills and can be easily incorporated into the classroom.  Fine motor busy bags like these can be a powerful tool for the school based OT!


    Looking for more ways to create fine motor busy bags for parents, teachers, or classrooms?  
    Use clothes pins to help kids build and develop fine motor skills like hand strength.


    Check out the video below for ideas to use clothes pins to develop fine motor skills. If you can’t see the video due to blockers on your device, check out our video on The OT Toolbox YouTube channel.

    Working on fine motor skills, visual perception, visual motor skills, sensory tolerance, handwriting, or scissor skills? Our Fine Motor Kits cover all of these areas and more.

    Check out the seasonal Fine Motor Kits that kids love:

    Or, grab one of our themed Fine Motor Kits to target skills with fun themes:

    Want access to all of these kits…and more being added each month? Join The OT Toolbox Member’s Club!

    Separation of the Sides of the Hand Activity

    This simple activity is one that is designed to promote motoric hand separation.  This is a skill that is necessary for so many tasks!  From holding a pencil to cutting with scissors, to zippering a zipper, motoric separation of the two sides of the hand is an essential skill when it comes to fine motor skills
    You see this positioning of the hand during one of the steps of zippering a jacket where the thumb and finger hold the zipper pull in place at the bottom of the zipper while the ulnar side of the hand holds the bottom of the zipper.


    Separation of the sides of the hand activity for kids

    Separation of the sides of the hand activity for helping kids improve fine motor skills needed for many functional tasks like fastening buttons or holding a pencil
     
    This activity is one that kids will love.  The use of small sponge pieces promotes a tactile reminder to squeeze the individual fingers down into the palm, separating the ulnar side of the hand from the radial side.  
     
    When kids write with a pencil, they need to hold and move the pencil with the thumb, pointer finger, and middle finger.  This precision side of the hand is used for fine motor movements and dexterity. 
     
    Try this DIY Pick-Up Stick Activity to work on Precision Skills.
     
    When writing, we use the power side of the hand, or the strength side of the hand to stabilize the hand during it’s motions. 
     
    Try this Fine Motor Craft to work on Gross Motor Grasp Skills.

    This Separation of the sides of the hand activity is fun when working on precision of grasp and strength of gross grasp skills needed for tasks like handwriting and holding a pencil.


    Activity to Improve Motoric Separation of the Two Sides of the Hand

     
    This activity is such a fun one for kids!  You’ll need just one material (and it can be used over and over again.)
     
    (Affiliate links are included in this post.)
     
    We used a kitchen sponge and cut it into small squares.  We used two different colored sponges, but you could use the same sponge and the same color squares. 
     
    Simply cut the kitchen sponge into 1 inch x 1 inch pieces.  Next, wet the sponges.  Place one sponge square into the palm of the child’s hand.  Ask them to close their pinkie finger and ring finger around the sponge to hold it in place.  The sponge should not hold enough water so that it drips down the palm of the hand and wrist.  
     
    For kids that need more cues to hold the ulnar side of the hand with closed fingers, you can add more water to the sponge.  When they squeeze the sponge down with the ring and pinkie fingers, the water will drip out of the sponge.
     
    Next, use another sponge square in the remaining fingers (middle and pointer fingers and thumb).  The child can squeeze the sponge to remove water with just the precision fingers.  
     
    To make this activity more difficult, add water to just one sponge while keeping the other sponge dry.  Then, ask them to squeeze the water from the wet sponge with the appropriate fingers.  This REALLY draws attention to the separation of the two sides of the hand!
     
    Other ways to play with this activity while addressing separation of the sides of the hand:
    • Use a wet sponge to draw letters, numbers, or words on a large chalkboard.  
    • Draw with chalk on a sidewalk and then erase it with a wet sponge.
    • Water seedlings by squeezing water from the sponge.
    • Drip water designs on colored paper.
    For more precision and gross motor grasp development, try this precision building activity to separate the two sides of the hand.

    Separation of the Sides of the Hand Activities and Resources

    Want to know more about what’s going on with bad pencil grasps and how to incorporate separation of the sides of the hand into handwriting and pencil grasps? This is a big part of a functional pencil grasp and efficient handwriting.

    Join the Pencil Grasp Challenge to find out more on this functional skill.

    The pencil grasp challenge is a free, 5 day mini course and challenge. During the course of five days, I’ll be teaching everything you need to know about the skills that make up a functional pencil grasp. You’ll learn what’s going on behind the inefficient and just plain terrible pencil grasps you see everyday in the classroom, clinic, or home. Along with loads of information, you’ll gain quick, daily activities that you can do today with a kiddo you know and love. These are easy activities that use items you probably already have in your home right now.

    Besides learning and gaining a handful (pun intended) of fun ideas to make quick wins in pencil grasp work, you’ll gain:

    • 5 days of information related to pencil grasp, so you know how to help kids fix an immature pencil grasp.
    • Specific activities designed to build a functional pencil grasp.
    • Free printable handouts that you can use to share with your team or with a parent/fellow teachers.
    • You’ll get access to printable challenge sheets, and a few other fun surprises.
    • And, possibly the best of all, you’ll get access to a secret challengers Facebook group, where you can share wins, chat about all things pencil grasp, and join a community of other therapists, parents and teachers working on pencil grasp issues.

    Click here to join the Pencil Grasp Challenge.

    Colleen Beck, OTR/L is an occupational therapist with 20 years experience, graduating from the University of Pittsburgh in 2000. Colleen created The OT Toolbox to inspire therapists, teachers, and parents with easy and fun tools to help children thrive. As the creator, author, and owner of the website and its social media channels, Colleen strives to empower those serving kids of all levels and needs. Want to collaborate? Send an email to contact@theottoolbox.com.

    Pincer Grasp Fine Motor Activity

    This fine motor activity uses a material you might have in your house right now.  Finding easy ways to incorporate household items into developmental progression is important for therapists.  Parents can easily use those items to help kids develop the skills they need for handwriting, clothing fasteners, tool use (scissors, staplers, forks, knives, rulers, screwdrivers) more easily, allowing for increased independence and success during activities.  This pincer grasp  fine motor activity improves many areas (described below) but is a great way to help kids improve pincer grasp.

    Pincer grasp activity for fine motor skill development in kids

    Pincer Grasp Fine Motor Activity

    You’ll need just a few materials for this fine motor activity:
    This post contains affiliate links.

    Sticky tack (also known as removable poster putty)
    Small beads- We used alphabet beads
    The Flower Play Mat to hold the beads and to encourage in-hand manipulation skills

    What is Pincer Grasp?

    Pincer grasp is a skill that develops around 9-12 months of age.  At this time, children are typically able to pick up small items such as cereal with the pads of the thumb and pointer finger.  This pad-to-pad grip is called the pincer grasp.

    Pincer grasp is important for many fine motor tasks.  Any functional skill that involved holding items between the thumb and index finger are based on effective development of pincer grasp.

    There are things that can impair pincer grasp.  When a child holds their pencil or any small item such as beads with a squashed thumb web space, they are ineffective in in-hand manipulation, dexterity, and strength.  Try these activities to work on an open thumb web space.

    Use this FIne motor play mat for kids to help build and boost fine motor skills.

    To complete this pincer grasp fine motor activity, you’ll need to place the beads in a small bowl.  The partitions of the The Flower Play Mat are perfect for holding small beads.  The wells of the mat are deep, which required children to cup their palm into a curved arch.  This motion of the hand as they pick up beads with a pincer grasp allows them to use in-hand manipulation to squirrel beads away into their palm while strengthening the intrinsic muscles of the hand.  What a powerhouse set of tasks with just one single task of picking up beads!

    Use poster tack to help kids improve fine motor skills like pincer grasp.

    Next, use the beads to push into the sticky surface of the poster tack.  Children can use a pincer grasp to hold the beads as they press them into the resistive dough.

    This action further strengthens the intrinsic muscles of the hands, making those hands stronger for skills like pencil grasp, coloring, and manipulating items.

    We used the letter beads to spell words.  It was fun to see the impression of the letters in the sticky poster putty.

    Kids will love this pincer grasp fine motor activity that uses beads and poster sticky tack.

    Try a few of these other pincer grasp activities:

    Neat Pincer Grasp Fine Motor Activity Buttoning Tips and Tricks https://www.theottoolbox.com/2015/11/benefits-of-playing-with-stickers-occupational-therapy.html

    The Most Creative Lacing Cards and Fine Motor Skills

    Fine motor development is essential for so many tasks.  Kids begin their fine motor skills development as soon as they are placed in tummy time as an infant.  While the manipulation of small motor muscles in activities like lacing cards and handwriting doesn’t come until much later, the building blocks for success in tool manipulation and dexterity is established within days of birth.


    Because fine motor skills are used in so many of our daily functions, it can be frustrating for kids (and their parents or teachers!) when manipulation and dexterity of the hands and fingers are a struggle.


    Today, I’m sharing in inside scoop on how lacing cards boost fine motor skills and creative ways to further develop those skills through creation of DIY lacing cards, in unique process art ways!

    Use lacing cards to address fine motor skills with kids in the classroom, home, or therapy clinic.

    Lacing Cards and Fine Motor Skills


    When kids thread a string through a lacing card, they are doing much more than establishing a baseline of sewing skills.  The motor movements required to perform this activity are powerful.  In fact, it shouldn’t come as a surprise to know that many Occupational Therapists use lacing cards as a power tool, i.e. a therapy treatment tool that addresses many common goal areas in kids.

    Lacing cards and fine motor skills are great for building skills needed in tasks.

    Let’s talk about the skills needed to manage and lace up a lacing card:


    Bilateral Coordination-  In order to hold the lacing card and the string or ribbon, kids need to be able to manipulate and coordinate both hands together in a functional way.  They need to bring both hands to midline and work with one hand moving as a manipulating hand to move and thread the string.  The other hand, typically the non-dominant hand works as an assisting hand to hold the lacing card.  Both hands, wrists, and shoulders need to work together to position the card and string in a coordinated fashion.  


    Read more about bilateral coordination activities.


    Tripod grasp or Pincer grasp-  Depending on the size of the lacing card holes and the thickness of the string, different types of pinching grasps can be used with the dominant hand.  it is common for these grasps to vary during and throughout the task of lacing a single card.  One thing is consistent though and that is the fact that the fingers are working in a functional way that is beneficial for pencil grasp and manipulation of small items such as needles, beads, and clothing fasteners.  


    Here is more information about a pincer grasp and activities to address this skill.


    Separation of the two sides of the hand- When holding the string, it is useful for the ring and pinkie fingers to bend into a fist in order to stabilize the hand.  This positioning is effective for a functional grasp on the pencil when writing. In this way, lacing cards boost fine motor skills as a pre-writing tool. 


    Check out these easy ideas to address motoric separation of the hand.


    Visual Motor Skills- Coordinating visual information with motor movements of the hands is essential for handwriting, cutting with scissors, and many other tasks.  Manipulating lacing cards is an excellent way to address these needs. 


    Read more about visual motor skills.


    Motor Planning- A motor plan is functional execution of a task which is viewed with the eyes and carried out with the hands in order to complete tasks, such as mazes, walking around obstacles, cutting along a line, and writing within a space on a form.  Visual motor skills can be difficult for children with visual processing difficulties.  Identifying and organizing information is in a motor plan works on problem solving skills.  


    Read more about motor planning activities for kids.


    Process Art DIY Lacing Cards 

    This post contains affiliate links.
     
    While there are many lacing cards available on the market, it can be a lot of fun (and quite beneficial) to make your own lacing cards.  We had a blast making a big set of lacing cards recently, using inspiration from Barbara Rucci’s new book, Art Workshop for Children.  
     
    We were lucky to receive a book to check out and WOW! What a resource for developing creativity and inspiration in kids.  I loved flipping through every page with my kids as we picked out project after project to complete.  
     
    One of the art projects that stood out to me, is the watercolor lacing cards activity.  As an Occupational Therapist, I was drawn to the fine motor goldmine with this activity.
     
    We were inspired by the watercolor lacing cards in the book and HAD to make our own.  Just like the extended activity ideas that are included with every art activity in Art Workshop for Children, I had to get my kids creating by making their own colorful and creative lacing cards.
     
    So often you see printable lacing cards that are very cookie cutter.  There are so many on the market that are simple shapes and single colors or images.  These are fun and completely perfect for boosting the fine motor skills needed for functional tasks.

    Use art supplies to make your own lacing cards and address fine motor skills.


    However, when we saw the creative opportunity in Art Workshop for Children, we had to get busy with the fine motor development!
     

    Creative DIY Lacing Cards and Fine Motor Skills

    I set up our dining room table with a bunch of supplies:

    Paper plates

    Glitter Shakers 
    Glitter Glue
    You'll need just a few materials to make your own lacing cards and fine motor skill development.
     
    I didn’t have to do much in the way of instruction with this creative activity.  My kids were drawn to the paints and paint brushes like kids to candy.  They got busy painting, dripping, splotting, and dumping.  It was fun to hear the comments about glitter and paint mixing and I laughed because it reminded me of the “Overheard” sidebar comments in the Art Workshops for Children book.

    Glitter and watercolors are all you need for creative lacing cards and fine motor skills development in kids.
    Use glitter glue to make creative lacing cards and fine motor skills development.
     
    Just making the watercolors were a fine motor goldmine.  Squeezing glitter glue tubes, sprinkling glitter, and painting with paint brushes of all sizes worked those intrinsic muscles of the hands. 

    Use watercolor cakes to paint lacing cards and address fine motor skills.


    Kids can make lacing cards for fine motor skills.

    One surprising way that we worked on fine motor skills was using old water color cakes.  I pulled the cakes right from the water color set and showed my kids how to dip them into water and then draw on the paper.  Pinching the wet and messy watercolor cake was a great sensory experience that promoted a tripod grasp.  This is a great way to strengthen the intrinsic muscles of the hand and promote arch development needed for endurance in tasks such as coloring and writing.

     
    Once our paintings were dry, my oldest daughter and I cut them into large shapes and used a hole punch to create lacing cards.  We used yarn to thread around the holes.  I showed my kids how to stitch the holes in two different ways, going up and down through the holes and also around the edge of the lacing card.  Both techniques great for addressing the fine motor skills described above.

    Kids love to make their own lacing cards for addressing fine motor skills.
    Lacing cards and fine motor skills go hand in hand with creative activities.
     
    These gorgeous watercolor lacing cards are perfect for developing fine motor skills in kids and are great addition to any home, classroom, or therapy clinic…from start to finish!  We’ll save our lacing cards and use them again and again! 
     
    I am so excited to be on the Art Workshop for Children blogging team.  You can read more about the book here and read more about the creative activities in the book. 
     
    Consider adding Art Workshop for Children to your holiday shopping list!  Pair the book with art supplies for a creative and unique gift idea that kids of all ages will love.  Teachers and therapists will find this book beneficial for the classroom or clinic, too. 

    Grab the Art Workshop for Children book for creative art ideas.

    Who do you know that would love a creating art gift like this?

    Lacing cards and fine motor skills are great for developing the strength in the hands for handwriting and pencil grasp.

    Everything You Need for Your Minecraft Fan

    My son is a Minecraft fan.  He is obsessed.  From playing the game, to pretending with action figures, to reading the books.  He is Minecraft obsessed in a big way.  Although this is a different sort of post than I usually share, I wanted to put together a gift guide that has everything Minecraft that you need for your obsessed child.  Use this list as a guide for gift ideas, stocking stuffers, and even pass it on to grandparents who are asking what to buy this holiday season.


    And here is a tip: when that Minecraft loving kid HATES to practice handwriting, use his or her passions to spark a writing fire! 


    I’ve got all of the Minecraft writing tools toward the bottom of this post, so scroll on down…but for now, here are  toys that will help improve pencil grasp.


    Everything you need for your minecraft fan this holiday season. use these minecraft ideas for gifts.


    Minecraft Gifts That Your Child Will Love

    There are SO many Minecraft ideas that are out there.  From gift ideas to stocking stuffers, you can find them all here.

    Affiliate links are included in this post.

    These figures are perfect for building, setting up imaginative scenes and pretend play scenarios.  The great thing about Minecraft is that the mind is the limit when it comes to creating scenes.There are so many mini figures that can be used in pretend play scenarios. Use them to encourage storylines.  Then, kids can write down characters, plays, and actions of the figures.

    amzn_assoc_placement = “adunit0”;
    amzn_assoc_search_bar = “true”;
    amzn_assoc_tracking_id = “sugaun-20”;
    amzn_assoc_ad_mode = “manual”;
    amzn_assoc_ad_type = “smart”;
    amzn_assoc_marketplace = “amazon”;
    amzn_assoc_region = “US”;
    amzn_assoc_title = “My Amazon Picks”;
    amzn_assoc_linkid = “6784097fea76382fa17229ecbf3d34ed”;
    amzn_assoc_asins = “B015QZMIQM,B015QZMIPI,B015QZMJOS,B015QZMHSQ”;


    Use these blocks to create landscapes: 

    amzn_assoc_placement = “adunit0”;
    amzn_assoc_search_bar = “true”;
    amzn_assoc_tracking_id = “sugaun-20”;
    amzn_assoc_ad_mode = “manual”;
    amzn_assoc_ad_type = “smart”;
    amzn_assoc_marketplace = “amazon”;
    amzn_assoc_region = “US”;
    amzn_assoc_title = “My Amazon Picks”;
    amzn_assoc_linkid = “6784097fea76382fa17229ecbf3d34ed”;
    amzn_assoc_asins = “B00DOQD0Y0,B013DZOC7U,B00KLCH5FK,B00MI55QWW”;

    What to do with all of those mini figures? Grab a storage case. Use small Minecraft notepads to label the figures in the case.


    amzn_assoc_placement = “adunit0”;
    amzn_assoc_search_bar = “true”;
    amzn_assoc_tracking_id = “sugaun-20”;
    amzn_assoc_ad_mode = “manual”;
    amzn_assoc_ad_type = “smart”;
    amzn_assoc_marketplace = “amazon”;
    amzn_assoc_region = “US”;
    amzn_assoc_title = “My Amazon Picks”;
    amzn_assoc_linkid = “3f1e1cf9ecd4ac819f32bdccac5d9f83”;
    amzn_assoc_asins = “B00RZ62A1O,B01D0XP32I,B016YXMYQ4,B00DOQCV9U”;
    Looking for a few digital ideas? Ask kids to write labels on the games or instructions for play.


    amzn_assoc_placement = “adunit0”;
    amzn_assoc_search_bar = “true”;
    amzn_assoc_tracking_id = “sugaun-20”;
    amzn_assoc_ad_mode = “manual”;
    amzn_assoc_ad_type = “smart”;
    amzn_assoc_marketplace = “amazon”;
    amzn_assoc_region = “US”;
    amzn_assoc_title = “My Amazon Picks”;
    amzn_assoc_linkid = “3f1e1cf9ecd4ac819f32bdccac5d9f83”;
    amzn_assoc_asins = “B00RZ628O8,B0119J9VMI,B00KVQYJR8,B00992CF6W”;
    Most parents are interested in getting the kids to read. For the Minecraft obsessed kid, a story about Steve may be just the material that creates a bookworm. Use the books to encourage writing.  Ask your child to write a story extension to the books. Here are some Minecraft books to try:


    amzn_assoc_placement = “adunit0”;
    amzn_assoc_search_bar = “true”;
    amzn_assoc_tracking_id = “sugaun-20”;
    amzn_assoc_ad_mode = “manual”;
    amzn_assoc_ad_type = “smart”;
    amzn_assoc_marketplace = “amazon”;
    amzn_assoc_region = “US”;
    amzn_assoc_title = “My Amazon Picks”;
    amzn_assoc_linkid = “3f1e1cf9ecd4ac819f32bdccac5d9f83”;
    amzn_assoc_asins = “1632207117,B018B6RU7A,1539650138,1943330115”;
    If you are a lost Minecraft parent, here are some guide books that might help: 

    amzn_assoc_placement = “adunit0”;
    amzn_assoc_search_bar = “true”;
    amzn_assoc_tracking_id = “sugaun-20”;
    amzn_assoc_ad_mode = “manual”;
    amzn_assoc_ad_type = “smart”;
    amzn_assoc_marketplace = “amazon”;
    amzn_assoc_region = “US”;
    amzn_assoc_title = “My Amazon Picks”;
    amzn_assoc_linkid = “6784097fea76382fa17229ecbf3d34ed”;
    amzn_assoc_asins = “B01IT02ZTG,0399593217,B01CGNHVE6,B00VDIZ788”;

    Everything you need for your minecraft fan this holiday season. use these minecraft ideas for gifts.


    If you’ve got a child who HATES to write or practice handwriting, but LOVES Minecraft, then why not try to sneak some handwriting skills into their interest? Try these Minecraft themed handwriting activities: 

    Use this paper to practice handwriting with a Minecraft theme:

    Kids can use the journals to practice handwriting, using the toys in the ways described above. Encourage quality handwriting, but overall legibility over quality.  Minecraft is your child’s passion and you don’t want to make it a job to just play! 

    amzn_assoc_placement = “adunit0”;
    amzn_assoc_search_bar = “true”;
    amzn_assoc_tracking_id = “sugaun-20”;
    amzn_assoc_ad_mode = “manual”;
    amzn_assoc_ad_type = “smart”;
    amzn_assoc_marketplace = “amazon”;
    amzn_assoc_region = “US”;
    amzn_assoc_title = “Minecraft Paper”;
    amzn_assoc_linkid = “adf0e86e8226ee4b5a6bbfe983117789”;
    amzn_assoc_asins = “B008CQMHTQ,B01M659Q4G,3739237651,1537225340,1537225464,1507836201,1537224069,3739229179”;

    Minecraft handwriting activiites

    Easy Trick for Tripod Grasp

    Kids love to have a secret.  

    Sometimes that secret is told to the next unsuspecting person they come into contact with, and other times that secret is held tight. 

    (Helllo, Who-Squeezed-the-Entire-Tube-of-Toothpaste-Into-the-Sink!) 

    This super easy handwriting trick will help kids work on their pencil grasp in order to promote a more functional grip on the pencil. It’s a handwriting trick that might not be obvious to the other student’s in the classroom or even the student at the next desk. 

    And whether your kiddo tells their pencil grasp secret or holds it tight to themselves, it will be a trick that helps them to write with better pencil control and letter formation.


    Pencil grasp trick that places a small item like an eraser in the palm of the hand.

    Hold an Item in the Palm When Writing to Help With Pencil Grasp


    This post contains affiliate links.  

    For this easy pencil grasp trick, you’ll need only one item:

    Show your child/ student/ OT client how to tuck the pencil eraser into the palm of their hand to help with pencil grasp.  While they are writing, they should hold the eraser in place using their pinkie and ring fingers. 

    Why does this pencil grasp trick work?


    When kids hold a small item like a a pencil cap eraser in the palm of their hand, they are using motoric separation of the two sides of the hand.  This encourages the thumb, pointer finger, and middle finger to manipulate the pencil with more control using the skilled side of the hand while the remaining fingers curl in to provide stability.  

    This is a trick that you won’t want to keep a secret.  Grab enough pencil cap erasers for the whole classroom.

    Love this handwriting trick?  Stop over to see all of the simple handwriting tricks for better handwriting in our 30 handwriting series. This post is part of our Easy Quick Fixes to Better Handwriting seriesBe sure to check out all of the easy handwriting tips in this month’s series and stop back often to see them all.  

    You’ll also want to join the Sweet Ideas for Handwriting Practice Facebook group for more handwriting tips and tools.
    Pencil grasp trick that places a small item like an eraser in the palm of the hand.
    What kid wouldn’t love to hold these secret erasers when they write?

    amzn_assoc_placement = “adunit0”;
    amzn_assoc_search_bar = “true”;
    amzn_assoc_tracking_id = “sugaun-20”;
    amzn_assoc_ad_mode = “manual”;
    amzn_assoc_ad_type = “smart”;
    amzn_assoc_marketplace = “amazon”;
    amzn_assoc_region = “US”;
    amzn_assoc_title = “My Amazon Picks”;
    amzn_assoc_linkid = “e6290d3b4dc5e6255905cd4d496ccb5a”;
    amzn_assoc_asins = “B00ANS2YCG,B008O81IN8,B0036VZWC6,B007K1D4JQ”;

    Coban Pencil Grip

    Pencil grips can be pricey, especially if you are buying a big batch to try and find the right fit for a single child.  Then, add a classroom of kids or a caseload of 50-60 children who each have different pencil gasps, different strengths, different handwriting quirks, and you can go pencil grip bankrupt!  This easy, DIY, custom-made, and cheap coban pencil grip is one that will work with every child no matter what their current pencil grasp looks like.  The secret weapon? Self-adhesive, removable (yet still totally stick-able and re-usable) coban!


    Use coban to make a customized, re-usable, DIY pencil grip for improving pencil grasp, perfect for the whole classroom or OT clinic.
    This activity is part of our month-long handwriting series where we are sharing creative and easy ways to address common handwriting issues in our 30 Easy Quick Fixes for Better Handwriting series.

    You’ll also want to join the Sweet Ideas for Handwriting Help Facebook group where you can find support and resources for handwriting. 

    Coban Pencil Grip (A handwriting gripper secret weapon!)


    This post contains affiliate links.

    Use coban to make a customized, re-usable, DIY pencil grip for improving pencil grasp, perfect for the whole classroom or OT clinic.
    What is coban??? Is a question you might be asking right now.  Perhaps you’ve seen it before.  If you’ve ever had a surgical wound or a bad wound of any kind, you might have come across coban before.  It’s a self-adherent wrap that works a lot like surgical tape.  It’s rally a pretty cool material.  It sticks to itself again and again and it requires no adhesive to stay in place.  My days as a hand therapist brings back memories of coban in my therapy tool box.  It’s a great device for applying compression to edema, immobilization, and a wrap to dressings.  

    But it also makes a pretty awesome pencil grip!

    Coban is unique in it’s ability to stick to itself, so why not use it to create a customized and DIY pencil grip?  Being that a roll of it is pretty inexpensive, you can create pencil grippers for every pencil in the pencil box as well as colored pencils, mechanical pencils, and even markers.  These writing tools usually don’t work with conventional pencil grips, but coban can be fit to any writing device.

    Use coban to make a customized, re-usable, DIY pencil grip for improving pencil grasp, perfect for the whole classroom or OT clinic.
    We tried a bunch of different writing tools and then made a variety of pencil grippers with the coban.  A child that needs just a tactile cue to pinch the tip of the pencil can use a thin ribbon of coban around the tip of the pencil.

    The child that needs a molded form can have the coban built up at the top and end of the pencil grip.  (Just keep wrapping the coban around more to create more layers and a thicker portion.)

    The child that uses too much pressure on the pencil could benefit from a foam-y thick layer of coban the whole way around the tip of the pencil.

    The child that needs cues to open the thumb web space could have a small “pocket” of coban formed at the end of the pencil gripper. 

    The possibilities are endless with this custom-made pencil grip material.

    And the best part is that when the pencil needs sharpened, you peel off the coban and move it on up the pencil.

    We used blue coban but here is a very inexpensive option for purchasing.  If you need a bunch of rolls for one or several classrooms, this bulk purchase might be a better deal. (Note: that bulk purchase is a 3 inch wide material. You can then cut the material to a thinner strip, essentially tripling the amount of coban you have on hand but also having a thicker material to fold for pencil grips.)

    Here are a few tips for making your coban pencil grip:
    Using a thicker width of coban is fine (it is available in a variety of widths) as it can easily be cut or folded to fit the needs of your child.  

    When making your pencil gripper, fold the end of the coban over once to make a thicker end that will be easier to find and peel off when it comes time to sharpen the pencil or adjust the coban.

    Let me know how this DIY pencil grip works for you!

    Use coban to make a customized, re-usable, DIY pencil grip for improving pencil grasp, perfect for the whole classroom or OT clinic.

    Looking for more ways to improve pencil grasp? Start here:

     Pencil Grasp Activity Pencil Grasp Exercise Thumb opposition activity
       

    amzn_assoc_placement = “adunit0”;
    amzn_assoc_search_bar = “true”;
    amzn_assoc_tracking_id = “sugaun-20”;
    amzn_assoc_ad_mode = “manual”;
    amzn_assoc_ad_type = “smart”;
    amzn_assoc_marketplace = “amazon”;
    amzn_assoc_region = “US”;
    amzn_assoc_title = “My Amazon Picks”;
    amzn_assoc_linkid = “c38e496d469ec77338b54bbaab0d1158”;
    amzn_assoc_asins = “B00UEHDW04,B0070P25TM,B01AWCCP9Y,B001DND1XG”;