Colleen Beck, OTR/L is a pediatric occupational therapist and the owner and author of The OT Toolbox website. She manages all of The OT Toolbox social media accounts and runs the popular newsletter.
Read about Colleen's experience and career as an occupational therapist, including how The OT Toolbox began on our About The OT Toolbox page: https://www.theottoolbox.com/about-us/
Colleen created The OT Toolbox in 2011 and since then has written thousands of blog posts designed to support therapy providers, educators, parents, counselors, admin, and caregivers in promoting the healthy development of kids.
Check out Colleen's blog posts below:
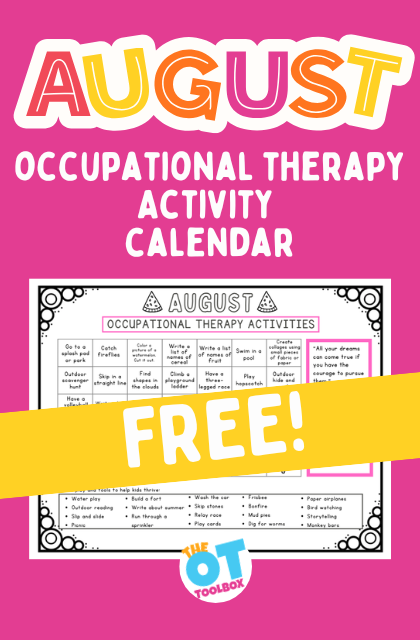
We love a great Summer OT program for carryover of skills. The best activities involve play and the family. This month’s Occupational Therapy calendar is full of backyard summer fun activities that build skills using sensory processing components. These are great activities to get the kids moving and developing skills using the senses.
This August list of Summer things to do with kids and families is a list of therapist-approved activities that help promote stronger core muscles, refined fine motor skills, and the very skills kids need to learn, play, and develop.
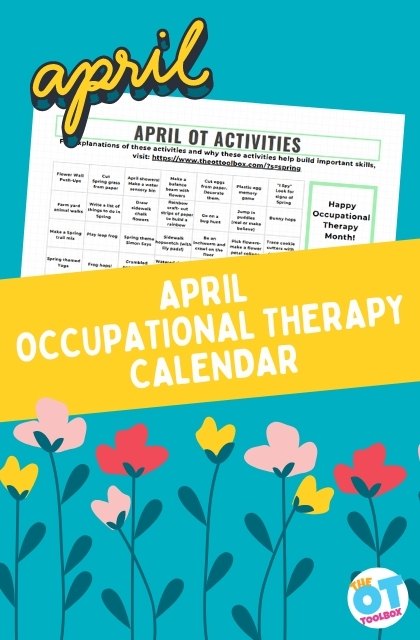
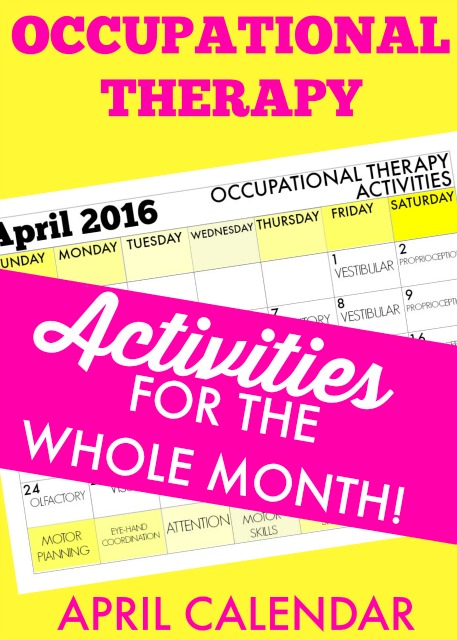
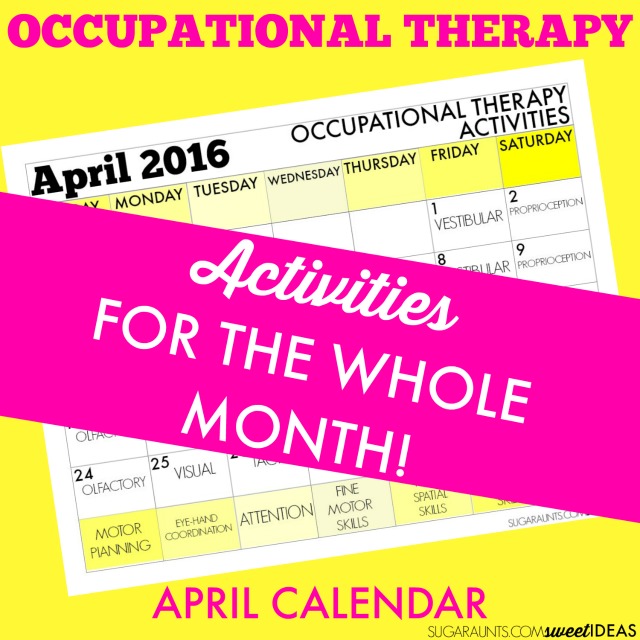
August Occupational Therapy Activities Calendar
This free August occupational therapy calendar is great for creating home programs and to use when school based OT is out of session for the Summer. We love to print these calendars off as a printable Summer OT program for parents and guardians to use all Summer long.
We suggest to print these off and hang them on the fridge at home. Pick one OT activity and day and do them in order or do them in an order that makes sense for your schedule and family needs. We didn’t put dates on these calendars for just that reason. We want these Summer OT ideas to be fun and motivating…not a challenge to do!
August Occupational Therapy Activities
We have many Summer activities here on The OT Toolbox, and as a Member in our membership club, you can find thousands of printable, Summer themed activities.
If you need some ideas, check out these resources:
Colleen Beck, OTR/L has been an occupational therapist since 2000, working in school-based, hand therapy, outpatient peds, EI, and SNF. Colleen created The OT Toolbox to inspire therapists, teachers, and parents with easy and fun tools to help children thrive. Read her story about going from an OT making $3/hour (after paying for kids’ childcare) to a full-time OT resource creator for millions of readers. Want to collaborate? Send an email to contact@theottoolbox.com.
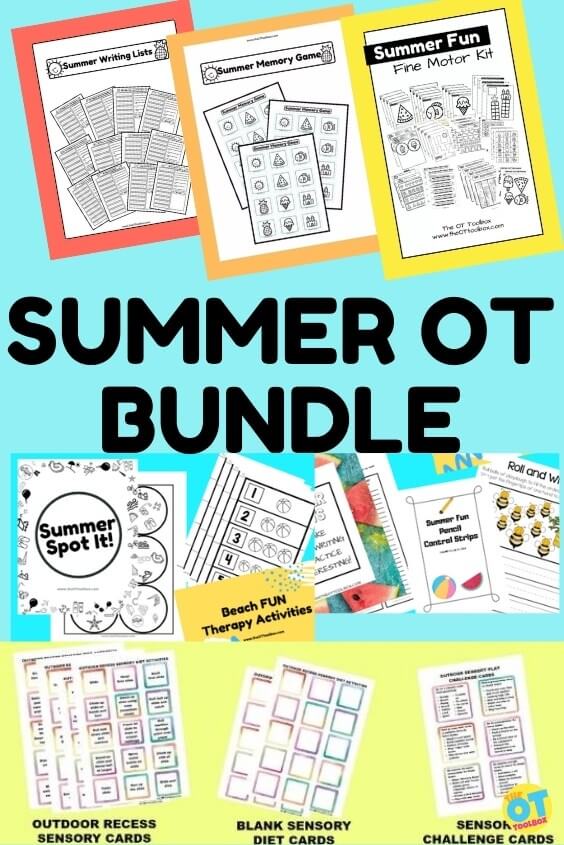
Work on fine motor skills, visual perception, visual motor skills, sensory tolerance, handwriting, scissor skills, and much more so that kids can accomplish self-care tasks, learn, and grow through play all summer long.
This bundle is perfect for the pediatric occupational therapist who needs resources and tools to use in summer therapy sessions.
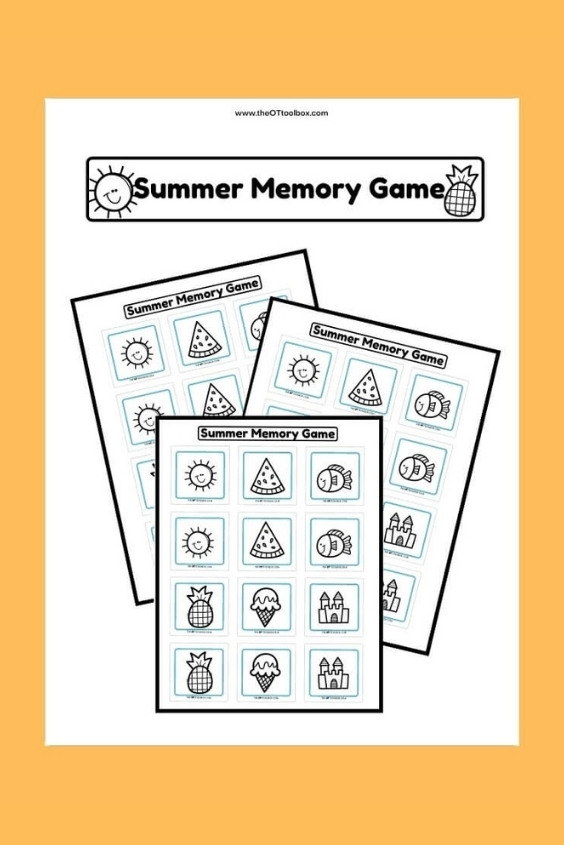
Summer Memory Game- perfect for playing Memory or using in sensory bins
Summer OT Packet ($20 value)
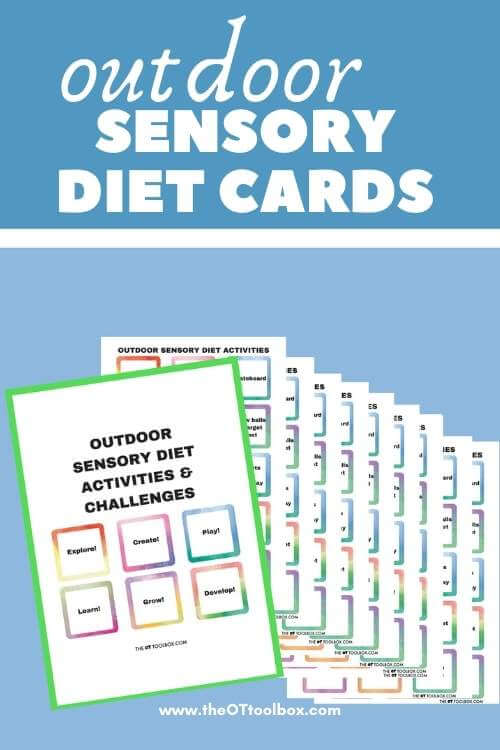
180 Outdoor Sensory Diet Cards- for when your kiddo is “sooooo bored” or using in sensory diets
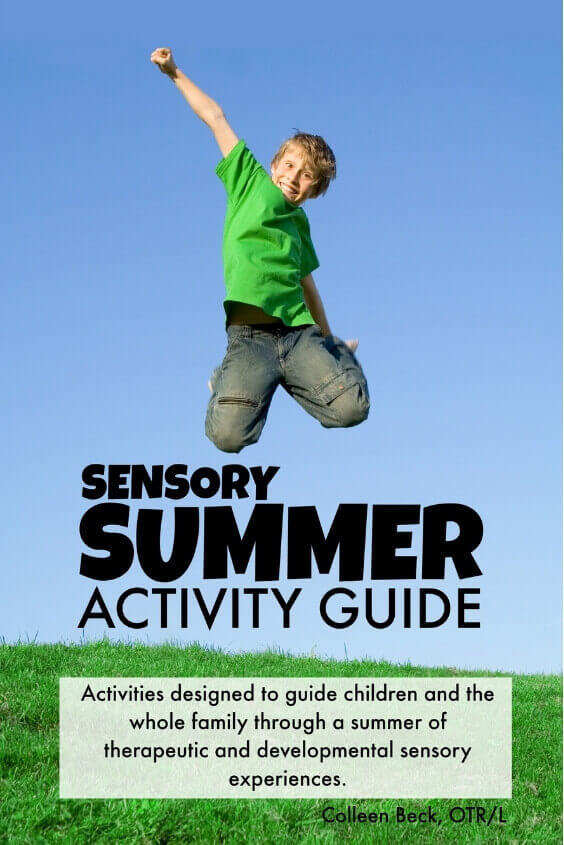
BONUS: Summer Sensory Activity Guide
This is a digital product that will last all Summer long!
Summer Fine Motor Kit
The Summer OT Bundle is your ticket to sending the kids back to school in the Fall without worrying about the “Summer Slide”. Each Fall, kids need to catch up on areas that they’ve lost over the summer months. With the Summer OT Bundle, there is no worry about falling backwards. Use the materials to maintain and even grow motor skill development this summer so kids can thrive and jump into learning next Fall.
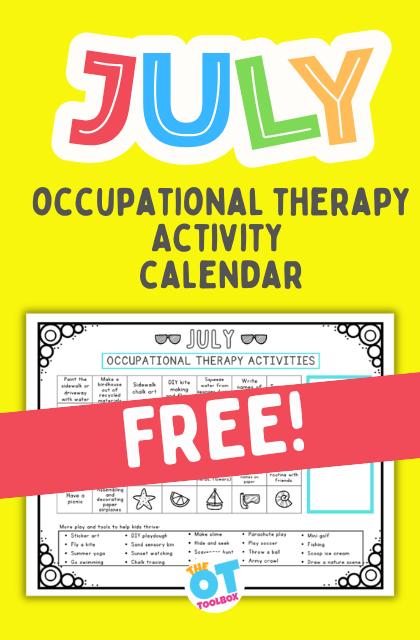
Can you believe that July is upon us? This month’s Occupational Therapy calendar is full of backyard summer fun activities that build skills using sensory processing components. These are great activities to get the kids moving and developing skills using the senses.
This list of Summer things to do with kids and families this summer is a list of therapist-approved activities that help promote stronger core muscles, refined fine motor skills, and the very skills kids need to learn, play, and develop.
That’s why we made this…
Free July Occupational Therapy Calendar!
This free July occupational therapy calendar is great for creating home programs and to use when school based OT is out of session for the Summer. We love to print these calendars off as a printable Summer OT program for parents and guardians to use all Summer long.
Our recommendation is to print these off and hang them on the fridge at home. Pick one OT activity and day and do them in order or do them in an order that makes sense for your schedule and family needs. We didn’t put dates on these calendars for just that reason. We want these Summer OT ideas to be fun and motivating…not a challenge to do!
These calendars and activities are backed by expertise, education, and experience as an Occupational Therapist.
This month is all about backyard summer fun and creative ways to incorporate sensory input into summer activities.
These activities are sure to keep away the summer boredom. Many kids who receive school-based OT are on a break from their school-based therapy services and are following a summer program. These ideas are perfect for adding to a summer therapy program or just doing for fun!
Are you looking for Occupational Therapy activities to beat the summer OT slide? What are you doing to work on certain goal areas?
July Occupational Therapy Activities
We have many Summer activities here on The OT Toolbox, and as a Member in our membership club, you can find thousands of printable, Summer themed activities.
If you need some ideas, check out these resources:
Colleen Beck, OTR/L has been an occupational therapist since 2000, working in school-based, hand therapy, outpatient peds, EI, and SNF. Colleen created The OT Toolbox to inspire therapists, teachers, and parents with easy and fun tools to help children thrive. Read her story about going from an OT making $3/hour (after paying for kids’ childcare) to a full-time OT resource creator for millions of readers. Want to collaborate? Send an email to contact@theottoolbox.com.
Work on fine motor skills, visual perception, visual motor skills, sensory tolerance, handwriting, scissor skills, and much more so that kids can accomplish self-care tasks, learn, and grow through play all summer long.
This bundle is perfect for the pediatric occupational therapist who needs resources and tools to use in summer therapy sessions.
Summer Memory Game- perfect for playing Memory or using in sensory bins
Summer OT Packet ($20 value)
180 Outdoor Sensory Diet Cards- for when your kiddo is “sooooo bored” or using in sensory diets
BONUS: Summer Sensory Activity Guide
This is a digital product that will last all Summer long!
Summer Fine Motor Kit
The Summer OT Bundle is your ticket to sending the kids back to school in the Fall without worrying about the “Summer Slide”. Each Fall, kids need to catch up on areas that they’ve lost over the summer months. With the Summer OT Bundle, there is no worry about falling backwards. Use the materials to maintain and even grow motor skill development this summer so kids can thrive and jump into learning next Fall.
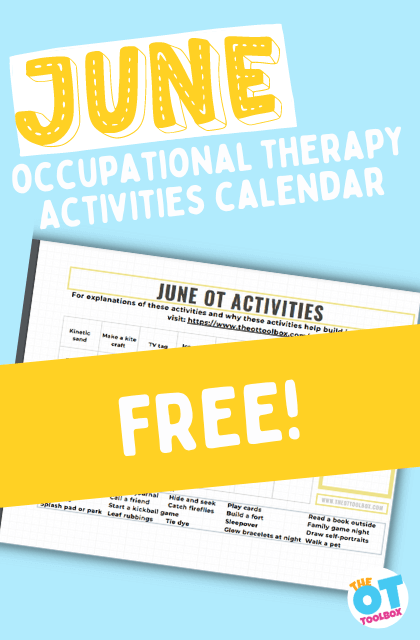
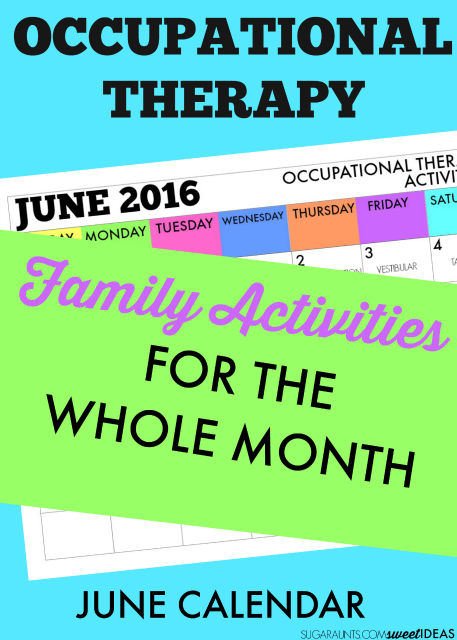
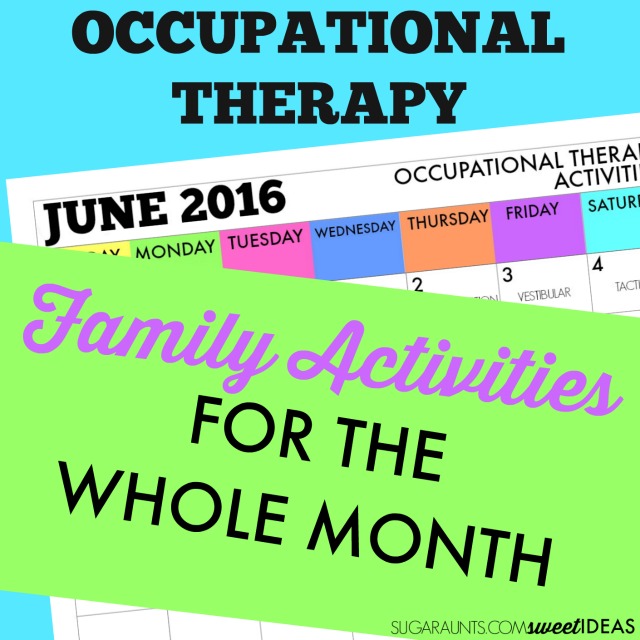
If you are looking for Summer occupational therapy activities, this June occupational therapy calendar is for you! It’s loaded with June calendar ideas to help kids move, develop skills, and play this summer. Having a calendar for therapy activities ready to go is important to beat the summer slide when it comes to helping kids move with therapist-approved activities. Use this printable June calendar in occupational therapy home programs, summer lesson plans, and OT summer sessions! You’ll find more summer occupational therapy ideas on various places on the website.
Both can be printed and used along with this free June activity calendar to support kids’ OT needs this year.
June Occupational Therapy Calendar
We’re plugging along as the end of this school year arrives and the start of summer is right around the corner. Are you ready for a summer with the kids?
It can be hard to stay on track with Occupational Therapy goals during the carefree days of summer. This month, with the June activity calendar, I wanted to bring you easy ways to keep up on therapy goals.
There is nothing better than the whole family getting involved with a game or an outing. Family time is memory-making time and so this month’s Occupational Therapy calendar is focused around family activities.
June Activities
This Family wellness BINGO game is another tool to support overall family needs and can be a great addition to summer activities.
The June calendar ideas include other activities at the bottom of the page to support a variety of needs. These ideas can be used to replace activities on the calendar, if needed.
All of the June activities support a variety of developmental areas. We’ve selected the activity ideas based on development of skills through play and movement.
Some of the developmental areas addressed in these June activities include:
Sensory processing
Visual processing
Executive functioning skills
Direction following
Motor skill development (fine motor and gross motor)
Each June activity on the OT calendar targets sensory motor areas:
Tactile input
Proprioception
Vestibular input
Visual input
Some activities are guided by olfactory, auditory, and gustatory input.
We’ve selected these June activities to support areas of functioning such as:
Handwriting
Scissor skills
Self-care
Cooking (following recipes)
Game play
Exploring the community
More June Activities
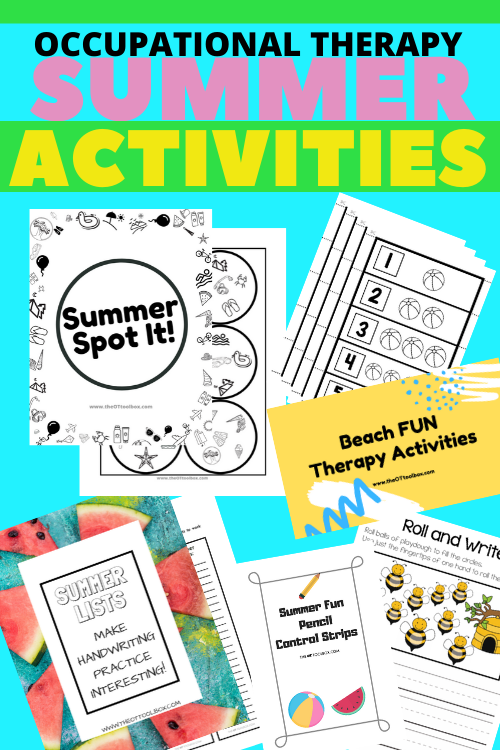
Exploring all that summer allows is a great way to develop skills during the Summer months. However, if you need a strategy, we’ve created a few resources for just this need.
In fact, I’ve created a whole summer of OT activities that the get the family involved! These are sensory-based treatment activities that build on skills that may make up your child’s Occupational Therapy goals. The nice thing about these activities is that you can adjust the activity to meet individual goals.
You’ll be interested in our new Summer Occupational Therapy Activities Packet. It’s a collection of 14 items that guide summer programming at home, at school, and in therapy sessions. The summer activities bundle covers handwriting, visual perceptual skills and visual motor skills, fine motor skills, gross motor skills, regulation, and more.
You’ll find ideas to use in virtual therapy sessions and to send home as home activities that build skills and power development with a fun, summer theme. Kids will love the Summer Spot It! game, the puzzles, handouts, and movement activities. Therapists will love the teletherapy slide deck and the easy, ready-to-go activities to slot into OT sessions. The packet is only $10.00 and can be used over and over again for every student/client!
Want to print off this calendar and add it to home programs or use it in therapy planning this summer? Enter your email address into the form below.
Want to add this resource to your therapy toolbox so you can help kids thrive? Enter your email into the form below to access this printable tool.
This resource is just one of the many tools available in The OT Toolbox Member’s Club. Each month, members get instant access to downloadable activities, handouts, worksheets, and printable tools to support development. Members can log into their dashboard and access all of our free downloads in one place. Plus, you’ll find exclusive materials and premium level materials.
Level 1 members gain instant access to all of the downloads available on the site, without enter your email each time PLUS exclusive new resources each month.
Level 2 members get access to all of our downloads, exclusive new resources each month, PLUS additional, premium content each month: therapy kits, screening tools, games, therapy packets, and much more. AND, level 2 members get ad-free content across the entire OT Toolbox website.
Colleen Beck, OTR/L has been an occupational therapist since 2000, working in school-based, hand therapy, outpatient peds, EI, and SNF. Colleen created The OT Toolbox to inspire therapists, teachers, and parents with easy and fun tools to help children thrive. Read her story about going from an OT making $3/hour (after paying for kids’ childcare) to a full-time OT resource creator for millions of readers. Want to collaborate? Send an email to contact@theottoolbox.com.
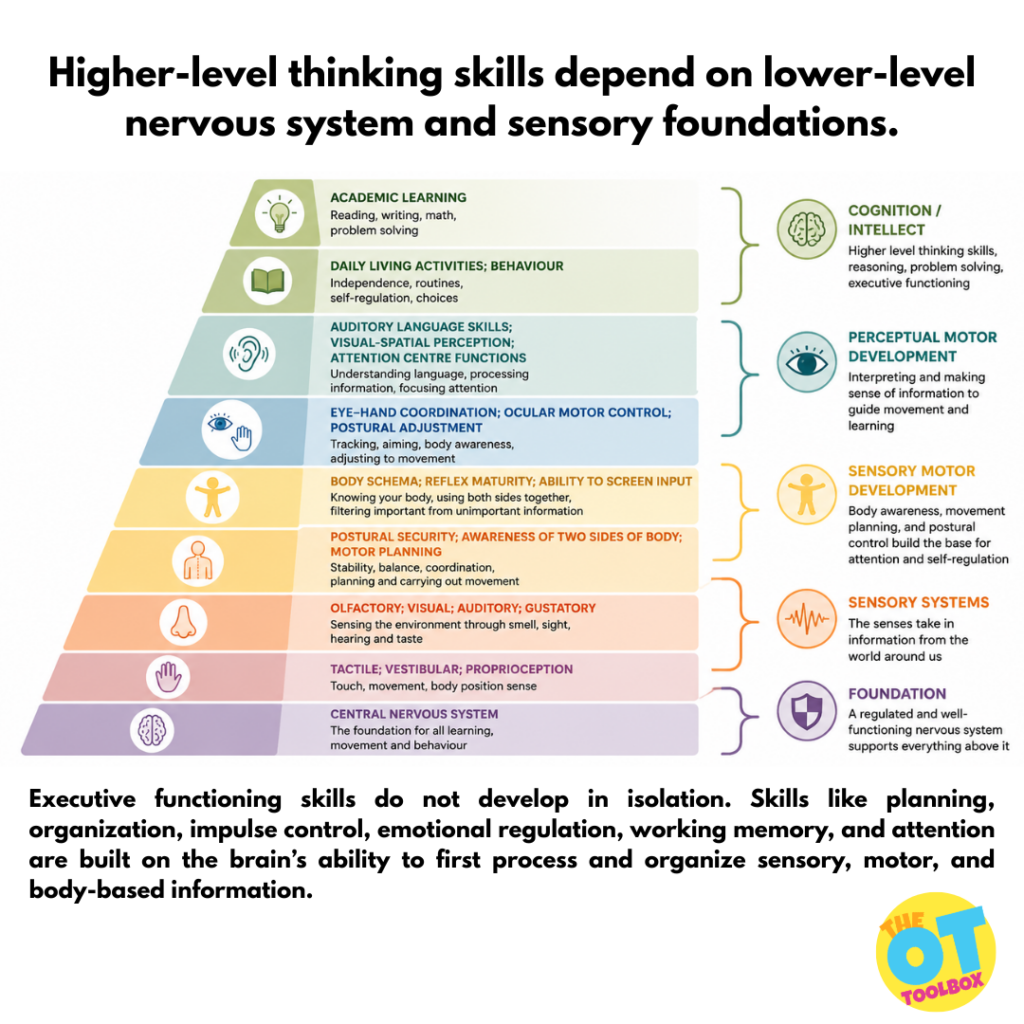
The Pyramid of Learning helps explain how higher-level skills like attention, emotional regulation, problem solving, organization, and executive functioning are built on a foundation of sensory, motor, and nervous system development. For example, executive functioning skills do not develop in isolation. Before the brain can consistently plan, focus, regulate emotions, manage time, or complete tasks, it first needs a strong foundation of body awareness, sensory processing, movement, postural control, and regulation.
When lower levels of the pyramid are unstable or overwhelmed, higher-level thinking skills can become more difficult to access. Understanding executive functioning through the lens of the Pyramid of Learning reminds us that learning and behavior are deeply connected to the nervous system, and that supporting the foundation often strengthens the skills at the top.
What is the pyramid of learning
The sensory Pyramid of Learning is a helpful visual framework often used by occupational therapists, educators, and parents to better understand how children develop the foundational skills needed for learning and participation. The pyramid illustrates the idea that higher-level skills such as reading, writing, attention, emotional regulation, and academic learning are built upon a strong sensory and motor foundation. Rather than viewing learning as isolated academic performance, the Pyramid of Learning helps us see how the nervous system, movement, sensory processing, and regulation all work together to support development.
The Pyramid of Learning was developed by occupational therapist Kathleen Taylor and special educator Maryann Trott. Their work was heavily influenced by the sensory integration theories of A. Jean Ayres, who emphasized the importance of sensory processing in child development. The pyramid serves as a developmental road map, helping adults understand how foundational sensory systems support the growth of more complex skills over time.
The Pyramid of Learning is a developmental framework often used in occupational therapy and education to explain how foundational sensory and motor skills support higher-level learning and participation. The idea behind the pyramid is that children build skills from the “bottom up.” Before children can successfully complete complex academic tasks, they first need strong foundational systems that support attention, regulation, movement, and processing.
At the base of the pyramid are the sensory systems, including:
Vestibular processing (movement and balance)
Proprioception (body awareness and force)
Tactile processing (touch)
Visual and auditory processing
Interoception (internal body awareness)
These sensory systems help children understand and respond to the world around them. When these foundational systems are well organized, children are better able to develop motor coordination, postural control, body awareness, and emotional regulation.
The middle levels of the pyramid include:
Visual motor integration
Bilateral coordination
Motor planning
Attention and focus
Language processing
Emotional regulation
These areas support participation in daily activities and classroom tasks.
At the top of the pyramid are higher-level academic and functional skills such as:
Reading and writing
Problem-solving
Executive functioning
Organization
Behavioral regulation
Social participation
From an occupational therapy perspective, the Pyramid of Learning reminds us that when a child struggles with attention, handwriting, behavior, or learning, it is important to consider the underlying foundational skills first. For example, a child who has difficulty sitting still during class may actually be struggling with sensory processing, postural control, or body awareness rather than motivation or behavior alone.
This framework helps parents, teachers, and therapists understand that learning is connected to the nervous system, sensory processing, movement, and regulation. Supporting foundational skills through movement, sensory experiences, and meaningful activities can improve participation and functional performance across home, school, and community environments.
pyramid of learning occupational therapy
In occupational therapy, the Pyramid of Learning is used as a framework to understand how foundational sensory and motor systems support a child’s ability to participate in everyday activities. Occupational therapists often use this model to look beyond the surface of a child’s challenges and identify the underlying skills that may be impacting function.
From an OT perspective, higher-level skills like handwriting, attention, emotional regulation, reading, and classroom participation do not develop in isolation. These abilities are built upon a strong sensory and motor foundation. If the foundational systems at the bottom of the pyramid are not well developed, children may struggle with more advanced tasks at the top of the pyramid.
The lower levels of the pyramid include sensory processing systems such as:
Vestibular processing (movement and balance)
Proprioception (body awareness)
Tactile processing (touch input)
Visual and auditory processing
Interoception (awareness of internal body signals)
These systems support body awareness, postural control, motor planning, and regulation. Occupational therapists often address these foundational areas through movement-based and sensory-rich activities that help organize the nervous system.
As children build stronger foundational skills, they are better able to develop:
Bilateral coordination
Fine motor control
Visual motor integration
Attention and focus
Self-regulation
These middle layers support successful participation in school, play, self-care, and social activities.
At the top of the Pyramid of Learning are higher-level functional skills such as:
Academic learning
Executive functioning
Emotional regulation
Problem-solving
Behavioral organization
Occupational therapists use this framework to help explain why children may struggle with tasks like sitting still, handwriting, or following directions. For example, difficulty with attention may actually be related to sensory processing challenges, weak postural control, or a nervous system that is not fully regulated.
The Pyramid of Learning also supports a strengths-based and developmental approach to intervention. Rather than focusing only on correcting behavior or academic performance, occupational therapists work to strengthen the underlying systems that support participation and independence.
This framework helps parents, teachers, and therapists understand that learning and behavior are deeply connected to sensory processing, movement, and nervous system regulation. When foundational skills are supported, children are often better able to engage, learn, and participate successfully across environments.
Base of the Pyramid of Learning
At the base of the pyramid are the primary sensory systems: tactile, vestibular, and proprioceptive processing. These systems form the foundation for all higher learning and participation. The tactile system involves touch and helps children understand their body and environment through sensory experiences. The vestibular system processes movement and balance and plays an important role in body awareness, posture, and attention. The proprioceptive system provides information about body position, force, and movement, helping children coordinate their actions and navigate their environment efficiently.
A child’s nervous system requires sensory input in order to grow, organize, and mature. Sensory experiences provide the brain with critical information that supports neural development and learning. The more opportunities children have to move, explore, touch, climb, swing, and engage with their environment, the more input the brain receives to build strong neural pathways. This is why sensory play, movement activities, and hands-on experiences are so important in early childhood development.
As the sensory systems develop, they support the middle layers of the pyramid. These layers include skills such as postural control, bilateral coordination, body awareness, motor planning, visual perception, and auditory processing. These foundational motor and perceptual skills allow children to participate more successfully in everyday activities. For example, a child with good postural control and body awareness is better able to sit upright in a classroom chair, manipulate school tools, and focus on learning tasks.
Higher up on the pyramid are advanced skills such as attention, emotional regulation, academic learning, executive functioning, social participation, reading, and handwriting. These are often the skills adults notice first when a child is struggling. However, the Pyramid of Learning reminds us that challenges with attention, behavior, or academics may actually reflect difficulties in the foundational sensory systems lower in the pyramid.
Bottom Up Approach to Intervention
From an occupational therapy perspective, this framework supports a “bottom-up” approach to intervention. This means therapists often address foundational sensory and motor skills before expecting success in more advanced tasks. For example, if a child struggles to focus during handwriting tasks, the underlying issue may not be motivation or behavior alone. The child may need support with sensory processing, postural stability, body awareness, or regulation in order to fully engage in learning.
higher level thinking
This image connects very closely to executive functioning skills because it demonstrates a foundational developmental concept:
Higher-level thinking skills depend on lower-level nervous system and sensory foundations.
Executive functioning skills do not develop in isolation. Skills like planning, organization, impulse control, emotional regulation, working memory, and attention are built on the brain’s ability to first process and organize sensory, motor, and body-based information.
Here’s how this pyramid relates to executive functioning:
Executive Functioning Is Built From the Bottom Up
The top of the pyramid represents:
Academic learning
Cognition
Intellectual functioning
This includes executive functioning skills such as:
Planning
Organization
Attention
Working memory
Task initiation
Cognitive flexibility
Self-monitoring
But the brain cannot consistently access these higher-level skills when the lower levels of the pyramid are unstable.
The Lower Levels Support Executive Function
Central Nervous System
This is the brain-body communication foundation.
If the nervous system is dysregulated, stressed, or overwhelmed:
attention decreases
emotional regulation becomes harder
impulse control weakens
A dysregulated nervous system directly impacts executive functioning performance.
Sensory Systems
Includes:
vestibular
proprioceptive
tactile
auditory
visual
The brain must process sensory input efficiently in order to:
sustain attention
filter distractions
regulate arousal levels
maintain focus
When sensory processing is difficult, executive functioning can appear inconsistent.
Example: A child struggling to process background noise may look inattentive or disorganized when the issue is actually sensory overload.
Sensory Motor Development
Includes:
postural control
motor planning
bilateral coordination
reflex integration
These skills influence:
sitting upright for attention
coordinating actions
sequencing tasks
sustaining effort
Executive functioning requires physical regulation as well as cognitive regulation.
Sensory activities play a major role in supporting the Pyramid of Learning. Tactile activities such as sensory bins, messy play, and texture exploration help children process touch input and develop body awareness. Vestibular activities like swinging, spinning, climbing, and obstacle courses provide movement experiences that support balance, coordination, and attention. Proprioceptive activities, often called “heavy work,” include pushing, pulling, carrying, climbing, and resistance-based tasks that help organize the nervous system and improve body awareness.
Children who need additional foundational sensory support may demonstrate signs such as difficulty sitting still, poor coordination, weak body awareness, emotional dysregulation, handwriting challenges, or sensory seeking and sensory sensitivity behaviors. Understanding these signs through the lens of the Pyramid of Learning helps adults move beyond simply addressing behavior and instead focus on supporting the nervous system and developmental foundation beneath the behavior.
Perceptual Motor Development
Includes:
visual perception
visual-spatial skills
eye-hand coordination
auditory language processing
These systems support:
following directions
organizing information
reading and writing
remembering steps
Weaknesses in these areas often impact working memory and organization.
Executive Functioning Emerges From Integration
Executive functioning develops when:
sensory systems are regulated
movement systems are organized
attention systems are stable
emotional systems feel safe
This is why:
movement breaks improve focus
heavy work supports attention
co-regulation improves problem solving
sensory supports can improve organization and behavior
The brain develops executive functioning through integrated nervous system experiences.
Clinical Takeaway
This pyramid reminds us that executive functioning challenges are not always “behavior problems” or “motivation problems.”
For parents and educators, the Pyramid of Learning provides a powerful way to understand the connection between sensory experiences and learning. It reinforces the idea that children learn best when their nervous systems are supported through movement, sensory exploration, play, and meaningful experiences. Learning is not just about academics at the top. It’s is deeply connected to the body, brain, and environment working together.
Supporting the foundational layers of the pyramid through sensory-rich experiences can improve participation, regulation, and functional performance across home, school, and community settings. By recognizing the importance of sensory processing and movement in development, we can better support children as they grow, learn, and engage with the world around them.
Sometimes the brain is working so hard to:
process sensory information
regulate emotions
maintain posture
filter input
…that fewer resources remain available for higher-level executive functioning skills.
Supporting executive functioning often means supporting the nervous system first.
Executive functioning sits at the top of a developmental foundation. Attention, organization, planning, and self-regulation depend on the brain first feeling:
regulated
organized
safe
connected
sensory stable
When we support the lower levels of the pyramid, we strengthen the foundation for executive functioning growth.
Colleen Beck, OTR/L has been an occupational therapist since 2000, working in school-based, hand therapy, outpatient peds, EI, and SNF. Colleen created The OT Toolbox to inspire therapists, teachers, and parents with easy and fun tools to help children thrive. Read her story about going from an OT making $3/hour (after paying for kids’ childcare) to a full-time OT resource creator for millions of readers. Want to collaborate? Send an email to contact@theottoolbox.com.
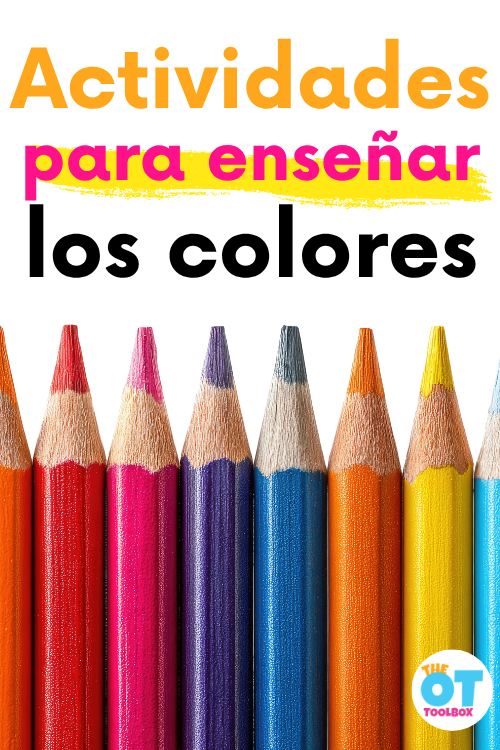
Hay muchas maneras de incluir el juego multisensorial en la enseñanza de los colores a los niños. Aquí encontrarás formas prácticas y creativas de enseñar los colores del arco iris mediante juegos que ayudan a los niños a desarrollar sus habilidades, a moverse y a crecer. Utiliza estas actividades de colores en preescolar o para enseñar a los niños pequeños los colores. Es una forma divertida de desarrollar la capacidad de discriminación visual en los niños pequeños.
Incluyo actividades de color para niños de jardín de infantes y de edad escolar, también, porque estos temas de color pueden ser utilizados en actividades de terapia o para ayudar a los niños a desarrollar la escritura a mano, o las habilidades motoras visuales en los grados mayores. Aquí hay un montón de actividades divertidas y prácticas que ayudan a los niños a aprender los colores y a explorar a través del juego.
Cómo enseñar los colores a los niños pequeños
El juego y el desarrollo de los niños pequeños consiste en la exploración práctica del mundo. Tenemos un montón de actividades para niños pequeños diseñadas para desarrollar las habilidades motoras y el aprendizaje aquí en el sitio web que usted querrá comprobar.
Para enseñar los colores a los niños pequeños, se trata de hacer las cosas divertidas. Estas actividades para niños pequeños le permitirán comenzar con actividades prácticas de desarrollo.
Muchas de las actividades relacionadas con los colores en los primeros años de vida implican la clasificación de colores, la identificación de colores y el señalamiento de colores. Todas estas actividades sientan las bases de la discriminación visual que los niños utilizarán más adelante en la lectura y la escritura.
Prueba estas actividades para enseñar los colores a los niños pequeños:
Esta actividad utiliza juguetes y objetos que se encuentran en el hogar, haciendo que la identificación de los colores forme parte de la vida cotidiana. Puedes utilizar elementos que el niño utilice y vea a diario.
Enseñar a clasificar los colores – Esta sencilla actividad de clasificación de colores es ideal para las familias que tienen un niño de preescolar y otro de corta edad. El niño de preescolar puede cortar láminas de espuma y trabajar la destreza de las tijeras y luego tanto el niño de preescolar como el pequeño pueden clasificar los restos de papel por colores. Esta es una bonita actividad que permite a los hermanos trabajar juntos para aprender conceptos y desarrollar habilidades juntos.
Bolsa de trabajo para clasificar por colores- A los niños pequeños les encanta dejar caer objetos en contenedores, y poner cosas en cubos, contenedores y bolsas… y luego volver a sacarlos. Todo forma parte del proceso de aprendizaje. Esta bolsa ocupada para clasificar colores les da a los niños pequeños palitos de colores para manualidades o palitos de piruleta teñidos y los hace clasificar por colores. También es una actividad estupenda para desarrollar la motricidad fina y la coordinación.
Clasificación de vasos para niños pequeños: esta actividad de clasificación por colores utiliza elementos del hogar, como los vasos de plástico para niños pequeños. Hay algo en los niños pequeños que juegan en la cocina con artículos seguros para el bebé… y éste construye habilidades de pre-alfabetización y pre-matemáticas que utilizarán durante mucho tiempo… ¡a través del juego!
Hablar de los colores – Señalar los colores durante el juego, la conversación, la lectura de libros y los paseos… hay muchas maneras de enseñar los colores a los bebés y a los niños pequeños a través de las conversaciones cotidianas. Es tan sencillo como decir “mira esa flor azul” para añadir términos descriptivos a los niños.
Colorear con la pintura: incorpore todos los colores del arco iris en actividades multisensoriales desde una edad temprana. Estas actividades de juego artístico incorporan los colores en el juego y el aprendizaje a través del arte con los niños pequeños.
En la etapa preescolar, los niños comienzan a desarrollar la capacidad de reconocer e identificar colores. En este momento del desarrollo, el enfoque está en la exposición, la repetición y la interacción significativa con los colores en actividades cotidianas.
Desde el punto de vista del desarrollo, los niños en edad preescolar están fortaleciendo:
Habilidades de percepción visual (notar diferencias entre colores)
Desarrollo del lenguaje temprano (aprender los nombres de los colores)
Atención y memoria (recordar información sobre colores)
Formación de conceptos (entender que el color es una característica de los objetos)
En esta etapa, es común que los niños puedan reconocer un color antes de poder nombrarlo. También pueden confundir colores similares o usar los nombres de los colores de manera inconsistente, lo cual es parte normal del desarrollo.
Por qué es importante enseñar los colores en preescolar
Enseñar los colores en preescolar apoya:
El desarrollo del lenguaje y la comunicación
La capacidad de seguir instrucciones simples
La participación en el juego y las rutinas diarias
La preparación para habilidades académicas futuras
El aprendizaje de los colores es más efectivo cuando se integra en el juego y en experiencias diarias, en lugar de enseñarse de forma aislada.
Cómo enseñar los colores a niños en preescolar
Usar repetición en las rutinas diarias (por ejemplo: “Aquí está tu vaso azul”)
Enfocarse en uno o dos colores a la vez
Relacionar los colores con objetos familiares
Utilizar actividades prácticas y sensoriales
Mantener el aprendizaje divertido y significativo
Actividades de colores para preescolar
Clasificar objetos por color
Emparejar bloques o juguetes de colores
Búsquedas de colores en el entorno
Pintura con los dedos usando pocos colores
Emparejar colores con pegatinas
Clasificar pompones por color
Emparejar objetos con vasos de colores
Cajas sensoriales con actividades de clasificación por color
Juegos de saltar al color indicado
Emparejar formas de colores
Usar marcadores de puntos para identificar colores
Clasificar crayones por color
Juegos de “Veo, veo” con colores
Emparejar piezas de rompecabezas por color
Rodar y emparejar pelotas de colores
Actividades de colores para kindergarten
En el nivel de kindergarten, los niños avanzan más allá de identificar colores básicos y comienzan a aplicar este conocimiento en actividades académicas. A esta edad, la mayoría de los niños puede nombrar colores con consistencia y utilizarlos en tareas estructuradas.
Desde el punto de vista del desarrollo, los niños en kindergarten están desarrollando:
Discriminación de colores (notar diferencias más sutiles)
Comprensión conceptual (entender que los objetos pueden tener diferentes colores)
Uso del lenguaje (describir y comparar colores)
Aplicación del conocimiento en actividades escolares
El aprendizaje de los colores en esta etapa apoya la lectura, las matemáticas y la participación en el aula.
Actividades de colores para kindergarten
Clasificación por color y forma
Gráficas de objetos por color
Creación de patrones con colores
Seguir instrucciones de varios pasos con colores
Búsquedas de colores con listas
Experimentos de mezcla de colores
Clasificar materiales del aula por color
Actividades de centros con códigos de colores
Emparejar tonos y degradados
Reconocimiento de palabras de colores
Resaltar palabras con colores
Dibujos dirigidos con colores específicos
Circuitos de movimiento con colores
Uso de materiales de colores en matemáticas
Clasificación por múltiples características (color y tamaño)
La enseñanza de los colores en preescolar
En la etapa preescolar, el aprendizaje se produce a través del juego. Estas actividades de aprendizaje del color están diseñadas para promover el aprendizaje a través de la exploración práctica, porque esas son las formas en que el aprendizaje “se pega”… cuando las manos están ocupadas y desarrollan las habilidades motoras que luego necesitarán para sostener y escribir con un lápiz. Veamos algunas formas de enseñar los colores en los años de preescolar:
Teaching Shapes and Colors with Rainbow Rocks by Fun-A-Day- Esta actividad es divertida porque utiliza el peso de las rocas para enseñar los colores y las formas. Pero, además, los niños fortalecen sus manos y obtienen información motriz sobre los objetos mientras exploran los colores y otros factores de discriminación como el peso y el tamaño.
Clasificación de colores y formas – Esta actividad preescolar de clasificación de colores ofrece a los niños experiencias de motricidad fina con wikki stix. Pida a los niños de preescolar que copien las formas, para que adquieran más habilidades motoras finas y la integración de la motricidad visual.
Ordenación de colores de motricidad fina – Coge un viejo recipiente de especias o de queso y unas pajitas. Esta actividad de clasificación por colores sienta las bases para el desarrollo de la motricidad fina y las habilidades matemáticas. Los niños pueden contar las pajitas a medida que caen en el recipiente y trabajar en la clasificación de colores mientras desarrollan el espacio de la red del pulgar abierto, la separación de los lados de la mano y la fuerza del arco.
Cubo de agua de colores – Esta actividad de aprendizaje de los colores es una actividad motriz sensorial que también enseña las letras. Es perfecto para el preescolar y el jardín de infancia o incluso para cursos superiores, ya que los niños se sumergen en el aprendizaje multisensorial con las letras y las habilidades de prelectura.
Libro y actividad “El oso ve los colores” – Aprovechamos la merienda para explorar los colores con un libro preescolar muy querido. Esto es el aprendizaje multisensorial en su máxima expresión.
Juegos de colores de motricidad gruesa – Hay muchas maneras de explorar y enseñar los colores usando juegos. Prueba algunas de estas opciones para añadir movimiento y juego al aprendizaje de los colores en el nivel preescolar:
Color I Spy- Diga un color y los niños pueden correr a tocar algo que sea de ese color. Añade variaciones de movimiento pidiendo a los niños que salten, salten, se arrastren o caminen como un oso para tocar los colores.
Colorea lo que dice Simón – Llama a las direcciones basándote en los colores de la ropa que llevan los niños. Añade tantas variaciones de movimiento como desafíos auditivos. Se trata de una actividad estupenda para desarrollar las habilidades de la memoria de trabajo en los niños de preescolar.
Color Tag- Los niños pueden jugar a la etiqueta y cuando marcan a otro jugador, tienen que decir un color para que esa persona vaya. Otra variante es hacer que los jugadores que son marcados corran hacia un color que el etiquetador llama.
Enseñar los colores en el jardín de infancia y en los cursos superiores
Una vez que los niños están en edad escolar, la enseñanza de los colores no termina. En los años escolares, los niños exploran la mezcla de colores, el aprendizaje de los colores primarios y mucho más. Mira todas estas experiencias de color que los niños aprenden durante los años escolares:
Ortografía de los nombres de los colores
Aprender los colores primarios
Aprender los colores secundarios
Mezcla de colores
Teoría del color
Rueda de colores
Colores complementarios
Prueba algunas de estas actividades de color para niños mayores:
Color I Spy Esta búsqueda del tesoro con temática de colores hará que los niños se pongan en movimiento, utilizando los objetos que tienen en su casa mientras trabajan las habilidades de percepción visual, la escritura y mucho más. Los niños pueden escanear visualmente su casa para que coincida con los colores de la pizarra. Además, hay un componente de escritura a mano. Este es un gran paquete de diapositivas para cualquier persona que trabaje en las habilidades de escritura a mano con los niños, virtualmente.
Ejercicios de color– Utiliza ejercicios de motricidad gruesa y estiramientos, así como ejercicios de motricidad fina, para que los niños se muevan mientras trabajan en tantas áreas de habilidades: coordinación bilateral, planificación motriz, fortalecimiento, fuerza central, precisión, destreza, habilidades motrices visuales…
Ejercicio de respiración profunda del arco iris– Este PDF imprimible gratuito es muy popular. Hay una razón: a los niños les encanta la actividad de respiración profunda y a nosotros nos encantan los beneficios de la atención plena, las habilidades de afrontamiento, la calma y la regulación. Genial para todas las edades.
Manualidad de prismáticos arco iris– Los niños pueden utilizar los tubos de papel de cocina en una manualidad que les ayuda a buscar e identificar los colores. Utiliza estos prismáticos arco iris en la exploración visual, la discriminación visual, la figura-fondo visual y otras habilidades perceptivas.
Actividades con lápices de colores– Todo lo que necesitas es un par de lápices de colores (o sustituirlos por un lápiz normal si es lo único que tienes a mano) para trabajar el control del lápiz, la conciencia del trazo, la presión del lápiz y la formación de las letras.
Hacer plastilina con crayones– Explorar los colores con un trabajo intenso a través de las manos y los brazos utilizando todos los colores del arco iris. Esta receta de plastilina con crayones es una receta sensorial muy popular aquí en el sitio web.
Colleen Beck, OTR/L has been an occupational therapist since 2000, working in school-based, hand therapy, outpatient peds, EI, and SNF. Colleen created The OT Toolbox to inspire therapists, teachers, and parents with easy and fun tools to help children thrive. Read her story about going from an OT making $3/hour (after paying for kids’ childcare) to a full-time OT resource creator for millions of readers. Want to collaborate? Send an email to contact@theottoolbox.com.
As an occupational therapist, I look at color learning as more than just an early academic milestone. The ability to recognize colors, name colors, and use colors is directly connected to how a child participates in everyday activities. And, we use these skills in every therapy session! Think about a typical therapy session: pick up the green craft pom poms and sort them into the green cup. This is a visual perceptual skill and we use these multi-step directions as part of our skill therapy interventions. Or, maybe we use the colors of the Alert program when working on self-regulation. Then, we use color directions to work on handwriting skills (stop at the red baseline on modified paper).
These are just some of the ways that colors come into our therapy sessions.
This is a recently updated article where we’ve added a ton of information on color recognition, because it’s something we can use in occupational therapy as a tool to support development through play. (example: a color sorting activity for toddlers or a creative painting for our older kids)
Color recognition in child development
But, maybe the most important reason we need to address color recognition in occupational therapy is that when we work with children, we are working with the whole family, and parents have questions about child development! We are often-times the go-to expert within reach of that parent who has many questions about their child’s development. We might be the only professional a parent feels comfortable enough to ask questions like,
“When do kids learn colors?” Or,
“When do babies learn colors?” “When should my child know their colors?”
Color learning shows up in daily routines more than we often realize. A child is expected to “grab the red folder,” “find the blue marker,” or “sort the toys by color.” These directions require not only color recognition, but also attention, expressive language processing, and the ability to act on that information. When a child struggles with color identification, it can impact independence, confidence, and overall task performance.
When children develop strong color recognition skills, they are better able to follow directions, engage in classroom tasks, and interact with their environment in meaningful ways.
In school settings, color is often used as a visual cue to support learning. Worksheets, charts, schedules, and early reading materials rely heavily on color coding. If a child has difficulty with color perception or identifying colors, they may miss important visual information, which can affect participation in learning activities.
As parents, we are constantly amazed by the curiosity displayed by our toddlers. Every day is an opportunity for them to discover something new, and what better way to nurture their inquisitive minds than by introducing them to the vibrant world of colors?
Learning colors is not only an engaging and exciting experience for toddlers, but it also plays a crucial role in their overall cognitive and sensory development.
Learning Colors
In the toddler years, learning explodes. And when toddlers learn colors, it’s a great chance for them to show off their skills and expand their vocabulary.
We will share a few creative activities about teaching colors to toddlers, but also share a wonderful experience with one of our own little ones!
Here’s the thing: colors are everywhere around us, from the blooming flowers in the garden to the vibrant pictures in storybooks. For toddlers, grasping the concept of colors is a significant milestone in their early development. Describing the world around them is very much a part of their environment, and this is something we really focus on in occupational therapy.
Understanding colors helps children enhance their visual discrimination skills, develop language and communication abilities, and stimulate their creativity.
And, (this is important as an OT), learning colors supports cognitive growth by promoting executive functioning at an age-appropriate level, pattern recognition, and memory retention.
It also lays the foundation for more advanced concepts, such as color sorting, classifying, and categorizing objects based on their attributes.
Color recognition is a foundational visual perceptual skill that develops gradually in early childhood. It involves both the ability to visually detect color differences (color perception) and the cognitive ability to label and categorize colors (color identification).
In child development color recognition, children move from simply noticing visual contrast (light vs. dark) to recognizing, naming, and applying colors in meaningful ways. This process is influenced by visual system maturation, language development, memory, and experience with the environment.
From an occupational therapy perspective, color recognition supports:
Early learning and reading colors in books and materials
Sorting, categorizing, and problem-solving
Following directions (e.g., “grab the red crayon”)
Participation in classroom tasks
Color Perception: The Early Foundation
First, let’s talk about vision in babies. There is a lot happening in this developmental process, from birth, especially with vision in general. Part of it is spatial awareness that babies develop, and the development of aspects of the eye, too.
Color perception begins in infancy as the visual system develops. Research shows that babies are not born with fully developed color vision. Instead, their ability to perceive color improves over time as the retina and visual pathways mature.
In early infancy:
Babies first detect light and dark contrast
Color vision emerges gradually as cone cells in the retina develop
Neural pathways between the eyes and the visual cortex strengthen
By around 3-6 months, infants begin to differentiate basic colors such as red, green, and blue. This early perception is the foundation for later color identification in child development.
So When Do Babies Learn Colors?
Parents often ask, “when do babies learn colors?” The answer is that babies begin seeing colors early, but understanding and naming colors comes much later.
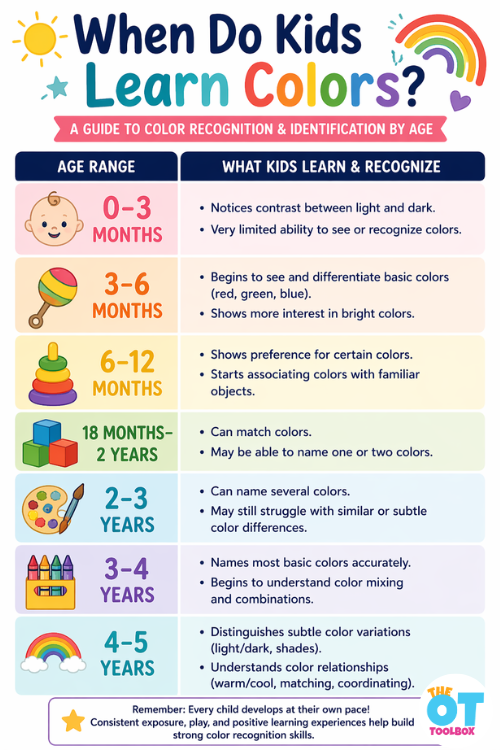
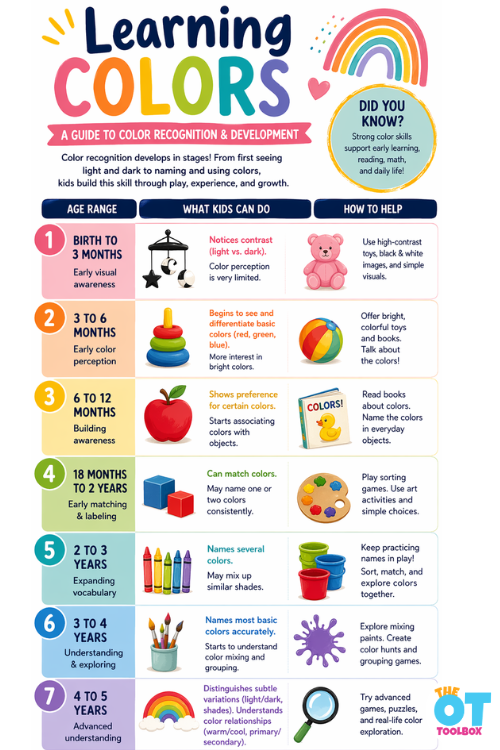
0-3 months: Detects contrast (light/dark), limited color perception. This is why we see so many baby toys or books that are black and white or black, white, red. These bold colors contrast and are appropriate for the babies’ vision at this stage.
3-6 months: Begins to differentiate basic colors
6-12 months: Shows preference for certain colors
At this stage, babies are developing visual awareness. They are not labeling colors yet. Exposure to colorful toys, books, and environments supports this early stage of color perception.
When Do Kids Learn Colors?
Another common question that comes up is, “when do kids learn colors?”
The quick answer is that kids learn colors at a really young age…even before they can speak! You can start to see young babies sorting colors.
This question is probably related to the toddler stage when kids are starting to follow directions like get your green boots, or pick a blue shirt, or find your other yellow sock. Or, we might see small kids starting to name various items like book, dog, ball, etc. At this point, parents can start expanding their child’s vocabulary by adding the adjective of a color. They can say, “pick up the red block” instead of just “Pick up the block”. In this way, we can help kids to start using a larger vocabulary, AND we are helping them build neural connections in the brain to expand their learning. It’s really cool when you think about how much a small child can and does learn, right?
Color learning happens over several years and depends on both cognitive and language development.
Most children begin:
Recognizing colors before they can name them
Learning color names through repetition and exposure
Using color words meaningfully between ages 2-4
Be sure to check out our article on baby brain building, because this is one of my absolute favorite activities to do with babies, especially at the 1-2 year stage. They are learning SO much and it’s really cool to see in action.
When Should Kids Know Colors?
So let’s rephase the question above to when SHOULD kids know colors. Because this is a different concept.
By preschool age, many children can identify and name basic colors, though consistency varies.
Parents and educators may wonder, “when should kids know colors?” While there is a developmental range, general expectations include:
2-3 years: Begins naming a few colors
3-4 years: Names most basic colors consistently
4-5 years: Understands color relationships and variations
If a child is not recognizing or naming colors by age 4-5, it may be helpful to provide more structured opportunities for learning or consider underlying visual or language factors.
Color Identification in Child Development
Color identification child development involves more than just seeing color. It requires:
Visual discrimination (telling colors apart)
Memory (recalling color names)
Language (labeling colors)
Cognitive flexibility (understanding that objects can vary in color)
Children often learn colors best through meaningful experiences rather than isolated drills. For example, identifying the color of a favorite toy or choosing a color during play is more effective than rote memorization.
How to Learn Colors Through Play
If you’re wondering how to learn colors, the most effective approach is through play and daily interaction.
Try:
Sorting objects by color
Matching colored items
Reading books that highlight colors
Using art activities like painting and coloring
Playing games that involve color choices
From an OT perspective, multisensory learning (seeing, touching, moving) strengthens color learning and retention.
Engaging Activities to Learn Colors:
Sensory Play: Encourage your toddler to explore colors through sensory activities like finger painting, playing with colored playdough, or sorting objects by color. These hands-on experiences not only stimulate their senses but also strengthen their fine motor skills.
Color Walks: Take your little one on a family nature walk with a color-themed adventure outdoors. Spot colorful flowers, birds, or vehicles and engage them in identifying and naming each color they encounter. This activity not only encourages outdoor exploration but also helps them make connections between colors and the real world.
Color Sorting Games: Set up simple sorting games using colored blocks, buttons, or toys. Your child can enjoy sorting objects into different color groups, enhancing their cognitive abilities while having fun.
Rainbow Crafts: Engage your toddler in crafting activities that revolve around creating rainbow crafts. Whether it’s using colored paper, finger paints, or even recycling old magazines, these crafts provide an opportunity for creative expression and reinforce color recognition. A simple crayon activity is perfect! Try these best crayons for toddlers.
Colorful Story Time: Explore children’s books that focus on colors. Read aloud and discuss the different colors with your toddler, allowing them to associate specific colors with familiar objects or characters in the stories.
Reading Colors and Early Learning
The next stage is connecting “knowing” to “reading” and “understanding”. Reading colors is an important early literacy skill. Before children can read words, they learn to recognize visual information like colors, shapes, and symbols.
Color recognition supports:
Identifying objects in books
Following visual cues in learning materials
Building vocabulary
Supporting comprehension
Books, visual schedules, and classroom materials often rely heavily on color cues, making this an essential developmental skill.
Developmental Progression of Color Recognition
Above we went into specifics for each age, but we wanted to put this all together into list format, so you can see how the progression happens.
Birth to 3 Months
Notices contrast between light and dark
Limited ability to perceive color
Visual system is still developing
3 to 6 Months
Begins distinguishing basic colors
Increased visual attention to bright objects
Strengthening visual pathways
6 to 12 Months
Shows preferences for certain colors
Starts associating colors with familiar objects
Improved visual clarity
18 Months to 2 Years
Begins matching colors
May label one or two colors
Early memory and language connections forming
2 to 3 Years
Expands vocabulary of color names
May confuse similar colors
Learning through repetition and play
3 to 4 Years
Identifies most basic colors consistently
Begins exploring color mixing and relationships
Improved categorization skills
4 to 5 Years
Recognizes subtle differences between shades
Understands how colors relate to each other
Uses color knowledge in learning tasks
Pretty cool to put it all into sequential development, right?
Color recognition is not just an academic skill. It supports participation in daily activities, classroom routines, and early learning experiences.
From an occupational therapy perspective, color recognition is connected to:
Visual processing
Attention and focus
Task completion
Functional independence
When children understand and use colors effectively, they are better able to engage in learning and everyday tasks.
Underlying Skills Needed for Color Recognition
So, when things don’t happen as expected, and your child gets colors mixed up, or can’t seem to remember the names of colors consistently, it’s helpful to know what’s really happening here.
Learning colors is not just about memorizing names. It is a complex skill that relies on multiple underlying systems working together. When a child is having difficulty with color identification, it is important to consider these foundational areas.
Visual Processing Skills
At the core of color learning is visual processing, specifically the ability to perceive and discriminate between colors. Children must be able to notice differences between shades, recognize similarities, and visually attend to color features in their environment.
Visual memory (remembering color names and associations)
Remember above, how we said executive functioning skills at an age appropriate level? This is where those skills come into play. And the skills transfer and are practiced for other situations.
If these skills are not well developed, a child may confuse colors or struggle to consistently identify them.
Language Development
Color learning is closely tied to language. A child may be able to see and recognize a color but not yet have the vocabulary to label it. This is why some children can correctly match colors but cannot name them.
Language skills involved include:
Receptive language (understanding color words)
Expressive language (naming colors)
Concept development (understanding categories like “red” or “blue”)
This is an important distinction when considering color identification in child development.
Cognitive Skills and Memory
Children need working memory and attention to learn and retain color concepts. They must remember what a color looks like, connect it to a word, and apply that knowledge across different contexts.
Cognitive processes involved include:
Categorization (grouping items by color)
Concept formation (understanding color as a property)
Flexible thinking (recognizing that objects can change color)
These skills develop gradually and support higher-level learning tasks later on.
Sensory Processing and Attention
Some children may have difficulty with color recognition due to sensory processing differences. For example:
Visual sensitivity may make it harder to focus on certain colors
Difficulty filtering background input can reduce attention to visual details
Attention plays a key role in how to learn colors, as children need to focus on relevant features in their environment.
Fine Motor and Visual Motor Integration
Color learning is often paired with activities like coloring, sorting, and drawing. These tasks require fine motor skills and coordination between the eyes and hands.
When children color within lines, choose specific crayons, or complete color-based tasks, they are integrating:
When we look at color learning through a functional lens, we see how it impacts real-life tasks:
Following classroom directions
Participating in art and play activities
Completing worksheets and early academic tasks
Engaging in sorting and organizing tasks
Building early literacy and reading skills
If a child struggles with color recognition, it can affect their ability to keep up with peers and participate fully in daily routines.
Color Recognition Activities
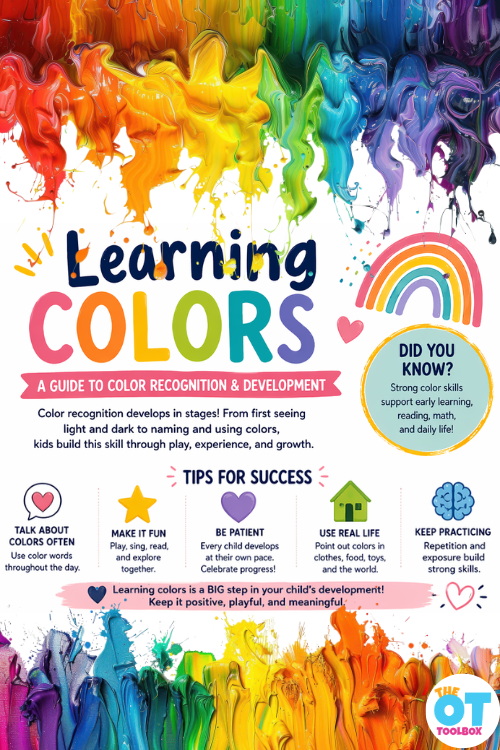
The image graphics we have in this article explain some ideas for helping kids learn colors. So, if you are wondering exactly HOW to learn colors, this list of activities is the way to go, from the perspective of a pediatric occupational therapist.
Color sorting with pom-poms, beads, or blocks
Matching colored clothespins to colored cards
Color scavenger hunt around the room or home
Sorting laundry by color
Color matching with stickers on paper
Painting with primary colors and mixing new colors
Using dot markers to match colors on worksheets
Color-coded obstacle course
Matching colored lids to containers
Building patterns with colored blocks
Color bingo
Sorting crayons or markers by color
Matching colored puzzle pieces
Color memory matching game
Sorting food by color during snack time
Threading beads by color pattern
Using colored tape lines for movement paths
Color hop game (jump to called color)
Matching colored shapes to outlines
Sensory bins with color sorting tasks
Coloring by color code worksheets
Matching socks by color
Sorting buttons by color
Color graphing activities
Using colored cups to sort small objects
Painting objects and matching to color cards
Color-themed I Spy activities
Matching colored magnets on a board
Sorting Legos by color
Using flashcards for color identification
Color stamping activities
Matching colored pegs on pegboards
Color sequencing activities
Sorting colored paper scraps
Color-coded task cards
Matching colored ribbons or strings
Sorting colored erasers
Using colored bins for cleanup tasks
Color tracing activities
Matching colored balls to targets
Sorting natural items (leaves, flowers) by color
One Day when we Learned Colors…
A Little Sponge
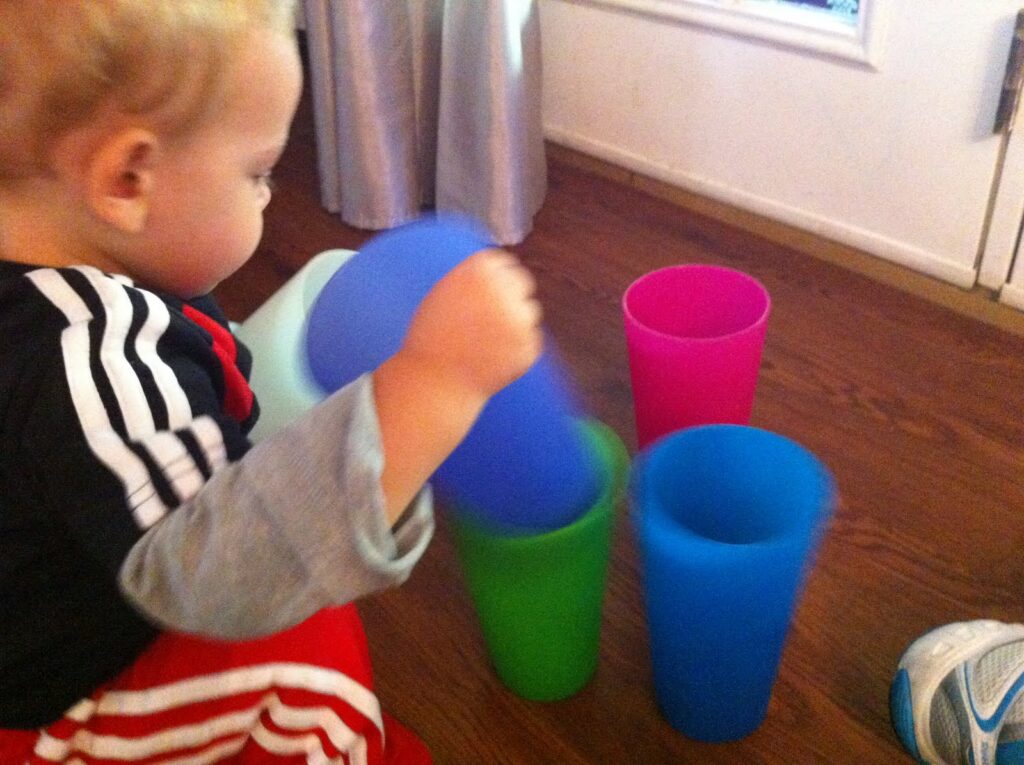
Today I had my 16 month old all to myself and we had so much fun playing together. We played outside, went for a walk, rode in his red car, and tried to play basketball, or “bunga ball” as he calls it. Now is the time his brain is like a little sponge, absorbing it all.
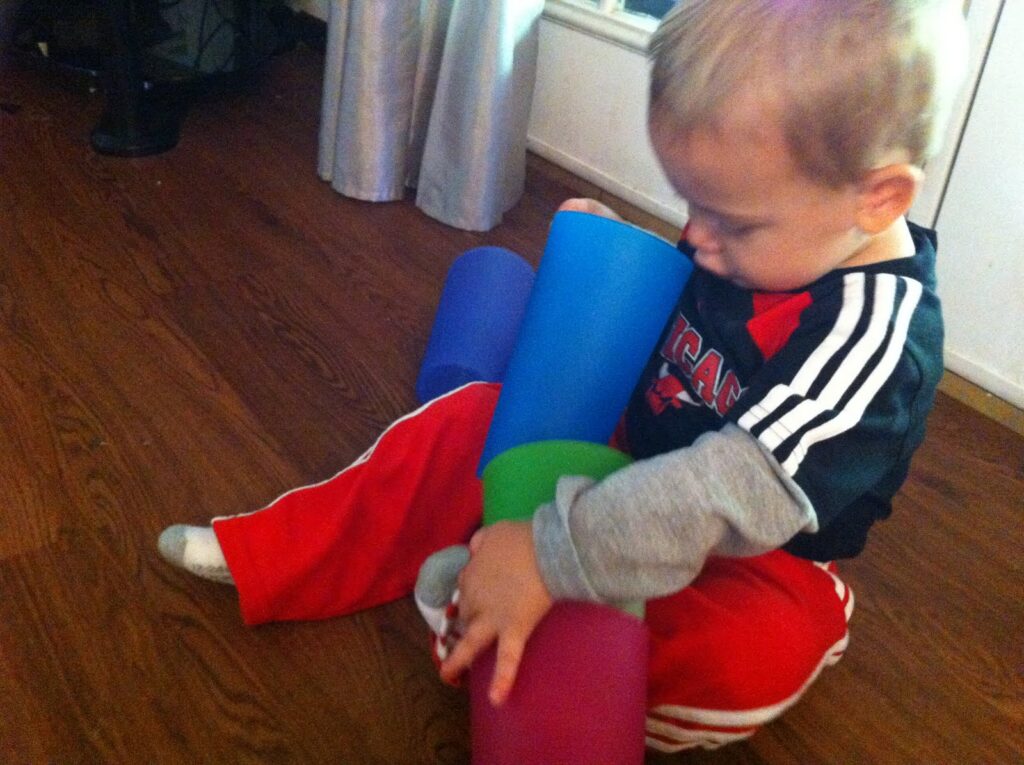
We invented a fun game that we named “Find the Binky”(he is a binky addict and any game involving finding the binky he enjoys…hehe).
I pulled out these big plastic cups and separated them by color. He would put the binky in a cup and I would say the color.
He would try to repeat the color (or some word that kinda sounded like it). Most of the time he was wrong and I would correct him. He thought that was hilarious!
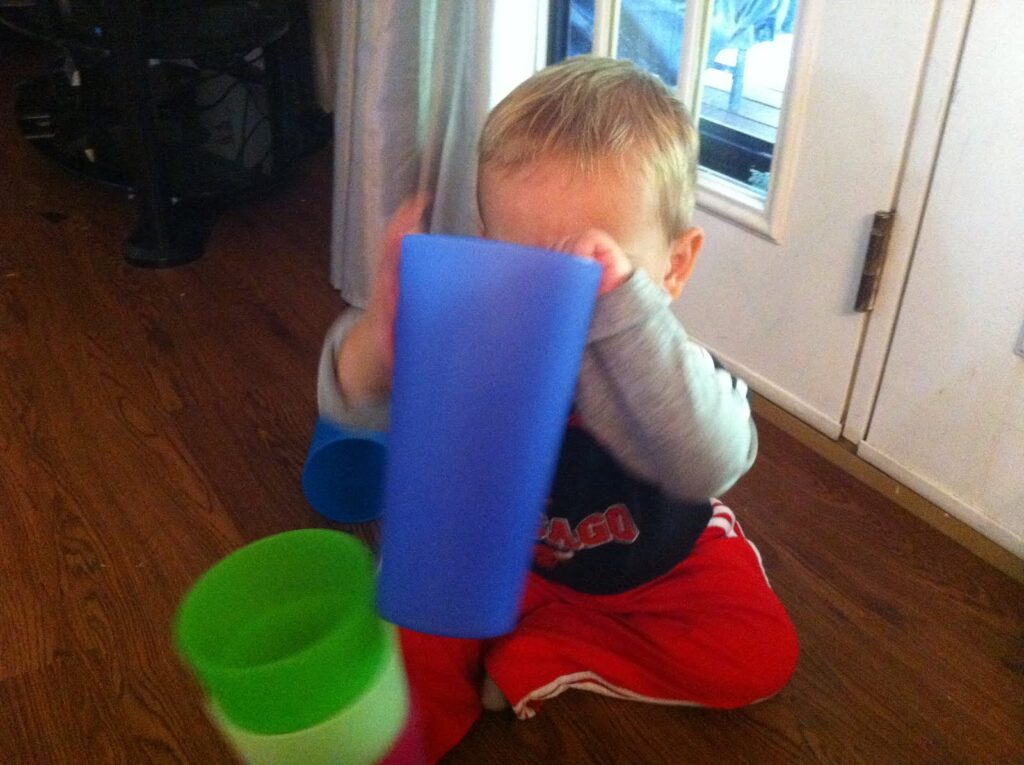
At this age, he loves stacking things and knocking them down.
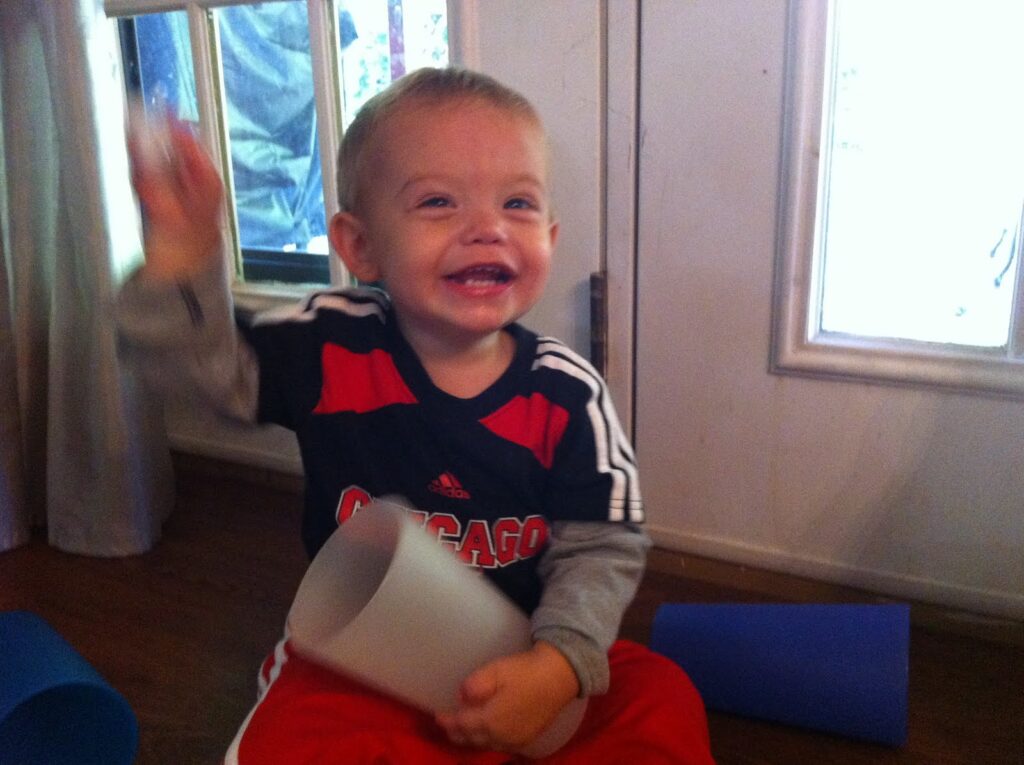
Found it!
Another fun thing to do is scream into the cups…this is a neat way to learn about sound and while holding the cup he feels the vibration.
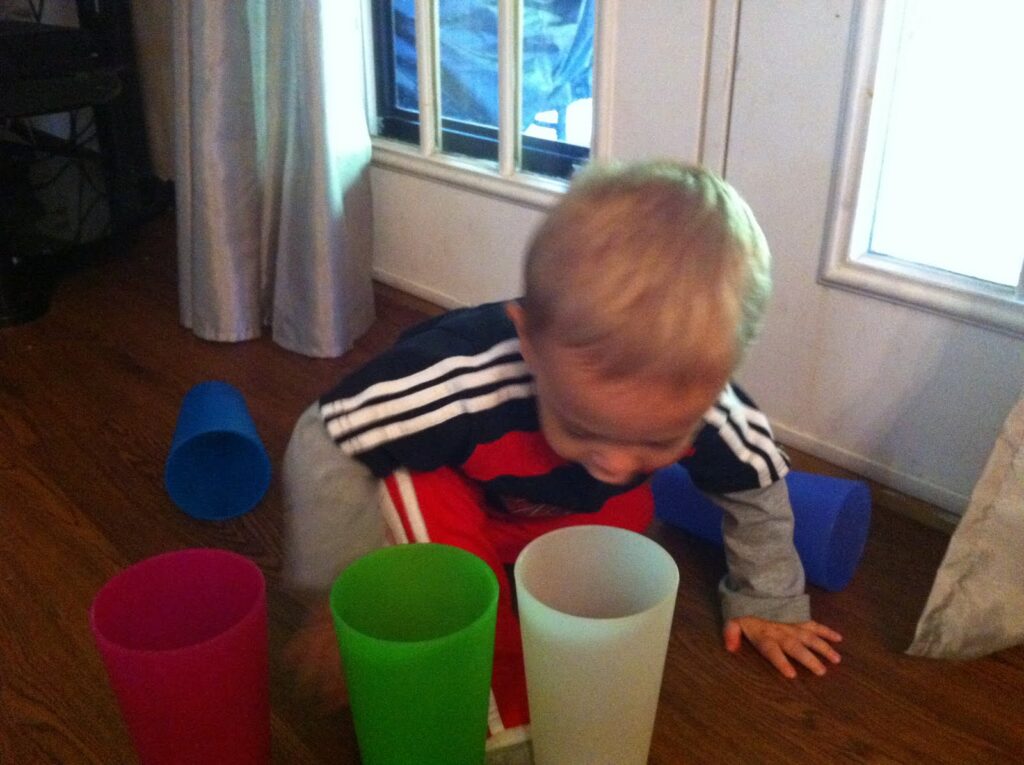
I later found him playing this game he made up by himself…he is such a boy. He made a t-ball stand with the cup and was swinging at the soccer ball with another cup. What a great imagination he has already. I love watching him think.
Rainbow Handwriting Kit– This resource pack includes handwriting sheets, write the room cards, color worksheets, visual motor activities, and so much more. The handwriting kit includes:
Write the Room, Color Names: Lowercase Letters
Write the Room, Color Names: Uppercase Letters
Write the Room, Color Names: Cursive Writing
Copy/Draw/Color/Cut Color Worksheets
Colors Roll & Write Page
Color Names Letter Size Puzzle Pages
Flip and Fill A-Z Letter Pages
Colors Pre-Writing Lines Pencil Control Mazes
This handwriting kit now includes a bonus pack of pencil control worksheets, 1-10 fine motor clip cards, visual discrimination maze for directionality, handwriting sheets, and working memory/direction following sheet! Valued at $5, this bonus kit triples the goal areas you can work on in each therapy session or home program.
Colleen Beck, OTR/L has been an occupational therapist since 2000, working in school-based, hand therapy, outpatient peds, EI, and SNF. Colleen created The OT Toolbox to inspire therapists, teachers, and parents with easy and fun tools to help children thrive. Read her story about going from an OT making $3/hour (after paying for kids’ childcare) to a full-time OT resource creator for millions of readers. Want to collaborate? Send an email to contact@theottoolbox.com.
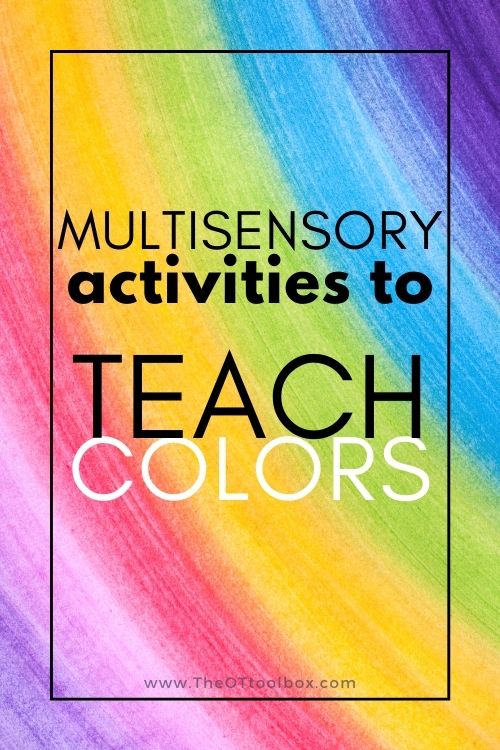
There are so many ways to include multisensory play in teaching colors to children. Here, you’ll find hands-on, creative ways to teach colors of the rainbow using play that helps kids develop skills, move, and grow. Use these color activities in preschool or to teach toddlers colors. It’s a fun way to develop visual discrimination skills in young children.
Teaching colors and coloring goes hand-in-hand. Our resource on the best crayons for toddlers is a huge help, especially when deciding on the type of crayon to use at the age of teaching colors to toddlers and young children.
I’m including color activities for kindergarten and school-aged children, as well, because this color themes can be used in therapy activities or to help kids develop handwriting, or visual motor skills in the older grades. There is a lot of fun, hands-on activities listed here that help children learn colors and explore through play!
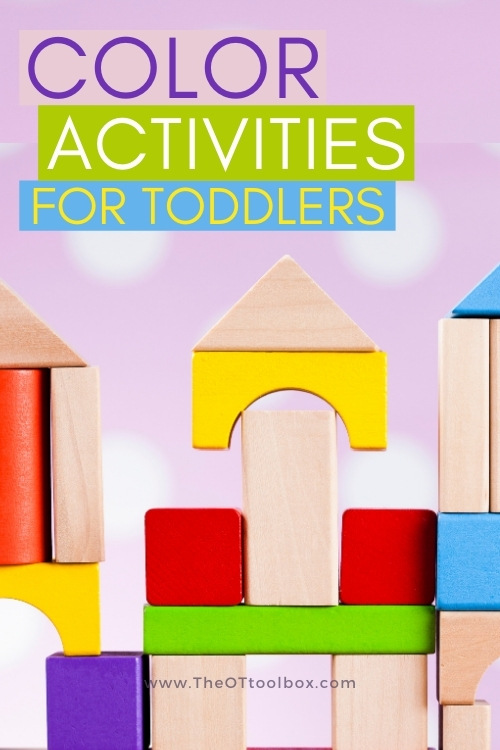
Teaching Colors to Toddlers
Toddler play and development is all about the hands-on exploration of the world. We have a lot of toddler activities designed to develop motor skills and learning here on the website that you’ll want to check out.
To teach colors to toddlers, it’s all about making things fun. These toddler activities will get you started with hands-on development activities.
So many color activities in the toddler years involve sorting colors, identifying colors, and pointing out colors. All of these activities lay the building blocks for visual discrimination that kids will use in reading and writing down the road.
Try these activities for teaching colors to toddlers:
Toddler Color Sorting with Toys– This activity uses toys and items that are found around the home, making the color identification part of every day life. You can use items that the child uses and sees every day.
Teach Color Sorting Activity– This simple color sorting activity is great for families that have a preschooler and a toddler. The preschooler can cut foam sheets and work on scissor skills and then both the preschooler and toddler can sort the paper scraps by color. This is a nice activity that allows siblings to work together to learn concepts and grow skills together.
Color Sort Busy Bag– Toddlers love to drop items into containers, and put things into buckets, bins, and bags…and then take them back out again. It’s all part of the learning process! This color sorting busy bag gives toddlers colored craft sticks or dyed lollipop sticks and has them sort by color. It’s a great activity for developing fine motor skills and coordination, too.
Cup Sorting for Toddlers– This color sorting activity uses items in the home, like plastic toddler cups! There is just something about toddlers playing in the kitchen with baby-safe items…and this one builds pre-literacy and pre-math skills that they will use long down the road…through play!
Talk about colors– Pointing out colors during play, conversation, in reading books, and going for walks…there are so many ways to teach colors to babies and toddlers through everyday conversation. It’s as simple as saying, “look at that blue flower” to add descriptive terms to kids.
Color with painting– Incorporate all of the colors of the rainbow in multisensory activities from a young age. These art play activities incorporates colors into play and learning through art with toddlers.
In the preschool stage, learning occurs through play! These color learning activities are designed to promote learning through hands-on exploration, because those are the ways that learning “sticks”…when hands are busy and developing motor skills that they will later need for holding and writing with a pencil. Let’s look at some ways to teach colors in the preschool years:
Color by Letter Worksheets– These are great for the preschool age because they are getting the exposure to letters in uppercase and lowercase format but not through writing. the coloring builds hand strength and fine motor skills needed in kindergarten and beyond.
Teaching Shapes and Colors with Rainbow Rocks by Fun-A-Day- This activity is fun because it uses the heavy weight of rocks to teach colors and shapes. But, kids are also strengthening their hands and gaining motor feedback about objects as they explore colors and other discriminating factors like weight and size.
Color and shape sorting– This preschool color sorting activity gives kids fine motor experiences with wikki stix. Ask preschoolers to copy the shapes, too for extra fine motor skill building and visual motor integration.
Fine Motor Color Sort– Grab an old spice container or cheese container, and some straws. This color sorting activity lays the groundwork for fine motor skill development and math skills. Kids can count the straws as they drop into the container and work on sorting colors while developing open thumb web space, separation of the sides of the hand and arch strength.
Color Matching Water Bin– This color learning activity is a sensory motor activity that also teaches letters. It’s perfect for preschool and kindergarten or even older grades as kids are immersed in multi- sensory learning with letters and pre-reading skills.
Clothespin Color Match– Children will love this fine motor activity that builds hand strength in a big way.
Bear Sees Colors Book and Activity– We used a snack to explore colors with a beloved preschool book. This is multisensory learning at its finest.
Gross Motor Color Games– There are many ways to explore and teach colors using games. Try some of these to add movement and play into learning colors at the preschool level:
Color I Spy- Call out a color and kids can run to touch something that is that color. Add variations of movement by asking kids to skip, hop, leap, crawl, or bear walk to touch the colors.
Color Simon Says- Call out directions based on clothing colors that kids are wearing. Add as many variations of movement and auditory challenges. This is a great activity for building working memory skills in preschoolers.
Color Tag- Kids can play tag and when they tag another player, they need to say a color for that person to go to. Another variation is having the players who are tagged run to a color that the tagger calls out.
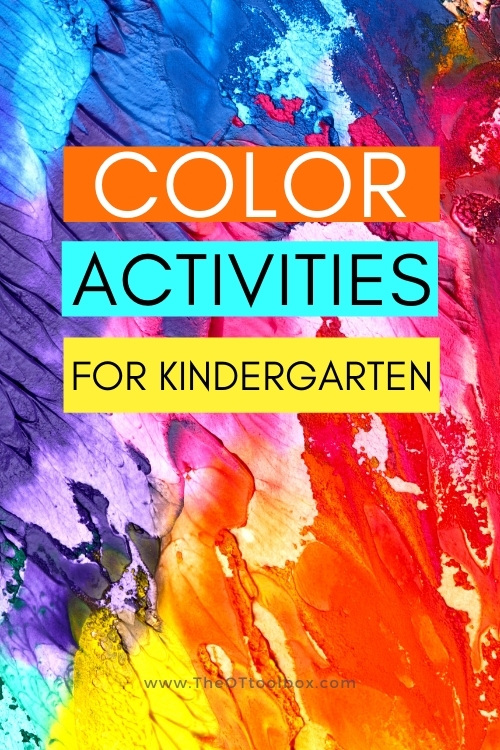
Kindergarten Color Activities
At the kindergarten level, children are moving beyond basic color naming and into more advanced use of color in learning. At this stage of development, most children can consistently identify and name common colors, and they begin to understand how color relates to academic tasks such as sorting, categorizing, and following multi-step directions.
From a developmental perspective, kindergarteners are refining:
Color discrimination (noticing subtle differences between shades)
Conceptual understanding (recognizing that objects can be different colors)
Language use (describing and comparing colors)
Application of color knowledge in structured tasks
Color learning at this stage supports reading readiness, math concepts, and classroom participation. Children are often expected to follow directions such as “circle the green object” or “underline the word in red,” which requires both recognition and functional use of color.
Kindergarten Color Activities
Color-coded math sorting (by shape and color)
Graphing objects by color
Color pattern creation with blocks or beads
Following multi-step directions using color cues
Color scavenger hunts with written checklists
Color mixing experiments with paints
Sorting classroom objects into colored bins
Color-coded center activities
Matching shades and gradients
Color word recognition and labeling
Highlighting sight words by color
Directed drawing using specific colors
Color-coded obstacle courses
Using colored manipulatives for math problems
Sorting and categorizing by multiple attributes (color + size)
Teach Colors in Kindergarten and older grades
Once children are school-aged, teaching colors doesn’t end. In the school years, children explore color mixing, learning about primary colors, and more. Look at all of these color experiences that kids learn during the school years:
Spelling color names
Learning Primary Colors
Learning secondary colors
Color mixing
Color theory
Color wheel
Complimentary colors
Preschool Color Activities
Teaching colors in preschool is a huge part of the curriculum.
Teaching Colors to Preschoolers
In preschool, children are just beginning to develop the ability to recognize and name colors. This stage is focused on exposure, repetition, and meaningful interaction with color in everyday activities.
Developmentally, preschoolers are building:
Visual perception skills (noticing differences in color)
Early language development (learning color names)
Attention and memory (recalling color information)
Concept formation (understanding color as a property)
At this stage, children may recognize a color before they can name it. They also commonly confuse similar colors or use color names inconsistently. This is a normal part of development.
Why Teaching Colors Matters in Preschool
Teaching colors in preschool supports:
Early communication skills
Following simple directions
Participation in play and routines
Preparation for academic tasks
Color learning is most effective when it is embedded in play and daily experiences rather than taught in isolation.
How to Teach Colors to Preschoolers
Use repetition in daily routines (e.g., “Here is your blue cup”)
Focus on one or two colors at a time
Pair colors with familiar objects
Use hands-on, sensory-based activities
Keep learning playful and engaging
Color sorting with large objects
Matching colored blocks or toys
Simple color scavenger hunts
Finger painting with one or two colors
Color matching with stickers
Sorting pom-poms by color
Matching colored cups and objects
Color-themed sensory bins
Color hop games (jump to the color called out)
Matching colored shapes
Using dot markers for color matching
Sorting crayons by color
Color I Spy activities
Matching colored puzzle pieces
Rolling and matching colored balls
Try some of these color activities for older children:
Color I Spy free therapy slide deck- This color themed scavenger hunt will get kids up and moving, using the items they have in their home as they work on visual perceptual skills, handwriting, and more. Kids can visually scan around their home to match the colors on the slide deck. Then, there is a handwriting component. This is a great slide deck for anyone working on handwriting skills with kids, virtually.
Color Exercises– Use gross motor exercises and stretches as well as fine motor exercises to get kids moving while working on SO many skill areas: bilateral coordination, motor planning, strengthening, core strength, precision, dexterity, visual motor skills…
Rainbow Deep Breathing Exercise– This free printable PDF is super popular. There’s a reason why: kids love the deep breathing activity and We love the mindfulness, coping skills, calming, and regulation benefits. Great for all ages.
Rainbow Binoculars Craft– Kids can use paper towel tubes in a craft that helps them look for and identify colors. Use these rainbow binoculars in visual scanning, visual discrimination, visual figure-ground, and other perceptual skills.
Colored pencils activities– All you need is a couple of colored pencils (or substitute with a regular pencil if that’s all you’ve got on hand) to work on pencil control, line awareness, pencil pressure, and letter formation.
Make crayon play dough– Explore colors with heavy work input through the hands and arms using all the colors of the rainbow. This crayon play dough recipe is a popular sensory recipe here on the website.
Key Differences Between Preschool and Kindergarten Color Learning
Preschool focuses on exposure, recognition, and early naming
Kindergarten focuses on consistency, application, and use in academic tasks
Understanding this progression helps ensure that activities are developmentally appropriate and support functional skill development.
One activity book we love is our Colors Handwriting Kit:
Rainbow Handwriting Kit– This resource pack includes handwriting sheets, write the room cards, color worksheets, visual motor activities, and so much more. The handwriting kit includes:
Write the Room, Color Names: Lowercase Letters
Write the Room, Color Names: Uppercase Letters
Write the Room, Color Names: Cursive Writing
Copy/Draw/Color/Cut Color Worksheets
Colors Roll & Write Page
Color Names Letter Size Puzzle Pages
Flip and Fill A-Z Letter Pages
Colors Pre-Writing Lines Pencil Control Mazes
This handwriting kit now includes a bonus pack of pencil control worksheets, 1-10 fine motor clip cards, visual discrimination maze for directionality, handwriting sheets, and working memory/direction following sheet! Valued at $5, this bonus kit triples the goal areas you can work on in each therapy session or home program.
Colleen Beck, OTR/L has been an occupational therapist since 2000, working in school-based, hand therapy, outpatient peds, EI, and SNF. Colleen created The OT Toolbox to inspire therapists, teachers, and parents with easy and fun tools to help children thrive. Read her story about going from an OT making $3/hour (after paying for kids’ childcare) to a full-time OT resource creator for millions of readers. Want to collaborate? Send an email to contact@theottoolbox.com.
If you are looking for OT activities for the month, then you are in luck with this April occupational therapy calendar! April is occupational therapy month and here, you’ll find an Occupational Therapy calendar for your therapy planning.
April Occupational Therapy Calendar
Not only will you find a great calendar of activities for OT sessions, but we’ve included other therapy ideas and activities for OT month, and all of Spring!
I have a HUGE resource for you that will carry you throughout the rest of Spring with treatment ideas and activities that are designed to meet the needs of many common goal areas. This resource is perfect for planning a month or a season of therapeutic activities for kids.
If you’ve seen the last few months’ calendars (Check them out, if you missed them: January, February, & March), then you will see that this month’s calendar is just a bit different.
Other Spring-related activities that will go well with this activities calendar include:
Spring Sensory Stations- add movement and mindfulness with a Spring theme.
I’ve found that I completely love coming up with themed activities that are designed to address many needs of children receiving (or who need to receive) Occupational Therapy services. I’m enjoying this monthly calendar so much that I decided to take it a bit further.
For April’s calendar, I decided to provide MORE ideas, more ways to develop necessary skills, and more ways to cover many more systems of development.
This month’s calendar is essentially going to rock your OT kiddo’s socks!
Activities based on the Pyramid of Learning
This month, I’ve decided to create a huge resource for your OT treatment activity ideas.
Each month’s calendar is such a valuable resource of OT ideas, and this month is no different, except that it has a TON more ideas to address many areas of deficits that typically present in kids receiving OT services. I’ve got Spring themed activities that can be modified to meet the needs of your child.
Each activity in this month’s OT calendar takes into account, the Williams and Shellenberger Pyramid of Learning.
The activities are designed so that they allow for proper sensory experiences in order to adjust for the child’s needs and presenting areas of difficulty.
Based on the Pyramid of Learning, the activities are designed to meet the foundations of sensory needs in order to work on higher tasks that present as difficulties in functional skills.
The pyramid uses a triangle illustration to depict the central nervous system at the base of sensory systems as a support and underlying tier to sensory motor skills, perceptual motor skills, and cognition.
Using the visual of the pyramid of learning in activity development, we can see how integration of the sensory systems as a part of the CNS impact development, functioning, and intellect.
Let’s take a closer look at the pyramid of learning before exploring how the activities in our April calendar cover these areas.
Base of the Pyramid of Learning
The base of the pyramid is the Central Nervous System. Above that is the second tier, which identifies the body’s sensory systems. These systems include:
Tactile (touch)
Vestibular (balance)
Proprioception (knowing where their bodies are in space)
Note that these three are at the base of they other sensory systems. This is an important concept covered in our book, Sensory Lifestyle Handbook.
Then comes the other sensory systems:
Olfactory (smell)
Visual (vision)
Auditory (hearing)
Gustatory (taste)
Sensory Motor Development Tier of the Pyramid of Learning
Next is the sensory motor development level. This area includes body awareness, reflex maturity, sensory screening abilities, postural stability, bilateral integration, motor planning.
These areas of development are closely related to the sensory systems. They are also essential to functional participation in essentially every functional task we perform throughout the day.
Note that there are three areas of sensory motor development on the base of this tier:
Postural security (confidence in maintaining certain postures to prevent falling)
Awareness of two sides of the body (bilateral integration)
Motor planning (ability to plan their movement)
Then, above those three areas are three more areas of sensory motor development. This relationship is also discussed in our book, The Sensory Lifestyle Handbook.
Body scheme (body awareness through movement)
Reflex maturity (having developed reflexes, for safety purposes)
Ability to screen input (knowing what sensory experiences are important to pay more attention to)
Perceptual Motor Development Tier of the Pyramid of Learning
Above the sensory motor level is the perceptual motor development tier. Perceptual motor skills rely and build on sensory motor abilities. These skill areas are smaller and more distally presented in relation to the internal systems. While built heavily on the sensory systems and motor abilities, these areas allow us to take in information about the world around us. It allows us to use that information to move and perceive what is happening in our world.
This connection is essential to function and occupational performance.
This is easy to conceptualize when you think about the areas that make up this level:
Eye-hand coordination (when they use what they see to guide the movement of their hands)
Ocular motor control (locating and fixating on something in their environment)
Postural adjustment (adjusting their posture to maintain balance)
Then above those three areas of motor control areas are three additional perceptual motor skill areas of development:
Auditory language skills (hearing and speaking appropriately)
Visual-spatial perception (identifying what is seen in space)
Attention center functions (maintaining attention to tasks)
Cognition Intellect Tier on the Pyramid of Learning
At the top of the pyramid of learning stands the cognition or intellect tier. This area begins with daily living skills and behaviour at the base of the top tier, followed by academic learning.
Daily living activities (such as eating, toileting, bathing)
Behavior
Academic learning
What does the pyramid of learning tell us?
The very clear visual graphic of a pyramid shows us exactly how cognitive and learning abilities are based on sensory, motor, and perceptual development. These underlying areas are essential to functioning, behaviors, or the way we act and behave in any given situation, and learning.
In order to move and participate in functional tasks, development in bilateral coordination, motor planning, and vision, proprioception, and tactile systems is necessary. In order to learn, auditory language development, oculomotor skills, the ability to screen input, and vestibular, visual, auditory, and proprioceptive input is necessary.
Every functional task could be filtered down to identify underlying areas that impact one’s ability to perform specific tasks. And the entire pyramid builds upon itself, so that each task includes all of the skills and developmental areas under it as a whole pyramid.
April Activities Based on Underlying Skill Areas
And what I like best about this month’s calendar, is that the activities can be adapted in several different ways so that the resource calendar can be used over and over again in coming months.
When you combine the calendar with the Spring Occupational Therapy Activities booklet, you’ll discover many ways to add movement, sensory movement, perceptual movement, and learning to Spring-themed activities.
In fact, there are 109 activities in this book using all of the combinations of activities.
This month’s calendar is a little different that the last few calendars. I’m including a schedule of sensory activities but it does not include specifics to perform each day’s task.
You’ll need the Spring Occupational Therapy Activities ebook in order to complete each day’s activity. You will be guided through sensory activities that meet many different goal areas.
This ebook will carry you through the next few months as you work on each task and it’s breakdown of variant activities. It’s all included in the ebook:
Play your way through the next few months with Spring-y activities that are broken down into several different goal areas.
April Occupational Therapy Activities for Home Carryover
The month of April is a meaningful time to highlight the occupational therapy profession and the impact it has on helping individuals participate in everyday life. Recognized by the American Occupational Therapy Association (AOTA), this month celebrates how occupational therapy practitioners support people in building skills for independent lives through engagement in meaningful daily activities.
For parents and caregivers, April is the perfect opportunity to bring occupational therapy activities into the home. Simple, intentional activities can reinforce skills children are working on in therapy sessions and help support carryover in real-life situations.
Why Home Carryover Matters in Occupational Therapy
One of the most important parts of occupational therapy is helping children apply skills outside of therapy sessions. Practicing activities at home allows children to build consistency, confidence, and independence in natural environments.
Occupational therapy activities at home can support:
Fine motor skills (writing, cutting, dressing)
Sensory processing and regulation
Coordination and motor planning
Executive functioning and routines
When families are involved, children are more likely to generalize skills into their daily routines.
Easy Occupational Therapy Activities to Try at Home
Here are simple, effective activities families can use to support development at home:
Fine Motor Activities
Use tongs or clothespins during snack time
Practice buttoning, zipping, and dressing skills
Build with small blocks or beads
Sensory Activities
Create sensory bins with rice, beans, or sand
Use movement breaks like jumping or animal walks
Try calming strategies like deep breathing or heavy work
Daily Living Skills
Help set the table
Practice pouring drinks or preparing snacks
Organize toys or personal items
These types of activities naturally support the goals addressed in occupational therapy sessions.
Celebrating Occupational Therapy in April
Throughout April, the occupational therapy community celebrates the work of therapists, assistants, and families who support participation and independence. Events such as the AOTA annual conference and professional gatherings like an expo highlight new ideas, research, and strategies that support best practices in the field.
The work of occupational therapy extends far beyond the clinic. It impacts homes, schools, and communities every day.
Sharing Occupational Therapy Ideas on Social Media
April is also a great time to share ideas and inspiration on social media. Parents, teachers, and therapists can highlight meaningful activities, success stories, and simple strategies that support development.
Using hashtags like:
#occupationaltherapy
#OTmonth
#OTactivities
#pediatricOT
can help connect with others and spread awareness about the value of occupational therapy.
Supporting Caregivers and Families
Occupational therapy is most effective when it includes collaboration with caregivers. By sharing simple activities and strategies, therapists empower families to support their child’s development in everyday routines.
Even small changes, like adding a fine motor task during play or incorporating movement into transitions, can have a big impact over time.
Bringing OT Into Everyday Life
The goal of occupational therapy is to help children participate fully in their daily lives. By incorporating simple activities at home, families can support skill development in a natural, meaningful way.
April is the perfect time to reflect on how occupational therapy supports growth, independence, and participation, and to take small steps toward building those skills every day.
Colleen Beck, OTR/L has been an occupational therapist since 2000, working in school-based, hand therapy, outpatient peds, EI, and SNF. Colleen created The OT Toolbox to inspire therapists, teachers, and parents with easy and fun tools to help children thrive. Read her story about going from an OT making $3/hour (after paying for kids’ childcare) to a full-time OT resource creator for millions of readers. Want to collaborate? Send an email to contact@theottoolbox.com.
Ten Apples Up on Top is one of our favorite books. We do love finding fun books to come up with creative book-related activities. In fact, we’ve covered this book before when we made baked cotton balls for a sensory fine motor activity.
The book, Ten Apples Up on Top by Dr. Seuss is a great activity to us in a book club for kids and an awesome book for creative play and hands on learning. We went with a pre-writing activity based on the book using an apple theme, and had so much fun working on pre-writing lines with Ten Apples Up on Top in mind!
Ten Apples Up On Top Activity for Fine Motor and Learning
This Ten Apples Up On Top craft is a fun, hands-on way to target fine motor skills, visual motor integration, and early learning concepts in a playful format. Using beads as apples, children place them onto circles drawn on a piece of paper, creating a meaningful connection between movement, counting, and literacy.
This activity works well in the classroom, therapy sessions, or at home and is especially engaging for younger kids and kindergarten learners. It combines motor development with early math and literacy skills, making it one of those top activities that supports multiple areas of development at once.
Building Fine Motor Skills with Apple Activities
As children place beads onto the drawn circles, they are strengthening the small muscles in their hands. This supports fine motor skills needed for writing, cutting, and daily tasks. Picking up and placing beads requires coordination and control, especially for little hands that are still developing precision.
Connecting the apples across the page adds another layer of skill-building. When children draw lines to connect each apple, they are working on pencil control, pre-writing strokes, and visual tracking. This helps prepare children for handwriting tasks while keeping the activity fun and meaningful.
Supporting Counting and One-to-One Correspondence
This activity is also a great way to build early math skills. As children count and place each bead, they are practicing one-to-one correspondence, matching one object to one space on the page. This foundational skill is essential for understanding numbers and quantity.
You can vary the number of apples used in the activity to match the child’s level. Try using different numbers for differentiation, making it appropriate for a wide range of learners. This makes the activity perfect for a math center or small group math lesson in the classroom.
Visual Motor and Pre-Writing Skill Development
After placing the beads, children can connect the apples across the entire paper, creating lines that support pre-writing development. These lines can be straight, curved, or zig-zag patterns to increase the challenge.
This part of the activity targets:
Pencil control
Visual scanning
Crossing midline
Directionality
These skills are important for handwriting, reading, and overall task performance in school-based activities.
Making It Engaging and Thematic
This activity can easily be adapted into seasonal or themed learning. For example, you can switch the apples to a pumpkin theme in the fall or use other small objects for different units of study.
Adding the activity to sensory bins for a tactile component
Creating a story connection where apples are stacked on the top of their heads like in the book
These types of engaging activities help keep children motivated while reinforcing important developmental skills.
Using This Activity in the Classroom
In a classroom setting, this activity works well as:
A math center activity
A fine motor station
A literacy extension paired with the book
A small group intervention activity
Clear instruction and visual models can help children understand expectations and complete the task independently. Teachers and therapists can easily adjust the difficulty level based on student needs.
Ten Apples Up on Top book and pre-writing activity
This post contains affiliate links.
This activity is very easy to set up. you’ll need only a few materials:
To get started on this pre-writing activity, create small circles with a red marker on the paper. This can be a job for the adult/parent/teacher/clinician.
The circles should be about the size of the pony beads and you will want to make them going in two rows, one at the top of the page and one at the bottom of the page.
You or your child can use the brown and green markers to add leaves and stems to each apple.
Show your child how to place a red pony bead on each circle. Grasping the pony beads and placing them on the circles is an exercise in pincer grasp, opening of the thumb web space, and in hand manipulation.
Each of these skills is needed for proper pencil grasp and it makes this fine motor activity a great handwriting warm-up exercise.
Then, you can show your child how to draw a line from the top apple to the bottom apple on the paper. They can continue to draw vertical lines connecting each pair of apples. They should draw the lines going from top to bottom to best prepare for correct letter formation.
After completing a page of top-to-bottom vertical lines, kids can repeat the exercise by drawing horizontal lines across a page to connect apples.
Continue to add complexity to pre-writing skills by having them connect lines in a cross sign, an “x” and even in circles and curved lines. We had to make a stack of ten “apples” and trace the line of apples, too!
How many ways can you think of using these apple markers to work on handwriting and pre-writing? Maybe creating letters and connecting the apples would be fun.
Or, try using just one apple as a starting point for forming letters once the child is ready.
Looking for more apple themed activities to go along with the book, Ten Apples Up on Top? Try these ideas from the Virtual Book Club for Kids:
Working on fine motor skills, visual perception, visual motor skills, sensory tolerance, handwriting, or scissor skills? Our Fine Motor Kits cover all of these areas and more.
Check out the seasonal Fine Motor Kits that kids love:
Colleen Beck, OTR/L has been an occupational therapist since 2000, working in school-based, hand therapy, outpatient peds, EI, and SNF. Colleen created The OT Toolbox to inspire therapists, teachers, and parents with easy and fun tools to help children thrive. Read her story about going from an OT making $3/hour (after paying for kids’ childcare) to a full-time OT resource creator for millions of readers. Want to collaborate? Send an email to contact@theottoolbox.com.