Colleen Beck, OTR/L is a pediatric occupational therapist and the owner and author of The OT Toolbox website. She manages all of The OT Toolbox social media accounts and runs the popular newsletter.
Read about Colleen's experience and career as an occupational therapist, including how The OT Toolbox began on our About The OT Toolbox page: https://www.theottoolbox.com/about-us/
Colleen created The OT Toolbox in 2011 and since then has written thousands of blog posts designed to support therapy providers, educators, parents, counselors, admin, and caregivers in promoting the healthy development of kids.
Check out Colleen's blog posts below:
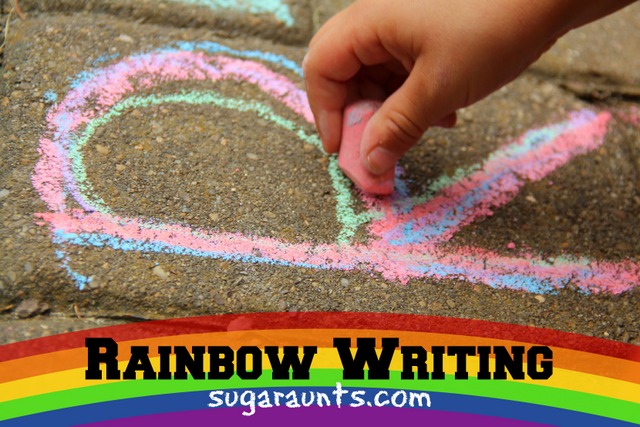
Have you heard of rainbow writing? How about chalk rainbow writing? There are many fine motor and visual motor skills that are used when using rainbow writing as a handwriting practice strategy! Let’s break down what rainbow writing is and how this chalk writing activity is a skill-builder for letter formation. Also check out our handwriting library for more ideas.
Tracing letters with chalk is a handwriting practice strategy that helps to build muscle memory when learning letter formations. You can rainbow write on paper or with different utensils such as crayons, colored pencils, markers, or chalk!
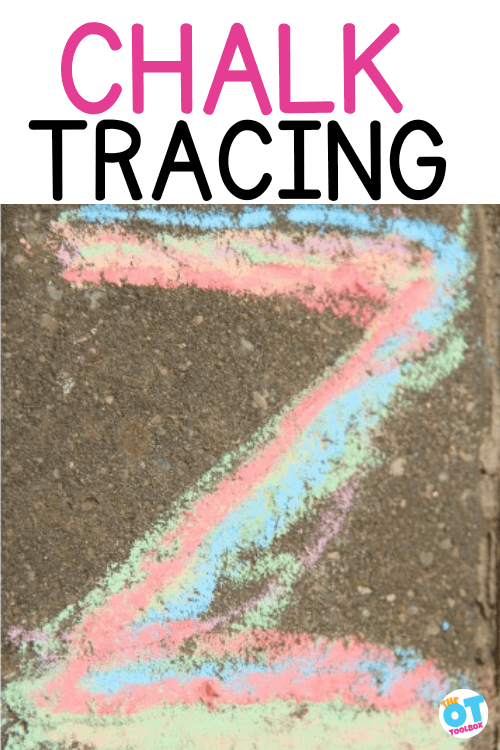
Tracing Letters with Chalk
Tracing letters with chalk is a colorful way to practice letter formation. The strategy builds skills in visual motor and hand eye coordination in order to trace over the lines of a letter.
When you use chalk tracing to practice a letter or a word, the child traces over the letter with each color of the rainbow.
They will end up with 6 or 7 trials in writing over the letter.
Some things to consider with tracing with chalk
Tracing over letters with chalk, crayons, or colored pencils is a powerful strategy when practicing letter formation and the line awareness needed for letter size and line placement.
Read through this resource on tracing sheets to see the pros and cons of tracing with kids.
Some things you’ll want to consider about chalk tracing writing activities:
Be sure to watch how the student starts the letters. It can be easy to start a poor muscle memory for writing the letters if they start at the wrong starting point or form the letters incorrectly. This creates an incorrect motor plan in the handwriting process.
Make sure the letters don’t progressively get worse as the student traces over the letters when rainbow writing.
Some kids tend to make the rainbow letters with colors next to each other like a rainbow rather than tracing on top of each color. Ask the student to make a mixed up rainbow by tracing right on top of each color.
Rainbow Writing with chalk
We did rainbow writing with chalk one day. This was a great way to work on letter formation while outside because there was the added benefit of playing on the ground.
Using chalk to practice letters supports development by adding proprioceptive input through the core, strengthens the shoulder girdle for adding more stability for writing, as well as adding strength and stability to the wrist. It’s also a great way to focus on wrist range of motion exercises in a fun way.
We have a big ol’ bucket of chalk that we play with almost everyday. Our sidewalk and driveway have been know to be very colorful at times! We took the chalk to our sidewalk squares one day this week and practiced a little letter formation.
Our sidewalk squares were the perfect area to practice forming letters accurately. I used simple verbal cues to describe the formation of each letter (big line down, little curve around, little line) and we started in the corner of each square as we made the letters.
I made the letter first and Big Sister and Little Guy watched. Then we went to work making our letters very colorful!
Tracing the letters over and over again was a great way to practice accurate formation. Big Sister got into this activity. Little Guy only wanted to make a few letters that are in his name.
When the child is tracing the letters over and over again, they become more efficient at planning out and executing the movements needed to make a letter accurately. This activity is great for a new writer because they are given a confined space to practice a letter, and visual cues (and verbal prompts from mom).
Use the activities and ideas in The Handwriting Book for more ways to work on writing skills.
The Handwriting Book is a comprehensive resource created by experienced pediatric OTs and PTs.
The Handwriting Book covers everything you need to know about handwriting, guided by development and focused on function. This digital resource is is the ultimate resource for tips, strategies, suggestions, and information to support handwriting development in kids.
The Handwriting Book breaks down the functional skill of handwriting into developmental areas. These include developmental progression of pre-writing strokes, fine motor skills, gross motor development, sensory considerations, and visual perceptual skills. Each section includes strategies and tips to improve these underlying areas.
Strategies to address letter and number formation and reversals
Ideas for combining handwriting and play
Activities to practice handwriting skills at home
Tips and strategies for the reluctant writer
Tips to improve pencil grip
Tips for sizing, spacing, and alignment with overall improved legibility
Colleen Beck, OTR/L has been an occupational therapist since 2000, working in school-based, hand therapy, outpatient peds, EI, and SNF. Colleen created The OT Toolbox to inspire therapists, teachers, and parents with easy and fun tools to help children thrive. Read her story about going from an OT making $3/hour (after paying for kids’ childcare) to a full-time OT resource creator for millions of readers. Want to collaborate? Send an email to contact@theottoolbox.com.
If you’ve worked with kids in school based OT or in peds occupational therapy in outpatient settings than you may need a few handwriting practice ideas that kids’ don’t hate. You’ve probably seen it: Kids that struggle with handwriting really can give push-back on the writing practice, especially when they perceive the task as hard or meaningless. Handwriting problems mean that writing is hard, so why practice something that is difficult to do? Today, we’re covering some low-key and low pressure handwriting practice ideas that you can add to your handwriting toolbox!
Use these handwriting practice tips to support writing needs.
Handwriting Practice
Handwriting can be a stressful situation for many students. Encouraging written communication in a stress-free environment can help kids write more fluently and legibly.
Kids that are reluctant to write may really stress out or even refuse to practice handwriting! They’ve probably seen their fill of writing pages, rote practice sheets, and letter activities’ that just don’t mean anything to them! It is possible to add a few handwriting practice sessions into therapy or the classroom (and home) while building functional writing abilities…and not totally stressing the kid out!
When you make handwriting practice less stressful, you will gain writing practice that is meaningful and motivating.
Then, you can plug any handwriting samples into a handwriting rubric for monitoring progress on the IEP goals.
Stress Free Handwriting Practice
For the student who is who struggles with handwriting, practicing written work can be very overwhelming. He or she may scribble down whatever is on their mind as quickly as they can just to get the task done.
Encouraging an environment where students feel respected and less handwriting-related stress can help with handwriting legibility.
When kids push-back on handwriting sessions, there may be underlying skills that need developing. These challenges mean that even when the individual practices over and over again, they still may have unmet underlying skills that contribute to handwriting legibility.
trouble with near point or far point copying skills
other
Use the ideas below to encourage a climate of acceptance and respect where students can write in their own manner.
Stress free handwriting practice ideas
Having a handful of handwriting practice strategies in your therapy toolbox (or parent or educator toolbox!) helps to make the handwriting practice sessions less stressful for both you and the student.
Try some of these tips when it comes to handwriting practice sessions:
Break Tasks into Smaller Steps: Just like we break down tasks that seem overwhelming or too big, we can make a handwriting task seem more manageable by breaking up the requirements into steps. If a task feels too big or complex, break it down into smaller, more manageable sub-tasks. This can make the overall task seem less daunting.
Incorporate mindfulness: Yep, really! When things seem too difficult, sometimes a mindfulness session is a practical way to reset the overthinking and just do the thing we need to do. This can work for handwriting practice needs, too. One easy way to do this is to use some deep breathing exercises and then write about it. Use that time to practice areas such as legibility and letter formation.
Encourage an environment of acceptance students can then right as they like without worrying about how letters are formed how they’re spaced or how hard they’re pressing with their pencil.
Use rewards. Do you have a little box of prizes for therapy sessions? This can be motivating for some kids. Celebrate achievements like forming letters correctly or writing on the lines.
Encourage the freedom to write as they like. Let the students know it’s OK to write as they normally do and to be spontaneous and written work. This simple freedom can enable students to write more fluently and efficiently.
Take away the stress by limiting criticism, comparison, judgment, and competition regarding handwriting legibility. In this way students can know that what they are writing down on paper is more important than the way it looks. This is important to limit the stress of writing. You don’t want the student to get into a perfectionism mindset. Teach them to accept that handwriting tasks don’t always have to be perfect. Show the student that they can do their best, but recognize when handwriting is “good enough.”
Make writing fun! Take away the seriousness of handwriting practice by balancing freedom to experiment with ideas putting ideas on paper and producing clear written work. Encourage a fun writing assignment but make sure the student knows that it does take work to make written material legible.
Share excitement and encouragement about handwriting. Kids that see that handwriting practice can’t be fun will be more eager to practice. Use big motions, music, songs, letter rhymes, and any creative ideas like fun ways to work on letter formation to help kids spark enjoyment of handwriting practice.
Remove the obstacles of handwriting. Take away comparison, Over-analysis, judgment, and over-reactions to mistakes to help kids feel more at ease with handwriting.
Allow time. Give kids lots of time to put their ideas on paper. A graphic organizer can be one way to help kids get ideas down on paper in a visual way. They can then use the graphic organizer as a sloppy copy to help hand writing occur in a timely but efficient manner where they are given enough time to put their words on paper. Many times kids can work practice letter formation in legibility of him ready when they don’t have to think about what they are writing.
Let kids write without asking them to stop and correct mistakes. Students can write down their ideas and get answers on the paper without worrying about legibility mistakes or letter formation mistakes. Use a short period of time at the end of the assignment to quickly go over and check any legibility errors.
Collaborative writing. When kids right with others they can see the momentum that goes into hand writing. For the reluctant and writer sharing good ideas in writing in a group setting can help them to see that others are writing just as they are. Kids can also see good writing skills happening. Create a small group writing area where students can sit at a desk or table of 3 to 4 other students and each writes about one particular item that is sitting in the middle of the table such as a bowl of pipe cleaners. Use that physical picture as a writing prompt for students.
Balance the seriousness of handwriting with the freedom to experiment in written work. Kids should know that writing does take hard work but it can be fun to put your words on paper so that others can read them. Set up a writing pen-pal relationship where students correspond with students in another school.
Handwriting Practice Activities
Now that you’ve got some strategies to support the student in mind, what are some stress-free handwriting practice activities?
Here on The OT Toolbox, we LOVE to share all things handwriting, so you’ll find many fun and engaging writing activities to keep kids interested.
Some ideas you may want to try include:
Make it motivating by writing lists about the things that interests the individual. Use our Interest Lists resource for ideas and writing sheets.
What are your favorite ways to encourage stress-free handwriting?
Try these handwriting ideas to work on the skills needed for legible handwriting :
The Handwriting Book is a comprehensive resource created by experienced pediatric OTs and PTs.
The Handwriting Book covers everything you need to know about handwriting, guided by development and focused on function. This digital resource is is the ultimate resource for tips, strategies, suggestions, and information to support handwriting development in kids.
The Handwriting Book breaks down the functional skill of handwriting into developmental areas. These include developmental progression of pre-writing strokes, fine motor skills, gross motor development, sensory considerations, and visual perceptual skills. Each section includes strategies and tips to improve these underlying areas.
Strategies to address letter and number formation and reversals
Ideas for combining handwriting and play
Activities to practice handwriting skills at home
Tips and strategies for the reluctant writer
Tips to improve pencil grip
Tips for sizing, spacing, and alignment with overall improved legibility
Colleen Beck, OTR/L has been an occupational therapist since 2000, working in school-based, hand therapy, outpatient peds, EI, and SNF. Colleen created The OT Toolbox to inspire therapists, teachers, and parents with easy and fun tools to help children thrive. Read her story about going from an OT making $3/hour (after paying for kids’ childcare) to a full-time OT resource creator for millions of readers. Want to collaborate? Send an email to contact@theottoolbox.com.
In this blog post, you’ll discover how to use a handwriting rubric to collect handwriting data for the IEP, progress reports, and to monitor progress on handwriting goals. When I became a school-based therapist, I was taken aback by the steep learning curve. Honestly, I felt lost for quite some time and it took me a while to get my bearings in the new “IEP world”.
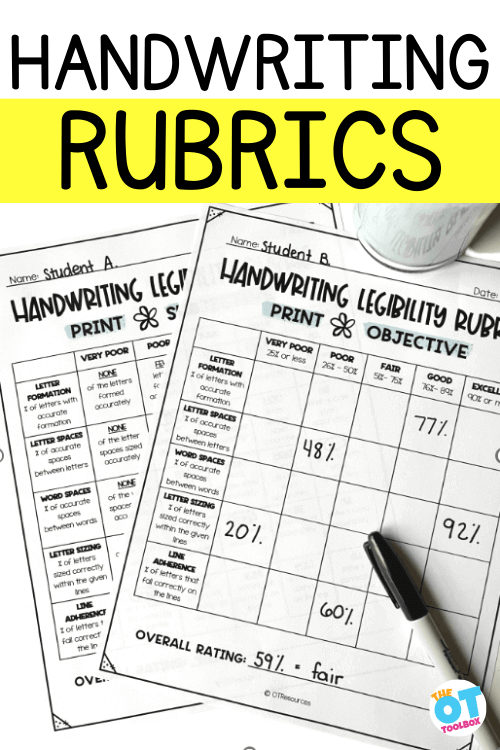
A handwriting rubric is a data scoring tool used to collect and analyze data by outlining specific criteria and performance expectations for assessing handwriting quality.
Handwriting Rubric
It can be hard to translate what we do as occupational therapy practitioners into IEP goals. And, it can be equally as challenging figuring out how to measure progress on those goals you worked so hard to formulate. This might be especially true for handwriting.
If you are looking for guidance on how to collect data on handwriting and to use that data in documentation, you’ve come to the right place. Like it or not, this is a goal area we often spend a lot of time on as pediatric occupational therapy practitioners, and in particular, school based occupational therapy professionals.
Since “IEP world” is so data-driven, using a rubric for handwriting to guide your data collection is a game-changer.
Read on for a step-by-step breakdown on how to step up the data collection game by using a handwriting rubric for progress monitoring.
How to Collect Handwriting Data
Below, we’ll cover the steps of using a writing rubric to collect data. A quick overview of the process is as follows:
Collect a handwriting sample.
Select your data collection method (type and format of handwriting rubric tools).
Fill out the rubric.
Assess the data to update progress reports and IEP handwriting goals.
Let’s discuss each step of this process in more detail.
Step 1: Get a handwriting sample that meets your goal criteria.
A solid IEP goal should have measurable conditions (the “M” in the wonderful “SMART” acronym). Read about breaking down goals for more information.
I typically do something like “student will self-generate a 4-6 word sentence” or “student will near-point copy 2 sentences.”
If the goal I am reporting on has specifications – it’s important that the data is taken from a sample that meets those criteria! It wouldn’t be a good representation if my data is based on a 3-word sentence, but my student’s goal is to copy a short paragraph.
Your goal may not have a specific condition and that’s OK – just get an appropriate handwriting sample for your student that is a good representation of their abilities.
Step 2: Choose your data collection method (legibility rubric)
During my years of working in school systems, I’ve come up with two tried-and-true handwriting data collection methods. Both are great options, depending on your needs and style.
Handwriting rubrics make collecting data on handwriting goals a breeze.
Types of Handwriting Rubrics
In order to collect data and use that data to write reports, report on handwriting goals, and assess goal achievement, a handwriting rubric can be used to support the OT provider.
There are two types of rubrics for writing skills that you could use:
Objective Handwriting Legibility Rubric
Subjective Handwriting Legibility Rubric
It’s also worth mentioning that individual circumstances may help you decide what is the right rubric for you. For example, I tend to use the subjective rubrics more in teletherapy (where it can be harder to get objective data).
Let’s explore each of these types of handwriting rubrics…
Objective Legibility Rubrics
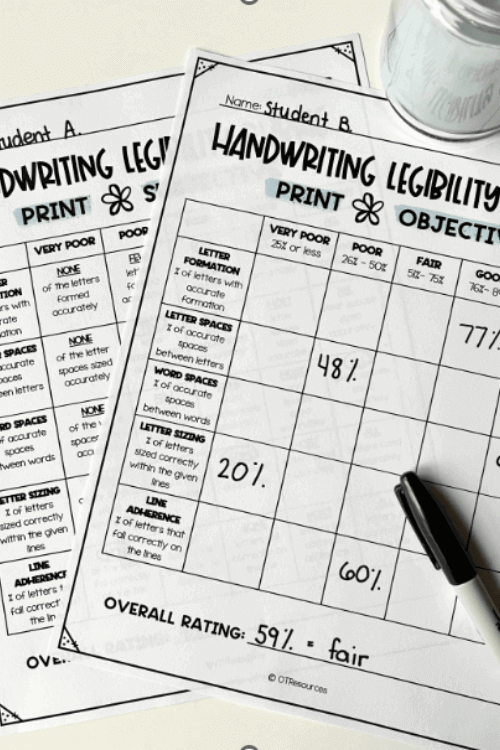
This type of handwriting rubric provides a detailed breakdown of each letter/word of the sample to obtain percentages.
This is the most objective level of data collection. It requires more time and precision, but it will give you hard numbers to work with.
Subjective Legibility Rubrics
This type of handwriting rubric uses terms such as “most”, “some”, “few”, etc. with correlating scale terms “good”, “fair”, “poor”.
This is for therapists who prefer not to get bogged down with detailed numbers, but still provides a consistent and specific rubric in order to be able to adequately demonstrate progress to other team members.
handwriting rubric Formats
Now once you’ve decided on using the objective or subjective rubric, it’s time to decide on your record keeping format. There are two formats that we’re covering here:
Handwriting Rubric PDF – printable PDF for use with paper and pen
Digital Handwriting Rubric – online access via a file or Google form
Personally, I am an old fashioned pen-and-paper (or more accurately, pretty colored flair pens) kind of gal. My preferred method of data collection is printing out a legibility rubric, filling it in by hand, and then attaching it to the handwriting sample. I love that when I look back at a students’ file, the sample and hard data are side by side.
If digital paperwork is more your jam, the google forms legibility rubric may be a better fit for you. You simply input your data on the google form, and the magnificent G-suite works its’ magic. You can see all of your data digitally for a nice comparison.
Completing a Handwriting Rubric
After you’ve selected your type and format of writing rubric, the next step is to fill in the handwriting data.
Step 3: Fill out your handwriting legibility rubric based on the collected writing sample.
Here is where we get into the nitty-gritty of handwriting criteria. This is the most time-consuming step. While it is dreaded by many therapists, I personally find it relaxing and cathartic (especially when paired with a nice cup of coffee).
Whether you are using the printable rubric or google forms, your legibility rubric will guide you to break the sample down into the following components:
Letter formation: how many letters are formed accurately (i.e. they look like the letter they are supposed to look like?)
Letter spaces: how many of the spaces between LETTERS are an appropriate amount of space (not too close or too far)?
Word spaces: how many of the spaces between WORDS are an appropriate amount of space (not too close or too far)? Spacing between letters and words is spatial awareness in handwriting.
Letter sizing: how many letters are the correct SIZE (i.e. tall letters should be bigger than small letters). This is also considered letter size awareness.
Line adherence: how many letters are placed age-appropriately on the baseline? Also known as line awareness.
For the subjective rubric, you will take the time to really look at the handwriting sample in respect to each category, then make a judgment call based on your professional opinion. If your gut is telling you MOST of the letters are formed accurately, you will circle that category.
By the end, you’ll be able to say that this student has “good” letter formation, “fair” letter spaces, etc.
For the objective rubric, you sit down and do the math calculation. First, add up the total number of items for that category. So, for letter formation, add up the total number of letters. For word spaces, add up the total number of spaces between words.
Then, record the number of letters/spaces that meet expectations. Complete the division problem to obtain your percentage.
At the bottom of each rubric, there is a category for “overall rating”. Just take the average of each individual component to get your overall legibility score. This is super helpful when looking at the big picture of the handwriting sample.
Use a Handwriting Rubric to Update Progress Report
After you’ve collected the data and run it through the writing rubric tool, you can use that data to write your progress report and update goals.
Step 4: Use the data to update student progress over time.
The process may seem tedious, but it does get quicker the more you do it. Once you get the hang of it, it should be a painless process.
It’s important to take these samples a few times per reporting period to make sure you have enough data samples to compare progress. Trust me, you’ll be grateful you did come progress report time!
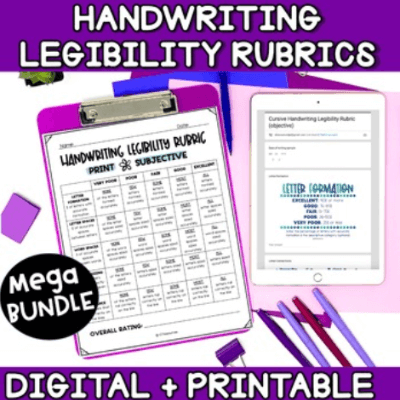
The Handwriting Rubric Bundle includes printable PDFs and digital Google Drive formats for both print and cursive handwriting.
Handwriting Rubric Bundle
To help out my fellow OTs, I’ve put all these resources together in the Handwriting Legibility Rubric Bundle. It includes both the objective and subjective rubrics in the printable & google forms versions.
Even better, it includes each rubric for both manuscript and cursive! The cursive rubric is essentially the same as print, but it breaks down differently to be more representative of cursive writing (for example, “letter connections” instead of “letter spaces”).
I hope this writing rubric tutorial has shed light on the possibilities of success using handwriting rubrics. Using these rubrics has made me feel more confident as a practitioner (especially in IEP meetings!), and I hope they do the same for you.
In this blog post, we are discussing ADLs (Activities of Daily Living) for kids and teens. These occupational self care tasks are tasks that make up day to day living. Let’s break this down. For additional information on various roles, check out our article on IADLs.
Occupational self care refers to many things. Occupational therapy practitioners support individuals with daily activities that are part of a functional life. One of those important daily tasks is personal self-care, or the ability to care for one’s own being. From dressing oneself to toileting, all of these include daily occupational self care tasks.
In this blog post, you’ll find resources and activities to support children of all abilities in self-care skills.
When exploring the topic of occupational self care, you’ll also want to check out our resource on developmental checklist as a tool for understanding typical development of skill acquisition.
ADLs are self-care skills
Self-care skills, also known as Activities of Daily Living (ADLs), are essential tasks that individuals of all ages perform to take care of their own physical, emotional, and mental well-being.
For children, occupational performance in ADLs is dependent on the child’s age and stage. We can take a look at various stages of development with regard to ADL participation. Those stages include:
infancy
toddlerhood
early childhood
elementary childhood
adolescense
adulthood
Each of these stages will involve different components and abilities when it comes to occupational performance and ADL skills. You will see and expect different occupational roles, adaptive behaviors, self-care skills and abilities, and changes in self-management needs.
Infant Self-Care Skills
Infant self-care involves receiving nurturance of parents and guardians. Self-sufficiency involves primitive reflexes and accepting self-care. ADLs in the infancy stage is mainly regarding family participation which is a vital role.
The infant responds to nurturing, and takes nourishment they receive from their parent or caregiver. They are learning to move and communicate. During the infant stage, babies gain control of their body as they learn to move in daily self-care tasks.
Toddler Self-Care Skills
For toddlers, self-care continues to involve acceptance of the self-care routines provided by parents or guardians. However, at this age, there is more independence beginning as well. You’ll see preference and willingness in toddler ADLs.
Toddlers are refining and mastering some of the skills that they have passively participated in during the first 2 years of their life.
They start to develop self-sufficiency in eating, dressing, washing, and toileting areas.
Childhood Self-Care Skills
During the ages of 6-12, children have continued occupational roles as a daughter or son, friend, and now as a student. These new roles with peers bring on additional self-care tasks as well as adaptive behaviors in childhood ADLs.
The self-care skills of a child include continuing to master ADL skills with more self-sufficiency, routine participation (brushing their teeth each morning and evening with greater independence) and less support.
Children develop preferences in expressing themselves in hairstyles and clothing, which impacts self-care. There are also new learning opportunities which impact occupational performance, including social skills and peer interaction.
The years between ages 13 and 19 bring on even more development and self-sufficiency during adolescence. They also have more occupational roles such as an employee, a driver on the road, a teammate, volunteer, and may have a different peer group than before.
Self-care, and ALDs in the teen years include mastery or independence of ADLs and IADLs. There is self-expression, building relationships, and defining occupational roles involved in this stage. The adolescence is preparing for independent living, so self-care supports that transition.
Occupational therapy practitioners are skilled in analyzing, evaluating, and creating detailed plans of care of ADLs at all stages of life.
What are ADLs?
Activities of Daily Living (ADLs) are daily tasks, or activities, that make up a person’s day. They are tasks that are required for participating (or living) in an environment such as a home or workplace. ADLs involve occupational roles or the various roles one plays throughout their day.
These skills are fundamental for daily life and can vary depending on a person’s age and abilities.
Activities of Daily Living Examples
Self-care skills encompass a wide range of activities and typically include:
Personal hygiene
Bathing or showering: The ability to clean one’s body, including washing hair, face, and body.
Oral care: Brushing teeth, flossing, and mouthwash.
Hair care: Brushing hair, combing, and washing hair with shampoo and conditioner
Grooming- hair care, shaving, hygiene
Makeup application
Washing face
Caring for hair styles including using a ponytail holder, styling hair, etc.
Handwashing: Proper handwashing techniques to maintain hygiene.
Dressing and clothing management
Dressing: Putting on and taking off clothing, including clothing fasteners like buttons and zippers.
Selecting appropriate clothing: Choosing weather-appropriate clothing and outfits suitable for different occasions.
Awareness of danger: Recognizing and responding to potential hazards.
Emergency procedures: Knowing what to do in emergencies, such as fire drills or safety protocols.
Medication management
Taking medications: The ability to take prescribed medications independently and follow dosing instructions.
Time management and organization to participate in daily tasks
Scheduling: Managing daily routines, appointments, and activities.
Staying on task: Using calendars, reminders, or tools to stay organized.
Transferring or mobility in daily tasks, like moving from one surface to another, sitting and standing from the toilet, getting into and out of a car, moving in and out of the shower or bathtub, getting into and out of bed, sitting and standing from various surfaces and seats. All of these are considered functional mobility in ADLs.
Self-care skills are crucial for promoting independence, maintaining health, and participating in daily life. These skills are typically learned and developed throughout childhood and adolescence, and they may need to be adapted or supported as individuals age or face physical or cognitive challenges.
Occupational Self-Care
Occupational therapy professionals often work with individuals to enhance or regain occupational self-care skills as part of rehabilitation or therapeutic interventions.
Personal care tasks are part of life. As children grow, they tend to want to “do it myself!” Sometimes however, children grow and tend to continue to require continued support to perform self-care functional tasks. Parents, caregivers, and support staff can use varying degrees of verbal and visual cues to encourage independence in personal care tasks, but sometimes it’s just not enough.
Be sure to check out our resource on toddler behavior red flags for more information on participating in daily activities at the toddler age.
This month in the Functional Skills for Kids series, 10 Occupational Therapist and Physical Therapist bloggers have come together to analyze and dissect personal care skills. Take a look through the links below to find tricks, tips, developmental milestones, and creative ways to encourage independence in personal care tasks.
These therapist-approved strategies are perfect for typically developing children and those with special needs.
How to Help Kids Learn Self Care and Personal Care Skills:
Colleen Beck, OTR/L has been an occupational therapist since 2000, working in school-based, hand therapy, outpatient peds, EI, and SNF. Colleen created The OT Toolbox to inspire therapists, teachers, and parents with easy and fun tools to help children thrive. Read her story about going from an OT making $3/hour (after paying for kids’ childcare) to a full-time OT resource creator for millions of readers. Want to collaborate? Send an email to contact@theottoolbox.com.
Parents of young children may notice sensory red flags, or sensory preferences in their children that bring up a few questions. For parents of toddlers, this can be a gut feeling that milestones may be delayed, regressing, or “off”. Below, we’re covering red flags related to sensory, including toddler behavior red flags that might indicate a need for consultation with a pediatrician. Let’s go deeper…
Sensory red flags can help parents recognize their child’s’ sensory processing issues. These gut feelings can help kids to get the sensory input they need for independence and functioning.
One consideration is overstimulation anxiety. Worrying about the sensory input from different experiences because there are sensory stimulants that impact function is one example of a sensory red flag.
Sensory Red Flags
Sometimes parents just know there is something “off” with their child. That deep, inner gut feeling is what lets us know that there is just something different about the way their child interacts, processes information, or performs in daily tasks.
That ability to recognize gut feelings allows us to know there is an unsuspected ear infection in our toddler or it might be the one red flag that nags at us during sleepless nights that something bigger is going on with our child.
You might have heard it said before: Mom’s always have that gut feeling about their child. Well, sometimes that inner voice can be a loud scream that a child has sensory issues or it can be a quiet nagging sense that there are underlying sensory processing problems.
Below, you’ll find common and more unique “gut feelings” that might indicate a sensory processing problem in children. These are the quieter indications that might make you furl your eyebrows or question a behavior that your child seems to show over and over again.
Use these sensory processing red flags as a way to put the whole picture together for your child. Any one behavior or tendency that shows up with your child may be a meaningless coincidence, however if a child presents with several items on the list below, it may be necessary to speak to your child’s pediatrician.
Use these sensory processing red flags to ease that gut feeling that you have and seek out the information or help that is needed for your child.
Identifying sensory issues can mean there is a need not being meant. These sensory red flags are just some things to consider. One or two items on the list may not mean anything. Seeing many of the red flags listed below may mean that a consultation with your child’s pediatrician is in order.
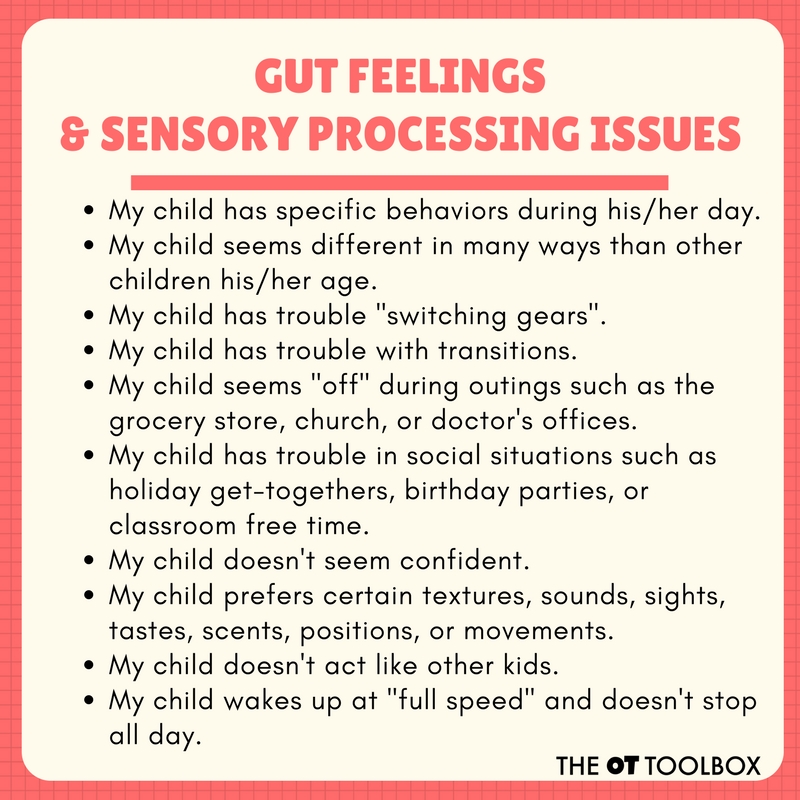
Sensory Processing Red Flags
Get a free printable checklist version of this list below.
My child has specific behaviors during his/her day.
My child has strange tendencies.
My child seems different in many ways than other children his/her age.
My child has trouble “switching gears”.
My child has trouble with transitions.
My child seems “off” during outings such as the grocery store, church, or doctor’s offices.
My child has trouble in social situations such as holiday get-togethers, birthday parties, or classroom free time.
My child doesn’t seem confident.
My child prefers certain textures, sounds, sights, tastes, scents, positions, or movements.
My child avoids certain textures, sounds, sights, tastes, scents, positions, or movements.
My child doesn’t act like other kids.
My child gets upset by confined spaces.
My child gets upset by certain sounds like lawnmowers.
My child is difficult to calm down at times.
My child wakes up at “full speed” and doesn’t stop all day.
My child can not control the volume of his/her voice.
My child can not stop jumping/spinning/bouncing/crashing.
My child strictly avoids jumping/spinning/bouncing/crashing.
My child is drawn to specific repetitive motions or activities.
My child strictly avoids specific repetitive motions or activities.
My child seems to have a problem that is difficult to pin point.
My child seems to struggle to keep up with other kids.
My child has no fear.
My child has extreme fears.
My child seems withdrawn at times.
My child doesn’t seem to notice details.
My child seems overly preoccupied with details.
My child doesn’t seem to notice when they fall and get hurt.
My child doesn’t notice dangerous situations (age-appropriately).
Do any of these gut feelings sound familiar? There are many red flags on the list above that are conflicting signs of different problems. Not every concern that is noted above will be seen of every child with sensory processing difficulties.
Parents of toddlers are often the first to notice when something seems different or “off” with their child’s behavior. When we refer to toddler behavior, remember that we are referring to the way that the toddler acts or behaves in any given situation.
Toddler Behavior Red Flags
When therapists refer to “behavior” in the context of a toddler’s development or therapy, they are typically talking about the observable actions exhibited by the child in various daily situations. This includes how the child responds to their environment, interacts with others, and manages their emotions and impulses. There is a lot going on in toddlerhood that we can observe!
While it’s essential to remember that children develop at their own pace, there are signs that may prompt parents to seek guidance or evaluation from a healthcare professional.
Here are some common toddler behavior red flags that might be connected to sensory needs and preferences:
No interest in daily functional tasks such as dressing, feeding, etc.
Fearful of stimuli
Repetitively seeks out stimuli
Difficulty managing certain foods or textures
Sensitive to sensory stimuli such as lights, sounds, or textures
Aggression
Behind on several developmental milestones like walking, speaking words, etc.
Delays in language or speech
Frequent meltdowns that are out of proportion for typical toddler development
Little to no gesture use in communicating wants or needs
Regression in previously acquired skills such as self-care, language, or social skills
Self-injury
The parent questionnaire for guardians of toddlers can include some of the sensory red flags listed above, however it is geared toward the typical toddler development that happens in the 1-3 age range. This may be a time when sensory red flags become apparent to parents and guardians.
A parent questionnaire for a toddler well visit, particularly when assessing developmental milestones and potential signs of Autism, may include questions related to various aspects of a child’s behavior, self-care skills, and communication. These could be related to sensory processing needs, which impact functional performance and typical development at this age.
Here are some sample questions that could be included:
1 Communication: Some children with sensory needs may struggle with social skills and communication, which can impact their ability to understand, participate in daily activities, follow self-care instructions, etc. Communication support and social skill development may be necessary. Being aware of these milestones is important.
Is your child using words to communicate their needs and desires?
Can your child follow simple instructions, such as “give me the ball” or “come here”?
Does your child make eye contact when interacting with others?
How often does your child engage in babbling or attempts to speak?
2. Social Interaction: Social skills and sensory red flags go hand in hand. For more information, check out our social skills checklist.
Does your child show interest in playing with other children or adults?
Does your child respond to their name when called?
Is your child able to imitate simple gestures or actions, like waving goodbye?
How does your child react to new people or unfamiliar situations?
3. Behavioral Concerns: For some, activities like rocking, hand-flapping, or spinning objects may provide a calming or organizing sensory input. Noticing these behavioral habits can be a predictor of sensory needs.
Are there any repetitive behaviors or unusual movements that you’ve observed in your child?
Does your child have intense reactions to sensory stimuli (e.g., lights, sounds, textures)?
How does your child handle transitions or changes in routine?
Are there any specific fears or phobias that your child exhibits?
4. Self-Care Skills: Taking a look at age-appropriate self care skills in children, (or the ability to complete functional tasks like dressing, potty training, feeding, etc.) is important because at the toddler age, there should be an interest in “doing things myself” or becoming more self-sufficient. A sensory red flag may mean that there sensory sensitivities and preferences that impact the child’s ability to notice or perform age-appropriate self-care tasks independently.
Is your child showing interest in self-care tasks like dressing themselves, feeding, or potty training?
How well is your child able to use utensils and drink from a cup?
Can your child independently perform basic self-care tasks, such as washing hands or brushing teeth?
5. Play and Imagination: Play is the work of the child but when sensory needs predominate, play can seem habitual or repetitive as a means to support sensory preferences. This can offer a sense of predictability and comfort to some children. Noticing these play preferences may convey their needs, sensory preferences, or discomfort.
Does your child engage in imaginative play, such as pretending to cook, play house, or use toys to represent real-life scenarios?
Is your child interested in a variety of toys and activities appropriate for their age?
How does your child explore their environment and play with objects?
6. Sleep Patterns: Sleep hygiene impacts functional performance of the whole family and sometimes during the Toddler years, we see a change in these habits, possibly related to sensory needs.
What is your child’s sleep routine like? How many hours does your child sleep at night?
Does your child have difficulty falling asleep or staying asleep?
What is your child’s typical diet like? Are there any aversions or strong preferences?
Is your child able to self-feed with utensils, or are they still primarily using their hands?
8. Safety Concerns- Do “sensory” considerations seem to impact direction following, the child running off in a crowded space, not listening about touching the stove or outlets, seeming to seek out unsafe situations, or other safety aspects?
Are there any safety concerns or behaviors that you find challenging to manage?
Does your child engage in any repetitive or potentially harmful behaviors?
It’s important to remember that these questions serve as a screening tool and not a diagnostic tool. If parents have concerns about their child’s development or behavior, they should discuss them with their healthcare provider for a thorough evaluation and appropriate guidance. This may be part of an indicator for exploring early intervention for Autism or other developmental needs.
Every child is different, but the concerns noted above will be indications to seek out more information and issues that should be brought up to your child’s pediatrician.
Be sure to check out our resource, our sensory processing disorder chart, to better understand how differences impact kids in different ways.
Get a free printable checklist version of our sensory red flags checklist below.
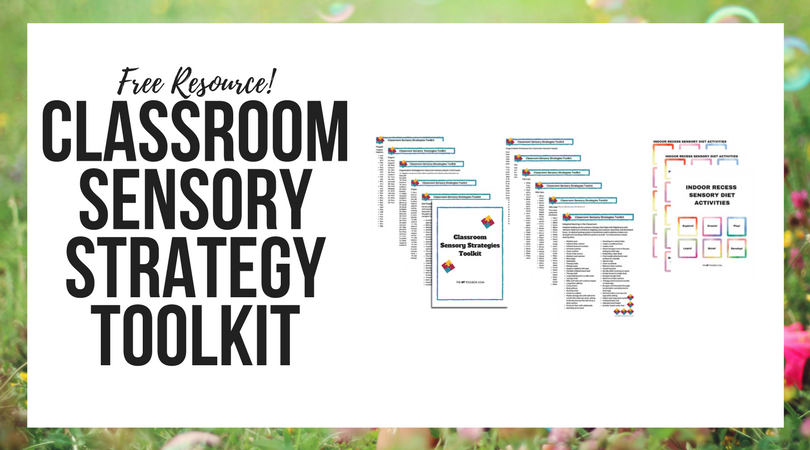
You may also be interested in the free printable packet, The Classroom Sensory Strategy Toolkit.
The Classroom Sensory Strategy Toolkit is a printable packet of resources and handouts that can be used by teachers, parents, and therapists. Whether you are looking for a handout to explain sensory strategies, or a tool for advocating for your child, the Classroom Sensory Strategy Toolkit has got you covered.
And it’s free for you to print off and use again and again.
In the Classroom Sensory Strategy Toolkit, you’ll find:
Fidgeting Tools for the Classroom
Adapted Seating Strategies for the Classroom
Self-Regulation in the Classroom
105 Calm-down Strategies for the Classroom
Chewing Tools for Classroom Needs
45 Organizing Tools for Classroom Needs
Indoor Recess Sensory Diet Cards
red flags checklist
Print off a copy of our Sensory Red Flags checklist. This printable tool can be a helpful resource when it comes to noticing and identifying sensory considerations that impact day to day functional performance.
To get the printable, enter your email address into the form below. You will receive a handout via email.
As always, if you suspect an area of need, consult with your child’s physician for individualized information and recommendations. This sensory red flags checklist and the toddler red flags list in this blog post is for informational and educational purposes only.
This red flags checklist is also available inside our Membership Club, along with all of the printable downloads available on The OT Toolbox website. Level 2 members can also access over 1500+ resources, sensory activities, handouts, ebooks, and much more.
Colleen Beck, OTR/L has been an occupational therapist since 2000, working in school-based, hand therapy, outpatient peds, EI, and SNF. Colleen created The OT Toolbox to inspire therapists, teachers, and parents with easy and fun tools to help children thrive. Read her story about going from an OT making $3/hour (after paying for kids’ childcare) to a full-time OT resource creator for millions of readers. Want to collaborate? Send an email to contact@theottoolbox.com.
For more information on sensory processing, development, and how to incorporate sensory needs and preferences into daily life, check out our ebook, The Sensory Lifestyle Handbook.
The Sensory Lifestyle Handbook walks you through sensory processing information, each step of creating a meaningful and motivating sensory diet, that is guided by the individual’s personal interests and preferences.
The Sensory Lifestyle Handbook is not just about creating a sensory diet to meet sensory processing needs. This handbook is your key to creating an active and thriving lifestyle based on a deep understanding of sensory processing.
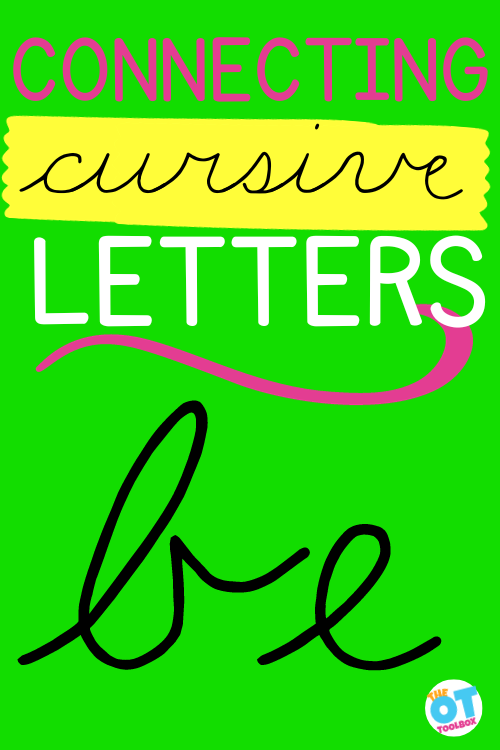
When kids are learning to write cursive letters, they need to also learn about connecting cursive letters together appropriately right from the start. In this blog post on on how to connect cursive letters, we’ll explore the tips for seamlessly joining cursive letters within a word to ensure fluid and proficient cursive handwriting. Teaching correct connectors between letters is essential for cursive accuracy and legibility. Let’s break down cursive connectors…
Connecting some cursive letters is an obvious flow into the next letter, but others are more difficult. Then, there is the pencil flow, the motor planning, and baseline control…there is a lot to consider for the student learning to write in cursive!
Connecting Cursive Letters
If cursive letters don’t connect properly, one letter can look like different letter. Connecting the letters together requires practice and instruction. The more a child succeeds in proper cursive connectors, the more legible handwriting will be.
If the letters don’t connect correctly and it can be hard to read handwriting. This is especially true as we get older and practice the incorrect forms. Your hand will become accustomed to producing the incorrect forms.
Connecting cursive letters is especially important with some of the letters that have a tow rope connectors between the letters. We call these letters tow rope letters.
Cursive b is one of these letters.
Cursive v and cursive o are other tow rope letters, meaning that the connecting lines between these letters and the letter next to them is at the middle line and changes the motor plan to the letter following the tow rope letter.
This resource on teaching cursive b has more information on this difference in motor planning in the letter formation.
How to Connect Cursive Letters
When forming specific letters, it can be easy to merge letters or for a cursive writer to form commonly connected letters in an alternative manner. You may find this is true when you write a letter e and e connected together. One cursive writer may make this letter combination completely different than another person who connects letters in a different way.
Timed writing samples show that cursive writing is more efficient and quicker than the fastest printed writing. Joining letters with connectors is what makes in writing happen more quickly and efficiently.
Connecting cursive lines in handwriting should occur fluidly and with a gliding motion of the pencil on the paper. If this doesn’t occur, or the writing looks choppy or jumpy with letters being jumbled as a result of connection issues, it can be helpful to take breaks in between writing strokes.
There are several factors that impact fluid writing in connecting cursive letters in a word. Checking for these items is the first step when you see difficulties with letter connections, or choppy handwriting:
Fluidity of writing
Writing speed
Writing rhythm
Paper position
Experience with cursive writing (practice)
Fluidity of writing- The handwriting motor plan that you have in your mind for forming two letters together may remain the same with practice.
Writing Speed and Rhythm- Letter writing speed and rhythm has a lot to do with unique formations and connections of cursive letters.
Paper positioning- Cursive letter formation and connectors can also have a lot to do with the angle of handwriting, or the paper positioning when writing in cursive. Paper slanted and positioned to the left will affect the way cursive g connects to the letter next to it.
Experience- More practice of letter connectors will help with speed and rhythm in cursive writing. When children just start out with learning cursive, they are working on the overall letter form. The connectors are a “pause” moment for them as they finish one letter and then move onto the next. For new cursive writers, you’ll see a drawn out connection. You might even see the pencil lift up from the paper. This is a sort of mental break. With experience, forming the cursive letters becomes more natural and the connection between the cursive letters becomes more fluid.
The connections between letters will come naturally according to the individual’s personal writing style.
Variations in Connecting Cursive Letters
The thing about cursive writing is that it is very personalized. While the letter form is the same for most, there can be variations in the letters that becomes part of that person’s handwriting style.
Think about an adult hand writing or your own handwriting. The cursive letters are probably fluid and not exact as you might have learned in a cursive handwriting guide book or in second grade cursive writing instruction. This is because you have develop your own style of cursive. This has happened over time and with practice.
Look at your own cursive handwriting. You may notice that some letters are not formed or connect exactly as you were taught in grade school. Adaptations to cursive result in personal cursive writing styles and can be completely legible.
The motor plan is established. Kids can create their own cursive style too. When that happens, handwriting will be legible and comfortable. For kids that are learning cursive letter connections, or kids that don’t have the fluid motions quite yet, flow exercises can be a big help.
Cursive Line COnnecting Exercises
Cursive lines can be practiced with specific activities to support the development of this skill.
Flow exercises are very important and useful in helping kids to develop fluid fluid motions and establishing a comfortable style of handwriting. Exercises designed to improve cursive letter connectors are made up of simple bends and arches, joined together from the base.
Cursive letter connector exercises connect common letters together and start at the base. This might be a series of “cursive i“s connected with ease. Another connector exercise might be a string of cursive letter “l”s connected. You can also mix other letters such as cursive u and cursive n, working on the flow between two different letters.
Tips for Fluid Cursive Lines between letters
A few tips for teaching cursive letter connections include:
Mix it up. Try to incorporate different letter directions and sizes of joining strokes when working on the flow of connections.
Connect just a few letters together at first. Flow exercise typically occur with 2 to 3 letters in groups. This helps to form a motor plan for letter formation.
Start letters at the correct starting point. Another important point about connecting letters is formation. It’s important to start certain letters at a specific point such as cursive o. It always needs to start at the top and curve around in a counterclockwise motion. In this way the letter can connect easily two other letters.
How to Connect Cursive Letters
There are several strategies to use, and because of the different letter strokes, it’s a good idea to work through these.
Pause and connect- One strategy to work on letter connections is to practice forming the letter and then when the letter is completed, pause and then connect to make the next letter. This then progresses to the next step in teaching cursive connections.
Baseline control- Most of the letters connect at the baseline. They rock or slide into the next letter. The pencil moves along the baseline as it ramps up to connect to the next cursive letter.
Work on this baseline control by using muscle groups to control the pencil. This can be achieved by hand strengthening and fine motor skill work, but also practice with pencil control exercises. Specifically, pencil control worksheets like tracing along the lines of graph paper can support this skill.
Right handed writers will push the pencil along the baselines and then use pulling motions of the hand to pull slanted pencil strokes back into the palm of the hand. Work on this motion with pencil control and with fine motor work to pull items into the hand.
Left handed writers will pull rocker letters and rainbow motions of the pencil to the right by pulling the pencil into the palm. They will connect letters along the baseline with a pushing motion of the pencil moving away from the palm. Work on this motion with pencil control and with fine motor work to push items away from the hand. Here is more information on left-handed cursive.
Backward chain letter formation- Another way to teaching students how to connect cursive letters is through the technique of backward chaining.
Backward chaining is a common strategy for tasks such as teaching kids to tie their own shoes or to fasten zippers. It can be used for learning cursive handwriting connectors, too!
With backward chaining in cursive writing, it’s important that this strategy is only used with letters that are very well established. Try this trick only when a child is very fluent with cursive letter b, for example. Then: students can start out with a cursive b.
Add in multisensory strategies- In addition to the backward chaining technique, you can add multisensory strategies to add more learning styles.
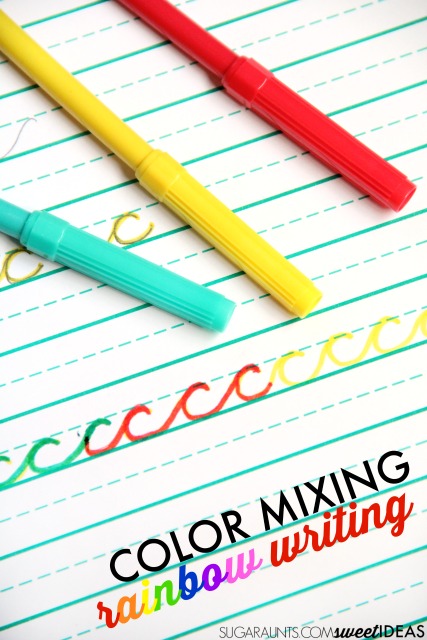
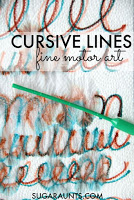
We shared a color mixing rainbow writing activity before that explains this activity. They can write in a black magic marker or trace over a worksheet. Students can use a highlighter marker to trace over just the connector of the b. They can do this several times across a sheet of paper, tracing over only the connector line of the b as it travels to the next letter. Students can even trace that connector over to connect to other letters such as cursive e, cursive a, cursive i, etc.
Then, ask students to complete the whole letter b, connecting it to the same letters that were practiced above.
Air writing- Still another tactic to teach cursive connections is through gross motor air writing. Practice backward chaining with cursive letters by forming big motions of the cursive letters. For example, don’t as students to start at mid loop of the b.
Direction change in cursive letter connections
One aspect of connecting letters is the direction change that happens when some letters connect with others. The pencil changes direction and uses a different muscle set mid-letter or mid-connection.
Joining two letters that change directions can be confusing for kids who are just learning to write in cursive and connect letters correctly. Some letters require a change pencil direction when connecting.
Some examples of this include:
cursive b connected to other cursive letters
cursive w connected to other cursive letters
cursive v connected to other cursive letters.
cursive o connected to to other cursive letters
When two letters connect that require the pencil to go in one direction, and then stop and reverse to go in the opposite direction to connect the letter, it can be quite difficult for a child who is just learning to write in the continual pencil motions that cursive writing requires.
These letters require precision and pencil control for legibility. Cursive writers need to have a relaxed style otherwise the retrace required in these letters can make the retrace wide.
Re-Trace in Connective cursive letters
Re-trace is when the pencil traces back over the line it already made. Cursive letters with re-trace include:
a, c, d, g, h, i, j, m, n, o, p, q, s, t, u, w
Some of these letters have a re-trace because of the swing up to create the letter. This is the initial connection to start the letter. This includes the letters:
a, c, d, g, o, q
Other of these re-trace letters have a re-trace formed by the bumps of the letter. This might be the starting connector or it might be inside the letter. This includes:
h, m, n, u, w
Other of these letters have re-trace formed within in the letter:
i, t, j, s, p
It’s important for kids to learn to correctly re-trace and connect letters when they are just learning. As they grow and develop their own personal writing style lifting the pencil for these letters is fine.
Cursive letter s has re-trace as well as directional changes that use different pencil control and motor plans.
Connections between letters can vary from person to person as an individual ages and develops. As long as legibility and functional speed are appropriate, this is fine!
Some top handwriting programs for addressing skills like letter formation and cursive connectors:
Need help with the underlying skills needed for handwriting? Start here on our Handwriting resources page.
The Handwriting Book is a huge resource when it comes to addressing handwriting concerns. It’s a book written by 10 occupational therapists and physical therapists and refers to every underlying skill related to written work. This is a tool for therapists, teachers, and parents.
The Handwriting Book is a comprehensive resource created by experienced pediatric OTs and PTs.
The Handwriting Book covers everything you need to know about handwriting, guided by development and focused on function. This digital resource is is the ultimate resource for tips, strategies, suggestions, and information to support handwriting development in kids.
The Handwriting Book breaks down the functional skill of handwriting into developmental areas. These include developmental progression of pre-writing strokes, fine motor skills, gross motor development, sensory considerations, and visual perceptual skills. Each section includes strategies and tips to improve these underlying areas.
Strategies to address letter and number formation and reversals
Ideas for combining handwriting and play
Activities to practice handwriting skills at home
Tips and strategies for the reluctant writer
Tips to improve pencil grip
Tips for sizing, spacing, and alignment with overall improved legibility
Colleen Beck, OTR/L has been an occupational therapist since 2000, working in school-based, hand therapy, outpatient peds, EI, and SNF. Colleen created The OT Toolbox to inspire therapists, teachers, and parents with easy and fun tools to help children thrive. Read her story about going from an OT making $3/hour (after paying for kids’ childcare) to a full-time OT resource creator for millions of readers. Want to collaborate? Send an email to contact@theottoolbox.com.
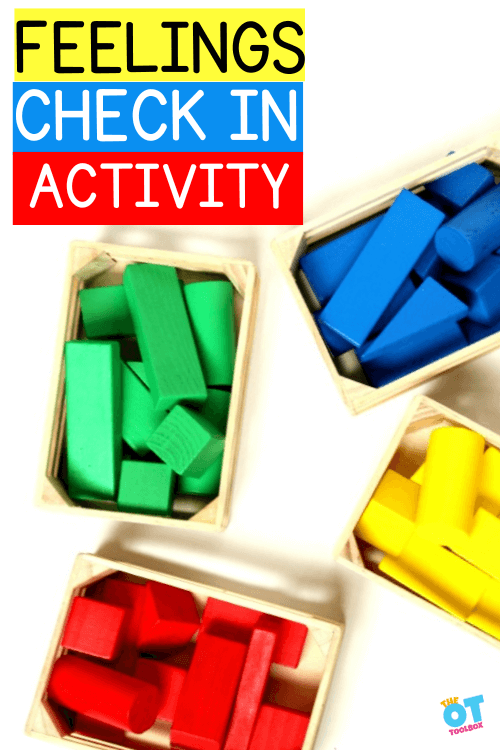
A feelings check in station in the classroom is a great way to explore emotions and develop the emotional regulation strategies to support social emotional development. The block activity that we share below is one feelings check in that can be used with preschoolers or young kids in a kindergarten classroom, but with some adaptations, this can work for older children as well.
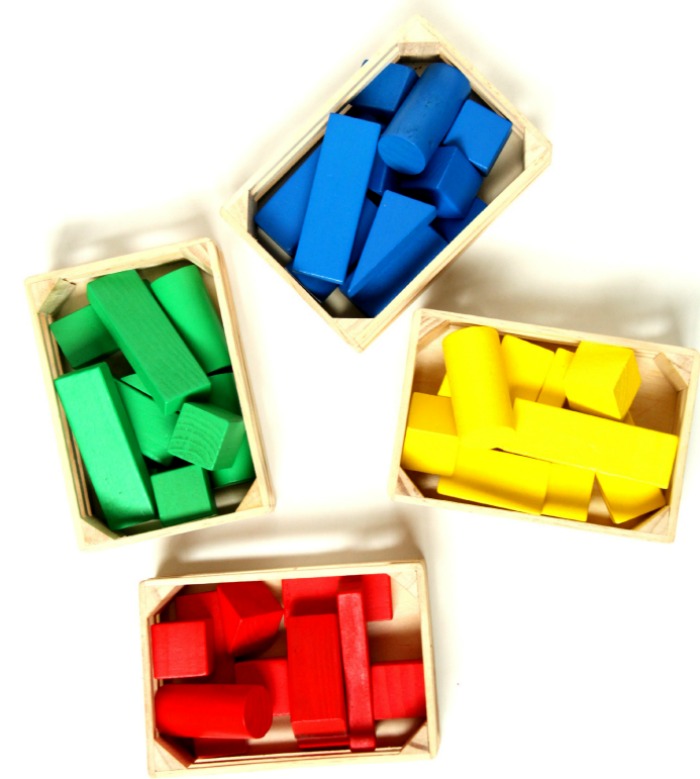
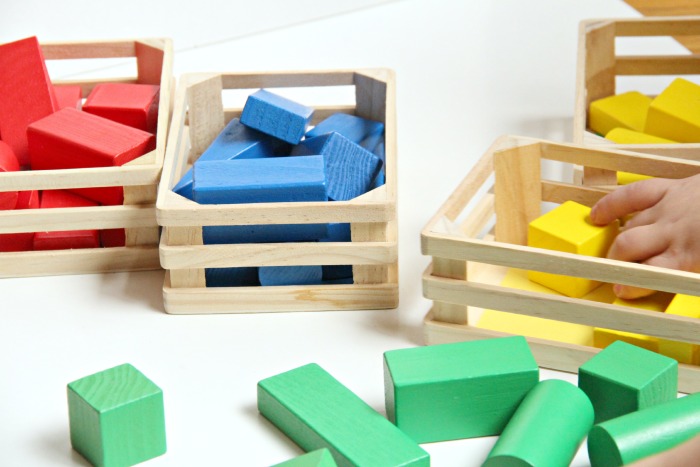
We created this feelings check in activity many years ago, using colored blocks and labelled bins or baskets. We love this activity for learning the colors that go along with the Zones of Regulation® program.
This color sorting busy bag activity allows children to sort colored blocks while working on color identification, shape and identification with eye-hand coordination, fine motor skills, visual memory, and visual scanning.
For our feelings check-in activity, we used the colors red, blue, green, yellow because that was the colors of blocks that we had in our set. The fact that they matched the Zones of Regulation colors was actually coincidental. It was a great teaching moment for identifying those colors and the associated states of regulation, however. You could substitute different colors if needed. Or, you could use plain blocks labeled with emotion names. Using these colors that are associated with various feeling names is convenient, however.
Supplies needed for this emotions check in activity:
Four containers or wooden crates
Colored blocks in four different colors (You could also substitute the colored blocks with colored craft sticks or plain blocks/pieces of paper labelled with feeling names)
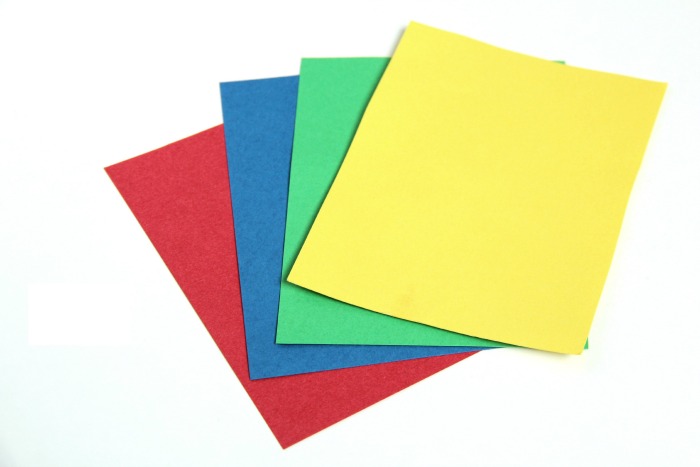
Colored paper to match the colors of the blocks
Set up the emotions check in activity:
Start by cutting the paper to fit your containers. Label the paper with names of emotions. We used wooden crates for our sorting activity, so rectangles fit the bottom of the crates worked. If you are using bowls, cut the paper into circles. You’ll want the base of the containers to hold the paper.
You can also label the outside of the container if you like, or you can challenge the little ones to identify emotions and feelings based on the colors.
Scatter the colored blocks around on the table and begin the sorting activity by showing the child how to sort the colored blocks into the containers. The child can select one block that matches their emotion or feelings and “check in” by placing the block into a container.
Looking around at the scattered blocks allows a child to work on their visual scanning. The child needs to scan and examine the surface with many colored blocks, while focusing and fixating their eyes on the specific colors. Another benefit of scanning for the name of the feeling that they are identifying with is that the child/student can see that there are many different emotions that they are not personally experiencing at that moment.
This supports the awareness of empathy as well as the development of empathy, and the awareness that others may not check in with the same emotion as them at that given moment.
Additionally, scanning for the block that they are looking for and the matching container color supports visual processing skills. This pattern of fixations and saccades of the eyes is a necessary organized skill required for tasks such as reading and writing.
Visual perceptual skills are closely related to eye-hand coordination. Eye-hand coordination, (or hand-eye coordination) is defined as using the hands in a coordinated manner in conjunction with the movements of the eyes. Visual input guides reaching and grasping of the hands in functional activities).
Encourage language in this activity by asking questions such as “What shape is this block?”, “What feeling does this color match?”, “What color goes into this crate?” Asking these questions develops an emotional vocabulary that will carry into other tasks throughout the day as a tool for supporting regulation.
Feelings Check in for Older Kids
This activity can be adjusted for older children by asking the child to count the number of blocks in each container, doing simple addition (“How many blocks are in the yellow bin and the green bin all together?”)
To make this more appropriate for older kids, you can replace blocks with tally marks or a paper that they slip into a ballot box (for privacy). Also, offer paper next to the check in. After they “check in their feelings”, they can write about it on a private journal. This is a great way to support emotional development with the middle school age range and a wonderful middle school journal prompt.
Asking older kids to come up with coping tools as needed can be helpful, too.
Pumpkin emotion activities (substitute with other shapes and themes throughout the year)
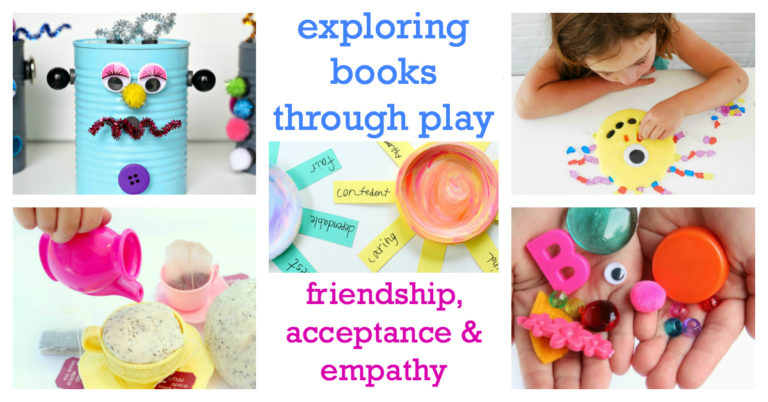
If you liked this feelings activity, you’ll love the hands-on, play-based activities and crafts in our collaborative book, Exploring Books Through Play: Friendship, Acceptance & Empathy. The book is geared toward the preschool and young elementary age, and includes many activities to foster an awareness of feelings and the feelings of others.
Colleen Beck, OTR/L has been an occupational therapist since 2000, working in school-based, hand therapy, outpatient peds, EI, and SNF. Colleen created The OT Toolbox to inspire therapists, teachers, and parents with easy and fun tools to help children thrive. Read her story about going from an OT making $3/hour (after paying for kids’ childcare) to a full-time OT resource creator for millions of readers. Want to collaborate? Send an email to contact@theottoolbox.com.
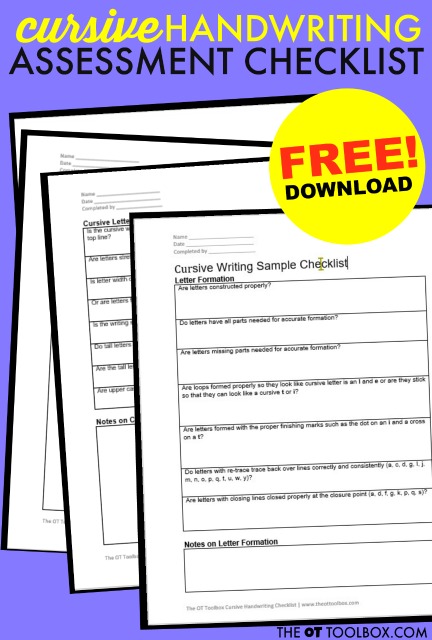
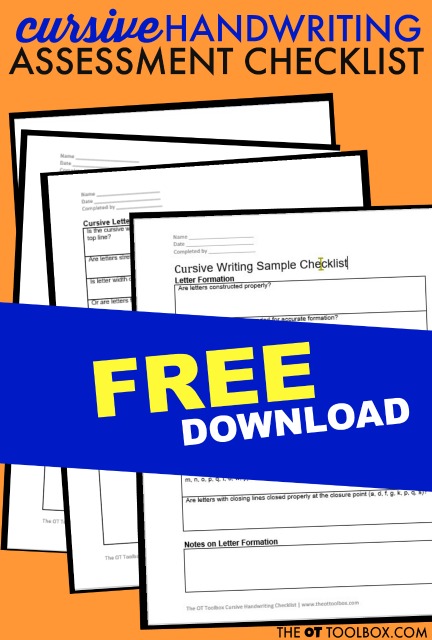
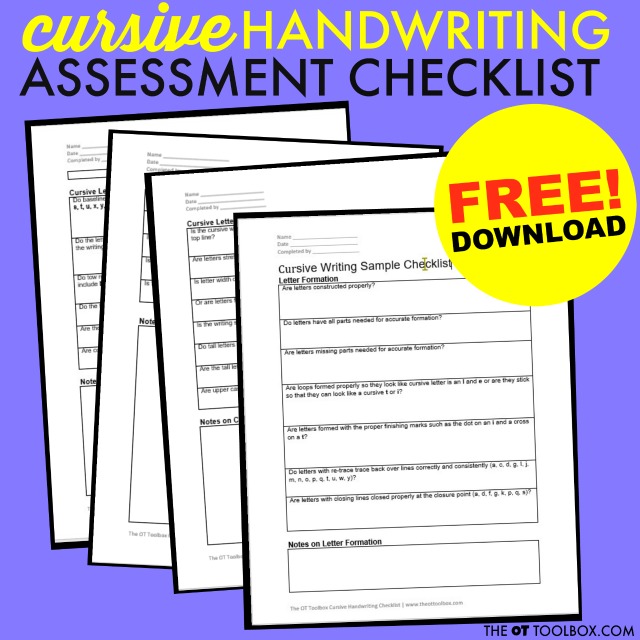
Supporting kids by teaching cursive handwriting can be a challenge when there are problems in cursive writing. We’ve covered many issues that contribute to handwriting problems, but when you look at cursive in particular, there are differences to consider. One tool to support an educator or occupational therapy practitioner is a cursive writing screening tool. Below, you’ll find a cursive handwriting checklist to support and overcome problems in cursive writing. Also be sure to check out tips and specific strategies to teach cursive.
Get your copy of the cursive screening tool at the bottom of this blog post.
Problems in Cursive?
Cursive handwriting can be a challenge to learn. When kids do learn the letters, many times cursive writing takes on a personal style of letter formation. To assess cursive handwriting in the child who is already writing, it takes assessment of the individual parts of cursive writing such as letter formation, speed, rhythm, and legibility.
To diagnose cursive handwriting struggles, it’s important to look at the overall piece of written work. The cursive writing assessment checklist below will help to assess cursive handwriting and work on cursive writing progression.
Is the writing sample legible?
Can the individual read it after a period of hours or days?
Are specific letters identifiable?
Are letters formed properly, and are they connected correctly?
Do the letters flow and can join together accurately?
Are the strokes leaning in a consistent direction?
Are there added pencil strokes or portions of letters missing?
Is there consistent use of line and size awareness?
There is a lot to consider when it comes to supporting cursive writing needs!
Looking at all of the parts that make up cursive handwriting can be beneficial to pinpoint areas that need more work in order to promote functional cursive handwriting.
These are all things to look at when assessing cursive handwriting.
Once the specific needs of the student are identified, these strategies can be taught and practiced. Then, a cursive self-assessment of cursive writing can be used by the student for handwriting carryover.
How to Diagnose Cursive Writing Problems
Look at the items below to diagnose cursive handwriting issues and figure out how to work on these areas to improve overall legibility.
is the writing correct but layout and spacing poor?
Another area to consider when assessing cursive writing is to look at desk and paper positioning.
cursive writing lines
The lines that make up cursive letters support legibility but there is more to it as well. We cover these areas in the cursive writing problems screener.
Children may encounter various challenges when it comes to writing cursive letters on lines:
Letter Size and Spacing: Maintaining consistent letter size and appropriate spacing between words and letters can be difficult. Some children may write letters that are too large, too small, or unevenly spaced.
Letter Formation: Cursive letter formation involves specific strokes and connections between letters. Kids may struggle with remembering the correct sequence of strokes or the direction of loops and curves.
Letter Slant: Cursive writing typically has a specific slant or angle to the letters. Children may find it challenging to maintain a consistent slant throughout their writing.
Staying on the Lines: Writing within the lines requires fine motor control and coordination. Children might have difficulty staying within the designated lines, resulting in letters that float above or dip below the lines.
Legibility: Poorly formed cursive letters or inconsistent sizing and spacing can lead to illegible handwriting, making it challenging for others to read.
Fatigue: Cursive writing can be more physically
Included in the form are areas for notes on handwriting, along with the above questions divided into sections:
Cursive Letter Formation
Cursive Letter Connections
Cursive Letter Size
Overall Cursive Letter Legibility
This Cursive Handwriting Assessment Checklist is a great way to assess and monitor cursive handwriting progression.
Use this Cursive Handwriting Assessment Checklist to diagnose and identify specific problems in cursive handwriting samples.
Once specific issues are determined, it can be easy to work on those specific skills.
Each child will be different in the way that their writing appears on paper. Even children who are instructed in a group will end up with writing that looks completely different, especially once a personal style is incorporated into cursive writing.
If you’re seeing problems with cursive handwriting skills and would like to assess where the breakdown is happening, you’ll want to grab our cursive screening tool. Use it to assess cursive handwriting using a checklist of cursive writing skills.
To get this printable, enter your email address into the form below. The printable will arrive via email so you can print it from any device and from any location.
This cursive screener is also found inside our membership club. Members can log in and then head to our cursive resources.
Colleen Beck, OTR/L has been an occupational therapist since 2000, working in school-based, hand therapy, outpatient peds, EI, and SNF. Colleen created The OT Toolbox to inspire therapists, teachers, and parents with easy and fun tools to help children thrive. Read her story about going from an OT making $3/hour (after paying for kids’ childcare) to a full-time OT resource creator for millions of readers. Want to collaborate? Send an email to contact@theottoolbox.com.
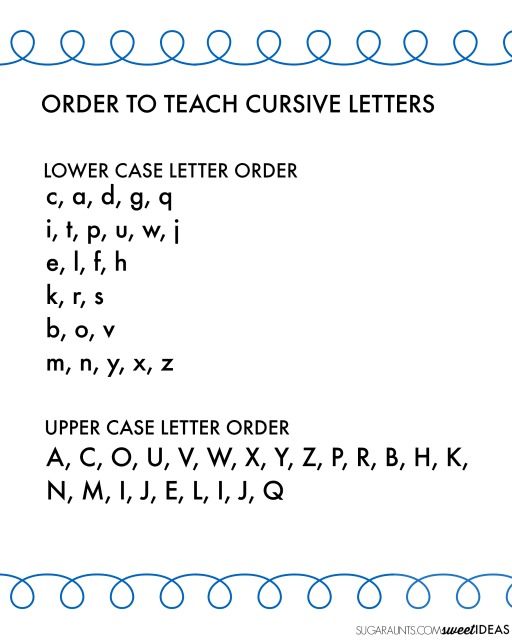
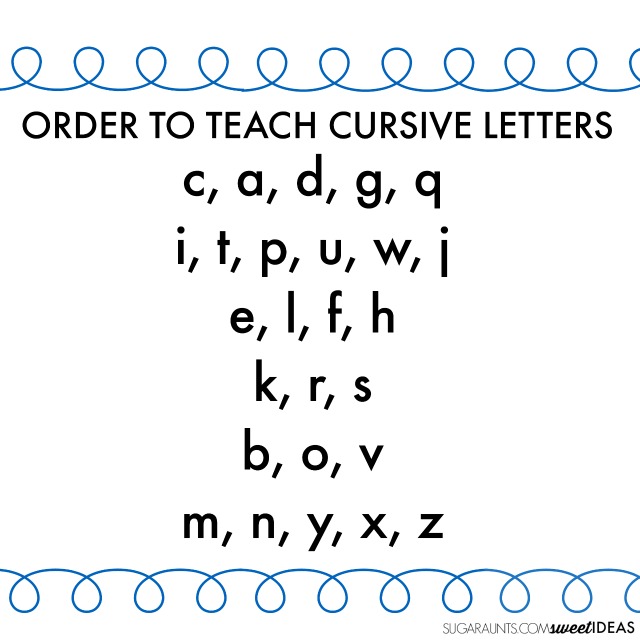
Did you know there is a specific order to teach cursive letters to promote cursive writing legibility and carryover of cursive handwriting? Occupational therapy providers work with the occupation of handwriting and cursive letters are part of that process. In this post, you’ll learn about cursive writing order to teach letters of the alphabet, including the Handwriting Without Tears letter order for teaching cursive. The order that kids should learn the cursive alphabet, including print letter patterns that are directly transferable to cursive alphabet letters.
Using a developmental approach to teaching cursive letters supports children and sets them up for success.
order to teach cursive letters
The order that cursive letters are taught is based on development of skills. Just like the order to teach printed letter formation is based on development of pencil control skills, visual motor skills, cursive letter order is also taught developmentally.
This means that letters are grouped into similar pencil strokes, or letter families.
Learning to write the alphabet in cursive, writing one’s name in cursive, and writing words in cursive is something that many kids want to do around the second grade.
It’s around second grade, or 7-8 years of age that fine motor skills develop in such a way that pencil control and graded precision are developed to enable greater in-hand manipulation, and movement through the range of mobility in the thumb and intrinsic muscles within the hand.
This enables pencil movements to become more mobile and fluid, which are pre-requisites for cursive writing skills.
Prior to this skill achievement, handwriting is taught based on pencil strokes, including uppercase letters before lowercase letters because of the developmental aspect of learning letter formations.
Cursive seems like a “grown up” style of communication that kids see adults or older students using and they try to make swoopy writing on their own.
Some children can be very motivated to learn to write the alphabet in cursive and use it in their written work.
However, one tip for teaching children to write in cursive is to go through the letters in an order that makes sense according to the pencil movements needed to create the letters.
Writing cursive letters in a group of similar pencil strokes is helpful for carryover of pencil control practice and letter formation. Here is more information on teaching groups of similar cursive letters together in a chunk, or cursive letter families.
Once kids have a start on cursive letter formation, they can practice in creative ways like on the window.
Other children who may not be exposed to cursive written work might have their first exposure to cursive in the classroom. Still other students might be in a public or private classroom where cursive handwriting has been dropped from the curriculum. These kids may need extra practice at home or might need to learn cursive handwriting from the very beginning.
But where to start when teaching kids (or adults!) the cursive writing alphabet and how to form words in cursive? Read on for tips and strategies to get started on learning cursive letters.
Cursive Letters Order
We’ve touched on cursive handwriting in previous posts, include a small piece about starting to teach cursive letters. This strategy will outline the alphabet and the letter order to make learning cursive more easy, based on learning letters in a developmental and progressive order.
There are print letter patterns that are directly transferable to cursive letters.
These are cursive letters that are formed similarly to their printed letter counterparts. The muscle movements of the hands that are used to form some printed letters are directly related to the same letters. For this reason, it’s a good idea to start with these letters when learning the cursive writing alphabet.
The printed letter patterns that make up some letters will transfer directly to cursive, and when formed with a few subskills, cursive letter formation will easily follow (in most cases):
Left-to-right strokes
Good starting points
Direction of movement
Consistent stopping points
Control of downstrokes
Smooth rhythm
Given the subskills noted above, cursive letter formation will lend to more legible letter formation. Often times, learning correct letter formation and motor practice will help with legibility and ease of cursive writing into a viable form of written communication.
Cursive Letter Order Patterns
If you take a look at cursive letters, you might see a pattern that is similar among the letters. This is part of why we use a cursive pre-writing lines approach when teaching cursive for the first time.
You’ll see pencil and paper activities that support this pencil movement with different pencil strokes:
Upswing (the line to start a cursive i or t)
Downswing (the line to start a cursive c or a)
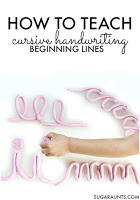
Both of these movements can transfer to different starting lines for the other letters. The muscles used to make these lines can then transfer to the other starting movements. Check out our blog post on cursive beginning lines for more information on this concept.
Heling kids to start off with confidence in pencil control to make these beginning strokes supports confidence when learning cursive letters from the start!
When teaching the cursive alphabet, where to begin?
These letters have print patterns that are directly transferable to their cursive letters. This is related to the pencil strokes that are used to form the cursive letters. For this reason, there is a different order to teach cursive lowercase letters compared to their uppercase letter counterpart.
When we consider printed letters, we can directly translate the pencil strokes to some of the cursive letter counterparts. This means that learning the cursive letter form of the letter should be easier based on knowledge of the printed letter’s form.
Having letter recognition skills for printed letters supports the ability to learn cursive letters. For example, there are printed letters which directly translate to the pencil strokes in cursive:
t, i, and u and w transfer to their cursive letter counterparts.
e and l transfer to their cursive letter counterparts.
n, m, p, and h transfer to their cursive letter counterparts.
a, c, d, q, and o transfer to their cursive letter counterparts.
j and g transfer to their cursive letter counterparts.
This means that the remaining letters are the only ones that need to be taught as a new handwriting motor plan in mind. Those letters include:
b, f, k, r, s, v, x, y, and z
We can help learners with this group by calling them cousins or relatives to their printed letter counterpart because they are similar, but different.
Lowercase Cursive Letters
The following letters transfer directly to their cursive letter forms: c, a, d, g, o, q, i, t, u, j, e, l, f, h, p, n, and m.
Knowing that there are letters that use similar motor plans as a starting point, it is recommended to follow an order when teaching lowercase cursive letters:
c, a, d, g, q – These letters can be considered “wave letters” because of the beginning stroke.
i, t, p, u, w, j – These letters can be considered the “tree letters” because of the beginning line to swing up. e, l, f, h – These letters can be considered the “loop letters” because of the loop that the pencil makes.
k, r, s
b, o, v – These letters can be considered the “tow truck letters” because of the ending connection.
m, n, y, x, z – These letters can be considered the “bump letters” because of the beginning pencil stroke.
Uppercase cursive letters
Upper case cursive letters should be presented in a specific order as well:
A, C, O, U, V, W, X, Y, Z, P, R, B, H, K, N, M, I, J, E, L, I, J, Q
This letter order uses a combination of research-based strategies and focuses on movement based patterns as well as common letter formations, i.e. the way the letters connect to form words. Read about how to connect cursive letters for specifics.
In general, it’s considered that the baseline connecting letters are taught prior to the middle line connecting letters. This isn’t accurate for the Learning Without Tears program (Handwriting Without Tears cursive letter order) when it comes to letter w which is taught near the beginning, due to it’s direct translation from the printed version of letter w.
This upper case cursive letter order (or cursive capital letters) order teaches upper case letters that are similar to lower case letters first. Always teach lower case cursive letters before upper case letters.
The Handwriting Book breaks down the functional skill of handwriting into developmental areas. These include developmental progression of pre-writing strokes, fine motor skills, gross motor development, sensory considerations, and visual perceptual skills. Each section includes strategies and tips to improve these underlying areas.
Strategies to address letter and number formation and reversals
Ideas for combining handwriting and play
Activities to practice handwriting skills at home
Tips and strategies for the reluctant writer
Tips to improve pencil grip
Tips for sizing, spacing, and alignment with overall improved legibility
A final note on teaching cursive letters
Sometimes, cursive letters are taught as a writing format for children that struggle with the motor plan to form and use legible printed handwriting. This might be the case for several reasons:
The motor plan to form printed letters is choppy and difficult to recall the different pencil strokes for each letter.
Cursive letters use a smoother flow to form letters. The continuous hand movements can be easier for some students because it involves fewer stops and starts compared to print writing.
The challenge of letter reversals and letter confusion that occurs with dysgraphia can mean that cursive writing may be easier to learn and use than printed handwriting. This is because cursive letters connect with continuous pencil strokes, leading to less letter reversals and other common writing errors associated with dysgraphia.
Just like printed handwriting, cursive letters are one form of written expression however, there are differences when it comes to legibility. Perfect formation and pencil strokes are not always necessary!
Cursive Letters Tips
We have many blog posts here on The OT Toolbox that support cursive letter writing. Explore these activities and tools to teach the cursive alphabet.
Colleen Beck, OTR/L has been an occupational therapist since 2000, working in school-based, hand therapy, outpatient peds, EI, and SNF. Colleen created The OT Toolbox to inspire therapists, teachers, and parents with easy and fun tools to help children thrive. Read her story about going from an OT making $3/hour (after paying for kids’ childcare) to a full-time OT resource creator for millions of readers. Want to collaborate? Send an email to contact@theottoolbox.com.