About Ayres Sensory Integration

Ayres Sensory Integration

In this post, we are going to give you the basics of Ayres Sensory Integration. If you have never heard of it, continue reading for plenty of information and resources that will help you become more familiar with this practice. Or, if you are trained in sensory approaches and looking to refresh your knowledge, we have got you covered. Learn more about the sensory system and and sensory-based activities in this resource on Sensory.

Ayres sensory integration and how this specialized sensory treatment impacts kids with sensory processing needs.

WHAT IS Ayres SENSORY INTEGRATION?

You may have heard the terms Ayres Sensory Integration, of Ayres SI. Maybe you’re familiar with the term sensory integration. But what do these terms mean?

Sensory integration has many layers, but it can be made quite simple. In fact, everyone has experienced sensory integration! Think about your senses; the way you feel things on your skin, see bright or dim light, smell a cup of coffee, or feel dizzy on a rollercoaster. Your body senses a stimulus, for example, the feeling of your shirt against your skin.

After a few moments, you don’t think about how the shirt feels on your skin. You wear it all day long without feeling it touch you.

This is an example of sensory integration. That sensation – the touch of the shirt to your skin – was processed and organized by your nervous system, and the nervous system decided that it did not need to process it any more. In other words, it was integrated!

But what happens if the sensation is not integrated?

You may have heard of someone who can feel their shirt, particularly the tag of their shirt, all day long. It may bother them so much that they cut off those tags to avoid feeling that sensation.

It may be that somewhere along the sensory nervous system pathway, the signals for processing that touch sensation are blocked, or lost. Instead of being processed and integrated as, “You don’t need to feel this any more!”, it’s stuck in a processing limbo of, “what is this that I am feeling?”.

Much like how a sudden closure on the freeway means that you will have to find another way to your destination, those sensory signals need to learn where to go when their path is not clear.

Sensory integration therapy can help find a new path to that destination and turn off the signals that cause the over-response to the stimuli (in this case, the shirt).

Who is Jean Ayres? Dr. A. Jean Ayres, an occupational therapist, psychologist, and neuroscientist, developed this theory and practice in the mid 1970s. She recognized that a child’s sensory system can greatly impact how they perceive and interact with the world around them. Dr. Jean Ayres developed specific sensory integration interventions based on her research findings over the course of her career.

WHO IS Jean AYRES?

Dr. A. Jean Ayres, an occupational therapist, psychologist, and neuroscientist, developed this theory and practice in the mid 1970s. She recognized that a child’s sensory system can greatly impact how they perceive and interact with the world around them. Dr. Jean Ayres developed specific sensory integration interventions based on her research findings over the course of her career.

Since 2005, Ayres Sensory Integration (ASI) has been trademarked to differentiate this particular method from other sensory-based therapies. The term Ayres Sensory Integration, or ASI, encompasses the theory, assessments, and interventions that were developed by Dr. Ayres.

WHAT IS SPECIAL ABOUT Ayres Sensory Integration?

There are reasons why ASI is trademarked and other sensory approaches are not – so what makes Ayres Sensory Integration so unique? One reason why the trademark was necessary was to clarify to the public and the academic communities which evidence to correlate with ASI.

The evidence for sensory interventions were becoming increasingly mucky – it became difficult to discern if ASI worked because so many people were calling any sensory approaches ASI, even if they did not align with the principles (Parham et al., 2007).

To be considered true ASI, a trained practitioner must follow a specific protocol in their evaluation and treatment of their client. To start, the practitioner would evaluate their client using methods of naturalistic observation, conducting caregiver and teacher interviews, administering standardized testing, and performing clinical observations.

After the evaluation is complete, they will determine the ways in which sensory integration deficits may be interfering with the child’s functional performance.

Core Elements of Ayres Sensory Integration

After determining that ASI is an appropriate intervention method for a child, the trained practitioner will develop sensory interventions that fall within the core elements of the ASI approach:

  1. Ensures physical safety.
  2. Presents sensory opportunities.
  3. Helps maintain appropriate levels of alertness.
  4. Challenges postural, ocular, oral, or bilateral motor control.
  5. Challenges praxis and organization of behavior.
  6. Collaborates in activity choice.
  7. Tailors activity to present the just-right challenge.
  8. Ensures that activities are successful.
  9. Supports a child’s intrinsic motivation to play.
  10. Establishes a therapeutic alliance.
    (Parham et al., 2020)

DOES Ayres Sensory Integration WORK?

Sensory integration is an on-going research topic in the field of occupational therapy. Many recent publications have suggested that ASI can be used to improve occupational performance (Koester et al., 2014; Miller, Coll, & Schoen, 2007; Pfeiffer, Koenig, Kinnealey, Sheppard, & Henderson, 2011; Roley et al., 2015; Schaaf & Nightlinger, 2007; Schaaf et al., 2013, Schaaf et al., 2015; Watling & Hauer, 2015).

In other words, ASI is supported by research in it’s main goal: to increase a child’s participation in their daily activities.

ASI was originally developed as a measure to address the functional abilities of children with learning and behavioral concerns. The positive outcomes of ASI have since been well-documented for children with Autism Spectrum Disorder, as well as for children with learning disabilities, ADHD, developmental delay, regulatory disorder, and developmental coordination disorder.

The theory and practice has also been modified for use with other populations and age groups, too!

Who Uses Ayres Sensory Integration?

Most recent research estimates that up to 95% of children with developmental delays or disabilities have deficits in sensory functioning (AOTA, 2017).

Additionally, it is estimated that sensory processing difficulties occur in 5% to 14% kindergartners, 16% of elementary students, and 10% to 12% of people of all ages with no related diagnosis (AOTA, 2017).

In short, the relevance for sensory integration is huge, due the prevalence of sensory deficits in individuals of various populations.

To find out if an individual can benefit from ASI therapy, the Sensory Integration and Praxis Test (SIPT) would be administered, per the ASI guidelines. The SIPT was developed by Dr. Ayres specifically to test whether or not ASI is appropriate for an individual, and to highlight specific deficits in sensory processing.

RESOURCES on Sensory Integration

There are many great resources available for practitioners and families alike. See the options below to discover more about the sensory system, ASI theory, and sensory-based interventions.

Ayers Sensory Integration and Therapy

While Sensory integration (SI) refers to a theory developed by Dr. Jean Ayers in the 1960’s much has changed in the world since the conception of sensory integration therapy.

We have screens, online worlds, technology, fast paced lifestyles, full schedules, various educational models and programming types, changed environments, different home lifestyles, adapted parenting styles, and many other overall lifestyle differences since the 1960s.

The theory that our Central Nervous System (CNS) takes information from the outside world that has VASTLY changed, while our internal systems has not is an interesting one to chew on.

We’ve had to accommodate for these different and updated needs that our world has moved into.

What hasn’t changed is the nervous system’s ability t take information from the outside world, organize it, and use that information to produce purposeful and useful responses toward specific goals we have, physically, cognitively, emotionally, and behaviorally.

We are able to use that purposeful information in order to perceive incoming sensory information (the sensory systems of touch, movement, pressure, sounds, tastes, joint sense, sights, and internal information) in order to determine the quality of the responses of each sensory system as they work together as a whole.

It’s amazing when you think about it, right?!

Then, there is the vast amount of knowledge that we have as individuals. Today, we can access information, the use of AI, and we can share that information in seconds. Today, the awareness of tools and underlying reasons why we behave the way we do is available to every individual.

This might mean that sensory interventions can be used in not just the clinical setting anymore. Jean Ayres layed the framework for this knowledge and theories.

References on Jean Ayers Sensory Integration

The following are sources of information regarding Jean Ayers Sensory Integration.

For more in-depth information on Jean Ayres’ sensory integration theory and a comprehensive exploration of occupational therapy interventions based on her principles, I recommend referring to authoritative textbooks, academic papers, and professional resources in the field of sensory integration therapy. These references can provide valuable insights and guidance for those seeking a deeper understanding and effective application of Ayres’ groundbreaking concepts in occupational therapy practice.


American Occupational Therapy Association [AOTA]. (2017). Frequently asked questions (FAQ) about: Ayres Sensory Integration®. https://www.aota.org/-
/media/Corporate/Files/Secure/Practice/Children/FAQAyres.pdf

Koester, A. C., Mailloux, Z., Coleman, G. G., Mori, A. B., Paul, S. M., Blanche, E., … Cermak, S. A. (2014). Sensory integration functions of children with cochlear implants. American Journal of Occupational Therapy, 68, 562–569.
http://dx.doi.org/10.5014/ajot.2014.012187

Miller, L. J., Coll, J. R., & Schoen, S. A. (2007). A randomized controlled pilot study of the effectiveness of occupational therapy for children with sensory modulation disorder. American Journal of Occupational Therapy, 61, 228–238.

Parham, L. D.., Smith Roley, S., May-Benson, T. A., Koomar J., Brett-Green, B., Burke, J. P., Cohn, E. S., Mailloux, Z., Miller, L. C. & Schaaf, R. C. (2020). Development of a fidelity measure for research on the effectiveness of the Ayres Sensory Integration® intervention. American Journal of Occupational Therapy, 65, 133-142. https://doi.org/10.5014/ajot.2011.000745

Parham, L. D., Cohn, E. S., Spitzer, S., Koomar, J. A., Miller, L. J., Burke, J. P. … Summers, C. A. (2007). Fidelity in sensory integration intervention research. American Journal of Occupational Therapy, 61, 216–227.

Pfeiffer, B. A., Koenig, K., Kinnealey, M., Sheppard, M., & Henderson, L. (2011). Effectiveness of sensory integration interventions in children with autism spectrum disorders: A pilot study. American Journal of Occupational Therapy, 65, 76–85. http://dx.doi.org/10.5014/ajot.2011.09205

Roley, S. S., Mailloux, Z., Parham, L. D., Schaaf, R. C., Lane, C. J., & Cermak, S. (2015). Sensory integration and praxis patterns in children with autism. American Journal of Occupational Therapy, 69, 6901220010. http://dx.doi.org/ 10.5014/ajot.2015.012476

Schaaf, R. C., Benevides, T., Mailloux, Z., Faller, P., Hunt, J., van Hooydonk, E.,… Kelly, D. (2013). An intervention for sensory difficulties in children with autism: A randomized trial. Journal of Autism and Developmental Disorders, 44, 1493–1506.
http://dx.doi.org/10.1007/ s10803-013-1983-8

Schaaf, R. C., Cohn, E. S., Burke, J., Dumont, R., Miller, A., & Mailloux, Z. (2015). Linking sensory factors to participation: Establishing intervention goals with parents for children with autism spectrum disorder. American Journal of Occupational Therapy, 69, http:// dx.doi.org/10.5014/ajot.2015.018036

Watling, R., & Hauer, S. (2015). Effectiveness of Ayres Sensory Integration® and sensory-based interventions for people with autism spectrum disorder: A systematic review. American Journal of Occupational Therapy, 69, 6905180030.
http://dx.doi.org/10.5014/ajot.2015.018051

Sydney Thorson, OTR/L, is a new occupational therapist working in school-based therapy. Her
background is in Human Development and Family Studies, and she is passionate about
providing individualized and meaningful treatment for each child and their family. Sydney is also
a children’s author and illustrator and is always working on new and exciting projects.

Dyslexia and Occupational Therapy

dyslexia occupational therapy

In this blog post, we’re covering dyslexia occupational therapy and dyslexia resources for occupational therapy interventions. School based occupational therapy practitioners often come across diagnoses like dyslexia in their evaluations and in supporting students in the classroom environment. Let’s break down how OT can support dyslexia needs.

Dyslexia occupational therapy

Dyslexia and Occupational Therapy

Occupational therapy practitioners support their clients with daily functional tasks, or occupations, and dyslexia can be one contributing factor that impairs day to day tasks.

When addressing needs that impact reading and writing, dyslexia and occupational therapy go hand-in-hand.

While OT for dyslexia is not specifically addressed in most classroom situations, the skills of an occupational therapy provider make dyslexia occupational therapy interventions a natural fit.

How can occupational therapy support clients with dyslexia?

Reading is a functional occupation. We use reading for safety, work, school, and almost every aspect  in our everyday life.

Another important aspect is health literacy.  How can we expect our clients to follow health advice if they cannot read the information given to them? 

Everyone should have the ability to protect themselves and families. OTs need to advocate for their clients and help support them as they navigate the health system and beyond.

Because of these closely related tasks and the underlying skills that play a role in function, occupational therapy providers support clients by targeting both the underlying skills as well as the functional task. Knowing the warning signs of dyslexia can help occupational therapists identify clients that need support. 

Occupational Therapists have a unique talent to identify and help students with learning differences, especially dyslexia.

According to the International Dyslexia Association 20% of the population has dyslexia. About 20-40% of students with dyslexia have a comorbidity or another diagnosis. 

Occupational therapy practitioners work with clients and can identify dyslexia warning signs when there is another diagnosis present. 

Clients with handwriting/dysgraphia difficulties may also have dyslexia and would benefit from identification. 

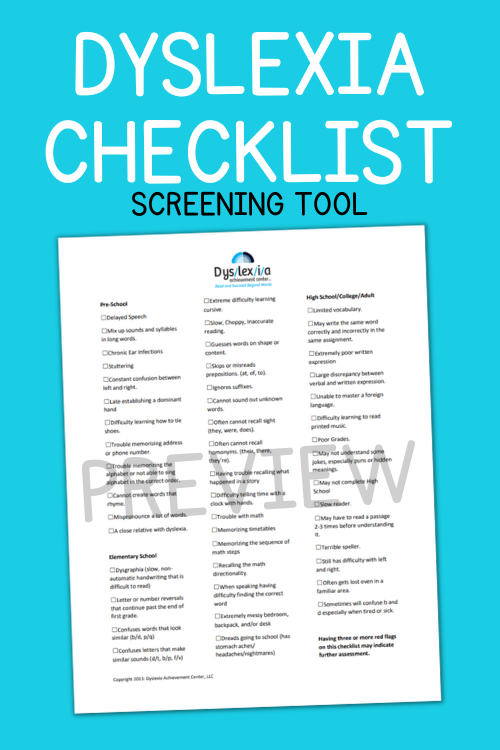
The Dyslexia Checklist can help occupational therapists assist their clients in identifying warning signs of dyslexia.

Take a look at this quote about dyslexia and the contributing factors that impact overall learning in the classroom:

“Dyslexia is a specific learning disability that is neurobiological in origin. It is characterized by difficulties with accurate and/or fluent word recognition and by poor spelling and decoding abilities. These difficulties typically result from a deficit in the phonological component of language that is often unexpected in relation to other cognitive abilities and the provision of effective classroom instruction. Secondary consequences may include problems in reading comprehension and reduced reading experience that can impede growth of vocabulary and background knowledge.”

This quote comes from the International Dyslexia Association.

What is Dyslexia

Dyslexia is included as a Specific Learning Disability in this DSM-5 (Diagnostic Statistical Manual-5th edition), the reference for cognitive, emotional, and psychological disorders. As such, it is covered by The Americans with Disabilities Act. Dyslexia is usually inherited, it is lifelong, although it can be remediated with correct instruction. 

Dyslexia can impact one or many of the following areas:

  • Difficulty with phonemic awareness (hear, identify, and manipulate phonemes—smallest sounds in a word)
  • Difficulty with phonics (correlating sounds with letters)
  • Difficulty with learning to decode (break down printed word into speech)
  • Difficulty learning to spell (Orthography) (write or name letters that form a word in the correct sequence)
  • Difficulty with Comprehension (understanding what the words or sentences mean)
  • Difficulty with Orthographic Mapping (formation of the letter-sound connections to bond spelling, pronunciations, and meanings of specific words to memory)
  • Orthographic Mapping –how we store words into our long term memory. This orthographic mapping tool is a good resource.

You’ll find many more indicators listed on the printable screening support tool: The Dyslexia Checklist. This printable list of red flag indicators is a resource to use in screenings or to help identify risk factors that may impact learning, reading, and writing, as well as other functional tasks.

How to support dyslexia in OT

Best results are attained for a student with dyslexia when two circumstances occur:

  • Accommodations
  • Specialized Instruction such as The Science of Reading (SOR) such as Orton Gillingham

Within these two strategies, occupational therapy is a natural fit for dyslexia. Accommodations in the classroom is something the occupational therapy practitioner excels in. And features of the science of reading, Orton Gillingham or other SOR programs, include, among other tools, a multisensory approach to learning.

A student with dyslexia must ultimately build skills necessary for reading, writing, and spelling competently.

Students with dyslexia benefit from learning the English language in detail, mastering the sound/symbol correspondences, syllable patterns and this structure of our English writing system (orthography).

The student benefits when the instruction is provided in a multisensory way, relying upon not just one or two neural pathways for learning, but several simultaneously. This is known as the Science of Reading or Orton Gillingham. 

Occupational therapists can use the warning signs tool to help identify client’s at risk for dyslexia. Occupational therapists can refer clients to a dyslexia specialist in their area if there are any concerns about dyslexia.  Dyslexia interventionists have 60-70 hours of training and a year practicum where they are supervised by an experienced trainer. They must have at least  100 hours of supervision in order to apply for certification.  

The main certification organizations include: 

  • OGA (Orton Gillingham Academy)
  • IMSLEC (The International Multisensory Structured Language Education Council)
  • ALTA (American Language Therapy Association)

Lists of qualified, certified dyslexia interventionists can be found on each of these organization’s websites. 

Diagnoses with Dyslexia -Occupational Therapy Support

Some diagnoses that are common with dyslexia include:

  • ADHD/ADD
  • Autism
  • Language processing disorders
  • Dysgraphia (writing)
  • Dyscalculia (math)
  • Dyspraxia (coordination)
  • Other learning differences

Executive functioning can be impacted with or without one of the diagnoses listed above. Specifically, executive functioning needs may be present along with dyslexia.

Additionally, executive functioning can impact learning in a variety of ways and if not addressed, may slow progress with dyslexia intervention. Occupational therapy providers have many assessments and interventions for executive functioning, which can also be used to identify specific challenges in the student with dyslexia.  OT should be part of the dyslexia team to help these students succeed. 

Reading supports planning and organization in our daily lives. We rely on it to decipher calendars, to-do lists, and reminders, facilitating efficient scheduling and task management. When this is difficult for our clients or their family members, we can see challenges with follow through.

The Occupational Therapy Dyslexia Connection

Reading is a functional occupation. OT providers support individuals of all abilities in participating in daily functional tasks given modifications, adaptations, and skilled interventions.

Because of the way that occupational therapists and occupational therapy assistants target daily occupations, or the tasks that take up our time, facilitating reading supports in these daily tasks is essential.

Reading is a fundamental part of daily life, influencing nearly everything we do. Reading information plays a role in how we communicate, stay informed, and learn.

In occupational therapy evaluations and interventions, it’s essential to recognize the significance of reading, especially for clients with dyslexia.

Dyslexia can make reading challenging, impacting their ability to perform tasks like following instructions for cooking, navigating through maps, or even understanding medical information. Other ways that reading challenges as a result of dyslexia may interfere with daily functional tasks, include:

  • It serves as a cornerstone of communication, allowing us to understand written messages in various forms, including emails, text messages, and handwritten notes, facilitating connections and efficient responses to others.
  • Reading is necessary for everyday activities such as cooking, where we read recipes to ensure accurate comprehension of measurements, instructions, and ingredient lists for preparing meals.
  • Reading is vital for the IADL, shopping, enabling us to decipher labels and product descriptions, especially for individuals with dietary restrictions or allergies.
  • Reading is necessary for making appointments, deciphering communication, and healthcare.

By supporting clients with dyslexia in developing their reading skills, occupational therapists empower them to participate more fully in daily life tasks, education, and work, ultimately enhancing their overall quality of life.

Occupational Therapy providers need to advocate for their clients and help them find support and resources. Knowing the warning signs of dyslexia, can help occupational therapists identify clients that need support.

For specific list of Dyslexia indicators, grab a copy of The Dyslexia Checklist.

Created by occupational therapist, Nicole Boyington, The Dyslexia Checklist is a printable tool to support therapists, interventionists, educators, and parents in identifying specific needs of the individual child.

When students struggle with reading, writing, and/or comprehension as a result of Dyslexia, many areas of function can be impacted. Reading is a complex occupation and many different aspects can be impacted. One student with dyslexia does not look like another student with dyslexia. Being able to identify red flags is important to increase literacy for all populations. The Dyslexia Checklist is a tool to support anyone working in this area.

the dyslexia checklist

Nicole Boyington has been an Occupational Therapist for 22 years.  Residing in Wisconsin, Nicole is currently a faculty member at a local university. She has a Master of occupational therapy from St. Ambrose University and a Post Professional Doctor of Occupational Therapy from Chatham University. Nicole is the current president of the Wisconsin Occupational Therapy Association. Nicole has been tutoring students with dyslexia for the past three years and is a Certified Structured Literacy Dyslexia Interventionist. She currently owns a Dyslexia tutoring center and is on the board of the Wisconsin International Dyslexia Association.

Occupational Therapy Money Management Activities

occupational therapy money management

Occupational therapy money management activities are a functional task for all ages. One way that occupational therapy providers support clients is by targeting the areas of function and daily tasks that enable independence such as ADLs and IADLs. One area may be counting money. In this blog post, we’re covering teaching clients to manage money and count money.

As an Amazon Influencer, I earn from qualifying purchases.

money management occupational therapy

Occupational Therapy Money Management Activities

We are plowing through second grade with my oldest kiddo and this Money series was perfect timing for supplementing what she’s learning at school.  

We’ve done a lot of second grade activities here based on what she’s been doing at school. While the beginning stages of money management is initiated in the second grade, this is a task that can be a challenge at all stages of development and across the lifespan.

Occupational therapy providers may support clients with aspects of money management:

  • identifying coins
  • manipulating coins
  • counting coins
  • managing dollar bills
  • making change for a purchase
  • counting coins and bills to make a purchase
  • managing a check book
  • budgeting
  • paying bills

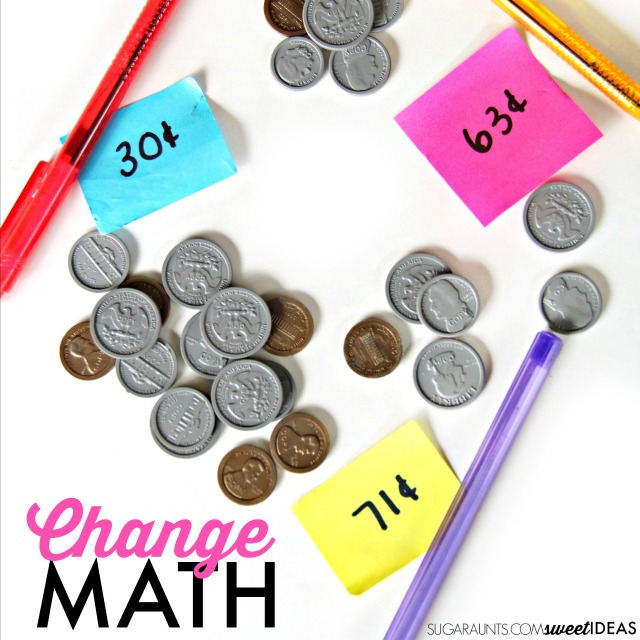
Today, we practiced counting coins and making change with a hands-on activity with a little pretend shopping.  This was a fun way to practice counting money while working on fine motor skills, too.

We’ll also share other resources related to money management for occupational therapy.

Identifying Coins- One of the first steps to money management is to identify coins. Be sure to grab our count and color worksheet for more counting and fine motor tasks. In the activity, we target the fine motor skills needed to pick up and manipulate a coin in order to identify it and use it in counting money tasks.

Identifying coins and bills requires several skills:

 
Counting coins math for kids, including making change and fine motor skills with hands on coin counting math.

How to Teach Kids Money and Making Change

Using and counting coins is a functional task needed for Instrumental Activities of Daily Living (IADLs) such as shopping and purchasing necessary items for functional tasks. Because of this, an occupational therapy practitioner may work with clients on handling money. 

While the “teaching” aspect isn’t quite an OT domain when it comes to teaching bills and how to count, there is a very functional thread in this task. 

Counting money and handling bills and coins is a very functional task that requires underlying skill areas that occupational therapy providers often address in OT interventions:

This post contains affiliate links. 

Sort Coins Activity

For this activity, we used our play money set. (affiliate link) I love this set because it’s loaded with coins and bills.  It’s a great way to practice and learn money skills with hands-on learning.  

We started off by sorting out the coins (after a certain one year old dumped the whole set on the floor!) and it was a good warm up to name and practice counting coins as we put them back into the correct spots in the wooden storage box.

  1. Put all of the same coins into a pile.
  2. Count the number of each coin.
  3. Count by adding on to add up the amount of money in the pile.

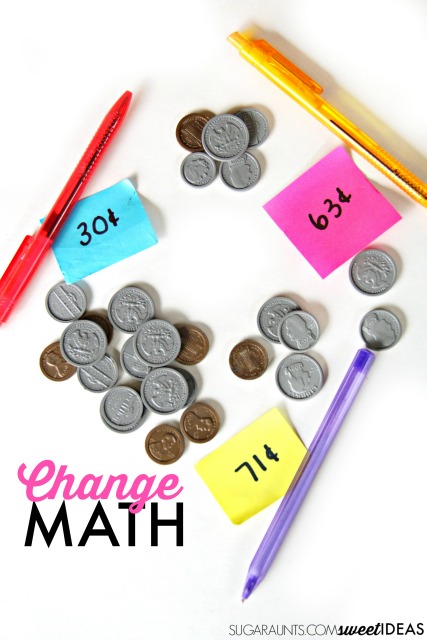
Next, I found a few stacks of sticky notes (affiliate link) and wrote some amounts.  I varied the amounts from cents to several dollars.  Then, I grabbed a handful of pens (affiliate link) in different colors.  

This activity is very adaptable.  Use whatever you’ve got in the house, from pretend play food to real pantry items,  you can use any item for counting money and change.  Use items that keep your child interested. 

Teach Kids to Count Money


I matched up the items with different amounts written on the sticky notes.  

I had my daughter count out the coins, starting with the largest coin.  I asked her to tell me the number of each coin needed to get the amount, using the least amount of coins.

Counting coins math for kids, including making change and fine motor skills with hands on coin counting math.


Counting Coins Activity to Make Change

Next, I gave her a few play bills and a handful of coins.  I placed the price tags on each pen and asked her to buy the pen she wanted.  

She chose a pen and then counted out the coins needed.  Finally, we switched roles.  I gave her a bigger amount and asked her to count change, starting with the price of the pen until she reached the bill or coin amount.  


We practiced this game over and over again and got some great hands-on money practice, all with “buying” pens!  Using the play coins (and having a huge pile of money to “pay” with) really motivated her to keep practicing money counting. 

Counting coins math for kids, including making change and fine motor skills with hands on coin counting math.


Fine Motor Skills with Money

Manipulating coins requires fine motor skills. The fine motor dexterity and precision needed to manipulate coins can be a challenge for some individuals. In order to handle money, one needs the following fine motor skills: 

Counting coins math for kids, including making change and fine motor skills with hands on coin counting math.


Flip Coins for Fine Motor Work- We’ve shared how to use coins in fine motor skills before.  We used a few of those techniques today with our play money.  

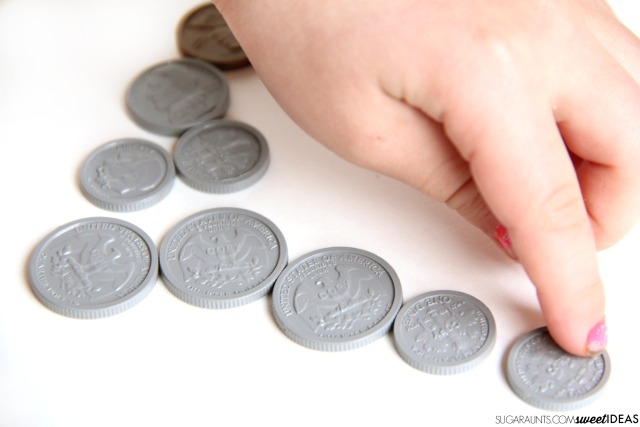
Stack coins- Stack the coins for a pincer grasp and practice in precision as you and your child count out the coins.

Looking for more money activities?  Try these:

  • Create a budget
  • Write a check
  • Balance a checkbook
  • Count change for a product that is purchased in a store
  • Fill in forms such as bank forms and a checkbook

All of these forms are found inside our Membership Club for Level 2 members. Not a member yet? Join us today!

Counting coins math for kids, including making change and fine motor skills with hands on coin counting math.


occupational therapy activities to work on money management

Some common ways to work on the functional skill of money management in occupational therapy interventions include the ideas listed above.

There may be a fine line between the educational aspect and the “teaching” of managing money. Identifying coins, counting change, managing a budget may not exclusively fall under the role of occupational therapy. These are, however, IADLs and that IS a main role of OT.

Money management can be a collaborative process, particularly when there are considerations at play such as:

  • Dysgraphia
  • Dyscalculia
  • Visual perception needs
  • Fine motor challenges
  • Tactile defensiveness
  • Other considerations

Particularly in the outpatient setting, IADLs such as money skills can be addressed.

For situations where it is appropriate, some additional ideas for targeting money management as a pre-vocational skill with teens or adults:

  • Use real money to count and buy items
  • Print off fake money to work on money use
  • Identify coins and bills
  • Make change for $10 or $20
  • Play BINGO with coins
  • community outings with purchases
  • Use real menus to make pretend purchases with play money or real money

What are your favorite ways to support needs with money management?

Colleen Beck, OTR/L has been an occupational therapist since 2000, working in school-based, hand therapy, outpatient peds, EI, and SNF. Colleen created The OT Toolbox to inspire therapists, teachers, and parents with easy and fun tools to help children thrive. Read her story about going from an OT making $3/hour (after paying for kids’ childcare) to a full-time OT resource creator for millions of readers. Want to collaborate? Send an email to contact@theottoolbox.com.
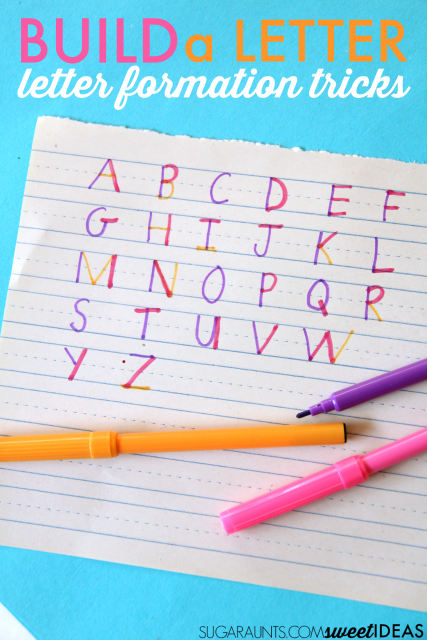
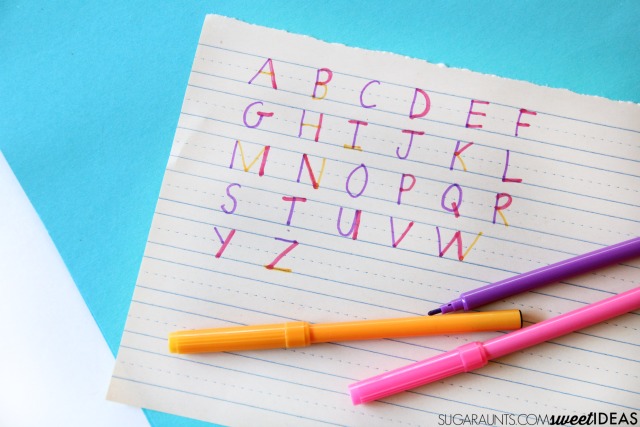
Beach Ball Wiggle Cushion

beach ball sensory seat

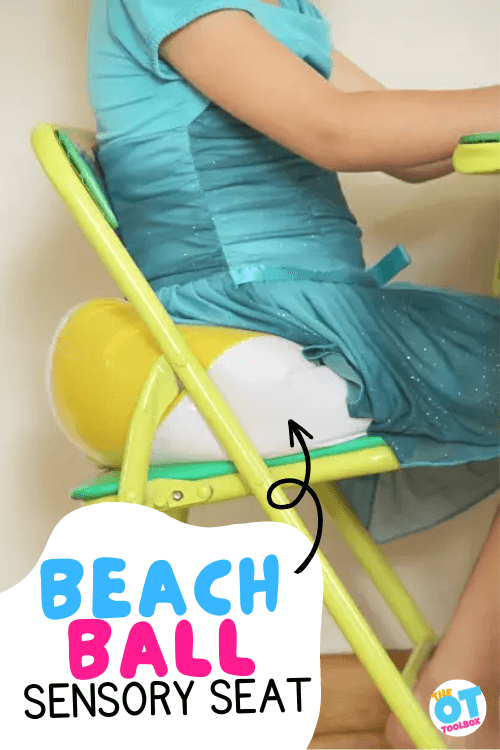
One trick up my occupational therapy sleeve is using a beach ball cushion as a cheap sensory seat alternative. A beach ball wiggle cushion is actually a DIY occupational therapy seat cushion that offers all of the sensory input that a typical wiggle cushion offers but at a much more affordable cost. This is an OT tip that I’ve used time and time again to support sensory needs in the classroom. Let’s explore this occupational therapy sensory seat alternative!

This blog post was originally published May 11, 2016 and updated in 2023.

As an Amazon Influencer, I earn from qualifying purchases.

beach ball sensory seat

Beach Ball Cushion

You’ve probably seen a wiggle seat or other occupational therapy sensory cushion in use. However, have you ever seen a beach ball cushion in action?

Let’s explain…

Sensory strategies in the classroom are not always easy to use. There are many factors at play for the school based OT: items get lost, the price of sensory items, the carryover…there are a lot of factors that impact the use of sensory strategies such as wiggle seat cushions! However, the need for calm down items in school environments are prevalent.

Flexible seating in the school environment is one area that school based OTs address, because of the impact that seating may have on learning:

  • Posture and sitting balance
  • Handwriting and fine motor skills
  • Attention and focus in learning
  • Sensory input and needs
  • Vision needs
  • Other

However alternatives to seating can be pricy. That’s why having a few DIY flexible seating options are handy.

Affiliate links are included in this post.

occupational therapy seat cushion

Take a look in a classroom or an Occupational Therapist’s clinic.  You might see a few interesting occupational therapy seat cushions that are used to support sensory and regulation needs. 

There are bright blue disk cushions, wedges (affiliate link) of different sizes, and even giant therapy balls (affiliate link), wiggle stools, and even sensory chairs.  All of these sensory seating ideas are perfect for vestibular input during sitting.  

Each of these occupational therapy cushions are designed to promote movement and wiggling to allow for improved attention and needed sensory input.  

Wobbly seat cushions, or “wiggle cushions” like these are used for self regulation and allow students to attend to classwork or sit at the dining room table while participating in functional tasks because their body has an opportunity to fidget with calming or alerting sensory input.  

These types of seats allow kids to keep their mind focused and help kids who can’t seem to sit still. 

Address vestibular needs with this easy therapy hack!

Therapy discs or cushions are perfect for so many kids. There is no denying that they help many children and even whole classrooms stay on task.  But, the biggest issue with these types of therapy seating options is the price.  At $25/cushion (or more!), it can become a pricey option for better attention.  

 
Cheap sensory seating hack to help kids with attention, fidgeting needs, and sensory vestibular sensory input needs. This sensory hack is perfect for kids with SPD, and neurotypical children, too.


Cheap Sensory Seat Cushion

Today, I’ve got a simple sensory hack for therapy cushions.  This is a tip that I’ve recommended for years as a pediatric Occupational Therapist.  School districts that simply could not afford to purchase one therapy cushion were able to use this therapy hack to help with attention and sensory needs.  

Enter the beach ball.

Every time I’ve shared this tip with parents, teachers, and administrators, I’ve gotten wide eyes and a “ooooh” type of response.  

Ready?  

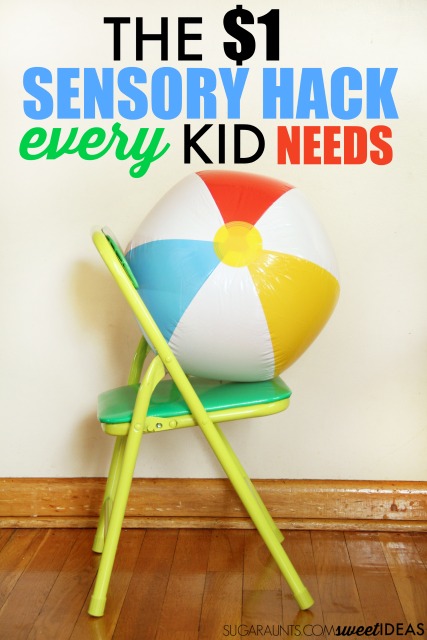
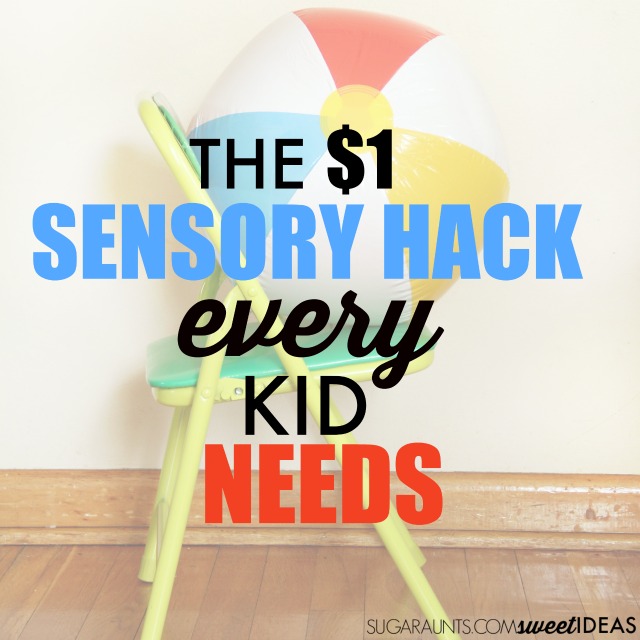
  1. Grab a beach ball from your nearest dollar store.  
  2. Inflate it with only one or two breaths.  
  3. Place the beach ball on a chair.  

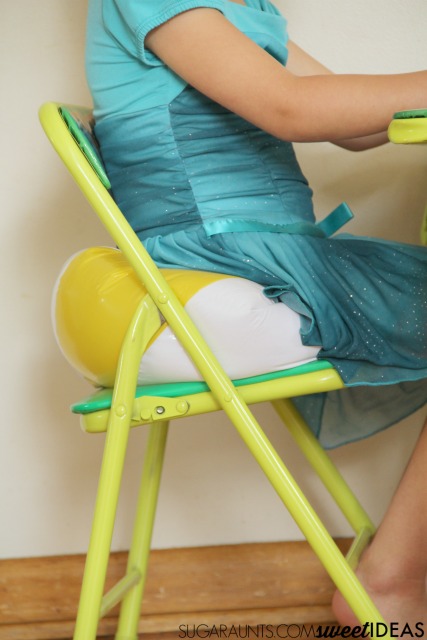
Watch your little one wiggle and move while attending to their math homework, spelling list, or dinner conversation.


Some classrooms that I’ve serviced as an Occupational Therapist had decided to use partially inflated beach balls with many of the students.  

This sensory hack is an easy fix for every child, whether they exhibit attention or sensory needs or are neurotypical children.  

Moving and fidgeting is an attention strategy that every one of us uses. Try this inexpensive sensory hack with your kiddo.


Sitting on the partially inflated beach ball adds an unstable seating surface and allows for just enough movement that children can better focus and attend.  They are given vestibular input through their trunk to help with fidgeting needs. 

 Cheap sensory seating hack to help kids with attention, fidgeting needs, and sensory vestibular sensory input needs. This sensory hack is perfect for kids with SPD, and neurotypical children, too.


Need more movement ideas? Try balance beam activities.


Another idea for that $1 beach ball:
Place it on the floor for a movement surface for the feet.  Given the chance to move the feet, most kids are able to better attend to desk work.


NOTE: A $1 beach ball will NOT last forever.  It will pop at some point.  Excessive sitting and standing with force will shorten the lifespan of your sensory seating hack.  Be aware that while this is a great seating option for kids with attention and sensory needs, it is not the intended use of a beach ball.  Inflating the beach ball more than a few breaths will make the seating surface more firm, however, it will make the beach ball more prone to popping.


TIP: Some kids might tend to slide forward into a slouched position when sitting on the partially inflated beach ball. Add a sheet of dycem (affiliate link) to the surface of the seat to keep the beach ball from sliding.

Cheap sensory seating hack to help kids with attention, fidgeting needs, and sensory vestibular sensory input needs. This sensory hack is perfect for kids with SPD, and neurotypical children, too.
 
 
Are you looking for more information on Sensory Processing or any of the body’s sensory systems and how they affect functional skills and behavior?  This book, Sensory Lifestyle Handbook, will explain it all.  
 
Activities and Resources are included.  Get it today and never struggle to understand or explain Sensory Integration again.  Shop HERE.
 

Looking for MORE sensory hacks to help with fidgeting?  Try these along with your occupational therapy seat cushions:

Colleen Beck, OTR/L has been an occupational therapist since 2000, working in school-based, hand therapy, outpatient peds, EI, and SNF. Colleen created The OT Toolbox to inspire therapists, teachers, and parents with easy and fun tools to help children thrive. Read her story about going from an OT making $3/hour (after paying for kids’ childcare) to a full-time OT resource creator for millions of readers. Want to collaborate? Send an email to contact@theottoolbox.com.
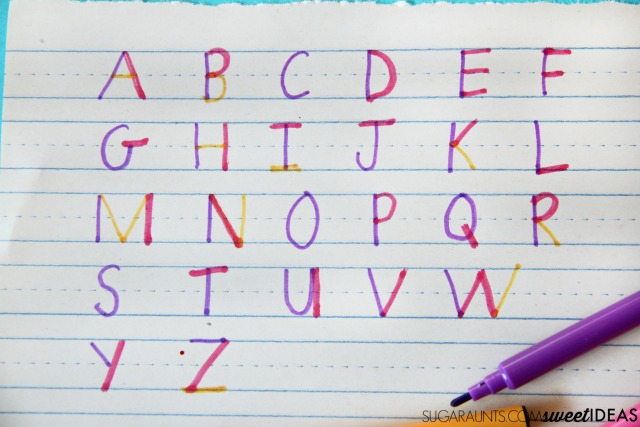
Identify Emotions with Pumpkin Emotion Faces

pumpkin emotions

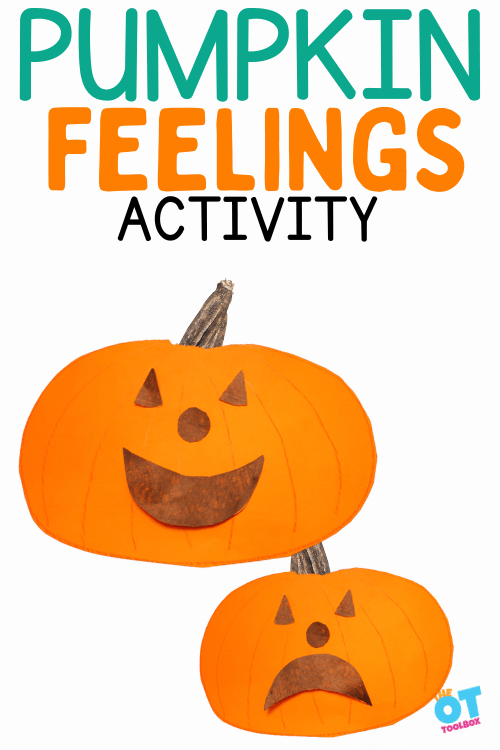
This pumpkin feelings activity is an OLD one here on the site. But there is just something fun about pumpkin emotion faces that little ones love! It’s a social emotional activity for preschoolers and toddlers that foster emotional development…with fun and interactive pumpkin feelings!

This fun Fall activity helps with learning to identify emotions using pumpkin emotion faces! It’s a great emotional development activity for toddlers and preschoolers. Kids love moving the faces on the pumpkins and practicing different facial expressions is a bonus.

Kids love this emotions activity, and it would be fun to use along with our pumpkin sensory bin this Fall!

pumpkin feelings

Pumpkin Emotions Activity

You can use interactive felt pieces to create pumpkin emotions, or facial expressions on pumpkins to create different feelings on the pumpkins. This is a great way for toddlers and preschoolers to play with facial expressions, practice emotions, and put a word to the emotion.

You’ll need just a few items for this activity:

  • Orange poster board
  • Green paint or green marker
  • Black paper
  • Tape

Time needed: 10 minutes

How to Make a Pumpkin Emotions Activity for Preschoolers

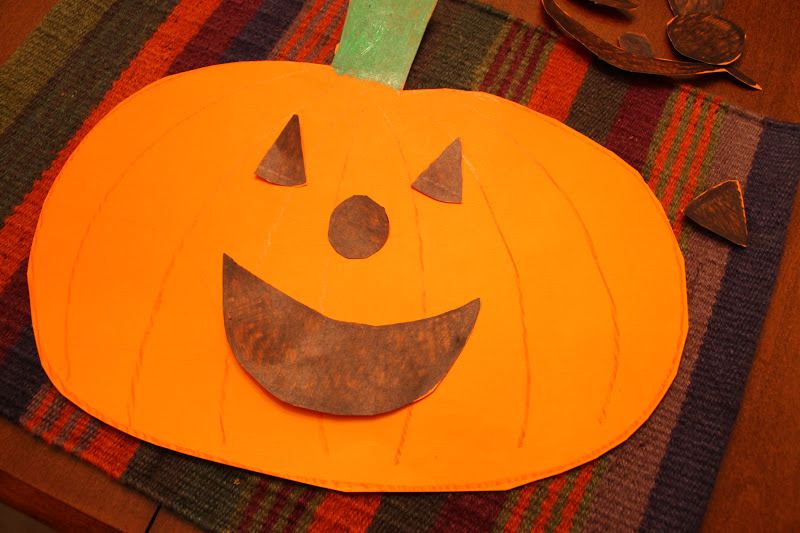
  1. Cut out a Pumpkin Shape

    Use orange poster board and cut out a large pumpkin shape. Add a few lines with a black marker for more pumpkin details if you like.

  2. Paint the stem green.

    You could use green paint or a green marker. Or, use green paper and glue the green paper over the stem area.

  3. Cut out face pieces from black paper.

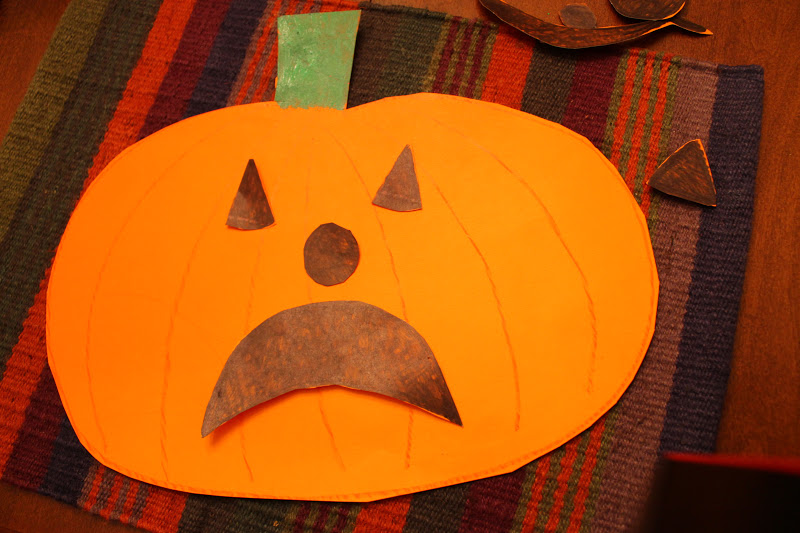
    Cut out circle eyes, a triangle nose, and different smiles. You can create angry eyes, surprised eyes, a circle mouth, a frown, a smile, etc.

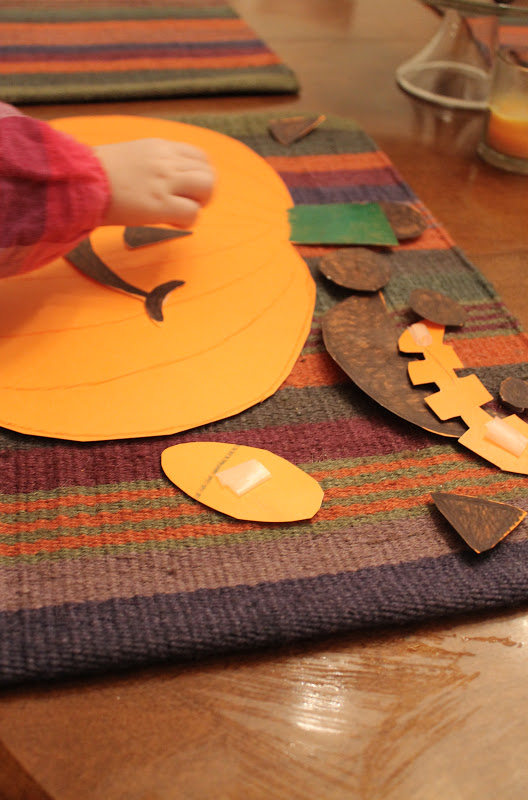
  4. Add tape to the back of each pumpkin emotions piece.

    Roll the tape into a donut and stick to the back of each facial expression. You could also use sticky tack.

Identification of Emotions

The tricky part of developing self regulation in preschoolers is the development of an essential skill that impacts self-regulation in later years. Giving young children the words, or the emotion vocabulary, to explain how they feel by identifying emotion faces is the perfect starting point!

That’s where these pumpkin emotion faces come into play!

Young children often have difficulty expressing their emotions.  Recently my 18 month old son has reverted to hitting, screaming, and throwing things, which is part of typical development.

I was trying to think of a way to help him learn how to express himself in a calmer more acceptable manner and that’s how this pumpkin faces emotions activity came to life.  With all the fall fine motor OT activities and Fall-inspired posts lately, I got to thinking about decorating a pumpkin…

First, let’s break down the identification of emotions aspect. 

This is an important developmental process in toddlers and preschoolers. Emotional intelligence is a skill that needs practice to develop, and is essential for social situations, communicating with others, and self-regulation of emotions and feelings. Identifying emotions is one of the first steps for young children.

One way to do this would be to pair the pumpkin feelings activity with a feelings check in. Children could identify their own feelings and match it to the pumpkin facial expressions.

There are ways to support emotions identification in preschoolers, toddlers, and older children:

  • Use this social emotional learning worksheet to help kids match emotions to behaviors and coping strategies.
  • Put words to feelings. Do you feel sad? Are you unhappy? You feel mad. I am happy.
  • Point out facial expressions and emotions in books. Picture books are a great way to talk about emotions and see facial expressions in the context of a story.
  • Another fantastic resource that can help develop social and emotional skills is the activity book, Exploring Books Through Play.

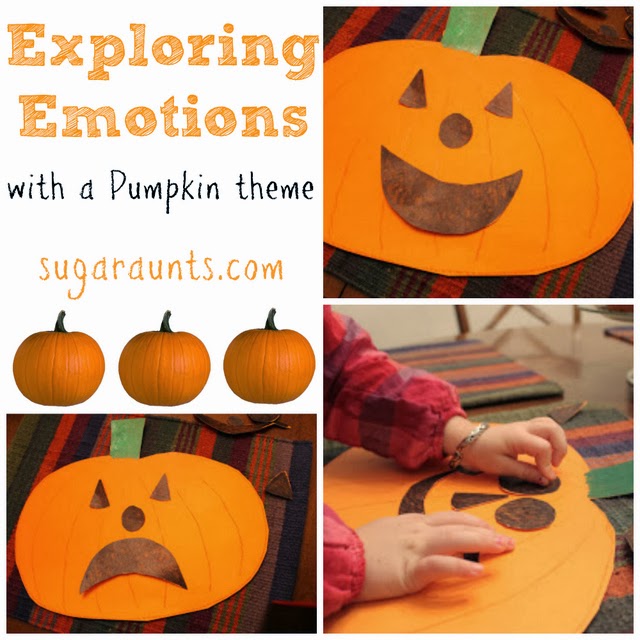
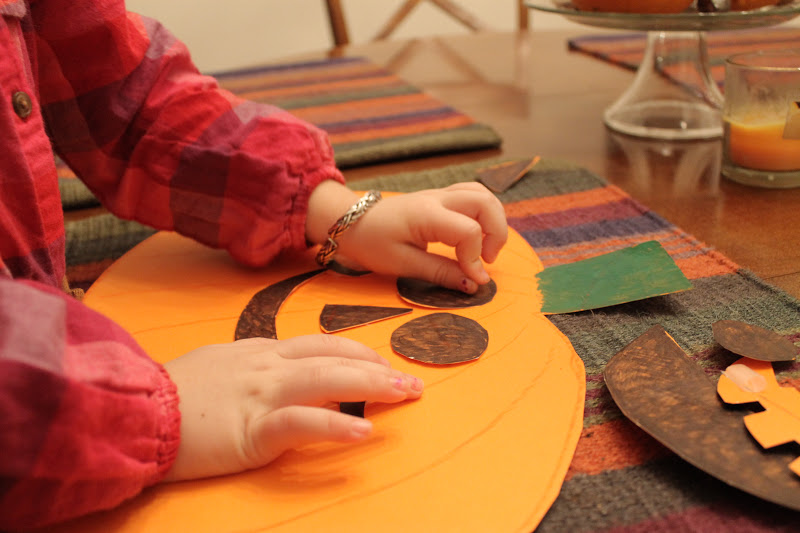
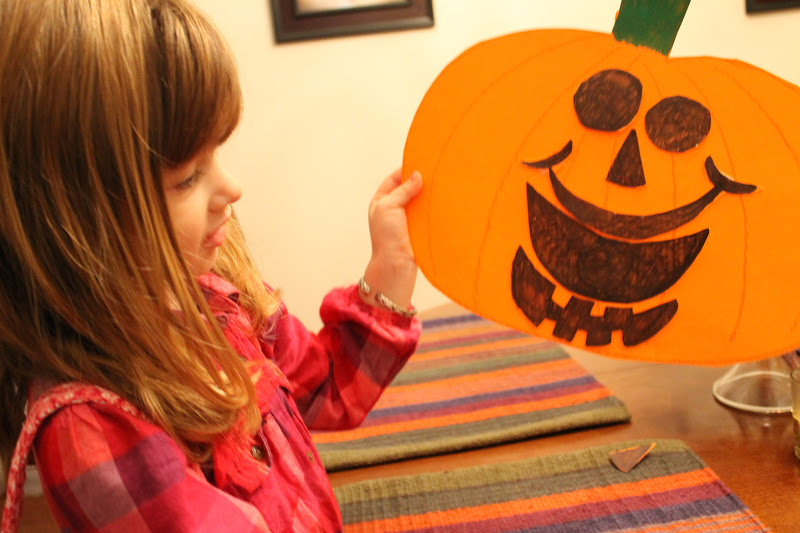
pumpkin emotion faces with a paper pumpkin activity
 
 
Paper pumpkin with a happy face


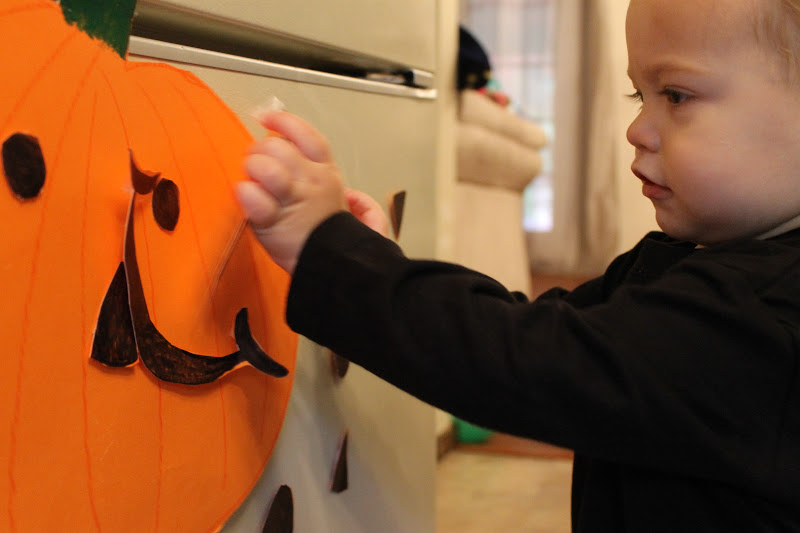
Preschool pumpkin emotion activity, child places paper pieces on a pumpkin to make a smile


Identifying and Expressing Emotions with pumpkin Faces

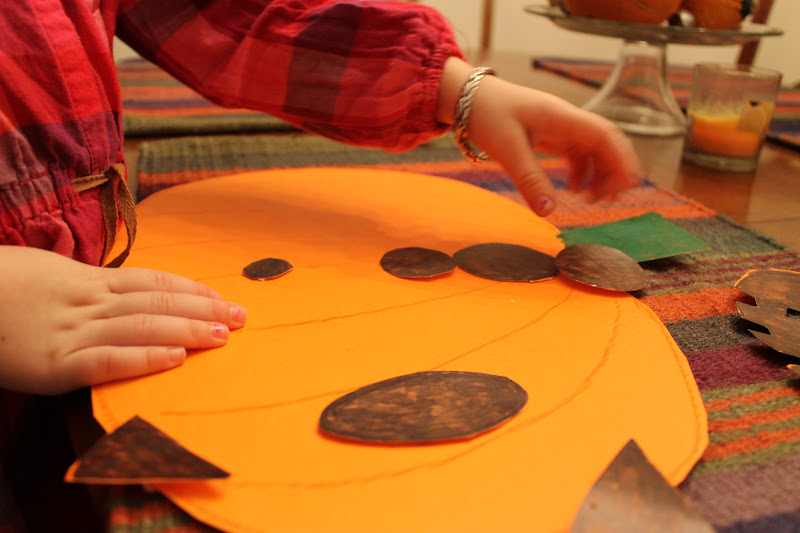
 My 4 year old helped cut out the shapes of the eyes, nose, and mouths. The different shapes and the sturdy paper (we used cardstock) makes this a great scissor skills activity for preschoolers.

After the pumpkin emotion pieces were cut out, we started identifying emotions. Happy, sad, angry, etc. We have a great resource on emotional vocabulary that helps to teach preschoolers about identifying emotions.

Then, we talked about the shapes and what those mouths looked like. We talked about positive and not so positive ways to express our feelings. “When I get sad, it is not OK to hit”. 

At the preschool age it is important for her to be able to express her feelings with words and associate them with how her actions make others feel.  Learning about feelings helps with her social emotional development.

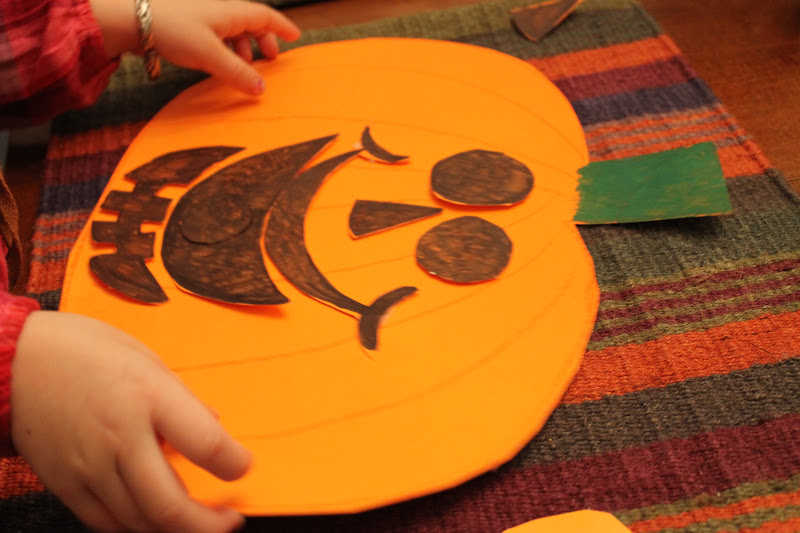
Preschool pumpkin emotions activity using a paper pumpkin
Paper pumpkin with facial expressions
Use a cardstock paper to make a pumpkin and facial expressions for a preschool activity


“This one has a mustache!”

Sad pumpkin face for preschoolers

“This guy is sad because his sister took away his toy.”

Paper pumpkin fine motor activity

Toddler Pumpkin Emotion Activity 

This is also a great activity for helping toddlers build emotional development skills. Toddler play is where all of the development happens, and this activity is a powerhouse.

Toddlers can use the activity for several skills:

  • Spatial relations activities
  • Fine motor skills
  • Working on a vertical surface to develop eye-hand coordination, fine motor work, and core strength
  • Social emotional development

We also had fun lining up the shapes. We had a row of triangles, circles, and ovals.

Another great emotions activity for toddlers and preschoolers are our emotions playdough mats to support naming and identifying emotion names and facial expressions to match the emotion name.

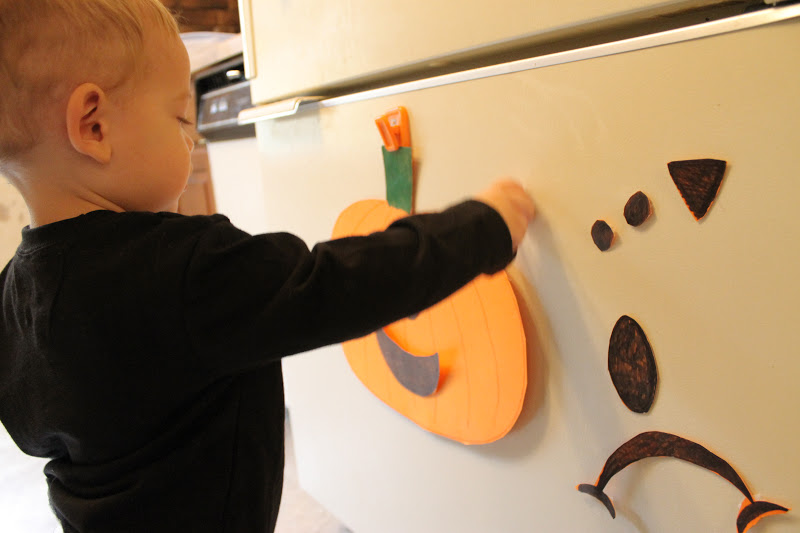
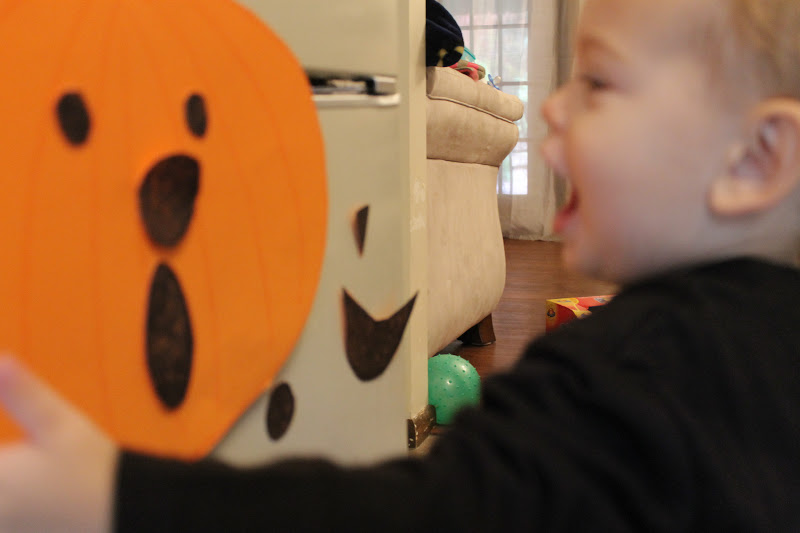
Toddler playing with pumpkin face pieces on a refrigerator.

 For little guy we placed the pumpkin on the refrigerator with a magnet and tape on the back of the shapes.  He had a blast making the pumpkin fall down…over…and over…and over again!  

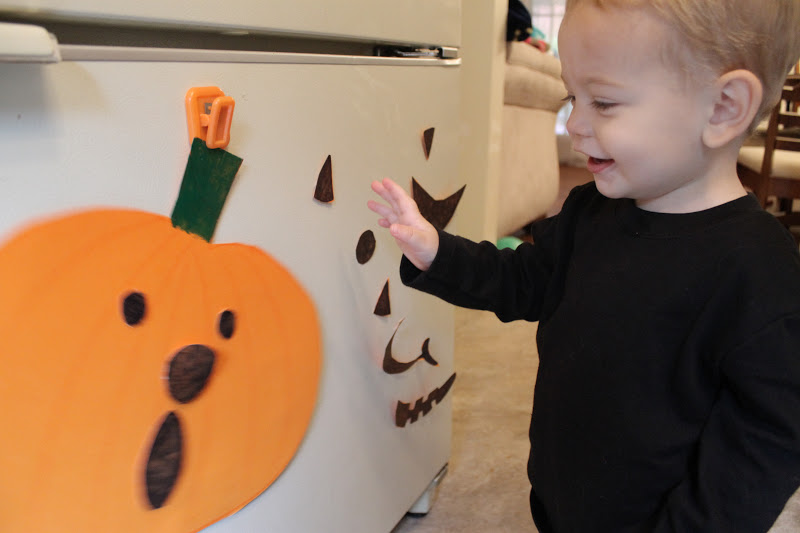
Toddler copying pumpkin facial expressions playing on a fridge with magnet pieces.

  I would help him put a different shape mouth on the pumpkin and mimic the face. He thought I was pretty silly, but I think he started catching on 🙂

Toddler copying a surprised pumpkin face

  Surprised face!  

Toddler placing pumpkin facial expression magnets on a fridge.

  This also helps with learning spatial relations and where a nose, mouth, and eyes belong on a face.  He was trying to put the mouth where the nose goes…he will learn eventually!

Toddler moving pumpkin face pieces to make a smile

  We all know that babies and toddlers have feeling just as we as adults do, they just need a little help trying to figure out what they are feeling!  Hopefully this will help my little guy learn to deal with his frustrations a little better…I will keep you posted!

Pumpkins

Colleen Beck, OTR/L has been an occupational therapist since 2000, working in school-based, hand therapy, outpatient peds, EI, and SNF. Colleen created The OT Toolbox to inspire therapists, teachers, and parents with easy and fun tools to help children thrive. Read her story about going from an OT making $3/hour (after paying for kids’ childcare) to a full-time OT resource creator for millions of readers. Want to collaborate? Send an email to contact@theottoolbox.com.
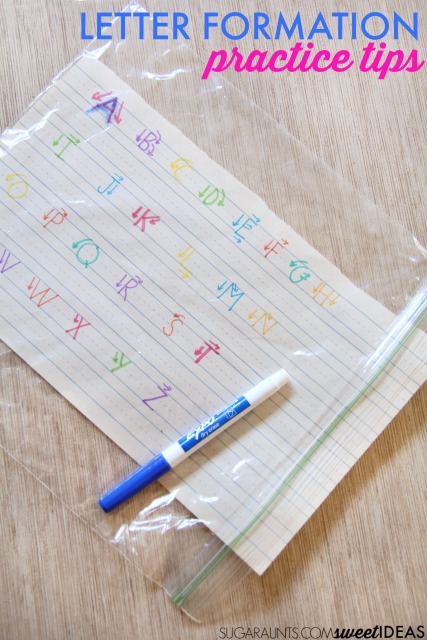
Farm Brain Breaks

farm brain breaks

Today we have a fun addition to our brain break collection here at The OT Toolbox: Farm Brain Breaks! Brain breaks are such a useful tool for boosting attention and focus in the classroom. This is just one of the farm activities that we love as a therapy tool for building skills in kids. So, check out the Farm Brain Break activities below, along with the fun ways to use these movement activities in farm obstacle courses, farm stations, and more!

As an Amazon Influencer, I earn from qualifying purchases.

farm brain breaks

Farm Brain Breaks

We love this printable set of farm themed brain breaks because a farm theme is great for this time of year. Kids LOVE cows, chicken, roosters, pigs, and so adding a twist to the regular brain break activities makes the skill-building fun and engaging.

You can probably think of a dozen or more animal walks, but having a set of farm animal brain breaks all in one place is perfect as a therapy tool for supporting self-regulation and heavy work needs.

Why Farm Brain Breaks?

Here’s the thing: Taking a sensory-based movement break in between learning tasks is a great way to help kids with sensory needs and without re-group and attend to classroom work.  

Brain breaks are a great gross motor coordination activity, too. For the child that needs to work on skills such as the ones listed below, these farm gross motor activities do the job!

  • Balance
  • Standing on one foot
  • Hopping
  • Skipping
  • Squatting and standing back up
  • Building core strength
  • Balance in a dynamic position

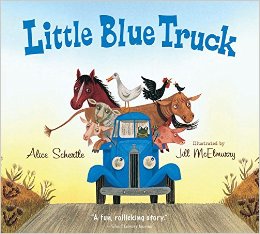
This month in the Virtual Book Club for Kids series, we read the fun book, Little Blue Truck and created farm animal themed brain breaks that are perfect for movement and sensory needs like vestibular activities in the classroom.

Sometimes creative movement can be just the movement and gross motor exercise that kids can use as a sensory tool for effectively addressing needs in the classroom.  

Brain Breaks use vestibular and proprioceptive input to address the sensory needs that can help kids with their attention and focus during classroom tasks. This can also support body awareness.

Kids that need to boost their level of alertness with fast movements.  Those kids that seem to droop and lose attention during classroom work may benefit from a vestibular sensory movement activity that uses the whole body.

Children that need to calm their body’s movements and regulate their sensory system may benefit from slow, rocking movements using the vestibular sensory system or heavy work gross motor activities that utilize the body’s proprioception system.  


farm brain breaks


Little Blue Truck and farm themed brain breaks for attention, focus and sensory needs in the classroom based on farm animals.


Little Blue Truck Farm Themed Brain Breaks

We came up with the brain break ideas in our farm theme based on the book, Little Blue Truck. This is a fun way to explore books in occupational therapy sessions to keep things fun and engaging.

This post contains affiliate links.

With the animals in Little Blue Truck (affiliate link), we focused on the farm animals and how they move and work to help our friend, the little blue truck.  There are many ways that kids can use the typical movements of farm animals to address sensory and attention needs in the classroom.


 Little Blue Truck book activity


In the book, Little Blue Truck (affiliate link), we meet each of the farm animals that say a friendly “hello” to the little blue truck.  When he ends up stuck in the mud, the animals are the one that come to help their truck friend.  

This book is such a fun way to look at the way friends can work together in small ways to help make big things happen.  What a great way to look at the way the class works together to make changes.  

A group of classroom students that each do their part to pay attention and focus can make the whole classroom a better place. 

We decided to use the movements of the animals in Little Blue Truck (affiliate link) to create gross motor, movement-based brain breaks.  These are activities that can be done in conjunction with the book and used all year long for attention and focus in the classroom.

 
Little Blue Truck and farm themed brain breaks for attention, focus and sensory needs in the classroom based on farm animals.


How to use Farm themed Brain Breaks

Print off your brain break printable sheet.  The form is at the bottom of this blog post. Simply enter your email address and the printable will arrive in your inbox.

Then, cut out the cards and start to play! These animal brain break cards can be used to add movement within the classroom.  They can be used at home or in therapy sessions. We love to use these along with other farm activities and crafts.

Some fun ways to use these farm brain breaks are below:

Farm Obstacle Course

One way to support gross motor skills is with a Farm obstacle course:

  1. Place the farm brain break cards in an obstacle course. 
  2. Ask the child to go through the course by crawling as they push a tractor or pretend to be a tractor, doing animal walks, or moving on a floor scooter.
  3. When they get to a brain break, they should stand up and complete the brain break action. 
  4. They can then move onto the next activity.

Farm Stations

Set up stations around the room using the farm brain break cards. Here’s what this entails:

  1. Place the brain break activities in various places around the room. These will be the farm stations.
  2. The child can go to the first farm station and pick up the brain break card. They can collect a small farm animal figure in their hand.
  3. Ask them to copy the name of the animal onto paper.
  4. Then they should complete the gross motor farm animal action.
  5. If it’s an animal walk, they can use that farm animal walk to move to the next station. 
  6. Ask them to take the animal figure with them to encourage in hand manipulation as they collect more and more animal figures.
  7. At the end of all of the farm stations, the child can then place the animal figures into play dough like we did in our farm play dough sensory bin.

Farm Writing Prompts

Use the brain breaks as a warm up for handwriting. 

  1. Select one of the farm brain break cards. 
  2. Then ask the child to follow the directions to complete the brain break action.
  3. Next, use that card as a farm writing prompt. They can write a sentence or two about the animal such as their favorite thing about that animal, the role it plays on a farm, etc.
  4. Or grade the activity down by simply asking the child to write the name of the animal as the farm writing prompt.

Little Blue Truck Activities

Use these brain break activities based on the animals in the book (Amazon affiliate links) Little Blue Truck (affiliate link):

 
Little Blue Truck book activity with gross motor movement brain breaks based on animal movements.


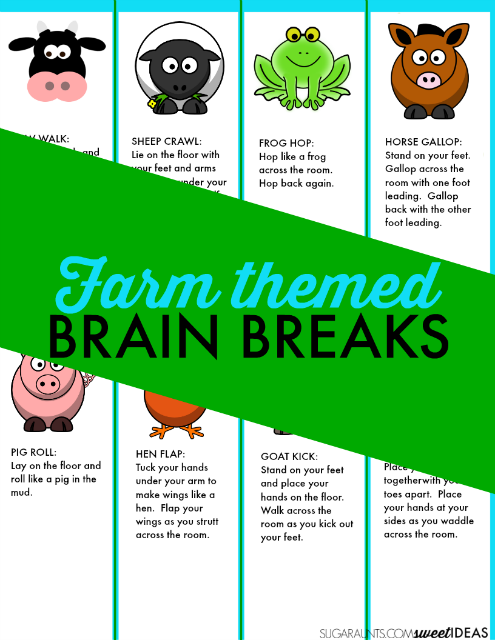
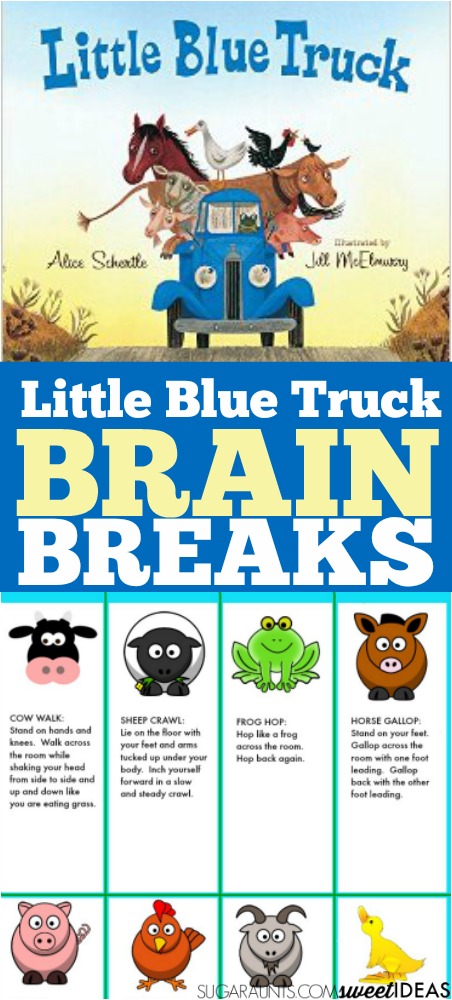
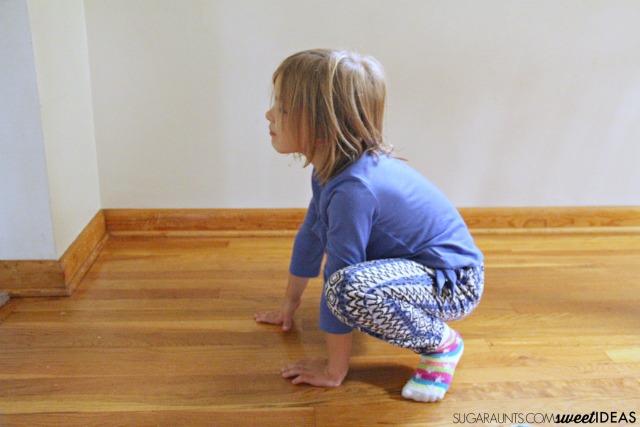
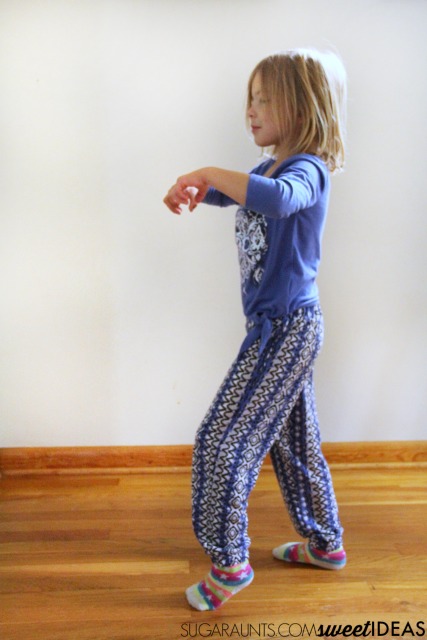
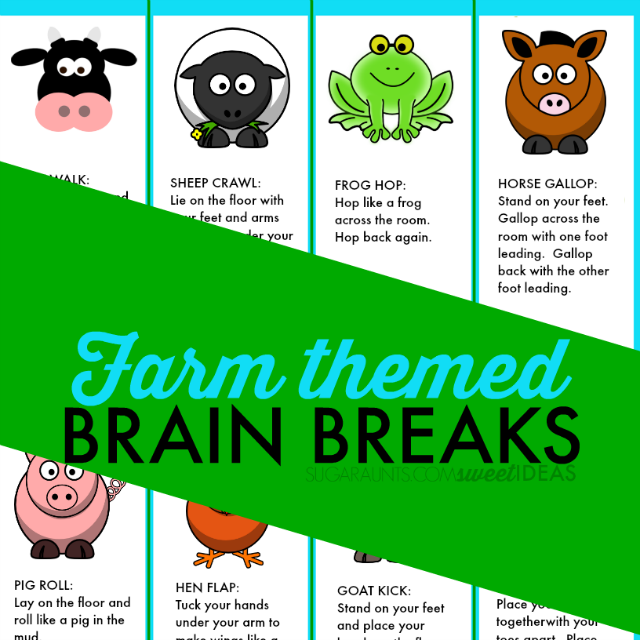
Cow Walk: Stand on you hands and knees.  Walk across the room while shaking your head from side to side and up and down like eating grass.


Sheep Crawl: Lie on the floor with your feet and arms tucked under you.  Inch yourself forward in a slow and steady crawl.


Frog Hop: Hop like a from across the room.  Hop back again.


Horse Gallop:  Stand on your feet.  Gallop across the room with one foot leading.  Gallop back with the other foot leading.


Pig Roll: Lay on the floor and roll like a pig in the mud.


Hen Flap: Tuck your hands under your arms to make wings like a hen.  Flap your wings as you strut across the room.


Goat Kick: Stand on your feet and place your hands on the floor.  Walk across the room as you kick out your heels.


Duck Waddle: Place your heels together with your toes apart.  Place your hands at your sides and waddle across the room.


Print out your printable animal brain break cards.


Add heavy work to these activities by pushing against the wall like the animals in the book (affiliate link) push against the little blue truck to help their friend out of the mud. 


 These farm animal themed brain breaks would work for any of these farm book. 

Looking for more movement and learning brain breaks?  You’ll love this dinosaur version based on the book, Dinosaurumpus! (affiliate link)

Little Blue Truck and farm themed brain breaks for attention, focus and sensory needs in the classroom based on farm animals.

Looking for more farm themed activities? 

These Farm brain breaks go very well with our Farm Therapy Kit! It has 93 pages of farm activities and therapy resources: 

  • Farm connect the dot pages
  • Farm crafts
  • Farm visual motor activities using bales of hay
  • Farm sensory motor movement tasks
  • Farm handwriting activities
  • Farm visual discrimination tasks
  • Farm executive functioning tasks
  • Farm letter cards
  • And much more!

Get your copy of the Farm Therapy Kit here!


Free Farm Brain Breaks

Print off the farm brain breaks page and get started with gross motor activities! This item is also found in our membership under Level 1 along with all of the other free printables on our site. It’s also found in Level 2 under Farm Theme.

Not a member yet? Join us today!

FREE Farm Brain Breaks

    We respect your privacy. Unsubscribe at anytime.

    Colleen Beck, OTR/L has been an occupational therapist since 2000, working in school-based, hand therapy, outpatient peds, EI, and SNF. Colleen created The OT Toolbox to inspire therapists, teachers, and parents with easy and fun tools to help children thrive. Read her story about going from an OT making $3/hour (after paying for kids’ childcare) to a full-time OT resource creator for millions of readers. Want to collaborate? Send an email to contact@theottoolbox.com.

    Pencil Control Worksheets

    pencil control worksheets

    Part of handwriting legibility is the visual motor skills needed for pencil control and one tool in our toolbox are pencil control worksheets. Pencil control in isolation isn’t always addressed, but actually focusing on the refined pencil strokes and controlled movements of the pencil makes a huge difference in overall legibility. In this blog post, you’ll find many pencil control worksheet ideas and even have the ability to access a few of our favorites.

    pencil control worksheets

    Pencil Control Worksheets

    Pencil control worksheets, or printable PDFs that target specific visual motor skills needed to move the pencil with precision and refined movements are tools that support handwriting.

    When we use pencil control worksheets, it’s more than just moving the pencil to make marks.

    Pencil skills worksheets can target many aspects of writing with a pencil:

    • Making small lines within a given space
    • Moving the pencil within a given space on a paper with presence of finger dexterity
    • Writing a letter on a small space, such as on our code breaker worksheets
    • Tracing over lines (Read here about the benefits of tracing lines)
    • Using precise movements in order to re-trace over letters when forming the alphabet correctly (letters like h, m, n, and r have re-trace where the pencil moves over an already formed pencil line).
    • Erasing the pencil marks
    • Writing with an appropriate and legible pencil pressure
    • Fluid and coordinated pencil strokes

    Using worksheets to target specific skills like practicing letter formation isn’t always ideal. The occupational therapy practitioners may actually sway away from rote handwriting practice.

    We’ve all seen it: A child is copying letters on a worksheet and the letters progressively get worse as they go across the page…or the margin creeps in as the child writes down the paper.

    That is not to say that all letter formation worksheets are bad! In fact, we LOVE to target specific skills using letter writing practice on printable PDFs.

    The OT trick is to facilitate the underlying skills, special themes that make the worksheet fun and engaging, and even using interactive worksheets that support skills in games or play-based learning.

    The multisensory aspect is what turns an ordinary writing worksheet into a therapy tool!

    All of these reasons are why using pencil control worksheets are great ways to target specific skills leading to handwriting legibility and functional writing skills.

    Below, you’ll find ideas to make DIY pencil control worksheets, and then some of our favorite pencil control sheets. You can also grab a printable pencil control worksheets pdf at the very bottom of the page.

    DIY pencil control worksheets

    DIY Pencil Control Worksheets

    The ideas below are some of our favorite ways to create your own DIY pencil control worksheets.

    Does your school-aged child have difficulty with line awareness, pencil control, or letter formation?  Is your preschooler just learning to control the pencil while making straight lines, the diagonal lines of an “X” or the angled, connecting lines of shapes like a square, rectangle, or triangle? Do you know a child who is learning to control the “wobble” of the pencil while making a circle that connects the start to the finish?

    All of these are pencil control skills!

    It is easy to make fun worksheets that apply to your child’s needs/age-appropriate level/skills…and interests!

    To make your own worksheets, you need just a few items:

    • plain paper
    • lined paper
    • graph paper
    • marker or highlighter
    • markers
    • pencil
    • stickers
    • dice

    You don’t need to use all of these items…the activities below can be created over the course of several days or weeks. Pick and choose an activity and then go from there!

     
    We shared one of our favorite pencil control exercises previously.
     
    Use that idea along with these other worksheet ideas for more visual motor and fine motor work.
     
    These are some easy handwriting exercises that can be done at home, or in the classroom. However, going from personal experience, the school-based OT doesn’t always have a ton of supplies on them. Depending on the setting and schedule, you may only have a marker, a pencil, and some paper in your possession. That’s where these DIY pencil and paper worksheets come into play.


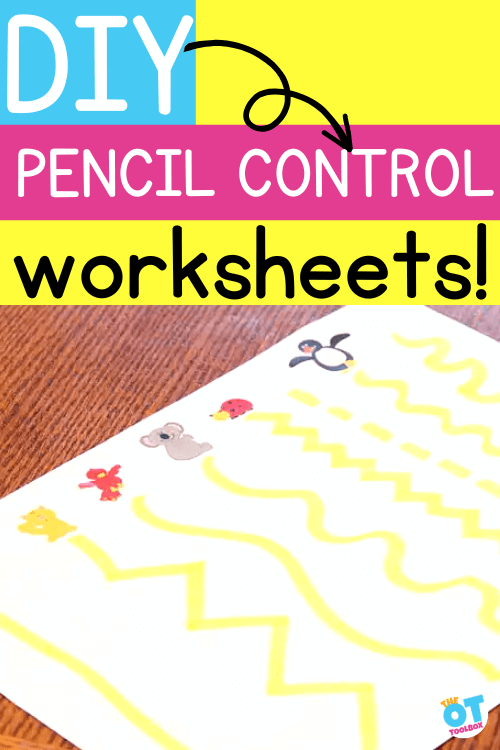
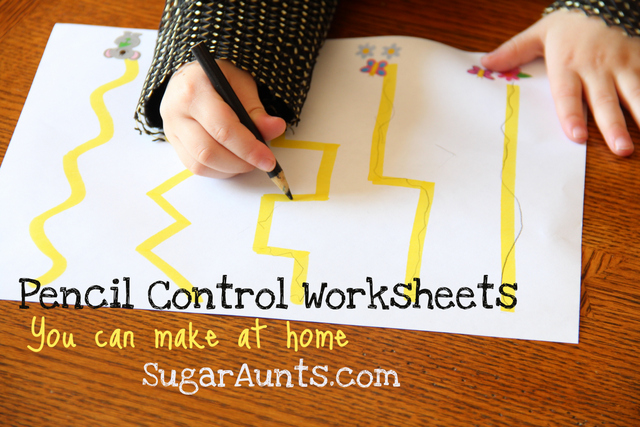
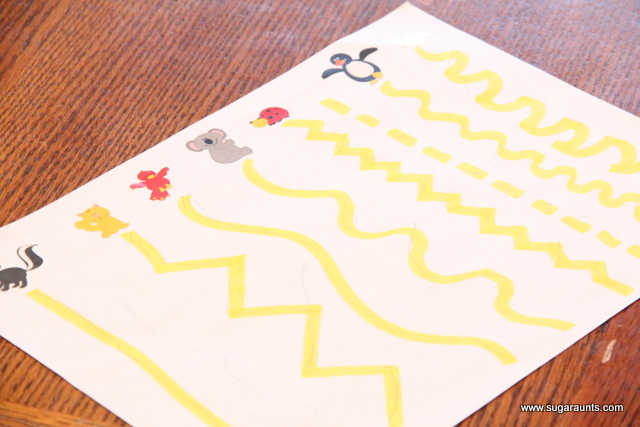
    Pencil control worksheet with stickers
     

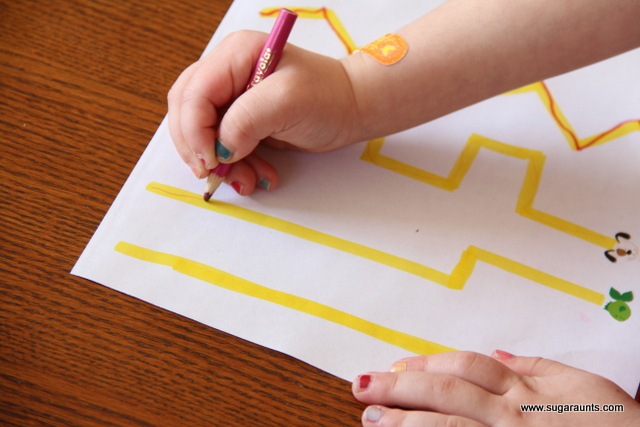
    DIY Pencil Control Sheet with Stickers

     
    This worksheet activity is great because it targets pencil skills with a motivation factor. Using fun stickers makes it engaging for the user. Plus, you can factor in the benefits of playing with stickers by asking the child to place the sticker at one end of the lines.
     
    Try to find some stickers that work with your therapy theme of the week or just are fun and motivating for the child’s interests.
     
    Don’t have stickers? It’s not a big deal. Draw a small smiley face, simple car for the child that loves vehicles, or even colors of the rainbow. You can easily factor in so many personal interests to make this activity motivating with a simple drawing.
     
    To make this pencil control activity:
    1. Use a highlighter to make straight, angled, and curvy lines going across the page…or add different twists and turns for your older child to trace along. 
    2. Grade the activity with the line width. Use thicker lines for a new writer and the school-aged child can work on very thin lines.
    3. Add a sticker at one end of the line. You can also add another sticker at the other end of the line if you like. 
     
    Ask the child to keep the pencil lines inside of the yellow guide.  Fun stickers at the end of the lines always help 🙂
     
     
    DIY pencil control worksheet


    Graded Pencil Control Activity

    This handwriting activity can be “graded” (adjusted to start out very easy for the child and then changed just slightly to make it more and more challenging).  Grading an activity is helpful for the learner because it allows the child to feel success and gain confidence during a task, but also builds success with more difficult  levels.
     
     Ideas to grade these pencil worksheets:
     
    • Consider orientation: By changing the direction of the lines, you can target different skills.
    • Lines that start at the top of the page and go down toward the child’s body are easiest. Start there. Consider placing this style of worksheet activity on a slant board or vertical surface for strengthening, support, or upper body positioning. 
    • Lines that go from left to right across the page cross the midline. This is a need for many children and can also target visual scanning skills. Also check out our blog post on crossing midline activities for preschoolers for the younger ages.
    • Consider using all curved lines or all angled lines, depending on the needs of the individual.
    ((I love Little Guy’s knight costume sleeve in this picture.  He rocks the knight costume at lease once a day  haha!))


    DIY Pencil Control Sheets- Shapes

     
    For the preschool child who is just learning to control the writing utensil, requiring them to write letters or write their name is beyond the scope of their development. We cover this in our resource on what happens when preschoolers are asked to write.
     
    The pre-writing skills preschoolers actually need involve lines, shapes, coloring, and of course, fine motor play! We can target these skills using a pencil control sheet on shapes.
     
    Think of it this way: To make a letter “A”, a child needs to create diagonal lines, which are two separate pencil strokes. The pencil needs to be placed at the correct point as the second line is created. The diagonal lines are further down the line-up, developmentally. Then, the middle line needs to connect two diagonal lines. For the child with an “A” in their name, asking them to make these marks before typical developmentally ready, you may end up with curved lines, shaky pencil marks, and misaligned connecting lines.
     
    Practicing these skills in preschool over and over again leads to a motor plan for a poor letter formation.
     
    That’s where pre-writing lines pencil control tasks are key.
     
    We can foster the line markings of letters by making shapes and lines that ARE developmentally appropriate.
     
    Pre-writing skills that can be targeted with pencil control shapes include: 
    • Straight lines
    • Starting the pencil at a certain point
    • Stopping the pencil at a certain point
    • Diagonal lines of an “X”
    • The angled, connecting lines of shapes like a square, rectangle, or triangle (making a sharp corner)
    • Smooth pencil strokes to create a curved line of a circle
    • Connecting shapes completely to close the shape
    • Hand strength and endurance to color in the shapes
    • Lifting the pencil and placing it on a specific point (Like adding a triangle to the top of a square to create a house, which is a skill needed to form some letters like adding the middle line to an “A”)
     
     
    This DIY worksheet is similar to the one described above. Simply draw shapes using a marker. Create thicker or thinner lines. Then ask the child to trace over the lines.
     
    You can then ask the child to color in the shapes using a crayon. We explained the skills behind this task in our pencil control activity which used colored pencils to fill in circles. 


    DIY Pencil Control WORKSHEET with Line Awareness

    The next worksheet idea focuses on spatial awareness skills in handwriting. This is also a pencil control technique.
     
    1. Use a blank piece of paper and using a marker, draw a shape such as a square.
    2. Draw a square around it. 
    3. Take turns with your child to make larger and larger shapes.

    This activity is an easy way to work on pencil control skills using pre-writing shapes, but also focuses on the sharp angle of lines as they turn a corner. 

    When the child makes the shape around your shape, they can work on pencil control for evenly spaced pencil strokes.

     
    It’s a lot like doodling you did in your notebooks or while talking on the phone, right?
     
     
    Taking turns with your little handwriting student helps them to see an accurate shape right next to the lines that they are drawing…with sharp edges and straight lines.


    DIce Pencil Control Worksheet

    Big Sister LOVED doing this one.  She filled out the whole sheet and had so much fun!  She would roll the dice, count the dots, and draw the dots (in the correct arrangement) in the squares on the page.
     
    To create this DIY worksheet, you’ll need:
    • Blank paper
    • Marker
    • Dice
    • Pencil, crayon, or marker

    You can work on so many skills with this activity. Counting, Copying, and Drawing with accurate spacing all work on her visual perceptual skills and spatial awareness.  

    Set this activity up by:

    1. Draw lines to create a large grid on the paper. 
    2. Roll a dice. We used a large dice but a regular game dice would work too.
    3. Count the dots on the dice using the point of the pencil. Touch each dot. (A GREAT activity for targeting graded precision skills with the pencil)
    4. Then draw the dots on the paper in one of the spaces. Draw the dots exactly as they are on the dice.
     
    These skills are essential for forming letters on lines, placing letters close enough to others in a word, and when copying lists of words. It’s a great beginner activity for near point copying skills.


    Make early handwriting fun and your preschooler will have success…and love it!


    Printable Pencil Control Worksheets 

    Printable pencil control PDFs are an easy way to work on skills in therapy. You can print off a handful of the worksheets for your therapy caseload and use them in a variety of ways to target different OT goals and by grading the activities.

    In The OT Toolbox Membership Club, we have over 130 printable pencil control worksheets (along with a thousand+ other skill-building activities and PDFs!). Membership Club members can log in and then head to our Pencil Control Skill to access them all.

    Some of our favorites include:

    • Pencil control mazes
    • Dot games
    • Simple line printables
    • Eraser skill PDFs
    • Pencil control roads
    • Mazes
    • Connect the dot PDFs
    • Pre-writing pencil mazes
    • Pencil shading worksheets
    • Pencil line drawing activities like adding textures, dot features, or symmetry activities
    • Word search printables
    • Connect the matching items
    • So many more!
    free pencil control worksheets

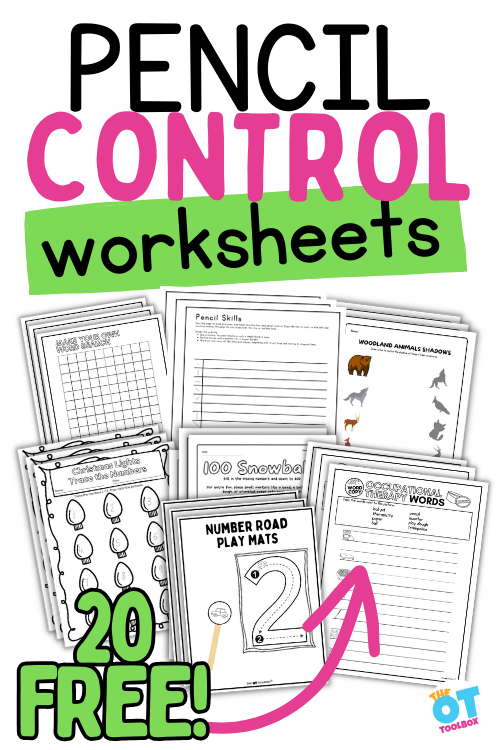
    20 Free Pencil Control Worksheets

    To get some printable pencil control worksheets, head to these blog posts. Each one addresses various aspects of handwriting skills, but in them, you can get a free printable pencil control PDF.

    To get these printable worksheets, simply go to the bottom of the blog post and enter your email address into the form. (Each printable is also found in Level 1 of our membership, where are all “freebies” can be found. Level 2 members also get this benefit as well).

    1. Pencil Control Exercise– Copy pre-writing lines and shapes in a given space, between writing lines
    2. OT Coloring Pages– target hand strength and coloring in the lines
    3. Copy OT Words onto lines
    4. Mitten I Spy and Writing Pages– Color the shapes with a colored pencil and then write the words on the lines
    5. Number Formation Worksheet– Trace numbers on the shaded numbers
    6. Winter Color By Number– Color in the given space with controlled pencil/crayon motions
    7. New Years Maze– Keep your pencil in the path of the lines
    8. Number Road Playmats– Great for pencil control when making numbers
    9. Blank Word Search– Place letters inside the squares of the wordsearch grid
    10. 100 Snowballs Worksheet– Place numbers inside the circles
    11. Snowball Letter Practice– Trace letters on snowballs
    12. Holiday Lights Letter Tracing worksheet
    13. Hannukah Word Scramble– write the letters in the boxes
    14. Christmas Word Match– write the letters in the boxes
    15. Arctic Animal Word Search– circle single letters or the words to work on pencil skills
    16. Shadow Matching Worksheet– Connect the matching animals with pencil lines
    17. Dinosaur Worksheet– Connect the matching dinos with lines
    18. Owl Directed Drawing– Use pencil lines to create a simple owl
    19. Cotton Swab Art PDF– Break a cotton swab in half and use it to dot the lines
    20. Fine Motor Writing Sheets– Place play dough or small objects in the dots…or mark each dot with an X to fill the picture. Then write on the lines

    For more resources, check out our library of letter formation worksheets. These printables are free and can be used to target a variety of skills.

    The OT Toolbox membership club

    Get all of the items listed above when you join The OT Toolbox Member’s Club! Free printables are available in our Level 1 membership and the freebies PLUS 1500+ more printable tools are available in our Level 2 membership!

    Join The OT Toolbox Member’s Club today!

    Colleen Beck, OTR/L has been an occupational therapist since 2000, working in school-based, hand therapy, outpatient peds, EI, and SNF. Colleen created The OT Toolbox to inspire therapists, teachers, and parents with easy and fun tools to help children thrive. Read her story about going from an OT making $3/hour (after paying for kids’ childcare) to a full-time OT resource creator for millions of readers. Want to collaborate? Send an email to contact@theottoolbox.com.
    Pencil Control Exercises

    Pencil control exercises

    Pencil control exercises, or visual motor exercises using precise pencil lines in a given space, support the motor skills needed for handwriting. Unlike what you typically think of when you hear the word, “exercise”, pencil exercises do not need to be rote physical work. The pencil control exercise ideas we have listed below are fun and easy ways to support refined and coordinated pencil control when writing.

    Pencil control exercises

    Pencil Control Exercises

    We originally wrote this blog post back in 2017 and used graph paper to create a DIY pencil control exercise, targeting small pencil movements, eye hand coordination, and visual motor skills. The pencil exercise remains a valuable tool now, too! In fact, there are many reasons why using graph paper supports handwriting and the visual motor precision needed for forming and writing letters of the alphabet. Don’t forget about that sleeve of graph paper that is in the bottom of your filing cabinet!

    When we say pencil control exercises we are referring to just one tool in the occupational therapy provider’s toolbox.

    Pencil control can be achieved in many ways.  Using crayons to help with improving pencil control in handwriting  is one fun way that doesn’t seem like handwriting practice.  

    Colored pencils are another tool that can be used to work on pencil control, like we did with these rainbow pencil control exercises

    Below, I’m sharing how to use graph paper to address pencil control.  

    But first, what is pencil control?  Glad you asked.

    What is Pencil Control?

    Pencil control is using the pencil to write in a way that is fluid and in control.  It’s writing letters with changes in direction at a speed that is developmentally appropriate and automatically.  

    Writing with pencil control allows children to write letters and words on the lines and with in a given space efficiently. 

    Pencil Control Exercises

    These pencil control exercises are so easy to throw together and a sure way to help kids work on line awareness and pencil use.  Working on pencil control is a way to help kids with letter formation and legibility in handwriting.  

    When kids write quickly, legibility often times diminishes.  When kids have control over pencil strokes, they are able to carry over those skills.  

    There are many ways to work on pencil control in creative and fun ways.  

    We’ve shared a few different pencil control activities ideas that may help.  The pencil control practice sheets below are one that can be done quickly and in between classroom or therapy activities. 


    Use this free pencil control exercise to help kids work on handwriting legibility.
     

    This post contains affiliate links. As an Amazon Influencer, I earn from qualifying purchases.


    Use graph paper to work on pencil control:

    It is very easy to work on pencil control with graph paper.  Graph paper is readily available.  Grab this inexpensive pack of graph paper, (affiliate link) and get started!
     
    First, it doesn’t matter what size graph paper you use.  Younger kids are using less control naturally, so changes in direction in a smaller area are more difficult for new writers.  
     
    However, beginning lines and control with those lines can be used with smaller graph paper sizes.  
     
    By that, I mean learning the beginning strokes of pencil control don’t contain a lot of changes of direction in a small area.  Beginning pencil control includes starting and stopping pencil lines, line length, and placing the pencil and pick it up in the correct areas.  
     
    More advancing pencil control, and the ability needed for smaller handwriting size can use smaller sized graph paper for more changes in direction.  
     
    Use this free pencil control exercise to help kids work on handwriting legibility.
     

    Pencil Control Practice Sheets

    This exercise is very easy to set up.
     
    You need just two items:
    1. Graph paper
    2. Pencil
     
    How to set up this pencil control exercise:
    1. Using the graph paper, just draw lines, shapes, dots, angles, and shapes.  
    2. Then, show kids how to copy those forms.  They will need to keep their pencil on the lines of the graph paper, start where the model starts, and end where the model lines end.  
     This is a good sheet to start with for kids who are writing.  Kids who have never written letters before or are new writers may benefit more from pencil control worksheets without the graph paper grids.  


     Other Pencil Control Exercises

    You can use graph paper or regular notebook paper for these exercises.
     
    • Another way to work on pencil control with graph paper is using increasingly complicated forms and shapes on the graph paper.  Think: squares, X’s, and up/over/down lines.
    • Used lined paper and simply draw a series of lines from top to bottom lines, going across the page. Show the student how to start at the top line and stop at the bottom but not go over the line.
    • Then go across the page and draw lines down. 
    • Draw circles on the line.
    • Draw diagonal lines in both directions, starting at the top and then starting at the bottom.
    • Use blank paper and draw small circles like we did in this rainbow pencil control activity. Then fill in the circles with colored pencils.
    • Make your own pencil control worksheets.
     
     
    Use this free pencil control exercise to help kids work on handwriting legibility.
     

    Use this free pencil control exercise to help kids work on handwriting legibility


    Read more on pencil control and find creative ways to improve handwriting through improved pencil control activities. 


    Skills needed for pencil control exercises?

    Movements of the pencil in order to form letters and place written work on lines or in a given space requires several underlying skills. Those skills include:

    These skills enable the individual to move the pencil with the smaller joints of the hand, place the pencil point in a precise location, and move the pencil with graded movements.

    When these skills are lacking, you might see the pencil movements not being precise or refined, the pencil not moving fluidly when forming letters, letters not being placed on the lines, lack of legibility, writing at an appropriate pencil pressure, poor re-trace in letters, and other factors that lead to challenges with controlled pencil strokes.

    Looking for more Pencil Control Exercises?

    Grab some of the pencil control worksheets we have here on the website! The OT Toolbox membership members can also access many resources inside the membership that target this area of development.

    Level 2 members will find over 130 pencil control exercises, activities, and tools to specifically support this skill, with more being added all of the time. Plus, there are over 1500+ other printables, activities, screening materials, and much more available to target other skill areas.

    Members can log into their account and click this link to access the printable materials.

    Not a member yet? Learn more here.

    The OT Toolbox membership club

    Free Pencil Control Exercise

    This free printable sheet is perfect for kids who struggle with legibility during writing, older kids who need to touch back on the basics of pencil control.  

    It’s a great start for kids who need to work on visual perceptual skills needed for handwriting. Plus, we created this activity to target pre-writing skills. So, for our younger learners in kindergarten who are possibly pushed to write before they have developed the fine motor and visual motor skills needed to copy letter forms on a line, this is a great morning work activity or center activity.

    Get the printable below by following these directions:

    1. Enter your name and email address into the form below.
    2. Click the button.
    3. Check your email.
    4. Find the email that just arrived from The OT Toolbox (sometimes it lands in spam, so check there too).
    5. Download the file in that email.

    Here you go…

    FREE Pencil Control Exercise

      We respect your privacy. Unsubscribe at anytime.

      Colleen Beck, OTR/L has been an occupational therapist since 2000, working in school-based, hand therapy, outpatient peds, EI, and SNF. Colleen created The OT Toolbox to inspire therapists, teachers, and parents with easy and fun tools to help children thrive. Read her story about going from an OT making $3/hour (after paying for kids’ childcare) to a full-time OT resource creator for millions of readers. Want to collaborate? Send an email to contact@theottoolbox.com.
      Rainbow Bottle Xylophone

      Plastic bottles filled with water at different levels with colorful water in rainbow order. Text reads "bottle xylophone"
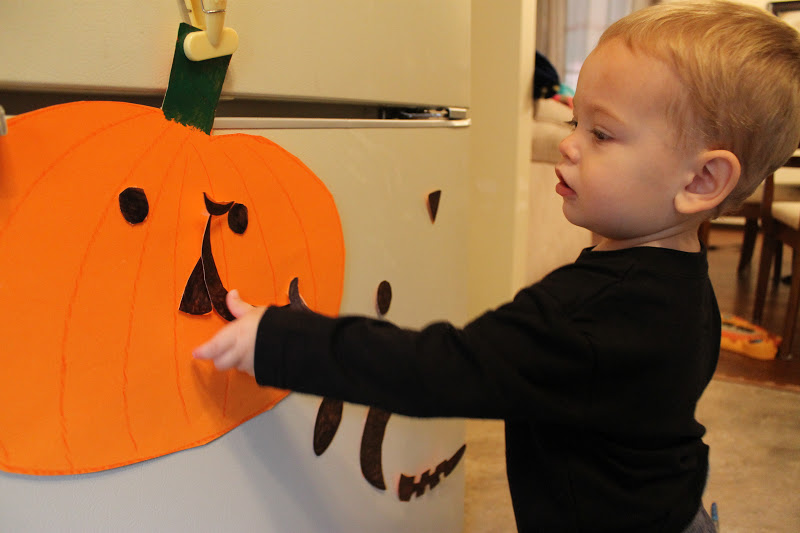
      Many years ago, we made a DIY instrument…a bottle xylophone to be exact! We used recycled plastic water bottles to create a rainbow xylophone and explored not only colors of the rainbow, but also creating a water xylophone made from plastic bottles. This was a fun activity the whole family loved! Another of our favorite DIY instruments is our DIY tambourine craft.

      bottle xylophone

      Bottle Xylophone

      If you have plastic water bottles or a couple of drink containers or recycled plastic bottles in the recycle bin, this is an easy activity to do with kids. It’s actually a great science experiment too. By exploring how different levels of water make different sounds in the bottle, you can really foster a lot of learning.

      Here is one easy way to use plastic water bottles to make a color xylophone with the kids. 

      We made these music bottles to explore auditory processing skills: specifically, these musical bottles were perfect for noticing differences in tone of sound. When we notice these differences and put them together with other tones, we get music! This simple instrument is a DIY music activity my kids loved…and they didn’t mind the auditory processing lesson.

      You’ll need just a few materials to set up your own bottle xylophone:

      • Empty and clean plastic bottles
      • Water
      • Food coloring (you can make a bottle xylophone without the food coloring, but the rainbow feature is fun, especially if you are including this activity in rainbow activities or a rainbow theme.)

      How to make a Water Xylophone with Plastic Bottles

      If you follow this blog, then you know that we love to use recycled materials in play and crafts. After our bottles of Coca-Cola were empty, we decided to make our own songs with a DIY water xylophone!


      To make a water xylophone using recycled plastic bottles:
      This was SUCH a huge hit with my kids.  The process is very simple, and it’s a great activity for kids.

      1. We filled the plastic bottles with varying amounts of water.
      2. We used all six bottles from the six pack of plastic Coke bottles and added liquid food coloring to the bottles.  Each bottle held a different color of the rainbow to make a rainbow water xylophone.
      3. Start by pouring water to almost the top of one water bottle. Then, pour a little less into the next plastic bottle. Continue down the line.
      4. Test the sound by blowing across the top of each bottle. You should get a nice hollow sounding sound. When you have the sound as you like it, add drops of food coloring to create a rainbow. 
      Kids love this rainbow water xylophone using recycled bottles to make music.
       

      I showed my kids how to blow across the top of the opening of the bottles to make a musical sound.  It was fun to see my kids’ expressions as they realized they could make a sound on the opening of the bottles.  

      Even better was watching them make a little tune with the xylophone!  This is one activity that they will remember for a long time to come.  

      A hint for pouring water into the plastic bottles: One functional skill that can be challenging for some kids is pouring water. Pouring water into the plastic bottles requires skills such as: 

      • bilateral coordination
      • eye-hand coordination
      • refined dexterity of the pouring (dominant hand)
      • strength

      Doing this activity over a kitchen sink or outside can make the process easier for some. You can also use a funnel or a small pitcher with a lipped spout to make the pouring task graded. To foster pouring skills, try these pouring and scooping activities.

      This is a great activity for addressing oral sensory needs. Blowing across the top of the open bottles to create a sound can even be a calming oral motor exercise. Check out some of our favorite ways to provide sensory input through oral motor exercises for sensory calming sensory input in our animal cracker oral motor activity and our plastic egg boats activity

      Kids love this rainbow water xylophone using recycled bottles to make music.
       

      A water xylophone would be the perfect addition to a summer bucket list!  Take this idea outside to create memories with your kids!  Just like music invokes memories, making music with this water xylophone will be the hit of the summer break.

      Kids love this rainbow water xylophone using recycled bottles to make music.

      Other DIY instruments that we loved include:

      Don’t forget to check out all of the great resources on the OT Toolbox, including the Auditory Processing Tool Kit.

      The resources support listening skills, auditory memory strategies, and includes games and activities to foster auditory processing during functional tasks.

      Get your copy of the Auditory Processing Kit here.

      Auditory Processing Kit

      Colleen Beck, OTR/L has been an occupational therapist since 2000, working in school-based, hand therapy, outpatient peds, EI, and SNF. Colleen created The OT Toolbox to inspire therapists, teachers, and parents with easy and fun tools to help children thrive. Read her story about going from an OT making $3/hour (after paying for kids’ childcare) to a full-time OT resource creator for millions of readers. Want to collaborate? Send an email to contact@theottoolbox.com.