How to Use Medbridge Education in OT

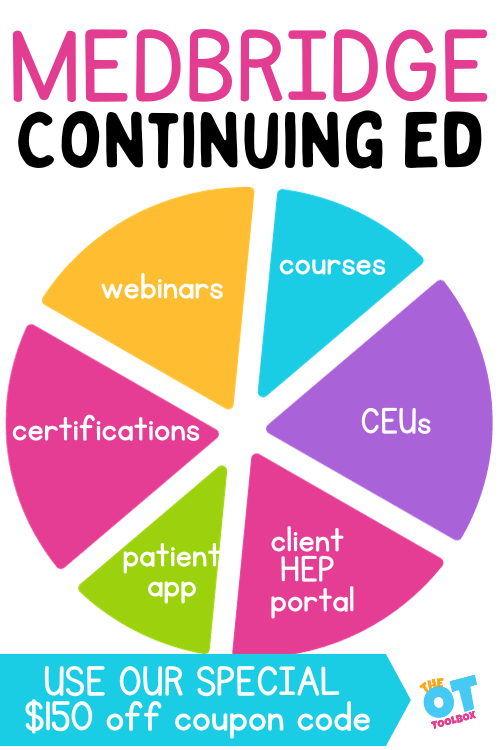
Medbridge education

In this blog post, we’re covering how to use Medbridge Education to support your professional licensure needs, and how to support clients using Medbridge as a tool and resource.

Occupational therapy providers (and for the PTs and SLT who read this site!) we know that continuing education is a must for keeping licensure up to date. That’s why we wanted to highlight a tool that supports continuing education for professional therapy providers with more options and benefits than your typical weekend conferences has to offer!

Medbridge education

For occupational therapy providers looking for support in their continuing education needs, MedBridge is a dynamic online platform that has rapidly become a cornerstone resource in the healthcare industry. Renowned for consistently producing top-quality educational content, MedBridge is on a mission to enhance the lives of both patients and caregivers…and the therapy providers that use the services.

So, what exactly is MedBridge, and who can benefit from it? In this blog post, we’re hoping to provide in-depth insights into MedBridge, its diverse components, available subscription plans, pricing details, and what sets MedBridge apart as an exceptional tool for healthcare practitioners, patients, and organizations.

What is MedBridge?

MedBridge Education is a comprehensive online platform that specializes in providing continuing education and professional development resources for healthcare and therapy professionals.

It offers a wide range of educational content, tools, and resources to help healthcare practitioners (OT, PT, ST, AT…and more) to stay up-to-date with the latest industry knowledge, improve their clinical skills, and meet their continuing education requirements.

How does MedBridge work?

There is a lot to get to know about using Medbridge Education as a resource.

You can access courses, videos, and other resources on specific topics or area of intervention (school-based therapy, outpatient, inpatient) or in regards to specific diagnoses or functional needs.

MedBridge is an online platform designed to provide healthcare and therapy professionals with access to a wide range of continuing education resources, tools, and features.

Let’s go over how MedBridge works

  1. Subscription Access: Healthcare practitioners, subscribe to MedBridge to gain access to its extensive library of educational content and resources. Subscriptions can be tailored to individual needs or organizational requirements. Click here for subscription fee info.
  2. Registration and Account Creation: New Medbridge users start by registering for a MedBridge account, which typically requires providing basic information and selecting a subscription plan based on their professional goals and interests.
  3. Dashboard: Once logged in, users are greeted by a personalized dashboard. This dashboard serves as a central hub for accessing all the features and resources available on MedBridge. There, you’ll find course options, upcoming webinars, and more.
  4. Course Selection: Users can browse MedBridge’s vast course library, which includes over 2,000 accredited courses covering a wide range of healthcare disciplines, specialties, and topics. These courses are designed to meet continuing education requirements and enhance clinical knowledge. The course selections offer resources for occupational therapy, physical therapy, speech-language pathology, nursing, and more.
  5. Course Completion: Healthcare professionals can select and enroll in courses of interest. Courses often include video lectures, written materials, quizzes, and assessments. Users can progress through courses at their own pace and complete them as required.
  6. CEU Credits: Many of MedBridge’s courses are eligible for Continuing Education Units (CEUs), which are essential for maintaining professional licenses and certifications. Users can earn CEUs upon successful course completion.
  7. Live Webinars: MedBridge offers live webinars conducted by experts in the field. Users can participate in real-time, ask questions, and interact with presenters during these webinars.
  8. Home Exercise Program (HEP) Builder: Clinicians can use MedBridge’s HEP Builder to create customized home exercise programs for their patients. The platform includes a library of over 8,000 exercise videos that can be integrated into customized exercise programs based on the needs of the individual clients.
  9. Patient-Oriented App (MedBridge GO): MedBridge GO is an app designed specifically for patients. Clinicians can prescribe exercises and educational content to their patients through this app, allowing for improved patient engagement and compliance. The patients can then access their prescribed exercises and educational content that their therapy provider has selected for them.
  10. Certification Programs: Occupational therapy providers (and other professionals) who are interested in advancing their expertise can pursue certification programs offered by MedBridge. These programs typically involve comprehensive training and assessments and allows them to demonstrate advanced expertise in their chosen areas.
  11. Progress Tracking: Users can track their course progress, CEU completion, and overall professional development through their MedBridge accounts. The platform often provides certificates of completion for courses and certifications.
  12. Support and Resources: MedBridge offers customer support to assist users with any questions or technical issues. The platform also provides supplementary resources, such as compliance training, non-accredited courses, and patient feedback systems.
  13. Accessibility: MedBridge is accessible online through web browsers and also provides dedicated apps for smartphones and tablets, catering to the convenience and mobility needs of users.

Medbridge Education Subscription Levels

Because there is so much in the way of tools and resources available on Medbridge education, the service offers three subscription levels tailored to users’ specific needs:

  1. Education Plan: Geared towards clinicians seeking CEUs, certifications, and access to reference materials.
  2. Premium Plan: Designed for clinicians who desire all the benefits of the Education plan along with the capability to create home exercise programs for their patients and provide access to educational videos.
  3. Enterprise Plan: Intended for larger therapy organizations seeking the features of the Premium plan, plus additional customization, branding, patient feedback systems, patient outcome tracking, and ongoing staff training. The Enterprise package is not typically suited for individuals.

Most clinicians find the MedBridge Premium plan to be an ideal choice, given its robust Home Exercise Program (HEP) Builder, particularly beneficial for outpatient therapists.

The comprehensive exercise video library serves as a valuable reference tool, even for those who may not frequently create home exercise programs.

Medbridge Coupon

I have exciting news…if you would like to access thousands of educational resources to meet your professional development needs, Medbridge is the source for you.

And, you can use a special Medbridge coupon code, just for readers of The OT Toolbox.

Use the Medbridge coupon code: THEOTTOOLBOX to save $150 off all individual subscriptions.

This means that the discounted prices for a subscription to Medbridge Education are:

  1. $225 for Education (access to our entire course library)
  2. $275 for Premium (Education, plus access to the HEP and patient education library and builder) 
  3. $120 for SLP Education (SLP courses only)
  4. $170 for SLP Premium (SLP Education, plus access to the SLP HEP and patient education library and builder) 

Thinking about joining? Click here for more information on joining Medbridge for continuing education needs!

Colleen Beck, OTR/L has been an occupational therapist since 2000, working in school-based, hand therapy, outpatient peds, EI, and SNF. Colleen created The OT Toolbox to inspire therapists, teachers, and parents with easy and fun tools to help children thrive. Read her story about going from an OT making $3/hour (after paying for kids’ childcare) to a full-time OT resource creator for millions of readers. Want to collaborate? Send an email to contact@theottoolbox.com.
Process Art Monster Cupcake Liner Craft

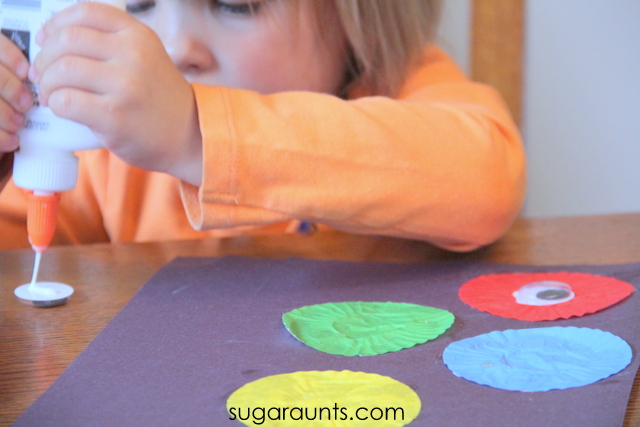
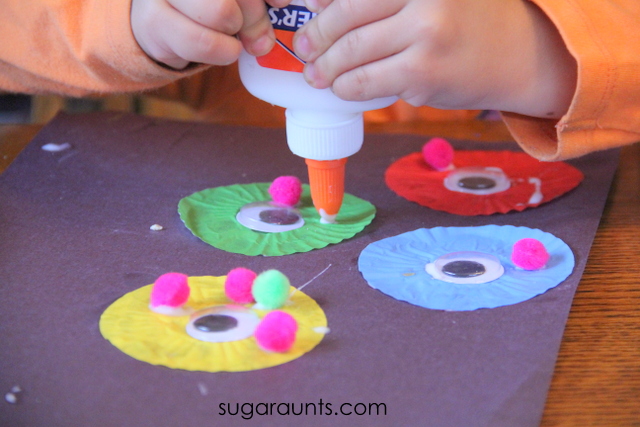
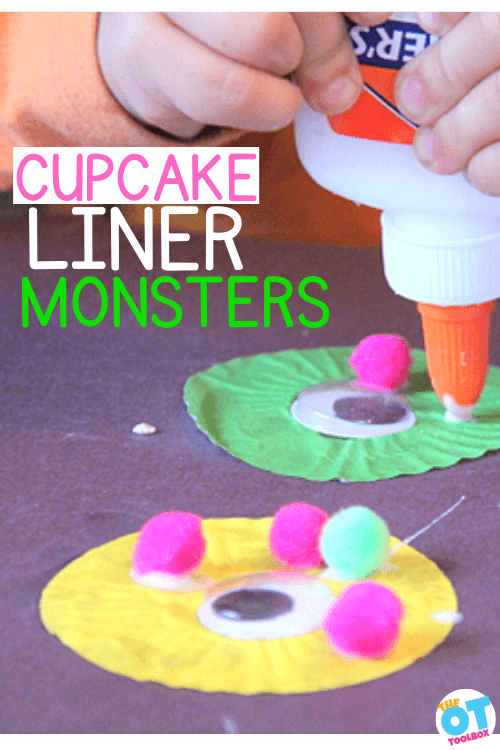
monster craft made from cupcake liners, googly eyes, and craft pom poms. Hands squeezing glue to add craft items to cupcake liner

These cupcake liner monsters are a fun monster craft and all you need are craft supplies from your recycle bin, googly eyes, and cupcake liners! We love this cupcake liner art for building fine motor skills through play! It’s a great kids craft that is perfect for building underlying skills through crafting…and having fun!

As an Amazon Influencer, I earn from qualifying purchases.

This cupcake liner craft is great for Halloween. Making cupcake liner monsters works on many fine motor skills.

Cupcake Liner Monsters

These cupcake liner monsters are not just fun to make. They build skills, too.

Use a variety of craft materials to make process art with a monster theme, perfect for Halloween occupational therapy activities.

Manipulating the materials for this cupcake liner monster craft builds several underlying skill areas:

Process Art Craft for Kids

 
Process focused play is a great way to create and explore.  What is process art?  It’s creative and open-ended art that focuses on the child’s thought processes.  
 
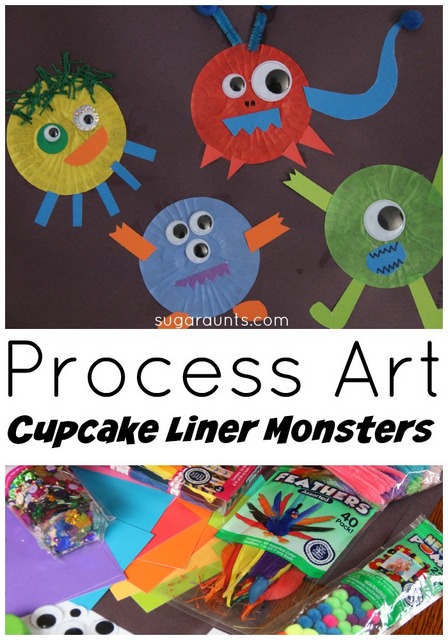
We made these super cute monsters with a pile of crafting supplies and no clear end in mind.  We went with the flow of creativity all while working on fine motor skills, language, creativity, and more.


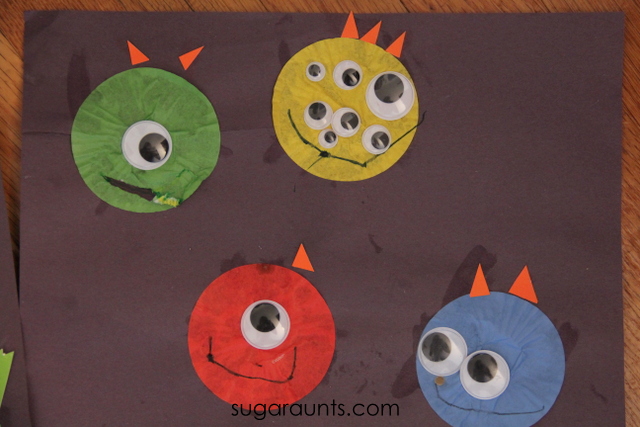
Cupcake liner monster craft made with process art.
 
This post contains affiliate links. 


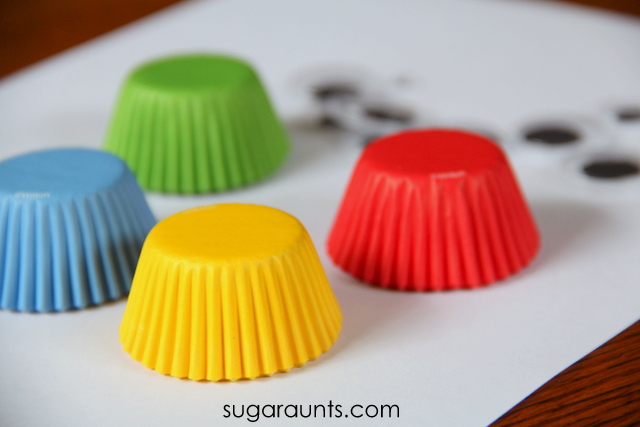
Start with Wilton mini cupcake liners (Amazon affiliate link) in primary colors.

 
Glue them flat onto a piece of  black construction paper (Amazon affiliate link).  Add googly eyes.  Monsters need lots of googly eyes.
 

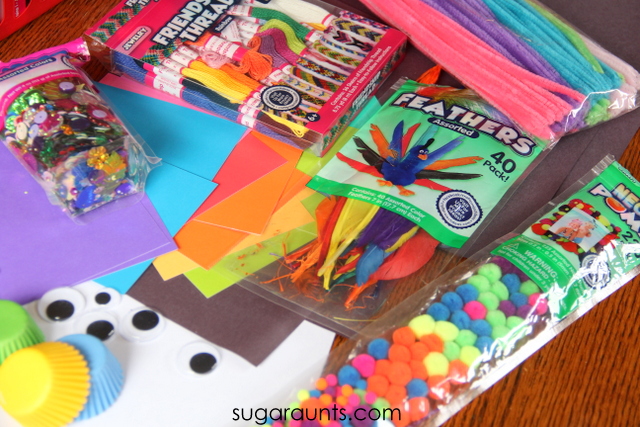
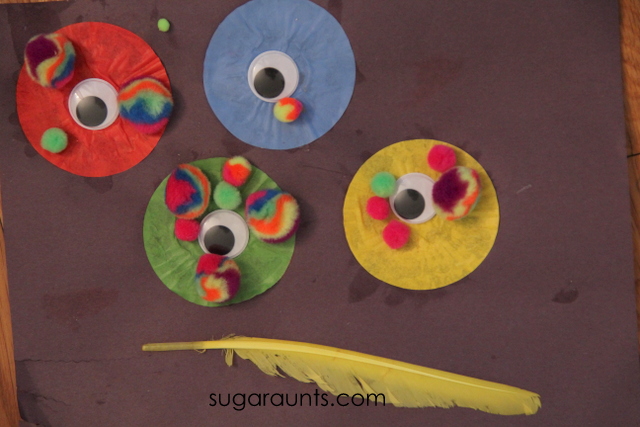
Pile up a bunch of craft items.  Pom poms, feathers, colored paper, glitter, string, pipe cleaners…This looks like fun, right??!


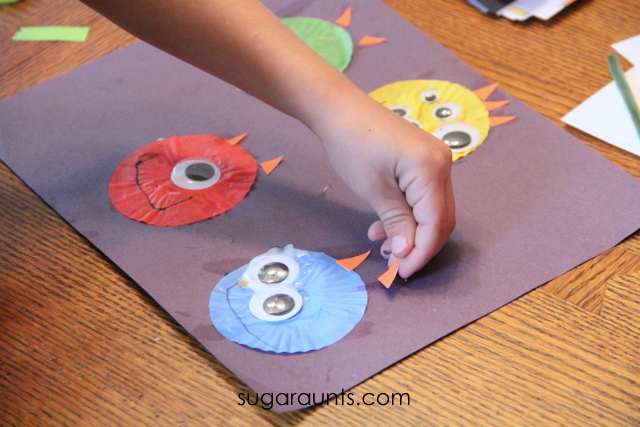
It was fun to watch the kids as they created.  Each made their monsters in their own way, and it suited their personalities.  We let the creativity flow!


Little Guy needed a lot of spikes for his monsters.  We told a few jokes.  
Who is the messiest monster? 
Slopzilla


Hilarious!

These monsters took a ride on their feather taxi. 

Create, imagine, explore.  We did that!  What a fun way to practice fine motor skills, textures, and materials.  If you make process art monsters, share them with us! We’d love to see them!

Colleen Beck, OTR/L has been an occupational therapist since 2000, working in school-based, hand therapy, outpatient peds, EI, and SNF. Colleen created The OT Toolbox to inspire therapists, teachers, and parents with easy and fun tools to help children thrive. Read her story about going from an OT making $3/hour (after paying for kids’ childcare) to a full-time OT resource creator for millions of readers. Want to collaborate? Send an email to contact@theottoolbox.com.

Indoor Balance Beam Ideas for a Rainy Day

DIY balance beams

Some of our favorite ways to work on gross motor skills are with a simple balance beam, and having indoor balance beam ideas on hand is key to throwing together a therapy plan or movement activity on the go. With the start of cooler weather, the kids may not get a chance to be outdoors so this is when gross motor coordination tasks is a must for self-regulation and movement needs. 

As an Amazon Influencer, I earn from qualifying purchases.

We have many balance activities here on The OT Toolbox, and one of our favorites is a DIY balance beam that targets interests to making things meaningful and motivating through play.

You’ll also want to check out our outdoor balance beam ideas for more information and inspiration.

However, sometimes, it’s impossible to get outside when the weather is rainy.  Other times, kids need a break from very hot temperatures.  It’s a great idea to work those core muscles as well as balance with sensory vestibular input through play with balance beam play weather the kids are playing indoors or out. These ideas would work for rainy indoor days, too!

You’ll want to check out our blog post on crossing midline for preschoolers because the balance beam can be a tool for supporting sensory motor needs and abilities such as maneuvering over a balance beam.

Indoor Balance Beam Ideas

Kids love balance beams!  There is a good reason to promote them, too. Balance, core strength, and bilateral coordination are all addressed with just a simple balance beam.  You can find out more about these areas in our How Balance Beams Help Kids.

One thing to be aware of is how balance develops. For younger children a balance beam may be more difficult than it is beneficial in building strength or coordination.

If you are looking for more information on how core strength helps with attention in kids, read this Core Strength and Attention activity that we did previously.

Related, this Brain Gym Bilateral Coordination activity is a great way to get both sides of the body moving in a coordinated manner through play. 

Balance beams are a great activity for preschool because of the development happening at this age. You can start with a floor balance beam and then move on to a raised beam. A 2×4 wooden beam is all it takes. Read about indoor gross motor activities for preschool for more ideas and information.

Indoor balance beam ideas for a rainy day


Indoor Balance Beam Ideas for a Rainy Day

Indoor balance beams are a great way to encourage vestibular and proprioceptive movement through play and gross motor work. 

This post contains affiliate links. 

Cut paper or cardboard into shapes. You could also use pieces of contact paper that sticks to the floor or shelf liner paper so the targets won’t slip when stepped on.

Kids can cut out these shapes and tape them to the floor to create an indoor balance beam on a rainy day.  

Some of these ideas would work:

Another idea is to use the theme of a playground balance beam in an indoor setting. Our playground balance beam therapy slide deck does just that and it’s great for indoor play or in a virtual therapy setting, too.

Rainy day ideas including indoor balance beams for kids
 

Let’s take a look at some DIY balance beams…these are great indoor balance beam ideas!

Some of our favorite DIY balance beams use items found around the home.

DIY balance beam ideas

There are so many DIY balance beam ideas that you can use indoors or even outdoors.

One tip is to consider the space between steps that a child has to make. You can move the surface that they are walking on closer together or further apart.

Mix up the surfaces. Use pillows or foam mixed with hard surfaces like cardboard or a wooden board.

Encourage students to bend, crouch, or swing their feet along the side of the balance beam to encourage the user to challenge more balance and gross motor work.

  • Make a DIY balance beam using foam cutouts like these flowers.
  • Stick painters’ tape to the floor in a balance beam, using zig zag lines.
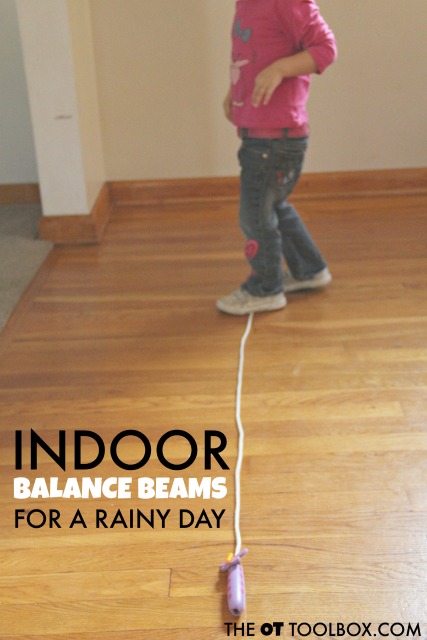
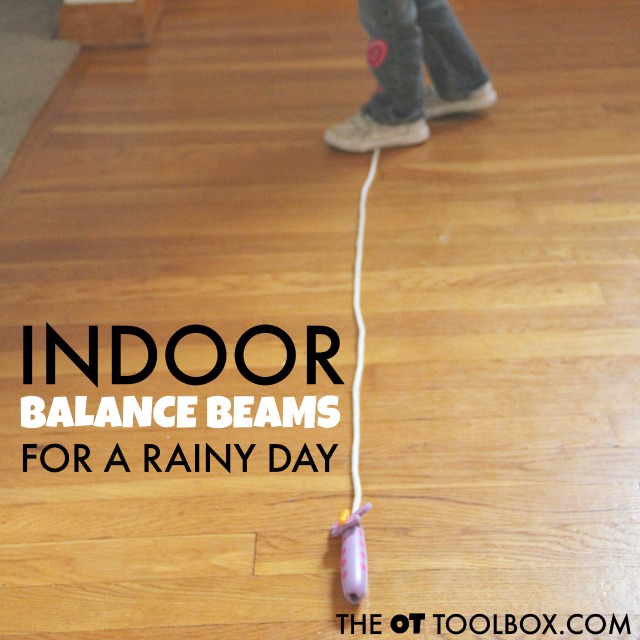
  • Rope balance beam- Use a jump rope on the floor. Balance along the jump rope. You can also use thread, twine, yarn, or other forms of string.
  • Paper plates- Tape them down so they don’t slide, or use them on a carpet for a sliding balance beam challenge!
  • Pillow Balance Beam- Place a line of pillows across the floor. You can easily grade this by using bigger pillows or smaller pillows. Even couch cushions would work.
  • Use a Sheet- Make a path using a sheet for a wide balance beam. Fold a bed sheet into a long strip and use to to walk across the floor.
  • Roll up a blanket or sheet as a balance beam like this Gross Motor Apple Tree Balance Beam.
  • Use a 2 by 4 piece of wood. You can place this right on the ground for a low DIY balance beam, or raise it up by using two other small pieces of wood.
  • Make a chalk balance beam outside on the driveway or on the sidewalk. Here are more ideas for an outdoor sensory diet using a driveway.
  • Get creative and make a Wikki Stix obstacle course like we did with our wikki stix race car path. While this is not the traditional balance beam, it is a huge skill-builder because crawling on the floor on all fours or on three points (two knees and one arm as the child pushes a car along a path) develops core strength and stability.
  • Pool Noodle Balance Beam:
    1. Cut pool noodles in half lengthwise.
    2. Place the pool noodle halves in a straight line on the ground.
    3. Duct tape them together to form a stable balance beam.
  • Cardboard Box Balance Beam:
    1. Cut cardboard boxes into strips or squares.
    2. Tape the cardboard pieces together to make a path along the floor.
balance beam toys

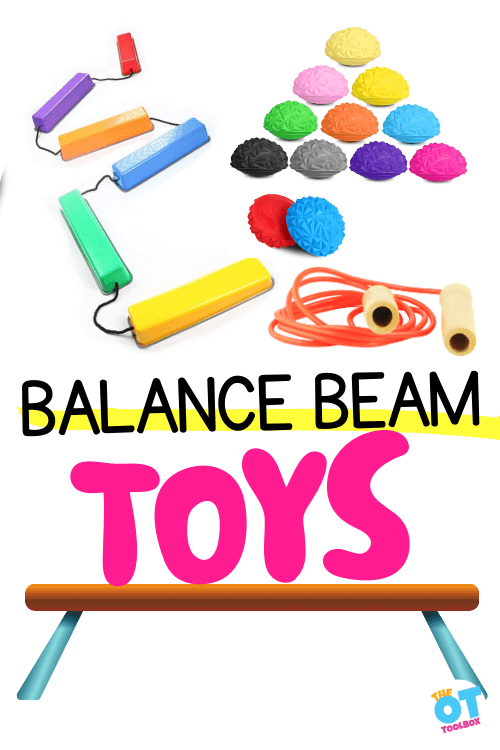
Balance beam toys are another way to develop core strength, stability, and balance, and they can be graded to meet the needs of each child.

Balance Beam Toys

Other balance beam toys are out there on the market, that are inexpensive tools for developing balance, coordination, visual convergence, body scheme, crossing midline, and more.

These skills can be challenged by changing the balance surface, encouraging stepping down and up from the balance beam toy, or using a variety of different balancing toys in a series.

Occupational therapy obstacle courses do this really well.

As an Amazon Influencer, I earn from qualifying purchases. The links below are Amazon affiliate links.

  • This Folding Beam (affiliate link) is great for storage concerns. Add creative balance beam activities like transferring items from a bucket at one end to a bucket at the other end.
  • Balance Pods (affiliate link) can be positioned in any room or activity. Encourage big and little steps by spacing them closely and further apart.
  • Stepping Buckets Balance (affiliate link) challenge motor planning. Place obstacles in between the buckets for more visual tracking while working on vestibular sensory integration.
  • The BSN Gymnastics Curve-A-Beam (affiliate link) can be reconfigured in many patterns and directions.
  • Gonge Riverstones (affiliate link) are a great challenge to the vestibular system with various sloped sides.
  • Connected Balance Beams– (affiliate link) This balance beam toy encourages different balance motor plans, including stepping across an open space.
  • Balance Pods (affiliate link) can be used in many different ways. Position them close together to make a beam, or space them apart to challenge the child with a more difficult balance path.

Looking for more ways to move and play indoors?  Try these ideas:

Indoor Tee Pee

3 Ingredient Kinetic Sand

Colleen Beck, OTR/L has been an occupational therapist since 2000, working in school-based, hand therapy, outpatient peds, EI, and SNF. Colleen created The OT Toolbox to inspire therapists, teachers, and parents with easy and fun tools to help children thrive. Read her story about going from an OT making $3/hour (after paying for kids’ childcare) to a full-time OT resource creator for millions of readers. Want to collaborate? Send an email to contact@theottoolbox.com.
The Tech Wise Family

tech wise

Today, we are talking about an important concept: the “tech wise” family. This is such an important concept for families. Technology is here to stay.  It is the wave of the future. While it definitely has benefits, media can also be problematic.  In this post you will learn how to be “tech wise” with kids and the family. This is more than considering the effects of screentime. Helping families to be tech wise is a newer IADL that OT practitioners may need to add to their toolbox.

tech wise

Being tech wise as a family supports regulation, brain development, learning and motor skills.

What does it mean to be Tech Wise?

This post not only addresses young children and their viewing habits, but their caregivers as well.  Being tech wise means many things:

  • Limiting exposure to certain technology
  • Setting screen time limitations
  • Creating a technology plan as a family
  • Considering the impact of digital advertising on children
  • Privacy considerations
  • Inappropriate content
  • Cyberbullying
  • Sexting or online solicitation
  • Mental health concerns
  • SO much more!

The Tech Wise Family

Media is in schools, a part of socialization, in the community, in the living room, and a part of every aspect of daily life. As parents, it can be tough to manage all of this virtual input.

The American Academy of Pediatrics (AAP) has a lot to say about how to be “tech wise” with kids and the family. 

When your children are viewing media of any kind, are you attending to the commercials and advertising that are being shown?   According to the American Academy of Pediatrics: 

Evidence suggests that exposure to advertising is associated with unhealthy behaviors, such as intake of high-calorie, low-nutrient food and beverages; use of tobacco products and electronic cigarettes; use of alcohol and marijuana; and indoor tanning. Children are uniquely vulnerable to the persuasive effects of advertising because of immature critical thinking skills and impulse inhibition. School-aged children and teenagers may be able to recognize advertising but often are not able to resist it when it is embedded within trusted social networks, encouraged by celebrity influencers, or delivered next to personalized content.”

Let’s go through some things to consider about steps you can take to be tech wise as a family.

A Tech Wise Family Media Plan

Creating a Family Media Plan can help you and your children set media priorities that matter most to your family. It is important to be tech wise, so your children are not in danger or being exposed to the wrong content.

Another thing to consider is digital advertising. This article describes research that shows that children aged 12 an under have limited abilities to understand advertising and marketing as a persuasive intent. The research shows that children 7 years and younger have limited ability to understand that someone else is trying to change their thoughts and behavior.

It says that from ages 7 to 11 years, children can start to recognize television advertising and persuasive intent with their parents’ assistance but lack the abstract thinking skills that help individuals recognize advertising as a larger commercial concept. This tells us that a tech wise family should have conversations about the influence of marketing that children might see in their everyday entertainment.

Children are exposed to advertising and marketing in so many different places: on social media, in TikTok videos, YouTube videos, through gaming apps and video games, and by their favorite influencers online. It can be hard for kids to filter through all of this to see that their favorite celebrities or characters are trying to influence them to buy or do something.

A tech wise family can have a plan for the amount of time spent on screens. A tool like a screen time check list is one option to support the whole family.

Additionally, talking through the things that kids see in their games or entertainment videos is so helpful for parents or guardians.

Media and Young Minds 

The American Academy of Pediatrics has been researching the dangers and effectiveness of media on the young developing mind. 

These are specific strategies a tech wise family can use.

  1. Children younger than 2 years need hands-on exploration and social interaction with trusted caregivers to develop their cognitive, language, motor, and social-emotional skills
  2. They believe children under 18-24 months should have NO exposure to media, except perhaps Skype or Facetime with a live person on the other end.  This includes passive exposure while a parent or sibling has electronics on in the background, or in their presence
  3. Children ages 2-5 can safely be exposed to one hour of media per day.  This is more effective when adults are actively engaging with their child
  4. Young children can not transfer what they learn on a video screen to 3D real life.  A child may be able to do block designs or puzzles on an iPad, but will be unable to transfer this to real puzzles
  5. Well designed programs such as Sesame Street and other PBS programs have consistently shown merit. Again these should be viewed with your child
  6. Digital books are acceptable when viewed and interacted with an adult caregiver
  7. Young children do not understand facts versus fiction. I had a student who wanted to go to heaven like in the movie Coco, so he tried to lie down in the road to get run over. He was too young to understand it is fiction, and that he would not magically come back to life. Another student tried to stab his mother with a butter knife, and said she would still have four lives left if she died. These are frightening stories.
  8. Population-based studies continue to show associations between excessive television viewing in early childhood and cognitive, language, and social/emotional delays, likely secondary to decreases in parent–child interaction when the television is on.
  9. Pediatricians should be asking families about their media use, as well as educating them about the importance of early brain development
  10. Choose high quality programming (such as PBS, Sesame Street, or Common Sense Media)
  11. Recommend no screens during mealtimes and stop all media one hour or more before bedtime (due to the negative influence of visual stimuli on the sleep cycle)
  12. Avoid fast-paced programs (young children do not understand them as well), apps with lots of distracting content, and any violent content.
  13. Turn off televisions and other devices when not in use.
  14. Avoid using media and technology as the only way to calm your child. Although there are intermittent times (e.g., medical procedures, airplane flights) when media is useful as a soothing strategy, there is concern that using media as strategy to calm could lead to problems with limit setting or the inability of children to develop their own emotion regulation.
  15. Monitor children’s media content and what is downloaded. Test apps first.  Some apps appear child friendly, however there is questionable content
  16. Lock devices out of certain apps, limit access to certain tv channels, purchase a device or app that monitors the amount of media use per day.  Here is a list of the 10 best parental control apps.

Parental Media Use 

Part of being a tech wise family is the parents or guardians being a model for their children.

According to the AAP, parents’ background television use distracts from parent–child interactions and child play.  Heavy parent use of mobile devices is associated with fewer verbal and nonverbal interactions between parents and children, and may be associated with more parent-child conflict.

To support parents and children together as a tech wise family, be sure to keep bedrooms, mealtimes, and parent-child interactions free from digital content.

Family and Technology Use: Benefits of Media

Despite all of the warnings, and negativity surrounding technology, it does have some benefits for children of school age and higher:

  • Both traditional and social media can provide exposure to new ideas and information, raising awareness of current events and issues.
  •  Interactive media also can provide opportunities for the promotion of community participation and civic engagement. 
  • Students can collaborate with others on assignments and projects on many online media platforms. 
  • The use of social media helps families and friends who are separated geographically communicate across the miles.
  • Social media can enhance access to valuable support networks, which may be particularly helpful for patients with ongoing illnesses, conditions, or disabilities.
  • Research about screentime also supports the use of social media to foster social inclusion among users who may feel excluded.
  • Social media may be used to enhance wellness and promote healthy behaviors, such as smoking cessation and balanced nutrition.

Risks of Media

  • A first area of health concern is media use and obesity. People are often sedentary and prone to snacking while watching television
  • Evidence suggests that media use can negatively affect sleep hygiene. Exposure to light (particularly blue light) and activity from screens before bed affects melatonin levels and can delay or disrupt sleep
  • Children who overuse online media are at risk of problematic Internet use, and heavy users of video games are at risk of Internet gaming disorder. The Diagnostic and Statistical Manual of Mental Disorders, Fifth Edition, lists both as conditions in need of further research. Symptoms can include a preoccupation with the activity, decreased interest in offline or “real life” relationships, unsuccessful attempts to decrease use, and withdrawal symptoms. 
  • The prevalence of problematic Internet use among children and adolescents is between 4% and 8%,and up to 8.5% of US youth 8 to 18 years of age meet criteria for Internet gaming disorder
  • the use of media while engaged in academic tasks has negative consequences on learning
  • There is some evidence of a newer condition termed virtual autism linking media use with autistic type symptoms
  • Evidence gathered over decades supports links between media exposure and health behaviors among teenagers such as early drug, alcohol, and tobacco use
  • Cyberbullying, sexting, and online solicitation
  • Mental health concerns – students who browse and follow media versus interacting with people online have a higher chance of depression
  • Privacy – young people do not understand what information to keep private. Once information is on the internet, it is hard to erase it.
  • Some parents can be distracted by media use, and miss important opportunities for emotional connections that are known to improve child health. When a parent turns his or her attention to a mobile device while with a young child, the parent is less likely to talk with the child.

Monitoring Media as a Tech Wise Family

One of the most important ways to support children in their development and learning as a technology wise family is by monitoring the technology use. Because technology is such an ingrained part of everyday life, there is simply no getting around it in most cases. What we can do as families, is support our children’s development by monitoring the usage of technology on a daily basis.

As parents in a tech wise family, we can offer balance. We can support our kids’ minds and nervous systems through play, learning, sensory motor input and regulation so learning, emotions, behaviors, and mental well-being flourishes. Much of this can be impacted by another crucial aspect, the parents’ co-regulation abilities.

The following are some recommendations for supervising and monitoring media within the family:

  • Develop, consistently follow, and routinely revisit a Family Media plan
  • Address what type of and how much media are used and what media behaviors are appropriate for each child or teenager, and for parents. 
  • Place consistent limits on hours per day of media use as well as types of media used.
  • Promote that children and adolescents get the recommended amount of daily physical activity (1 hour) and adequate sleep (8–12 hours, depending on age).
  • Recommend that children not sleep with devices in their bedrooms, including TVs, computers, and smartphones. Avoid exposure to devices or screens for 1 hour before bedtime.
  • Discourage entertainment media while doing homework, designate media free times together.
  • Promote activities that are not technology related. Make non-tech activities a part of every day. Some ideas include reading, talking, hiking, board games, mini golf, etc.
  • Communicate guidelines to other caregivers, such as babysitters or grandparents, so that media rules are followed consistently.
  • Engage in selecting and co-viewing media with your child to insure it’s safety.
  • Have ongoing communication with children about online citizenship and safety, including treating others with respect online and offline, avoiding cyberbullying and sexting, being wary of online solicitation, and avoiding communications that can compromise personal privacy and safety.
  • Actively develop a network of trusted adults who can engage with your children.
  • Have young students use their technology in the presence of adults. Move the computer to the kitchen table, no media in the bedroom, or on the bus.
  • Use spyware and other apps to limit and control viewing access. PC Mag has a list of recommendations
  • Last, but not least, engage in fun, non-technology activities with the whole family. Try these service ideas for ways to support the community.

When I see the amount of young babies sitting in strollers watching an iPhone video, it makes me cringe. I have to restrain myself from commenting to them, or reciting facts and figures. I think there are some people who know and don’t care, however I believe there is an equal number who follow the crowd and have no ideas of the dangers out there on both mental and physical development.

I am thankful my girls grew up in the early 2000’s before media and internet use exploded.  We stuck to VHS tapes, PBS, and Disney Classics.  No television in the bedroom, and no phones until middle to high school. The three of us shared 4 GB of data a month, which would last a teenager a day or two now. Be mindful and wise about family and technology use.

Tech Wise Solutions: Use a Screen Time Checklist

One tool at your disposal is to use a checklist as a tool to monitor screentime. Set up limits by requiring certain non-screen activities be completed prior to entertainment on screens.

Here is a printable tool you can use. Enter your email address into the form below and the printable checklist will be emailed to your inbox. You can then print it from any device.

This resource is also available inside our Membership Club. Log in and access the tool.

Grab the Screen Time Checklist

    We respect your privacy. Unsubscribe at anytime.

    Victoria Wood, OTR/L is a contributor to The OT Toolbox and has been providing Occupational Therapy treatment in pediatrics for more than 25 years. She has practiced in hospital settings (inpatient, outpatient, NICU, PICU), school systems, and outpatient clinics in several states. She has treated hundreds of children with various sensory processing dysfunction in the areas of behavior, gross/fine motor skills, social skills and self-care. Ms. Wood has also been a featured speaker at seminars, webinars, and school staff development training. She is the author of Seeing your Home and Community with Sensory Eyes.

    Stellaluna Activities

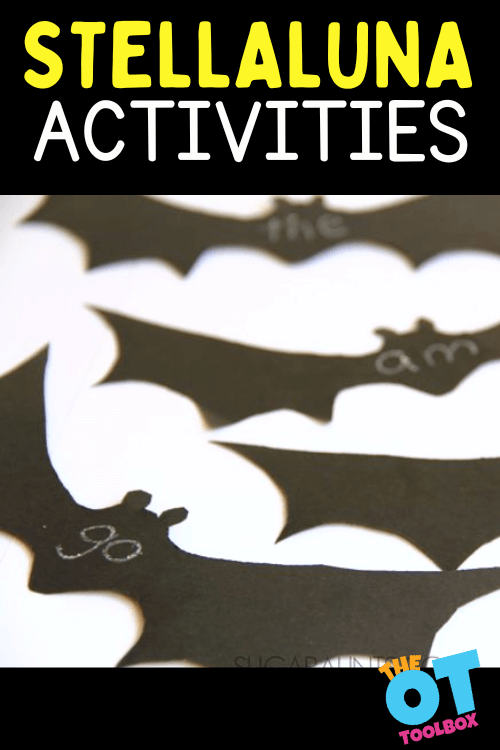
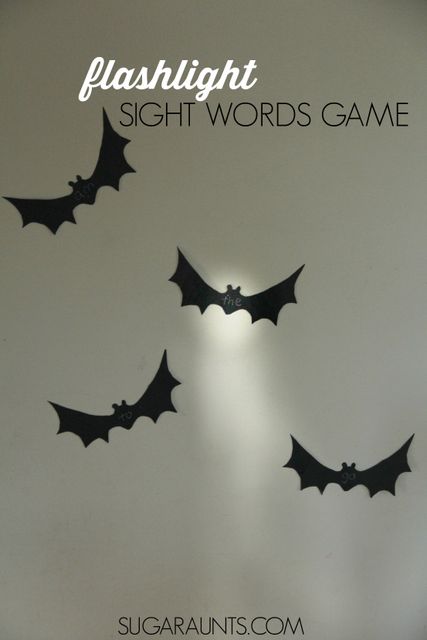
    Bats cut from construction paper with sight words written in chalk. Text reads "stellaluna activities"

    Today we have several Stellaluna activities that we created many years ago. This Halloween fine motor task doubles down on the skill-building. With one bat craft based on the children’s book, Stellaluna, we’re covering skills like handwriting, scissor skills, math, reading, bilateral coordination, visual scanning, and much more!

    As an Amazon Influencer, I earn from qualifying purchases.

    Stellaluna activities

    Stellaluna Activities

    If you haven’t read the children’s book, Stellaluna, then you are in for a treat. The Stellaluna activity and bat games we have to share today are fun ways to read the book and play with a bat theme, and the bat activities would work for a Halloween party with kids, too!

    Scroll on for Stellaluna games that teach and are fun!

    Stellaluna by Janell Cannon is a sweet story of a bat who is adopted by a bird family after he is knocked from his mother’s grasp during a flight.  We see how different and same the bat and the birds are and also notice the differences.  We were able to talk about how we as family members are all the same, yet different, and how other people we meet or know might be different and do things differently, but inside we are all the same.

    Going on the theme of differences and similarities among the bat and his new bird family, we decided to examine sight words, Upper case letters, and numbers with bats! For more fun, make a bat craft to go along with your Stellaluna game, too!

    While this is a great preschool book extension activity, the best thing about our Stellaluna game is that we modified it to fit the needs of my three older kids.  

    We practiced upper case letter identification with the 3 year old preschooler, sight word identification with the Kindergartner, and math facts with the Second grader. The 16 month old toddler just liked grabbing the bats from the wall.  

    Very fun and age appropriate, but we’ll share more about what the older kids did today 😉

    Stellaluna Bat Activity

    This post contains affiliate links.
    If you haven’t read the book Stellaluna (affiliate link), grab it up at your library!  This was a new book to us, and one that I’m so glad we read. 

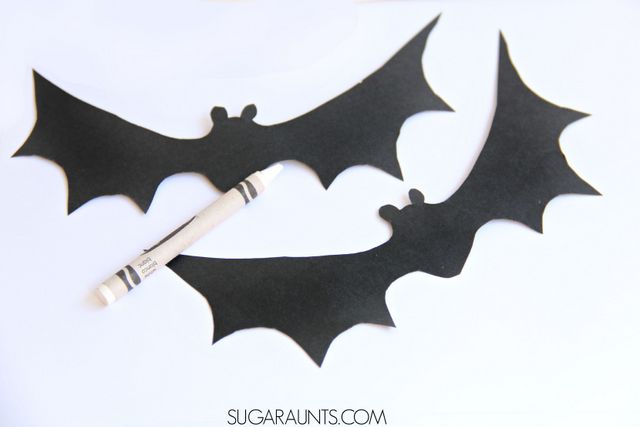
    For this Stellaluna craft, you’ll need just a few materials:

    • Black construction paper
    • Bat template
    • White crayon

    Then, if you want to work on visual processing skills needed for reading and writing such as the skills:

    1. visual scanning– Needed to scan on the page or overhead on the board to copy words and sentences. When the eyes shift back to the page and then back to the copying source, sometimes the eyes shift and get lost. This is how we have omissions in handwriting tasks.
    2. visual tracking– This visual skill is essential for following along a line of words in a reading task.
    3. visual attention– When the eyes shift on the pages without sustained attention, we see missing words or lines of text.
    4. visual memory– This skill is difficult for many children, and it’s how we recall what we’ve seen to work on memorizing, reading, and writing skills.

    then you’ll also need:

    • Flashlight(s)
    • Tape
    • A yardstick or ruler (for visual tracking skills)
    Bat template for a Stellaluna activity

    Let’s start with using the bat template to make the bat craft.

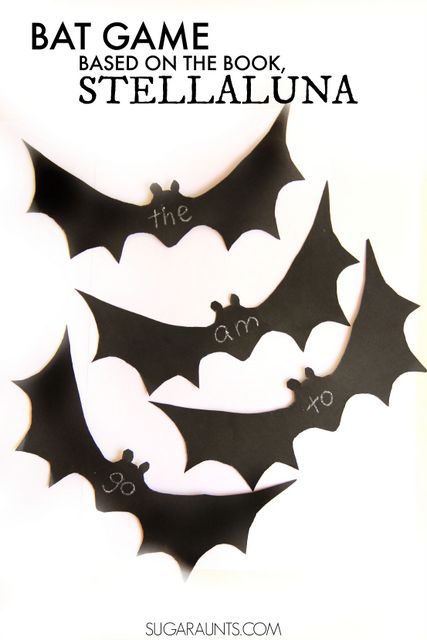
    1. First, print off this free printable bat stencil.  Cut out the bat and trace it onto black cardstock (affiliate link) paper.  
    2. We cut out about 15 bats, but you can cut out as many bats as you need.  If you’ll be practicing letters, you may want one for each letter of the alphabet.
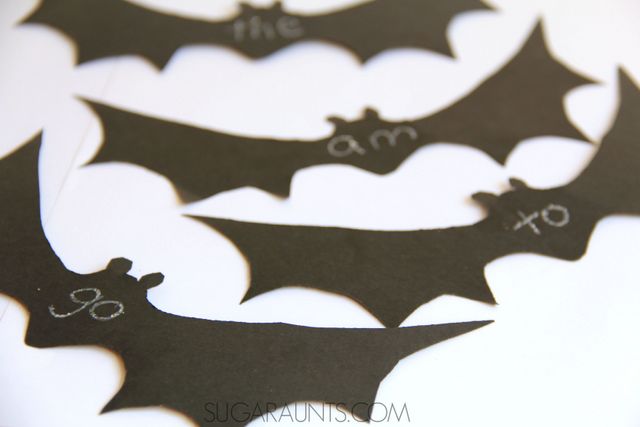
    3. Write on the bats with a white crayon.  We practiced sight words first and wrote out the words my Kindergartener has been working on. 
    4. Tape the bats to the wall and get ready to play!  
    Stellaluna book bat games including sight word games, math facts game, letter identification game.  This is a fun twist on learning facts and words for preschoolers, kindergarten, and second grade, with a bat theme!  I love the flashlight game!

    StellaLuna Activity for Sight Words

    First, we played a flashlight sight word activity as a warm-up.  I read through a few pages of the book and when we got to a sight word, my son used the flashlight to find the matching sight word on the wall.  He really got into this activity.  

    Note that this activity was done many years ago (2015) and we were focusing a lot on sight words in reading.

    Now, this might not be the optimal way to target reading skills. Using vocabulary words from Stellaluna may be more ideal for working on reading skills. Feel free to use this activity with the reading curriculum or standards that work for your classroom or school.

    Stellaluna Game

    Next, to make this Stellaluna activity into more of a game, we created a flashlight race using the same bat cut outs.

    We pulled out a second flashlight and when we reached a sight word in the book, the two older kids raced to flash their light on the sight word.  

    The first to light it up was the winner.  

    Using the flashlights in a dark-ish room reminded us of Stellaluna (affiliate link) flying at night and how the birds would need a flashlight to see.

    Again, feel free to use the words from the book on the bats. Just turn down the lights in the classroom and pull the shades to darken the room. Then, use the flashlights to “race” to find the word that you call out.

    StellaLuna Math Activity

    We also used these same bat cut outs to work on math skills.

    1. To play the math facts game with my second grader, I wrote out numbers 10-20 on the bats.  (Just flip the bats over and use the other side if you are playing more than one game!  No need to cut out more bats, unless you need them.)  

    2. Tape the numbered bats to the wall in a random arrangement.  This game was fun for her to practice her math facts up to 20.  

    3. I called out a number and then had her roll a die.  

    4. She then had to add the number to the number that I called out and run over to the wall and hit the right number.  

    We also did a round of subtraction.  You can make this more of a game by adding a second player. Then, extend the math activity by using a couple of flashlights to make this a fun racing game in a dark room.

    Here are more Halloween math activities that you can also try.

    Bat Letter Identification Activity

    Finally, we used the same bat shapes to work on letter identification skills.

    For my preschooler, we wrote upper case letters on the bats and taped them to the wall.  

    She played a version of the flashlight game as we scanned through the book.  I pointed to a lower case letter and named it and she had to flash the light on the letter on the wall.  

    We also practiced letter sounds by saying the sound the letter makes and she had to find the letter on the wall.

    Scanning for the correct bat on the wall was a great way to incorporate visual scanning and visual perceptual skills into this learning game activity.  

     
    Stellaluna book bat games including sight word games, math facts game, letter identification game.  This is a fun twist on learning facts and words for preschoolers, kindergarten, and second grade, with a bat theme!  I love the flashlight game!


    Stellaluna book bat games including sight word games, math facts game, letter identification game.  This is a fun twist on learning facts and words for preschoolers, kindergarten, and second grade, with a bat theme!  I love the flashlight game!
     

    More Stellaluna Activities

    Looking for more Stellaluna (affiliate link) activities?  Here are some fun bat activities that pair well with the book:


    Free Stellaluna Bat Template

    Print off the template and trace it onto construction paper. Enter your email address into the form below to access this resource. You’ll also find this item inside our Membership club, along with many other bat themed activities and resources.

    Free Bat Stencil

      Are you interested in resources on (check all that apply):
      We respect your privacy. Unsubscribe at anytime.

      Colleen Beck, OTR/L has been an occupational therapist since 2000, working in school-based, hand therapy, outpatient peds, EI, and SNF. Colleen created The OT Toolbox to inspire therapists, teachers, and parents with easy and fun tools to help children thrive. Read her story about going from an OT making $3/hour (after paying for kids’ childcare) to a full-time OT resource creator for millions of readers. Want to collaborate? Send an email to contact@theottoolbox.com.
      Positive Self Talk for Kids

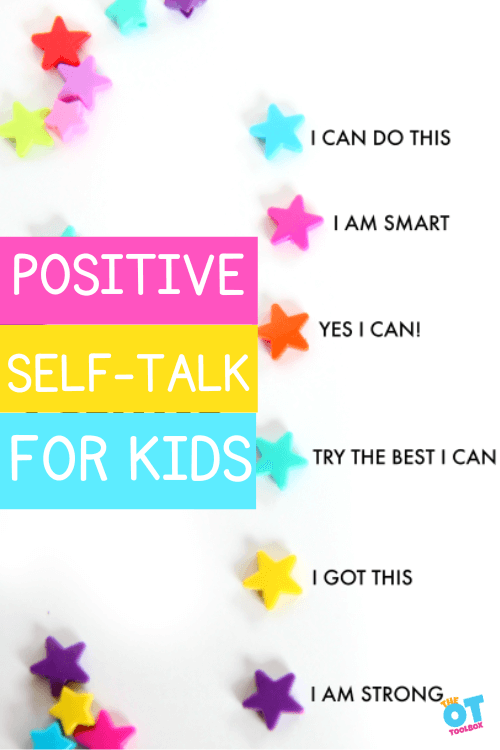
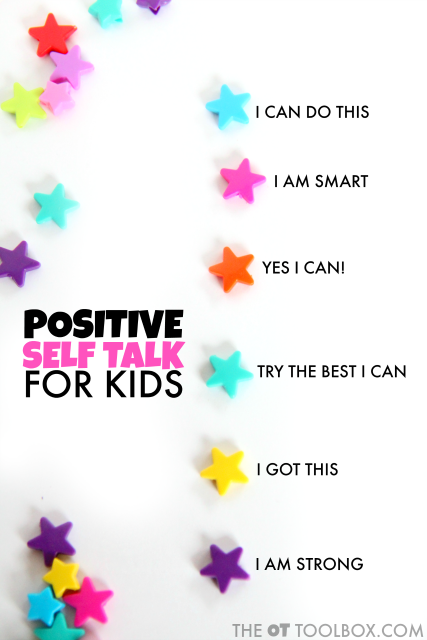
      Beads next to words saying I can do this, I am smart, Yes I can, Try the best I can, I got this, and I am strong. Text reads "positive self talk for kids"

      This blog post on positive self talk for kids covers how self-talk is a powerful tool in supporting mindset. We’ll also include a positive self talk activity that you can create with kids in therapy sessions or at home as a support tool. Positive self talk is a great coping tool kids for kids, too.

      positive self talk for kids

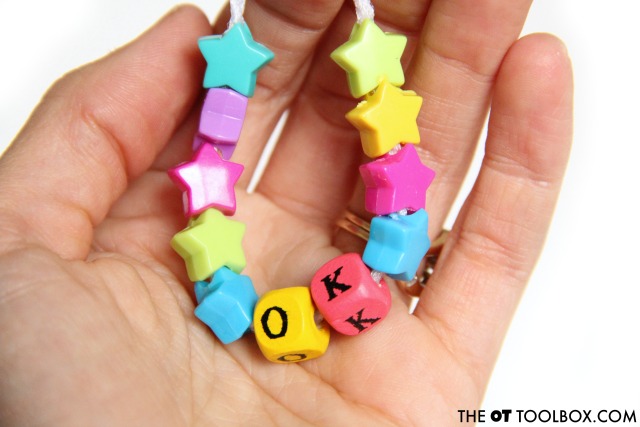
      Make a positive self talk kids craft with colorful beads.

      Positive Self Talk for Kids

      Positive self talk can make a big difference for kids! From seeing that big test in front of them, to walking into a new classroom full of strangers, to gearing up for a big game…kids can become overwhelmed and stressed out from daily tasks.

      Each of these situations can be a source of worries that impact functional performance. When the worries become too much, a self-regulation support may be needed.

      One such tool is the use of positive self talk.

      Teaching kids positive self talk can be a minor tool to use in building confidence, easing anxiety, and helping with attention and focus.  As a mom and an occupational therapist, I’ve seen the power of positive self-talk in my own kids and therapy clients.

      These self-talk beads are a fun way to show kids how to use positive self talk to their advantage! 

      This post is part of our series on executive functioning skills and just one tool to have in your toolbox when helping kids build the skills they need for function and independence!

      Self-talk is a powerful tool when it comes to self-regulation because of the self awareness component and knowing when to implement self regulation strategies.


      Teach kids positive self talk with these bracelets for helping with attention, self-confidence, self-esteem, and executive functioning skills.


      Teach Kids Positive Self Talk

      Talk to your kids or students about the power of self-talk.  Ask them how they feel when they hear positive and negative self-talk statements.  
       
      Show them how they can identify with these feelings during situations in school, on the sports team, or when with friends.  
       
      Each child is different, but there are common concerns that kids might have. From anxiety over a test to feeling self-conscious around peers, a positive thought can really help. 
       
      Executive functions are heavily dependent on attention.  Read about the attention and executive functioning skill connection and the impact of attention on each of the executive functioning skills that children require and use every day.
       
       
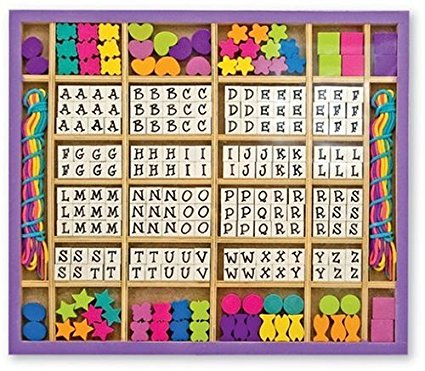
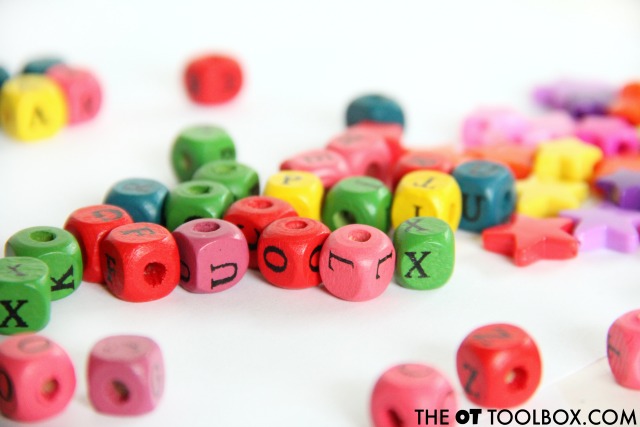
       alphabet bead kit
       
      This alphabet bead kit is perfect. (affiliate link) As an Amazon Influencer, I earn from qualifying purchases.


      Positive self talk for kids

      Self talk does wonders for kids (and adults!)
       
      Self-talk can boost self-confidence, self-esteem, self-control, and influence impulse decisions.  When kids are in a situation where they question themselves or put them selves down in their minds, they can end up struggling even more.  
       
      Related read:  Read more about attention and how kids can improve attention at home and at school.
       
      Help kids understand positive self talk with these bracelets for helping with attention, self-confidence, self-esteem, and executive functioning skills.
       

      How to make positive self-talk bracelets

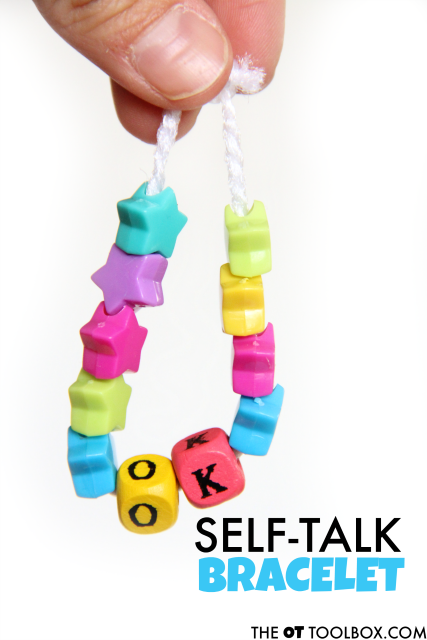
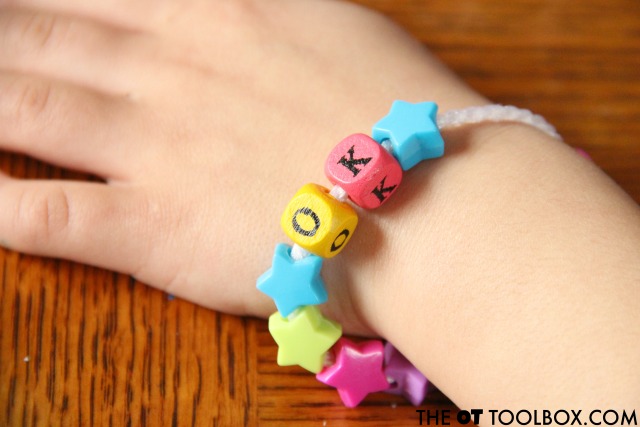
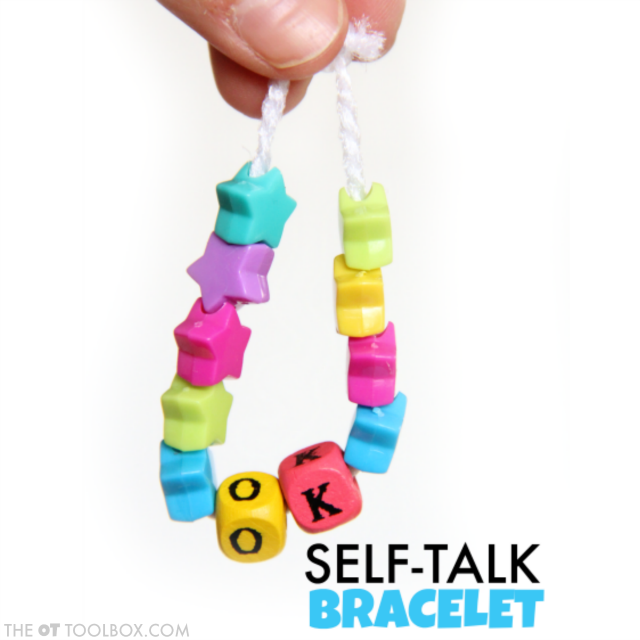
      We made a self talk craft years ago. It’s a fun way to teach the skill of self-talk to children and the self talk bracelet is a visual and tactile reminder of their superpowers.
       
      (Affiliate links are included in this post.)
      You’ll need just a couple of materials for this self talk bracelet.
       
      • Yarn
      • Wooden Alphabet Beads
      • Star Beads
       
      Any type or style of beads would work, though.
       
      Kids can use these positive self talk bracelets for helping with attention, self-confidence, self-esteem, and executive functioning skills.
       
      To make the self talk craft, follow these directions:
       
      1. First, spread out the beads and start talking with your kids about positive self talk!  


      Teach kids positive self talk with these bracelets for helping with attention, self-confidence, self-esteem, and executive functioning skills.
       
      2. Assign each of the colored beads to a positive statement.  
       
      3. Then help your child to pick out the statements that speak to them.  
       
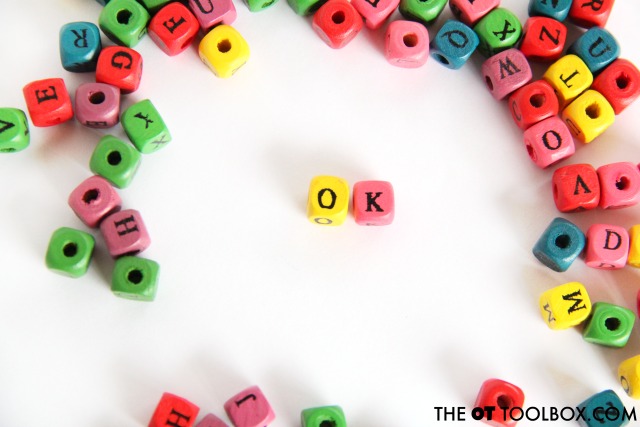
      Use the alphabet beads to create a positive statement they can see on their bracelet.  Ideas include: “It’s ok!”, “Yes I can!”, or “I can do this”.  
       
      Teach kids positive self talk with these bracelets for helping with attention, self-confidence, self-esteem, and executive functioning skills.
       
       
      If the children you’re working with don’t want to put words on their bracelet, they can just assign colors to different positive thoughts and add them to their bracelet.  
       
      Teach kids positive self talk with these bracelets for helping with attention, self-confidence, self-esteem, and executive functioning skills.
       
      When children wear their bracelet, they can see and feel the colors and remember positive thoughts!  
       
      We did a different activity similar to this when we talked about the feelings of others.  
       
      Check out our empathy beads, too!
       
      Teach kids positive self talk with these bracelets for helping with attention, self-confidence, self-esteem, and executive functioning skills.


      Positive Self-Talk for Kids Information

      As therapy providers, it’s essential to understand the concept of “private speech.” This is an easy way for our clients to understand the self-talk concepts they run through their head are a kind of private conversation they have with themselves during tricky situations or tasks.

      This concept of private speech was introduced by Les Vygotsky, a psychologist who studied “private speech,” which is when individuals talk to themselves during problem-solving or task completion.

      He argued that this self-talk plays a crucial role in cognitive development during childhood.

      Private speech, or self-talk, is simply talking to oneself, a practice that everyone engages in, although it’s often considered unusual when done aloud. The goal is to help children externalize their private speech, gradually internalizing it over time.

      In therapy, we encourage children to use private speech as a tool. It’s like talking through a problem, which is easy for a child to understand.

      However, if private speech turns into verbal speech, or if a child is using private speech about a task that was previously mastered, it could indicate that the child is facing challenges or confusion with the activity. Remember, we all talk to ourselves, especially when we’re tackling difficult tasks. So, encourage your child to use their self-talk and let them know it’s a helpful tool for growth and learning.

      Colleen Beck, OTR/L has been an occupational therapist since 2000, working in school-based, hand therapy, outpatient peds, EI, and SNF. Colleen created The OT Toolbox to inspire therapists, teachers, and parents with easy and fun tools to help children thrive. Read her story about going from an OT making $3/hour (after paying for kids’ childcare) to a full-time OT resource creator for millions of readers. Want to collaborate? Send an email to contact@theottoolbox.com.
      Rainbow Writing Letter Formation Activity

      Colorful letter As and lowercase a's with overlapping colors. Text reads "rainbow writing"

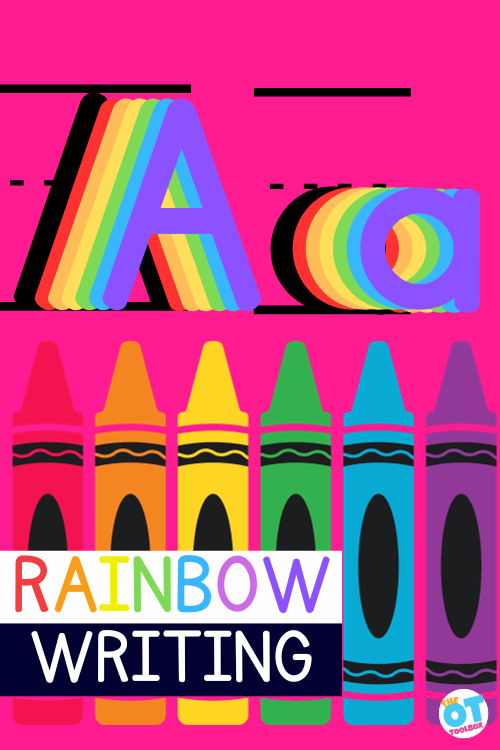
      This quick and easy rainbow writing activity is an easy handwriting activity to working on letter formation and letter construction.  Rainbow writing handwriting is a strategy to work on letter formation as a multisensory learning activity for kids. This handwriting activity is an Easy Handwriting strategy that can be so helpful in teaching letter formation and pencil control. 

      rainbow writing

      You can practice letters with rainbow writing using different utensils. We used rainbow writing with chalk before too.

      What is Rainbow Writing

      Rainbow writing might be a handwriting activity that you’ve heard of before. Many times, we see rainbow writing as an option for practicing sight words or high frequency words, especially as a multi-sensory learning options.

      Typically, you’ll see rainbow writing as one way that kids can practice writing words and letters: They are asked to write the words in a color of the rainbow and then trace over those letters with another color, thus making a rainbow of letters.

      Rainbow writing is a great strategy for practicing handwriting! Kids get multiple attempts at forming letters, working on motor planning, pencil placement, and repetition (practice) that very much plays a part in handwriting legibility.

      Things to Watch for with Rainbow Writing

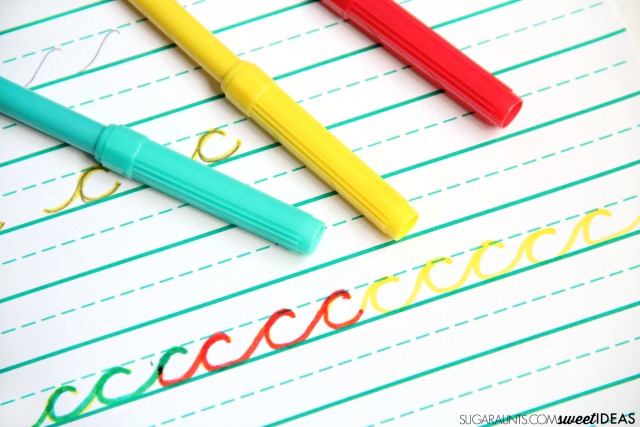
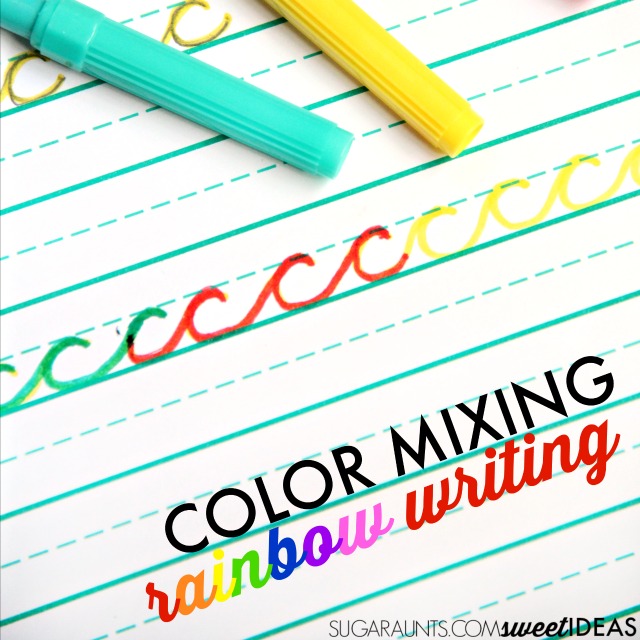
      Color mixing rainbow writing activity for helping kids with letter formation

      When tracing, there are some things to consider. Especially with rainbow writing, kids can develop bad letter formation habits. Read through this resource on tracing sheets to see the pros and cons of tracing with kids.

      Some things you’ll want to consider about rainbow writing activities:

      • Be sure to watch how the student starts the letters when they rainbow write. It can be easy to start a poor muscle memory for writing the letters if they start at the wrong starting point or form the letters incorrectly. When they rainbow write each letter and it progressively gets worse, this can create an incorrect motor plan in the handwriting process.
      • Make sure the child that is using rainbow writing to practice letters don’t progressively move their pencil in bigger and bigger strokes as they include each color.
      • Some kids tend to make the rainbow letters with colors next to each other like a rainbow rather than tracing on top of each color. Ask the student to make a mixed up rainbow by tracing right on top of each color.

      How to use Rainbow Writing for handwriting

      Rainbow writing is a way to work on legibility of written work.

      Helping kids write letters with correct letter formation is essential for legibility, especially as kids get older and are required to produce more written work at a faster rate.  Consider the high school student that needs to rapidly jot down notes.  If letters are formed from bottom to top or in sections, their speed and legibility will drastically drop. Sometimes it is speed OR legibility  that suffers when a child needs to produce more amounts of written work in a specific period of time (i.e. copying down notes as a teacher rattles off details.    

      The younger student will be affected by inaccuracies in letter formation as well. Around the third grade, students are responsible for jotting down their homework assignments into a planner.  

      When the child is bombarded by classroom sensory input (pencil sharpeners, students, desk chairs moving, hallway distractions, coughing classmates…) difficulties with letter formation can result in illegible homework lists and trouble with re-reading the assignment list when the student attempts to start on homework.  

      Rainbow Writing Color Changing Activity

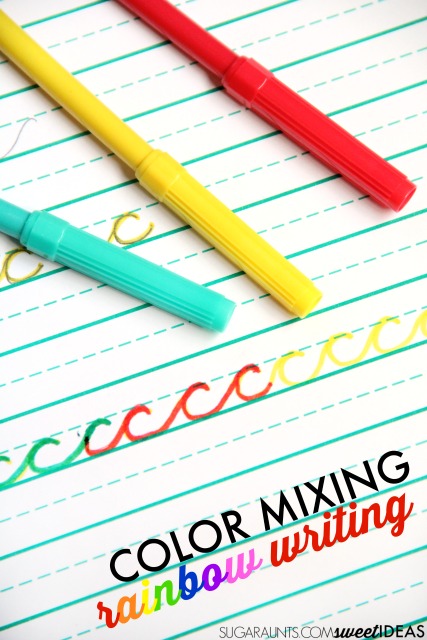
      There’s more to rainbow writing than incorporating colors and sensory experiences into handwriting. Color Mixing Rainbow Writing is a creative way to help kids learn the right way to actually form letters, because the task allows children to self-correct their written work right in the moment.

      They can see where their letter formation has veered into poor letter size or placement. Rainbow writing then becomes a strategy to improve motor planning in handwriting and pencil control as well.    

      Affiliate links are included below.

      In the handwriting activity shared here, we are taking rainbow writing a step further.

      This letter formation activity is really simple and a LOT of fun.  Kids can work on typical motor pattern of letters by exploring color mixing.  

      MATERIALS for Rainbow Writing

      When you rainbow write, a student can use different colors of crayons, markers, colored pencils, or even chalk. You can use colors of the rainbow, or if you want to work on color changing, use just a couple of the colors.

      • You’ll need just three markers for this activity.   
      • Red, Yellow and Blue markers  are all you need to work on letter formation with color mixing.  We used dollar store markers, but also tried these washable markers (affiliate link- As an Amazon Influencer, I earn from qualifying purchases.) and the activity worked too. 

      How to rainbow write with color changing

      1. For this activity, you’ll need to first write the letters that you are working on in one color. Then, using another color, trace over the letters to create a new color.  

      2. Mixing the yellow and red made orange letters and mixing the yellow and blue markers made green letters.  

      Kids can work on letter formation but experience the color changing of the markers when they write over letters in different colors.

      Some different options to try with this rainbow writing activity:

      • Use just 2 colors so kids can try mixing two primary colors to see what the colors make
      • Not when the colors do not change: did they marker lines go off the lines? Can letters be written again or can the student try again to make the colors change?
      • Some kids may benefit from a model that is written in one color by the teacher, therapist, or parent. Then, the student can try to keep their letters on the lines to ensure proper size, spacing, and formation
      • Try making color coded messages to one another using the color changing activity
      • Work on phonetic awareness, by making vowels or phenomes one color and consonants or letter blends another color.
      Rainbow Writing Activity with Color mixing for handwriting.


      Tips for Rainbow Writing

      Because kids can develop bad habits with rainbow writing, here are some things to keep in mind.

      1. Work on letter formation with this activity by providing kids with the amount of assistance they need to form letters correctly.  At first, they may need verbal, physical, and visual cues to form letters correctly.
      2. Encourage students to form the letters from top to bottom and in the correct way.  When they re-trace the letters with a second color, be sure they are forming and tracing the letters correctly.    
      3. When kids trace over the colors, they will be forming letters slowly in order to trace over the letters and ensuring the colors mix.  
      4. By tracing over the lines to form letters, they are building the typical motor patterns needed to write the letters correctly and efficiently.  

      We worked on cursive letters with this activity, but it would work very well with printed letters, particularly letters that are typically reversed or confused like b and d reversals.  

      Here is more information on letter reversals to consider.

      Color mixing rainbow writing activity for helping kids with letter formation

       Looking for more creative ways to work on handwriting?  Check out these creative ways to help kids work on their written work:  

      Functional Handwriting Practice Ideas

      What is Visual Spacing

      Visual Tracking Tips and Tools

      Handwriting Spacing Tool and Spatial Awareness Tips and Tools

      DIY Dry Erase Board Handwriting Travel Kit

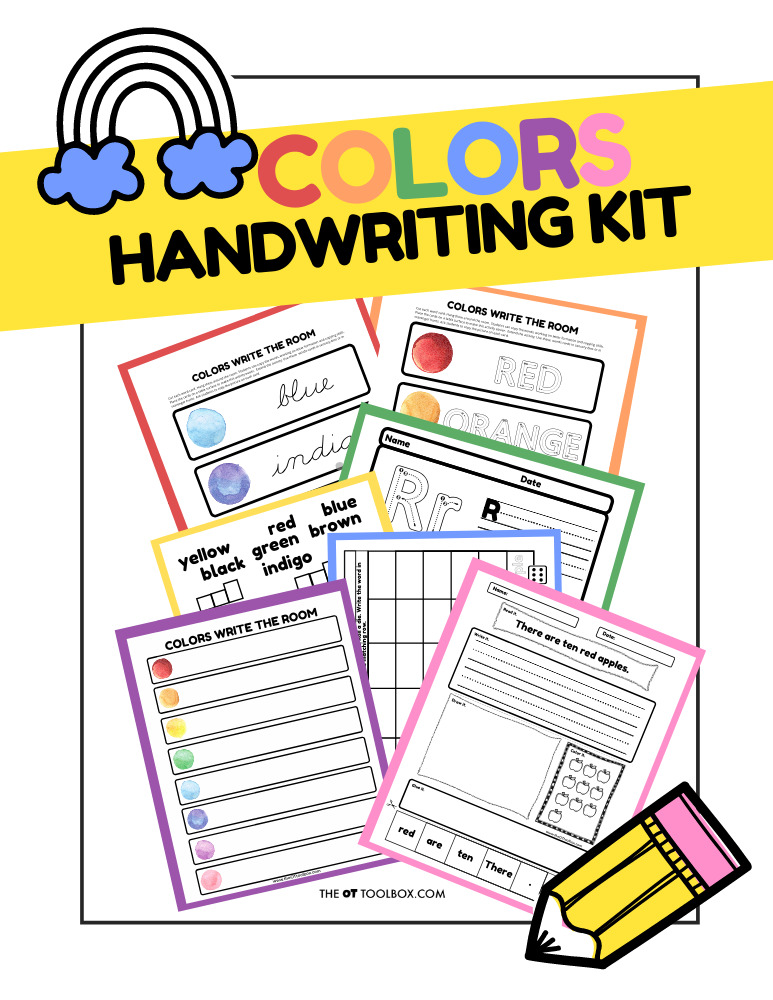
      Colors Handwriting Kit

      Rainbow Handwriting Kit– This resource pack includes handwriting sheets, write the room cards, color worksheets, visual motor activities, and so much more. The handwriting kit includes:

      • Write the Room, Color Names: Lowercase Letters
      • Write the Room, Color Names: Uppercase Letters
      • Write the Room, Color Names: Cursive Writing
      • Copy/Draw/Color/Cut Color Worksheets
      • Colors Roll & Write Page
      • Color Names Letter Size Puzzle Pages
      • Flip and Fill A-Z Letter Pages
      • Colors Pre-Writing Lines Pencil Control Mazes
      • This handwriting kit now includes a bonus pack of pencil control worksheets, 1-10 fine motor clip cards, visual discrimination maze for directionality, handwriting sheets, and working memory/direction following sheet! Valued at $5, this bonus kit triples the goal areas you can work on in each therapy session or home program.

      Click here to get your copy of the Colors Handwriting Kit.

      Colleen Beck, OTR/L has been an occupational therapist since 2000, working in school-based, hand therapy, outpatient peds, EI, and SNF. Colleen created The OT Toolbox to inspire therapists, teachers, and parents with easy and fun tools to help children thrive. Read her story about going from an OT making $3/hour (after paying for kids’ childcare) to a full-time OT resource creator for millions of readers. Want to collaborate? Send an email to contact@theottoolbox.com.

      Tracing Letters with Chalk

      chalk lines overlapping to make letter z in several colors of chalk. Text reads "chalk tracing"

      Have you heard of rainbow writing? How about chalk rainbow writing? There are many fine motor and visual motor skills that are used when using rainbow writing as a handwriting practice strategy! Let’s break down what rainbow writing is and how this chalk writing activity is a skill-builder for letter formation. Also check out our handwriting library for more ideas.

      tracing letters with chalk

      Tracing letters with chalk is a handwriting practice strategy that helps to build muscle memory when learning letter formations. You can rainbow write on paper or with different utensils such as crayons, colored pencils, markers, or chalk!

      Tracing Letters with Chalk

      Tracing letters with chalk is a colorful way to practice letter formation. The strategy builds skills in visual motor and hand eye coordination in order to trace over the lines of a letter.

      When you use chalk tracing to practice a letter or a word, the child traces over the letter with each color of the rainbow.

      They will end up with 6 or 7 trials in writing over the letter.

      Some things to consider with tracing with chalk

      Tracing over letters with chalk, crayons, or colored pencils is a powerful strategy when practicing letter formation and the line awareness needed for letter size and line placement.

      Read through this resource on tracing sheets to see the pros and cons of tracing with kids.

      Some things you’ll want to consider about chalk tracing writing activities:

      • Be sure to watch how the student starts the letters. It can be easy to start a poor muscle memory for writing the letters if they start at the wrong starting point or form the letters incorrectly. This creates an incorrect motor plan in the handwriting process.
      • Make sure the letters don’t progressively get worse as the student traces over the letters when rainbow writing.
      • Some kids tend to make the rainbow letters with colors next to each other like a rainbow rather than tracing on top of each color. Ask the student to make a mixed up rainbow by tracing right on top of each color.

      Rainbow Writing with chalk

      We did rainbow writing with chalk one day. This was a great way to work on letter formation while outside because there was the added benefit of playing on the ground.

      Using chalk to practice letters supports development by adding proprioceptive input through the core, strengthens the shoulder girdle for adding more stability for writing, as well as adding strength and stability to the wrist. It’s also a great way to focus on wrist range of motion exercises in a fun way.

      Upper body strength in this way supports distal finger dexterity and mobility needed for writing.

      Chalk Rainbow Writing

      This chalk tracing activity was a lot of fun.

      We have a big ol’ bucket of chalk that we play with almost everyday.  Our sidewalk and driveway have been know to be very colorful at times!  We took the chalk to our sidewalk squares one day this week and practiced a little letter formation.

      Our sidewalk squares were the perfect area to practice forming letters accurately.  I used simple verbal cues to describe the formation of each letter (big line down, little curve around, little line) and we started in the corner of each square as we made the letters. 

      I made the letter first and Big Sister and Little Guy watched.  Then we went to work making our letters very colorful!

      Tracing the letters over and over again was a great way to practice accurate formation.  Big Sister got into this activity.  Little Guy only wanted to make a few letters that are in his name.

      When the child is tracing the letters over and over again, they become more efficient at planning out and executing the movements needed to make a letter accurately.  This activity is great for a new writer because they are given a confined space to practice a letter, and visual cues (and verbal prompts from mom).


      Use the activities and ideas in The Handwriting Book for more ways to work on writing skills.

      The Handwriting Book is a comprehensive resource created by experienced pediatric OTs and PTs.

      The Handwriting Book covers everything you need to know about handwriting, guided by development and focused on function. This digital resource is is the ultimate resource for tips, strategies, suggestions, and information to support handwriting development in kids.

      The Handwriting Book breaks down the functional skill of handwriting into developmental areas. These include developmental progression of pre-writing strokes, fine motor skills, gross motor development, sensory considerations, and visual perceptual skills. Each section includes strategies and tips to improve these underlying areas.

      • Strategies to address letter and number formation and reversals
      • Ideas for combining handwriting and play
      • Activities to practice handwriting skills at home
      • Tips and strategies for the reluctant writer
      • Tips to improve pencil grip
      • Tips for sizing, spacing, and alignment with overall improved legibility

      Click here to grab your copy of The Handwriting Book today.

      Colleen Beck, OTR/L has been an occupational therapist since 2000, working in school-based, hand therapy, outpatient peds, EI, and SNF. Colleen created The OT Toolbox to inspire therapists, teachers, and parents with easy and fun tools to help children thrive. Read her story about going from an OT making $3/hour (after paying for kids’ childcare) to a full-time OT resource creator for millions of readers. Want to collaborate? Send an email to contact@theottoolbox.com.

      Handwriting Practice Kids Don’t Hate

      outline of slouched child holding a pencil with upset lines coming from head. Text reads "stress free handwriting practice"

      If you’ve worked with kids in school based OT or in peds occupational therapy in outpatient settings than you may need a few handwriting practice ideas that kids’ don’t hate. You’ve probably seen it: Kids that struggle with handwriting really can give push-back on the writing practice, especially when they perceive the task as hard or meaningless. Handwriting problems mean that writing is hard, so why practice something that is difficult to do? Today, we’re covering some low-key and low pressure handwriting practice ideas that you can add to your handwriting toolbox!

      handwriting practice

      Use these handwriting practice tips to support writing needs.

      Handwriting Practice

      Handwriting can be a stressful situation for many students. Encouraging written communication in a stress-free environment can help kids write more fluently and legibly.

      Kids that are reluctant to write may really stress out or even refuse to practice handwriting! They’ve probably seen their fill of writing pages, rote practice sheets, and letter activities’ that just don’t mean anything to them! It is possible to add a few handwriting practice sessions into therapy or the classroom (and home) while building functional writing abilities…and not totally stressing the kid out!

      When you make handwriting practice less stressful, you will gain writing practice that is meaningful and motivating.

      Then, you can plug any handwriting samples into a handwriting rubric for monitoring progress on the IEP goals. 

      Stress Free Handwriting Practice

      For the student who is who struggles with handwriting, practicing written work can be very overwhelming. He or she may scribble down whatever is on their mind as quickly as they can just to get the task done.

      Encouraging an environment where students feel respected and less handwriting-related stress can help with handwriting legibility.

      When kids push-back on handwriting sessions, there may be underlying skills that need developing. These challenges mean that even when the individual practices over and over again, they still may have unmet underlying skills that contribute to handwriting legibility.

      Some of those skill areas include:

      Use the ideas below to encourage a climate of acceptance and respect where students can write in their own manner.

      Stress free handwriting practice ideas

      Having a handful of handwriting practice strategies in your therapy toolbox (or parent or educator toolbox!) helps to make the handwriting practice sessions less stressful for both you and the student.

      Try some of these tips when it comes to handwriting practice sessions:

      • Break Tasks into Smaller Steps: Just like we break down tasks that seem overwhelming or too big, we can make a handwriting task seem more manageable by breaking up the requirements into steps. If a task feels too big or complex, break it down into smaller, more manageable sub-tasks. This can make the overall task seem less daunting.
      • Incorporate mindfulness: Yep, really! When things seem too difficult, sometimes a mindfulness session is a practical way to reset the overthinking and just do the thing we need to do. This can work for handwriting practice needs, too. One easy way to do this is to use some deep breathing exercises and then write about it. Use that time to practice areas such as legibility and letter formation.
      • Encourage an environment of acceptance students can then right as they like without worrying about how letters are formed how they’re spaced or how hard they’re pressing with their pencil.
      • Use rewards. Do you have a little box of prizes for therapy sessions? This can be motivating for some kids. Celebrate achievements like forming letters correctly or writing on the lines.
      • Encourage the freedom to write as they like. Let the students know it’s OK to write as they normally do and to be spontaneous and written work. This simple freedom can enable students to write more fluently and efficiently.
      • Take away the stress by limiting criticism, comparison, judgment, and competition regarding handwriting legibility. In this way students can know that what they are writing down on paper is more important than the way it looks. This is important to limit the stress of writing. You don’t want the student to get into a perfectionism mindset. Teach them to accept that handwriting tasks don’t always have to be perfect. Show the student that they can do their best, but recognize when handwriting is “good enough.”
      • Make writing fun! Take away the seriousness of handwriting practice by balancing freedom to experiment with ideas putting ideas on paper and producing clear written work. Encourage a fun writing assignment but make sure the student knows that it does take work to make written material legible.
      • Share excitement and encouragement about handwriting. Kids that see that handwriting practice can’t be fun will be more eager to practice. Use big motions, music, songs, letter rhymes, and any creative ideas like fun ways to work on letter formation to help kids spark enjoyment of handwriting practice.
      • Remove the obstacles of handwriting. Take away comparison, Over-analysis, judgment, and over-reactions to mistakes to help kids feel more at ease with handwriting.
      • Allow time. Give kids lots of time to put their ideas on paper. A graphic organizer can be one way to help kids get ideas down on paper in a visual way. They can then use the graphic organizer as a sloppy copy to help hand writing occur in a timely but efficient manner where they are given enough time to put their words on paper. Many times kids can work practice letter formation in legibility of him ready when they don’t have to think about what they are writing.
      • Let kids write without asking them to stop and correct mistakes. Students can write down their ideas and get answers on the paper without worrying about legibility mistakes or letter formation mistakes. Use a short period of time at the end of the assignment to quickly go over and check any legibility errors.
      • Collaborative writing. When kids right with others they can see the momentum that goes into hand writing. For the reluctant and writer sharing good ideas in writing in a group setting can help them to see that others are writing just as they are. Kids can also see good writing skills happening. Create a small group writing area where students can sit at a desk or table of 3 to 4 other students and each writes about one particular item that is sitting in the middle of the table such as a bowl of pipe cleaners. Use that physical picture as a writing prompt for students.
      • Balance the seriousness of handwriting with the freedom to experiment in written work. Kids should know that writing does take hard work but it can be fun to put your words on paper so that others can read them. Set up a writing pen-pal relationship where students correspond with students in another school.

      Handwriting Practice Activities

      Now that you’ve got some strategies to support the student in mind, what are some stress-free handwriting practice activities?

      Here on The OT Toolbox, we LOVE to share all things handwriting, so you’ll find many fun and engaging writing activities to keep kids interested.

      Some ideas you may want to try include:

      What are your favorite ways to encourage stress-free handwriting?


      Stress-free handwriting practice ideas for kids who hate handwriting or have practiced handwriting but continue with frustration.


      Stress-free handwriting practice ideas for kids who hate handwriting or have practiced handwriting but continue with frustration.
       
       
      Try these handwriting ideas to work on the skills needed for legible  handwriting :
       
       color mixing letter formation activity bold lines handwriting trick Small pencil trick for helping with a better pencil grasp  Thumb IP joint flexion pencil grasp trick


      The Handwriting Book is a comprehensive resource created by experienced pediatric OTs and PTs.

      The Handwriting Book covers everything you need to know about handwriting, guided by development and focused on function. This digital resource is is the ultimate resource for tips, strategies, suggestions, and information to support handwriting development in kids.

      The Handwriting Book breaks down the functional skill of handwriting into developmental areas. These include developmental progression of pre-writing strokes, fine motor skills, gross motor development, sensory considerations, and visual perceptual skills. Each section includes strategies and tips to improve these underlying areas.

      • Strategies to address letter and number formation and reversals
      • Ideas for combining handwriting and play
      • Activities to practice handwriting skills at home
      • Tips and strategies for the reluctant writer
      • Tips to improve pencil grip
      • Tips for sizing, spacing, and alignment with overall improved legibility

      Click here to grab your copy of The Handwriting Book today.

      Colleen Beck, OTR/L has been an occupational therapist since 2000, working in school-based, hand therapy, outpatient peds, EI, and SNF. Colleen created The OT Toolbox to inspire therapists, teachers, and parents with easy and fun tools to help children thrive. Read her story about going from an OT making $3/hour (after paying for kids’ childcare) to a full-time OT resource creator for millions of readers. Want to collaborate? Send an email to contact@theottoolbox.com.