Colleen Beck, OTR/L is a pediatric occupational therapist and the owner and author of The OT Toolbox website. She manages all of The OT Toolbox social media accounts and runs the popular newsletter.
Read about Colleen's experience and career as an occupational therapist, including how The OT Toolbox began on our About The OT Toolbox page: https://www.theottoolbox.com/about-us/
Colleen created The OT Toolbox in 2011 and since then has written thousands of blog posts designed to support therapy providers, educators, parents, counselors, admin, and caregivers in promoting the healthy development of kids.
Check out Colleen's blog posts below:
This scooping words activity is a fun way to work on literacy and fluency with reading. Use this activity along with our ping pong bounce game for fine motor fun with reading! This is a multisensory learning activity kids love.
Scooping Words
Sight Words and decodable reading are something that we’ve been working on every day around here. With Big Sister being in Kindergarten (and my oldest…so this is all new to me, too!) we’ve been going right along with the fast pace that reading, writing, and math brings home for homework every day.
And not only that, I love to add fun and creative ways to supplement Big Sister’s work.
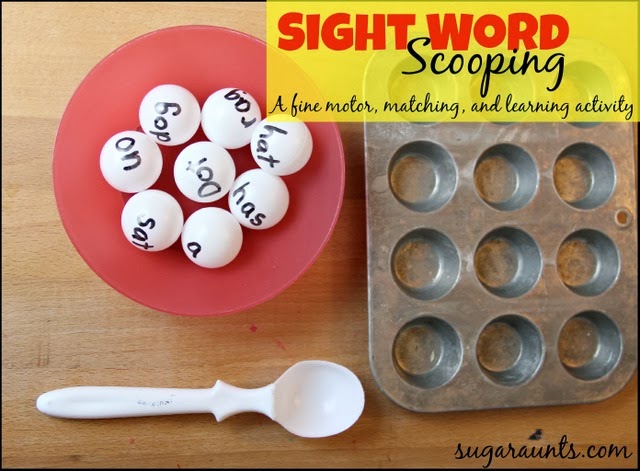
This Sight Word Scooping Activity was a fun one for a little after school (and after homework) fun. We used ping pong balls to practice a lot of her sight words but also some of her decodable words. This activity was great for a new reader because it added in some fun while encouraging fine motor skills to the learning.
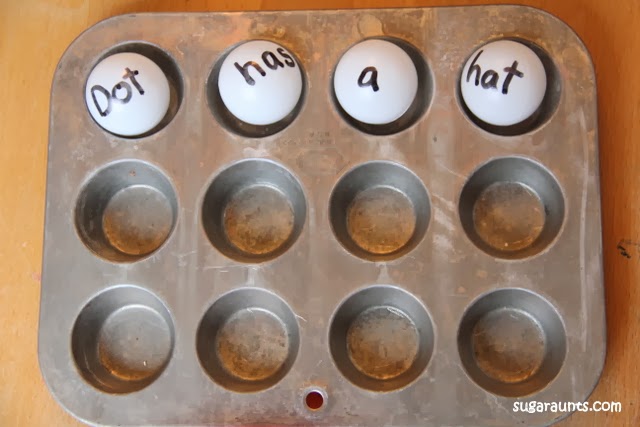
I had written some words on the ping pong balls and had a few of them set into the mini muffin tin.
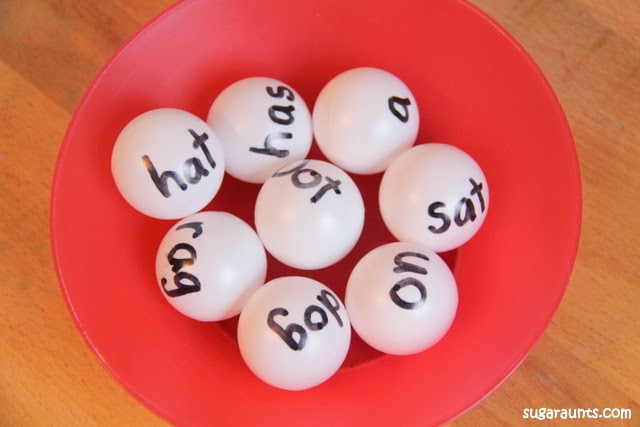
Big Sister read the sentence and smiled. She loves that she can decipher words into meaning, too! Other ping pong balls were in a bowl ready for scooping.
Scooping Words Activity
Big Sister grabbed the Ice Cream Scoop and started scooping the ping pong balls into the muffin tin.
She would tell me the words on the pin pong balls as she scooped. Baby Girl had to get involved in this activity when she saw the scooping fun!
Scooping and pouring (and scooping words) is a great fine motor activity for toddlers, so this was not only fun for her…it was also a great developmental activity!
For Big Sister, scooping the ping pong balls while making sure the words were showing was good for her fine motor work.
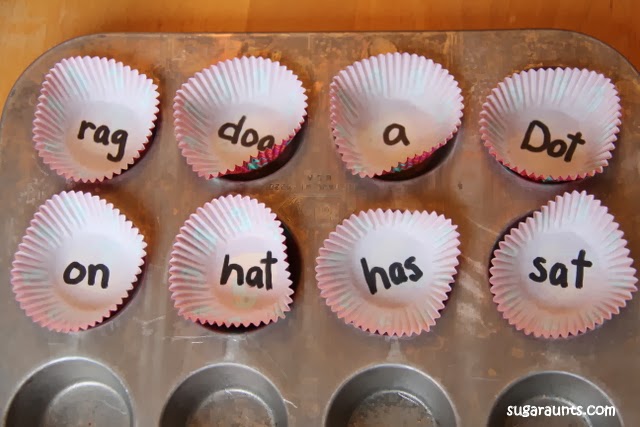
I added a handful of Mini Muffin Cupcake Liners with the same words written out on them. They were in a random order for Big Sister to match words.
She plopped a ping pong ball with the matching word into the cupcake liner.
She decided that we needed some water in the bowl to make scooping a little more fun. She was right. It was more fun!
(Especially for Baby Girl. She was in scooping heaven, here!)
Working on fine motor skills, visual perception, visual motor skills, sensory tolerance, handwriting, or scissor skills? Our Fine Motor Kits cover all of these areas and more.
Check out the seasonal Fine Motor Kits that kids love:
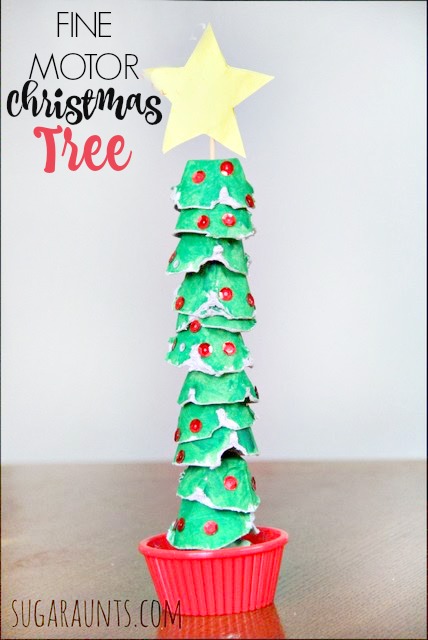
We are in full Christmas craft mode around here with tons of Christmas fine motor activities…and this egg carton tree was a fine motor hit! We’re excited to share more Christmas crafts and activities that develop motor skills, like this festive egg carton craft.
For now, we’ve got a fun fine motor activity that the kids will love! This Fine MotorChristmas Tree activity and craft was a favorite of Little Guys’. He loved sticking the egg carton pieces through the skewer and seeing his Christmas tree grow! We do so many fine motor activities in our house and this one was just right for the Christmas season!
Fine Motor Christmas Egg carton Tree
This post contains affiliate links.
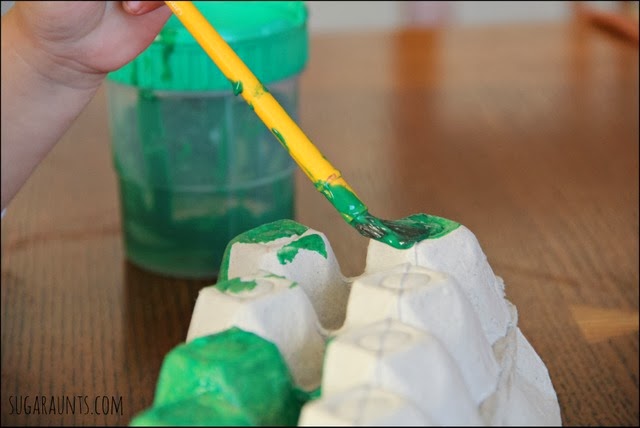
We started with a recycled egg carton and some Washable Green Tempera Paint, a paint brush, and our Spill Proof Paint Cup. (We love these things! Never have spilled paint and the snug lids keep the paint from drying up between uses. Perfect for little artists!)
Paint the egg carton green. Let dry.
After the paint dried, I cut out each section of the egg carton. Now we were ready for the fun part!
Little Guy LOVED this! He used a Bamboo Skewer to poke through each of the egg carton sections. He slid each section down the length of the skewer. This is pure concentration, here! (I would suggest putting a wooden cutting board under the skewer if you do this one at home. Our table was fine, but I wouldn’t want any skewer holes in your dining room table!)
Once all of the egg carton pieces were on the skewer, we slid them down to fill out the whole tree. For the next part, I didn’t get any pictures, but it was really easy.
We put a lump of play dough in a little red Christmas-y cup and stuck the skewer into the dough. Little Guy and I used glue to put little dots all over the egg cartons.
Now, this was Baby Girl’s favorite part…She loved sticking the red Sequins onto the glue dots. This is such a great fine motor activity using a neat pincer grasp to hold the sequins and place them on the tree.
When the skewer is positioned upright in the play dough, the child’s wrist is positioned in an extended position. This is just right for pre-handwriting and for improving tripod grasp when writing.
This Christmas tree activity and craft was fun for all ages! If you make one at home, let us know! We love to see your versions of our ideas!!
More Fine Motor Christmas Tree Activities
For more fine motor Christmas activities that develop precision and dexterity skills, try this fine motor Christmas card that kids can make and give to family and friends.
This clothes pin Christmas tree builds hand strength, bilateral coordination, and eye-hand coordination skills.
And, for holiday fun with fine motor skill-building, you’ll love the convenience of our Christmas Fine Motor Kit:
Looking for done-for you therapy activities this holiday season?
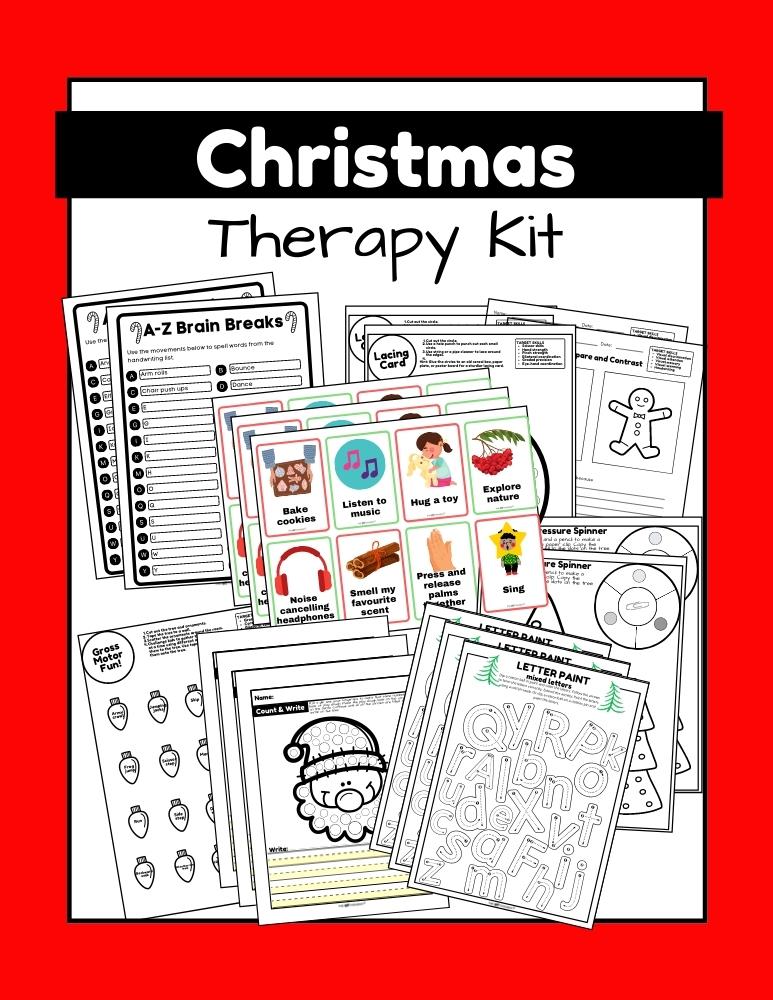
This print-and-go Christmas Therapy Kit includes no-prep, fine motor, gross motor, self-regulation, visual perceptual activities…and much more… to help kids develop functional grasp, dexterity, strength, and endurance. Use fun, Christmas-themed, motor activities so you can help children develop the skills they need.
This 100 page no-prep packet includes everything you need to guide fine motor skills in face-to-face AND virtual learning. You’ll find Christmas-themed activities for hand strength, pinch and grip, dexterity, eye-hand coordination, bilateral coordination, endurance, finger isolation, and more.
Colleen Beck, OTR/L has been an occupational therapist since 2000, working in school-based, hand therapy, outpatient peds, EI, and SNF. Colleen created The OT Toolbox to inspire therapists, teachers, and parents with easy and fun tools to help children thrive. Read her story about going from an OT making $3/hour (after paying for kids’ childcare) to a full-time OT resource creator for millions of readers. Want to collaborate? Send an email to contact@theottoolbox.com.
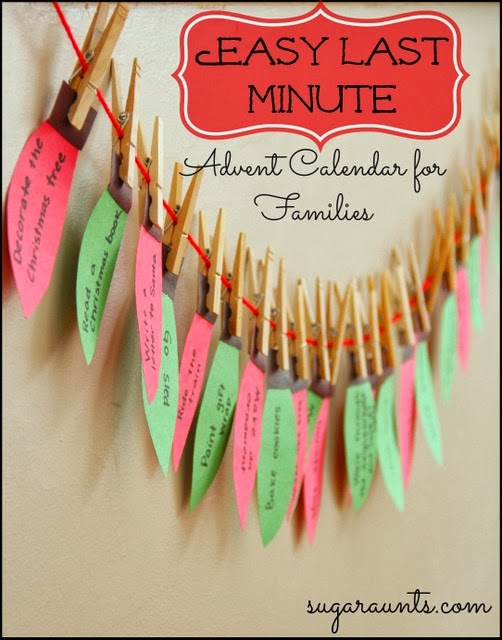
Use these easy last minute Advent calendar ideas for families as a way to connect this season. This advent calendar is a craft the kids will love to create each year while developing fine motor skills and making memories!
For Christmas activity ideas with a therapy punch, use these 25 days of Christmas play ideas. Paste them onto the Christmas lights in the Easy last minute Advent calendar below.
Does your family made an Advent Calendar each year? We love to fill our Advent Calendar with activities for the whole family, and designed to make memories. This year, we were a little late getting our calendar filled with activates and figured there are so many other busy families who are in the same boat! We needed an Easy, Last Minute, and Home-made Advent calendar. This calendar does just that. This was so easy to throw together, and with a little help form the kids, hang in our home for festive Christmas décor! We chose activities that are part of are usual Holiday traditions, so that it would be easy to add into our days leading up to Christmas. We really don’t need to have a huge to-do list every day and make more work for our selves. This Christmas Advent Calendar is perfect for busy families and will make lasting memories!
{Note: This post contains affiliate links. In other words, this blog will receive monetary compensation when any purchases are made through the links in this post. Our opinions and ideas are in no way affected. As always, we thank you for your support and community here at Sugar Aunts.}
Easy Last Minute Advent Calendar
To make our calendar, I cut light shaped pieces of red and green Construction Paper , and little black squares. These were by no means exact AT ALL! Just easy and quick. A little Glue to hold the black squares in place, and the lights were done.
Advent Calendar Activities for Families
The kids and I came up with fun Christmas activities that we normally do every year to write on our lights. This is memory making right here, folks! With a black Marker, I wrote out our favorite traditions…
A little tape and Red Yarn, our lights were strung! We used clothes pins to attach our activity lights for ease and for the one reason that may make our holiday very simple…
we can easily change the activities around based on what our day looks like. Maybe on a certain day, Christmas play dough is just NOT going to happen. Switch it out for Reading a Christmas Book.
See, this really is the easiest Advent calendar for busy families!
Our Christmas Advent calendar ends with a star and a special activity…Singing Happy Birthday to baby Jesus!
So, we’re heading into the Christmas season with our last minute, home-made Advent calendar all ready to go!
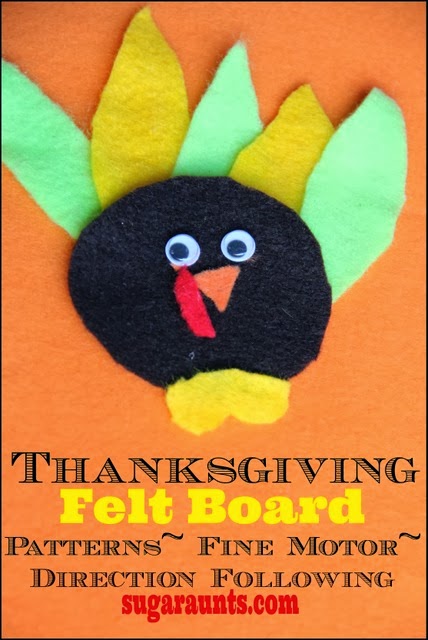
This Thanksgiving Felt Board activity was just the thing we needed one afternoon when Little Niece and Nephew were at our house. It was a super cold day and we were happy to stay inside warm and cozy playing and having fun with a few Thanksgiving activities!
Thanksgiving Felt Board
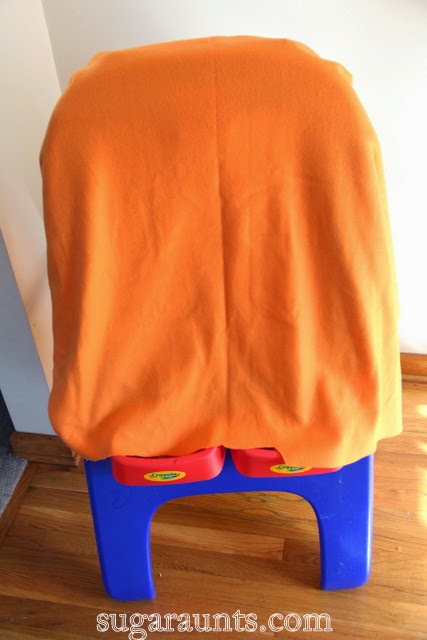
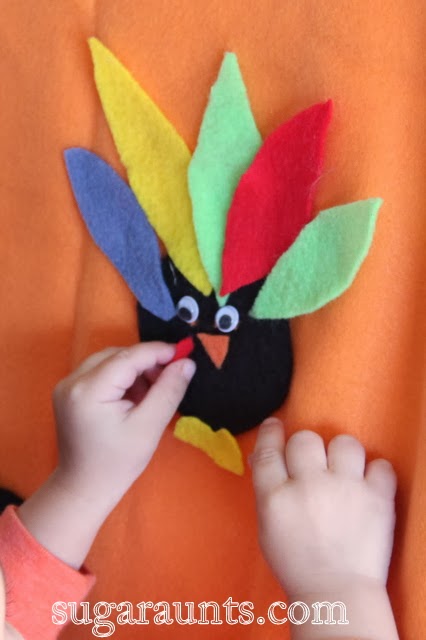
This felt board was super easy to put together. I have a big sheet of orange colored fleece fabric that we use for all kinds of activities and play. It makes the perfect fuzzy background for felt play, pretend play when we need to have an impromptu living room teddy bear picnic, and the perfect baby doll blanket!
This time we used our fleece to make an easel cover for our Felt Board Direction Following Turkey.
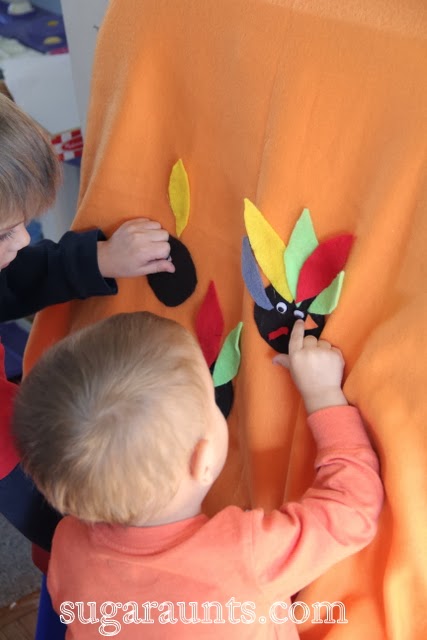
We’ve been doing a lot of turkey crafts and activities leading up to Thanksgiving, and this one was even more fun for the littler ones. Baby Girl (age 2) and Little Nephew (age 2) both loved moving the felt pieces all over the board. And worked on fine motor skills and direction following and patterning at the same time!
This post contains affiliate links.
Just a few supplies are needed for this activity.
The Orange Fleece worked perfectly to hold the felt pieces of our turkey.
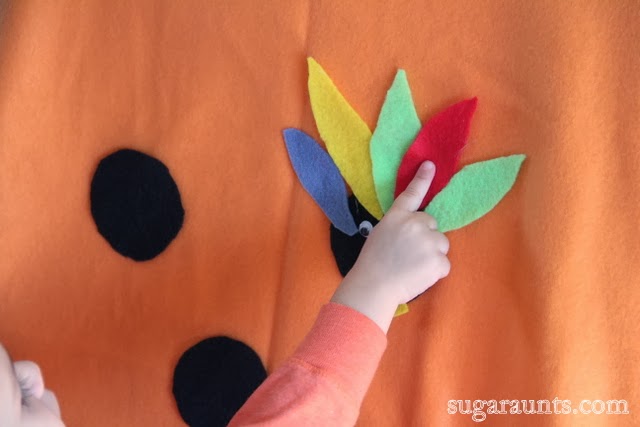
A few brown circles, feathers of different colors, little turkey feet, a beak, and a wattle and our turkey was ready for creating!
I snipped a few little pieces of felt and glued them to the backs of Googley eyes. Then the googly eyes could stick to the fleece.
The fleece was perfect to throw over our Easel. The fleece stayed in place pretty well without sliding much. With the material up on an included surface, the kids were able to manipulate the pieces of the turkey while using an extended wrist.
This positioning of their hand while managing small pieces prepares them for handwriting with a proper position of the wrist and fingers while holding a pencil.
I put one turkey together so the Toddlers could see where all of the pieces went.
This task required visual scanning and direction following. We put our turkeys together with multi-step directions to add a little difficulty to the task.
Little Guy (age 4) worked on some patters with the feathers. We used an AB pattern for our turkey feathers.
Little Nephew is a smarty when it comes to identifying colors. He told us all of the colors of the feathers easily!
Working those little pieces was a great fine motor task for these guys!
They needed to use a pincer grasp to pinch the littlest pieces, all while maintaining that extended wrist.
We had such fun day with our Turkey patterns, direction following, and fine motor play. This would be an easy activity to put together in these last days before Thanksgiving!
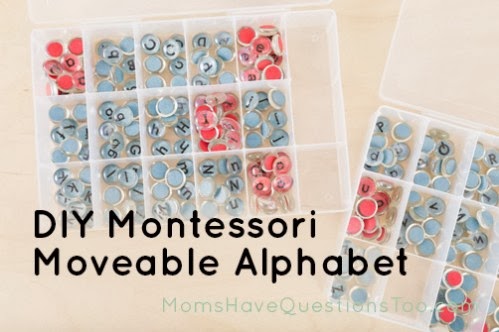
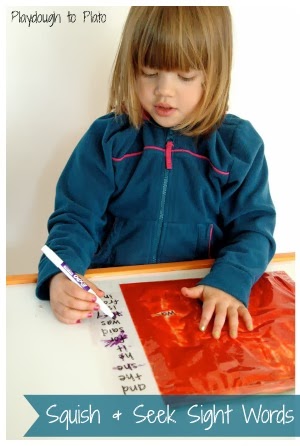
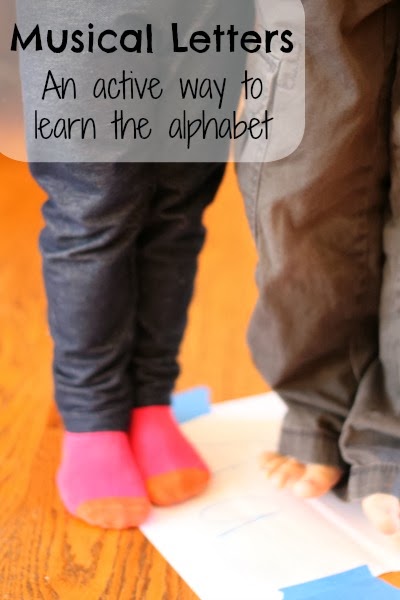
This week on Share It Saturday, we are highlighting Playful Ways to Learn the Alphabet. We love to create unique learning experiences for our kids. Not only is it a great way to encourage participation and develop multiple skills, it’s just fun! Learning letters (and the whole alphabet) in a playful way ensures retention of letter formation, the order of the ABC’s, and encourages children to actively ENJOY learning letters and pre-reading skills! Learning the alphabet in a playful way can be fun with a little creativity. Check out the links below for awesome ways to Play and learn the alphabet!
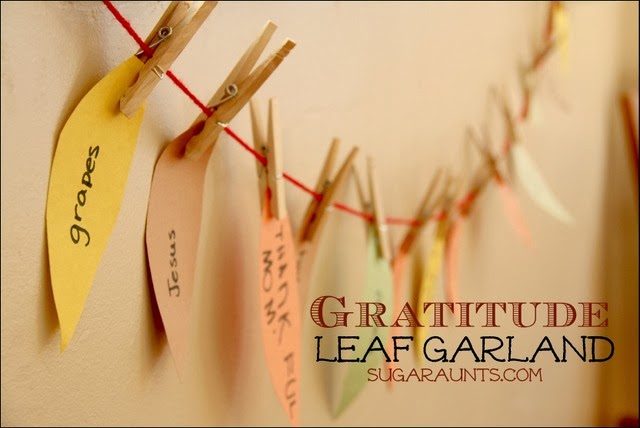
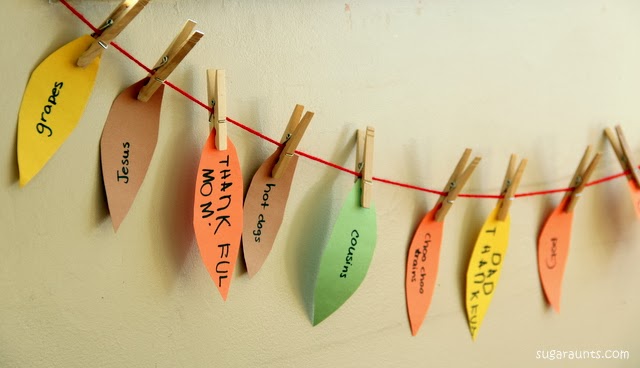
We make a Thankful Tree every year where the kids tell me the things they are thankful for and I write out the leaves. We have our Thankful Tree up on the dining room table all November up until Thanksgiving. Check out last year’s Thanksgiving Tree. This year we went a different route with our thankful leaves and made a Gratitude Garland. We still had the fall colored leaves and the kids told me all of the things they are thankful for. We strung our garland along the wall in the dining room so we can see the leaves while we’re eating dinner. We save our leaves from each year in envelopes so that we can read through them together and remember the things we were thankful for each year. This is one of our favorite Thanksgiving traditions!
{Note: This post contains affiliate links. In other words, this blog will receive monetary compensation when any purchases are made through the links in this post. Our opinions and ideas are in no way affected. As always, we thank you for your support and community here at Sugar Aunts.}
Garland Leaf Garland
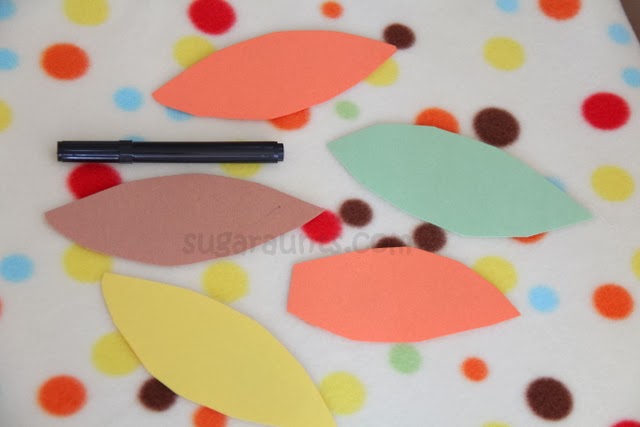
I cut out a bunch of leaves in nice fall colors and set out the pen so we were ready to go once Big Sister got home from school one day. The kids started telling me all of the things they are thankful for. My favorites: noodles, God, Jesus, hot dogs, and especially the handwritten-by-Big Sister “thankful mom” and “thankful dad” leaves!
This is the easiest family craft to make. All you need is Construction Paper, Markers, and Yarn. A few leaves cut from the paper and you are all set. This would be a great scissor skill activity for the kids too if they would cut out the leaves.
Big Sister wrote out a few of her leaves this year. Love that new writer handwriting!
I LOVE pulling out the envelopes of leaves from each year and reading through them with the kids! We keep them in our fall decorations bins in storage, so once it’s time to decorate for fall, we have them handy each year.
These leaves will be something that I save forever!
Do you have any Thanksgiving traditions to share gratitude? Do you make a thanksgiving tree or garland?
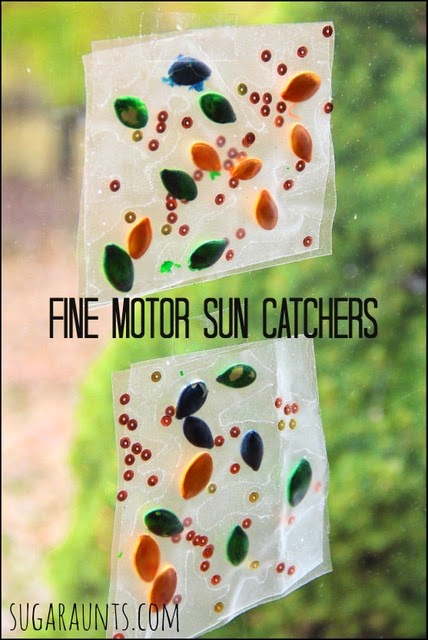
The dyed pumpkin seeds have returned in this easy, last minute, thrown-together craft! A fine motor play activity turned into a cute sun catcher craft. We played with sequins and contact paper before nap time one day recently, and it’s a great Halloween occupational therapy activity. With a little child-led art, the sequins-on-contact paper turned into a pumpkin seed/sequins sun catcher!
This post includes affiliate links.
Supplies needed for this sequin fine motor activity and sun catcher craft include Sequins,Clear Contact Paper, pumpkin seeds, and Food Coloring.
Sequin Fine Motor Activity
We started out with this little fine motor play activity for the littlest kids in the house before their nap time one afternoon. I put out squares of clear contact paper and a scatter of sequins and let them go to it! I showed them how to pick up the sequins and stick them onto the contact paper.
Baby Girl and Little Niece and Nephew are two years old and I wasn’t sure how this would go over with them. They both really liked sticking those little sequins on the sticky paper! (There was a lot of tongues sticking out too…you know when kids stick their tongues out when they cut with scissors or reeeeallly concentrate on something? LOVE that cuteness!)
Pumpkin Seed and Sequin Sun Catcher
Then Little Nephew pulled out some of the Dyed Pumpkin Seeds that we have been playing with a lot lately. He started sticking them onto the contact paper and making a pretty little art collage!
These little buggers are so easy to make…just a few drops of food dye into a baggie of dry seeds and you’ve got an instant sorting, pattern making, art medium for play and learning!
One funny thing, when the dyed pumpkin seeds were stuck to the contact paper and then moved, the dye peeled off a little. We stuck another square of contact paper on top of our sun catchers and hung the art to our dining room window. Cute, easy sun catcher fun!
Note: Be sure to monitor closely children when laying with small items such as sequins and pumpkin seeds with young children. All children are different and an activity like this one may not be appropriate for some. Always use caution when doing one of the activities found on our website and social media communities. Have fun!
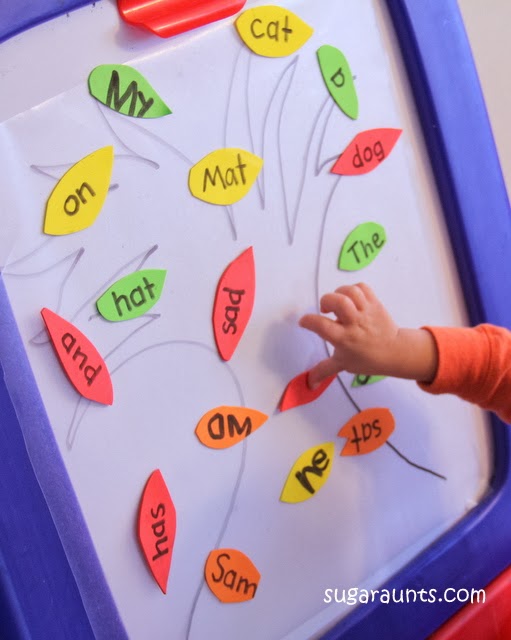
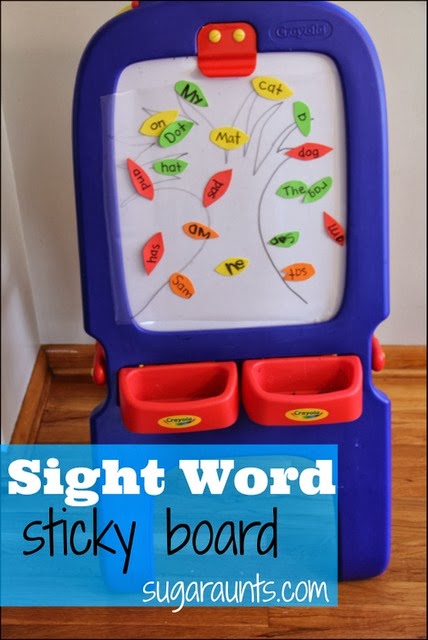
This was a fun post to write, and more importantly it was fun to PLAY this one! We made this Sight Word Sticky board on the easel to practice a few of Big Sister’s sight words with a fun fine motor twist. Big Sister, Little Guy, Baby Girl, and Little Niece and Nephew all enjoyed this sticky board easel activity.
At one point there were hands everywhere sticky leaves up on the sticky board. We used different colored leaves to help the littler kids to learn some of their colors. Big Sister liked reading the words as she went along sticking letters up on the tree. We went with a leaf theme, but this sight word activity could be modified to so many different themes, all using a few items. Check out what we did…
We received the books from Set 1 for beginner readers from BOB Books to review. We were so excited when the package arrived with our book set.
Big Sister opened the first book up as soon as she got home from school and started reading her way through it! This was her first real book that she’s read through by herself and was so happy that she could do it! You could see her confidence overflowing when she read that book! So what did she do then? She pulled out the next book and read that one too! This was such an amazing experience for us both. She was all smiles when she finished those books!
The fact that similar characters are in each book helps with carry over with new readers. Each book is only 12 pages, so it’s short enough that she didn’t lose interest or become overwhelmed. I loved the consistent sounds and words in each book. These beginner books are just what I have been looking for as Mom of a new reader. I wanted a book that would allow her to have confidence so she wouldn’t give up as she learns to decipher words. These books were just that! We are so excited to be working our way through the books and can’t wait to get started on the next one!
Sight Word Sticky Easel
We made this activity to go along with some of the words in the third book, as well as some of the words Big Sister has recently learned in school.
For this activity, we used (Amazon affiliate links) Foam Sheets , Clear Contact Paper, and our Crayola Magnetic Double-Sided Easel
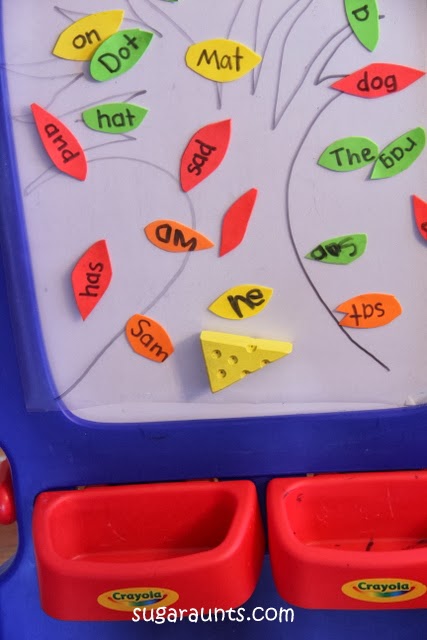
to do this activity. First, I cut little leaf shapes from different colors of the foam sheets. I wrote out the words on the leaves. They were in one of the bins on the easel and ready to grab.
For the tree, I drew a quick tree shape on the non-sticky side of the contact paper. I pulled the backing from the contact paper and attached it to the easel with some tape.
The kids LOVED this! There were hands in every direction as they stuck leaves to the contact paper.
Big Sister would tell us the words on the tree and the younger kids would tell us the colors. Little Nephew and Baby Girl played with this much longer than everyone else, just pulling the leaves from the contact paper and sticking them back up again.
Reaching up to the easel and placing the leaves on the contact paper was a great fine motor activity for them.
Later, I found an interesting thing stuck to the contact paper…
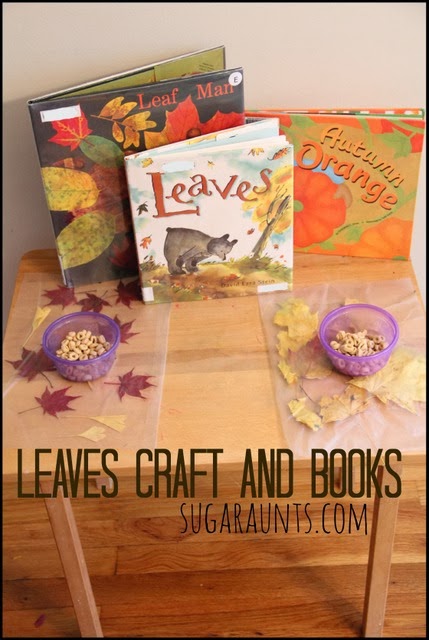
We made a Leaf Placemat Craft recently for a play date craft. This was so much fun that when we came home from the play group, the kids wanted to make more! Our dining room table is looking pretty festive with our leaf place mats. We enjoyed going out on a nature hunt to collect lots of leaves of different size and color from the yard. And now, it’s nice to see them every day at every meal! This was such an easy craft for younger kids and a hit at the play group. One day, I was able to set up a little after-nap snack and book time, using our leaf place mats and a few new favorite books from the library. 123 We read the books and had a little Cheerio snack on our easy leaf placemats. Read more below to see what we did and our book recommendations:
{Note: This post contains affiliate links. In other words, this blog will receive monetary compensation when any purchases are made through the links in this post. Our opinions and ideas are in no way affected. As always, we thank you for your support and community here at Sugar Aunts.}
Leaves Craft
We started by collecting different colored leaves from around the yard in lots of colors and sizes. Luckily (or unluckily, depending on who is working the rake…) we have a bunch of HUGE trees and loads of leaves to jump in, play with, and collect. We put our leaves in big trays to dry and take to our play group.
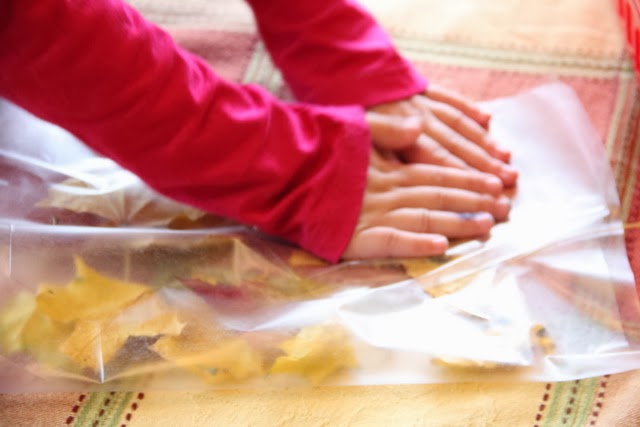
The craft was SO easy and perfect for toddlers. We cut sheets of Clear Contact Paper
into large sheets that would be able to fold over to placemat size. This was definitely NOT accurate or precise. Each of our placemats are slightly different sizes and as unique as the child making them!
Be sure to grab the clear contact paper and not the one with a white backing so the leaves will show through both sides.
This was fun for the kids to scatter leaves around on the contact paper. Big Sister made a few shapes and pictures with her leaves. (Perfect for one of the books we read!)
Fall Leaf Books
The books we had from the library were fun fall books, just right for a leaf placemat snack!
Leaf Man by Lois Ehlert is such a fun book, showing leaves as they move across the land in the breeze. They pictures of the leaves change forms as the book progresses and Big Sister really like pointing out the man, or cow, or bird made from leaves on each page. This book was perfect for our leaf craft project!
Leaves
by David Ezra Stein is such a cute story about a bear who is surprised about the falling leaves. This book was fun for us because we enjoy seeing the leaves fall from our trees and we love to try to catch them as they fall.
Autumn Orange (Know Your Colors)
by Christianne C. Jones was a good book for us and a fun read. Especially Baby Girl liked this one (who is just learning her colors and thinks every color is purple 🙂 !
It’s not too late to grab up a few fall themed books and create a leaf craft before the craziness of the Christmas season is on us! What are your favorite fall books?


 , and a
  .
. 

 with the same words written out on them. They were in a random order for Big Sister to match words.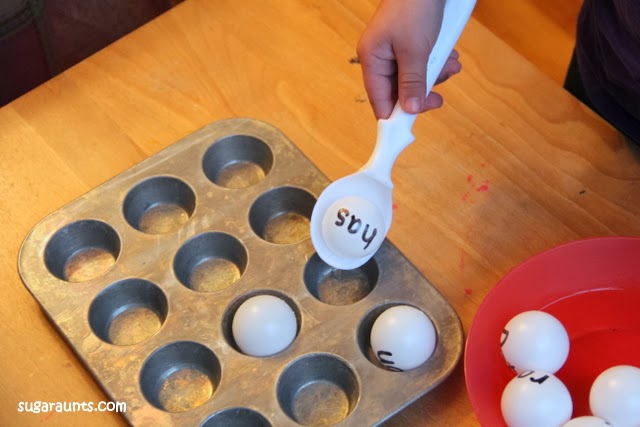








 . (We love these things! Never have spilled paint and the snug lids keep the paint from drying up between uses. Perfect for little artists!)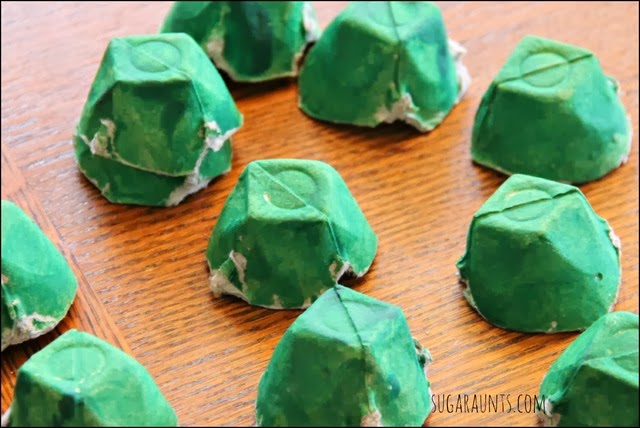

 to poke through each of the egg carton sections. He slid each section down the length of the skewer. This is pure concentration, here! (I would suggest putting a wooden cutting board under the skewer if you do this one at home. Our table was fine, but I wouldn’t want any skewer holes in your dining room table!)
 onto the glue dots. This is such a great fine motor activity using a neat pincer grasp to hold the sequins and place them on the tree.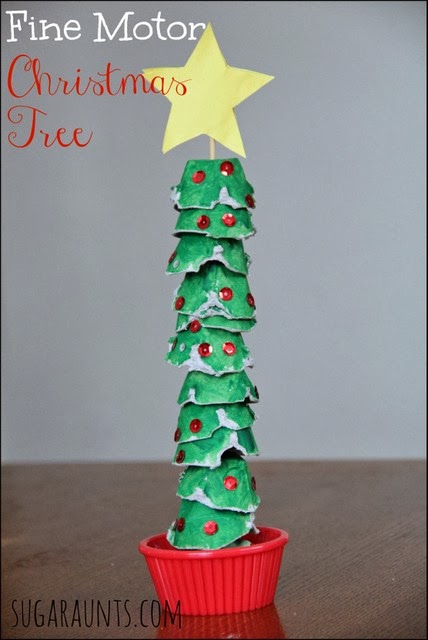

 , and little black squares. These were by no means exact AT ALL! Just easy and quick. A little


 , I wrote out our favorite traditions…
 , our lights were strung! We used clothes pins to attach our activity lights for ease and for the one reason that may make our holiday very simple…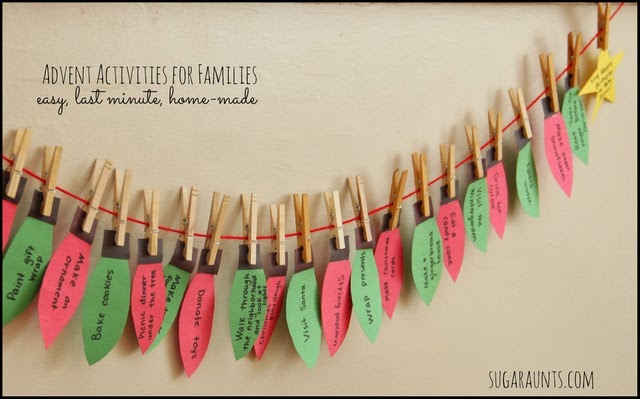

 worked perfectly to hold the felt pieces of our turkey.
  .
. 
 . The fleece stayed in place pretty well without sliding much. With the material up on an included surface, the kids were able to manipulate the pieces of the turkey while using an extended wrist.





 . A few leaves cut from the paper and you are all set. This would be a great scissor skill activity for the kids too if they would cut out the leaves.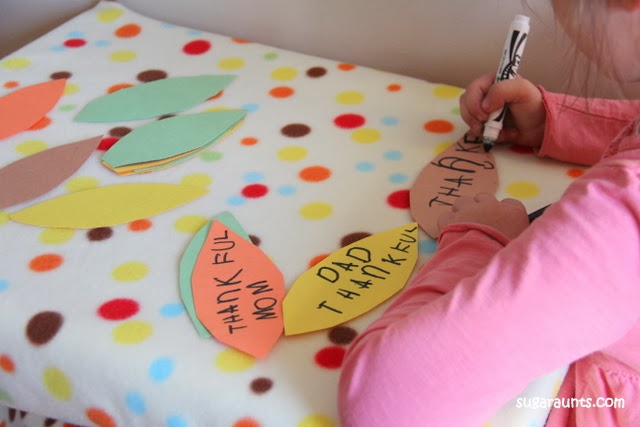

 , pumpkin seeds, and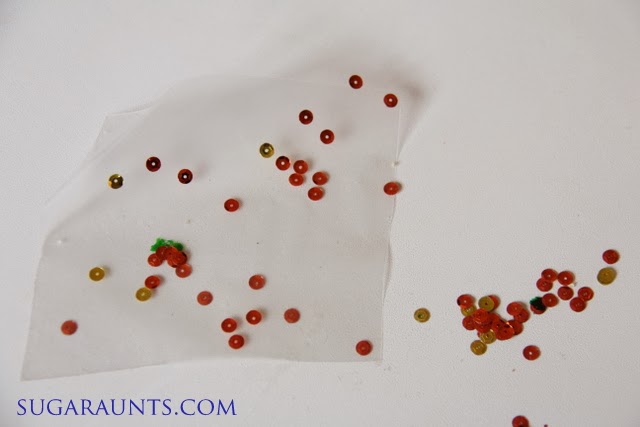


 ,
,