Cursive Writing Slant

A unique feature of cursive writing is the slant of letters. Typically cursive writing slant towards the right. 

This cursive handwriting post is part of our 31 day series on cursive handwriting

Use these tricks to help address cursive letter slant when teaching kids to write in cursive.

While slant of cursive writing may not be a huge deal when it comes to overall legibility, the biggest area to address and correct is consistent slant direction. 

If all of the letters are leaning in one direction, it helps with the overall legibility of the written piece. If there is a variety of pencil stroke directions or inconsistent pencil stroke slants then legibility is affected.


Cursive writing slant


First, it’s important to note that cursive handwriting traditionally does have a slanted position. The tilted angle of the paper enables slanted letters. However, slanted writing is not a MUST for cursive. 

The Handwriting Without Tears program teaches and promotes an upright position of letters on the page. Another cursive handwriting program that does not promote a slanted font includes the Spalding font.

As explained in our left-handed cursive post, students who write with their left hand will struggle to write with a slanted cursive style and will naturally write with a more upright formation of letters. 


How to Teach Cursive Slant

There is some evidence (although from an old source) indicating a progression of slanted printed work to cursive slant as helpful in the progression toward slanted cursive writing. 

However, additional changes in font of printed work may be difficult for the child with visual perceptual or visual motor skills. 

The article mentioned above indicates that the progression of from printed work to cursive is made easier with a slanted print step.


Inconsistent cursive letter slant in handwriting

If letters are leaning in all directions legibility is affected. There may be several reasons for these this to occur.


Pencil control is one issue that interferes with cursive slant. Letter formation inconsistencies mixing styles of writing a letter formation can affect slant as well.


Fluidity and tension in holding the pencil can result in slanted letters and consistencies.


Connectors between letters can affect slant. This happens when one letter is not connected correctly to the next or inefficiently connect to the next.

Tips related to cursive writing and slant of letters:

  • Slanted handwriting font is not necessary. 

  • Focus first on letter formation, then fluency including rhythm and speed of handwriting. 


Use these tricks to help address cursive letter slant when teaching kids to write in cursive.

Enstrom, E. (1966). In Second Grade Handwriting: The Acceptance of Slant Print. Elementary English, 43(4), 409-412. Retrieved from http://www.jstor.org/stable/41387583

Cursive Writing Rhythm

When we write in cursive, the pencil moves across the page in smooth and fluid motions from letter to letter and at an even pace. But what happens when the pencil is not moving smoothly. What happens if the pencil strokes are scratchy or letters vary in width. What happens when the pencil stops mid-letter or there is stopping and starting within the words. This cursive writing rhythm allows us to move from these scratchy, bumpy, and uneven letters to fluid and functional movements. This is cursive writing rhythm. 


This cursive handwriting post is part of the 31 day series on cursive handwriting that is occurring here at The OT Toolbox. 

Use these handwriting strategies to help kids who are learning to write in cursive work on the rhythm and flow of cursive writing including pencil control, motor plan, with smooth cursive writing strokes and legibility in written work.


Cursive Writing Rhythm


The rhythm of cursive handwriting doesn’t happen automatically or overnight. It’s an ability that occurs with practice and with maturity. A student who is just learning cursive letters won’t have rhythm in their written work, but it is a goal that can be achieved with practice. Rhythm and fluid cursive writing occurs over time.

Formation of individual letters is just one part of cursive writing. Another piece is the rhythm of pencil strokes. 

Using a pattern of consistent pencil strokes makes letters recognizable. Without that pattern and rhythm, writing can turn into scribbling very quickly. 

The rhythm that it takes for cursive writing is what makes letters legible and helps with overall appearance. A person may be able to read their own “chicken scratch” cursive writing but another person is not used to that technique will not be able to read it at all. 

What is the difference in these two extremes? It’s the rhythm of the pencil with as it as you write in cursive. 

Rhythm can change when people write in cursive. When you’re writing very quickly, pencil strokes look different than when you take your time for a letter or note. The rhythm of a doctor signature on a prescription looks quite different then probably a signature on a thank you note to a grandparent.


People in general have different rhythm when they write. This is what gives some individuals a forward slant and others a backwards slant. Some writers use a loopy cursive font and others still, a scratchy style of writing. 

Use these handwriting strategies to help kids who are learning to write in cursive work on the rhythm and flow of cursive writing including pencil control, motor plan, with smooth cursive writing strokes and legibility in written work.

How to improve cursive writing rhythm


How can you work on rhythm of cursive writing? 

It’s easy with simple exercises of a series of lines and sweeps. Working on small letters and tall letters in a pattern of three letters across the page can help to establish a pattern of pencil movement. 

Try combining small lines with big lines. 

Try combining the curves of lowercase “t” and “p” in a series. 

Try joining together letters like lowercase “t” and “a” to mix pencil stroke movements. These different exercises teach you the movement pattern of arches including the starting point, stopping points, and retrace.


Activities to improve rhythm and fluidity in cursive writing


Exercises with tracing worksheets can help with pencil control and fluidity when in cursive writing. However there is an natural movement that each individual uses in their own motor plan to form curves and changes in direction.

Ask kids to make their own scribble on a piece of paper. Then allow them to use a highlighter or colored pencil or marker to trace over there scribble. This natural tracing over scribbles that are self drawn, is more likely to match motor plans as it’s natural for this individual.

Try completing the activities described above to help with rhythm of cursive writing. 

Here are a few more activities that can help with pencil control and motor planning in handwriting: Try these pencil control handwriting exercises to work on writing in lines with the small muscles of the hands for more accuracy with lines, legibility, and speed when writing.Work on handwriting with crayons using these easy precision of pencil control exercises. Kids love these ideas to work on fine motor skills and develop neat handwriting.!

Left Handed Cursive Writing

Cursive handwriting can be a difficult new skill for any child! For the child who writes with their left hand, learning cursive handwriting can be especially difficult. 

Below, you will find information about teaching cursive handwriting and letters that are similar and should be taught together in groups for ease of learning.


read more about cursive letter families below as well as more cursive writing strategies and tools here and in the How to Teach Cursive Writing series that we have on The OT Toolbox this month.

You can find all of the tips and strategies for teaching cursive handwriting under the cursive writing tab up above.
These cursive handwriting strategies will help students who write left-handed to learn cursive writing, including left handed pencil grasp, positioning, slant, and cursive letter formation.


Left-Handed Cursive Writing


Left-handed writers often times have more of a challenge with writing in both printed handwriting and in cursive written work. There are several reasons for this. One of the reasons is that left-handed writers may be in the minority in a classroom. When instructed by a teacher who is right-handed, students can struggle with letter formation or pencil grasp. Additionally, the pull and push of the pencil that is necessary for letter formation can be different from the way letters are formed by an individual who writes with their right hand.


Left-handed writers can have a challenge in learning to write cursive as well.  

Hooked Wrist Position for Left Handed Writers


The direction of letter formation moves from left to right across the page. This natural direction of letter formation for the right handed writer requires a person to pull a pencil as they move it across the paper.


For a left-handed writer, the pencil needs to push across the page as it forms letters. For left-handed students they may find themselves holding their pencil and a hooked wrist position as they write. This seems to happen naturally as they push the pencil to form letters. The hooked wrist positioning can also occur as a result of positioning the hands of the student so they can see their written work.


Cursive slant for left-handed writers

For left-handed writers a cursive slant is often times very difficult. It’s more natural for left-handed writers to use an upright grass uprights late on letters.

Left handed writers may benefit from an upward or backward slant of cursive writing. This can allow for them to pull down as the right rather than pushing away with the pencil tip as they form the strokes of cursive letters.


Left handed writers and positioning


For the left-handed writer, the paper should be placed to the writer’s left side. Paper should be slanted slightly towards the right for the left-handed writer. 

Left handed students should use a pen that does not smudge or a pencil with a harder point. This is so that writing letters don’t smudge as they move their hand across the page. A softer pencil carbon will result in more smudging of pencil strokes.


Left handed students should also have enough lighting so that the shadow of their hand doesn’t interfere with their written work. Students should be positioned high enough in their desks so that they can see over their hand otherwise they may slouch onto the desk or rest their head on to their right assisting hand in order to see their written work.


Left-handed pencil grasp 

One final strategy for left-handed cursive writers is using a pencil grasp where the pencil is held far enough from the tip. Teachers or therapists can ask students to hold the pencil like they normally would and then inch their pencil up towards the eraser so that there is an extra inch at the end of the pencil between their fingers in the tip of the pencil. This allows for better view of the letter formation as they write on the paper.


Cursive letter difficulties with left handed writers


Left-handed writers often times find that clockwise movements are easier to form with small pencil motions then counterclockwise pencil strokes. Letter “o” maybe it difficult for the left-handed writer as well as the other wave letters (a, d, g, and q). These letters require the left handed writer to use larger distal pencil motions as they move those pencil away from their palm to form the curves of these letters. 

It can be common for left-handed writers to form certain letters with a right starting line by pulling the pencil back towards their palm. This adjustment can become part of their personal writing style and efficient for left-handed writers. 

Inaccuracies in in letter formation for left-handed students can progress without detection if handwriting is overall legible. Improper letter formation for left-handed writers should be assessed for function versus legibility.

Final tips for left-handed cursive writers


It’s essential students who write with their left hand to address any underlying skills needed for efficient and functional handwriting. Just as a right-handed student progresses toward independent cursive handwriting, the underlying skills need to be put into place for legibility in written work. 

Some resources in addressing the underlying skills needed for handwriting success:


Try these tricks and tips for helping students who write left-handed to learn cursive writing.


Cursive Handwriting Self-Assessment

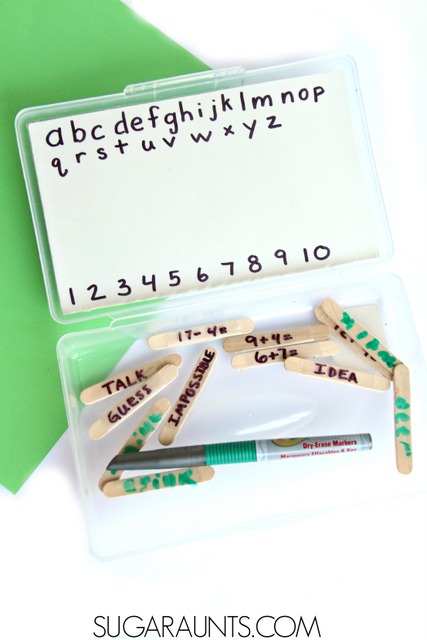
One way to work on cursive handwriting legibility is for students to check for mistakes. When kids are just learning to form cursive letters, they can look back over handwriting sheets to self-assess for formation mistakes, connection errors, placement on lines, or other errors. These cursive handwriting self-assessment strategies is an easy way to ensure carryover of handwriting skills.

This cursive handwriting post is part of the 31 day series on cursive handwriting that is occurring here at The OT Toolbox. 

Use these tricks to help students learn cursive handwriting for a cursive handwriting self-assessment to check for accurate letter formation and legibility when learning to write cursive writing.

Cursive Handwriting Self-Assessment


Try these strategies to help kids check their own handwriting:

Every cursive letter has its own form and way of being connected. When students are learning and they are aware of these rules of cursive handwriting they can notice mistakes when assessing handwriting work.


Ask students to look at a sample of written work. It can be their own or someone else’s. Ask students to notice the letters in the hand writing. They should see that the letters are slanted in the same direction, have spaces between the words, and connect the cursive letters that are connecting to each other. Ask them to look at a sample of writing and make sure that the cursive writing follows the rules that they have learned.

Students can check their own writing or a neighbor’s writing after writing and practicing a series of letters or cursive letter families.


Cursive Self-Assessment for Letter Closure

Some letters need to be closed such as cursive wave letters a, d, o, g, and q. Have students use a highlighter to make sure these letters are closed at the top. If these letters are not closed they can look like other letters. For example,cursive a can look like a cursive c if it’s not connected and closed at the point where the line pauses to trace back over itself. 

Cursive d that is not connected at its re-trace point can look like a cursive c and a tall lowercase cursive t that hasn’t been crossed. 

Cursive letter o can look like a cursive c and a small hook if it is not connected and closed properly. 

Cursive q can look like a cursive c and a tale of a j if it’s not connected at the retrace point. 

Students can use a highlighter to dot on any areas where these letters are not closed.

Cursive Self-Assessment for Loops

Some letters have loops. These letters should have loops but not big ones. Letters with loops include cursive b, e, f, h, j, k, l, q, y, and z.

If a cursive l does not have a loop, it can look like a tall line of a t that has not been crossed.

If a lowercase d does not have a loop, it can look like a c and an i that has not been dotted. 

If the loops are too big, cursive can get sloppy and difficult to read. If loops are just lines, they  can look scratchy and difficult to read.

Cursive Self-Assessment for Dots

Some letters have dots that need to be in place. These letters include lowercase letter i and j. Have students make sure that the dot is in place for these letters. If the letters are missing a do,t an i can look like a u when connected with other letters. 

If j does not have dot or is formed with a wide base, it can look like and i with a tail.

Ask students to look back over their work and notice any missing dots. They can use a colored pen or pencil to add in any missing dots. They can check for all dots in place by making a colored dot at the end of each line that has it’s dot in place.

Cursive Self-Assessment for Connecting Lines

Some letters have connecting lines that need to go straight across to the next letter. These letters include lowercase b, o, v, and w. If these letters do not connect with a strait bridge, they can look like other letters. 

For example a b that is missing its bridge can look like a cursive l. 

A v that is missing its bridge can have a letter floating next to it. Lowercase letter o that is missing it’s bridge can look like a cursive c. 

Ask students to use a highlighter or colored pencil to mark the bridges on each letter. If bridges are missing they can highlight or dot to mark where the bridge should be to connect these letters to its neighbor.

Cursive Self-Check for Crosslines

Some letters have a crossline. This includes lowercase t and uppercase letter F. If the cross is missing on these letters they can look like different letters for example cursive t can look like a squashed l if it is missing its cross. 

Uppercase letter F can look like a T if it is not crossed at the correct point.

Students can look over their handwriting sample and make sure all crosslines are in place. They can point to each letter and finger trace lines. Some students like “marking” their paper just like their teacher might with a red pen. Students can make a small “-” line at the end of each line that has their dashed crosslines in the correct spaces.

Cursive Self-Check for Tails

Some letters have tails that go below the baseline. This includes letter f, g, j, p, q, y, and z.  If these lower case letters are missing their tail they can float above the baseline making cursive handwriting difficult to read and raised above the line. A lowercase p can look like an uppercase P if it is not drop below the baseline. A lowercase f can look like a lowercase p if the tail on the F is not dropped below the baseline.


Occasionally cursive handwriting errors can result in spelling mistakes for students who are beyond the practice stage of cursive writing.

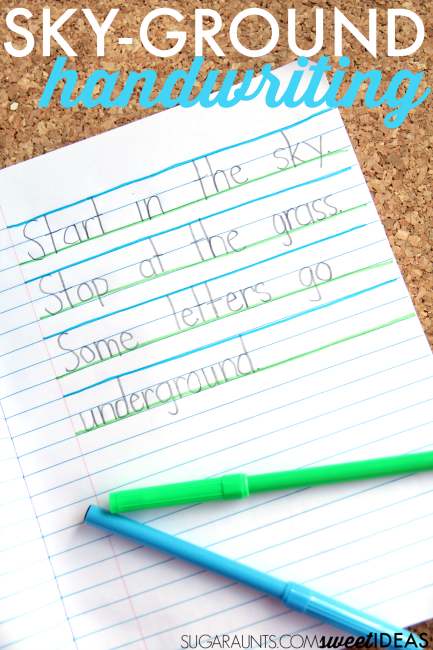
Students can check for tails that drop down over the lines. Sometimes, specialized paper is appropriate. Try printing out adapted paper from this ultimate list of free adapted paper. It’s a great place to find free printable versions of adapted paper.  Add a visual prompt to regular paper using different colored markers like in this DIY sky-ground paper.


Cursive Writing Self-Assessment Journal

Students can create a cursive writing journal to assess handwriting progression over time. Provide students with a folder that includes pockets on the sides. Students can keep loose leaf paper in this folder. Papers should be self-assessed frequently over time. Once the student has a collection of cursive writing samples they can look back over there their writing. This is helpful because as a student progresses they’re able to notice mistakes or cursive letter formation errors that they used previously that maybe did not stand out as well. Self assessment should occur in a positive manner, meaning that marks are not taking off as a child is learning cursive. Rather, progress should be monitored for overall improvements and carryover.

Use these tricks to help students learn cursive handwriting for a cursive handwriting self-assessment to check for accurate letter formation and legibility when learning to write cursive writing.


What are some ways that you have used to invite students to self-assess their handwriting? Try these ideas to help kids learn cursive writing:


Creative Cursive Practice Ideas

creative cursive handwriting activities
Getting creative with cursive practice can help with carryover and legibility of cursive writing.  Practicing on cursive worksheets week after week can get real boring, real fast! Below you will find creative ways to practice cursive writing with a tactile sensory piece. 
This list of cursive writing ideas is part of our 31 day series on cursive handwriting where you can find strategies, tools, tips, and ideas to teach cursive writing. 
Try these creative cursive practice ideas to practice writing letters in cursive handwriting.

Cursive Practice Ideas

Try the creative ways to work on cursive writing and teaching cursive letter formation listed below. each cursive activity is a tool to practice writing letters using kinesthetic learning or by using sensory writing methods

Cursive Practice with Tracing

Trace over lines with transparency sheets to learn proper formation then remove the transparency sheets and practice writing letters independently.  Compare the differences between using transparency sheets and not using transparency sheets. 


Trace over letters using colored glue to practice cursive letters. Let the glue dry and then trace the letters with the finger. 

Cursive Practice with Sensory

Allow students to practice forming letters in finger paint. 


Place finger paint into a plastic Ziploc bag. Tape the top shut. Students can trace letters using their finger. 


Try using color changing markers to trace trace over cursive letters using rainbow writing. 


Practice cursive letters with wet chalk on pavement or on a chalkboard. 

Allow students to form letters using clay or play dough. Use foaming clay with baking soda clay and squirting or dropping on vinegar. 


Practice letters on another student’s back using a finger. Students can try to guess the letter that another student wrote on their back.

Spray shaving cream onto desk surfaces. Students can form letters and shaving cream right on their desk. Swoosh the shaving cream aside to a race and start over again.

Cursive Practice Games

Try using disappearing ink. Use for cursive writing games like Hangman, Madlibs, or tic tac toe.


Try the Letter Listen Game: teachers can describe how the letter is formed and students have to write it on the paper. Then when the letter is completed they can raise their hands and say the letter that they wrote. 

Cursive Practice Ideas to add to your Toolbox

What are your favorite creative ways to practice handwriting? All of the strategies that work for printed handwriting can be used to practice cursive letters. There are a ton of ideas listed under the handwriting tab at the top of this site. Here are some of our favorites:

 Sky Ground handwriting method DIY desk letter strip
 Letter construction for letter formation


Try these creative ways to practice cursive writing to help kids learn to write cursive letters and write legibly.

Cursive Letter Formation “Wave Letters”

As we discussed in the previous post titled cursive families you can see there are groups of cursive letters that are similar information. In this post we will discuss “Wave Letters”. These are the cursive letters that start with a wave curve beginning at the baseline and curving up to the middle line. The wave curve then traces back over itself but pulls away at the baseline to form a cursive “c”. This formation is used in the initial portion of cursive letters a, d, g, q, and o.


Working on these letters together in a group can help with formation as students are practicing the motor plan needed for cursive wave letters.
 
Practice cursive letter formation using Wave Letters to practice handwriting and teach cursive letter c, a, d, g, q, and o with this fun fish handwriting activity.
 
 
This post is part of our 31 day series on teaching cursive. You’ll want to check out the How to Teach Cursive Writing page where you can find all of the posts in this series. For more ways to address the underlying skills needed for handwriting, check out the handwriting drop-down tab at the top of this site.
 
For resources in handwriting, join us in the Sweet Ideas for Handwriting Help Facebook group.
 
Affiliate links are included in this post.
 
Cursive wave letters are cursive letter c, a, d, g, q, and o. Using a wave can help kids learn to write these cursive letters.


Cursive Letter Formation of Wave Letters


When instructing students in forming these letters, start by outlining a cursive letter lesson plan of activities. You can read more about cursive letter lesson plans here.


When teaching the Wave Letters, start by asking students to practice a wave of cursive lines. This can look like a string of cursive letter “c’s” joined together. Children can draw the wave across a page. Be sure to instruct students to draw a wave with the proper re-trace back from the crest of the wave.
 
When beginning with cursive instruction, students should concentrate on curving up but not going beyond the middle line, tracing back over the same line, and swinging away at the base of the wave. Start initially with just this formation several times. Students can then string together a group of cursive letter “c’s” soon after they learn this prompt. 
 
Practice cursive letter formation using Wave Letters to practice handwriting and teach cursive letter c, a, d, g, q, and o with this fun fish handwriting activity.
 
To help teach the concept “wave letters” for formation of cursive c, a, d, g, q, and o: Try this wave and fish activity!
 
We used a blue plastic tray and a dry erase marker to draw the waves and the cursive letters. This would be great practice for kids to improve their re-trace needed for the wave letters. 
 
With the dry erase marker, write the wave letters on the tray. Then, make fish from cardstock. Write a cursive letter on each fish. Kids can work on letter identification by matching the fish to the letters on the tray. You can also play a form of “Go Fish” by creating more letter cards. When students need to “go fish”, they can write the letter they need on the tray. It’s fun practice!


Tips for teaching cursive wave letters


Focus on the retrace when teaching cursive letters c, a, d, g, q, and o. This can be done with a highlighter or colored markers. Try this cursive re-trace activity described previously on the OT toolbox using colored color changing markers for addressing re-trace.
Use short phrases to instruct cursive formation. Phrases like “Pause”, “Stop”, “Trace back”, “Swing away to connect” can help. Prompts should involve starting and stopping points such as “Stop at the baseline”, “stop at the middle line”, and “Stop at the top line”. Line names should remain consistent with names used by the student in learning printed handwriting.


Students learning the Wave Letters will benefit from a clock image. Students can visualize the stopping point for the top crest of the wave for cursive letters c, a, d, g, q, and o as 1 o’clock on the face of the clock. Students who are learning cursive have most likely been exposed to learning time and the image of a clock.  


How to Teach Lowercase Cursive c


Use the following verbal prompts to teach lowercase cursive letter “c”:
 
Start at the baseline. Curve up to the right and stop at 1:00 on the the middle line. Pause. Trace back along the face of the clock. Then swing away to connect.


How to Teach Lowercase Cursive a


Use the following verbal prompts to teach lowercase cursive letter “a”:
 
Start at  the baseline. Curve up to the right and stop at 1:00 on the middle line. Pause. Trace back along the face of the clock. Travel along the baseline. Spike up to 1:00. Pause. Trace back down. Pause. Swing away to connect.


How to Teach Lowercase Cursive d


Use the following verbal prompts to teach lowercase cursive letter “d”:
 
Start at the baseline. Curve up to the right and stop at 1:00 on the middle line. Pause. Trace back along the face of the clock. Travel along the baseline. Spike up to 1:00 and continue to the top line. Pause. Trace back down to the baseline. Swing a way to connect.


How to Teach Lowercase Cursive g


Use the following verbal prompts to teach lowercase cursive letter “g”:
 
Start at the baseline. Curve up to the right and stop at 1:00 on the middle line. Pause. Trace back along the face of the clock. Travel along the baseline. Spike up to 1:00. Stop at the middle line. Trace back down past the baseline. Loop left. Swing a way to connect.


How to Teach Lowercase Cursive q


Use the following verbal prompts to teach lowercase cursive letter “q”:
 
Start at the baseline. Curve up to the right and stop at 1:00 on the middle line. Pause. Trace back along the face of the clock. Travel along the baseline. Spike up at one to 1:00. Stop at the middle line. Trace back down past the baseline. Loop right and touch the baseline. Swing a way to connect.


How to Teach Lowercase Cursive o


Use the following verbal prompts to teach lowercase cursive letter “o”:
 
Start at the baseline. Curve up right to the right and stop at 1:00 on the middle line. Pause. Trace back along the face of the clock. Travel along the baseline. Curve up right around the clock to 1:00. Pause. Swing a way to connect.


You can see how, with all of these verbal prompts, it would be overwhelming to learn cursive only by verbal instruction. For this reason it is very important that students visualize each step as it’s performed. This can happen on an overhead with the chalkboard or whiteboard classroom instruction, one-on-one with verbal visual and verbal cues, and with close models of the letters. Another strategy is a visual model of letters with direction arrows.


Practice each letter in a group focusing on one letter at a time. Use the wave model as a guide. When a new letter is introduced, continue with previously learned letters. If a c is taught first followed by a letter a, students can connect “c” to “a” almost immediately after learning letter “a”.
 

More Cursive Handwriting Tools and Resources:


More cursive writing resources (Click on the images to find out more):

Need help with the underlying skills needed for handwriting? Start here on our Handwriting resources page.
The Handwriting Book  is a huge resource when it comes to addressing handwriting concerns. It’s a book written by 10 occupational therapists and physical therapists and refers to every underlying skill related to written work. This is a tool for therapists, teachers, and parents.
Share this cursive resource!
Practice cursive letter formation using Wave Letters to practice handwriting and teach cursive letter c, a, d, g, q, and o with this fun fish handwriting activity.

Pre-Cursive Activities

Before a child learns to write letters in cursive, connect letters together, and recall the formation of cursive letters, it is helpful to build the skills needed for controlled pencil movements.  When writing in cursive, we keep the pencil tip on the paper for a longer period of time compared to printed handwriting. When writing in print, the pencil lifts up several times within a single letter. For cursive handwriting, it is necessary to move the pencil with a dynamic pencil grasp in order to move the pencil along the line of a word. Engaging kids in pre-cursive activities and exercises can help with the dexterity needed for cursive letters.

Pre-cursive activities like tracing and copying curves, re-trace, bumps, and angles helps develop the visual motor skills needed for copying cursive letters. 

If you have plans to teach cursive handwriting to a student or classroom soon, then the pre-cursive activities listed in today’s post will be a benefit to you.


This post and the posts you’ll see here over the next month are part of our 31 day series on teaching cursive. You’ll want to check out the How to Teach Cursive Writing page where you can find all of the posts in this series. 


For more ways to address the underlying skills needed for handwriting, check out the handwriting drop-down tab at the top of this site.


Use these pre-cursive activities to help kids develop the dexterity and motor control as well as the visual motor skills needed for writing in cursive.

Pre-Cursive Activities


A quick Google search will present you with tons of worksheets designed to promote pre-cursive skills. You can find some that we’ve shared on our new Cursive Handwriting Pinterest board. While pre-cursive worksheets work for boosting the skills needed to copy and form letters, worksheets can get a little boring. And for the student who just wants to learn to write in cursive, they can become downright tedious!

Addressing the pre-cursive skills needed for dexterity and visual motor skills can be developed and strengthened with hands-on activities that are far from tedious…they are fun!

Pre-cursive lines for cursive writing


Fun Pre-Cursive Activities for Kids

First, start with a set of lines that will help with pencil control. Then, use some of the activity ideas below to copy and trace these lines.

  • Pre-cursive handwriting activities can help kids trace and copy the lines needed for continuous pencil motions while strengthening the hands.
  • Try some of these fun pre-cursive activities. (And then try some of the others on another day!)
  • Create waves, angles, bumps, loops and swoops with a pencil across a page. Students can trace the lines with highlighters or colored markers. Ask them to continue to trace the lines with additional colors, creating a color rainbow.
  • Draw a wave, curve, series of bumps or loops across a page in pen. Students can trace the line in glue. Allow the glue to harden. Students can then trace the glue line with their finger. 
  • Draw a wave, series of loops or bumps across a page. Students can trace the line with glue and then stick a length of yarn onto the glue.
  • Create a series of waves, loops, curves, or bumps across strips of paper. Students can copy the form onto another piece of paper using various mediums: chalk, colored pencil, water (use a paintbrush), or pipe cleaners.
  • Use Wikki Stix to copy or create lengths of pre-cursive lines. 
Use these pre-cursive activities to help kids develop the dexterity and motor control as well as the visual motor skills needed for writing in cursive.

These therapy tools can help kids learn to develop and strengthen the skills needed for learning to write in cursive by strengthening visual motor skills, motor planning, and dexterity.

Tools to build pre-cursive writing skills:


Affiliate links are included in this post.

Wikki Stix Wikki Stix are a huge fine motor tool for building strength and dexterity. Stick ends of the bendable and sticky pieces to one another to create a long strand that can be used to copy and create series of loops, cursive letter “c’s”, bumps, or angles.
Jump Ropes Use jump ropes to form and copy curves, spikes (several lines needed for letter “w”, or bends. This set of colorful jump ropes are 9 feet long and comes in a set of 6 ropes that can be tied or simply placed end to end on the floor. 
Colorful Craft String can be used with glue to copy or create textured pre-cursive lines on strips of cardstock. Use this set of string to create cursive line art on a large outline of a picture.
Stretchy Fidget String is a short length of string, but it’s stretchy components make it a fine motor tool that you don’t want to miss. Attach several strands together to copy and create pre-cursive lines from a model.
Pipe Cleaners can be used in so many ways to copy and create the pre-cursive lines and writing strokes needed for cursive handwriting.
Use craft pom poms to build cursive lines. Ask kids to copy or trace curves, loops, angles, or bumps with glue. They can then press the crafting pom poms into the cursive lines to develop and strengthen fine motor skills while boosting visual motor skills.

The Handwriting Book  is a huge resource when it comes to addressing handwriting concerns. It’s a book written by 10 occupational therapists and physical therapists and refers to every underlying skill related to written work. This is a tool for therapists, teachers, and parents.
These therapy tools can help kids learn to develop and strengthen the skills needed for learning to write in cursive by strengthening visual motor skills, motor planning, and dexterity.


Gross Motor Cursive Writing Warm-Up Exercises

Today in the cursive handwriting series on The OT Toolbox, we’re talking all about gross motor activities and gross motor cursive writing warm-up exercises that can be used to work on and teach cursive letter formation. These are fun activities that can be used with kids who haven’t even yet attempted to write their first letter in cursive. 


If you are teaching cursive writing to a student, this cursive writing series is for you. 


If you are concerned about how to teach cursive writing to students, then this cursive writing series is for you. 


If you are you a therapist who is looking for strategies and creative ideas to help students improve cursive writing as a means of functional and legible handwriting, then this cursive series is for you. 


Below, you’ll find ways to teach cursive writing by addressing the motor plan and verbal cues needed for cursive letter formation in a playful and fun way.


Cursive writing strategies to help kids learn to write in cursive, and this gross motor cursive warm-up exercises are perfect for teaching kids to write in cursive!
This post and the posts you’ll see here over the next month are part of our 31 day series on teaching cursive. You’ll want to check out the How to Teach Cursive Writing page where you can find all of the posts in this series. For more ways to address the underlying skills needed for handwriting, check out the handwriting drop-down tab at the top of this site.

For resources in handwriting, join us in the Sweet Ideas for Handwriting Help Facebook group.


Gross Motor Cursive Writing Warm-up Exercises


One strategy for teaching cursive writing is using a warm-up program with gross motor movement activities. This is an easy way to get kids moving and ready to focus on cursive writing practice. The large motor cursive writing exercises described below can be used with kids who haven’t yet started on cursive writing instruction. They can also be used at the start of each cursive practice session as a warm-up tool. 

An added bonus for the classroom teacher is that these activities can be a much needed brain break activity during the school day.

Introduce the cursive motions needed for letter formation using large motor patterns. This can be done in a variety of creative ways (described below). Students who are learning a new series of letters or new cursive letter family can practice the movement patterns using large motor or gross motor exercises.


TIP: Try teaching groups of letters together based on the components of the letters. Teaching cursive letters by their cursive letter families can help kids learn letter formation and with carryover.

Gross Motor Exercises for Pre-Cursive Writing


Gross motor cursive warm-ups can be done as a class or individually.  For kids who are not yet learning cursive writing, use the gross motor cursive writing warm-up exercises as an introduction for verbal prompts they will hear as they begin to learn letters.

Instruct children to complete the exercises using a model and with consistent verbal cues. Verbal cues should be the prompts that will be used for cursive letters (i.e. “Start at the bottom. Swoop up. Trace back down. Stop. Swing away.”) Repeat a series of motions needed for a specific letter family or letter. 

The teacher or therapist should stand in front of the students with their back facing the students so that the motions are consistent and the class is able to copy the large motor motions. 

Instruct students to continue with a set of loops, scalloped motions (such as forming a series of lowercase cursive “u’s” in the air), or bumps (as in forming a series of lowercase cursive letter “m’s” in the air.)

Children can move their arms through the air as they practice writing the cursive letter family strokes. Then move onto individual letters. Try using some of the ideas below to work on gross motor motions for introducing cursive letters.

Gross Motor Cursive Writing Activities

Cursive writing strategies to help kids learn to write in cursive, and this gross motor cursive warm-up exercises are perfect for teaching kids to write in cursive!


Use a movement stick with a ribbon attached to a dowel rod. This is an easy do-it-yourself craft that kids can work on together and to get excited about learning cursive. Or, use a highlighter or marker with a lid. Tie long ribbons in a knot under the lid of the marker. This is a fun activity for the whole class.


Allow each student to use a pencil with the eraser side pointing out into the air, as if the pencil were a wand. Ask them to hold the pencil tip in their hand and use the pencil wand to form letters or cursive family strokes in the air.


Students can use a paintbrush on a chalkboard to draw letters in water. Ask them to draw large movements.


Children can hold a feather to draw letters in the air. 

Students can use their finger to work on cursive connectors or cursive family strokes on the back of another student.


Use a writing tray with a variety of sensory mediums.


As noted above, be sure to use consistent verbal prompts when using gross motor cursive writing warm-up exercises. 

Don’t forget to try all of the cursive writing strategies in the How to Teach Cursive Writing series!


More cursive writing resources (Click on the images to find out more):

 Cursive writing strategies to help kids learn to write in cursive, and this gross motor cursive warm-up exercises are perfect for teaching kids to write in cursive!

You’ll find more cursive writing strategies by clicking the images below:


Cursive Writing Lesson Plan

When students learn new cursive letters, it can be very helpful to have a consistent pattern of instruction. A cursive writing lesson plan can include consistent activities that are used with each letter as it’s learned. Students can then know what to expect and can benefit from different learning tools to ensure motor planning of letter formation. This strategy is helpful when teaching kids how to write in cursive


This cursive writing activity guide and the posts you’ll see here over the next month are part of our 31 day series on teaching cursive. Be sure to check out the How to Teach Cursive Writing page where you can find all of the posts in this series. There are more ways to address the underlying skills needed for handwriting under the drop-down tab at the top of this site.
 
For resources in handwriting, join us in the Sweet Ideas for Handwriting Help Facebook group.
Use these cursive writing lesson plans for ideas on how to teach cursive writing to kids using creative cursive writing tips, handwriting activities, movement, and cursive writing ideas.


Cursive Writing Lesson Plan


This plan of activities can be used for each letter of the alphabet as it’s taught.


1.) Gross Motor Warm-Up


2.) Show and Describe- The teacher, therapist, or parent can write a model of the letter and use the simple verbal prompts needed for each stroke of the letter. This can be repeated several times and as needed throughout the cursive writing lesson.


3.) Air Write and Say- The instructor should stand in front of the student/s with their back to the student/s. They can use their whole arm to write the letter in the air, using consistent verbal cues for each stroke of the letter. After showing the students how to write the letter in the air, the class/student should write the letter in the air. They can say the verbal cues out loud. Repeat air writing as needed. Gross motor cursive handwriting practice can help with the overall direction of letters and the view of the letter in the mind’s eye of a child…helping with formation skills and carryover.


4.) Eyes Closed Air Write- Students can form the letter in the air while their eyes are closed. Students should say aloud, the verbal prompts for each stroke of the letter. When students write with their eyes closed, accurate formation is not essential, however the student will visualize the letter in their mind’s eye while practicing the verbal cues for each stroke of the letter, building carryover of verbal cues.


5.) Finger Trace and Say- Students can trace the cursive letter on paper, using their index finger to trace a model. Students should say aloud, the verbal cues for each stroke of the letter.


6.) Pencil Trace and Say- Students should trace the lines of the letter using gray scale letters so that they can see their pencil strokes. The verbal prompts for each stroke of the letter should be said aloud.


7.) Pencil Trace- Students can trace the letter without saying the verbal cues.


8.) Write and Say- Students can write letters without tracing while saying the verbal cues for each stroke of the cursive letter. Students should have a visual cue on each line of the paper and should write each letter no more than three times after each visual model.


9.) Write- Students can write the letter without saying verbal cues out loud. They should continue with the visual model, and writing each practice letter no more than three times between visual models.

TIP FOR TEACHING CURSIVE:
Try teaching groups of letters together in clusters according to the components that make up that letter’s formation. Read more about cursive letter families and this strategy.


Once cursive letters have been taught, it can be helpful to practice them in creative ways using multiple senses. There are many ways to practice cursive letter formation. Try some of the ideas below.