Positioning When Writing in Cursive

positioning for cursive writing letters

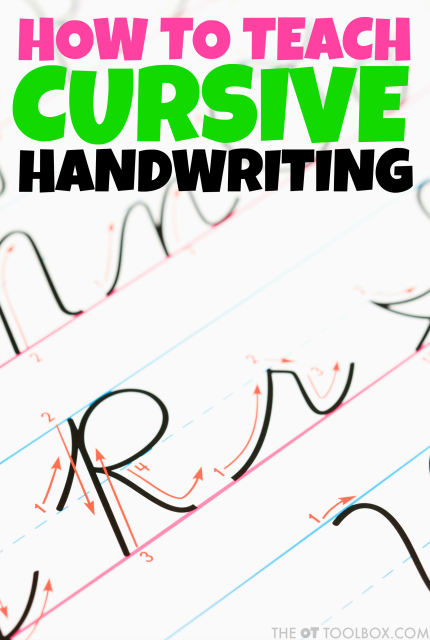
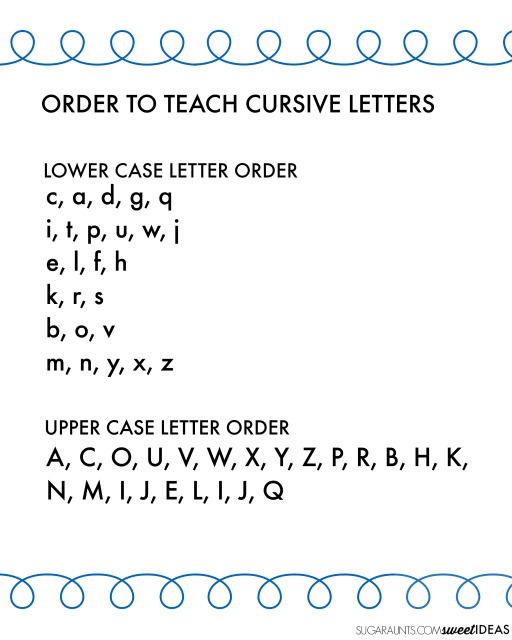
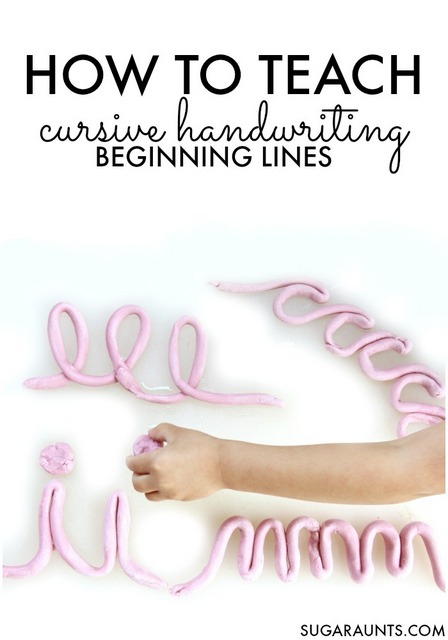
Have you been working on cursive writing with a student? Are you concerned about how to teach cursive writing to students? Are you a therapist who is looking for strategies and creative ideas to help students improve cursive writing as a means of functional and legible handwriting? The handwriting ideas below are for you! Below, you’ll find ways to teach cursive writing by assessing and promoting proper posture in cursive writing. 


  This post and the posts you’ll see here over the next month are part of our 31 day series on teaching cursive. You’ll want to check out the How to Teach Cursive Writing page where you can find all of the posts in this series.

For more ways to address the underlying skills needed for handwriting, check out the handwriting drop-down tab at the top of this site.  

For resources in handwriting, join us in the Sweet Ideas for Handwriting Help Facebook group.  

Use these tips and strategies to help kids writing in cursive by addressing positioning at a desk, environmental concerns with cursive writing, and paper positioning with cursive writing.

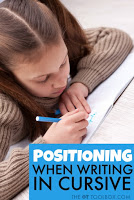
Positioning During Cursive Writing

    When we write in cursive it’s really no different than sitting at a desk to write and print it work.

Proper positioning can make a big difference however, between sloppy cursive writing and legible cursive writing. Here are a few a few key points to remember when positioning a child for cursive writing success.

Positioning at a desk when during cursive handwriting

The child must be seated seated comfortably and upright. They should be well-balanced and straight at the midline with 90° flexion posture at the knees, feet, and hips.   

A proper sized desk and chair is essential for cursive handwriting as well as printed writing. The writing arm should be slightly abducted at the shoulder with the elbow flexed. The elbows should be even with the desk surface.   

It’s essential that a child is not sitting at a desk that is too tall for the child. This is a common factor when it comes to positioning for any student in the classroom.   

Paper positioning on a desk for left handed writers and right handed writers when learning to write in cursive.

Environmental positioning issues when writing

When a child is learning to write in cursive or is practicing handwriting there should be sufficient light.

Especially when writing in cursive, a hand can get in the way so that little kids cannot see how they are forming letters. If their shadows reflecting onto the written work, it can interfere with self assessment of formation.

A sloped writing surface such as an easel or a three ring binder can help with extended wrist and with copying letters from a source like an overhead board or a SmartBoard.

Paper positioning for cursive handwriting

When a child is writing they should be able to move their hand and arm freely to position the paper. When writing in cursive, right-handed children should position the paper slightly to left side of the desk.

Left-handed children should position the paper slightly to the right side of the desk. This is especially true for the left-handed writer whose arm crosses over their body in front of them on the desk.

They can’t see what the letters have been formed and the amount of writing space that is available as they head towards the right margin of the page.   The top of the paper should be parallel with the child’s dominant hand and at a 45 degree angle on the desk.   

The tilt of the paper can help with slant of cursive letters. Left-handed writers will want to slant the paper about 20% to the right. The right lower corner of the paper should be pointing toward the child’s right armpit.   

Right-handed writers will want to slant the paper about 20% toward the left. The left lower corner of the paper should point to the child’s left armpit.

Poorly positioned paper on the desk can result in cramped motions of letter formation and specifically reduced dexterity in the distal fingers.

Providing enough room and space on the desk and placement of the paper can allow for flow in rhythm in cursive writing.   Here, you will read more about paper positioning when writing and find an easy desk modification that can be used in the classroom.   

Posture and positioning make a big difference in legibility of cursive handwriting. Be sure to start each cursive writing practice session with a quick posture check and environmental check.   

Stop back tomorrow for another cursive writing strategy or check them all out on our How to Teach Cursive Writing master page.    

Use these tips and strategies to help kids writing in cursive by addressing positioning at a desk, environmental concerns with cursive writing, and paper positioning with cursive writing.


How to Teach Cursive Handwriting

You may have heard on our social media channels or via our newsletter that we have an exciting new series planned here on The OT Toolbox. Over the next month, you will find strategies, tools, and tips to teach cursive handwriting


This cursive writing series is designed to provide many different ideas for helping kids learn cursive writing for the first time or to address problems like cursive writing legibility.

Many times parents and teachers struggle with how to teach cursive handwriting. These cursive tips, cursive writing tools, and handwriting activities will help kids learn to write in cursive.


Cursive writing is being taught in the schools less than before. Teachers struggle to find time within their busy day to focus on the pre-writing exercises needed for cursive writing. Many times, teachers and entire school districts don’t have a specific cursive writing curriculum to follow. 


This means teachers across the hall from one another in the same building can be instructing students in very different ways. Some kids in the same school district may have more practice that other kids. 


When those students age into older grades, some will be able to write with more legibility and a better base of cursive handwriting knowledge than others.


Other schools have completely eliminated cursive writing. What may happen then is that parents instruct their children at home or not at all.


For other children who struggle with printed work or who present with handwriting problems in general, cursive writing is a strategy for legibility.  For the child who struggles with dysgraphia, the fluid motion and reduced pencil movements of cursive can help with legibility.


For all of these reasons, we wanted to share an intense look at cursive writing.


Watch the video below.  You may have seen it floating around on Facebook. But if not, check it out. Cursive handwriting, and teaching the art of cursive is very needed in our kids today!


Over the next 31 days, you’ll find writing exercises, tricks, strategies, and activities designed to teach cursive handwriting.


Be sure to stop back to this page each day over the month of October. We will add a link to each cursive writing tool here. When the month is over, you’ll have all of these cursive writing strategies in one place. Bookmark or Pin this page so you don’t lose it and can come back to the cursive writing tools over the next month.


This cursive writing series will work similarly to our previous 31 day series on handwriting.


One tip about this month’s series on cursive handwriting: This series is not intended to be completed in 31 days. Cursive writing involves pre-writing practice, instruction to ensure proper formation, and practice. It’s important to ensure carryover of skills by coming back to practice proper motor plans for legibility and success.

This 31 day series will go through all of the steps of learning cursive writing and teachers, therapists, and parents will love these handwriting strategies to teach cursive handwriting.

How to Teach Cursive Handwriting

31 Days of Cursive Handwriting:


more cursive handwriting tips:

Cursive writing tools to buy (Click on the image to find out more):
Affiliate links are included in this post. 
Kids will love these cursive writing tips and handwriting ideas to learn cursive handwriting.
Try this 31 day cursive writing series to teach kids to learn cursive. Therapists and teachers can use these handwriting tips, cursive writing tools, and cursive strategies to teach cursive handwriting.

How to teach cursive writing with tips, strategies, ideas, and research

Teach Cursive Writing

teach cursive letter formation

So often, teachers are challenged to teach cursive writing without a curriculum or without training. Maybe they have students who struggle with printed handwriting, are challenged with difficulties such as dysgraphia or fine motor problems. These teachers may be trying to fit cursive handwriting practice into an already packed school day. That’s you will love the strategies for cursive writing alphabet tricks, all about teaching cursive letters in ways that kids will love.

Teach kids cursive writing with these tips and tricks to make cursive fun.

Teach Cursive Writing (the fun way!)

This cursive handwriting series will be a collection of articles on teaching cursive letters in easy steps, using hands-on activities, simple verbal cues, fun visual prompts, and with video tools. It will be an extension of previous cursive handwriting activities found here on The OT Toolbox. For now, start with this post on How to Teach Cursive Letters for resources and cursive writing activities.

The links below will be helpful for teaching cursive letters for use in the classroom, homeschool dining room, or as additional handwriting practice at home.

Teaching cursive writing is easy with these handwriting tricks, verbal prompts, visual cues, and writing strategies for learning cursive handwriting.


Teach Cursive Writing

One of the struggles that teachers have mentioned in the Sweet Ideas for Handwriting Help Facebook group is finding time in the school day to teach cursive handwriting. This teaching cursive letters series can help with that struggle. Each letter will have an accompanying video that can be played on loop while students complete worksheets related to that cursive letter. This is a nice morning work activity that students can complete on their own. Simply have the video playing as students walk into the room. They can then follow along to complete the practice sheets.

Start by grabbing this cursive writing order free printable sheet. There, you can read more about why this particular order is recommended.

Be sure to stop back for more cursive handwriting posts here as this series is completed.

This series will be addressed through our 31 days of cursive writing challenge. Letters will be added throughout the series. Join us each day over a 31 day span to learn cursive writing tips, tools, activities, and pre-cursive exercises.


Cursive Writing A-Z

Wave Family Letters

These cursive letters are part of the “wave family”. Each letter in this group starts with a curved upward line that looks like a wave. The pencil traces back down over that wave and curves to the bottom. Here are tips and tricks to teach wave cursive letters.

Lowercase cursive letter c 
Lowercase cursive letter a
Lowercase cursive letter d
Lowercase cursive letter g
Lowercase cursive letter q

Tree Family Letters

The cursive letters in this group are part of the “tree family”. These are letters that swing upward and then back down over that same line, like a tree or a stick. Here are tips and tricks to teach tree cursive letters.

Lowercase cursive letter i
Lowercase cursive letter t
Lowercase cursive letter p
Lowercase cursive letter u
Lowercase cursive letter w
Lowercase cursive letter j
Lowercase cursive letter r

Lowercase cursive letter s

Loop Family Letters

These cursive letters all begin with a loop, making them part of the “loop family”. Here are tips and tricks to teach loop family letters.

Lowercase cursive letter e
Lowercase cursive letter l
Lowercase cursive letter f
Lowercase cursive letter h
Lowercase cursive letter k
Lowercase cursive letter b
Lowercase cursive letter o

Bump Family Letters

All of these cursive letters are part of the “bump family”. The letters begin with a bump. Here are tips and tricks to teach the bump cursive letters

Lowercase cursive letter v
Lowercase cursive letter m
Lowercase cursive letter n
Lowercase cursive letter y
Lowercase cursive letter x
Lowercase cursive letter z


Teaching Upper Case Cursive Writing

Uppercase cursive letter A
Uppercase cursive letter C
Uppercase cursive letter O
Uppercase cursive letter U
Uppercase cursive letter V
Uppercase cursive letter W
Uppercase cursive letter X
Uppercase cursive letter Y
Uppercase cursive letter Z
Uppercase cursive letter P
Uppercase cursive letter R
Uppercase cursive letter B
Uppercase cursive letter H
Uppercase cursive letter K
Uppercase cursive letter N
Uppercase cursive letter M
Upperase cursive letter I
Uppercase cursive letter J
Uppercase cursive letter E
Uppercase cursive letter L
Uppercase cursive letter Q
Uppercase cursive letter D
Uppercase cursive letter T
Uppercase cursive letter F
Uppercase cursive letter G
Uppercase cursive letter S

Teaching cursive letters and need them in alphabetical order? 
a | b | c | d | e | f | g | h | i | j | k| l | m | n | o | p | q | r | s | t | u | v | w | x | y | z 
A | B | C | D | E | F | G | H | I | K | L | M | N | O | P | Q | R | S | T | U | V | W | X | Y | Z

Teach kids cursive writing with these cursive handwriting tips and tools.

More creative cursive writing practice

Looking for more ways to work on cursive letters? Try these cursive writing ideas:

 
Teach cursive writing a-z with these cursive handwriting tips.

Thank you for Cursive Writing Checklist

Thank you for grabbing the Cursive Writing Assessment Checklist. 


Right now, you should have an email with the freebie in your email inbox. There, you will be able to access the cursive writing assessment checklist.


Use the checklist as a way to assess cursive handwriting needs to to monitor progress. 


Be sure to use the notes area of each section to describe and record the development of specific skills, strategies, and accommodations. There is space to record anecdotal notes and comments related to each area within the checklist. 


Consider using assessment strategies such as:
Mark and identify skills they would like to improve within the assessment checklist. 
Mark or identify more difficult areas of cursive handwriting for the individual. 
Mark of identify current accommodations.


If you arrived on this page by search and would like to access the free printable cursive handwriting assessment checklist, grab it HERE.


Use these cursive writing activities to further address needs such as letter formation, progression, and practice:


How to Teach Cursive Writing

If cursive writing practice (and the order to teach cursive letters) is on your mind, this resource on how to reach cursive writing is for you! You might have noticed a few cursive handwriting activities on the blog recently. I have a new third grader who learned cursive letters last year in second grade and is excited to write more in cursive handwriting this year in third grade.  I loved teaching kids to write in cursive as a school-based Occupational Therapist. 

How to Teach Cursive Writing


Cursive handwriting can be a struggle for many kids.  Many times, it is the lack of practice time that impacts legibility.  

When schools are cutting or limiting cursive handwriting instruction from the daily curriculum, children just don’t get the practice time they need for fluid pencil strokes, cursive letter connectors, and appropriate letter formation in formal instruction time.  

Consider the increased use of screens and technology as a means of written expression and cursive handwriting may fall even further in the lineup of importance.  


At home, parents may be limited in time when it comes to homework help, after school activities, work requirements, dinner preparation, evening activities, and bedtime preparation.  When the daily schedule is filled to the brim, there may not be time to work on handwriting. 


There are a lot of handwriting resources here on the site.  The cursive handwriting strategies are increasing as well.  Adding cursive handwriting practice into play in creative and playful manners can help kids improve letter formation and letter strokes when time is limited for addressing how to teach cursive letters. 

I loved teaching motor planning to form letters, line and size awareness to keep the letters on the lines, and re-trace with the cursive swoops and loops to help make written work legible.  


So, with my own kiddo being so excited to improve her cursive, I decided to work through the alphabet and share tips and tricks to help parents and teachers teach cursive letters.  

There are many school districts that are cutting cursive instruction from their curriculum. For parents who have students in those many school districts, it can be overwhelming to teach their kids cursive letters and written work.  


On this page, you’ll find links to all of the cursive letter posts as they are created.  Be sure to bookmark this page and come back often as we go through the cursive letters of the alphabet.  


You’ll notice that the cursive letters are not being done in alphabetical order. There is a reason for the cursive letter order that we’re doing.  

How to teach cursive letters to kids and students with creative tricks and tips
 
It’s important to mention that there is a lot of talk and debate about schools cutting cursive instruction from the learning day.  
 
There is even a push to teach cursive handwriting before manuscript. Whatever your thoughts, it might be of interest to teach or supplement your child’s cursive handwriting instruction with creative, hands-on learning styles.  
 
Parents can use these tips to teach kids cursive handwriting at home.  
 
Teachers can use these tips and tools in the classroom. And therapists can use these ideas in the clinic setting.


How to teach each of the cursive letters:

These resources cover how to teach cursive writing from a hands-on approach. Each activity listed below covers a different aspect of cursive writing. 

You’ll find activities that address areas such as:

  • How to teach specific letters in cursive
  • Cursive letter order
  • Creative cursive practice ideas
  • Sensory cursive activities
  • Fun ways to teach cursive writing


You’ll find lots of creative ways to practice these cursive letters here: 
Cursive letter orderLearn cursive writing with this cursive handwriting activity to learn cursive letters, lines, and connecting lines on the window.


So? Which activity do you think you’ll try to teach cursive letters?

Cursive Letter Order Handout

Get the cursive handwriting letter order sheet here.  Print it out for handing out to parents, other therapists, or to use in an Occupational Therapy home exercise program or education.  


We do love to share creative ways to teach cursive letters and letter order is just a starting point when parents or teachers are wondering where to begin. 


Read the full post for therapeutic reasoning for this cursive letter order.


Here is more information about teaching cursive letters in groups or cursive letter families.


Please contact Colleen at theottoolbox@gmail.com with any inquiries about using this handout in group education. 


Print out your handout here.

See all of our cursive handwriting activities here.

Looking for more ideas to help with cursive? You’ll love our 31 day series on How to Teach Cursive Writing.

Slime Writing Tray

Have you made slime?  I have to admit. We’ve got tons (and tons) of play dough recipes…but we have never made slime.  It’s been on our list for a long time, but we just never got around to it.  We whipped up our first batch the other day and I think I have created a family of slime monsters.  My kids were all. over. the slime.  When we started using the slime in a slime handwriting tray activity, they were even more into it!  This is a perfect addition to our writing trays for handwriting ideas. 


(Psssst: This sensory writing activity would be perfecto in a DIY Sensory Handwriting Camp this summer!)


They were a little hesitant to try touching the slime at first, but once they saw mom getting in on the fun, they had to try the squishy, slimy material. After a few “eeeewwww!”s, they were loving the slime!  I think we have a lot of slime in our future. 

Have you ever wondered how to make slime? This slime recipe is super easy and a great tactile sensory play texture for kids. We used it to work on letter formation and motor control of the pencil with a sensory handwriting writing tray!

How do you make slime?


So, you’ve probably seen all of the awesome slime sensory play pictures all over pinterest.

(Check out our Play Dough, Clay, Goop, and More pinterest board for tons of fun sensory play ideas.)


But, how do you actually make the stuff?  As a newbie slime-making mom, I had to look it up.  We used this recipe and it turned out completely slimy and fabulous.  I have to tell you though: If you are a new slime maker, there is no way you can mix up a batch of slime and take pictures.  It just won’t happen.  So, I have to apologize for the lack of awesome slime-in-process pics, and even the requisite slime-falling-from-a-child’s-hands pictures. We are a ways off from those action shots in our slime journey.


So after we mixed up our new slime baby, we had to get to playing.  


Slime novice tip:  Slime is messy.  And by messy, I mean M.E.S.S.Y. If you are looking for a tactile sensory play activity, this is it.  It’s the coolest texture, but it is mess in a bowl.


Slime Handwriting Tray

After playing Slimer from Ghost-busters with our wiggly glob, we decided to try a writing tray.  This was super easy and a creative way to work on letter formation.  Plop the slime into a low edged tray.  I used a lid from a plastic bin.  Then, grab a pencil with an intact and new(ish) eraser.  Use the eraser to write letters and shapes.  


Love writing trays? Try this easy rice writing tray to work on letter formation and number formation. 
 
Have you ever wondered how to make slime? This slime recipe is super easy and a great tactile sensory play texture for kids. We used it to work on letter formation and motor control of the pencil with a sensory handwriting writing tray!

Sensory handwriting idea: Try this sensory writing tray for high visual contrast letter formation.

Have you ever wondered how to make slime? This slime recipe is super easy and a great tactile sensory play texture for kids. We used it to work on letter formation and motor control of the pencil with a sensory handwriting writing tray!
This is a GREAT way for new writers and pre-writers to work on letter formation and pre-writing forms.  The slime maintains it’s form for just a little while, but long enough for the letter to stay visible for a bit.  It’s a nice way for kids to trace shapes with an appropriate motor plan and tripod grasp on the writing tool.  
 
Try these handwriting activities with a slime writing tray:
  • Trace shapes, lines, and letters in the slime.
  • Copy words into the slime.
  • Practice spelling words in the slime.
  • Do single, double, and multiple digit addition and subtraction problems in the slime.
 
Have you ever wondered how to make slime? This slime recipe is super easy and a great tactile sensory play texture for kids. We used it to work on letter formation and motor control of the pencil with a sensory handwriting writing tray!

How would you use a slime writing tray for handwriting practice?

A few of our favorite messy, sensory activities that you will love:

.

                                                   Fizzy Dough Cursive Letters 
                                                    Sensory Letter Formation 

Learn Cursive Handwriting on the Window

Looking for a fun way to learn cursive writing or practice handwriting?  This cursive handwriting on the window activity will encourage a functional grasp on the pencil, an extended wrist, and improved letter formation.  Learning cursive letters with creative writing techniques makes new concepts fun and memorable.  


My daughter is all about learning cursive lately.  When I share a fun way to practice, she is even more into it!  One day, I taped a piece of paper to the window for creative cursive practice.  Using a gel highlighter and a pencil makes this activity easy to set-up and efficient for learning.  


We’re sharing this post as part of our 31 Days of Occupational Therapy with free materials where most of the items we’re using are ones that you can find in your home.  It’s been a fun series and we’re excited to continue with today’s post!

Learn cursive writing with this cursive handwriting activity to learn cursive letters, lines, and connecting lines on the window.

 Learn Cursive Writing on the Window: 


This post contains affiliate links.  

Writing on a vertical surface encourages an extended wrist.  While writing on a full vertical surface like a wall or a window is not effective for a lot of writing, practice is appropriate for short periods.  Kids can practice letter formation and learn cursive writing lines with this activity.  
 
This activity is so easy to set up:  

  • Tape paper to a window.
  • Write cursive lines with a highlighter or marker.  I used a gel marker which is perfect with it’s smooth writing lines.  The gel glides onto the paper and with the glass surface of the window, it really provide a a lot of feedback for writing the smooth lines of cursive letters.  Let your child write with the gel marker to try it, too!  
  • Have your child trace the highlighter with a pencil.  The light will shine through the highlighter lines and make a great tracing line.  You can practice beginning strokes like we shared in this post, cursive letters, and words with connecting cursive lines. 
  • It can be helpful to teach similar cursive letters together in groups. Read more about cursive letter families.
Learn cursive writing with this cursive handwriting activity to learn cursive letters, lines, and connecting lines on the window.
 
This would be a great way to continue to learn cursive writing and practice cursive in your Creative Cursive Journal (get it free!)
 
You could also use free cursive worksheets right on the window for another way to practice.
Learn cursive writing with this cursive handwriting activity to learn cursive letters, lines, and connecting lines on the window.

More creative ways to work on learning cursive writing:

Do you remember learning cursive as a kid?  Do you still write in cursive?

Cursive Lines Fine Motor Art

The latest obsession in our house is learning cursive handwriting.  My oldest daughter asked to learn how to write in cursive and I was so very excited to show her.  Teaching kids how to write in cursive with creative techniques and unique modifications was one of my favorite things to teach as a school based Occupational Therapist.  

We’ve shared a few of the very beginnings of cursive lines, loops, and re-tracing marks that are a the foundation to to writing in cursive, and an important area to work on with older kids who might need a little more practice with pencil control and letter formation on in cursive handwriting.  


You can see all of our cursive writing ideas by searching “cursive” or clicking here.  This cursive lines fine motor art is a powerhouse of fine motor work and cursive handwriting practice.  We connected cursive lines, loops, and re-tracing to form the beginning letters (Read more about which cursive letters to start with.) and worked on connecting lines as well…all with a fine motor twist that resulted in gorgeous artwork!  

We worked on our cursive handwriting, however this activity would be done with any printed letter formation and number formation, too.
Work on cursive handwriting with this paper towel art with a fine motor twist.  Teach kids how to learn cursive lines and connecting lines with this fun activity.


This post contains affiliate links, however we used items that we had around the house as part of our  month-long Learning with Free Materials series where we are sharing learning ideas for homeschoolers and school-extension activities using items that are free or mostly free (i.e. CHEAP or you already have in the home), and is part of the 31 Days of Homeschooling Tips as we blog along with other bloggers with learning at home tips and tools.

Work on cursive handwriting with this paper towel art with a fine motor twist.  Teach kids how to learn cursive lines and connecting lines with this fun activity.


Cursive Handwriting Activity:

This activity is really so simple and makes such pretty art with a fine motor twist.  Start by using fine tip washable markers to write cursive letters, swirls, loops, and lines on a few sheets of paper towels.  Practice cursive connecting lines by making a long line of cursive letter “e”s or “l”s connected together.  Make a long line of “m”s connected to work on the re-trace needed for the bumps of the letters.  You’ll want to practice the re-trace of the letter “c” because that part of the letter is used in so many other cursive letters (a, d, g, and q).  Practice connecting them together for the up-swoop and smooth lines needed with writing cursive words.

Work on cursive handwriting with this paper towel art with a fine motor twist.  Teach kids how to learn cursive lines and connecting lines with this fun activity.

Next, re-trace the loops, swirls, and lines with other colored washable markers for more practice.  It’s starting to look colorful and arty already!
Work on cursive handwriting with this paper towel art with a fine motor twist.  Teach kids how to learn cursive lines and connecting lines with this fun activity.

Fine motor handwriting with an eye-dropper:

Pull out a dish of water and your favorite dropper to slowly add droplets of water.  Pinching the bulb of the dropper is a great fine motor workout for little hands.  Squeezing an eye dropper to grab water and then release droplets requires an open web-space and strengthens the hand muscles.  Dropping water slowly and by the droplet requires a precision and dexterity that works on motor control and further strengthens the intrinsic muscles of the hand.

Work on cursive handwriting with this paper towel art with a fine motor twist.  Teach kids how to learn cursive lines and connecting lines with this fun activity.
Try to use the water dropper as a writing utensil to follow along the lines of the cursive letters.  This will further strengthen fine motor skills as well as line awareness which is so important in handwriting.  Cursive letters will be practiced again and again with repetition by tracing with the dropper and further work on cursive letter formation.

My kids loved that they could add water slowly and make some parts very mixed and other parts more bold by adding less water.  Once you’ve added water to your cursive letter lines, let the paper towels dry.  The best method we’ve found for drying this art works is by hanging the wet paper towels over a cookie drying rack
which can be placed over a cookie sheet
to catch any drips.
More cursive handwriting activities you will Love: 

Love it?  Pin it!
Looking for more ideas to help with cursive? You’ll love our 31 day series on How to teach cursive writing.