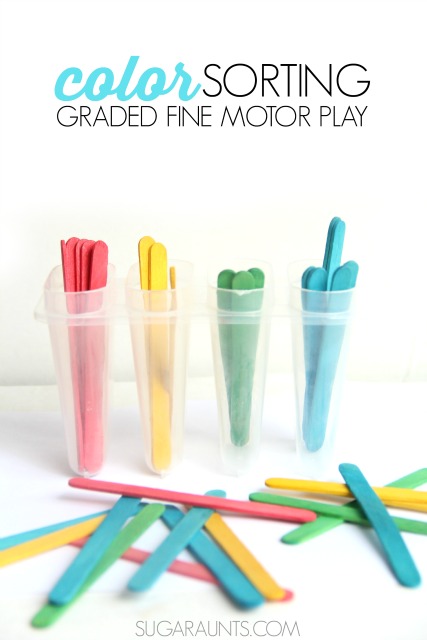
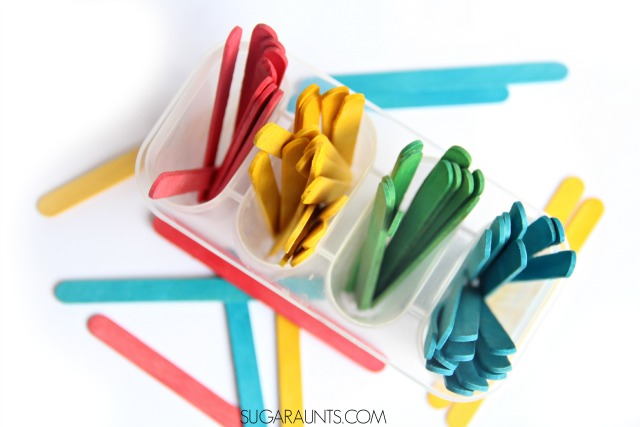
Pencil grips, pencil grips, pencil grips, there are so many types of pencil grips! Do I try this grip or that one? Does this child really need a pencil grip? Will they use this pencil grip? Will it be used correctly if they use it in the classroom? Ugh! So much to decide and so many variables to consider when it comes to handwriting. It is overwhelming! Does this sound like you in your practice as an OT? I’ve been there, and I’ve said these things to myself, and sometimes even to others. This post is here to help you decide what pencil grips to try and why!
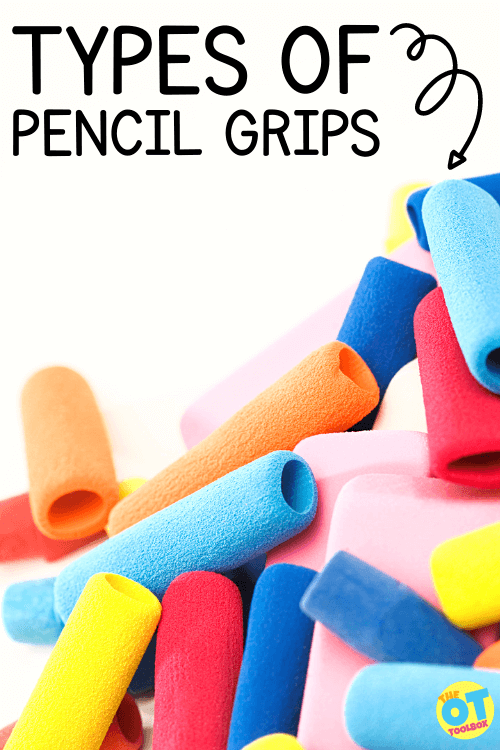
Types of Pencil Grips
In this blog post, we’ll dive into pencil grips occupational therapy practitioners may offer as a tool to support handwriting needs.
We’ll address types of pencil grips (with links for purchase) and why each pencil grip is used.
Finally, we’ll cover a variety of related resources and activities to support the development of pencil grip use.
To further explore pencil grasp development, take a look at our blog post, Pencil Grasp Development and get this great Pencil Grasp Quick Visual Guide, which helps Occupational Therapists identify and explain grasp patterns, using pictures to educate, and explain how pencil grasps progress developmentally.
The visuals will help parents and teachers understand grasp development and the goals for an appropriate grasping pattern. My prediction is that these tools will help get buy-in from the educational team and the family. It helps them understand exactly where the child is developmentally and where you, as the OT, wants the learner to head, and why!
pencil grips and Occupational Therapy
First, let me begin by saying that pencil grips are NOT a miracle cure for pencil grasp. They can help in certain circumstances based on the child’s individual needs.
Different types of pencil grips do not help to overcome the root of the inefficient grasp, as these issues must be addressed simultaneously, while implementing the gripper.
In occupational therapy sessions, the OT practitioner is striving to achieve the most effective and functional pencil grasp for each individual. A therapist may have 40, 50, or even 70 students on their school-based OT caseload…and each student will be completely different when it comes to grasp patterns, pencil pressure, positioning of the fingers, preferences, letter formation strokes, executive functioning skills, self-regulation, visual motor skills, sensory preferences, and handwriting considerations. All of these areas play into handwriting.
To meet the needs of the individual student, a pencil grip may be supplied as a tool to support those individual needs.
Before we get into the various types of pencil grips you may see an occupational therapy practitioner recommend, it’s important to cover functional pencil grip.
Pencil grips are designed to support the most functional and efficient pencil grasp a child can achieve.
This is based on many factors including; their current skill level, motivation, and understanding that the pencil grasp should be efficient and effective, but NOT perfect.
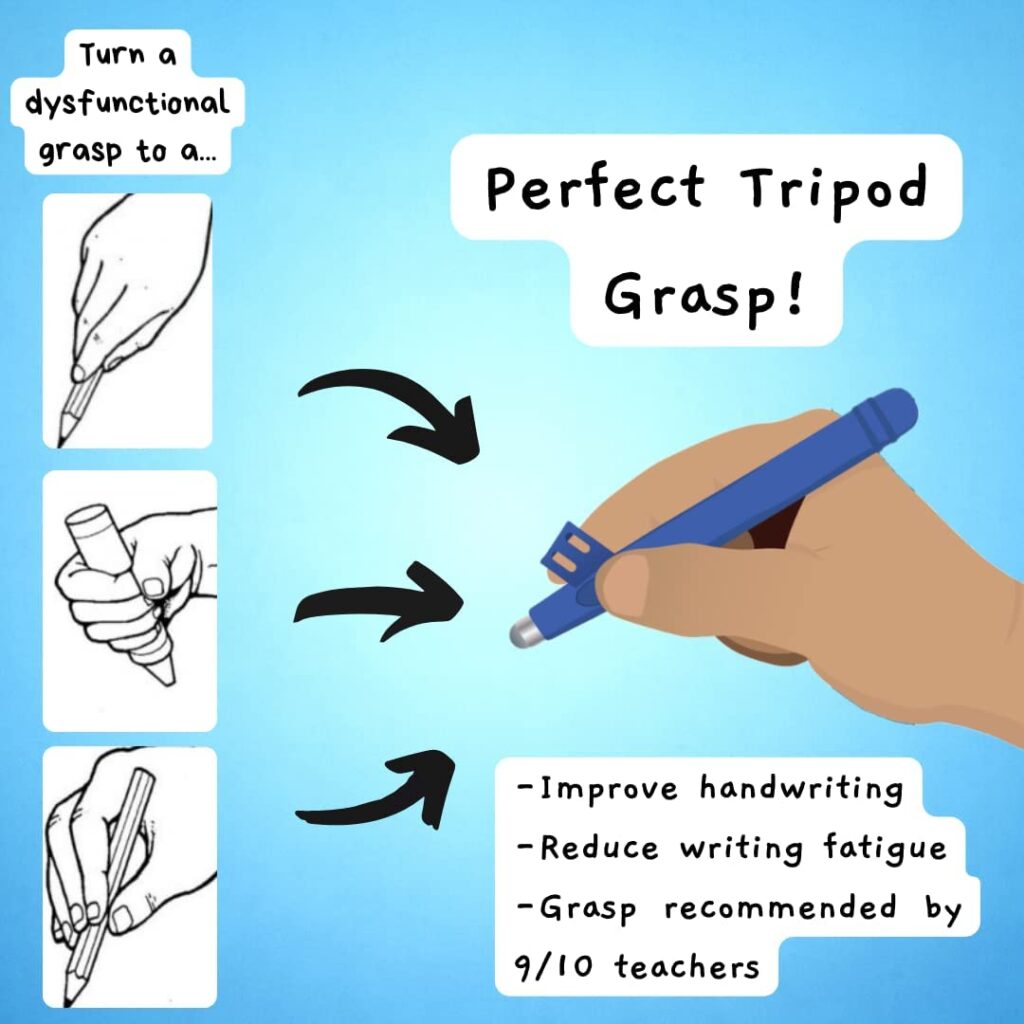
Functional grasps have a few basic components, which include; an open web space, skill fingers holding the pencil (thumb, first, and middle fingers), and stability (achieved with the ring and little fingers being curled securely into the palm). This results in an efficient and functional tripod grasp for the most success with handwriting, drawing, and coloring.
Inefficient grasps are used as a child attempts to compensate for lack of stability, skill finger strength, and endurance. With this inefficient grasp comes fatigue, pain, stress on the joints, decreased writing speed and overall legibility.
A pencil grip may be a tool provided to support a functional pencil grasp, depending on the needs of the individual student.
Think of pencil grips as a supplemental tool to aid a child as they continue to work on building the hand and finger skills needed to achieve an independent and efficient grasp.
The type of pencil grip can also serve to support the child as they focus on the writing process, therefore not exhausting their thought and energy, trying to remember to grasp the pencil properly for the best function.
The OT Toolbox has a great Pencil Grasp Bundle available for purchase to support various needs related to pencil grasp.
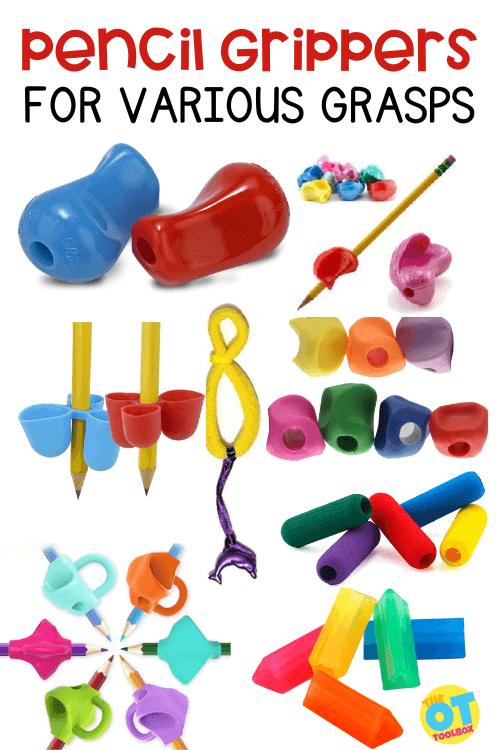
types of pencil grips
Now, without further ado, let’s proceed to types of pencil grips that most OTs recommend, what their purpose is, and why they are recommended!
There are so many types of pencil grips out there on the market. Some of those listed out include:
- Trigangle pencil grip
- Grotto pencil grip
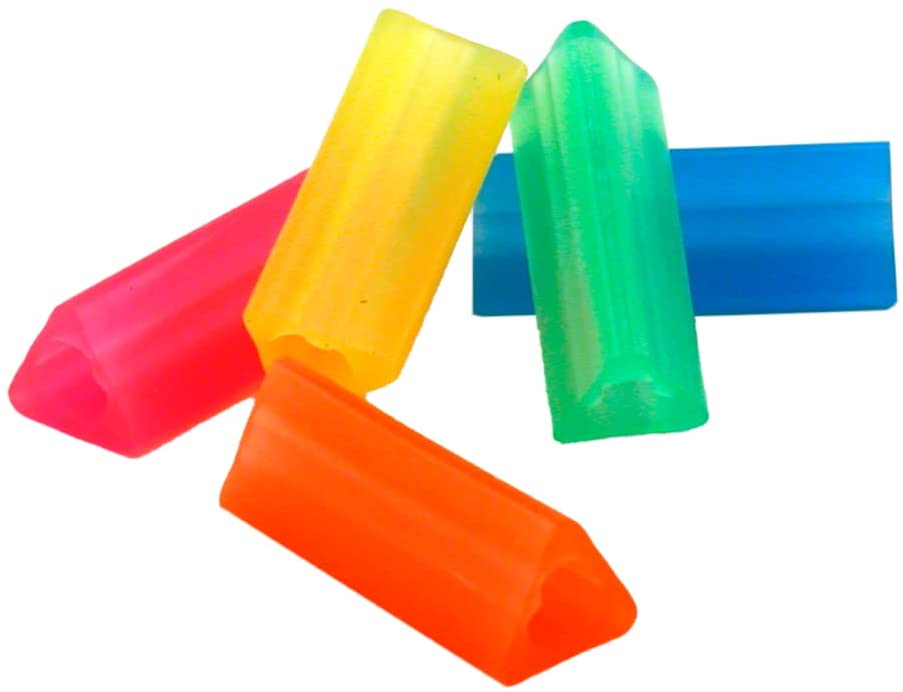
- Soft foam pencil grip (Classic foam pencil grip)
- The Pencil Grip
- Crossover Gripper
- The Writing C.L.A.W.
- Firesara Grip
- Twist n’ Write
- Handiwriter
- Write Right Stylus
- Stetro Gripper
- Weighted pencil grip
This is just a start of all of the types of pencil grips out there. We’ll go into greater detail on the benefits of each pencil grips, and why you would select one grip over another.
Let’s get started!
Amazon affiliate links are included below for purchase of various types of pencil grips.
Sometimes the easiest way to ensure a better grip on a pencil is by getting a smaller pencil into those hands. Golf pencils are some of the best tools for smaller hands, as they are the right size. The use of larger pencils and crayons leads to compensatory grasping patterns, as they are too long and too heavy for little hands to grasp and hold for long periods of time. A typical sized pencil in the hands of a child, is the equivalent of an adult trying to use a 12 inch pencil!
The physical size of hands and biomechanics of the muscles and joints in a child’s hand can’t possibly hold a large writing instrument unless they grasp it with compensatory efforts. This generally results in inefficient and ineffective grasps. Younger learners have far more maladaptive pencil grasp patterns than older adults, due to the young age at which learners are instructed to write. 40 years ago, writing did not begin until first grade. That gave the hands time to develop. Now writing starts in the two year old class, or in preschool many times. It’s because of the early push to trace, copy, and write letters in preschool that we see poor pencil grips established.
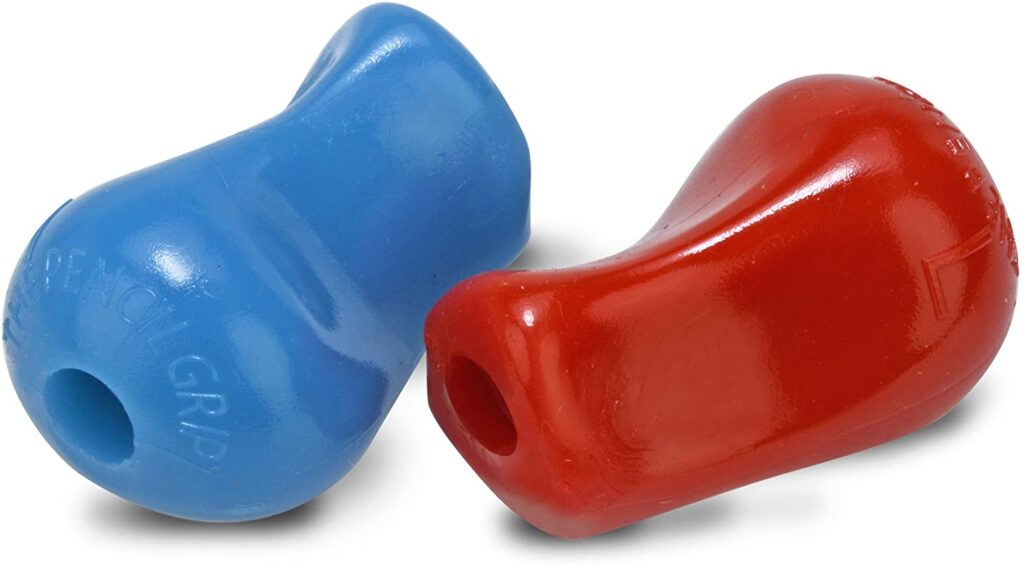
- The Pencil Grip (affiliate links):
This grip, simply called “the pencil grip”, is an oldie, but a goodie for some children. It is designed to provide cushiony comfort, with proper finger placement indicators for left AND right-handed writers. The Pencil Grip helps learners gain improved pencil control, while reducing fatigue. This type of pencil grip supports an open web space and tripod grasp. The pencil grip comes in mini, standard, and jumbo sizes, making it available for a variety of children and adults. Recently, I have been unable to find the mini-sizes.
- Crossover Grip (affiliate links):
Honestly, this grip is essentially “The Pencil Grip”, with a wing on the front to help prevent the fingers and thumb from wrapping over the pencil shaft. This helps keep the web space open. The crossover grip will aid some children who do not have a strong thumb overwrap pattern yet. If their thumb overwrap is significant, this grip may not be the one for them, as it allows a wrap grasp with little resistance. It is cushiony and does not prevent the learner from wrapping their thumb over the material.
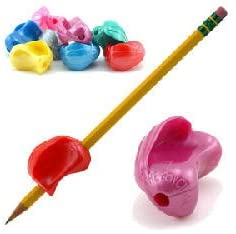
- Grotto Grip (affiliate links):
This type of grip is great for the children that have a thumb wrap grasp which closes up their web space. The Grotto Grip is not as cushiony as “The Pencil Grip”, but it is easier to use, as it has molded finger slots for the thumb and index fingers, and an indentation on the bottom for the grip to rest on the middle finger. It also has a wing on the front, and the material is stiffer in design, which can help aid in the prevention of any finger or thumb wrapping.
Left and right-handed writers can easily use the Grotto Grip, as the finger placement is exactly the same, making it less confusing for children to know where their fingers should be placed while using it.
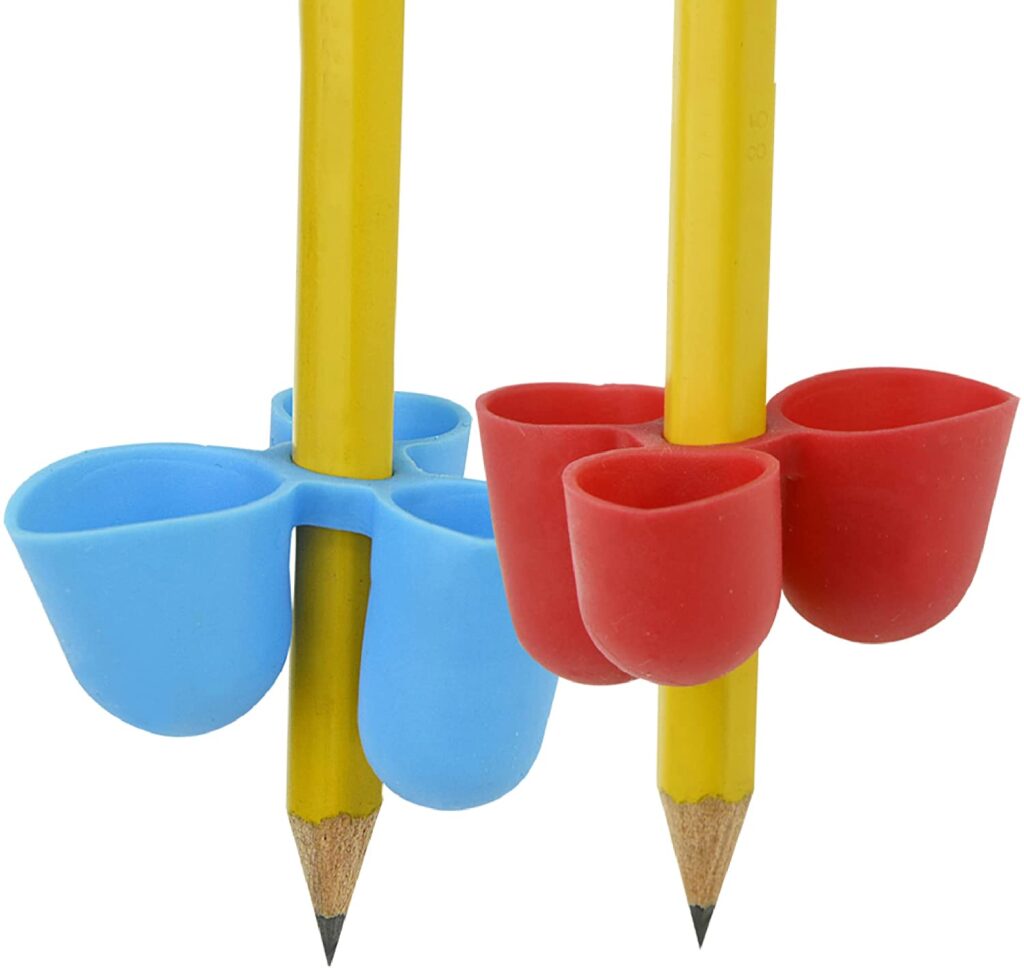
- The Writing C.L.A.W. (affiliate links):
This grip has three finger cups to support finger placement, and can be used by both left and right-handed writers with a simple change of finger placement within the cups. The finger placement indicators are on the bottom of each cup. The design leaves little room for error, and supports a variety of children, as it comes in three different sizes.
The Writing C.L.A.W. fits a wide variety of writing, drawing and coloring tools such as standard pencils, primary pencils, crayons, markers, and paint brushes!
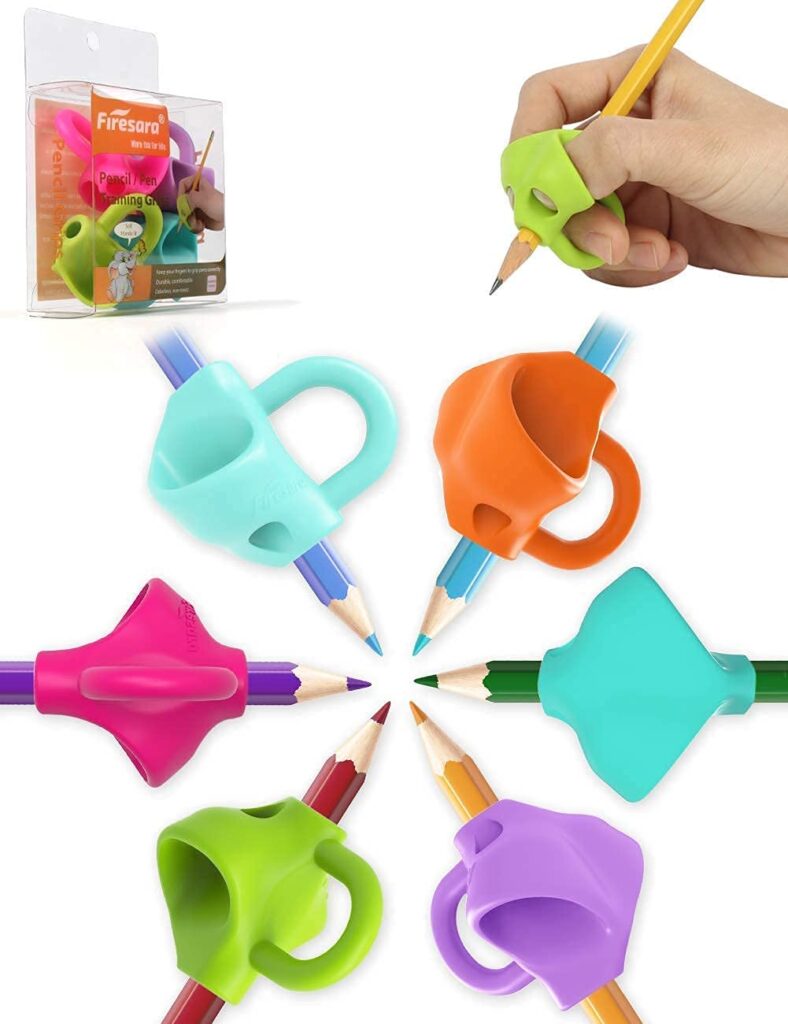
- Firesara Grip (affiliate links):
This grip is similar to the Writing C.L.A.W. as it has two cups for the thumb and index fingers, but it has a ring for the placement of the middle finger. The Firesara Grip can easily be used by left and right-handed writers. Learners place their thumb and index fingers into the cups, and the middle finger goes into the ring finger of either hand.
Using this grip, helps the three fingers to be fixed tightly to the pencil shaft. The Firesara type of grip is made of soft, durable silicone.
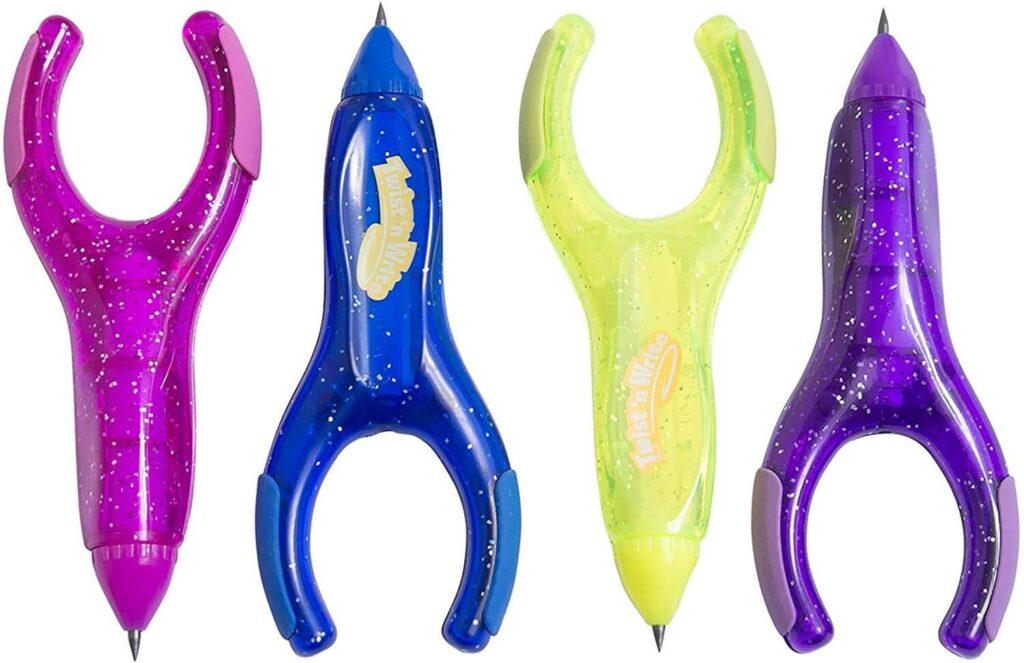
- Twist n’ Write (affiliate links):
The Twist n’ Write, also called the Rocket Pencil, is not a pencil grip, but a pencil that has a wishbone-shaped design. This helps fingers to be placed into a tripod grasp with little guidance. It has rubbery sides that double as erasers! The pencil twists at the bottom to push forward more lead. It needs a special tool to add more lead, which makes it a little less efficient for use. It is often easier to buy multiple pencils rather than trying to replace the lead. The pencil design is for not for tiny hands, but is effective for finger placement without the use of a pencil grip, making it more motivating to use.
The Twist n’ Write pencil can easily be used by left and right-handed writers. Some learners or teachers might not like the rocket pencil, because it looks so different from traditional pencils.
- Handiwriter (affiliate links):
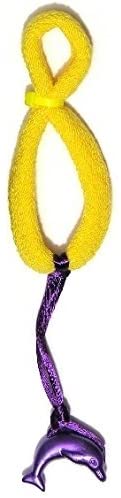
This is not really a type of grip, but rather a position support for the pencil. There are some children who hold the pencil vertically instead of at an angle, or have a thumb overwrap grasp with a closed web space. The Handiwriter positions the pencil at the correct angle within the hand. This pencil positioner helps to reposition the pencil within the web space, by pulling the pencil back into the web space, while promoting improved finger placement on the pencil shaft.
The “charm” on the commercially purchased Handiwriter is grasped by the ring and pinky fingers, and curled into the palm, providing increased hand stability. These can purchased as pictured, but can also be made with or without the charm support, by using two terry cloth hair bands using these directions, or by following the visual sequence for creating one using elastic bands.
- Write Right Stylus (affiliate links):
You can put a grip on an existing tablet stylus, or buy get his great stylus that has a gripper on it! I tried this device with some of the kiddos I work with, and it worked well with the added index finger placement into the cup that is on the shaft of the stylus.
The Write Right Stylus will only work if the index finger is properly placed into the cup, and ensures proper positioning when using a tablet or screen for writing tasks. This placement helps to promote a tripod grasp. The symmetrical design allows it be used by left and right-handed writers.
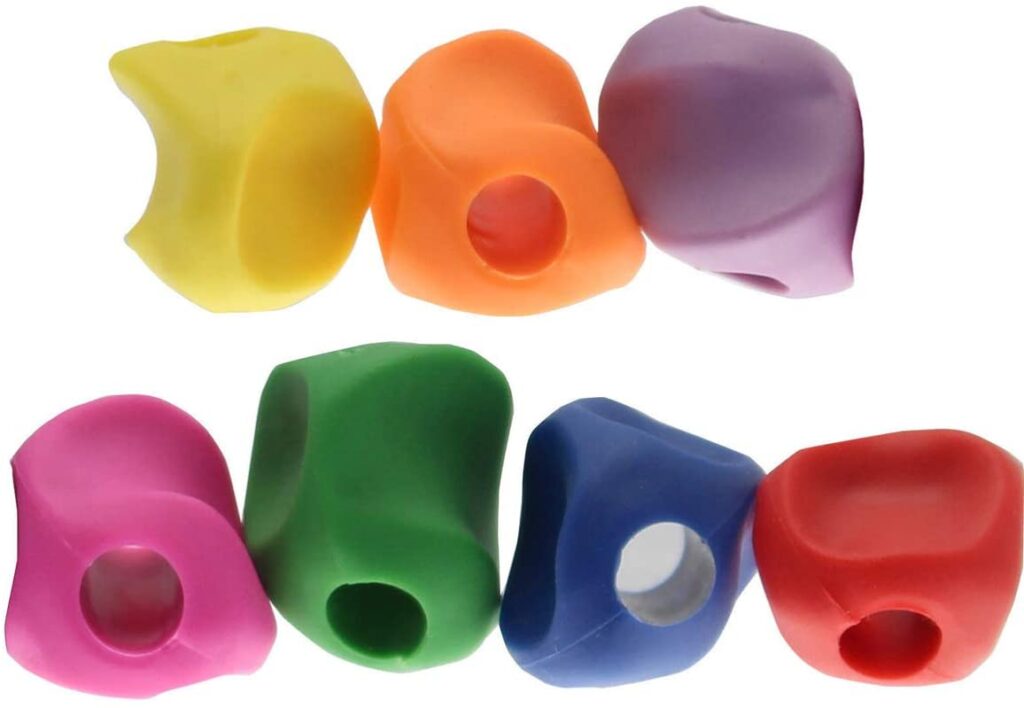
- Stetro (affiliate link)- This pencil grip is efficient when The Pencil Grip is too large and the individual benefits from a smaller “target” to pinch the pencil.
- Traditional Triangle (affiliate link)- the Traditional triangle grip is a common pencil grip that is offered to the whole classroom from teachers, parent teacher groups, or in back-to-school kits. The triangular sides offer a flat placement for the fingers, but this grip may not work for all individuals. One therapy tip is to cut the triangle grip in half or in thirds and use the triangular ridges as bumps on the pencil to stop the fingers from moving too close to the pencil point. This way the ridges bring awareness for placement.
- Weighted pencil (affiliate link) grips- Pencils with weighted added on are typically an adaptation to support specific needs related to tone, proprioceptive sensory input, tremors. Read about pencil pressure and the benefit of adding a weighted pencil grip for more information.
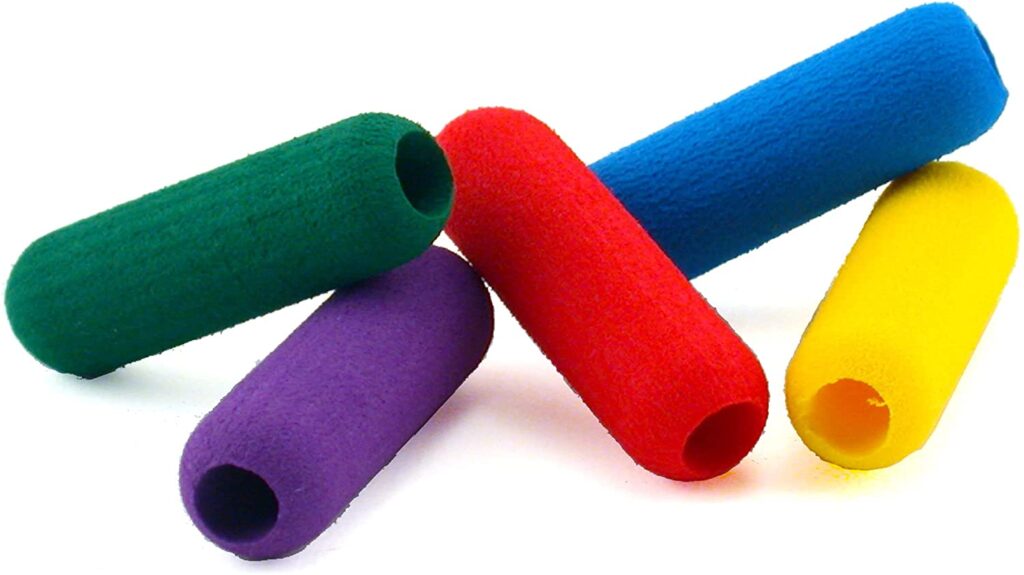
- Classic Foam (affiliate link) for relieving pressure
Adaptive Pencil Grips
The alternative pencil grasp pattern that is successful for many kiddos who simply cannot achieve an efficient grasp is use of an adaptive tripod grasp, or any grasp which enables a functional grip on the pencil. There are adaptive pencil grips that support various needs.
For those struggling to manipulate, use, position, and write with a pencil grip during written output, sometimes an alternative grip is the answer.
There are several alternative grasps for pencil manipulation.
The Adaptive Tripod Grip is appropriate to use when low muscle tone or hyper mobility of the finger joints limits pinching and manipulating the pencil.
It is easy to achieve, and I often use it if I am writing a lot. My husband uses it all of the time, and has since grade school.
In the adaptive tripod grasp, the child places the pencil between the index and middle fingers rather than within the traditional web space. They grasp the pencil shaft with the thumb, index, and middle fingers. The placement of the pencil between the index and middle fingers provides ample support and stability allowing for good pencil control, and less hand and finger fatigue.
This grasp pattern is similar to the “Rocket Pencil” described above. This can be used with different types of pencil grips if needed.
When pencil grips are uncomfortable
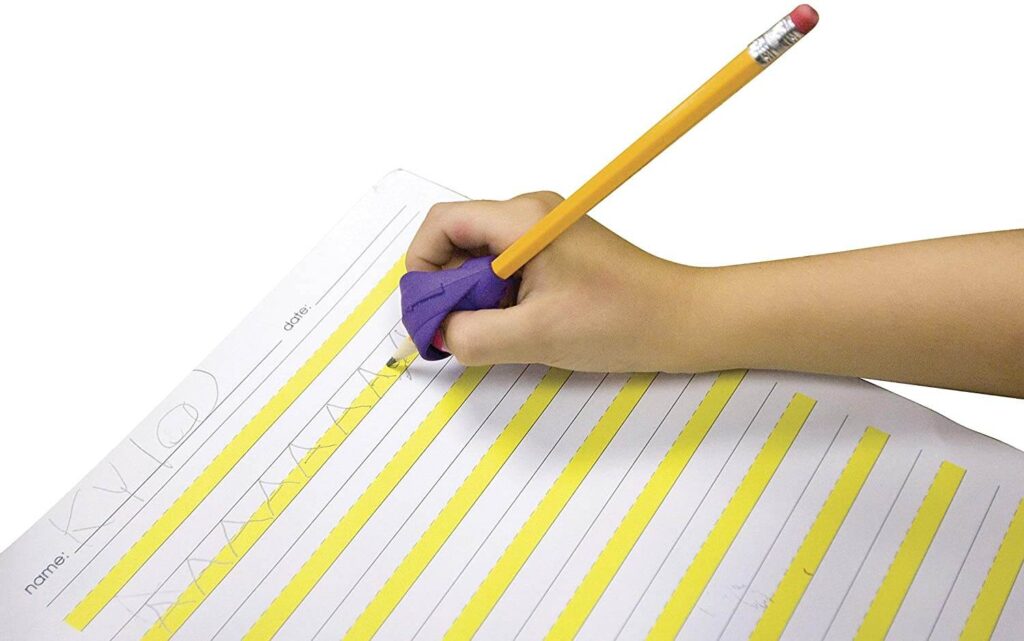
One final note on the use of pencil grips, they WILL be uncomfortable to use at first. Learners are having to utilize the correct finger and hand muscles.
They are not used to using them in this way, therefore they will be uncomfortable and met with resistance. With this discomfort comes less motivation and desire to use.
Rest assured, the use of the right pencil grip, when coupled with the activities you are using to get to the root of the problem, will help.
Be patient, encouraging, and rewarding to your learners, as they work on these skills. A good grasping pattern will be essential later in school, as handwriting tasks become longer and more complex. You are supporting their present AND future success!
Pencil Grip Kit
Here is an OT tip just for you! Create a pencil grip kit as pictured below. This will serve you coordinate an approach to determining the best pencil grip for any learner. You will have children that the typical grip will not work for, and you’ll need that one rarely used grip just for them! Have it on hand!
Below is a picture of my own pencil grip kit, which I have used with kiddos to help determine which one is the best grip for them. You can buy pencil grip kits on Amazon that come with several different types of grips.

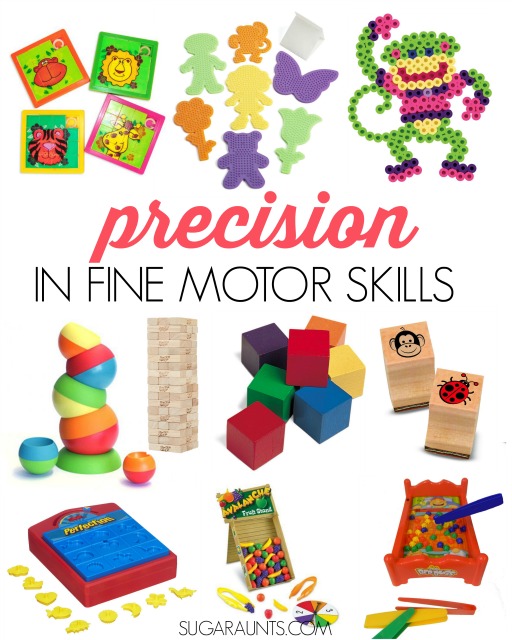
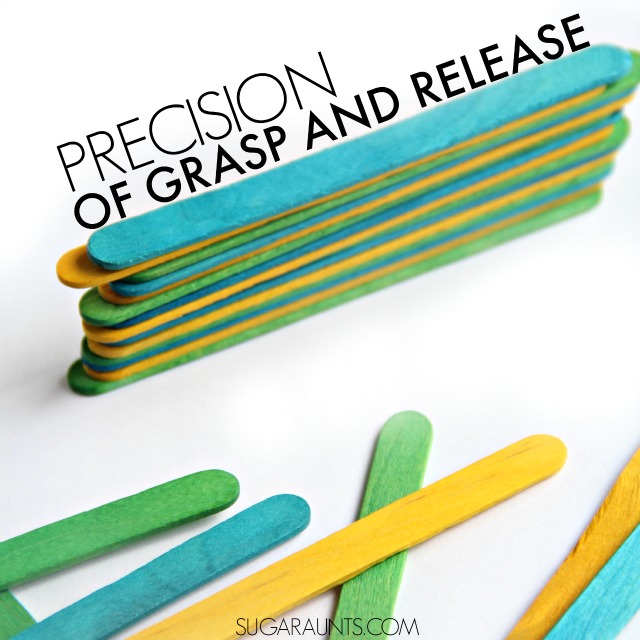
Pencil Grip Activities
Be sure to check out our FREE Pencil Grasp Challenge . This is a 5-day email series that will provide you with loads of information about everything you need to know about the skills that make a functional pencil grasp. You will gain quick, daily activities that you can do with learners to help them right now.
Explore the other blog posts we have here at The OT Toolbox regarding pencil grasps by reviewing the convenient list of these just for you:
- Pencil Grasp Development
- The Pencil Grasp Challenge
- Pencil Grasp Activities with Fine Motor Play
- Pencil Grasp Bundle
- Work on Tripod Grasp (and Pencil Grasp) with Everyday Items
- 5 Things OT’s Want Parents to Know About Pencil Grasp
- The Cutest Little Pencil Grasp Trick
- What is a Functional Pencil Grasp
- Games That Improve Pencil Grasp
- Simple Trick for a Better Pencil Grasp
- Toys to Improve Pencil Grasp
- Slime Pencil Grasp Activity
- Pencil Grasp Exercise for Thumb Wrap Grasp
- Cursive Writing Pencil Grasp
- Small Pencil Better Pencil Grasp
- Pencil Grasp Trick from Fine Motor Skills ABC Activities
- Craft Stick Tweezers to Help with Pencil Grasp
- Handwriting Grasp at Home
- How to Teach Carryover of Functional Grasp with Coloring
- Clothespin Pencil Grip
- Easy Trick for Tripod Grasp
- Coban Pencil Grip
- Easiest DIY Pencil Grip Ever!
- Benefits of Using Crayons
Pencil Grips for Other writing utensils
It’s important to cover another aspect of using pencil grips on writing utensils like gel pens, golf pencils, or weighted pencils. For some students, a different type of writing tool is needed and you can incorporate a pencil grip that supports sensory motor needs.
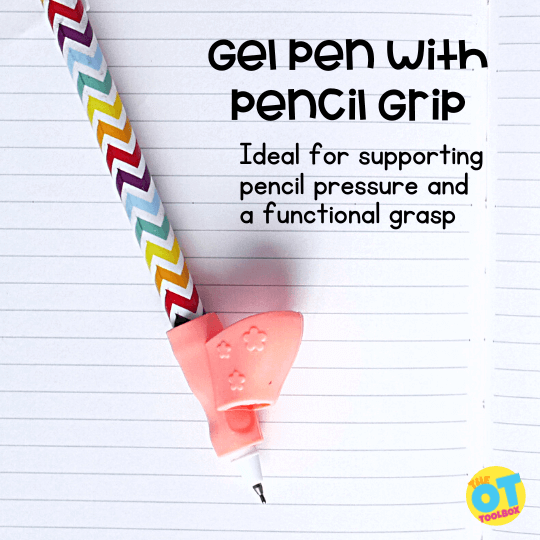
Gel Pen Pencil Grips
For example, a student that requires a gel pen over a pencil might have needs with proprioceptive awareness or trouble with pencil pressure. In this case, the gel pen offers lower resistance of the pen as it moves across the page. This can allow handwriting that was previously illegible because the pencil marks were too light on the page, to now show up. Other students might not have enough strength to move the pencil across a page given the force required to press through the lead of the pencil over the paper.
For these students, you might want to trial various gel pens that require less force to use.
Pencil grips that can be used with gel pens include any of the pencil grips listed above. Some of the ideal grippers include:
- Classic foam grip
- Grotto grip
- Writing CLAW
- Crossover grip
Depending on the needs of the individual, you can use other grips as well. Essentially, a gel pen grip supports a combination of handwriting needs, so combining these tools can target different needs.
Golf Pencil Grips
Pencil grips can also be used with golf pencils. You might want to use a small pencil like a golf pencil to support more precision and fine motor control with the mechanics of the finger grasp on the pencil.
Just like using an alternative writing tool like a gel pen, a golf pencil will fit with a variety of pencil grippers.
Elastic Band Pencil Grip
An elastic band pencil grip is a simple yet effective tool that is easy to make. The elastic band pencil grip is essentially a rubber band or a hair tie attached to the writing end of the pencil. The other end of the rubber band might be loose in a loop or it might have a charm attached.
Students that struggle with holding the pencil up and down might have a closed web space, tightly around the pencil. This means the pencil doesn’t have full motion and there is limited finger dexterity in the tips of the thumb, pointer finger, middle finger, and possibly the ring finger. In this case, using an elastic band that is attached to the pencil and loose (without a charm) can position the pencil into an upright position. You’ll want the student to put the loose end of the rubber band around their wrist. The elastic material then pulls the pencil into a vertical position.
Students that tend to put all four fingers in opposition with their thumb may not use a separated sides of the hand when writing. This means they might not move the pencil as efficiently as they could (and leads to lower letter legibility). In this case, the rubber band attaches to the tip of the pencil and the other end, which has the charm attached can be tucked into the palm of the hand.
In combination with these rubber band grippers or traditional pencil grips, incorporating a few manual dexterity goals can make all of the difference. A true tripod grasp might not be achieved, but a functional grasp is achievable.
The primary purpose of the elastic band pencil grip is to promote a functional and efficient grasp, thereby enhancing fine motor skills and handwriting abilities. Tools that support development of coordination and strength include:
- Pencil Grasp Play Book– activities to support dexterity, fine motor strength, coordination, and more, all with an efficient pencil grip in mind.
- 6 Month Fine Motor Plan– This plan outlines specific and easy fine motor exercises designed around play and sensory exploration that support fine motor skills needed for pencil grasp.
Types of Pencil Grip
Understanding the different types of pencil grip helps parents, teachers, and therapists support handwriting development in a meaningful way. Pencil grasp develops over time as children build hand strength, coordination, and motor control. Each stage reflects underlying fine motor development and the ability to use the small muscles of the hand efficiently.
There are several common types of pencil grips, ranging from early developmental grasps to more refined and efficient patterns used for writing tasks in school.
Pencil Grip Names and Developmental Stages
There are specific pencil grip names used to describe how a child holds a writing tool. These names help professionals identify whether a grasp pattern is developmentally appropriate or if support may be needed.
Common pencil grip names include:
- Palmar supinate grasp
- Digital pronate grasp
- Static tripod grasp
- Dynamic tripod grasp
- Quadrupod grasp
- Lateral tripod grasp
Each of these grasps reflects different levels of control and hand development. Early grasps involve larger arm movements, while more advanced grasps rely on refined finger movements.
Types of Pencil Grips in Occupational Therapy
In occupational therapy, understanding the different types of pencil grips is essential for evaluating handwriting skills and identifying areas of need. Therapists do not focus only on how the pencil looks in the hand, but also on how the grasp impacts function.
An efficient grasp allows for:
- Smooth, controlled finger movements
- Reduced fatigue during writing tasks
- Improved letter formation and legibility
- Better endurance for classroom activities
Occupational therapists consider multiple factors when assessing pencil grasp, including:
- Hand strength
- Stability of the wrist and forearm
- Separation of the sides of the hand
- Motor planning and coordination
Why Choosing the right Pencil Grip Matters
While there are several acceptable types of pencil grips, the goal is not perfection…it is function. Some children may use a non-traditional grasp but still write clearly and efficiently. Others may have a grasp that looks typical but struggle with control, speed, or endurance.
From an OT perspective, pencil grip is just one part of handwriting. It works together with posture, visual motor skills, and fine motor development to support overall writing performance.
Supporting Pencil Grip Development
When children struggle with pencil grasp, occupational therapy strategies focus on building the underlying skills needed for efficient movement.
Helpful strategies include:
- Strengthening hand muscles through play (putty, clothespins, tongs)
- Encouraging finger isolation activities
- Using short crayons or pencils
- Practicing writing on vertical surfaces
- Supporting proper positioning and posture
These approaches help develop the foundation needed for more refined types of pencil grips used in handwriting tasks.

Regina Parsons-Allen is a school-based certified occupational therapy assistant. She has a pediatrics practice area of emphasis from the NBCOT. She graduated from the OTA program at Caldwell Community College and Technical Institute in Hudson, North Carolina with an A.A.S degree in occupational therapy assistant. She has been practicing occupational therapy in the same school district for 20 years. She loves her children, husband, OT, working with children and teaching Sunday school. She is passionate about engaging, empowering, and enabling children to reach their maximum potential in ALL of their occupations as well assuring them that God loves them!