Putting ball pit balls in a baby pool is a great sensory room DIY ball pit that kids love. Whether you play inside or outside with the baby pool full of water, this sensory play activity is one of our favorite ball pit activities!
Baby Pool Sensory Play
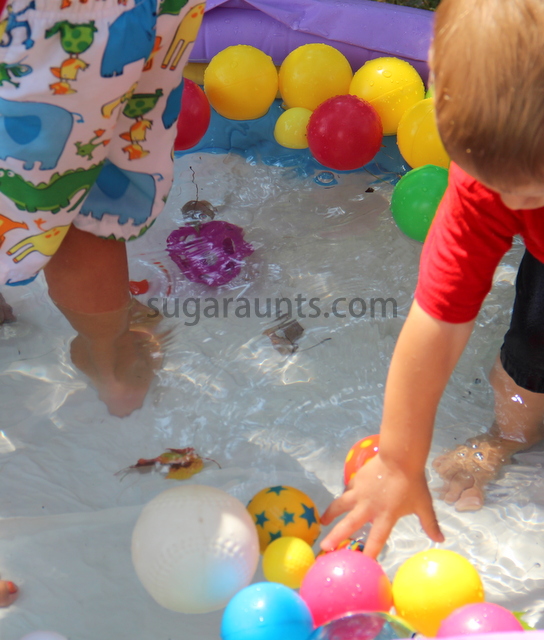
We’ve been loving these last days of summer before the school starts up again. One super nice and sunny day, we had the baby pool out and added a colorful twist…all kinds and shapes, and colors of different balls.
Baby Pool with Balls
We threw in ball pit balls, ping pong balls, whiffle balls, and every other kind we could find. This was such a fun way to play in the pool. Everyone had fun throwing them in and out of the baby pool and grabbing at the different colors.
We had all preschool-aged and toddlers at our house today, but, this would be great for sitting babies too! The eye-hand coordination and visual tracking skills really develop with this one.
They can visually track the different colored balls as they scoot around in the water and grasp at them. We had so much fun with this. Let us know if you try this activity, we would love to hear how it goes in your house!
Try putting something different in your baby pool while the weather is still warm, or pin it for next summer 🙂
Looking for more eye-hand coordination activities? Try one of these:
Colleen Beck, OTR/L has been an occupational therapist since 2000, working in school-based, hand therapy, outpatient peds, EI, and SNF. Colleen created The OT Toolbox to inspire therapists, teachers, and parents with easy and fun tools to help children thrive. Read her story about going from an OT making $3/hour (after paying for kids’ childcare) to a full-time OT resource creator for millions of readers. Want to collaborate? Send an email to contact@theottoolbox.com.
We had a big old fashioned family reunion this summer with lots of family, food, and fun! Us Aunts were in charge of the kid’s games and activities and had a blast putting the activities together…and playing, of course!
We started out by researching the best outdoor lawn games from the best kid’s activity bloggers out there. If you missed our round-up post, check it out and pin for next summer. We’ve got SO many outdoor summer lawn games together in one place.
We knew we would have a ton of kids aged newborn to high school age and were catering to the younger set. Our plan included an obstacle course, ball lawn games, dress up, and bubbles.
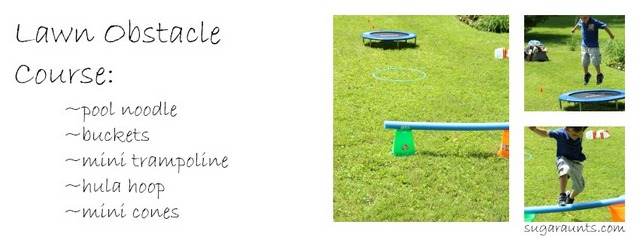
Lawn Obstacle Course
This was so easy to set up. We bought a pool noodle from the dollar store and raided our kid’s outdoor toy bin. Add a couple of buckets from the sandbox for a hurdle. They ran around the mini cones, jumped on the trampoline, dove through the hula hoop, and hurdled the pool noodle. You’ve got your self a pretty nice little obstacle course! This was a fun activity for the toddlers and preschoolers. There was a lot of trampoline jumping going on, too 🙂
Family Reunion Lawn Games
We filled a bunch of water bottles with colored water…and have been playing with them in lots of fun ways…blog posts to come 😉 For the Family Reunion, we used them to bowl! The kiddos had a blast with this.
Another game we played was catching a ball with milk jugs. We’ve done something like this before with our Halloween ghost catch game. I taped the edges with duct tape and electrical tape so there were no sharp edges to catch little fingers on.
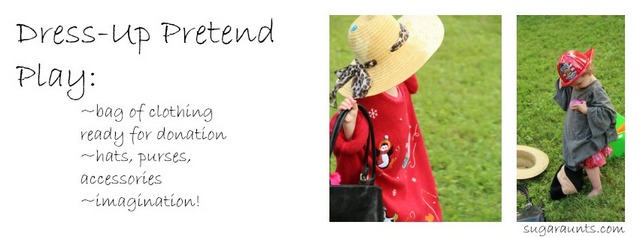
Outdoor Play Dress-Up Pretend Play
The dress up time was super cute. We pulled a bunch of old clothes out that were ready for donation and laid them out for the kids to dress up as they pleased. Add a few accessories like hats, scarves, and purses. It was seriously the cutest thing to see the kids all dressed up!
Family Reunion Lawn Play
The bubble station was a big bin of water and dish detergent bubbled up and bubble wands made from pipe cleaners. A few of the kids really got into the bubbly fun and hung out here for a long time 🙂
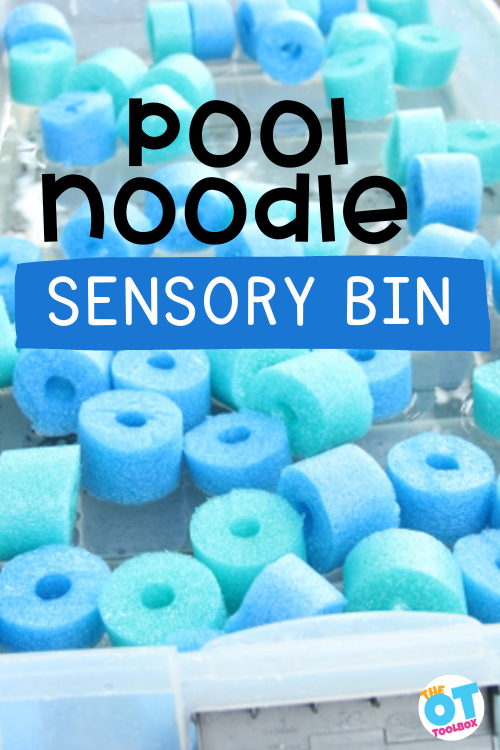
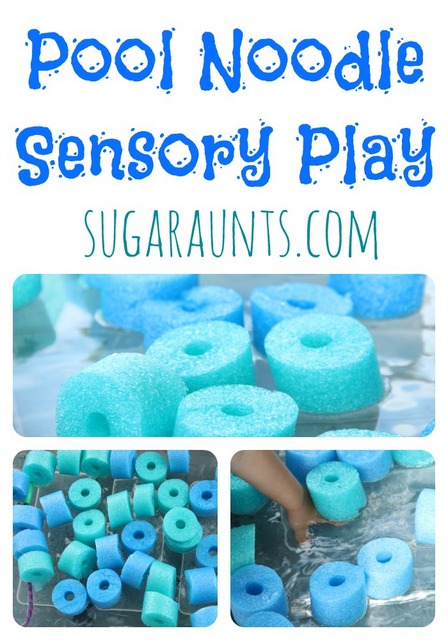
This pool noodle sensory bin is a water bin activity that uses one item…a dollar store pool noodle! We love the therapeutic benefits of ball pit activities, and using pool noodles cut into pieces is an inexpensive option with sensory benefits. This is a pool noodle game and a great summer activity for building skills in coordination and motor skills through water play and pool noodles! This might be one of our favorite easy sensory bin ideas because there are so many ways to boost creativity through a single material.
A pool noodle sensory bin can be used in outdoor sensory play, or as an indoor DIY sensory ball pit.
Pool Noodle Sensory Bin
A noodle sensory bin is a fun and creative way to encourage sensory exploration in children. One of the most versatile materials to use for a sensory bin is pool noodles, which can be found at most dollar stores or discount retailers like Dollar Tree or Dollar General. With a few simple steps, you can turn these pool noodles into a unique sensory play experience that your child will love.
This week’s theme was so much fun and EASY to throw together. We had a couple of pool noodles purchased from the Dollar Store that we used for our family reunion games (keep an eye out for the post on this!) These pool noodles were just asking to be played with!
How to make a Pool Noodle Sensory Bin
If you aren’t familiar with pool noodles, these floating pool noodles into sensory ball pit fillers is easy.
Pool noodles are buoyant so if you fill the sensory bin with water, they will float. However, you can make a dry ball pit as well, and they are a great foam filler that offers calming proprioceptive and tactile input.
You can typically find pool noodles at a dollar store and many other stores during the summer months. However, you can also get them on Amazon. (affiliate link) Here’s a set of 20 pool noodles that can be cut into small sections to fill a baby pool ball pit or any large container.
Making pool noodle sensory bin is very simple:
1. Use 2 pool noodles.
2. Cut the pool noodles into 2 inch slices using a sharp knife.
3. Place the cut pool noodles into a large bin. We used an under-the-bed storage bin.
4. Add water.
To set up a pool noodle sensory bin, you’ll need several pool noodles in different colors, textures, and sizes. You may also want to include some dollar store serving spoons or other utensils to help your child scoop and pour the sensory materials.
Start by cutting the pool noodles into small sections, using scissors or a serrated knife. The best way to cut pool noodles is to make sure they’re held securely and to use a sawing motion, rather than trying to slice straight through.
I cut up two pool noodles and added a couple of big serving spoons, slotted spoons, and a ladle for scooping fun. Baby Girl loved this. And of course got right in there in the water bin!
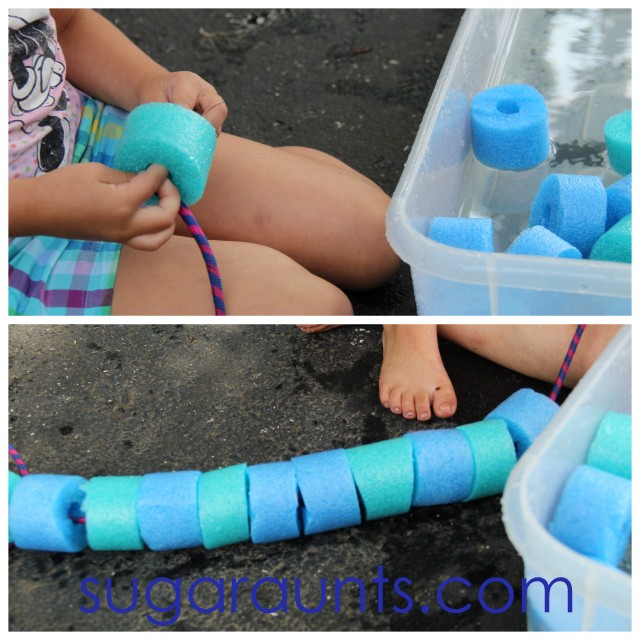
Thread a Pool Noodle
I added Big Sister’s jump rope for an extra large beading activity.
This was a great activity for large motor movements of both arms. With that huge string, and sliding the pool noodle “beads” down the rope, this really got the arms going in whole body motions.
This gross motor body motion and repetitive movements in a novel manner help brains develop new neural connections and long term learning abilities.
Not only that, threading the “beads” onto the jump rope was great for fine motor manipulation and bilateral hand control (bilateral coordination).
We did a nice pattern and had to grab the correct color as it floated along in the water bin. Reaching for and grabbing the intended color object in the water develops hand-eye coordination skills. (Eye-hand coordination!) So much learning and SO much fun!
Big Sister thought her super-sized necklace was pretty cool!
This water bin was perfect for a hot and muggy afternoon. Have you been doing any fun water play this summer?
You can use the cut up pool noodles again and again in other sensory bin activities. Add them to a dry sensory bin, too. One idea we love is to use dry rice or dry beans, or even shredded paper sensory bins as a base for hiding and finding objects like the cut up pool noodles.
You can use anything from sand and water to rice and beans as a sensory bin filler for the base for your sensory bin. Then, add the pool noodle sections on top of the base material.
Encourage your child to explore the different textures and colors of the pool noodles and to use their imagination to come up with new ways to play. Use tongs to grab the pool noodles for building hand strength, too.
One fun activity you can do with a pool noodle sensory bin is to create an occupational therapy obstacle course using the noodles. Stack them up into towers or weave them in and out of each other to make a fun and challenging course for your child to navigate. You can also use the pool noodles to practice counting or sorting by color.
If you’re looking for a bigger sensory experience, consider using an extra large pool noodle to create a sensory pool noodle tunnel. Simply cut a pool noodle in half lengthwise, and then cut off one end at an angle. This will create a tunnel that your child can crawl through and explore. You can also fill the tunnel with other sensory materials, like soft fabric or foam blocks, to make it even more engaging.
Overall, a pool noodle sensory bin is a fun and budget-friendly way to encourage sensory play in children. By using inexpensive materials from the dollar store, you can create a unique and engaging play experience that will stimulate your child’s senses and foster their creativity. Whether you’re setting up an obstacle course, building towers, or crawling through a sensory tunnel, there are endless ways to play with a pool noodle sensory bin. So grab some pool noodles and get ready to dive into a world of sensory exploration and fun!
Colleen Beck, OTR/L has been an occupational therapist since 2000, working in school-based, hand therapy, outpatient peds, EI, and SNF. Colleen created The OT Toolbox to inspire therapists, teachers, and parents with easy and fun tools to help children thrive. Read her story about going from an OT making $3/hour (after paying for kids’ childcare) to a full-time OT resource creator for millions of readers. Want to collaborate? Send an email to contact@theottoolbox.com.
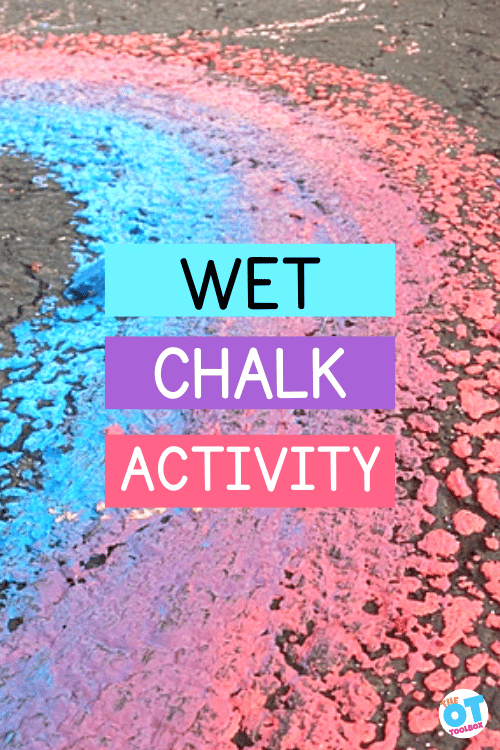
Drawing with wet chalk on a driveway is such a fun sensory experience for outdoor play and one that develops so many areas of gross motor skills, fine motor skills, and visual motor skills through sensory play. Drawing milestones like coloring with chalk is part of childhood but this driveway chalk activity builds many skills!
Wet Chalk
We played outside one cool morning and discovered something really fun…We had left a couple of pieces of chalk outside during an overnight rainstorm.
The texture of wet chalk is so cool! It smears on the driveway so easily and is the neatest texture. For children struggling with tactile defensiveness wet chalk is a great sensory experience because you can grade the dryness or the wetness of the chalk texture.
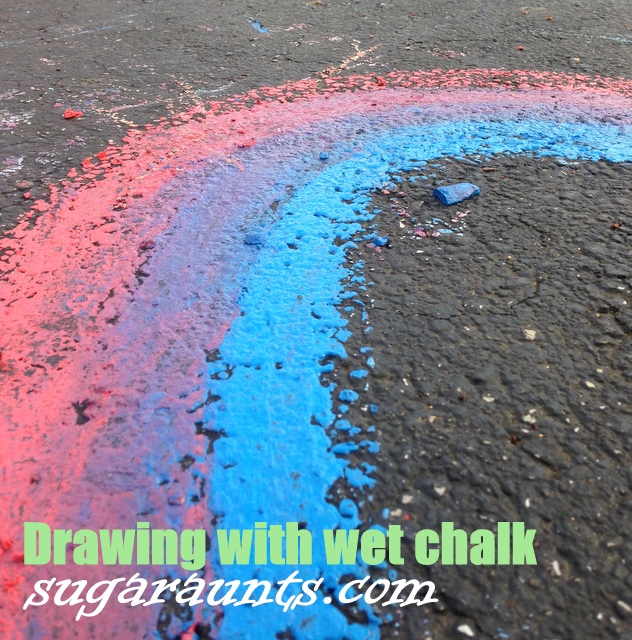
There was only red and blue that were soaked through, but they combined to make a pretty nice rainbow!
How to make wet chalk
There are several ways to make wet chalk to use on a driveway.
Soak driveway chalk in a bucket of water overight or for a few hours.
Draw with chalk on a wet driveway. After a rain works or spray the driveway with water from the hose.
Crush chalk into a powder and mix water into the chalk dust to create a messy, thick chalk paint. This liquid chalk paint recipe explains more on this strategy.
You can select the wet chalk method that works best for you!
Once you have your wet chalk created, you can get started with the chalk art.
Wet Chalk Activities
We’ve created a list of chalk activities here on the website before so any of those ideas would work. But if you want to explore development of other skills, try these wet chalk activities:
Make a chalk rainbow
Make a driveway obstacle course
Create letters and use a wet-dry-try method of writing the letters
We played with this for a while…the chalk drawing even started to dry on the driveway.
I LOVE this picture!
Baby Girl loved this messy play. She got her hands right in there and covered them with the chalky mess.
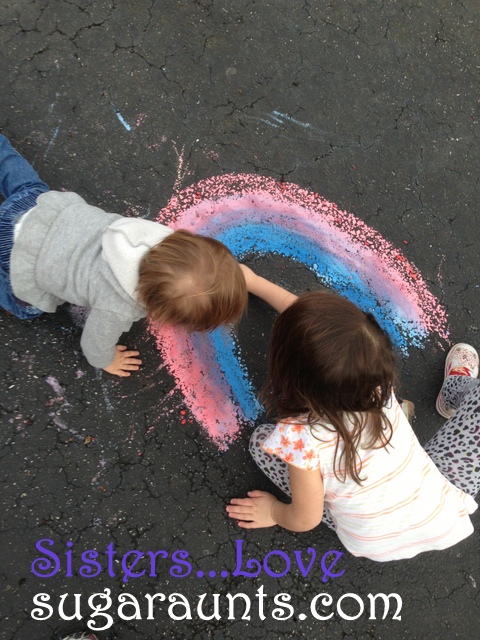
Outdoor Sensory Play
What a great sensory experience! Check out how Baby Girl is on her hands and knees…She’s putting weight through her upper body and down to the hands, and strengthening her shoulder girdle which is so important for fine motor dexterity. All this while exploring the texture of the chalk, manipulating little pieces of chalk, and having fun with her sister!
We kept tracing over the rainbow lines until the chalk became so small…great for working on that tripod grasp!
Big Sister was really aware of the lines of the rainbow when she was tracing. This is fun for a new hand writer who is learning to place letters on the lines of paper ((line awareness)).
Tracing the big arch of the rainbow allowed her to cross midline on a fun activity. Why do kids need to cross midline?? One reason is so that hand writers efficiently allow the dominant hand to do the work during handwriting while moving left to right across the page in a smooth manner.
And of course, you MUST add raindrops to the rainbow 😉
Rainbow Handwriting Kit– This resource pack includes handwriting sheets, write the room cards, color worksheets, visual motor activities, and so much more. The handwriting kit includes:
Write the Room, Color Names: Lowercase Letters
Write the Room, Color Names: Uppercase Letters
Write the Room, Color Names: Cursive Writing
Copy/Draw/Color/Cut Color Worksheets
Colors Roll & Write Page
Color Names Letter Size Puzzle Pages
Flip and Fill A-Z Letter Pages
Colors Pre-Writing Lines Pencil Control Mazes
This handwriting kit now includes a bonus pack of pencil control worksheets, 1-10 fine motor clip cards, visual discrimination maze for directionality, handwriting sheets, and working memory/direction following sheet! Valued at $5, this bonus kit triples the goal areas you can work on in each therapy session or home program.
This is part 2 of a two-part outdoor messy play activity. If you missed part one, Sensory Paint Play(Part1) was very fun…Check it out! We left the bubble wrap/blue paint dry right in the bins overnight.
The next day was another super hot and sunny day. Add a bin of water and some empty plastic bottles, and let the fun begin.
Sensory Play
The paint-y, texture-y, messy play returned when the water was added.
Plus, it’s just fun to pour water from bottles.
And put the bottles on your head, of course.
What a fun sensory play experience!
Fine Motor Play
Baby Girl thought it would be pretty fun to drop the gems and beads into the plastic bottles. She did this for a LONG time. That little ‘bonk’ sound was pretty cool!
and, such a great fine motor task.
{{LOVE this picture!}}
Colors
When all of the water was added, we had a blast on this 85 degree day in our BLUE water bin!
This sensory paint activity used bubble wrap for a wonderful tactile experience. We loved to feel the bubble wrap sensory activity. Kids can use this as a way to work on sensory touch and tactile defensiveness, or just for fun, creative painting!
Sensory Paint
This sensory paint idea is easy. You’ll need just a couple of items:
Paint
Bubble wrap
Paper to press onto the bubble wrap
How to do this bubble wrap sensory play
When you get a package in the mail that has bubble wrap, it’s a special day! After some jumping and a little popping, we used the bubble wrap in a fun sensory play activity.
Finger paint, and a handful of beads, and glass gems made this extra special.
This sensory painting activity is a great activity for sensory exploration. Add it, along with this rubber duck painting activity to your painting ideas!
This was SO much fun! Perfect outdoor play for a hot day.
Don’t you just want to get messy and play with this???
It was such a neat sensory experience…and very BLUE. After we were done playing, we squirted the kids off with the hose. I left the blue bubble wrap, beads, and everything right in the bin until the next day. I had plans…
*stop back tomorrow to see what we did the next day after the whole mess dried!*
UPDATE: Here is the post for the next part of this two-day sensory play activity…PERFECT for a hot, sunny, outdoor messy play day! Fine Motor/Sensory/Water Play (Part 2)
We did use a little of that wet blue paint for some face painting. Big Sister gave me a nice smiley face on my foot 🙂
This was a fun activity that the toddlers around here loved. I put a bunch of little objects out on a tray, all in shades of blue. Different textures, shapes, and sizes were perfect for little exploring hands. Baby Girl and my niece and nephew played with these for a while.
Once they had enough of that activity, I poured the whole tray into the sandbox and we had a ball covering everything with sand, finding little things, and starting all over again.
We’ve been on a blue kick around here. It started when we filled our bird feeder and had a Blue Jay in our front yard.
We’ve been playing with blue, sorting blue, crafting blue, eating blue (berries), and even reading about blue…
Toddler Sensory Tray
((I love the little knuckle dimples in these pictures!!))
Watch this space for more BLUE play and craft activities!
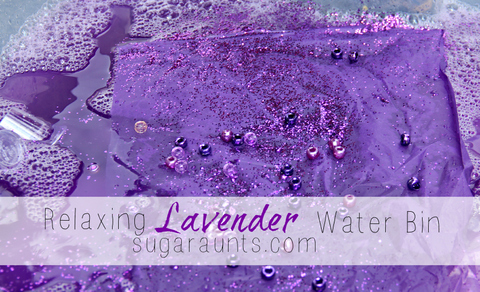
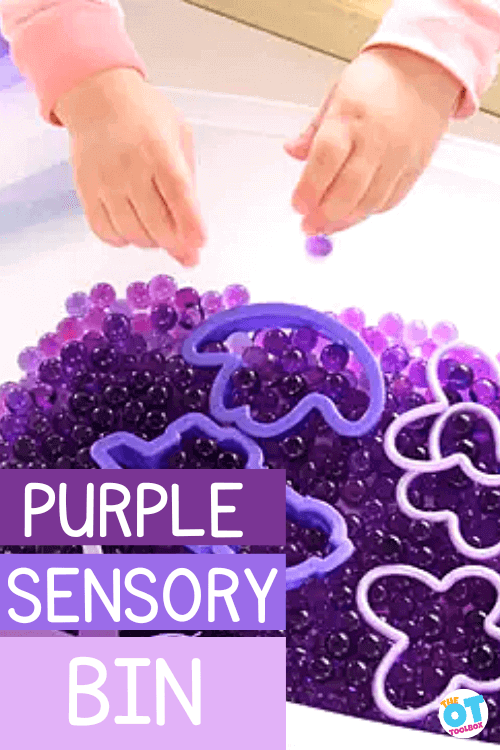
This purple sensory bin is a fun way to explore the color purple using one of our favorite sensory play materials: a water bead sensory bin! While this is a very old post on our blog (circa 2013), we still love the mesmerizing impact of a color themed sensory play activity. Plus, if you are looking for more fun ways to extend the play, check out our water bead activities!
Purple Sensory Bin
A purple themed sensory bin has many benefits beyond exploring the color purple. Of course, you could make a color themed sensory bin based around any color and gain so many benefits:
Tactile sensory experience- Targeting tactile discrimination and tactile exploration is one of the main skills that are address with a sensory bin. You can address various aspects of tactile defensiveness through engaging and motivating play.
Social Emotional Skills- Playing in a sensory bin like our purple sensory activity is an engaging activity that fosters group play (parallel play) and encouraging peer interaction by borrowing tools, working together. Engaging in a new situation is an excellent way to foster communication, cooperation, and other social emotional skills. Here are more social skills activities kids love.
How to set up a purple sensory bin
In our colorful sensory bin, we gathered just a few items from around the home:
Add a few spoons, cups, and manipulative items, and you are ready to go!
This was a fun and easy little sensory bin to put together. Someone (cough, Big Sister, cough) threw some bath water colors into the bin of blue water beads we had out. They absorbed the color reeeeally fast. And are VERY vivid in their new purple hue.
I found a few purple bracelets and cookie cutters, and a few other purple things, and voila!
Purple Sensory Bin fun!
I’m not sure why, but every time we do water bead or corn bin sensory play, Little Guy goes into the kitchen and grabs my whisk and whatever other utensils look right. So, now Baby Girl does the same thing. I guess it’s just fun to mix and stir when you’re playing with a sensory bin!
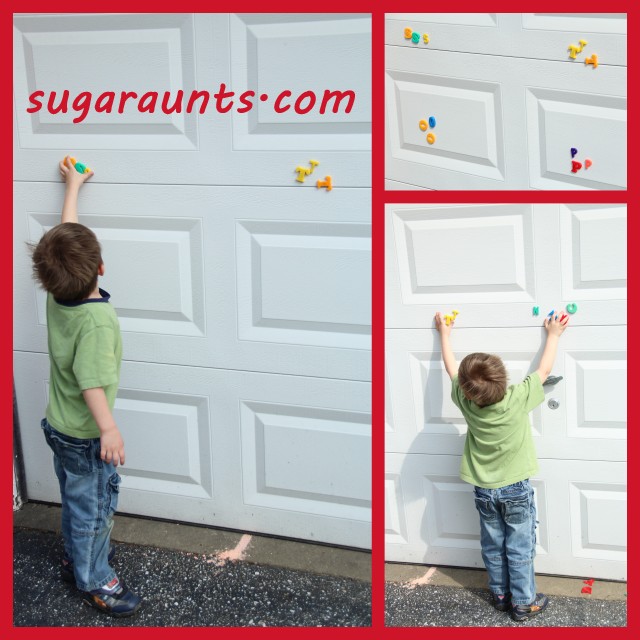
We have a bin of magnetic letters that we’ve been playing with for years. Packs of these magnetic alphabets are everywhere; You can find them at the dollar store and so many other stores. I have pulled this bin out so many times for play. Each child has loved to sort, dump the bin out, place all over the fridge, and more. The big kids are spelling their name and words. We’ve used these letters in all kinds of sensory bins…even molded into Jello for messy sensory play!
Last week, we took the bin of letters outside and found the BIGGEST magnetic board EVER!
Big Sister is learning to spell and read some words and found the letters for a few words she knows. Little Guy is a big fan of spelling “stop” at every stop sign we come to on the road. So, he found the letters to that word.
((He also has the recent …funny…habit of spelling “YES” or “NO” instead of saying the actual word when you ask him a yes/no question.)) SO funny, and SO him!
Movement and Learning in Letter Identification and Spelling
There is a lot of research out there showing that incorporating movement into learning helps with so many aspects of cognition. Kathryn at Movement and Learning shares a great collection of research.
We played a little game to sort out the letters to a word that both of them knew really well. I wanted to encourage self-confidence by starting with a word they know. I put one of each of the letters of “stop” in different areas of the garage. Little Guy (who is learning letter identification) looked in the pile of letters on the ground and found an “S” and put it with the rest of the “S’s”. Then he found a “T” and put it with the rest of the “T’s”. He found each of the letters in order and went through the word “stop” three times.
Big Sister is learning to read beginner words. I wrote some “-ar” words on the driveway in chalk (car, jar, far, star) and she would walk from the word to copy the words in magnets on the garage.
Cross Lateral Movement and Learning
I had them try another game to put the letters back into the bin. I asked them to put the letters away one by one, using alternating hands to reach across their midline to grab the letter.
What is the midline?? Imagine a line going down the middle of your body from the middle of your forehead, and strait down, dividing your body into two symmetrical halves. Your right and left sides are divided by your midline.
The right side of the brain controls the left side of the body and the left side of the brain controls the right side of the body. Crossing midline forces the two halves of the brain to work together.
It was a little difficult to get them to reach for letters with their non-dominant hand. It required more verbal cues, physical prompts, and visual cues. Why was this so tricky? Because the brain was being asked to do something novel. Both Big Sister and Little Guy needed the extra prompts and cues to reach across their midline, all the while recalling the letter in order to spell the word.
Pretty Cool!
So, is crossing midline difficult for your child? Try these play activities:
Crawling in a tunnel, finger painting with both hands, digging in sand to find objects, Pat-a-Cake hand and rhythm games, Simon Says games, playing with ribbon wands or scarves.