Healthy snacks for moms

Healthy snacks for moms

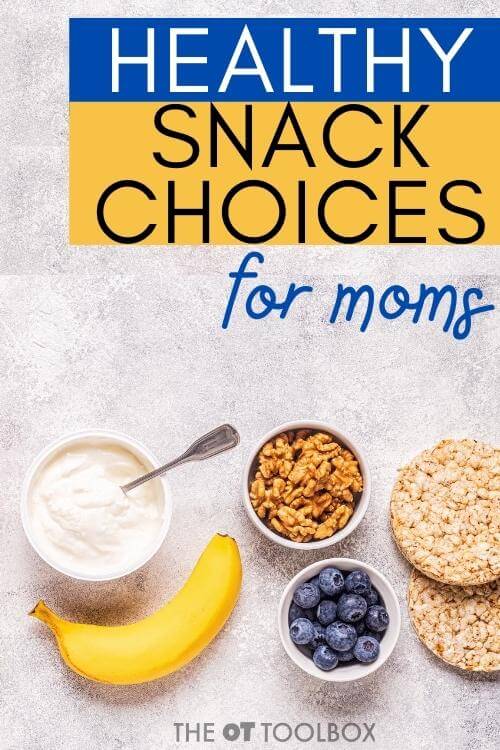
Here, we’re talking healthy snacks for moms. I’m covering healthy snacks that add not only a nutritious option, but also add a calming and regulating sensory input. Did you know the snack choices you make offer more than just filling a void of boredom or hunger? Let’s talk about how healthy snack choices impact your mood, emotions, and energy state.   

Healthy snacks for moms

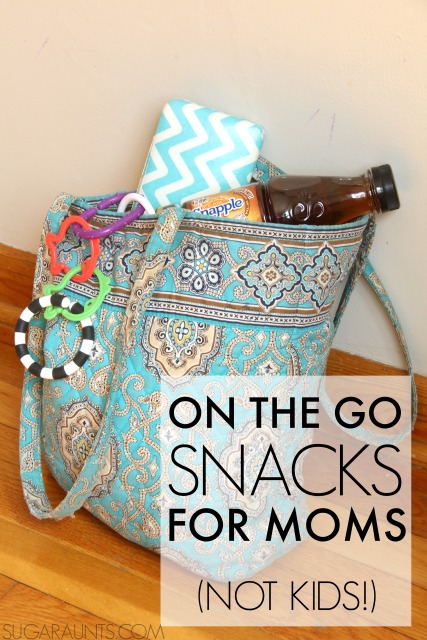
Most of us moms are on-the-go, right?  We’re off every day to work, the bus stop, preschool drop-off, the library, sports, kids’ activities, family visits, pediatrician visits, grocery store, SOMEWHERE all the time.  

With constant barrage of information, social media, and never-ending to-do lists, it can be easy to grab fatty, salty, crunchy snacks that offer little in the way of nutritious benefits.  

In fact, diet and nutrition as well as physical exercise affects brain functioning, energy, and self-regulation of emotion and mood.   

Healthy Snacks vs Unhealthy snacks

I’m a pretty healthy mom and with four kids, I need energy to keep going throughout the day.  Sometimes, I get in a little low-energy funk during all of the running around. It’s those times that I grab a quick and healthy snack and pick-me-up to pull through the rest of the afternoon!   Do you ever feel this way?  

The thing is that there is a direct connection between a healthy diet and a healthy brain. Read here for information on superfoods. Essentially, eating foods that contain a variety of nutrients, minerals, vitamins, and antioxidants are the key to nourishing the brain. This is because the foods that nourish the brain protect it from oxidative stress, or the free radicles stress produced with the body uses oxygen to process these foods. It leads to damaged cells and forces your brain and body to run on low nutritious foods.  

There’s more.   

When you crunch and chew, you are gaining the heavy work input through the mouth and jaw that is calming. Read here about the heavy work input through the mouth and jaw that certain foods offer.    Here is another explanation of the benefits of crunchy foods on regulation and sensory input.  

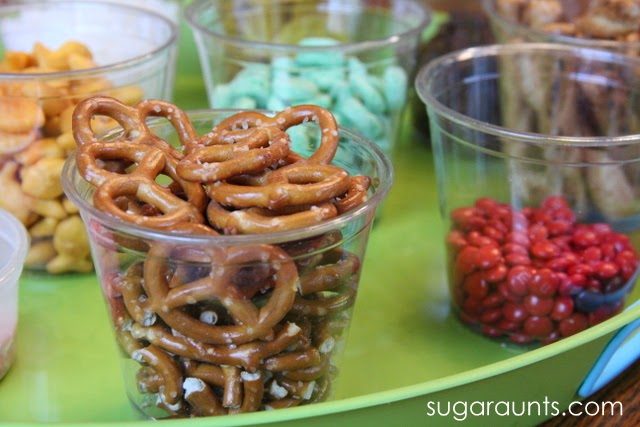
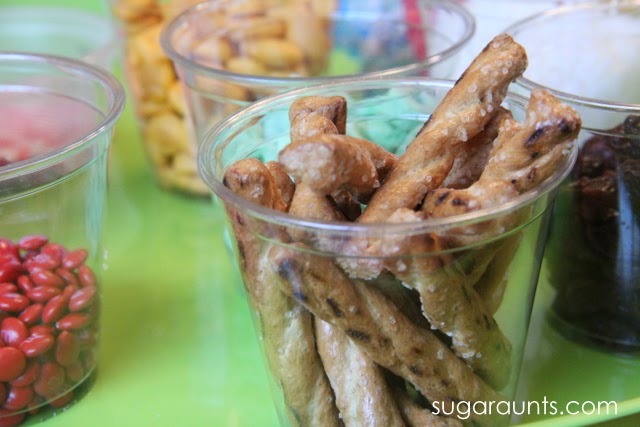
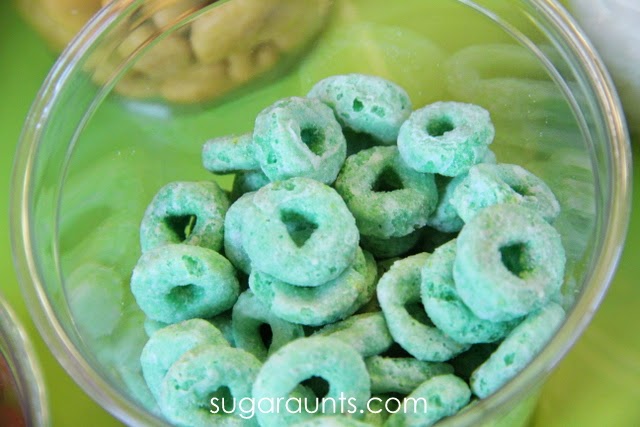
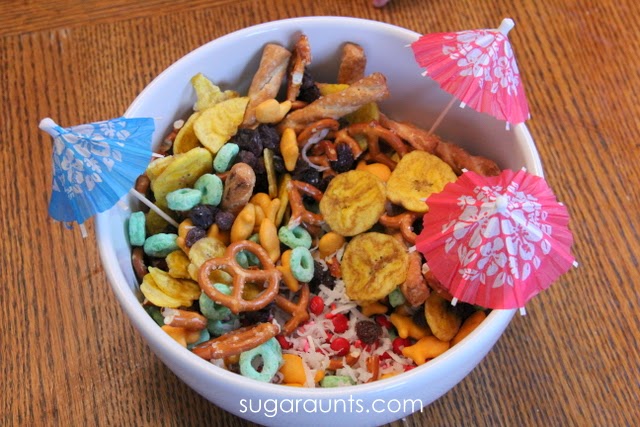
In short, when the jaw and mouth chew or crunch foods, they gain proprioceptive input through the mouth. That heavy work offers just as much of the nutritious benefits as it does the sensory benefits. Foods like crunchy nut mixes, granola, crisp apple slices, or air-popped popcorn require heavy work through the mouth and jaw. Likewise, chewy fruit leather, smoothies, or dried dates, cranberries, and raisins can meet that proprioceptive need. 

In this way, heavy work foods offer the same sensory benefits of a brain break, and heavy work through the joints and muscles that you gain in say running on a treadmill.   

Read more about this concept in an upcoming blog post on heavy work snacks. (coming soon)

Refined sugars, empty fatty foods (like those crunchy chips that are soooo satisfying) can lead to impaired brain function, inflammation, low nutritious value, and short-term benefits of the proprioceptive and calming regulatory input. 


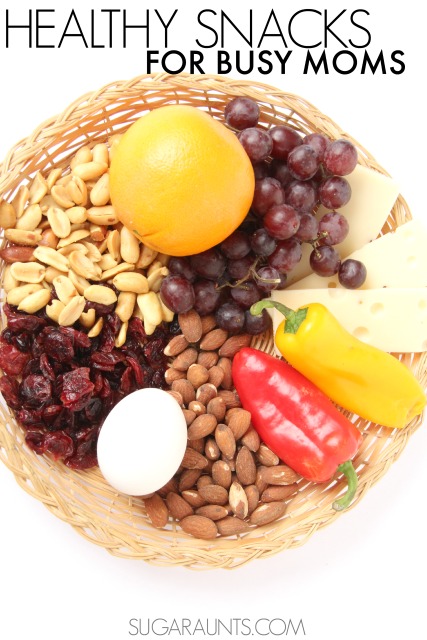
Healthy Snacks for Moms

Try these healthy snacks as a quick healthy snack option for moms:
  • Almonds
  • Granola Bar
  • Dried Cranberries
  • Almond Butter and celery sticks
  • String cheese
  • Hard boiled egg
  • Turkey roll-up
  • Avocados
  • Frozen blueberries
  • Apple 
  • Edamame
  • Popcorn
  • Broccoli
  • Celery sticks
  • Peanuts
  • Walnuts
  • Almonds
  • Cherry tomato/mozzarella cheese
 
*These are definitely snacks that kids can share…and they are great healthy snacks for kids!  But, sometimes a mom needs a secret stash of her own for a pick me up.  And in that case, dark chocolate is the perfect addition to this list!


Pair Healthy Snacks with Exercise

Pairing healthy snacks with exercise adds enormous value when it comes to feeling better and having more energy that moms so often need. One of the reasons is that heavy work input that we addressed earlier. And, what’s more is that there is a correlation between physical exercise and brain functioning. Add that to the benefits from healthy, crunchy, chewy snacks and you’ve got a practical solution for regulation of emotions, mood, and energy!

Exercise promotes self-regulation

Exercise has the ability to offer benefits in self-regulation and emotional regulation. Studies show this. And, in fact habitual aerobic exercise is associated with emotion regulation and mood benefits. This is great news, especially when paired with the regulating benefits of heavy work snack choices.

Just like the sensory benefits of crunchy and chewy snacks, exercise offers us the benefits of heavy work input through the joints. More than that, through regular aerobic exercise offers overall wellbeing, and benefits the brain in that it boosts the size of the hippocampus, gets the heart and sweat glands pumping, and involved with verbal memory and learning

We know that the hippocampus shrinks in late adulthood, leading to impaired memory and increased risk for dementia. So, with the benefits of healthy foods along with regular exercise, we can make these healthy choices.

How to add practical physical activity to a busy day

For myself, I’ve found that using a treadmill allows me the time and ability to fit physical exercise into the busy day of a mom with a business, full schedule, and even facilitating hybrid learning for my four kids. Having a treadmill in the home allows me to sneak in exercise in the morning, during the middle of the day, or in the evenings (even when this mom needs to run kids to and from activities and sports practices). A beginner HIIT treadmill workout is one way to make regular exercise happen within in a busy schedule.

Incorporating healthy choices into the day, try a home treadmill program. I love the Horizon treadmills, because the exercise equipment is easy to store, and it’s possible to jump on the treadmill throughout the day while gaining the heavy work benefits as well as the aerobic input.

Check out the Horizon fitness deals, including free shipping that you can access now on the Horizon site.

Affiliate links are included in this post, but I only recommend products that I own, and love!

Colleen Beck, OTR/L has been an occupational therapist since 2000, working in school-based, hand therapy, outpatient peds, EI, and SNF. Colleen created The OT Toolbox to inspire therapists, teachers, and parents with easy and fun tools to help children thrive. Read her story about going from an OT making $3/hour (after paying for kids’ childcare) to a full-time OT resource creator for millions of readers. Want to collaborate? Send an email to contact@theottoolbox.com.

Baked Cotton Balls Ten Apples Up On Top

Did you ever do an activity with the kids that was such a hit, that the kids ask to re-do the activity over and over and over again?  This one is it for us.  There is rarely a day that goes by that I don’t hear about our smashing apples activity. Especially if we happen to see a hammer.  Oh, this baked cotton ball activity was a fun one for us! 
 
We’ve never made baked cotton balls before, but have had the idea bubbling for a while.  When we heard that the Preschool Book Club‘s book for this week would be Ten Apples Up on Top, we knew it would have to be an apple themed baked cotton ball activity.  We even made these waaaay before all of the other book activities in the second series of books.  Like back in June.  If you’ve never made baked cotton balls before, this is a MUST-DO activity!
This post contains affiliate links.  


How to make Baked Cotton Balls:

First read Ten Apples Up On Top! by Dr. Seuss.  This is such a fun book for counting and playing along with the story.
Begin by mixing together one cup of flour and one cup of water.  This is a great activity for the kids.  Scooping, stirring, direction following, sneak tasting (my kids aren’t the only ones who go crazy for flour, right!??)
 
Pour in a bunch of red food coloring.  We typically go with Wilton gel colors for all of our dying activities, but I knew I wanted a really deep red color.  It seems like red coloring requires SO much dye to get a good shade of red.  I ended up using a bottle from the dollar store and used about half of the bottle of food dye.  This was maybe 20 drops?  Add enough to get a nice red color.
 
Mix in the food coloring.
Now is the cotton ball part.  Grab up your stash of cotton balls.
Mix them around to coat all of the cotton balls.  
Place a layer of aluminum foil on a baking tray and place the cotton balls on the tray for baking.  I used two forks to pick up the coated cotton balls and was able to let excess flour coating drip off before placing the cotton balls onto the foil. You’ll want to let as much excess drip off before putting them on the sheet to avoid the sharp edges and flat bottom once the cotton balls bake.
 
Pop the baking sheet into the oven for around 60 minutes at 300 degrees F.
 
While the cotton balls are baking, snip up the leaves and stems for the apples.  We used brown pipe cleaners and green crafting foam that we received from www.craftprojectideas.com.
When the apples are done, pull them out of the oven and let them cool for a bit. They will be nice and hard.  You’ll need to snip the bottom edges of the apples to remove any sharp edges that dripped to the base before baking.
 
To attach the leaves and stems, lay the leaves on the apple top and poke the pipe cleaner through the foam sheet and into the cotton ball.  The kids were able to help with this part, but assisting with stem attachment did not allow this mama to take any pictures 😉
 
Our crop of apples were ready for playing with!
 
We followed along with the book as we read to stack up apples one by one.  What a great way to learn and play with math facts, counting, number order, and simple adding.  Little Guy LOVED this activity.
We got to hammering the cotton balls and this was the really fun part!  The baked cotton balls have a hard outer edge that allow for a satisfying crunch when smashed, and a squishy, cottony center.  What a fun way to explore and play.
 
We used a plastic hammer, but any hammer would do.
In fact, fists work just as well for smashing.
We had a smashing afternoon.


The remains of our cotton ball smashing reminded us of this page in the book.  Be sure to let us know if you make baked cotton balls!  We would love to hear about your experience with this sensory and fine motor activity!
 
Stop by the other Preschool Book Club bloggers to see their takes on Ten Apples Up On Top!
 

Apple Math Counting and Adding Activity

We love using math concepts that are learned in school into playful activities at home.  Learning through play is a great way to strengthen concepts learned in the classroom.  We used apples to count, add, and learn one day, all in the great outdoors!
Be sure to use our free count and color worksheet for more fine motor math through play.

Kindergarten and Preschool students will enjoy this math activity using apples or other objects with chalk.  One to one correspondence, dice math, counting


Apple math activity for Kindergartners and Preschoolers

 
This post contains affiliate links.  If a purchase is made through these links, we receive a small percentage in payment at no cost to you.

We used Sidewalk Chalk and a
dice for this activity.  I took the kids outside to the sidewalk one afternoon and drew a bunch of apple shapes.  We were ready to play.


Note–you could also draw any shape for this activity: pumpkins, smiley faces, geometric shapes, simple houses…any thing would work.

To play the game, I had the kids roll the dice.  They had to count the dots on the dice, or simply look at the dots to determine how many dots there were.  Big Sister did a lot of dice activities last year in Kindergarten so she was able to glance at the dice and know how many dots there were.  Little Guy counted the dots.  This is a great early math skill for preschool aged kids.

Once they counted the dots on the dice, I had them color in the same number of apples to correspond to the number of dots.  

We used the squares of our sidewalk to wok on Kindergarten math concepts that Big Sister learned towards the end of her school year.  Some of the squares had two apples drawn on them, and others had four or more.


This was a great opportunity to review addition. 


She added the apples to make the total match the number of dots on the dice. 


Little Guy counted along with Big Sister to count the total number of apples filled in.

Coloring in the apples with the chalk requires use of the small muscles of the hand.  The sidewalk surface is resistive and the area they colored in was small.  This required precision to stay in the lines.  Not to mention, coloring in all of those apples really strengthened the hands!


This was such a fun way to review old math areas for the new first grader and introduce new math concepts to the preschooler. Like this math activity?  Try a few of these ideas:

The Mixed-Up Chameleon Snack Mix

Mixed up Chameleon activity

Many years ago, we made a mixed up snack mix to go along with some “The Mixed Up Chameleon” activities that we were doing with a group of preschoolers. It’s a fun way to engage little minds using a colorful snack, and is inspired by Eric Carle’s beloved book, “The Mixed-Up Chameleon”. Whether you’re exploring chameleon activities for preschoolers or simply looking for a creative way to engage kids in snack time, this mix is sure to be a hit.

The Mixed Up Chameleon Activity

Just like the mixed-up chameleon changes its colors to blend in with its surroundings, our snack mix offers a variety of flavors and textures to tantalize young taste buds. From crunchy to chewy, sweet to savory, every bite is a delightful surprise!

You’ll want to check out all of our cooking with kids recipes and all of the benefits of getting kids involved in the kitchen. A cooking task as simple as this mixed up recipe is great for little ones!


We have been loving this Preschool Book Club Series!  This week’s book is The Mixed Up Chameleon by Eric Carle (affiliate link) and one of our favorites.  We decided to make a mixed up snack mix to go along with the story.  And what a fun time this was! 


Mixed-Up Chameleon Snack


To create your own Mixed-Up Chameleon Snack Mix, gather an assortment of colorful ingredients. Think vibrant green pretzel sticks, golden cereal squares, red and blue dried fruit, and perhaps even some chocolate candies for an extra treat. Encourage your little ones to mix and match the ingredients just like the chameleon mixes up its appearance.

You could actually use any ingredients that you prefer or have on hand. This could be fruit to make a mixed-up fruit cup, or a trail mix type of snack.

As you prepare the snack mix together, take the opportunity to engage in some mixed-up chameleon activities. Discuss the chameleon’s unique ability to change colors and blend in with its surroundings. Encourage your children to use their imaginations and pretend to be chameleons, adapting to different environments as they munch on their colorful snack mix.

For added fun, consider incorporating story time into your snack session by reading “The Mixed-Up Chameleon” aloud. As you enjoy the story together, point out how the chameleon’s adventures parallel the mixing and matching of ingredients in your snack mix.

 
This post contains affiliate links.


Have you read The Mixed-Up Chameleon (Amazon affiliate link)
by Eric Carle?   We love this story, just like we love all of Eric Carle books.  This was a great book to read with a little snack.   First, we needed to do a little cooking with the kids.
 
 Our snack mix used all of the colors for the different animals in the book.  As the chameleon decides he wants to be a different animal, we added the ingredient to go along with that animal, and mixed it up, of course…with a mixing spoon!


In the book, first the Chameleon wants to be like the Polar Bear.  We added coconut flakes to our bowl to represent the polar bear’s fur.  Not a fan of coconut?  Try marshmallows.


Next the Chameleon wants to be like the Flamingo.  We added pink sprinkles.  Because sprinkles make everyone happy 🙂


Next the Chameleon wants to be like the Fox, so we added red M&Ms.

 
Goldfish crackers are for the goldfish, of course.


When the Chameleon wanted to be like the Deer, we added pretzels for antlers.


For the Giraffe’s long neck, we used our imagination and added pretzel sticks to the snack mix.


Green Fruit Loops represented the Turtle in the book.

Next, the Chameleon wants to be like the Elephant and again we used our imagination to use dried banana chips for elephant ears.  It was a little stretch, but worked for us.  And was a tasty addition to our snack mix!

 
The Chameleon decides he wants to be like the seal and at that point, we added raisins to represent the seal’s flippers.


The final addition to our snack mix was the umbrellas for the people. 


The snack mix was stirred up and all done!  Ready to eat, while we read the book.  Again!


Have fun with your snack mix and the Mixed-Up Chameleon!

Mixed Up Chameleon Book Activities

We had so much fun creating this Mixed up Chameleon activity! 
Be sure to stop by the other bloggers in this series to see how they are playing and crafting with the Mixed-Up Chameleon:


Home Grown Friends Mixed Up Creatures 
 
 
Frogs and Snails and Puppy Dog Tails Sensory Bin 


Mama. Papa. Bubba. Camouflaged Chameleon Hunt


Here are more kids crafts based on children’s books.

This activity is one of our favorite ways to explore books through play! There are many more ideas in our resource: Exploring Books Through Play.
social emotional activities for kids

Colleen Beck, OTR/L has been an occupational therapist since 2000, working in school-based, hand therapy, outpatient peds, EI, and SNF. Colleen created The OT Toolbox to inspire therapists, teachers, and parents with easy and fun tools to help children thrive. Read her story about going from an OT making $3/hour (after paying for kids’ childcare) to a full-time OT resource creator for millions of readers. Want to collaborate? Send an email to contact@theottoolbox.com.

Grow a Garden Pretend Play Dough

We are loving all things Spring these days.  One rainy morning, Baby Girl and I played with this play dough fine motor activity while Little Guy was away at preschool.  She loves play dough and was very excited to Grow a Garden with a few extras thrown in there to make a fun flower garden.
Play dough is such a great way to work on fine motor skills and this garden activity hits the mark when it comes to strengthening those little muscles in the hands.  Not only that, it’s totally fun and happy!


{This post contains affiliate links.  In other words, this blog will receive monetary compensation when any purchases are made through the links in this post.  Our opinions and ideas are in no way affected.  You can read our full disclosure policy here.  As always, we thank you for your support and community here at Sugar Aunts} 

I started by making a bunch of flowers.  I used my circle paper punches and glued circles together to make flowers.

Baby Girl and I stuck them onto green paper clips.  It was a great way to get started on the fine motor work in this activity.  She was really focused on putting the paperclips onto the flowers.

Next, I pulled out the green play dough and we started planting flowers!
Rocks were needed for our flower garden, of course! 

Fine Motor Activity for Kids

We tried clay and play dough for this activity.  The clay was more resistive to press the paper clips into, and a better strengthening tool…but it seemed to stick more to the paper clips.  Play dough worked better for us, and was just as good a fine motor strengthening work out. 

Pressing the paper clips into the play dough is a great way to encourage a tripod grasp while strengthening the intrinsic muscles of the hands.  The small muscles within the hand are so important for arch support and control in many fine motor tasks (coloring, zippering, buttoning…)

We’ve done another paper clips and play dough color match activity recently that hit on the fine motor work in this activity.  Check it out…your little play dough fan will love it!

This was a fun way to pretend and play as we grew our little garden!

More play dough ideas you may like:

Word Scavenger Hunt

Sight words written in chalk on bricks of a sidewalk. Text reads Multisensory word scavenger hunt

This word scavenger hunt is a hands-on play activity to work on sight words, spelling words, or common words. Use this creative sight word activities for kindergarten and active learning. While we used this activity many years ago to practice sight words, you can definitely use the idea to practice reading words and spelling words. Kids love these sensory word ideas to practice reading words with multisensory learning and gross motor play.

word scavenger hunt

We started practicing sight words.  One day we took them outside for a little movement and learning. 


Word Scavenger Hunt

Setting up a word scavenger hunt is easy. We used bright yellow cards to write the words to make it easier to spot the letter cards, but you could use any type of paper, or even letter rocks to spell out sight words. 

Another idea is to use clothes pins in the scavenger hunt. This is a great adaptation to the activity because you can foster hand strength, too.

I wrote our sight words on the sidewalk and had the kids match them up with our cards. 
 
They jumped on the word as I called it out and then could put the card on top.  This was a good gross motor coordination warm-up for our Scavenger Hunt.


Sight Word Scavenger Hunt

 
Big Sister went off and closed her eyes so she couldn’t see (with a little peeking…) and I hid the cards in different places in our yard.
 
Sight Word Scavenger Hunt
 
When all of the cards were hidden, I had her come back to the sidewalk and I would say one of the words.  She ran off and tried to find the word.
 
We had sight words hidden all over!  The kids had so much fun with this.  Even Little Guy, who hasn’t been practicing the sight words, got in to the action.  He loved helping Big Sister hide the words for me to find too.


When it was my turn to find the words, Big Sister would read one of the words on the sidewalk and I had to go find it.  I would ask her, “is this pan…?”  So she could read the word on the card, too.


After the Sidewalk Sight Words and Scavenger Hunt, we put the cards in the water bin with some bird seed for fun sensory play.
 
 
We’ve been doing a bunch of different activities with our sight words.
 
Looking for more ways to practice building words and spelling using letter cards or manipulatives? Grab our Letters Fine Motor Kit.


Want printable handwriting and sensory motor activities to target the visual motor skills needed for letter writing? Grab a copy of our Letters! Fine Motor Kit. The printable PDF contains 100 pages of hands-on letter writing practice for multisensory handwriting!

Letters Fine Motor Kit

Inside the Letters Fine Motor Kit, you’ll find:

  • A-Z Multisensory Writing Pages: Roll a ball of dough letters, ASL sign language letters, gross motor movement, small-scale letter box writing task, finger isolation letter trace, and writing practice area
  • Alphabet Fine Motor Clip Cards– Clip clothespins or paper clips to match letters with various fonts to strengthen the hands and focusing on eye-hand coordination, bilateral coordination, visual processing skills, and more.
  • Cut and place Fine Motor Mazes– Cut out the letter pieces and trace the maze with a finger to work on eye-hand coordination and finger isolation. Place a small letter on the letter spots to address in-hand manipulation and dexterity skills.
  • A-Z Cotton Swab Cards– Includes upper case and lower case letters. Dot the cards using a cotton swab or laminate the cards and use them over and over again.
  • A-Z Pattern Block Cards– These cards include a section for tracing with a finger tip for separation of the sides of the hand, eye-hand coordination, and finger isolation during letter formation. There is also a space to “finger write” the letter using the fingertip. This multisensory letter formation activity can be a great brain break during handwriting or literacy tasks. Learners can then form the letter using parquetry blocks.
  • Fine Motor Letter Geo-Cards– These geo board cards include A-Z in upper case forms. Users can copy the letter forms in a variety of multi-sensory strategies.
  • A-Z Color and Cut Letter Memory Cards– These upper case and lower case letter cards can be used to color for letter formation. Then use them in fine motor matching tasks or in sensory bins.
  • Color By Size Sheets– Help learners discriminate between tall letters, small letters, and tail letters. This visual perception activity invites learners to color small areas, using hand muscles for strengthening and handwriting endurance.
  • A-Z Building Block Cards– These LEGO block cards invite users to copy the cards to form letters using small building blocks. Users can place the blocks on the cards or copy the letter to address visual shift and visual memory. This activity set comes in upper case and lowercase letter forms.
  • A-Z Play Dough Letter Formation Cards– Print off these cards and laminate them to create play dough mats. Learners can form the letters using the arrows to correctly form letters with play dough while strengthening their hands and visual motor skills. Each card includes a space for practicing the letter formation, using a dry erase marker if the cards are laminated.
  • Graded Lines Box Writing Sheets– Users can trace and form letters in boxes to work on formation of letters, line awareness, starting points, and letter size.
  • Alphabet Roll and Write Sheets– Roll a dice and form the letter associated with the number of dots on the dice. This is a great way to work on letter formation skills using motivation. Which letter will reach the top first? This activity is easily integrated with a rainbow writing task to increase number or repetitions for letter practice.
  • Pencil Control Letter Scan– Use the letter bubble tracks to scan for letters. Users can fill in the letters of the alphabet to work on pencil control skills.
  • Color and Cut Puzzles– Color the pictures to work on hand strength and letter formation skills. Then cut out the puzzles and build visual perceptual skills.

Get your copy of the Letters Fine Motor Kit today!

Colleen Beck, OTR/L has been an occupational therapist since 2000, working in school-based, hand therapy, outpatient peds, EI, and SNF. Colleen created The OT Toolbox to inspire therapists, teachers, and parents with easy and fun tools to help children thrive. Read her story about going from an OT making $3/hour (after paying for kids’ childcare) to a full-time OT resource creator for millions of readers. Want to collaborate? Send an email to contact@theottoolbox.com.

Clay Nature Art Sculptures

We’ve been enjoying some beautiful weather and having TONS of outside play.  We’ll hang out in our back yard and get into all kinds of ball throwing, tree climbing, water playing fun.  One morning we pulled out some lumps of clay.  They were combined into pretty swirls of colors.  Ad a few leaves and sticks and we had


Nature Art Sculptures from Clay!

This clay is reeeeally hard, so we put it into a bin of water and pressed and pulled the clay until it became softer.  The warm sun didn’t hurt either.  What better fine motor strengthening play than messing with clay!
The sticks and colorful leaves
(HOW are the leaves falling already!?!)
made pretty little sculptures  for our driveway.
 
Pushing those sticks into the hard, resistive clay was great fine motor dexterity work, including tripod grasp for the smaller trigs, and tip to tip grasp to push the leaf stems into the clay lump.
 
These lumps of clay turned into something else not long after our sculpture fun…wait until you see what happened next 😉
Looking for more ways to work on tripod grasp?  Start here:

“I Spy” sight word sensory bottle

We made this sensory bottle

and sight word “I Spy” bottle

for an easy little learning activity.  Two of us Sugar Aunts were together one afternoon for a little play session with the kids and this was quick and easy to put together. 
One bottle of sand.
A handful of foam sheet shapes (we wrote a few beginner sight words on front and back of each shape).


 It was perfect for the different age groups of the kids (5, 4, 3, 2, and 1!)
And these kids seem to LOVE anything they can put into something else. The little fingers were everywhere when we told them to drop the shapes into the bottle opening! This is Awesome for tripod grasp skills.
This was great for the 5 and 4 year olds who are learning their sight words.  We used some beginner reader words that they recognize (Their current favorite book around here is “Sam I Am”.  Seeing those words in a new place is pretty cool way to emphasize reading confidence, I think!)
The 3 year old knows most of his shapes (that rectangle gets him every time!) so this was good for his learning level.
The two year old could point to the colors (and with only three options in the bottle, it was not overwhelming for him).
And for the one year old, this was overall great for language development!
((and super fun to shake !!)
We had fun with our sensory sight word bottle.  Have you done one of these? Link them up in the comments, we would love to see them!

Fine Motor Strengthening Color Match

When I saw how the thread matched the color of some of the crafting poms, I knew we had to do a color matching activity. 

Fine Motor Strengthening

I wrapped the thread around the ends of the clothes pins.

We received a great package in the mail one day from http://www.craftprojectideas.com/.  This was just a small part of the free goods we received… There are SO many project ideas and crafting supplies on their website. 
(we have a lot more crafting to do!!)

And Big Sister helped, too.  What a GREAT fine motor and bilateral hand coordination manual dexterity task!  She reaaaallly had to concentrate on this.  It was such a novel task for her.  It was neat to see her watch me wrap the thread, follow my verbal directions and cues, and as it became easier for her…wrap that thread around faster and faster!

Big Sister and Little Guy liked matching up the colors to the clothes pins. 
After they sorted the poms, we changed it up just a little.  I pulled out washable markers in the same four colors and Big Sister wrote right on the plastic tray.  She is learning to sound out words so we worked together on the letters to spell out the colors.

Pre-handwriting Warm-up Exercise

The pinching and fine motor strengthening with the clothes pins is a great mini-hand exercise to warm up the hands before a handwriting task.
This was such a fun activity!