How to Teach Spacing Between Words with a Clothespin

spacing between words with a clothespin craft

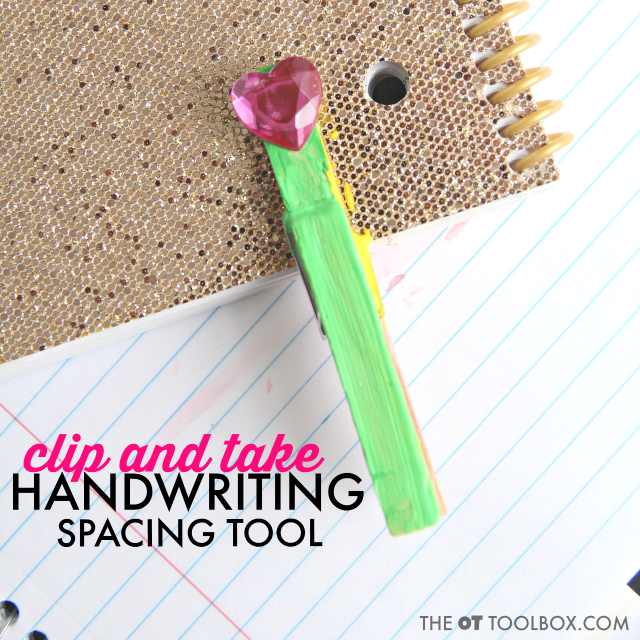
If you are working on spacing between words when writing, then this OT trick is for you. Many years ago, we created this blog post using a clothespin to teach spacing in handwriting. It’s a simple activity really, and one that kids love to use because they can make the clothespin spacing tool their own! Let’s teach spacing between words with a cute clothespin craft!
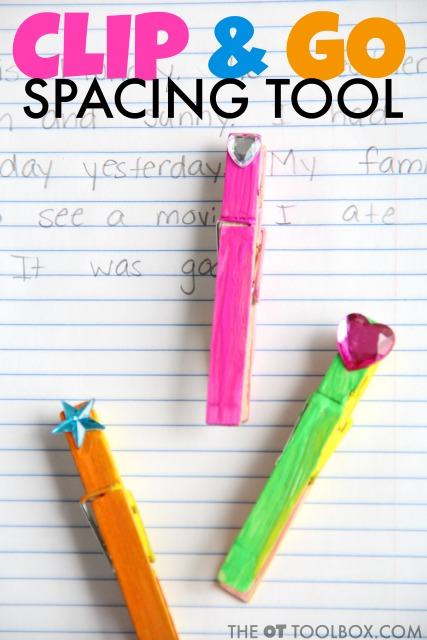
Use a clothespin to teach handwriting as a spatial awareness tool.
Use a clothespin to teach spacing between words.

Teach spacing between words

When it comes to legibility in handwriting, spacing between words makes all the! Addressing spatial awareness in handwriting can make a big difference in legibility fairly quickly given intervention, practice, awareness, and the tools to address spacing in written work.

Using a visual and physical cue to teach spacing between words is very effective. This is especially true for young students who are beginning to write with more organizational requirements: lines, margins, smaller writing spaces, and faster writing speeds are some of these organizational needs in handwriting tasks.

Let’s break those areas down to describe how each might impact letter formation and legibility of written work:

  • Line use- Line use progresses from kindergarten (where many students are exposed to writing letters and words on lines for the first time. This progresses to first grade with more writing requirements. Moving onto second grade may bring a smaller line space for written work. In third grade, writing lines may be smaller yet. In about fourth grade, many students move to a lined notebook. These pencil control and line use can impact legibility especially when handwriting lessons are rushed in the general curriculum of most schools. This blog post on line awareness is a great resource for written work requirements.
  • Margin use- One visual perception component to handwriting includes margin use in written work. This impacts legibility when writing on a sheet of paper or moving to the next line. Sometimes, margins creep over across the page as a student copies lists or words or writes sentences as in a journal. Spatial relations includes the visual perception aspect, particularly the visual processing skill of visual tracking, which includes following the pencil as in copying words. Visual attention and visual scanning are also involved. This blog post on margins in handwriting covers this area in more detail.
  • Writing in smaller spaces- Sizing in written work impacts legibility. When letters are written to large, the spacing can be crowded, leading to poor legibility. This can be especially the case when writing on worksheets or workbook pages with limited space availability. This blog post on spatial awareness is a good one to check out regarding sizing and space use.
  • Faster writing speeds- Writing sped impacts legibility because when a student writes quickly, sometimes the legibility of accurate letter formation is lost. When this is the case, adding a bit of space between words can impact overall legibility. As students progress, writing speed requirements increase. Consider the second grader that is required to copy their homework onto their notebook or homework planner. There is only so much time in the school day, so a limited chunk of time is given for this task. When a student struggles with pencil control, letter formation, motor planning, or any other contributing factor, this can really impact written work on a functional handwriting task that has dire consequences. When the student comes home for the day, they are unable to read their homework assignment. This same issue is true for older students. In middle school or high school, they are unable to copy notes in their class. This can lead to difficulty copying notes and studying. This resource covers writing speed in written work.

We’ve shared several handwriting spacing tools here on The OT Toolbox, like a cute DIY space martian spacing tool and this pipe cleaner spacing tool.

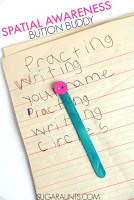
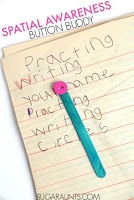
Sometimes a simple visual cue like this craft stick spacing tool and pointer stick can make a big difference in handwriting spatial awareness and handwriting legibility.

Read on for another quick craft that kids can make and use to teach spacing between words…using a clothes pin for better spatial awareness in written work.

WHy Use Clothes Pins to Strengthen Hands

There are many ways a clothes pin is a hand strengthening tool. It’s actually always found in my occupational therapy bag because it’s so versatile when it comes to hand strengthening.

Here is a video that shows the different grasp patterns that you can target with just a clothes pin:

Clothes pins can be used to work on hand strengthening and grasp pattern development!

Handwriting Spacing Between Words Tool

This clothespin spacing tool is one that can be attached to a notebook or folder and used again and again…because any school-based OT knows that those spacing tools can get lost very easily!

The best part of this handwriting spacing tool is that kids can make their own, while creating a unique tool that fits their personality!

First, read more about how spacing tools work.
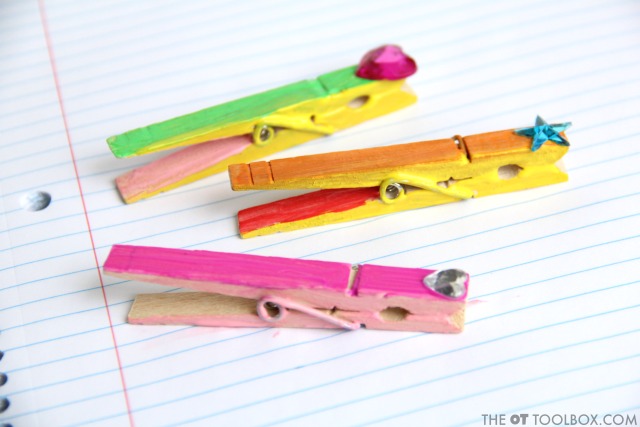
Teach spacing between words with a clothespin for better legibility and spatial awareness in handwriting.

Next, get all of your materials ready, because this handwriting spacing tool is a fun activity! In fact, school-based therapists can create a group activity in a classroom with random items found in a craft bin…while boosting those fine motor skills!

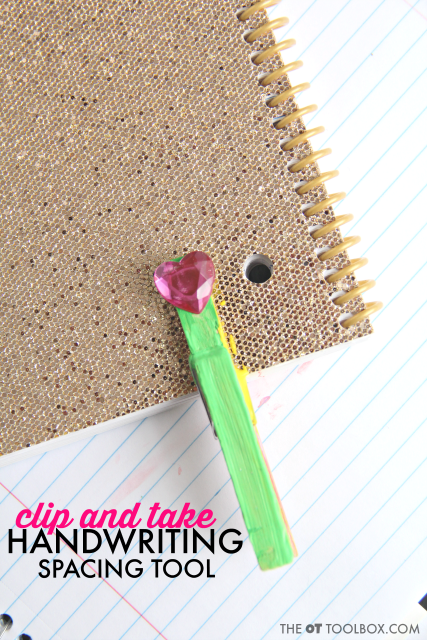
To make a DIY spacing tool, you’ll need a clothes pin. The wooden type is perfect for painting and decorating, making a fine motor craft based on the child’s interests, favorite color, etc. When the child makes their own spacing tool, they are more likely to use it again and again.

Using the clothes pin clip allows the spacing tool to be saved. (Better yet, the clip prevents another lost therapy item later found at the bottom of a backpack or in the midst of desk chaos!)
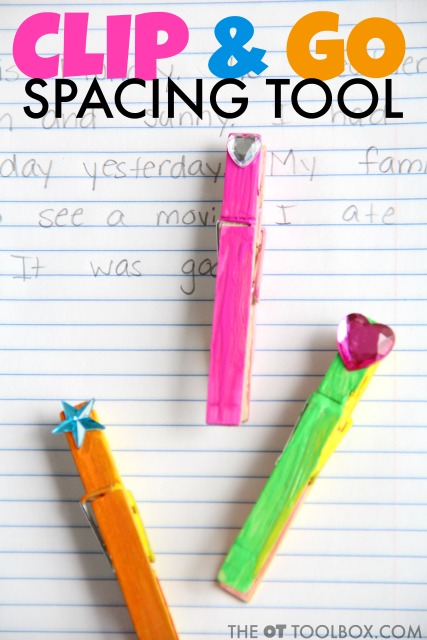
Kids can make these clothespin spacing tools to learn spacing between words in handwriting for better legibility and neat written work, just clip to a notebook or folder!

How to teach spacing between words with a clothespin:

The clothes pin clip is perfect for attaching to notebooks, folders, or a pencil box on a desk. Students will always know where their spacing tool is…but how do they use it?

Use a clothespin to teach spacing between words the same way you would use other spacing tools.

Show students how to place the clothespin on the paper after the last letter of a word. They can keep the clothespin in place as they write the next word in a sentence. They physical and visual cue of moving and seeing the clothespin can make a lasting impact on spacing between words.

Think about it this way: the messiest written work is easier to read when it has space between words. As readers, we tend to fill in missing blanks using our predictive reading skills. When words are spaced out, students will be better able to read back over notes, homework assignments, and other written work.

Spacing is often times, the easiest way to make a big impact on handwriting legibility!

For younger students, using the clip portion of the clothespin spacing tool can be achieved using strips of paper to practice handwriting. Simply cut regular double ruled paper into strips and clip the clothespin between each word as the child writes.

Those strips can even be laminated and handwriting practiced with a dry erase marker.

Using the clothespin spacing tool can make a big impact on written legibility!
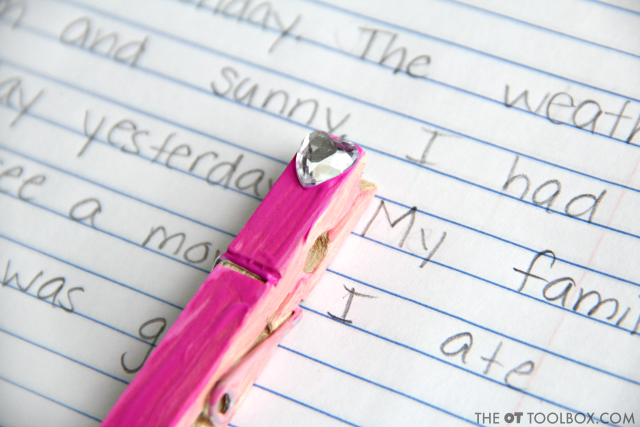
Use a clothespin craft to work on spacing between words.

To make the ClothesPin Spacing Tool

You’ll need some basic craft items (affiliate links are included below):
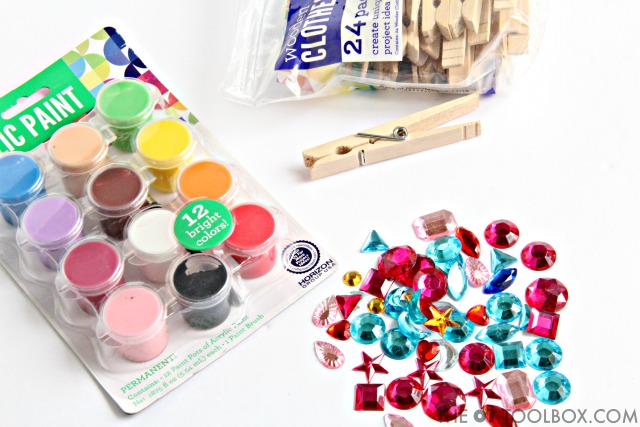
Kids can make this clothespin craft in occupational therapy or school to teach spacing between words for better handwriting.
Handwriting craft for occupational therapy
  1. Next, get the kids started on painting. Ask the child or group of kids to paint all sides of the clothes pins.
  2. On the wet paint, glitter and sparkling gems can be added.
  3. Let the paint dry and embellish with additional items including gems, stickers, puffy paint, or other items.
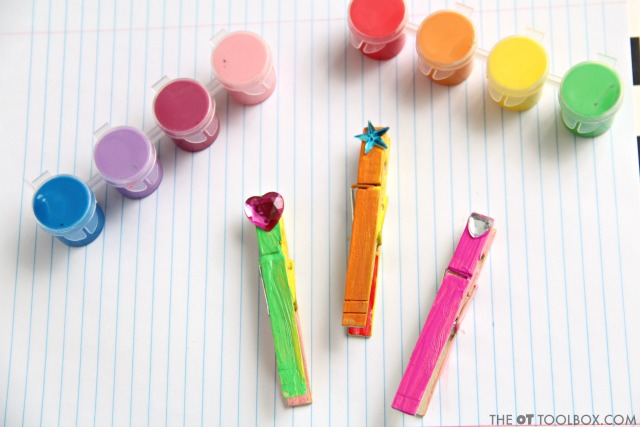
Make a clothespin craft to work on spacing between words when writing.
Paint clothespins and add gems or stickers for an occupational therapy handwriting craft.
Use a clothespin craft to teach spacing between words for better legibility in handwriting.

Looking for more ways to teach spacing between words? Try these ideas:
Use a clothespin craft to teach spacing between words using a clip clothespin for better legibility and spatial awareness in handwriting.


Visual Perception and spatial awareness in kids.  What is Spatial awareness and why do kids have trouble with spacing between letters and words, reversing letters, and all things vision.  Great tips here from an Occupational Therapist, including tips and tools to help kids with spacing in handwriting. Visual Spatial Relations activities for handwritingEasy accommodations for poor spatial awareness in handwriting.Try this line awareness and spatial awareness handwriting activity using puzzle pieces and crayons to work on handwriting in a fun and creative way that doesn't require writing.
 
 
Looking for more ways to address spatial awareness? 
The Handwriting Book is a comprehensive resource created by experienced pediatric OTs and PTs.

The Handwriting Book covers everything you need to know about handwriting, guided by development and focused on function. This digital resource is is the ultimate resource for tips, strategies, suggestions, and information to support handwriting development in kids.

The Handwriting Book breaks down the functional skill of handwriting into developmental areas. These include developmental progression of pre-writing strokes, fine motor skills, gross motor development, sensory considerations, and visual perceptual skills. Each section includes strategies and tips to improve these underlying areas.

  • Strategies to address letter and number formation and reversals
  • Ideas for combining handwriting and play
  • Activities to practice handwriting skills at home
  • Tips and strategies for the reluctant writer
  • Tips to improve pencil grip
  • Tips for sizing, spacing, and alignment with overall improved legibility

Click here to grab your copy of The Handwriting Book today.

Colleen Beck, OTR/L has been an occupational therapist since 2000, working in school-based, hand therapy, outpatient peds, EI, and SNF. Colleen created The OT Toolbox to inspire therapists, teachers, and parents with easy and fun tools to help children thrive. Read her story about going from an OT making $3/hour (after paying for kids’ childcare) to a full-time OT resource creator for millions of readers. Want to collaborate? Send an email to contact@theottoolbox.com.
What are Visual Spatial Relations

spatial relations activities

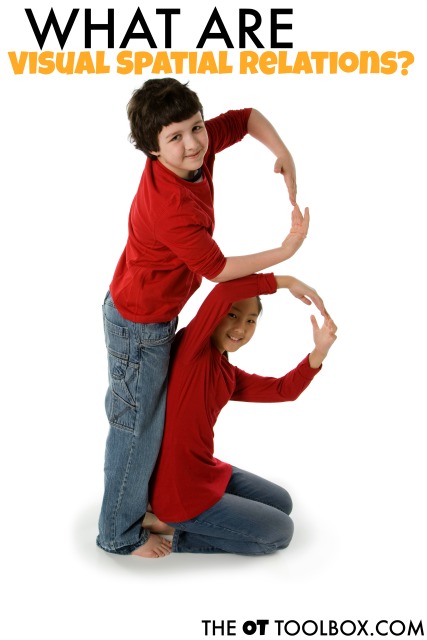
Visual Spatial Relations is an important visual perceptual skill that is important for many functional tasks.  Spatial relations allows the organization of the body in relation to objects or spatial awareness.  This is an important part of spatial awareness in handwriting and many other movement-based activities.  An important part of visual spatial relations includes laterality and directionality. In general, these spatial relationship terms refer to left-right body awareness and the ability to perceive left/right relationship of objects. 

Spatial Relations is being aware of oneself in space. It involves positioning items in relation to oneself, such as reaching for items without overshooting or missing the object. Most of us realize as we walk through a doorway that we need to space ourselves through the middle of the door.

Some with poor visual spatial skills may walk to closely to the sides and bump the wall. It also involves the fine motor tasks of coordinating handwriting with writing in spaces allowed on paper, placing letters within an area (lines), and forming letters in the correct direction.

What are spatial relations?

Spatial relations, or visual spatial awareness, refers to an organization of visual information and an awareness of position in space so the body can move and perform tasks. Spatial relations are needed for completing physical actions, moving in a crowded space, and even handwriting.

Knowing which shoe to put on which foot.  Understanding that a “b” has a bump on the right side.  Putting homework on the left side of the take home folder before putting books into a locker beside the gym bag.  Visual spatial relations are everywhere!

More examples of spatial relations

Here are more everyday examples of spatial relations at work:

  • Letter formation and number formation
  • Writing letters without reversal
  • Reading letters without reversal
  • Sports
  • Completing puzzles
  • Walking in a crowded hallway without running into others
  • Standing in line without bumping into others
  • Left/right awareness
  • Understanding spatial reasoning concepts such as beside/under/next to/etc
  • Reading without losing one’s place
  • Copying written work with appropriate spatial awareness
  • Reading maps  

Visual spatial skills in occupational therapy activities are an important skill.  

Visual Spatial Skills and Handwriting

Spatial relations, and the ability to organize physical movements related to visual information impacts handwriting.

You might be thinking: “Movement and handwriting!? What?? I want my kiddo to sit still and copy his homework into his planner without wiggling all over the desk!”

Ok, ok. Here is the thing: We are asking our kids to write way to early. Preschoolers are being given paper with lines and are asked to write their name with correct letter formation. Kids are being thrown into the classroom environment with expectations for legible written work an they are missing the necessary basics.

When kids are not developing the skills they need to hold a pencil, establish visual perceptual skills, and organize themselves, they are going to have struggles in handwriting.

NOTE: There are a few other baseline tools that kids need in order to establish a base for better handwriting. Fine motor experiences, positioning, attention are just a few of these areas.

Here are a few easy hands-on strategies to help with spatial relations in written work:

  1. Read this resource on hand dominance and laterality.
  2. Then check out this post on what you need to know about writing with both hands.
  3. Finally, check out this movement activity for direction following that involves spatial relations.
  4. Spatial relations also plays a role in near point copying skills, or accuracy of copying written work.

These resources are all connected and can impact spatial relations skills!

Another resource is this post on Hand Aerobics and Fine Motor Skills Needed in the Classroom

You can find all of our handwriting posts here.

Spatial Relations Quick Tip:
Write a letter on the student’s back using a finger or a pencil eraser. Ask the student guess what letter it is. Then, ask the child to air write the letter. (While holding a pencil, with large motion, whole arm motions AND very small with just the fingers!) Finally have him write the letter on paper.

  • These activities all require the ability to perceive an object in space.  The way they interpret position in space to their body and to other objects in the environment impacts motor skills.    
  • Spacing pieces of a puzzle amongst the others and writing in relation to the lines is one way to work on this skill.

Fine Motor Quick Tip:
Encourage pinching activities. So many kids are exposed to screen technology from a young age. Screen interaction uses the pointer finger in isolation or just the thumb. These digits become strong and a dynamic pencil grasp is limited. Promote strengthening of the intrinsic muscles by pinching clay or tearing and crumbling small bits of paper. Read more about intrinsic muscle strengthening here.

What are visual spatial relations and how are visual relationships and visual concepts needed for functional tasks?

Spatial Relations Activities

Try these movement-based spatial relations activities to work on the visual spatial skills needed for writing and completing everyday tasks:

  • Create a paper obstacle course. Draw obstacles on paper and have your child make his /her pencil go through the obstacles.
  • Draw circles, holes, mud pits, and mountains for them to draw lines as their pencil “climbs”, “jumps”, “rolls”, and even erases!
  • Create an obstacle course using couch cushions, chairs, blankets, pillows to teach left/right/over/under.
  • Write words and letters on graph paper. The lines will work as a guide and also a good spacing activity.
  • Use stickers placed along the right margin of to cue the student that they are nearing the edge of paper when writing.
  • Highlight writing lines on worksheets.
  • Draw boxes for words on worksheets for them to write within.
  • Play Simon Says. Use these therapy Simon Says commands.
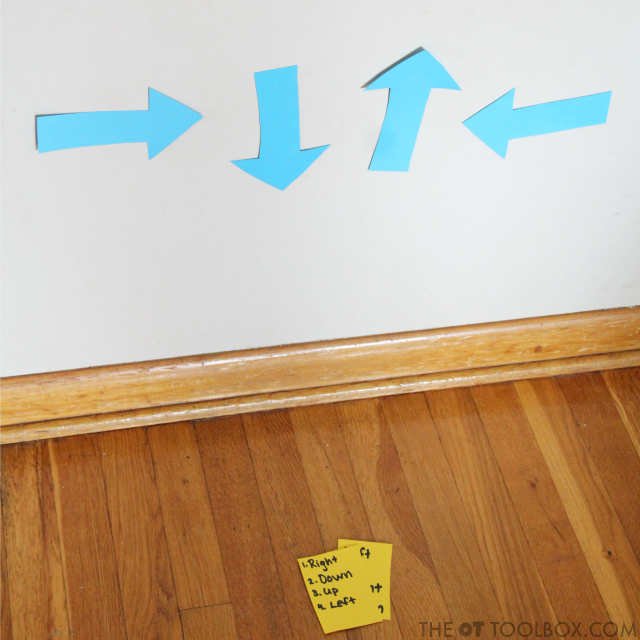
  • Practice directions. Draw arrows on a paper pointing up, down, left, and right. Ask your child to point to the direction the arrow is pointing. The child can say the direction the arrows are pointing. Then create actions for each arrow. Up may be jumping. Down may be squatting. The Left arrow might be side sliding to the left, and the Right arrow might be a right high kick. Next, draw more rows of arrows in random order. Ask your child to go through the motions and try to go faster and faster.
 
 
This map activity is great for building and developing spatial concepts and higher level thinking right in the backyard, using a map and lights to develop spatial relations. Teaching Spatial Concepts to Preschoolers and Toddlers through play. Over, under, around, and through and their need in functional tasks like shoe tying and handwriting. Visual Perception and spatial awareness in kids.  What is Spatial awareness and why do kids have trouble with spacing between letters and words, reversing letters, and all things vision.  Great tips here from an Occupational Therapist, including tips and tools to help kids with spacing in handwriting. What is spatial awareness?  Tips and tools for handwriting, reading, scissors, and all functional skills in kids and adults, from an Occupational Therapist.


Other activities to incorporate spatial relations include:

Try these other activities that challenge visual spatial relations:

Movement and spatial relations worksheet to improve spatial awareness in kids

Free Movement and Handwriting Worksheet

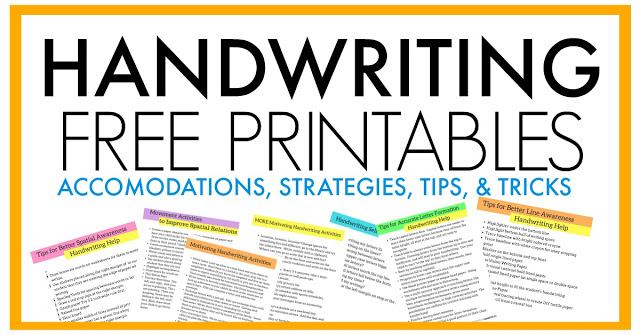
Today’s free printable shares movement based activities to help kids improve their spatial relations. These are the skills kids need to write legibly. It includes tips and activities to improve spatial relations, that were mentioned above. This free handout is a great resource to add to your occupational therapy toolbox.

You will receive this handout when you join the Handwriting Tips and Tricks series. Each day over the course of 5 days, you’ll receive a free handwriting worksheet to use in addressing common handwriting issues.

Join the free handwriting series!

handwriting handouts

Colleen Beck, OTR/L has been an occupational therapist since 2000, working in school-based, hand therapy, outpatient peds, EI, and SNF. Colleen created The OT Toolbox to inspire therapists, teachers, and parents with easy and fun tools to help children thrive. Read her story about going from an OT making $3/hour (after paying for kids’ childcare) to a full-time OT resource creator for millions of readers. Want to collaborate? Send an email to contact@theottoolbox.com.
Fix Spacing in Handwriting (Free Handout)

spacing in handwriting handout

Working to fix spacing in handwriting so the kids you serve can write legibly? Spatial awareness is a huge means to improving legible handwriting. Sometimes having a few strategies to actually improve the spacing between letters and words is so beneficial for accuracy and carryover in handwriting.

Today, I have another free handwriting handout as part of our handwriting tips and tricks series. If you’ve already signed up for this series, you have the free worksheet in your inbox. This is the space to access more spacing in handwriting resources and tools to help with spacing between letters and words for legible written work.

Free spacing in handwriting handout that includes tips for improving spacing between words and letters in written work.

Fix Spacing in Handwriting

Spatial awareness is a powerhouse when it comes to legibility in written work. The child who forms letters with award formation no matter how many times you teach them that letters start at the top can increase overall legibility by spacing out words on the lines.

However, spacing between letters and words can be difficult when visual motor integration is an issue. Modifications and adaptations can help.

For those kiddos who have zero awareness of organization on the page and start at the middle of the paper or don’t seem not notice space constraints on a worksheet will definitely benefit from spatial awareness tips and tricks.

Here are a few easy ways to fix spacing in handwriting:

  1. Use graph paper
  2. Use a highlighter for writing words
  3. Use a small dot (colored pencil) to space between words
  4. Use a spacing tool. Kids can make their own (check out the spacing tools listed below) to help with carryover and use.
  5. Highlight margins
  6. Use boxes for words or letters. This blog post shows how to set up boxes for spacing between letters and words.
  7. Encourage the child to use a “finger space” between words and physically place their finger on the paper. This incorporates bilateral coordination and holding the paper when writing.
  8. Use stickers placed along the right margin of to cue the student that they are nearing the edge of paper when writing.
  9. Draw a red stop sign at the right margin.
  10. Graph paper Try 1/2 inch wide rule first.
  11. Raised line paper
  12. Slant board
  13. Try smaller width of lines instead of primary paper.
  14. RediSpace paper has a green line along the left margin and a red line along the right margin.

Fix Spacing between words with a spacing tool

There are many spacing tools on the market, but when kids are involved in the creation process, they are likely to use the item in handwriting tasks. We’ve made several spacing tool crafts here. Try these ideas:

Why Spacing between words is important

Spacing between letters and words is one of the easiest ways to improve overall legibility in written work. Why? There are a few reasons…

When letter formation is difficult for children, letters can appear sloppy or hard to discriminate from one another. This can make reading back written work difficult for children. Spacing between words can create white space that makes it easier to read sloppy or poorly formed letters.

Those that struggle with handwriting challenges such as dysgraphia or dyslexia, fine motor challenges, sensory issues, motor planning challenges, correct formation of letters can be quite difficult. Spacing between words helps to improve overall legibility.

For more information, check out our blog post on dyslexia and occupational therapy.

Spacing helps when line use is a challenge. Some children struggle with the visual perceptual skills needed to write on lines. Other contributors to poor line use may include pencil control challenges, motor planning issues, fine motor skill development, or difficulties visual motor skills. When any of these challenges exist, placing letters correctly on the lines, below the lines can impact legibility. Addressing spacing between letters and words can help with readability of written work.

Spacing helps with letter size issues. Similarly to the concept of line use, sizing of letters is important. When sizing is incorrect or inconsistent, children may fill the entire space with their letters. They may make all of the letters the same size or use quick writing speed which impacts legibility and results in large letters. Adding more space between words can help with reading this written material.

Addressing spacing issues allows others to read one’s handwriting. Teachers and parents can agree that when handwriting is illegible, there are difficulties with learning. Kids struggle to read their notes or homework list. Others might not be able to read back over what they’ve written making studying for quizzes and tests a challenge. Students may miss questions on exams or homework assignments when legibility is an issue. All of these issues can impact learning of information and grades.

For more information, you’ll want to check out all of our handwriting posts here.

Spatial Awareness Quick Tip:

Make a spacing tool that can be used while your child is writing words and sentences. It can be as easy as a popsicle stick or even the child’s finger. Show them how to place the spacing tool between words and sideways between letters.

Fine Motor Quick Tip:

Help kids to develop and strengthen the skills needed for improved pencil grasp with fine motor experiences. Encourage flexion of the thumb IP joint (bending the tip of the thumb). Thumb IP joint motion during handwriting helps with pencil control and positioning in the hand. Check out this resource on improving pencil grasp through play, or this massive Pencil Grasp Bundle for activities and tools to impact pencil grasp, motor planning, and fine motor skills.

Spacing in Handwriting Handout

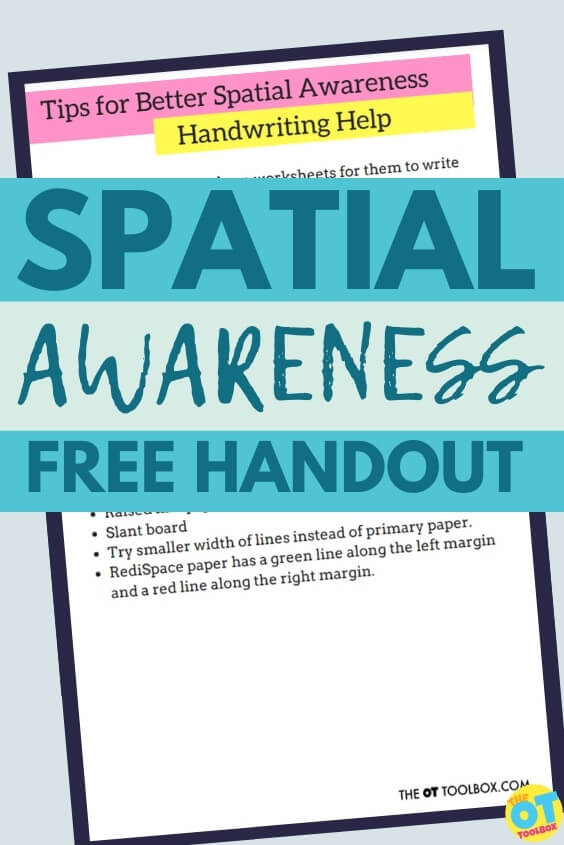
Want tips and tricks to work on spacing in handwriting in a handout form? This free resource is a spacing worksheet that can be used to develop spacing awareness skills in written work. Use the handwriting strategies listed on the handout in educating parents, teachers, or other therapists on the needs of a child.

This free spacing worksheet lists the strategies we covered above and can be a great addition when making suggestions for specific spacing needs. To access this free handout, join the Handwriting Tips and Tricks series…5 days of free handouts and information on all things legible written work!

Head to Handwriting Occupational Therapy Tips and Tricks to sign up. You’ll receive 5 free handwriting handouts related to aspects of written work: spacing, sizing, line use, letter formation, and more. Each day for 5 days, a free handwriting printable is delivered to your inbox.

handwriting handouts
The Handwriting Book is a comprehensive resource created by experienced pediatric OTs and PTs.

The Handwriting Book covers everything you need to know about handwriting, guided by development and focused on function. This digital resource is is the ultimate resource for tips, strategies, suggestions, and information to support handwriting development in kids.

The Handwriting Book breaks down the functional skill of handwriting into developmental areas. These include developmental progression of pre-writing strokes, fine motor skills, gross motor development, sensory considerations, and visual perceptual skills. Each section includes strategies and tips to improve these underlying areas.

  • Strategies to address letter and number formation and reversals
  • Ideas for combining handwriting and play
  • Activities to practice handwriting skills at home
  • Tips and strategies for the reluctant writer
  • Tips to improve pencil grip
  • Tips for sizing, spacing, and alignment with overall improved legibility

Click here to grab your copy of The Handwriting Book today.

Colleen Beck, OTR/L has been an occupational therapist since 2000, working in school-based, hand therapy, outpatient peds, EI, and SNF. Colleen created The OT Toolbox to inspire therapists, teachers, and parents with easy and fun tools to help children thrive. Read her story about going from an OT making $3/hour (after paying for kids’ childcare) to a full-time OT resource creator for millions of readers. Want to collaborate? Send an email to contact@theottoolbox.com.
Friendship Skills- Personal Space

friendship skills for personal space and body awareness with a free therapy slide deck for teletherapy

Part of building friendship skills is teaching kids to have an awareness of personal space with those around them. Body awareness is a big part of this, especially when social distancing is something to consider. Friendship skills involve a variety of pieces of the bigger social emotional skills picture and a component of that is personal space, or a personal bubble of comfort space. Read more about the part that personal space plays in friendship skills, including personal space/body awareness activities. You’ll also find a free therapy slide deck to help children with the friendship skill of personal space and body awareness. If strategies to address friendship skills is needed for your clients, also try this writing about friendship slide deck.

Friendship skills for personal space and body awareness using gross motor activities in a free therapy slide deck.

Children who struggle with social and emotional development, and those with specific sensory preferences may show personal space issues that could be related to body awareness needs. For these needs, occupational therapists can offer several suggestions and interventions.

Occupational therapists have the ability to play a role in social skills training in children. Included in this support is activities designed to improve social and emotional skills.

One study indicated that children who participated in a friendship skills group in occupational therapy. The researchers found that children receiving the social skills training group showed improved friendship skills and quality of friendship as reported by the children’s parents.

Personal Space and Body Awareness

Some strategies to address personal space and body awareness can include:

  • Develop strategies specific to the child to address the individual’s preferences
  • Offer strategies for self-regulation
  • Offer strategies for controlling inhibitions
  • Focusing on spatial relations
  • Teach self-regulation techniques, such as progressive muscle relaxation, self-awareness, and mindfulness, to decrease anxiety while improving body awareness
  • Incorporate play into spatial concepts such as over, under, around, and through
  • Body drawing activities
  • Body part naming activities
  • Obstacle courses
  • Proprioceptive activities
  • Coach the child to state their preferences for personal space in a given situation
  • Map activities for teaching spatial concepts
  • Set up a small social skills group for a low-stress social gathering
  • Offer instruction in sensory tactics that can help to calm or regulate sensory needs such as deep breathing exercises, heavy work input, or deep pressure
  • Sensory integration occupational therapy interventions
  • Practice social skills interactions that may come up in a given situation
  • Work on working memory so the individual can pull from past successful situations
  • Work on foresight so the individual can think ahead of tools they might need in a given situation
  • Incorporate dance and music
  • Body awareness games and activities such as Simon Says, Twister, and the Hokey Pokey. Use these printable Simon Says commands.
  • Body awareness positioning activities

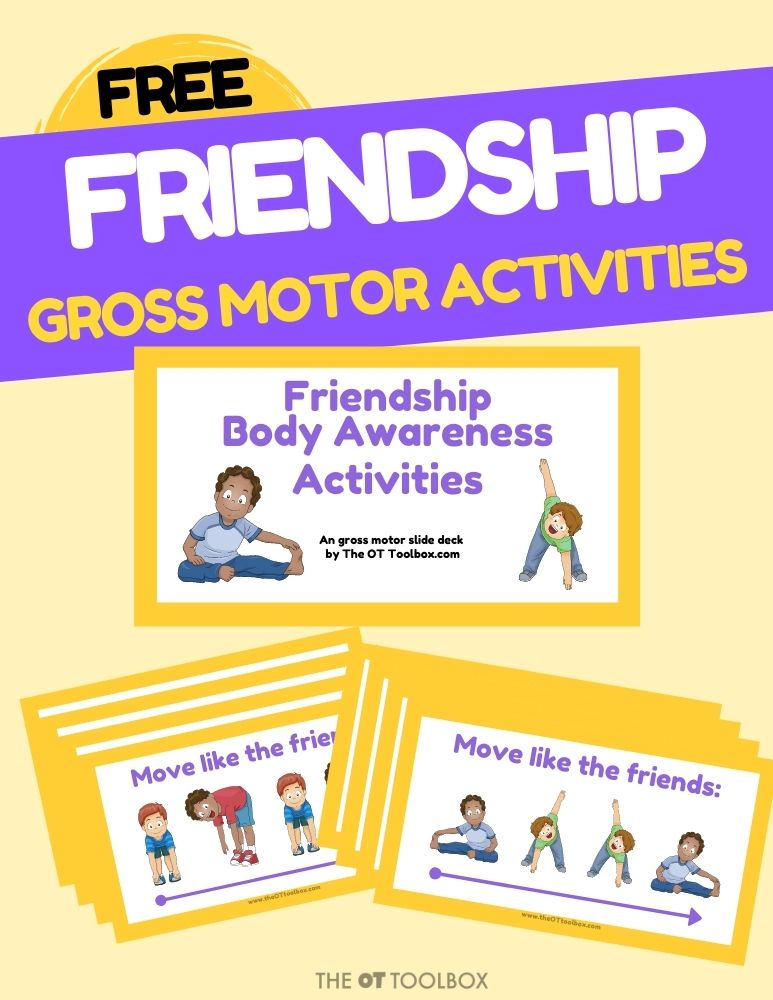
Because of the need many children have with developing an awareness of personal space, and the part that plays into friendship skills, I wanted to create a free Google slide deck to work on these skills.

You’ll see that the therapy slide deck pairs friendship with body awareness activities so that kids can practice various gross motor body positioning challenges.

These free slides offer movement activities to incorporate proprioceptive and vestibular input, as well as motor planning challenges. All of these activities challenge movement changes and body awareness.

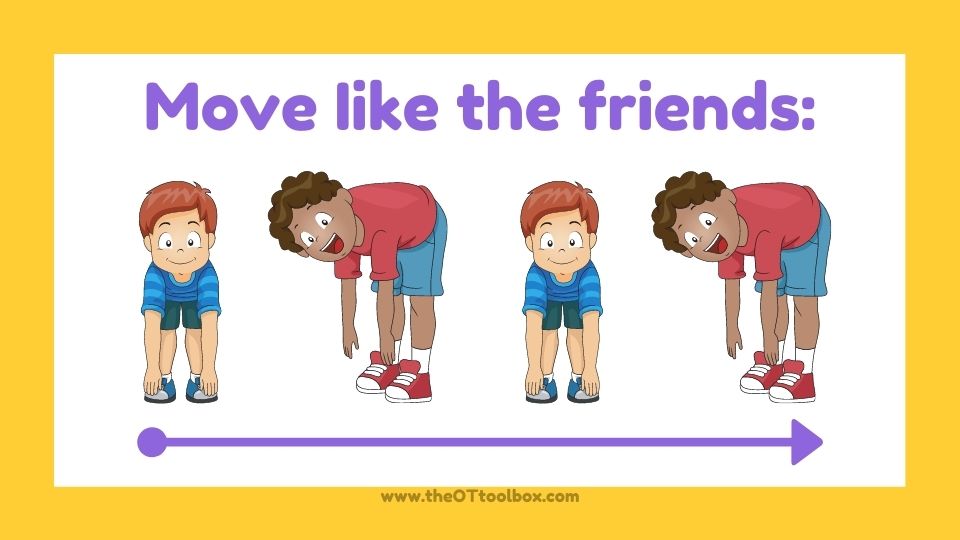
Friendship skills gross motor activity for body awareness and personal space awareness.

Users can go through the slides and visually track from left to right as they complete each gross motor activity. There is an interactive portion of the slide deck when used in “edit mode” in Google slides. Kids can slide the round dot along the arrow to complete each gross motor activity in sequence.

This motor planning activity challenges body awareness needed for personal space awareness as a friendship skill. Kids can challenge themselves in movement, motor planning, bilateral coordination, core strength, and movement changes for addressing personal space considerations as they learn how their body moves through space.

Free Body Awareness Slide Deck

Want to get a free Google slide deck to help kids with personal space and body awareness? This friendship theme activity deck is a fun way to get kids moving and gaining an awareness of their body and how it moves through space.

Enter your email into the form below. You will be emailed a PDF so you can access this slide deck at any time.

Before clicking the button on your PDF, be sure you are logged into your Google account. Make a copy and share the slide deck with anyone on your therapy caseload.

FREE Friendship Skills Body Awareness Activities Slide Deck

    We respect your privacy. Unsubscribe at anytime.

    MORE SOCIAL Skills RESOURCES

    Want to help kids explore social and emotional learning through play? Exploring Books Through Play inspires social and emotional development though play based on children’s books. The specifically chosen books explore concepts such as differences, acceptance, empathy, and friendship.

    Exploring Books Through Play: 50 Activities Based on Books About Friendship, Acceptance and Empathy is filled with hands-on activities rooted in interactive, hands-on, sensory play that focus on creating a well-rounded early childhood education supporting growth in literacy, mathematics, science, emotional and social development, artistic expression, sensory exploration, gross motor development and fine motor skills. Kids can explore books while building specific skills in therapy sessions, as part of home programs, or in the home.

    Click here to explore acceptance, empathy, and friendship through play.

    social emotional activities for kids

    Colleen Beck, OTR/L has been an occupational therapist since 2000, working in school-based, hand therapy, outpatient peds, EI, and SNF. Colleen created The OT Toolbox to inspire therapists, teachers, and parents with easy and fun tools to help children thrive. Read her story about going from an OT making $3/hour (after paying for kids’ childcare) to a full-time OT resource creator for millions of readers. Want to collaborate? Send an email to contact@theottoolbox.com.
    How to Start a Handwriting Club

    How to start a handwriting club that kids want to join

    In this article, you’ll discover how to start a handwriting club for kids to develop and enhance the skills needed for legible handwriting. Create a Handwriting Club as an after school program, an in-school activity, or as a home program idea. A Summer Handwriting Club is a great way to prevent the summer slide in handwriting skills in fun ways and using multisensory strategies to get the kids excited about practicing handwriting skills. A handwriting club can even be implemented as part of the RTI process. Plus, this is a great way to help with handwriting skill carry over!

    Start a handwriting club to help kids learn handwriting and practice legible written work in a fun and creative environment. Handwriting club can be a fun way to practice letter formation, letter spacing, line use, and handwriting speed.

    Why Start a Handwriting Club?

    Occupational Therapy practitioners know the importance of learning handwriting skills for children.  They understand the necessity of learning pre-writing strokes and shapes prior to attempting letter formation and numeral formation and they understand the importance of proximal to distal development in order to provide the best foundation for a child to be the most successful.  Handwriting is a complex skill and requires many components to generate legible written output.

    When handwriting instruction is overlooked, some children will struggle with letter forms, legibility and writing speed. It is important that handwriting be directly taught with a targeted focus and monitoring on body preparedness as well as formation patterns. When handwriting becomes automatic, children can focus on other aspects of writing such as grammar, planning, punctuation, composition, and self-correction or revision.

    A fun handwriting club may be just the ticket for some children who experience more difficulty with learning handwriting due to a poor foundation. A handwriting club can provide direct instruction in body preparedness and formation or mechanics that utilizes sensory and motor activities to facilitate the learning process.

    You can work through groups of letters following the Handwriting Without Tears letter order, for example.

    This post will help describe the steps to organize and implement a simple handwriting club.

    How to Start a Handwriting Club

    Affiliate links are included below.

    Here are the planning steps in the development of a handwriting club:

    1. Determine the purpose of the club.  Will it target prewriting, upper case formation, number formation, lowercase formation, cursive formation, mechanics of handwriting such as letter size, letter placement, line use, spacing, etc.?

    2. Determine your target group and the specific handwriting goals you wish to achieve.

    3. Determine the handwriting resources or programs you wish to utilize such as (Amazon affiliate links) Handwriting without Tears, Size Matters, Loops and Other Groups, First Strokes,  etc.

    4. Decide the club agenda or sequence of club activities – always begin with body preparation in gross motor to fine motor and then proceed to handwriting content. This will be based on the length of time for the session.  Later in this article, I will provide an example of a formation handwriting club agenda.

    5. Collect and prepare the materials you will need to implement the activities of the club.

    6. Create any parent information sheets explaining the purpose of the club and any homework expectations.

    7. Prepare any homework materials.

    8. Determine the exact day(s), time(s), duration, and location of the club.

    9. If you want, decide the name of the club or this could be part of your first session.

    10. Finally, begin the club meetings.

    11. At the final session, present children with certificates of completion.

    Use sensory handwriting activities, fine motor and gross motor activities to promote handwriting skills in a fun way with a handwriting club. Here's how to start your own handwriting club at school, as an after-school club, or a handwriting RTI process.
    Use a handwriting club to foster growth in handwriting goals without pressure. Having friends be a part of the writing process makes handwriting goals more fun and meaningful.

    Make a Handwriting Club Fun for Kids

    By experience, a fun club name could provide the “just right” motivation for participation. Having children create a secret club name appeals to their sense of mystery and fascination.

    Another fun element could be using special accessories that are worn only during the club meeting time. An example would be dollar store glasses (with lenses popped out if needed) in which children wear only during the club time.

    Having a secret club handshake as the greeting can also make it more interesting and appealing for children to engage in the club.

    What Happens in a Handwriting Club?

    Here is an example of a formation handwriting club agenda or sequence of activities that has a duration of approximately 45 minutes:

    Step 1: Approximately 5 minutes. Greet with a secret handshake. Start each session with gross motor warm-ups. Work on activities that prepare the body while simultaneously building core, shoulder, and arm strength and control. (Send any activities home.)

    Step 2: Approximately 5-10 minutes. Follow with fine motor warm-ups. These should serve to “wake up” the hand and finger muscles while simultaneously building fine motor strength, coordination, and manipulation. (Send any activities home.)

    Step 3: Approximately 5-7 minutes. Follow with beginning instruction in formation. (This time could also include a review of previous letters learned.)  The formation could be upper case, numeral, lower case or cursive letter focused.  Utilize verbal and visual strategies placing yourself appropriately in order for children to see from their handwriting viewpoint.

    For example:
    Instructor demonstrates formation with emphasizes on start point and sequence utilizing verbal and visual cues such as those in the (Amazon affiliate link) Handwriting without Tears program. Use the board and air writing format.

    Follow with air writing imitation for children as they follow verbal and visual instruction. Instructor should monitor child arm movements to ensure correct start and sequence pattern. If needed, provide hand-over-hand guidance to facilitate the correct motor plan.

    Once confident in gross motor, shift formation with children to finger writing on the table top while children verbalize steps and instructor monitors finger movements to ensure correct start and sequence pattern. If needed, provide hand-over-hand guidance to facilitate correct motor plan.

    Step 4: Approximately 10 minutes. Provide further multisensory activities to practice formation before moving to paper. Change the medium with each session, if desired.

    Step 5:  Approximately 10 minutes. Move to formation practice using handwriting workbooks or paper with instructor monitoring and correcting errors in grasp and formation. Have the children circle their best formation. (To note, utilizing the Handwriting without Tears workbooks (Amazon affiliate link) could provide children with a simple page format containing less visual clutter and improved space for handwriting practice coupled with visual cues and instruction. However, there are other handwriting programs that have a similar format.)

    Step 6: Approximately 3-4 minutes. Once letter practice is complete, explain and issue any materials or information sheets that you plan to send home in order for parents to support their child’s club participation.

    When you’ve collected handwriting samples from the students, you can plug the information into a handwriting rubric to collect data for any IEPs.

    Handwriting Club Activities

    Try some of these fun strategies to use motor components and sensory activities in handwriting:

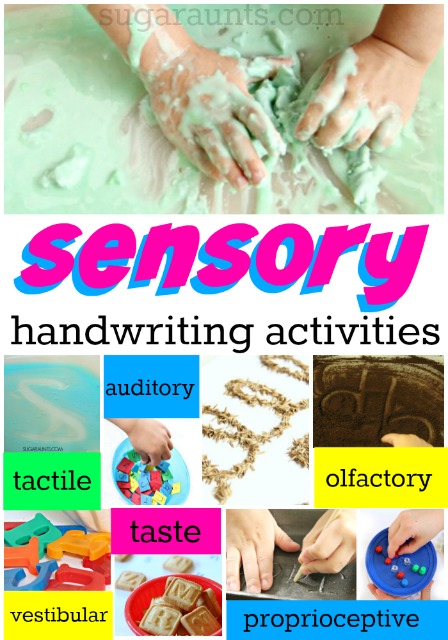
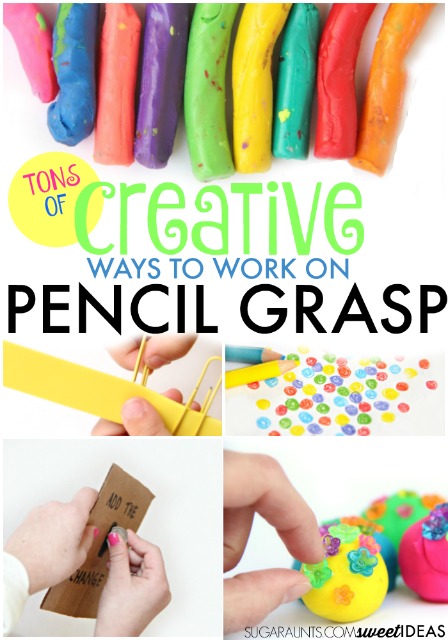
    sensory handwriting activities for kids to learn how to write letters and numbers creative ways to build and work on a functional pencil grasp

    Sensory Handwriting Activities add multisensory components to learning letter formation.

    Use creative fine motor and play activities to promote a better pencil grasp.

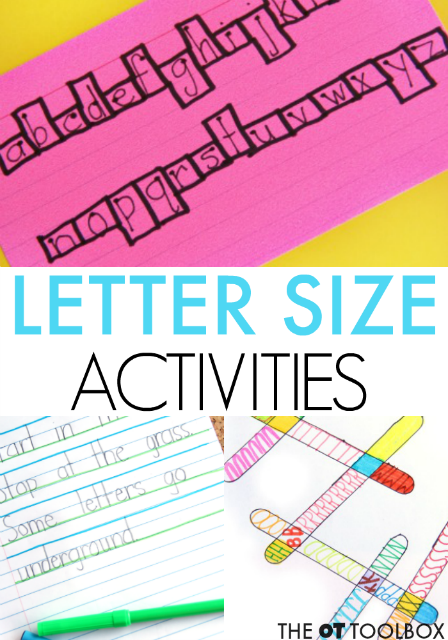
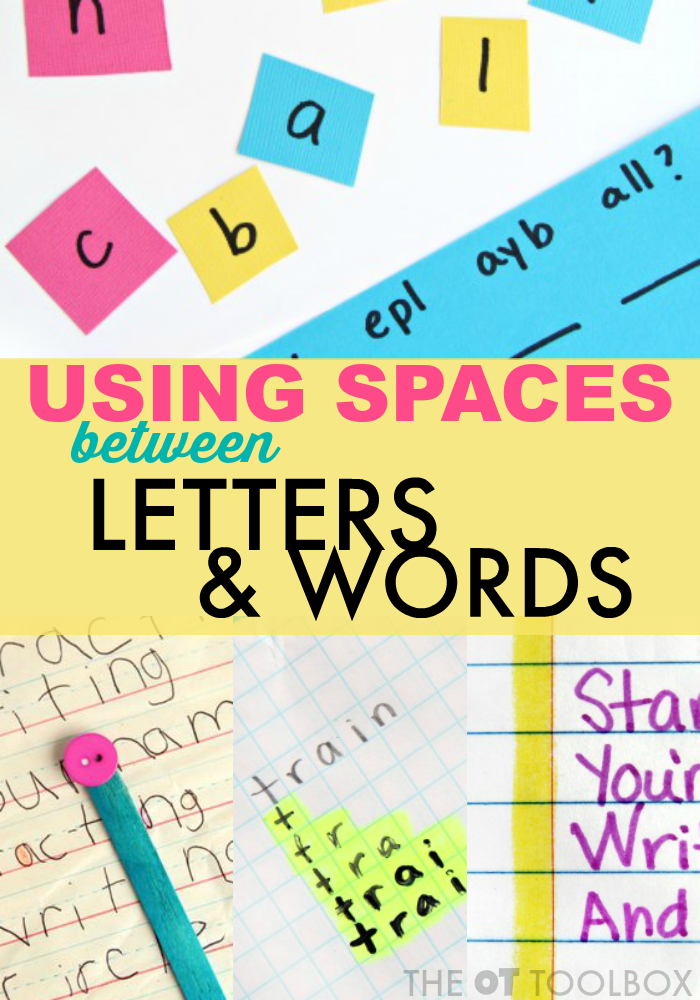
    Size awareness activities for legibility and neat handwriting Spatial awareness handwriting activities to help with spacing between letters and words when writing.
    Promote and boost spatial awareness in handwriting for consistent use of spacing between letters and words with creative (and memorable) activities.

    A Handwriting Club Makes Handwriting Practice Fun!

    A handwriting club such as described in this article can help generate enthusiasm and make handwriting fun for children who struggle or need additional support in developing the foundational skills necessary for future handwriting success.

    A fun club makes it seem less like dreaded handwriting work and more like special-time fun with friends. A handwriting club can provide the much time needed for children to develop essential skills in foundational body preparedness as well as handwriting acquisition.

    Included with this article is a free Handwriting Club Session Planner and a list of possible Handwriting Club Activities including gross motor, fine motor, and multisensory activities, all which could be used during club meeting times. Get it by entering your email address below. If you are already a subscriber to our newsletter, you will still need to enter your email address. This is simply so we can deliver the PDF file to you.

    Kids can join a handwriting club to improve handwriting and work on the skills kids need to produce legible handwriting.

    Following Direction Activities

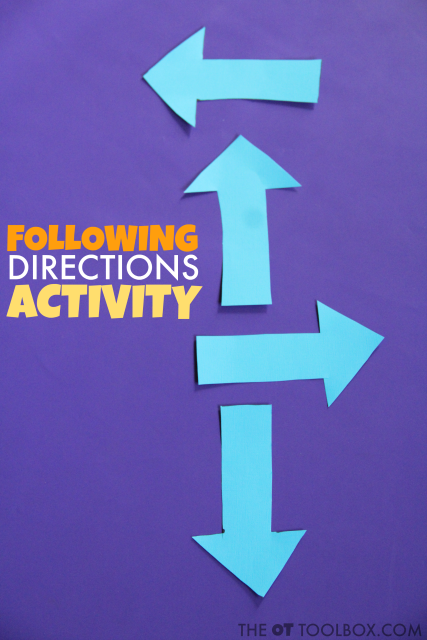
    These following direction activities are directionality activities that can help kids learn directions or spatial concepts such as left, right, up, down, and compass directions (north, south, east, and west) with a motor component. This hands-on learning activity really gets the kiddos moving and learning! 


    We’ve shared directionality activities before that help kids navigate and use maps with movement. 

    Following Direction Activity

    These direction following activities can help kids learn directionality such as left/right awareness, laterality, and directions needed for navigating.

    Teaching kids to follow the directions they need to physically move right, left, up, down requires development of spatial concepts such as spatial reasoning. This can be a real challenge for some kids! 


    Following directions and understanding of spatial concepts is a foundation for understanding and utilizing compass directions or the cardinal directions of north, south, east, and west, and the use of maps. 

    Left Right Confusion Direction Challenges

    It can be a real challenge for some kids who struggle with the spatial understanding of following directions, or understanding their left from right in a subconscious manner. 


    Have you come across the child who is told to raise their right and and they take a five second count to stop, think, and then raise their hand? They might hesitate when raising one hand or the other and still be uncertain whether or not they have held up the correct hand. Then, when the teacher, parent, or anyone else really, says the inevitable, “Your other right hand…”, the child feels a sense of discouragement and self-consciousness that doesn’t drive in the underlying need to really know the right from left! 


    That’s where a directionality activity or following direction activity can come into play. Adding a physical component to learning directions and the difference between right, left, up, and down and what that looks like in relation to the child’s body can be such a helpful force in driving home this concept. 

    Why work on directions with kids?

    Working on the ability for kids to follow directions and spatial concepts is so important for kids. The direction/spatial relationship/preposition words that tell you where something is related to something else (beside, in front of, behind, over, under, around,  through, last, etc.) are very important when teaching math and handwriting concepts. Directionality and the ability for kids to follow physical directions is important for discovering where their bodies are in relationship to objects. This translates to following directions when getting from place to place by following a map or the cardinal directions.


    When kids picture a scene in their mind’s eye and use that image to draw a map on paper, they are using higher thinking skills and spatial reasoning.

    Directionality Activities

    Amazon affiliate links are included below. 


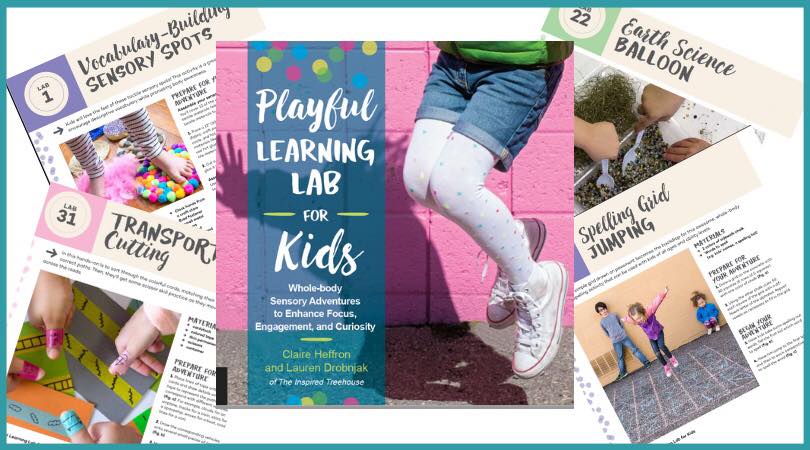
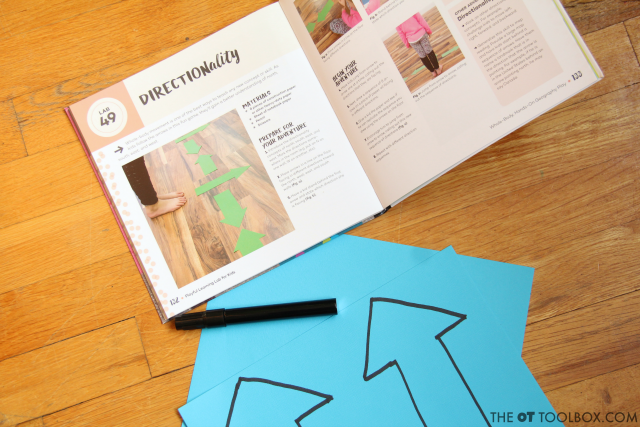
    The fun idea below comes from a new kids’ activity book that we’re devouring. It’s the new Playful Learning Lab for Kids, by the occupational therapist and physical therapist team at The Inspired Treehouse. It’s a book full of whole-body and sensory activities that enhance focus, engagement, and learning through movement and interaction.

    Playful learning Lab activities for kids to learn through whole body movements


    We used just a few materials to create this following directions activity:


    Playful Learning Lab for Kids Book
    Cardstock
    Marker
    Scissors

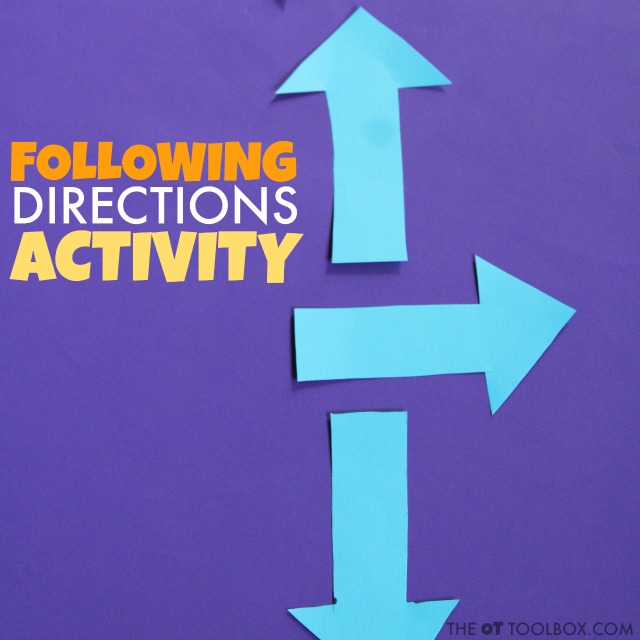
    Use arrows to work on following directions and learning directions or directionality.


    This is a simple activity (perfect for the classroom or homeschool when teaching directions!). First, draw and cut out large arrows from the cardstock. 


    Next, place them along the floor in a path and start playing! 

    Teach kids about directions and left right awareness or directionality through whole body movements with arrows!


    There are so many ways to use these arrows to work on following directions and directionality:

    1. Place the arrows on the floor for a fun brain break or sensory walk that uses directions as the kids work on following directions to stand in the direction the arrows are pointing. 

    Direction following activities with arrows are a fun way to teach kids directionality and teach left and right with movement.


    2. Name a cardinal direction or spatial direction and ask the child to point to the corresponding arrow. 


    3. Place the arrows in a compass rose on the floor and ask kids to “step into a map” on the floor as they move north, south, east, and west.

    Teach spatial concepts and spatial reasoning with arrows.

    4. Stick the arrows to a wall using tape. Ask the students to write out a list of words that describe the directions the arrows are pointing (left, right, up, and down).


    5. Hold up a sequence of arrows pointing in different directions. As the child to remember the pattern or order as they complete a series of side steps, front steps, or backward steps to follow the directions they see. 


    6. Work on left/right directionality by holding up an arrow pointing in either the left or right directions. Kids should call out “Left!” or “Right!” when they see the direction the arrow is pointing. 

    Teach kids directions and north, south, east, west using arrows and directionality concepts.


    All of these following direction activities are ones that can be completed as on an individual basis or with a whole group. It’s a great mini brain break for the classroom and can be incorporated into the classroom curriculum by working on cardinal directions. 


    Want to grab more movement-based learning ideas that you can start on today? You will love the bright pictures, sensory-based activities, and whole-body activities in Playful Learning Lab for Kids


    It’s available now and is the perfect way to add movement to learning to improve attention, focus, brain function, remembering and learning!


    This book will shift your entire mindset so you can begin to replace sedentary, one-dimensional lessons and worksheets with whole-body, multi-sensory activities that can instantly create a classroom or house full of active, engaged learners.


    Playful Learning Lab for Kids is available on Amazon.

    Wacky Wednesday Visual Perception Activity

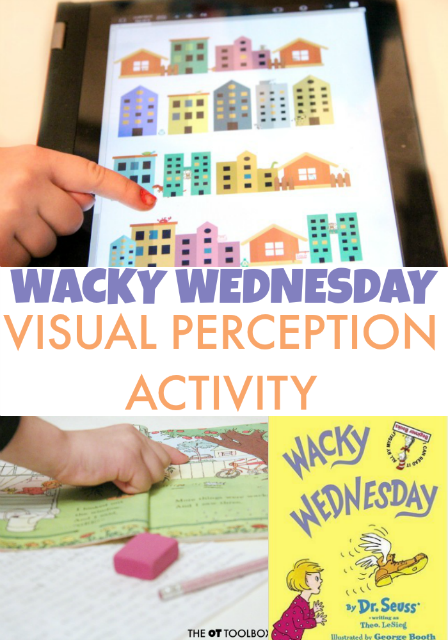
    Sometimes you have a book that is just so loved.  We have a few VERY loved books in our house and one of those books with the dog-eared corners is Dr. Seuss’ Wacky Wednesday.  We used the book in a visual perceptual activity and worked on the skills needed for handwriting.  Visual perception is made up of many different skill areas that are used in virtually every functional task we perform.  Handwriting is just one of those tasks that relies on appropriate development of visual perception.  Kids can use creative activities like hidden pictures and books like Wacky Wednesday to improve visual perception.  Try this Wacky Wednesday Visual Perception Activity and have fun working on handwriting skills in a wacky way!


    Kids love this Wacky Wednesday Visual Perception activity while working on visual perceptual skills.


    Wacky Wednesday Visual Perception Activity

    This post contains affiliate links.
     
    Wacky Wednesday visual perception activity based on Dr. Seuss books
     
     
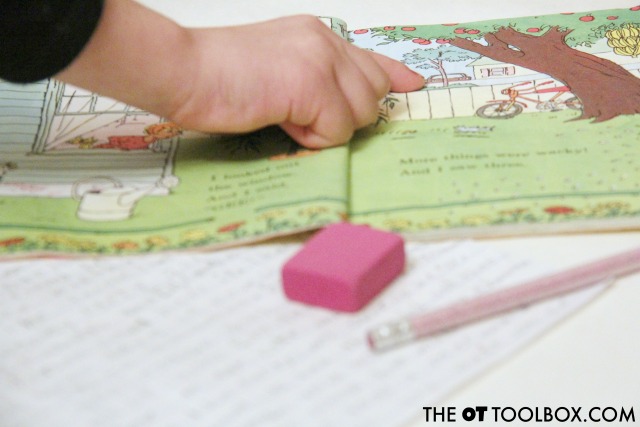
    Dr. Seuss writes as Theo LeSieg in his book, Wacky Wednesday.  It is perfect for developing visual perception.  The book uses humor through hidden pictures to encourage readers to visually scan and locate weird, wacky, and out-of-place items.  Each page is like a puzzle that will have your kids pouring over the pictures until they find all of the wacky images.  

    Visual Perceptual Skills Developed by Completing Hidden Pictures

    Hidden pictures and visual scanning activities like the pages of Wacky Wednesday are great ways to encourage the development and strengthening of visual perception skills.  
     
    When kids complete hidden picture puzzles, they strengthen many of the visual perceptual skills needed for handwriting and other functional tasks:
    Visual Memory
    Visual Closure
    Form Constancy
    Visual Figure-Ground


    Visual Perception Skills

    Visual perceptual skills are addressed by completing hidden picture puzzles. Kids visually scan pictures and find hidden items, locate unusual images, and store those pictures in their mind’s eye.  Hidden pictures are a valuable tool for addressing the visual perception skills needed for handwriting.

    Build these Visual Perception Skills by working on hidden picture puzzles

    Visual Memory– This is one’s ability to store visual information in short term memory.  This skill allows us to recall visual information.  When completing hidden picture puzzles, kids visually store images of items they are looking for when scanning to locate a specific shape or image.  This skill is necessary for handwriting tasks when copying information from a source, such as lists of words, homework lists, and copying sentences. 
     
    Visual Closure– This visual perceptual skill allows us to see part of an object and visualize in our “mind’s eye” to determine the whole object.  When we see part of an item we use visual closure to know what the whole item is.  This skill requires the cognitive process of problem solving to identify items.  Visual Closure is used to locate and recognize items in a hidden picture puzzle.  In written work, we use visual closure to recognize parts of words and letters when reading and copying work.
     
    Form Constancy– This skill allows us to visually recognize objects no matter their orientation.  When completing a hidden picture puzzle, children can recognize the missing object whether it is upside down or sideways.  In handwriting skills, we use this ability to read and know letters and numbers no matter which direction we see them. 
     
    Visual Discrimination–  This visual perception skill enables us to determine slight differences in objects.  In hidden picture activities, this skill is needed to determine and locate different hidden objects.  When writing and reading, visual discrimination allows us to perceive the difference between “p” and “d”.
     
    Visual Figure-Ground–  This skill enables us to locate items in a busy background.  Finding hidden items in a hidden pictures puzzle works on this skill by visually scanning and identifying items within a busy scene.  In handwriting, visual figure ground is necessary for copying written work from a model and locating the place left off when shifting vision.
    Try this wacky Wednesday visual perception activity to address the skills needed in handwriting.


    Wacky Wednesday Visual Perception 

    The book is one that we were handed down in a bin of clothes and toys that another child had outgrown.  It was apparent that the copy of Wacky Wednesday was a favorite book for this other child.  When we started reading it, we were hooked too!


    Use the book to visually scan and locate funny items while addressing the visual perceptual skills needed for handwriting.  Then, ask kids to use those funny items they’ve found to work on handwriting skills.  Kids can list out the funny items that are wacky.  So, while searching and finding the funny images on each page, they can build the visual perceptual skills needed for handwriting.  Then, they can visually shift to write lists while addressing neatness and legibility in written work.  

    Address visual perception with the book Wacky Wednesday.


    Many times, a motivating subject or activity can be just the thing that helps kids want to practice handwriting.  Use the funny book that is Wacky Wednesday as a motivator.

    If you are looking for more creative ways to work on the visual perception skills addressed in hidden pictures and relay them into handwriting skills, you are in luck! 

    Work on visual perception with hidden pictures.


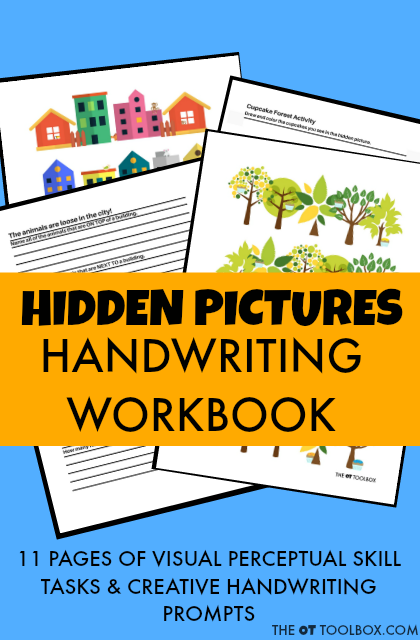
    Hidden Pictures Handwriting Workbook

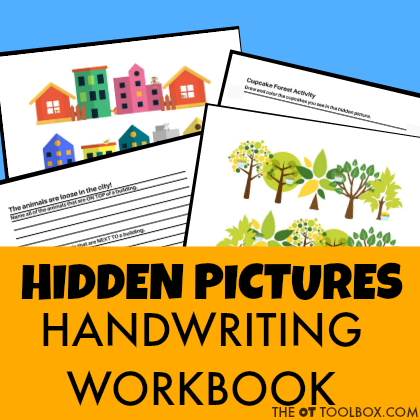
    I’ve created this Hidden Pictures Handwriting Workbook to address visual perceptual skills through hidden pictures.  In this workbook, you’ll find two separate puzzles and related handwriting activities that can help kids address the visual perceptual skills noted above.  By completing this 11 page workbook, kids can use creative handwriting activities and themed writing prompts to practice written work in a fun way.  

    Hidden pictures visual perception workbook to help kids work on the visual perceptual skills needed in handwriting


    What’s in the Hidden Pictures Handwriting Workbook?

    • 11 pages of activities
    • 2 hidden pictures puzzles
    • 8-9 themed writing prompts for each puzzle
    • Activities to promote visual shift, visual memory, visual discrimination, visual-figure ground, and form constancy
    • Digital file that you can print or use on your tablet


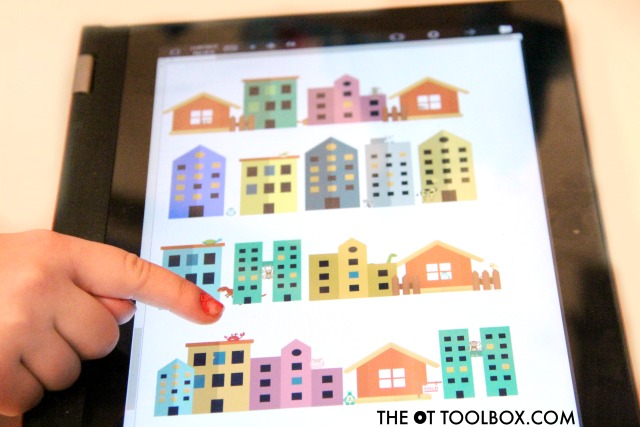
    We used the Hidden Pictures Handwriting Workbook on our touch laptop screen. Using the workbook on a tablet or touch device allows kids to visually scan and address those visual perception skills without printing out the color images.  


    This would be a great activity for a group in the classroom or for kids who need an at-home activity.

    Visual perception hidden pictures printable workbook for kids who are working on handwriting.


    This is a digital file.  


    Get your copy of Hidden Pictures Handwriting Workbook for $4.99.


    Hidden pictures visual perception handwriting workbook for helping kids address the skills needed in handwriting.


    Looking for more ways to celebrate Dr. Seuss?  Try the books in the Virtual Book Club for Kids series:


    Green Eggs and Ham Letter Practice from Still Playing School

    Alphabet Puzzles from Sea of Knowledge

    Would You Eat This? A Green Eggs & Ham Activity from Sunny Day Family

    Horton Hears a Who Listening Activities from JDaniel4’s Mom
    Dr. Seuss Sensory Play with Kinetic Sand from The Educators’ Spin On It
    Lorax Cause and Effect Matching Game from Inspiration Laboratories

    Ten Apples Up on Top Printable Math Activity from The Moments at Home


    Cat in the Hat Inspired Popsicles from View from a Step Stool


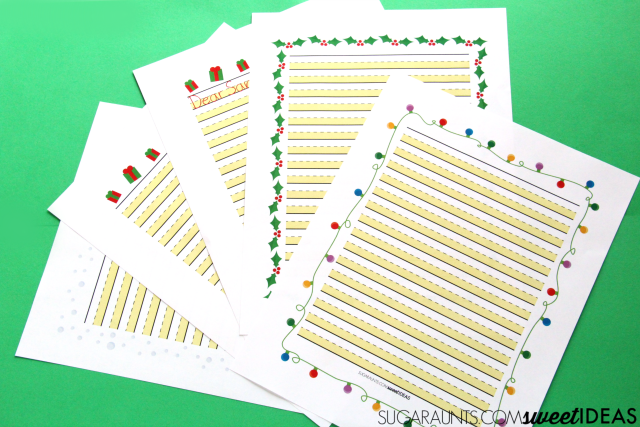
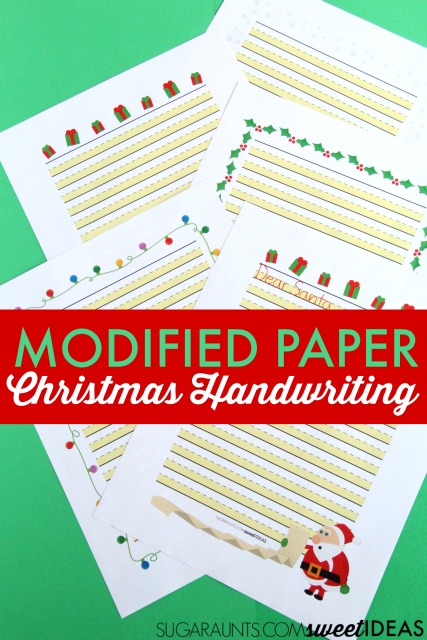
    Modified Paper Christmas Handwriting Pack

    It is hard to believe that Christmas is right around the corner.  It’s just about that time of year when we have Christmas lists, to-do lists, letters to Santa, and thank you notes to write out.  


    But what happens when your child struggles with handwriting?  


    Writing out that Christmas wish list is a difficult task that brings out tears instead of holiday excitement.  I’ve got a solution for your kiddo with handwriting difficulties: a packet of modified paper for all of the Christmas handwriting tasks that come up each year.  Use this handwriting pack to help kids who struggle with handwriting to participate in holiday traditions while even working on and developing their handwriting skills!

    Christmas Worksheets for Kids

    Try this modified paper Christmas handwriting pack for helping kids work on handwriting this year.

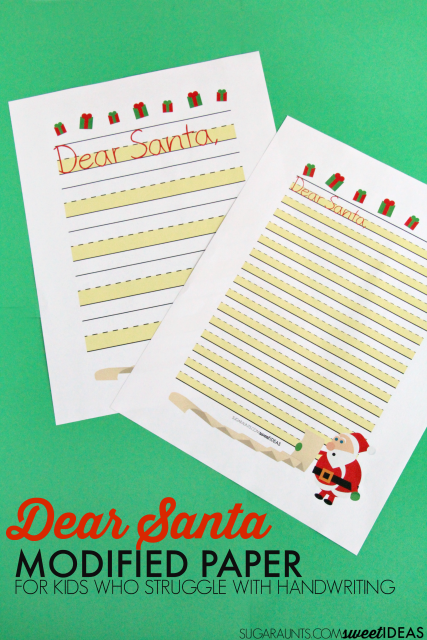
    Modified Paper for Handwriting Needs with a Christmas Theme


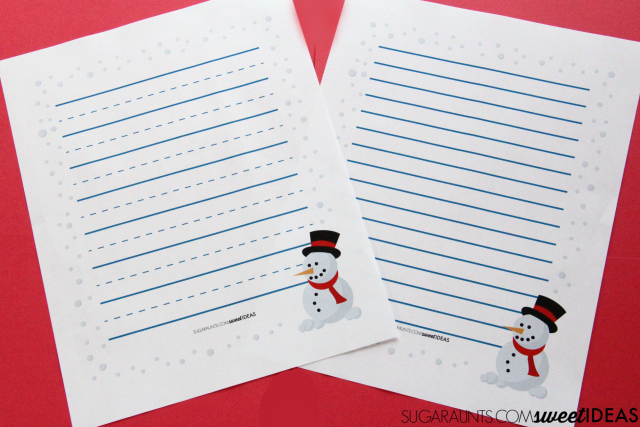
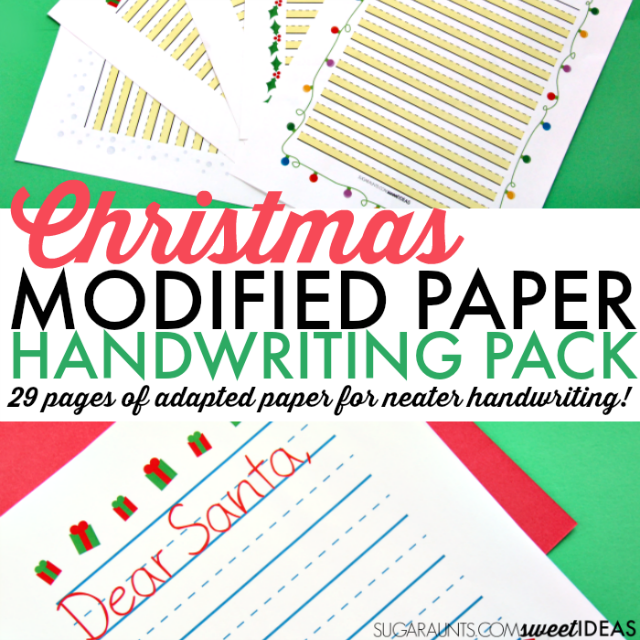
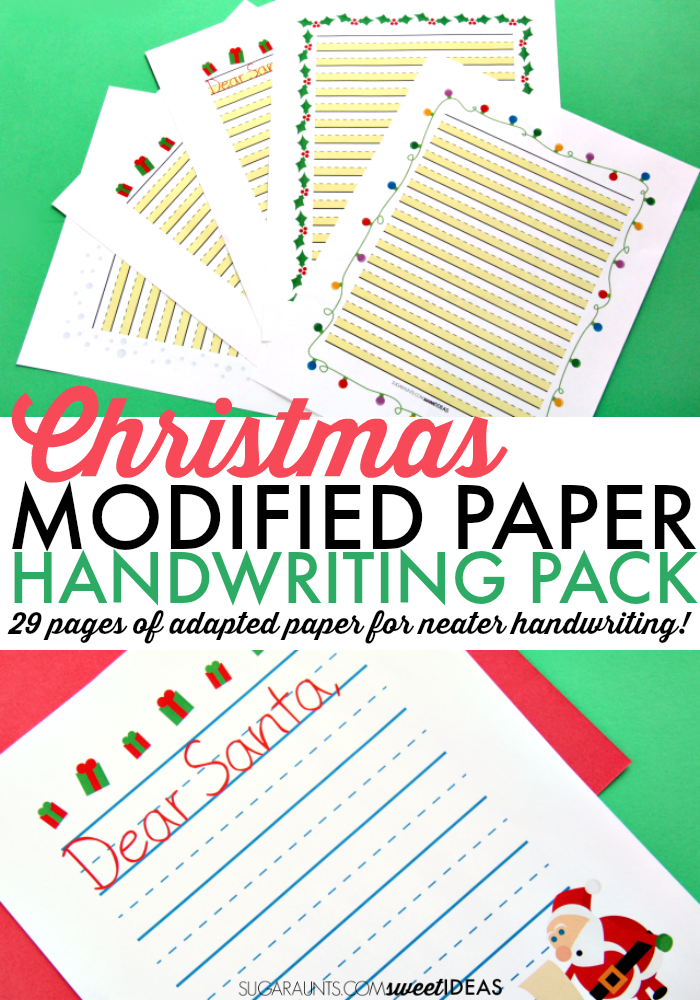
    This handwriting packet will be a solution to so many handwriting needs.  It’s a 35 page handwriting pack that contains 30 different modified handwriting sheets.  There is a section that explains the “why” behind each type of paper and how they should be used to promote legibility in written work.  There is a printable Christmas themed writing prompt sheet to help inspire handwriting. There are two different sized line pages for each Christmas theme.  


    This is a huge printable pack that can be used over and over again!

    Modified paper Christmas Handwriting pages are great for kids to work on written work this holiday season.


    Consider the ways that kids can write and practice handwriting this season:

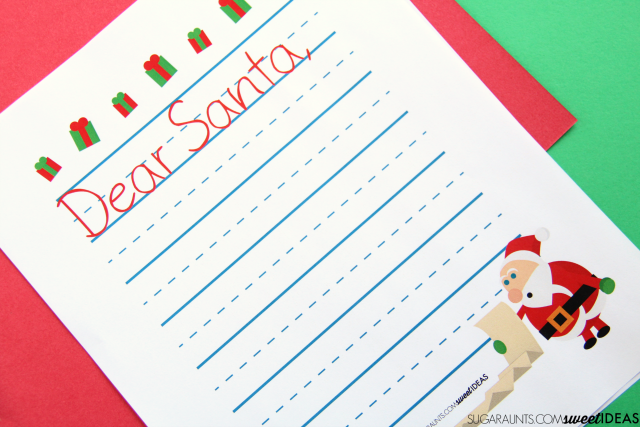
    • Letter to Santa (Use the “Dear Santa” prompt page and additional sheets for longer letters to the Big Guy in Red.)
    • Christmas Wish List
    • Holiday To-Do List
    • Shopping List
    • Recipe Sharing
    • Thank You Notes
    • And more (There are a bunch of ideas on the printable writing prompt sheet!)
    Want the packet? Grab it now in time for Christmas planning and your Advent calendar.
     
     
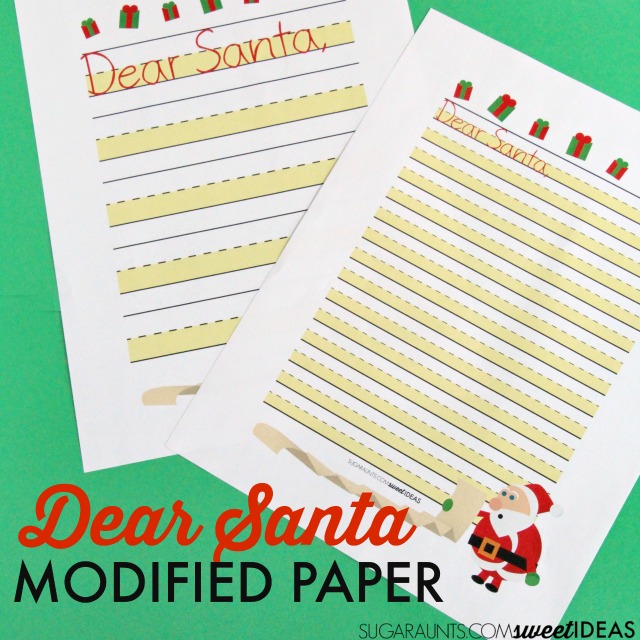
    Dear Santa Christmas letter pages are part of the modified paper Christmas handwriting pack for kids.

    So, what’s in the Handwriting Pack?

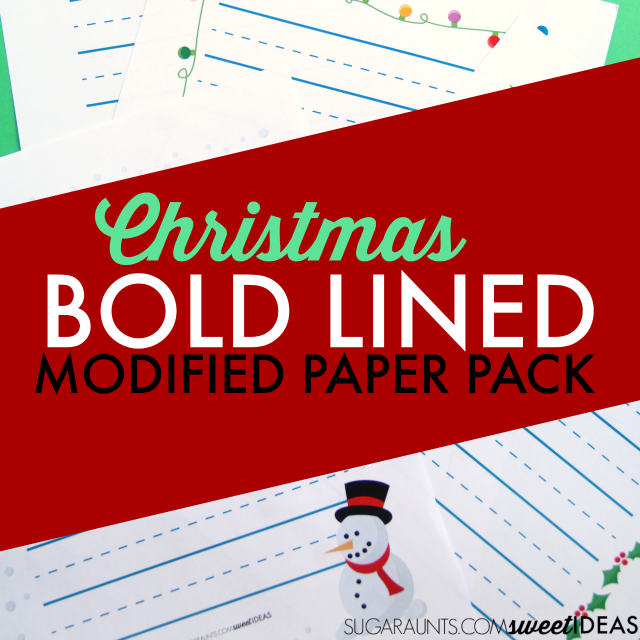
    • THREE types of modified paper: Bold lined paper, Color-coded paper (with Christmas-y colors), and Highlighted Paper
    • FIVE different Christmas and Winter themed borders.
    • TWO different sized lined of each type of paper: Narrow Rule for older kids and Wide Rule for younger kids.  
    • That’s 30 different sheets of modified paper all with a Christmas theme.
    • There is a detailed explanation of reasoning behind each type of paper.  This will help explain how to use each modified paper and the reasons why each type might be the style of adapted paper to use for particular handwriting concerns.
    • PRINTABLE Christmas writing prompt sheet.  Use this to inspire handwriting practice all season long in fun and meaningful ways…on fun Christmas-themed paper, of course!
    All of this is available for printing as many sheets as you need throughout the holiday season.  The 30 handwriting pages, instructional sheets, printable Christmas writing prompt page is available for $7.99.
     
    Use highlighted paper to work on letter size and formation, part of the modified paper Christmas Handwriting Pack
     
    This handwriting pack will meet the needs of kids of all ages-From Kindergarten on up through High School.


    What writing needs can be met with this handwriting printable pack?

    • Poor Line Awareness
    • Inaccurate Letter Size
    • Poor Spatial Awareness
    • Poor Letter Formation
    • Inaccurate Spatial Organization
    • “Floating” Letters and Words
    • Inconsistent Written Work
    JUST ADDED: 


    For those of you who would like to try just ONE style of paper for a lower price, you can.  I have broken the packet down into three sections so that parents, teachers, and therapists can benefit from just one style of modified paper.  Each smaller packet comes with 10 pages each of modified paper with a Christmas theme. Read about each of the packets here:

     
    Highlighted paper in the modified paper Christmas Handwriting pack for kids
     

    Who would use this modified paper handwriting packet?  

    As an Occupational Therapist, I would LOVE to have this packet available for use during the holiday season.  As we get nearer to Christmas and the holiday break, kids start to get a little antsy in the classroom. 
    Modified lined paper is a useful tool for kids who struggle with visual perceptual needs or visual motor challenges in handwriting. Children who write with letters placed haphazardly on the lines or have trouble with spacing between letters and words will benefit from this paper. Kids who write with letters of mixed size or those who write with a mixture of upper and lowercase letters will like this modified paper. 
     
    Teachers in grades Kindergarten on up will benefit from the different styles of paper in this packet. The packet comes with different sized lines and a variety of rules with each holiday-themed styles. 
     
    Therapists who work with children on handwriting goals will love to use the motivation of the Christmas and holiday season to work on underlying skills needed for accuracy and function in handwriting. 
     
    Parents who want their children to write out Christmas lists or Thank You notes will LOVE this modified paper that allows independence in written work.
     
    Use modified paper Christmas handwriting pack to work on legibility in written work.
     
    Making writing practice fun and meaningful can be beneficial for addressing handwriting goal areas. Print off the pages that you need for individual students. 


    Try one type of paper and then another to see what works.  When you find a modified style of paper that works, print off the other themed pages using that same modification.  
     
    Bold lined paper and a modified paper Christmas handwriting pack
     
    There are so many ways to practice handwriting skills in the weeks leading up to Christmas.  THEN, print off a few pages to send home with students for the holiday break. Students can use the paper to work on a list of writing prompts as part of their OT homework.
     
    Work on handwriting with modified paper Christmas handwriting pack for kids.
     
    Having so many different types of paper and border styles in one pack makes this resource easy to use for many different students.  Teachers can use the pack to address the needs of the whole classroom.
     
    Modified paper Christmas handwriting pack for kids.
     
    Parents can print off the pages that they would like to try with their child.  Use the writing prompts to work on handwriting in a fun and relaxed way.
     
    Use this modified paper Christmas Handwriting Pack to work on legibility and handwriting struggles with kids.

    Teach Handwriting with Transfer Paper

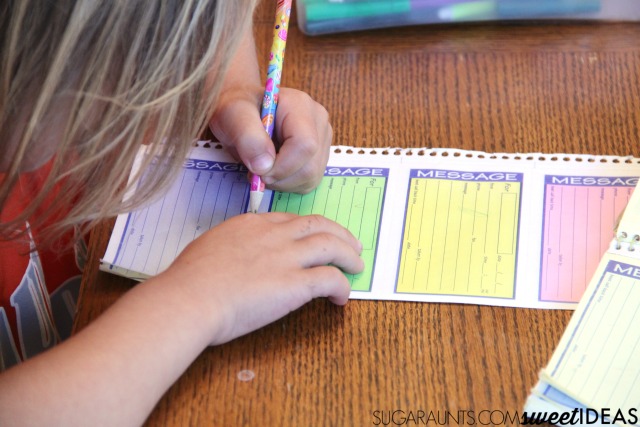
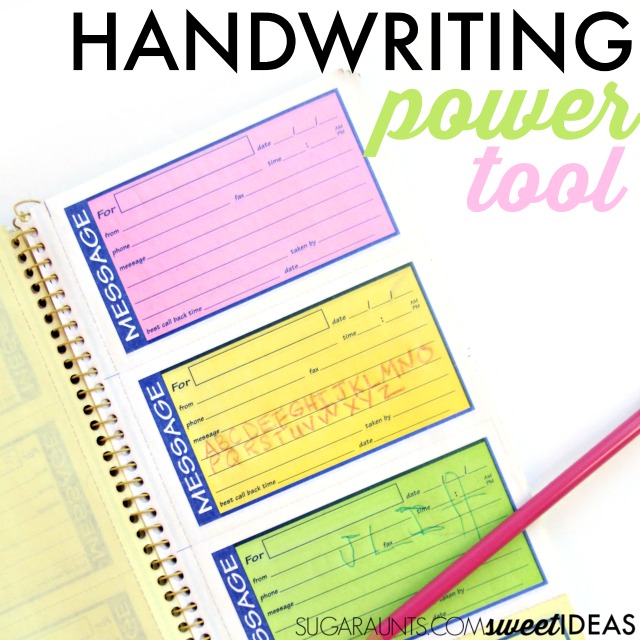
    This handwriting trick is one that will get the kids excited about practicing their letter size, line awareness, letter formation, and pencil pressure when writing.  It’s a power tool that works on so many aspects or written work, making it a simple way to practice many components of handwriting at once.  What is this super handwriting tool?  Transfer paper!


    Follow along in the Sweet Ideas for Handwriting Facebook page, where over 300 readers and Facebook users are coming together to share and find handwriting tricks and tips.


    Use transfer paper to work on letter formation, size awareness, line awareness, and pencil pressure in handwriting with this easy writing trick that will help kids write with neater and legible handwriting.

    Use transfer paper to work on many handwriting skills


    This post contains affiliate links.

    There are so many ways you can build the skills needed for legibility in written work with a simple transfer paper notebook or transfer paper sheets.

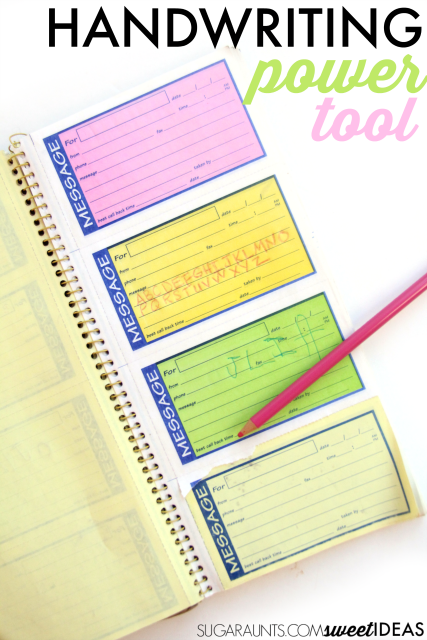
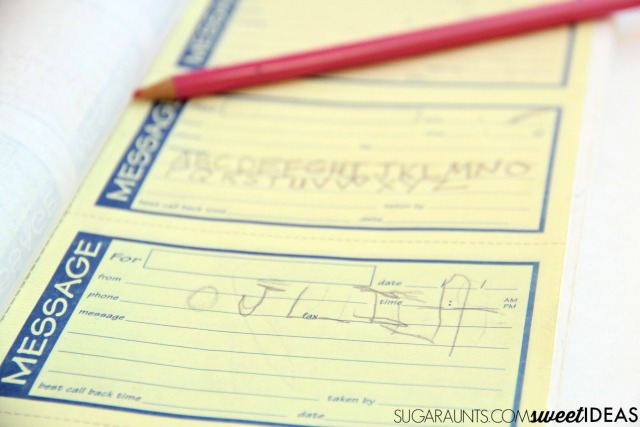
    First, what is transfer paper?  It is that sheet of paper that creates a copy in memo notebooks.  It’s a sheet of paper that is used to create an instant copy by simply hand writing on paper.  It can be a fun surprise for kids that allow a moment’s focus and attention to writing practice that just doesn’t happen with regular paper and pencil.

    Use transfer paper to work on letter formation, size awareness, line awareness, and pencil pressure in handwriting with this easy writing trick that will help kids write with neater and legible handwriting.

    Build handwriting skills with transfer paper:


    Letter size and Line awareness- This messages book is perfect for helping kids work on letter size and line awareness.  It’s a great way to build the skills needed for keeping letters and words within writing spaces on worksheets and forms.  The act of writing on the given spaces with an awareness of how the letters will look on the copy is rewarding for kids.

    Letter formation– When kids are writing and flipping over the sheet to see how their writing looks, they slow down.  A slower speed can help kids work on letter formation.  Try verbal prompts for accurate letter formation with this slower speed.

    Pencil pressureTransfer paper is a great tool for building an awareness of pencil pressure and writing with a “just right” amount of pressure through the pencil.  Read more about proprioception and handwriting.

    Use transfer paper to work on letter formation, size awareness, line awareness, and pencil pressure in handwriting with this easy writing trick that will help kids write with neater and legible handwriting.
    Use transfer paper to work on letter formation, size awareness, line awareness, and pencil pressure in handwriting with this easy writing trick that will help kids write with neater and legible handwriting.
    This post is part of our Easy Quick Fixes to Better Handwriting series

    You’ll also want to join the Sweet Ideas for Handwriting Practice Facebook group for more handwriting tips and tools.

    MORE Creative Handwriting Tricks you will love:

    http://www.sugaraunts.com/2015/11/benefits-of-playing-with-stickers-occupational-therapy.html   


                                        Toys and Games for Reluctant Writers

    Get 29 pages of modified paper with a Christmas Theme for legible and neat Letters to Santa, Christmas Wish Lists, Thank You Notes, Holiday Lists, and MORE!