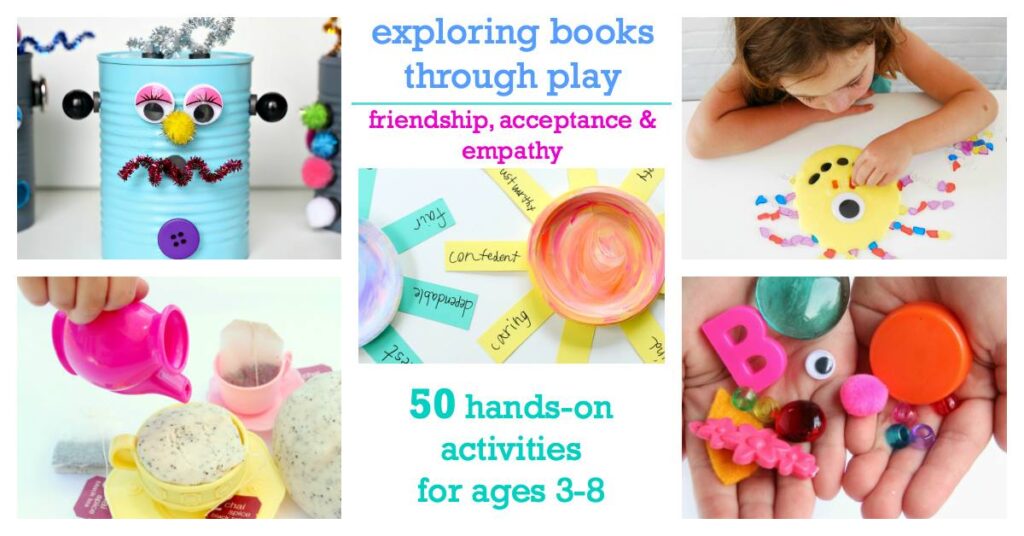
Oh, how we love sensory play activities! From water bin playtosoda dough, we love to get messy and learn through the senses. We decided to give magic foaming dough a try, and oh boy. Was this ever fun! This crumbly dough is moldable, soft, and the best part is the magic. It brings a little science into the sensory play while entrancing the kids with the foaming, goopy, messy fun. (This post contains affiliate links. We received a free book to complete this post. Our opinions are our own.)
We were honored to review Asia Citro’s new book, 150+ Screen-Free Activities for Kids and check out all of the best and easiest play time activities. We really had a blast with our Magic Foaming Dough, but the pictures in this book really drew us in. The kids kept pointing at each page and saying, “OOOOh, let’s do that!” There are over 150 activities in the book that help develop creativity and skills…all without a screen. I loved the easy directions and the fact that activities were budget friendly. This would be a great gift idea for parents to keep kids engaged, entertained, and learning.
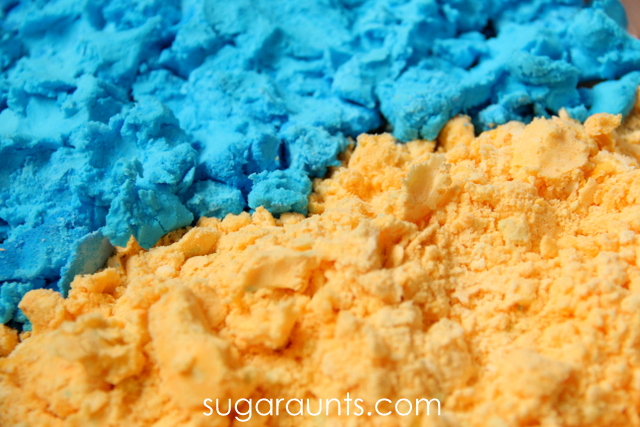
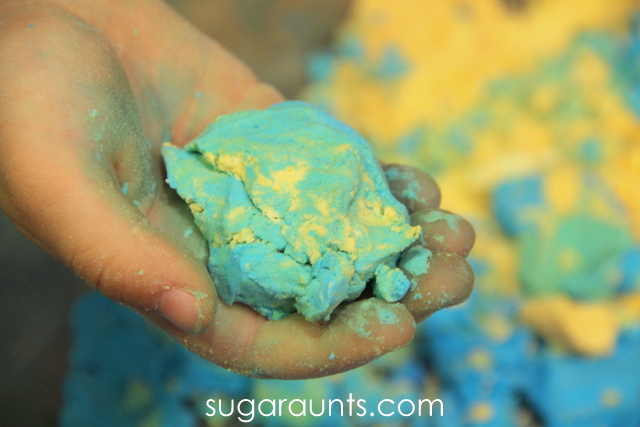
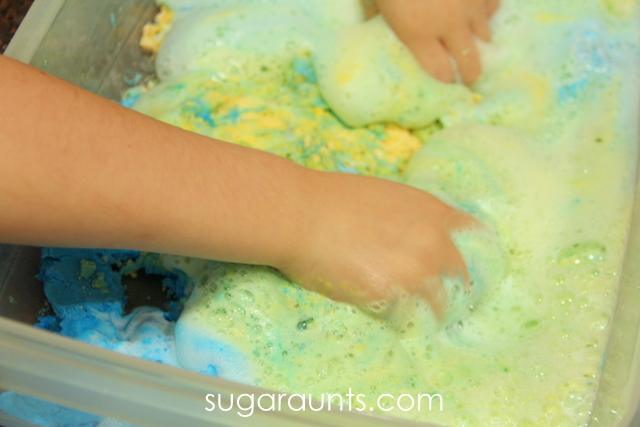
Magic Foaming Dough Activity for the book, Little Blue and Little Yellow:
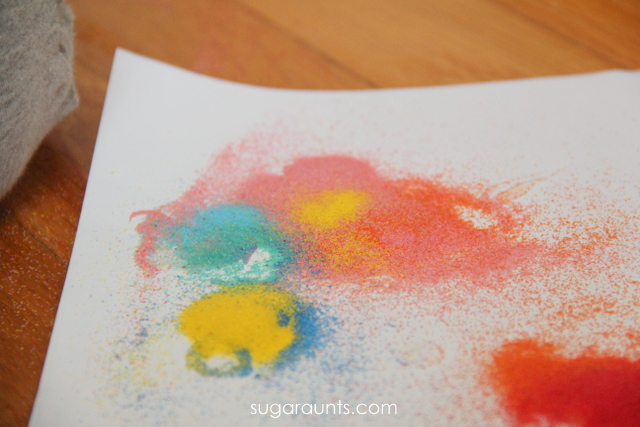
We whipped up a batch of magic foaming dough, following the easy directions in the book. We separated the dough into two bowls and added blue food coloring to one bowl and yellow food coloring to the second bowl. These colors looked great next to each other.
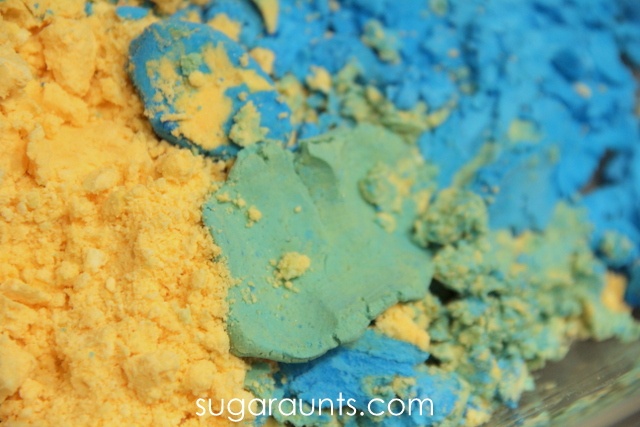
Like the directions said, it was dry and crumbly, but completely moldable. We explored the colors and like in Little Blue and Little Yellow, we pretended some of the yellow moved over to the blue, and vise versa.
The kids had fun guessing what color blue and yellow make when combined. (Baby Girl’s guess of It makes PINK!” was received by groans from Big Sister and Little Guy. ((Guess we need to work on the color mixing with Baby Girl…haha!))
“Look it makes GREEN!”
Little Blue and Little Yellow made Little Green.
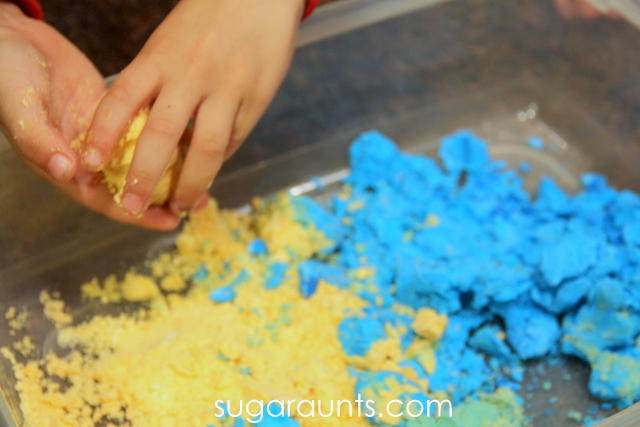
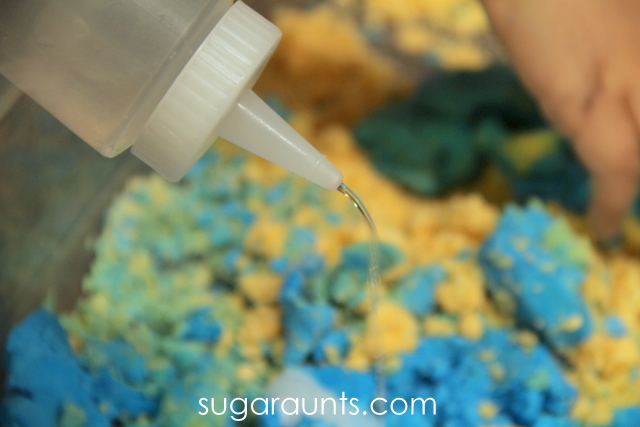
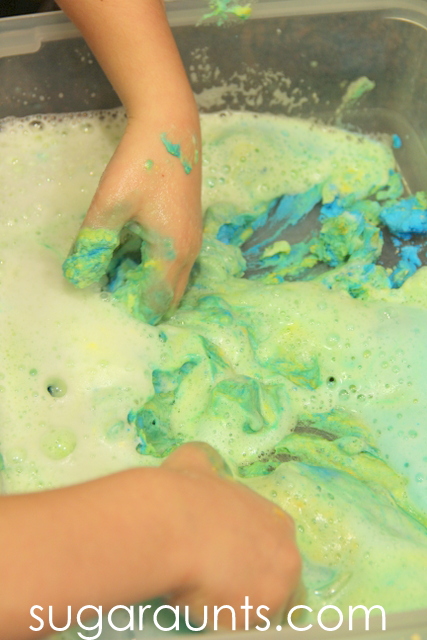
After the kids played for a while, I told them I had a surprise to make this dough magic. They were SO completely excited! I gave them a squirt bottle of vinegar. (Icing squeeze bottles work really well for this part!) …and the magic begins!
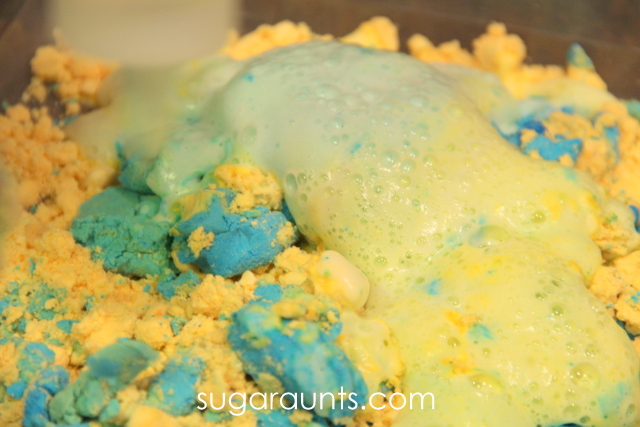
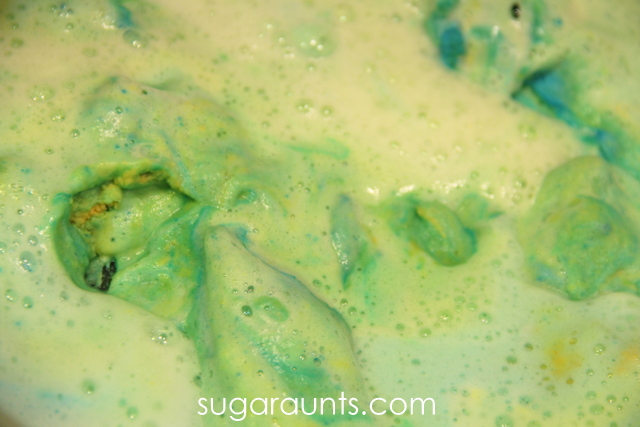
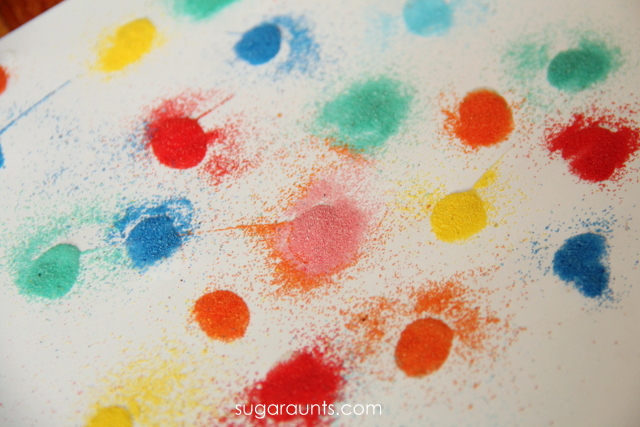
It was really neat to see how much this dough foams up. I wasn’t quite expecting such a reaction, but it turned out to be pretty magic for mom, too 😉
It was pretty cool to see the foaming yellow, blue, and green in different areas of our bin.
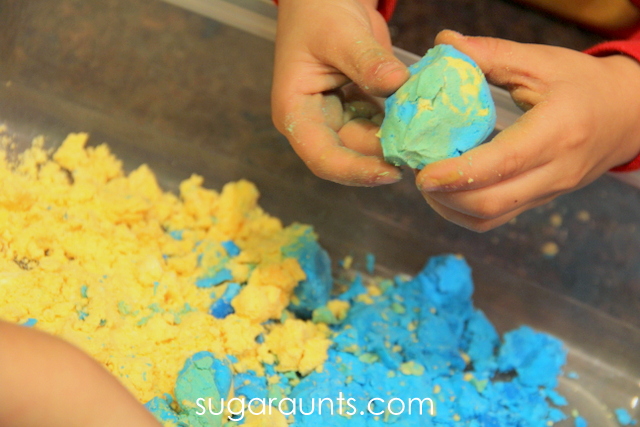
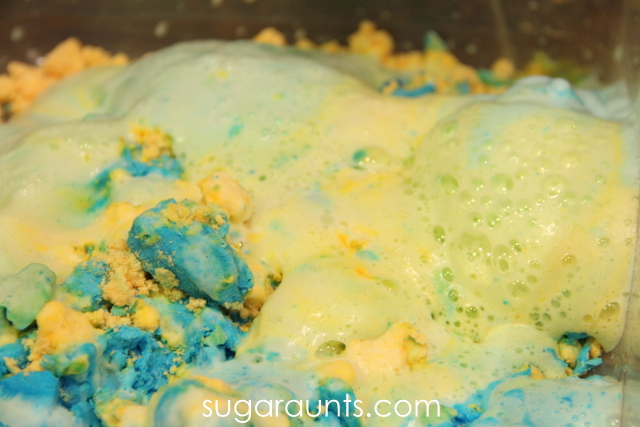
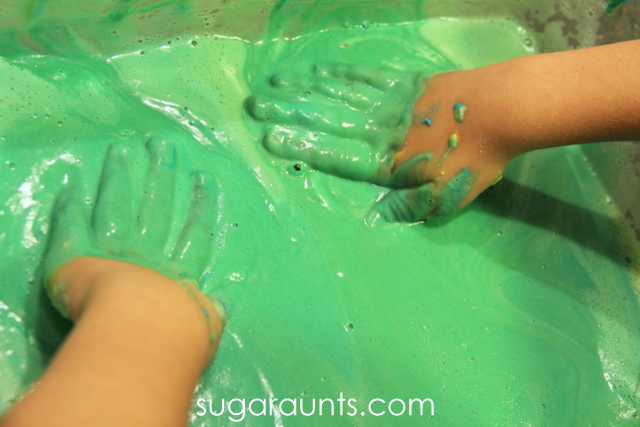
We had to get our hands in there to play. Big Sister looooooved this! She mixed up the colors even more to make a vivid green color.
She kept saying, “I love this stuff! I love this stuff!”
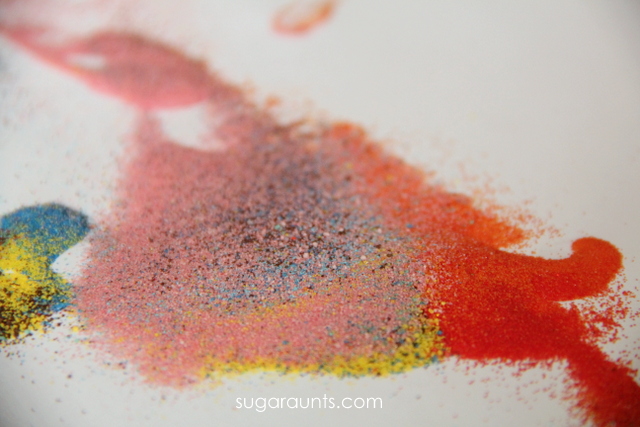
Even when the bubbles died down, it was still super fun to play with. The mixture turned into a silky smooth goopy sensory bin. We really found out what happened when little blue and little green gave each other a hug. Just like in the book 🙂
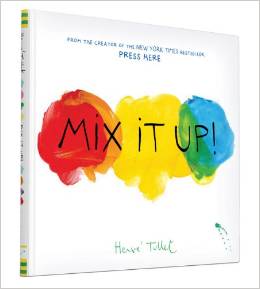
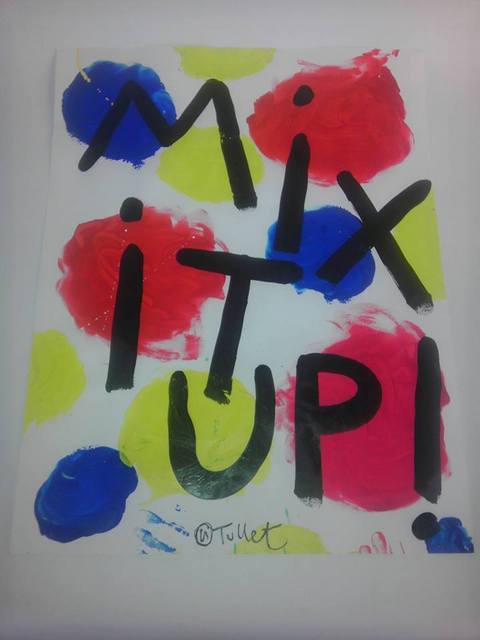
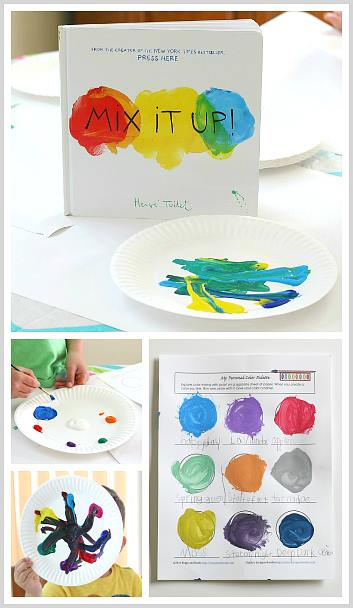
Have you introduced the kids to books by Herve Tullet? Not too long ago, we read Press Here and made a fun sensory shaving cream bin to go along with the colors and active interaction the book inspires. When we were given the chance to review Herve Tullet’s newest book, Mix It Up!, we jumped at the chance. Tullet’s books are colorful, bright, inspiring, and FUN!
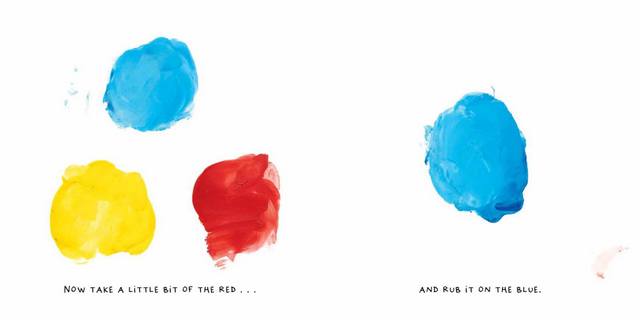
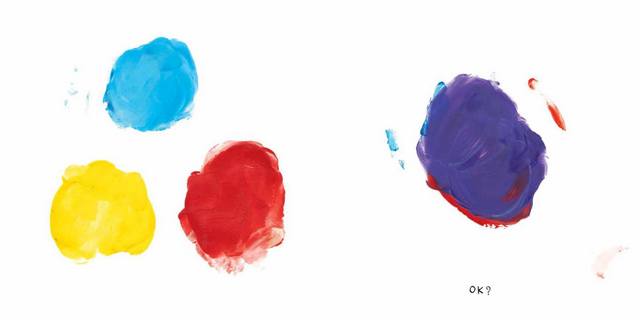
Take a peek inside Mix It Up! :
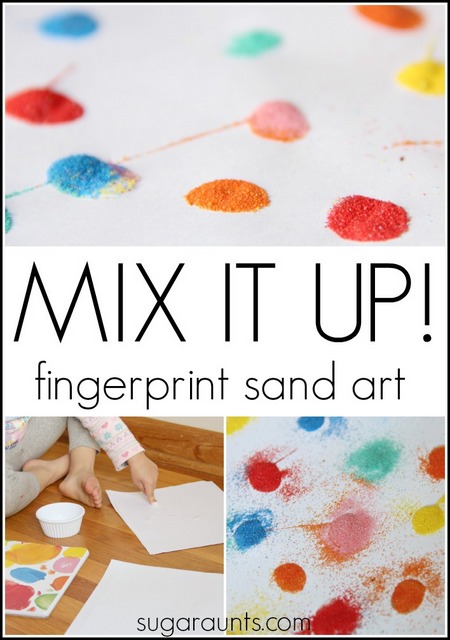
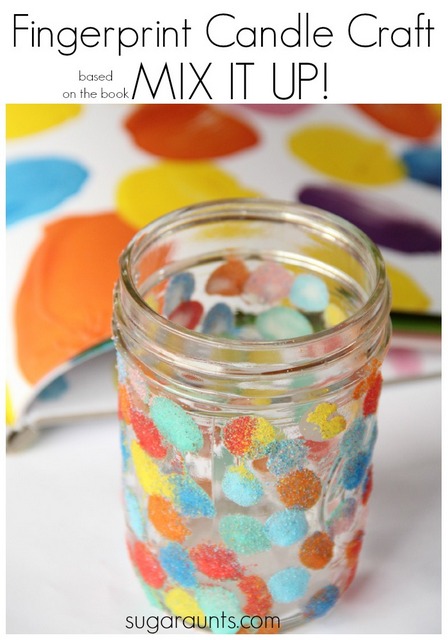
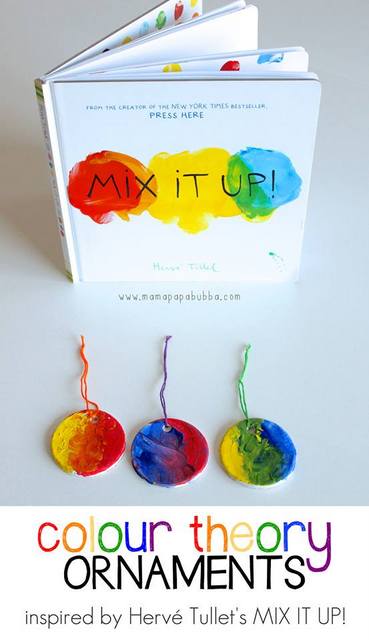
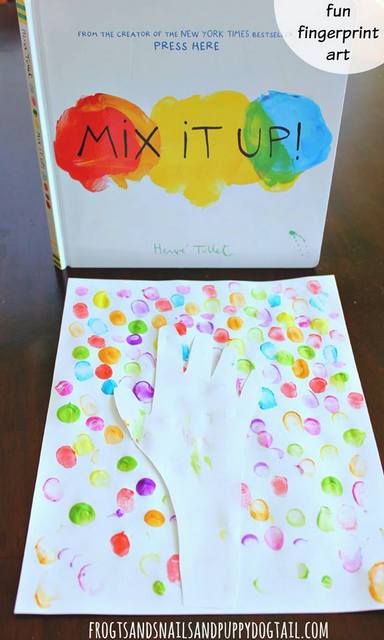
We loved the active learning and color mixing in Mix It Up! The pages inspire readers to get involved with the book, mixing colors to make new colors, and then to go off and create. We decided to make sand fingerprint art and mix up our own colors using colored sand. We made art and a colorful candle holder craft that would make a great DIY gift.
Mix It Up! Art and Craft
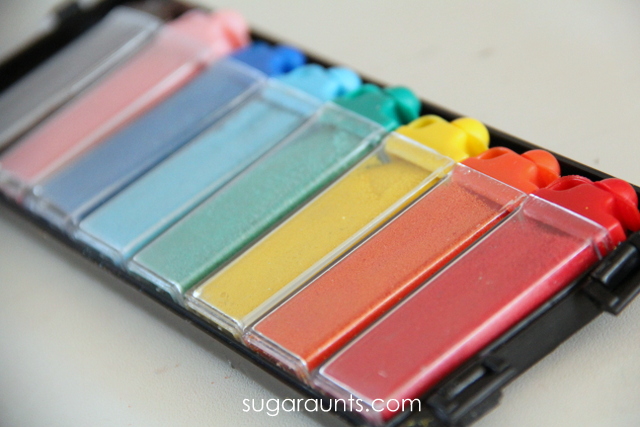
The book has colors everywhere, so when we pulled out our rainbow of sand. We were handed down this set, but any rainbow sand set would work for this activity.
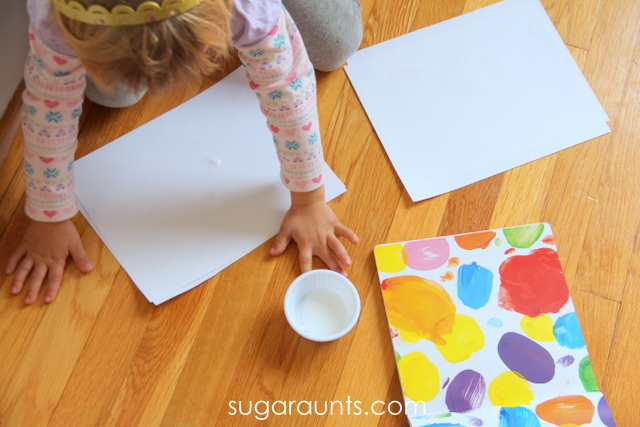
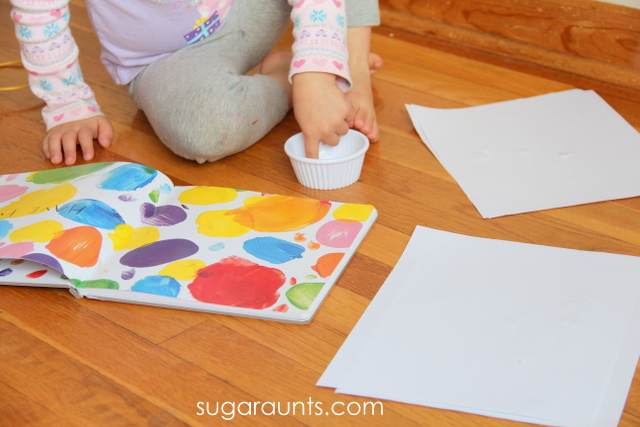
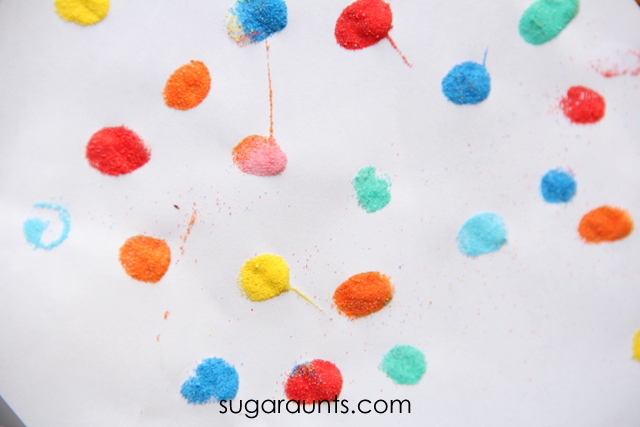
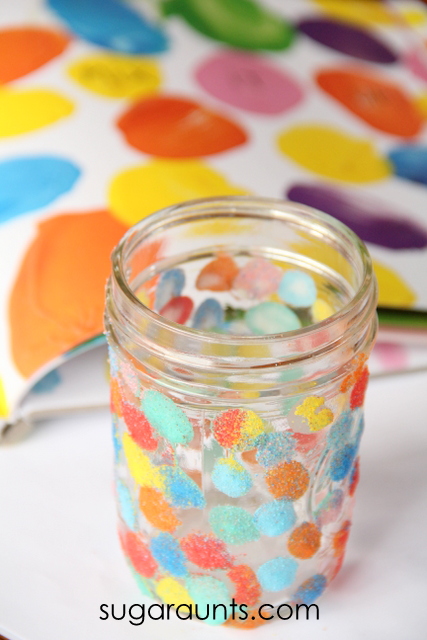
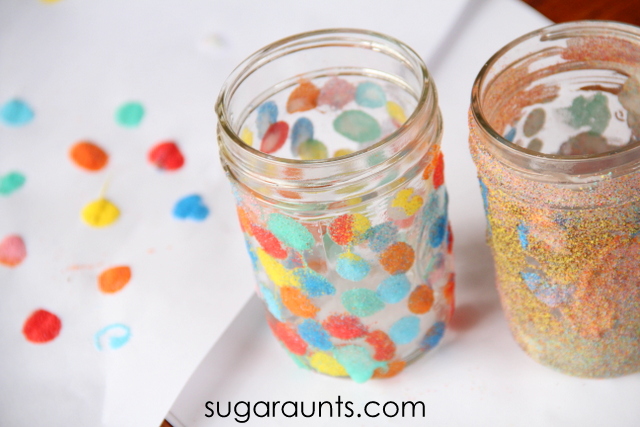
We spread out the book on the floor as inspiration and got started. Baby Girl used a little tub of glue to make glue fingerprints on white paper.
This part of the activity alone was mesmerizing for her. She made dots all over the page just like the dots and fingerprints in the book.
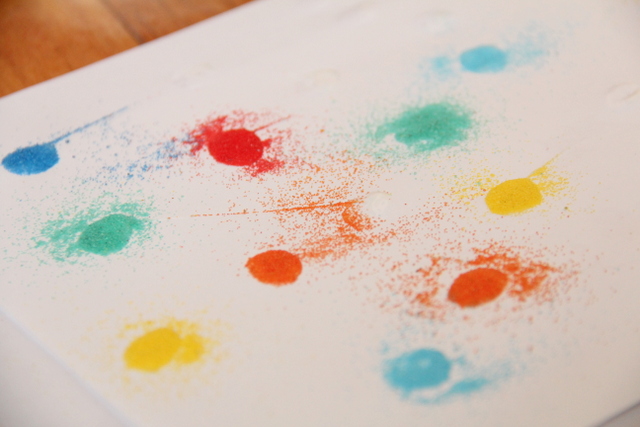
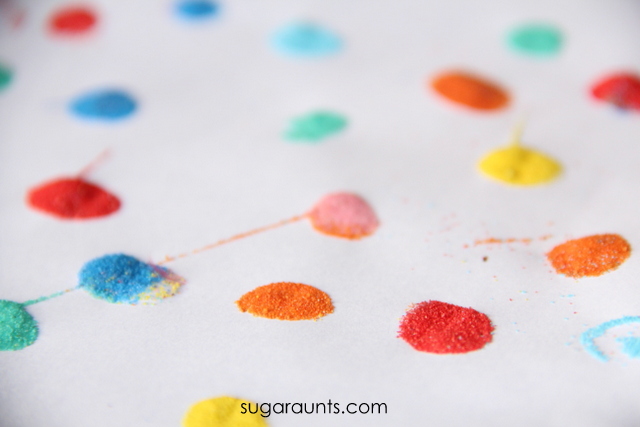
Now for the fun part! We added color to the glue fingerprints and started with solid colors. How beautiful is this rainbow of fingerprints?
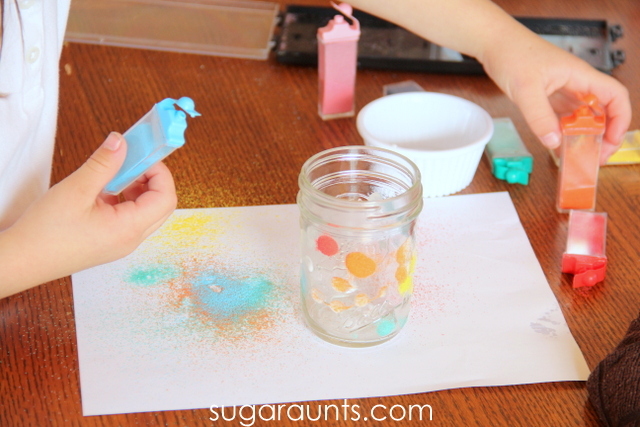
Then things got interesting! We added dabs of color and mixed up the different colored sands to make different colors.
We really did Mix It Up!
Baby Girl wanted to do footprints with glue, too but we decided our glue tub was too little for whole feet. She ended up making toe prints with glue instead.
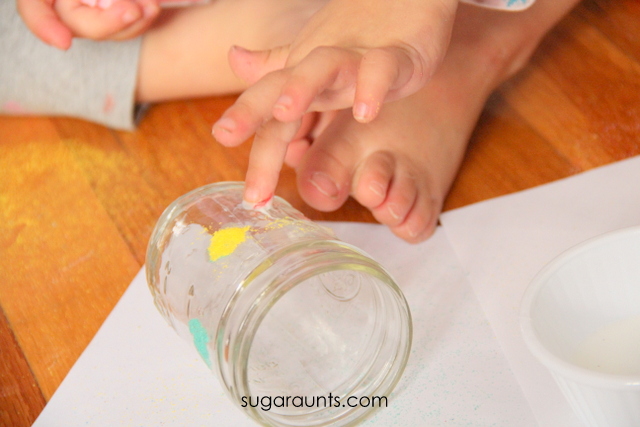
After practicing with fingerprints on paper, we moved onto our candle holder craft.
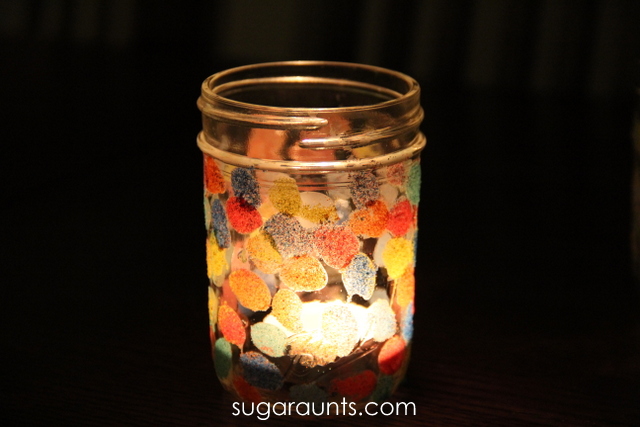
Fingerprint Candle Holder Craft
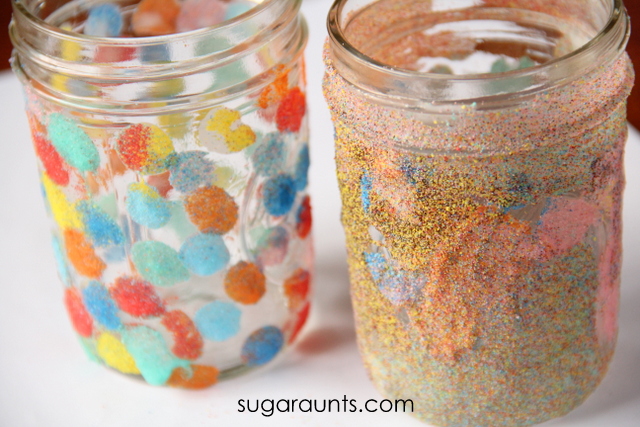
I showed Baby Girl how to make her glue fingerprints onto the side of a mason jar. We carefully poured the colored sand onto the fingerprints, keeping the jar over white paper to catch the excess sand.
We covered all of the glue fingerprints with sand.
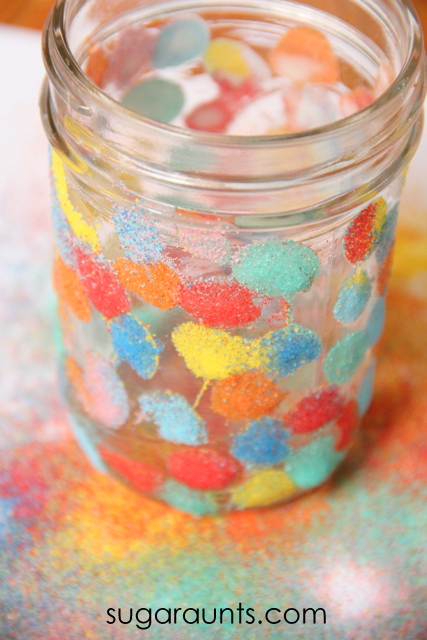
It started to look just like the colorful pages from the book.
We made a few candle holders and some ended up more mixed up than others. I love how the colored sand mixed together.
These candle holders look great in the sunlight…
…and by candlelight! We’ll be gifting a few of these candle holders to friends and family. They make a great DIY gift made by kids.
This was one fun book and we are so happy that we got to enjoy it and create along with it.
The best news is that you can enter on each of our Preschool Book Club bloggers websites to increase your odds.
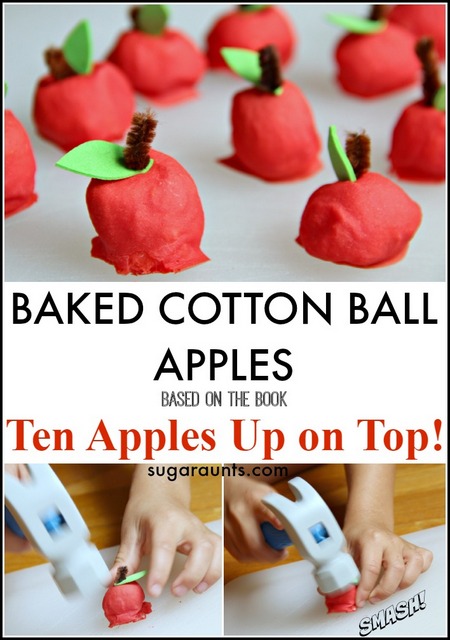
This Ten Apples Up on Top activity was a huge hit with my kids, because they love the book, so making baked cotton ball apples was a fun way to play through the book. And as a pediatric OT, I loved the fine motor and heavy work input that was an added benefit. You can add this to apple activities that you are doing in occupational therapy sessions or at home. These baked cotton ball apples would be a great addition to our apple pie sensory bin, and they would be fun for hands-on play with our Fine Motor Therapy Kit for visual motor, handwriting, and fine motor play.
Here’s what we did…
Ten Apples Up on Top Activity
Did you ever do an activity with the kids that was such a hit, that the kids ask to re-do the activity over and over and over again? This one is it for us. There is rarely a day that goes by that I don’t hear about our smashing apples activity. Especially if we happen to see a hammer. Oh, this baked cotton ball activity was a fun one for us!
We’ve never made baked cotton balls before, but have had the idea bubbling for a while. When we heard that the Preschool Book Club‘s book for this week would be Ten Apples Up on Top, we knew it would have to be an apple themed baked cotton ball activity. We even made these waaaay before all of the other book activities in the second series of books.
Like back in June. If you’ve never made baked cotton balls before, this is a MUST-DO activity!
This post contains affiliate links.
How to make Baked Cotton Balls
Are you familiar with baked cotton balls? This sensory tool is a DIY sensory material that kids love, and for so many great reasons. Actually, mixing up and making the baked cotton balls is as much of a therapy task as playing with them!
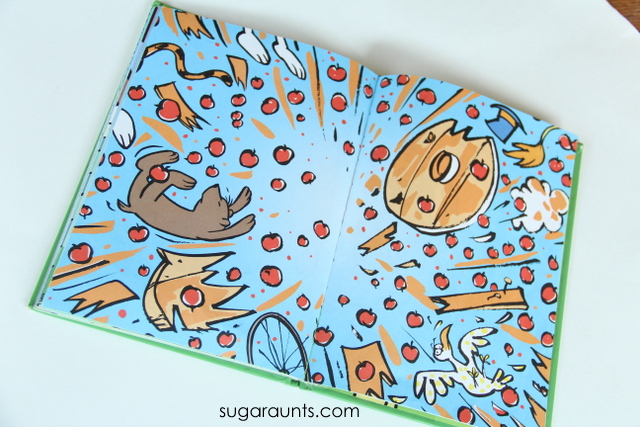
First read Ten Apples Up On Top! by Dr. Seuss. This is such a fun book for counting and playing along with the story.
How to make baked cotton balls:
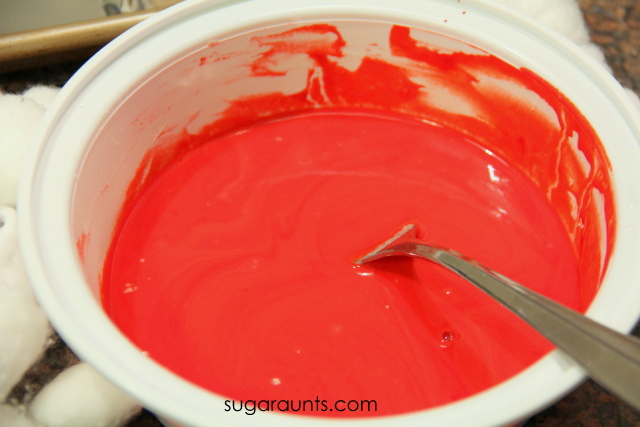
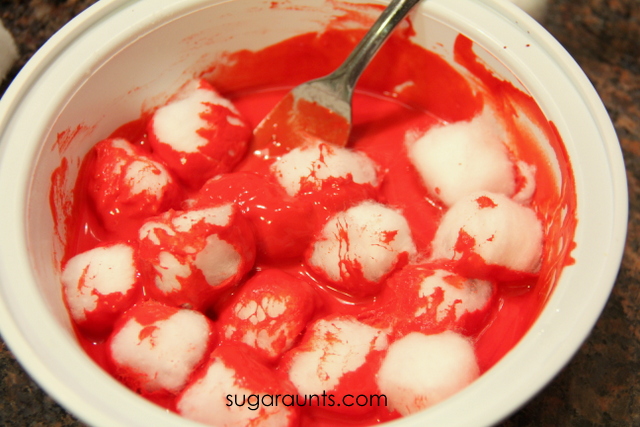
Begin by mixing together one cup of flour and one cup of water. This is a great activity for the kids. Scooping, stirring, direction following, sneak tasting (my kids aren’t the only ones who go crazy for flour, right!??).
Pour in a bunch of red food coloring. We typically go with Wilton gel colors for all of our dying activities, but I knew I wanted a really deep red color. It seems like red coloring requires SO much dye to get a good shade of red. I ended up using a bottle from the dollar store and used about half of the bottle of food dye. This was maybe 20 drops? Add enough to get a nice red color.
Mix in the food coloring.
4. Now is the cotton ball part. Grab up your stash of cotton balls.
5. Mix them around to coat all of the cotton balls.
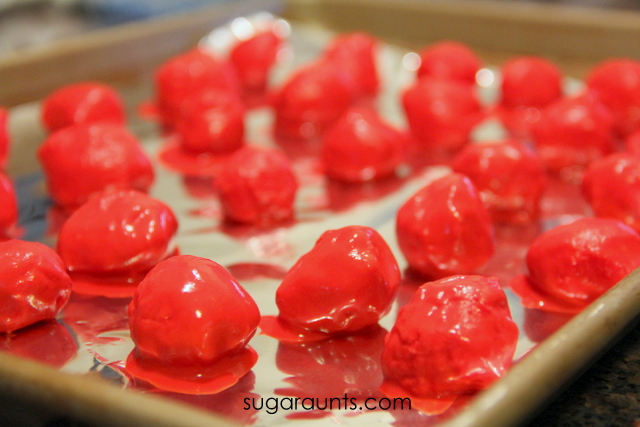
6. Place a layer of aluminum foil on a baking tray and place the cotton balls on the tray for baking. I used two forks to pick up the coated cotton balls and was able to let excess flour coating drip off before placing the cotton balls onto the foil.
You’ll want to let as much excess drip off before putting them on the sheet to avoid the sharp edges and flat bottom once the cotton balls bake.
7. Pop the baking sheet into the oven for around 60 minutes at 300 degrees F.
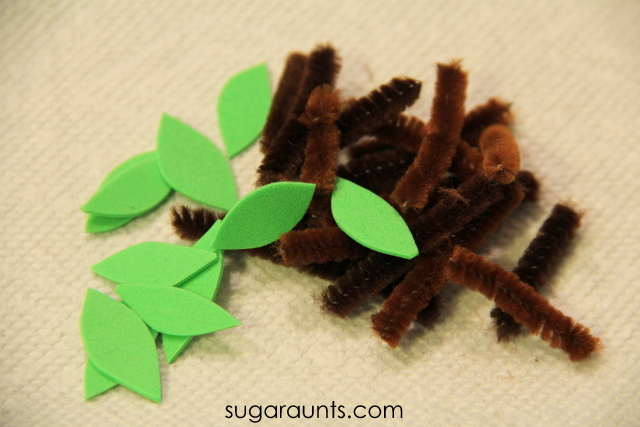
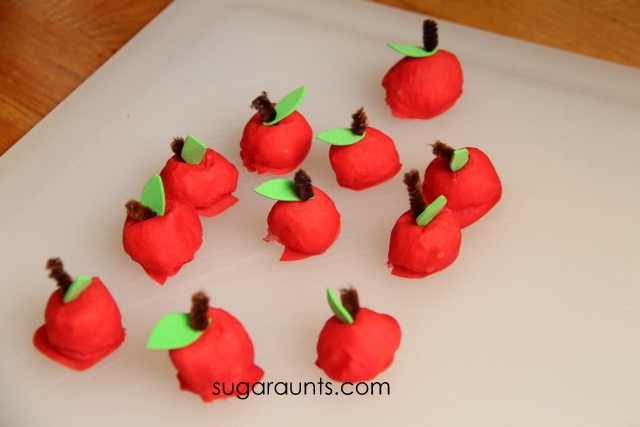
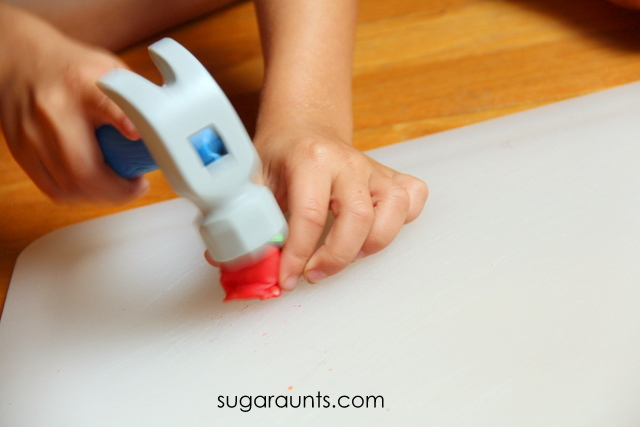
While the cotton balls are baking, snip up the leaves and stems for the apples. We used brown pipe cleaners and green crafting foam.
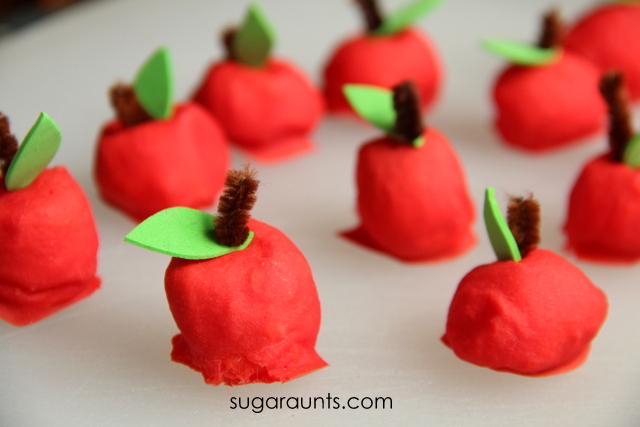
When the apples are done, pull them out of the oven and let them cool for a bit. They will be nice and hard. You’ll need to snip the bottom edges of the apples to remove any sharp edges that dripped to the base before baking.
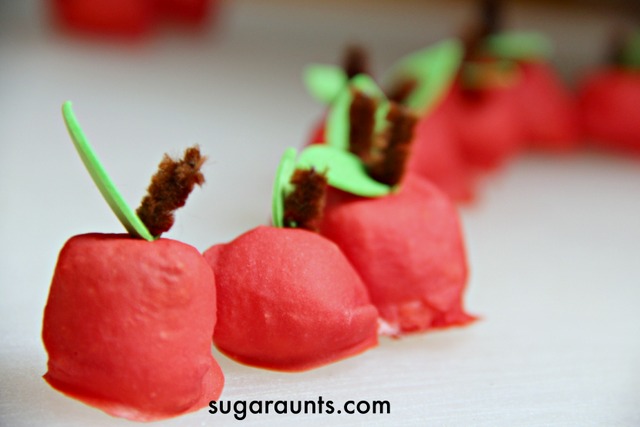
To attach the leaves and stems, lay the leaves on the apple top and poke the pipe cleaner through the foam sheet and into the cotton ball. The kids were able to help with this part, but assisting with stem attachment did not allow this mama to take any pictures 😉
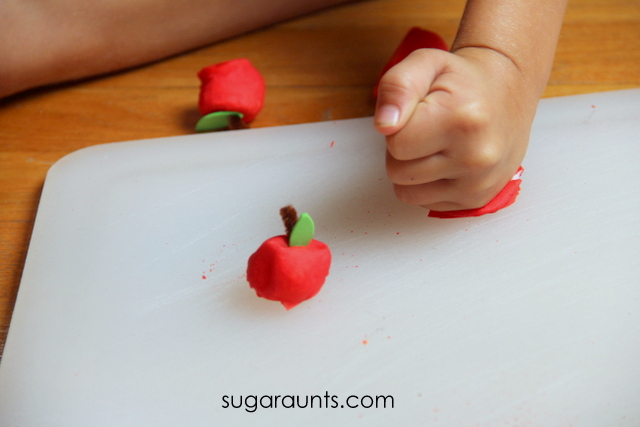
Our crop of apples were ready for playing with!
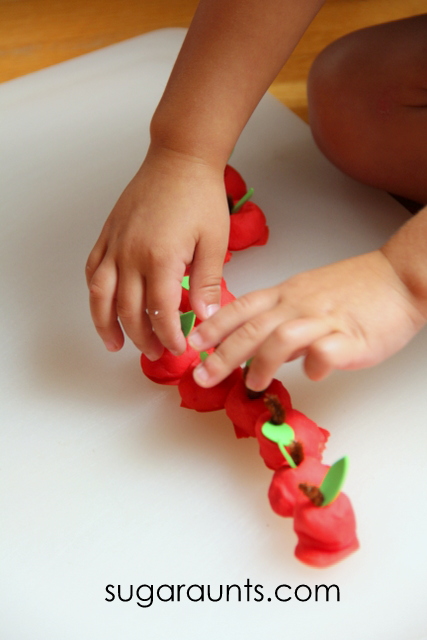
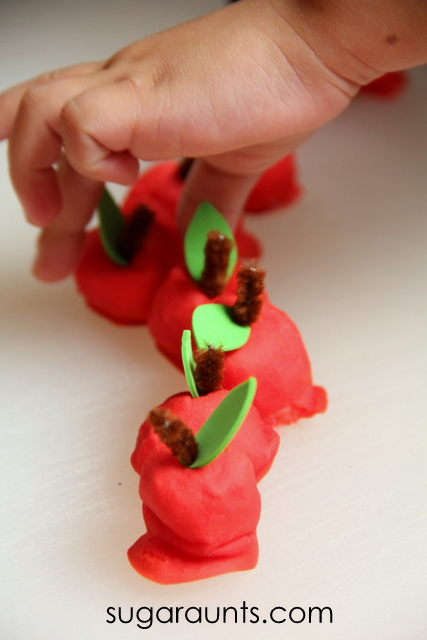
We followed along with the book as we read to stack up apples one by one. What a great way to learn and play with math facts, counting, number order, and simple adding. Little Guy LOVED this activity.
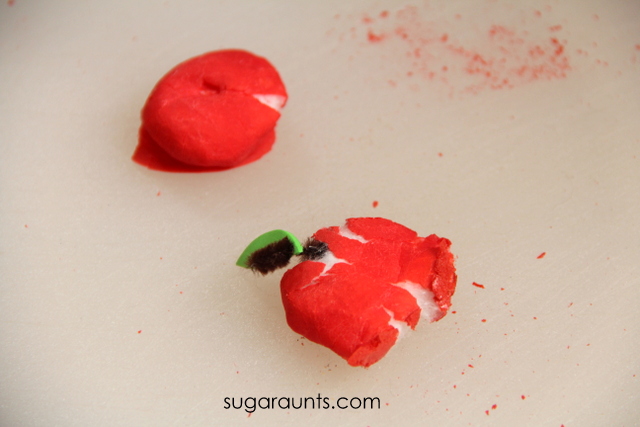
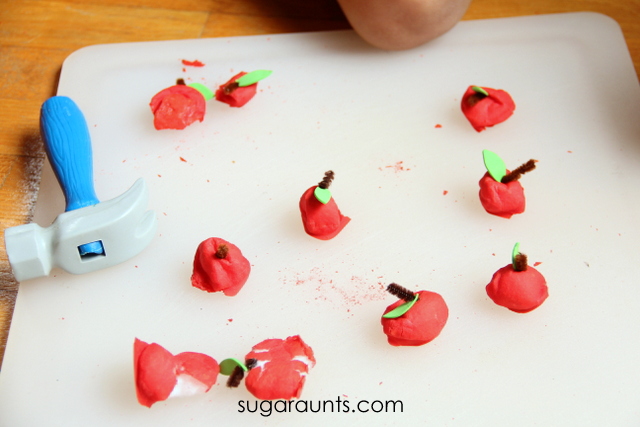
We got to hammering the cotton balls and this was the really fun part! The baked cotton balls have a hard outer edge that allow for a satisfying crunch when smashed, and a squishy, cottony center. What a fun way to explore and play.
We used a plastic hammer, but any hammer would do.
In fact, fists work just as well for smashing.
We had a smashing afternoon.
The remains of our cotton ball smashing reminded us of this page in the book. Be sure to let us know if you make baked cotton balls! We would love to hear about your experience with this sensory and fine motor activity!
Stop by the other Preschool Book Club bloggers to see their takes on Ten Apples Up On Top!
Colleen Beck, OTR/L has been an occupational therapist since 2000, working in school-based, hand therapy, outpatient peds, EI, and SNF. Colleen created The OT Toolbox to inspire therapists, teachers, and parents with easy and fun tools to help children thrive. Read her story about going from an OT making $3/hour (after paying for kids’ childcare) to a full-time OT resource creator for millions of readers. Want to collaborate? Send an email to contact@theottoolbox.com.
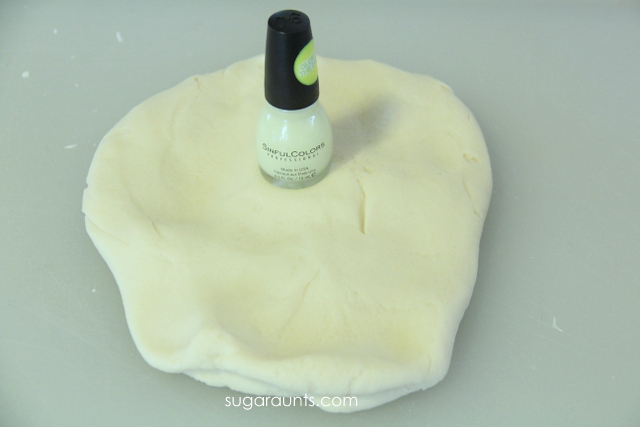
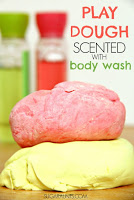
We’ve been having so much fun lately making all sorts of play dough. There’s so much to do with play dough…from pretending, to working on fine motor skills…play dough is one of our favorite ways to play. And the fun ways to make play dough; Oh boy things can get crazy in the play dough workshop (aka my kitchen). We’ve mixed up dough with everything from crayons to cola.
This time, we were on a mission to create our very own Glow-In-The Dark play dough. This was fun!!
This little experiment turned into a fun adventure with the kids. We brainstormed all kinds of ways to turn our play dough into glowing dough. Little Guy’s idea of lightning bugs was thoughtful, but a little yucky. And cruel to glowing bugs. So where to start with making glowing dough?? We packed up the minivan and headed off to Target.
The sales clerk gave us the eyebrow when we said we needed anything that glowed. But this was a mission for creativity. We grabbed up glow in the dark stickers, duct tape, nail polish, and silly string.
We were looking for things that could be added to dough to make a glowing dough. While doughs that require a black light for luminosity are very cool, we don’t have a black light. And, lots of parents out there don’t have the budget for a black light, so glowing dough was the way to go for us.
We started our experiments with the nail polish.
Please don’t make play dough with nail polish. Won’t glow. And the fumes, yikes! Round two.
Silly String Play Dough~
We started by mixing up a batch of our homemade play dough recipe with a small modification. We were out of cream of tarter, so I substituted a half cup of flour for the cream of tarter. I also cut the recipe in half. This is important for the glowing of the dough, as we only used one can of silly spray. More dough would require more silly string for a glowing shade. Our play dough ingredients were:
2 cups flour
3/4 cup salt
1 and half cup water
1 Tbsp oil
It’s important to note that different ingredients and temperatures/humidity will result in different play dough consistencies. The most important part of this dough recipe is the kneading. You’ll need to knead it a lot for smooth play dough. Repeat that: Need to knead. Need to knead. 😉 If your dough is too sticky, add more flour.
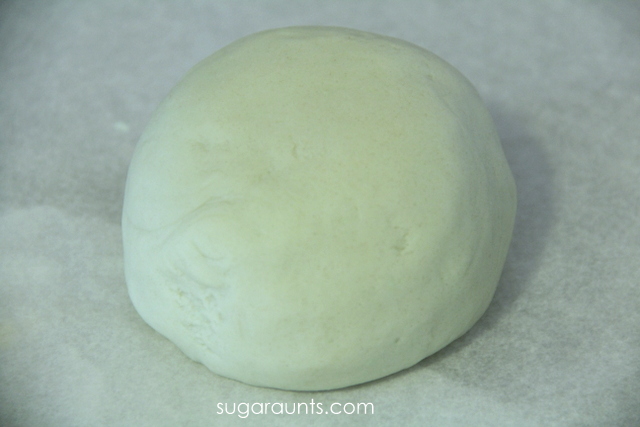
This is a no-cook dough. The warnings on the Silly String say to keep away from heat. I wan’t taking any chances with warm dough, so no-cook it was. Mix together the ingredients for the dough and knead, knead, knead. When you’ve got a nice play dough consistency, it’s time for the fun part. Silly String! (This link is not the brand we used, but should work. We used a bottle of 3 oz glow in the dark Silly String found at Target). Little Guy waited very patiently for this part. If patiently means reminding mom that we need to spray the silly string, then it was patiently. 😉
Spread the dough out on wax paper and spray! We sprayed to whole bottle onto the dough without any attempts to spray each other. Success.
Roll the dough edges into the center and mix in that silly string. we did not have any dying of skin with the silly string, but feel free to wear gloves if you like. The nice part about the silly string is the non-toxic notice on the side. Non-toxic=awesome.
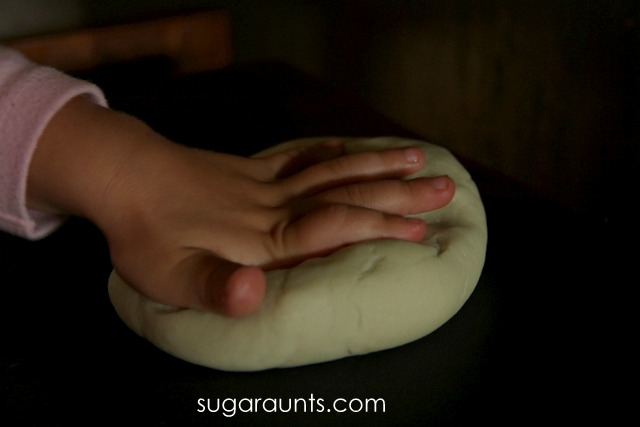
We did not add any coloring to our dough. The greenish shade of the silly string dough was enough, but it would be fun to experiment and see what a bright green food coloring would do to the dough. You might want to add another bottle of silly string to your dough for a more vivid glowing dough. If you add more silly string, you’ll need to add more flour to take away the stickiness.
Once, mixed take that dough into a dark closet to check it out! I did notice that our dough was more vivid if we “charged” under a light first. This stuff was very cool! The kids were pretty impressed with the glowing dough.
NOTE~ The “glow” is not extremely strong. This dough would not be able light your way on a dark night. It will be visible in a dark room. It will not enable you to see across the room. It will glow enough to see. It will not turn your dark living room into a glow-in-the-dark disco party. It will last about 2 weeks in a sealed plastic bag or container, with “charging” to get the glow. It will not make a great flashlight on Halloween. It will be very fun to play with!
And when the dough gets stuck to the couch, you can now see it in the dark. Yay!
We love using math concepts that are learned in school into playful activities at home. Learning through play is a great way to strengthen concepts learned in the classroom. We used apples to count, add, and learn one day, all in the great outdoors!
Apple math activity for Kindergartners and Preschoolers
This post contains affiliate links. If a purchase is made through these links, we receive a small percentage in payment at no cost to you.
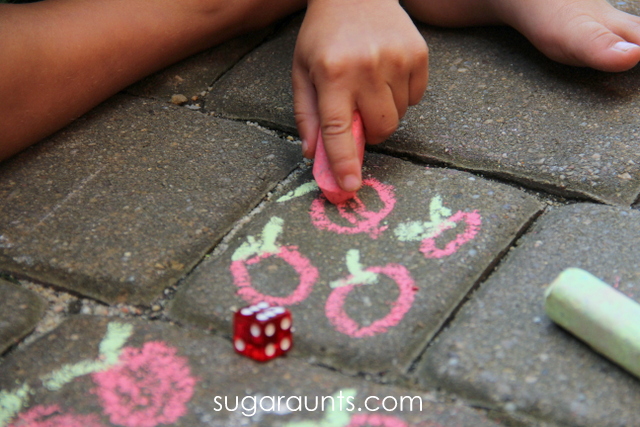
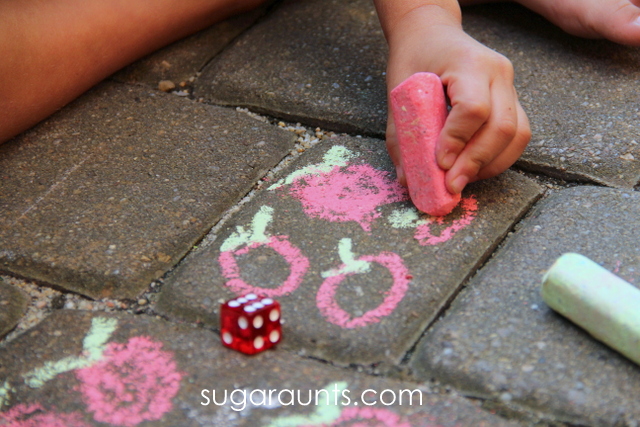
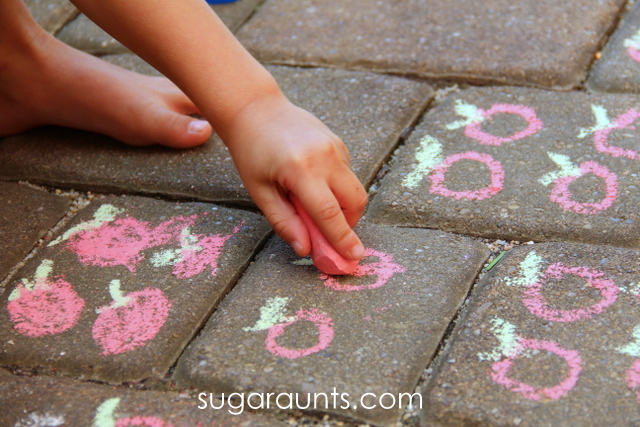
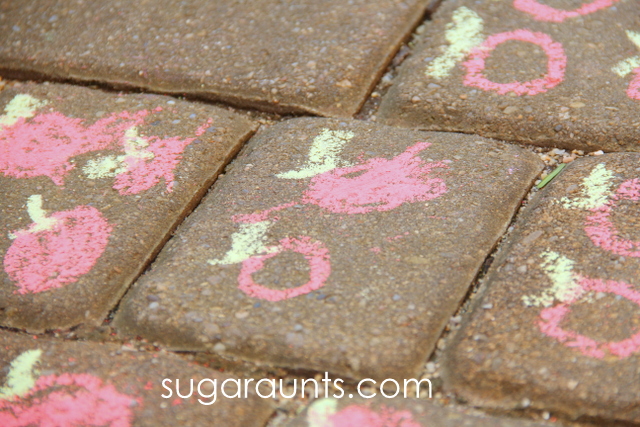
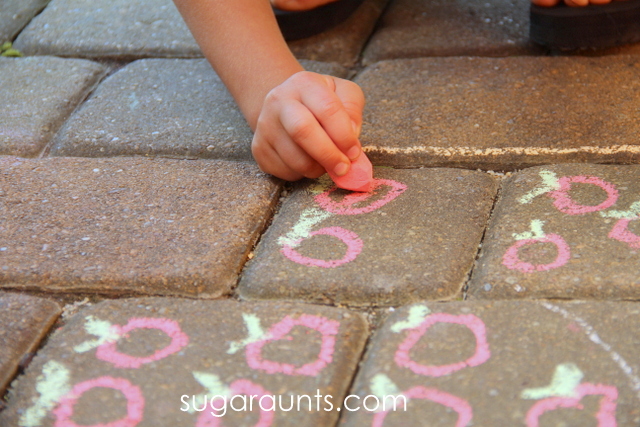
We used Sidewalk Chalk and a dice for this activity. I took the kids outside to the sidewalk one afternoon and drew a bunch of apple shapes. We were ready to play.
Note–you could also draw any shape for this activity: pumpkins, smiley faces, geometric shapes, simple houses…any thing would work.
To play the game, I had the kids roll the dice. They had to count the dots on the dice, or simply look at the dots to determine how many dots there were. Big Sister did a lot of dice activities last year in Kindergarten so she was able to glance at the dice and know how many dots there were. Little Guy counted the dots. This is a great early math skill for preschool aged kids.
Once they counted the dots on the dice, I had them color in the same number of apples to correspond to the number of dots.
We used the squares of our sidewalk to wok on Kindergarten math concepts that Big Sister learned towards the end of her school year. Some of the squares had two apples drawn on them, and others had four or more.
This was a great opportunity to review addition.
She added the apples to make the total match the number of dots on the dice.
Little Guy counted along with Big Sister to count the total number of apples filled in.
Coloring in the apples with the chalk requires use of the small muscles of the hand. The sidewalk surface is resistive and the area they colored in was small. This required precision to stay in the lines. Not to mention, coloring in all of those apples really strengthened the hands!
This was such a fun way to review old math areas for the new first grader and introduce new math concepts to the preschooler. Like this math activity? Try a few of these ideas:
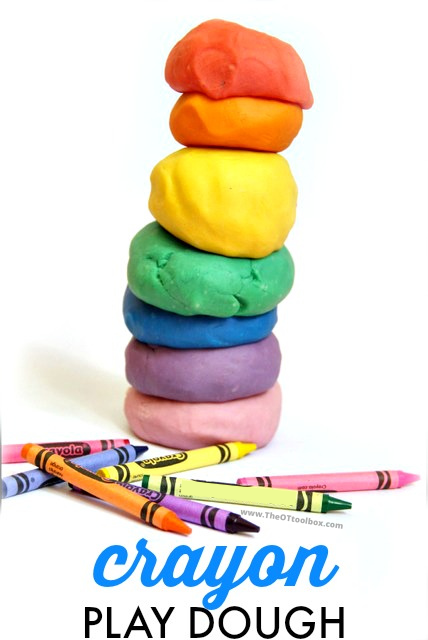
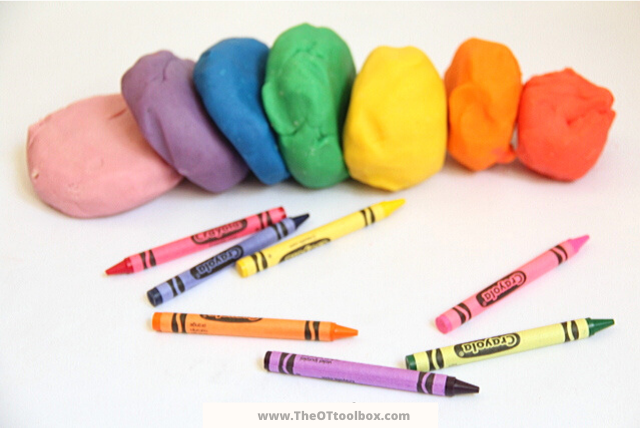
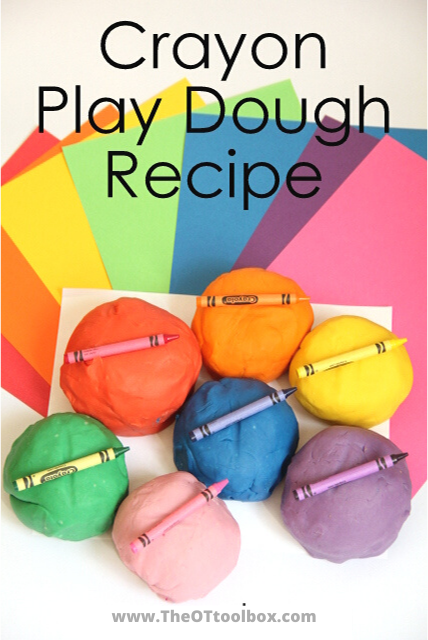
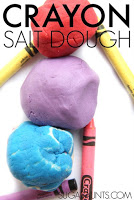
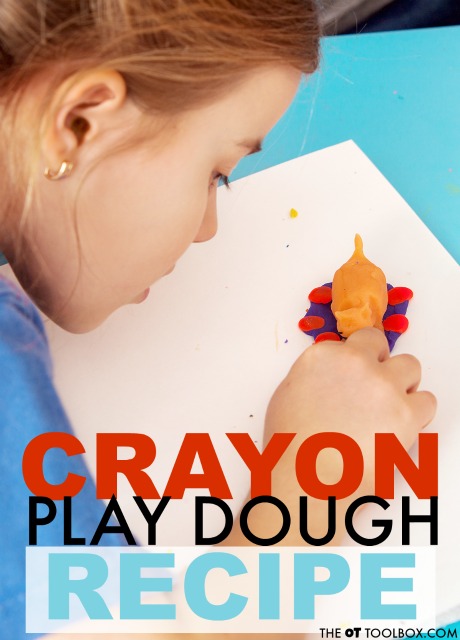
Did you know that September 16th is National Play Dough day? Me either, until a blogging buddy brought it up. What a better day than to share our DIY Rainbow Crayon Play Dough recipe? It’s one of our many crayon play dough recipes that we have here on the site.
We first made our crayon play dough recipe to go along with a book activity that called for purple play dough. But when the kids started playing with this dough every single day? I loved it for the fine motor benefits. My kids just thought it was cool to make play dough from old crayons. I knew we had to make a few other colors.
And that turned into every color of the rainbow.
This Crayon play dough recipe is so easy, that you’ll want to make it in every shade, too. Here is everything you need to know about How to Make Crayon Play Dough:
This post contains affiliate links.
How to make Crayon Play Dough:
You will need just a few ingredients to make play dough using old crayons. The other ingredients are probably in your kitchen cupboards right now!
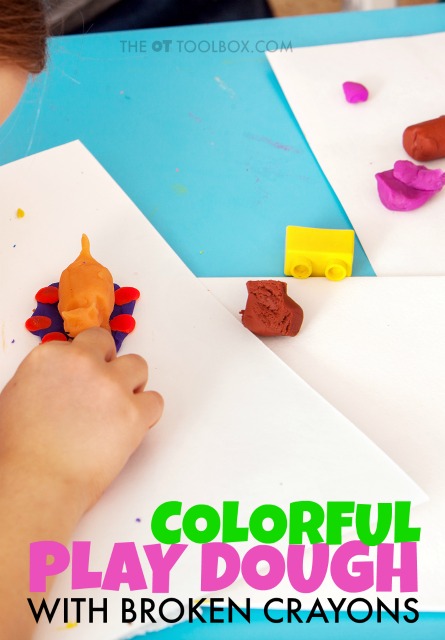
Now, when we made play dough in a rainbow of colors, things were moving very quickly over the stove. I didn’t get a chance to take many action shots. With the heat of the stove, hot oil, and chopping up the crayon bits, this is a job for the mamas or papas rather than helpful kids. Older children certainly could do this recipe. I wasn’t able to take pictures while making our dough. 🙁 You can see how the crayons were chopped in our Harold and the Purple Crayon post that inspired more colors of play dough. Start by chopping up your crayons into pieces. This is where your broken crayons will come in handy. We used a variety of brands of crayons mixed together and it didn’t seem to alter the texture of the dough.
Use Broken Crayons to Make Crayon Dyed Play Dough:
You’ll need the following ingredients: 2 Tbsp oil 2 and half broken crayons (each color) 2 cups water 3 cups flour 1 1/2 cup salt 2 Tbsp. cream of tartar I halved these ingredients to make each shade. If you read our Harold and the Purple Crayon post, you saw that we used 2 and a half chopped up crayons for the full recipe as well. When I halved the ingredients, I kept the amount of crayons and we got bright, bold colors for our dough. Perfect for playing! First, chop up 2 and a half crayons.
In a large bowl, mix together the dry ingredients (flour, salt, cream of tartar)
Next, heat the oil in a pan. Add the chopped crayons. Stir until the crayons are completely melted. Slowly stir in 2 cups of water while stirring. Certain types of crayons will either make a clumpy and gooey looking liquid. Other types will make a smooth liquid once the water is added. Either way is fine. Just keep stirring.
Slowly, stir in the dry ingredients. The dough will pull together in a ball over the heat. Once the dough pulls together, dump it out onto a cutting board or counter. Let the dough cool until you can tolerate kneading. Knead the dough for a few minutes until smooth.
By the time we got to our last color, we ran out of cream of tartar. I know that in certain areas of our readership, cream of tartar is unavailable. Without the cream of tarter, the dough recipe still worked fine, just a little less smooth. To make all of the colors of dough, I had to hustle a little; I made one color, plopped it onto a cutting board, let it cool while starting the next batch. When the first color was cool enough to touch for kneading, I took a little break from the stove mixing and crayon chopping. It got a little hectic in the kitchen, and you may want to completely mix up one color at a time. For your own sanity 😉 Note: If you have an old pan, use that to melt the crayons down. I was able to get any waxy residue out of my pan with soaking and boiling dish detergent on the stove, though.
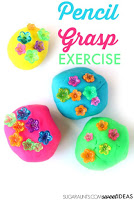
This dough is such a soft dough but is it is still a great way to incorporate fine motor skills and strengthening in a vividly colorful way. In fact, playing with crayon play dough would be a great way to work on pencil grasp and an awesome addition to one of the top 5 blog posts that we’ve shared, on improving pencil grasp with fine motor activities.
A few more play dough recipes that look like a fun way to celebrate National Play Dough Day:
If you like the idea of using your broken crayon pieces in something as fun and creative as play dough, then you will love to try a few different ideas, too. We’ve given crayon play dough a run for it’s fun and tried a few different versions. Check them out and if you make a batch, let us know how you get creative with crayon play dough!
Favorite Play Dough recipes and activities for kids:
Click on the images or the links below each image:
Do you LOVE using play dough as a sensory and fine motor tool in therapy and in play? I have a subscriber-only play dough mat that is designed to work on the intrinsic hand muscles which are needed for pencil grasp and fine motor skills. Read more about the play dough mat and the areas it will help with HERE. This play dough mat is available for FREE only for our Play Dough is Awesome newsletter group. (This is a different email list than our regular subscribers. If you’re on our subscriber list, you’ll still need to sign up for this one to receive the play dough freebies coming your way!)
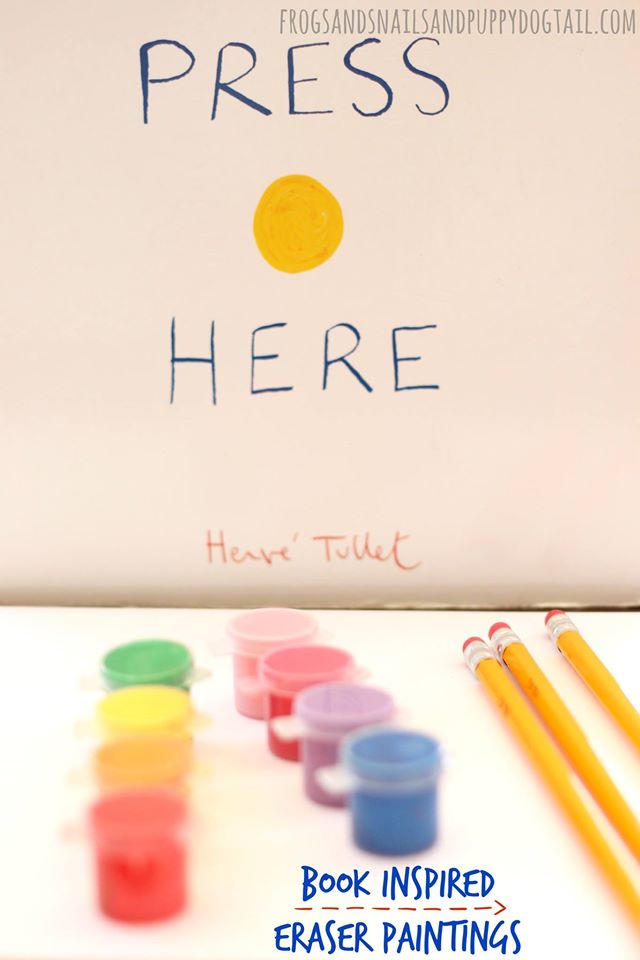
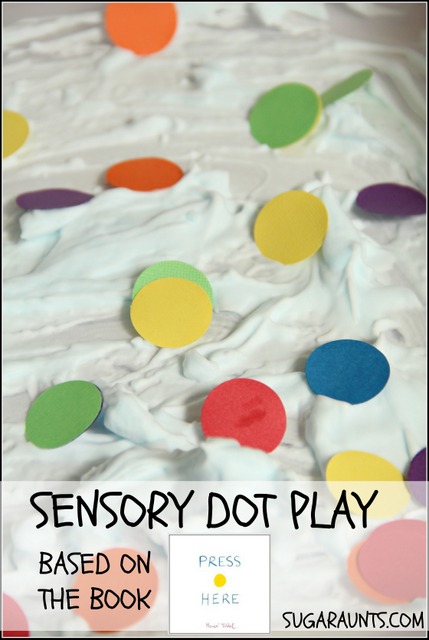
If you love sensory activities to pair with children’s books, you will LOVE this Press Here book activity! The book, “Press Here” is a memorable one that kids adore, but when you add a fun sensory play activity that goes with the book’s themes, you’ve got a winner. It has been so much fun coming up with play and learning ideas for Harold, Elmer, Pete, and more. This week, we’re reading and playing with the book, “Press Here” by Herve Tullet.
Press Here Book Activity
This post contains affiliate links.
Press Here is a new book to us. And what a fun book it is! The bright and bold pictures, the movement and direction following, and the fun instructions made this book a huge hit in our house.
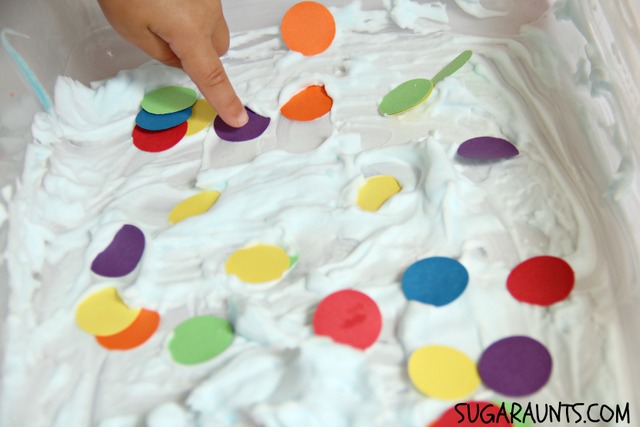
Little Guy (age 5) is STILL talking about this book. He loved following the directions to shake, pull, push, and move the dots and even the whole book. We decided to put the movement into our play activity with a sensory based interpretation of this fun book.
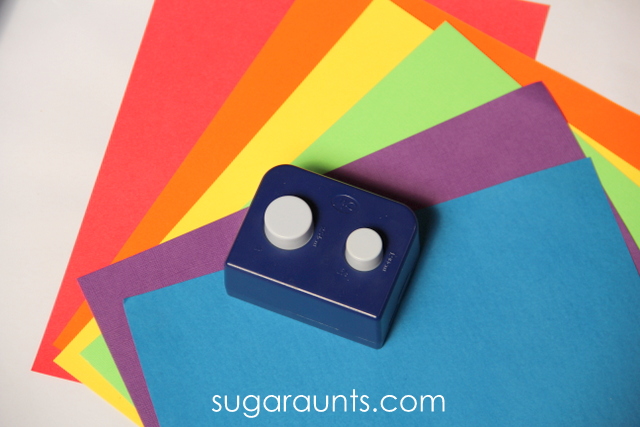
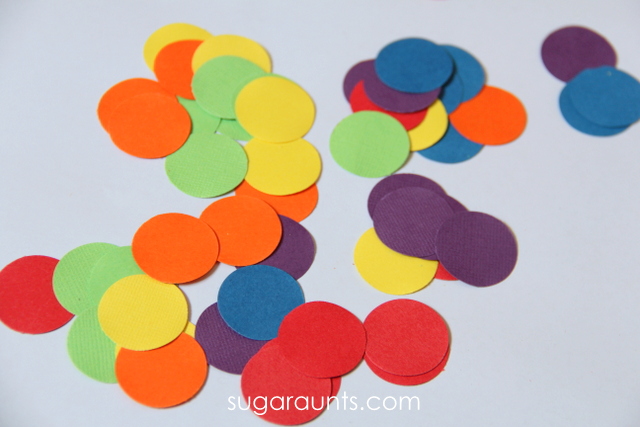
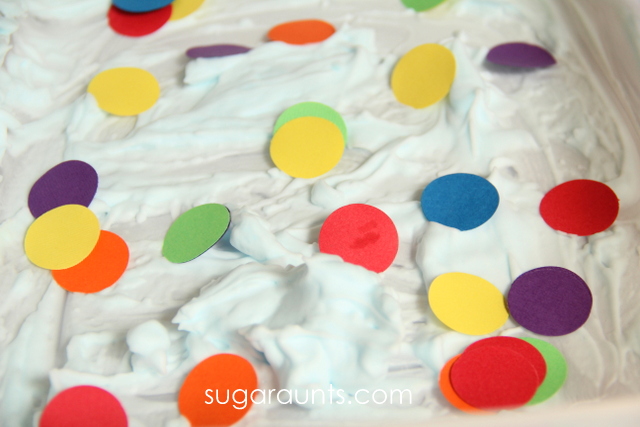
I started with rainbow cardstock and a circle hole punch. I punched a bunch of holes from all of the colors. Little Guy (age 5) LOVED helping me with the hold punching. Fun stuff!
How pretty are these colorful dots??
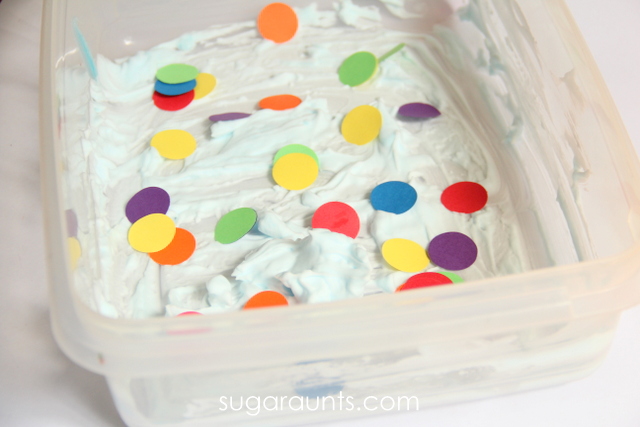
Add shaving cream to a container, and sprinkle in the colored dots. Sensory play is ready for little fingers!
We pushed, pulled, and poked the dots just like in the book. Be sure to talk about the colors while playing. This is a great sensory bin to work on color identification. Sensory play and learning go hand in hand, and this is a great way to learn and play.
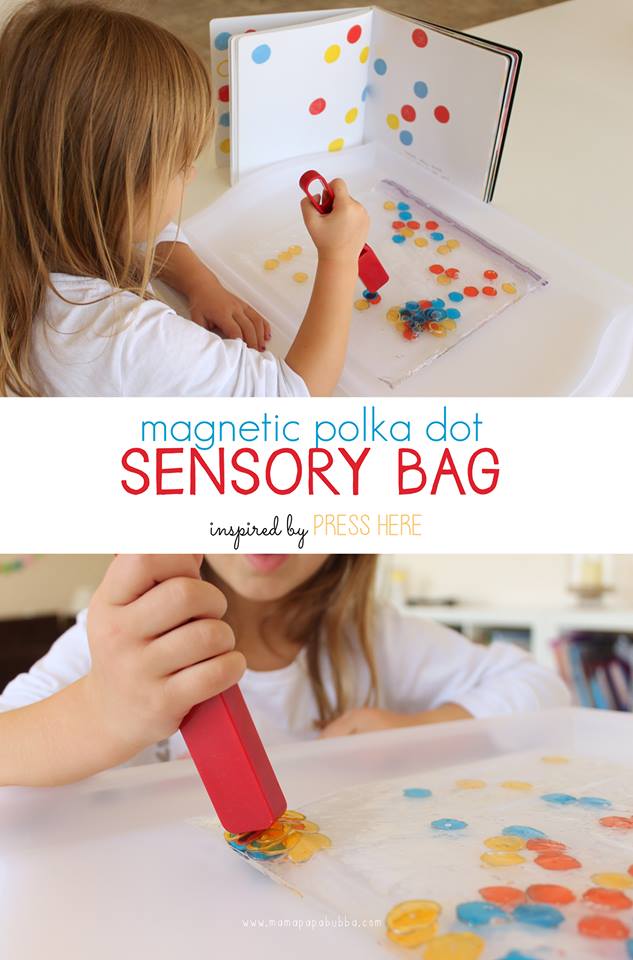
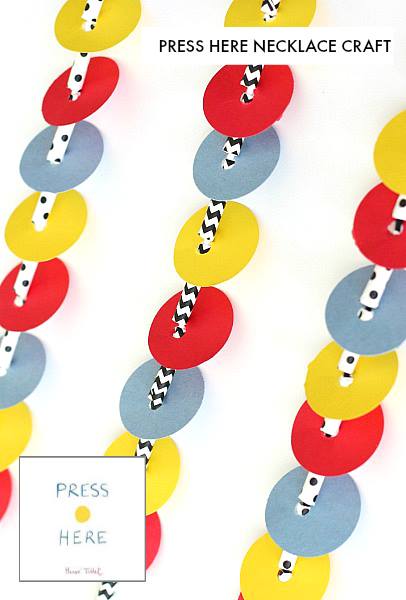
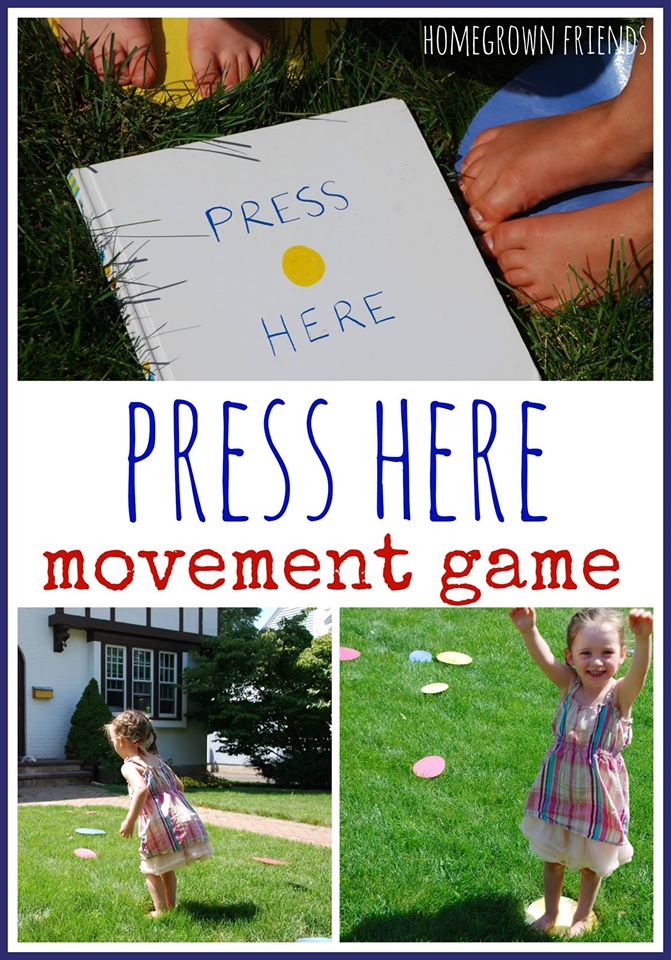
Press Here Activities
For more Press here activities, check out the ideas listed below. Each Press Here book activity uses the concepts in the book, the fun colors of the dots, and lots of pressing!
Check out the other Preschool Book Club bloggers for more Press Here ideas. And be sure to watch for our next book club activity. You won’t want to miss it!
Colleen Beck, OTR/L has been an occupational therapist since 2000, working in school-based, hand therapy, outpatient peds, EI, and SNF. Colleen created The OT Toolbox to inspire therapists, teachers, and parents with easy and fun tools to help children thrive. Read her story about going from an OT making $3/hour (after paying for kids’ childcare) to a full-time OT resource creator for millions of readers. Want to collaborate? Send an email to contact@theottoolbox.com.
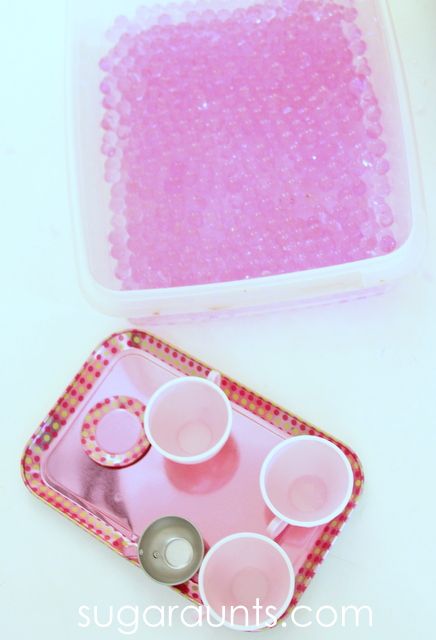
We LOVE water beads! They are such a fun way to play. We’ve done so many fun activities with water beads: color matching,seasonal sensory bins, and even fine motor play with them. One day we pulled out a pretty pink color for a little tea party pretend play.
Water Bead Tea Party
Note~ All children’s activities that we share on Sugar Aunts should be supervised by a responsible adult. This activity especially should be monitored closely by an adult as children may get swept up in the moment of imaginative play. If you are worried that your child may put water beads into their mouth, please do not attempt this activity. Sugaraunts.com is not responsible for any injuries or accidents. Sorry for the lameness, but it must be said…because you never know. Just use caution.
This post contains affiliate links. Thank you for your support.
Onto the fun. We grabbed a packet of Pink Water Beads and let them sit overnight in water. By the next morning, we had a bin full of beads ready for playing. I set up our tin tea set. We were ready to play!
How fun does this look??
We poured a few cups of “tea”. This was a great fine motor activity for Baby Girl (age 2.5). Pouring, scooping, and transferring the water beads from cup to cup is a great way to practice dexterity and control with movements.
We pretended to have a tea party with lots of refills needed. This sensory play activity that was very relaxing. Running your hands through water beads has such a calming affect.
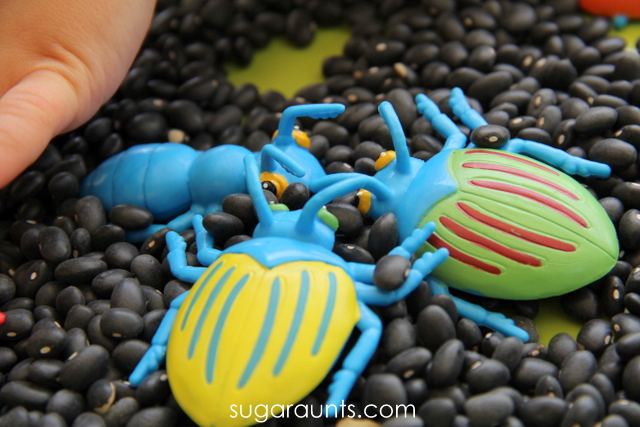
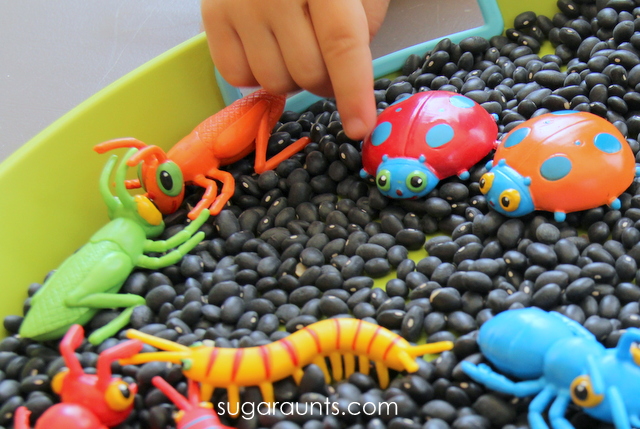
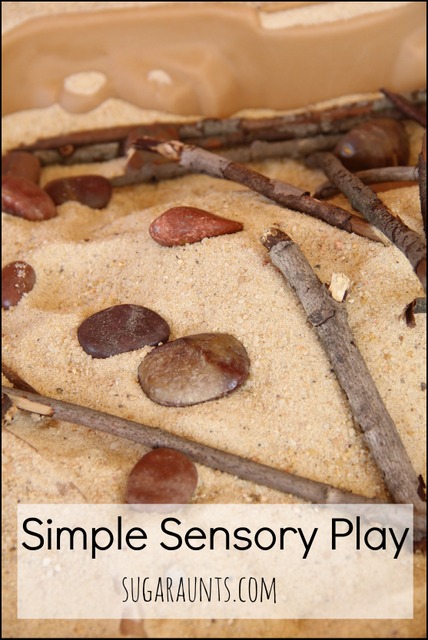
Simple sensory bins are fun to throw together in a few minutes. Sometimes, all it takes to occupy the kids in a sensory learning activity is just two items that you can find around the house or in the toy bin. We started a Simple Sensory Bin series a few weeks ago, making sensory bins with just two items. We’re working our way through the alphabet with simple sensory activities. Of course we’re not going alphabetically…that would make too much sense 🙂 Instead, we’re just playing our way around the alphabet. Today, we bring you B is for Beans and Bugs!
This post contains affiliate links. Thank you for your support to our blog.
“B” themed sensory bin
We gathered up just two items for this easy sensory bin.
How easy is this sensory bin? It doesn’t get much easier to throw together. Open a bag of dried beans. Scatter bugs around. Play.
We love our Melissa and Doug bugs. The colors of these little guys are so vibrant and stand out great against the black of the beans.
We played with this bug sensory bin for such a long time. And the pretend play…we had bugs digging in “dirt”, bugs making other buggy friends, and bugs building “dirt houses”.
These three buggy friends were talking and having a party.
Sensory play has never been so easy. We put these black beans away for another day. And maybe dinner. 😉
What simple sensory ideas will be next in our series? Stay tuned for easy ideas coming this way soon!


.jpg)