A while back, we were on a bit of a Circus Theme in our pretend play. We had a bunch of fun with our circus party ideas and read a bunch of circus books. We did this sensory bin around that time, but are just now getting the chance to blog about it. This was such an easy sensory activity to throw together that we will definitely be playing this again.
This post contains affiliate links. Read our full disclosure here.
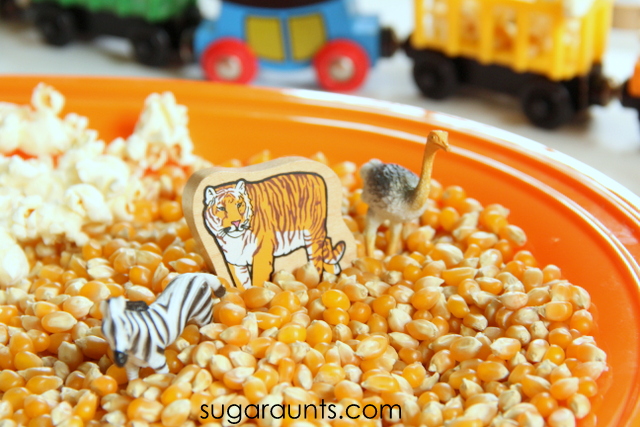
To create an easy Circus Sensory Bin, you will need:
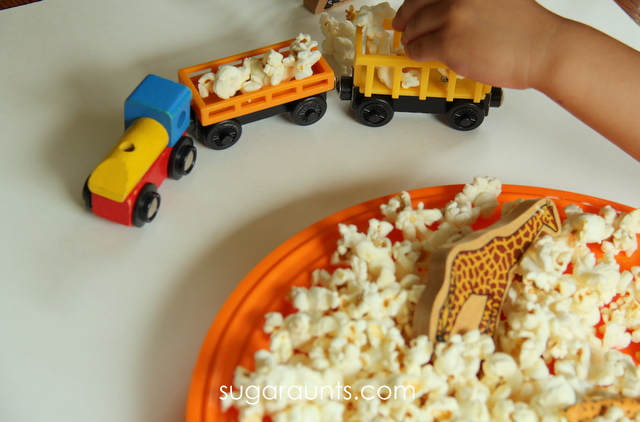
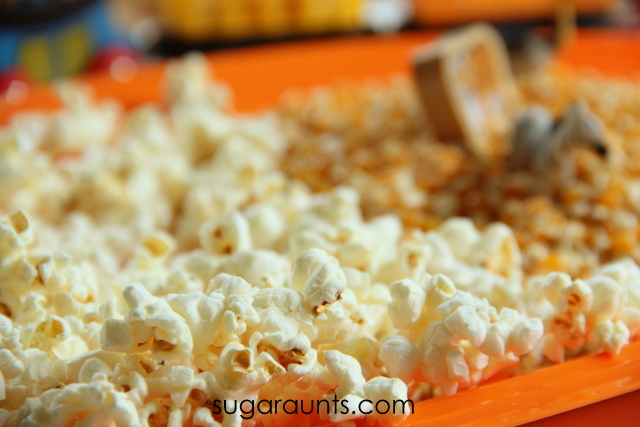
I started by popping some corn. And only ate a few handfuls. Pop extra. Snacks are good.
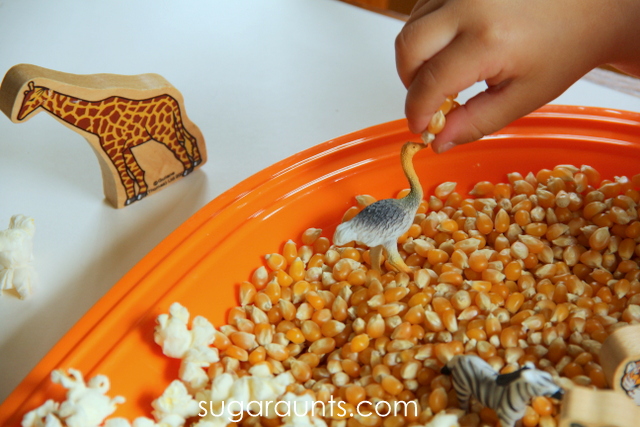
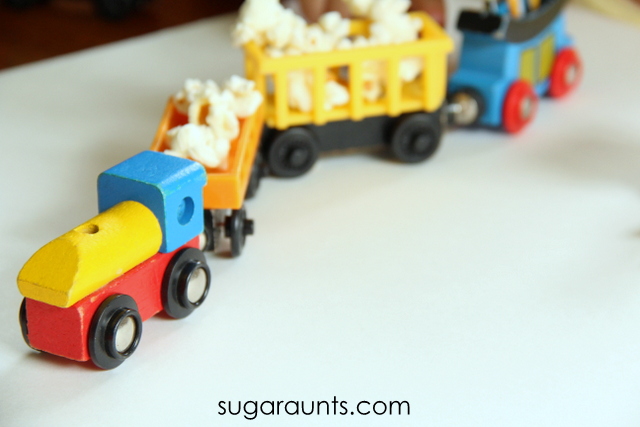
I put some popped and un popped corn onto a plastic tray. Then, simply added our train set and animals. The scene was set for imagination and pretend fun!
The animals in the different textures was such a fun way to explore animal names, animal sounds, and all in an easy sensory bin.
Baby Girl (age 2) loved this pretend play so much! Not only did we have a blast playing and learning, she got a snack too! Bonus!
Of course, the animals needed feeding, too.
We loaded up the train with popcorn and made deliveries. Such a fun way to play away an afternoon.
This might be the perfect accompaniment to our circus tent craft. Sensory play, craft, and snack…sounds like the perfect afternoon with the kids to me!
Note: Like all of our activities on sugaraunts.com, we encourage playing alongside your kids and in a supervised manner. Some crafts and activities may present a dangerous situation for children who like to put things into their mouths. Please monitor your child with this and any activity you see on our website. Popcorn will present as a choking hazard for small children. Please use your best judgment if you decide to do this activity with your kids.
We love playing all kinds of learning through water on the water table. We’ve played lots of other materials too…sand,nature, and even snow have made their way into our water table. Recently, we explored a single color with water play in the water table. Monochromatic learning through water play is such a great summer play activity, but could be carried over to year round with a little mess-proofing indoors.
This activity is part of the All Things Kids blogger’s monthly series. This month we’re talking about Learning with Water Play. You can see all of the great ideas from the All Things Kids bloggers by checking out the series homepage on All Things Kids.
Learning with Color
This post contains affiliate links. Your purchases through these links provide us with a small percentage and enable us to run this blog. Thank you for your support!
Monochromatic Water Bin Play
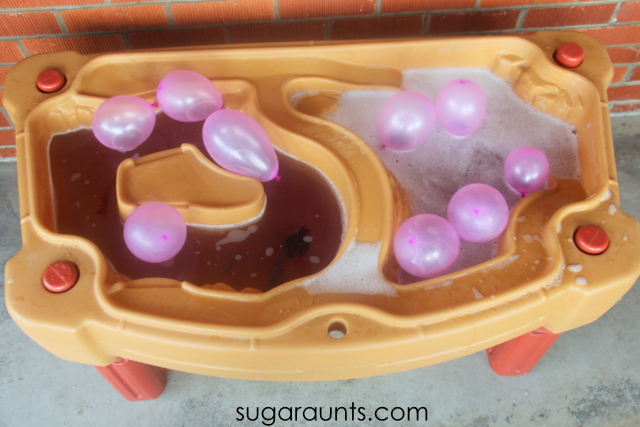
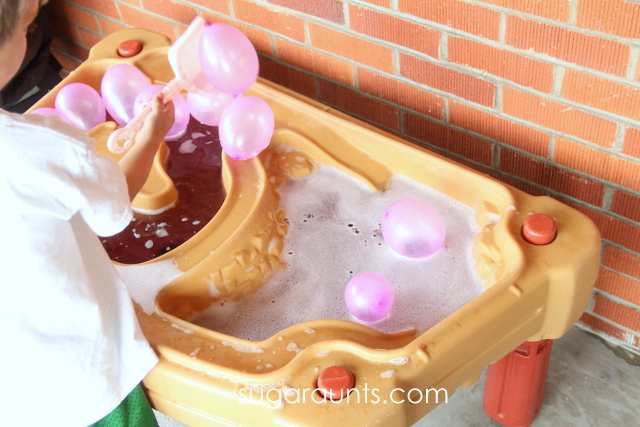
We started with our sand and water table
and filled both sides with water. We added a little bit of grape scented bubbles
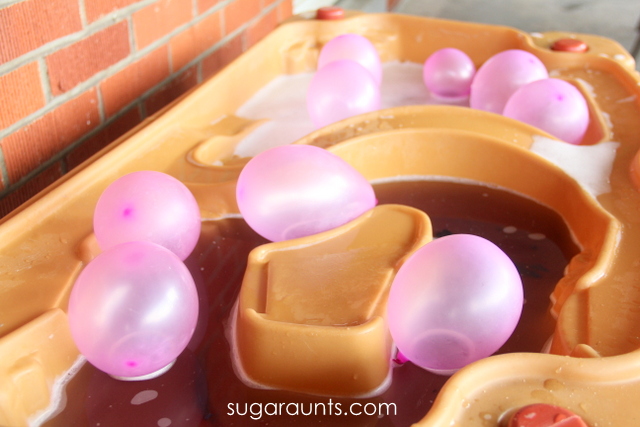
for a fun scent and foamy sensory play on one side of the water table. I blew up a bunch of purple water balloons and threw those in the water table. (HINT: Blowing up water balloons can be a beast! We have a little hand air pump that came from some toy and made it much easier to blow up the water balloons!) You could use any size balloons for this activity, but I wanted small size for our transferring part of the fun.
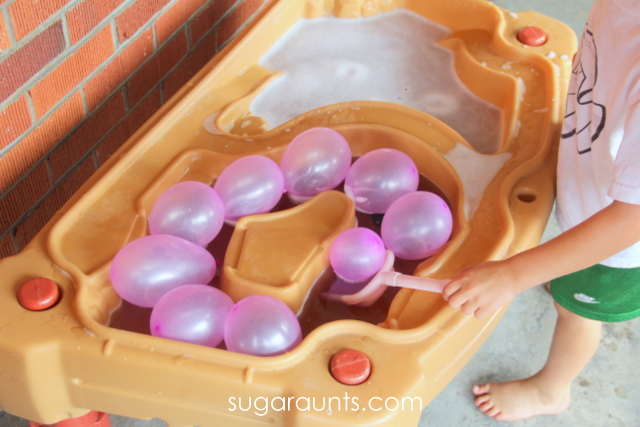
I gave the kids a little plastic shovel from our sandbox and showed the kids how to transfer the balloons from side to side in the water table.
It was fun to try to catch the balloons as they scooted around on the water surface. Transferring the balloons with a shovel is a great way to work on eye-hand coordination while encouraging bilateral hand coordination and crossing midline. Transferring from left to right is great for pre-readers, too. Kids need to scan from left to right across the page as they read and working on this skill in pre-readers is a great beginner activity.
We had so much fun talking about the different shades of purple and the term “monochromatic” as we pointed out the different shades. Our learning with water activity was a great way to spend a hot summer afternoon.
You may be interested in some of the products that we love and used in this post’s activity:
We’ve been on a bit of a sensory bin kick lately. Summer weather permits tons of outside play and the water bin is the way to go during hot sunny days. This sensory bin is one in a series that we’ve been working on and will continue to add to over a (probably) loooong time.
ABC’s of Sensory Bins
We’re hoping to hit all of the letters of the alphabet in our ABC’s of Sensory Bins series. Each sensory bin is an easy and fun way to play with the kids while focusing on one letter at a time.
Being a sensory bin, it’s a great way to explore textures, language, and now letters too as we play. Each sensory bin in our series will contain only 2-3 ingredients (simple!) and begin with the same letter.
We’re not going through the alphabet in sequential order, but hopping around. Each bin will eventually be added to a giant list of the ABC’s of sensory bins. Come along and play with us. We’re ready to have some sensory bin fun!
S themed sensory bin
This post contains affiliate links. Thank you for your support to our blog.
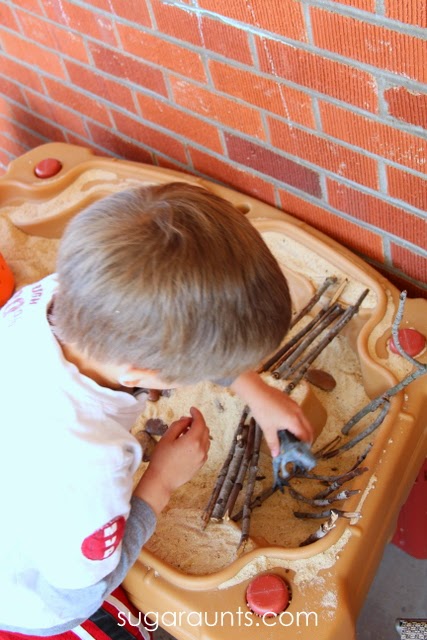
We LOVE our Sand and Water Table. We’ve used it in SO many water table activities. This one was thrown together in a matter of minutes since we still had sand in the water table at the time. Both sections of the water table were filled with sand and ready for a “S” themed play.
We started with a bin full of sand and went on a hunt through the yard for some nice sized sticks.
Some were a little too big and needed to be snapped to fit little hands. Little Guy liked to help with the snapping.
The old snapping the twigs over the knee trick was a huge hit and we had a pretty big pile of snapped twigs thanks to his handy work!
A couple of handfuls of river rock to the bin and we were ready for simple sensory bin play!
Imagination Play in a Sensory Bin
Sand, sticks, and stones made up an easy (SIMPLE) sensory bin ready for imagination and play. We built paths with the stones, bridges and huts with the sticks, and tunnels through the sand.
Little Guy made a few traps for bad guys.
…And had to add in his dinosaurs for more pretend play fun!
We had a blast with our first simple sensory bin. Here’s to hoping we get this series up and running with loads of new sensory bins for you to enjoy too! Looking for more sensory bin fun? Try one of these ideas:
Summer brings cookouts, backyard parties, swimming pools, and fireworks! We were in the mood for some summer fun and creating these fireworks painting art did the job. A little bit of sparkle made the artwork really pop. And what art isn’t better without a little glitter, right??
This post contains affiliate links for your convenience. Your purchases through these links help to support our blog. As always, thank you for your support!
Fireworks Artwork Craft
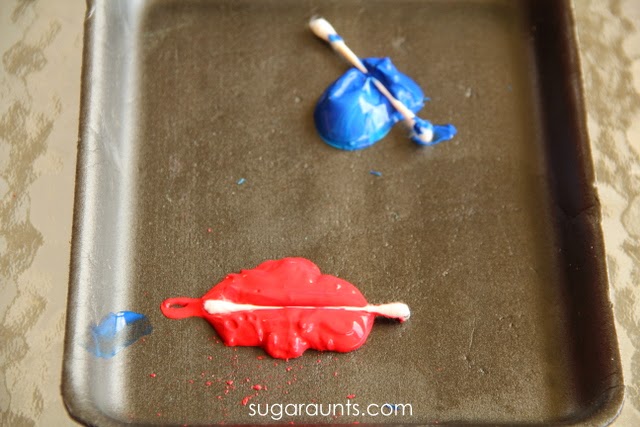
We started with blobs of red paint
and blue paint on a Styrofoam tray. Add a handful of cotton swabs
and we were ready to go.
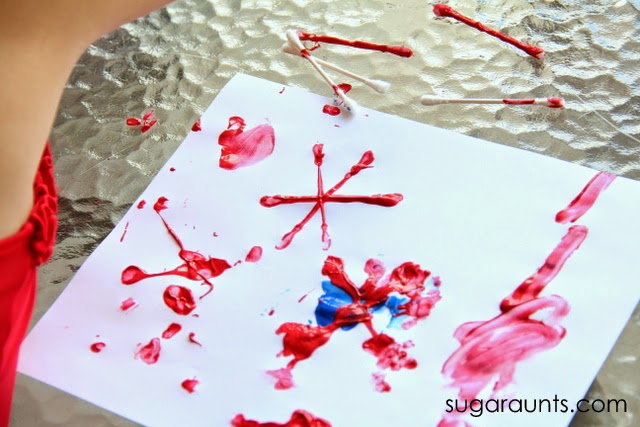
We used the cotton swabs to stamp the red and blue paint onto white paper into our fireworks shapes. Stamping the paint covered cotton swabs was a super messy and sensory painting experience. We mixed the colors for some of the fireworks to get a nice red and blue mixture into purple. This was a great time to talk about the colors and how they mix to make purple.
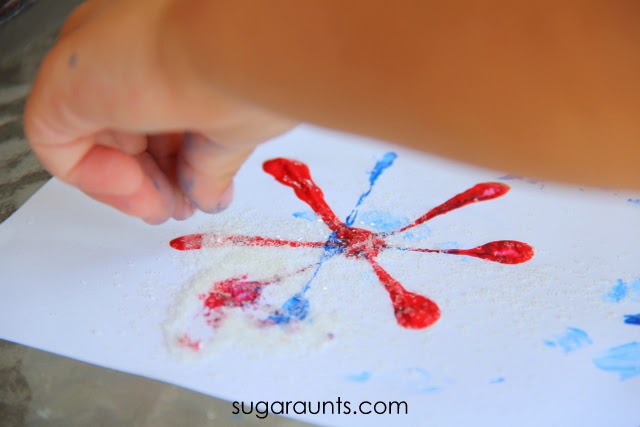
The fireworks painting needed a little something.
GLITTER!
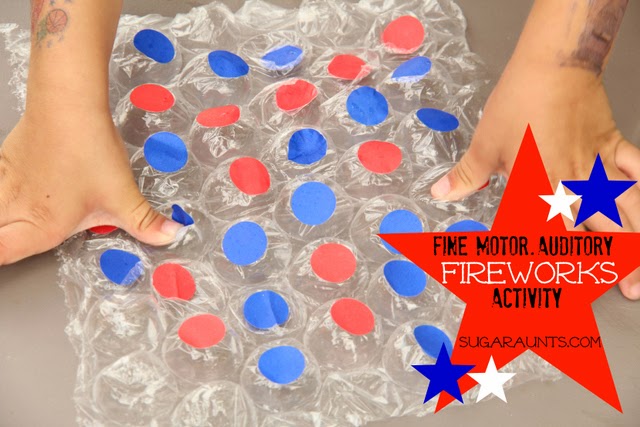
Fine Motor Fireworks Activity
We used clear glitter
and sprinkled it on while the paint was still wet. It stuck right onto the paint and made our fireworks really pop.
Pinching the glitter was such a good way to work on fine motor strength during a fun craft activity. Using the index, middle finger, and thumb to grab up the glitter and sprinkle it around is a great tripod grasp task. Using those three fingers to manipulate a material like glitter in a controlled manner strengthens the intrinsic muscles of the hand. Intrinsic muscles are those little muscles within the hand that are essential for controlled pencil manipulation and many other fine motor tasks.
This fireworks painting craft was just right for some easy sensory summer fun. Celebrate the season with fireworks art!
You may be interested in more patriotic crafts and activities. Try these:
We love sensory art and play activities at my house. We also love making our own DIY sensory play recipes for playtime and art. This Liquid Chalk recipe is just one of our favorite ones to make. It is cheap and easy and my kids love it. It can be a little messy but clean up is pretty easy. Liquid chalk is a fun way to spend time with the kids outside on a nice sunny day while engaging in some tactile sensory challenges.
These liquid chalks would be a great addition to a rubber duck painting activity too, and a great way for kids to explore tactile sense with creative art.
Liquid Chalk Recipe
I mixed up a batch of liquid chalk in a muffin tin. I placed it on a tray and sat it outside for the kids.
The kids had foam brushes to paint with. They painted the driveway and garage floor.
Liquid chalk is fun to explore sight and touch. Creating art on the concrete is a fun change from paper inside.
Painting outside like this gets the kids up and moving around too. I have so much fun painting with them, when they let me.
This day we wanted to mix it up with the typical chalk painting we usually do. I had seen a fun Fizzing Sidewalk Paint Recipe by Kids Activities Blog and had wanted to try it out. Today seemed like as good a day as any.
After the kids had painted a while, I brought out spray bottles with vinegar in them. I let the kids spray the chalk paint. We watched to see if it would fizz? A little added simple science too.
We got a little fizzing action but not a lot. They kids still had a blast spraying the vinegar on the ground either way. This was a hit at my house and we hope you can enjoy it too.
This is a guest post by Jaime at Frogs and Snails and Puppy Dog Tails. Jaime is an everyday stay at home mom. She has 3 boys ages 5 yr to 1 yr. Jaime loves to find fun activities, crafts, recipes…. for us to do together. When she is not washing clothes and chasing the boys around she enjoys sharing our activities and crafts on her blog.
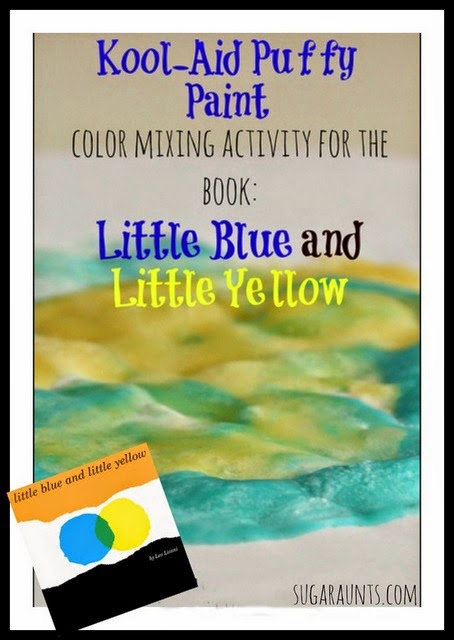
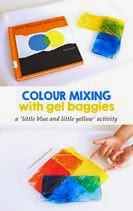
Check out this Little Blue and Little Yellow activity to work on color mixing and sensory play with a children’s book favorite! We whipped up a batch of Kool-Aid puffy paint for a sensory play experience that has a scented aspect. Kids will love this color mixing activity, and will be sure to remember it for years to come!
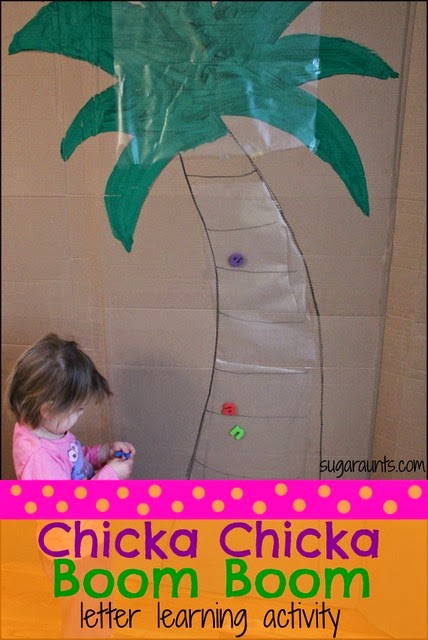
Last week’s Pete the Cat snack and our Chicka Chicka Boom Boom Letter Learning Activity have been a huge hits in our house. these are some of our most favorite and read (and re-read) books, so this preschool book club series has been a blast!
This week we’re loving another favorite book of ours with Little Blue and Little Yellow. We made Kool-Aid Puffy Paint to create our own version of color mixing to go along with the book. This was beyond cool and so much fun to create.
Little Blue and Little Yellow Painting activity
This post contains affiliate links.
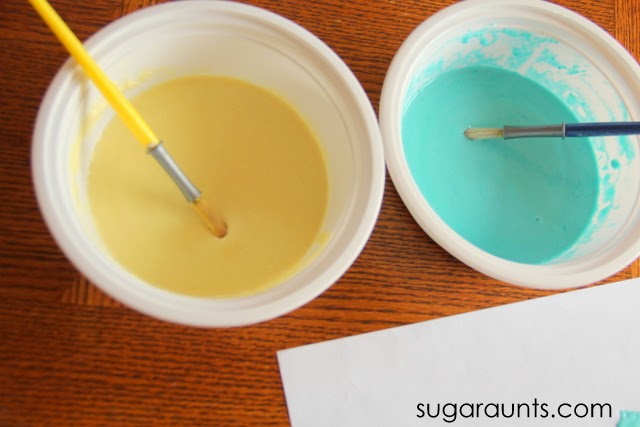
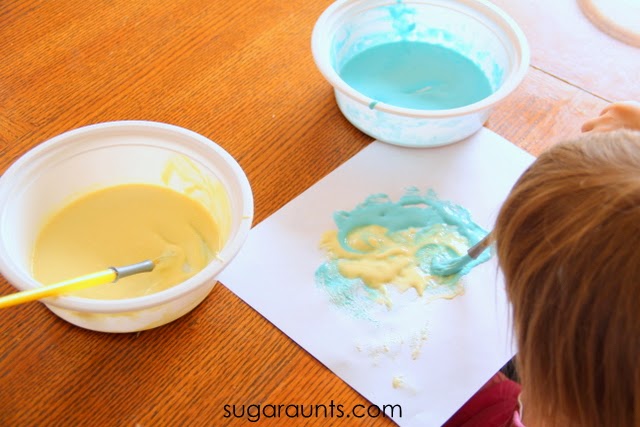
We LOVE the book Little Blue and Little Yellow, by Leo Lionni. When we saw this book on the series, I knew we had to do some color mixing. This Kool-Aid paint recipe smelled so good and the creating mixtures of blue and yellow was a ton of fun.
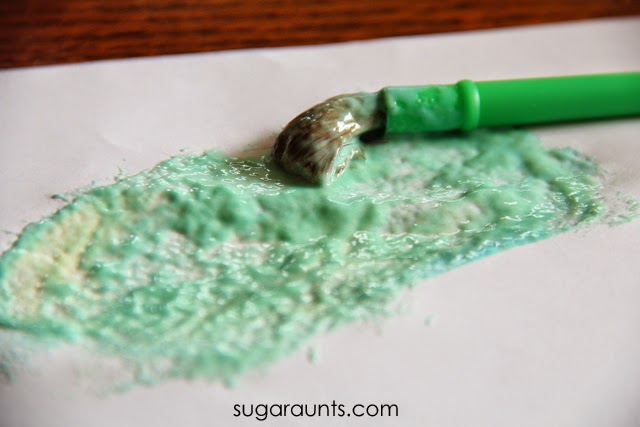
The YELLOW paint was the same recipe, only using a packet of lemonade flavored Kool-Aid. Mix the paints up until it’s a smooth consistency and painting is ready to begin!
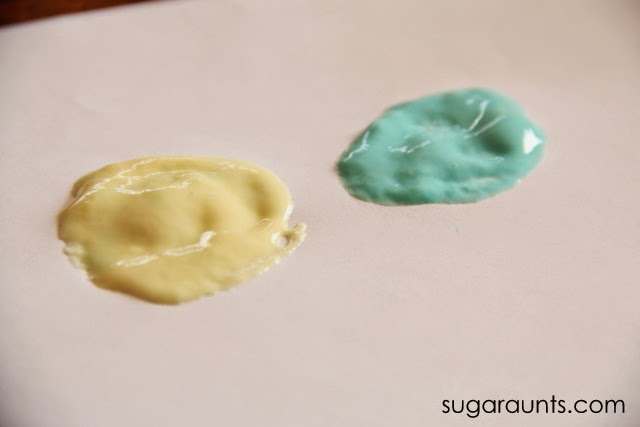
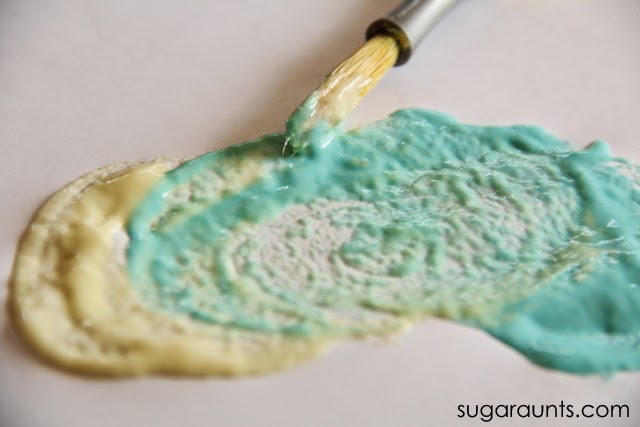
We made a little blue and a little yellow spot of paint and the kids guessed what color they thought we would get when they mixed. Little Guy liked to add little bits of color at a time just like in the book to mix into green.
These paints were very sensory! The texture and scent were such a fun painting experience.
The paints made a pretty green color.
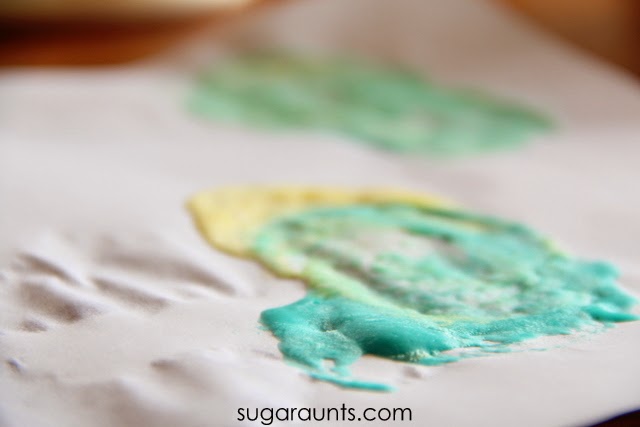
After we mixed a bit of the blue and yellow together, I put the paintings into the microwave for 30 seconds. These paints puffed right up. Your microwave oven may vary, so keep a close eye on this while the paints are cooking!
We had to do a bunch more of these. Baby Girl loves her painting activities!
These puffy paints were very fun. We painted for a while making puffy blue and yellow mixtures. And loved the scents!
Be sure to stop back next week for another Preschool Book and activity. For now, check out the other awesome ideas to go along with Little Blue and Little Yellow from our Preschool Book Club buddies:
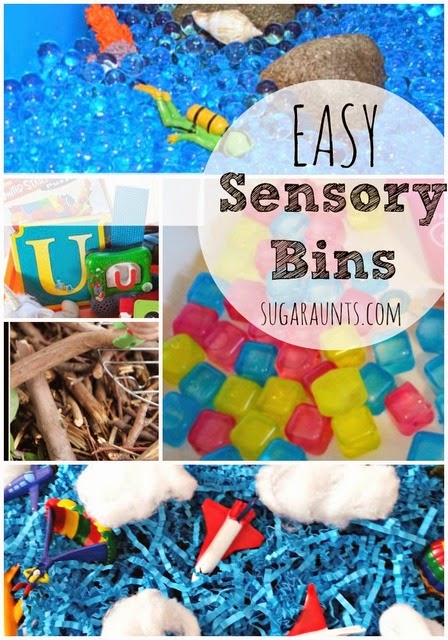
These easy sensory bins are inspiring ways to encourage creative play, movement, and skill building in kids. The features listed below are easy sensory bins for the kids to use to learn, explore, and play. So if you are looking to throw together a sensory bin or two, these are the ones for you…easy and fun!
Be sure to check out our blog post on sensory materials to add as a filler.
Sensory bins do not need to be complicated to gain all of the benefits of sensory play! A container, a sensory filler, and small items to manipulate are all you need.
You can create sensory bins for any season or holiday, like these Christmas sensory bins. There are so many ways to support skills with this versatile therapy tool!
Easy Sensory Bin ideas for kids
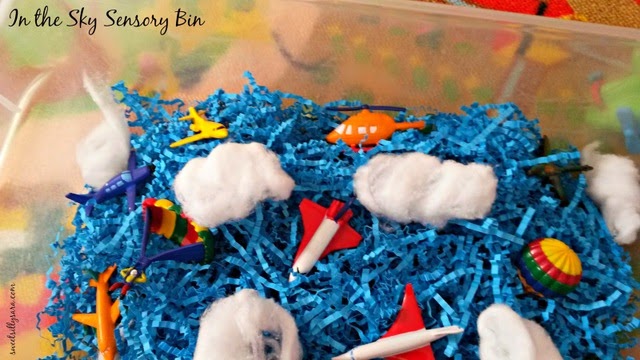
This In The Sky Sensory Bin from Sweet Silly Sara uses just a few materials and inspires imagination while encouraging exploration of textures.
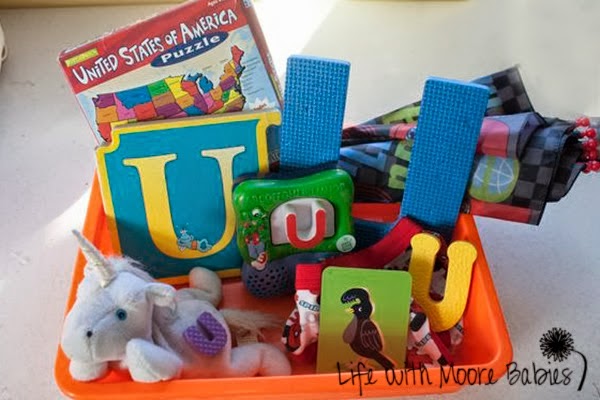
Looking for a learning sensory bin idea? This Letter themed sensory bin from Life With Moore Babies uses items from around the house. No need to purchase anything, just go on a letter hunt and fill a bin!
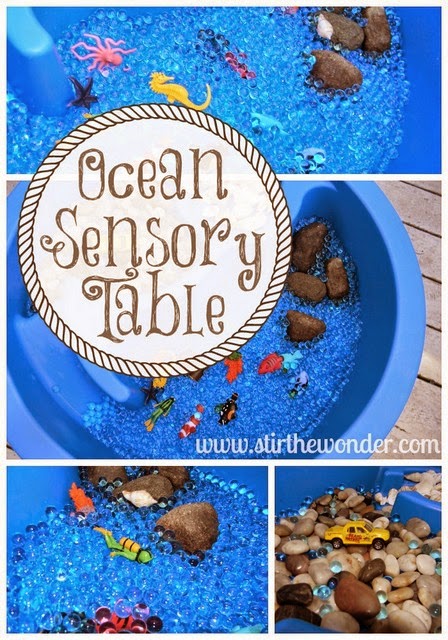
For an Ocean Sensory Bin, Stir The Wonder used a water table as a sensory bin, making play easy and fun.
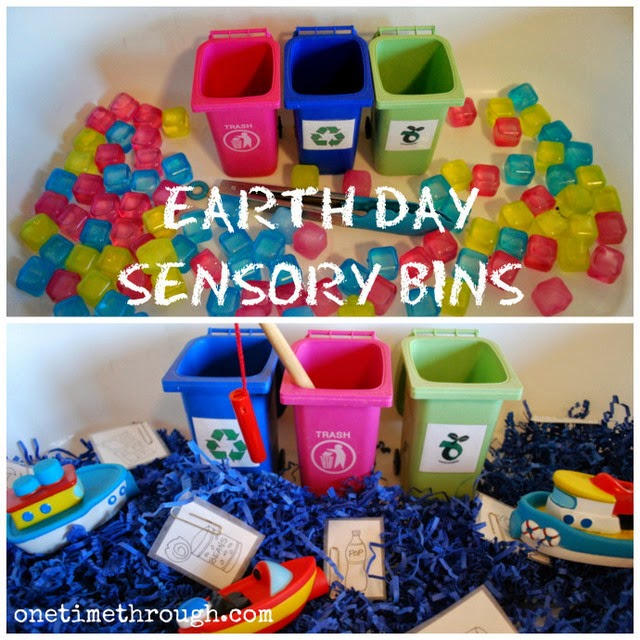
It is easy to encourage a little learning with this Math and Science Sensory Bins from One Time Through. Simple objects can allow for big learning of math, science, and more.
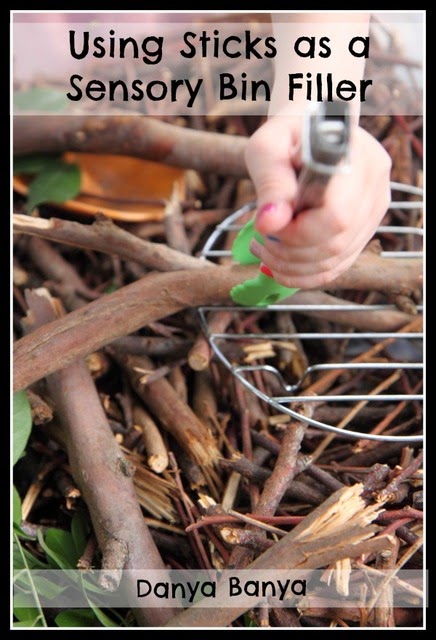
Nature inspired sensory bins are maybe the easiest way to explore textures and the great outdoors. This Sticks Sensory Bin hits the mark with fine motor play, imagination, and fun.
More easy sensory bin ideas:
These easy sensory bin ideas hit the mark when it comes to working on motor skills, sensory exploration, and creative play. Use the easy sensory bin ideas below to inspire development and movement using materials found around the home.
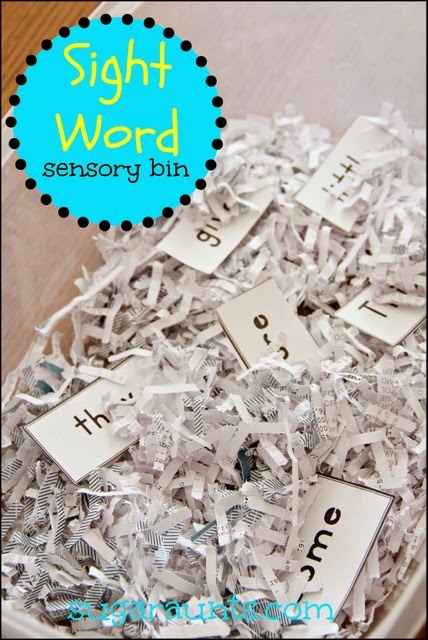
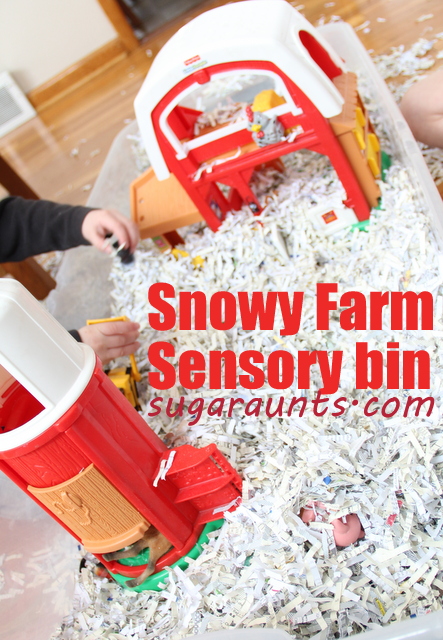
Sight Word Sensory Bin – Grab paper from the paper shredder and add some cut up paper pieces or flash cards. This sight word sensory bin is great for challenging tactile sensory input with all paper in a variety of textures. You can use numbers, letters, sight words, spelling words, or any other learning component with this paper sensory bin.
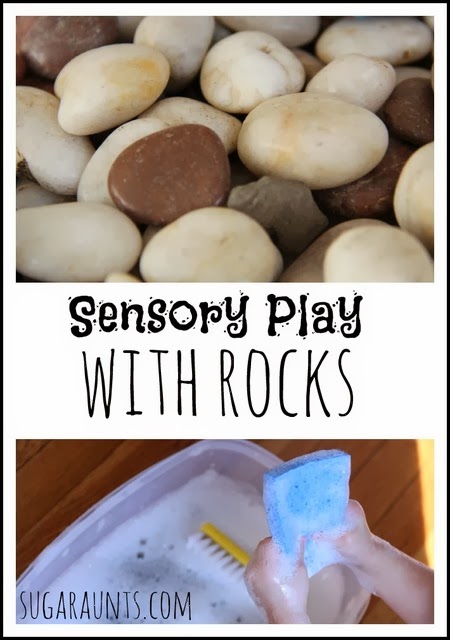
Rocks Sensory Play – Incorporate rocks from the garden or head to the dollar store and use craft rocks. This is a fun easy sensory bin to inspire tons of creative play, imagination, and communication or language building. Add small bug figures, play dough, or any small toy for fine motor work. The rocks offer heavy work, proprioception through the hands and fingers.
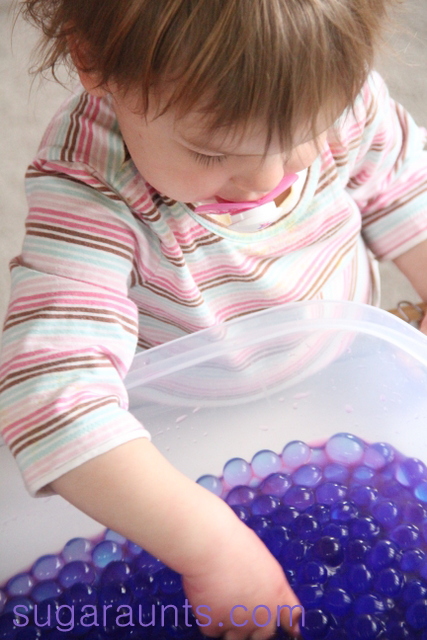
Calming Water Bead Sensory Bin – Have you used water beads? They are a fun tactile sensory play experience! Just add water and have fun with the senses.
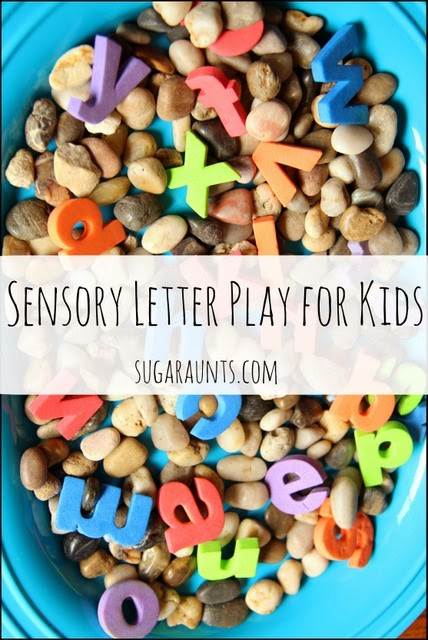
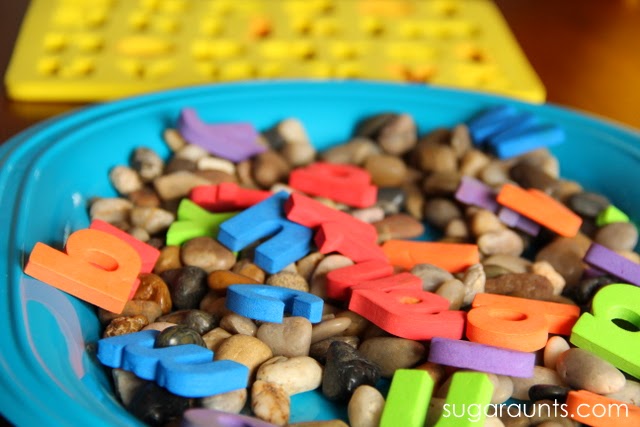
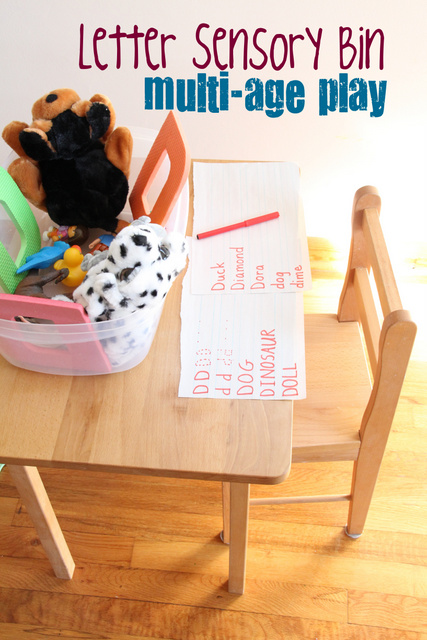
Sensory Letter Play for Kids – A foam letter puzzle from the dollar store is a great addition to sensory play and can be used in so many ways. Try these ideas to get you started.
Colleen Beck, OTR/L has been an occupational therapist since 2000, working in school-based, hand therapy, outpatient peds, EI, and SNF. Colleen created The OT Toolbox to inspire therapists, teachers, and parents with easy and fun tools to help children thrive. Read her story about going from an OT making $3/hour (after paying for kids’ childcare) to a full-time OT resource creator for millions of readers. Want to collaborate? Send an email to contact@theottoolbox.com.
This sensory letter activity is a totally easy way to play and explore senses while learning a little along the way.
Baby Girl and I get some one-on-one time while Little Guy is at school a few days a week. She is all about fun ideas and willing to go along with all of my crazy play ideas. We have so much fun together! We had fun with foam letters and an easy sensory bin one day and she’s been wanting to play with these things over and over again.
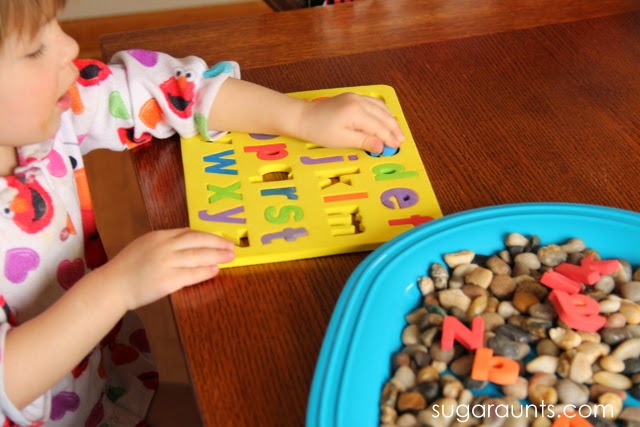
Sensory play activities are big in our house, but we try to make them easy, with simple set-up, and on the cheap. This sensory letter rock bin was no exception!
sensory letter activities
I started with a bag of pebbles you can find at your local dollar store. These guys are meant for vase filler, but make an excellent fine motor and sensory play item. We pulled out our foam letter puzzle and added the letters to the bunch. Time to play!
Don’t you want to get in there and play?
There are more ways to use these rocks in sensory letter activities.
Just punching those letters out was fun enough, but exploring the colors, letter names, and checking out the different rocks was an added bonus. Baby Girl likes to play with these little rocks and pick out her favorites. She has a few “cute little rocks” that are extra special.
We went through the bin and pulled the letters out and put them back into the puzzle one at a time. This was a fun way to play and learn…the easy way!
Note: As always, please use your judgment with any activity that you see on this blog. Activities like this one should be supervised. If your child tends to put items in their mouth, put this activity away and try again in a few months. Have a fun and safe time playing!
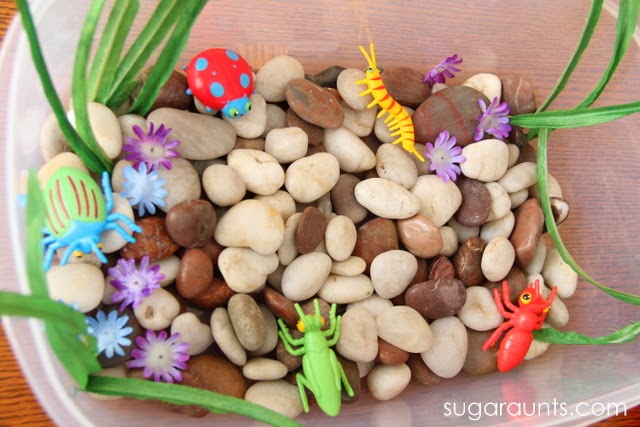
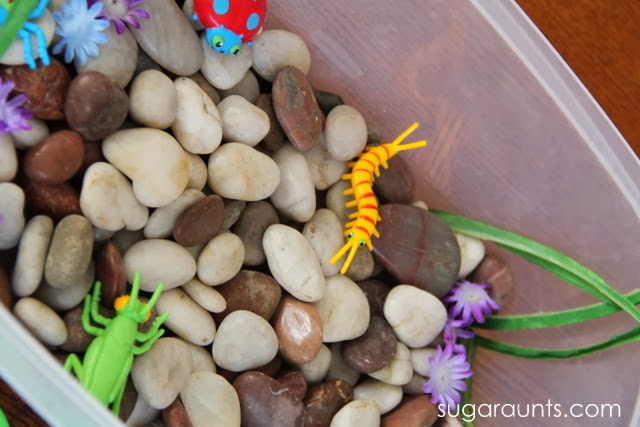
This bug small world is a rock sensory bin that builds fine motor skills through play. Let’s break down how we made this sensory bin activity.
Bug Sensory Bin
This is all about sensory bins! Each blogger is featuring a different sensory bin filler. So WHAT is a sensory bin filler you ask?? You know the stuff that makes up the base of the sensory bin. Sand, shredded paper, or any other textural item might be the base of your sensory bin and part of the sensory experience.
We decided to make our sensory bin with a rock filler. We filled a bin with rocks and added a bug small world for play and exploration. What fun!
Bug Sensory Bin
This bug sensory bin was a fun way to explore bugs and insects while developing fine motor skills.
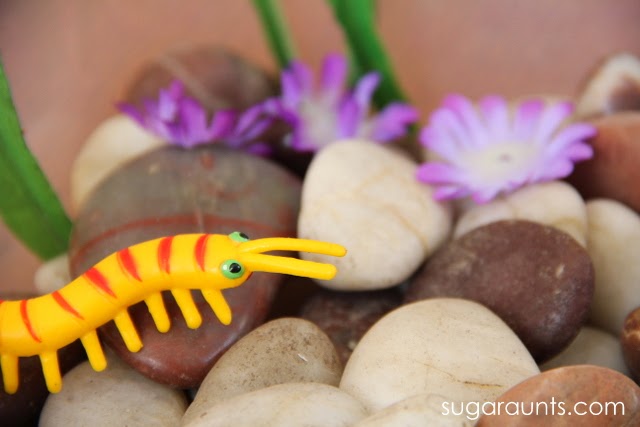
We started with a bin of river rock and added some touches to make a bug small world. These bugs, a few fake flowers, and strands of floral filler made a pretty fun small world.
We were ready to play!
These bugs are too cute and just right for some pretend play.
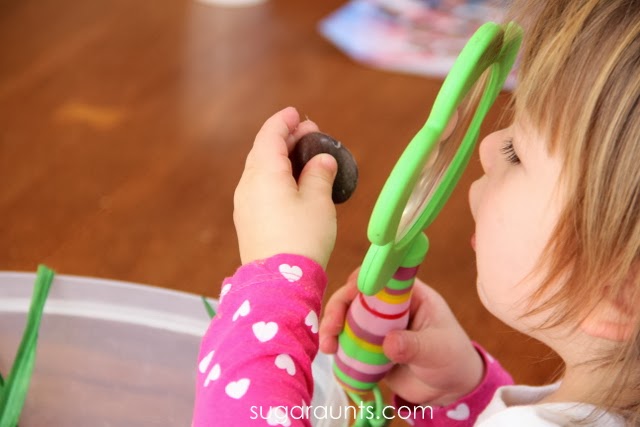
Baby Girl used a magnifying glass to examine the bugs. Love that squashed up nose!
We had a ton of fun pretending these little bugs were a family and building a house with rocks.
You’ve got to examine the rocks with the magnifying glass, of course.
Manipulating the rocks, bugs, and pieces to our sensory bin provided great fine motor play, language development, sensory exploration, and just plain fun!
Looking for more sensory ideas using rocks? Try some of these:


.jpg&container=blogger&gadget=a&rewriteMime=image%2F*)