Colleen Beck, OTR/L is a pediatric occupational therapist and the owner and author of The OT Toolbox website. She manages all of The OT Toolbox social media accounts and runs the popular newsletter.
Read about Colleen's experience and career as an occupational therapist, including how The OT Toolbox began on our About The OT Toolbox page: https://www.theottoolbox.com/about-us/
Colleen created The OT Toolbox in 2011 and since then has written thousands of blog posts designed to support therapy providers, educators, parents, counselors, admin, and caregivers in promoting the healthy development of kids.
Check out Colleen's blog posts below:
If you’ve got a little one who is a big fan of unicorns, than this Unicorn Yoga is a sure win. I’ve had this unicorn craft on the site for years and wanted to add a few other unicorn activities to go with the craft. That’s where these stretches and gross motor exercises come into play.
Unicorn Yoga
Just in time for Unicorn Day (yep, that’s actually a thing! Unicorn Day is on April 9th), these unicorn yoga exercises are a great addition to your therapy toolbox.
The exercises are a free slide deck that can be used in teletherapy, or as a brain break activity to incorporate into a functional sensory diet or self-regulation strategy.
Kids that love all things unicorns will find these unicorn yoga poses a fun way to incorporate their interests into a meaningful and motivating sensory and gross motor exercise.
In each slide deck, kids can follow along with the unicorn yoga pose to challenge core strength, stability, strengthening, motor planning, crossing midline.
Other benefits of yoga exercises for kids include:
Also included in this slide deck is a deep breathing activity. The unicorn image shows children how to take in deep breaths for the sensory and regulating benefits. Kids can use these deep breathing strategies while completing each unicorn yoga pose throughout the slide deck.
Unicorn Yoga Slide Deck
To incorporate these slides into your therapy practice, you’ll access the slides via the form below. Then, you can pull up the slide deck onto your Google drive. Go through each yoga pose with children in your virtual therapy sessions, at home, or in the classroom. Kids can copy the positioning with your verbal cues, and correct any body positioning, depending on spatial awareness and body awareness needs.
Parents, teachers, and therapists may want to follow along with the cute unicorns on each slide, too!
Want to add this free therapy slide deck to your toolbox? Enter your email address below and the exercises will be delivered to your inbox.
NOTE: Please consider using a personal email address rather than a work or school district email. Due to recent changes with network security measures, the email delivering the resource may be blocked by your work institution.
Colleen Beck, OTR/L has been an occupational therapist since 2000, working in school-based, hand therapy, outpatient peds, EI, and SNF. Colleen created The OT Toolbox to inspire therapists, teachers, and parents with easy and fun tools to help children thrive. Read her story about going from an OT making $3/hour (after paying for kids’ childcare) to a full-time OT resource creator for millions of readers. Want to collaborate? Send an email to contact@theottoolbox.com.
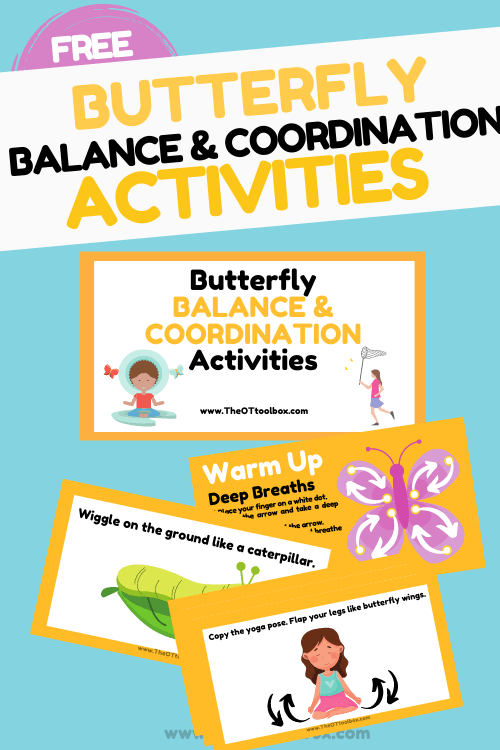
This week’s occupational therapy theme is all about the butterfly activities. And, these butterfly exercises help with coordination, motor panning, coordination, and add heavy work input. You’ll love the butterfly yoga activities that are fun, motivating, and engaging! Add these butterfly gross motor exercises to your Spring occupational therapy activities.
In this free slide deck, you’ll love the heavy work and gross motor coordination activities with a butterfly theme. Butterfly exercises get those kiddos moving and building coordination skills so they can move, play, and develop skills.
Butterfly exercises
Kids will love these gross motor exercises that challenge the following skills in kids:
Balance
Coordination
Motor planning
Crossing midline
Movement changes
Sequencing
When kids follow along with the visual images in the slides, they can work on planning out gross motor actions, crossing midline, and building core strength that helps with attention, following directions, and getting much needed proprioceptive and vestibular sensory input.
These are fantastic butterfly gross motor activities for preschool, Pre-K and grade-school kids as a brain break that builds gross motor skills.
Butterfly yoga
In the slide deck are butterfly yoga positions to challenge balance and build strength. These exercises use a variety of yoga positions with a butterfly theme. Some of the activities use the butterfly yoga pose and others have visual images of a butterfly net or other images to make the yoga exercises motivating and fun for kids.
Can they balance on one foot while pretending to catch a butterfly with their net?
Butterfly gross motor activities
You’ll also love the deep breathing exercise in the slide deck to encourage deep breathing. Try using this deep breathing exercise while doing the butterfly yoga!
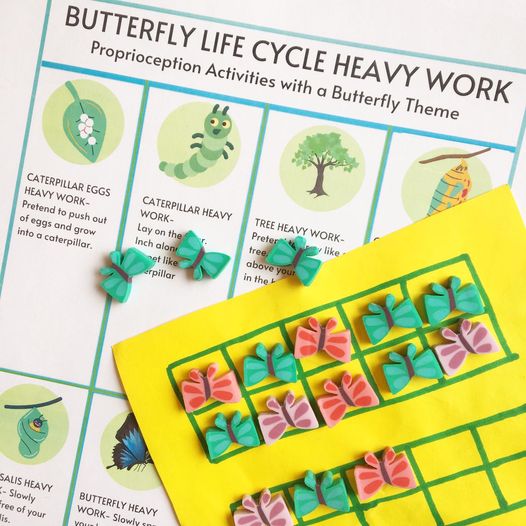
Use the butterfly life cycle heavy work activities in the Heavy Work Cards to work on calming proprioceptive input.
Butterfly Exercises Slide Deck
Want to add these butterfly yoga and butterfly exercises to your therapy toolbox? Enter your email address into the form below to access this slide deck.
Note that if you are using a school system’s email address, the PDF delivery may be blocked by your institution or workplace as a result of your system’s security measures. A personal email address may be better used.
Spring Fine Motor Kit
Score Fine Motor Tools and resources and help kids build the skills they need to thrive!
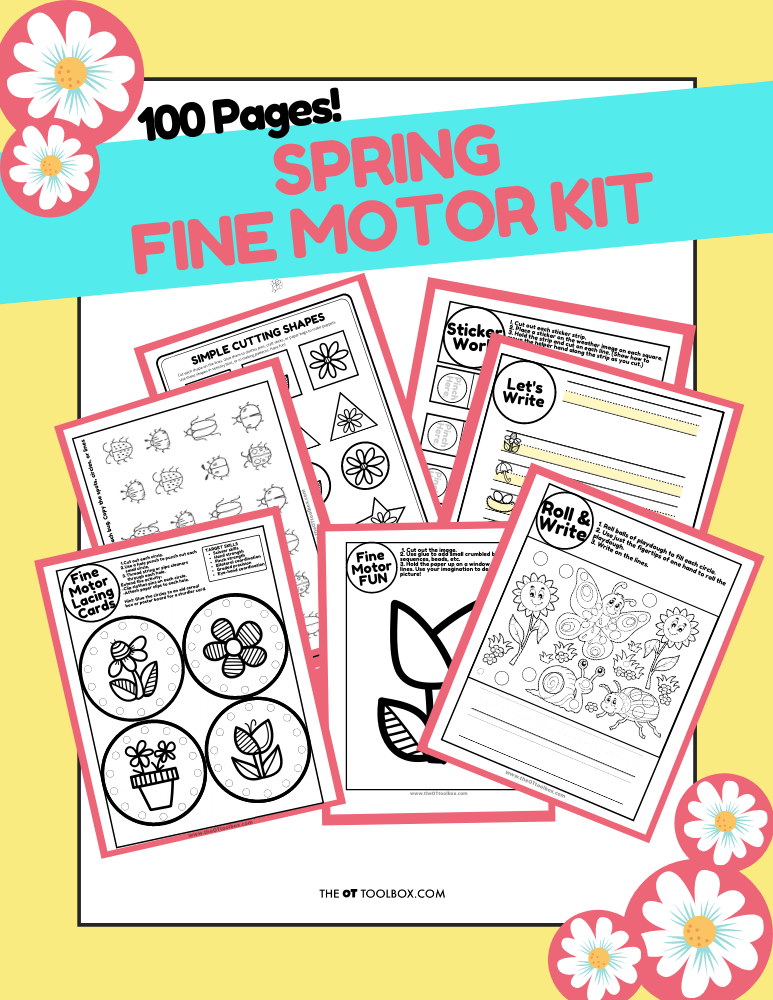
Developing hand strength, dexterity, dexterity, precision skills, and eye-hand coordination skills that kids need for holding and writing with a pencil, coloring, and manipulating small objects in every day task doesn’t need to be difficult. The Spring Fine Motor Kit includes 100 pages of fine motor activities, worksheets, crafts, and more:
Colleen Beck, OTR/L has been an occupational therapist since 2000, working in school-based, hand therapy, outpatient peds, EI, and SNF. Colleen created The OT Toolbox to inspire therapists, teachers, and parents with easy and fun tools to help children thrive. Read her story about going from an OT making $3/hour (after paying for kids’ childcare) to a full-time OT resource creator for millions of readers. Want to collaborate? Send an email to contact@theottoolbox.com.
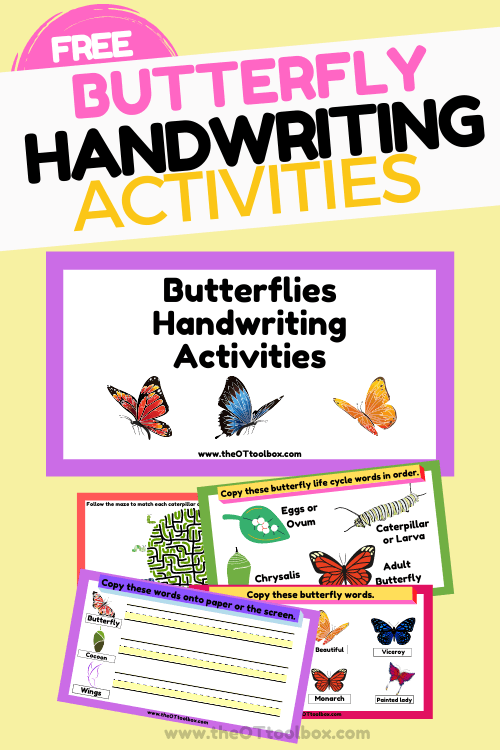
Today, I have another free slide deck activity that is great for Springtime, or anytime of year! These butterfly handwriting activities can help to foster handwriting practice with a butterfly theme. Or, use this free therapy slide deck to facilitate a therapy session while working on letter formation, copying skills, spatial awareness, and size awareness. Want to add this handwriting activity to your therapy toolbox? Let’s break down the butterfly themed activities in this virtual therapy activity. Add this activity to your Spring occupational therapy activities.
Butterfly handwriting activities
Working on handwriting with kids doesn’t need to be boring. When you help kids work on the visual perceptual skills associated with legible written work, students sometimes do well in the therapy session, but are challenged to carryover written work into their classroom handwriting tasks.
In this slide deck, I’ve created handwriting activities that use a butterfly theme to work on different aspects of handwriting.
In the slide deck, the activities start off with a butterfly maze to challenge visual perceptual skills, spatial awareness, eye-hand coordination, visual attention, and visual tracking.
All of these areas play a part in handwriting.
In the slide deck, students can click the caterpillar images and drag them through the tree maze in order to match the identical caterpillars.
Butterfly Writing Activities
In the next slides in the deck, you’ll see various butterfly writing tasks. There are slides designed to copy longer words and shorter words to challenge copying skills.
Encourage users to break apart parts of the words such as spelling butterfly by the word’s syllables. Kids can then copy each section of the word and work on copying accuracy.
Other butterfly words to copy include:
Caterpillar
Monach
Painted Lady
Viceroy
Beautiful
Cocoon
These words are presented with lined paper for writing the butterfly words, and in a simple copying activity.
To extend this handwriting exercise, you could ask some students to write sentences and others to simply copy the butterfly terms.
Butterfly Writing Task
Included in this therapy slide deck is also a blank slide. Use this as an open-ended activity to work on skills for each individual’s specific needs. Try some of these butterfly writing tasks with this part of the session:
Ask students how to spell butterfly.
Break the word butterfly apart into smaller words
Rearrange the letters in butterfly to spell different words
Work on forming the specific letters of the word butterfly (work on letter b reversals and diagonal letters)
Work on visual memory to write out the words in a butterfly life cycle.
Draw a Butterfly
The next section of the therapy activities include butterfly drawing activities. Kids can copy the simple and complex forms to copy each butterfly drawing.
This can be a fun way to end a therapy session while working on visual motor skills needed to copy the butterfly forms.
There are so many ways to use this slide deck in therapy sessions!
Use the butterfly life cycle heavy work activities in the Heavy Work Cards to work on calming proprioceptive input.
Free butterfly therapy slide deck
Want to add these butterfly handwriting activities to your therapy tools? Enter your email address into the form below and you’ll receive this full slide deck to implement into therapy sessions.
Spring Fine Motor Kit
Score Fine Motor Tools and resources and help kids build the skills they need to thrive!
Developing hand strength, dexterity, dexterity, precision skills, and eye-hand coordination skills that kids need for holding and writing with a pencil, coloring, and manipulating small objects in every day task doesn’t need to be difficult. The Spring Fine Motor Kit includes 100 pages of fine motor activities, worksheets, crafts, and more:
Colleen Beck, OTR/L has been an occupational therapist since 2000, working in school-based, hand therapy, outpatient peds, EI, and SNF. Colleen created The OT Toolbox to inspire therapists, teachers, and parents with easy and fun tools to help children thrive. Read her story about going from an OT making $3/hour (after paying for kids’ childcare) to a full-time OT resource creator for millions of readers. Want to collaborate? Send an email to contact@theottoolbox.com.
This slide deck activity goes really well with these hands-on butterfly crafts and activities:
Here, we’ll discuss the specific considerations for sensory issues with clothes. You’ll also find intervention strategies to support children with clothing sensitivities. The thing is that sensory processing issues for children can be highly complex and sometimes puzzling to those who do not have these difficulties. We see children that refuse to wear socks or shoes. Or we see children who will not put on pants in the dead of winter. Other kids can’t tolerate the seams of shorts or the fasteners of bras. How do you support individuals with sensory sensitivities? Let’s talk about strategies to address clothing sensitivities.
This post addresses and discusses considerations and a few possible solutions for clothing sensitivities to provide insight and areas to investigate in order to provide a child with the best possible sensory experiences with dressing and clothing as possible. The considerations are not all encompassing, but do provide valuable information in pursuit of understanding the possible reasons for clothing sensitivities for a child.
Sensory issues with clothes
Sensory issues with clothes and other sensory challenges can interfere with school, community, and home life for children who struggle with sensory processing on a daily, hourly, or even minute by minute basis. Sensory issues can be random, sporadic and happen one time, but not another despite similarities in circumstances.
A child can also have sensory sensitivities and not be diagnosed with a disorder per se, but even sensitivities have a real impact on daily functioning. Check out these clothing red flags for common sensory issues that come up again and again.
A common sensory issue reported by parents are their child’s clothing sensitivities. This involves more than the child who always wants to wear the same shirt because it has their favorite logo on it or it is their favorite color as this is more about style preference. It’s dealing more with a child who has real issues donning clothing and refuses to wear an article of clothing based on the way it feels causing the child to cry and scream and not be able to proceed with the task of dressing.
Using certain clothing preferences to address clothing sensitivities include sensory friendly clothing options.
All of us have separate sensory systems that help us register, discriminate, and process sensory input. When there is a clothing sensitivity, this is dealing with the tactile (touch) sense and how the information from that sense is sending information to our brain to process. These may show up as tactile defensiveness in some.
We have fabrics we like as they are cozy and provide us comfort and we have fabrics that are scratchy and prickly causing anxiety and keeping us on edge not allowing us to focus on much of anything else other than getting it off. Some individuals with serious sensory issues register this input as harmful and even dangerous making them want to flee or do anything to get that feeling away from them. An important thing to remember is never force a child to don something that they perceive as painful or harmful. A child’s dramatic responses, such as mentioned above, can make home life chaotic and frustrating.
Stating the obvious, dressing is a necessary part of daily living and clothing is required for a child to engage in school and community life and it helps for clothing to be worn at home even though it is not completely necessary there. With some children who do have intense clothing sensitivities, they find their home is a free place to go without clothes.
If you are a parent, these considerations can help you investigate and pinpoint the possible problem with clothing or dressing for your child. These considerations can give you valuable information to either share with your child’s OT practitioner or to pursue an assessment with an occupational therapist. Occupational therapy practitioners can provide interventions specifically directed for your child and their needs as every child is different and requires a skilled set of eyes with knowledge of your child and their needs to provide the best possible interventions and opportunity for your child’s successful daily life engagement.
Sometimes considering simple clothing anatomy for sensory sensitivities can be a good place to start, but there are other areas of clothing and the tactile (touch) sense that need to be explored a little more directly. We’ll look at both in this post.
Related: Sensory issues that impact fine motor skills can make fastening buttons and zippers a difficulty for many children.
Sensory issues with Pants
Consider: length of shirt sleeves and pant legs. The feeling of pant legs and sleeves can cause aggravation to the child’s extremities. Maybe the sounds of fabric while walking such as when wearing denim or corduroy or even the feeling of the leg fabric rubbing together while walking is enough to irritate.
Consider: elastic waistbands vs. zippered and buttoned pants as they may work better for the child. Elastic can provide more flexibility and comfort for some children. Does the waistband roll down or bunch up or are there hidden adjustable waist band apparatuses? Adjustable apparatuses can be cut out by an adult if necessary.
Consider: if there are tags or buttons sewn into the seam of pants of shorts. A tag at the back of pants can cause irritation. These can be removed by cutting out or purchase tag-free clothing.
Consider: certain textures may be more irritating to the skin or even possibly pulling arm or leg hair. If older, shaving legs can help. If the texture feel is the difficulty, purchase clothing with more soft and natural materials.
Sensory issues with shirts
Consider: The length of shirt sleeves. The feeling of sleeves can cause a tight sensation in the arm pits or around the neck, elbows, or wrists, causing aggravation to the child’s extremities. Clothing can feel too tight in the trunk.
Consider: length of shirt tails as they can be drafty if short, especially when sitting.
Consider: if the clothes are too tight or too loose. Do they sway or shift when they move? Does the fabric bunch up in the arm pits or at the wrists from being too big? Purchase clothing with the fit that is preferred for size and pressure, maybe they like tight vs. loose.
Consider: graphics on shirts and get one-dimensional graphics if necessary therefore no sequins, gems, puffy pieces, etc. are impacting the child.
Consider: if the seams in clothing are large or thick with too much fabric inside the clothing causing discomfort. Check this before you purchase clothing items. Purchase seamless clothing or turn clothing inside out as appropriate.
Consider: the pulling of hair as a shirt is pulled over the head or being too tight of a neck hole causing irritation. Purchase button up shirts vs. overhead shirts.
Consider: some clothes may be more uncomfortable to wear due to the feel of waistbands, cuffs, or collars. Explore if they are too tight, too loose, ribbed or simply hemmed. Maybe a certain type is preferred over another. Purchase no collared clothing or lightly hemmed cuffs vs snug-fitting, ribbed cuffs.
General Sensory Considerations with Clothing
Sensory issues with clothes can look different for every individual. But, there are some common similarities that make helping those with clothing sensitivities more comfortable and functional. Try these general considerations:
Consider: some clothing may be hotter or even colder to wear.
Consider: how clothes fit and adhere to the body when sitting vs. standing. Also, check regarding static cling in different seasons and purchase cling free dryer sheets to help when drying clothes.
Consider: layers of clothing to keep warm rather than wearing a jacket.
Consider: the smell of the clothing. Is the smell of the detergent, fabric softener or dryer sheet too strong for the child to tolerate? Purchase odorless detergent, softener or dryer sheets.
Consider: the color of the article of clothing, if they’ve had a bad experience with a certain color, it could be recalled for every article of clothing that color.
Sensory Socks and Shoes
Issues with wearing socks or shoes is a common concern for those with sensory challenges.
Consider: checking sock seams and the position on the toes. How do the socks fit? Are they a good size, too tight, too loose, too short, or too long? Have the socks stretched and become ill-fitting? Purchase seamless socks or wear them inside out.
Consider: if socks are smooth or have fuzz ball lent on them. Are they nylon or cotton fabric, thick or thin? Purchase socks that do not gather fuzz balls as they are washed.
Consider: if toe nails are scrapping the fabric when donning. Do the shoes “eat” the socks when walking causing them to ball up under the heel? Cut the toe nails and purchase socks that do not get pulled under the heel.
Consider: shoe comfort such as width, size, and how high the backs are. Are the shoes too tight or too loose? Purchase shoes that have an open heel.
Consider: if the tongue is twisted or shifted. Is there anything inside that could be poking or irritating the foot? Make sure to put laces through the slots on shoe tongues to keep them straight, if this is part of the shoe design.
Understand that shoes fit and feel different with and without socks and even with thick or thin socks.
Sensory Issues and Underwear
Consider: the seams in the underwear, especially in the crotch. Are the genitals comfortable? Purchase underwear without seams or fewer seams.
Consider: if they fit too loose or too tight. Maybe they prefer more tightness like boxer briefs or maybe they prefer more looseness like regular briefs. Is the waistband too high, too low, too tight or too loose on the stomach? Is the hip design too high or too low?
Consider: if they bunch up when pants or shorts are donned. Does the underwear ride the groove between the buttocks when walking or moving? Do they harbor hygiene odors?
Consider: if the child has thigh sensitivity and underwear is possibly pulling leg hair such as with boxer briefs.
Sensory Issues and Bras
Sensory issues in teens can show up in different ways than the younger years. Some considerations include the need for a bra. For kids that previously have struggled with tight or scratchy sensations with clothing, wearing a bra can be difficult. Here are some things to consider:
Consider: the fit of the bra. Is it too tight and causing discomfort from the straps, rings/sliders, under band, or underwire as evidenced by skin markings and redness? Purchase bralettes or bras that do not have these features. Maybe an athletic bra would be better.
Consider: if they are sensitive to the feel of the hook closures against the back when leaning on a surface. Do the straps brush the arm as they slide off of the shoulder causing some irritation? Does the fabric feel uncomfortable such as with lace that tends to be scratchy?
Sensory Pajamas
Sleepwear can cause a lot of issues for some children. Pajamas can be tight and compressing, which can benefit other children who prefer and benefit from compression garments. Others, however, can feel too much pressure that impacts sleep. Here are some things to consider about sensory issues and pajamas.
Consider: the fit of sleepwear. Is it too tight, too loose, too hot, too cold, too scratchy, or too silky? Is the texture of the material such as fleece, silk, nylon, cotton, spandex, etc. cause irritation or does the sound of it against the bed sheets cause sensitivity?
Consider: if wearing p.j. bottoms, do the legs of the pants ride up the leg while moving in bed causing bunching and sensitivity? Do the shirt sleeves shift up the arm when sleeping making them uncomfortable causing bunching and creases that rub or mark the skin?
Consider: if buttons cause discomfort when lying on the stomach. Do collars or tags irritate? Do ribbed cuffs or seams cause irritation?
Investigate the fabric and other issues of the bed sheets and covers. Explore the sounds, feel, temperature, fuzz balls on the fabric due to washing, smell of detergent, softener, dryer sheets, static cling, etc.
There are many ways to address these sensory sensitivities. Sometimes any number of the above solutions can help. Allowing a child to shop for their own clothing and make their own choices while acknowledging and respecting their desire and need for certain tolerated textures can help with sensory issues.
But for those with more intense sensitivities the best bet for success is looking at a sensory diet tailored to their direct needs. If you are a parent, contact an occupational therapist for assistance. They are available to assess, treat, and consult regarding your child’s specific sensory needs. Often times, sensory sensitivities can be significantly reduced or even completely eliminated with proper treatment.
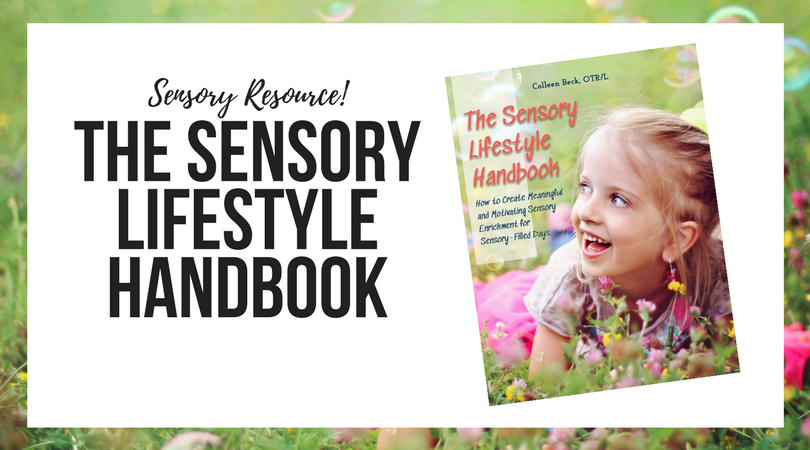
In the Sensory Lifestyle Handbook, we cover various options to address sensory issues in children and teens. You’ll find in this comprehensive resource, strategies to implement a motivating and meaningful sensory diet that is integrated right into day-to-day activities and tasks in order to create a lifestyle of sensory solutions.
How to support children with clothing sensitivities
If you are an occupational therapy practitioner, below are some activities or intervention ideas which can help support a child with their tactile sensitivities. Be sure to go through the considerations listed above to investigate where clothing sensitivities are stemming from in regards to specific clothing. This step can help with finding clothing styles and types that meet the needs of the individual child.
1. Explore a variety of fabrics on the skin by using fabric swatches – increase time as tolerated.
2. Desensitize skin with lotion rubbing prior to donning clothing.
3. Use whole body deep pressure activities.
4. Present a variety of textured materials by dressing a doll with various textured clothes.
6. Massage with a towel vigorously prior to introducing new textures.
7. Rub feet with lotion or towel prior to donning socks or shoes.
8. Provide textured material exploration with sensory bins
9. Provide textured floor mats for feet.
10. Explore textures using stuffed animals of different textures.
11. Suggest tight-fitting swim or biking shirt or shorts, spandex clothing or workout attire under clothes.
12. Use vibration to the extremities and back/neck as tolerated even allowing child to do this – sometimes the child will choose to do this themselves.
13. Use firm pressure activities such as rolling a therapy ball up and down the body (avoid the face).
14. Use a squeeze machine or body sock.
15. Roll child up in a bedsheet (not the face) like a taco.
16. Use firm pressure to the top of the head or up and down the arms/legs.
17. Give hugs.
18. Rub lotion on body prior to dressing as dry skin can be more easily irritated than moist skin.
Utilize the motivating strategies in the Sensory Lifestyle Handbook to integrate a sensory diet right into the daily life activities of each child, in a way that works for the whole family.
Regina Parsons-Allen is a school-based certified occupational therapy assistant. She has a pediatrics practice area of emphasis from the NBCOT. She graduated from the OTA program at Caldwell Community College and Technical Institute in Hudson, North Carolina with an A.A.S degree in occupational therapy assistant. She has been practicing occupational therapy in the same school district for 20 years. She loves her children, husband, OT, working with children and teaching Sunday school. She is passionate about engaging, empowering, and enabling children to reach their maximum potential in ALL of their occupations as well assuring them that God loves them!
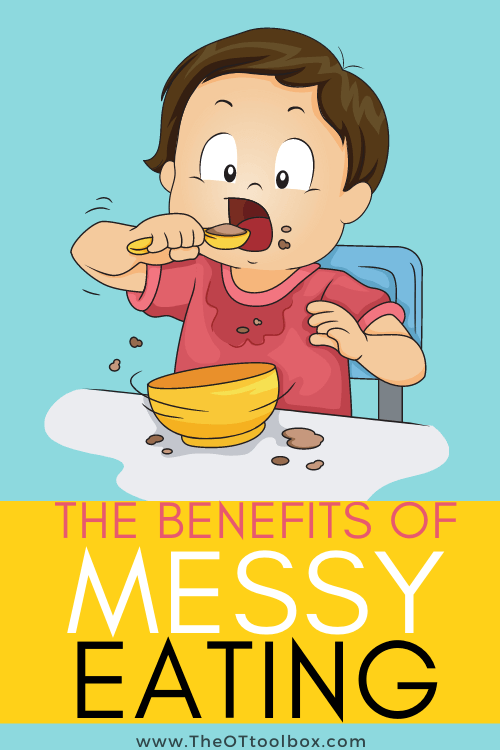
Have you ever noticed that small children eat meals with recklessness? Bits of food covers the face, cheeks, hands, lap, floor, belly, and even hair. Part of it is learning to use utensils and manage food on the fork or spoon. But there’s more to messy eating too! Messy eating for a baby or toddler is actually a good thing, and completely normal part of child development. And, letting a small child get messy when they eat, and even playing with their food as they eat is OK!
Messy eating
I’m sure that your mother never told you it was okay to play with your food at the dinner table, but I’m here to tell you otherwise. Playing with food is not only okay, it is vital to development of self feeding skills and positive engagement with food. When young children play with their food they are engaging in a rich, exploratory sensory experience that helps them develop knowledge of texture, taste, smell, changing visual presentation of foods and oral motor development.
When solid foods are introduced to baby, it is often a VERY messy ordeal. There is food on the chair, the bib, the floor, you…everywhere but the baby’s mouth. Often times, parents may feel discouraged or don’t like the mess that is the result, but it is OK. In fact, the messier the better.
Exploring food textures with the hands provides tactile experience to the hands, palm, and individual fingers. Are foods sticky, chunky, goopy, or gooey? All of that exposure to the hands is filed away as exposure to textures.
Picking up and manipulating foods offers fine motor benefits, too. Picking up and manipulating bits of food offers repetition in pincer grasp, graded precision, grasp and release, eye-hand coordination, bilateral coordination, crossing midline, and proprioceptive feedback. All of this is likely presented in a baby seat or high chair that offers support and stability through the trunk and core. When that support is offered to babies and toddlers, they can then work on the distal coordination and dexterity. At first, manipulation of food is very messy as those refined skills are developed, but it’s all “on-the-job training” with tasty benefits!
Research shows that a child moves through a series of exploratory steps before successfully eating new foods. This process involves messy play from the hands, up the arms, onto the head and then into the mouth. The steps of this process cannot happen unless the child is encouraged to touch, examine and play with their food. In today’s culture of sterilization and cleanliness, this often counterintuitive to parents and a hard pattern to break.
Promoting Play with Food
Mealtimes can be rushed affairs, making it hard to play with food, but they are not the only times we engage with food throughout the day.
Cooking and meal prep are two of the most common opportunities for play and engagement with food. These activities present perfect opportunities for parents to talk about color, size, shape, texture, smell and taste of the foods that are being prepared. Use of descriptive words, over exaggeration when talking about and tasting foods, along exploration opportunities develop a positive interest in foods.
Babies can be involved in kitchen prep as they play with appropriate utensils and kitchen items like baby-safe bowls or pots. Toddlers enjoy being involved in the food preparations and can wash, prep, and even chop soft foods with toddler-safe kitchen tools.
Explore these cooking with kids recipes to get small children involved in all the benefits of the kitchen.
Here are more baby play ideas that promote development.
Food Art
Free play with foods like yogurt, jello and applesauce are also great opportunities to promote messy play and creativity. Utilize these foods for finger painting, or painting with other foods as the brushes. This activity challenges tactile and smell regulation, along with constant changes in the visual presentation of the food.
Creativity with Food
When presented with food for free play, or at the dinner table encourage their creativity–carrot sticks become cars or paint brushes, and raisins become ants on a log.
The sillier the presentation, and more engaged the child becomes, the more likely they are to eat the foods you have presented to them. Especially, if these foods are new, or are non-preferred foods. High levels of over exaggeration also leads to increased positive experiences with foods, which in turn leads to happier eaters, and less stressful mealtimes down the road.
Ideas like these flower snacks promote healthy eating and can prompt a child to explore new textures or tastes in a fun, themed creative food set-up.
Messy Eating and Oral Motor Development
Not only does play promote increased sensory regulation and positive engagement with foods, it also promotes oral motor skill development. Oral motor skill development is promoted when a variety of foods are presented and the mastered skills are challenged.
Foods that are long and stick like such as carrots, celery and bell peppers, promote integration of the gag reflex, along with development of the transverse tongue reflex that later supports tongue lateralization for bolus management.
Foods such as peas, or grapes promote oral awareness and regulation for foods that “pop” when bitten, and abilities to manage multiple textures at one time.
Messy Eating and Positive Mealtimes
Whether you have a picky eater, or are just trying to make mealtimes fun, play is the way to go!
Play with food is critical to development of oral motor skills and sensory regulation needed to support positive meal times. Through the use of creative play, exposure, and over exaggeration these milestones can be achieved.
Although the goal is for your child to eat new foods there are many steps we need to conquer before getting there. Don’t worry, these can be fun and stress free!
Let me ask you a question. If you were presented with a new food, something so new and anxiety provoking that you don’t want it near you and you definitely don’t want to touch it; do you think you would want it anywhere near your mouth? About in your mouth? Even more, how about swallowing it? The answer for most would be NO WAY!
Well, we can’t expect the same from our kids. If they don’t want to look at or touch a food, they most definitely will not want to eat it! So before getting kids to put new foods near or in their mouth, we need to take several steps back and learn how to interact with it. This is where the fun can come in!
This week we are going to experiment with various ways of play or interacting with foods. Remember, the goal in not to eat it. The goal is simply to interact with it and hopefully to start getting messy with it! Let’s kid you child comfortable with touching food and have fun doing it. This will not only get them a few steps closer to eating it, but it will also build positive associations with the food and also make them more comfortable with various aspects of it. This can include the color, texture, shape, smell, etc. The more foods we play with, the more of these they are feeling comfortable with. So in short, let’s start our food journey with our hands and our eyes by getting messy!
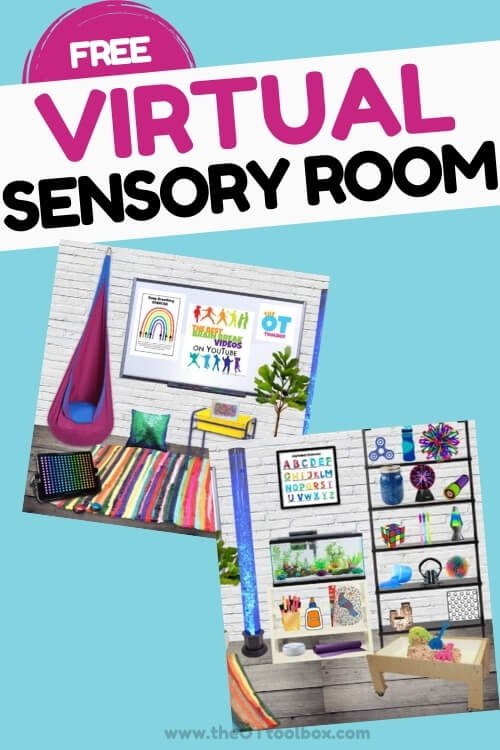
This virtual sensory room has been on my “to-do” list for a while. It’s a free slide deck that adds all the benefits of a calming sensory space in an online version. You can use this free virtual calming room as a sensory tool in teletherapy sessions, in the home, and in face-to-face classroom or therapy sessions. Let’s take a look at this virtual sensory room space and all of the calming tools it includes.
Virtual Sensory Room
Adding sensory diet tools to an online platform isn’t always an easy concept. Especially in a virtual space, the calming benefits of a sensory room can be difficult to integrate the senses of proprioception, vestibular input, and oral motor sensory input.
Many of the free online sensory videos out there are mindfulness videos, virtual lava lamps, and auditory videos like waves or rainforest sounds. But the virtual sensory spaces sometimes omit calming heavy work input and proprioceptive feedback that offer the calming and self-regulatory benefits of heavy work.
That’s why I wanted to create this virtual calming room.
Virtual Calming Room
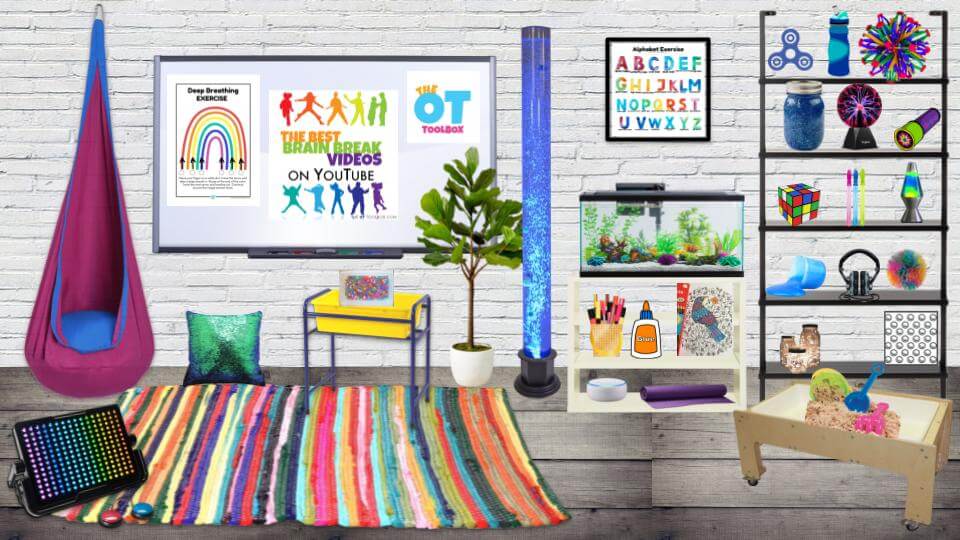
In this virtual calming room, you’ll find the following sensory items that kids can click on and access videos:
Fidget Spinner
Water bottle
Hoberman breathing sphere
Sensory jar
Plasma globe
Kaledescope
Rubic cube
Bubble wands
Lava lamp
Slime
Calming sounds headphones
Koosh Ball
Glitter jars
Fish tank visual
Online relaxing coloring activities
Sound machine
Yoga mat
Kinetic Sand Bin
Bubble wrap popping activity
Heavy work exercises
Light tube
Nature grounding exercises
Waterbeads sensory bin
Brain breaks
Deep breathing exercises
Sequin pillow
Light tube
Kids crafts
When you click on the sensory objects in the sensory room, you’ll be directed to different online sensory tools. These include:
Guided meditation videos
Slime videos
Yoga exercises
Calming sounds videos
Deep breathing exercises
Craft ideas to involve the hands in fine motor resistive work
Grounding exercises
Calming visual images
Relaxing vision and auditory input
Brain breaks
Calming videos
All of these are links to videos, exercises, and resources to promote calming self-regulatory input for kids of all ages. You can add these tools to a sensory diet or use them in Zones of Regulation activities.
Free sensory room slide deck
Want to add this online sensory room to your therapy toolbox? Enter your email address into the form below and you can add this tool to your Google drive. It’s just one of the many free slides available here on The OT Toolbox.
NOTE- Due to an increase in security measures, many readers utilizing a work or school district email address have had difficulty accessing resources from the delivery email. Consider using a personal email address and forwarding the email to your work account.
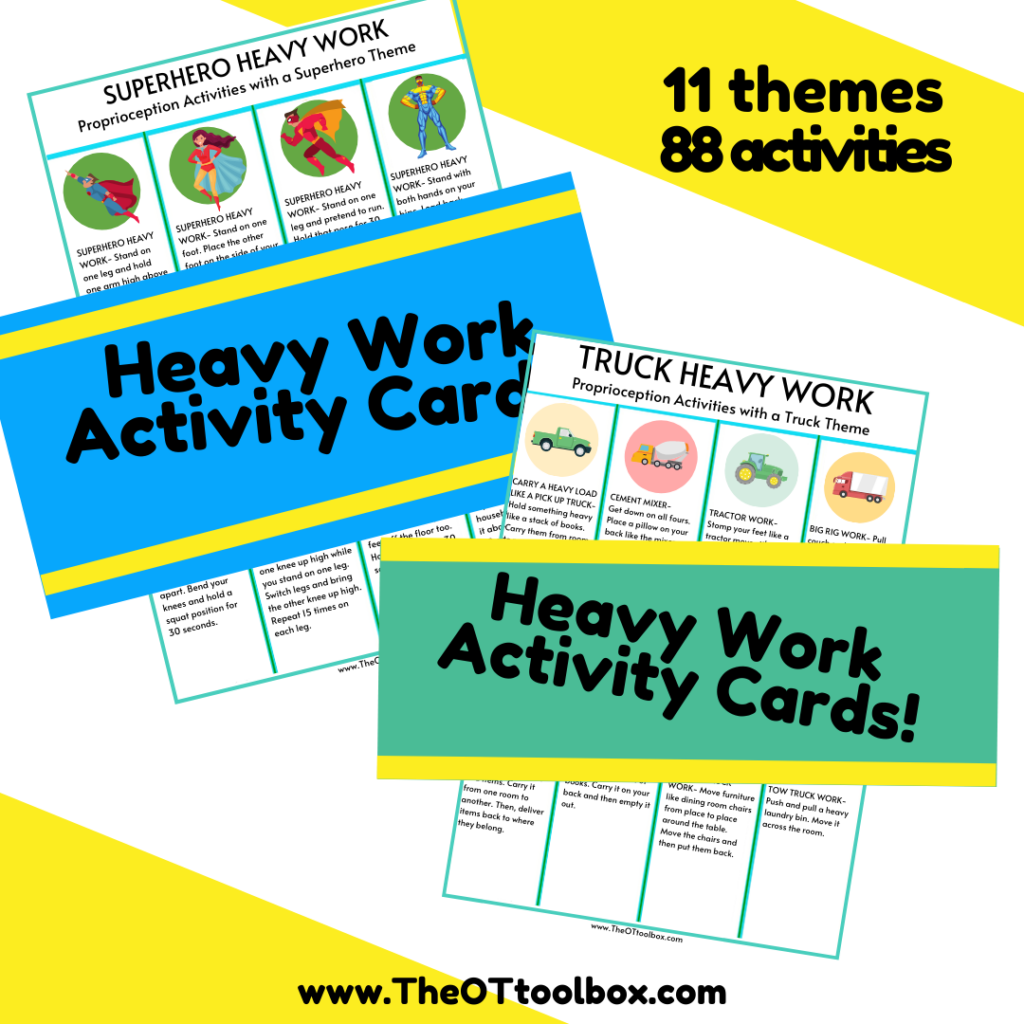
Add heavy work with these heavy work exercises to incorporate many themes into therapy and play.
Colleen Beck, OTR/L has been an occupational therapist since 2000, working in school-based, hand therapy, outpatient peds, EI, and SNF. Colleen created The OT Toolbox to inspire therapists, teachers, and parents with easy and fun tools to help children thrive. Read her story about going from an OT making $3/hour (after paying for kids’ childcare) to a full-time OT resource creator for millions of readers. Want to collaborate? Send an email to contact@theottoolbox.com.
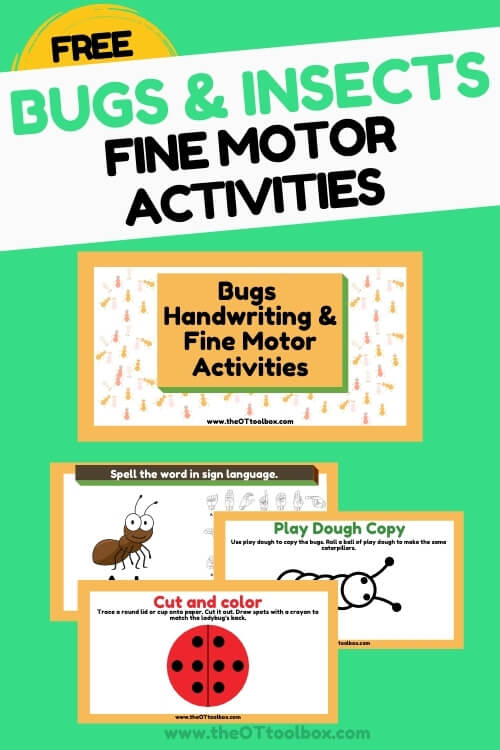
Today’s free therapy slide deck has a bug fine motor activities theme for creepy crawly fine motor fun. The bugs and insects activities in this virtual therapy slides will get those hands moving and building coordination, dexterity, and motor planning skills. Just in time for Spring bugs, this is just one of the many free slides we have on the site.
We recently released this bug emotions slide deck to help with social emotional skills, so if you are wanting to create a bug theme in therapy, today’s fine motor slide deck is the perfect addition.
I created this slide deck with several different activities, designed to use in teletherapy or to guide a therapy session. (Use this slide deck as an outline for therapy services for face-to-face sessions, too!)
The first fine motor task asks kids to use ASL to sign the letters to spell different bugs and insects names. Kids can copy the slide deck to find the letter they need to spell each bug or insect’s name.
As they scan for the letters to spell ladybug, grasshopper, ant, or dragonfly, they are challenging their visual scanning and visual attention skills to look for each letter in the key.
The sign language forms is a great way to build finger isolation skills, dexterity, and motor planning skills while learning ASL.
Bug Play Dough Activity
The next part of the slide deck asks kids to use play dough to copy the caterpillar designs. This also challenges visual motor skills, but asks kids to create small balls of play dough and then use them to make the caterpillars.
Play dough builds intrinsic hand strength when children roll small balls of dough with their fingertips. This hand strengthening activity is a great one for building endurance, separation of the sides of the hand, and precision.
You may want to take the hand strengthening further with our Roll and Write Play Dough Mats. There is a bug theme play dough mat included that would be a great addition to this bug theme slide deck!
Bug Color and Cut Activity
The next section of the slides includes a color and cut activity to help kids with functional fine motor skills. Kids can use materials they have in their home to create different ladybug images. This challenges direction following, visual motor skills, bilateral coordination, and eye-hand coordination.
Bug Visual Motor Activity
The next part of the slide deck asks kids to copy designs to work on visual motor skills. This is a good way to integrate the fine motor warm up from the previous slides into a handwriting activity. Copying forms like the insects and bugs on these slides challenge kids in the skills they need to copy letters and words without omitting parts.
Bug Handwriting Activity
The last part of the bug theme is a handwriting activity. Kids can copy the different bug and insect names. There is a Jamboard option for these slides so if you’re using the slides in virtual sessions, kids can write right on the screen.
Free Bug Theme Slide Deck
Want these bug fine motor activities in your therapy toolbox? Enter your email address into the form below and you’ll get a slide deck with all of the activities listed above, as well as a link to a Jamboard version.
Spring Fine Motor Kit
Score Fine Motor Tools and resources and help kids build the skills they need to thrive!
Developing hand strength, dexterity, dexterity, precision skills, and eye-hand coordination skills that kids need for holding and writing with a pencil, coloring, and manipulating small objects in every day task doesn’t need to be difficult. The Spring Fine Motor Kit includes 100 pages of fine motor activities, worksheets, crafts, and more:
Colleen Beck, OTR/L has been an occupational therapist since 2000, working in school-based, hand therapy, outpatient peds, EI, and SNF. Colleen created The OT Toolbox to inspire therapists, teachers, and parents with easy and fun tools to help children thrive. Read her story about going from an OT making $3/hour (after paying for kids’ childcare) to a full-time OT resource creator for millions of readers. Want to collaborate? Send an email to contact@theottoolbox.com.
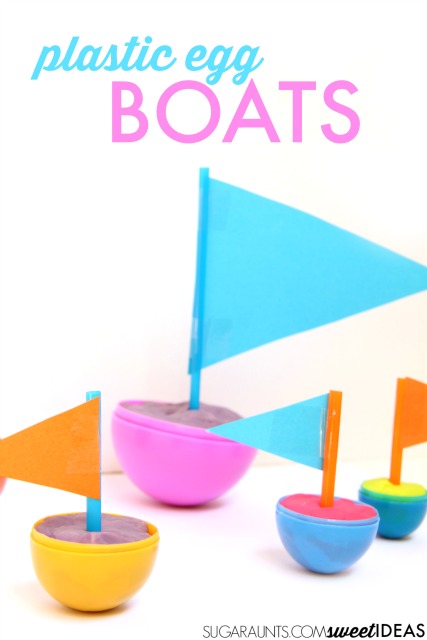
These plastic Easter egg boats is a Spring occupational therapy activity to add to your line-up this year. If you’ve got a few plastic Easter eggs on hand and some play dough, you are ready to go for Easter STEM that challenges kids to explore fine motor skills in STEM activities AND incorporates wind power with calming oral motor sensorimotor input and got our boats moving, sensory style!
Hey now, there’s an idea: There’s STEM for science, technology, engineering, and math, right? And there’s STEAM with the added component of art…what if we added a sensory component to the STEM/STEAM mix?? It could be called STEMS or STEAMS! I think it’s what the world needs: bring the science/math/art/technology, etc full circle with whole body movements and the underlying systems of sensory processing for integrated learning through the senses. Genius I tell ya!
STEMS: Science, Technology, Engineering, Math, and SENSORY
STEAMS: Science, Technology, Engineering, Art, Math, and SENSORY
You heard it here first!
Back to our world-changing egg boats.
Plastic Easter Egg Boats
Full disclosure: This post contains affiliate links.
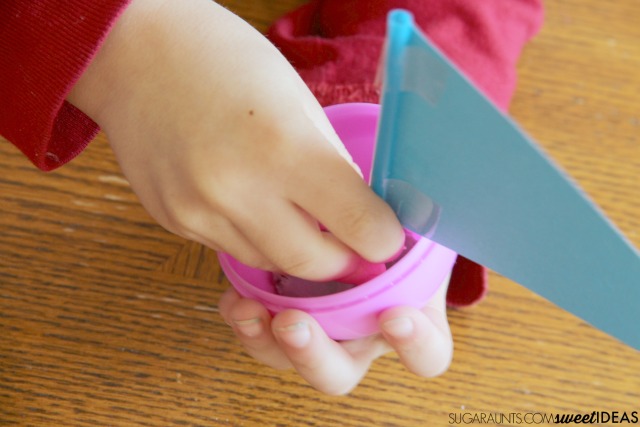
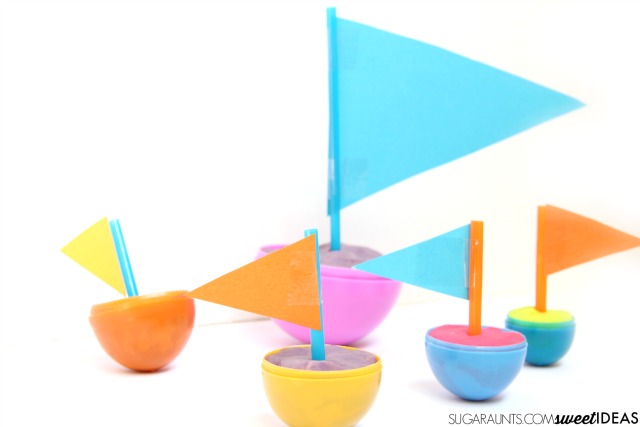
This is an easy activity to throw together: Grab some plastic eggs, straws (every childhood needs brightly colored straws), card stock, tape, and play dough. Fill one half of the plastic egg with play dough. Stick a piece of straw into the play dough. Tape a triangle of card stock to the straw. Done.
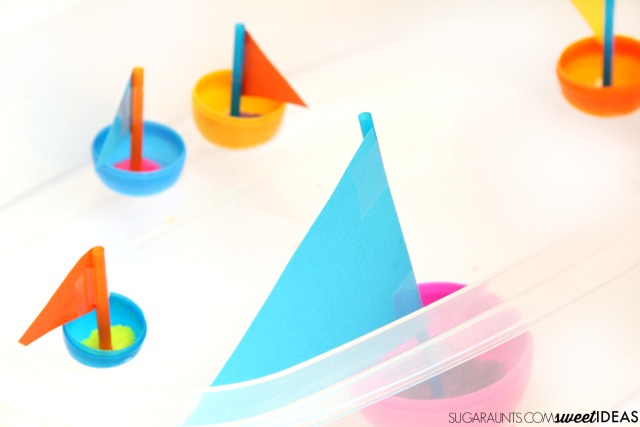
NOW: Here’s the fun part. Fill a bin with water and see if they will float. If you and the kids have filled the plastic eggs to the brim with play dough, they will not. Alas, you’ve got some capsized eggs. However, with some help from your STEM noggin, you can remove some of the play dough so it’s just a bit at the bottom of the egg. See how they float now.
Move the play dough up the sides of the egg a bit more and see if you can get the boats to stay upright. Now we’re talkin’!
Oral Motor Sensory Activity Wind Boats
So. You’re wondering how this might be a state-of-the-art sensory-tastic STEMS activity (see, it just rolls off the tounge, right??!!)
Here’s what we did to add a sensory oral motor component to this activity. Use one of those bright and colorful straws to add a bit of wind power to your egg boats. See how much breath it takes to move the boats across the water while providing proprioception to the mouth. The heavy work of the lips is an effort that is calming to kiddos who seek out sensory input through chewing or biting.
Have a few boat races with friends as you both blow the boats across a large bin of water.
Looking for more propriocetive input to the mouth? Try a smaller straw or this top-secret Occupational Therapist trick: pinch the straw so it’s flat the whole length of the straw. Now you’ve got a power proprioception tool for oral sensory motor input!
What are your favorite ways to address oral motor sensory needs? Let us know if you try these WORLD-CHANGING plastic Easter egg boats!
Spring Fine Motor Kit
Score Fine Motor Tools and resources and help kids build the skills they need to thrive!
Developing hand strength, dexterity, dexterity, precision skills, and eye-hand coordination skills that kids need for holding and writing with a pencil, coloring, and manipulating small objects in every day task doesn’t need to be difficult. The Spring Fine Motor Kit includes 100 pages of fine motor activities, worksheets, crafts, and more:
Colleen Beck, OTR/L has been an occupational therapist since 2000, working in school-based, hand therapy, outpatient peds, EI, and SNF. Colleen created The OT Toolbox to inspire therapists, teachers, and parents with easy and fun tools to help children thrive. Read her story about going from an OT making $3/hour (after paying for kids’ childcare) to a full-time OT resource creator for millions of readers. Want to collaborate? Send an email to contact@theottoolbox.com.
Because self-care is such a necessary component of battling caregiver burnout as a therapist, a beginner HIIT treadmill workouts can add the physical exercise piece that is often missing from self-care. Here, you’ll find HIIT beginner workouts for the treadmill. These are simple ways to get started with HIIT workouts and adding the much-needed self-care piece of occupational balance.
Self care activities play a role in addressing burnout that many occupational therapists experience. As occupational therapists, we often educate clients on
Here, we’ll cover easy strategies to get started with HIIT on a treadmill workout.
Physical Self Care- Having a simple physical exercise strategy in place helps when caregiver stress and burnout and overwhelm make you want to skip the physical exercise.
Implement an easy treadmill exercise program that doesn’t require a lot of thought or planning. Treadmill routines can address different needs including endurance, muscle building, weight loss, etc.
Beginner HIIT treadmill workouts
Adding physical activity that impacts physical wellbeing is the HIIT workout, or high intensity interval training. We talked about the use of a treadmill to assist with wellbeing in a previous post.
HIIT workouts are beneficial for many because they provide the physical health benefits in a shorter amount of time.
Those periods of high intensity running along with slower periods are very effective. There’s a reason why studies show that HIIT exercise impacts health and fitness. For busy therapists, quick and impactful exercises that helps with weight loss, and physical wellbeing.
And, in fact, one study determined that HIIT exercise and MIT (moderate intensity training) decreased anxiety, stress, and depression as well as increased resilience during the COVID-19 pandemic confinements to home. The study also determined that the HIIT intervention seemed to be more beneficial to reduce depression than the MIT intervention. These are great findings when it comes to addressing factors that impact burnout in therapists and overall self-care.
Put it on your schedule- When a physical exercise plan is written down, it becomes a part of your day visually. It’s easier to commit to an exercise plan that is on your daily schedule. And, having a fast routine a part of your day can create a daily habit that becomes part of the routine.
A self-care workout plan includes time for you, Warm up, quick sprints, recovery intervals, and a cool down. During the high or moderate intensity period of the exercise session, your heart rate should rise at a perceived level of exertion.
For beginners, getting started with a treadmill program can gain the benefits of a HIIT program but can start with a short activity plan.
Setting up a treadmill plan can begin with just 10 minutes of activity at first, and then can gradually build up to 20-30 minutes and then longer.
HIIT and MIT in treadmill intervals
An essential part of physical exercise includes a warm-up, whether that be stretching, walking, or deep breathing. Adding relaxing music or pump-up music that fits with your interests makes getting started fun. This can then be incorporated into a cool-down at the end of your treadmill workout. The warm-up and cool-down periods reduce risk of injury as well.
Use these clues as guides to determine if your treadmill intervals workout is high intensity interval training or moderate intensity:
Moderate intensity exercise
MIT, or moderate intensity training feels difficult, but at medium of the road level. Some signs of a somewhat difficult level include a quicker breathing rate, but you’re not out of breath. You should be able to easily carry on a conversation during your exercise. And, you should note perspiration during your exercise.
High intensity exercise
High intensity training is a more challenging level of exercise, where breathing rate is more vigorous. You need to pause during conversation to breathe, and perspiration occurs sooner in the exercise period. It is possible to quickly move from moderate level to a high level of intensity throughout exercising.
Interval training routinely switches between these levels of intensity.
Interval training sessions can switch between periods of higher rate of perceived exertion and lower rates of perceived exertion. It doesn’t take much to get started with HIIT. You can start with 30 seconds of high intensity running followed by 90 seconds of a recovery stage at a lower intensity.
Another option for interval training can include treadmill speed, or incline.
Still another HIIT workout can utilize the treadmill programs within the treadmill.
With the Horizon Fitness treadmills and fitness equipment, there are a number of programing options, including quick, 20 minute programs, and other streaming fitness opportunities. The print-intensity workout is pre-programmed and some of the treadmills have a button to select the intervals.
Check out the Horizon fitness deals, including free shipping that you can access now on the Horizon site.
Affiliate links are included in this post, but I only recommend products that I own, and love!
Colleen Beck, OTR/L has been an occupational therapist since 2000, working in school-based, hand therapy, outpatient peds, EI, and SNF. Colleen created The OT Toolbox to inspire therapists, teachers, and parents with easy and fun tools to help children thrive. Read her story about going from an OT making $3/hour (after paying for kids’ childcare) to a full-time OT resource creator for millions of readers. Want to collaborate? Send an email to contact@theottoolbox.com.





 , straws (every childhood needs
  ), card stock, tape, and play dough. Fill one half of the plastic egg with play dough. Stick a piece of straw into the play dough. Tape a triangle of card stock to the straw. Done.