Retained Primitive Reflexes & Child Development

Images of babies. Text reads Primitive Relaxes and occupational therapy

This post is all about retained primitive reflexes, what retained reflexes look like, and how they impact child development. You’ll find specific strategies to integrate retained primitive reflexes as well. In a recent blog post, we discussed what are primitive infant reflexes, and why they are so important to infant development. Now, it is time to discuss what can happen if these reflexes hang around for too long.

Remember that every case is unique, and if your child matches these characteristics, that does not necessarily mean that they have retained that reflex. If you are concerned about your child’s abilities and how they may relate to retained reflexes, we recommend talking to your pediatrician.

For more information on primitive reflexes and their impact on child development, be sure to check out some of these books on primitive reflexes.

Retained primitive reflexes

retained Primitive Reflexes

The term “retained primitive reflexes” might be a phrase you’ve heard before. But what does that mean and what do retained reflexes look like in children? Well, there is a lot to cover.

Basically, as infants develop into toddlers, their primitive reflexes should do what health care professionals call “integration”. The response that comes with the primitive reflex should integrate into a more mature or voluntary movement. When primitive reflexes are retained, those instinctive actions, movements will remain past the typical age range…they continue to exist. They are retained.

If primitive reflexes are still present long after they should have integrated, the child will display certain characteristics specific to the retained reflex, many of which limit their development and academic skills.

Just to add some background information, when we say that primitive reflexes are integrated, that means that the movements (or reflexes) are absorbed and contributing to characteristics, actions and neurological responses. To put it in other words, a reflex moves along a neurologic arc and when integration of those reflexes occurs, a process where specific stimulus results in a predictable response (or lack of that predictable response) so that movements are more efficient. This occurs so the neurologic system is connected and communicating efficiently. It’s all part of the nervous system.

PALMAR REFLEX

The palmar reflex is important for the development of purposeful grasping, something that an infant is learning throughout their first year of life. The palmar reflex can be seen when you place your finger in the palm of an infant’s hand and their reflexive response is to hold on to your finger. What an adorable reflex, right?

This is not something we want to see in an older infant or child, though. While the response is necessary for a newborn to learn how to use their hands, it limits an older infant or child to only using their hands and fingers for a strong grip.

retained palmar reflex

Children with a retained palmer reflex may:

  • Get fatigued very easily with handwriting or fine motor tasks, like stringing beads.
  • Have a sensitive or “ticklish” palm
  • Open and close their mouths while using their hands for tasks like writing or cutting with scissors.
  • Have difficulty in speech articulation

The mouth and the hands are connected via neural pathways in infancy, and that connection is still strong in those who have the palmar reflex. This is why the movements of the mouth and speech may be involved in the retained palmar reflex.

How to integrate the Palmar Reflex:

  • Tasks that encourage separate use the fingers
    • Squeeze a ball with one finger and thumb, alternating fingers to squeeze
    • Stringing Beads
    • Playing with small Legos or similar toys

MORO REFLEX

The Moro reflex is also called the startle reflex – it can be seen in a frightened infant up to about 4 to 6 months old. The reflex causes a baby to stretch out their arms and legs, and quickly bring them back in, in jerky movements. This is in response to the feeling of falling, a loud sound, or a drastic change in temperature.

Retained Moro Reflex

Children with retained Moro reflexes are often very sensitive to stimuli – sounds, tags on clothing, lights, etc. They tend to lack emotional and self-regulation skills and have a difficult time paying attention in class. Without an integrated Moro reflex, their fight or flight response can be activated very easily causing them to have deficits in many areas of life.

How to integrate the Moro Reflex:

  • Starfish Exercise
    • While seated, open up into a big “X” shape with straight arms and legs.
    • Cross right ankle over left & Cross right arm over left
    • Open up to big “X”
    • Cross left ankle over right & Cross left arm over right
    • Repeat
  • This is also how you can test for its presence! If a child has a very difficult time completing these actions, without another known cause, they may have a retained Moro reflex.

TONIC LABYRINTHINE REFLEX

The tonic labyrinthine reflex (TLR) is used for head and postural control. We know that baby has poor control of their head and neck when they are born, and this reflex is part of what helps them gain control over this part of their body.

Retained Tonic LABYRINTHINE reflex

This reflex typically integrates around 4 months old, but if it persists, the following may occur:

  • Difficulties judging space, speed, depth, and distance.
  • Toe walking
  • Discoordination in simultaneous movements, such as walking or swimming.
  • Avoiding lying on their stomach.

Children with retained TLRs tend to be perceived as clumsy and often have a difficult time sitting upright and still in their chairs. This can decrease their ability to pay attention in the classroom setting. When posture exercises in kids don’t work, sometimes it’s easy for teachers or parents to wonder what is going on, when a look at retained reflexes may be in order. In some cases, integrating the TLR reflex can support posture.

How to integrate TONIC LABYRINTHINE REFLEX

  • Incorporate activities on their stomachs as much as possible, or for as long as they can manage each day.
  • Try reading, watching TV, or playing with a toy while on their tummies
  • Daily practice will strengthen their muscles and correct this response.

ASYMMETRICAL TONIC NECK REFLEX

This reflex is important to the initiation of crawling, as the arms and legs move as a baby turns their head while on their belly. While infants are on their bellies, and while crawling, they are exposed to a ton of visual stimulation by looking at their arms moving, looking and grabbing toys, etc. Tummy time is so important for this reason and more!

The ATNR should disappear around the time an infant is gearing up for crawling, around 6 months old.

Retained ASYMMETRICAL TONIC NECK REFLEX

If asymmetrical tonic neck reflex doesn’t integrate, the following may occur:

  • Poor Coordination during movements like skipping or riding a bike
  • Trouble crossing midline
    • Example: Moving right arm to left side of the body to buckle a seat belt.
  • Poor visual tracking = academic issues
    • Difficulty reading and writing

A quick test for a retained ANTR starts with having the child stand with both arms directly out in front of them. Ask the child to slowly turn their head all the way to the left. Their left arm will remain straight and their right arm will bend if the reflex is still present.

How to integrate the ATNR

  • Lizard Crawling Exercise
    • Start on the stomach
    • Look to your left, and bend your left elbow and left knee
    • Look to your right, and bend your right elbow and right knee

There are many more primitive reflexes, as well as postural reflexes, that are important to child development and student success. We have not covered everything here, but we hope to have given you a nice place to start building your understanding of what may happen when primitive reflexes are maintained over time.

Want to learn more about primitive reflexes, what to do when reflexes are retained, and how to know there might be an issue? Check out the primitive reflexes course below. (affiliate link)

Assessment And Integration Of Primitive Reflexes For Improved Independence In Daily Activities is a course on primitive reflexes where you’ll learn how to, screen, test and integrate retained primitive reflexes and find tools to help your client or child improve motor, social and daily functioning skills by implementing fun, therapeutic, and functional activities!

In this primitive reflexes course, created by two occupational therapists, you’ll find modules and functional intervention activities for:

  1. Moro reflex
  2. The Tonic Labyrinthine (TLR) & Landau Reflex 
  3. The Rooting Reflex
  4. The Asymmetrical Tonic Neck Reflex (ATNR)
  5. The Spinal Galant Reflex
  6. The Palmar Grasp Reflex
  7. The Symmetric Tonic Neck Reflex (STNR)
  8. Support for kids who push back
  9. Printable handouts, screening tools, and checklists
  10. Information on postural reflexes, yoga, sensory diets, and more
  11. Case studies
  12. Research
  13. AOTA continuing education: 1.05 AOTA CEUs

If your child has retained primitive reflexes, learning to integrate them could lead to improved development in many areas:

  • Social Skills
  • Learning
  • Motor Skills
  • Executive
  • Functioning
  • Coordination
  • Reading & Writing

Primitive Reflexes and Occupational Therapy

This article was originally published in 2021.  While reflexes have not changed since then, there is new research and resources available on primitive reflexes. This is important to keep up to date with as an occupational therapist working with children. Inevitably, we will see a child who has retained reflexes impacting daily functional skills.

When it comes to primitive reflexes and occupational therapy, there is a lot of connection because of the motor and sensory components that impact function.

This article talks about the link between retained primitive reflexes and autism spectrum disorder. The authors go on to say that this connection is due to a brain imbalance and connectivity. They offer a specific set of exercises, with EEG testing done at the beginning and end of treatment to show progress.

The research is limited on the efficacy of integrating reflexes thus far, however there is plenty of evidence on reflexes.  Reflexes are important for survival in infancy and early childhood. They need to be integrated so we can produce smooth movements, which later might impact motor planning and body awareness. Without this integration we often see uncoordinated movements, an increased startle reflex, difficulty with frontal lobe maturation. 

Because the research about the “integration of reflexes” is not there, the AOTA is suggesting using exercises and activities to improve coordination and performance in activities of daily living (ADLs) and instrumental activities of daily living (IADLs), rather than calling it the integration of reflexes.

Images of babies. Text reads Primitive Relaxes and occupational therapy

A Therapist’s Perspective on Reflex Integration in OT

Whenever I have parents or other professionals questioning the validity of certain treatment ideas such as sensory integration, therapeutic listening, vibration, astronaut training, and more, I try the “what can it hurt” approach.  

“What can it hurt”, is a worthwhile approach to life and taking risks. I am much more willing to take risks if the reward is greater than the potential drawbacks. This holds true for a lot of what we teach as OTs.  This includes primitive reflex “integration” therapy.  Whether you believe in integration/retained reflexes or not, think about the treatment methods provided. 

Treatment methods for reflex retention include strengthening, coordination, and stretching exercises.  Whether the cause of incoordination is reflex retention or something else, practicing strengthening and coordination exercises can help either way. While finding the “why” during treatment is helpful, it is not always available. There are times we may never know the cause of a disorder.  In this case we treat the symptoms we see. 

According to Samantha Heidenreich, OTD, MOT of occupational therapy .com, There are theories as to the cause of primitive reflex retention including: 

  • the birth method, like Cesarean section versus vaginal delivery
  • Trauma during pregnancy, birth, or shortly after
  • exposure to toxins
  • Anesthetics during pregnancy/birth
  • medications

Additionally, other possible causes for retained primitive reflexes are decreased tummy time in infancy, a lack of crawling, early walking, head injuries, or chronic ear infections. In the OT world, we are always looking at decreased tummy time and that lack of crawling during our intakes and assessments. 

Based on what we do know, the back to sleep program and container baby syndrome, are having an effect on development that needs to be counteracted. When we take a step forward for safety, innovation, and technology, there are often consequences if not used in moderation or with caution. (Being a “tech-wise” family means having an awareness of this from the start. Its something that we as OTs can educate our families on, even when working with children of a very young age.)

Education and early intervention are the keys to success. Whether you are talking about retained primitive reflexes, or another difficulty seen in children, we can do more by letting people know how to care for young children, and intervening early. 

How can you add to your OT Toolbox to better educate yourself about reflexes and treatment?  Check out some of our resources!

The resources at the OT Toolbox are endless.  Want to find an easier way to locate resources instead of clicking and scrolling?  Become a member today!  One of the perks of being a member is access to restricted content, and easy search categories.

Victoria Wood, OTR/L is a contributor to The OT Toolbox and has been providing Occupational Therapy treatment in pediatrics for more than 25 years. She has practiced in hospital settings (inpatient, outpatient, NICU, PICU), school systems, and outpatient clinics in several states. She has treated hundreds of children with various sensory processing dysfunction in the areas of behavior, gross/fine motor skills, social skills and self-care. Ms. Wood has also been a featured speaker at seminars, webinars, and school staff development training. She is the author of Seeing your Home and Community with Sensory Eyes.

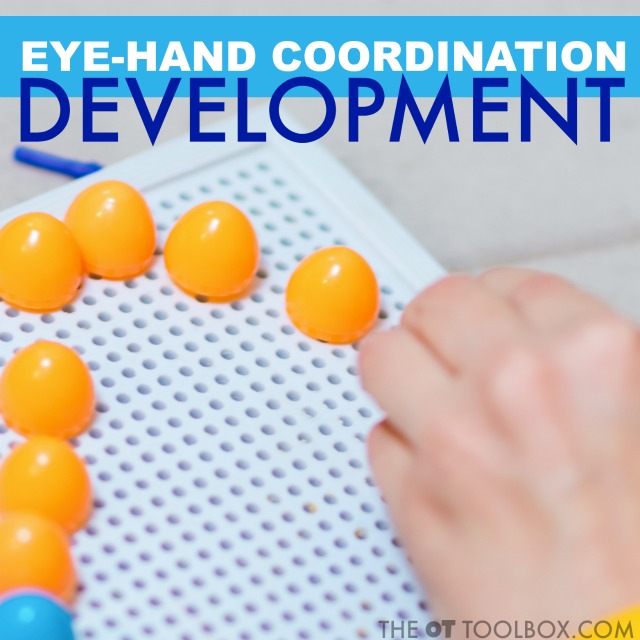
Development of Eye-Hand Coordination

hand eye coordination

Hand eye coordination plays a powerful role in daily activities. Through the integration of fine motor skills and visual processing, we see intentional and controlled motor skills. But there’s more to catching and throwing a ball at a target than the coordinated use of the hands and eyes. Let’s break down hand eye coordination development skills as well as the other underlying skills needed.
hand eye coordination

We have included affiliate links to resources in this blog post on hand eye coordination milestones. As an Amazon Influencer, I earn from qualifying purchases.

Hand Eye Coordination

Hand eye coordination refers to the coordination, or integration, of visual input and the processing of that visual information for coordinated movement of the hands. These skills impact fine motor dexterity and motor movements in functional tasks for so many tasks while manipulating movements and objects.

Eye-hand coordination is essential in handwriting, scissor use, threading beads, reading, throwing a ball, placing a cup on a shelf, coloring in lines, feeding, self-care, and much, much more.

The phrases “Hand-eye coordination” and “eye-hand coordination” are used interchangeably, however, we tend to use the phrase eye-hand coordination more appropriately, because input comes through the eyes first and the hand responds in motor tasks. However, the general population may primarily use the phrase “hand-eye coordination”.

In this blog post, we will use both phrases interchangeably, in order to reach the populations seeking information on either phrase.

In essence, hand-eye coordination, or eye-hand coordination, are the  Visual motor skills used in motor tasks.

Part of this development is the refined motor skills led by arch development in the hands. Paired with dexterity and precision skills, along with visual motor components, we see hand-eye coordination.
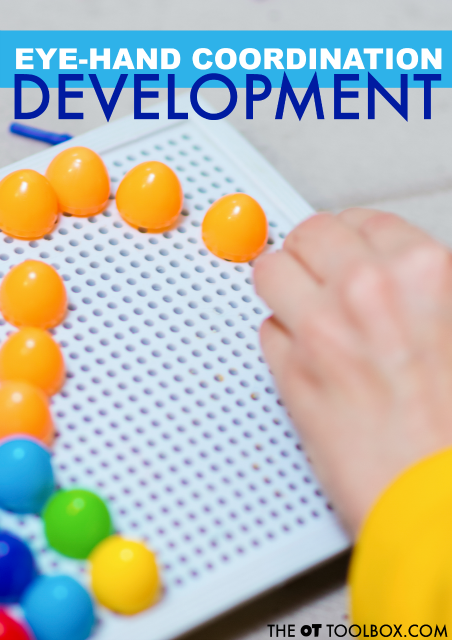


Eye hand coordination develops from a very young age! Here is information about the development of visual motor skills, specifically eye hand coordination in babies, toddlers, and preschoolers.


Eye Hand Coordination Development

Eye-hand coordination development typically occurs through movement, beginning at a very young age. The visual components of oculomotor skills (how the eyes move) include visual fixation, visual tracking (or smooth pursuits), and visual scanning. These beginning stages of child development play a big part down the road in taking in visual information and using it to perform motor tasks. 

These hand-eye coordination developmental guidelines listed below are general guidelines of development based on approximate development of the visual motor skills needed for play, motor skills, and visual motor development.

Holding and talking to baby in the very young ages plays such an important part in the puzzle of visual motor skills. 


Additionally, tummy time and as the baby gains head strength and control, they eyes become stronger in their ability to fixate, track, and scan from the prone position. This is why we place toys around a baby on a baby blanket and encourage reach.

That pivotal stage when baby begins to roll is a social media-worthy time in the parent’s life. But there is more to celebrate than baby’s new rolling skills. Control of the eyes with movement is a big accomplishment and something that baby strengthens with movement. 

Hand Eye Coordination

These skill areas are broken down by months, all the way up through the preschool years. 


Disclaimer: Amazon affiliate links are included in this post.

ONE MONTH:
     Tracking a rattle while lying on back                                    
     Tracking a rattle to the side                
   
TWO MONTHS:
     Infant regards their own hands
     Tracks a ball side to side as it rolls across a table left to right and right to left.
     Tracks a rattle while lying on back side to side
   
THREE MONTHS:
     Extends hands to reach for a rattle/toy while lying on back
   
FOUR MONTHS:
     Reaches to midline for a rattle/toy while lying on back
     While lying on back, the infant touches both hands together.

hand Eye coordination and Crawling

Crawling on the hands and knees plays a vital role in hand eye coordination, too. When baby positions themselves up on all fours, they are gaining awesome proprioceptive input, strength in the shoulder girdle, core, and neck.

When crawling, baby is gaining mobility, but also using targeted movement toward a goal they visually process.

Research shows that hands-and-knees and walker-assisted locomotor experience facilitate spatial search performance. Spatial awareness, or visual spatial relations, and visual skill development is needed for coordinated use of the hands in motor tasks.


In fact, crawling improves so many areas needed for refined eye-hand coordination, including the fine motor skills, gross motor skills, gross motor coordination, balance, and strength needed for tasks like precision of in-hand manipulation, positioning in activities, and sustained endurance. We cover more on this topic in our blog post on spatial awareness for baby.
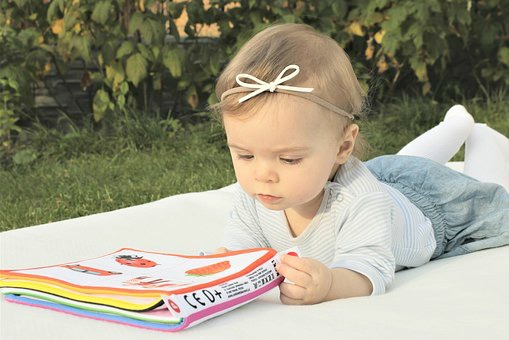
Eye hand coordination develops from infancy! Playing with baby in tummy time is a crucial element to eye hand coordination development.


SIX MONTHS:
     Brings hands together to grasp a block/toy while sitting supported on an adult’s lap
     Extends arm to reach up for a toy while laying on back
   
SEVEN MONTHS:
     Transfers a block/toy from one hand to the other while sitting supported on an adult’s lap.
     Touches a cereal piece with index finger
     Bangs a toy on a table surface while sitting supported on an adult’s lap

NINE MONTHS:
     Claps hands together

TEN MONTHS:
     Removes loose pegs from a Peg Board (affiliate link) 

ELEVEN MONTHS:
     Removes socks
     Releases a cereal bit onto table surface
     Places blocks (affiliate link) into a cup
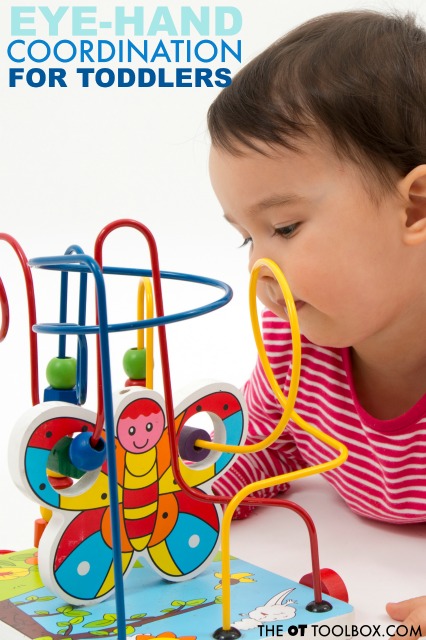
A lot of eye hand coordination development occurs in the toddler years. Here are developmental milestones for eye hand coordination from 1-3 years.


Development of Eye Hand Coordination for Toddlers

Development of hand eye coordination accelerates during the toddler years because motor skills develop at an increasing pace during the years of 1-3. 

TWELVE MONTHS/ ONE YEAR:
     Turns pages in a board book
     Imitates stirring a spoon (affiliate link) in a cup

THIRTEEN MONTHS:
     Imitates tapping a spoon on a cup
     Begins to places large puzzle pieces in a beginner puzzle (affiliate link) 

FOURTEEN MONTHS:
     Scribbles on paper

SIXTEEN MONTHS:
     Imitates building a tower of 2-3 blocks (affiliate link) 

NINETEEN-TWENTY MONTHS:
     Builds a block tower, stacking 4-5 blocks (affiliate link) 

TWENTY THREE-TWENTY FOUR MONTHS:
     Imitates copying vertical lines


TWENTY FIVE-TWENTY SIX MONTHS:
     Removes a screw top lid on a bottle
     Stacks 8 blocks (affiliate link) 
     Begins to snip with scissors

TWENTY SEVEN-TWENTY EIGHT MONTHS:
     Imitates horizontal strokes with a marker
     Strings 2 Beads (affiliate link) 
     Imitates folding a piece of paper (bending the paper and making a crease, not aligning the edges)

TWENTY NINE MONTHS:
     Imitates building a train with blocks
     Strings 3-4 Beads (affiliate link) 
     Stacks 10 blocks (affiliate link) 

THIRTY ONE MONTHS:
     Builds a “bridge” with three blocks (affiliate link) 

THIRTY THREE MONTHS:
     Copies a circle

THIRTY FIVE MONTHS:
     Builds a “wall” with four blocks (affiliate link) 
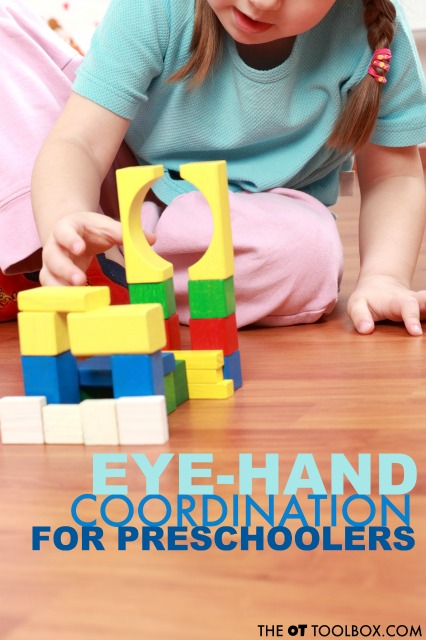
Eye hand development continues in the preschool years. Here are ways that eye hand coordination develops in preschool and how to improve these visual motor skills.


hand Eye Coordination in Preschoolers

During the preschool years, we see even more fine motor and gross motor development. These refined skills, along with more coordinated efforts enable precision and dexterity with hand-eye coordination. Check out some of the preschool activities that we love to use to support this development.

Additional information and resources are covered in our blog post on crossing midline activities for preschoolers, as the eye-hand coordination at this age develops quickly and the sensory motor skills needed for play is an important part of development.

Preschoolers are beginning to use tools such as crayons, scissors, markers, glue sticks, and more. You’ll see greater control in using these materials. 

Preschoolers are also playing with more pretend play, and are able to use different toys with more refinement. While the preschool age may be able to use a pencil to create forms, occupational therapy practitioners prefer that handwriting is not encouraged at this age.

Read about the detrimental impact that handwriting has when pushed before preschoolers build the visual motor experience in this stage.

THIRTY SEVEN MONTHS:
     Cuts a paper in half with scissors

FORTY MONTHS:
     Lace 2-3 holes with string on Lacing Shapes (affiliate link) 
     Copies a cross

FORTY TWO MONTHS:
     Cuts within 1/2 inch of a strait line.
     Traces a horizontal line

FIFTY MONTHS:
     Copies a square
     Cuts a circle within 1/2 inch of the line
     Build “steps” with blocks (affiliate link) 

FIFTY FOUR MONTHS:
     Connects two dots to make a horizontal line.
     Cuts a square within 1/2 inch of the line
     Builds a “pyramid” with blocks (affiliate link) 

FIFTY FIVE MONTHS:
     Folds a piece of paper in half with the edges parallel
     Colors within lines


There is so much happening through regular play, interaction with babies and toddlers at each stage. What’s important to know is that the development doesn’t stop there! 


Studies have shown that eye-hand coordination impacts learning, communication, social-emotional skills, attention, and focus. Wow! 

Coordination Skills

Here are some ideas to work on eye-hand coordination for preschooler kids and older: 
This Letter Eye Hand Coordination Activity helps with bilateral coordination and the visual processing skills needed for reading and so many other skills. 

Try this scooping and pouring eye-hand coordination activity that can be adjusted to meet the needs of many ages and abilities.

More visual processing activities

For even MORE information on eye-hand coordination and activities to use in your occupational therapy practice, you will want to join our free visual processing lab email series. It’s a 3-day series of emails that covers EVERYthing about visual processing. We take a closer look at visual skills and break things down, as well as covering the big picture of visual needs.

In the visual processing lab, you will discover how oculomotor skills like smooth pursuits make a big difference in higher level skills like learning and executive function. The best thing about this lab (besides all of the awesome info) is that it has a fun “lab” theme. I might have had too much fun with this one 🙂

Join us in visual processing Lab! Where you won’t need Bunsen burners or safety goggles!

Click here to learn more about Visual Processing Lab and to sign up.

Free visual processing email lab to learn about visual skills needed in learning and reading.
Work on eye-hand coordination with preschoolers by building with blocks!
 
Try activities like geoboards, pegboards, and lacing beads to improve eye hand coordination development in kids.

References:
Kermoian, Rosanne & Campos, Joseph. (1988). Locomotor Experience: A Facilitator of Spatial Cognitive Development. Child development. 59. 908-17. 10.2307/1130258. 

Colleen Beck, OTR/L has been an occupational therapist since 2000, working in school-based, hand therapy, outpatient peds, EI, and SNF. Colleen created The OT Toolbox to inspire therapists, teachers, and parents with easy and fun tools to help children thrive. Read her story about going from an OT making $3/hour (after paying for kids’ childcare) to a full-time OT resource creator for millions of readers. Want to collaborate? Send an email to contact@theottoolbox.com.

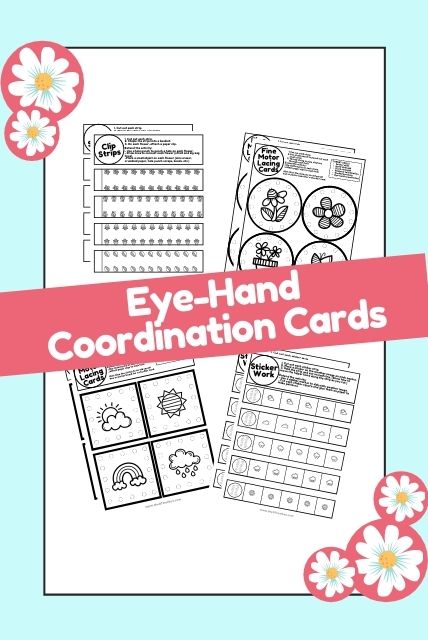
Spring hand eye coordination fine motor worksheets

Hand eye coordination activities can be as simple as lacing cards, hole punching activities, and paperclip tasks using printable OT activities. The ones in the image above are found in our Spring Fine Motor Kit, but there are many others in our other Fine Motor and Therapy Kits:

Working on fine motor skills, visual perception, visual motor skills, sensory tolerance, handwriting, or scissor skills? Our Fine Motor Kits cover all of these areas and more.

Check out the seasonal Fine Motor Kits that kids love:

Or, grab one of our themed Fine Motor Kits to target skills with fun themes:

Want access to all of these kits…and more being added each month? Join The OT Toolbox Member’s Club!

Ambidexterity or Mixed Dominance

What is ambidexterity

Many parents see their child switch hands during tasks, or show refined use of both hands and wonder if their child is ambidextrous. Maybe a child uses their left hand to throw a ball, but bats with their right hand. Maybe they kick a ball with their right foot, but hold a pencil with their left hand. Ambidexterity is a common question among parents of kids who switch hands in activities or don’t use one hand consistently.

In this blog post, you’ll find information on

Ambidextrous Or Mixed Dominance?

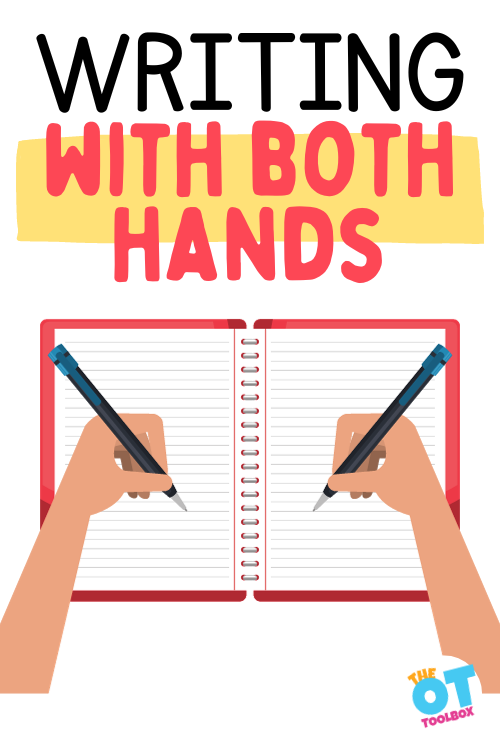
Here, we are covering several aspects of ambidexterity. We’ll go over the difference between being ambidextrous and having mixed dominance. We’ll cover what it means when a child uses both hands to write or color. And, we’ll go over some activities to support a dominant hand.

How do you know if your child is ambidextrous or if they are showing signs of mixed dominance? This post will explain a little more about ambidexterity as well as mixed dominance and what it means in motor skills.

Ambidextrous refers to use of both sides of the body in equal ability and refined finger dexterity. This can refer to a bilateral refined movement and skill in the hands, feet, and eyes. Ambidexterity is the ability to use both hands equally well. It means that a person can perform tasks with either hand without any noticeable preference.

Cross dominance refers to a situation where a person’s dominance does not favor one side over the other. In simpler terms, it means that your child hasn’t developed a clear preference for using either their right or left hand for tasks.

Mixed dominance is an other name for cross dominance. It can extend beyond just hand preference and also involve other body parts like the eyes or feet. For example, a child with mixed dominance may have a dominant hand different from their dominant eye or foot. This means that their dominance is spread across different sides of their body.

In other words, cross dominance or mixed dominance is different than ambidextrous in that an individual with cross dominance might switch between dominant sides depending on the task they’re performing. For instance, they may write with their right hand but prefer to eat with their left hand.

Let’s break this down further to explore ambidexterity.

What is ambidexterity? Is my child ambidextrous?

What does Ambidextrous Mean?

The definition of ambidextrous is use of both hands with equal refined precision and motor skill. This means that each side of the body is equally able to write with natural motor planning, fine motor control, strength, and refined motor movements.

According to the definition of ambidexterous, there is equal refinement and precision. You might think this means just the hands and fingers are involved with equal use of both sides. However, that’s not exactly the case.

Those who are truly ambidextrous may have equal use of hands, as well as feet, eyes, and even toungue motor skills.

An ambidextrous child will play naturally with toys using both hands. You might notice equal use of the hands and feet, or switching left to right or right to left during play, sports, school work, and other tasks.

When it comes to someone being ambidextrous and fine motor involvement, this can refer to:

  • Writing
  • Scissor use
  • Clothing fasteners
  • Play
  • Hand strength
  • Brushing teeth and hair
  • Many other every day tasks

Ambidextrous also refers to the feet too.

An ambidextrous person will be able to kick equally strong and with the same amount of force with both feet. They are able to “take off” from a running stance with equal feet placement, whether they start out running on their left foot or their right foot. Gross motor ambidexterity can be seen in:

  • Jumping
  • Running
  • Skipping
  • Hopping
  • Balance
  • Kicking a ball
  • Throwing a ball
  • Catching a ball
  • Among many other every day tasks

Ambidexterity can be observed in the eyes, too. Typically, all of us have one eye that is stronger, or a naturally dominant eye. We can complete a visual screening to identify this, or a visual exam may be in order.

Finally, an ambidextrous individual may show motor overflow movements with the tongue to both sides of the body.

Are you wondering about a child who uses both hands to write or perform tasks? Maybe you know a child who uses both hands equally and with equal skill. Perhaps your child uses one hand for specific tasks and their other hand for other tasks.

Mixed Dominance or Ambidexterous?

Just yesterday on The OT Toolbox, we discussed mixed dominance. In this post, we will cover more about true ambidexterity and what that means.

A child with mixed dominance demonstrates clear, stronger patterns based on the side of the body they are utilizing to complete the task.

For example, a child who is left hand dominant will develop a stronger fine motor pattern then a child who is not left side dominant but compensating for fatigue and is moderately adept at utilizing the left hand as a coping skill.

Is my child ambidextrous

A child who is truly ambidextrous will be equally as skilled at utilizing both sides of the body and it will look and feel natural to the child. Statistically, only 1% of the population is truly ambidextrous—it’s really very rare, and it is more likely that your child is experiencing mixed dominance patterns.

True ambidexterity requires both hands to be used with equal precision and there is no true preference in either the right or left hand for either both fine or gross motor tasks.

Can you make yourself ambidextrous?

This is an interesting question. Many times there is a perceived benefit to being ambidextrous, or switching hand or foot use during a task. Some perceived benefits might be:

  • Switching hands when one is fatigued from use during a task
  • Switching dominant sides during a sport such as baseball or softball to pitch with the other arm, batting from another side, dribbling to the other side when bringing up the ball during basketball, or kicking a ball with the other foot during soccer.
  • Writing equal legibility with both hands

Actually being ambidextrous is different than teaching yourself to become ambidextrous.

To use both sides of the hand as a learned concept takes cognitive attention whereas natural ambidexterity occurs without thought. Because of the neuroplasticity of the brain, humans have the ability to teach themselves to use their non-dominant hand or side to complete tasks. It takes practice, practice, and more practice.

Read here on motor planning where we cover this concept.

Ambidexterity or Mixed Dominance?

Is my child ambidextrous? Isn’t that what mixed dominance is? These are two questions that therapists get asked frequently when evaluating a child for the first time for mixed dominance and other concerns. The answer is no, they are not the same thing.

This is a tricky area. Therapists recognize mixed dominance as a miscommunication or poor integration of the left and right sides of the brain and that’s how it’s explained to parents. However, there is a lot of information out there on this topic that may or may not be relevant to your child and her struggles— keep this in mind when Googling information.

It is more likely, that your child’s brain is utilizing the left and right sides for very specific motor skills such as writing, eating and throwing a ball. This can lead to motor confusion—this is where the poor integration and lack of communication between the left and right sides of the brain comes into play.

When the child is not utilizing one side of the brain more dominantly for motor patterns, confusion and poor motor learning occur leading to delays and deficits in motor skills.

how to tell if your child is ambidextrous

It is unclear why the brain develops this way, but it does happen, and it is okay. In fact, it is easily addressed by an occupational therapist.

Determining if your child is ambidextrous, meaning they have equal proficiency and comfort using both hands, can require some observation. Here are a few signs that may indicate ambidexterity in your child:

  • Equal use of hands
  • Kicks a ball with either foot with equal distance and force
  • Balances on each leg equally
  • Equal tongue movements laterally
  • Proficient functional performance with either side of the body
  • Efficient use of tools with assistance of the other hand: scissor use, pencil use, feeding utensils, and other functional tools

In addition to these abilities, you can take a look at areas of functional performance. These include the underlying skills that impact function.

  • Frequent hand-switching: Observe if your child regularly switches hands during activities such as writing, drawing, eating, or playing sports. Ambidextrous individuals often demonstrate fluidity in using either hand without a clear preference.
  • Equal proficiency: Notice if your child shows similar levels of skill and coordination when using both hands for various tasks. They may exhibit no significant difference in handwriting quality, drawing ability, or manipulating objects with either hand.
  • Ease in learning new skills: Ambidextrous children tend to adapt quickly when asked to perform tasks with either hand. They may show little to no difficulty when switching hands for activities.
  • Mirror-like movements: Pay attention to your child’s movements. Ambidextrous individuals may display symmetrical movements, where actions performed with one hand can be mirrored almost identically by the other hand.
  • Lack of hand dominance: Ambidexterity implies the absence of a clear hand dominance. If your child does not consistently favor one hand over the other for a majority of tasks, it suggests a potential ambidextrous inclination.

Ambidexterous Motor Development

I already touched on this a little, but a child with mixed dominance may switch sides for task completion when experiencing fatigue. Due to this, their motor development and precision is typically delayed.

The most common area that this is noted in is in fine motor development for handwriting. This is because the child is equally, but poorly skilled with both hands, and will switch hands to compensate for fatigue.

Motor delays may also be noticed later on when it comes to the reciprocal movements needed to throw/catch or kick a ball and when skipping. A child with mixed dominance may attempt to catch and throw with the same hand, hold a bat with a backwards grip, or stand on the opposite side of the plate when hitting.

They may also experience a moderate level of confusion, and frustration as they are unsure of how to make the two sides of their body work together leading to overall poor hand/foot-eye coordination skills.Ambidexterity or mixed dominance and what this means for kids who use both hands to complete tasks like handwriting.

For a few fun hand dominance activities, try these ideas to help kids establish a

Ambidextrous hands and eyes

If you have more questions and want to learn more on a dominant eyes and understanding how the eyes and hands work together during activities, you’ll want to check out our Visual Processing Lab.

It’s a 3-day series of emails that covers everything about visual processing, visual motor skills, and eye-hand coordination. We take a closer look at visual skills and break things down, as well as covering the big picture of visual needs and how the hands and eyes work together.  

In the visual processing lab, you will discover how oculomotor skills like smooth pursuits make a big difference in higher level skills like learning and executive function. The best thing about this lab (besides all of the awesome info) is that it has a fun “lab” theme. I might have had too much fun with this one 🙂  

Join us in visual processing Lab! Where you won’t need Bunsen burners or safety goggles!  

Click here to learn more about Visual Processing Lab and to sign up.
ambidextrous eye dominance

Hand preference is something we are often aware of, whether we are right-handed or left-handed. However, many parents may not realize that we also have a preferred or dominant eye. This aspect of eye dominance is often overlooked because we typically use both eyes together for most activities.

So, how can you determine which eye is dominant?

Observing monocular tasks: When using a camera, telescope, microscope, or squinting with one eye. Pay attention to which eye you naturally prefer to use. This eye is typically your dominant eye. In most cases, eye dominance aligns with handedness, meaning that if you are right-handed, you are more likely to be right-eye dominant. However, there are instances where the dominant eye may differ from handedness.

Knowing about eye dominance is important because it can help to gain insights about a child’s visual processing and to identify any variations in eye-hand coordination. This knowledge can be particularly helpful when engaging in activities that require controlled motor planning, speed and timing of movement, and accuracy.

 
Free visual processing email lab to learn about visual skills needed in learning and reading.

Colleen Beck, OTR/L has been an occupational therapist since 2000, working in school-based, hand therapy, outpatient peds, EI, and SNF. Colleen created The OT Toolbox to inspire therapists, teachers, and parents with easy and fun tools to help children thrive. Read her story about going from an OT making $3/hour (after paying for kids’ childcare) to a full-time OT resource creator for millions of readers. Want to collaborate? Send an email to contact@theottoolbox.com.
Name Practice for Kindergarten

name writing activities for kindergarten

This blog discusses the developmental criteria needed prior to introducing name writing to kindergarteners, specifically name practice for kindergarten. We’re covering the related fine motor strengthening activities, and ten fun ways to work on name writing practice for kindergarten students. Be sure to check out our resource on name writing activities for more tips at different ages and abilities.

At this age it’s important to understand the reasoning behind tracing sheets.

name writing activities for kindergarten

name practice for kindergarten

Today’s Kindergarten curriculum includes increased developmental requirements than in previous years, but the opportunities to practice writing can be a “just right” level for many children at this age.

An important thing to cover when it comes to name writing practice: name writing in kindergarten is when handwriting begins to be developmentally appropriate. In preschool, writing AND pre-writing with a pencil or writing utensil is NOT developmentally appropriate. Preschool curriculum that tell you otherwise are simply inaccurate.

Being that this article is about kindergarten name writing, know that handwriting in kindergarten requires the establishment of pre-writing skills (which occur through play).

Once children have developed visual/spatial awareness, pre-writing strokes, and fine motor strength, they are ready to practice writing their name. Also a common consideration in kindergarten name writing is that sometimes children may be developmentally ready, but they don’t show an interest in writing their own names.

You can practice name writing in lots of different ways that include multisensory name creation and letter recognition games to entice even the most reluctant student.

Let’s take a deeper look at kindergarten name practice.

Developmental prerequisites needed for name writing

There are many skills children need to develop before they are able to write their names. In order for greater success, they need to know the sounds and names of letters, be able to use their body correctly, know how to copy written lines, and so much more.

For better success rates, many developmental skills are needed for handwriting to be developed before a child is able to write their name:

  • Pre-writing line formation (straight lines, circles, cross, diagonal lines, triangles, squares) 
  • Identifying letters of the alphabet
  • Visual perceptual skills
  • Visual motor skills
  • Fine motor skills to hold and manipulate a writing utensil
  • Spatial relations (positioning, placement, left to right progression)
  • Direction following
  • Eye-hand coordination to place letters on a paper
  • Visual Tracking skills 
  • Crossing midline skills
  • Bilateral coordination skills

One of the the best ways to learn new skills is through a multi-sensorial approach.

Letter identification and sounds can be taught through worksheets and flashcards, but kindergartners love to learn through play. 

How do I know they are ready for name writing practice?

One of the best ways to know when your child is ready to start writing their name, is by using an assessment tool formulated for kindergarteners.

This handwriting observations and data collection kit has everything you need to get started. This shape formation and pre-writing screening tool can be used along with observations and data collection to assess and analyze a child’s progression in pre-writing skills.

Remember that for some kids, in the kindergarten classroom is the first time they are picking up a pencil or any coloring tool. Others may have been “instructed” to write their name before they were developmentally ready. They might have formed inaccurate motor plans for letters. They might have a pencil grasp that is founded in an inefficient grasp due to using a pencil as a writing tool before they were ready. Kindergarten name writing can look like many different things based on these differences.

Name practice for kindergarten can look like many different things for each kindergartener.

Now that you have determined that your child is developmentally ready to write their name, let’s take a peek at the most enjoyable name writing practice activities available. 

Multisensory activities for name writing practice for Kindergarten

These 10 name writing activities are perfect for kindergarteners ready to take the next step in forming words. Kindergarten name practice can occur through play based activities that support development of underlying skills through play.

Try some of these name practice for kindergarten.

  • Sensory bin handwriting activity: Fill up a tray with sand, shaving cream or other fine sensory material. Laminate the child’s name on a card and place it next to the tray. Using a stick or capped pen, the child can write their name in the tray material. If the material is thin enough, try putting the name card in the tray for students to uncover
  • Letter b and d reversal activities: Do you have a child that has a lowercase b or d in their name? It is common for kids to interchange these letters when learning how to write. These letter reversal activities will help them learn which letter is which
  • Waiting list: When children are waiting for a turn with a toy, or to complete a task, start a “waiting” list on a white board. When one child would like to use a toy another child is using, they can write their name on the board. When it’s their turn, they erase their name, and another child can write their name.
  • Sensory tracing bag: Place some shaving cream and food coloring in a plastic ziplock bag. Smear the shaving cream around so it takes up the entire bag. Some children love to add glitter to their bag to make them sparkle. Once, the bag is flat, have the child use their pointer finger to write their name on the bag, creating a colorful name. These bags can be made with hair gel and glitter, birdseed, dry rice, or sand.
  • Labeling artwork: Once a child is done drawing, write their name using a yellow highlighter. Have the child trace their name using a pen or marker. 
  • Sidewalk Chalk Painting: Write a child’s name in sidewalk chalk outdoors. Give them a paintbrush and water, and have them “erase” their name by tracing the letters with the wet paintbrush. When they are ready, they can write their own name with sidewalk chalk.
  • Name Kits: A name kit is a great way to organize name practice in a folder for each child in your class. To make a name kit, you’ll need letters of the name in different fonts, letter magnets, and writing strips. By adding a laminated name card, the plastic letters in their name, letter cut outs, and a few other name products, kids can grab their name kit at any time to practice the letter order and spelling of their name. We have many different letter activities available that can be used with many different students in our Letter Fine Motor Kit. The kit can be printed off and used with an entire therapy caseload, printing off the letters needed for each student. You’ll find many letter manipulatives in the kit.
  • Name Tracing Folders: Isolating the index finger to trace letters in our name, or using a writing utensil to trace letters, can help children learn the order in which the letters in their name go. 
  • Magnetic Letter Names: Use magnetic letters along with a magnetic surface such as a cookie sheet, refrigerator, or even building names on the garage door to build names using a name cards, to allow children to practice spelling their names anytime. This spoons and magnetic letters activity is another fun idea.
  • Play dough Names: Use colored play dough to roll, stretch and cut the dough. Children can spell their names with the play dough both indoors and outdoors.
  • Graph Paper Letter Boxes: Use large graph paper or letter boxes for students to write one letter of their name in each box. This helps with sizing and spacing, and is often less frustrating to the new learner.
  • Velcro letters: Add velcro to several letters. Have students find the matching letters to their name and stick them onto a board. Pulling velcro is a great finger strengthening activity

A final note about name writing

Name writing practice for kindergarten students is an essential part of their curriculum. Name writing is an essential skill students will need for life, but it is important to remember all of the developmental skills needed in order to write a name.

Allowing children plenty of time to practice, and a variety of multi sensory activities, will make name writing fun. It may take a few months before children are able to write their names legibly, without tracing, because everyone develops at a different pace.

Jeana Kinne is a veteran preschool teacher and director. She has over 20 years of experience in the Early Childhood Education field. Her Bachelors Degree is in Child Development and her Masters Degree is in Early Childhood Education. She has spent over 10 years as a coach, working with Parents and Preschool Teachers, and another 10 years working with infants and toddlers with special needs. She is also the author of the “Sammy the Golden Dog” series, teaching children important skills through play.

The Letter Fine Motor Kit has many letter manipulatives to allow kindergarten students to practice name writing with different letter activities and letter cards to support name writing practice through fine motor play.

Oral Motor Problems and Feeding

oral motor problems

Many times, OT professionals receive referrals for oral motor problems and feeding. It’s through oral motor occupational therapy interventions that kids can move from challenges biting, chewing, and moving food around inside the mouth, to success with eating and trying new foods. Let’s get started!

Oral motor problems lead to difficulty biting, chewing, and manipulating foods. They can cause difficulties with textures of foods, and can be a cause of extremely picky eating! A good place to start is with understanding the development of oral motor skills. Be sure to check out our resource on infant feeding therapy too, because we cover how to support food intake in infants and babies in practical ways that can help the caregiver or parent.

Oral Motor problems

One thing is for sure; individuals can have a huge spectrum of considerations when it comes to oral motor issues. No two kiddos will be alike. That’s why it’s so important to discuss oral motor issues with a professional.

The process of eating is a complex collection of movements patterns with physical and sensory components.

When feeding is a challenge, many times individual oral structures and sensory-motor patterns are a cause. 

If you are questioning whether an eating issue is sensory or oral motor, be sure to take time to explore each consideration. There can be different interventions and strategies depending on the underlying cause of eating difficulties. For example, there are specifics when it comes to issues with sensory food aversions and sensory food issues.

What are Oral Motor Problems Occupational Therapy Addresses?

The oral motor problems listed below are just some of the issues that can impact function in feeding.  

In a small series of blog posts, I have broken down each oral motor problem that occupational therapists typically address. Each blog post includes information about the specific oral motor concern, the reasoning or underlying influences that relate to each oral motor issue, and feeding issues related to the specific oral motor problem.   

This series of blog posts should be a resource for you to find more information relating to how feeding issues are related to specific oral motor problems and how these feeding issues can be addressed in treatment.   

Click on the links below for more information on each oral motor problem area as they relate to feeding. 

  • Mouth Clamped Shut when eating- Consider the child who clamps their mouth shut during meals.  This is usually the biggest sign to a parent that the child is all done eating, is full, or is refusing to eat.  However, it might be an oral motor problem that is actually the cause of the clamped shut mouth.  The child falls back on this technique because it’s worked for them in the past in some way to provide stability, move out of the difficult oral motor exercises, or has resulted in a response from the parent.   

Other oral motor problems include:

  • Tooth Grinding
  • Tonic Bite
  • Jaw Retraction
  • Tongue Retraction  
  • Tongue Protrusion
  • Tongue Thrust      

Kids can have trouble with picky eating and difficultities in feeding when there are oral motor problems. Different types of oral motor problems.

Occupational Therapy for Oral Motor

Oral motor interventions in occupational therapy can cover a variety of intervention techniques. It is essential to begin with an evaluation and individualized assessment by a feeding professional. Occupational therapists are trained in this area, but some OTs have additional certifications.

The list of occupational therapy oral motor strategies listed below is for educational purposes only and not a replacement for therapy of any kind.

Some occupational therapy oral motor strategies that can be used are:

  1. Oral motor assessment- It is essential to start with the assessment process for safety of the individual. Addressed in more detail below.
  2. Oral motor stimulation- In occupational therapy, strategies include brushing to the lips or cheeks, towel stimulation, feeding swab, tongue mobility exercises, etc. These are explained in greater detail below.
  3. Oral Motor Exercises– We’ve listed a larger list of specific exercises to use in play and in therapy sessions.
  4. Oral motor coordination exercises– Use the oral motor cards in the deep breathing kit to improve oral motor coordination skills. Try mimicking the movements by using a mirror and visual modeling.

Oral Motor Assessment Occupational Therapy

Assessment occurs by a pediatric occupational therapist, but there are many things to be considered.

Feeding is developmental and it’s essential to consider the level, age, and abilities of the individual as this will impact all aspects of feeding and oral motor considerations.

Oral motor assessment and infants-

In infancy, oral motor skills are both a means for self-regulation (nurturing through sucking) and nutritive. Things to consider in an occupational therapy oral motor assessment for infants and babies at this age and stage:

  • Is the infant able to suck in exploration for nipple of bottle or breast?
  • Does the infant suck in bursts and have pauses to allow for breathing while eating?
  • Assessment of the physical mechanics of swallow
  • Timing of sucking and pauses- sucking should occur at a rate of about one suck per second with pausing to swallow the liquid and breathing. This should occur in a coordinated manner.
  • Lip closure
  • Jaw movements to draw liquid into the mouth and to swallow (infants)
  • Anterior tongue movement during the sucking, along with cheek movement and jaw movement as the tongue draws milk or formula to the rear of the mouth to swallow (older babies)
  • Oral reflexes and whole body primitive reflexes (root reflex, a suck reflex, a swallow reflex and then protective reflexes like gag and coughing)
  • Liquid leaking from the mouth during eating
  • Anatomy of the mouth, tongue, lips, neck, etc.
  • Positioning during feeding
  • Family educational needs
  • Sleep and timing considerations

Oral motor assessment in babies

In older babies, you begin to see certain developments. Missing these milestones can indicate oral motor problems. These considerations should be addressed in occupational therapy oral motor assessments as babies grow:

  • Hands in the mouth in exploration and play- this is normal part of exploration and supports development of tongue, lips, cheek mobility
  • Positioning and seating (high chair positioning)
  • Neck, head, and upper body control against gravity
  • Motor coordination at age appropriate levels
  • Bite reflex
  • Mouthing toys, teethers, etc.
  • Making sounds with a variety of oral motor movements
  • Mimic facial expressions (open mouth, tongue out, etc.)
  • Gag reflex present
  • Accepting variety of baby food textures, flavors
  • Accepts foods from a baby spoon
  • Lip closure
  • Tongue mobility (thrusting tongue after initial spoon offerings is normal)
  • Transverse tongue reflex- The baby/child feels stimulation on the side that tongue and the tongue moves in that lateral direction- needed for swiping foods
  • Attempts or tries a variety of flavors, textures, and softer, larger foods

Oral motor assessment in toddlers-

During the toddler years, oral motor issues can present in drinking, feeding, and other areas. Consider these aspects in OT assessments:

  • Drinking from sippy cup/open cup
  • Drinking from a straw
  • Drinking a variety of textures and thicknesses (water, juice, thick or thin smoothies
  • Eating a variety of textures and thicknesses
  • Eating fluids mixed with solids (cereal, soups)
  • Biting foods from a larger piece of food
  • Moving food around within the mouth
  • Swiping the mouth with the tongue to clear the mouth
  • Chewing with rotational movements of the jaw
  • Begins to remove food from the lips with the tongue

Oral motor stimulation

We cover specific oral motor exercises designed to support the oral motor stimulation to move the lips, tongue, and jaw to bite, move, swipe, clear the mouth of food, and swallow food in our resource on oral motor exercises. However, below you will find strategies to provide oral motor stimulation to the mouth, lips, gums, and tongue.

Oral motor stimulation in occupational therapy centers around play in order to enable function. This focuses on independence with feeding with safe ability to bite food, clear food from the mouth with the tongue so that food can be swallowed.

Tongue Stimulation-

  • Use a mouth swab– to touch, swipe, tap and swab the tongue on the sides, at the tip, and along the length, avoiding the back of the tongue to avoid activating a gag reflex.
  • Use a vibrating toothbrush- to stimulate tongue movement on the sides. This can help the tongue with lateral movements.
  • Use a gloved finger- Put on a latex or non-latex glove and use a finger to tap the sides of the tongue. The glove can be worn by either the occupational therapist or the individual themselves.
  • Use a mirror- Move the tongue by mimicking movements and watching them in a mirror. You can even have the individual touch their tongue to a clean mirror surface. Play in front of a mirror alongside the child or in front of the child above the mirror so the child can look at the therapist’s face and check their movements in the mirror at the same time.
  • Tongue movement exercises- Use the tongue and mouth exercises included in our Deep Breathing Exercise pack for ideas.
  • Tongue sounds- Make clicking sounds with the tongue on the roof of the mouth. As the child/individual to copy the sounds.
  • Push the tongue into the cheeks of the mouth to copy motions. This can help with lateral sweep of the tongue to clear foods by increasing tongue range of motion.

Lip and Cheek Stimulation

  • Washcloth oral motor simulation- this occurs with a dry wash cloth and then a wet wash cloth by rubbing the lips and cheeks. Each area can be separated so they are addressed in isolation. Use a dry washcloth or wet washcloth to wipe the face, without food use. Use a warm or cold washcloth to wipe the face.
  • Making faces- Cheeks and lips can obtain heavy work, or proprioception by puffing up the cheeks, making fish lips, sealing the lips and blowing, blowing raspberries, copying facial expressions, etc. Play “Simon Says” with facial expressions. We have oral motor Simon Says Commands to share!
  • Food stimulation- Some foods (sweet, sour) are very alerting. These can be used as a frozen pop in the form of a lemonade pop, smoothie, or popsicle. Or, add fruits and frozen foods to a mesh bag that is sucked on.
  • Ice pops- Freeze an ice cube on a popsicle stick and use it as an alerting and stimulating tool to “wake up” the lips and cheeks.
  • Vibrating tools- Play with vibrating mouth toys and touch the face, mouth, lips, teeth in the way of a vibrating toothbrush (offering input through the jaw).
  • Wilbarger Brushing Protocol– Use prior to eating foods (contact a trained therapy professional)

Jaw Stimulation-

  • Vibrating toys- vibrating toys, chewing tools, or a vibrating toothbrush can offer oral motor stimulation through the jaw. This can be very alerting, so use with caution.
  • Chewing tools- biting on “chew toys” (described as heavy chewing therapy tools) or chewing tools that add heavy work through the teeth and jaws. This offers feedback to “wake up” the jaws.
Oral motor issues related to feeding in kids

    As you can see there is a lot of different areas that need to be assessed and addressed when it comes to oral motor concerns related to eating and drinking.       


Colleen Beck, OTR/L has been an occupational therapist since 2000, working in school-based, hand therapy, outpatient peds, EI, and SNF. Colleen created The OT Toolbox to inspire therapists, teachers, and parents with easy and fun tools to help children thrive. Read her story about going from an OT making $3/hour (after paying for kids’ childcare) to a full-time OT resource creator for millions of readers. Want to collaborate? Send an email to contact@theottoolbox.com.

Container Baby Syndrome

container baby syndrome

If you are a new parent, then you have probably heard that tummy time is important for your baby, but it’s so important to process the concept of container baby syndrome. In this blog post, we are covering container syndrome, what this means, and what you can do to support your most precious little one.

container baby syndrome

What is Container syndrome?

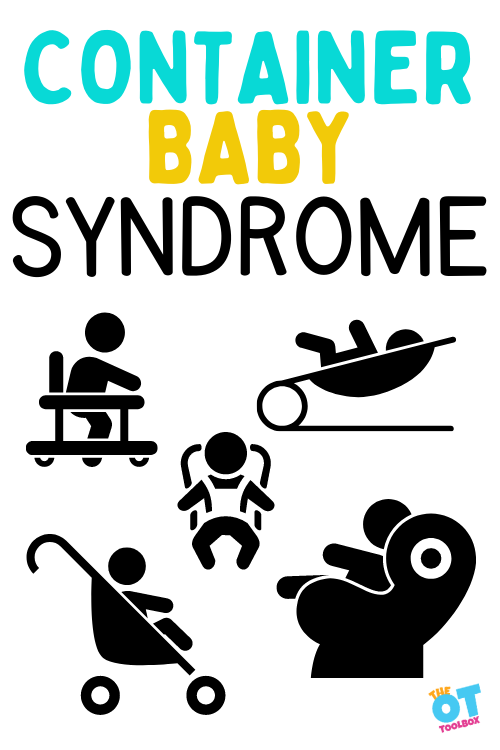
Container Syndrome is a term used to describe the lack of skill in infants who are not allowed ample movement opportunities. Container Baby Syndrome is the result of an infant being placed in a container for an excessive amount of time during the day. 

Importantly, this is not to shame use of baby containers…or to say that use of these items is to be omitted at all costs. It’s important for the wellbeing of the caretaker to put the baby down sometimes! Things need done around the home. Parents need a shower, or some time to themselves. Other children need cared for.

The important thing to know here is that we are talking about constant use of baby holders all the time, during the day and night. Moving the baby from one container to another is the issue.

Constant use of positioners, or devices is what leads to the syndrome known as baby container syndrome, not using some of these items sporadically.

This extended time leads to structural, movement, and behavioral challenges as a result. 

Baby containers include baby equipment and items such as:

  • Restrictive playpen that does not allow for movement
  • Crib
  • Car seats
  • Strollers
  • Bumbo seats
  • Bouncy seats and swings
  • Rockers
  • Nursing cushions
  • Vibrating chairs
  • Jumpers
  • Exersaucers
  • positioning pillows
  • Slings
  • Floor seats
  • Infant swings
  • Walkers
  • Jumpers

The other issue is when the devices are used for nighttime and daytime sleep.

It’s easy to fall into that trap of the newborn sleeping in the rocker chair or bouncy seat because the reclined position puts the upper body into a reclined position, which can help with reflux that a baby might have. The warmth and close sides allow the baby to fall asleep easily. But when the newborn is sleeping in this positioner all night and then wakes for a short period and then goes back to sleep in the same device, is when we see the issues with constant pressure on one side of the head and neck positioning that can lead to issues.

For support and help with newborns not sleeping through the night, be sure to check out our blog post on this topic. Occupational therapy professionals can help with sleep during the newborn stage which impacts so many aspects of functional development and family dynamics.

All of the time spent in these baby containers adds up! When in a positioning device such as the ones listed above, little ones are limited in the motor development that results from stretching, wiggling, turning, reaching, and otherwise moving.

Why Worry About Container Syndrome?

As a new parent, you might be wondering “why can’t I just use the wonderful bouncers, baby rockers, and other entertainment devices for infants and toddlers? After all, I got all of these amazing baby chairs, rockers, and positioners for my baby shower…can’t wait to use them!

Why should I put my baby on the floor? The biggest reason has to do with the benefits to development. Putting a baby in a container such as a jumper, positioning seat, bouncy seat lead to something called container baby syndrome.

It’s understandable why the baby seat or jumper seems like a better option than the floor for a baby. Parents and caregivers have shown a great deal of support for baby “containers” like bouncy seats, Bumbo seats, and activity centers. In fact, these baby holders have become so popular over the years, that a term has been coined; “container baby syndrome”. 

When babies are constantly keep in a space where they cannot freely move, how can they be expected to roll, crawl, or walk, when it is the developmentally appropriate timeframe?

Furthermore, babies need experiences where they can learn from their world in a physical way.

They need to discover “what happens when I move my arm and head like this”?’ Babies may fall over, and have some stumbles along the way, but this is how young children learn about gravity and develop postural stability.

Without those learning opportunities, children will only learn that their seat will catch them from falling, no matter how much they wiggle. 

With fewer movement opportunities, a delay may be seen in typical development and reflex integration. More serious issues may occur when we keep babies still, like a flattened head from lying down (positional plagiocephaly) or a tight neck that reduces head movement (torticollis). 

There is the visual component too. When babies are in a positioner such as a bouncy seat, they are positioned on their back with little to no neck movement. The neck, back, spine don’t receive the time (even minutes) to stretch, turn, and move. But the eyes are limited as well.

When placed on the back in a reclined position, the eyes are not strengthened to look and gaze based on head and neck movements. The eyes may stay in one place and are not challenged to focus on different depths and peripheral stimuli.

Neck movements are limited to turning from side to side, and they eyes tend to follow the neck. This limited eye movement can later impact other areas of development.

Where did container syndrome come from?

In 1992 the “back to sleep” campaign was introduced to lessen the likelihood of sudden infant death syndrome (SIDS).  While the rate of SIDS went down 50%, (yay!) container syndrome rose 600%, to one in seven babies! 

This is astounding. 

Parents are so nervous about SIDS, they place their babies in various containers most of the day. While this seems a safe, convenient, and supportive option, the use of too many “containers” can lead to container baby syndrome. 

Babies who have not had enough tummy time may resist this at first, giving the false impression that the container is the best place for them. 

What does container syndrome look like?

  • Head Shape Flatness. The back or the side of the head is abnormally flat
  • Facial asymmetry. The sides of the baby’s face may appear unequal as a result of skull deformity and flatness
  • Torticollis. The baby has difficulty turning the head to one side, or keeping the neck and head straight due to muscle tightness on one side of the neck
  • Decreased movement, strength, and coordination -the baby may not be able to roll, sit up, crawl,  lift the head or reach with their arms while on their tummy. 
  • Delayed milestone achievement
  • Speech, sight, hearing, and cognitive problems – Visual skills can be affected such as following moving objects with the eyes and seeing toys from different distances. Hearing can be disordered, as baby does not hear from all angles. Delayed cognitive skills may arise because the infant is not able to problem solve, explore their environment, or develop language skills
  • Attention deficit hyperactivity disorder (ADHD)
  • Increased weight/obesity

How to prevent container syndrome in babies

Container baby syndrome is 100% preventable.  If you suspect your baby or a client of yours has symptoms of this syndrome, speak with their pediatrician, get a referral to a physical therapist, and begin working on exercises.

  • Allow baby plenty of supervised free time on a blanket on the floor, or in a large play yard. Encourage tummy time, reaching for toys, exploration.  Some caregivers feel unsure about putting their baby on the floor.  A blanket, sheet, or other floor covering can be placed and washed after usage. Or, use toys such as a baby gym to encourage belly play.
  • Limit baby’s exposure to containers. Use only when transporting the baby, or there is truly no other safe option
  • Increase supervised tummy time during the day.  Your baby may cry and resist at first, as this may be difficult or uncomfortable.  Start slowly and persevere. Colleen from the OT Toolbox has a great article on Tummy Time Myths.
  • Hold your infant in your arms, or in a sling for short periods during the day.  This will encourage movement, increased head control, and socialization
  • Rotate baby through various stations and positions during the day. Holding a baby all of the time is not healthy for a growing child either. 
  • Floor Play for Babies is another great resource from your friends at the OT Toolbox
  • Use gates and other borders to secure a safe place for baby to play, away from wandering pets, or siblings who may step on them
  • EDUCATE caregivers and other people about the danger of container baby syndrome. Encourage caregivers to provide opportunities for the baby to explore their environment freely.  Demonstrate tummy time and other appropriate movement experiences

Activities to Prevent Container Syndrome

Now that it is understood that playing on the floor is important, let’s get into the many different ways you can do it! One of the easiest ways to encourage floortime with your baby is to lay a blanket on the floor, preferably with a carpet underneath for comfort, and place a toy or two near the baby.

Depending on their age and abilities, the baby may be totally independent, rolling and playing happily. If the children are younger, or less comfortable playing by themselves, this is a great opportunity for a caregiver to step in. A fair amount of babies do not like being on their tummy for various reasons, including medical or sensory.

Babies who have gastrointestinal issues may be hesitant to engage in tummy time, as it is uncomfortable. Work through these difficulties while encouraging floor play.

How do I keep them safe down there? Prepare a safe and clean environment for movement. This may involve baby gates, barriers, or a large corral to allow freedom of movement, without risking baby falling down the stairs. Lie on the floor yourself and see what is down there at child level. You may be surprised to notice extension cords, small objects, or other unsafe objects while you are down there.

  • 2 months or younger: Talk with your baby, showing them toys, describing them, and giving them to their hand to feel and explore. Sing songs – whatever songs you know! Encourage them to wiggle their arms and kick their legs along with songs, tickles, or kisses. 
  • 3-4 months: Your baby will be able to hold tummy time for a bit longer by now. If they have trouble staying there, lay down with them! Be a part of the team, showing them how fun being on their tummy can be. Babies around this age can reach and bring toys to their mouths, so give them safe opportunities to do so.
  • 5-6 months: Rolling should be part of the baby’s physical development around this time. Encourage this movement by enticing them with something they love. Maybe it’s you, a special toy, the TV remote, or their next bottle. Try singing Five in the Bed. When the song says “Roll over!” show your baby how to roll.  During this time of development, your baby may be moving more than ever. They may even be crawling! Encourage even more floor play with these new skills. As long as the area surrounding them is safe, and you are close by, tons of fun (and important development) can be had! Read here about the types of crawling you might start to see at this age.
  • 7-8 months: Just like rolling, encourage crawling by giving the baby lots of space on the floor (that may mean moving aside some furniture) and placing toys or books in various places. There are so many fun games to be played! Playing “Peek-a-boo” where the baby pulls a blanket or towel off to show what’s underneath, is a classic game and critical to development. This teaches baby object permanence. Scatter toys near and far to encourage looking, stretching, and moving.
  • 9-10 months: Around this age, your baby will really be on the go. Maybe a baby obstacle course is up their alley…crawl over mom’s legs, under the coffee table, around the dog, and up the step into the kitchen! Creative barriers and safety gates will likely come into play around this stage to keep young children safe.
  • 11-12 months: Almost one-year-olds may be walking, which means they will likely not tolerate being in a “container” very well anymore. Now that they are cruising on furniture, squatting to pick up toys, and participating more in play, they may likely lead the way! See what your child’s interests are during floor playtime and follow their lead. 

Need more tummy time information?  The OT Toolbox has several articles on baby play that support the development of balance and coordination through play.

Another great resource to read more on how to promote development through play is DIR Floortime as it covers strategies to support development through interest-based play.

The National Institute for Health also has a great resource on tummy time. 

Victoria Wood, OTR/L is a contributor to The OT Toolbox and has been providing Occupational Therapy treatment in pediatrics for more than 25 years. She has practiced in hospital settings (inpatient, outpatient, NICU, PICU), school systems, and outpatient clinics in several states. She has treated hundreds of children with various sensory processing dysfunction in the areas of behavior, gross/fine motor skills, social skills and self-care. Ms. Wood has also been a featured speaker at seminars, webinars, and school staff development training. She is the author of Seeing your Home and Community with Sensory Eyes.

A final note on container syndrome

While the “back to sleep” campaign has certainly been successful, it is not without pitfalls. The rule of thumb for parenting is;  everything in moderation.  Not too much screen time, sweets, or containers.  Parents do not need to be laden with guilt over container baby syndrome.  Most caregivers are doing the best they can with what knowledge they have.  As they learn more, they will do more.

NOTE* The term “they” is used instead of he/she to be inclusive.

Truths About Toddlerhood The OT Wants You To Know

toddlerhood

The toddler years can be a struggle! From the age of one year to 3 years, toddlers grow and develop immensely. But when parents are in the midst of toddlerhood, it can seem like the never-ending tantrums, meltdowns, sometimes crazed attempts at independence, and picky eating, sleep issues, etc… never end. Not to mention learning new words (with little-to-no filter), sleep changes, appetite and eating considerations, toddler years can be a real challenge to parents. But as an occupational therapist, there is a very real developmental need for these toddler antics.

Be sure to read our resource on newborns not sleeping through the night, because sometimes sleep habits can carry over to toddler sleep issues that impact function, development, and family dynamics.

Toddlerhood gets a bad rap with terms like the “terrible twos” and the “three-nager years”. But is it all bad? Here’s what your friendly OT wants you to know…

Strategies for toddlerhood

Toddlerhood Development

So, what is it about the toddler years? These cute packages of rolly, squishy, no-longer babies are little people with BIG emotions, BIG personalities, and BIG smiles. Some of the sweetest memories I have from when my kids were younger come from the toddler stage, when little voices pronounce words totally incorrectly…but in the cutest way possible. Those big teethy smiles and non-stop play was nothing but learning and developing skills.

As a mom, I loved to watch my littles learn. I loved to kiss their sweet heads to sleep each night. Oh, there were meltdowns, demanding, whining breakdowns that these cuties experienced (daily). There were messes, spills, diaper issues, and the house was in a constant state of disaster zone.

But as the occupational therapist? I knew this was all part of the stage of development and toddlerhood means messy repetition. (i.e. Yes, we will need to practice cleaning up blocks 37 times a day. Yes, we will do it again tomorrow).

But, from that perspective of a pediatric developmental professional, there is so much more to say about the toddler years. ALL of that pushing buttons, whining, changing minds, meltdowns, carrying purses full of toys, getting into the kitchen cupboards, streaking naked through the house…it’s all essential toddler development! Really!

We have a great resource on child development that covers developmental milestones. From that blog post, you’ll discover the toddler developmental stages that occur from 1-3 years.

This developmental checklist can help to define specific milestones.

Early childhood is a critical time when children develop skills they will use throughout their lives. These areas of development include:

  • physical
  • cognitive
  • communication/language
  • emotional
  • social skills

It is during the first years of life that children show a tremendous level of growth in each of these areas.

Occupational Therapy and Toddlerhood…

As a pediatric OT, there are a few sticking points that is important to remember.

The toddler years get a bad rap for behaviors, saying “no”, tantrums, going “boneless” as we used to say about sudden tantrums where the toddler flops on the floor in refusal for some task, activity, or thing like getting dressed. However, if there are extreme issues, regressions, or you have a gut feeling about certain developmental concerns, these may be toddler behavior red flags to explore in further detail along with a pediatrician.

But, here are a few things about the “good” of toddlerhood…

  1. Have patience with your toddler.

Because of the tremendous amount of development, it is easy to become overwhelmed by skills (running, hopping, getting dressed, manipulating toys and materials, self-feeding…the list goes on and on!) Plus, young children want to exhibit independence in these areas. They want to do what mom or dad or big siblings are doing, but they may not have the skills to do so. Frustration ensues!

Things to remember is that the child is developing in all of these areas at once. By watching routines, listening to parents talking, watching siblings, they learn to throw, carry, put away, wash, color…these are multi-faceted skills. There is sensory, motor, cognitive, visual all happening at once with daily tasks.

Plus, the cognitive development occurring at the same time means that following directions are not always on target with what the small child wants to do. They want a piece of toast for breakfast. Then they don’t. It can be easy to lose patience as the toddler has a tantrum on the floor, but they are managing emotions, thought processes, decisions, and communication challenges all at once. It can be a lot to process! Be patient as the adult in the situation.

Patience is key as your little toddler develops skills at the rate that is right for them.

That brings us to our next point.

2. Remember that each child is different.

Toddlers grow and develop at a fairly predictable course and rate. There are general developmental expectations that happen during the toddler years, called developmental milestones. However, not all child achieves these milestones at the same time. And that’s ok!

It can be easy to become upset as a parent when a friend’s child achieves skills or abilities. Remember that each child is on their course of development. From birth to three years, a child visits the pediatrician many times.

You’ll experience many questions on development during those visits, where the doctor or staff ask about milestones. If there is a concern with development, or evident delay, this is where you can explore services to support needs.

Even through each toddler is different and development occurs in different stages, it’s all part of showing independence. This can mean picky eating, throwing food, saying “NO!” or any other aspect of showing independence.

3. Development occurs through play.

Occupational therapy practitioners use play as a tool to promote more play! And it’s through play that toddlers develop skills.

It’s through play that toddlers achieve stability, build relationships with parents, siblings, and others.

They test boundaries and explore the world around them.

Play offers opportunities to use their reflexes, transform motor skills, and distinguish refined motor skills (i.e. using their arms and legs to achieve a desired action such as getting up those stairs!)

Sensorimotor skills expand and toddlers gain control in play objects and tool use; They begin to use crayons, spoons, forks, and manage clothing. Previously, we’ve shared the best crayons for toddlers that support this development through functional play.

Young children are fascinated by mastering new skills and learning new things. You might see them drawn to activities or experiences that offer sensory experiences, are repetitious, or involve exploration. But even though novel opportunities support child development, routine is essential.

Read about the power of play for more ideas to support your toddler.

Physical Development during toddlerhood

Going back to the development aspect, you can generally expect to see the following skills developed during toddlerhood:

12-18 months

  • First steps
  • Walking
  • Climbing stairs

18-24 months

  • Running

24-36 months

  • Jumping
  • Begin to ride a tricycle

3 years

  • True run with both feet leaving the ground
  • Walk upstairs with alternating feet
  • Walk downstairs
  • Able to remove most clothing

Cognitive Development During Toddlerhood

From 1-3 years of age, so many cognitive skills are built and expanded upon. You’ll notice in the list below that many of these cognitive skill components are grounded in play. Remember that play builds skills! Let’s break down the skills by age:

12-18 months

  • Includes others at recipients of play behaviors
  • Imitates new behavior

18-24 months

  • Demonstrates invention by combining mental combinations
  • Finds hidden objects (separation skills)
  • Shows differed imitation
  • Uses toys or dolls in pretend play

24-36 months

  • Substitutes objects in pretend play
  • Integrates themes in play

3 years

  • Begins operational thinking
  • Counting words up to 5
  • Can solve nesting cup problems

Language Development for Toddlers

The first few years are a huge time for development of receptive language and expressive language. Here are some specifics:

12-18 months

  • Expresses self through jargon, sounds, cries

18-24 months

  • Understands multi-word phrases/sentences
  • Uses multi-word phrases to express thoughts (“Me up” to indicate a desire to be picked up; “Mommy go” to indicate that mommy has left the house)

24-36 months

  • Initiates a conversation with words or phrases
  • Uses 2 part sentences or phrases (“Me go home.”)

3 years

  • Understands positional terminology (in, on, under)
  • Uses more complex sentences
  • Distinguishes between images and words or text on paper or in books
  • Begins to generalize rules for verb tenses and using plurals

Toddler Social-Emotional Development

Social emotional development occurs even from the young age in toddler years. Social skill development occurs through interaction with others, play, and day to day tasks. Here are some milestones you may see:

12-18 months

  • Experiences peak of separation anxiety

18-24 months

  • Demonstrates less separation anxiety
  • Begins to show empathy for another person, animal, toy

24-36 months

  • Begins to respond with empathy to another person’s distress
  • Includes others in pretend play

3 years

  • Shows physical aggression over verbal aggression when distressed or upset

Toddlerhood Tips

So, how can you and your toddler thrive during these hectic years? A pinch of patience, play, play, and more play! We actually have actionable strategies over on our toddler play page, including fun ways to play with your toddler that inspire development.

Some quick tips (described in more detail over on that main toddler page) include:

  1. Meet the level of the child.
  2. Set up a toddler safe space.
  3. Be a balanced play partner.
  4. Enjoy & have fun with the play.
  5. Limit screens. (Or use in moderation.)

Transforming Toddlerhood With Play

Ask any occupational therapist and you’ll see that play is the way and the means to develop skills during these years. Looking for therapist-approved activities to inspire learning through play for toddlers? These are some of our favorite ideas:

Or, try making a craft with 2 year olds and 3 year olds…an easy suncatcher activity using items you have in the house!

Colleen Beck, OTR/L has been an occupational therapist since 2000, working in school-based, hand therapy, outpatient peds, EI, and SNF. Colleen created The OT Toolbox to inspire therapists, teachers, and parents with easy and fun tools to help children thrive. Read her story about going from an OT making $3/hour (after paying for kids’ childcare) to a full-time OT resource creator for millions of readers. Want to collaborate? Send an email to contact@theottoolbox.com.

The Incredible Power of Play

child development through play

Did you ever stop and think about the power of play? There are so many ways child development progresses through every day play. We know as occupational therapists that play is the primary work of the child, but it is also through play that essential skills are developed and refined.

Play Development

We’ve covered the development of play in various places across this website, breaking areas down by age:

As well as play activities by skill area:

From independent play to parallel play to organized games, play exists along a continuum that development can exist at various ages.

The Power of Play

Play is the essence of childhood and it’s the means for children to develop and grow! The incredible power of play is a tool and a means to children development.

It’s through play that kids learn. Kids delight in games, toys, and creative play while developing skills like fine and gross motor development. They learn to self-regulate. They learn to communicate, manage their emotions, and gain valuable sensory input. Play is powerful for kids!

Let’s go over the importance of children’s play

Here are 5 ways play builds child development in gross motor skills, fine motor skills, executive functioning, self-confidence, and sensory processing.

The Power of Play

Not long ago, I was asked by Radio Flyer to represent occupational therapy as an Expert Play Panelist. Such fun! As occupational therapists, we KNOW the power of play. We KNOW that kids need to move, climb, run, and experience all of their senses in order to grow and develop. Play is the means. Play is very simply, what kids do. It’s their job to play, and play is the way they develop skills they need throughout their life.

Play is powerful!

You can read the blog post over at Radio Flyer that describes the impact that play has on child development.

In that blog post, I discussed the power of play on fine motor skills, gross motor skills, self-confidence, sensory processing, and executive functioning skills. All of these areas (and more!) areas by play.

This play meme is perfect for sharing the immense power of play through getting dirty, playing inthe mud, jumping in puddles, and outdoor sensory play.

Play is a learning tool. Play-based learning is one way that children can learn valuable lessons through play, however it’s more than that. It’s through play that children learn about the world around them.

Kids learn how things work, move, and interact through play. Movement-based learning offers kids an opportunity to learn through gross and fine motor activities, but while they are moving, they are learning how their body works, too. They develop motor skills at the same time.

Play Development

Here’s the thing. Children develop play skills as they grow. But play also develops skills! It’s a win-win situation.

Play Develops Gross Motor Skills

Gross motor skills occur during play as kids innately practice moving in a variety of positions. Gross motor coordination, balance development, endurance, motor planning, proximal stability, and visual motor skills are all developed through play.

Whole body movements begin to develop from birth, through tummy time and play supports that. But as a baby begins to explore the world around them, they crawl, stand, and walk and all of this is rooted in play. These early gross motor milestones support development of later skills, too.

Play Develops Fine Motor Skills

Play develops fine motor skills through tool use, manipulating toys and pretend materials, and engaging in play activities. Take a look at this fine motor milestones list and see how many of the developmental milestones are rooted in play and exploration of the world using the hands and fingers.

Children can gain strength and precision in their hands through play so that coordinated and efficient use of a pencil or scissors becomes fluid and natural.

Play develops core strength and stability, refined precision skills, and endurance in the hands for managing clothing fasteners and other everyday items.

Play Develops Executive Functioning

By playing with new activities, games, or acting out pretend play situations, children can try new things, practice tasks they’ve observed grownups doing, and explore, gaining self-confidence and resilience.

Play offers experiences for developing executive functioning skills such as:

  • impulse control
  • coping skills
  • organization
  • problem solving
  • attention
  • planning and prioritization
  • task completion
  • working memory

Play is a way to practice jobs, too. Think about the child that plays house, construction worker, race car driver, or shopping. All of these occupations require executive functioning skills to plan the activity, carry out tasks, and complete the play sequence. This pretend play is a huge role in development of skills.

Play Develops Sensory Processing

Through play, children understand how their body works as they learn and integrate sensory information.

Dr. A. Jean Ayres, an occupational therapist, psychologist, and neuroscientist, developed her Ayres sensory integration theory and practice in the mid 1970s. She recognized that a child’s sensory system can greatly impact how they perceive and interact with the world around them, through play.

Play allows kids to become aware of their body awareness and body movement as they jump, roll, spin, and tumble upside down.

Play that offers a variety of movements and heavy work opportunities offer proprioceptive and vestibular input that impacts self-regulation. These sensory systems, through play are related to interoception, or internal awareness of the body’s functions.

Play also develops the visual motor system as children move through space and coordinate hand and eye information.

Play Develops Self-Confidence

By playing with new activities, games, or acting out pretend play situations, children can try new things, practice tasks they’ve observed grownups doing, and explore, gaining self-confidence and resilience.

Self-confidence allows us to try new things.

And trying new things (and trying the hard things!) is important for kids.

Self-confidence is an aspect of emotional intelligence. It’s part of social emotional skills that allow us to participate in tasks, interact with others, understand and recognize emotions, and essentially function!

All of these areas: motor skills, cognitive skills, social emotional skills, sensory processing skills…they are all founded in childhood, established at a young age through the very fun occupation of PLAY! What’s cool is we are lead as humans to do meaningful and motivating tasks, and play is just that! It makes us WANT to participate so we can learn and develop!

Play meme: Play has an extremely powerful role in child development.

The Role of Play in Child Development

Ok, you might be thinking, “Right. Kids play. That’s nothing new.”

And you’re right. Play is so natural. Some of your earliest and best memories may be of play situations in your own childhood. Play happens instinctively. But the thing is that play is suffering in kids. If you’re in an educational setting or an occupational therapist, you might be nodding your head right now. Kids are different than they were in the past. And play is at the root, once again.

Play's powerful role in child development.

But Play has Changed.

Times change. We know this. Technology advances, knowledge progresses, and the world transforms. However, play being the root of child development, learning, and pediatric skill acquisition doesn’t change.

Here are a few ways that play has changed and how that may look in kids today:

Almost all creativity involves purposeful play. Quote by Abraham Maslow on the power of play.

Play gives children a chance to practice what they are learning. A great play quote by Mr. Rogers.

Less Time for Kids in Nature

Kids spend less time outdoors- Do you remember playing outdoors for the entire day and coming home when the streetlights came on? Kids are spending more time indoors. After school hours aren’t spent outdoors or in free-play. They are spent indoors, at child care centers, or after-school programs. Sometimes, it’s the fact that kids need to complete their homework so they can dart off to sports practices or appointments. Other times, it’s not safe for children to play outside in the yard on their own. Kids miss out on the free running space, climbing, running, rolling, and motor development.

Kids are spending more time in the car, running back and forth to organized activities- There are wonderful benefits to spending time on a team or learning an instrument.

However, for children now, they are a member of several sports teams, participating in various activities, clubs, and other organized activities. Sports teams sometimes have more than one practice or game per week. Kids are being run to and from sports practices, instrument lessons, clubs, appointments, and more. All of that time spent in the car limits free and creative play.

This isn’t’ to say that sports and clubs aren’t good for kids! It’s just a point of awareness that time spent in these organized tasks limits free play, outdoor experiences, and growth in learning through the senses and motor experiences.

There are so many benefits to nature play!

Less recess time- Are you seeing this too? Kids in my district are limited in outdoor recess time by the weather. So, when it’s cold or raining, they don’t get to go outdoors to play. And that lack of monkey bar time at recess can be an issue with the afternoon learning. Students in the older grades don’t even get recess in our district.

From grades 4-6, there is a limited time for recess. In fact, recess and lunch time is shared. So if children need extra time to eat, they miss out on recess. Not cool for our kids that are “big kids”!

Kids need that outdoor play.

Are you seeing less recess time at your schools?

Play sparks learning, communication, discovery, motor development, insight, and jowy. And that's just the beginning.

Kids are spending more time on technology- The screens are taking over! So often, a child has a phone or tablet screen in front of them rather than spending time playing games, playing with friends, they are playing digital games or watching videos. They are limiting themselves in motor and sensory experiences. Movement and creative play are impacted.

Don’t take this the wrong way: Technology is awesome! It’s a way of life. We are lucky to be alive during this time of knowledge and awareness granted by technological advancements. Kids can learn from devices…some of them know more about technology than their adults. The point is that being aware of time spent in a head-down position holding that phone limits interaction with the world around them. Awareness of this time is key.

There are more changes that we’ve been seeing in kids today. This is just a short list but one to be aware of as practitioners, parents, and teachers. As the adults in the room, we need to make the change that kids need.

We need to be vigilant in making play available to kids…the power of play is essential to child development!

We need to guide children to play.

Because, the organized sports and scheduled activities are fun. It’s fun to play on a team with friends. It’s easy to fall into the day-to-day-life that daily schedules require. It’s fun and exciting to watch YouTube videos and play games with friends online.

It’s our job as parents, teachers, therapists…adults to see the impact these life changes are having on our kids.

Our kids deserve it!

Learning Through Play Quotes

In this blog post, we covered more than just the power of play. You’ll also fine learning through play quotes and memes about play. These quotes about play are just one way to advocate on the power of play.

I’m sharing great social media graphics about play that you can share online. These are importance of sensory play quotes, quotes about play, and play development memes. (Just link to this page as your source!) I’m also talking about the incredible benefits of play in kids.

There's no such thing as bad weather, only bad clothes. Outdoor play is so essential for child development!
“There’s no such thing as bad weather, only bad clothes.”
A fresh mindset about kids and how play impacts their development.
“A fresh start is not a place, it’s a mindset.”

We can take a fresh start on offering play opportunities for our kids. Let’s expose them to the power of play!

Kids are growing up in a world where play is restricted or limited. We can change that!
“I wouldn’t change you for the world. But I would change the world for you.”

We as parents, educators, and therapy professionals have the opportunity to take a stand on making the power of play more powerful! Let’s change current practices of limited recess time, lack of outside play opportunities, and busyness! Let’s change the world and its expectations and perspectives so we can promote the power of play as a means for supporting child development.

In every job that must be done, there is an element of fun. Quote by Mary Poppins
“In every job that must be done, there is an element of fun.”

This quote from the Mary Poppins book and movies equates with the through of play being the work of the child, but it’s through play that development happens and is practiced. Not only can we play to support development, we can make the process therapeutic and fun! It’s all connected!

Play and therapy looks like just playing, but it's so much more! Play is learning, growint, building skills, gaining confidence, obtaining strategies.
“Yes, we play in therapy. No, we are not just playing. We are becoming independent, growing stronger, building skills, learning, gaining confidence, obtaining coping strategies, transforming lives…”

This play quote by Colleen Beck, OTR/L at The OT Toolbox shares why play is so powerful and benefits development in children. Play offers tools that a child will use throughout their lives.

Almost all creativity involves purposeful play. quote about kids.
“Almost all creativity involves purposeful play.”

Creativity is play and play is creativity. Both are interconnected but also a way to support play development.

Childhood is a journey, not a race.
“Childhood is a journey. Not a race.”

That childhood journey involves much development; cognitively, physically, emotionally…This is a process and it’s through play that the child has the opportunity to learn and practice essential skills.

Occupational therapy goals can be accomplished with various ball pit activities, and you’ll often see this therapy tool in OT clinics.

Occupational therapy uses play in practice to build essential skills.
“I play with shaving cream, toys, and a ball pit at work. I am an occupational therapist.”

Play is the work of the child, and for the pediatric occupational therapist, play is a tool to support development.

It seems that play is one of the most valuable tools for learning.
“It seems that play is one of the MOST valuable tools for learning.”

This is one of my favorites of the learning through play quotes. Learning happens through all aspects of play.

Play builds skills that kids need to build skills.
“Children have a superpower. It’s this morphing ability to take on amazing powers. If we tell them they are capable, they become capable. If we tell them they are kind, they become kind. Let’s power our kids with the tools they need!”

This play based learning quote is so powerful. We can support the development of kids through play and we can guide them to develop the skills they need!

child development through play

Free Handout on The Power of Play

Being that we as therapy professionals, teachers, or parents have this knowledge on play and child development, we can be advocates for our kids. Not only that, but by promoting play as a tool for child development, we serve other children as well. It’s an enormous ripple effect that has the power to impact a generation and generations following.

That’s why I wanted to put the information in this blog post into handout form.

Let’s share what we know about the power of play to teach others how play supports essential child development skills.

Print off this handout in either black and white, printer-friendly version or the color copy. They can be used as educational handouts to teach others on the power play has on child development skills.

To get your copy, just enter your email into the form below.

This handout set is also available in our OT Toolbox Member’s Club. Current Membership Club members can log into your account and head to the dashboard toolbox labeled “Educational Handouts“. Print off the handouts without the need to enter an email address.

Want to add this resource to your therapy toolbox so you can help kids thrive? Enter your email into the form below to access this printable tool.

This resource is just one of the many tools available in The OT Toolbox Member’s Club. Each month, members get instant access to downloadable activities, handouts, worksheets, and printable tools to support development. Members can log into their dashboard and access all of our free downloads in one place. Plus, you’ll find exclusive materials and premium level materials.

Level 1 members gain instant access to all of the downloads available on the site, without enter your email each time PLUS exclusive new resources each month.

Level 2 members get access to all of our downloads, exclusive new resources each month, PLUS additional, premium content each month: therapy kits, screening tools, games, therapy packets, and much more. AND, level 2 members get ad-free content across the entire OT Toolbox website.

Join the Member’s Club today!

FREE Handout: The Power of Play on Child Development

    We respect your privacy. Unsubscribe at anytime.

    Colleen Beck, OTR/L has been an occupational therapist since 2000, working in school-based, hand therapy, outpatient peds, EI, and SNF. Colleen created The OT Toolbox to inspire therapists, teachers, and parents with easy and fun tools to help children thrive. Read her story about going from an OT making $3/hour (after paying for kids’ childcare) to a full-time OT resource creator for millions of readers. Want to collaborate? Send an email to contact@theottoolbox.com.

    Writing with Both Hands-What you Need to Know

    Left and right hand holding a pencil and writing on both sides of a notebook. Text reads "writing with both hands"

    Writing with both hands is a common concern for parents, teachers, and therapists working with students on handwriting skills. Using both hands to write might look like switching hands while writing or even coloring as a result of hand weakness. But there could also be other considerations at play including mixed hand dominance or confusion on which hand to pick up the pencil and which hand holds the paper.

    You’ll definitely want to check out a related resource on more information on hand dominance and establishment of a preferred hand in functional activities.

    writing with both hands

    Writing with both hands- what’s going on

    Have you seen a child on your therapy caseload that writes with both hands? Writing with both hands can be a problem when it comes to handwriting legibility and efficiency.

    Have you ever wondered is my child a lefty or a righty? Or perhaps writing with both hands piqued your curiosity about whether or not your child is ambidextrous.

    Or been asked if they are a lefty or righty and unable to answer?

    Have you noticed that your child seems to use both hands equally when writing? If so, your child may be experiencing mixed hand dominance patterns or cross-dominance, and this is why you are not sure if they are a lefty or a righty. Writing with both hands can have implications that affect handwriting.

    Read on for information on using both hands to write writing and what you need to know about mixed-handedness.


    Where to begin when kids write with Both Hands 

    First, it’s important to understand what is happening when a student uses both hands to write.

    Hand dominance

    Let’s discuss mixed dominance to begin. Here is more information about hand dominance and activities to promote laterality.

    What is it called when you write with both hands

    We get the question about a name for writing with both hands. One way to describe this is the term mixed dominance.

    What is Mixed Dominance?

    Mixed dominance refers to when a child does not demonstrate a strong preference for either the left side or the right side of the body for completion of activities, or clearly utilizes both hands for specific sets of activities. For example, a kiddo might throw with his left hand, but write with his right hand.

    It should also be noted that children with mixed dominance often utilize both sides of the body equally, but poorly. When they fatigue, this leads to confusion with if they are left-side dominant or right-side dominant.

    When Does hand Dominance Develop?

    Dominance of one side of the body or the other is not expected until 5 years of age. Before the age of 5 years old, use of both hands is expected to a moderate degree. However, most children are showing a strong preference for one hand or the other by 3.5-4 years of age.

    Determining Mixed Dominance

    Dominance is typically determined through observation of the eyes, hands and feet and which one the child uses for task completion. For example, a child who is demonstrating mixed dominance may be right eye dominant, and left hand/foot dominant or left eye dominant, right hand dominant and left foot dominant, or any combination of these characteristics.

    Therapists may utilize the Jordan Left/Right Reversal Questionnaire or clinical observations to help them determine mixed dominance. In a vision screen, the therapist can have the child pretend to be a pirate, and see what eye they close when looking through a tube/rolled paper.

    The eye that the child closes is the non-dominant or “weak” eye and the dominant or “strong” eye is the open one. If the “strong” eye does not match the hand preference the child has been showing, this is mixed dominance in action.

    Be sure to watch this space, because tomorrow we’ll cover more about writing with both hands, ambidexterity, and mixed dominance.

    For more information on visual screening, check out our vision screening packet:


    Writing with both hands Impacts Writing and Reading

    Children who experience mixed dominance patterns, evidenced by writing with both hands, often have challenges with left/right awareness.  This left/right confusion can impact reading and writing, as a result of delayed reading and writing skills. 

    Left Right Confusion and Handwriting

    The child that doesn’t know their left from their right side at the kindergarten to first grade stage may show challenges as they are learning letter formation.

    Poor left/right awareness can affect a student’s ability to accurately form letters and result in ‘dyslexia’ looking reversal patterns. Read about more information on occupational therapy dyslexia supports.

    The reversal patterns in letter formation and recognition may also lead to poor phonemic awareness, and later poor spelling, further delaying their reading and writing skills.

    Reading left to right may also be a significant challenge as a result of poor eye teaming, as both sides of the brain are attempting to ‘dominate’ the skill. This struggle between the two sides of the brain results in poor organization of the information and retrieval of phonemic rules. Here is more information about visual processing and the skills that impact reading and learning.

    Difficulties in these areas can be red flags of mixed dominance patterns that need to be addressed.

    Switching hands when writing means that the student holds the pencil with a different hand each time and doesn’t have the experience to create motor plans for each letter. They are looking at different angles and directions to the paper, writing  sample to copy formations, and establishing loose “muscle memory” when it comes to creating an established plan of action for letter forms. 

    Writing with different hands can impact overall organization on the paper, too. This includes use of margins, and writing in lists. Typically, when writing, we need to hold the paper with the non-dominant hand to stabilize the paper. Placing letters  

    More implications of using both hands to write

    Mixed dominance does not always seem like a big deal, but when left unaddressed your child may be left frustrated with their struggles in gross motor play, reading and writing. 

    Struggles in these areas significantly impact a child’s self-esteem and desire to participate in age appropriate activities. Fortunately, mixed dominance can be easily addressed through therapy.

    Try this pouring and scooping activity to refine hand dominance in functional tasks.

    Occupational Therapists screen for visual problems in order to determine how they may impact functional tasks. Visual screening can occur in the classroom setting, in inpatient settings, in outpatient therapy, and in early intervention or home care.  

    This visual screening tool was created by an occupational therapist and provides information on visual terms, frequently asked questions regarding visual problems, a variety of visual screening techniques, and other tools that therapists will find valuable in visual screenings.

     
    Free visual processing email lab to learn about visual skills needed in learning and reading.
     

    Occupational Therapy Vision Screening Tool

    Click here to read more about the Visual Screening Packet.   This is a digital file. Upon purchase, you will be able to access the 10 page file and print off to use over and over again in vision screenings and in educating therapists, teachers, parents, and other child advocates or caregivers.  


    For even MORE information on eye-hand coordination and activities to use in your occupational therapy practice, you will want to join our free visual processing lab email series. It’s a 3-day series of emails that covers EVERYthing about visual processing. We take a closer look at visual skills and break things down, as well as covering the big picture of visual needs.


    In the visual processing lab, you will discover how oculomotor skills like smooth pursuits make a big difference in higher level skills like learning and executive function. The best thing about this lab (besides all of the awesome info) is that it has a fun “lab” theme. I might have had too much fun with this one 🙂


    Join us in visual processing Lab! Where you won’t need Bunsen burners or safety goggles!

    Click here to learn more about Visual Processing Lab and to sign up.

    The Handwriting Book is a comprehensive resource created by experienced pediatric OTs and PTs.

    The Handwriting Book covers everything you need to know about handwriting, guided by development and focused on function. This digital resource is is the ultimate resource for tips, strategies, suggestions, and information to support handwriting development in kids.

    The Handwriting Book breaks down the functional skill of handwriting into developmental areas. These include developmental progression of pre-writing strokes, fine motor skills, gross motor development, sensory considerations, and visual perceptual skills. Each section includes strategies and tips to improve these underlying areas.

    • Strategies to address letter and number formation and reversals
    • Ideas for combining handwriting and play
    • Activities to practice handwriting skills at home
    • Tips and strategies for the reluctant writer
    • Tips to improve pencil grip
    • Tips for sizing, spacing, and alignment with overall improved legibility

    Click here to grab your copy of The Handwriting Book today.

    Colleen Beck, OTR/L has been an occupational therapist since 2000, working in school-based, hand therapy, outpatient peds, EI, and SNF. Colleen created The OT Toolbox to inspire therapists, teachers, and parents with easy and fun tools to help children thrive. Read her story about going from an OT making $3/hour (after paying for kids’ childcare) to a full-time OT resource creator for millions of readers. Want to collaborate? Send an email to contact@theottoolbox.com.