Colleen Beck, OTR/L is a pediatric occupational therapist and the owner and author of The OT Toolbox website. She manages all of The OT Toolbox social media accounts and runs the popular newsletter.
Read about Colleen's experience and career as an occupational therapist, including how The OT Toolbox began on our About The OT Toolbox page: https://www.theottoolbox.com/about-us/
Colleen created The OT Toolbox in 2011 and since then has written thousands of blog posts designed to support therapy providers, educators, parents, counselors, admin, and caregivers in promoting the healthy development of kids.
Check out Colleen's blog posts below:
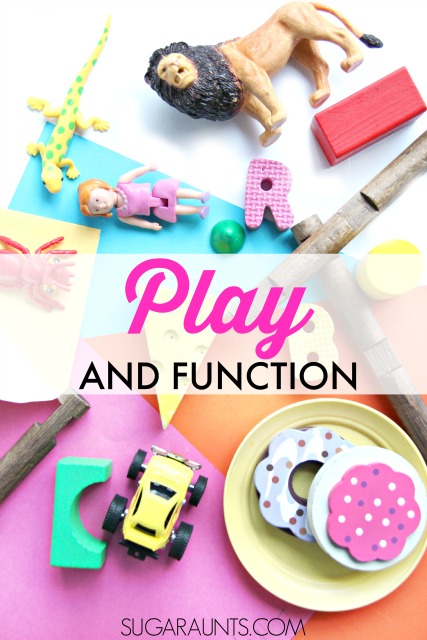
Play is the primary role of the child and so in In this blog post, we are covering functional play to support development using toys you might find in most households. Occupational therapy supports the development of individuals across the lifespan and when working with children, the main tool for supporting development of skills is functional play. Not only for young children, but throughout the lifespan there is functional play. We cover more on OT play interventions in our occupational therapy play post.
Today we are talking about using everyday toy items in developing skills in therapy sessions or at home, all to promote child development.
What is functional play?
Functional play refers to using toys, objects, and items designed for play in their intended function to participate in play as an occupation. There are many types of play and the various functional play skills promote development in young children. Play age and stage makes a difference in the development of functional play.
For example, functional play is:
Building blocks into a tower or other imaginative construction
Coloring with crayons
Driving matchbox cars along the floor
Swinging a bat to hit a ball
Kicking, throwing, or rolling a ball
Pushing a doll in a play stroller
Using a volleyball to play a volleyball game
Many toys can be used in ways different than their intended nature. We see this a lot in occupational therapy sessions where we think outside the box with the toys we have on hand. Toys are used in ways not exactly inline with their function, or the reason why they were created.
We use blocks or jump ropes to make an obstacle course path.
We make playdough using crayons.
We stack kitchen containers.
We climb up the slide.
Each of these examples stretches the object’s typical use into other ways to play.
Functional play is neither right, or wrong.
It’s good and natural to think outside the box. Functional play offers tools for healthy development in children. The opposite of functional play, or using those very same toys in ways that they were not intended is healthy for the development of children, as well!
Like many homes, ours has lots of children’s toys in random locations. Books under the coffee table. Light up balls in the hallway. Sports equipment by the door.
But. Then I remember the function that all of these toys brings to my children. These plastic pieces, wooden blocks, and little figures are tools for learning and development. They are the tools of functional play!
We all use toys, tools, equipment, and materials in functional play.
Types of Functional Play
The types of play change over the course of development. Broken down, play includes these various stage of play as a developmental progression:
We can break down each form of play into play activities that utilize the levels of play as a powerful tool to support development. In each level listed above, you’ll see components:
Creative play
Communication play
Movement-based play
Socio-dramatic play
Dramatic play
Imaginative play
Explorative play
Fantasy play
Mastery play
Role play
Historical play
How do kids use basic toys in imagination, language development, social skills, fine motor strength, sensory integration, gross motor development, and problem solving?
Toys are tools of function and help to develop a child’s skills in so many areas. Grab a cup of coffee, move the ninja turtles from their couch battle scene, and read on!
The Function of Play in Kids
In Occupational Therapy, probably one of the most asked questions is, “What is Occupational Therapy?” Since hanging up my graduation cap over 15 years ago, I’ve probably answered this question a few zillion times.
Occupational Therapy is rehabilitation and treatment of activities of a person’s daily living skills and occupations in order to improve function. A child’s occupations are learning to get themselves dressed, feeding themselves, and play, (among other things and depending on their age)!
Whatever is important to a person, whether it be interests or to function throughout a day, is what an Occupational Therapist can work on in therapy services.
“Play is a child’s work.” It’s a phrase coined by Maria Montesorri, and a concept developed by Jean Piaget. Through play, children learn, develop, and integrate their systems and functional abilities.
Today, I’m going to share how children can use those random toys scattered all over the house in development and learning.
But first, here are a few easy play ideas we’ve shared on the blog using toys you probably have around the house:
From infancy, play is a way of learning and developing skills. A baby reaches for a rattle and discovers that their arm can move intentionally.
The sound, weight, and texture of a rattle integrates into the child’s central nervous system and establishes neural pathways.
This early sensory integration and every interaction with the environment helps to work on sensory processing in a child. As a child ages, they bounce, run, jump, and LOVE to play; their body seeks play.
From 0-2, play is solitary. They are experiencing tastes, touch, sights, sounds, and smells.
A one year old repeats the same play actions over and over again in play routines. Peek-a-boo and putting blocks into a basket over and over again helps the child to master physical and sensory skills.
They develop problem solving, cause and effect, direction following, and a sense of self.
Functional Play for a Baby is:
Peek a boo games
Board books with an adult
Cloth toys
Teething toys
Texture toys
High contrast toys
Play mats
Floor play
Balls and sorting toys
Functional Play for Toddlers
Toddlers begin to imitate, pretend, and play with others. Pretend play encourages language, emotional exploration, and “job” scenes. Through pretend play, children build social skills.
They can lead scenes, take turns, follow directions, explore empathy, gain more of a sense of self, build self-confidence, while working on tool use, clothing fasteners, and building and developing fine and gross motor skills.
Toddlers explore their environment by walking an finding things, putting things into containers, rolling things, throwing things, turning pages, and examining the inside and outside of things.
From 2 to 2.5, children observe others but do not play with them. Kids aged 2.5-3 play alongside other children, but not with them in social situations. Starting at 3, children often times begin to interact with others in their play.
Bath toys
Scribbling with crayons
Putting toys into a sorter
Rolling a ball
Carrying a bag full of toys
Pushing a toy shopping cart
Cause-effect toys
Board books
Functional Play for Preschool
In Preschool aged children, kids play together with shared roles. They are curious and love to explore stories about animals and people.
Crayons, paints, scissors, clay, sand, dirt, and other things are fun!
Running, jumping, tumbling, rolling, and spinning provide movement and heavy work fun.
Preschoolers love to mix and feel how things are as they explore. Around three and four years old, imaginations begin to become awesome as they tell stories!
Functional Play for School Aged Children
School-aged children build cognitive skills in games as they problem solve, establish executive functions, share, build relationships, take part in winning/losing situations, and establish complex roles with other children.
They are constructive with tools, projects, and toys.
Functional play for school aged children includes:
Board games
Crafts
Drawing activities and supplies
Sports games and sporting events
Video games
Books
Functional Play for Teenagers
Teenagers are involved in play, too! Even during the teens, children are developing skills in executive functioning skills, and refining motor skills, motor planning, and skill use.
Play happens naturally. A child is led to perform instinctive physical milestones through play.
A baby rolls over to reach that brightly colored shaky toy.
A toddler pushes a car around the house while crawling on all fours, providing himself with vestibular and proprioceptive input and strengthening to the arms and neck. Read here about crawling as a functional play tool and mobility as independent activity for young children.
There are so many benefits to play! Just some of those naturally occurring skills include:
Problem-solving skills
Functional task practice
Fine motor skills
Gross motor skills
Practicing communication skills and vocabulary
Working through behaviors in a low-stress environment
Reinforcement of skill development
Understanding the world around the young child and getting a sense of the world as it occurs through practice
Repetition of skill performance through repetitive actions
Exploring one’s surroundings
Executive functioning
Visual motor skills
Hand-eye coordination
These play situations happen naturally and purposefully (even if the kiddo doesn’t realize that his body is seeking out certain sensory situations!) Play should happen naturally, but there are ways to work on skill areas through play.
How can you build on natural play instincts with toys you already have in your house to work on developmental areas or Occupational Therapy goals?
Use a child’s interests to create pretend play situations.
Model appropriate language or problem solving.
Encourage imitation of actions using cars or action figures.
Work on arm strength and shoulder girdle strength by pushing cars up a ramp.
Provide proprioceptive situations by playing and building couch cushion forts for dolls.
Respond to attempt to communicate in pretend play with animal figures.
Encourage turn-taking.
Allow your child to “lead” a play situation.
Encourage grasp development with toy manipulatives.
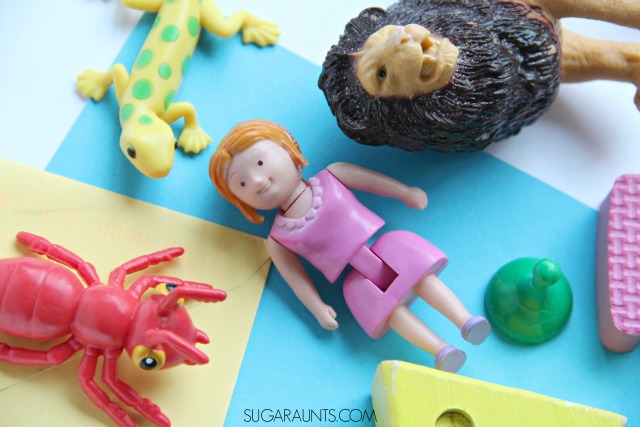
Work on multi-step direction following in a pretend play situation where the bug needs to hop on the block, then go around the sticks, and get food from under the rock.
Functional Play Toys
The benefits of functional play occur in the natural environment for the child: the home, playground, outside, in the school classroom, etc. Play happens everywhere! So what are some functional play toys that can support this aspect of development?
Try these toy ideas:
Legos
blocks
play dough
An empty cardboard box (great for creative play)
art supplies and a piece of paper
Playground equipment such as a swing and slide
The benefits of play does not need much! You can foster higher-level skills with simple materials.
What are your child’s favorite play figures or imaginative toys?
This post is part of my 31 Days of Occupational Therapy series where I’m sharing ways to work on common Occupational Therapy treatment areas using every day, free, or almost free materials.
You will love some of these play and developmental ideas!
Occupational therapy at home is an important topic to address. Occupational therapy practitioners tackle supporting daily activities in clients of all ages, and so integrating OT interventions into the home setting is essential. In this blog post, we’re covering how to set up occupational therapy home programs, how to support carryover of OT goals in the home, and home-based OT activities that support goal achievement. Let’s get started!
Occupational therapy at home doesn’t need to be difficult. Explore our list of Occupational Therapy Amazon deals for toys and tools to support various needs.
Occupational Therapy at Home
Pediatric occupational therapists and occupational therapy assistants work with children of all ages and developmental abilities. In therapy sessions, OTs address the whole lifespan and target goals designed to support the individual and the family so the individual can prosper. Whether in schools, outpatient settings, hospitals, the community, or other environment, there are functional tasks to be done. All aspects of living is a task that occupies one’s time and these are skills that an OT can support.
Occupational therapy at home is a continuum of care, and this is because the home is a natural setting for living. It’s the place for self-care, dressing, bathing, toileting, eating, and other activities of daily living (ADLs).
The home is also a natural setting for other aspects of daily life: instrumental activities of daily living (IADLs). The term IADLs refers to tasks such as meal preparation, home management, shopping, paying bills, managing medications, laundry, and other tasks. These daily living activities are part of one’s life but not always a task that is completed each day. These are also covered in occupational therapy interventions, however, because they impact one’s ability to function.
The occupational therapist working with children, or pediatric occupational therapy professionals support children in the daily tasks that are important to them, and may include aspects such as:
emotional development
physical development (fine and gross motor skills)
social development
cognitive development
Therapy providers support children and the families they are a part of through interventions based in play, as play is the primary occupation of the child. It’s through play that development of underlying skills are refined and developed so that they can support functional tasks.
Likewise, daily activities done in the natural environment require these underlying skill areas. Professionals can work with the child in the therapy setting, but a main role of the OT practitioner is to empower the child and family unit to thrive on their own in their home environment, or the natural setting.
No matter what the diagnosis, OTs support various goals. Some diagnoses that can be supported in occupational therapy at home include:
Autism
Sensory processing disorders and sensory processing challenges
Developmental delay
Down syndrome and other genetic disorders
Cerebral palsy and other physical mobilitydiagnoses
Coordination challenges
Motor skill delays or developmental disorders
Occupational therapy services are not limited to these diagnoses. OT at home can support any individual struggling in the home or community to complete daily activities.
Therapy providers do this through caregiver education, OT home programs, and consultancy including coaching of skills, support services, and checking in on struggles.
Occupational Therapy at Home and Carryover of Skills
If there’s one thing that is for certain, it’s that occupational therapists love to see carryover. We love to encourage functioning and independence with personal goals across environments. It’s through occupational therapy home programs that we encourage families, parents, and teachers to get involved with a child’s goals so they can accomplish skills at home, in the classroom, and community.
I wanted to put together some activities that OTs can add to home programs that build skills. Use these as part of OT recommendations in occupational therapy teletherapy sessions, or in home programming as a result of changes in our current public health situations. Whatever your situation is, here are some activity recommendations that promote movement, learning through play, and help to keep the kids off screens.
Occupational therapy home programs for movement
So…many of us are dealing with the uncertainties of coronavirus and the possibility to be sent home from wor. School based OTs who are contracted into a school district may even be out of work if and when school students are sent home to learn from home. They may see the need to send home activity plans with children who will be stuck indoors. Other therapists are working within the available technology systems that are in place and can work with children remotely or via teletherapy. In each of these cases, there is a need for therapist-recommended activities that require items that are probably in the homes of most parents.
Use these activities to encourage play and movement. Encourage playing together as families. These activities have therapeutic benefits, but they are also great for family time, too.
“Push In” Therapy at Home– Combine OT interventions with learning at home using these movement-based, goal oriented activities that can be incorporated into learning, math, reading, etc.
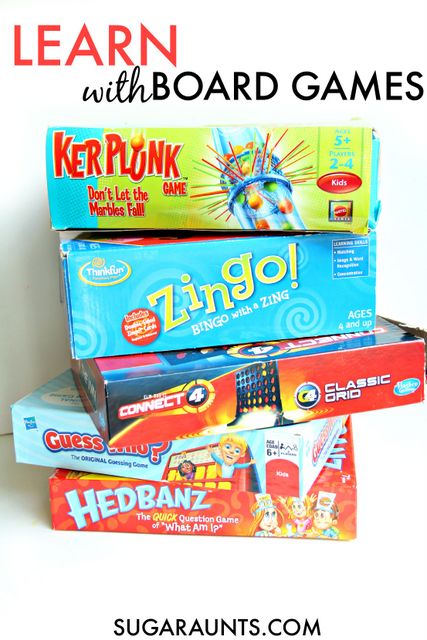
A lot of times, families have board games in the home that they haven’t played with in a while. Family time games like the ones in the posts below can build essential skills that might be addressed in therapy, too. Use time spent at home to play games and work on therapy goals at the same time. Here are some game suggestions:
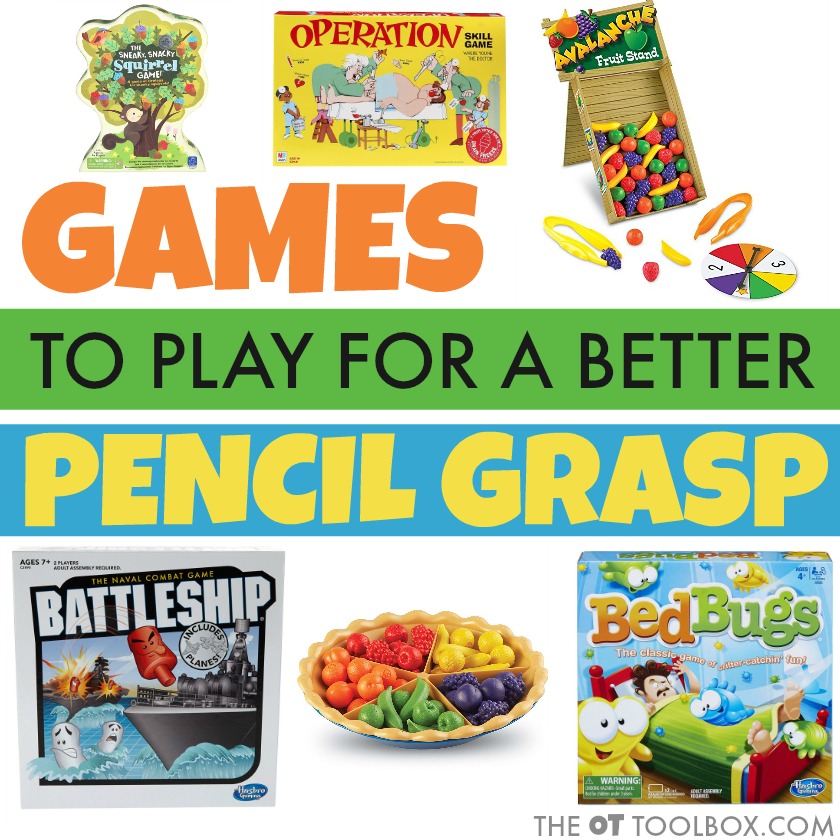
Games that improve pencil grasp build fine motor skills, but don’t seem like “work”. Do you have any of these fine motor games in your game closet?
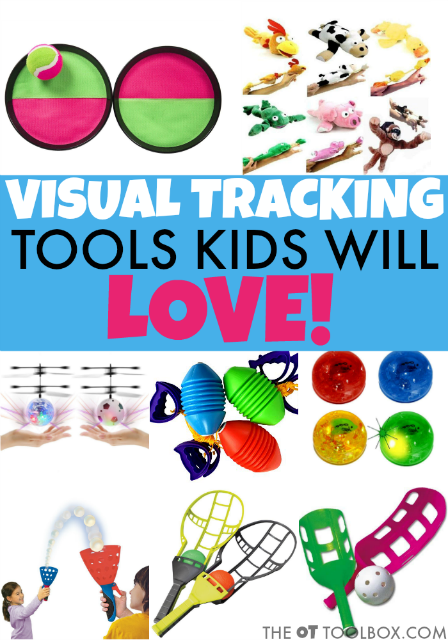
Visual Tracking Games are fun ways to work on an essential visual processing skill…visual tracking! This skill is needed for visual attention, reading, writing, and so much more.
Looking for more ways to keep the kids busy at home while working on developing skills? Run a search through the search bar above!
How can I help my child with occupational therapy at home?
If working on developmental areas is needed, you can do activities to support specific areas, using everyday play. Many times, OT practitioners will work with families to design an individualized home OT program that supports specific needs for each child.
Having a specialized OT home program is important because occupational therapists and OTAs can come up with activities that target several areas of development at once, including self-regulation, social emotional development, for example. Or, they may offer ideas to integrate visual motor skills while targeting specific aspects of visual perception. Another example is OT activities that offer calming heavy work input while supporting movement needs (a combination of proprioceptive input and vestibular input) while providing therapy activities that do not over-stimulate the vision and vestibular system.
If you want to add activities to the home that do offer motor skill and precision input for strengthening fine motor skills, some play activities can do this.
These materials are often found in many homes, and occupational therapy providers use these items because they are so prevalent in homes, making the activities easily carried over at home. Try using these materials in occupational therapy at home interventions:
Chalk
Beads
Swinging on swings or playing at playgrounds
Jumping on a trampoline
Playing in a sand box
Turning coins on a table or dropping coins in a piggy bank
Playing with tweezers to pick up beads or crumbled paper or small objects
Making a sensory tray with shaving cream
Playing with various textures
Rolling dice
Offering sensory input by jumping on couch cushions or hopping on pillows
Making a noodle necklace
Coloring
Playing with play dough
Tearing a piece of paper
Talking about emotions
Sorting buttons
Picking up beans one at a time
These simple activities can be incorporated into the daily routine to support development through play.
Occupational Therapy Home Programs
Occupational therapy home programs are a vital part of the therapeutic process and crucial to a child’s success in therapy. As we know, most children attend therapy sessions once or twice a week, and following through outside of the therapeutic setting is important to both the child and the family. It is essential that you do your best to blend therapy home programs into the already busy schedules and routines of families to ensure compliance and habituate follow-through at home.
Most therapists love providing families with targeted activities or exercises to work on at home to continue a child’s progress toward their goals. Providing these in a fun way can be both a unique art and science in creation by a therapist and the family. Yep, it’s true, including the family in the design is both encouraging and allows for unique ownership by both the child and the family, therefore, making it more successful overall. Keep in mind that home programs can vary greatly depending on a child’s specific needs, family design, and the skill development needed.
Sometimes families need a sensory diet for home or community use, an exercise program to advance skills in strength and endurance, a chore and/or self-care checklist for skill advancement and attainment, an activity program to facilitate targeted skill development and keep motivation with therapy, or a handwriting home program to give further practice in letter formation and handwriting legibility practice.
Let’s take a deeper look at each home program mentioned. Keep in mind that you shouldn’t put in a lot of different choices or activities as this will oftentimes decrease compliance and increase the lack of follow-through in the home setting. Always consider doing fewer activities and/or exercises and change them out more frequently as compliance and success are achieved.
Don’t load a family or child up with activities and exercises to keep it all front-end packed as this will become overwhelming and not successful in the back end. Provide a limited number with a specific focus coupled with full, open communication as the program is followed at home.
Occupational Therapy Home Programs for Sensory Needs
Sensory diets by design provide a child-specific activity program that is scheduled into a child’s day to provide sensory activities or approaches that kids perform throughout the day to ensure they are getting the input their bodies need to assist with attention, arousal, soothing, and adaptive responses. The activities are generally chosen to target a child’s needs based on sensory integration theory.
The best approach to a sensory diet is to provide a visual schedule for parents and children to follow as well as a worded description of ideas to further facilitate understanding and follow-through. Look at following
time-based activities
routines
interaction recommendations
environment suggestions, and
targeted sensory needs that include oral sensory, heavy work, and vestibular.
Always provide contact information on each sensory diet to ensure families have what they need to consult with you about strategies and activities as well as any questions that may arise during diet implementation.
Home exercise programs provide guidelines for the overall program and each exercise should have a picture or diagram, the number of safe sets/reps, specific precautions, and a checklist for either daily, weekly, or monthly implementation with the understanding to share this checklist at end of a cycle to ensure compliance by family.
As therapists, we often use tools for home exercises that may include therapy putty, theraband, dumbbells, hand and finger exercisers, exercise bikes, or even table-top pedal bikes. Make sure these tools are either provided to the families as part of their programming or that they can afford to purchase them outside of therapy. A loan program can be established to provide the child with what they need for a limited time.
Sometimes, we as therapists, need to get creative in how we get the exercises into a home that are needed, so look outside the typical places for items such as in thrift stores, ask families who no longer need items and are willing to donate them to you, utilize a “donate and need” board at your clinic or schools, look on Facebook groups such as OT Trader for items, etc.
Chore or self-care checklists are just as they sound, a list of chores or self-care actions for each day or week. Create a simplified checklist or find one online that has everything you need to copy and share. Take a look at Your Therapy Source as they have convenient and time-saving Life Skills activities, checklists and graphs for data collection in the home, school, and community making it easier to target each step and to score and record progress over time.
Activity programs are intended to motivate the child (and the family) while developing essential skills that the child needs as they perform them in the home setting. This program can be completed with siblings to increase the fun and compliance as needed. The child can learn each activity during therapy and then follow through occurs at home after the therapist reviews the program with the parent(s).
A fun way to do this is to have the child demonstrate each activity during therapy with a parent present as this builds confidence and full engagement by the child.
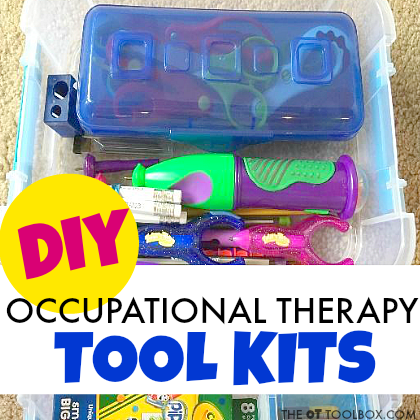
Other than a written activity program with pictures, you can also create a fine motor toolbox with different activities inside that can be used at home for a few weeks.
On our blog posts on occupational therapy kits, you’ll find specific ideas and images for how to set up an OT kit at home.
Here is a picture of some kits, which I share with families and use during therapy sessions:
Occupational therapy kits for home OT.
I try to keep them small with 5-6 activities in each box and each box is designed to address a child’s specific needs. This means that I often switch activities around in the boxes so I must maintain a checklist of what each child has already worked on so that I can keep the boxes new and fresh.
Frankly, I found this design to be more successful than the larger Magic 20 Box that I worked with colleagues to create several years back.
The 20 items in the box tended to become overwhelming to children and families and more often than not, they ended up wanting to do a select few that they found fun and engaging. My personal experience has been finding families and children are more compliant with smaller boxes and fewer activities.
I also enjoy using my monthly game boards for fine and gross motor activities at home as it triggers high interest and enjoyment for both my clients and their families.
Occupational Therapy at Home: Handwriting
Handwriting home programs are designed to have children practice the important skills they have learned during therapy as a carryover into a different setting. Handwriting is a complex skill and practice in meaningful and natural ways is most useful in developing skills.
You can also use it as an educational tool for families too. My handwriting home programs are written in a way that sets the scene for successful handwriting practice in the home easing tension and anxiety for increased follow-through and overall compliance.
Some ways to support handwriting interventions for occupational therapy at home include:
With so many options around for creating and designing a child-specific home program, any child and family can benefit from your skilled OT home program. We all know that without regular practice and intervention, a child can regress in their skills and it can take a very long time to regain the skills they once had. So, go get some quick inspiration here in this blog post and then go and help those kiddos on your caseload build the important skills they need to be successful in their daily lives. Oh, and don’t forget, you’re empowering those families to proceed on and power through to progress for their child, that’s what you do!
Colleen Beck, OTR/L has been an occupational therapist since 2000, working in school-based, hand therapy, outpatient peds, EI, and SNF. Colleen created The OT Toolbox to inspire therapists, teachers, and parents with easy and fun tools to help children thrive. Read her story about going from an OT making $3/hour (after paying for kids’ childcare) to a full-time OT resource creator for millions of readers. Want to collaborate? Send an email to contact@theottoolbox.com.
The OT Toolbox Fine Motor Kits are a great resource for occupational therapy at home!
Working on fine motor skills, visual perception, visual motor skills, sensory tolerance, handwriting, or scissor skills? Our Fine Motor Kits cover all of these areas and more.
Check out the seasonal Fine Motor Kits that kids love:
Before we know it, March will be here and all of the rainbow crafts and activities will be dominating social media. Rainbow craft ideas are a fun kids craft with a rainbow theme. So, let’s begin a blog post that will give you some fun rainbow craft ideas now that will address multiple skill areas as well as celebrate the season and the holiday! Use these craft ideas along with our rainbow activities for themed fun.
Just know that this post of rainbow crafts cannot only be used for the season and the holiday but if you have a weather theme that you need some unique ideas for, then this round-up will help!
Rainbow Crafts
Here in this post, you will find a colorful collection of paper, cardboard, and food items that will help you jazz up your rainbow craft approach. Not only do these craft activities incorporate skill development, but they also provide an end product that can be displayed or sent home with children and families to enjoy.
Some can even result in an end product that can be enjoyed right away – like some rainbow food crafts! Delicious!
Now, read on and take a look at some colorful crafts that children of many ages can participate in making either during therapy, in the classroom, or at home. Whether you are looking for rainbow crafts for toddlers, preschoolers, or older children, you’ll find colorful ideas for all ages.
We’ve selected ideas that support development of several areas through the crafting process. Areas that are supported with these rainbow craft ideas include:
To get started with crafting DIY rainbow craft projects, gather a variety of different materials and crafting supplies. These materials are great for making rainbows…
Colorful tissue paper
Markers (great for coloring, making DIY colored salt, DIY watercolors, etc.)
Glue
Scissors
Paper plates
Construction paper in a variety of colors
Food coloring
Ribbons
Marshmallows (if you want to make an edible rainbow)
Let’s get started with the easy rainbow crafts!
Rainbow Crafts for Occupational Therapy
While we state that these rainbow activities are designed for occupational therapy, they are actually a simple and fun way for kids of all ages to build skills in the areas mentioned above.
Paper Rainbows-
A cut and paste rainbow craft is easy to set up and make while building scissor skills. Or, ask young learners to tear bits of paper or tissue paper. Use a few materials:
Construction paper or tissue paper cut into strips
Scissors
Glue
Show the child how to snip the paper strips into small squares. They can also just tear off a small piece. Tearing paper is a great tool for developing fine motor skills.
A torn paper rainbow craft that can be performed with scissor cutting or paper tearing as the main hand actions needed to create it. It’s a craft that can be completed by younger kiddos or by slightly older kiddos as the skills needed can be varied depending on the approach.
A more advanced version of a paper rainbow craft is using colored construction paper with different sized curves. Children can cut the curves from the edge of the pieces of paper and then layer the curved pieces on top of one another. This activity works on cutting skills as children cut different sizes of half-circle shapes. It provides the opportunity for children to think about the sizing and positioning of the shapes by stacking them according to size – largest to smallest – to create the rainbow.
Paper Plate Rainbow-
To mae a colorful paper plate rainbow, you need just a few items:
Paper plate cut in half
Cotton balls
Construction paper in each color of the rainbow
Glue
To make a paper plate rainbow:
Cut a paper plate in half.
Glue cotton balls to the paper plate.
Cut a one inch strip of paper from each color of construction paper.
Add glue to one end of each strip of paper.
Glue the paper strips in rainbow order starting at the left side of the straight edge of the paper plate.
This paper plate rainbow craft can be completed by younger kiddos and you can be creative in having kiddos make the rainbow-colored ‘beams’ by having them tear strips of paper versus cutting them. It is a little more involved to tear, so if kiddos are unable to tear then just simply cut.
How about a new spin on the rainbow paper craft by creating a Rainbow Happiness Craft? This is a combination of two paper crafts mentioned above, but the child will write on the rainbow beams things like happy thoughts and positive remarks. Their statements could be about what they like to do that makes them happy or could be recalling some happy memories.
Rainbow Templates-
Using a printable rainbow is an easy way to work on the order of the rainbow by putting items into rainbow order. Use the templates to make a Fruit Loop Rainbow craft, too!
In The OT Toolbox membership, we have a Rainbow template for Q-Tip painting. It’s a fun printable that has children use q-tips dipped into rainbow paint colors to fill in the dots on the rainbow pattern. This is the perfect craft to encourage a pincer grasp or tripod grasp and to provide an opportunity to target eye-hand coordination for q-tip placement within the dots.
We have a free Rainbow Template Printable here that you can just print and color to make it a simple craft for just about any age or if you are working on pencil control, scissor skills, eye-hand coordination, or direction following, this template can address all of those skill areas too!
We know there are many benefits to making paper chains with kids. A Rainbow Paper Chain Craft includes the creation of paper chains that are linked together to create the beams of a rainbow cloud. The strips can already be cut or you can have the child cut the strips themselves, but either way, it addresses fine motor skills while creating and linking the paper chain links so pasting skills are involved too!
Weave a Rainbow-
Here is a unique approach to a paper plate rainbow that involves Rainbow Weaving which is simply the use of a paper plate and colored pipe cleaners to create the rainbow pattern, but you’ll also need a crayon to color the plate and some Styrofoam pieces or cotton balls to create the cloud formation. This is probably a craft for some older kiddos due to the fine motor skill and sequencing skills needed to weave the pipe cleaners. Weaving activities are great for building many skills so this is a great tool for occupational therapy.
Rainbow Sun Catcher-
Suncatcher crafts are another great strategy for developing skills. This craft is definitely a favorite, it’s called the Rainbow Pony Bead Prism Suncatcher which is created by stringing transparent pony beads onto a fishing line that is attached to a plastic sewing needle. So, in a way, it makes the craft activity kind of like a functional task too – sewing.
This Yarn Wrapped Rainbow Craft are OT favorites as they involve the use of multiple hand skills to create, but the end product has its own unique look that doesn’t make it good or bad or right or wrong, just a rainbow. If needed, you can snip along the edges of the cardboard rainbow and it will provide a latching point for yarn as it is wrapped.
Toilet Paper Tube Rainbow-
Now, this is another unique rainbow craft called Rainbow Binoculars where you recycle either toilet paper or paper towel cardboard rolls and wrap them with strips of rainbow-colored paper to create the binoculars. Take a look at this unique craft by clicking on the link and you’ll see what I mean. Just know that after these are created, you can then use them to play a fun I Spy game around the room.
Another fun activity is our rainbow cardboard tube. Use a paper towel roll or a toilet paper tube to make a mini rainbow, perfect for small world pretend play or just painting a rainbow!
Rainbow Bracelet crafts-
This is a wearable Rainbow Bracelet Craft where children need to be able to string pony beads onto pipe cleaners and then twist them together to create a colorful wearable product! This one is super for addressing fine motor and bilateral coordination skills.
Never tried this one before, but it looks interesting as it’s a food product that is cut and then strung onto a plastic lace to create a Rainbow Necklace. I’m guessing the colorful Twizzler licorice sticks will make it a real motivator for children.
This one is a Rainbow Mobile Craft that is a little more involved and time-consuming, but the result is a super colorful and creative use of pasta pieces turned into a rainbow of color. This craft can be expanded into days-long crafting if you include the dying of pasta pieces and then the use of pasta to string and create the mobile. With a tying opportunity, it can be used with older kiddos too. Fun!
Are you working on food exploration or tolerance with younger kiddos or maybe just kitchen tool use with older kiddos? This craft idea addresses both and it’s YUMMY! It’s a Rainbow Fruit Pizza! The fruit included is sliced strawberries, sliced kiwi, blueberries, blackberries, and mandarin oranges. Or if you don’t want to try fruit, how about a Rainbow Snack?
We hope you have enjoyed all the crafts included in this rainbow round-up of ideas and we hope that you have found some unique and never-before-tried crafts that will become some of your colorful favorites!
Regina Parsons-Allen is a school-based certified occupational therapy assistant. She has a pediatrics practice area of emphasis from the NBCOT. She graduated from the OTA program at Caldwell Community College and Technical Institute in Hudson, North Carolina with an A.A.S degree in occupational therapy assistant. She has been practicing occupational therapy in the same school district for 20 years. She loves her children, husband, OT, working with children and teaching Sunday school. She is passionate about engaging, empowering, and enabling children to reach their maximum potential in ALL of their occupations as well assuring them that God loves them!
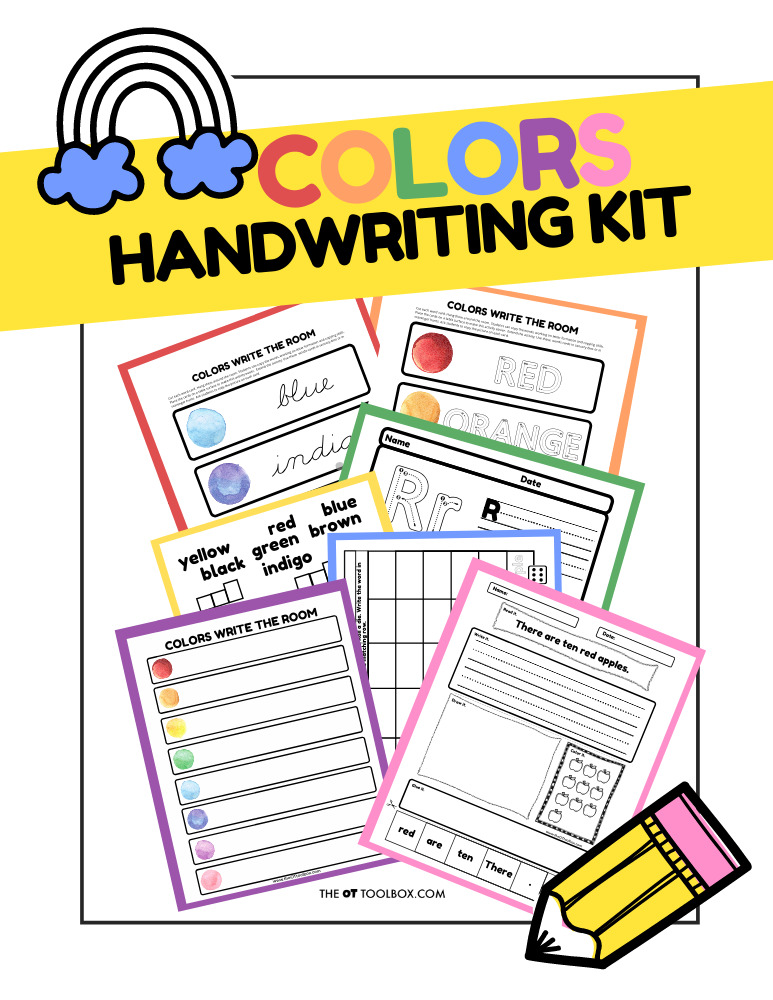
Rainbow Handwriting Kit– This resource pack includes handwriting sheets, write the room cards, color worksheets, visual motor activities, and so much more. The handwriting kit includes:
Write the Room, Color Names: Lowercase Letters
Write the Room, Color Names: Uppercase Letters
Write the Room, Color Names: Cursive Writing
Copy/Draw/Color/Cut Color Worksheets
Colors Roll & Write Page
Color Names Letter Size Puzzle Pages
Flip and Fill A-Z Letter Pages
Colors Pre-Writing Lines Pencil Control Mazes
This handwriting kit now includes a bonus pack of pencil control worksheets, 1-10 fine motor clip cards, visual discrimination maze for directionality, handwriting sheets, and working memory/direction following sheet! Valued at $5, this bonus kit triples the goal areas you can work on in each therapy session or home program.
It’s possible that you’ve heard the term visual closure before as this is a common visual skill that impacts learning, reading, and math skills. But did you know that visual processing skills also impact fine motor skills. Occupational
therapists assess and treat visual skills as one of the underlying contributors to functional deficits. Visual closure is just one of those visual perceptual skills that impact everyday tasks.
In this post will we discuss how visual closure is utilized in daily life, red flags for dysfunction, and some great activities to develop this skill.
What is Visual Closure
Visual closure refers to the brain’s ability to complete a picture or visual representation using incomplete information. This is a visual perceptual skill and a component of visual processing that enables us to visually fill in the blank with missing information.
This visual perceptual skill allows us to see part of an object and visualize in our “mind’s eye” to determine the whole object. When we see part of an item, we use visual closure to know what the whole item is. This skill requires the cognitive process of problem solving to identify items.
This visual perceptual skill is the one used to locate and recognize items in a hidden picture puzzle. In written work, we use visual closure to recognize parts of words and letters when reading and copying work.
Visual Closure is defined as the ability of the eyes to visualize a complete image or object when only a portion is seen. An individual can see just part of a letter or number when reading and recognize how to write that figure. We can read a word or sentence without focusing on each letter and how it is made.
Visual Closure is an essential skill for many tasks. It is a skill that enables us to recognize a friend when it their face is partially covered by a scarf. It allows us to identify a road sign that is hidden by tree branches. It allows us to read, write, spell, complete math, and manage many other daily tasks.
Visual Closure enables us to look at an incomplete form and abstractly fill in the missing details in order to identify the form or shape. The skill allows us to comprehend portions of visual information without actively assessing each detail in isolation. This skill is one that utilizes abstract problem-solving skills.
Visual closure is a skill we use all day long.
From learning, to driving, to getting dressed, we use this aspect of visual perception in discerning between both familiar items and unfamiliar objects in every environment.
Visual closure takes into consideration spatial relationships, orientation in space, and knowledge about similar objects. In this way, both visual memory and working memory plays a role in recognizing a familiar item previously filed away in the brain’s knowledge.
Perceptual skills like vision closure allow us to function in day to day tasks, use safety awareness, and complete everyday activities through visual motor integration.
Visual perception is just one of many functions of the body that OT practitioners can address in therapy to improve quality of life.
Examples of Visual Closure
We are able to visually close an incomplete image when we see part of an item partially obscured by other items in the environment.
Some examples of visual closure include:
Recognizing that a complete object is in front of us even when part of it is covered up
Identifying a stop sign even when it’s partially obscured by a tree branch
Knowing that a complete fork is in the tray of utensils when we see only a portion of the fork
Realizing the approximate size of objects when part of it is blocked from our vision
Using the ability to make inferences about an object’s size even when portions are blocked from our line of sight
Realizing the complete whole of an object is still there even when obscured, for example: knowing a window continues behind a curtain.
Reading a word with fluency and effiencey, as well as reading comprehension (more on all of these areas below)
Needed skill for spelling and sight word recognition
Required to help figure out a shape or form that is partially hidden
Needed to recognize an object when only a portion is visible
Necessary skill for identifying spelling mistakes or incorrect information in written work
Required to visually locate partially hidden objects in a busy background
Required skill for reading words or recognizing words that are partially visible
Visual perception involves a complex set of skills, including one that we will highlight here: visual closure. This important cognitive ability involves being able to understand and interpret incomplete or abstract visual information. In other words, it’s the ability to see an object or figure in your mind’s eye when only a part of it is actually visible. Pretty cool, right?
WHY IS Vision CLOSURE USEFUL?
Visual closure is a type of visual perception skill that allows you to understand the whole shape of an object, even if part of it is hidden.
For example, we use this skill to recognize a letter of the alphabet when part of it is erased. Many students would recognize a visual closure worksheet without knowing it – they often look like one half of a familiar shape, and the student must draw the remaining half to create the whole the shape.
They may also use this skill during a color-by-number worksheet, where they can recognize an image appear before it is even complete!
This is an important skill as it increases our ability to understand the world and adapt to changes. Having strong vision skills also increases your overall visual cognitive performance, leading higher reading and writing abilities. It also sets you up for success for finding lost keys or quickly locating a spice in the cabinet.
Visual Closure and Reading
When it comes to vision, there is a lot that goes into reading and writing. Understanding the visual differences between letters, visually connecting the form of a letter to a sound, and stringing single letters into words (and then sentences) involves coordination of visual processing and multiple skill areas. When a child picks up a pencil to write the daily homework assignments into a tracker or completes a math page, the visual processing system is going into overdrive with scanning, visual tracking, visual motor integration, and visual perceptual skill work.
In the classroom, we often times run into many students who struggle with reading. Parents may notice a difficulty with reading during homework or other reading tasks. When a child struggles with keeping their place when reading a line of text, has difficulty recognizing words they should know, struggles with reading fluency or reading comprehension, a visual processing issue may be at the center of the struggle.
One necessary foundation skill needed for reading fluency is visual closure. While it may not seem like the most predictable culprit of the visual perceptual skills that impact reading, vision closure certainly is at play.
Visual closure is a skill used when reading. These visual skills are used to visually complete the word in the mind’s eye without reading each letter. This is similar to word prediction technology. The mind is able to predict the word based on letters, and context. This enable reading fluency as well as reading comprehension.
Visual closure is one skill that allows us to recognize words without focusing on each individual letter within a word. It allows us to glance at a sight word and read the word quickly. It enables us to comprehend a reading passage with fluency and efficiency as we visualize and discern words. It allows us to read and discern words that have similar beginnings or endings.
When a child looks at words and sentences, they typically are able to fill in missing parts of information. They can predict what is coming when reading sentences, copy words if they don’t see the whole word, solve puzzles, and fill in worksheets. When visual closure and predicting information or self-correcting missing information is difficult, kids don’t recognize errors in reading, writing, and math.
Similarly, visual closure enables us to identify a word without perceiving each specific part of the letters which make up a word. It is easy to see how a child who struggles with this visual perceptual skill can labor at reading!
VISUAL CLOSURE RED FLAGS
How do I know if there is an issue with my visual closure abilities? There are signs that can indicate visual closure problems in children.
These are common red flags associated with poor visual closure in kids:
Children with difficulties in visual closure may have trouble completing mazes, puzzles, or worksheets. They might have difficulty identifying items that are partially obscured by other items, such as finding a serving spoon or a matching sock hidden in a draw full of items. They might have difficulty with spelling or math tasks or concepts.
Difficulty recognizing letters or reading in certain fonts
Often poorly forms letters while writing
Not being able to recognize a word that is partially hidden
Difficulty completing words with missing letters
Requires extra time to read because they must sound out each letter in a word rather than seeing the whole word
Unable to find an object when it is partially covered (ex: milk in the fridge or a shirt in a drawer)
May find puzzles too challenging
Figuring out how to put together toys with multiple parts
Difficulty interpreting visual information, such as maps or diagrams
Please note that this is list not exhaustive, nor does it by any means diagnose someone with visual or cognitive deficits. It is here it give you an idea of what it may look like or feel like to have impaired visual closure understanding.
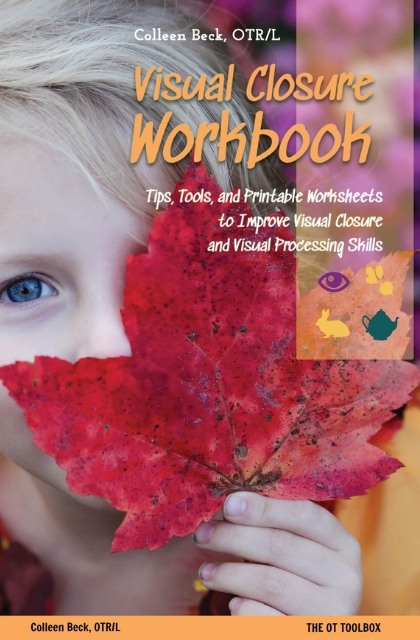
Since we know that various visual perception skills match these red flags, we have the perfect resource for you: this Visual Closure Workbook! This workbook gives an in-depth look at a very specific aspect of visual perception, it gives ample ways to identify it, and provides various levels of interventions with fun themes to go along.
Visual Closure ACTIVITIES & GAMES
The good news is that there are tons of fun ways to develop visual closure skills! Below you can find activities, games, books, and activities you can do with objects at home to build visual skills.
Here are a few easy activities that you can do at home to help:
Puzzles: Jigsaw Puzzles are a great way to work on this skill, as they require children to use their visual and spatial awareness skills to figure out how the pieces fit together. Start with simple puzzles and gradually increase the difficulty as your child improves.
Picture Matching: Cut out a set of pictures and have your child match the incomplete pictures to the complete ones. For example, you can cut out a picture of a house, leaving only the roof and part of the walls visible. Your child’s job is to find the matching picture of the whole house.
Printable Worksheets: Visual Closure worksheets can be a tool to support development of this visual processing skill. We love creating resources that build this area of development in various themes. We have fun downloads here on the website that targets visual closure.
Hidden Objects: Provide your child with a few objects and something like a blanket to cover parts of them. Have them use their visual closure skills to figure out what’s missing or covered up.
Drawing: Encourage your child to draw from memory. For example, you can show them a picture for a few seconds, then have them close their eyes and draw what they remember. This activity helps to develop their visual closure skills, as well as their memory and creativity.
Children with strong visual closure skills are better able to complete puzzles, read and write, and interpret their surroundings. On the other hand, children who struggle with vision closure may have difficulty with these tasks and may require extra support and intervention.
Dot to Dot Activities- Completing a connect the dot activity is a great way to develop visual closure skills by working on seeing the bigger picture. Best of all, these visual perception activities support development of other underlying areas, too: visual figure ground, visual scanning, form constancy, and the ability to complete a partial picture.
If you notice your child struggling with this skill, consider seeking out the help of an occupational therapist. With the right support and activities, your child can develop their visual closure skills and improve their overall functioning.
Sydney Thorson, OTR/L, is a new occupational therapist working in school-based therapy. Her background is in Human Development and Family Studies, and she is passionate about providing individualized and meaningful treatment for each child and their family. Sydney is also a children’s author and illustrator and is always working on new and exciting projects.
The Visual Closure Workbook is a 65 page digital file designed to impact visual perceptual skills for reading comprehension and efficiency, and the ability to visualize a complete image or feature when given incomplete or partial information. With functional visual closure skills, we are able to determine
This visual perceptual skill resource includes:
Information on visual processing and visual closure
Tips and tools to address visual closure needs
A thorough explanation of visual closure and what problems in this area look like in everyday tasks
Reproducible worksheets and activity lists
Activities to grade visual perceptual skills in hands-on activities
3 levels of worksheet pages in a variety of themes
We know the complexities of handwriting, and one of the contributing factors is good writing posture while sitting at a desk to write. Handwriting posture is a postural skill that impacts handwriting more than it might seem. When good posture is used at a desk, students have a sturdy foundation to complete school work. Look at it this way: even when there are other underlying issues contributing to handwriting challenges, an efficient writing posture at the desk gives the student one more tool in their toolbox.
This blog post on writing posture was originally written October, 11, 2016.
Writing Posture
Writing posture makes a significant impact in handwriting skills. When handwriting challenges exist, taking a quick look at the seating position of the student is the first place to look.
Occupational therapy providers often remind parents and others the value of proximal stability allowing for distal mobility. This concept is true in mobility tasks. Thinking about the proximal stability of the core of the body has on distal mobility and dexterity in the fingers, hands enables for refined dexterity and smooth motor skills in fine motor tasks.
The same is true for handwriting posture.
When seated at a table or desk, the writing posture is everything. If a child is positioned with sloppy posture, they will not be able to utilize refined motions in the hands to write.
Sitting posture during handwriting is a common problem for kids with sloppy written work.
Try the techniques listed below to start from the beginning with proximal stability to help kids sit up and stop the slouched chair posture while writing.
What does writing posture look like?
So often you see it. A child sits at his desk with his feet stretched out into the aisles, his back rounded and slid down in his seat, with his arms stretched out over the desk and his upper body leaning to the side.
Or you might observe this sight in any random classroom: The child hunched over his desk with his upper body held up by one bent elbow, legs stretched out under the desk in front of him, and his face almost touching the paper as his writing arm’s elbow is spread way out across the desk.
Sitting posture during handwriting matters.
You can see all of the posts related to handwriting in the series over on the Easy Ideas for Better Handwriting Page which is a completed series of 30 handwriting quick tips.
Be sure to join us in the Sweet Ideas for Better Handwriting facebook group. There are so many lovely Occupational Therapists, educators, and parents who all strive to help kids with their handwriting. What a resource!
So, after you’ve tried all of the other methods, one way that can quickly improve legibility of written work is to address sitting posture during handwriting. Asking kids to sit up straight can become a burden which is greeted with sighs but that upright sitting positioning can be a real game changer when it comes to legible written work.
Sitting Posture When Writing
Sitting is a dynamic task. It is not a static position even during a fixed task like completing written work. When a child is seated at a desk, there are many (MANY) variances in positioning and (sometimes more often than others) changes in those sitting positions.
When a child is seated at a desk and are attempting to work on written work, functional positioning is a must. Typically, this means a general 90/90?90 degree position at the hips, knees, and feet. When we talk about the 90-90-90 angle rule positioning, we are referring to the joints at the ankle, knee, and hip.
Starting at the floor, the feet should be flat on the floor positioned directly below the knees. The quad muscles should be parallel to the floor, which shows a 90 degree hip flexion.
Slight Variences to Handwriting Posture
Students in the classroom move all day long. Sustaining a fixed posture throughout a class is simply not possible. Movements in the desk is typical. Given that, a sustained 90-90-90 angle rule will not be in place all day long. This is especially true for children using excess energy through movement in their seat.
Knowing this, there are adjustments to the handwriting posture that are acceptable.
Slight forward lean (of hip flexion) so that the student leans toward the desk just slightly is typically effective.
Classroom supplies won’t always have desk chairs that allow for proper positioning when writing. Especially for the middle school and high school stuedents that switch classrooms throughout the day, there may be many different chairs used during a typical school day. Slight adjustments as a result of discrepancies of 1-2 inches in different in seat heights may be acceptable.
Factors impacting Writing Posture
There are several underlying contributions that have a large impact a child’s posture.
The factors that play into proper posture during writing include:
Strait on positioning so that the student is square to the desk
Legs parallel and in neutral position
Feet flat on the floor
Dominant arm slightly abducted at the shoulder with the elbow flexed
Elbows even with the desk surface
Wrist slightly extended enabling a functional pencil grasp (Read about wrist extension)
Non-dominant arm is slightly abducted with a flexed elbow enabling stabilization and re-positioning of the paper.
Ability to make quick fixes related to posturing
Proper desk size
The child’s chair size
Habit: A child might be used to slouching at their desk and this as well as other bad handwriting habits can have an impact
When these positions are unable to be used during written work, handwriting may suffer.
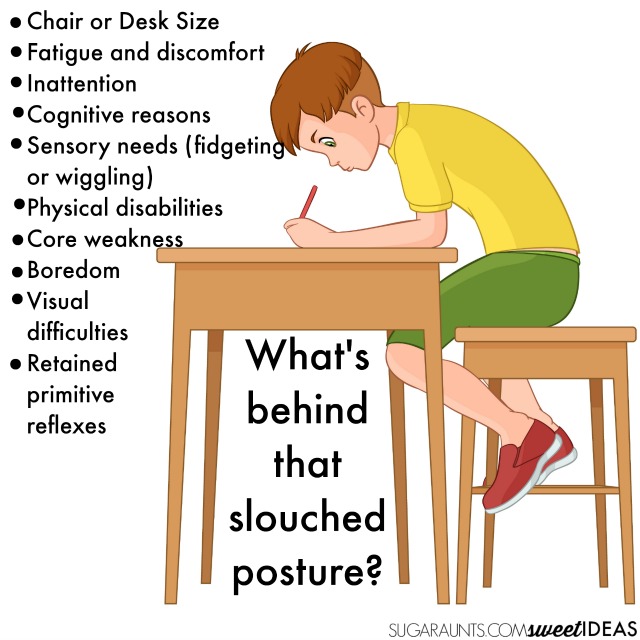
Slouching at desk
You have probably seen many students that are slouching at their desk. Did you ever wonder why are they so slouched??
There are many reasons why students might present with poor posture while writing:
Chair or Desk Size (An appropriately sized desk and chair is essential. Read more about an Occupational Therapist’s opinion on this pet peeve in the classroom.)
Fatigue and discomfort
Inattention
Cognitive reasons
Sensory needs (fidgeting or wiggling)
Physical disabilities
Core weakness: poor core strength can be a result of lack of physical activity, loose ligaments, etc.
Boredom
Visual difficulties (students may adjust their posture to accommodate for lacking visual skills)
Lower back pain (this can be related to poor posture as a result of tablet use)
When addressing posture when writing, it is important to consider the underlying reason. To address correct posture, start at the pelvis.
The pelvis provides a stable base for support while sitting. Following appropriate positioning and tilt of the pelvis, the legs should be parallell and neutral so that the length of the thighs are supported by the chair. When the feet are resting flat on the floor, the thighs are provided with appropriate weight distribution through the pelvis.
Once the lower body is positioned appropriately, the upper body can be positioned into a functional placement.
Good upper body posture while sitting follows pelvic symmetry. The child that leans over to the side while writing is most likely shifting their weight through the pelvis in a lateral tilt, rotating the thighs, and elevating the feet.
Proper and appropriate posture utilizes a similar curve of the spine that happens while standing. A slouched position of the shoulders and upper back can pull the whole body down to the desk surface.
Manipulation skills of the hands depend on the stability and symmetry of the trunk in order to allow the child to control the pencil and paper. For the child who positions the elbow tucked in at their side, there may be underlying core weaknesses or pelvic/thigh positional problems.
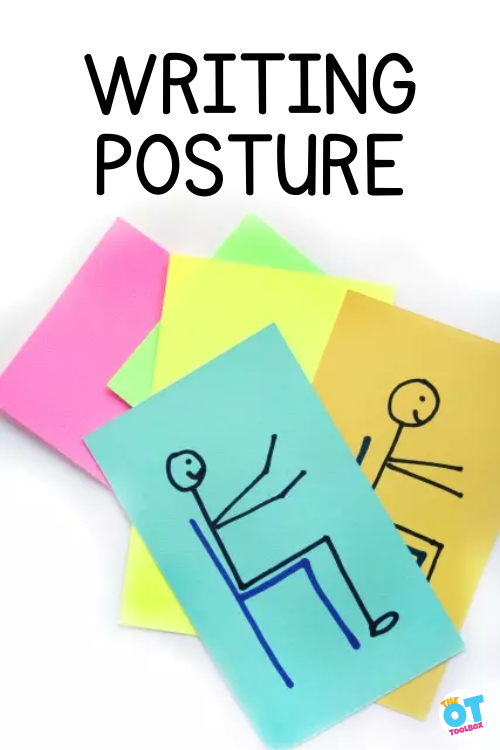
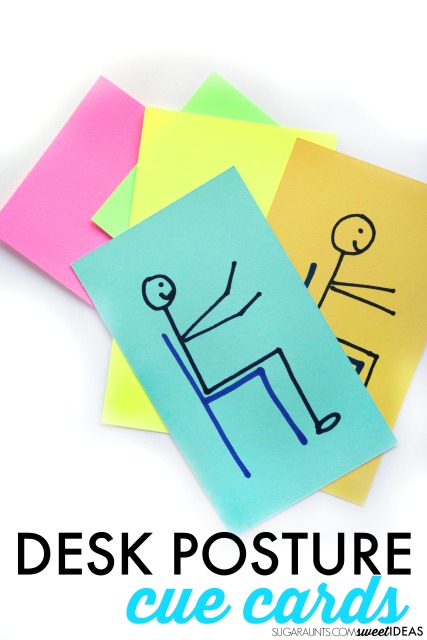
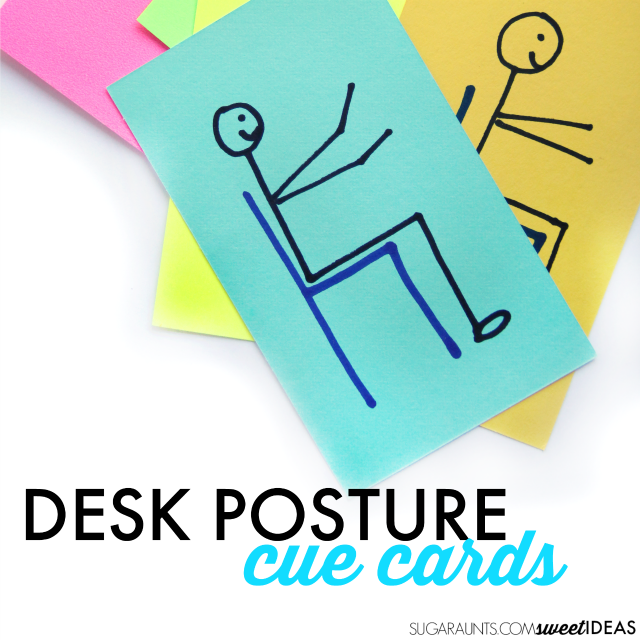
Handwriting Posture Cue Cards
These handwriting cue cards are great for the student who needs a quick visual reminder of proper positioning. These cards can be placed on the desk or reproduced on a large scale and hung on a bulletin board.
These are a great way to talk over the parts of sitting posture that make up the “write” way to sit. Simply work through this activity with kids in a whole classroom activity. This is a great way for school-based Occupational Therapists to “push in” to the classroom while working on a valuable writing goal area.
Hand out a colorful index card to each student. A brightly colored card may be just the pop of color that adds a high contrast visual prompt when taped to the desk. Work through the parts of appropriate posture as you draw a person and chair in step by step parts on the blackboard or at the student’s desk.
Students can copy and create their own cue card. Once the student has drawn their “write” way posture card, they can be checked over for accuracy as a way to recap and double check the student’s understanding of good sitting posture.
Water breaks, including a water bottle with a straw at the desk
Alternate chair options- Other flexible seating options like a rocker chair (affiliate link) or stool can help with attention
Use the back of their chair as a physical prompt through education
Ensure the seat of the chair is proper height
Check for the 90-degree angle at the ankles, knees, and hips
Consider a stool to ensure the back doesn’t curve into the back of the chair
It’s important to note that it is normal to move about and reposition the body when sitting at a desk for a period of time. All kids will present with awkward and inappropriate posturing at one time or another. The issue presents when handwriting is effected for a majority of the time due to sitting posture during handwriting.
Colleen Beck, OTR/L has been an occupational therapist since 2000, working in school-based, hand therapy, outpatient peds, EI, and SNF. Colleen created The OT Toolbox to inspire therapists, teachers, and parents with easy and fun tools to help children thrive. Read her story about going from an OT making $3/hour (after paying for kids’ childcare) to a full-time OT resource creator for millions of readers. Want to collaborate? Send an email to contact@theottoolbox.com.
The Handwriting Book is a comprehensive resource created by experienced pediatric OTs and PTs.
The Handwriting Book covers everything you need to know about handwriting, guided by development and focused on function. This digital resource is is the ultimate resource for tips, strategies, suggestions, and information to support handwriting development in kids.
The Handwriting Book breaks down the functional skill of handwriting into developmental areas. These include developmental progression of pre-writing strokes, fine motor skills, gross motor development, sensory considerations, and visual perceptual skills. Each section includes strategies and tips to improve these underlying areas.
Strategies to address letter and number formation and reversals
Ideas for combining handwriting and play
Activities to practice handwriting skills at home
Tips and strategies for the reluctant writer
Tips to improve pencil grip
Tips for sizing, spacing, and alignment with overall improved legibility
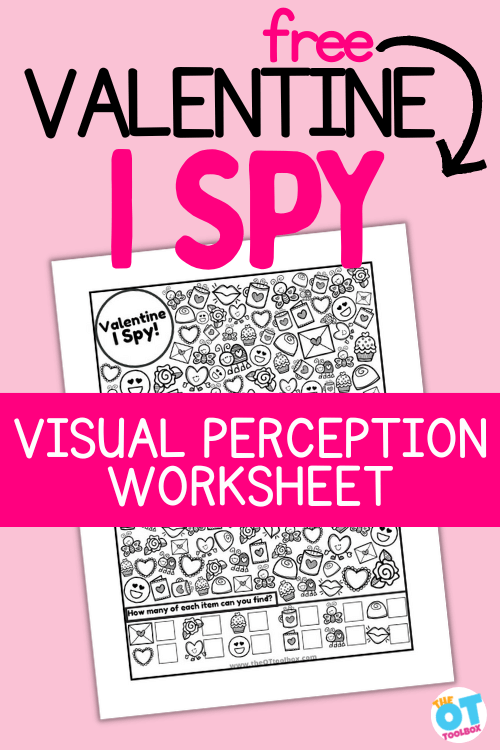
This Valentines Day I Spy is a fun activity for developing skills in visual perception, eye-hand coordination, and more. Add it to your collection of Valentine’s Day occupational therapy activities for a fun way to build skills!
Can you believe it is Valentine’s day already? Although this is considered a “greeting card” holiday made up for the benefit of selling products, children LOVE sending and receiving Valentines.
Just in time for the big day, the OT Toolbox is coming to your inbox with this free Valentine I Spy worksheet!
Valentine I Spy Free Download
What is better than Valentine’s day? Something free! Input your email address below and your Valentine I Spy PDF will be zoomed to your inbox. Better yet, become a member of the OT Toolbox and save the hassle of entering your email address each time. Membership has its perks. Extra resources not in the “free” section, member only downloadables, and themed sections with similar resources all in one place.
Fun Facts about Valentine’s day
Americans spent over 27 billion dollars on Valentines gifts in 2020
Americans send 145 million Valentines cards each year
One idea states in the middle ages Valentine’s day was created because it was the start of mating season
Legend says Valentine was killed for attempting to free prisoners, sending letters to the recipient signed, “from your Valentine”
Over 27 million Americans sent Valentines to their dogs in 2020
Nearly six million couples get engaged on Valentine’s day
How to use the Valentine I Spy worksheet
As always, the Valentines Day I Spy activity is designed to e used in a variety of ways to meet the needs of different levels of learners.
Laminate the page for reusability, or use a simple page protector. This saves on resources, and many learners love to write with markers! Note: while some learners love to use wipe off sheets, others become upset they can not take their work with them. For those who want to save their work, consider taking a screenshot of it.
Create a notebook of resources stored in page protectors for use each year
Slide the printable into a page protector sleeve and use dry erase markers to color in or circle the hidden objects
Make this part of a larger lesson plan including gross motor, sensory, social, executive function, or other fine motor skills
Talk about Valentine’s day, talk about the pictures in the worksheet, discuss traditions and expectations for the holiday
Enlarge the font for beginning learners who need bigger space to write, or have below average visual perceptual skills
Project this page onto a smart board for students to come to the board
More or less prompting may be needed to grade the activity to make it easier or harder
Block of certain areas of the Valentine’s I Spy page to help learners focus on one part at a time
Use different tools to mark the page. Bingo markers, Bingo chips, markers, crayons, pompoms, play dough, or a finger if you want to remove the fine motor element of the task
Learners can explore other games they could make using this activity
Write a report about Valentine’s day, types of Valentines, the history of the holiday, different celebrations, or activities
Executive function – hand the papers out with very limited instruction. Record how well your learners can follow instructions without repeat guidance
Have students write on a slant board, lying prone on the floor with the page in front to build shoulder stability, or supine with the page taped under the table
Visual Perception and the Valentine’s Day I Spy Printable
I Spy printables are great for building visual perceptual skills.
Visual perception refers to the brain’s ability to make sense of what the eyes see. This is different from visual acuity which is how clearly a person sees. A person can have 20/20 visual acuity and poor visual perceptual skills.
Visual perception is important for everyday activities like puzzles, math, finding the right cereal on the shelf, dressing, reading, cutting, and about a million other necessary skills. Visual perception is made up of seven different areas. The ones targeted in the Valentine’s Day I spy activity are:
Visual Attention: The ability to focus on important visual information and filter out unimportant background information.
Visual Discrimination Skills: The ability to determine differences or similarities in objects based on size, color, shape, etc.
Visual Memory: The ability to recall visual traits of a form or object.
Use this Valentine’s Day activity in a classroom party, as a fun activity for the classroom , or in therapy sessions leading up to Valentine’s Day.
Use this activity for different ages: Preschoolers can color the items they find. Middle school kids and high school kids can write about the objects hidden in the puzzle.
Work on early math skills with younger children. Add up the items hidden in the free printable game. Can they add up certain items to create Valentine math problems using picture symbols? Create Find the of correct number of items for each object.
Build coloring skills. Assign a color for each hidden object. Then use the activity as a color worksheet with hidden pictures. Children can place a colored bead or other marker on the graphics that match.
Use the activity as printable games to build skills. Working with a small group, users can race to find the hidden objects.
Challenge fine motor skills by asking the child to place heart candy on certain objects hidden in the I spy activity.
Add the activity to our other Valentine’s Day printables here on the site.
Encourage creativity: Ask users to color in all of the similar items with a certain color, or focus on finger isolation to place a fingerprint on all of the matching objects.
Build scissor skills, precision dexterity, and eye-hand coordination. Print off one copy and cut out the images at the bottom of the page. Then, present the user with a copy of their own. They can place the matching objects on the items they find in the valentine’s day printable.
This is a great activity for so many skill areas!
My personal favorite is the fun and interesting facts and legends surrounding this holiday. Who knew it started hundreds of years ago? Whether you are in it for the flowers and chocolate, hoping to get engaged, or spending some time with loved ones, use this holiday as a reason to create fun and engaging games and activities to help your learners.
Free Valentine’s Day I Spy
Want to add this printable worksheet to your themed items for Valentine’s Day fun? Enter your email address into the form below. Or, if you are a Member’s Club member, you can find this PDF file inside the membership under Valentine’s Day Therapy Theme (Level 2 members) or on the freebie dashboard under Vision Tools (Level 1 and Level 2 members).
Victoria Wood, OTR/L is a contributor to The OT Toolbox and has been providing Occupational Therapy treatment in pediatrics for more than 25 years. She has practiced in hospital settings (inpatient, outpatient, NICU, PICU), school systems, and outpatient clinics in several states. She has treated hundreds of children with various sensory processing dysfunction in the areas of behavior, gross/fine motor skills, social skills and self-care. Ms. Wood has also been a featured speaker at seminars, webinars, and school staff development training. She is the author of Seeing your Home and Community with Sensory Eyes.
Wondering how to paint snow? We’ve got you covered with this fine motor hand strengthening activity. Painting snow is a great winter fine motor activity but also one that builds memories. Use it as a toddler snow activity, a preschool art idea or even painting activities for adults! Painted snow is fun this time of year!
How to paint snow
How to Paint Snow
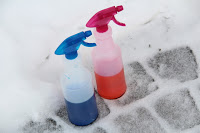
Painting snow using spray bottles is right up the occupational therapy provider’s alley, because using snow as a canvas for creative painting builds essential muscles in the hands. Fine motor skills are a developed by squeezing a spray bottle’s handle to paint the snow.
Let’s cover how to paint snow using a simple squeeze bottle…
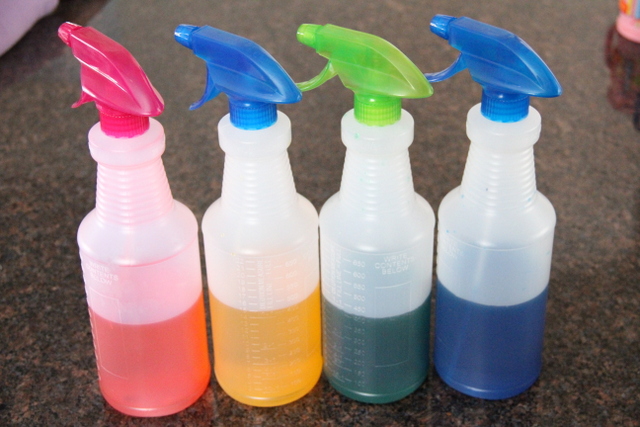
You’ll need just a few materials to paint snow:
Spray bottles
Water
Food coloring
You could also use diluted paint or watercolor paints.
To make the paint for painting snow:
Fill the spray bottles half way.
Squeeze in a few drops of food coloring.
Put the lid back on the spray bottle.
Shake the bottle to mix the color and the water.
Head outside to some fresh snow.
Start spraying!
The spray bottles came from the dollar store. When I saw the cute colored tops on the bottles, I grabbed up four of them…I can see lots of fun spray play in our future!
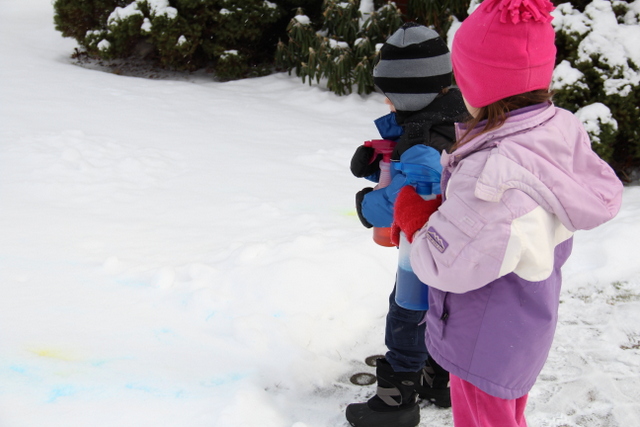
Big Sister and Little Guy filled the bottles part way with water and squeezed in some liquid food coloring (also from the dollar store…we seriously use this stuff for SO MANY projects. It lasts forever!!)
The big kids were SO excited to get started! They went right to work on creating a masterpiece on the front lawn. If you do this activity, be sure to keep the nozzle on a stream of water. When it was turned to a spray, the colors did not show up as well in the snow.
How to paint snow with spray bottles
Benefits of painting snow
We know the benefits of outdoor play, and even in colder temperatures, playing outside has enormous benefits for sensory needs, self-regulation, gross motor skills, and much more.
There is even a winter mindfulness to this activity. Creative expression is very regulating and calming, and that mindful awareness of squeezing the spray bottle, watching the paint as it changes the snow’s colors, and seeing snow patches in different colors is a very present and mindful activity.
Plus, before you can head outside in cold temperatures, you’ll need to dress for the weather. It’s a great time to practice zippers, snaps, and other self-dressing skills. These tips for supporting sensory kids to dress in winter clothing can be a great resource.
That’s where a painted snow activity like this one comes in. Getting kids outside in the winter can be a challenge, but when you pull in a fun activity like painted snow…you have kids that want to stay out until the paint is gone!
Best of all, you can be sure that painting snow with a bottle like this builds other developmental skills, too.
When painting snow with a spray bottle, several things are happening:
Heavy work (proprioception) through the hands and whole body as the child walks through the snow
Tactile challenges with different textures in the snow
Visual processing input seeing a familiar setting in a new light with fresh snow.
Painted Snow Activities
Want to extend the play and develop more skills? Incorporate these painted snow ideas:
Make a snow maze. Paint directions in the snow or add fun details with the snow paint.
Work on letter identification and visual discrimination skills using magnets. We show you how to use magnets in snow play in a previous blog post. With colorful paint, this is a great outdoor activity for kids!
Use the painted snow in a snowball experiment. This is a great winter science activity for kids.
For more early math, use the painted snow to make snow patterns.
If it’s too cold outside, bring the winter painting idea inside! Here’s how to paint snow inside using snow painting with watercolors.
Make a snow kitchen! This is a great activity for young children. Scooping and pouring is a great fine motor workout and you can use that painted snow to make all kinds of fun recipes in a pretend snow restaurant.
Incorporate our winter sensory stations printables. You can laminate the pages and take them outside in the snow for self-regulation fun. Place snow on the printables and spray it off. Then, wipe clean with more snow.
Little Guy wanted to shovel blue snow. ‘Cause that would be awesome!
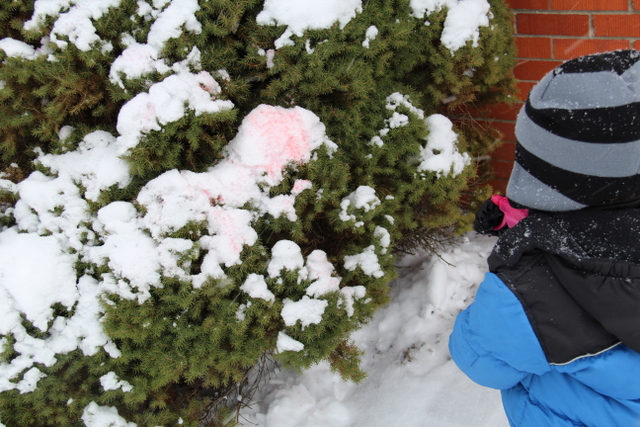
We mixed a little colors…making orange, purple, bluish-green…and mastered Big Sister’s goal of making brown. (This girl loooooves to mix paints to get brown. Every.Time.) haha!
Yes, you may paint the bushes…
This was a great way to spend a Sunday afternoon. If you have snow, go out and do this.
So Much Fun!
What if you had themed, NO-PREP activities designed to collect data and can help kids build essential fine motor skills?
Take back your time and start the year off with a bang with these done-for-you fine motor plans to help kids form stronger hands with our Winter Fine Motor Kit. This print-and-go winter fine motor kit includes no-prep fine motor activities to help kids develop functional grasp, dexterity, strength, and endurance. Use fun, winter-themed, fine motor activities so you can help children develop strong fine motor skills in a digital world.
The Winter Fine Motor Kit includes reproducible activity pages include: pencil control strips, scissor skills strips, simple and complex cutting shapes, lacing cards, toothpick precision art, crumble hand strengthening crafts, memory cards, coloring activities, and so much more.
Today we have a download that supports skills in kids (and adults) with these printable Valentine Cards. Use these printable activities along with some treats for a kid-made gift that helps them develop skills while making the cards. What parent or teacher wouldn’t love that type of holiday card! This PDF file is a winner when used to develop handwriting skills, coloring, visual motor skills, direction following, and more! Add this fun idea to your list of Valentine’s Day occupational therapy activities.
Also be sure to get our Valentines Day I Spy activity for more skill-building. You’ll also love our Conversation Heart Sort. It’s a sorting worksheet for a fine motor activity with conversation hearts.
Printable Valentines Cards
Sometimes a fun activity can make skill-building better! That’s where these adorable cards come into play. Grab a copy of the printable valentines and add your own message for working on handwriting skills, empathy, and more. It’s a fun way to develop goal areas using the holiday fun!
Can you believe how big this holiday is? Billions of dollars are spent buying Valentine’s gifts for others, millions of cards are sent, and hours of time is spent preparing for the festivities. However shallow and costly this may seem, we could all use a reason to celebrate. Some months it seems we slog from one week to the next waiting for the weekends to arrive, only to do it all over again on Monday. An added day or week of excitement breaks up the monotony and gives us a reason to celebrate. These free Printable Valentines Cards are perfect for celebrating without breaking the bank!
Kids of all ages can use these printables in occupational therapy sessions, the classroom or the home.
FOLDABLE PRINTABLE VALENTINES DAY CARDS TO COLOR
If you are looking for the perfect classroom valentines, look no further.
Not everyone has the money or belief to spend lots of money every time a holiday comes around. Many recipients find a homemade card or gift to be much more meaningful than a store bought one.
Let your learners of all ages show their creativity with these free printable Valentine’s cards to color. Enter your email address below and your printable Valentine’s day cards will shoot directly into your inbox.
The free printables are a great tool to work on coloring skills with an end result, while still allowing the kiddo (or user of any age) to show creative expression.
Get out lots of different art supplies to help your learners use their creativity. Pens, markers, glue, glitter, sequins, dot markers, paint, crayons, ribbon, tissue paper, and anything that can be used to decorate the free printable Valentine’s card will be a win with your learners.
As an added benefit, using the foldable printable Valentines Day cards to color and develop fine motor skills, users can work on eye-hand coordination, pinch and grip strength, visual motor skills, and more.
As you walk down the hallways of different schools, you might see different types of art projects. What do you notice? Many of them are cookie cutter, with all of the pieces exactly where they belong, looking identical to one another.
While this is super cute to send home to parents, there are a lot of reasons to stop doing this.
Young learners thrive on experimentation, getting messy, and free expression
Parents have a better picture of their child’s abilities if they see what their child makes independently
Learners get comfortable making mistakes while noticing their picture looks different than others
What better way to learn cause and effect by dumping a bottle of glitter and heaps of glue onto their printable Valentine’s card?
Teachers can witness their learner’s ability to independently follow a model without intervention, track their progress, and see their skills without influence.
Caregivers can learn a lot about the sensory system by watching young learners create. The sensory seeker might put their hands in the paint and spread it up to their elbows. The avoider might pick crayons instead of messy markers. A seeker tends to mark heavily on the paper with vigorous strokes, while the avoider draws with lighter strokes.
The ABC Learning Center has a great article on what artwork reveals about a person
An open-ended tool such as these thoughtful valentine’s day gift cards can support skill development while still allowing the user creative expression oppourtunites.
Free Printable Valentine Cards to Color
Start practicing today with the free printable Valentine cards to color. Make the decision to put out the supplies and let the students create their masterpiece independently. You can show an example so the students get an idea, however encourage learners not to just copy yours.
Stop prioritizing product over process
Sit on your hands if you need to. Sometimes the urge to “fix” things is overwhelming. Learners don’t always need reminders that they forgot to draw a nose, or that clouds are not pink.
Limit the amount of directions you give
Talk about their art. “I notice your whole picture is blue, what made you decide to choose that color?”
Encourage experimentation. As ugly as we might think it might be, young learners think mixing all of the paints into the infamous gray blob is exciting
Try not to criticize. Notice the process instead
There are times when the end product is supposed to look like the model in order to address following directions, however it does not have to look exactly like the model if the learner is unable to do this independently. You can discuss with the class your objectives for the task such as color inside the lines, cutting on the lines, and having legible handwriting.
This is not easy. There are some educators and therapists cringing as they read this. One teacher I work with only offers colored pencils because everything else is messy. Another freaks out if something goes awry. On the opposite end, I have teachers who embrace me coming in and letting their learners get messy and create how they are able. This week not one penguin looked like the other in the hallway outside one class!!
SKILLS LEARNED MAKING FOLDABLE FREE VALENTINE’S CARDS
As you set out the free printable Valentine’s day cards, get excited about how different each learner’s art will be. Watch as they make messes and get creative.
Younger children can simply decorate the printable cards. Older users, teens, or participants of any age can use the printable cards as last-minute valentine’s day cards that support handwriting and direction-following skills.
Take time to notice the great skills they are working on as they complete their printable Valentine’s cards:
Executive function, following directions, attention, attention to detail, focus, sequencing, planning, task completion, neatness, impulse control, compliance, behavior, and work tolerance to name a few
Social function – working together in a group, problem solving, sharing materials and space, turn taking, talking about their work, making mistakes
These printable Valentine Cards would look great on an occupational therapy bulletin board or sent to special teachers or paraprofessional support individuals in the school, too. This is a thoughtful Valentine’s Day gift that “gives” in more ways than one!
A general search on the OT Toolbox brought up dozens of posts and resources for Valentine’s day including hole punch cards, fine motor worksheets, fine motor printables, Valentine’s busy bag, Valentine sensory bottle, Valentines sensory bin, and more.
Enjoy the Valentine’s day celebration, however you choose to share it with others. Make time for creativity, and of course eating chocolate!
Free Printable Valentine Cards
Want to add this activity to your printable therapy resources? Enter your email address into the form below to access this therapy tool. This printable PDF is also available inside the Member’s Club. Members can log in and access the printable cards on our Valentine’s Day Therapy Theme (Level 2) or under Fine Motor Activities (Level 1 and 2).
Victoria Wood, OTR/L is a contributor to The OT Toolbox and has been providing Occupational Therapy treatment in pediatrics for more than 25 years. She has practiced in hospital settings (inpatient, outpatient, NICU, PICU), school systems, and outpatient clinics in several states. She has treated hundreds of children with various sensory processing dysfunction in the areas of behavior, gross/fine motor skills, social skills and self-care. Ms. Wood has also been a featured speaker at seminars, webinars, and school staff development training. She is the author of Seeing your Home and Community with Sensory Eyes.
Sorting colors is a big deal. Young learners in the toddler and preschool stage start out by sorting items such as blocks, plastic animals, coins, or colored items. Later in child development, sorting colors morphs into sorting silverware, matching socks, organizing drawers, or filing papers to name a few life skills. This is all part of child development in color recognition.
Sorting by color is an important skill for organizing items into categories to make sense of them, or for ease of locating them later. It is far easier to find a pair of socks in a drawer when they are matched together rather than in a large multi-colored pile. But what developmental skills are required for sorting colors? How can you support this essential skill?
Sorting Colors
First, let’s break down what we mean by sorting colors…
Sorting by color can refer to anything from colored blocks to silverware does not involve being able to name the item.
Developmentally, a young learner does not need to know their colors in order to sort. They are arranging the items according to their properties. You could sort foreign coins into their respective piles without any idea what they are. By participating in sorting color activities, the young child obtains hands-on practice in several areas of development:
Hopefully as your learner continues to sort items, they may start recognizing the qualities of each item. This can include shade, or color, shape, form, number, etc.
Sorting Colors Development
As with many skills, there is a hierarchy of learning to sorting tasks. Young children develop these skills through hands-on play and by playing with toys.
Development of color sorting progresses through these stages:
Grouping items that are exactly the same. Examples; colored plastic bears, blocks that are all the same size, coins, pompoms
Sorting items that are similar: different brands of socks in similar colors, silverware in varying sizes, towels, a bag of buttons
Sorting items that are similar AND different: sorting items by the color red, that are all different items. Sorting socks that are all different sizes, shapes, weights, and colors. Sorting items by colors that vary (five different shades of red).
Sorting items that have more than one category This stage of development progresses to categorizing objects that can be sorted such as a pile of paper to file. In this case there needs to be one similar quality selected first in order to sort, such as putting all the medical bills together, sorting by date, alphabetizing the papers. The last stage is where we may see challenges impacted by working memory. Those struggling with development of executive functioning skills can be limited in sorting objects in various categories, particularly when a background is busy such as a messy desk, cluttered locker, or home.
Sorting by color is not the easiest way to sort. When there are multiple items that are similar such as 100 colored plastic balls, your learner may not recognize these as different items. They see balls first, not colors. Try sorting very different items first. Example: 5 identical buttons, 3 towels, 4 pencils, and 6 spoons.
Color Sorting and Visual Perception
Sorting involves recognizing an item’s properties, but also visual perception. Through development of these skills, children move from thinking through the sorting of colors to visual efficiency which allows for automaticity in tasks.
Below are some thought processes that integrate color sorting with visual perceptual skills:
Figure ground lets the “perceiver” see the items as part to a whole,
Form constancy recognizes that two balls of different colors are still balls. or two shades of red are still red.
Visual discrimination allows the learner to tell difference between items.
Visual memory is the ability to remember what is seen as the eyes are scanning the items
Color Sorting Teaches Mental Flexibility
When teaching sorting, teach mental flexibility. Sort many different items in many different ways. Sort by, color, size, similarity, quality (4 legged animals), texture, weight, or two qualities.
Sort the same items two different ways. First sort the plastic fruit and veggies (affiliate link) into color, then sort by type. Later your learner can sort by larger categories such as fruits versus vegetables.
Color Sorting and Functional Tasks
Why do some people have difficulty organizing and cleaning up?
Sometimes a large task seems very overwhelming, therefore shut down and refusal tends to occur. The most effective way to combat this is to teach sorting and categorizing. Go into your child’s messy room and look for the categories.
Books all over the floor
Dirty clothes everywhere
Papers and trash scattered around
9 dishes and plates
29 stuffed animals
84 hair clips
64 crayons
Now this task seems much more manageable. I often had to solve this dilemma with my younger daughter.
What other, more complicated ways could she organize this messy room?
Sorting the books into genre, size, type, or alphabetizing
Organizing the dirty clothes into whites and colors
Determining trash versus recyclables
Crayons may be part of the “school supplies” category
Hair accessories or toys might be a larger category
How would you tackle this chore?
Sort into the larger category first such as books, then sort into their subcategories?
Sort into subcategories such as stuffed animals, games, action figures, puzzles, then group into toys?
There is no wrong answer depending on how your brain works. Actually the only wrong answer is not getting started or having a meltdown.
When working on basic sorting colors, and feeling it is futile or pointless, think about the bigger picture. A person who can put their laundry, silverware, and toys away will be more independent than one who can not.
Color Sorting Activities
So, are you wondering about a fun way to build development in this area? We’ve got plenty of ideas.
The OT Toolbox has a great resource for teaching sorting using everyday items.
Amazon has tons of toys and games for sorting! (affiliate link) Don’t limit yourself to store bought items though. Your kitchen, bathroom, junk drawers, and desk are filled with items that can be grouped and sorted.
Color sorting activities can include ideas such as:
Sorting colored circles (cut out circles from construction paper)
Sort different objects by color and drop them into baskets or bowls
Use color sorting activities along with a scavenger hunt. This color scavenger hunt is one fun idea.
Cut out cardboard shapes and sort by color or shape. This cardboard tangram activity is an easy way to make shapes in different colors.
Sort colored markers or crayons
Laminate a piece of construction paper and use it as a play mat. Sort different colored craft pom poms or other objects onto the correct mat.
Print out color words and sort them along with small objects. The Colors Handwriting Kit has these color words and other printable activities for playing with color.
This color sorting activity is a powerful fine motor activity and a super easy way to learn and play for toddlers and preschoolers. We’ve done plenty of activities to work on fine motor skills in kids. This straw activity is the type that is a huge hit in our house…it’s cheap, easy, and fun! (a bonus for kids and mom!)
A handful of straws and a few recycled grated cheese container are all that are needed for tripod grasp, scissor skills, color naming, and sorting.
SO much learning is happening with color sorting!
Fine Motor Color Sorting Activity with Straws
This color sorting activity is a powerful fine motor activity and a super easy way to learn and play for toddlers and preschoolers. We’ve done plenty of activities to work on fine motor skills in kids. This straw activity is the type that is a huge hit in our house…it’s cheap, easy, and fun! (a bonus for kids and mom!) A handful of straws and a few recycled grated cheese container are all that are needed for tripod grasp, scissor skills, color naming, and sorting.
This color sorting activity is great for toddlers and preschools because it helps to develop many of the fine motor skills that they need for function.
I had Baby Girl (age 2 and a half) do this activity and she LOVED it. Now, many toddlers are exploring textures of small objects with their mouths. If you have a little one who puts things in their mouth during play, this may not be the activity for you. That’s ok. If it doesn’t work right now, put it away and pull it out in a few months.
Always keep a close eye on your little ones during fine motor play and use your judgment with activities that work best for your child. Many school teachers read our blog and definitely, if there are rules about choking hazards in your classroom, don’t do this one with the 2 or 3 year olds.
You can adjust this color sorting activity to use other materials besides straws, too. Try using whole straws, pipe cleaners, colored craft sticks, or other objects that are safe for larger groups of Toddlers.
We started out with a handful of colored straws. These are a dollar store purchase and we only used a few of the hundred or so in the pack…starting out cheap…this activity is going well so far!
Cutting the straws is a neat way to explore the “open-shut” motion of the scissors to cut the straw pieces. Baby Girl liked the effect of cutting straws. Flying straw bits= hilarious!
If you’re not up for chasing bits and pieces of straws around the room or would rather not dodge flying straw pieces as they are cut, do this in a bin or bag. Much easier on the eyes 😉
Once our straws were cut into little pieces and ready for playing, I pulled out a few recycled grated cheese containers. (Recycled container= free…activity going well still!) We started with just one container out on the table and Baby Girl dropped the straw pieces into the holes.
By repeating the task with multiple repetitions, kids develop skills in visual attention and visual memory. These visual processing skills are necessary for reading and math tasks.
The ability to recall differences in objects builds working memory too, ask kids remember where specific colors go or the place where they should sort them.
These sorting skills come into play in more advanced learning tasks as they classify objects, numbers, letters, etc.
And, when children sort items by color, they are building What a great fine motor task this was for little hands! Sorting straws into a container with small holes, like our activity, requires a tripod grasp to insert the straws into the small holes of the grated cheese container.
Sorting items like cut up straws helps preschoolers and toddlers develop skills such as:
Fine motor skills (needed for pencil grasp, scissor use, turning pages, etc.)
Hand strength (needed for endurance in coloring, cutting, etc.)
Visual discrimination (needed to determine differences in letters, shapes, and numbers)
Visual attention
Visual discrimination
Visual perceptual skills
Left Right discrimination (needed for handwriting, fine motor tasks)
Counting
Patterning
Classification skills
Preschoolers can get a lot of learning (colors, patterns, sorting, counting) from this activity too. Have them count as they put the pieces in, do a pattern with the colored straws, sort from smallest to biggest pieces and put them in the container in order…the possibilities are endless!
Color Sorting Activity with Straws
Once she got a little tired of the activity, I let it sit out on the table for a while with two more containers added. I started dropping in colored straw pieces into the containers and sorted them by color.
Baby Girl picked right up on that and got into the activity again. This lasted for a long time. We kept this out all day and she even wanted to invite her cousin over to play with us. So we did! This was a hit with the toddlers and Little Guy when he came home from preschool. Easy, cheap, and fun. I’ll take it!
Looking for more fun ways to work on color sorting?
You’ll find more activities to build hand strength, coordination, and dexterity in this resource on Fine Motor Skills.
Colleen Beck, OTR/L has been an occupational therapist since 2000, working in school-based, hand therapy, outpatient peds, EI, and SNF. Colleen created The OT Toolbox to inspire therapists, teachers, and parents with easy and fun tools to help children thrive. Read her story about going from an OT making $3/hour (after paying for kids’ childcare) to a full-time OT resource creator for millions of readers. Want to collaborate? Send an email to contact@theottoolbox.com.
Rainbow Handwriting Kit– This resource pack includes handwriting sheets, write the room cards, color worksheets, visual motor activities, and so much more. The handwriting kit includes:
Write the Room, Color Names: Lowercase Letters
Write the Room, Color Names: Uppercase Letters
Write the Room, Color Names: Cursive Writing
Copy/Draw/Color/Cut Color Worksheets
Colors Roll & Write Page
Color Names Letter Size Puzzle Pages
Flip and Fill A-Z Letter Pages
Colors Pre-Writing Lines Pencil Control Mazes
This handwriting kit now includes a bonus pack of pencil control worksheets, 1-10 fine motor clip cards, visual discrimination maze for directionality, handwriting sheets, and working memory/direction following sheet! Valued at $5, this bonus kit triples the goal areas you can work on in each therapy session or home program.