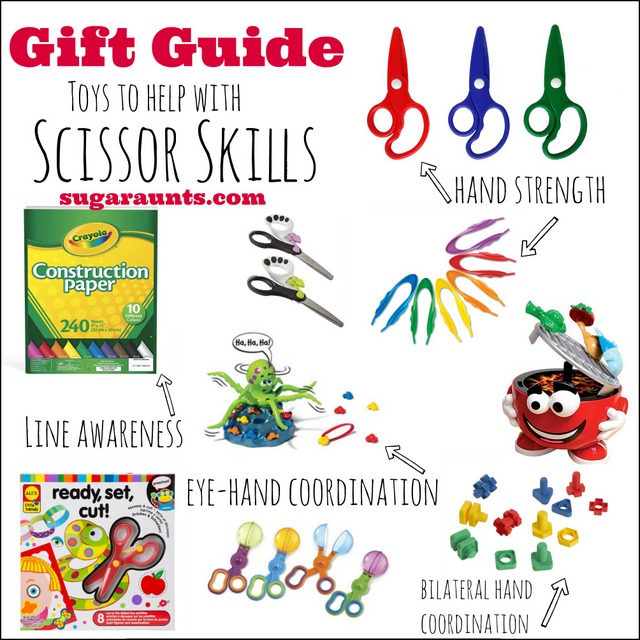
Working on scissor skills can be tough for some kids! There’s a lot that goes into cutting a shape from a piece of paper. The grasping of the scissors, opening and closing the loops, holding and manipulating the paper, keeping the scissors on the line, maintaining endurance to keep on snipping…it can be a difficult task for little ones with hand weakness or difficulty with any of these parts of the scissor task.
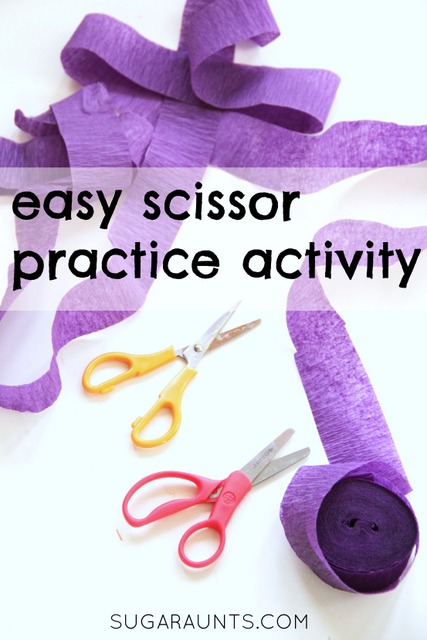
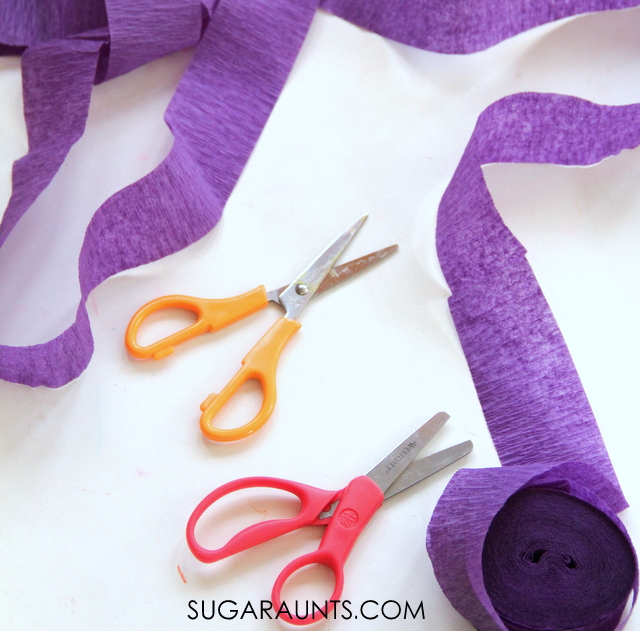
Cutting streamers is an inexpensive way to teach kids to snip paper.
This scissor practice activity is great for kids who are just starting out with scissor use or kids who need a little practice with managing scissors.
In-hand manipulation activities are a great way to boost fine motor skills needed for tasks like managing clothing fasteners, using a pencil when writing, manipulating items like coins or beads, and more.
Easy way to practice cutting with scissors:
This post contains affiliate links.
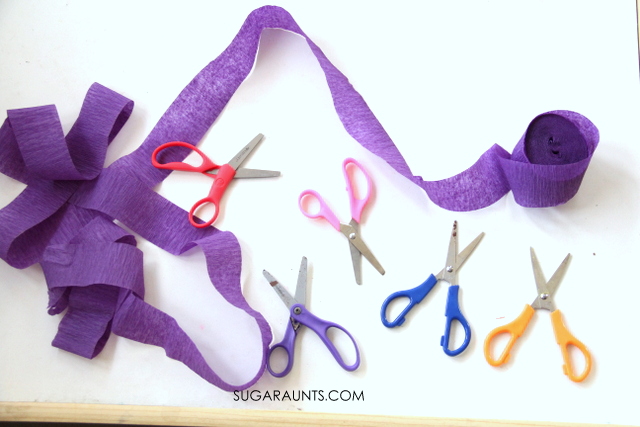
We started this easy activity with just a few items. A roll of crepe paper streamer and a pair of scissors are all that you need for this easy scissor activity. I love Fiskars Blunt Tip Kid Scissors for new scissor users, but you can see more scissor options here.
I pulled out a handful of scissor colors for my son, just to make it fun for him. He’s a little reluctant with cutting, only because he needs more practice and he’s just not into it. Activities like this are a good way to get him interested in practicing the skills needed for accuracy with cutting shapes.
Practice Scissor Skills with Kids using Streamers!
I had my son snip the streamer into snips. He first cut the whole way across the width of the streamer so we had a ton of little pieces. Don’t worry about the mess. Picking up the shreds is a good fine motor work out too. Have your child grab up those pieces of streamer and tuck them into their hands, one at a time.
When they hold a few pieces in their palm as they gather up more little pieces using the pointer finger and thumb practices in-hand manipulation and the process of translation. Manipulating items like this from the tips of the fingers into the palm is a good way to encourage dexterity of the hands and intrinsic muscle strength.
After he cut the width of the streamer, I had him snip only half way across the width of the streamer. This made a fringe the length of the crepe paper.
Cutting only half way encourages motor planning and controlled movements of the scissors. What a great way to practice opening and closing those scissor blades with control.
Managing the streamer with the assisting hand requires bilateral hand coordination to hold the streamer and move the fingers along as he continued snipping.
To make this task even more difficult, have the child cut the length of the streamer. Cutting a longer distance requires endurance of the hand muscles and controlled motor planning to manipulate the streamer with the helper hand as the child snips down the center of the streamer. Older kids who need to work on eye-hand coordination would benefit from this task.
Unfortunately, the images of the process of cutting didn’t make the cut (see what I did there??) with fuzzy pictures. I wouldn’t want to hurt your eyes with my bad photography skills. We’ll be doing this task again with my Little Guy so I’m hoping to catch a few images and add them at some point. Let us know if you try this activity with your child!
Looking for more scissor activities? We’ve got a bunch to share:
We’ve had a new baby in our house for six months now. Those six months have gone by in a blur.
Just last week, my three year old asked, “Mom, are we keeping (the baby) for ever?” I think it finally hit her that baby is here to stay. Sometimes it’s difficult for kids to understand a new baby coming into the house and family and staying (forever!) with all of it’s stuff, and cries, and messy diapers. Life sure does change when a new baby is introduced to a family!
We love sensory play for it’s simple ways to teach concepts, exploration, language development, and ideas that are developed. We did this new baby sensory play activity a few months back…but maybe it’s time to play again with the new baby sensory bin, just to help the older siblings understand the new family dynamic we’ve got going on!
Sensory Play for Siblings of a New Baby
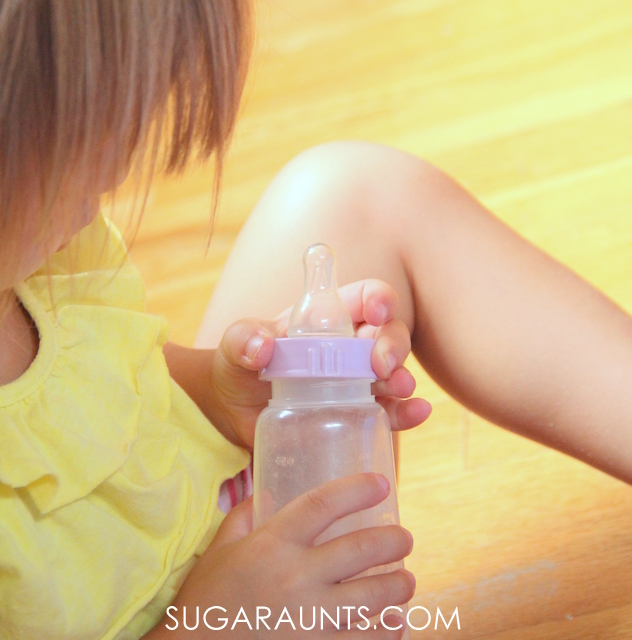
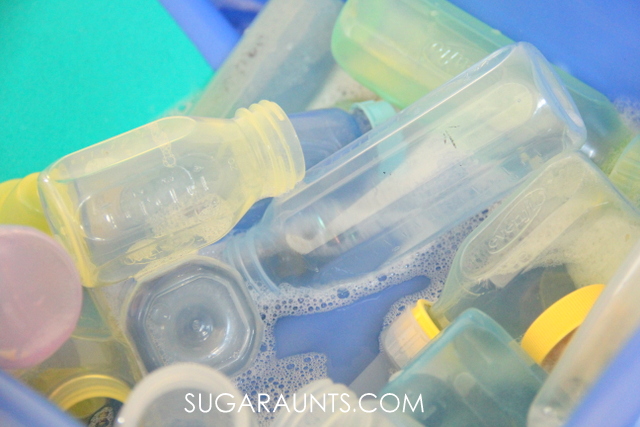
We needed to wash a bunch of baby supplies a few months ago, and anytime washing is involved, Little Sister (age 3) jumps at the chance to help out. This sensory bin kind of just happened because of a job that needed done anyway, but it turned out to be a fun way to explore the new baby’s supplies and talk about things that a new baby needs.
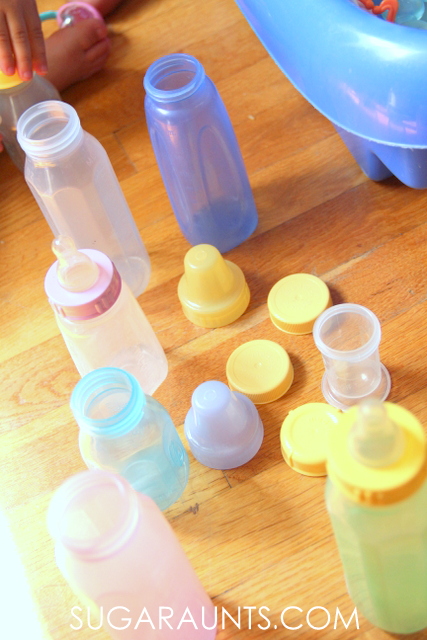
I pulled out a big box of bottles
and lids, bottle nipples
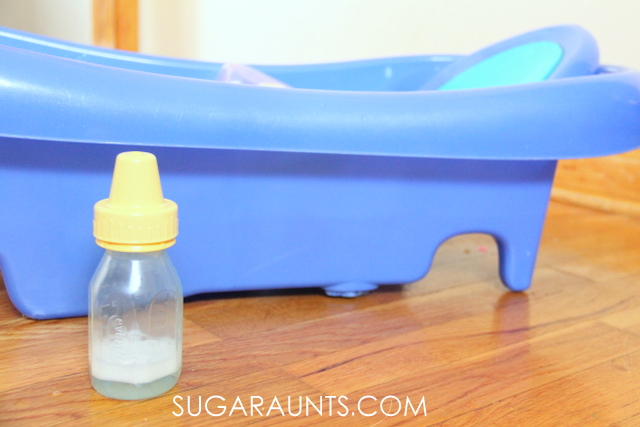
, and a few bottle brushes that all needed washing. Instead of putting them in the sink, I put them in our baby bath tub right on the dining room floor. Some warm soapy water and we were ready to clean and explore baby’s things.
Little Sister had fun matching up the lids to the bottles. Twisting them on and off was a fun way to work on many fine motor skills: bilateral hand coordination, hand-eye coordination skills, motor planning, and translation in the palm.
Time goes by at lightning speed when you’re a parent…but at the same time, the days draaaaaag. How can my sweet little baby already be six months old? But certain hours of the day can seem to last twice as long. This baby sensory bin was perfect for spending time with my three year old while doing a job that needed done anyway. She liked talking about all the supplies, the lids that cover bottles, and the bottle brushes that are used to clean bottles.
Cleaning the bottles was a hit for her! She loved cleaning the bottles with the bottle brush and the warm soapy water was a great sensory experience for her.
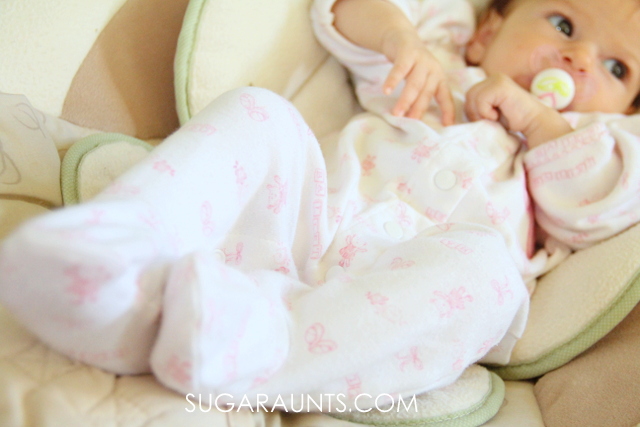
This little sweetie watched the fun from her infant seat.
It’s always a bonus when sensory play leads to cleaning rather than messes! This one was a big hit and we’ll be pulling out all of the bottles again soon. Let us know if you play and explore baby items with a big brother or big sister. We would love to hear about it!
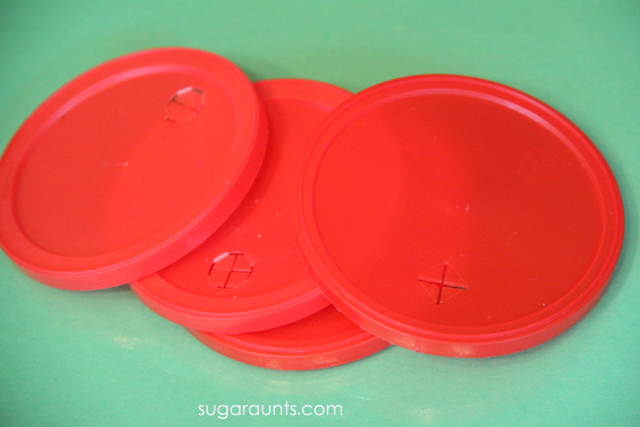
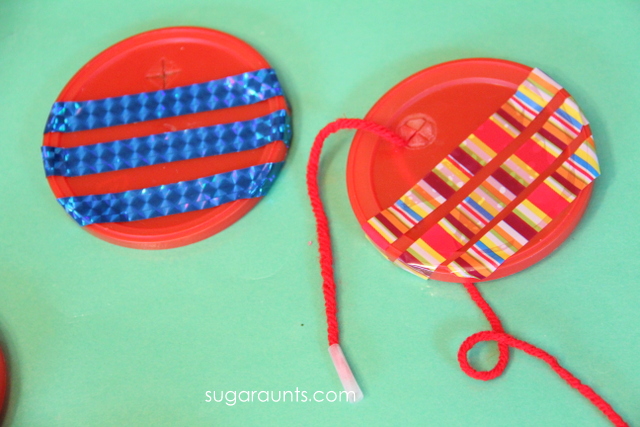
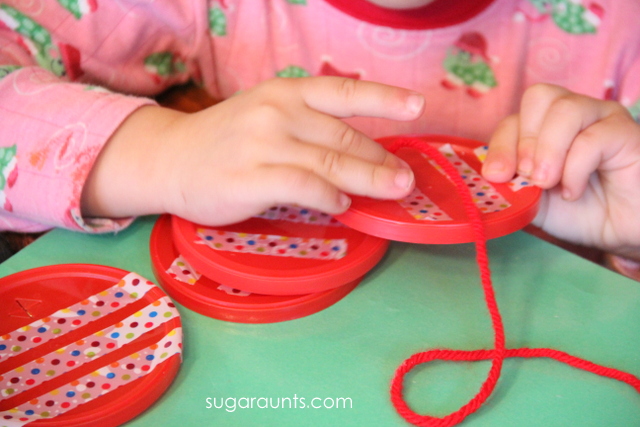
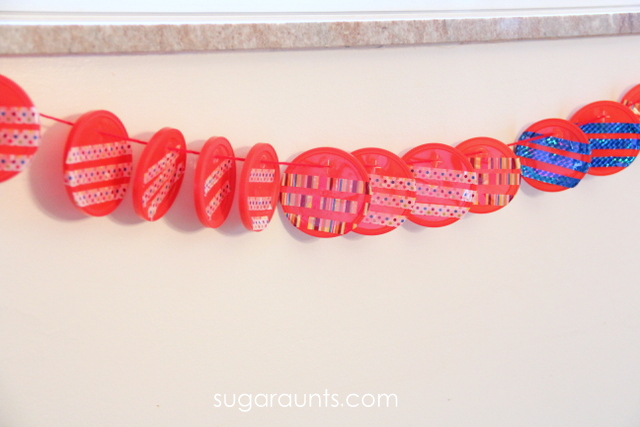
We are big fans of creating crafts and activities using recycled materials and pulled out a stash of recycled lids to make this ornament garland. The kids loved making a Christmas garland, and I loved the fine motor skills that happened!
This post contains affiliate links.
Fine Motor Threading Activity
The fine motor portion of this threading activity makes this garland a great way to practice many skills year-round. The tripod grasp, bilateral hand coordination, and crossing midline during this activity make it a fun way to create and develop many important skills.
We started with a big stack of recycled lids. These are the plastic lids that come on children’s drink cups at restaurants. When you have three kids, you end up with a lot of drink lids!
Fine Motor Skills with a Roll of Tape
We used decorative tape that has been in our crafting bins for ages. You can use (Amazon affiliate link) washi tape to decorate those lids. The fine motor benefits of a child and a roll of tape are immense; There are a TON of fine motor dexterity skills that can occur by allowing a child to use tape. A neat pincer grasp is required to pinch and grasp the sticky tape, while using the other, non-dominant hand to grasp the dispenser just right. Pulling the tape and tearing it at the metal teeth of the tape dispenser requires controlled motor movements and eye-hand coordination. Children will inevitably pull and pull and pull the tape when they first begin using a roll of tape, unassisted. That’s ok! They learn as they play and a roll of tape is a fun and creative way to practice fine motor skill.
Note: If you give a child a roll of tape, you will end up with tape on the walls. ((That should be the title of a children’s book! Ha!)) The urge to display artwork is just too great!
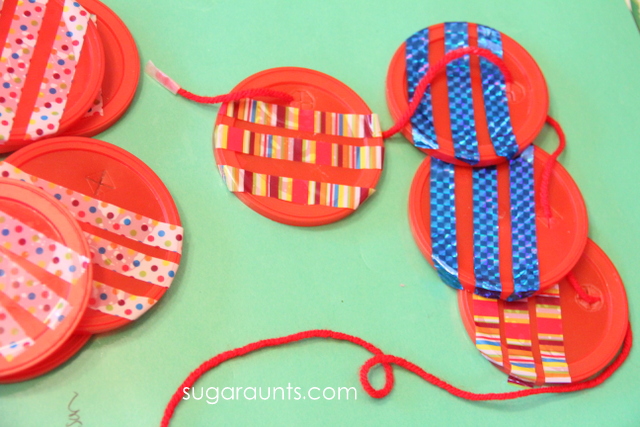
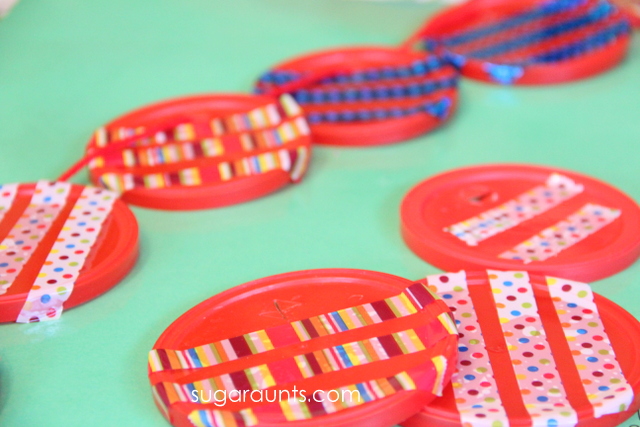
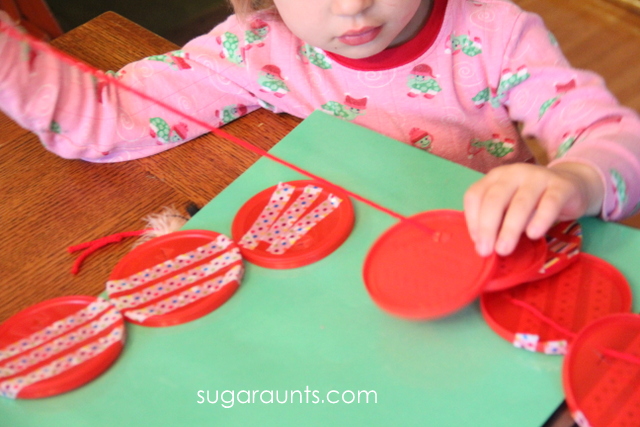
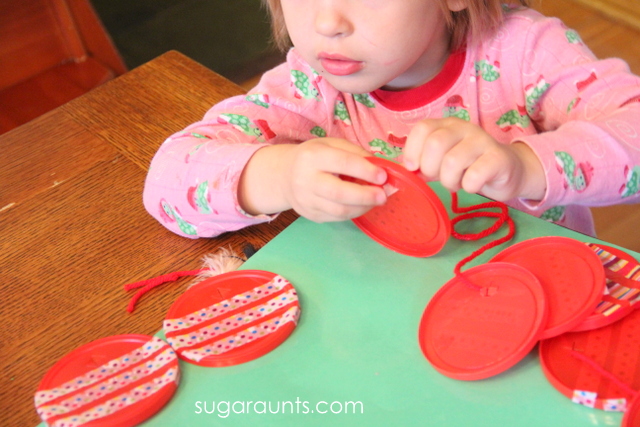
Once all of the lids are decorated with tape, grab a long piece of yarn. We used a piece of tape at the end to make threading easier.
Baby Girl (age 3) loved this threading activity. She asked to re-make this garland a few times in the week after we first made ours. She did a great job of threading the yarn through the straw holes of the lids. This is such a good way to work on tripod grasp and hand-eye coordination.
Pulling the thread all the way through the hole and pulling the lid down the yarn requires bilateral hand coordination to use the hands together in a coordinated manner. This is an important skill for many self-care tasks like shoe tying, zippering, and buttoning.
We used our garland as a Christmas decoration by hanging them from our window sill. While this is a fun Christmas activity, I would definitely recommend doing this as a fine motor exercise year-round.
Christmas Handwriting Activities
Writing out that Christmas wish list is a difficult task that brings out tears instead of holiday excitement. I’ve got a solution for your kiddo with handwriting difficulties: a packet of modified paper for all of the Christmas handwriting tasks that come up each year. Use this handwriting pack to help kids who struggle with handwriting to participate in holiday traditions while even working on and developing their handwriting skills! Working on handwriting with kids this Christmas season? Grab your copy of the Christmas Modified Handwriting Packet. It’s got three types of adapted paper that kids can use to write letters to Santa, Thank You notes, holiday bucket lists and much more…all while working on handwriting skills in a motivating and fun way! Read more about the adapted Christmas Paper here.
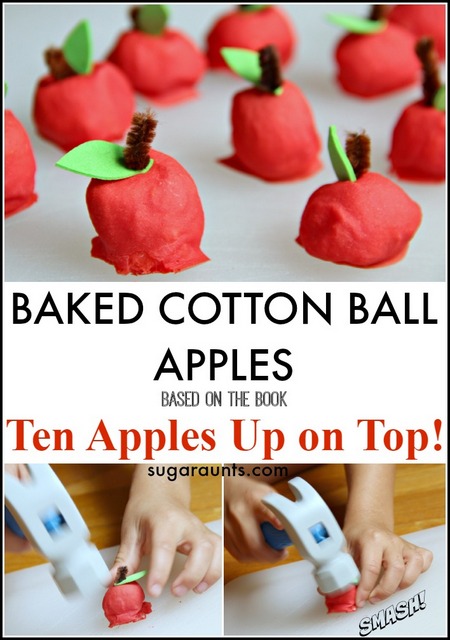
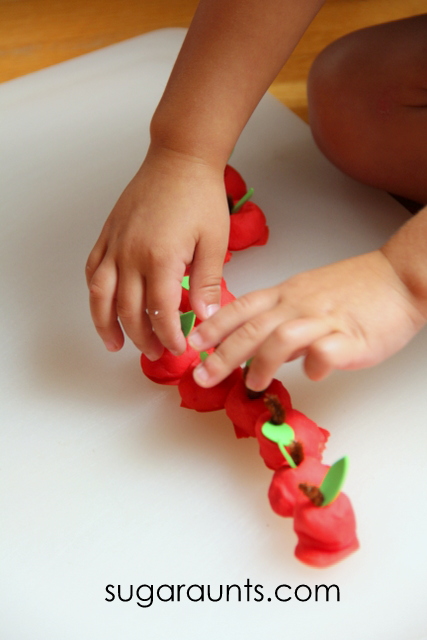
This Ten Apples Up on Top activity was a huge hit with my kids, because they love the book, so making baked cotton ball apples was a fun way to play through the book. And as a pediatric OT, I loved the fine motor and heavy work input that was an added benefit. You can add this to apple activities that you are doing in occupational therapy sessions or at home. These baked cotton ball apples would be a great addition to our apple pie sensory bin, and they would be fun for hands-on play with our Fine Motor Therapy Kit for visual motor, handwriting, and fine motor play.
Here’s what we did…
Ten Apples Up on Top Activity
Did you ever do an activity with the kids that was such a hit, that the kids ask to re-do the activity over and over and over again? This one is it for us. There is rarely a day that goes by that I don’t hear about our smashing apples activity. Especially if we happen to see a hammer. Oh, this baked cotton ball activity was a fun one for us!
We’ve never made baked cotton balls before, but have had the idea bubbling for a while. When we heard that the Preschool Book Club‘s book for this week would be Ten Apples Up on Top, we knew it would have to be an apple themed baked cotton ball activity. We even made these waaaay before all of the other book activities in the second series of books.
Like back in June. If you’ve never made baked cotton balls before, this is a MUST-DO activity!
This post contains affiliate links.
How to make Baked Cotton Balls
Are you familiar with baked cotton balls? This sensory tool is a DIY sensory material that kids love, and for so many great reasons. Actually, mixing up and making the baked cotton balls is as much of a therapy task as playing with them!
First read Ten Apples Up On Top! by Dr. Seuss. This is such a fun book for counting and playing along with the story.
How to make baked cotton balls:
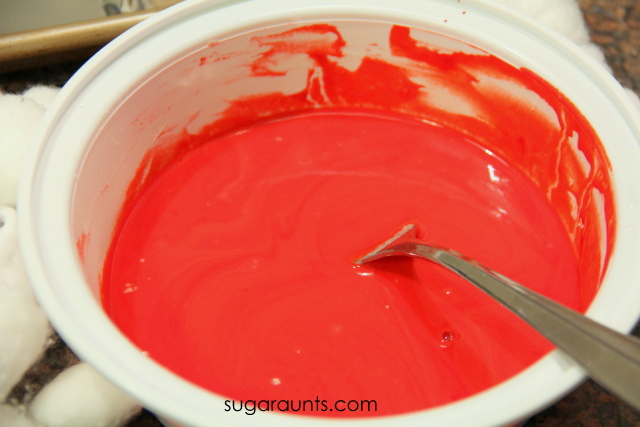
Begin by mixing together one cup of flour and one cup of water. This is a great activity for the kids. Scooping, stirring, direction following, sneak tasting (my kids aren’t the only ones who go crazy for flour, right!??).
Pour in a bunch of red food coloring. We typically go with Wilton gel colors for all of our dying activities, but I knew I wanted a really deep red color. It seems like red coloring requires SO much dye to get a good shade of red. I ended up using a bottle from the dollar store and used about half of the bottle of food dye. This was maybe 20 drops? Add enough to get a nice red color.
Mix in the food coloring.
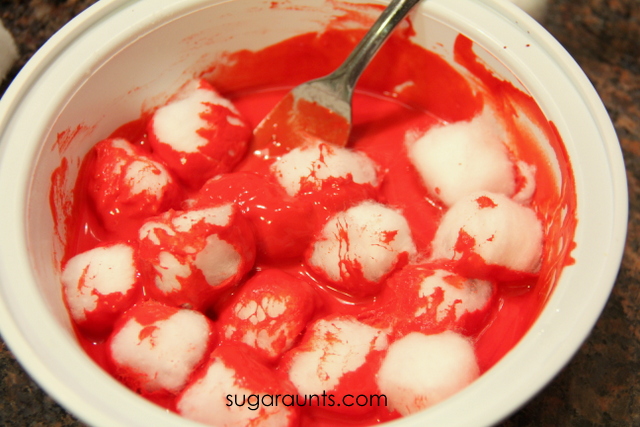
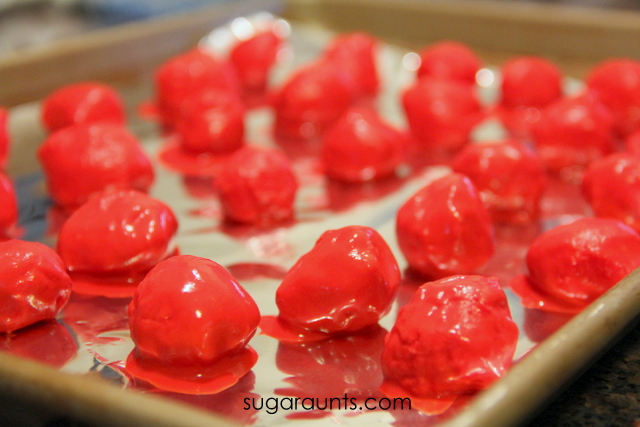
4. Now is the cotton ball part. Grab up your stash of cotton balls.
5. Mix them around to coat all of the cotton balls.
6. Place a layer of aluminum foil on a baking tray and place the cotton balls on the tray for baking. I used two forks to pick up the coated cotton balls and was able to let excess flour coating drip off before placing the cotton balls onto the foil.
You’ll want to let as much excess drip off before putting them on the sheet to avoid the sharp edges and flat bottom once the cotton balls bake.
7. Pop the baking sheet into the oven for around 60 minutes at 300 degrees F.
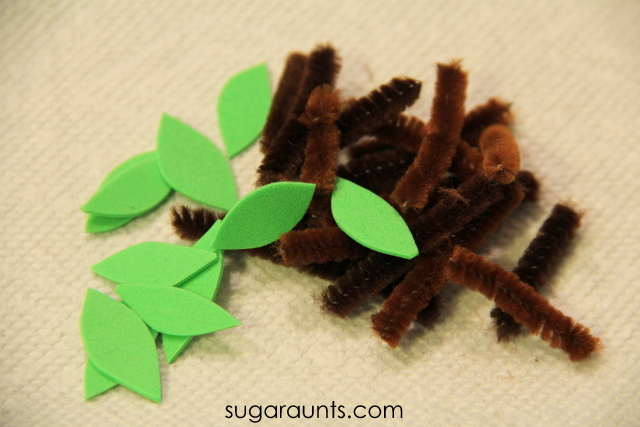
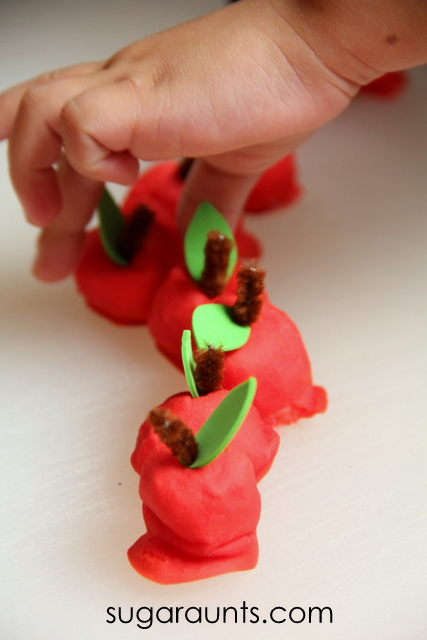
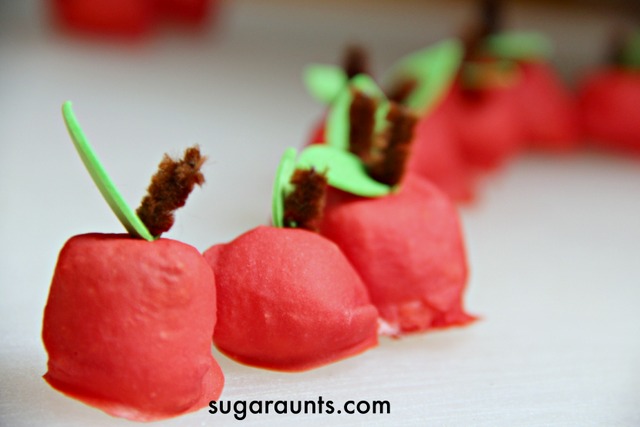
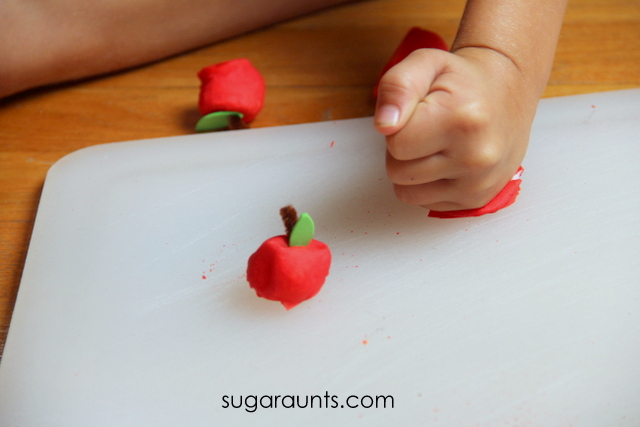
While the cotton balls are baking, snip up the leaves and stems for the apples. We used brown pipe cleaners and green crafting foam.
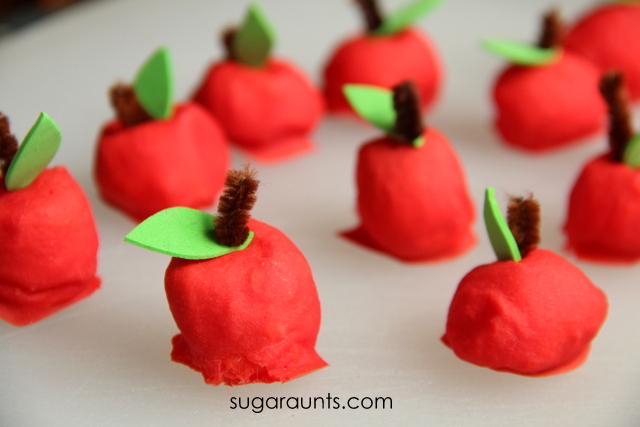
When the apples are done, pull them out of the oven and let them cool for a bit. They will be nice and hard. You’ll need to snip the bottom edges of the apples to remove any sharp edges that dripped to the base before baking.
To attach the leaves and stems, lay the leaves on the apple top and poke the pipe cleaner through the foam sheet and into the cotton ball. The kids were able to help with this part, but assisting with stem attachment did not allow this mama to take any pictures 😉
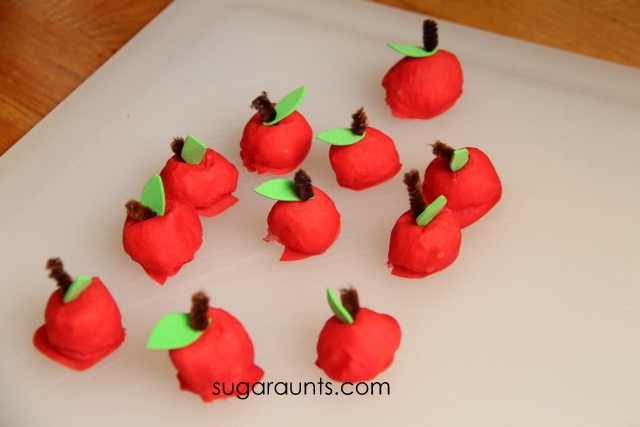
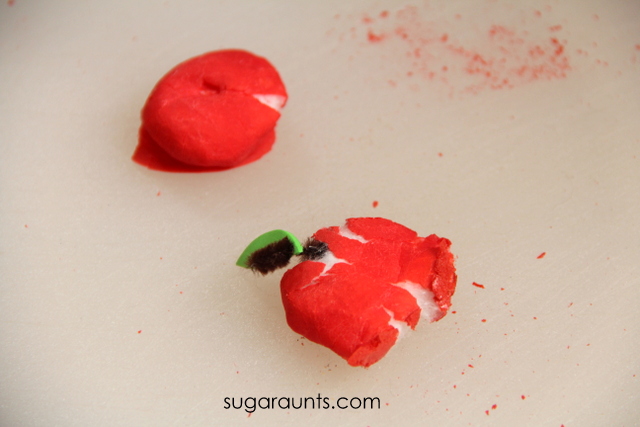
Our crop of apples were ready for playing with!
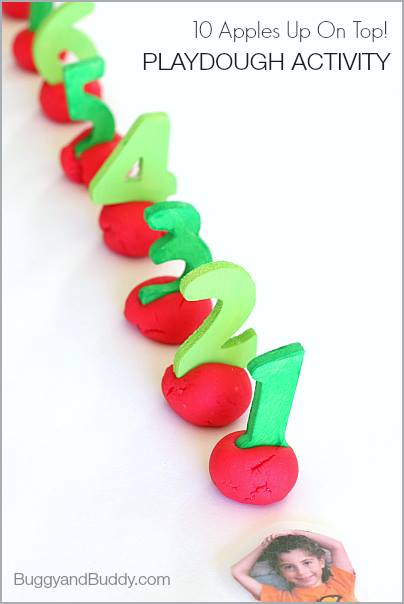
We followed along with the book as we read to stack up apples one by one. What a great way to learn and play with math facts, counting, number order, and simple adding. Little Guy LOVED this activity.
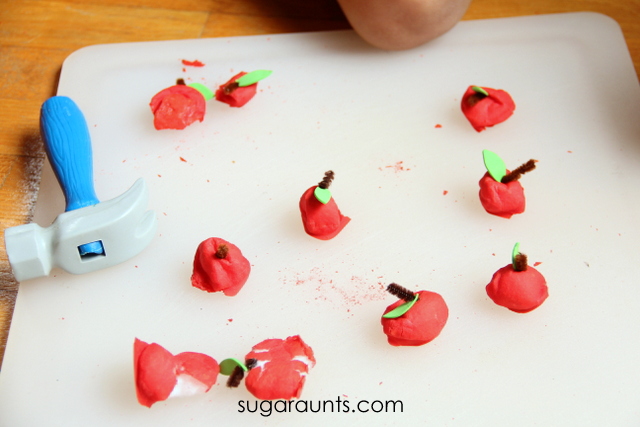
We got to hammering the cotton balls and this was the really fun part! The baked cotton balls have a hard outer edge that allow for a satisfying crunch when smashed, and a squishy, cottony center. What a fun way to explore and play.
We used a plastic hammer, but any hammer would do.
In fact, fists work just as well for smashing.
We had a smashing afternoon.
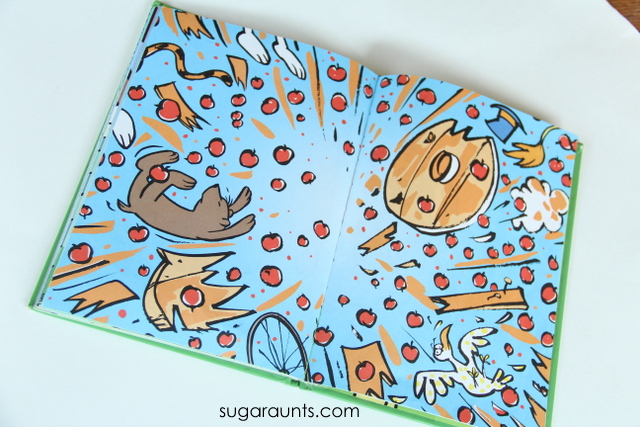
The remains of our cotton ball smashing reminded us of this page in the book. Be sure to let us know if you make baked cotton balls! We would love to hear about your experience with this sensory and fine motor activity!
Stop by the other Preschool Book Club bloggers to see their takes on Ten Apples Up On Top!
Colleen Beck, OTR/L has been an occupational therapist since 2000, working in school-based, hand therapy, outpatient peds, EI, and SNF. Colleen created The OT Toolbox to inspire therapists, teachers, and parents with easy and fun tools to help children thrive. Read her story about going from an OT making $3/hour (after paying for kids’ childcare) to a full-time OT resource creator for millions of readers. Want to collaborate? Send an email to contact@theottoolbox.com.
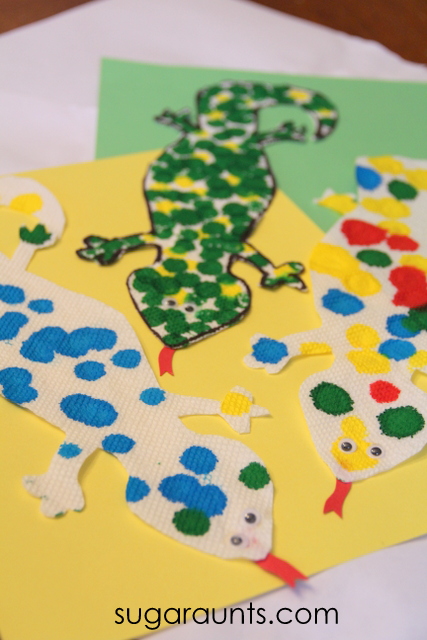
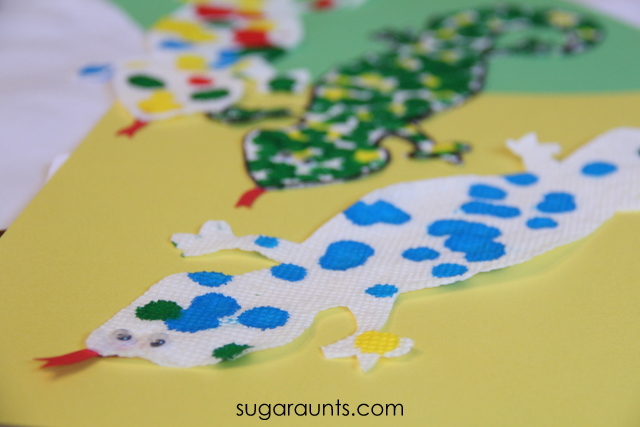
We love making cute crafts and our dining room wall can attest for that. There’s a nice gallery of kid art going on on all four walls (and the ceiling, too!) and this cute newt craft is sure to make the wall!
We’re joining bloggers from all over in the 31 days of ABCs series hosted by All Done Monkey. Each day, a blogger has been publishing a blog post based on a letter. We’re up next with N and our napkin newt.
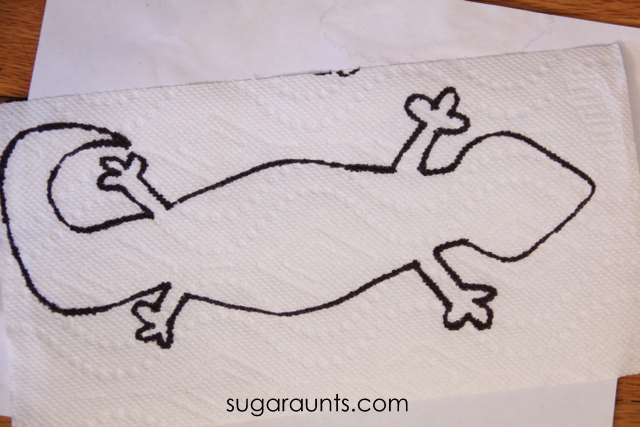
Newt Craft:
To make your newt, you’ll need a few supplies. We used napkins, googly eyes, paint dab markers, glue, and red card stock. We received the googly eyes and paint dab markers from www.craftprojectideas.com.
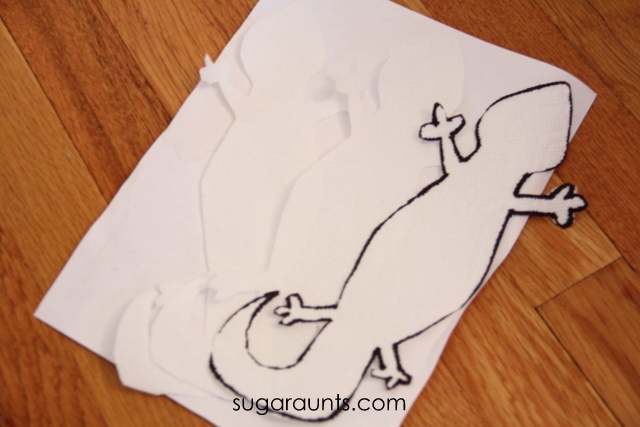
Start by drawing a simple newt shape on the napkin. I used a marker, but a pen would work, too.
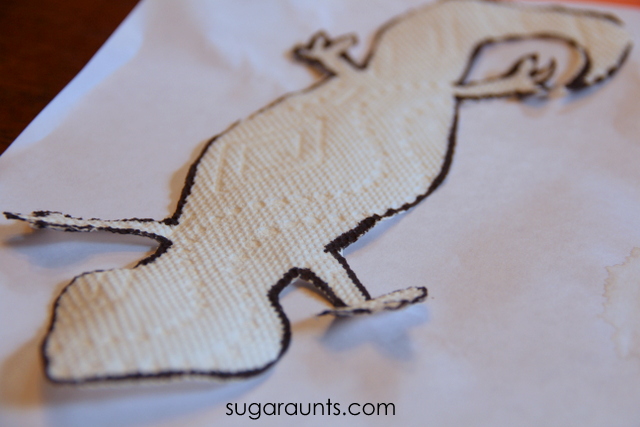
If you have a bunch of newts to make for a preschool class or siblings, stack up a few sheets of napkins. Grab your sharpest scissors and cut out the newts. This is a job for a parent, but an older child could cut this complex shape. Hold the napkins together tightly as you cut around the toes.
We liked how our napkin newt’s texture looked like scales.
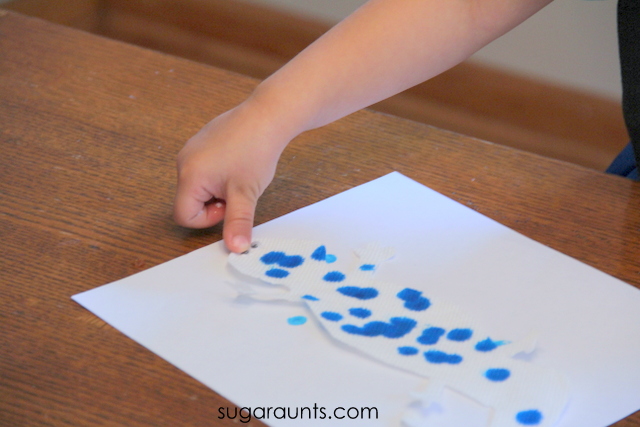
Next, use your paint dab markers to dab on spots. We went with different colors, and each child made their newt differently.
It was fun to see my daughter’s personalities coming out in their craftiness. Big Sister was deliberate and colorful with her painting.
Baby Girl painted in typical Baby Girl fashion…fast and furious and with STYLE!
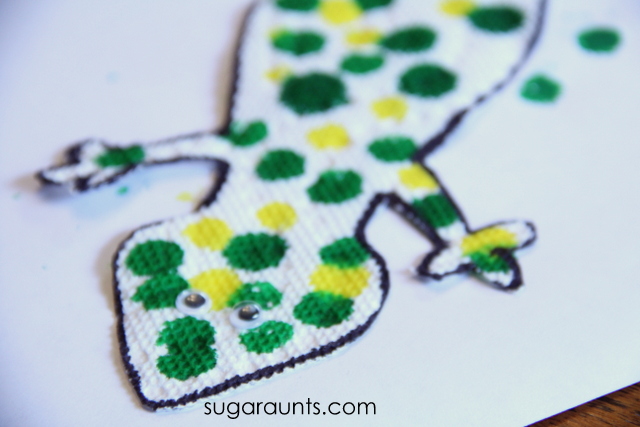
Next, glue on googly eyes.
These newts are almost done. We talked about the letter N and how Newt and Napkin both start with “N”. We said a bunch of other words that start with “n” as we crafted.
Snip tongues from the red card stock and glue to the back of the newts. Super cute newt!
Let us know if you make this craft. We would love to see your version! Stop by our Facebook page and tell us all about it.
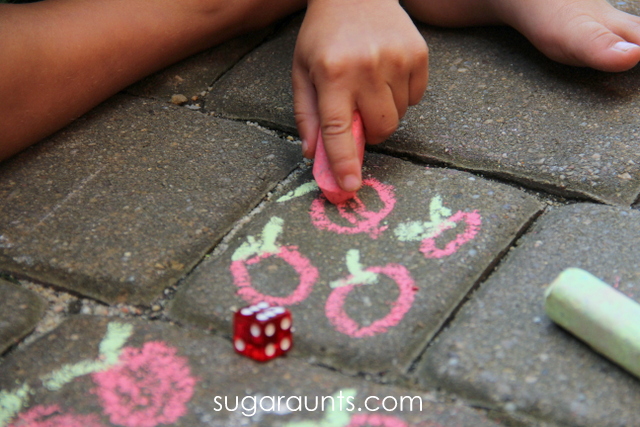
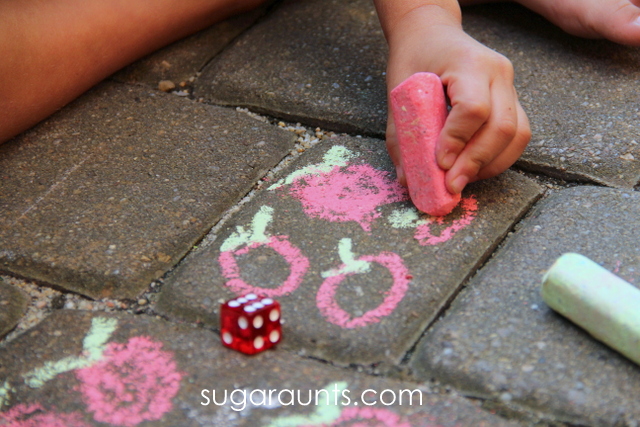
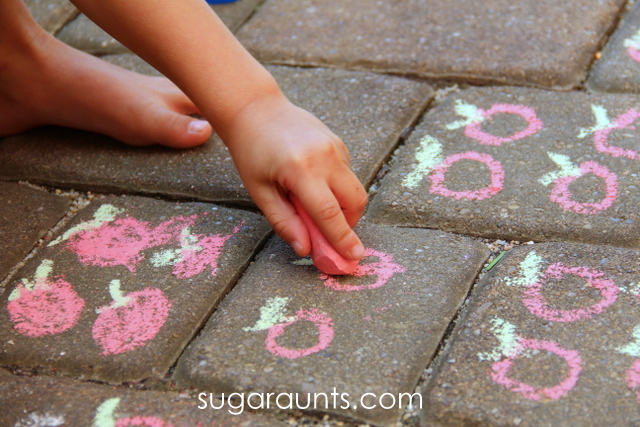
We love using math concepts that are learned in school into playful activities at home. Learning through play is a great way to strengthen concepts learned in the classroom. We used apples to count, add, and learn one day, all in the great outdoors!
Apple math activity for Kindergartners and Preschoolers
This post contains affiliate links. If a purchase is made through these links, we receive a small percentage in payment at no cost to you.
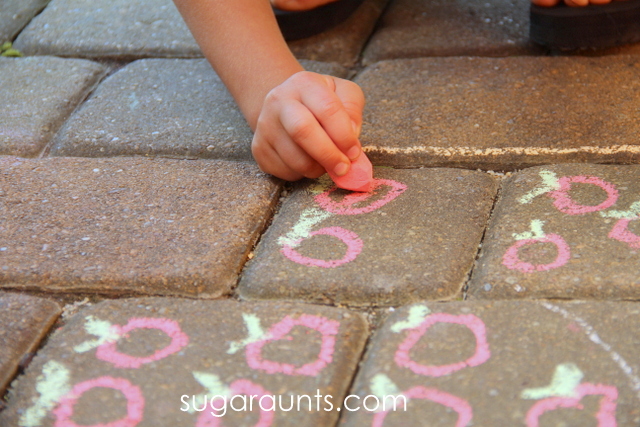
We used Sidewalk Chalk and a dice for this activity. I took the kids outside to the sidewalk one afternoon and drew a bunch of apple shapes. We were ready to play.
Note–you could also draw any shape for this activity: pumpkins, smiley faces, geometric shapes, simple houses…any thing would work.
To play the game, I had the kids roll the dice. They had to count the dots on the dice, or simply look at the dots to determine how many dots there were. Big Sister did a lot of dice activities last year in Kindergarten so she was able to glance at the dice and know how many dots there were. Little Guy counted the dots. This is a great early math skill for preschool aged kids.
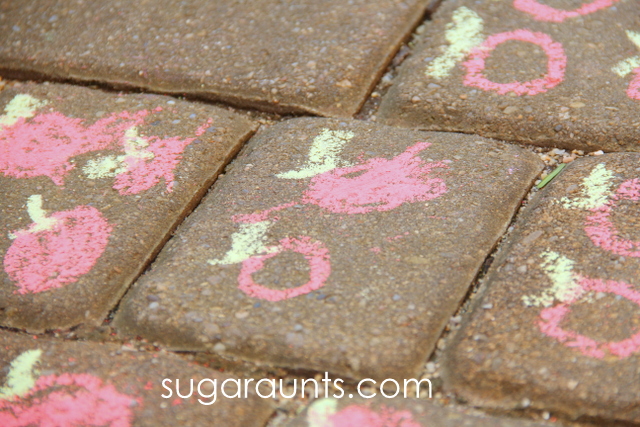
Once they counted the dots on the dice, I had them color in the same number of apples to correspond to the number of dots.
We used the squares of our sidewalk to wok on Kindergarten math concepts that Big Sister learned towards the end of her school year. Some of the squares had two apples drawn on them, and others had four or more.
This was a great opportunity to review addition.
She added the apples to make the total match the number of dots on the dice.
Little Guy counted along with Big Sister to count the total number of apples filled in.
Coloring in the apples with the chalk requires use of the small muscles of the hand. The sidewalk surface is resistive and the area they colored in was small. This required precision to stay in the lines. Not to mention, coloring in all of those apples really strengthened the hands!
This was such a fun way to review old math areas for the new first grader and introduce new math concepts to the preschooler. Like this math activity? Try a few of these ideas:
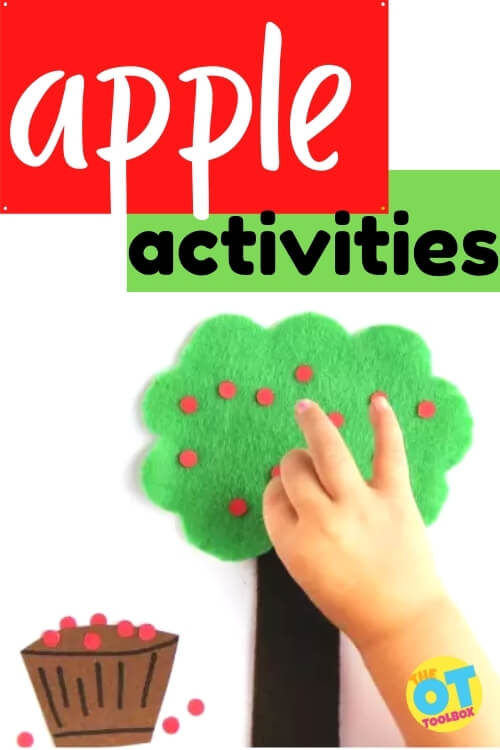
It’s that time of year again for all of the apple activities! The kids are headed back to school and crisp, fall days are ahead. The excitement that comes with summer has dwindled, but don’t you worry – we are here to help fill your days with fall-themed fun, starting with Apple Activities to use in occupational therapy sessions or at home to help kids develop skills! Get started with our apple pie sensory bin to start off the sensory and fine motor play, and grab a copy of our Fine Motor Therapy Kit for visual motor, handwriting, and fine motor play.
Just think of the hot apple cider, apple picking, and apple pie that lies ahead…along with the opportunities to learn, of course!
We have broken down our activity list into therapy topics, so that you are able to pick and choose what you would like to address that day: sensory, motor, vision, cognition, or social skills!
Apple Sensory Activities
Amazon affiliate links are included in this blog post.
For heavy work through the hands that offers proprioceptive input AND tactile sensory experiences, try making these baked cotton ball apples. We used them in apple sensory play and fine motor work.
Sensory bins can be a great way to learn by experience. An apple-themed one could look like this: Apple-Cinnamon Sensory Bin. You could hide magnet letters to find and spell out the word “apple”, which would be great practice for children who have difficulty with shape constancy and letter reversals – actually holding the letter in their hand can help wire their memory for future use!
Applesauce oobleck is just like traditional oobleck, a type of slime, but with applesauce! The applesauce adds a new texture that is not often felt in traditional slime, as well as the smell of apples and cinnamon, as an added sensory experience. You can use these types of sensory experiences to address sensory concerns, like hyper or hyposensitivity, or you can use them as a means to address other unrelated concerns. For example, I love making slime as a way to address attention, sequencing and direction following. Additionally, when paired with education or discussion, it can be used as an adjunct to a socioemotional intervention.
For more Fall sensory activities, grab our Fall Sensory Activities Guide for hands-on sensory play with apples and all things Fall.
Apple Fine Motor Activities
To work on fine motor skills, strength, dexterity needed for functional tasks like handwriting, clothing independence, pencil grasp, cutting with scissors, and more, an apple themed fine motor activity is the way to go. Check out our Apple-Themed Fine Motor Math activity for a multi-sensory learning activity with apples.
Kids love these apple stamps using a toilet paper tube. It’s a fun OT craft to work on precision, eye-hand coordination, crossing midline, and much more.
Apple Poke with Toothpicks is a super easy but satisfying sensory and fine motor activity for children of all ages. Holding the thin toothpick requires a fine grasp like a pincer or tripod, which prepares hands for the work of a child (handwriting, buttoning, zipping, etc).
Adjust as necessary to make this activity your own:
Follow a pattern with colored toothpicks
Encourage fine motor precision by poking on dots or in pre-made holes
Use golf tees or one-sided toothpicks for a safer option
Apple Pointillism is a great way to use one of my favorite tools – the hole punch. Hole punching strengthens important hand muscles, in preparation for skills like handwriting, buttoning, and so much more. Even better, picking up those teeny-tiny circles will encourage a pincer grasp.
Apple Gross Motor Activities
Apple gross motor activities can be used to develop core strength, endurance, balance, position changes, motor planning, and more. All of these skill areas are a must for occupations and functional tasks. Try these gross motor activities with an apple theme:
Check out our Apple-Themed Brain Breaks for plenty of movement-based activities as well as self-regulation through whole body movement.
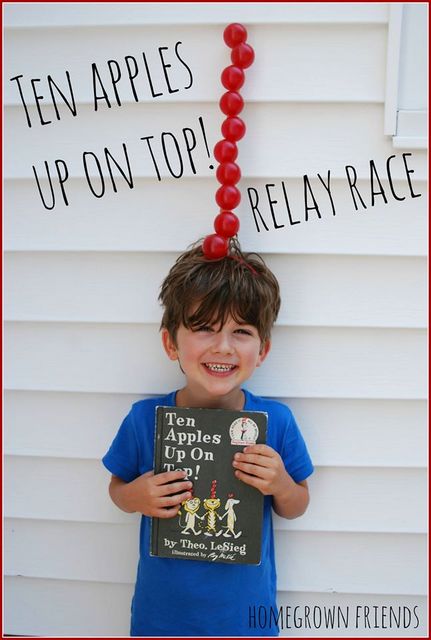
Ten Apples Up on Top by Dr. Seuss is a great book for sequencing and identifying numbers, but I think it could be great for gross motor development like coordination, balance and postural stability. Just have your child copy the movements of the animals! For even more challenging fun, cut out felt “apples” so they can balance them on their heads, too!
Just like you would do with tangrams, you could create a pattern fitting for the theme with Lego Apples. Matching an image to another by building a structure is a great way to address visual perceptual skills, problem solving, and spatial awareness.
Plus, here are some more on-theme resources for vision and fine motor skills:
Cooking and executive function go hand-in-hand. To work on executive functioning skill development with an apple theme, try this apple salt dough recipe. It’s great fun and a wonderful sensory and fine motor experience, too.
The Apple Pie Tree by Zoe Hall shows the life cycle of a tree, and even shares a recipe for apple pie! I love using this story for sequencing and attention.
You can address attention, memory, spelling, letter recognition or word recognition with these Red Apple Cups. You could use constructing the cups as an intervention, too – this activity can be used in so many different ways!
Apple Activities for Social Emotional Skills
Social Communication Skills with Apples from the Social Butterflies Club offers great resources to use with kids that encourage social interaction in a structured activity.
We hope that you have been inspired to create your own apple themed activity, or have chosen one that will work great for your kiddos! Check in for more fall-themed activities soon. While you are waiting, take a look at these awesome resources for a great fall: Fall Themed Water Table, Fall Gross Motor Activities, and Fall Fine Motor Crafts.
Apple Theme Activities
Sydney Thorson, OTR/L, is a new occupational therapist working in school-based therapy. Her background is in Human Development and Family Studies, and she is passionate about providing individualized and meaningful treatment for each child and their family. Sydney is also a children’s author and illustrator and is always working on new and exciting projects.
A while back, we were on a bit of a Circus Theme in our pretend play. We had a bunch of fun with our circus party ideas and read a bunch of circus books. We did this sensory bin around that time, but are just now getting the chance to blog about it. This was such an easy sensory activity to throw together that we will definitely be playing this again.
This post contains affiliate links. Read our full disclosure here.
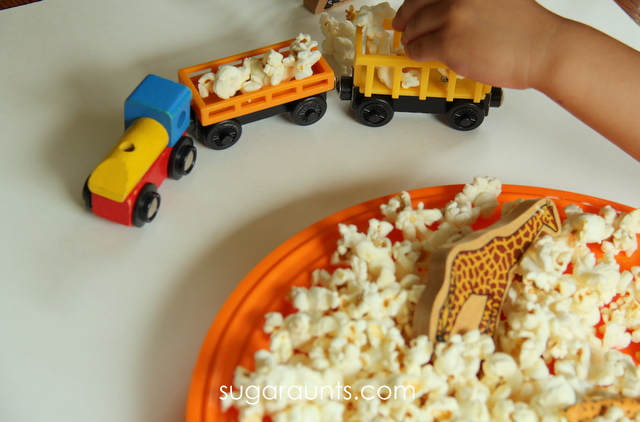
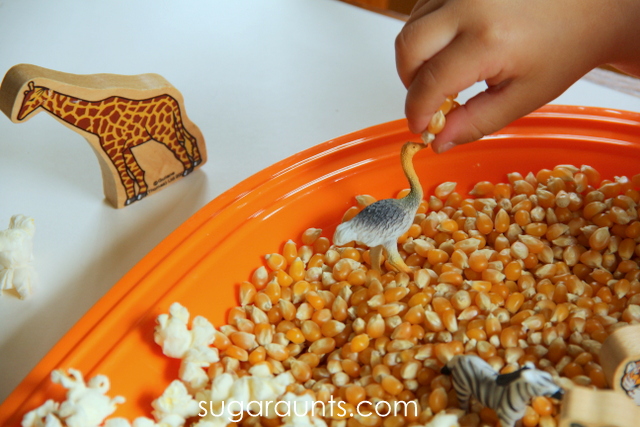
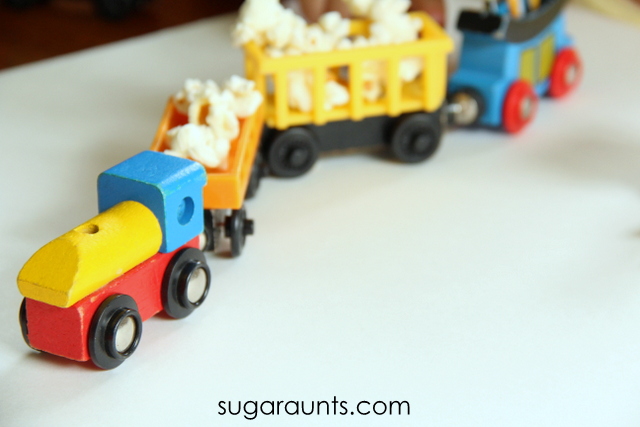
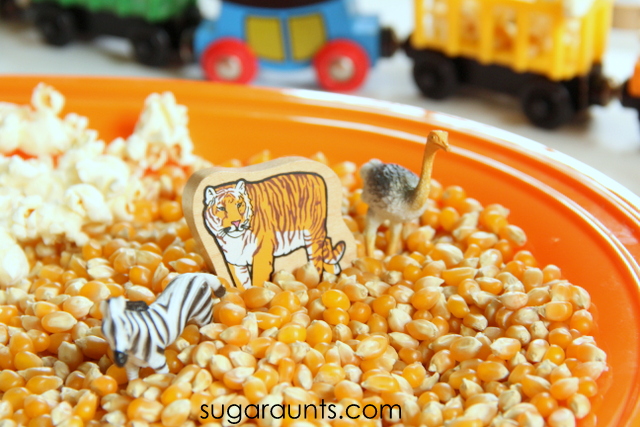
To create an easy Circus Sensory Bin, you will need:
I started by popping some corn. And only ate a few handfuls. Pop extra. Snacks are good.
I put some popped and un popped corn onto a plastic tray. Then, simply added our train set and animals. The scene was set for imagination and pretend fun!
The animals in the different textures was such a fun way to explore animal names, animal sounds, and all in an easy sensory bin.
Baby Girl (age 2) loved this pretend play so much! Not only did we have a blast playing and learning, she got a snack too! Bonus!
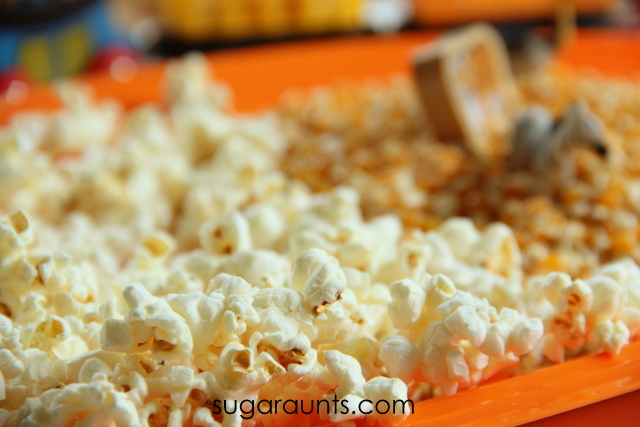
Of course, the animals needed feeding, too.
We loaded up the train with popcorn and made deliveries. Such a fun way to play away an afternoon.
This might be the perfect accompaniment to our circus tent craft. Sensory play, craft, and snack…sounds like the perfect afternoon with the kids to me!
Note: Like all of our activities on sugaraunts.com, we encourage playing alongside your kids and in a supervised manner. Some crafts and activities may present a dangerous situation for children who like to put things into their mouths. Please monitor your child with this and any activity you see on our website. Popcorn will present as a choking hazard for small children. Please use your best judgment if you decide to do this activity with your kids.
Is there a song or nursery rhyme that is a huge hit in your house? You know the one that is said over and over (and over) again? Right now we are on a This Little Piggy Went to the Market kick. Baby Girl (age 2 and a half) loooooooves This Little Piggy. She will ask me to do the finger play rhyme on both feet and then both hands again and again. I’ve even heard her saying it to herself…with lots of adorable mistakes. It’s beyond cute. I love when she asks me, “Mom, what does this piggy do?” and points to a toe. What a cutie!
When we made this piggy craft, Baby Girl very excited. I told her we were making a This Little Piggy craft and she was so happy!
This Little Piggy Went to the Market craft for Toddlers
This post contains affiliate links. Your purchases through these links help support our blog.
This craft for toddlers is very easy and a great opportunity for some learning, too. You can talk to your Toddler about circles and sizes (big and little). Toddlers are learning concepts such as size awareness and you can show them the big and little circles as you build the pigs.
I started with 5 big circles cut from pink construction paper and 15 small circles. We counted out the big circles together.
I helped Baby Girl fold ten of the small circles in half. These will be the pigs ears.
Big Sister helped out a little with counting out our piggy ears.
Baby Girl is all about using the glue stick. This Little Piggy Went to the Market + glue stick
= Baby Girl’s best day ever! She went crazy gluing on the big circles, ears, and snouts.
After all of the pieces were glued in place, I drew on little faces. We had fun saying the finger play while using our five little piggys to join in on the fun. Baby Girl played with these little piggys all day!


.jpg)