Pencil Grasp Development

Pencil grasp development

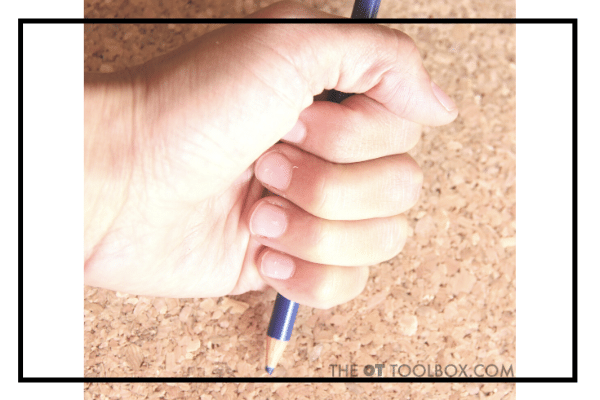
Pencil grasp development is a common concern for many parents, teachers, and therapists. So often, we see children holding a pencil with all of their fingers wrapped around the pencil, or very awkward pencil grips and wonder what is a typical pencil grasp. But, did you know that children typically progress through pencil grasp development in a predictable pattern? It’s true! Let’s talk pencil grasp.

First, when it comes to writing with a pencil, there are a few things that therapists want parents to know about pencil grasp.

Secondly, it’s important to note that grasp development, while it can be predictable, can also vary in timing. And when grasp doesn’t follow the progression listed below…it can be ok! In fact, a functional pencil grasp is perfectly fine for children.

Pencil grasp development in kids

Pencil Grasp Development

Grasp development follows three main categories: primitive grasps, transitional grasps, and mature grasps.

Primitive Pencil Grasps

In this beginning pencil grasp, the whole arm moves the pencil. These grasps include two specific grips which are described below:

  • Palmer Supinate Grasp (a whole hand grasp)
  • Digital Pronate Grasp
Primitive pencil grasp

 ​1. Whole Hand Grasp/Palmer Supinate Grasp- (Typically seen between 12 months-1.5 years) Child holds the crayon with their whole hand, with the writing end of the crayon sticking out near their pinkie side of the hand. I​t looks like they are holding a paint stirrer or potato masher.

Digital pronate pencil grasp

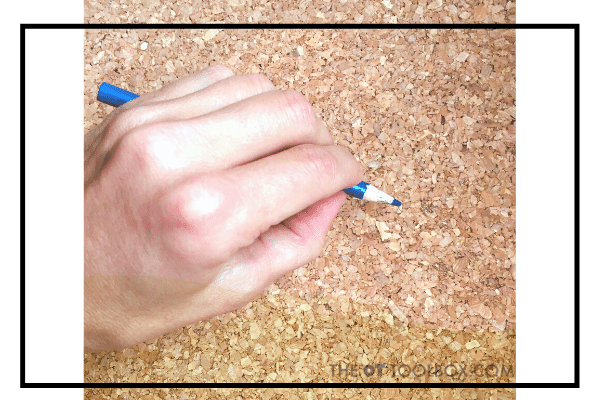
2. Digital Pronate Grasp/ Pronated Wrist Grasp- (2-3 years) Crayon is held in the hand so the tip of the crayon (or the drawing end) is held on the thumb side of the hand.

Transitional Pencil Grasps

In the transitional pencil grasp stage, the child’s forearm and/or wrist moves the pencil.

Transitional Pencil Grasps include:

Four finger or five finger pencil grasp

1. Quadrupod Grasp, or Four Fingered Grasp- (3-4 years)- Crayon is held between their thumb, and tips of the pointer finger, middle finger, and ring finger. As the child progresses, these four fingers may pull down to the tip of the finger into a quadrupod grasp.

Static tripod pencil grasp is a mature pencil grasp pattern

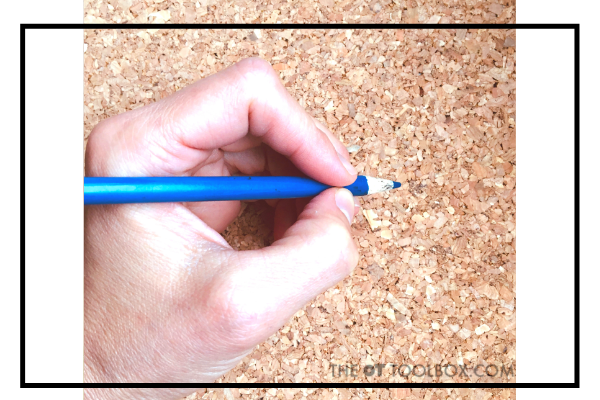
2. Static Tripod Grasp- (3.5-4 years)- Child holds the writing utensil with the thumb, pointer finger, and rests the utensil on the last joint of the middle finger. The ring finger and pinkie fingers are tucked into the palm of the hand.

3. Other grasp patterns- There can be many variations of grasp patterns that occur in the transitional stage, marked by the use of the wrist or forearm to move the pencil.

Mature Pencil Grasps

In the mature pencil grasp stage, the child holds and maneuvers the pencil using mobility in the fingers or the hand.

Mature grasp patterns include:

  • Dynamic Tripod Grasp
  • Lateral Tripod Grasp
  • Dynamic Quadrupod Grasp
  • Lateral Quadrupod Grasp
Dynamic tripod pencil grasp is a mature pencil grasp

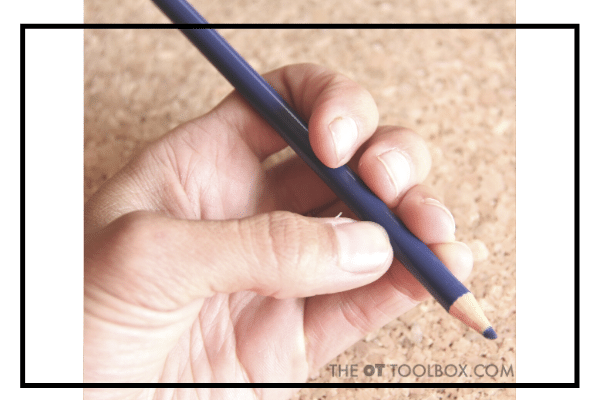
1. Dynamic Tripod Grasp- (4-6/7 years) Thumb and pointer finger hold the pencil as it rests on the last joint of the middle finger. Pencil movements occur via manipulation of the fingers and hand. Note that a true dynamic tripod grasp may not be established up until around 14 years of age.

2. Lateral Tripod Grasp- Thumb is pressed in against the pencil (or adducted) to hold the pencil against the side of the pointer finger. The tip of the thumb may bend over (or flex) over the pencil in a “wrapped” position. This grasp is sometimes called a thumb wrap grasp because the thumb is not involved with the distal movement of the pencil. Distal mobility occurs, but it is the index and middle fingers manipulating the pencil.

3. Dynamic Quadrupod Grasp- Grasp is similar to the dynamic tripod grasp, but opposition includes the thumb, pointer finger, middle finger on the pencil shaft.

4. Lateral Quadrupod Grasp- Grasp is similar to the lateral tripod grasp, with its thumb wrapped positioning of the thumb, but uses the pointer, middle, and ring fingers are on the pencil shaft and manipulate the pencil.

Quadrupod Grasp

One thing that is important to mention is the quadrupod grasp. You might have noticed this term was mentioned a few times above, and in difference areas of development through the progression of pencil grasp development.

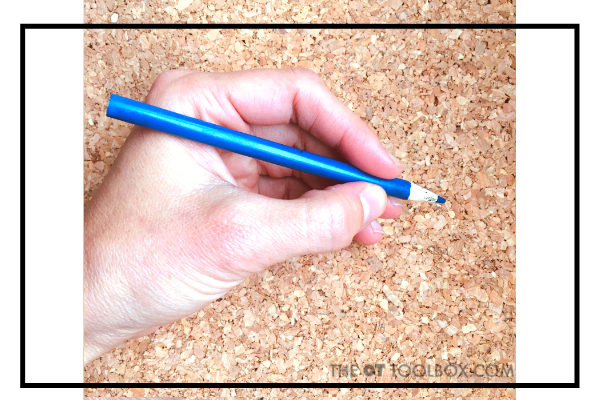
The quadrupod grasp is considered a four finger grasp, in which four fingers (thumb, pointer finger, middle finger, ring finger) are used to hold the pencil. Quadrupod grasp progresses from a static form to a dynamic form where there is fluid motion and repositioning in the joints of the hands.

Quadrupod Grasp- If the thumb opposes the pointer finger, middle finger, and ring finger this may be called a quadrupod grasp. A quadrupod grasp can also occur with the pencil resting on the side of the ring finger.

The quadrupod stage is an important part of grasp development as the fingers move into a dynamic position with pronation and extension of the wrist. However, don’t get stuck on a quadropod grasp if this type of grip is used with older children or if students are established with their quadrupod grasp!

Quadrupod grasp or Tripod Grasp?

Research tells us that the quadrupod grasp is a very functional grip and the use of one extra finger (as opposed to the traditional sense of a tripod grasp) is actually very functional in written work.

Some may say that the quadrupod grasp is more restrictive than the tripod grasp, however that extra stability can actually promote more mobility in the pencil and be used in very efficient and effective handwriting.

When the child that the uses a quadrupod grp on the pencil is forced to use a tripod grasp, you may see a decrease in written work legibility due to decreased stability. The arches of the hands may need to compensate for strength and dexterity in the fingers and that precise placement that the ring finger adds to the shaft of the pencil just isn’t as targeted with the arches of the hand and the stability offered through the ulnar side of the hand. For those who have the stability in the ulnar side and within the arches or intrinsic muscles, a tripod grasp can be more precise and lead to more refined pencil motions.

So you can see that it all is up to each individual when it comes to forcing a student to move from quadrupod to tripod. It just may not make sense to do so for some…and that’s ok and very functional!

Other Functional Pencil Grasps

There are other grasps that can be considered “functional” in which the child holds the pencil differently than described here, but can also write in an efficient manner.

These can include (but not be limited to) a thumb wrap grasp, thumb tuck grasp, inter-digital brace grasp, or a finger-wrap grasp.

How to help with pencil Grasp

Want to know more about pencil grasp progression, development, and strategies to use to help children build a strong, efficient, and functional pencil grasp? It’s all in the Pencil Grasp Bundle!

Pencil Grasp Bundle

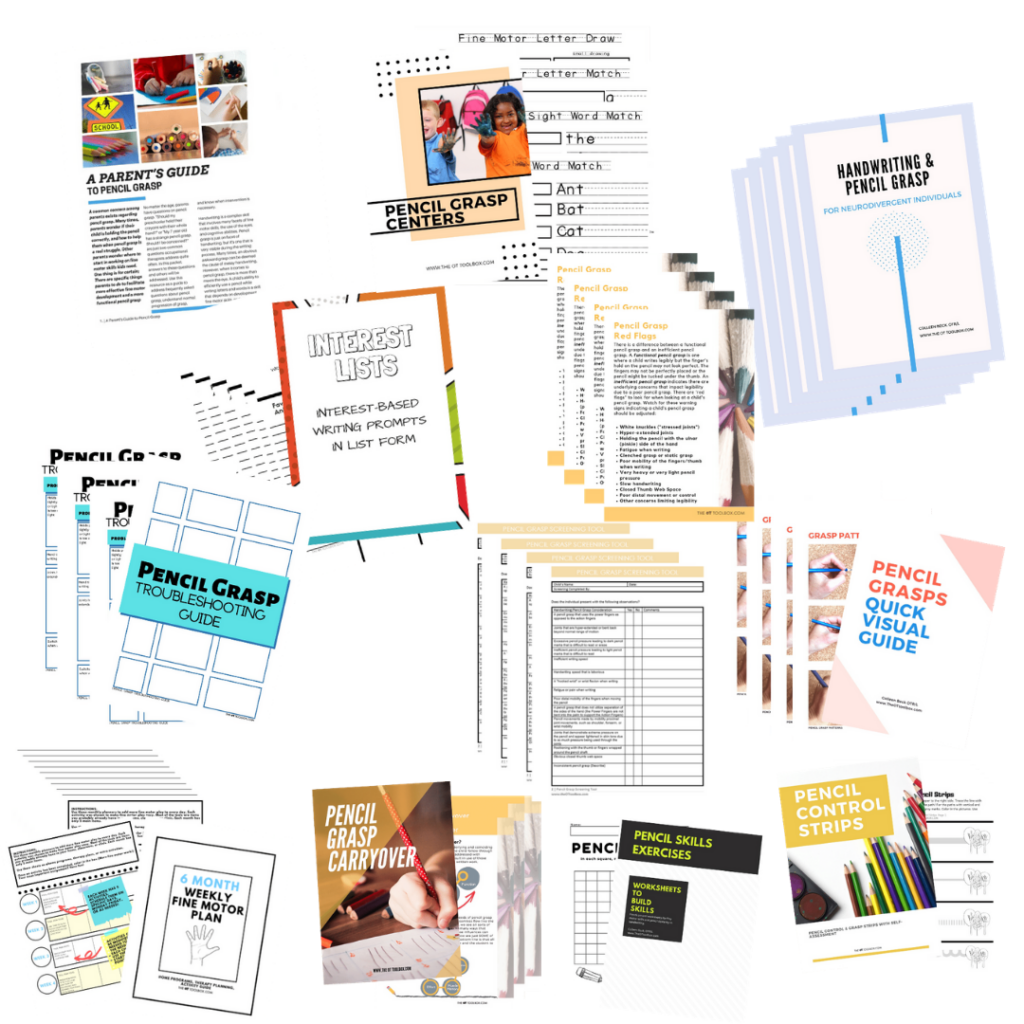
The Pencil Grasp Bundle is for those struggling to help students with carryover of skills. It’s designed to make pencil grasp practice meaningful and motivating. The Pencil Grasp Bundle is 16 pencil grasp resources, guides, worksheet sets, and tools.

Pencil Grasp Success Was Never Easier.

  • It can be a real struggle to help kids address tricky pencil grasps.  
    It is frustrating and difficult to weed through all of the information and pull out what will work for a child.  
  • You struggle with kids who work on skills but can’t carryover handwriting and pencil grasp into the classroom. 
  • Therapists may search for fresh ideas to address pencil grasp needs and wonder whether a grasp is considered functional or needs changing. 
  • Therapists need pencil grasp screening and educational materials to address a huge influx of therapy referrals.
  • Parents wonder about development and skills. 
  • Teachers will love the Centers activities to incorporate into learning to impact carryover of handwriting skills.

The Pencil Grasp Bundle includes 16 products and is valued at over $73. It’s bundled together and offered at just $24.

More pencil grasp help

free pencil grasp challenge

Want to know how to fix a problem with pencil grasps? Need help knowing where to start when it comes to immature pencil grasps or a child hating to write because their hand hurts? The Pencil Grasp Challenge in open for you! In this free, 5 day email series, you’ll gain information, resources, specific activities designed to promote a functional, efficient pencil grasp.

The pencil grasp challenge is a free, 5 day mini course and challenge. During the course of five days, I’ll be teaching everything you need to know about the skills that make up a functional pencil grasp. You’ll learn what’s going on behind the inefficient and just plain terrible pencil grasps you see everyday in the classroom, clinic, or home. Along with loads of information, you’ll gain quick, daily activities that you can do today with a kiddo you know and love. These are easy activities that use items you probably already have in your home right now.

Besides learning and gaining a handful (pun intended) of fun ideas to make quick wins in pencil grasp work, you’ll gain:

  • 5 days of information related to pencil grasp, so you know how to help kids fix an immature pencil grasp.
  • Specific activities designed to build a functional pencil grasp.
  • Free printable handouts that you can use to share with your team or with a parent/fellow teachers.
  • You’ll get access to printable challenge sheets, and a few other fun surprises.
  • And, possibly the best of all, you’ll get access to a secret challengers Facebook group, where you can share wins, chat about all things pencil grasp, and join a community of other therapists, parents and teachers working on pencil grasp issues.

Click here to join the Pencil Grasp Challenge.

Colleen Beck, OTR/L has been an occupational therapist since 2000, working in school-based, hand therapy, outpatient peds, EI, and SNF. Colleen created The OT Toolbox to inspire therapists, teachers, and parents with easy and fun tools to help children thrive. Read her story about going from an OT making $3/hour (after paying for kids’ childcare) to a full-time OT resource creator for millions of readers. Want to collaborate? Send an email to contact@theottoolbox.com.

Pen Grip for Handwriting Pressure

Pen grip handwriting trick

Today, I wanted to share a tip for addressing handwriting pressure…using a pen grip! Pencil pressure when writing is something that comes up a lot. You may have seen children who press so hard on the paper that the pencil tip breaks or smudges and mistakes don’t fully erase. You might have a child that writes so lightly that it is hard to read their writing or their written work is brushed away by their sleeve. Writing pressure is a hot topic in handwriting legibility. We have a previous resource on pencil pressure when writing. There are many tips and tricks for addressing handwriting and writing pressure there.

For example, things like hand gripper exercises can show kids how much pressure is used to move a gripper to the full range of motion. Using that force to move the gripper helps them to visibly see the pressure and supports integration of force modulation during functional tasks.

Today’s tip has more to do with the sensory benefits of writing with a pen to address heavy or light writing pressure.

Related read- Here are 5 things therapists want parents to know about pencil grasp.

Pen Grip

Did you know that sometimes using a pen can help with handwriting? When a child presses so hard with their pencil, or writes so lightly that it’s hard to read their writing, there could be a sensory component. The child typically can’t regulate the amount of pressure that they need to use to press and hold the writing utensil.

Pen trick for handwriting

One strategy to help with writing pressure that is too dark or too light is to use a pen.

The sensory concerns might be that the child can’t tell how hard they are pressing on the utensil and so press very hard. Their ability to register proprioceptive input may be off. Check out these proprioception sensory activities to help with this sensory input.

Or, they might not notice that they care holding the writing utensil with a very loose grasp.

Using a pen to write is one way to help the child get around these sensory issues. Using a pen that writes smoothly across the page can help with kids that write too lightly.

When writing with the pen, they can use their normal grasp and clearly see the written work because the pen slides more smoothly across the writing surface and they don’t need to accommodate for the resistance of the paper.

Other kids who write very dark can benefit from using a pen to practice ghost writing. The child can use the pen to write on a notebook with paper underneath. When they turn the page, if they can read their writing on the next paper, you can teach the child that they are pressing too hard. Keep trying to write without “ghost letters” left behind.

The issue with using a pen to write is many times, the shaft of the pen is thinner, requiring more precision of grasp and more developed arches in the hand. The intrinsic hand strength that allows for developed arches is required so the child can write for an extended amount of time without hand fatigue.

Having a pen grip is ideal to help in these situations.

Triangle pencil grip

One way to address the smaller shaft on a pen and the need for hand strength (which many of our kids lack), is using a triangle pencil grip on the pen, so that the child has placement for their fingers and a built up shaft for their fingers to grip.

Benefit of a triangle pencil grip with the block portion that prevents the fingertips from moving too far up or down the writing utensil. Also, the triangle pencil grip is commonly known, so kids are familiar with this pencil gripper.

Left handed writers and right handed writers both can use the triangle grip, making it easy to use for either writer.

The triangle pencil grip promotes a tripod or modified tripod grasp. For more help on building a stronger grasp and a functional pencil grasp, try using these activities to develop pencil grasp through play.

Pen Grip

What if you had the chance to try a pen grip to work on handwriting, writing pressure, and grasp? Now you do! I’m so excited to partner with Two Sparrows Learning Systems to offer this Dex Pen Grip!

Dex comes complete with our patent pending stopper to support your grip for all your writing and drawing needs.  

The pen grip’s triangular shape provides comfort and ease for a functional grasp.  The pen comes already installed on a beautiful designer pen and comes with textured or soft grip options.  

  • Dex grip comes pre-installed on a beautiful pen which can be refilled with ink cartridges.
  • Dex pen grip is ergonomically designed for comfort.  The grip tapers at the end and the stopper is tapered in so that you can easily see over top of it and it sits comfortably in your hand. 
  • Using the Dex grip you do not have to press or grip as hard when writing, so your hand does not tire as easily. 
  • This is the perfect grip for teens to adults. 
  • The pen is sleek and stylish and when paired with the grip, this will quickly become your favorite, go-to pen.
  • Dex comes complete with our patent pending stopper to support your grip for all your writing and drawing needs. 

Colleen Beck, OTR/L has been an occupational therapist since 2000, working in school-based, hand therapy, outpatient peds, EI, and SNF. Colleen created The OT Toolbox to inspire therapists, teachers, and parents with easy and fun tools to help children thrive. Read her story about going from an OT making $3/hour (after paying for kids’ childcare) to a full-time OT resource creator for millions of readers. Want to collaborate? Send an email to contact@theottoolbox.com.

Developmental Checklist

developmental checklist and milestones for kids from birth to 2 years old

Parents and therapists alike often look for a developmental checklist. Having a list of developmental milestones in physical development, emotional, and social development would be handy, right? A printable resource that acts as a guideline to child development could be useful for parents to track the milestones of their child for the first two years of life. A pediatric developmental checklist can help to identify red flags or to reference a child’s growth and development.

Also check out our blog post on ADLs as we cover each stage as it relates to daily functional tasks.

developmental checklist and milestones for kids from birth to 2 years old

Today, I wanted to share developmental checklists that are available here on The OT Toolbox, so you can have a one-stop spot for understanding growth and development stages in children.

Be sure to read this resource on toddlerhood for specifics on birth-3.

Developmental Checklist

These blog posts listed below were created to serve as a guideline, and reference, for parents to track the milestones of their child for the first two years of life. Ideally, this milestone resources will be helpful to identify developmental progression in order to guide the conversation with your child’s provider in reference to their growth and development, and to any concerns which become apparent. 

It is important to note that all children develop at their own pace; however, the guidelines provided in this book are the accepted steps in development by doctors, service providers and educators alike. 

For ease of use, these childhood development milestones are broken down by the general developmental month span utilized in the medical community (i.e. 0-3 months, 3-6 months, etc.). This book covers the following:

  • Speech/language milestones
  • Feeding milestones
  • Fine motor milestones
  • Gross motor milestones 
  • Activities to address each of the above
  • Red flags to look for in each range
  • Pre-K readiness checklist
  • Kindergarten readiness checklist
  • Potty training tips
  • Expected stages of play
  • Pre-writing progression
  • Resources (websites and podcasts)

In addition, many of these milestone resources provide printable checklists for increased ease in filing and long term record keeping for each of your children, as well as the ability for your child’s provider to make copies of, and keep the information for their own files. 

Childhood developmental milestones

It is important to note that all children develop at their own pace; however, there are a set of developmental guidelines that are accepted steps in development by doctors, service providers and educators alike. 

Here are developmental milestone lists that we have here on The OT Toolbox. Use these to better identify any developmental concerns:

Fine Motor Milestones

Social Emotional Skills Developmental Milestones

Visual Motor Integration Developmental Milestones

Spatial Awareness Development in Babies

Foster Development with Block Play

Development of Oral Motor Skills

Development of Eye-Hand Coordination

Development of bilateral coordination and how this skill impacts feeding

Executive Functioning Skill development

Boost child development with rhyming games

Scissor Skills development

Grasp development

Developmental progression of pre-writing lines

Development of Play

Developmental Milestones in Kids Getting Dressed

Knowing all of this information on typical child development, it would be very handy to have a complete checklist of aspects of developmental progression from birth to two years.

Colleen Beck, OTR/L has been an occupational therapist since 2000, working in school-based, hand therapy, outpatient peds, EI, and SNF. Colleen created The OT Toolbox to inspire therapists, teachers, and parents with easy and fun tools to help children thrive. Read her story about going from an OT making $3/hour (after paying for kids’ childcare) to a full-time OT resource creator for millions of readers. Want to collaborate? Send an email to contact@theottoolbox.com.

Letter Sizing Activity

letter sizing activities

Working to help a child write with correct letter sizing and placement on the lines? Are you trying to come up with letter sizing activities to help kids write smaller letters that fit between the lines on the paper? Are you struggling with a child that forms letters without regard to size or line awareness? Letter size awareness is a real struggle for some kids!

This post is part of our Christmas in July giveaway series.

Letter sizing activities to teach kids to write the correct size.

Here, you will find suggestions to work on letter size awareness, along with a letter sizing activity that can be including into any handwriting curriculum. It’s one that focuses on how to form smaller letters, numbers so kids use a more precise pencil control that they can use when writing on any paper.

Letter Sizing Strategies

Do your students have trouble making their letters or numbers the right size? You might have seen kids that write without regard to the lines. Or, they may copy or independently write letters that take up the whole space, no matter what lined paper is used.

Other kids form letters that are correctly sized on the lines…but only when they have boxes drawn for each individual letter. But, that accommodation simply isn’t a possible option all of the time, for consistency and carryover.

During their earliest exposure to handwriting activities, young children at the preschooler and kindergarten ages may form large letters. Letters might fill the whole page or the whole available space. These forms are not always completed with a motor plan in place. the lines of the letters might be more of strait lines that intersect.

As kids gain more experience with writing with a pencil and with writing letters, they gain a motor plan that they can use on any surface and without a visual model for the letter.

Students then start to notice and use a letter size differentiation, or letters that are tall letters and reach the top line (e.g. b, d, f, h, k, l, t), letters that have tails that hang below the bottom line (g, j, p, q, y), and letters that rest in the bottom half of the writing space (a, c, e, i, m, n, o, r, s, u, v, w, x, y, z).

Kids will notice the differences between these differently sized letters and the upper case letters which are all the same size.

All of this letter size awareness occurs through experience and practice.

However, when there isn’t experience or practice time…or there is a visual perceptual concern, or a visual motor issue, there may be trouble or inconsistencies with letter placement.

That’s when interventions may be needed to help work on letter sizing.

Try some of these letter sizing activities

>> Using regular notebook paper, or bold lined, baseline paper, highlight the bottom half of the writing space. This is where the small letters are placed. Explain to the child that the tall/Capital letters start in the white, and the little letters start the grey(photocopied paper or yellow highlighted area). This writing paper is an easy fix for many writing situations.

>> Use modified paper. Here are free adapted paper types for all handwriting ages.

>> Try the box and dot strategy. This is a nice way to teach size awareness for kids who are just beginning to notice letter size.

>> Re-teach letter size of the upper case letters. Allow the child to notice where each letter starts. Then work on tall letters which start at the same point on the writing area. Next, teach the letters that are located in the bottom half of the writing space (the small letters). Finally, re-teach the tail letters which hang below the baseline. In each set of letters, allow students to notice where each letter rests.

>> Try any of these letter size activities.

>>Reduce distractions on the page by using black paper with white forms in increasingly smaller form size, like in the BlackBack writing program. This writing program allows students to form the motor plan for upper case letters and lower case letters, as well as numbers.

The BlackBack Writing Program depicts strokes, upper and lower case letters and numbers in white on a black background which helps the child see their strokes as they use the white space. Additionally, there is only one image on the page eliminating distraction from competing images and increasing attention to the single task on the page. Each letter, number and stroke has 6 sizes. The first size is very large and the last is the height of a wide-ruled notebook paper.  

The BlackBack Writing Program can be customized to begin where the child is in his/her writing journey. The letters, numbers, and strokes can be used on its own or as a supplement to any writing program.  The BlackBack Strokes, Letters and Numbers programs can be combined or used separately. 

Black Back Writing Program

I’m so excited to partner with Two Sparrows Learning Systems to offer this Black Back Writing Program.

It’s an awesome handwriting tool that addresses pencil control, motor planning, size awareness, visual motor skills, visual distraction, and more.

Therapy Box

therapy boxes for occupational therapy activities

This year, as we prepare for back-to-school, many therapists are asking how to create therapy kits. Many parents are wondering how to set their child up for success in hybrid schooling. Many with kiddos that will attend full or part-time online school are trying to figure out how prepare for the upcoming school year.

As a pediatric occupational therapist, I have always come up with small occupational therapy boxes or “kits” to use in practice. I love to create a themed box or bin of OT activities and use that to work on a certain set of skills.

THEMED THERAPY BOXES

In this upcoming school year, we will be using themed kits in our home to help my youngest learn and develop skills (handwriting, precision in cutting with scissors, reading, manipulatives and math). This was one way that I was able to hold her attention for schooling at home this past Spring, and we will continue with that strategy this school year.

Some ideas that help to hold a child’s attention and get them excited for therapy or learning include these therapy boxes based on a theme:

Back-to-School Therapy Kit

Toddler Color Bin

More themed occupational therapy kits

Mini-Stars Sensory Bin

Deep Blue Sea Book Sensory Bin

Each of these themed therapy bins takes a common theme and offers ways to build skills- fine motor skills, sensory exploration, and more- through play!

Having a boxed set of therapy materials allows children to explore tools that help them grow stronger as they explore and play. Kids love to “unbox” the materials and use them while they discover the therapy box materials.

It’s a great way to get kids excited about therapy this Fall when school and learning routines are out of the ordinary.

THERAPY BIN GIVEAWAY

The boxes are available as a single box purchase or in a monthly subscription model so that each month, you have a new therapy box arrive at your door. What a great way to get the kids excited about building developmental skills!

When you receive your box, you will be provided with activities for fine motor development, gross motor development, sensory play and family fun to enhance opportunities for growth & development.

Check out the items in this giveaway box…add these tools to your OT sessions or at home activities:

Occupational therapy giveaway items

OT for Me, is dedicated bringing families quality, hand-picked products and activities that have been tested and approved by the occupational therapy creators.

The therapy box aims to enhance kids’ individual skills and is cognizant that not all children develop at the same rate, so descriptions of the skills each product targets include strategies to make each activity harder or easier for that “just-right challenge”.

Each month, the therapy boxes are packed with new and exciting activities, meant to motivate children to “work” on developmental skills, all while having fun. Each box will always have an activity or product targeting the following 4 domains: Fine motor, Gross Motor, Sensory, & Academic/Family Fun- as well as other fun items! 

Colleen Beck, OTR/L has been an occupational therapist since 2000, working in school-based, hand therapy, outpatient peds, EI, and SNF. Colleen created The OT Toolbox to inspire therapists, teachers, and parents with easy and fun tools to help children thrive. Read her story about going from an OT making $3/hour (after paying for kids’ childcare) to a full-time OT resource creator for millions of readers. Want to collaborate? Send an email to contact@theottoolbox.com.

Cutting with Scissors Program

Tips to teach kids to hold scissors

Teaching kids to cut with scissors depends a lot on the type of scissors that are used. Ask any pediatric occupational therapist, and you will find recommendations for kid-friendly scissors that actually allow kids to cut paper. You know…the training scissors to introduce kids to scissor skills…the ones that don’t just tear through paper.

Choosing the best scissors for kids

When it comes to finding the best scissors for kids, there is a lot more to it than you might think. Cutting scissors need to fit the child’s hand and feel comfortable. They need to be safe and allow the child to learn to manipulate the scissors while cutting paper (and nothing else). They need to have molded handles that are easy to hold in the correct position. And they need to grow with the child so they can progress from cutting snips to shapes and multi-angled forms.

Teaching kids to cut with scissors is a progress. There are tips that can help along the way and there are strategies that can help a child succeed.

Having scissors and a strategy can help!

Why is teaching scissor skills important? Teaching kids to cut with scissors helps with fine motor skills and more.

Why is cutting with scissors important?

When we teach kids the correct way to hold scissors, kids find so much more success in cutting shapes. You probably have seen the child that holds scissors sideways on the paper. They open and close the scissor blades but nothing happens.

Maybe you’ve seen the child that pushes the scissors through the paper. They tear and rip the page instead of cutting along the lines.

You might recall the child that holds the scissors with their elbow out and up in the air so they are cutting in toward their body instead of out and along the lines.

All of these positioning tactics lead to poor scissor skills and a frustrated kiddo.

Importance of Scissor Skills

When we show kids how to properly hold scissors we set them up for success. When we hand scissors that properly fit the child, we are providing the tools for accuracy.

Teaching kids to hold the scissors correctly allows them to position correctly so they can cut along the lines and feel success as they cut shapes.

When kids open and close the scissor blades, they gain precision of fine motor skills. And, those same fine motor skills allow the child to gain accuracy in cutting more complex shapes and forms.

Cutting with scissors builds bilateral coordination skills so they can use both hands together in a coordinated manner.

Cutting along lines offers a way to gain accuracy and precision in eye-hand coordination skills.

Not only are kids gaining developmental motor skills, they are completing a functional task, too. Teaching kids the proper way to hold scissors allows them to open and close the blades to cut along the lines with accuracy. They can snip the paper rather than tear. They can progress in scissor skill development from showing an interest in cutting with scissors to cutting complex shapes.

So how to teach kids the right positioning for cutting with scissors?

use these tips to teach kids to hold scissors

Positioning for scissor skills

First in addressing positioning for scissor skills is sitting posture. Make sure the child is seated at a desk or table with their feet flat on the floor and arms at a functional position. Using a table that is too high puts the elbows and shoulders into too much flexion.

Tuck the elbows into the sides. Many times, we see new scissor users holding their elbows way out to the sides as they attempt to bring the scissor work closer to their face and body. Actually, having the child tuck their elbows into their side offers more support so they can work on refining those fine motor skills.

Make sure the scissors are positioned on the hand correctly. Kids often times, place their thumb in the small loop of the scissor handles and push all of their other fingers into the larger hole. If possible, ensure that the thumb is in the smaller loop and the middle finger is placed in the larger loop with the ring ginger and pinkie finger tucked into the palm for support.

If that positioning isn’t possible, allow the child to use their middle, ring, and pinkie fingers in the larger loop.

Be sure that the scissors are positioned perpendicular to the paper. When the scissors tilt sideways due to upper body positioning, the paper tends to tear rather than cut.

All of these tips, and much more are available in The Scissor Skills Book, created by an occupational therapist and physical therapist team that covers all things development and motor skills needed for cutting with scissors.

Scissor Skills Curriculum

So, if working on scissor skills, positioning, and building scissor accuracy is something you are working on with kids, then you are going to love this item!

This scissor book offers step by step strategies to support development of scissor skills. It’s a therapist’s look at scissor skills curriculum using a developmental approach to help with positioning the scissors so kids can cut along lin

Sensory Backpack

What is a sensory backpack

Today, we are starting off our Christmas in July celebration with a giveaway on a Sensory Backpack! Sensory backpacks are a powerful calming tool for children of many needs. There are weighted backpacks, compression packs, and book bag fidget tools out there. Here, you’ll find out some information on these sensory resources AND, can enter for a chance to win a Relax Pack Sensory Backpack of your own!

What is a sensory backpack?

What are Sensory Backpacks?

Have you heard of the term “sensory backpack”?

Most kids you know probably have a backpack that weighs way too much for their age or size. But for some children, the added weight of a backpack is calming. It’s proprioceptive input that has an organizing effect on kids.

Sensory diet bags are tools that help to support a child’s sensory needs, while on the go, at school, or in the community. Understanding your child’s Sensory Needs is just part of the puzzle.

A sensory kit can be used to meet the needs of a child and can look like many things: Sensory kits like a weighted backpack offers calming sensory input that can be used to both calm and stimulate a child’s sensory system.

Typically, it is portable and easy to maneuver as a way to make the tools accessible at all times to the child or children in need. Since all children have sensory needs, a sensory backpack can be a way to provide sensory input in a discreet and engaging way.

Sensory backpacks offer proprioceptive input in the way of pressure and weight.

They offer a means for the child to fidget and move their hands.

Many times, there are chewable items for the child to gain calming, heavy work through the mouth.

By using all of these items on a sensory backpack, kids can gain calming, heavy work input that allows them to focus, pay attention, remain safe in group settings, and help to organize the child during community settings or outings.

Calming Sensory Input

Children with sensory problems often are either at high alert hyper-reactive or unresponsive (hypo-reactive) to the input from their environment. They become overly distracted by outside stimuli, or they may seek out additional sensory input from the world around them. Over responsiveness or under-responsiveness can mean difficulty with paying attention or focusing.

The proprioceptive system receives input from the muscles and joints about body position, weight, pressure, stretch, movement and changes in position in space.  Our bodies are able to grade and coordinate movements based on the way muscles move, stretch, and contract. Proprioception allows us to apply more or less pressure and force in a task. But, the sensory system allows us to accept input too, in a way that is calming and organizing, so that we can self-regulate input from the world around us.

Self-regulation is an issue in sensory integration disorders and other diagnoses…as well as in children without a specific diagnosis. Children with self-regulation problems usually demonstrate unusual sleeping patterns, eating difficulties and self-calming issues. They struggle to cope with sensory input and need coping strategies.

Sensory input in the way of deep pressure, weight through the muscles or joints, chewing on resistive surfaces, or bear hugs are some coping tools that can have a grounding effect on kids with sensory issues.

Sensory Backpack Calming STRATEGY

That’s why a sensory backpack offers such a calming and organizing input for kids.

It’s a powerful way to help kids feel safe, pay attention, focus on walking in the hallway, or on the bus.

This year, children may return to school with an even higher level of anxiety or worries. Things are different this year and the school schedule may be different. Maybe kids are not in school at all.

A sensory backpack can offer a routine for schooling at home and allow them to self-sooth using proprioceptive input so they can complete distance learning tasks.

Christmas in July Giveaways

Christmas in July therapy tools giveaway

Friends, I think if there is one thing to say about 2020, it’s that we all could use a break. A mental break, an emotional reprieve, and just rest. Because this has been such a stressful year, I wanted to bring you a week of giveaways for an occupational therapy Christmas in July event. This Christmas in July party is to celebrate YOU! It’s to honor all that OTs, teachers, and parents offer in the way of adapting to recent changes, managing balance, and providing support for our kids.

This giveaway offers a chance for you to win an item that will be useful in helping kids thrive. I’me excited to share with you a WEEK of giveaways on items that can be used in occupational therapy practice or in addressing the needs of children of all ages.

Christmas in July Giveaway!

You will want to bookmark this page, because here you will find each day’s giveaway item linked so that you can easily get to the giveaway page.

Here is what you need to know:

1. Each day from July 24th-August 1st, you’ll find a new giveaway item listed here. Feel free to enter one or all of the giveaways!

2. Participants are limited to US entrants only due to deliver-ability.

3. Each item has one winner. Winners will be randomly chosen. Winners will be notified through email. If your name is randomly chosen as the winner we will email you for shipping information. The giveaway item will then be shipped to you.

4. Giveaway is open July 24th-July 31st at 12:01 am PST. Each day, a new giveaway item will be announced here and in a new blog post. Enter to win by leaving a comment on the giveaway item’s blog post.

Without further ado, here are your giveaway items:

Friday, July 24th: Click HERE to enter to win a Relax Pack Backpack – $79 value

Saturday, July 25th: Click HERE for a chance to win a Noggins Scissors set and curriculum

Sunday, July 26th: Click HERE for a chance to win an OT for Me occupational therapy box!

occupational therapy giveaway item

Monday, July 27th: Click HERE for a chance to win a BlackBack Writing Program!

BlackBack writing program

Tuesday, July 28th: Click HERE for a chance to win a Developmental Checklist Spiral Bound Book.

Developmental milestones checklist giveaway

Wednesday, July 29th: Click HERE for a chance to win a Dex Pen Grip.

Dex pen grip

Thursday, July 30th: Click here for a chance to win a copy of The Sensory Lifestyle Handbook.

Sensory Lifestyle Handbook giveaway

Friday, July 31st: Click here for a chance to win the Pencil Grasp Bundle.

Pencil grasp bundle giveaway

Be sure to stop back each day to find out the details of each giveaway item!

Christmas in July Giveaway

Old Woman Who Lived in a Shoe Craft

Shoe tying craft for there was an old woman who lived in a shoe craft

This nursery rhyme craft is based on the classic nursery rhyme, “There was and Old Woman Who Lived in a Shoe”. We had a blast building fine motor skills with this kids craft. It’s a great way to work on shoe tying, too!

Shoe tying craft based on the nursery rhyme, There was an old woman who lived in a shoe.
Shoe tying craft for kids

We are starting off the nursery rhyme craft and activity series with a timeless nursery rhyme…There was an old woman who lived in a shoe.  This is one of our favorite nursery rhymes to recite, although to be honest, in our house we love them all!  When we visit the library, we usually hit up the nursery rhyme shelf and come home with a book or two about nursery rhymes.    

Nursery Rhyme crafts and activities for learning and play

Nursery Rhyme Craft

There is just something wonderful about reciting nursery rhymes.  The repetition of rhythm and rhyme teach kids about language, memory, and literacy.  They are fun to say over and over again.  And with this repetition, comes self-confidence in the child.  The timeless quality of nursery rhymes brings together generations of storytelling.  There is much to discover about how nursery rhymes help with learning, including pitch, imagination, sequencing, and phonics.    

We recited “There was an Old Woman who lived in a shoe” and made a boot craft to explore the rhyme.     There was an old woman  Who lived in a shoe. She had so many children She didn’t know what to do. She gave them some broth And a big slice of bread, Kissed them all soundly And sent them to bed.   (We went with the Mother Goose version)  

There was an old woman who lived in a shoe fine motor craft.

  This post contains affiliate links.  Thank you for your support of this blog.  

Shoe Tying Craft

This craft doubles as a shoe tying craft, too. Kids can build so many skills by making this craft, that are so important for shoe tying, including:

  • Bilateral Coordination
  • Lacing a shoe
  • Pincer Grasp
  • Eye-hand coordination
  • Tying a bow

The best thing about this shoe tying craft is that kids will leave with a sense of accomplishment, allowing them to feel self-confidence with shoe tying.

There was an old woman who lived in a shoe craft

Craft supplies for a nursery rhyme craft for kids.

We started with a few supplies to make our nursery rhyme craft:

blue foam craft sheet 
red yarn 
colored card stock 
marker
yellow circle label stickers 
glue
hole punch

scissor skill craft shoe craft

  Start by drawing a large boot shape on the craft foam sheet.  Draw dots with the marker for the lacing holes.

Shoe craft for kids, based on the nursery rhyme, There Was an Old Woman Who Lived in a Shoe.

Older kids can cut out the boot shape.  Crafting foam is a great material to snip with scissors and provides a different resistance when cutting.

This shoe tying craft builds fine motor skills and bilateral skills that kids need to learn to tie their shoes.

Use the hole punch to punch the lacing holes.  We started with a kid friendly hole punch, but it didn’t work very well on the craft foam material.  The old fashioned hole punch worked better.

Child holding scissors with two hands.

Snip a long length of yarn.  Clearly Little Guy needs a little work on his scissor grasp. 😉  He was being silly with cutting the yarn.  

Here is a guide to scissor skills, including the bilateral coordination needed for shoe tying AND cutting with scissors.

Kids can use this shoe tying craft to build fine motor skills, lacing, and shoe tying.

Tape one end of the red yarn to the back side of the boot.  Get the kids lacing away on the boot.  This is a fantastic fine motor task for little fingers.  Tripod grasp, bilateral hand coordination, motor planning, eye-hand coordination…lacing is great for preschoolers!

Fine motor lacing activity boot craft for kids

This boot alone would make a very cute fine motor craft.  But it needs a little something extra for our nursery rhyme.

Use this shoe tying craft to help kids with lacing and tying shoes.

  We made a little old woman and many children on the boot.  Baby Girl loved sticking the yellow circle label stickers onto the boot.  These would be the faces.

Shoe tying craft for kids

  Next, we cut our colored card stock into triangles and rectangles for the bodies.  More fine motor work with the snipping card stock.  A bit of glue holds these shapes in place.  Be sure to talk about shapes and colors with your preschooler while doing this part.  

There was an old woman who lived in a shoe craft for kids

Baby Girl used a marker and drew faces on each person.  Working in a small defined area is a great way to further develop pre-handwriting skills drawing and pencil control.

She then drew arms and legs for the old woman and children.

How cute is this nursery rhyme craft?  It brings the rhyme to life with imagination and creativity.  Baby Girl wanted to introduce a duck to the woman and children.


Be sure to stop back tomorrow and the rest of this week and next week for the rest of the nursery rhyme series.  You can find them all of our nursery rhyme crafts here. 


This isn’t our first nursery rhyme craft.  Check out our This Little Piggy Went to the Market craft:

Nursery rhyme craft for the Three Little Pigs