Colleen Beck, OTR/L is a pediatric occupational therapist and the owner and author of The OT Toolbox website. She manages all of The OT Toolbox social media accounts and runs the popular newsletter.
Read about Colleen's experience and career as an occupational therapist, including how The OT Toolbox began on our About The OT Toolbox page: https://www.theottoolbox.com/about-us/
Colleen created The OT Toolbox in 2011 and since then has written thousands of blog posts designed to support therapy providers, educators, parents, counselors, admin, and caregivers in promoting the healthy development of kids.
Check out Colleen's blog posts below:
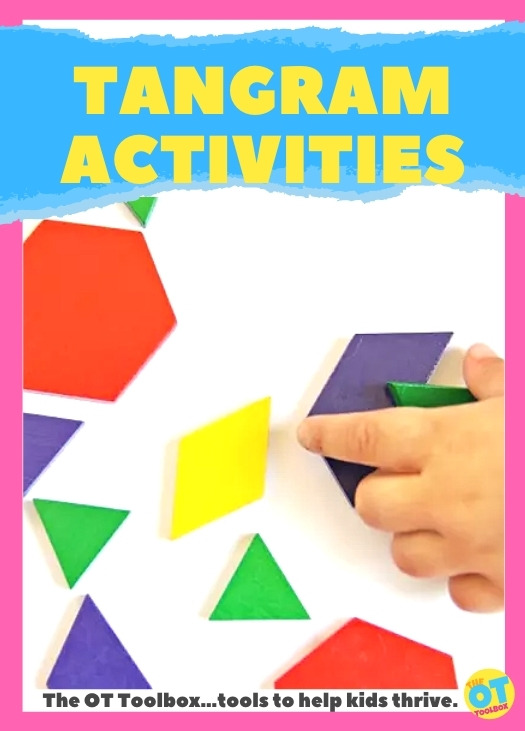
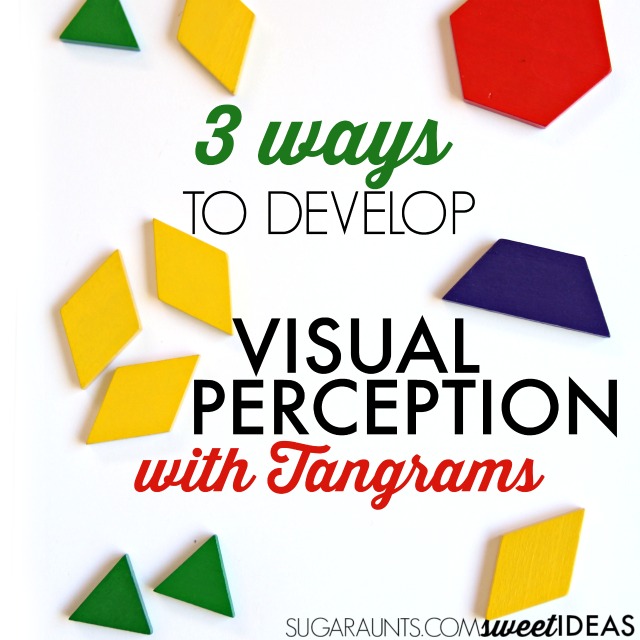
These tangram activities are designed to develop visual perceptual skills, visual motor skills, and fine motor skills in kids. Tangrams make a great addition to any occupational therapy treatment bag!
Tangram Activities
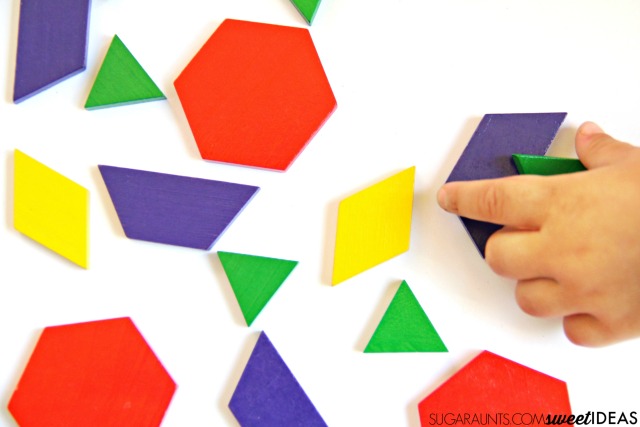
Tangrams are a great tool for learning and development. The colorful shapes are perfect for building images and working on math skills such as shape identification and patterning.
Tangrams are also an easy way to incorporate visual perceptual skills, fine motor skills, and visual motor integration into play.
Development of visual perceptual skills is essential for tasks like reading, writing, math, movement, self-care, and many other functional tasks. These tangram activities are perfect to improve visual perception in a playful way. You can use tangrams to address visual perception in many more ways, including ideas to help with handwriting.
And check out these cardboard tangrams for developing visual motor integration skills.
This post contains affiliate links.
Visual perception allows us to take in visual information, process it, and use it to interpret information from our environment. There are many parts of visual perception, but today, I’ve got three visual perceptual skills that can be developed using tangrams.
Visual Percepetion and Tangrams
1. Visual Discrimination allows us to determine similarities and differences based on color, shape, etch. This skill allows us to know that a 6 and a 9 are different and that a p and a q are not the same letter.
Use tangrams to work on visual discrimination:
Place tangram shapes on a piece of paper. Ask the child to locate all of the triangles, all of the squares, etc.
Ask the child to find shapes that are the same even if they are different sizes. This tangram set has several different sizes of triangles, making it a great tool for form constancy.
Use two different shapes to discuss what makes the shapes similar and different.
2. Visual Memory allows us to retain visual information. We need visual memory in order to copy written work.
Use tangrams to work on visual memory:
Use the tangrams for a hands-on game of “Simon”. Place shapes on a piece of paper, taking turns to add one new shape at a time. Each player should recall the previous round before adding a new tangram shape.
Place several tangram shapes on a piece of paper. Allow the child to stare at the shapes for a period of time. Then, cover the shapes with a second piece of paper. Ask the child to recall the shapes that they saw.
3. Form Constancy is the ability to recognize shapes and forms no matter what position they are in.
Use tangrams to work on form constancy:
Use tangrams to build form constancy by positioning shapes in different positions. Ask the child to locate all of the squares, quadrilaterals, etc.
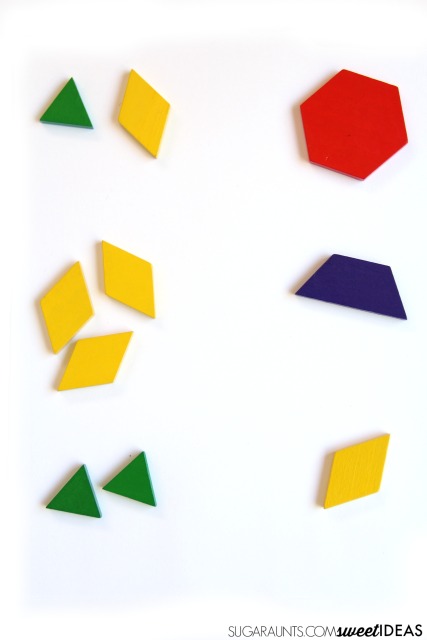
Position shapes on one side of a piece of paper. On the other side of the paper, position shapes that can be combined to make the shape on the first side of the paper. Ask the child to match up the two sides.
Position shapes along one side of a piece of paper. Position matching shapes along the right side of the paper, with the shapes slightly rotated. Ask the child to match up the shapes.
Colleen Beck, OTR/L has been an occupational therapist since 2000, working in school-based, hand therapy, outpatient peds, EI, and SNF. Colleen created The OT Toolbox to inspire therapists, teachers, and parents with easy and fun tools to help children thrive. Read her story about going from an OT making $3/hour (after paying for kids’ childcare) to a full-time OT resource creator for millions of readers. Want to collaborate? Send an email to contact@theottoolbox.com.
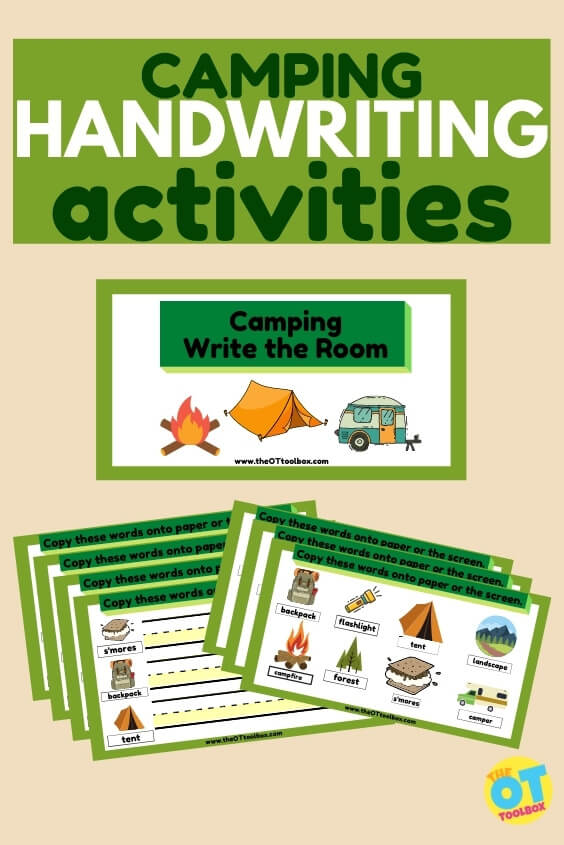
Going camping this summer? This free therapy slide deck is a camping writing activity that kids can use to work on handwriting skills this summer. Use the camping activity as a tool to work on handwriting skills in therapy sessions or at home this summer.
Camping Writing
When you think of camping and writing, you might think about writing letters home from a summer camp. Or, maybe you think of writing out packing lists before you head off to tent in the woods for the weekend.
Both are actually really great natural writing tasks that kids can use to put pencil to paper this summer and work on writing skills without the boring rote practice that thoughts of handwriting typically bring.
However, to expand on that theme a bit, this camping writing slide deck is great for building specific writing skills over the summer months.
You can use this slide deck in teletherapy sessions, in home programs, in extended school year, or at home to work on writing skills such as:
copying skills
letter formation
size awareness
line use
visual motor skills
The camping activities include visual forms that children can copy without admitting details so that they are working on visual perceptual skills such as form constancy, visual discrimination, visual closure, and other areas.
There are several simple camping images that build up to more complex camping images that kids can copy to build visual motor skills and attention to detail.
There’s also a part of the activity where kids can copy specific terms related to tenting and camping.
Kids can copy these words right onto the screen using an Google Jamboard or they can copy the words onto paper. Several slides have lined portions where kids can copy the words onto the screen. You’ll find a link to access this resource once you access the file in the form at the bottom of this post.
When kids copy words they need to work on they are using visual perceptual skills such as visual scanning, visual attention, visual memory, and visual shift. These tasks this skills are important for tasks such as copying written material from a chalkboard or smart board in the classroom.
This handwriting active activity can also be expanded to ask kids to copy the words into alphabetical order or to expand the activity by asking them to write a sentence including the words.
Free Camping Writing Slide Deck
Would you like to add this camping hand writing activity to your therapy tool box? Enter your email address into the form below to access this free therapy slide deck.
More Ideas for Summer
Want more ways to play and build skills while camping or with a camping theme in therapy sessions or at home? Check out these fun ideas:
Colleen Beck, OTR/L has been an occupational therapist since 2000, working in school-based, hand therapy, outpatient peds, EI, and SNF. Colleen created The OT Toolbox to inspire therapists, teachers, and parents with easy and fun tools to help children thrive. Read her story about going from an OT making $3/hour (after paying for kids’ childcare) to a full-time OT resource creator for millions of readers. Want to collaborate? Send an email to contact@theottoolbox.com.
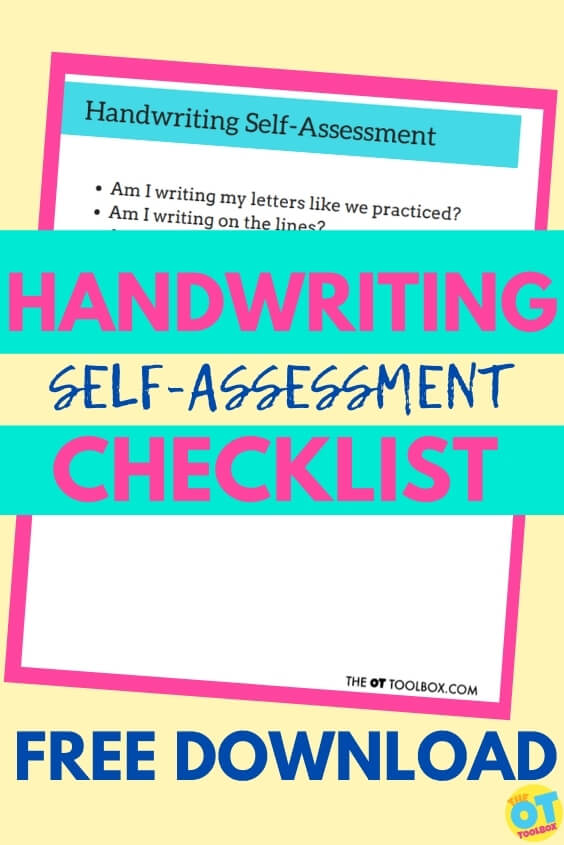
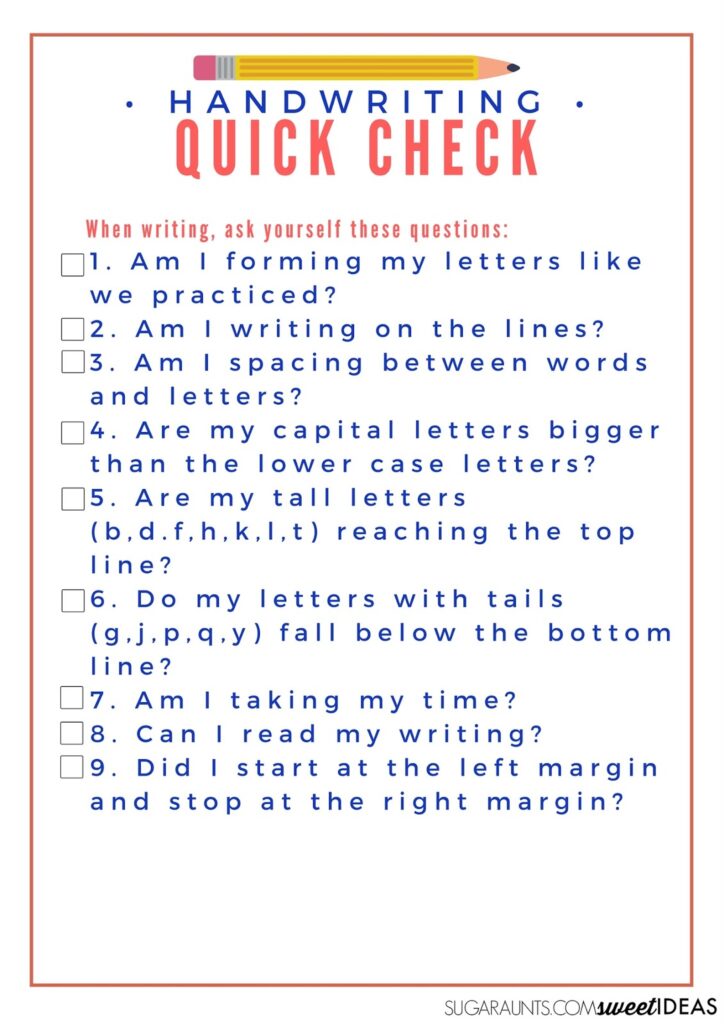
This handwriting checklist is a great handwriting assessment for kids to use when writing. Many times working on handwriting skills leads to frustration when kids struggle to carryover writing skills from occupational therapy sessions. This writing self-assessment can help!
When kids have been introduced to different techniques for beating their handwriting blahs, been provided with accommodations for handwriting difficulties, and even provided with modifications to written work requirements, a quick check can help with legibility. A child can use this quick check list to self-monitor and self-check their handwriting for neatness.
This activity is part of our month-long handwriting series where we are sharing creative and easy ways to address common handwriting issues in our 30 Easy Quick Fixes for Better Handwriting series.
A self-checklist should have questions to monitor letter formation, size, spacing, line awareness, upper case and lower case letter formation/size, letter positioning, speed, neatness, and legibility.
Self-analysis involves retrospection and an awareness of self, as well as the actions that one performs. This handwriting analysis observations post explains a bit more.
Print this checklist out for classroom use. It is available as an 8x 10 inch Free printable here.
This is a printable that can be printed and laminated for use at the student’s desk. Allow them to use a dry erase marker and check off each item after a handwriting task. Use the printable with the whole classroom, too!
Handwriting Self-Assessment Quick Tip: Print off the printable in a sized down format to create a smaller, wallet sized check list that can be stored in pencil boxes or in the front of a binder.
Fine Motor Quick Tip: Encourage kids to use both hands when writing! The dominant hand should always be the pencil holder, BUT that other hand has a job too. Holding and moving the paper with the non-dominant hand has an important job in written work. Read more about paper placement and using the helper hand during written work.
Free Handwriting Assessment Checklist
Handwriting checklists can include questions the student asks themselves after a writing task. They can look back over their work and self-assess the writing. Handwriting checklists can include questions such as:
Am I writing my letters like we practiced?
Am I writing on the lines?
Am I spacing between letters and words?
Are my upper case letters bigger than my lower case letters?
Do my tall letters touch the top line?
Do my tail letters fall below the bottom line?
Am I taking my time?
Can I read my writing?
Did I start at the left margin an stop at the right margin?
For another version of a handwriting assessment that is used as a handwriting checklist when completing written work, grab this printable resource in our Handwriting Printables series. The printable handout is great for using with kids to work on self-assessment of written work.
The Handwriting Book is a comprehensive resource created by experienced pediatric OTs and PTs.
The Handwriting Book covers everything you need to know about handwriting, guided by development and focused on function. This digital resource is is the ultimate resource for tips, strategies, suggestions, and information to support handwriting development in kids.
The Handwriting Book breaks down the functional skill of handwriting into developmental areas. These include developmental progression of pre-writing strokes, fine motor skills, gross motor development, sensory considerations, and visual perceptual skills. Each section includes strategies and tips to improve these underlying areas.
Strategies to address letter and number formation and reversals
Ideas for combining handwriting and play
Activities to practice handwriting skills at home
Tips and strategies for the reluctant writer
Tips to improve pencil grip
Tips for sizing, spacing, and alignment with overall improved legibility
What happens when an occupational therapy provider completes a handwriting evaluation? Check out our video covering just this:
Colleen Beck, OTR/L has been an occupational therapist since 2000, working in school-based, hand therapy, outpatient peds, EI, and SNF. Colleen created The OT Toolbox to inspire therapists, teachers, and parents with easy and fun tools to help children thrive. Read her story about going from an OT making $3/hour (after paying for kids’ childcare) to a full-time OT resource creator for millions of readers. Want to collaborate? Send an email to contact@theottoolbox.com.
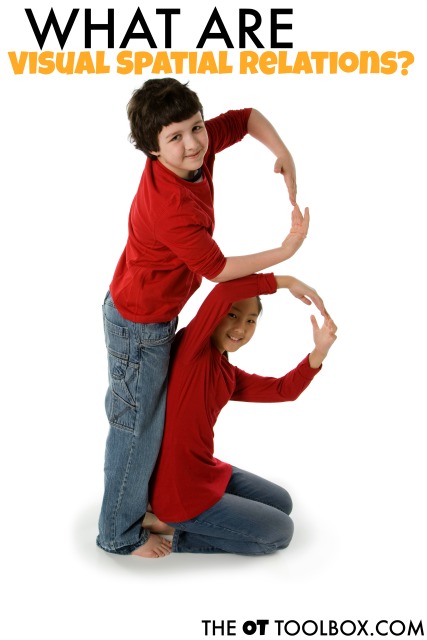
Visual Spatial Relations is an important visual perceptual skill that is important for many functional tasks. Spatial relations allows the organization of the body in relation to objects or spatial awareness. This is an important part of spatial awareness in handwriting and many other movement-based activities. An important part of visual spatial relations includes laterality and directionality. In general, these spatial relationship terms refer to left-right body awareness and the ability to perceive left/right relationship of objects.
Spatial Relations is being aware of oneself in space. It involves positioning items in relation to oneself, such as reaching for items without overshooting or missing the object. Most of us realize as we walk through a doorway that we need to space ourselves through the middle of the door.
Some with poor visual spatial skills may walk to closely to the sides and bump the wall. It also involves the fine motor tasks of coordinating handwriting with writing in spaces allowed on paper, placing letters within an area (lines), and forming letters in the correct direction.
What are spatial relations?
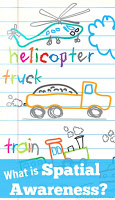
Spatial relations, or visual spatial awareness, refers to an organization of visual information and an awareness of position in space so the body can move and perform tasks. Spatial relations are needed for completing physical actions, moving in a crowded space, and even handwriting.
Knowing which shoe to put on which foot. Understanding that a “b” has a bump on the right side. Putting homework on the left side of the take home folder before putting books into a locker beside the gym bag. Visual spatial relations are everywhere!
More examples of spatial relations
Here are more everyday examples of spatial relations at work:
Letter formation and number formation
Writing letters without reversal
Reading letters without reversal
Sports
Completing puzzles
Walking in a crowded hallway without running into others
Visual spatial skills in occupational therapy activities are an important skill.
Visual Spatial Skills and Handwriting
Spatial relations, and the ability to organize physical movements related to visual information impacts handwriting.
You might be thinking: “Movement and handwriting!? What?? I want my kiddo to sit still and copy his homework into his planner without wiggling all over the desk!”
Ok, ok. Here is the thing: We are asking our kids to write way to early. Preschoolers are being given paper with lines and are asked to write their name with correct letter formation. Kids are being thrown into the classroom environment with expectations for legible written work an they are missing the necessary basics.
When kids are not developing the skills they need to hold a pencil, establish visual perceptual skills, and organize themselves, they are going to have struggles in handwriting.
NOTE: There are a few other baseline tools that kids need in order to establish a base for better handwriting. Fine motor experiences, positioning, attention are just a few of these areas.
Here are a few easy hands-on strategies to help with spatial relations in written work:
Spatial Relations Quick Tip: Write a letter on the student’s back using a finger or a pencil eraser. Ask the student guess what letter it is. Then, ask the child to air write the letter. (While holding a pencil, with large motion, whole arm motions AND very small with just the fingers!) Finally have him write the letter on paper.
These activities all require the ability to perceive an object in space. The way they interpret position in space to their body and to other objects in the environment impacts motor skills.
Spacing pieces of a puzzle amongst the others and writing in relation to the lines is one way to work on this skill.
Fine Motor Quick Tip: Encourage pinching activities. So many kids are exposed to screen technology from a young age. Screen interaction uses the pointer finger in isolation or just the thumb. These digits become strong and a dynamic pencil grasp is limited. Promote strengthening of the intrinsic muscles by pinching clay or tearing and crumbling small bits of paper. Read more about intrinsic muscle strengthening here.
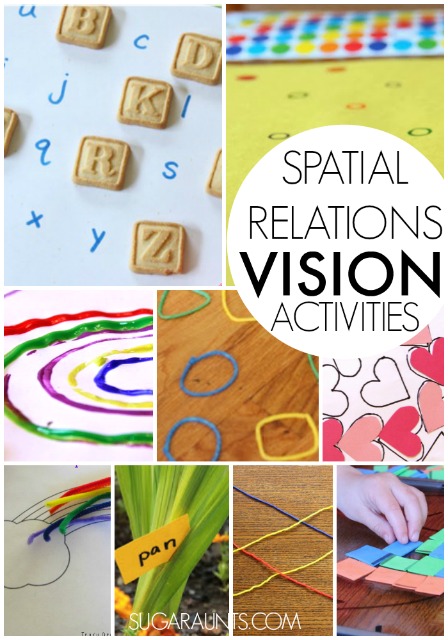
Spatial Relations Activities
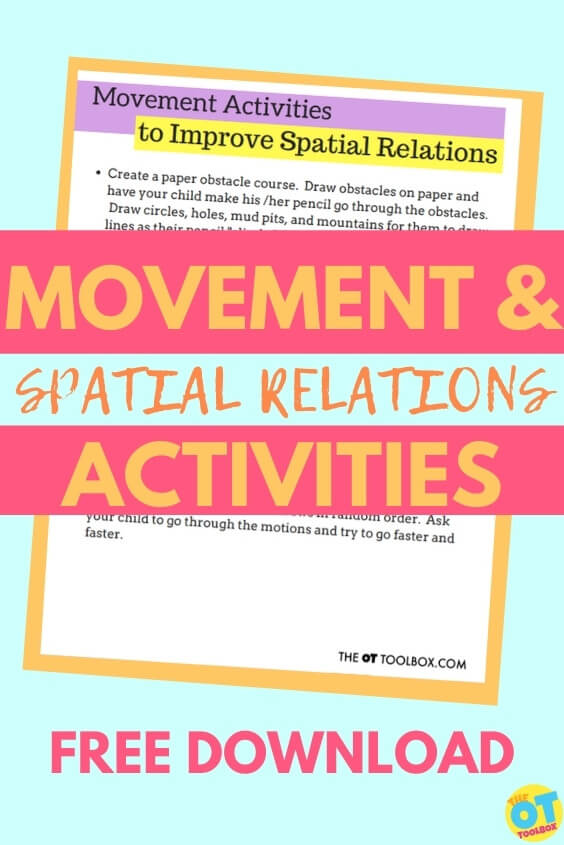
Try these movement-based spatial relations activities to work on the visual spatial skills needed for writing and completing everyday tasks:
Create a paper obstacle course. Draw obstacles on paper and have your child make his /her pencil go through the obstacles.
Draw circles, holes, mud pits, and mountains for them to draw lines as their pencil “climbs”, “jumps”, “rolls”, and even erases!
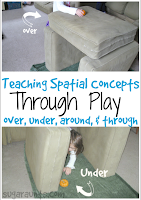
Create an obstacle course using couch cushions, chairs, blankets, pillows to teach left/right/over/under.
Write words and letters on graph paper. The lines will work as a guide and also a good spacing activity.
Use stickers placed along the right margin of to cue the student that they are nearing the edge of paper when writing.
Highlight writing lines on worksheets.
Draw boxes for words on worksheets for them to write within.
Practice directions. Draw arrows on a paper pointing up, down, left, and right. Ask your child to point to the direction the arrow is pointing. The child can say the direction the arrows are pointing. Then create actions for each arrow. Up may be jumping. Down may be squatting. The Left arrow might be side sliding to the left, and the Right arrow might be a right high kick. Next, draw more rows of arrows in random order. Ask your child to go through the motions and try to go faster and faster.
Other activities to incorporate spatial relations include:
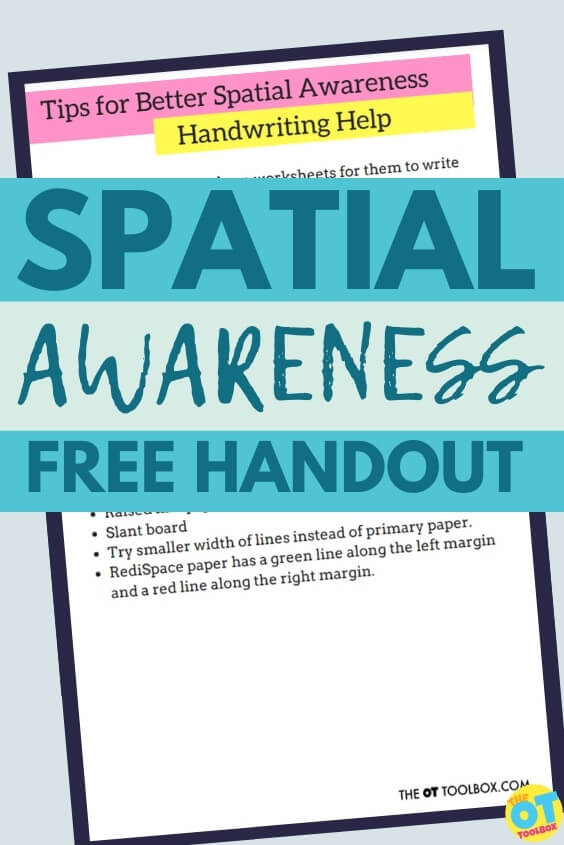
Today’s free printable shares movement based activities to help kids improve their spatial relations. These are the skills kids need to write legibly. It includes tips and activities to improve spatial relations, that were mentioned above. This free handout is a great resource to add to your occupational therapy toolbox.
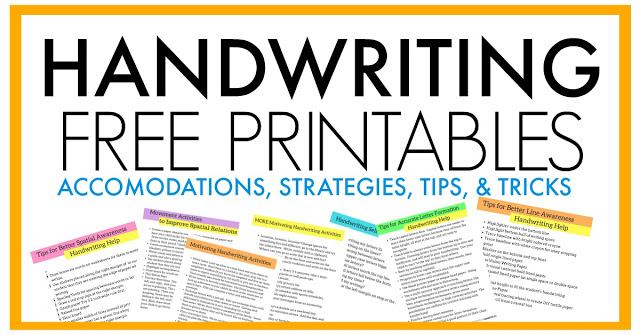
You will receive this handout when you join the Handwriting Tips and Tricks series. Each day over the course of 5 days, you’ll receive a free handwriting worksheet to use in addressing common handwriting issues.
Colleen Beck, OTR/L has been an occupational therapist since 2000, working in school-based, hand therapy, outpatient peds, EI, and SNF. Colleen created The OT Toolbox to inspire therapists, teachers, and parents with easy and fun tools to help children thrive. Read her story about going from an OT making $3/hour (after paying for kids’ childcare) to a full-time OT resource creator for millions of readers. Want to collaborate? Send an email to contact@theottoolbox.com.
Working to fix spacing in handwriting so the kids you serve can write legibly? Spatial awareness is a huge means to improving legible handwriting. Sometimes having a few strategies to actually improve the spacing between letters and words is so beneficial for accuracy and carryover in handwriting.
Today, I have another free handwriting handout as part of our handwriting tips and tricks series. If you’ve already signed up for this series, you have the free worksheet in your inbox. This is the space to access more spacing in handwriting resources and tools to help with spacing between letters and words for legible written work.
Fix Spacing in Handwriting
Spatial awareness is a powerhouse when it comes to legibility in written work. The child who forms letters with award formation no matter how many times you teach them that letters start at the top can increase overall legibility by spacing out words on the lines.
However, spacing between letters and words can be difficult when visual motor integration is an issue. Modifications and adaptations can help.
For those kiddos who have zero awareness of organization on the page and start at the middle of the paper or don’t seem not notice space constraints on a worksheet will definitely benefit from spatial awareness tips and tricks.
Here are a few easy ways to fix spacing in handwriting:
Use graph paper
Use a highlighter for writing words
Use a small dot (colored pencil) to space between words
Use a spacing tool. Kids can make their own (check out the spacing tools listed below) to help with carryover and use.
Encourage the child to use a “finger space” between words and physically place their finger on the paper. This incorporates bilateral coordination and holding the paper when writing.
Use stickers placed along the right margin of to cue the student that they are nearing the edge of paper when writing.
Draw a red stop sign at the right margin.
Graph paper Try 1/2 inch wide rule first.
Raised line paper
Slant board
Try smaller width of lines instead of primary paper.
RediSpace paper has a green line along the left margin and a red line along the right margin.
Fix Spacing between words with a spacing tool
There are many spacing tools on the market, but when kids are involved in the creation process, they are likely to use the item in handwriting tasks. We’ve made several spacing tool crafts here. Try these ideas:
Spacing between letters and words is one of the easiest ways to improve overall legibility in written work. Why? There are a few reasons…
When letter formation is difficult for children, letters can appear sloppy or hard to discriminate from one another. This can make reading back written work difficult for children. Spacing between words can create white space that makes it easier to read sloppy or poorly formed letters.
Those that struggle with handwriting challenges such as dysgraphia or dyslexia, fine motor challenges, sensory issues, motor planning challenges, correct formation of letters can be quite difficult. Spacing between words helps to improve overall legibility.
Spacing helps when line use is a challenge. Some children struggle with the visual perceptual skills needed to write on lines. Other contributors to poor line use may include pencil control challenges, motor planning issues, fine motor skill development, or difficulties visual motor skills. When any of these challenges exist, placing letters correctly on the lines, below the lines can impact legibility. Addressing spacing between letters and words can help with readability of written work.
Spacing helps with letter size issues. Similarly to the concept of line use, sizing of letters is important. When sizing is incorrect or inconsistent, children may fill the entire space with their letters. They may make all of the letters the same size or use quick writing speed which impacts legibility and results in large letters. Adding more space between words can help with reading this written material.
Addressing spacing issues allows others to read one’s handwriting. Teachers and parents can agree that when handwriting is illegible, there are difficulties with learning. Kids struggle to read their notes or homework list. Others might not be able to read back over what they’ve written making studying for quizzes and tests a challenge. Students may miss questions on exams or homework assignments when legibility is an issue. All of these issues can impact learning of information and grades.
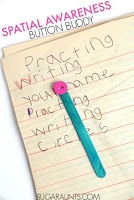
Make a spacing tool that can be used while your child is writing words and sentences. It can be as easy as a popsicle stick or even the child’s finger. Show them how to place the spacing tool between words and sideways between letters.
Fine Motor Quick Tip:
Help kids to develop and strengthen the skills needed for improved pencil grasp with fine motor experiences. Encourage flexion of the thumb IP joint (bending the tip of the thumb). Thumb IP joint motion during handwriting helps with pencil control and positioning in the hand. Check out this resource on improving pencil grasp through play, or this massive Pencil Grasp Bundle for activities and tools to impact pencil grasp, motor planning, and fine motor skills.
Spacing in Handwriting Handout
Want tips and tricks to work on spacing in handwriting in a handout form? This free resource is a spacing worksheet that can be used to develop spacing awareness skills in written work. Use the handwriting strategies listed on the handout in educating parents, teachers, or other therapists on the needs of a child.
This free spacing worksheet lists the strategies we covered above and can be a great addition when making suggestions for specific spacing needs. To access this free handout, join the Handwriting Tips and Tricks series…5 days of free handouts and information on all things legible written work!
Head to Handwriting Occupational Therapy Tips and Tricks to sign up. You’ll receive 5 free handwriting handouts related to aspects of written work: spacing, sizing, line use, letter formation, and more. Each day for 5 days, a free handwriting printable is delivered to your inbox.
The Handwriting Book is a comprehensive resource created by experienced pediatric OTs and PTs.
The Handwriting Book covers everything you need to know about handwriting, guided by development and focused on function. This digital resource is is the ultimate resource for tips, strategies, suggestions, and information to support handwriting development in kids.
The Handwriting Book breaks down the functional skill of handwriting into developmental areas. These include developmental progression of pre-writing strokes, fine motor skills, gross motor development, sensory considerations, and visual perceptual skills. Each section includes strategies and tips to improve these underlying areas.
Strategies to address letter and number formation and reversals
Ideas for combining handwriting and play
Activities to practice handwriting skills at home
Tips and strategies for the reluctant writer
Tips to improve pencil grip
Tips for sizing, spacing, and alignment with overall improved legibility
Colleen Beck, OTR/L has been an occupational therapist since 2000, working in school-based, hand therapy, outpatient peds, EI, and SNF. Colleen created The OT Toolbox to inspire therapists, teachers, and parents with easy and fun tools to help children thrive. Read her story about going from an OT making $3/hour (after paying for kids’ childcare) to a full-time OT resource creator for millions of readers. Want to collaborate? Send an email to contact@theottoolbox.com.
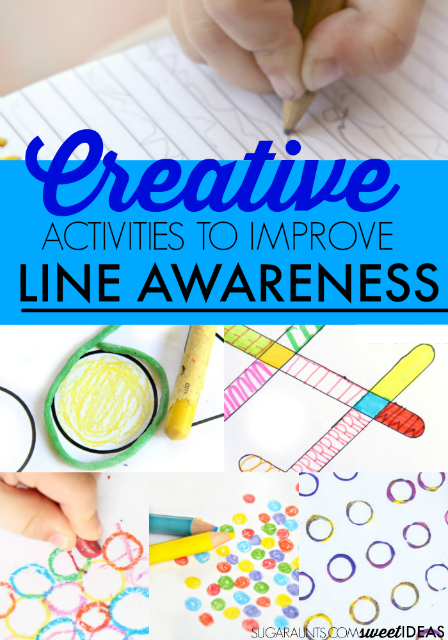
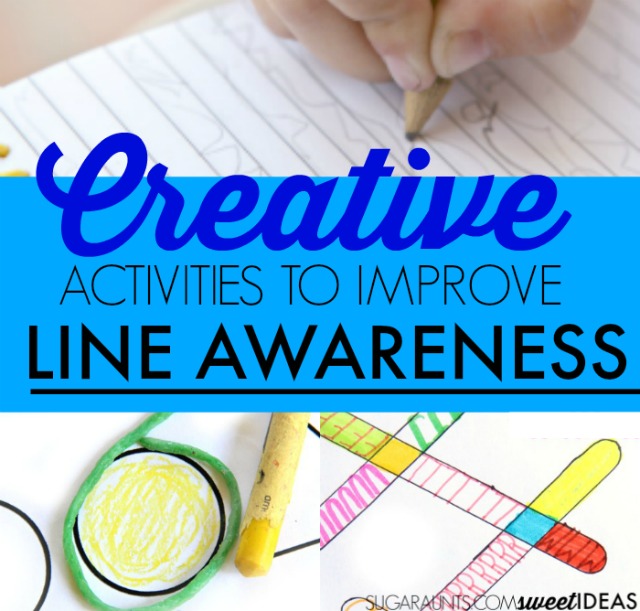
Here, you will discover line alignment resources and line awareness activities to promote accurate use of writing lines. Line awareness is a handwriting skill occupational therapists often address to promote functional written work and legibility in handwriting, by offering raised line paper and other handwriting strategies. Let’s talk line use!
Line Awareness Activities
Line awareness refers to placement of the letters accuratley on the writing lines. When we form letters, there are differnet letter sizes that are placed in different positions within the lines of the paper:
Letters that touch the top and bottom lines (b, d, f, h, k, l, t, and all upper case letters)
Letters that touch the bottom line (all upper case and all lower case letters)
Letters that cross the bottom line (g, j, p, q, y)
Letters that touch the middle line (or middle space if using single rule paper: a, c, e, g, i, m, n, o, p, q, r, s, t, u, v, w, x, y, z)
Line use allows for proper letter sizing and formation. Together these three aspects play an important role in legibility of written work.
Other aspects of line use refers to margin awareness or stopping writing before reaching the edge of the paper or writing area, and use of the left margin, or writing lists.
Typically, difficulties with line awareness are a result of visual processing problems. Visual processing skills that impact line use include: visual scanning, visual closure, visual discrimination, form constancy, eye-hand coordination, and visual motor integration.
Poor use of Writing Lines
Line awareness is a common struggle for many kids. You might know a child who writes with letters floating up over the lines, shows little regard to lines, or is inconsistent with line use. They might make letters of various sizes and write letters super big so that written work looks completely illegible and sloppy. Writing on the lines and using appropriate size awareness is an issue when visual motor integration skills are difficult for a child.
Perceiving visual information such as lines and available writing areas and then coordinating the motor movement needed to place letters accurately can lead to a lot of areas for legibility breakdown.
A child turns in an assignment and the letters are written all over the paper. They started out writing pretty neatly. But then, as they thought out their creative writing prompt, you see the words and letters dropping below the lines. Some of the letters are too big and even are scooting up into the letters on the line above. All of these are examples of poor line awareness.
Many times, kids are working on neatness in handwriting due to letters being written all over the page with little regard to placement on the lines. You might see kids writing with sloped arrangement as the words drift down over the lines or you might see younger kids who are making lower case letters the same size as the tall or upper case letters.
They might write as if they don’t even see the lines on the paper.
For older kids, they might not be able to go back over notes and understand what they’ve written in class.
Line awareness is often times an area that kids need to work on when there are difficulties with legibility in handwriting.
How can a child write neatly on lines of lined paper or worksheets when the letters drop below the lines? As teachers and parents, it can become difficult to read their writing.
How to Improve line awareness
There are many modifications that can be made to help with legibility due to trouble maintaining line awareness. Kids can build the visual perceptual skills needed for line awareness with activities designed to help the child attend to the lines.
Line use is closely related to spatial awareness that was discussed in yesterday’s email. Try using the tips and strategies in combination. Here are a few easy hands-on strategies to help with line awareness and visual motor integration:
Here are a few easy hands-on strategies to help with line awareness and visual motor integration:
Line Awareness Quick Tip: Work on letter formation before requiring students to address line awareness. Children are not developmentally ready to write on lines until between ages 5 and 6.
Fine Motor Quick Tip: Help kids to improve pencil grasp and pencil control when writing on lines by separating the two sides of the hand. When writing, we NEED a stable base to support the fingers that hold and move the pencil.
Encourage creative play activities that separate the two sides of the hands by tucking a cotton ball into the palm when playing with toys like beads. Here is more info about motoric separation of the two sides of the hand and fun ideas for play.
Activities for Writing Lines
Below, you’ll find fun activities to promote use of writing lines for overall legibility of written work.
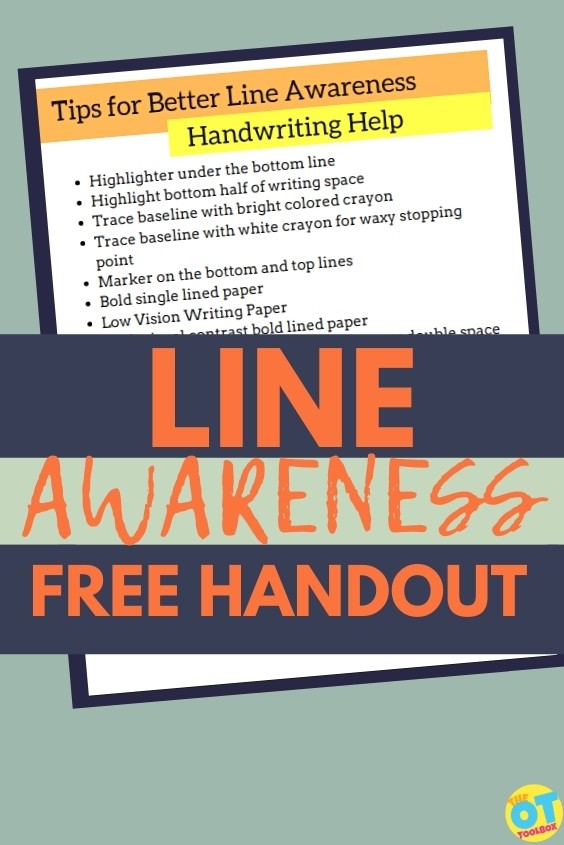
Use a movable baseline that provides a physical “stop” such as a ruler or index card.
Use paper designed to address placement on the lines like earth paper.
Highlight the bottom half of writing space
Trace baseline with bright colored crayon
Trace baseline with white crayon for waxy stopping
point
Marker on the bottom and top lines
Bold single lined paper
Low Vision Writing Paper
High visual contrast bold lined paper
Bold raised lined paper (in single space or double space
forms)
Adjust line height to fit the student’s handwriting
Raised Line Paper
Use a serrated tracing wheel to create DIY tactile paper
Make a stencil from a cereal box
Want these writing lines tips in printable format? You can get this list in a handout to use in therapy. Just join our 5 day series on Handwriting Tips Printables to access this along with 4 other free handwriting handouts.
Colleen Beck, OTR/L has been an occupational therapist since 2000, working in school-based, hand therapy, outpatient peds, EI, and SNF. Colleen created The OT Toolbox to inspire therapists, teachers, and parents with easy and fun tools to help children thrive. Read her story about going from an OT making $3/hour (after paying for kids’ childcare) to a full-time OT resource creator for millions of readers. Want to collaborate? Send an email to contact@theottoolbox.com.
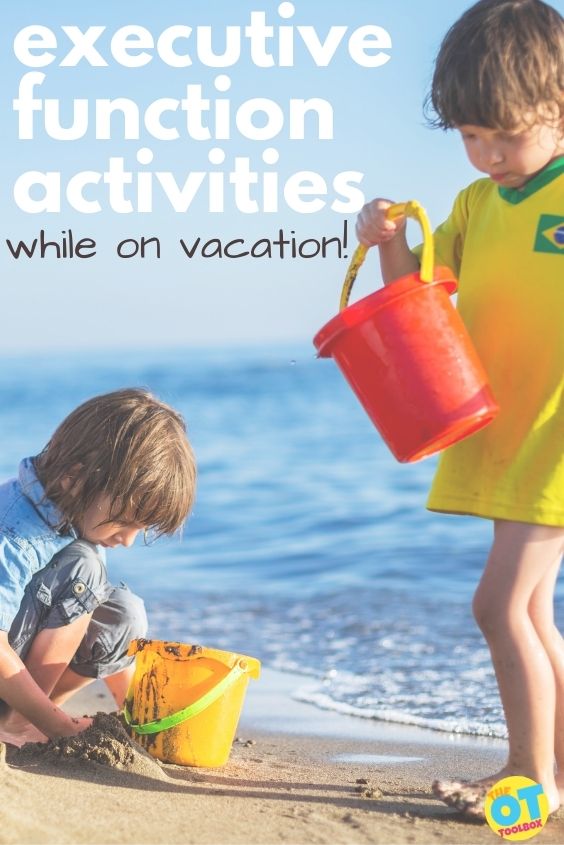
Executive functioning development is partly learning through experience, and partly trial and error. But did you know you could foster powerful executive function activities through everyday experiences? Here, we’re chatting how to foster executive functioning skills through play…and even at the beach! Add these ideas to improve executive functioning skills this summer.
Heading out of town on vacation to the beach soon? Check out these cool ways to work on executive functioning while you’re there! Once you get back, get to work on these seashell souvenirs!
Looking for engaging executive functioning activities doesn’t need a trip to the beach. Some of these ideas can be set up in your own backyard. But, if you are going on a vacation or trip this summer, why not use it to foster development of skills through executive functioning activities?
Executive Functioning Activities: Planning and Prioritizing for a Vacation
Trips to the beach can be a great opportunity for families to enjoy some time away! They can also be a fun way to integrate some therapy. Sensory processing, motor skills, executive functioning—the options are endless! Sensory processing and motor skills might seem more obvious than executive functioning. Let’s take a deeper look at a few popular activities at the beach and how they can use executive functioning!
You can start working on executive functioning even before you leave for the trip! These are excellent ways to work on planning and prioritization skills. Especially important in planning for a vacation is the prioritization aspect: when to pack, when to set aside time to wash necessary clothing, making the time to plan out a trip and make reservations can all impact the success of a vacation.
Have your child look up the forecast
Work on creating a packing list
Schedule time to gather needed items
Work together to organize vacation items into available bags.
This can be a great way to get them involved! It also challenges their ability to delay gratification, as they will need to wait until it is time to go, even if that is a few days away. Time management will also be necessary so that packing doesn’t take all day!
Executive Function Activities: Build Sandcastles
Kids love building sandcastles! This activity requires a lot of executive functioning skills.
A child needs to use impulse control so that no one gets sand thrown in their eyes and to avoid the castle from being smashed prior to completion.
The child also needs to develop a plan and organize their ideas prior to or as they build in order to get the product they would like.
They need to recall where they put their shovels or buckets, as well as sequence multiple components as they build.
They also need to problem solve, as the sand might not be their desired consistency! Sandcastles—a great, complex way to work on executive functioning!
Executive Function Activities: Skipping Stones
Remember trying to skip stones during calm days on the water? This is another great way to integrate the use of executive functioning skills.
Stones need to meet specific criteria in order to be the best candidates. Or, this can become an area for problem solving or making predictions (foresight) to see what type of stone might skip best.
Certainly, there is a significant amount of impulse control needed in order to ensure safety of others in the area! Work on emotional control through contests of who gets their stone the farthest, especially if a child has difficulty losing.
Don’t have the motor planning or coordination to skip stones? No problem! Toss stones into a pool of water instead.
Boogie boards/knee surfing Executive Function Activity
Boogie boarding or knee surfing can be another activity to work on executive functioning in a hidden way! A child needs to plan their motor movements before they take place, as well as consider timing of waves. Safety awareness will also be important, along with persistence, since this can be a challenging activity!
The beach is a great way to work on a variety of developmental skills, whether sensory processing, motor skills, or executive functioning! Enjoy some of these activities on your upcoming trip and enjoy the benefits of the beach!
The Impulse Control Journal…a printable resource for helping kids strategize executive functioning skill development. When saying “calm down” just isn’t enough…
When a child is easily “triggered” and seems to melt down at any sign of loud noises or excitement…
When you need help or a starting point to teach kids self-regulation strategies…
When you are struggling to motivate or redirect a child without causing a meltdown…
When you’re struggling to help kids explore their emotions, develop self-regulation and coping skills, manage and reflect on their emotions, identify their emotions, and more as they grow…
Grab the Impulse Control Journal to build organizational strategies, planning, prioritization, habits, and mindset in kids.
Colleen Beck, OTR/L has been an occupational therapist since 2000, working in school-based, hand therapy, outpatient peds, EI, and SNF. Colleen created The OT Toolbox to inspire therapists, teachers, and parents with easy and fun tools to help children thrive. Read her story about going from an OT making $3/hour (after paying for kids’ childcare) to a full-time OT resource creator for millions of readers. Want to collaborate? Send an email to contact@theottoolbox.com.
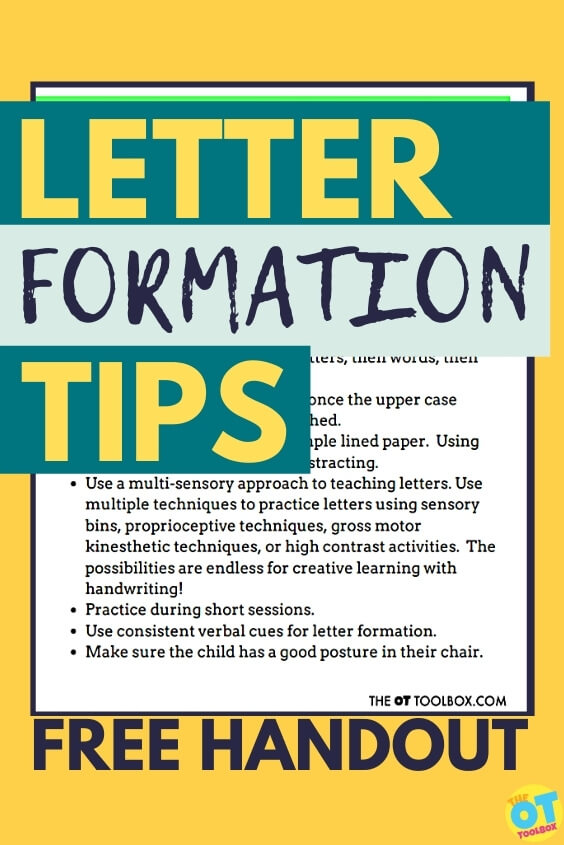
This blog post is DAY 1 in our Free Handwriting Handouts series. Here, you’ll find all of the information you need to educate others on letter formation. To access the free printable letter formation handout (and all of the other handwriting handouts in this series), be sure to sign up for the Occupational Therapy Handwriting Handouts where you will receive tons of resources and information related to occupational therapy handwriting interventions and handwriting instruction for helping children write legibly.
Use this informative handout in addition to our letter formation worksheets and hands-on activities to target legible writing.
You’ll also find many resources and writing strategies related to writing letters accurately and legibly on our letter formation resource page.
Letter Formation Handout
Letter formation can be a great challenge for children of all ages. Beginning with pre-writing strokes, preschoolers
Now, let’s move onto the details on letter formation. We’re going to cover a few concepts: tracing letters, letter formation development,
Tracing Letters
Tracing has it’s time and place. And like all things (especially chocolate chip cookies in my case), moderation is key.
Tracing letters is not an ideal format for teaching letter formation and here’s why: When children trace letters, they can become overly focused on the immediate line strokes under their pencil. It’s harder to create a motor plan for the letter in it’s entirety.
Also, tracing letters can set kids up for establishing a poor motor plan for letter formation. This is especially true if children are given a tracing worksheet with no cues or prompts to start letters at the top and to form letters in proper formation sequence. Often times, you’ll see children start letters at the bottom when tracing, or segmentally, jumping from piece to piece of the letter. This can be a recipe for disaster!
However, practicing letter tracing can be a good activity, too.
Tips for Tracing letters
When the child is tracing the letters over and over again, they become more efficient at planning out and executing the movements needed to make a letter accurately. This activity is great for a new writer because they are given a confined space to practice a letter, visual cues, and verbal prompts.
To make the most of tracing, be sure to ensure the child is tracing letters correctly. You’ll want to watch for a few things and show the child the correct way to trace if they are forming the letter incorrectly.
Make sure they trace starting at the top
Make sure the child retraces lines when appropriate
Make sure they form the letter in correct sequence (don’t picking their pencil up to trace the last part of the letter first, for example)
Tracing Letter Strategies
Some ways to effectively use tracing as a method for working on letter formation:
Write the letter in highlighted lines and ask the child to trace in a different colored marker to get a color-changing effect. This marker rainbow writing activity is one great example.
Use a tracing font that has numbers and arrows so kids know where to start and how to sequence the letter formation. These A-Z letter formation worksheets are a great resource for teaching letter formation of upper case and lower case letters segmentally to establish a motor plan. They are great for sensory handwriting techniques, too.
So often, handwriting is impacted by fine motor development and resulting endurance, strength, and therefore pencil grasp. Read here about fine motor skills.
Try this quick tip to address fine motor skills:
Provide tons of opportunities that open up the thumb web space. Many times, children with poor handwriting have their thumb squashed up against the pencil, the pointer finger wrapped around the pencil, or the thumb wrapped or tucked against the pencil.
Try to encourage your student or child to open up the space around the pencil. Read more about an open thumb web space and find a lot of creative activities to address this need HERE.
One final note: While functional handwriting is key, letters need to be formed in a manner that is readable and mostly accurate. By that I mean sometimes we need to follow the “beggars can’t be choosers” mindset. If a child is struggling with composing written work, building sentences, and putting their thoughts on paper, then a functional style of letter formation can be A-OK.
Need more Handwriting Help? If you landed here and want in on the full Handwriting Handouts series (and access 6 free handwriting resources for legible written work, head to Handwriting Occupational Therapy Tips and Tricks to sign up.
Colleen Beck, OTR/L has been an occupational therapist since 2000, working in school-based, hand therapy, outpatient peds, EI, and SNF. Colleen created The OT Toolbox to inspire therapists, teachers, and parents with easy and fun tools to help children thrive. Read her story about going from an OT making $3/hour (after paying for kids’ childcare) to a full-time OT resource creator for millions of readers. Want to collaborate? Send an email to contact@theottoolbox.com.
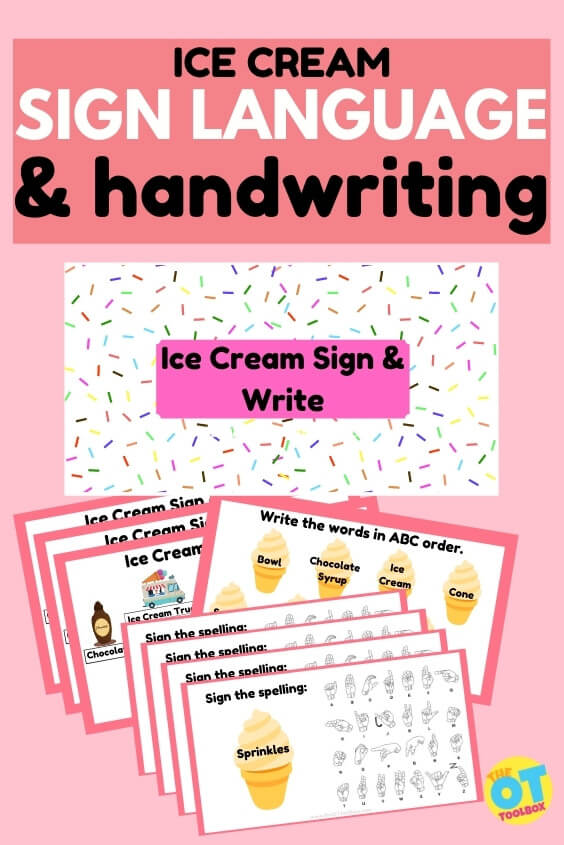
Today I have a fun ice cream writing activity that gets kids excited about writing ice cream words and everything fun and motivating about ice cream. If your kids are anything like mine they love ice cream and the toppings ice cream cones sprinkles and the jingle of the ice cream truck.
Ice Cream Writing
In this ice cream writing activity kids can work on the skills they need for legible handwriting including letter formation sizing spacing and copying skills and the fine motor skills needed for a functional pencil grasp.
All of this happens in an interactive in a free Google slide that you can use in teletherapy face-to-face therapy home programs or in the classroom for with an ice cream theme.
This ice cream writing activity begins with a several ice cream themed words including:
ice cream truck
chocolate syrup
ice cream scoop
cone
sprinkles
spoon
bowl
Ice Cream Writing Skills
Kids can copy the words from the slide deck and work on letter formation, sizing, spacing, and legibility.
You could expand the activity to ask kids to write the words in alphabetical order and address some visual perceptual skills such as visual scanning visual memory visual attention and visual discrimination and others.
Then the slides continue with a visual perceptual exercise that takes away one of the items on the previous slide.
This activity is much like one a hands-on “what’s missing” activity where you lay out several minute items on a table and then ask children to remember what they see in front of them and then after a few seconds you take away one of the items and ask them what’s missing.
“What’s Missing” games are such a great way to work on visual attention and visual memory skills. These skills are so needed for copying materials writing reading and recalling letter formation as well as hand writing rules like using spaces between words in pencil grasp rules.
The slides continue with several of these “what’s missing” activities with the ice cream theme where kids can write out the specific ice cream terms that are missing on each slide in further work on handwriting skills.
Write Ice Cream Words in ABC Order
The next ice cream handwriting activity asks kids to write in alphabetical order, several ice cream words scattered on ice cream cones.
Kids can work on copying those in order and work on the visual memory skills and visual perceptual skills needed for putting words into alphabetical order.
Ice Cream Sign Language Activity
The next several slides include several American Sign Language handwriting activities to spell out ice cream words.
There is an American Sign Language key on each slide so that kids can visually scan to copy the hand formations to spell out the words.
They will love using sign language to spell out ice cream words like sprinkles, scoop, ice cream, bowl, and spoon.
The benefits of asking children to use sign language to spell words is that if they do not know the sign language hand formations, that they need to visually attend to on the screen, using visual memory and visual attention skills to copy the formation.
However using sign language also develops working memory to recall and use the same letters in spelling. American sign language activities and spelling also benefits kids to work on fine motor skills such as:
finger isolation
separation of the sides of the hand
open thumb web space
arch development
dexterity
Ice Cream Writing Prompts
The last activity on this ice cream writing task is a open ended handwriting task which asks students to create sentences using the ice cream words.
You can expand this activity to meet the needs of various levels of children by asking them to copy more sentences or less sentences you can make the sentences very concrete and give them a specific sentence to write that contains the words or you can leave it open ended and ask students to write a silly sentence or a story using the words on the slide.
Use the ice cream writing prompts to meet the needs of your students!
You will also enjoy the other ice cream activities that we have here on the website including:
Would you like to add the slide deck to your therapy Toolbox? Enter your email address into the form below to access this ice cream writing activity.
Colleen Beck, OTR/L has been an occupational therapist since 2000, working in school-based, hand therapy, outpatient peds, EI, and SNF. Colleen created The OT Toolbox to inspire therapists, teachers, and parents with easy and fun tools to help children thrive. Read her story about going from an OT making $3/hour (after paying for kids’ childcare) to a full-time OT resource creator for millions of readers. Want to collaborate? Send an email to contact@theottoolbox.com.