How to Teach Coloring Skills

How to teach coloring skills to kids

Today I have another exciting resource…all about how to teach coloring skills to kids. This is an important developmental skill for kids, and you’ll want to check out our resource on color recognition skills in kids. So often, children do not have the exposure to crayons and paper that is needed for development of fine motor skills or visual motor skills. Teaching coloring skills is just not something parents think about in many cases! Let’s break down coloring skills by age and address specific tips to teach coloring to children.
Tips for how to teach coloring skills to kids based on child development.

Coloring is such an important part of childhood and growing up. There are many benefits to coloring as a tool for building skills. Coloring develops hand strength, visual perceptual skills, and precision skills in grasp. It’s the first time many of us express creativity and produce something we are proud of. It boosts confidence, develops understanding of cause and effect, and increases attention spans.

Coloring is also an important stage of child development, too.

Did you know that drawing is also an integral part of many early childhood skills like pre-writing development, fine motor skills, and spatial reasoning?

Let’s go into age-appropriate specifics on how to teach coloring skills at each age and stage, from babies, to toddlers, to preschool, to Pre-K, to elementary aged children. Specifically, you’ll want to use age-appropriate crayons for toddlers, based on developmental levels.

How to teach coloring skills

Coloring can be hard for kids. Many times, you see kids that refuse to color. Other times you come across kids that prefer markers over crayons. There are reasons for these difficulties, that make sense developmentally. Let’s take a look at the reasons why kids hate to color.

  • Coloring is HARD!
  • It hurts the child’s hands to color
  • Coloring makes the child’s hands tired
  • Child prefers markers over crayons
  • Coloring in the lines is hard
  • It’s hard to finish a coloring page

All of these reasons why kids hate to color are related…and many times, it comes back to a need for developing hand strength and underlying skills.
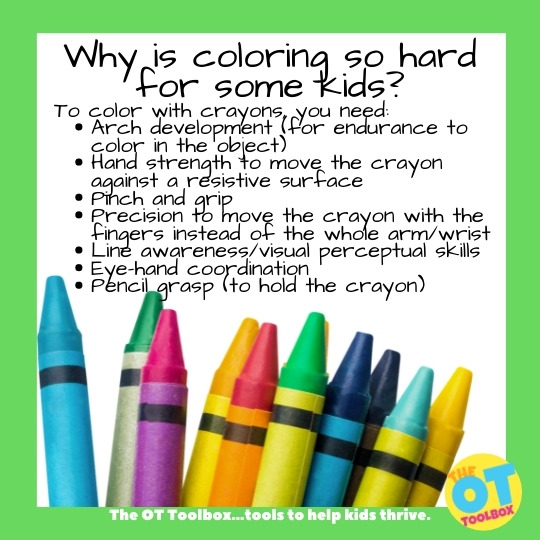
Coloring is hard for kids for many reasons. Here are underlying skills needed for coloring.

Skills needed for coloring

There are several areas, or underlying skills that play an important role in coloring:

  • Arch development (for endurance to color in the object)
  • Hand strength to move the crayon against a resistive surface
  • Pinch and grip
  • Precision to move the crayon with the fingers instead of the whole arm/wrist
  • Line awareness/visual perceptual skills
  • Eye-hand coordination
  • Pencil grasp (to hold the crayon)
  • Previous experience with fine motor activities/fine motor skill development

Fine motor skills and coloring- In order to hold a crayon, children need to develop fine motor skills. In order to color in a shape, hand strength is needed. In order to color within the lines, visual motor skills are needed. In order to color a whole shape or figure, distal mobility is needed.

Activities to develop these skills include fine motor play, beading, tweezer use, working on a vertical surface can develop these skills.

Line awareness and coloring– Another aspect of coloring is the line awareness to color within the lines. And, before a child can form letters with ease and fluency, they need to achieve pre-writing lines such as strait lines, squares, triangles, X and diagonals. This resource on line awareness can be a great starting point on this visual perceptual skills needed to color within the lines. Also try these tips to work on line awareness needed for coloring.

Pencil grasp and coloring– In order to teach coloring skills, it is important to progress through the stages listed below, whether at age level or not. Just like the underlying skills needed for pencil grasp development or handwriting, the basic levels need to be achieved. Before a child can hold a pencil with a functional grasp, they need to progress through more primitive grasp patterns such as a pincer grasp, palmer supinate grasp, digital pronate grasp, and quadrupod or static tripod grasp.

All of these underlying skills play an important role in how to teach coloring skills to kids!
How to teach coloring skills at each age depends on child development. These tips for teaching kids to color can help.

Coloring Skills By Age

In this post we will break down the coloring skills you can expect a child to do dependent on age. You will see that we break them down into age ranges – for good reason, too. Every child will develop different skills and different times. Generally, though, there is a developmental path that the majority of children will follow.

If you believe that your child is lagging behind in these skills, talk to your child’s health care team and let them know what you see in your child. They will direct you towards occupational therapy if it is right for your family! 

Coloring Skills at BIRTH – 6 MONTHS

Not much coloring going on in this time frame, as you may imagine! Instead, your little one is prepping those little fingers to hold and manipulate objects, that will one day lead to purposeful scribbling! 

I always recommend allowing your child to explore coloring as soon as they are able to hold a crayon in their hand and sit up safely in a high chair. Be sure to stay with your baby the whole time you are offering coloring opportunities, as they will likely put their crayons in their mouth. 

Support the development of Coloring Skills during infancy:

Babies under six months will typically grasp a small object in the middle or pinky-side of their palm. This grasp pattern is strengthening the building blocks for more refined grasps down the road. Tummy time is a great tool for lengthening the ulnar side of the hand for strengthening so that endurance in fine motor tasks is achievable at older ages. Tummy time also supports arch development even at this young age.

While most parents of new babies will not be thinking of coloring, these activities support the development of MANY motor and cognitive skills, and not just coloring!

Coloring Skills before 1 year

From 6 months to 12 months, babies are certainly not coloring. However, they ARE developing motor and visual skills needed for holding and marking with a crayon in the later years.

Grasping patterns grow a lot during this time! Your baby will start to use their thumbs a little bit more while stacking blocks, be able to pick up their Cheerios with only their thumb and pointer finger (pincer grasp), and can point to objects with one finger. By 12 months old, we should see a pincer grasp while holding small objects. This grasp prepares little fingers for sustained coloring!

Support the development of Coloring Skills during In babies:

Around a year old, your little one may show more interest in scribbling. They will likely make large marks across the paper (and hopefully not the walls!) by using their whole arm to move their crayon. As they develop, you will see that those big movements will get smaller and smaller as fine motor skills are refined.  

Grasp: On a coloring utensil, they will use a gross grasp that looks like a fist. 
Resources and information on how to teach toddlers to color.

Coloring Skills for Toddlers

The toddler years, for from 12 months to 2 years, is a great window to introduce coloring. It’s during this age that toddlers show interest in coloring and develop skills needed for motor development. This is a great time to explore how to teach coloring skills at an impressionable age!

During the 12 month to two year range, toddlers are building proficiency in coloring skills…and this is a great time to teach coloring!

In this time frame, your toddler will begin to recognize colors and shapes in their environment, and may purposefully choose colors while they are scribbling on paper. They will start to hold their crayon or marker a little more gently, with their pinky down towards the paper, and all fingers wrapped around. 

Teach Toddlers to Color:

During the toddler years, exposure is key! You can present many activities and coloring opportunities to color with crayons. Different types of crayons and coloring activities are great exposure, too. Here are tips to teach toddlers to color:

  • Offer just one crayon at first. Offering too many options can overwhelm the young child.
  • Try different crayon types. There are different crayon molds that are great for toddlers including egg shaped crayons, rock shaped crayons, or even bath crayons.
  • Try coloring materials that require less hand strength or resistance, to make a mark. Kwik Stick tempera paints are a great option.
  • Show toddlers how to color. Color alongside young children for an opportunity to connect with the child and interact. Toddlers love to mimic others and can learn a lot by watching their parent color alongside them.
  • Offer toddler-friendly coloring pages. A big coloring book with many details can overwhelm a child. Try a printed page with simple shapes in smaller sizes.
  • Don’t expect perfection. Just putting crayons to the page is a great learning experience that builds hand strength, eye-hand coordination, and coloring experience.
  • Expect whole-arm movements. Toddlers color with their shoulder and elbow movements, or the proximal movements and won’t color with precise movements of the fingers until an older age. This is normal and to be expected. Coloring for toddlers looks like scribbling and that’s OK!
  • Encourage coloring and mark-making with coloring games and toys. This post has games and toys for coloring that Toddlers will love.
  • Work on fine motor hand skills through games involving tweezers, games on the floor, gross motor play, and whole body play activities.
  • Encourage play with age-appropriate puzzles and blocks.
  • Use our winter color by letter worksheet to work on coloring in small spaces.

Your child may start to show more interest in coloring just like you do, trying to copy your marks and paying closer attention to where they are placing their pen to paper. They should be able to copy a vertical line by around age two – this is a key marker for pre-writing skills. Usually around this time they also choose a preferred hand dominance while coloring! 

The typical grasp pattern used by toddlers is the Palmar supinate grasp. This is a normal part of development. 
Tips and strategies to teach preschoolers to color. Includes information for younger preschoolers and Pre-K.

Coloring Skills for Preschool (2-3 years)

The early preschool years, or 2- 3 years of age are a prime range for developing beginning coloring skills.

Your young preschool child will start to shift their fingers towards the paper while they hold their coloring utensil by age three. Some children hold their pencil towards the top near the eraser during this stage of development. They should naturally work their fingers down the utensil, closer to the paper, as they get used to this new grasp. 

Use these strategies to teach young preschoolers to color:

During the 2-3 year period, you can expect your child to start drawing meaningful images. They will point to a drawing that may look like nothing to you, but then they will tell you that it’s their dog! By age three, your child should be able to do the next pre-writing task: copy a horizontal line and a circle. 

Teach Preschoolers to Color (2-3 years old):

For young preschoolers, continued exposure to coloring is necessary. So often, young children skip the needed PLAY that builds fine and gross motor skills. With more and more young children playing primarily on screens versus free play, independent play, and creative fine motor play that builds the necessary hand strength, mobility, dexterity needed for precision, endurance, and progression through typical grasp patterns. Children at the preschool stages need fine motor play, much less screen time exposure, and play experiences.

Another pet peeve of pediatric occupational therapists is the tendency to hand a young child a pencil or pen during the preschool years.

  • Continue with the suggestions listed above for the baby stage.
  • Use a variety of crayon types and sizes: regular crayons, finger crayons, egg-shaped crayons, rock crayons, jumbo crayons, bath crayons,
  • Don’t be afraid to use broken crayons. Sounds strange, right? Sometimes a whole crayon is too big for small hands. A broken crayon can be the “just right” size and can be used as a strengthening tool for fine motor skills as well.
  • Don’t expect perfection. Crayon lines will go over the border of the coloring area and that’s ok!
  • Offer small coloring spaces with wider borders.
  • Provide simple shapes for coloring opportunities.
  • Offer physical boundaries if needed: Use wikki sticks around the coloring area, use your hands to create a small coloring space.
  • Color small areas on an easel to engage the core as a stabilizer, work against gravity, to place the wrist into extension, to pull the fingers into a tripod type of grasp for dexterity.
  • Continue easel work and play with lite brite, painting on easels, sticking and peeling tape to the wall, sticking foam pieces to a wet easel surface.
  • Play with foam sheets on a window. Try this rainbow play activity where preschoolers can stick foam sheets to a wet window. Encourage use of a spray bottle to wet the window and then wipe with a towel to clean up any drips. (It’s a great way to teach colors to preschoolers, too!)
  • Draw with chalk on a vertical chalk board or on a driveway/side walk.
  • Try window paints.
  • Try coloring materials that require less hand strength or resistance, to make a mark. Kwik Stick tempera paints are a great option.
  • Show toddlers how to color. Color alongside young children for an opportunity to connect with the child and interact. Toddlers love to mimic others and can learn a lot by watching their parent color alongside them.

The typical grasp pattern used by young preschool children in the 2-3 year age range is the Digital pronate grasp. Use of this grasp pattern is a typical stage of grasp development.

Coloring Skills in Preschool (4-5 years)

During the later preschool years, at four and five years of age, preschoolers are developing more refined coloring skills as their motor and visual develop integrate.

Around age four is when you can start to see recognizable images appear more regularly in your child’s artwork. Four-year-olds will usually draw people with two, three, or four body parts. For example, the person may have a circle for a head, a rectangle for the body, and two circles for feet.

By the time they are five, they will likely be drawing people with six or more body parts! You will see their drawings becoming more and more life-like, by adding details like fingers, eye color, and buttons on clothing. 

By age four, we expect a child to be able to copy a cross – a very tricky visual motor skill! Around age five, we would expect a child to be able to copy a square and color inside the lines fairly well. 

Teach Preschoolers to Color (4-5 years old):

For older preschoolers, especially those in Pre-K, it can be common to see preschools and pre-K classrooms where young children are expected to write letters, write their name, or trace letters. This is potentially damaging for the young child and not recommended by pediatric occupational therapists. This premature exposure to writing with pencils, tracing letters, and writing letters isn’t based on child development of motor skills.

It will result in forming letters incorrectly and establishing poor motor plans for letters. It will result in poor pencil grasps that are difficult to change. It will result in forming letters from the bottom or in “chunks”. It is a detriment to children, especially because there is little time in the kindergarten classroom for working on letter formation, pencil grasp instruction beyond the regular curriculum. So changing motor plans and muscle memory that has been poorly established is detrimental for the young child.

What preschool and Pre-K children at 4 and 5 years of age need is play and the opportunity to develop and refine fine motor skills, hand strength, eye-hand coordination, visual motor skills. These skills are strengthened through play.

Try these strategies to teach older preschoolers/Pre-K children to color:

  • Use all of the strategies previously listed above.
  • Encourage coloring with interest-based coloring pages (run a Google search for coloring pages, i.e. “unicorn coloring pages”, “superhero coloring pages”, etc. You can generally find free printable coloring pages in most themes.)
  • Show off art work! Create a space in the home or clinic where coloring projects can be displayed. This is a great motivator for many children.
  • Encourage smaller coloring areas to improve eye-hand coordination with line use. A smaller coloring space enables children to use their fingers to move the crayon rather than the wrist, elbow, or shoulder.
  • Use a smaller or broken crayon to promote a developmentally appropriate quadripod or static tripod grasp.
  • Use simple shapes with curved lines like circles and ovals to promote smooth coloring lines with minimal direction changes and angles to the coloring picture.
  • If children are complaining of tired hands or tend to switch crayon colors a lot, it can be a sign of weakness in the hands. To strengthen the hands, encourage play with tweezers, tongs, spray bottles, pinch and grip activities, LEGO blocks, play dough, beading activities, peg boards, etc.
  • If you have a box of crayons with a crayon sharpener on the back, encourage the child to use it to sharpen crayons. The built-in sharpener is great for not only sharpening dull crayons, but also as a hand strengthening device!

The typical grasp pattern in preschool years for 4-5 year olds is the quadrupod or static tripod grasp. Use of either of these grasps is part of typical grasp development.  
Information and tools to teach elementary kids to color.

Coloring Skills at 5-6 years old

Somewhere between ages five and six, we would expect a child to be able to copy multiple shapes, including the ones they would have mastered in the past (i.e. vertical, horizontal, and crossed lines).

Around age five we would like to see what is called a dynamic tripod grasp when a child is writing or coloring. They should have their pencil between their pointer finger and thumb, with the middle finger supporting and the ring and pinky fingers tucked away into the palm. This grasp is “dynamic” if the fingers can move separately from the palm and wrist, allowing for good control of the writing utensil. This growing strength and control is why we see handwriting and coloring skills develop!

By age six, they should be able to copy more complex shapes, like triangles and rhombuses. You could expect them to independently draw some of the more simple shapes as well, like circles and squares. 

The dynamic tripod grasp is the most advanced pencil grasp and should continue throughout their life. Typically, whatever grasp a child has habituated by age 6 is the grasp they will likely continue to have. 

Teach kids to color at 5-6 years:

Try these strategies to teach children aged 5-6 years old children to color:

  • Use all of the strategies listed above under preschool, older preschool, etc.
  • Color using a variety of surfaces and mediums.
  • Color using squeeze paints to work on hand strength.
  • If hand strength is a challenge and the 5-6 year old complains of hand fatigue, try a less resistive coloring tool such as twist crayons.
  • Work on coloring larger areas for longer periods of time.
  • Use raised line borders if needed, including Wikki Stix or dry glue to border the coloring area.
  • Try a 3 crayon challenge.
  • Highlight the line with a marker.  A bright color can be a visual cue of where to write.  Letters should rest on the line.  You can start with a nice thick and brightly colored highlighter like this one and move to a thinner pen like these ones. Sometimes the visual cue of that bright line is enough to keep letters placed correctly.
  • Another strategy to work on line awareness in coloring is to add bolder coloring shape lines with more contrast by darkening the borders with a black marker. Simply outline the shape with a black marker for a visual prompt.
  • For kids that show a great deal of difficulty with coloring in a given space, use a stencil made from a thing cardboard like a recycled cereal box.  Cut out a rectangle and place it over the given writing space.  This will help to remove distractions of the rest of the page and proved a designated space to color within.
  • Use glue to trace along the outside border of the coloring space. Let the glue dry and then use that tactile border as a physical prompt for coloring lines.

The typical grasp pattern for 5-6 year olds is a tripod/dynamic tripod grasp.

Coloring Skills at SIX YEARS OLD AND BEYOND

Older children can sometimes struggle with coloring and see their peers who seem to have little trouble at all. This can be a stab at their confidence and self-esteem. For older children, coloring often-times is a “sometimes” task in the classroom, so there are limited opportunities for a hands-on fine motor task. Still older students use primarily colored pencils to color in the classroom. Coloring with colored pencils requires even more hand strength, precision, and mobility with the pencil, so this can be a challenge.

Try these strategies for teaching older kids coloring skills:

  • To teach coloring skills to older children, use all of the methods mentioned under each age level above.
  • Your elementary-aged child will continue to develop fine motor skills for writing and coloring, as well as manipulating other craft media like clay, papier mache, etc. Creating things with their hands will not only strengthen their muscles but will also benefit their social development, self-esteem, and problem solving skills.
  • Work on coloring with a variety of crayon types, markers, or paint pens.
  • Use a variety of coloring surfaces.
  • If crayon pressure or colored pencil pressure is a problem, try these strategies to address pressure on the writing utensil.
  • Use a coloring journal or a drawing journal.
  • Use interest-based coloring books or coloring pages.

A final note on teaching coloring skills

If wondering exactly how to teach coloring skills to children at various ages is something you are looking for developmentally appropriate strategies, this comprehensive resource is for you. Coloring is a child occupation needed for learning, interactive play, and creative play.

Encourage your kids at all stages of development to explore their creativity and the fine motor, visual motor, cognitive and socioemotional skills will follow. 

Use some coloring activities like our President’s Day coloring pages for themed coloring fun.

References

Dosman, C. F., Andrews, D., & Goulden, K. J. (2012). Evidence-based milestone ages as a framework for developmental surveillance. Paediatrics & Child Health,17(10), 561–568. https://doi.org/10.1093/pch/17.10.561

Centers for Disease Control & Prevention. (n.d.). Milestone moments: Learn the signs. Act early. Retrieved from: https://www.cdc.gov/ncbddd/actearly/pdf/parents_pdfs/milestonemomentseng508.pdf 

How to Teach Coloring Skills is a collaborative article by Colleen Beck, OTR/L and Sydney Rearick, OTS.

Colleen Beck, OTR/L has been an occupational therapist since 2000, working in school-based, hand therapy, outpatient peds, EI, and SNF. Colleen created The OT Toolbox to inspire therapists, teachers, and parents with easy and fun tools to help children thrive. Read her story about going from an OT making $3/hour (after paying for kids’ childcare) to a full-time OT resource creator for millions of readers. Want to collaborate? Send an email to contact@theottoolbox.com.

Sydney Thorson, OTR/L, is a new occupational therapist working in school-based therapy. Her
background is in Human Development and Family Studies, and she is passionate about
providing individualized and meaningful treatment for each child and their family. Sydney is also
a children’s author and illustrator and is always working on new and exciting projects.
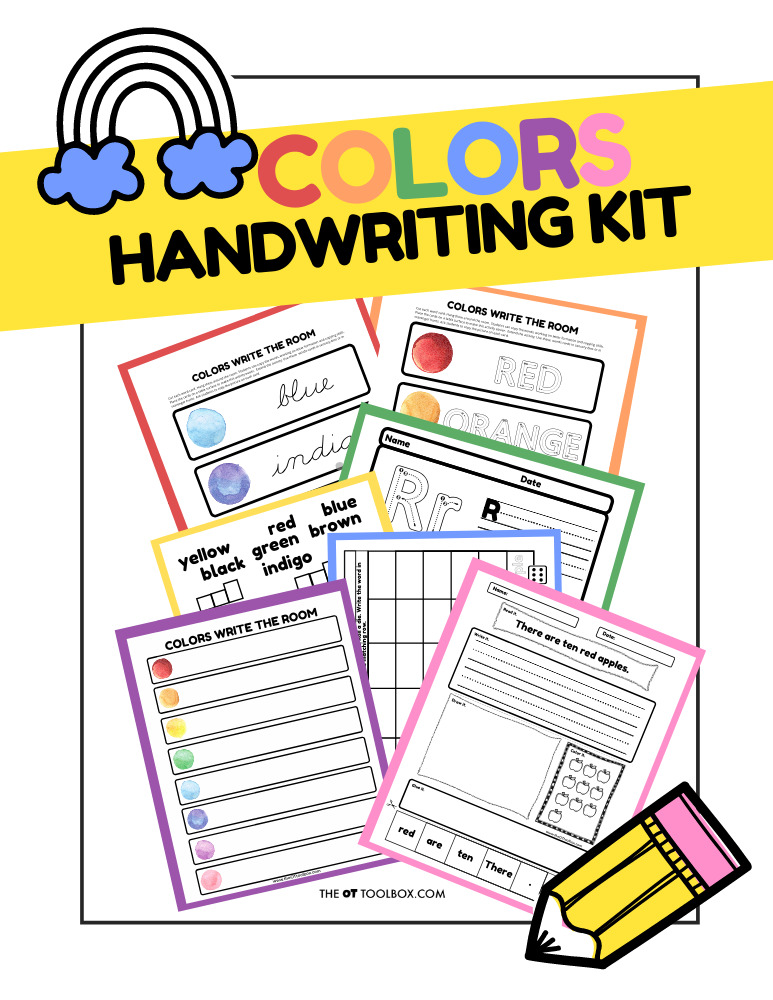
Colors Handwriting Kit

Rainbow Handwriting Kit– This resource pack includes handwriting sheets, write the room cards, color worksheets, visual motor activities, and so much more. The handwriting kit includes:

  • Write the Room, Color Names: Lowercase Letters
  • Write the Room, Color Names: Uppercase Letters
  • Write the Room, Color Names: Cursive Writing
  • Copy/Draw/Color/Cut Color Worksheets
  • Colors Roll & Write Page
  • Color Names Letter Size Puzzle Pages
  • Flip and Fill A-Z Letter Pages
  • Colors Pre-Writing Lines Pencil Control Mazes
  • This handwriting kit now includes a bonus pack of pencil control worksheets, 1-10 fine motor clip cards, visual discrimination maze for directionality, handwriting sheets, and working memory/direction following sheet! Valued at $5, this bonus kit triples the goal areas you can work on in each therapy session or home program.

Click here to get your copy of the Colors Handwriting Kit.

Colleen Beck, OTR/L has been an occupational therapist since 2000, working in school-based, hand therapy, outpatient peds, EI, and SNF. Colleen created The OT Toolbox to inspire therapists, teachers, and parents with easy and fun tools to help children thrive. Read her story about going from an OT making $3/hour (after paying for kids’ childcare) to a full-time OT resource creator for millions of readers. Want to collaborate? Send an email to contact@theottoolbox.com.
Owl Activities for Therapy

owl activities

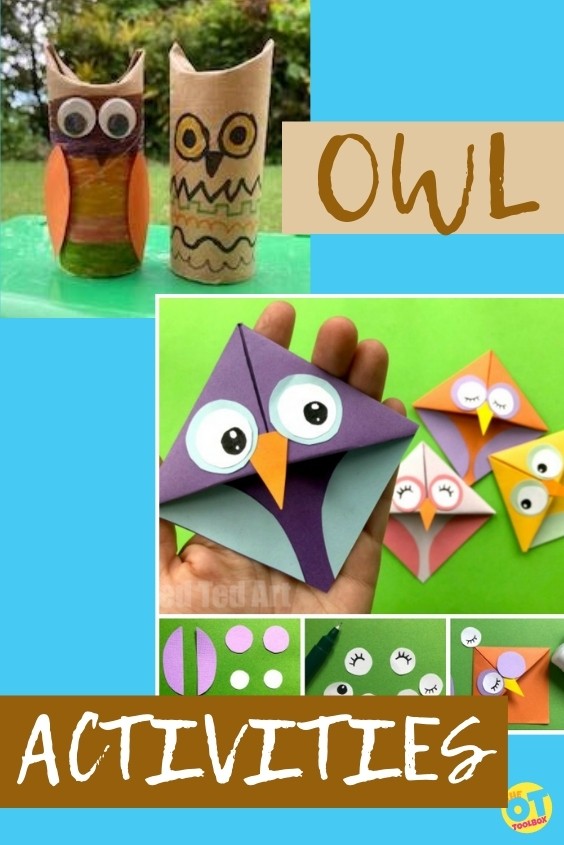
These owl activities are not just owl themed activities for kids, they are therapy tools to use in occupational therapy sessions! I love introducing the children that I work with to owls. There is something both appealing and mysterious about their big, thoughtful eyes and it’s fascinating to learn about their nocturnal nature. There are so many fun, creative ways that owls can be incorporated into therapy sessions to help you achieve your therapy goals.

Owl activities for kids

Owl Activities

Pick some of the owl activities below, using owl crafts, owl visual motor activities, and owl movement activities for helping kids develop skills.

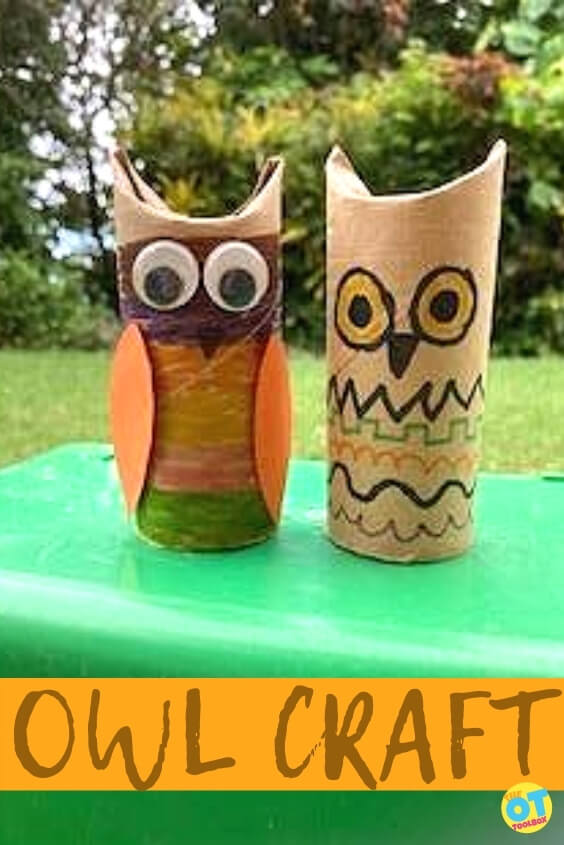
Owl Toilet Paper Roll Craft

This super simple activity produces a gorgeous little decorative owl. All you need is a toilet paper roll and some markers. Googly eyes are a bonus but not essential. Use markers to color in or decorate the paper toilet roll.

Younger children can color as they would like to and older children can be encouraged to draw patterns around the roll. Holding the paper roll and drawing on it requires co-ordination between the left and the right hand. This introduces a good way to promote bilateral integration.

Coloring in the toilet roll requires some bilateral integration while turning the roll while drawing patterns around the roll increases the demands on coordination between the left and right hands. For more bilateral coordination strategies, try these activities for bilateral integration.

To add another element to the task you could ask your child to copy the patterns or designs that you have drawn on your owl. This could be fun in sessions if you have two children attending together or in class where children could work in pairs.

Copying the patterns on the owl requires good spatial organization and the ability to transfer visual information accurately onto paper.

Once the paper roll is decorated draw or stick eyes onto the top and fold the top ends inwards to create the owl’s ears.

Owl craft for kids

Feed The Owl Fine Motor Activity

On the paper towel owl crat, draw the outline of an owls head and use scissors to cut out the beak so that it flaps open. You can stick a container underneath the beak to catch the food. Provide a clothes pin and a handful of small pom poms.

Use the clothes pin to pick up a pom pom and drop it into the owl’s beak. This is good for fine motor strengthening. Using a clothes pin also isolates the thumb, index and middle fingers which will help to establish a tripod grip. This is a great activity that uses a clothes pin activities to develop a child’s grasp.

Another option is to roll small worms of playdough between the thumb and index finger to feed to the owl. Rolling pieces of the playdough between the thumb and finger are great for precision, grasp development, and intrinsic hand strength.

Owl Art

Owl crafts, owl art, and owl drawing activities are fun ways to build skills.

How-to-draw activities are an excellent way to develop planning skills, copying abilities, pencil control and confidence in drawing. Children are often amazed at what they are able to draw after following a few simple steps. That’s where this how to draw an owl easy directed drawing worksheet comes into play.

The owl is a great animal to start with as it is made up of circles and simple shapes. Circles are one of the earliest developmental shapes a child is able draw.

The circle is also one of my best friends when we start working on letter formation in the foundation phase.

Mastering a good circle in an anti-clockwise direction puts you on the path to being able to form many of your letters correctly. Here are other prewriting lines activities that form this foundation of letter formation.

To draw an owl in building therapy skills needed for handwriting, use the simple steps from one to four to complete this cute owl. Copying simple shapes owl form helps children to develop their visual discrimination skills and to improve their copying abilities.

Once the drawing is completed spend some time discussing the final outcome. This part of self-assessment is effective in self-analysis and carryover of skills.

  • Is it the same as the picture provided?
  • Is anything different?

Copying, or visual motor integration is vital for successful learning in the classroom and learning.

The draw an owl activity can be extended to address other areas as well, including visual memory.

Challenge the children to have a look at the owl they have drawn for a minute and
then cover up their picture. See if they are able to reproduce the owl from memory. This is a good way to work on visual memory and copying, especially when copying written material from a distant point, where visual memory is helpful to recall materials so the child doesn’t need to shift their vision up and down for each letter or word.

Owl Bookmark Craft

Another great owl activity is this owl bookmark craft from Red Ted Art. When I tackle reading difficulties I find that creating an owl bookmark is a good way to motivate reluctant readers. Using the owl gives me an opportunity to talk to children about the importance of the visual system and how essential it is for our eyes to move well and see well so that we can read.

The owl bookmark craft helps them to understand many of the tasks that we do in therapy to develop eye tracking and visual perception. Most of all I think the children enjoy creating something of their own that they can keep and that they can use when they read their books at home.

When children follow the directions to make the owl bookmark, they are incorporating many fine motor skills and visual motor skills:

  • Bilateral coordintaion
  • Finger isolation
  • Separation of the sides of the hand
  • Arch development
  • Hand strength
  • Visual motor skills
  • Spatial organization

Paper folding develops spatial organization, bilateral co-ordination, fine motor strength and selective finger movements. For other ideas on paper folding activities have a look and the Beautiful Oops Book Activity

Owl Worksheets

There are also some lovely owl worksheet resources when you need to focus on pencil control and pre-writing skills:

I know that you will have a hoot including owls into your activities with your children.

Contributor to The OT Toolbox: Janet Potterton is an occupational therapist working predominantly in school-based settings and I love, love, love my job. I have two children (if you don’t count my husband!), two dogs, one cat, two guinea pigs and one fish. When I am not with my family or at work I try to spend time in nature. The beach is my happy place.

Water Sensory Bin Ideas

Sensory water bins in therapy

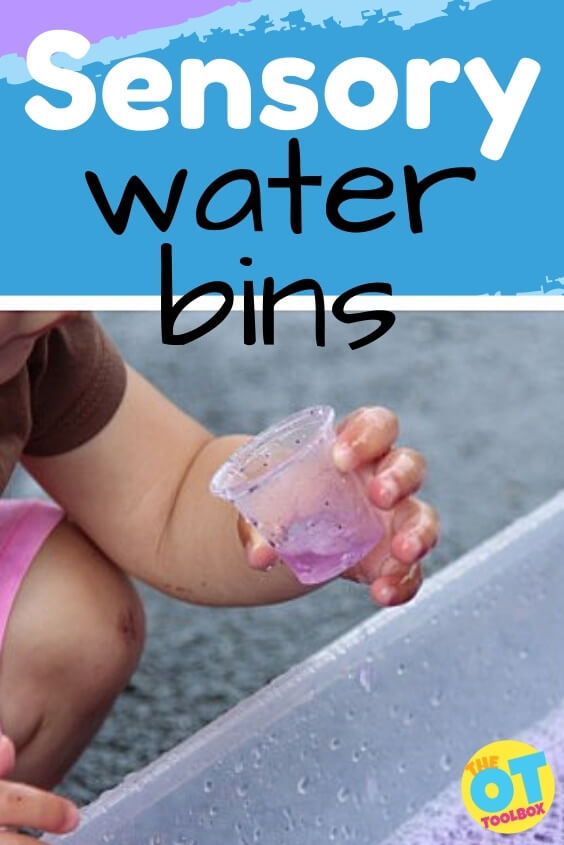
When the weather is hot, you need water play ideas that build skills…and make Summer memories! These water sensory bin ideas are perfect for HOT Summer days while incorporating sensory and motor skills. Use these water sensory bin activities in therapy or in the backyard to help kids build skills this Summer…and cool off!

Sensory water bins and sensory water table ideas for water therapy with kids.

Water Sensory Bin

Now, you may be wondering what is a water sensory bin??!! A water sensory bin is a sensory play experience that uses water as a medium for holding various textures designed to promote sensory motor play and learning.

A water sensory bin inspires motor skill development through the use of materials presented in water and the manipulation of tools to scoop, pour, and manipulate water and themed items.

Water sensory bins inspire creative play, exposure to various textures, and motor skill opportunities such as laterality, bilateral coordination, grasp, precision, manipulation, grip and pinch strength, and others.

And best of all, water sensory bins are a fun way to play and explore!

Water Sensory Table

Similar to a sensory water bin, a sensory water table is a sensory play experience using water and other materials in a water table. Water tables can be great for child development for toddlers and preschoolers as they are the perfect height for standing and moving around during play.

Aquatic Therapy

Water sensory tables, like water sensory bins, can be created in a variety of themes, designed for creative play or for learning specific skills or concepts. While aquatic therapy is often thought of as a gross motor therapy tool (using water or a swimming pool as a therapy medium for whole body movements, balance, and gross motor coordination), water bins and water tables involve water therapy play into a smaller scale of aquatic therapy. With a small pool of water, kids can develop and refine so many skills!

In therapy, water tables and water bins can be used to focus on specific skills, including functional tasks. Let’s take a look at different ways that water bins and water tables can be used in therapy:

Functional Skills in Aquatic Therapy

Water therapy can be used to help kids refine and develop functional skills…making water a resistive surface that provides proprioceptive feedback, turn-taking, and self-confidence. Functional skills that can be addressed in water play in therapy include:

  • washing hands
  • drying hands
  • wiping spills
  • pouring water (liquids)
  • using cups and pitchers or scoops (tool use)
  • measuring liquids for cooking tasks
  • play
  • washing dishes

Sensory Benefits of Water Therapy

Aquatic therapy involves the sensory systems and on a small scale, water bins and water tables are a powerful therapy tool. You can focus on refined sensory input on a small scale through play using water tables in therapy.

  • Proprioceptive input
  • Tactile exploration
  • Mixed textures
  • Temperature tolerances
  • Warm water temperature as a calming sensory input
  • Cold water temperatures as alerting sensory input
  • Reduces stress through calming sensory input
  • Visual processing benefits- visual scanning, visual tracking, visual discrimination, eye-hand coordination, visual closure

Fine Motor benefits of water therapy

On a small scale, water tables and water bins offer many motor skills opportunities for kids to develop fine motor skills! Fine motor skills abound in aquatic therapy!

  • Grasp
  • Coordination
  • Pincer grasp
  • Hand strength (tong or tweezer use, squeezing water squeeze toys, syringes, spray bottles)
  • Eye-hand coordination (scooping, pouring, dumping water)
  • Water resistance

Gross Motor Skill Benefits of water therapy

Even on a small scale, there are gross motor benefits of using water tables and water bins to help with gross motor skill development. Consider these strategies for developing skills using water play:

  • Core strengthening by playing in a water bin on the ground: crouching, squatting, getting up and down from the ground
  • Upper body support through the arm and shoulder for developing strength and stability
  • Sitting crisscross apple sauce with extended reach in all directions
  • Weighted containers to pour, mix, and dump water
  • Coordination skills
  • Motor planning
  • Heavy work to dump and move water
  • Crossing midline to pour or scoop water, reach for objects in the water
  • Bilateral coordination to support and manipulate items
  • Standing with reach at a water table
  • Mobilizing along a supported surface with head and arm movements

How to use a water sensory bin in aquatic therapy

Kids will love these water bin play ideas listed below! Adding sensory play into a water bin is an easy way to explore the senses, challenge tactile and sensory systems, and encourage development of skills such as fine motor skills, bilateral coordination, crossing midline, visual motor skills, coordination, confidence, and language. Kids love so many sensory activities when you simply add water.

Water sensory bins and tables use any basic water table or can be set up with just a large tote bin, a small food casserole dish, storage bins, or any container that will hold water. The nice thing about these water play ideas is that you can create any theme or use any type of manipulative to the water to engage kids attention and interest. Place the bin on the floor for floor play and core strengthening or position the bin on a table surface for a table set-up.

Water play is so great for little kids to experience and enjoy.  The sensory aspect of getting their hands in the water and manipulating objects is great for brain development and sensory integration.  They are improving their fine motor skills, bilateral hand coordination, language development, problem solving, creative development, and even self-confidence!  

The open-endedness of water play enables learning in endless varieties.  Consider adding math or letter concepts to a bin of water.  The child is enthralled by the sensory experience and learning happens!  Just think, all you have to do is add water and there is so much learning to experience!

To encourage movement, heavy work input, fine motor skill development, try adding these materials to water sensory play experiences:

  • Scoops
  • Measuring cups
  • Spoons
  • Watering can
  • Marble run
  • Water dropper
  • Syringe
  • Spray bottle
  • Squeeze toys
  • Tweezers
  • Tongs
  • Floating toys or foam
  • Cut pool noodles
  • Balls or ping pong balls (any ball that floats)
  • Small animal toys or figures
  • Water beads
  • Scents
  • Glitter
  • Food coloring or water paints
  • Paint brushes
  • Chalk

Water Sensory Play Ideas

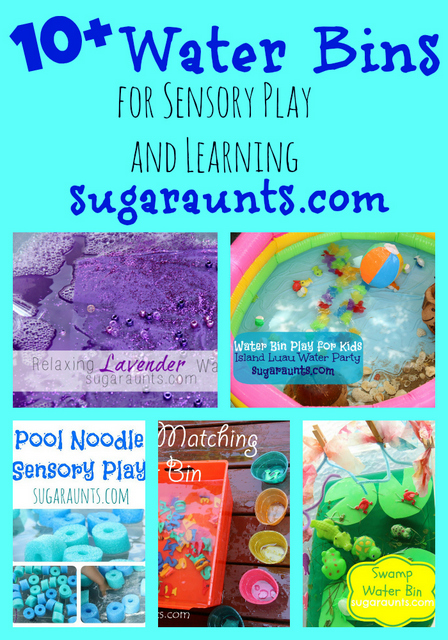
Below are are fun water bin sensory play ideas for kids that can be used to address a variety of skills or concepts. Scroll on to find some creative ways to encourage play and development of skills with simple water bins.

Kids of all ages will love these water play ideas…even the big kids! When the weather is hot (Or not…bring these water bin ideas indoors for more fun and sensory play!) you can add any type of learning, cause and effect, and even STEM activities, using some water and some added materials.

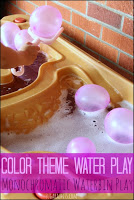
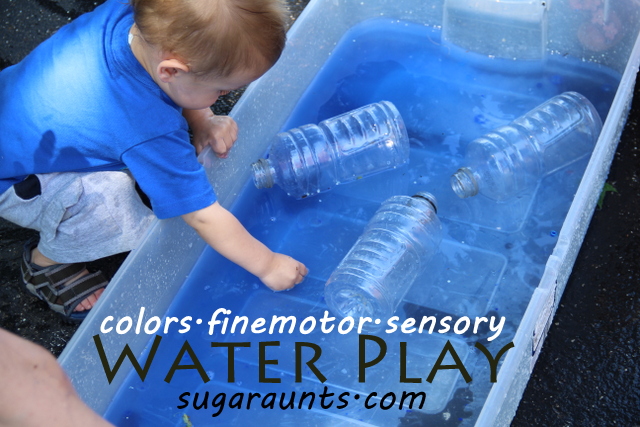
  • Colors/Fine Motor/Sensory Water Play– Work on bilateral coordination, eye-hand coordination, motor planning, precision, and proximal stability as well as tool use in this color water sensory bin.
  • Island Luau Water Party Water Bin – Use small scoops and island themed items to work on fine motor skills, scooping, pouring, and fine motor strengthening.
  • Swamp Water Bin – Explore textures in this swamp themed water bin.
  • Pool Noodles Water Bin -Incorporate cut pool noodles for fine motor work, core strengthening, and gross motor skills.
  • Color Match Water Bin – Use colors and letters to work on visual scanning, visual motor skills, visual discrimination, and learning colors and letters.
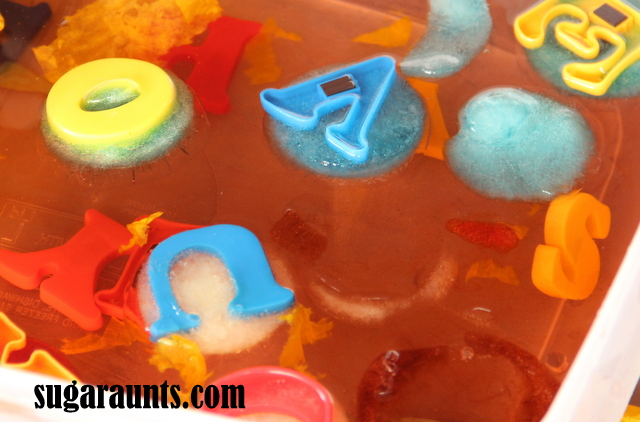
  • Rainy Summer Day: Ice Muffins Water Play – Freeze letter magnets or foam letters into ice cubes for sensory motor learning experiences. Kids can chip the alphabet letters from the ice cubes and explore letters while strengthening visual perceptual skills and fine motor strength.
  • Colors, Fine Motor, Sensory Water Play -Work on hand strength, grasp, coordination, visual perceptual skills and more with simple materials you already have in the home.
  • Ping Pong Ball Water Play for Toddlers– Work on eye-hand coordination, visual scanning, tracking, coordination, crossing midline and more.

    We are so excited to start playing away the summer with our water bins.  We’re hoping you are inspired…we are inspired, too!              

And here are links to the fun water bins over at Frogs and Snails and Puppy Dog Tails:
             Week 1: Lavender/Purple Water Bin by FSPDT
             Week 2: Beach Luau Water Bin by FSPDT
             Week 3: Swamp Water Bin by FSPDT
             Week 4: Pool Noodle Water Bin by FSPDT
             Week 5: Color Match Water Bin by FSPDT

more Sensory water bins

Colleen Beck, OTR/L has been an occupational therapist since 2000, working in school-based, hand therapy, outpatient peds, EI, and SNF. Colleen created The OT Toolbox to inspire therapists, teachers, and parents with easy and fun tools to help children thrive. Read her story about going from an OT making $3/hour (after paying for kids’ childcare) to a full-time OT resource creator for millions of readers. Want to collaborate? Send an email to contact@theottoolbox.com.
Suncatcher Crafts (that Build Skills)

Suncatcher crafts for kids

Looking for Summer activities that kids can do in therapy or at home while building fine motor skills? These suncatcher crafts are designed to do just that. I’ve put together a few sun catcher activities that kids can do this summer to work on dexterity and precision…and brighten up any room! Use these DIY suncatcher activities in occupational therapy interventions or therapy at home and let’s get those fine motor skills working!

Suncatcher crafts that kids can use to build fine motor skills.

These are just one of the many occupational therapy crafts for kids that we have here on the site. Use these suncatcher crafts to build essential skills needed for writing, pencil grasp, functioning, and play!

Suncatcher Crafts Kids will Love

This time of year (and all year long, really) suncatchers make a fun craft for kids to make.  They brighten up a room by bringing light and color in.  We had to look around the webs for more gorgeous suncatcher crafts and found some beautiful crafts for Summer fun.  These suncatchers are not only pretty, they use some different materials to catch the sun’s rays and fill your room with color.

Gorgeous Suncatcher crafts for kids

Sun catcher Crafts for Kids

This Faux Stained Glass Suncatcher from Buggy and Buddy is a great way to incorporate ruler skills, bilateral coordination, visual tracking, and other visual perceptual skills into a DIY suncatcher craft. Children can then color in the faux stained glass to work on line awareness and pencil control skills. What a great suncatcher activity for therapy!

This gratitude craft doubles as a Flower Suncatcher. Kids can work on scissor skills, bilateral coordination, motor planning, and even social emotional development. Involve the practice of empathy and mindfulness in kids as they focus on things and people they are thankful for when making this creative suncatcher craft.

This Rainbow Suncatcher from Fireflies and Mudpies is a great fine motor workout. Kids can thread beads onto pipe cleaners and build arch development, pincer grasp, tripod grasp, bilateral coordination, and eye-hand coordination skills. Then melt this DIY rainbow sun catcher into the most colorful window decoration.

This Button and Glue Suncatcher can be a fine motor workout as kids improve pinch, precision, eye-hand coordination, in-hand manipulation, separation of the sides of the hand. It’s a fun craft to use the materials you have in your home but also build fine motor skills!

This Crayon Shaving Suncatchers from Red Ted Art is a powerful fine motor activity. It works on separation of the sides of the hand, tripod grasp, and eye-hand coordination skills. Throw in cutting with scissors and you’ve got a scissor skills craft, too! Then, use those left-over crayon shavings to work on finger isolation like we did in this crayon shaving sensory bag.

These Oil Suncatchers from Meaningful Mama addresses a variety of skills: bilateral coordination, scissor skills, pencil control (using multisensory processes with a cotton swab and oil as the writing medium). What a fun way to work on fine motor skills that results in a beautiful sun catcher craft!

This Christmas Tree Suncatcher craft can be used for any theme or holiday. Use the same premise of picking up small sequins for a neat pincer grasp activity that builds arch strength, precision, and opposition of the fingers.

These Tissue Paper Heart Suncatchers from Fireflies and Mudpies can be a creative way to work on scissor skills. Cutting tissue paper is a challenge for kids because of the thin nature of the paper. But, it’s a great way to work on refinement of fine motor skills. Then add the bilateral coordination, motor planning, and visual figure-ground skill work and you’ve got a therapy craft that will be a hit! Here are more fine motor activities with tissue paper that can be used in OT interventions.

This Nature Collage Suncatchers from Hands on as We Grow can be a fun way to work on eye-hand coordination, grasp development, and visual figure ground skills with kids.

These Salt Dough Suncatchers from Homegrown Friends are a gorgeous sun catcher craft that can add heavy work through the hands, followed by pinch and dexterity grasp work.

Need more ways to build fine motor skills through play?

Grab the Summer Fine Motor Kit to work on precision, dexterity, grasp development, and much more!

Colleen Beck, OTR/L has been an occupational therapist since 2000, working in school-based, hand therapy, outpatient peds, EI, and SNF. Colleen created The OT Toolbox to inspire therapists, teachers, and parents with easy and fun tools to help children thrive. Read her story about going from an OT making $3/hour (after paying for kids’ childcare) to a full-time OT resource creator for millions of readers. Want to collaborate? Send an email to contact@theottoolbox.com.
How to Use Visual Reward Charts

Visual reward chart ideas for visual schedules

Visual reward charts are a powerful tool in helping kids accomplish tasks like potty training, tying shoes, chores, or other tasks, and can be used in conjunction with visual schedules. The use of this hands-on visual schedule can be effective in building intrinsic motivation and even executive functioning skills. Here, we’ll take a better look at visual reward charts, how to create one, and other tips for visual schedules with an identified reward.

Use visual reward charts in visual schedules.

In OT, we talk about personal motivators as a therapeutic intervention. We ask our clients what they want to work on as their therapy. We take what is important to them and strive to accomplish personal goals. Visual reward charts that use personal goals as an end result is very much aligned with occupational therapy. A visual reward chart can be a great motivator when integrating a personal goal with therapeutic interventions (or working on specific tasks at home, like chores, making the bed, potty training, or other tasks).

Visual Reward Charts

I discovered early on in my occupational therapy journey that positive reinforcement and visual reinforcement were powerful ways to shape behaviors and to achieve goals. When I become a mom I found that rewarding targeted behaviors also worked incredibly well with my own children.

This tool really appealed to me because I am a visual, goal-orientated person. I love to make lists and tick off the tasks that I have completed and I have the habit of putting a star or smiley face on my calendar when I make it to gym and manage to squeeze a workout into my day.

I gain a sense of achievement when I look back over the month and see the stars dotted throughout the weeks. I am also motivated to try harder when I look back at the month and there are not that many smiley faces staring back at me!

Reward charts can be highly motivating and very helpful in establishing specific behaviours and reinforcing necessary habits. But reward charts have also received a fair amount of criticism from those who are concerned that children will expect to receive a reward at every turn. The worry that children will become completely reward-focused has been followed up with research on extrinsic versus intrinsic motivation in the early years of development.

While it is clear that both extrinsic and intrinsic motivators are necessary in shaping children’s willingness to learn the role of reward charts remains under review.

Why Visual Reward Charts?

Visual reward charts build intrinsic motivation. In my experience each child I work with is completely unique. Some children are self-driven and easy to motivate and reward charts aren’t necessary. Some children are inspired by working towards a goal and visually tracking their progress. In these cases reward charts have been an absolute hit.

Develop executive functioning skills– Visual schedules that offer a personal goal or reward at the completion can be an effective way to shape a child’s actions in a given situation. Visual reward charts can provide a clear outline of the steps toward a goal that the child wants to accomplish. This can be a powerful tool in addressing initiation, task completion, and other executive functioning skills.

Visual schedules improve functioning- You’ve probably seen potty schedule reward charts, chore charts, reading reward charts, or savings charts (kids save up their money in order to purchase a wanted item). All of these visual charts use the concept of a visual schedule; Complete tasks for a certain period of time and at the end a benefit is gained. The benefit is personal autonomy.

There are many forms of reward charts that work to a functional goal:

  • Potty training chart
  • Chore charts
  • Reading reward chart
  • Math facts reward chart
  • Money savings chart
  • Tying shoes chart
  • Brushing teeth chart

Visual prompts are helpful in teaching the steps of toothbrushing.

Visual schedules can help with toilet training.

Schedules can get kids organized an on time for morning routines.

Visual charts offer a picture so children can “see” their progress– Working on a task can be abstract, especially for those with communication challenges. Visual chart that show time spent completing each therapy item, first-then charts, and visual schedules for autism or other neurodiverse individuals that need a visual breakdown of where they are in accomplishing a specific task.

Visual reward charts offer multisensory feedback- When children accomplish a portion of a task or complete a job in an activity (such as completing each activity of the therapy session, practicing handwriting for a certain number of trials, or performing steps of a task like potty training, they can move velcro image pieces to a visual chart, place stickers on a reward chart, or mark off that they completed those trials. That physical movement, plus the visual component, plus possible auditory feedback (Good Job!) offers positive reinforcement with multisensory feedback to the child. They will be motivated to continue and feel a sense of pride for moving the needle toward their goal.

How to Set up a Visual Reward Chart

There are strategies that impact how successful a reward chart is when it comes to achieving personal goals.

  • The reward chart must be simple and specific. To really gain the benefit of a reward chart you need to engage the child in the process of drawing up the chart.
  • The targeted task needs to be specified and not unrealistic for the child to achieve. The performance tasks should be discussed with the child and the child needs to understand why they are important for them to complete the activity. Explaining why the behavior is important makes the chart more meaningful for the child.
  • Only target one action or behavior at a time and focus on tasks that will have a positive impact on the child and family’s well-being.
  • Once the child has a clear understanding of what is expected of them, create a visual reminder of what that task is. Take a photograph of them performing the activity or draw a picture of it.
  • For older children’s description can be written on the chart.
  • Next decide on the number of times the action needs to be performed in order for them to receive a reward. Keep the number low for younger children and children who are new to reward charts. Expecting them to complete an activity 40 or 50 times before receiving a reward is unrealistic. Chances are they will give up long before they reach their goal.
  • Then decide on the reward. Most children have an idea of something they would like to work towards and this should be mutually agreed upon at the beginning of the exercise. A few of my children have said ‘surprise me’ and the added anticipation of not knowing their reward has been motivating for them.
  • When deciding on a reward make sure that it’s realistic and in keeping with the task. No trips to Disneyland for brushing your teeth. I try and avoid rewarding with sweets so that I don’t encourage a dependence on unhealthy food. Every child is unique but if you connect with the child you will find the right thing to get them working towards completing their chart.
  • Place the chart somewhere that is visible to the child and you are ready to go.
  • Make sure that you mark the chart as soon as the targeted behaviour is performed. Children become despondent if they have done their part and they have to wait three days to their action to be acknowledged.
  • Next be involved as the child completes the chart and focus on providing positive comments about the targeted behaviour they are performing.

When the chart is complete tell them how proud you are of their efforts and make a fuss of the fact they have worked towards achieving their goal. It is important that don’t become reliant on rewards and but focusing on the process they went through. Then, you can shift some of that extrinsic motivation to an awareness of how capable they are.

For other ideas on how to use positive reinforcement in conjunction with reward charts have a look at this resource.

A reward chart in action

The reward charts that I use are usually tailor made for the child and specific behaviour we are working towards. As I have already mentioned it’s important to keep the reward chart simple and specific.

A recent example of a chart I developed was to encourage a young four year old to get dressed in the morning. We established that he was capable of putting on his underwear, shorts and shirt but was really not interested in dressing himself each morning.

I took a photograph of him in his clothes and we stuck it on a page. This provided a clear simple visual of the outcome we were working towards.

We drew ten circles on the page and agreed that when he woke up and dressed himself in the morning he could color in a circle. This number of circles seemed attainable to the child. Remember that a visual chart with hundreds of blocks on it can be daunting.

We spoke about the fact that once all the circles were colored in he would have dressed himself independently ten times. Here we were focusing more on the process that the reward chart would be encouraging.

He loves dinosaurs and when we discussed a reward he asked if he could receive a dinosaur T-shirt when all of the circles were colored in. This seemed like a relevant reward given the task he was completing! We stuck a small picture of a dinosaur at the bottom of the page so he could remember the goal he was working towards. And that was his reward chart.

He was very excited about his chart and managed to complete the chart in eleven days. He woke up in the mornings and apart from one morning that he was feeling quite grumpy he dressed himself independently! His mom made a big deal of how proud she was and how grown up he was that he had dressed himself so well. She made a show of sending a message to his grandparents to tell them about his accomplishment as well. And she bought him a dinosaur shirt which is a firm favorite of his. What a cool reminder of what he is capable of!

In this case the reward chart worked well. It was presented in a positive way and the child was fully immersed in the process. Adjusting the reward chart according to the child’s age, interest and goal will go a long way towards helping them establish good habits.

Main points to remember about visual reward charts

  • Engage the child in the process
  • Target a specific behaviour
  • Have a visual representation of the behaviour
  • Decide on an appropriate number of repetitions of the behaviour
  • Decide what the reward is
  • Place the chart in a visible spot
  • Mark the chart as soon as the behaviour is performed
  • Praise the child’s efforts
  • Provide them with the reward when the chart is completed

Contributor to The OT Toolbox: Janet Potterton is an occupational therapist working predominantly in school-based settings and I love, love, love my job. I have two children (if you don’t count my husband!), two dogs, one cat, two guinea pigs and one fish. When I am not with my family or at work I try to spend time in nature. The beach is my happy place.

Beach Play for Kids

beach play and ocean activities

Today, I’ve got a fun list of beach play ideas. These are beach activities for preschoolers…or any age! When you’re looking for a beach theme for therapy or home skill-building, these are the must-do beach ideas for kids! Let’s Imagine we are at the Beach and build skills!

beach play and ocean activities for therapy

beach activities for preschoolers

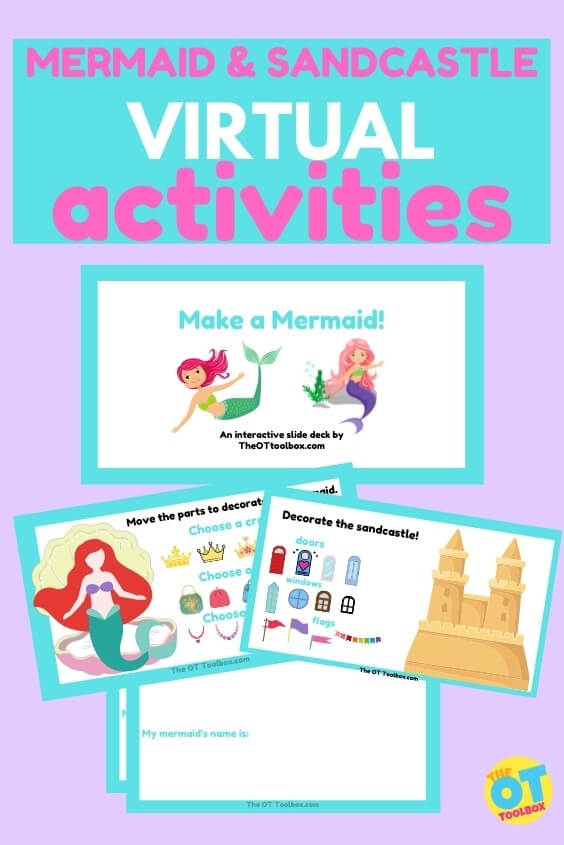
Mermaid & Sandcastle Activity– This free Google slide deck is a fun interactive activity where kiddos can move the mermaid’s accessories. Have them write the words, recall the items they added, all while working on sequencing, motor planning, fine motor work & more. Then, use the interactive sandcastle slides to decorate a sandcastle. There’s also a writing prompt slide to address more handwriting or typing skills.

Add to the beach theme:

Sand activities

If a beach theme in therapy or at home, then sand is a must! Use these sand activities to work on sensory experiences, fine motor play, and motor skill building.

  1. Make kinetic sand for sand sensory play! This easy 3 ingredient kinetic sand recipe inspires sensory play with a beach and sand theme. It’s a great fine motor workout too.
  2. Sandpaper writing– Stretch the sand theme to work with sandpaper and address handwriting skills.
  3. Make your own colored sand in a sensory and fine motor play activity. The, use the colored sand in sensory play or a sensory writing tray.
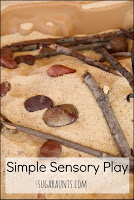
  4. This sand, stones, and sticks sensory bin was fun for fine motor skills, but with a few adaptations, it would be a great pretend beach activity, too!

Seashell Activities

Use these seashell activities to work on sensory experiences, fine motor work, motor planning, eye-hand coordination, and more.

  1. Seashell Sensory Bottle– If you have seashells from a beach trip (or the dollar store), then add them to a bottle to make a sensory discovery bottle. Sensory bottles are great tools for self-regulation and are calming heavy work to hold and look for all of the items. They are a fine motor challenge to make, too. Kids can then strengthen visual processing skills to track and work on visual attention and visual memory to find a specific number of shells too. Read more about making sensory bottles and all of the benefits of this sensory tool.
  2. Use seashells in a sensory bin for tactile experiences. This seashell and luau sensory water bin was fun for building fine motor skills, tactile sensory play, and fun one summer day!

Beach Crafts

These beach crafts are great for an ocean or beach theme therapy at home. Use these beach and ocean crafts for building skills like:

  • Scissor skills
  • Eye-hand coordination
  • Oral motor skills
  • Visual motor skills
  • Fine motor strength
  • Coordination
  • Motor planning
  • Direction-following
  • Creative expression

This Crab Craft from Preschool Powol Packets helps with scissor skills and cutting simple and complex shapes.

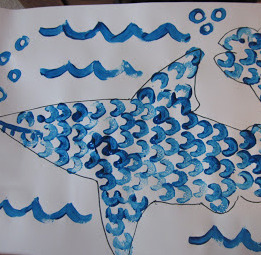
This Shark Craft from Inspired by Montessori uses a celery stalk to stamp fish scales. Work on eye-hand coordination, bilateral coordination, motor planning, fine motor precision, and more.

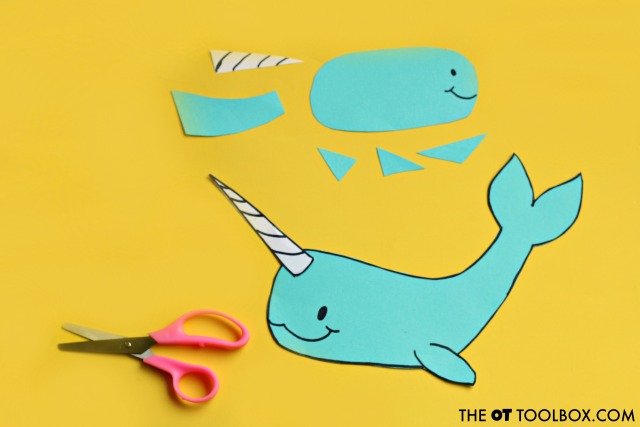
narwhal craft

This Narwhal craft is great for scissor skills and challenges graded scissor skills in cutting simple and complex shapes.

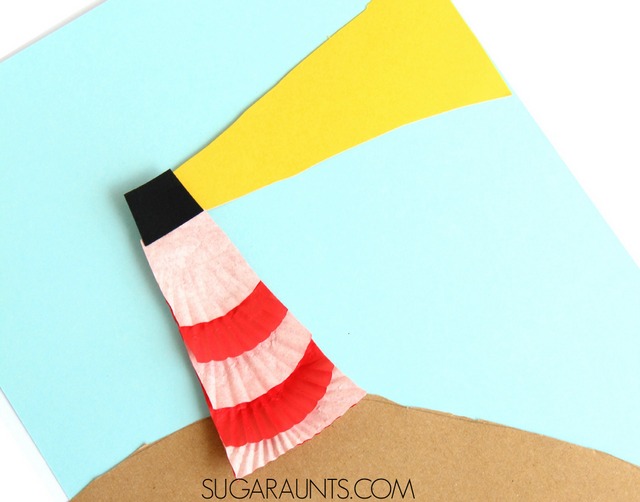
lighthouse craft

Make this lighthouse craft as a simple cutting activity that builds fine motor skills like folding, manipulating textures, and cutting different thicknesses of paper.

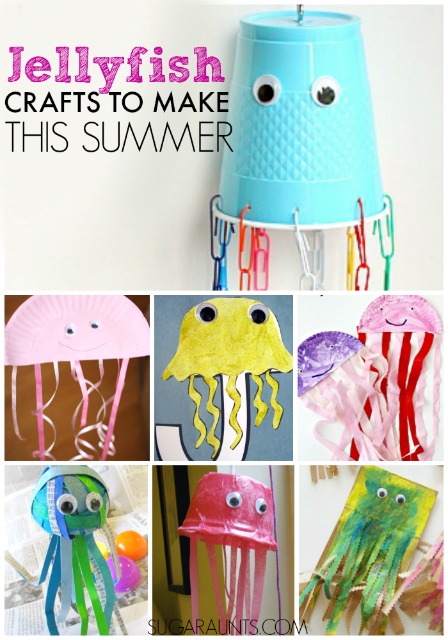
jellyfish crafts

Work on a variety of skills like coordination, hand strength, bilateral coordination, scissor skills, and more with these jellyfish crafts.

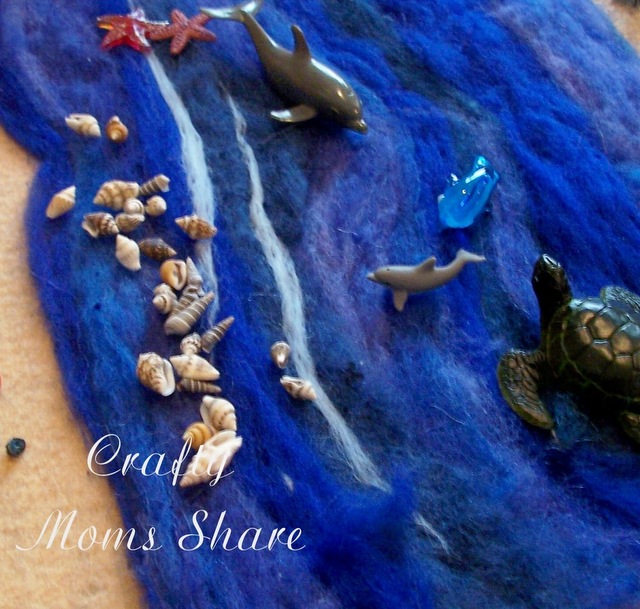
This Beach Mat by Crafty Moms Share is a sensory play mat that can be used for fine motor work and tactile sensory play.

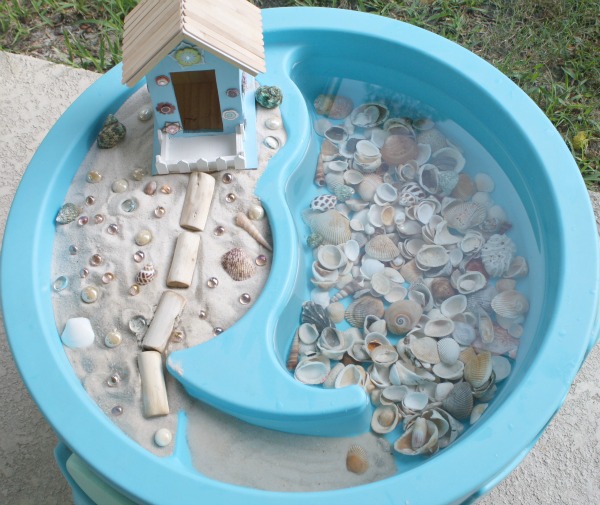
This Beach Sensory Play and Small World Play by Fantastic Fun and Learning is a great use of those seashells you collect at the beach!

Summer fine motor kit
Summer Fine Motor Kit

Or, grab the Summer Fine Motor Kit for tons of summer, beach, and ocean themed fine motor activities to build hand strength, scissor skills, coloring, coordination, and more.

Colleen Beck, OTR/L has been an occupational therapist since 2000, working in school-based, hand therapy, outpatient peds, EI, and SNF. Colleen created The OT Toolbox to inspire therapists, teachers, and parents with easy and fun tools to help children thrive. Read her story about going from an OT making $3/hour (after paying for kids’ childcare) to a full-time OT resource creator for millions of readers. Want to collaborate? Send an email to contact@theottoolbox.com.

Mermaid Sandcastle Activity

mermaid sandcastle

Do you know kids that love all things mermaids? Or, are you heading to the beach this summer and want to add a sandcastle activity to your skill building? This mermaid sandcastle is going to be a hit this summer! Kids can decorate the mermaid and build a sandcastle in an interactive slide deck for therapy goals!

Use this mermaid sandcastle activity to work on therapy skills- decorate a mermaid and a sandcastle and then complete the mermaid writing prompts and sandcastle writing prompts.

Mermaid Sand Castle Activity

Did you ever see a kiddo or little girl who loves all things mermaids? Using mermaid themes in therapy activities can be a fun way to engage kids in something that interest them like mermaids.

In this interactive slide deck children can move the pieces to add accessories to create a decorated mermaid.

This mermaid slide deck is mirrored off of our popular disguise a turkey slide deck from Thanksgiving and our fun decorate a gingerbread house from Christmas time. Both free slide decks were really popular during the pandemic when all therapy was virtual. Just like those interactive slides, this mermaid sandcastle activity allows kids the freedom of expression and creativity to decorate a mermaid and a sandcastle with movable pieces right on the slides.

This slide deck is a great summer occupational therapy tool to work on several areas.

Skills like eye hand coordination, visual motor skills, visual memory, visual attention, and visual discrimination can be used to move the different necklaces and crowns for the mermaid.

On the first slide children can select accessories for the mermaid by clicking and dragging on different accessories. They have to work on mouse control or finger isolation to click and drag.

Mermaid Writing Prompts

Next the slides prompt kids to write about what they selected to create their mermaid.

Depending on the child’s individual goals or needs they can work on hand writing and write out the sentence prompts on paper or they can type right on this the scrub slide deck.

The slide asks kids about the accessories they used to decorate their mermaid, so the prompts work on using visual memory and working memory skills as part of executive functioning. Children can try to recall the specific details about the accessories that they selected like the color the shape the form and other details.

This helps with awareness skills and recognition as well as discrimination and visual memory. All of his skills are essential for hand writing when copying materials or writing from memory to form letters and numbers.

Decorate a sandcastle activity

Next the slide deck continues with the sea theme with an interactive decorate a Sandcastle slide. On this slide, children can decorate this the Sandcastle using features such as colorful and fun windows, doors, and flags.

Sandcastle Writing Prompts

Then the next slide continues with a handwriting or typing prompt and asks about details that they selected for their Sandcastle.

Children can again work on working memory skills and attention to detail.

Both of the slide decks both of these slides are fun ways to use a mermaid and sandcastle theme in therapy.

Free mermaid sandcastle slide deck

Would you like to add the slide deck to your therapy Toolbox? Enter your email address into the form below to access the slide deck. You will receive an email with a PDF that you can click to cook to connect the slides to your Google Drive. When used in the edit mode the clickable pieces on the interactive slide deck will be movable. Note please consider using a personal email address as school email addresses and work email addresses may block the delivery of this PDF via email.

FREE Mermaid Sandcastle Slide Deck Activity

    We respect your privacy. Unsubscribe at anytime.

    Colleen Beck, OTR/L has been an occupational therapist since 2000, working in school-based, hand therapy, outpatient peds, EI, and SNF. Colleen created The OT Toolbox to inspire therapists, teachers, and parents with easy and fun tools to help children thrive. Read her story about going from an OT making $3/hour (after paying for kids’ childcare) to a full-time OT resource creator for millions of readers. Want to collaborate? Send an email to contact@theottoolbox.com.
    How to teach number formation

    number formation activities

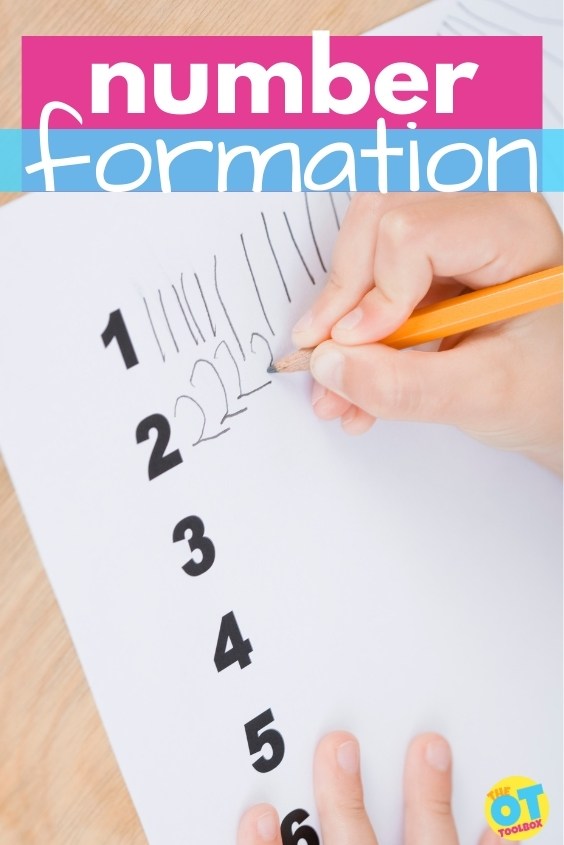
    Learning to write numbers is a big deal for youngsters and learning number formation correctly is an important handwriting skill to master in the foundation phase of school. As with most of the skills taught at school some children pick it up really quickly while others need a little bit of guidance before they are writing their 1,2,3’s. Much like letter formation activities, there are lots of fun, creative ways to reinforce correct number formations and methods to ensure that forming numbers correctly becomes second nature.
    number formation activities for teaching kids how to correctly form numbers

    Why correct number formation is important

    It’s always rewarding to see a young child start to recognize numbers and to attempt to copy what they see. Is it really that important how they form the numbers?

    Surely if a 5 looks like a 5 it doesn’t have to be formed in a specific way? It does seem very prescriptive to insist on forming the numbers one way. But it is important to teach correct formations when children begin to write their own numbers.

    Teaching number formation with the correct staring points and the correct path to follow when forming a number allows a motor memory to be effectively laid down in the brain. You can read about motor planning and motor planning’s impact on handwriting in previous posts.

    Following the same pattern each time you form the number allows this motor memory to become strengthened more quickly and the child’s ability to form the number automatically develops. This frees up their brain to focus more on the content of what they are working on as opposed to using brainpower to figure out how to make the number.

    How to teach number formation

    There are a few tips that will really help when teaching number formation. These include:

    • using correct starting points
    • incorporating sensory input
    • repetition
    • rhythm / song

    Number formation starting points

    The most important idea for me to get across to children learning to form numbers is that they must start from the correct place.

    We call this the starting point or the starting spot. I tell the children when we are learning to write numbers that we are always going to drive the same way on the “number road’’ of whichever number we are learning to write. We will always start at the same place and drive the same way – no reversing, changing direction or starting in the wrong spot!

    All of the numbers start at the top so we make sure that we always start ‘up there’. I have permission from the children to tickle their feet if I catch them starting any numbers from the bottom!

    Then I use a visual cue to show the children where we are going to start. This visual cue could be a sticker, smiley face, star, small picture, anything that is going to remind them of the correct place to start that number. Below is a picture of how to use round stickers to demonstrate where to start the number. You can also add arrows to indicate the direction you must travel from the starting point.

    • In the early stages of number formations allow children to trace over numbers or dotted lines making up the numbers.
    • Work on numbers 1 to 5 first and once we are feeling confident and happy about starting in the right spot we move on to number 6 to 10.

    Using sensory input for number formation

    Once children have started grasping the concept of how to form the numbers correctly you can use sensory input to pin down the map of how the number is formed.

    I have found movement and tactile inputs a sure fire way to reinforce correct number formations. Movement often involves forming large numbers on a blackboard or white board or ‘drawing’ these numbers in the air with your hand.

    Painting– Forming numbers in paint on an easel or drawing large numbers on the driveway are also ways to incorporate movement when learning number formations.

    Air Writing– By virtue of the big bold movements performed by the arm and hand more parts of the brain are activated in the process of laying down the motor pattern for that number. Children can get a real feel of how the numbers should be formed when their whole body and arm moves to make the number.

    Writing Trays– Tactile input is an equally powerful tool when it comes to reinforcing number formations. Forming numbers in sand trays and sensory bags reinforces the correct way the number should be written and makes learning numbers lots of fun. Try these writing tray ideas to work on number formation.

    Here are more ways to incorporate sensory input into formation of letters and numbers.

    Using repetition in writing numbers

    Like so many things that we learn practice makes perfect. And number formations are no different. A huge part of achieving success with number formations is repetition repetition repetition. Look for fun ways to encourage the repetition of the number you are working on.

    • Select a number to practice. Use a dice to see how many of that specific number you need to draw
    • Draw rows of each number
    • Draw the number on a chalk board, wipe it clean with a sponge and repeat
    • Turn each number into a rainbow number. There are some lovely ideas on rainbow writing that can be adapted for numbers.

    Rhythm and Songs for teaching how to write numbers

    Nothing sticks in your head like a catchy tune and using rhythm and song can be an effective way of cementing number formations in your brain. A simple example of a number formation is given below.  

    Here is more information on using rhythm in handwriting skills.

    e.g. Whoa its high up here but down I go. I’m number one I told you so (video 1)

    Here are a few ideas of number formation songs from youtube. I did notice quite a few sites form their zero in a clockwise direction. I always encourage anti-clockwise circles to prevent letter reversals with children start writing.

    It’s important for the child’s school, therapist and parent to use the same number formation stories to increase the effectiveness of the story being committed to memory.

    For more resources on number formation, grab a copy of The Handwriting Book, a comprehensive resource on development of handwriting, and specific strategies to promote legible and effective handwriting.

    Now you know your 1,2,3’s next time you can write with me!

    Contributor to The OT Toolbox: Janet Potterton is an occupational therapist working predominantly in school-based settings and I love, love, love my job. I have two children (if you don’t count my husband!), two dogs, one cat, two guinea pigs and one fish. When I am not with my family or at work I try to spend time in nature. The beach is my happy place.

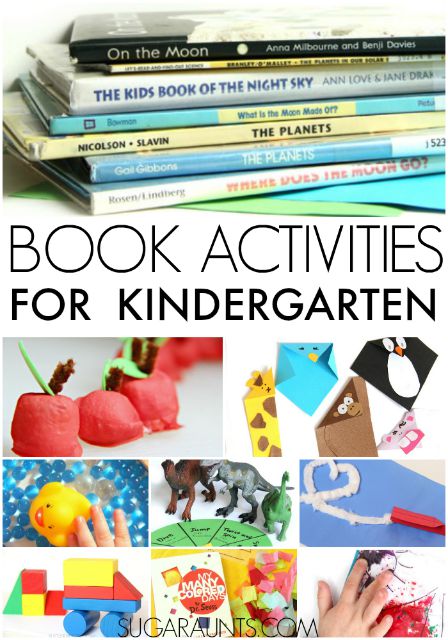
    Kindergarten Learning and Play Activities

    kindergarten activities

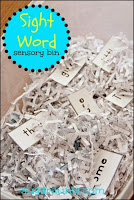
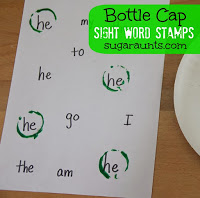
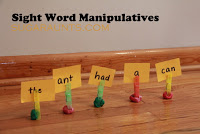
    Below are kindergarten activities that promote development of skills needed during the kindergarten year. These are great activities to use for kindergarten readiness and to help preschool and Pre-K children build the motor skills in order to succeed in their kindergarten year. You’ll find kindergarten letter activities, Kinder math, fine motor skills to build stronger pencil grasps when kindergarteners start to write with a pencil and cut with scissors. You’ll also find kindergarten sight word activities for when that time of the Kinder year comes around. Let’s have some fun with 5-6 year old activities!

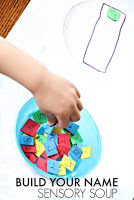
    Be sure to check out our tools to support name practice for kindergarten to work on name writing skills!

    Kindergarten activities and kindergarten readiness activities

    Kindergarten Activities

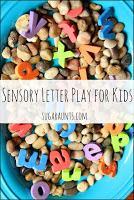
     What you’ll notice is missing from this massive list of Kindergarten activities, is handwriting, writing letters, and even writing names. (And writing letters in a sensory bin falls into this category too! Before kindergarten, children should not be copying letters into a sensory bin. You’ll see letters formed incorrectly, letters formed from bottom to top, and letters formed in “chunks”. The same rule applies to tracing letters and words and even “multisensory strategies” for writing. It’s just too early. Unfortunately, we see a lot of preschools and standards doing the exact opposite. You’ll even find online sites sharing preschool and Pre-K writing that is just in poor advice.
     
    Here’s why: prior to kindergarten age, kids are not developmentally ready for holding a pencil, writing with a pencil, and writing words. Their muscles are not developed, and asking them to write letters, copy words, and trace with a pencil is setting them up for improper letter formation, poor pencil grasp, and weak hands. 
     
    What children aged 5 and under DO need is play! They need exposure to sensory experiences, sensory play, coloring, cutting with scissors (even if it’s just snipping), puzzles, games, beads, blocks, stamps…there are SO many ways to help pre-K kids and preschool children develop the skills they need for kindergarten and beyond.
     
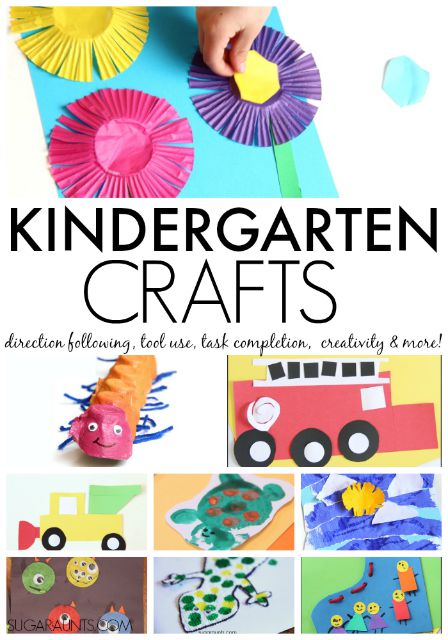
    Kindergarten is such a fun age.  Kids in kindergarten strive when they are given the chance to learn through play and hands-on activities.  These are our favorite Kindergarten activities that we’ve shared on the site, with Kindergarten math, reading and letter awareness, Kindergarten Crafts, and Kindergarten Play.   


    Kindergarten Functional Tasks

    Kindergarten is the stage when children go off to school for perhaps the first time. That’s why prior to kindergarten, it’s great to “practice” a lot of the functional tasks that children will need to do once they go to kindergarten. Some of these may include:

    Now…not all of these functional skills will be established for every kindergarten child…and that’s OK! Kindergarten can be the year to practice these tasks in the school environment. 

    Kindergarten Letter Activities

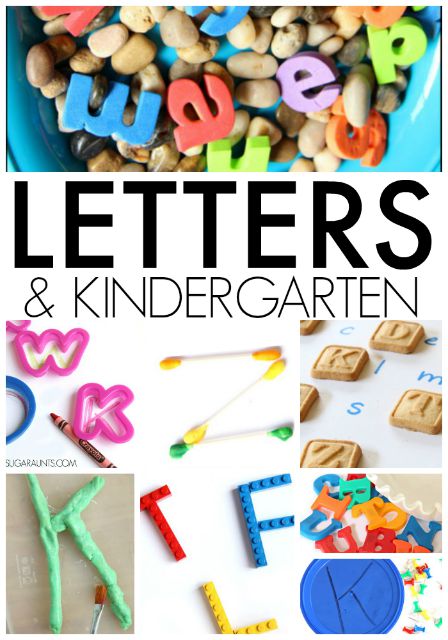
    Kindergarten is all about letters, upper case and lower case letters, and sounds.  They learn how letters go with sounds and work on decodable reading.  These letter learning activities will help your kindergarten student with identification, sounds, and beginning reading skills.

    Kindergarten Letter activities for letter learning


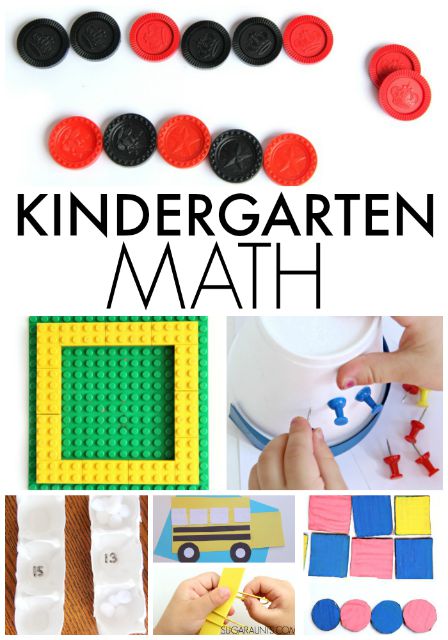
    Kindergarten Math Activities

    Kindergarten students work with manipulating items to discover and explore numbers and patterns.  They solve simple addition and subtraction problems, more or less, comparing amounts, and shapes.
     
    These Kindergarten math ideas will be a fun way to discover math ideas with playful learning.
    Kindergarten Math ideas


    Kindergarten Sight Words and Reading:

    Kindergarten students learn sight words throughout the school year. These sight word activities are fun ways to learn with play while reinforcing sight word skills.


    Sight Words Manipulatives | Outdoor Pre-Reading Letter Hunt

    Kindergarten Books and Activities

    Extending book ideas with crafts and activities are a fun way for Kindergarten students to become engaged with reading.  Listening to an adult read is a powerful tool for pre-readers.  They learn language, speech, articulation, volume, and tone of voice.  These book related activities will extend popular stories and engage your Kindergartner.

    Book ideas activities for Kindergarten


    Kindergarten Fine Motor Play

    Fine motor skills in Kindergarten students are essential for effective pencil control and handwriting, scissor use, and clothing and tool manipulation.  Kindergartners may have little experience with tools like scissors, pencils, hole punches, staplers, and pencil sharpeners. In fact, there are MANY fine motor skills needed at school. All of these items require dexterity and strength.  
     
    In-Hand manipulation play for fine motor skills: We had so much fun with water beads.  This post shares two ideas for improving in-hand manipulation skills which are so important for dexterity in self-care, handwriting, coin manipulation…and so much more!
     
    Finger isolation, tripod grasp, eye-hand coordination, bilateral hand coordination…Fine Motor Play with Crafting Pom Poms has got it all!  We even worked on color identification and sorting with this easy fine motor play activity.
     

    What play ideas can you come up with using common tools? These items are GREAT ways to build hand strength and dexterity that will be needed in kindergarten for pencil grasp development and endurance in handwriting. 

    • tweezers
    • tongs
    • beads
    • toothpicks
    • hole puncher
    • peg boards
    • lacing cards
    These fine motor activities will engage your student in fine motor skills for effective hand use in functional school tasks.
     
    Kindergarten Fine Motor activities


    Kindergarten Play:

    Play in Kindergarten is essential for so many areas.  Kindergartners are young students who need brain breaks from desk work.  Not only for that reason, but for turn-taking, language, social interaction, self-confidence, problem-solving, and interaction, play is an important part of your Kindergarten student’s daily lives.  

    Play builds skills! Check out this post on the incredible power of play. Play helps kids learn and develop cognitive experiences and the neural connections that impact their educational career, beginning right now! Occupational therapists know that play is the primary occupation of children, but what’s more is that play builds the very skills that kids need to learn and develop.

    Kindergarteners can gain valuable input through play:

    • Cognition
    • Problem Solving
    • Executive Functioning Skills
    • Attention
    • Strength
    • Balance
    • Visual Motor Integration
    • Visual Processing
    • Sensory Integration
    • Self Regulation
    • Language Development
    • Self-Confidence
    • Fine Motor Skills
    • Gross Motor Skills
    • Social Emotional Development
    • Stress Relief
    • Behavior
    • Imagination
    • Creativity

    Try these play ideas in the classroom or at home for fun learning (through play)!


    Kindergarten Crafts

    Crafts in Kindergarten are a great tool for so many areas.  Students can work on direction following, order, patterns, task completion, scissor skills, fine motor dexterity, tool use, and more by completing crafts in Kindergarten.  

    Kindergarten crafts can have one or more of the areas listed here to help and build skills:

    • Scissor practice (placing on hand and opening/closing the scissors)
    • Exposure to different textures and art supplies
    • Practice with using a glue stick and bottle of squeeze glue
    • Practice cutting strait lines and stopping at point
    • Practice cutting simple shapes
    • Practice cutting complex shapes
    • Coloring
    • Painting with finger paints and paint brushes
    • Experience washing hands after crafting
    • Opportunities for creative expression
    • Opportunities for rule-following and direction following
    • Multi-step directions
    • Experience copying a model for visual motor benefits

    Try a few (or all!) of these Kindergarten crafts for fun arts and play with your student. 

    Kindergarten Craft ideas


    Grand Old Duke of York Craft | Process Art Monster Cupcake Liner craft | Shoe Charm craft | Caterpillar Math Craft


    We’ll be adding more to this resource soon, so stop back to find more Kindergarten learning ideas.