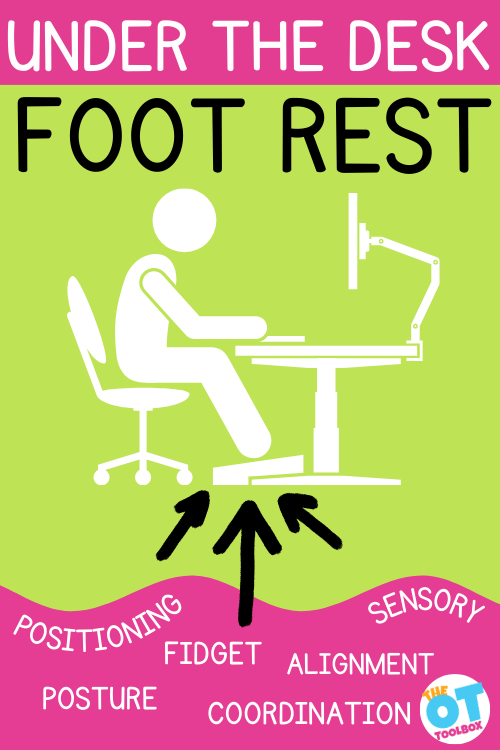
Recently we’ve had some questions about foot fidgets, or ideas for under desk foot fidgets. These movement tools support sensory motor needs and are a powerful tool to support not only attention in the classroom, but can also be a positioning device like our under the desk foot rests. In this post we will explore different ideas for feet fidgeting, and foot fidgets that fit under the desk.
As an Amazon Influencer, I earn from qualifying purchases.
A foot fidget is an under the desk fidget tool that supports movement needs while sitting at a desk.
Foot Fidgets
So what exactly do we mean by foot fidgets? A foot fidget, or an under desk fidget for the feet is a tool to allow movement and fidgeting to enhance learning. Some students need to move. These movement devices do just that: allow movement of the feet to facilitate an organized and regulated nervous system for optimal learning and classroom participation.
As a side benefit, a foot fidget under the desk can be a sitting posture device as well, to support sitting posture when writing or reading.
Additionally, a foot fidget is a great calm down sensory tool for the classroom, especially if it adds the needed movement some kids thrive on.
Do you often hit a road block with teachers when handing out fidgets for students to use in class? They can be a visual distraction to other students if not used properly.
If this happens to you, try using a foot fidget instead. Even though the foot is not always as fidgety as the hands, calming one area of the body helps reset the others. I like to call this the back door approach. The under the desk fidget tool is a quiet fidget for busy classrooms.
As you are aware, sensory based treatment is largely based on trial and error. While nothing is one sized fits all, you can add these foot fidget ideas to your OT Toolbox.
You can find the following products on Amazon. These are not the only site they are available, but rather examples to begin your search. Amazon affiliate links are included below.
Foot Fidget Products – the classic bouncy band
Bouncy Band – the most well-known is the bouncy band. There are different versions of this product, offering pros and cons to each one.
At 29.99, these basic stretchy bands (affiliate link) are a great price for 12. They are simple and easy to use (although not very easy to stretch over chair legs).
The negative comments I have heard about them is that the kids push them down with their feet and they end up on the floor, or fly off the chairs.
The Original Bouncy Band (affiliate link), while much more expensive is a far better product. It is sturdy and attaches to the chair legs directly.
They are super difficult to stretch into place, but with a little help from a friend, you can do it! I like that these fidgets are under the desk so they are not as much of a distraction as other fidgets.
innovative foot fidgets
Theraflow Foot Massager (affiliate link)– this little tool has a ton of good reviews. It is simple in its’ design and provides interactive foot movement. It is relatively small so it might be good to take to different classes.
The cons of the Theraflow would be; this does not attach to the floor to make it safe from students tossing it, and I bet it works better with bare feet than shoes. Here is the mini version of the foot massager (affiliate link) that can your students can easily carry in a backpack.
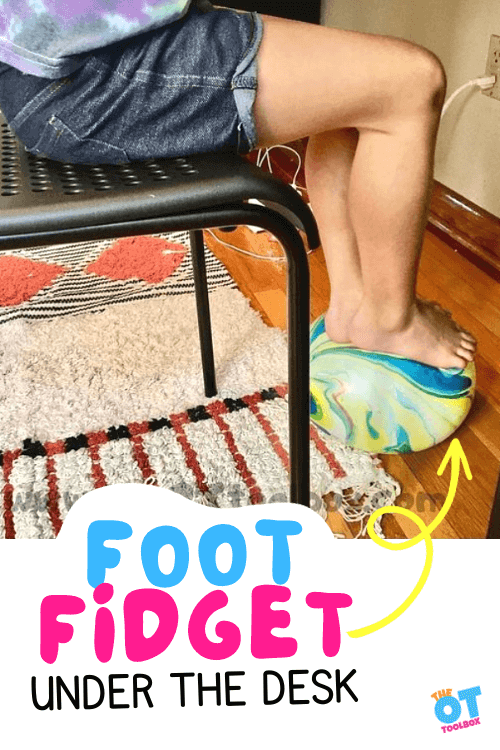
Foot Rest (affiliate link)- sometimes people just need a place to put their feet. This foot rest is great! It is light and soft.
While 19.99 does not seem too much to pay for this, it can be pricey if you need to buy ten of them.
Kids can place their feet on this or tap them up and down on it. I sometimes turn mine to the side and place my feet at an angle to stretch my ankles to the sides. I also turned it upside down to use as a rocker board similar to this one. This foot rest is large and not very portable.
Exercise Bike (affiliate link) – I love the idea of these under desk exercise bike! The idea is great, the execution not so much. The desk needs to be very high to have enough room under it to use the bike without hitting your knees on the desk.
If you have a high table that your student can reach the pedals while still sitting comfortably at their desk, this might be a good option. Not super expensive, but if you need more than one, it adds up quickly.
SWYNX Surfer (affiliate link)– thinking outside the box, this gadget looks cool. It does not have many reviews yet but they are all positive ones.
It seems like this would be a good option for small classrooms or home bound children as they are over 30.00 each. The manufacturer says it is easy to set up and you can use it anywhere, including restaurants.
Wiggle Feet (affiliate link)– this is a classic therapy tool. It allows for bouncing, as well as side to side movement. When you are not using under a desk, the Bouncyband Wiggle Feet is an excellent option for improving bilateral coordination, balance, and stabilization.
A less expensive version of this under the desk foot fidget is using a partially deflated beach ball. Or, you could partially inflate balloons for an even less expensive option. You can add the amount of air that meets the needs of the individual user.
Rolling Foot Fidget – This is similar to the bouncy band but has a roller element to it. You need a therapy band (affiliate link) and a section of pool noodle. Cut the therapy band to fit around the legs of the chair. Then thread the therapy band through the center of the pool noodle. Attach the therapy band to the chair legs by tying the ends tightly. The user can roll their feet on the pool noodle.
They look neat, but are not inexpensive. The Think and Roll is meant to be rolled on the floor by rolling the pool noodle on the floor. Kids pushing down on them will not be an issue like it is with the bargain bouncy band.
Budget Friendly Foot Fidgets
Not everyone has a large spending budget at their disposal, or you have 100 students to buy for. In these situations, buying or making tools is the way to go. Be mindful if your place of work has restrictions on using home made tools. These can be part of your DIY fidget tools that you have in your toolbox.
Bungee Cord – you can buy a pack of three mini bungee cords at the dollar store. You can easily attach these to the legs of a small chair. I can imagine there might be safety issues, so a bit of duct tape might be in order to secure them to the chairs.
Inflatable beach ball or small raft – get a beach ball or small inflatable raft at the dollar store. Blow a small amount into your inflatable to make a great foot fidget. These also make great wiggle seats. You can secure them with double sided tape, Velcro, or Dicem.
Pool noodle – attach a cord or rope through the pool noodle, securing it to the chair legs. You can also find these at the dollar store. You can cut each noodle into several pieces to be more cost effective. Experiment with different positions and designs for this cool idea.
DIY Foot Swing – Melissa Souden, Occupational Therapist— created her own foot fidget swings using PVC to help sensory and inattentive kids pay attention in class. Here are the step-by-step directions so you can do the same!
Theraband foot fidget – use Theraband (affiliate link) or Theratubing across the legs of the chair or desk to make a resistance band. These are not as inexpensive as pool noodles, rope, and bungee cords, but might be more likely to be approved as usable tools in your setting.
More thoughts about foot fidgets
You might be wondering why I did not add adaptive seating options to this list like ball chairs, wiggle seats, bean bags, rocker stools, etc. While these are excellent options for improving attention and focus for your students, they are not as discreet as a foot fidget under the chair.
They are also not as portable. If you are looking for a discreet fidget that will be less likely to distract the rest of the class, or make your student stand out from the rest, the foot fidgets are a great avenue to try.
Remember, nothing about OT (or children in general) is one size fits all. Child A might do exceptionally well with a bouncy band, while children B, C and D create chaos with them.
This is often the case in classrooms. Think of adaptations like eye glasses or prescription medication. There are many variables that go into the right fit, compliance, cost, and effectiveness.
This is often frustrating for therapists, however, think of yourself like a detective trying to solve a case. Each case is unique. You can also just have these options in the therapy room for trialing and testing, or you can use the under the desk foot fidgets in a sensory calm down corner to be used with reading or other regulating needs.
The bigger your toolbox of ideas and supplies, the more likely you are to find the right fit for each student.

Victoria Wood, OTR/L is a contributor to The OT Toolbox and has been providing Occupational Therapy treatment in pediatrics for more than 25 years. She has practiced in hospital settings (inpatient, outpatient, NICU, PICU), school systems, and outpatient clinics in several states. She has treated hundreds of children with various sensory processing dysfunction in the areas of behavior, gross/fine motor skills, social skills and self-care. Ms. Wood has also been a featured speaker at seminars, webinars, and school staff development training. She is the author of Seeing your Home and Community with Sensory Eyes.
The Sensory Lifestyle Handbook walks you through sensory processing information, each step of creating a meaningful and motivating sensory diet, that is guided by the individual’s personal interests and preferences.
The Sensory Lifestyle Handbook is not just about creating a sensory diet to meet sensory processing needs. This handbook is your key to creating an active and thriving lifestyle based on a deep understanding of sensory processing.