What is Prompting?

Graphics showing visual prompting with head and shapes seen from the eyes, face talking for verbal prompting, and physical prompting with hand touching. Text reads "what is prompting"

In this blog, we are covering what prompting means and types of prompting that is used to support goal achievement. If you’ve seen therapy goals in the past, you may have seen the words “prompts”, but what is prompting and what does this look like in therapy? Let’s discuss prompting in therapy.

Therapists use prompting with their learners continually. We do it without really thinking about it. Things like a helpful verbal prompt and visual schedules that list out the tasks to complete in therapy are part of every therapy session. Parents and caregivers use prompts also. 

Have you ever stopped to critically assess prompting, its meaning, how to use them, grading of prompts, and documentation methods? In this post we will dig deep into prompting to be sure we are using them effectively, in the least restrictive way to elicit a successful response. As we break down prompting you will learn how to best instruct caregivers in the use of prompts.
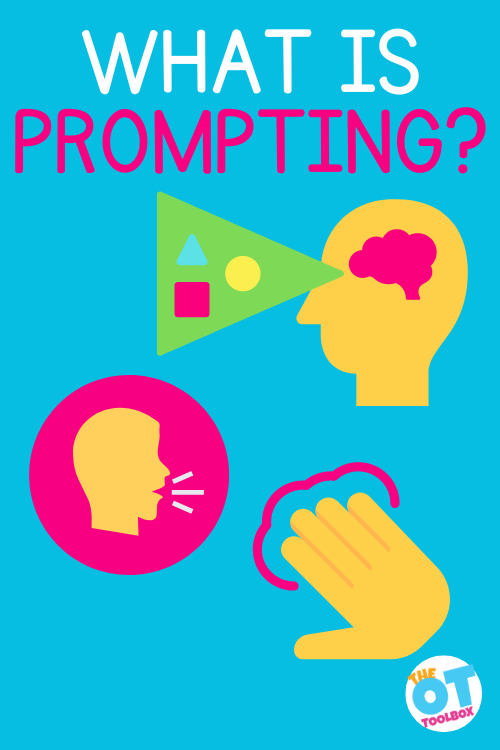
Graphics showing visual prompting with head and shapes seen from the eyes, face talking for verbal prompting, and physical prompting with hand touching. Text reads "what is prompting"

What is prompting?

Prompting is a cue or signal provided to guide and assist a child with performing a specific skill or behavior. One way to think about this assist is thinking of it as a “clue” or a “hint” to help the student or patient achieve a task. This hint can come in the form of a verbal cue, a visual cue, or a physical cue.

The dictionary definition of prompting is: to request input from, the act of persuading somebody to do something, to cause or bring about an action or feeling, and to cause someone to take a course of action. 

Prompts are a type of modification to the curriculum. When it comes to accommodations vs modifications, prompts are considered a modification because modifying a task includes using instructional strategies to breakdown a specific assignment, task, or curriculum. For example, modifications might include providing the student with a simplified version of a task, reducing the assignment, reducing the number of trials (math problems for example), and/or providing the student with prompts. Prompts might be used in addition to accommodations in the school environment.

That’s not to say that using prompts means that modifications are in place. This is just one way that a task might be modified.

Does this align with your perception of prompting?

In the context of working with children, prompting serves as a supportive tool used by teachers or therapists to enhance behavior shaping and skill acquisition. When a typical trigger fails to evoke the desired response to complete a specific task, prompting steps in to provide assistance, aiming to boost the likelihood of the targeted behavior.

Think of a prompt as a guiding cue or support system employed to encourage a behavior that might not naturally manifest. This approach is particularly crucial in educational and therapeutic settings, where tailoring support to individual needs is essential for effective learning and development

Successful performance of a desired behavior elicits positive reinforcement, therefore reinforcing learning. This means that the “Desired Behavior” or a specific action, response, or skill that is encouraged or expected.

The positive reinforcement component means that when someone does something well or as desired, they receive a positive consequence. The positive reinforcement serves as a consequence that strengthens or reinforces the likelihood of the individual repeating the behavior in the future.

For example, if a student successfully completes a challenging assignment (desired behavior), and the teacher praises them or provides some form of positive feedback (positive reinforcement), the student is more likely to repeat the behavior in the future. This cycle of behavior, followed by positive reinforcement, contributes to the learning and retention of the desired behavior.

A prompt is like a cue or support to encourage a desired behavior that otherwise does not occur. 

Prompts are always antecedents, which means they are given before the behavior starts. In other words, if the client is already completing the skill or task, a prompt is not needed; though positive reinforcement might be appropriate to encourage the behavior in the future.

The goal is to always use the least intrusive prompt possible that produces results. The frequency and types of prompts you use will depend on several factors, including the environment, and will always involve considering what prompts work best for an individual client.

A few things to remember about prompts:

  • Prompts in interventions vary from most to least intrusive.
  • Prompting in interventions should be faded to avoid prompt dependency.
  • A prompt can be anything the practitioner finds effective and that the client responds to.
  • Prompts are a modification to a task or an assignment, and they might be used in addition to an accommodation in the school setting.
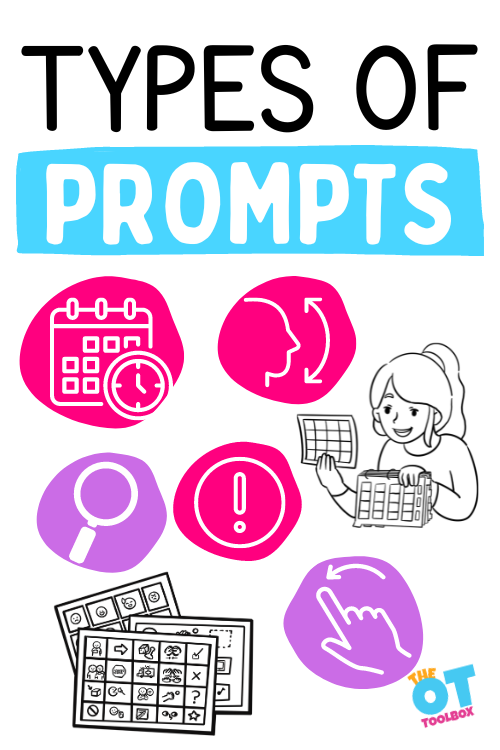
Graphic depictions of types of prompting including icon for schedule, nodding, gestures, pointing, visual schedules, and visual pictures. Text reads "types of prompts"

six different types of prompts

There are three general different types of prompts that can be used as graded support for those working on goals. These types can be broken down into different supports (like positional or gestural prompts which are a version of visual prompting).

There are different types of prompts that we use in therapy:

  • Visual prompts- this can include modeling and gestures. This can also include positional prompts, like placing items in a different place or more prominent place that offers a visual clue.
  • Verbal prompts- this can include words or sounds like a bell to change classes at school
  • Physical prompts- this can include hand-over hand support, slight nudges, or light touch.

We have listed these types of prompts from most restrictive to least restrictive:

  1. Full physical prompting– Hands-on assistance given to a child to successfully perform a skill or behavior. The practitioner places their hand over the hand of the client, guides it to the object, and wraps the client’s fingers around the object.
  2. Partial Physical Prompt- The caregiver moves the client’s hand toward the object.
  3. Visual Modeling– Showing the child the correct way to perform a skill/behavior (for example, demonstrating how to put toys away in the basket to show the child how-to pick-up toys).
  4. Visual gesturing- A movement that provides the child with information about how to perform the target skill/behavior (for example, pointing to the top of the paper to remind the child to write their name.
  5. Positional Prompting- The practitioner places the object next to the learner
  6. Verbal Prompting- Any words said to the child to help them perform a skill correctly
  7. Visual Prompting- A picture, icon, or object used to give the child information about how to perform a skill or behavior. This could also include a visual schedule or a list of tasks to complete, like a checklist.

Visual Prompts

One type of prompt that comes up a lot in therapy sessions, either in documentation or in goals, is the visual prompt.

A visual prompt is like a picture-based visual helper. This might include pictures, visual schedules, lists, icons, drawings, or symbols to symbolize a task. This could include highlighting the baseline of writing paper, or creating a bold line when cutting out a shape.

Other types of visual prompts used in therapy might include:

Gestural Prompts

Related to the visual prompt clues is gestural prompts. This type of prompt should be described in more detail because you can create a hierarchy of support and offer different types of gestures to support learning of skills.

Gestural prompts involve using gestures or physical movements to provide support or convey information. Some of the various types of gestural prompts or gestural supports include:

  • Pointing
  • Demonstration
  • Modeling desired actions
  • Hand Signals to communicate information
  • Facial Expressions
  • Body Language
  • Gaze or Eye Contact
  • Nodding or Shaking Head
  • Guiding Movements, or physically assisting someone by guiding their movements or actions.

Verbal Prompts

Another type of prompt worth highlighting is the verbal prompt. A verbal prompt can include a word, a phrase, or a complete direction that supports task completion or learning. Some examples include:

  • A verbal clue
  • The beginning letter sound of a word
  • A hint to begin a task
  • Safety prompts
  • Direct Instruction with clear and explicit verbal instructions on what needs to be done.
  • Brief spoken hints or clues to assist in a task or activity.
  • Asking questions to stimulate thought or prompt a specific response.
  • Feedback, with positive verbal reinforcement to acknowledge and encourage desired behaviors
  • Modeling by describing a behavior or task verbally while demonstrating it simultaneously.
  • Reminders, including verbal prompts to help someone remember steps of a task, or specific information.
  • Social Scripts, or pre-written or verbally communicated scripts to navigate social situations.
  • Countdowns

Different ways to offer and grade prompts

There are several different methods to offering and using prompts. There are at least three different levels of prompting usually used to teach a new skill. The practitioner first identifies the target behavior, and then identifies suitable prompts. 

  • Least-to-most prompting– This is gradually providing prompts to help the child be as independent as possible is key when using least-to-most prompting. At least three different levels of prompts are used to teach new skills. At the first level (usually the independent level), the child is given the opportunity to respond without prompts. The remaining levels include prompts that proceed from least to most amounts of assistance until the child responds correctly.
  • Most to least prompting- This is using more intrusive prompting and fading to least intrusive prompts. You would start teaching a task with the most assistance possible such as hand over hand guidance. Work on fading the amount of assistance until your learner is at the least intrusive they can manage.  This does not always mean independence. Some tasks may always require some prompting for success.
  • Delayed prompts- Sometimes a prompt will be given after a certain amount of time has passed without a response. This is almost the “sit on your hands” method of watching and waiting.

For each of these ways to offer prompts, the teacher therapist or will only use the prompt if the client gives the wrong response. They will give the student a chance to succeed or fail before adding prompts.

Steps to use in Prompting

Prompts support goal achievement. You can use the prompts as a shaping behavior and teaching skills is a three step process.  Those steps include:

  • Prompt
  • Offer reinforcement
  • Fade prompt
  1. Prompt- Identify the least intrusive prompt that is necessary for a correct response to occur. Does a visual prompt work, or is a visual and verbal prompt needed?
  2. Reinforcement- Give differential reinforcement. After a correct response, give appropriate reinforcement that is equivalent to the level of performance independency. At first reward the prompts and relevant cues, not just the prompts.  
  3. Fade- Fade prompts as quickly as possible to avoid prompt dependency.  When a child is first learning a new skill, responding to prompts can be rewarded.  As the child progresses, reward or affirm the child when unprompted responses occur. Fading a prompt means to move from most-to-least prompting. After the child masters a skill, gradually move prompt away or replace with least intrusive prompt.

3 components of prompting

  1. The antecedent includes the target stimulus and the cue. The target stimulus is the “situation” in which we want the learner to perform the target skill. The target stimulus is important because it signals to the toddler that something is expected of him with or without direction from adults. therefore, helping the toddler make this connection and minimizing prompt dependency. This might be getting the table ready to eat, or moving toward the sink to wash hands. The cue is a naturally occurring hint or task direction that tells the toddler the skills or behaviors they should be using.  The cue might be “time to eat.”  Toddlers are more likely to use a skill or behavior accurately when the cue and target stimulus are clear and consistent.
  2. The behavior (target behavior or target skill). This is what you are asking your child to do (sit down, snip with scissors, don a shirt) There are three types of target skills:
    • Discrete skillssingle skills of a short duration (e.g., requesting objects, labeling pictures, social greetings)
    • Chained skills: a series of behaviors/ skills that include several steps put together to form a complex skill such as (e.g., dressing and undressing, washing hands, cleaning up a play area)
    • Response classesgroups of responses that have the same function (such as waving hello, tapping someone on the shoulder, giving a high five to greet)
  3. The consequence.  What happens after the target skill is accomplished?  It might be a natural consequence, like getting to eat after washing hands, or a reinforcement such as praise, a treat, or preferable activity.  It will be important to find the right reinforcement for each child for the training to be effective

Other Words for Prompting

There are other ways to describe the concept of prompting and you might see these words in occupational therapy goals. These variations to the word “prompting” include:

  1. Cue
  2. Clue
  3. Hint
  4. Signal
  5. Prompting
  6. Assistance
  7. Support
  8. Nudge
  9. Guidance
  10. Stimulus

How to document prompting

Correctly and accurately documenting progress and the amount of support needed gets tricky.

Therapists have long-used the min, mod, max scale to document the amount of assistance. The problem with this type of documentation is, it is not specific.  What is minimal or 25% of assistance of cutting with scissors?  Based on the information above, you could describe whether you offered full or partial physical assist, gestural or verbal prompts, or visual cues. 

You can further define prompting by the number of prompts given.  “Child needed five verbal prompts to snip with scissors.”  This can be cumbersome to keep track of during a session, but is a great way to document progress, especially when the milestones are met very slowly.

After six months your student might not be able to snip with scissors, but they can tolerate hand over hand assist to open and close scissors.  They may not be able to wash their hands yet, but given continued verbal prompts they can go through the steps without physical assist.

What is prompting in the everyday world?

This may seem overwhelming when you see it written on paper, but you are probably already using prompts without thinking about it.  Now you have the verbiage and documentation strategies to put all the pieces together and instruct a caregiver.

Victoria Wood, OTR/L is a contributor to The OT Toolbox and has been providing Occupational Therapy treatment in pediatrics for more than 25 years. She has practiced in hospital settings (inpatient, outpatient, NICU, PICU), school systems, and outpatient clinics in several states. She has treated hundreds of children with various sensory processing dysfunction in the areas of behavior, gross/fine motor skills, social skills and self-care. Ms. Wood has also been a featured speaker at seminars, webinars, and school staff development training. She is the author of Seeing your Home and Community with Sensory Eyes.
Regulation Station Ideas

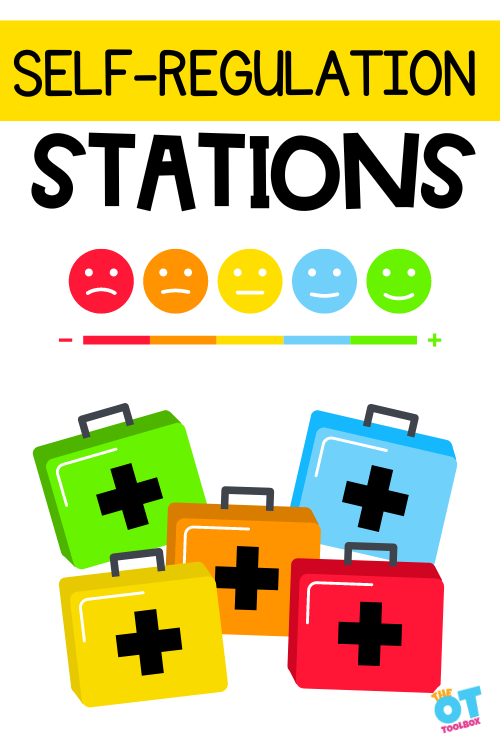
colorful toolboxes matching emotions and text reading "regulation stations"

In this blog post, we’re covering what you need to know about regulation stations, or a central space to focus on regulation needs. This can look like regulation centers or other group self regulation activities, or a “safe space” to meet regulation needs. With learning differences on the rise, there is a big need for self regulation, both in and outside of the classroom. Having a central space, or station, to target specific self regulation skills can be helpful, especially when it comes to emotional check-ins, and behavioral supports that meet the needs of self regulation needs. Students can not effectively learn if they are not in their just right zone. If a student (or students) arousal systems are not well regulated, it has an effect on everyone in the classroom. A well regulated student will begin to struggle when surrounded by learners who are out of control.

Teachers are turning toward using calm down corners, centers, or different areas in the classroom for self regulation. Let’s talk about coping and regulation station ideas.

colorful toolboxes matching emotions and text reading "regulation stations"

what is a regulation station?

A regulation station is a catchy term for a calming station, sensory corner, or other area designed to support self regulation needs. A regulation station can be a designated space for learners to use coping tools or supports as regulation tools and strategies to meet specific and individualized needs. It can be referred called a calm corner, regulation station, break area, sensory path, or sensory break place, to name a few. Using sensory supports as a regulation system, the regulation station is a consistent learning tool for different environments.

This sounds a bit like a sensory diet, right? As a seasoned OT, I love to use specific supports to meet individualized needs, and this can be a detailed, scheduled regimen, or it can be open-ended like a sensory room might be.

This does not have to be exclusively in a classroom. Regulation stations are also helpful at home, daycare, camp, amusement parks, the airport, or other sensory loaded environments. Basically, the regulation station is a place to calm or re-organize in a personal bubble, meeting regulation needs so learning can happen.

While practicing self regulation, be sure to emphasize that all emotions are ok, and that it’s ok to identify as one emotional level or another. And, we need to recognize that everyone experiences a full range of feelings throughout the day. What we are working on is the behavioral response to these feelings.

The goal of the sensory space/coping tool/calming corner/regulation station is to create a climate where learners feel safe and supported, no matter their zone or arousal level. Using a regulation break to meet needs can mean adding a few attention-boosting classroom breaks, depending on the needs of the students you serve.

One thing you might see in the school setting, is kids that walk in the hallway or in a busy classroom and bump into others. They might need that proprioceptive input to regulate themselves to create inner organization. We talk about this in our post on tips for walking in line and standing in lines. Having scheduled sensory input breaks in the form of a regulation station is a great way to support those kids.

ot toolbox resources and self regulation programs

Here is a great overview article from Colleen Beck of the OT Toolbox about Zones of Regulation and Self Regulation Activities. In her post you will find self-regulation activities (emotional, internal, and physical regulation strategies) to work on through interactive games.

Colleen mentions other programs to help with self regulation, including; The Alert Program, and programs available on Amazon (affiliate links):

how to implement a self regulation area

Adding any new system to a classroom can seem overwhelming.

By following a some strategies below, adding your own regulation station can be easier than expected:

A emotional regulation space, or even a self-regulation center activity in the classroom serves as a positive and non-punitive space designed to assist students in managing their emotional and sensory states, fostering self-regulation and emotional well-being. This supports the individual in emotional intelligence.

It is not a disciplinary measure but rather a proactive tool to support individuals in navigating different levels of regulation (various emotional and alertness states). It can even look like a check in that happens in the classroom.

Engage the entire class in deciding a suitable name for the self-regulation space. This can help to promote student involvement and ownership.

Using a self regulation area in the classroom, in a school-wide system, or even as a check-in when arriving to therapy is a great asset for emotional needs! Address the needs of learners across different levels of self-regulation, especially those prone to impulsive behaviors that impact learning or safety. The Regulation Station provides a proactive approach to help individuals maintain a sense of well-being by allowing their nervous systems to relax.

Self Regulation Centers

One way that occupational therapy supports educators in the school based occupational therapy setting is through consultation and push in OT services.

Setting up centers in a classroom can be a beneficial approach to support various aspects of child development. In an educational context, centers typically refer to specific areas or stations within the classroom where students can engage in different activities.

Here’s a simple plan to set up occupational therapy centers:

Identify Self Regulation Goals:

For a group activity that focuses on areas occupational therapy supports, like self regulation, you won’t have individualized goals. You might have a classroom-wide or grade-wide goal based on general expectations for the grade level. This can include something like identifying emotions, identifying responses to emotions, etc.

Then, you’ll want to break down the goal to determine the learning objectives you want to achieve through the centers. These could be related to cognitive, social, emotional, or physical development.

Select Appropriate Self Regulation Activities:

Choose activities that align with the learning goals and are suitable for the age and developmental stage of the students. For instance, activities might involve fine motor skills, problem-solving, or collaboration.

Figure out the space needed for Self-regulation centers:

If you’re doing a gross motor activity, the space might need to be a larger area like a hallway or a gym. If you are using brain breaks as a self-regulation too, these can be done in the classroom among desks. Designate specific areas within the classroom for each center. Ensure that there is enough space for students to move around comfortably and engage in the activities.

Organize Self Regulation Materials:

Gather the necessary materials for each center and organize them in a way that is easily accessible to students. This includes any instructional materials, tools, or equipment needed for the activities. Things like deep breathing posters or emotions play dough mats can be printed off and stored in binders.

Establish Rules and Procedures:

Clearly communicate the rules and expectations for each center. This helps maintain a structured environment and ensures that students understand how to participate appropriately.

Rotate Activities:

Consider periodically changing the activities within the centers to keep students engaged and provide new learning opportunities. This can also cater to diverse learning styles.

Rules for a Self-Regulation space

When it comes to implementing a self-regulation space in a school or other space where there are many variety of needs in one area, it’s important to come up with rules and protocols for success.

Here are some general guidelines to consider when setting up a self regulation area:

Assessment, Flexibility, and Planning:

  • Begin with a comprehensive needs assessment to identify the unique sensory requirements of students who may benefit from the sensory room.
  • Design the sensory room with flexibility in mind, allowing for easy modification of the environment based on individual needs and preferences.
  • Make sure use is understood by others who might use the space. Is a schedule needed? Should a sign-in and sign-out access be used?

Design, Equipment, and Budget Considerations:

  • Ensure the sensory room is well-designed with sensory-friendly elements, such as calming colors, soft lighting, and comfortable seating, while also considering budget constraints.
  • Optimize the use of cost-effective sensory tools, exploring affordable options without compromising on quality or safety.

Accessibility and Environmental Factors:

Allow for flexibility within the centers to accommodate different learning paces and preferences. This fosters an inclusive environment where each student can thrive.

  • Make the sensory room easily accessible to all students, taking into account environmental factors such as location, noise levels, and proximity to classrooms.
  • Consider the impact of the sensory room’s location on its effectiveness, avoiding high-traffic areas or spaces with potential disruptions.

Supervision, Training, and Adaptability:

  • Provide thorough training for staff on the purpose and use of the sensory room, emphasizing adaptability in responding to diverse student needs.
  • Foster an environment where staff can adapt interventions based on real-time observations, ensuring the sensory room remains a dynamic and responsive resource.

Consent and Communication:

  • Obtain consent from parents or guardians for sensory room use, clearly communicating the benefits. This might be something that is included in an IEP or 504 plan.
  • Maintain transparent communication with parents about budget constraints, involving them in discussions about cost-effective solutions and potential fundraising efforts.

Monitoring:

  • Integrate the sensory room into therapeutic plans, collaborating with occupational therapists to align interventions with evidence-based practices.
  • Implement a monitoring system that tracks not only the efficacy of the sensory room but also its cost-effectiveness and potential areas for improvement within budget constraints.

Other things to consider:

Clearly define expectations for the use of the self-regulation station, covering aspects such as the number of students, frequency of use, appropriate utilization, cleanup procedures, and respect for materials.

Recognize that some students may require more frequent use, and frame this discussion around the principles of equity versus equality.

Consider placement suggestions for the self-regulation area, preferably off to the side of the room but not at the back. The goal is to ensure visibility and audibility of instructional activities while striking a balance between privacy and safety/inclusion.

ideas and rules for implementing your new regulation Area

Sensory spaces can be set up in the classroom, this can be beneficial for students who need a calming space to retreat to on a frequent basis. A timer can be used to show the student how long they can stay there for. A visual schedule can also be used if needed.

Consider the self regulation environment, and consider how to support a variety of self regulation needs using sensory supports, deep breathing tools, or calming and regulating items. Calm down strategies can be different for every individual, but having a toolbox of supports helps.

The space could look like:

  • Furniture or a separator like a curtain that could be used as a separator, e.g. bookshelf
  • Cozy space like a table with cloth draped over it, or a pop up tent
  • a corner of a room

Consider resources within the space:

These ideas are just the tip of the iceberg when it comes to supporting needs using supports and tools.

adding to your regulation station

Every great strategy including the regulation station, needs a few ideas to make it work. Here is a post with some great Children’s Books on Self Regulation

Here are some Self Regulation Games to incorporate into your space to work on regulation. Challenges in the ability to self-reflect impact functional performance, social emotional skills, and learning. How about some Self Regulation Activities to get you started? The Sensory Lifestyle Handbook by Colleen Beck, has a great overview of sensory processing, and is a strategy guide.

regulation station ideas

Your regulation station can be as unique and customized as you like. It is meant to be a fluid space that changes depending on the needs of the learners who use it.

Generally you will have some sort of calm down area. This is useful for anyone, but targeted for learners in the red or yellow zone. You may also have a quiet area for reflection for those in the green zone, or coming out of the yellow zone, and an quiet alerting area for those struggling with low arousal (the blue zone).

Those students in the red zone are already out of control. They might exhibit anger, rage, physical touching or aggression, inappropriate behaviors, or extreme feelings. In the yellow zone, students are headed toward the red zone, but still have some self control. Students in the yellow zone might be silly, wiggly, anxious, worried, or having difficulty staying on task.

Regulation needs for different students

While creating a sensory regulation station is definitely a challenge, once it is in place and working well, you will see such a change in your classroom, it will be well worth the time invested. Remember, no two students are alike, and not one day is the same as the next. Having several different options in your regulation station, and being open to change, are a couple of the keys to success.

Victoria Wood, OTR/L is a contributor to The OT Toolbox and has been providing Occupational Therapy treatment in pediatrics for more than 25 years. She has practiced in hospital settings (inpatient, outpatient, NICU, PICU), school systems, and outpatient clinics in several states. She has treated hundreds of children with various sensory processing dysfunction in the areas of behavior, gross/fine motor skills, social skills and self-care. Ms. Wood has also been a featured speaker at seminars, webinars, and school staff development training. She is the author of Seeing your Home and Community with Sensory Eyes.

Letter Formation Rhymes

When working on handwriting skills, letter rhymes are a tool to have in your toolbox! Whether you are looking for summer enrichment, or planning for the upcoming school year, the OT Toolbox is highlighting letters with posts on games, activities, worksheets, and this one on Letter Formation Rhymes. Pair these multi-sensory activities with hands-on letter formation activities and letter formation worksheets for engaging and motivating skill-building.

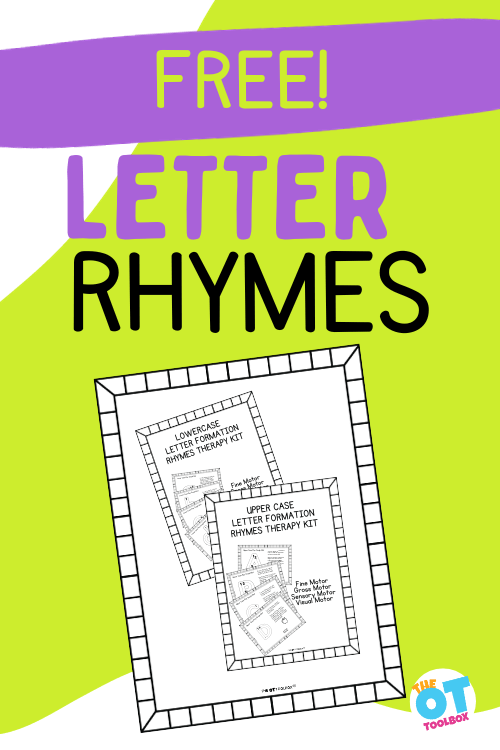
letter rhymes packet on green and white background with text that says "Free Letter Rhymes"

letter formation Rhymes

Before getting into letter formation rhymes, it’s important to understand the underlying skills necessary for writing letters with accuracy and automaticity when it comes to handwriting.

When it comes to auditory processing skills, auditory memory is a factor that improves carryover skills. The auditory memory tool of a rhyme to support letter creation is a spark for legible formation and the functional pencil stroke sequences in letter formation, however if the underlying components are not in place, a rhyme or letter song will not help.

As always, it is important to understand the basics before expanding your activities. Understanding development and the “why” before starting activities and games will improve your effectiveness and efficiency as a therapist. Knowing the reason a student is struggling on a particular task will point you in the right direction when it comes to treatment activities.

Difficulties with letter formation may come from a variety of different sources including:

Our lengthy resource on letter formation covers the reasons why the letter formation aspect of handwriting can be so difficult. Be sure to check out all of the letter formation activities including ways to teach letters that use a hands-on and sensory approach to learning letters. You’ll also find resources on letter order, and information on teaching letters based on child development.

Alphabet formation rhymes

Now that you are familiar with the basics, and have some great resources to get you started, how about adding letter formation rhymes to your toolbox!

Some tips and ideas to get you started with incorporating letter rhymes into teaching handwriting:

  • Use consistent verbal prompts. If you use a particular letter formation rhyme, stay consistent with using that same verbiage each time.
  • Use a visual prompt. You can use our letter formation rhyme printable.
  • Use age-appropriate directions. Younger students may appreciate rhymes and cute visuals to go along with the letter formation directions. Older students may appreciate simple instructions for each letter, such as: “m – start at the top. Down up, over, down again, and over once more to finish your m”.
  • Add whole-body learning. Incorporate movement using our alphabet exercises along with letter formation rhymes that uses body movements to describe the letters.
  • Teach letters in groups based on the pencil strokes that make up the letters. These are called letter families. For example, letters L, E, F, I, H, T are in a letter family. And c, a, g, o, and q are in a letter family. All letters of the alphabet can be grouped with other similar letters based on the pencil lines that make up the letter. This goes for uppercase letters as well as lowercase letters. Teaching letters in a similar group promotes the motor plan needed, as well as improves pencil control skills.
  • Simple verbal cues- Handwriting without Tears (now called Learning without Tears) has great rhymes and songs to go with their learning program. Mat Man is a big theme in their program, and simple yet effective directions for forming letters include: big line, little line, big curve, little curve.
  • Interactive Activities: Plan interactive and multi-sensory letter formation activities that involve students actively participating in the letter formation process. For instance, use large motor movements to draw letters on a whiteboard or on the floor.
  • Try different strategies. Here are 10 ways to teach letter formation that incorporate different sensory tools. Use these activities along with the letter rhymes to really establish a motor plan for each letter.
  • Use consistent letter formation activities along with verbal rhymes for each letter. We have our series of sensory letter worksheets that incorporate the same types of activities on each letter mat. Grab your copy of:

letter formation Rhyme videos

Some therapists and teachers prefer to teach using videos. This is definitely a viable option, however you can also use the videos to learn the songs, then teach them to your students without video aids. Plus, you can send a list of the letter rhyme videos to parents to support handwriting carryover at home as part of OT handwriting homework or a home program.

If you are looking for songs rather than letter formation rhymes, Jack Hartman has many videos on YouTube.

Pairing lowercase letter workout with uppercase letter gross motor coordination tasks can be a great lesson plan for teaching letter formation. This video has a workout for forming upper case letters:

This video encourages air writing for letters:

This video allows users to learn the sign language for each letter as well for fine motor coordination and finger dexterity. This can be a great home program recommendation for targeting manual dexterity goals.

This Alphabet Song is a fun way to add music and movement to letter formation activities:

We also have a series of videos that you can pull specific letter formation tips from. Each letter of the alphabet has it’s own video:

Letter A:

The video can be paired with letter rhymes to teach the motor skills needed for uppercase A.

Letter B:

The video covers how to teach letter B and then carry the pencil strokes over to similar letters.

Letter C:

The video addresses how to create a motor plan for letter C.

and so on…Check out the full letter formation playlist here.

why teach letter formation rhymes?

Incorporating a rhythmic song or rhyme to letter formation is helpful for establishing a motor plan for letter forms. This is especially helpful for those who learn with auditory input. We know that every student has their own learning style. The acronym VARK is used to cover these various styles of learning.

V is for Visual Learners- Some learners are visual. These individuals learn through visual input: reading, watching others complete tasks, visual examples, viewing videos, worksheets, etc.

A is for Auditory Learners- Other learners are auditory learners and need to hear the information for it to sink in.

R is for Learning Through Reading- You may find students who need to read and write the information in order to learn. This may include a combination of visual input and or auditory input by reading back information.

K is for Kinesthetic Learners- There are students who are kinesthetic learners. These learners better retain information by doing the task. A multisensory approach is great for this type of student. One tool to support this learning style when teaching letter forms is our A-Z multisensory learning mats.

Letter formation rhymes can fit all of the VARK learning categories. Videos and visuals help the visual learner. Songs and rhymes satisfy the auditory learner. Reading and writing along with the rhymes or songs can help the “R” learner, while the kinesthetic learner needs to get up and move around with the songs and rhymes.

You can modify the lesson for each individual learner, or provide a plan that has all four styles of learning embedded to meet the needs of your students. Meeting the needs of your students will be far more effective than having them bend to your particular teaching style. The most effective managers and teachers have figured out how to morph to meet the needs of each of their individual students or staff.

Alphabet Formation Rhymes

We’ve created our own letter formation rhymes for uppercase letters and lowercase letters. We’ve also put these letter rhymes into a packet, which includes uppercase letters and lowercase letters.

This takes a developmental approach to writing letters, which is to focus on the uppercase letters first and focusing on the simplest pencil strokes first, which is straight lines down and then vertical lines.

Then, the pencil strokes which can carryover to other letters are covered. We tried to come up with letter rhymes that focus in on these key developmental concepts.

Below, you’ll find the uppercase letter rhymes and the lowercase letter rhymes that we love to use.

We included a visual image (like an apple, butterfly, and cookie) for each letter. This is so the play mat has a small image that the user can color to work on fine motor skills and hand strength.

If you are a member of The OT Toolbox membership, you can log in and get these letter rhymes in a printable activity set.

Uppercase Letter Rhymes

Below are uppercase letter rhymes.

Please don’t copy these and post them in other places. Content on this site is copyrighted and trademarked.

A- A is for Apple, so round and red, To make an uppercase A, here’s what’s said: Slant to the left, a diagonal flight. Then slant to the right, with all your might. Across the middle, a line so true. Completing the A, just for you!

B- B is for Butterfly, vibrant and bright, Let’s learn to write it, with all our might. Line down, from top to base. Then a little curve, adds some grace. Another little curve, we’re almost through. Uppercase B, look at what we can do!

C- C is for Cookie, sweet and round, Let’s learn to make it, hear the sound. Start at the top, curve around in glee. A big, round shape, like a smiling C.

D- D is for Dinosaur, tall and strong, Let’s learn to make it, join along! Start at the top, make a straight line down, a sturdy backbone, with no frown. Curve to the right, like a big smile, Uppercase D, it’s been worth the while!

E- E is for Elephant, strong and grand, Let’s learn to write it, hand in hand. A big line down, from top to base, Uppercase E finds its rightful place. Then three short lines, straight across, E’s horizontal friends, no time to pause.

F- F is for Firefly, glowing so bright, Let’s learn to write it, with pure delight. A big line down, from top to base, Uppercase F takes its rightful place. Two short lines, right across it goes, One on top, the other below.

G- G is for Giraffe, tall and so grand, Let’s learn to write it, holding our hand. A big curve, starting from the top, Round and smooth, it won’t stop. Then a short line, right in the middle, Uppercase G, let’s solve the riddle!

H- H is for House, standing so tall, Let’s learn to write it, one and all. A big line down, from top to base, Uppercase H finds its rightful place. Another big line, parallel and strong, Side by side, where it belongs. Then a short line in the middle, you see, Uppercase H, formed brilliantly.

I- I is for Igloo, tall and grand, Let’s learn to write it, hand in hand. Start with a long line, from top to below, Uppercase I, a letter we’ll know! Add a short line up top, not too far, Like a little hat, it’s just the right star. Then a short line at the bottom, oh so neat, Uppercase I, it’s now complete!

J- J is for Jellyfish, swimming with glee, Let’s learn to write it, come and see! Start with a line that goes down, curving with grace, Uppercase J, taking its place. Then add a short line, standing high, Completing Uppercase J, reaching for the sky!

K- K is for Kite, soaring up high, Let’s learn to write it, reach for the sky! Start with a straight line, from top to base, Uppercase K takes its rightful place. Then make a slant, from top-right to left, Another slant down, with a gentle heft.

L- L is for Lion, strong and bold, Let’s learn to write it, as we’re told! Start with a big line, straight and tall, Uppercase L, stands proud overall. Then draw a short line, just like a mane, Completing the L with a majestic reign.

M- M is for Monkey, swinging with glee, Let’s learn to make it, just you and me! Start at the top, make a mountain peak, Uppercase M, strong and sleek. Downward we go, like a slippery slide, Then up again, right by its side. End with a big line down, no time to frown!

N- N is for Night, starry and bright, Let’s learn to write it, with delight! Start with a big line, straight and tall, Uppercase N, stands proud and all. Then a diagonal line, slanting right, Creating N’s shape, oh what a sight! Finally, a straight line, reaching up high, Uppercase N, reaching for the sky!

O- O is for Octopus, in the deep sea, Let’s learn to make it, you and me! Start at the top, a curve round and true, Uppercase O, a perfect circle for you. Go all the way around, never break the line, Uppercase O, a shape so fine!

P- P is for Penguin, waddling on ice, Let’s learn to write it, it’s simple and nice! Start at the top, a straight line down, Uppercase P, wear your writing crown. Then curve it around, like a little loop, Creating P’s shape, a playful swoop.

Q- Q is for Queen, majestic and true, Let’s learn to write it, just me and you! Start at the top, like a crown so grand, Uppercase Q, take your royal stand. Curve around, like a swooping bow. At the bottom, add a tail, Uppercase Q, you never fail!

R- R is for Rabbit, hopping with glee, Let’s learn to write it, you and me! Start at the top, a line straight down, Hop to the top for a writing crown. Then make a curve, like a little bow, Creating R’s shape, let it proudly show. Add a slanted line, with a tail so neat, Uppercase R, now complete!

S- S is for Snake, slithering with grace, Let’s learn to write it, at our own pace! Start at the top, with a curve so round, Uppercase S, a shape we have found. Then curve again, just like before, Creating S’s form, we explore.

T- T is for Tree, standing tall and true, Let’s learn to write it, me and you! Start at the top, a straight line down, Then add a line across the top, wearing its writing crown.

U- U is for Umbrella, keeping us dry, To write it, let’s give it a try! Start at the top, go down straight, Then curve around, like a smiley gate. Go back up, just like you came, Uppercase U, that’s its name!

V- V is for Violin, playing a tune, To write it, let’s try very soon! Start at the top, with a slanting line down, Then go back up, like a hill’s crown.

W- W is for Whale, swimming in the sea, Let’s learn to write it, you and me! Start with a slant down, then another the same, Climbing back up, like a mountain’s frame. Go down again, a slant it will be, Then climb back up, just like the sea.

X- X is for Xylophone, making a sound, To write it, let’s trace lines we’ve found! Start with a diagonal line, left to right, Then cross it over, it’s quite a sight.

Y- Y is for Yo-Yo, up and down, Let’s learn to write it, top to ground Start with a slant down, left to right, Then slant up, it’s a playful sight. From the center, a line straight and long, Uppercase Y, standing strong!

Z- Z is for Zebra, stripes so bold, Let’s learn to write it, we’ll be untold! Start at the top, a line going right, Then slant down left, it’s quite a sight. Another line straight, from left to right, Uppercase Z, you’re not a fright!

Lowercase Letter Rhymes

Below are alphabet rhymes for making the lowercase letters.

Please don’t copy these and post them in other places. Content on this site is copyrighted and trademarked.

a- a is for apple, juicy and red, To write it, follow these steps, it’s said: A curve on top, like a smile so sweet, Then a line down, to complete. Remember the shape, round and neat!

b- b is for butterfly, colorful and bright. To write it, here’s a simple guide: Line down, then a curved belly. A smaller hump, so lovely!

c- c is for cat, soft and sly, To write it, let’s give it a try: Start at the top, make a curve round, Then a line down, don’t make a sound! A simple shape, like a moon in the sky!

d- d is for dog, loyal and true, To write it, here’s what you can do: Start with a circle, nice and round, Then add a line, curving down. Writing d is easy, you’ll soon see!

e- e is for elephant, big and strong, To write it, it won’t take long: A line across, take a look! Then curve around. Writing e is fun, you’ll agree!

f- f is for frog, leaping so high, To write it, let’s give it a try: Start with a curve and then a line, straight and tall. Remember the line, like a lily pad, Writing f is easy, it’s not too bad!

g- g is for grapes, sweet and divine, To write it, let’s follow the line: A curve on top, just like a smile, Then a line down, it’s worth your while. Add a hook at the end, like a little swing, Writing g is fun, let your pencil sing!

h- h is for hat, worn with pride, To write it, here’s a guide: Start at the top, a line straight down, Then add a line, curved like a crown. Remember the shape, tall and true, Writing h is easy for me and you!

i- i is for igloo, icy and round, To write it, here’s what we’ve found: A line straight down, simple and neat, Dot on top, a tiny treat. Remember the dot, like a snowy flake, Writing i is easy, no mistakes to make!

j- j is for jellyfish, floating in the sea, To write it, let’s follow with glee: A line down, then a little hook, Like a curly tentacle, take a look! Remember the shape, curvy and bright, Writing j is fun, it feels just right!

k- k is for kite, flying so high. To write it, let’s give it a try: A straight line down, then a slant in and out, A shape like half a triangle or a spout.

l- l is for lion, fierce and grand, To write it, here’s what we command: A line straight down, standing tall, A line across, like a grassy stand.

m- m is for monkey, swinging with delight, To write it, follow this path just right: A little line down, like a playful dance, A hump in the middle, a joyful chance. Remember the shape, curvy and round, Writing m is fun, let’s make a joyful sound!

n- n is for nest, cozy and snug, To write it, here’s what we’ll plug: A little line down, Then one bump. Writing n is easy, up and down!

o- o is for octopus, in the deep blue sea, To write it, let’s follow this tip: A simple circle, round and true, Remember the shape, like a watery ring, Writing o is easy, let your imagination sing!

p- p is for panda, black and white, To write it, here’s what feels right: A line straight down, standing tall, Then a curve, like a bouncing ball. Remember the shape, curvy and clear, Writing p is easy, let go of any fear!

q- q is for quilt, cozy and warm, To write it, let’s follow this form: A curve round, just like c, but it’s neat, A tail curling out, like a cozy treat. Remember the shape, round and swirled, Writing q is fun, you’ll rock the world!

r- r is for rabbit, hopping the race, To write it, here’s what we’ll embrace: A line down, like a fast sprint, Then up with a curve. Remember the shape, bouncy and bright, Writing r is easy, let your imagination take flight!

s- s is for sun, shining up high, To write it, let’s give it a try: A curve on top, like a cheerful smile, Then a curve below, it’s worth your while. Remember the shape, like a wave in the sea, Writing s is easy, let your creativity roam free!

t- t is for tree, standing tall and strong, To write it, here’s where we belong: A line down, straight and true, A line across, like branches do. Remember the shape, simple and clear, Writing t is easy, have no fear!

u- u is for umbrella, keeping us dry, To write it, let’s reach for the sky: A line down, with a little hook, Then another line down, just like a book. Remember the shape, open and wide, Writing u is easy, enjoy the ride!

v- v is for Violin, playing a tune, To write it, let’s try very soon! Start at the top, with a slanting line down, Then go back up, like a hill’s crown.

w- w is for wagon, rolling with fun, To write it, here’s how it’s done: Start with a slant down, then another the same, Climbing back up, like a mountain’s frame. Go down again, a slant it will be, Then climb back up, just like the sea.

x- x is for xylophone, making a sound, To write it, let’s trace lines all around: A slant down left, then a slant right, They meet in the middle, just right. Remember the lines, crossing and strong, Writing x is easy, like a joyful song!

y- y is for yo-yo, going up and down, To write it, let’s spin lines all around: A slant down left, then a slant down right, The tail hangs down, just right.

z- z is for Zebra, stripes so bold, Let’s learn to write it, we’ll be untold! Start at the top, a line going right, Then slant down left, it’s quite a sight. Another line straight, from left to right, letter Z, you’re not a fright!

Free Letter Rhyme Play Dough Mats

Want to get your copy of letter rhyme play dough mats? We have put together a set for uppercase and lowercase rhymes.

Each alphabet rhyme play dough mat includes:

  • A large letter with directional arrows
  • A rhyme for the letter’s formation
  • A small picture to color or fill with play dough
  • A space to write the letter

You can laminate the play dough mats, or slide them into page protector sleeves. Add them to a binder and use it as a multisensory workbook for letter writing.

You can also practice the alphabet formation with other multisensory strategies, too:

  • Use wikki stix to form the letters
  • Use a dry erase marker to write the letter and color the letter picture
  • Finger trace the letter

These packets are both free downloads here on our site. You can get them by entering your email address into the form below. The printable packets will be delivered to your email address. This way, you can print them from any device and any location.

These uppercase and lowercase alphabet rhyme printables are also available inside the Membership Club, along with hundreds of letter formation and multisensory handwriting tools. Members do not need to enter their email address for each item, they are all in one place, sorted by topic! Not a member yet? Join us in The OT Toolbox Membership Club!

FREE Letter Rhymes Packet

    We respect your privacy. Unsubscribe at anytime.

    final thoughts on Alphabet rhymes

    If after scrolling through this post and clicking on some of the rhymes and songs, you find yourself humming along to one particular tune, you may have found the perfect one for you! Generations ago, Sesame Street or Barney was the way to learn. Now it seems Jack Hartman and Heidi have taken over. Whatever works for your particular students is the best way to teach!

    Victoria Wood, OTR/L is a contributor to The OT Toolbox and has been providing Occupational Therapy treatment in pediatrics for more than 25 years. She has practiced in hospital settings (inpatient, outpatient, NICU, PICU), school systems, and outpatient clinics in several states. She has treated hundreds of children with various sensory processing dysfunction in the areas of behavior, gross/fine motor skills, social skills and self-care. Ms. Wood has also been a featured speaker at seminars, webinars, and school staff development training. She is the author of Seeing your Home and Community with Sensory Eyes.
    Want printable handwriting and sensory motor activities to target the visual motor skills needed for letter writing? Grab a copy of our Letters! Fine Motor Kit. The printable PDF contains 100 pages of hands-on letter writing practice for multisensory handwriting!

    Letters Fine Motor Kit

    Inside the Letters Fine Motor Kit, you’ll find:

    • A-Z Multisensory Writing Pages: Roll a ball of dough letters, ASL sign language letters, gross motor movement, small-scale letter box writing task, finger isolation letter trace, and writing practice area
    • Alphabet Fine Motor Clip Cards– Clip clothespins or paper clips to match letters with various fonts to strengthen the hands and focusing on eye-hand coordination, bilateral coordination, visual processing skills, and more.
    • Cut and place Fine Motor Mazes– Cut out the letter pieces and trace the maze with a finger to work on eye-hand coordination and finger isolation. Place a small letter on the letter spots to address in-hand manipulation and dexterity skills.
    • A-Z Cotton Swab Cards– Includes upper case and lower case letters. Dot the cards using a cotton swab or laminate the cards and use them over and over again.
    • A-Z Pattern Block Cards– These cards include a section for tracing with a finger tip for separation of the sides of the hand, eye-hand coordination, and finger isolation during letter formation. There is also a space to “finger write” the letter using the fingertip. This multisensory letter formation activity can be a great brain break during handwriting or literacy tasks. Learners can then form the letter using parquetry blocks.
    • Fine Motor Letter Geo-Cards– These geo board cards include A-Z in upper case forms. Users can copy the letter forms in a variety of multi-sensory strategies.
    • A-Z Color and Cut Letter Memory Cards– These upper case and lower case letter cards can be used to color for letter formation. Then use them in fine motor matching tasks or in sensory bins.
    • Color By Size Sheets– Help learners discriminate between tall letters, small letters, and tail letters. This visual perception activity invites learners to color small areas, using hand muscles for strengthening and handwriting endurance.
    • A-Z Building Block Cards– These LEGO block cards invite users to copy the cards to form letters using small building blocks. Users can place the blocks on the cards or copy the letter to address visual shift and visual memory. This activity set comes in upper case and lowercase letter forms.
    • A-Z Play Dough Letter Formation Cards– Print off these cards and laminate them to create play dough mats. Learners can form the letters using the arrows to correctly form letters with play dough while strengthening their hands and visual motor skills. Each card includes a space for practicing the letter formation, using a dry erase marker if the cards are laminated.
    • Graded Lines Box Writing Sheets– Users can trace and form letters in boxes to work on formation of letters, line awareness, starting points, and letter size.
    • Alphabet Roll and Write Sheets– Roll a dice and form the letter associated with the number of dots on the dice. This is a great way to work on letter formation skills using motivation. Which letter will reach the top first? This activity is easily integrated with a rainbow writing task to increase number or repetitions for letter practice.
    • Pencil Control Letter Scan– Use the letter bubble tracks to scan for letters. Users can fill in the letters of the alphabet to work on pencil control skills.
    • Color and Cut Puzzles– Color the pictures to work on hand strength and letter formation skills. Then cut out the puzzles and build visual perceptual skills.

    Get your copy of the Letters Fine Motor Kit today!

    Wikki Stix Activities

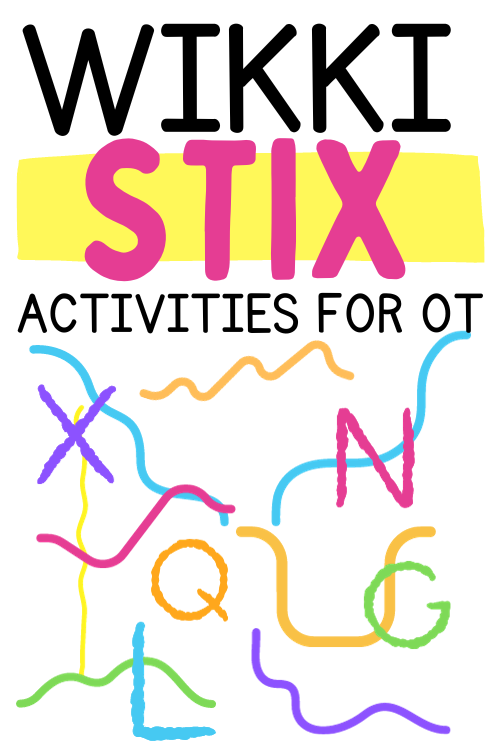
    string letters and designs in bright colors, Text reads "wikki stix activities for OT"

    Are you doing any Wikki Stix activities to support fine motor skills, visual motor skills, letter formation, and other underlying skill areas? If you are an occupational therapist, you have most likely heard of, or used Wikki Stix® (Amazon affiliate link). After being prompted to write about these neat little sticks, I started to do some research. Boy, was I missing out on the potential these things have!  Follow along to learn the ins and outs of Wikki Stix, the myriad uses for them, and some great Wikki Stix activities.

    WHAT ARE WIKKI STIX?

    Have you used (or played with) Wikki Stix® before? (Amazon affiliate link) If not, you might be wondering what are Wikki Stix? 

    Wikki Stix are bendable strings covered in colorful wax. These strand-like thingies are sticky sticks of string that you can bend, mold, and form into shapes. In reality, they are made of hand-knitting yarn enhanced with a microcrystalline, food-grade non-toxic wax… the kind used in bubble gum and lipstick. And that is it. (Psst…it is that touch of wax that allows them to stick). 

    Wikki Stix (Amazon affiliate link) were invented in 1989 and called “Sticky Wikki” at that time. While I could not find a specific reference to the origin of this name, the sticky part is obvious. Wikki, I believe comes from the word “wick” as in candle wick.  They were renamed Wikki Stix and Wikki Stix activities were born!

    FUN FACTS ABOUT WIKKI STIX:

    • They stick! No glue, no paste, no mess. Just press them down with light fingertip pressure on virtually any smooth surface and they will stick to itself and to other surfaces. This includes mirrors, dry erase boards, paper, walls, etc.
    • They stick to each other for 3-D creativity and fun. Twist, bend, stick, create. No preparation… no clean-up… no mess.
    • Wikki Stix do not break or tear apart, but cut easily with scissors.
    • Wikki Stix are great for all users, including kids with allergies, because they do not contain dairy or dairy byproducts, latex, gluten, nor peanut or other nut oils or byproducts.
    • Wikki Stix support hands-on, kinesthetic learning
    • They are reusable.
    • Purchase on the Wikki Stix website or (affiliate link) Amazon.
    • They come in endless types of fun packs!
    • Proudly made in the USA.

    NON-TRADITIONAL WIKKI STIX ACTIVITIES

    Before jumping into the more traditional use for Wikki Stix, I want to share some of the cool ideas for using these cool little sticky sticks.

    Some of these ideas are shown in this video:

    In the video, we show how you can use Wiki Stix for several skills: handwriting, spatial awareness, scissor use, pencil grasp, and more.

    Here are tips to use Wikki Stix to support functional areas:

    Wikki Stix for Coloring Skills

    • Use Wikki stix to create a border for coloring in the lines. The Wikki Stix offer a phsyical border for coloring in a given space, which is great for kids who overshoot the lines or need a specific area to color inside of. Outline areas to be colored in with Wikki Stix. This gives a visual and tactile cue where your student is expected to color. You will eventually fade this trick, but it is a great starting tool.
    • Wrap a small piece of Wikki Stix around the tip of a crayon to create a pencil grip. This is nice because traditional pencil grippers don’t always fit crayons and you can make grippers for a whole box of crayons inexpensively.

    Wikki Stix for Handwriting Skills

    • Improve hand grasp and stability by wrapping 1/2 of a Wikki Stix around the base of a pencil as a good reminder to hold it “down low”. We show an example of this activity in the video above.
    • Practice pre-writing lines with Wikki Stix. The bendable sticks can be used as a model or as a writing space.
    • Use Wikki Stix to make borders when handwriting, to keep letters on the line, as well as to indicate where to start and stop on the paper. Can also be used to create boxes to keep letters in.
    • Use Wikki Stix under workbooks or paper for stabilization or a desk positioner. You can support the student that needs assistance to use their non-dominant hand while writing. For the student that has the book or workbook slide from the writing area, this is a nice support.
    • You can even create a spiral with the Wikki Stix to hold the paper in the center onto the desk. Or, cut the Wikki Stix into smaller pieces and use them like reusable tape at the corners of the paper. Put them at the top of a piece of paper to keep in from moving while working.
    • Keep a slant board steady by putting these under the board.

    Wikki Stix for Self-Help Skills

    Gross Motor Activities with Wikki Stix

    FINE MOTOR FUN WITH WIKKI STIX

    • Play tic-tac-toe with Wikki Stix. Use the sticks to create the grid and/or to make the X and O’s.
    • Make a Wikki Stix maze. Learners can zoom cars, marbles, their pencil, pompoms, or other manipulatives through the maze.
    • Create a Wikki Stix racetrack.
    • On paper, use markers to draw a picture with dots. Then ask students to connect the lines using Wikki Stix. You can also use Wikki Stix to connect dots on a regular dot to dot sheet.
    • Use the Wikki Stix to work on visual tracking skills and form constancy to fill in a matching worksheet to connect matching items across the page. Here are free visual perception worksheets to try.
    • Use Wikki Stix to teach kids to tell time. Make a clock on paper or laminated sheet.  Use the sticks as the hands of the clock to practice telling time.
    • Practice cutting the Wikki Stix to make smaller pieces and develop hand strength/snipping skills needed for scissor skills in cutting.
    • Use as a string for lacing beads. Use them for many lacing activities. Use the Wikki Stix to create homemade lacing cards task. This creates more stability and an increased fine motor challenge
    • Use to hold pony beads for counting, like an abacus
    • Decorate rocks – use this sticks to make fun features on plain rocks, like faces, car parts, flowers, and more

    WIKKI STIX ACTIVITIES for Visual Motor Skills

    Some of the more traditional Wikki Stix activities support visual motor skills, include letter formation, creating art projects, making shapes, and other craft projects.

    • Trace letters, number, and shapes with the sticks. Create a page with shapes and letters and laminate the page, or slide it into a page protector sleeve. The students can use Wikki Stix to form the letters or numbers on the page protector.
    • Copying letters, shapes, etc. Cut the Wikki stix into smaller pieces. Show students a picture of a letter/number/shape and then ask them to recreate it with their Wikki Stix.
    • Use Wikki Stix to practice patterns. Create shapes with the bendable sticks and then create a pattern. Ask your student to recreate it.

    Wikki Stix Art

    These Wikki Stix Art activities double as fine motor and visual motor tools.

    • String them together to make longer ropes.
    • Make Wikki Stix glasses.
    • Use drawing prompts to create different shapes and pictures using the Wikki Stix.

    WIKKI STIX Activity Sets

    There are many Wikki Stix activity sets on the market that support various skills. You can use the bendable strings from these larger sets in all of the ways described above. Plus, you can use them in the ways that the Wikki Stix sets intend.

    Here are some of our favorites. These are all Amazon affiliate links.

    The website has endless ideas and products for Wikki Stix activities and creations.

    • Wikki Stix Holiday packs These sets include dot to dot pictures with a seasonal theme. Use the bendable strings to create a holiday image. Use the pack to create holiday masterpieces!  The Wikki Stix people have created endless templates and packs for further enjoyment. They have Halloween, Valentines, Easter and Christmas Wikki packs. We love:
    • Travel packs -If you are a therapist on the go, or searching for a take along task, the Wikki group have created several travel packs
    • How about Party Favors, or little treats for your students?  Wikki Stix activity sets have you covered!
    • Senior Activity set– The Wikki Stix Senior kit involves more of an art set that uses the bendable wax sticks. Adults and teens will love this set because it doesn’t seem like a kids’ activity but still offers the creative outlet and fine motor work.
    • Bilingual and multilingual packs are available too for French to English speakers.
    • Extra Long Wikki Stix– These are nice because the wax strands come in 3 foot long sections. This is a great activity kit for gross motor skills.
    • There are some imitators such as Monkey String, Fidget Sticks, Wax Sticks, Stringamajigs, and Doodle Stigs.  I have not used any alternative Stix, so I can not attest to their usefulness, pliability, or stickiness

    Benefits of Wikki Stix

    As with anything we tend to recommend for therapeutic intervention, Wikki Stix come with a list of added benefits. These are the reasons we use Wikki Stixs in occupational therapy.

    • Wikki Sticks helps fine motor development. As children bend and mold Wikki Stix into shapes, the muscles in their hands and fingers can develop
    • Kinesthetic learners benefit from learning by doing. Physically creating items helps build their understanding and learning
    • Touching Wikki Stix wax coated yarn stimulates the tactile system. Seekers tend to enjoy this sticky texture, while those who are sensory sensitive might find them harder to adjust to.
    • Wikki Stix help build pincer grasp, bilateral coordination, in-hand manipulation, and prehension
    • Visual perception -Students learn borders for coloring, can keep place in a book, recognize shapes and letters, and copy designs

    I feel like I may have been missing out on the (Amazon affiliate link) Wikki Stix potential.  I have them in my OT Toolbox but rarely use them anymore.  To be honest, I do not like the sticky feeling.  After researching and writing this, I am going to revisit my Wikki stash and revitalize it with my kiddos this week.

    Victoria Wood, OTR/L is a contributor to The OT Toolbox and has been providing Occupational Therapy treatment in pediatrics for more than 25 years. She has practiced in hospital settings (inpatient, outpatient, NICU, PICU), school systems, and outpatient clinics in several states. She has treated hundreds of children with various sensory processing dysfunction in the areas of behavior, gross/fine motor skills, social skills and self-care. Ms. Wood has also been a featured speaker at seminars, webinars, and school staff development training. She is the author of Seeing your Home and Community with Sensory Eyes.
    Endurance Activities

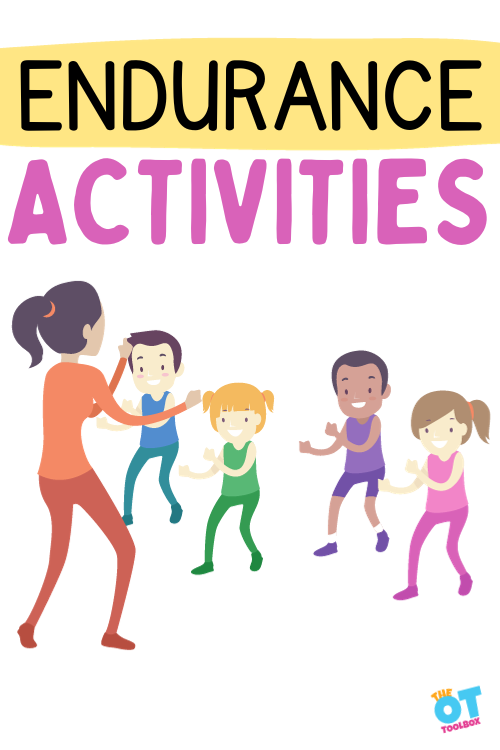
    teacher leading kids in a dance activity. Text says "endurance activities"

    One of the ways that occupational therapy supports clients, patients, and students is by targeting the areas impacting functional performance in daily tasks, and endurance activities are one of those underlying skills. When our patients lack the endurance to participate in daily activities, full participation is impacted. Today, we’re discussing endurance activities to support daily occupations.

    As an Amazon Associate I earn from qualifying purchases.

    endurance activities

    In this post we will look at some classic endurance activities, as well as learn about aerobic exercises that kids can do without realizing they are “working out”.

    endurance activities

    According to the American Heart Association, “endurance exercise is one of the four types of exercise along with strengthbalance and flexibility. Ideally, all four types of exercise would be included in a healthy workout routine”.

    Additional contributions include:

    Also called aerobic exercise, endurance activities include exercises that increase your breathing and heart rate such as walking, jogging, swimming, biking and jumping rope.

    Children, along with adults, need to engage in a certain amount of aerobic or endurance activities to keep their mind and body healthy. These skills enable physical health and overall wellbeing.

    Endurance activity keeps your heart, lungs and circulatory system healthy and improves your overall fitness. As a result, people who get the recommended regular physical activity can reduce the risk of many diseases such as diabetes, heart disease and stroke.

    Endurance activities build muscles and increase the ability to sustain exercise for longer periods of time.

    Not only are endurance activities great for the mind and body, they are excellent for aiding in regulating the sensory system. Endurance activities can help to organize the vestibular, proprioceptive, visual, and tactile systems.

    Endurance also is a tool in improving arousal level. Check out this post on Zones of Regulation and Self Regulation Activities. When you think about how sensory dysregulation appears, it can be a visual picture of low endurance and sensory organization of the nervous system. Having self regulation strategies on hand supports these needs.

    classic endurance activities

    There are numerous endurance activities appropriate for people of all ages. Children should get 60 minutes of aerobic exercise three times per week. Hint: don’t call it exercise, or no one will want to play!

    Classic endurance activities like the ones listed below, are a great way to get moving

    Running – this can include jogging, speed walking, sprinting, galloping, and skipping. Running can also be part of other activities like organized sports or fun outdoor games such as tag games.

    Walking – included is hiking, or taking a brisk walk around the park. Another option is HIIT treadmill workouts.

    Swimming – this does not have to be done competitively in order to be beneficial. Children can spend hours diving for pennies, racing their friends, diving into the pool, or jumping up and down in the water.

    Biking – two wheeled bikes, tricycles, scooters, skateboards, skating, balance bikes, big wheels, or anything else with wheels. Stay clear of motorized vehicles when looking for endurance activities. Here are tips to teach bike riding and ideas to support balance and endurance needs with bike riding.

    Sports – organized sports provide great exercise opportunities. These can be team sports like football or baseball, or individual activities such as martial arts, gymnastics, skiing, or fencing. Not everyone is suited for an organized group sport.

    Jumping rope – this classic endurance activity works on a plethora of skills. In addition to coordination, jumping rope improves balance, endurance, motor planning, and more. Other skills while jumping rope include hopping, one foot at a time, both feet together, and double Dutch. While practicing hopping and jumping, grab some chalk and make a hopscotch game.

    Dancing – jamming to favorite tunes, organized dance class, aerobic fitness class, or following along with videos

    Calisthenics – this is the “old fashioned” word for muscular endurance activities. These include; sit ups, push ups, burpees, jumping jacks, planks, squats, and lunges. Muscular endurance, is all about sustained efforts over a longer period of time.

    Yard work or chores – while these are not generally preferred activities, they are a great way to get the heart rate and breathing going.

    Skipping– This is a great endurance activity. Use some of our tips to teach skipping if motor planning and coordination is a challenge.

    non-traditional endurance activities

    There are definitely a large group of people who resist exercise of any kind. This group might need a little hidden exercise disguised as a fun game. While I am not a fan of electronics, games like the Wii, or Peloton combine exercise and technology. There are tons of other endurance activities that are just plain fun:

    • Tag games– who doesn’t love a great game of tag? Freeze tag, blob, Red Rover, Red Light Green Light, Musical Chairs, Flashlight tag, Duck Duck Goose, Mother May I, relay races, Zombie Tag, are just a few.
    • Ball games like Dodge Ball, Four Square, and Spike Ball are fan favorites
    • Classic outdoor lawn games such as Capture the Flag, Kick the Can, Hide and Seek, Simon Says, and Cops and Robbers will bring back fond memories
    • Obstacle courses – turn your house or backyard into an obstacle course. Become the next American Ninja Warrior!
    • Organized Play – if you prefer, there are great places to take the kids to get some exercise. The playground, trampoline park, mini golf, amusement parks, water parks, rock climbing, are just a few choices. These playground balance activities are more ideas.
    • Brain Breaks– many brain break activities are actually endurance work disguised as themed movements. Try our list of Brain Break videos on YouTube for more ideas.
    • Yoga activities like unicorn yoga improve core strength and stability.

    Endurance Activiies resources

    These activities are designed to develop strength and endurance through play:

    • Jungle Animal Heavy Work Exercises – Need to add heavy work to help kids regulate emotions, or to use as a coping tool for sensory needs? Help kids re-group or add movement into learning with these Jungle animal themed brain break cards. 
    • June Heavy Work Exercises – These adorable movement and heavy work activity cards will not only bring joy to students but also help them unleash their full learning potential, while caregivers can effortlessly provide easy and enjoyable activities. 
    • Fit Deck (Amazon affiliate link) has some great workout flash cards for children and adults.
    • Little Tykes Stationary bike – this includes a video screen for the reluctant learner

    final thoughts on endurance activities

    According to the Centers for Disease Control, “Less than one-quarter (24%) of children 6 to 17 years of age participate in 60 minutes of physical activity every day.” They also state that:

    • Students who are physically active tend to have better grades, school attendance, cognitive performance (executive function and memory), and classroom behaviors (compliance, attention, and on-task behavior).
    • Higher physical activity and physical fitness levels are associated with improved cognitive performance (concentration, memory) among students.

    “When I was a kid…..” we played outside all of the time. We came inside for dinner and went back out again. There also were not as many people with health issues, obesity, attention, or behavioral issues. While people have made many advances in technology and medicine, screen time and technology use has changed things. Let us not forget the basics of play and endurance activities in order to be healthy and well rounded.

    Victoria Wood, OTR/L is a contributor to The OT Toolbox and has been providing Occupational Therapy treatment in pediatrics for more than 25 years. She has practiced in hospital settings (inpatient, outpatient, NICU, PICU), school systems, and outpatient clinics in several states. She has treated hundreds of children with various sensory processing dysfunction in the areas of behavior, gross/fine motor skills, social skills and self-care. Ms. Wood has also been a featured speaker at seminars, webinars, and school staff development training. She is the author of Seeing your Home and Community with Sensory Eyes.
    Handwriting Games

    handwriting games

    Looking for fun ways to teach handwriting, then these handwriting games are your go-to activities to make letter formation fun and engaging! If you have ever worked with a student, you already understand how challenging working on handwriting can be. You also know how important handwriting is to academic and life success. Legible handwriting can mean the difference between a passing and failing grade. Learners of all ages that struggle with handwriting problems do not respond well to tasks that seem like work. Even the mention of work, sends a wail of protests.

    handwriting games

    Lets get to the games to work on letter writing!

    Handwriting Games

    Activities like the Handwriting Games highlighted below, seem less like work than handwriting worksheets.

    Before getting started, a word or two about letter formation…

    Before jumping into handwriting games, it is important to understand the basics of handwriting and letter formation. The OT Toolbox has several resources to help you better understand letter formation and written expression.

    Included in this post is a list over over 40 handwriting games and other activities. Here is a master page containing several resources for handwriting.

    One of the benefits of using handwriting games to teach the components of handwriting is that the gamification is a play-based tool for teaching an important, and functional skill. Some of the ways to target overall legibility in a game is to focus on the components that make up writing skills:

    • letter formation
    • line awareness
    • letter size
    • letter spacing
    • number formation
    • cursive letter formation

    You can target one or more of these areas using games!

    Why are young learners so reluctant to do visual motor tasks such as writing, coloring, and cutting?

    • Learners respond better to activities that mean something.  Rote math problems, writing sentences, or coloring endless shapes are often meaningless.  A task that involves a game often holds more meaning than standard worksheets.
    • These tasks are difficult.  It is difficult to keep finding motivation to do something hard.
    • Most of the learners we work with are not good at these tasks, that is why they are getting therapy or other help.  Again it is difficult to stay motivated doing activities you are not good at. 
    • Visual motor tasks such as writing, coloring, and cutting, are not predictable.  Puzzles are more straightforward.  There is only one way a puzzle can go together.  It is difficult for a new learner to make exactly the correct strokes on paper, cut on the lines, or glue items in the correct position.  Despite the correct amount of effort, sometimes the eyes/hands/body have different plans.  
    • It is hard to want to keep trying when failure happens more than success.

    what is a Handwriting game?

    As occupational therapy providers, we love to provide meaningful and motivating activities to foster function…and games are one way to do that!

    When I think of the word “game” I picture a competition between several people. There is a winner and loser. This in itself may pose a challenge to your stressed out learner.

    The dictionary defines games as: a form of play or sport, especially a competitive one played according to rules and decided by skill, strength, or luck.

    Games, however, can be “a structured form of play, usually undertaken for entertainment or fun, and sometimes used as an educational tool.

    Games are sometimes played purely for enjoyment, sometimes for achievement or reward as well. They can be played alone, in teams, or online; by amateurs or by professionals. 

    Key components of games are:

    • Goals
    • Rules
    • Challenges
    • Interaction

    These components are great tools for social interaction, functional performance, and achieving goals like learning letter formation, right??

    Games generally involve mental or physical stimulation, and often both. Many games help develop practical skills, serve as a form of exercise, or otherwise perform an educational, simulational, or psychological role.” Wikipedia.

    choosing handwriting games

    When choosing handwriting games, look at your audience before deciding if you are going to make a competition, educational tool, fun activity, or reward challenge.

    Some handwriting games are great activities to work on the components of writing skills, but are more of an educational tool than a competition or purely fun game.

    These letter formation games might be something like:

    • roll a dice and write a word that has that number of letters
    • roll a dice and count the dots. Write that letter of the alphabet

    On the other hand, there are other board games that can be adapted to include a letter formation component. These include Zingo, Boggle, Jenga, Candyland, Scattergories, Connect 4, Guess Who, or Battleship. These games can be done competitively, or as a single participant, depending on your students.

    Pencil and Paper Handwriting Games

    Other handwriting games simply use paper and pencil but have a fun gaming component. Some ideas include:

    • Play tic tac toe and use letters instead of the Xs and Os.
    • Play the dot game and place letters inside of the completed squares.
    • Word search races- Use a word search to race to find all of the letters of the alphabet. Then write the alphabet when you’ve found them all.
    • Play guessing games using ghost writing.
    • Play Letter Bingo. Create Bingo cards with letters instead of numbers. Call out letters, and players mark the corresponding letters on their cards. The first to complete a row or column shouts “Bingo!” Then, write all of the letters on the card to practice letter formation skills.
    • Play Letter Dominoes. Make your own set of letter dominoes by writing letters on index cards. Players take turns matching letters on the dominoes, forming a chain. When you’ve matched a letter, the child can practice writing the letters. Make this more complex by using words, like color words, seasonal words, etc.
    • Play Alphabet Memory. Create a set of letter pairs (e.g., uppercase and lowercase) on index cards. Place them face down, and players take turns flipping two cards to find matching pairs. When you’ve found a match, write the word onto paper.
    • Go on a Letter Scavenger Hunt. Write uppercase and lowercase letters on sticky notes and hide them around the house. Children search for the letters and then write them down when found.
    • Play Letter Charades. Write different letters on small pieces of paper and put them in a hat. One player picks a letter and acts out words that start with that letter while others guess. When a word is guessed, everyone has to write the word.
    • Play Alphabet Hopscotch. Draw a hopscotch grid with letters instead of numbers. Players toss a marker onto a letter and hop through the grid while naming the letters they land on. Then, they can write the letter and think of a word that starts with that letter. They can write it on paper, focusing on letter accuracy and line use.

    letter recognition games

    This post on Letter Recognition Games is a great way to introduce letters in a fun setting.

    Letter recognition is often a precursor to letter formation. Knowing what you are writing is just as important as how to do it.

    The author suggests games such as:

    • Beanbag Toss – Affix upper and lowercase letter stickers to one side of each bean bag. Put a basket or bucket across from your child. As your child throws the bean bags into the bucket, ask them to name the letters and their sounds of the letters. Students can run around looking for matching letters scattered around the room.
    • I Spy Letter Walk –Take a walk with your child and look for letters in their environment such as on license plates, street signs and building. Play, I Spy, searching for different letters, or letters in sequential order. The printable tools in the Letter Fine Motor Kit are a great resource for this activity.
    • Gross motor activities- Use a letter floor mat to jump on a specific letter. Ask the child to find a letter magnet and place it on the letter mat.
    • Letter recognition scavenger hunts- Use ideas like these letter clothes pins scavenger hunt for ideas.
    • Letter Sensory Bins – sensory bins are a staple activity for sensory play. Hide plastic letters in your sensory bin and ask students to find certain letters. They can find and name the letters, search for matching letters, find letters in alphabetical order, or look for a specific letter to spell a word.

    letter formation games

    Sometimes a store bought game is the easiest and most motivating way to work with students. Amazon for example, has some great ideas. (Amazon affiliate link- As an Amazon Associate I earn from qualifying purchases.) Believe it or not, some school districts frown upon home made items, citing they are not regulated, and not consistent for data collection.

    You can of course purchase these anywhere, the following are just examples and ideas.

    If your students need to develop fine motor dexterity along with writing letters, this post has some great games you can buy. Adjust these games to include writing or copying letters to make them more of Letter Formation Games. Bedbugs, Fruit Avalanche, Wok and Roll, Operation, and the Sneaky Squirrel Game are just a few of the examples cited.

    • Alphabet Bingo (Amazon affiliate link-commissions earned) – Recognize and identify the letters of the alphabet. A fun way to help your child practice and gain fluency with alphabet letters while making it engaging and keep them excited to learn. Multiple ways to play; Uppercase Bingo, Lowercase Bingo or Upper & Lowercase Bingo.
    • OSMO Letter Formation Sticks (Amazon affiliate link-commissions earned)- for those of you who use the iPad as a therapeutic tool, OSMO is a great add on to work on skills. Children interact with actual hand held pieces & an iPad or Fire Tablet, bringing a child’s game pieces & actions to life. Build & create letters & designs with squishy, colorful sticks & rings, then watch them come alive! Playful practice for preschoolers/pre-readers. Learn letter formation, phonics, & more than 300 words
    • PlayShifu (Amazon affiliate link-commissions earned) is another iPad based company with handheld manipulatives. PLUGO LETTERS is an AR-powered word building game kit that combines the goodness of hands-on learning and healthy screen-time. Spell with alphabet tiles, grow your vocabulary, and improve grammar with story-based games.
    • Kizh Wooden Letter and Number Construction Activity Set (Amazon affiliate link-commissions earned)- This set of different shaped wooden pieces can be placed on the special pegboard to form letters. Similar to the wooden pieces in Handwriting without Tears, but with colorful letters and a puzzle feel to it.
    • Learning Resources Alphabet Island (Amazon affiliate link-commissions earned) has some great educational games. This is often my “go to” when purchasing items to use in therapy.
    • Alphabet Go Fish (Amazon affiliate link-commissions earned)- a fun twist on the classic card game Go Fish
    • Scrabble Junior (Amazon affiliate link-commissions earned)- a great letter matching game
    • Check out these Ten Ways to Teach Letter Formation – this post includes ideas for sensory play, gross motor activities, hands on letter formation and more
    • What about multisensory letter formation using items found around the house? Kids can write in sand, shaving cream, pudding, with playdough, wikki stix, slime or slime. They can use manipulatives such as; chenille stems, buttons, pegboards, toothpicks, cotton swabs, play dough, and more to create letters
    • iPad writing apps – here is a list of several great iPad apps OTs often use to enhance learning.

    Other games for handwriting

    Whether your “go to” is iPad based games, home made activities, or store bought board games, there is an overwhelming amount of resources out there to help you motivate your learners to get excited about letters. While worksheets and printables definitely have their place in therapeutic learning, adding fun games can really spice up your therapy sessions!

    You can also modify the games you’ve already got and use the game pieces to work on handwriting skills. Try these ideas:

    • Use a game spinner to spin and write a letter.
    • Write letters on playing cards and use them to spell words or play card games. When you pull a card, practice that letter.
    • Use a game board and add letter stickers to the spaces. When a player lands on a letter, they can write the letter or write a word that starts with that letter.
    • Roll dice and write letters based on the number rolled.

    Other ideas include using LEGO blocks to make letters, forming letters with Geoboards, making Yoga Letters, and more. All of these activity cards are found inside the Letters Fine Motor Kit.

    You can also access the Letters Fine Motor Kit inside The OT Toolbox Membership Club.

    Victoria Wood, OTR/L is a contributor to The OT Toolbox and has been providing Occupational Therapy treatment in pediatrics for more than 25 years. She has practiced in hospital settings (inpatient, outpatient, NICU, PICU), school systems, and outpatient clinics in several states. She has treated hundreds of children with various sensory processing dysfunction in the areas of behavior, gross/fine motor skills, social skills and self-care. Ms. Wood has also been a featured speaker at seminars, webinars, and school staff development training. She is the author of Seeing your Home and Community with Sensory Eyes.
    Crossing midline Activities for Preschoolers

    crossing midline activities for preschoolers

    Today’s article on Crossing the Midline Activities for Preschoolers will be full of ideas to practice and strengthen crossing the midline. Hopefully you caught the earlier post on the midline. It highlighted what crossing the midline is, how to identify deficits, and strengthen this important skill.   

    crossing midline activities for preschoolers

    Why are we highlighting crossing the midline for preschoolers?

    Why this subgroup specifically, since crossing the midline is an important skill for all learners?  Preschool age of three to five is a critical area for development. 

    The baby years are spent exploring and learning basic developmental skills.  Preschool age is important for practicing, learning, and refining skills. 

    Skills learned from ages three to five will become the building blocks for higher level cognitive and functional skills including fine motor, self-help, handwriting, gross motor, and adaptive skills. 

    A child who is missing the building blocks will have difficulty moving to the next level.

    Imagine a student who does not know their numbers or addition, being asked to learn multiplication.  They do not have the basic skills to learn and incorporate this higher-level skill.  Writing begins with preschool prewriting strokes, then moves to letter formation.  Many skills we learn are progressive. You would not try building a big house without a solid foundation.

    Crossing the midline is no exception. A child who can not cross the midline will struggle with handwriting, reading, sports, self help skills, and more. There is a reason for the push toward early intervention for children. Build these skills early, then students can move forward with a solid foundation.

    crossing the midline and the Brain

    Let us do a quick recap of crossing the midline in case you missed the earlier post.

    Crossing the midline is like drawing a line down the middle of your body.  Many websites refer to this as reaching across the body with your arms and legs.  Do not forget your eyes!  Your eyes cross the midline as well, making reading, scanning, and writing possible.

    From a scientific point of view, crossing the midline strengthens the neural connection between the left and right hemispheres of your brain (aka bilateral integration).

    Crossing midline strengthens the neural connection between the left and right hemispheres of your brain (aka bilateral integration).  The left brain has different functions than the right, but they need to be in constant communication to make things happen smoothly.

    difficulty crossing the midline

    There are some early warning signs we might see in the preschooler who struggles with crossing their midline. This should be a natural and efficient motor plan by the preschool years. When we see a difficulty with the integrated motor patterns, this can be an indicator for various challenges.

    Some of the ways that difficulties with preschool crossing midline will present as:

    • Not developing a dominant hand. Students use the left hand for left sided tasks and the right side for right sided tasks. 
    • Showing delays in crawling, or an atypical crawling pattern. Here is a great article on Cross Crawling Activities.
    • Rotating or turning their entire body to retrieve objects on the other side of their body instead of reaching across the body to the other side
    • Having difficulty with age-appropriate self-care tasks like dressing or grooming activities
    • Skipping or doing jumping jacks in an uncoordinated manner. Check out this post on Gross Motor Midline Crossing Exercises
    • Difficulty making a horizontal line across a piece of paper (may stop in the middle and switch hands, or pause visually) or forming letters
    • Visual perceptual difficulties
    • Delayed or below average reading skills due to difficulty reading smoothly across the paper

    Crossing Midline Activities for Preschoolers

    Play is the occupation of a child. Caregivers will have better success by making lessons fun. Adults barely tolerate physical exercises like lunges and squats, what makes us think preschoolers will? 

    Turning skill acquisition into a fun game is a surefire way to engage your preschoolers. 

    Here is a great post on Occupational Therapy Activities for Preschoolers, and another one on Preschool Activities

    Start by checking out the list of activities and make a note what skills they are targeting.  I bet there are some on there addressing crossing the midline.

    Below are specific activities to target crossing midline for preschool aged children.

    Midline Activities for Preschoolers

    Let us look specifically at crossing midline activities for preschoolers. These activities will work for older children but for the purpose of this article we are highlighting ones for the three- to five-year-old crowd.

    1. Cross midline by reaching for stickers– Place stickers on your child’s clothing in different locations. Encourage them to reach across midline to pull them off and stick them onto a paper or board. Here are more benefits of playing with stickers.

    2. Encourage midline crossing with clothes pins- Similar to the stickers grab, clip clothespins to your child’s clothing, having them retrieve them.  Purposefully pick places they can not reach with the hand on the same side such as the top of the shoulder or elbow. Here are various clothes pin activities that can be used to target midline crossing skills.

    3. Sorting activities- have students sort items into different containers using one hand only.  You can switch sides half way through, but encourage use of just one side at a time. Start with sorting colors activities and move to other areas such as sorting letters by size or sorting shapes.

    4. Midline Crossing with Preschool Chores– While chores are work for adults, they are often novel for young children.  Sweeping, using a duster, pushing a vacuum, wiping down tables, and washing the car, all involve reaching across the body. You can use a visual reward schedule along with chores for preschoolers…and add those stickers from point number 1 listed above.

    5. Yoga for kids- There are some great yoga poses that involve crossing the midline. Use our unicorn yoga activities, penguin yoga activities, or even partner yoga poses to target midline crossing.

    6. Playing with trains, cars, or other vehicles- One way to work on midline crossing with preschoolers is by zooming cars down a track or trains around their track. Especially when playing on a floor with cars, this helps encourage crossing midline but also developing core strength and stability which is necessary for mobility needed for midline crossing skills.

    7. Simon says- While younger children might not understand the exact rules of this game, they can work on imitating and following directions.  Add Simon Says directions like: touch your opposite shoulder, do jumping jacks, side strides, clapping movements, etc. Our list of Simon Says commands has many gross motor tasks that encourage midline crossing for preschoolers.

    8. Rubbing lotion on the arms or legs- You can target midline crossing with preschoolers using a functional task: applying lotion! Ask children to rub in lotion by strategically add lotion to parts of the body only reachable by crossing over the midline. This can be extended to rubbing in sunscreen too.

    9. Rainbow draw- We shared our crossing the midline rainbow activity before as a tool to target visual scanning skills. Have your student sit on a large piece of paper or stand at a chalkboard/dry erase board. Using one hand only, have them draw a rainbow across their body with different colors.

    More crossing midline activities for preschoolers

    • Ball pass- Your child is seated on the floor with a bucket of bean bags or other items on each side.  They need to move the bean bags to the opposite side across their body.
    • Obstacle courses – Create obstacle courses that involve jumping, crawling, marching
    • Scooter and plunger- The students sit on a scooter and “paddle” forward with a plunger.
    • Swing a baseball bat- Hang a wiffle ball from a string and have your child hold the bat with two hands to try and hit the ball.
    • Painting on an easel- Use large paper on an easel or other vertical surface. Large paper calls for large movements. Be mindful that your child is using one hand for this task
    • Arm isolation- Play a game where your child has one arm hidden in a sleeve or is wearing a sock over their non dominant hand if they need their arm for safety.   Have them work on different table top tasks without being able to use both hands.
    • Animal walks- Taking brain breaks to practice crab crawl or bear walk has multiple benefits at once.
    • Twister- This popular game can be modified for the preschool age population
    • Visual scanning- Scatter lots of items on a large table. Have students visually scan looking for something. There are lots of printables for visual scanning available. Check out this OT Toolbox search for scanning activities
    • Hand clapping games – These are especially helpful when clapping with a partner, having to touch opposite hands or legs
    • Prone reaching- Kids can lie prone over a large ball while reaching for items in different locations
    • Bilateral tasks- bilateral coordination activities work on crossing midline as each side of the body is responsible for doing something different. Stringing beads, reading a book, coloring, cutting with scissors, puzzles, etc.
    • Magnadoodle- This simple toy is not only great for developing fine motor skills, but erasing in involves sliding the eraser across the doodler.
    • Cooking- There are many aspects of cooking with kids that foster midline crossing. What about stirring, spreading, pouring, measuring, and scooping?
    • Back to back ball pass- Sit back to back with your child, pass a ball back and forth by twisting your body to reach the other person.

    A final thought on crossing midline in Preschool

    As you read through these activities you may find you have already been doing many of them.  Perhaps you are already an expert and just needed confirmation that you are on the right track.

    Maybe you are new to this and felt overwhelmed seeing a “crossing midline” goal on a plan of care.

    Having therapy students keeps me on my toes because they have to break down tasks and do activity analysis all the time.  I have been put on the spot many times when asked what therapeutic intervention or model I am following.  I say, “I don’t know, play?”

    Victoria Wood, OTR/L is a contributor to The OT Toolbox and has been providing Occupational Therapy treatment in pediatrics for more than 25 years. She has practiced in hospital settings (inpatient, outpatient, NICU, PICU), school systems, and outpatient clinics in several states. She has treated hundreds of children with various sensory processing dysfunction in the areas of behavior, gross/fine motor skills, social skills and self-care. Ms. Wood has also been a featured speaker at seminars, webinars, and school staff development training. She is the author of Seeing your Home and Community with Sensory Eyes.
    Therapy Bags

    beige tote bag with the words "occupational therapy bags"

    Whether you are returning to a new school year, or working on your therapy tools, it is time to revisit the therapy bag. Depending on your work environment, caseload, and setting, your therapy bags may look different. For the therapy provider just getting started in the school setting, or for new grad OTs, the question comes up quite often: What is the best therapy bag to get?! In this post we will start by looking at different types of therapy bags people are using, then dive into the kinds of items therapists put in their “toolbox”. You may even want to consider a therapy bag as an occupational therapy gift for the OT or OTA in your life!

    therapy bags

    These therapy supply bags might even be a great gift for the occupational therapy provider in your life!

    The Best therapy bags

    The best therapy bag for you depends on your work space, the number of schools you might visit in a day, or the therapy setting (clinic, home setting, early intervention, etc.). Consider these questions to find the therapy bag that best meets your needs…

    • What kind of therapy bag do you like best?  Are you a backpack kind of therapist or a rolling cart therapy provider? 
    • Do you work out of the trunk of your car grabbing a handful of stuff as you go? A therapy backpack or pull cart might work for you.
    • Do you feel like you need to carry your entire office everywhere you go?  A rolling suitcase or therapy cart might work.
    • Are you fortunate enough to have everything at your fingertips, needing only a couple of things in your pockets? A therapy tote bag might best suit your needs.

    Let’s take a look at the various types of therapy bags and the pros and cons of each. (Amazon affiliate links are included below.)

    the Therapy Backpack

    A backpack is the go-to bag for many therapy providers. It is easy to carry, ergonomically designed to carry the weight of the bag and contents, and comes with lots of pockets for storing your tools.

    There are thousands to choose from, starting with the classic Swiss Army brand, the Jansport with its great warranties, Lands End and LLBean for their level of quality and more.

    These links below are Amazon affiliate links in which commissions are earned from qualifying purchases.

    • In the past I bought fancy trendy backpacks that were pretty, but not practical. Bags like this Vera Bradley design (commissions earned) were irresistible.  That was until my pens leaked into them, I sat them on the dirty floor, they were covered in who knows what, and the mysterious sticky stuff showed up at the bottom of the bag.  While these are washable, they are not practical. 
    • Now my preferred therapy backpack (commissions earned) is more practical, but less showy. It has over 89,000 positive reviews on Amazon.  It has lots of pockets for storing tools and toys. It is missing the chest strap, but generally my bag is not overloaded unless I am taking it on vacation. 
    • This Lovelook backpack (commissions earned) is very popular as a therapy backpack. It boasts many pockets and is trendy looking, however it does not open very wide, meaning all your stuff is going to end up at the bottom somewhere. It looks awkward to carry, especially if you have a heavy load or wear it frequently.
    • This great therapy bag from Coowoz (commissions earned) has a lot of space in it. It opens flat so you can see what is in the bag. The shoe compartment can hold baggies of stuff, or your lunch and snacks. It comes in a couple of different sizes. This therapy backpack is a cross between a piece of luggage and a backpack.
    • The Army Style backpack, (commissions earned) while looking very utilitarian, is functional and sturdy. Check out all the pockets!  It is also designed to be ergonomically correct with the chest and waist straps. I love that this one is called the Assault Pack. (commissions earned) Sometimes it feels like therapists are fighting a battle every day.

    Kawaii Therapy Backpack

    If you are set on fun over function, a Kawaii therapy backpack is a fun style. Check them out here. (commissions earned) The Kawaii backpacks are sweet and practical. 

    Kids will love to see the therapy tools they may use that day peeking through the windows of the backpack.

    Roller Therapy backpacks

    In recent years as I age, and my therapy supplies enlarge, I am leaning more toward a therapy bag on wheels. These are especially helpful if you travel on foot between schools, across a large campus, or throughout a big hospital or facility. 

    These types of therapy supply packs can vary from a roller backpack to a carry-on suitcase. For the therapy provider that works in school hallways or even supply closets, this can be a great bag to carry all of the therapy supplies from space to space.

    • The Rockland Rolling Backpack (commissions earned) is most cost effective. You might be able to replace this one every year if needed. I like that it still has handles for carrying up and down stairs or in tight spaces. Not sure how rugged and sturdy it is, and it only boasts a couple of pockets.
    • This J World New York style (commissions earned) is a little more costly but looks sturdier.  It comes in tons of fun designs and colors. It has a few pockets and nice big wheels for traveling.
    • Check out the giant wheels on this one! (commissions earned) If you travel in rough terrain, this bag might be for you.
    • Matein makes a roller bag (commissions earned) that is functional. It is high in price, but looks sturdy.  It has tons of pockets for all your tools and can be converted to a regular backpack.

    Alternative rolling therapy bags

    There are other options beyond your basic luggage rolling bag, too. These therapy bags are nice for the added features.

    • Rolling Duffle bags (commissions earned) have always been popular. They are not as sleek as other bags, but have lots of room and pockets. The added space means you can tote around extra supplies like wiggle cushions, alternative seating options, self-regulation tools, etc.
    • If you do not have a lot of things to carry in your therapy bag, a rolling laptop case (commissions earned) might be the way to go. They are more professional looking than a backpack or duffle bag if that matters where you work. This design has many pockets for storing items. It comes with carry handles and is not going to be as easy to tote as a backpack.

    the Rolling Suitcase

    In the past year I have switched over to a rolling suitcase.  I like that it is sturdy and big.  What I do not like is the lack of pockets. I find myself adding baggies of similar items into my case and searching for items. 

    Another benefit of the rolling suitcase therapy bag is that it’s easier on the back to pull, and the wheels are designed for someone who needs to walk through busy airports, or from school building to school building!

    • Us Traveler (commissions earned) has a basic budget friendly design. It comes with an additional bag for fidgets, manipulatives, snacks, or a grab and go bag. It does have some pockets and a large opening for your bigger tools.
    • Pediatric therapists (commissions earned) will love these cute bags!  They are not huge, but will be a big hit with your kids.
    • Scooter ride on case (commissions earned) – while I am not sure if these come in my size, I would love one!  Imagine scooting all over your work place. Plus, it doubles as a sensory therapy tool, too!
    therapy tote bags

    Therapy Tote Bags

    There are many therapy tote bags on the market, too. I love the fun advertisement for occupational therapy, physical therapy, or speech therapy that some of these offer!

    These links below are Amazon affiliate links in which commissions are earned from qualifying purchases.

    • A Utility tote is a nice compact bag with many pockets. If you do not have a long distance to carry it, and it is not too heavy, it is a practical therapy bag. This “Nurses bag” has 21 pockets!!  The trouble with too many pockets is remembering which one it is in!
    • If you are looking for something personal and crafty, there are tons of therapy bags listed. They come in all different shapes and sizes, can be personalized, and are fun to use.  While not as practical as a rolling tote, they are great for carrying a few items back and forth.

    Therapy Crate

    A rolling therapy crate or therapy box is nice because you can cart around paper, worksheets, and various therapy tools and materials.

    These links below are Amazon affiliate links in which commissions are earned from qualifying purchases.

    • The collapsible crate is becoming more popular. These are great for toting large items, or lots of toys at once.  No pockets, so stuff might get jumbled in there. FYI it does not fit in the trunk of a Mini Cooper, so it was out for me.
    • This hardshell bag is a functional sturdy bag. It does not have wheels and must be hand carried. This looks professional and has a large pocket for big items.  Not many pockets on this one.
    What's in my therapy bag? Occupational therapy supplies in a therapy bag

    The occupational therapy supplies in my therapy bag are geared toward younger elementary, preschool, and high school OT students.

    What is in your therapy bag?

    Now that you have selected the best bag for you (I am seriously eyeing a new roller backpack), you have to fill it with occupational therapy tools, and other stuff.  I love the “other stuff” because I am always amazed at what I find I have stuffed in my OT bag.

    There are many items that may make up your occupational therapy equipment list because therapy interventions depend so much on the needs of each individual. That’s why switching out items in your therapy bag (whatever the type) is so essential.

    Last year it was a random pair of socks, seven chapsticks, enough pens to write a novel, and a couple of valentines. If you are like me, your therapy bag is constantly changing, depending on the day and caseload.

    Let’s start with the basic standard occupational therapy tools to fill your therapy bag:

    • Mini zippered pouches (commissions earned) – these are a must have if you use small items. They are great for sorting items for easy retrieval. Fill them with school supplies, one for grippers, prizes, fidgets, snacks, or personal items.  You can also use pencil cases or plastic Ziplock bags for storage
    • Personal items – as noted above, lip balm is in my bag. You can pack items such as bandaids, feminine hygiene products, wipes, hand sanitizer, aspirin, makeup, hair spray, stain remover, ear buds, hair ties, extra reading glasses (had to make a quick Walmart run early one morning), or whatever you feel you might need.  I prepare for work as if I am living on a desert island where nothing is available.
    • Office supplies – pens, pencils, white out strip, paperclips, tape, scissors, envelopes, sharpies, labels, and a stapler. If you have an actual office, you might not need to travel with all these office supplies, but at least have a pen handy
    • Planner (commissions earned) I like this hourly one. Even if you do online scheduling, it is nice to glance at a paper calendar and have a back-up.  This way you have at least two sources to document your visits
    • School supplies – these are the standard supplies you use in therapy: scissors, glue, glue stick, paper, pencils, crayons, dot markers, etc. You can get a shower caddy to carry these or one of the zippered pouches

    beyond the basic therapy bag supplies

    These items can be used to create your own set of Occupational Therapy Activity Toolkits. Then, you can switch things out to keep the kids on your caseload motivated.

    • Fine motor therapy supplies – in the school system as well as some other settings you need a grab bag selection of pencil grips to try with your kids, different kinds of scissors (loop, self-opening, tiny ones), tongs, pom poms, a dressing board, pennies in a container, putty, beads and string, stickers, shaving cream, pop tubes, play dough, clothespins, and other small items to work on fine motor skills. Not sure what to add to your bag? You can make your own DIY Fine Motor Toolkit.
    • Small sensory items – you never know when a teacher or other professional is going to ask if you have ones they can use at this very moment. It is nice to have them handy. Small fidgets, calm strips, rubber bands, theratubing, a mini sensory bin, and different types of pencil toppers are great
    • Larger therapy items – hopefully you are not carrying too many large items on a daily basis. These might include: a rocker board, wiggle cushion, slant board, wipe off board, weights, headphones, or anything you use consistently. These items might fit best in the collapsible crate
    • Tools – some therapists need goniometers, grip and pinch meters, screwdrivers, and other items to work with their clients
    • Games and puzzles – large games like Connect 4, Candyland, Pop the Pig, Kerplunk and other classic games are great, but take up a lot of room.  There are now mini versions of several popular games. (commissions earned)
    • Snacks – as a therapist you are never ever certain you are going to get a lunch break.  Having snacks like granola bars, trail mix, candy, breakfast bars, and crackers is a good idea to keep on hand. If you motivate your students with candy or food, you will want to put some small items in your bag for them too.
    • Paper activities – while the bag is full of fun stuff, do not forget the fine motor paper tasks. Pack different lined paper, printed activities, color/cut/glue pages, mazes, puzzles, etc. I try and plan the week ahead by adding my printables to the bag that I can use all week.  Each week I rotate printables.  The OT Toolbox has some great themed kits like this A-Z Bug Themed activity set. Search on the site for fine motor kits, or shop in the OT Toolbox store.

    Therapy Bag tools change depending on setting

    There is not going to be a one sized fits all for the therapy bag.  Whether it is the type of bag you carry, or what you put in it. 

    Homebased pediatric therapists might have blocks, teething rings, stacking rings, and other primary toys.  A hand therapist will have tools specific to that trade. The school system therapy bag will vary depending on the age and type of students you work with.

    Therapy providers with multiple schools might find they have a different tote for each school. 

    One thing that helps with using a therapy bag of any kind, is staying organized and planning.  I can not tell you how many mornings I run around the office grabbing random things to throw into my bag, or dig around the bottom of the bag looking for a red crayon.  It is those weeks that I try and carve out a little time to reorganize the bag and get myself on track for the next week.

    All this talk of therapy bags has me wanting to order a new one for this school year!  I have my eye on a roller backpack this year, and am tempted by the scooter one if it fits. 

    Victoria Wood, OTR/L is a contributor to The OT Toolbox and has been providing Occupational Therapy treatment in pediatrics for more than 25 years. She has practiced in hospital settings (inpatient, outpatient, NICU, PICU), school systems, and outpatient clinics in several states. She has treated hundreds of children with various sensory processing dysfunction in the areas of behavior, gross/fine motor skills, social skills and self-care. Ms. Wood has also been a featured speaker at seminars, webinars, and school staff development training. She is the author of Seeing your Home and Community with Sensory Eyes.
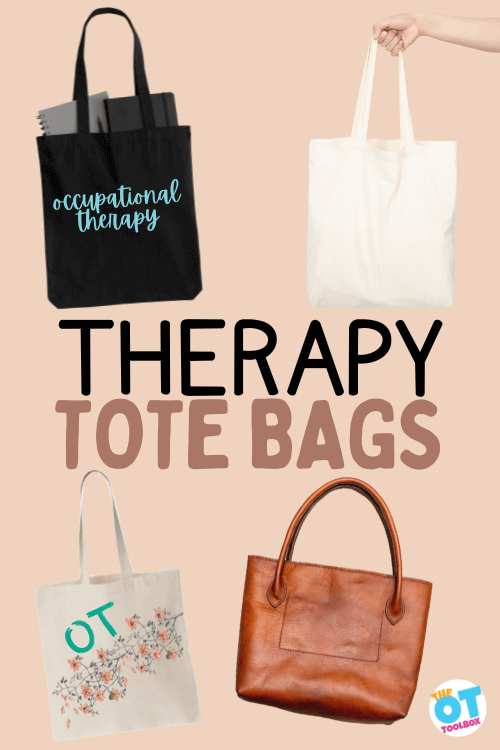
    Letter D Worksheet

    letter d worksheet

    Today’s post will address letter “D” and include a free printable Letter D Worksheet. All the letter formation worksheets in this series will have tips to the teach the selected letter, review the prewriting skills needed, and highlight different rhymes and prompts that are helpful to teaching the letter. D is for donuts and dogs, two of my favorite things! Moving through the alphabet, we are ready to learn how to teach the letter D. Keep an eye out for posts for all 26 letters!  

    The Letter D Worksheet is designed for students to cut the page into sections, then staple all the pieces together to create little alphabet books by grouping the dotted, tracing, playdough, and color sections together.  Click the link below and add your email address to get the FREE downloadable PDF letter D worksheet.

    Letter D worksheet

    If you have missed the posts for letters A, B, and C, be sure to check them out!

    letter D worksheet

    Today we are highlighting the Letter D, both in its upper and lowercase form. There are many terrific ways to teach letter recognition and formation. This article from the OT Toolbox archives is a great read when starting to teach letter formation.

    It is a great resource for providing multi-sensory learning. Using different methods to teach information can help find a method that works for your learners specifically, as not all students learn the same way. Find a way that works for your students specifically, as not all students learn the same way. 

    Teaching letter recognition and formation can be approached in various ways, and adopting a multisensory letter writing method is highly effective for enhancing skills while accommodating diverse learning styles among your students.

    On the Letter D worksheet, we’ve incorporated specific sections that cater to sensory-motor skill development when forming both uppercase ‘D’ and lowercase ‘d.’ These sections include:

    1. Dotted Letter D/d: This encourages tracing over dotted lines, promoting a tactile understanding of the letter’s shape.
    2. Tracing Letter D/d: Students can practice precise letter tracing, aiding kinesthetic learners who benefit from hands-on experiences.
    3. Playdough Letter D/d: Using playdough allows students to sculpt the letter, engaging their tactile senses and reinforcing motor planning.
    4. Color the Letter D/d: Coloring activities provide a visual and fine motor element to learning the letter’s form.

    These sections are particularly beneficial for kinesthetic learners who thrive when they can execute physical motions. I love that this worksheet series targets different sensory materials and supports differing learning styles while focusing on letter recognition and formation.

    The Letter D Worksheet is divided into six sections: 

    1. Build a Playdough letter D: hands-on learners will love the building section of the letter J worksheet. Students can mold the letter D out of play dough, clay, sticks, or other manipulatives.  Keep reading for more great ideas to build letters out of common items.
    2. Tracing letter D: Kinesthetic learners learn by doing, and will benefit from all the sections in these handouts, especially this section on tracing letters. Kinesthetic learners like to touch and engage in order to learn and retain information. Students can use their fingers, a wand, popsicle stick, or add a writing tool to trace the letters. You can also laminate the letter pages, place them on a tray covered with sand, salt, or shaving cream, and have students trace the letters this way.
    3. Do a Dot letter: Students can dip Q-tips or their fingertip into paint to make dots on the paper.  There are all kinds of stampers available on the web. What else can kids use to make dots on paper?
    4. Color letter D: encourage developmentally appropriate grasp patterns (broken crayons work wonders for developing a tripod grasp), work on coloring inside the lines, color selection, and attention to detail.  Explore different mediums for coloring including markers, gel pens, pencils, crayons (of all types), paint, glitter, or glue and small items to fill the space.
    5. Write letter D: these two sections are for students to put their practice into letter formation. They will practice writing the letters on the lines with correct sizing, formation, line placement, and details. Students also practice fitting the letters inside the small boxes to improve letter sizing and accuracy. As with the other sections, this section can also be laminated for reusability.

    how to teach letter D

    This letter D worksheet is a great start to teaching letter formation. Whether you are working on letter families to teach the letters in groups according to the lines that make up the letters, or teaching the letters in alphabetical order, these great worksheets provide a consistent method for teaching and tracking letter formation and understanding.

    There are several sites online with different rhymes available for teaching letters.

    • The HWT curriculum lowercase “d” narrative says: Magic c, up like a helicopter, up higher, back down, and bump the ground.   For the uppercase letter “D” HWT says: big line, big curve. The lowercase letters have some visual picture reminders to go with the wording. While the HWT curriculum does not use cute poems and rhymes, the consistent language that is taught using straight and curved lines is beneficial to learning.

    Letter D

    In addition to the skills above, students will need to know how to form
    straight lines and curves to make upper and lowercase D. Learning Without Tears highlights this as they teach “big line, curve” for uppercase D. Teach them about retracing so that the letters are formed correctly. This is a good time to start demonstrating the difference between b and d, as they are often confused.

    Uppercase Letter D has two pencil movements:

    • A straight line down
    • A big curve

    These two motions both start at the top line. Pencil control is needed to hop back up to that same spot on the starting line.

    Lowercase Letter D has two pencil movements also:

    • A small curve that starts in the middle line, and over to the right side
    • A big line down that starts at the top line, but must touch both curves of the first pencil stroke.

    This means that there is a lot of pencil control and visual motor skill awareness needed for placing that big line in a space that connects with the small curve. Otherwise, we end up with an opening in the letter. Pencil control exercises can support this development.

    As you are working on the Letter D Worksheet, be sure your students have the prewriting skills needed for writing letters. Here is a comprehensive post about the Prewriting Skills needed before letter formation.

    To make uppercase letter D, pre-writing skills are needed:

    • straight line down
    • circles with stopping at a given point
    • pulling the pencil into the palm of the hand to make the curve of the uppercase D (right hand writer)
    • pushing the pencil away from the palm of the hand to make the curve of the uppercase D (left hand writer)

    To make lowercase d, pre-writing skills are needed:

    • small circles with ability to stop at a given point
    • straight line down
    • pushing the pencil away from the palm of the hand to make the small curve of the lowercase d (right hand writer)
    • pulling the pencil into the palm of the hand to make the small curve of the lowercase d (left hand writer)

    You can see that the curves of the lines go in opposite directions for uppercase D compared to lowercase d. This can be confusing for some kids and might be a reason for commonly reversing letter d.

    Also, the straight line is on opposite sides of the letter when you look at uppercase D compared to lowercase d.

    Both of these considerations may result in letter confusion and are one more reason to teach letters according to lines used in the letters as opposed to teaching letters alphabetically.

    Additionally, the lowercase letter d requires greater visual motor integration and precision skills. The nice thing is that the curve is the same direction as a larger group of related letters (c, e, g, o, q, and the top of the f and s).

    Tracing Letter D

    Knowing these skills needed for forming an uppercase D and lowercase d, you can use the tracing letter D portion of the letter d printable to target these pre-writing strokes that make up the letters.

    Place Wikki Stix on the uppercase and lower case D and then trace the letters with a finger tip or even a paintbrush. Then, trace letter D on paper with that same fingertip or paintbrush.

    Finally, trace D and d with pencil lines, and then write the letters onto paper.

    prewriting skills needed to learn letters

    The prewriting skills for general letter formation include:

    • Grasping skills for holding the writing tool – it is preferable to work on forming a correct tripod grasp, but not essential for starting letter formation. Children begin to form a tripod grasp around age four. You can improve pencil grasp by working on hand strengthening activities
    • Finger isolation is what is needed to be able to tuck fingers into the palm when writing
    • In hand manipulation
    • following directions
    • Hand strength needed hold pencil and manipulate objects. Students with weak hand strength often have shaky, lightly written letters, and hold the writing tool lightly
    • Crossing midline is an essential skill for letter formation, otherwise letters like “t” are written in four pieces rather than two intersecting lines. In letter D, crossing midline is a consideration for the right handed writer forming uppercase D and the left hand writer forming lowercase d.
    • Imitating movements is important as many children do not respond to verbal directions only
    • Visual perception is making sense of what is written or seen.  These might include same/different, scanning, or discrimination
    • Prewriting strokes – being able to write lines and circles is important, as these are the foundation for forming upper and lowercase letters


    tips to teach letter D

    In addition to the rhymes above and using the letter D printable, there are other great strategies to teaching letter formation:

      • Letter I spy: Simply start asking your child to identify letters as you go about your day together. Beginning with letters that matter to them, such as the letters in their own name, is a great way to begin.

    •  

      • Finding letters in nature: Once you’ve gathered the natural materials you found, it’s time to practice forming uppercase letters and lowercase letters with these supplies. Start by choosing a letter that your child is familiar with, and have them write it out by forming it with one of their chosen materials.  Note: Rocks and leaves are easiest for forming rounded letters (B, C, D), and sticks are best for letters with straight lines (A, F, T).

      • Guess the magnetic letter: Grab your magnetic letters. Then, have your child put their hands behind their back before handing them a single letter of your choice. Ask your child to identify the letter in their hands — without peeking! — only by touch. For children who are still learning, provide choices for them to guess between (“Do you have a ‘T’ or a ‘B’ in your hands?”).

      • Letter matching cards: Start by cutting out rectangles of paper or cardboard for your cards, one for each uppercase and lowercase letter. Then, write a letter on each of the cards, or have your child practice writing it themselves. After the letters have been written, your child can decorate to their heart’s content! You might even want to draw (or glue a picture of) an object that corresponds to each letter to make it even more fun (like an apple on each of the “A” cards, a balloon for the “B” cards, and so forth).  This will also make the matching portion of the activity easier for your child if they are still mastering uppercase letters or lowercase letters.  When your letter cards are complete, mix them all up on the table and have your child select one. Their task is to find the corresponding uppercase or lowercase version of that letter from the selection in the pile.

      • Post it notes letters: Write an uppercase letter on 26 Post-It notes. Then, use the remaining ones for lowercase letters. Next, alternate placing uppercase and lowercase letters onto your wall or whiteboard. You might have a capital “A” followed by a lowercase “b.” Once you get to “Z,” set the remaining letters in a row so your child can see them. Point to the uppercase “A” and ask, “Can you find the lowercase letter that matches?” If your child correctly identifies the letter “a,” have them pick it up and stick it below the capital “A.”

    •  

      • If your child enjoys a bit of educational screen time, the HOMER Learn & Grow app is a great way to let them practice their letter identification skills.

      • Letter similarities and differences: Start by mixing up all of the letter cards. Then, invite your child to help you sort them into two groups: those that look the same in upper and lowercase and those that look different.  You may need to model this for your child a few times. For example, hold up the capital “D” card and ask, “Do you see a lowercase letter that looks like this?” Let your child examine both letters and highlight similarities and differences between the uppercase and lowercase versions. Continue sorting, letter by letter. Once your child sorts all the letters, have them count the cards in each bowl and see if there are more that look alike or more that are different. When your child finds it, say, “Both the uppercase ‘D’ and the lowercase ‘d’ look similar. They have the same shape, but one is a little smaller. Let’s put these two letters in this bowl because they look the same.”

      • write letters in the air with big arm movements

    •  

      • make letters in sand, shaving cream, chalk, sandpaper

      • teach the letter names and sounds before forming the letters so students understand what they are writing

      • use the whole body to teach letter formation

      • sing songs and rhymes about letters

      • practice prewriting skills through activities and play

      • encourage family to practice with their children at home

      • follow the same curriculum throughout the teaching for consistency. Whether you use Learning without Tears, Teaching Mama, Songs for Sounds, or another curriculum, being consistent helps students learn the language and follow the prompts

    •  

    how to use the letter D worksheet

    As described above, this free Letter D Worksheet, can be cut into sections and made into mini workbooks. There are many other great options for using these work pages:

      • Laminate the pages to make them reusable. Punch holes in them, and create a binder. This is especially helpful with the play dough cards

      • Take a photo of the letter made of playdough, rather than having students trying to keep their dough formations stuck in their books

      • Enlarge each section to make them full page sized. This might be helpful for younger learners who may need more room to write and color

      • Separate each kind of activity, and group them together to make an alphabet book. For example, make a book of all the “do a dot” letters. Keep going until your students have six mini alphabet books containing all 26 letters.  This is a great year long project to send home at the end of the year

      • Cut the pages into six sections, then staple together. Each book with have six pages, all relating to the same letter. For example, the Letter D Worksheet would be turned into a small booklet with a traced D, written D, colored D, dotted D, playdough D, etc.

      • Make your own modifications to some of the sections. Instead of tracing, students can fill the section with glue and glitter! In the coloring section, students can fill them with small manipulatives. Wikki sticks can be used instead of Playdough. Water color, paint, or any other creative medium you can find to fill in the spaces

      • Have sensory bins of manipulatives ready for creative play with this Letter D Worksheet

      • Glue, bits of paper, and other findings are always handy to have around

      • Making an activity fun will hopefully encourage the reluctant learners

      • Add this letter D worksheet to part of your bigger lesson plan including gross motor, sensory, social, reading, math, or other daily fun activities

    a final word on letter D

    When you get excited about teaching, it will become contagious. Your students will feed off your positive energy.  Teaching is not one size fits all, so it will take some trial and error to find something that works.  Find something that you feel you can teach over and over again. Sometimes the lessons become repetitive, so you need to like what you are teaching.  Modify these as needed to work with your students. Teach these in ABC order, or follow the Learning without Tears curriculum of grouping similar letters together.

    Free Letter D Printable

    Want a copy of this letter D worksheet? Enter your email address into the form below. We also have a copy of this printable and the other letters already released inside The OT Toolbox Member’s Club.


    FREE Letter D Worksheet


    I need this!

    We respect your privacy. Unsubscribe at anytime.