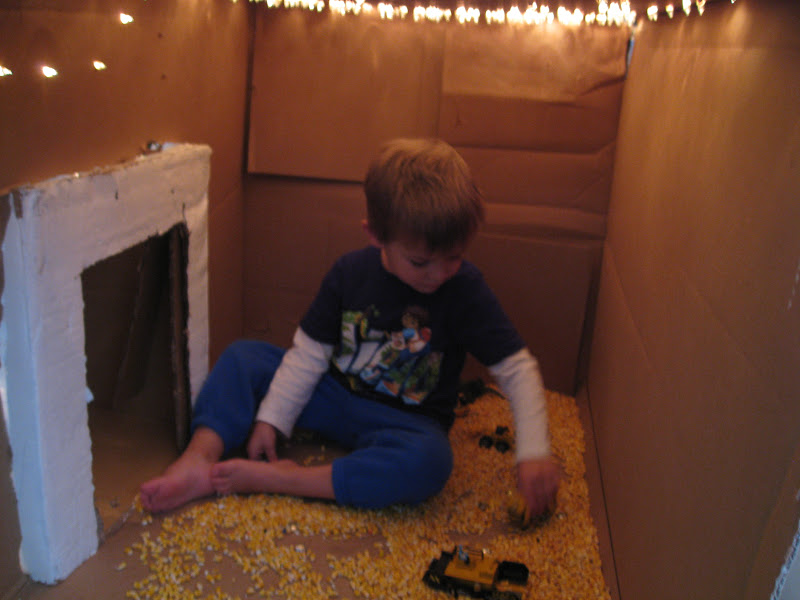
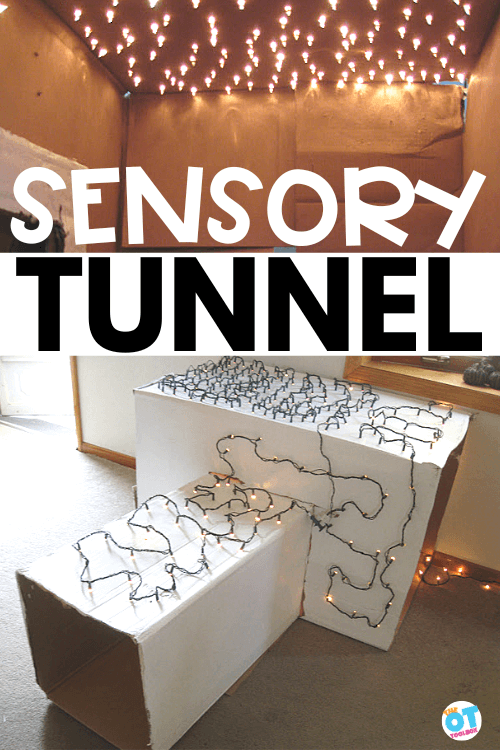
This sensory light box is an old blog post here on The OT Toolbox, but this Christmas light tunnel is one that my kids still talk about.
Creating a sensory-rich environment is essential for promoting optimal child development, and one innovative way to achieve this is through a DIY project like the one we made many years ago… the sensory light tunnel made from a cardboard box with Christmas lights.
Christmas Light Tunnel
This sensory play activity, often referred to as a “sensory light box” or “sensory light tunnel,” can be a fun addition to a child’s play space, providing both visual and tactile stimulation.
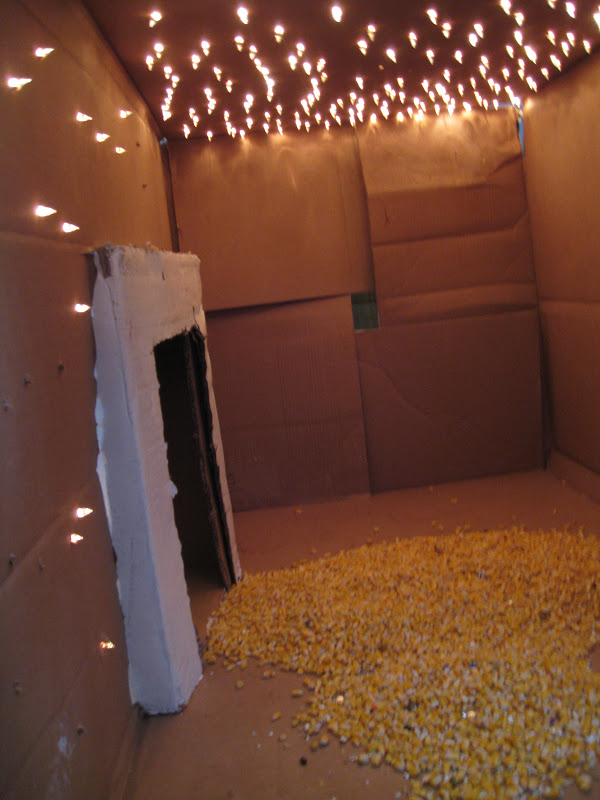
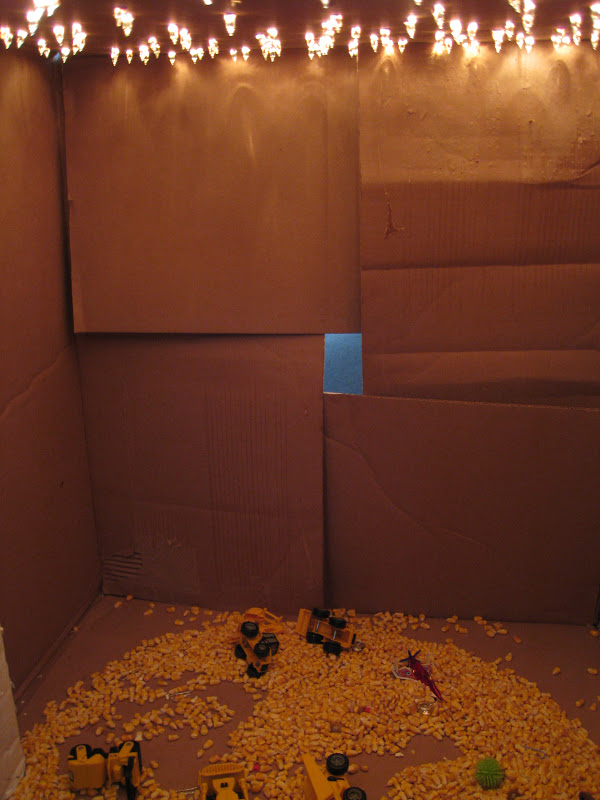
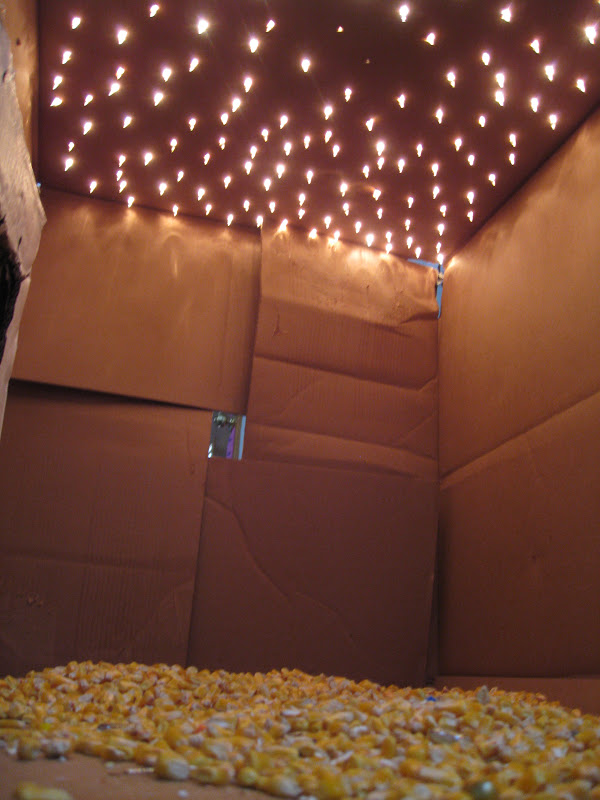
A Christmas light tunnel is exactly what you might imagine it to be…a tunnel made from cardboard boxes lit by Christmas lights that poke through holes in the box.
Making a sensory light tunnel is easy and inexpensive for parents and caregivers, making it a fantastic DIY project. Most of us have cardboard boxes available to us from deliveries, and Christmas lights are often times a household item.
The cardboard fort ideas we came up with many years ago come to life after the holidays when we were putting away Christmas lights for the year. WE used a few cardboard boxes, and taped them together to form a tunnel, creating a unique and inviting space for play.
Incorporating Christmas lights not only adds a festive touch but also introduces sensory lighting to the environment, fostering visual engagement and exploration.
Sensory Light Box for Babies
A sensory light box for babies and toddlers involves transforming a simple cardboard box into a magical tunnel of lights. The light box sensory play is designed to captivate young minds and enhance their sensory experiences. This DIY Christmas light tunnel serves as an indoor box fort, offering a cozy and imaginative space for children to explore.
The therapy providers will love this activity because it can be a calming and regulating sensory space in a home or in a calm down corner. For younger children, it’s a great way to encourage crawling.
Research supports the benefits of sensory play for child development. According to studies, sensory experiences contribute to cognitive, emotional, and social development in young children. The sensory cardboard box for babies provides opportunities for them to develop fine motor and gross motor skills, enhance spatial awareness for babies, and stimulate their senses in a safe and controlled environment.
For parents seeking research-backed information to support their child’s needs, this DIY light tunnel aligns with the principles of sensory processing, a well-established approach in occupational therapy for children with sensory processing difficulties. By incorporating Christmas lights into the sensory play, the child’s visual system is engaged, promoting attention, focus, and exploration.
We love this sensory light tunnel made from a cardboard box and Christmas lights for babies and toddlers.
It’s a great, inexpensive occupational therapy tool to use in therapy sessions and as a DIY recommendation for project for parents and caregivers, emphasizing the positive impact on child development through sensory play and exploration.
How to make a Christmas Light Tunnel
(Or a Light Tunnel from a cardboard box…)
I made this light tunnel for Baby Girl’s Twinkle Twinkle Little Star party. Babies love crawling through tunnels, playing in boxes. When I saw this, I knew my kids would love it in so many ways.
We used this light tunnel for the party, but have had it in our living room ever since the party and have used it in so many play activities.
All you need for this project is:
A large cardboard box (or several boxes)
Christmas lights
A Screwdriver or pencil
Duct tape (optional)
To make the Christmas Light Tunnel:
Use a screwdriver or pencil to poke holes into one side of a cardboard box. This side will be the top of the sensory tunnel, so think about which way you’ll want to position the box.
Poke each individual light of the Christmas light strands through the holes and into the box.
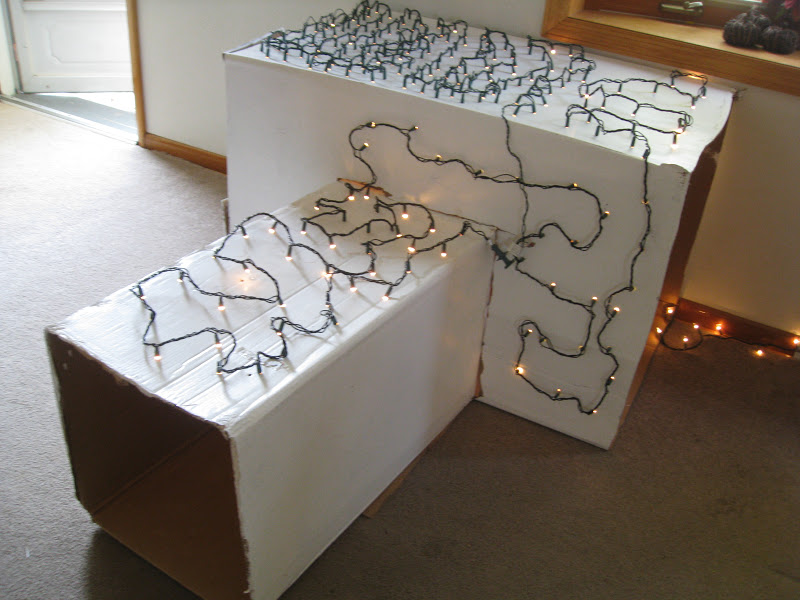
If you are creating a tunnel and have a second box, you can cut off the ends of the box to create a tunnel. then, use the duct tape to attach the boxes.
I started with two boxes and stuck them together by cutting a hole in one. I wanted two entrances since we have so many little little kids in our family.
It would be fun for them to crawl in one entrance and out the other. One box was a double stroller box that my sister-in-law had at her house. The big box, I grabbed up at an appliance store (before they crushed it down, apparently this happens fast when they unload appliances…the boxes go right into the compactor).
I stabbed the boxes with a screwdriver and stuck the Christmas lights in. Pretty easy!
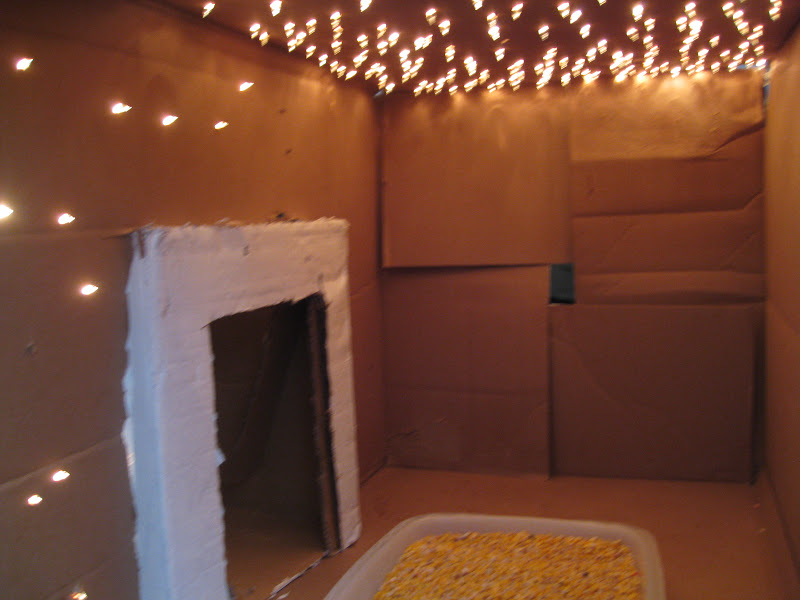
This is what the Christmas light tunnel looks like from the outside.
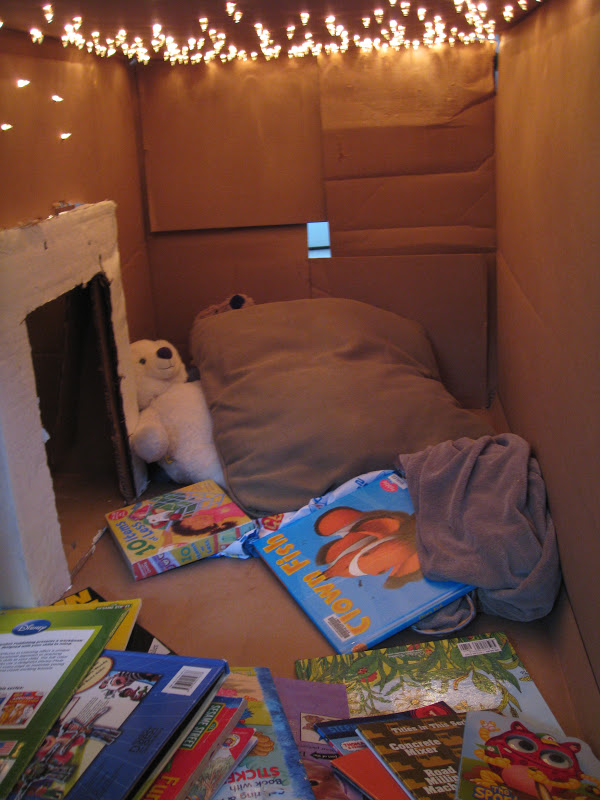
Since the party, we have been using this as a calm down place to chill out with some pillows, blankets, and great books.
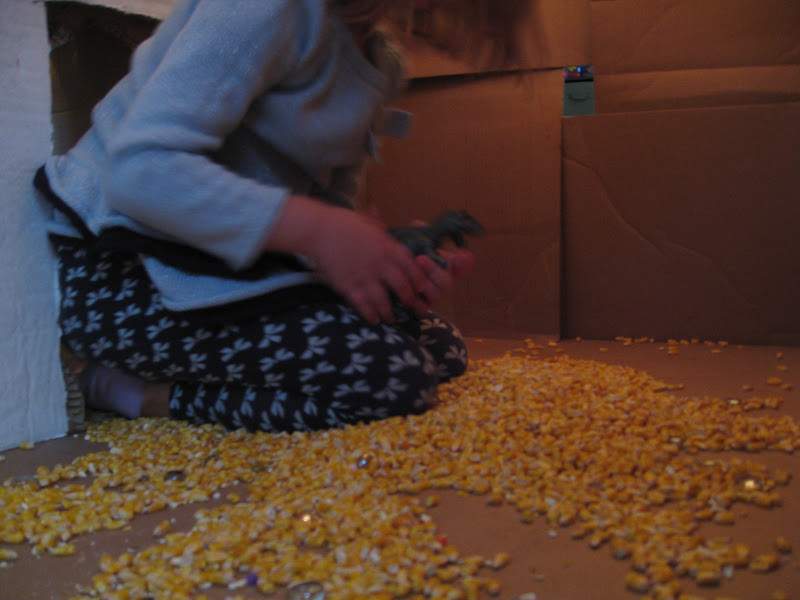
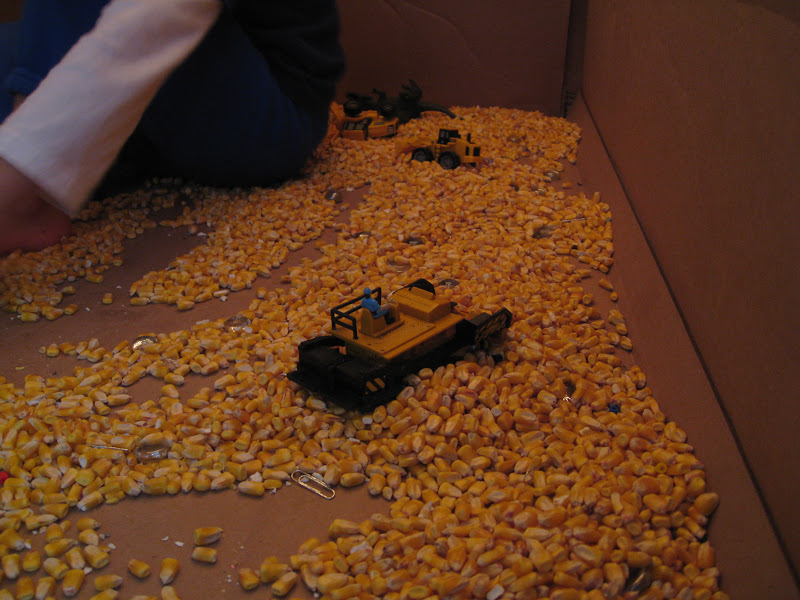
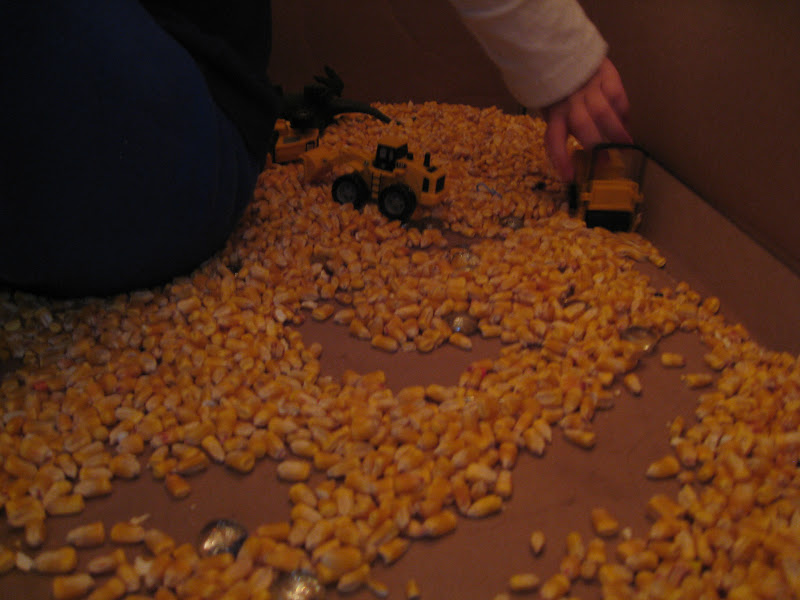
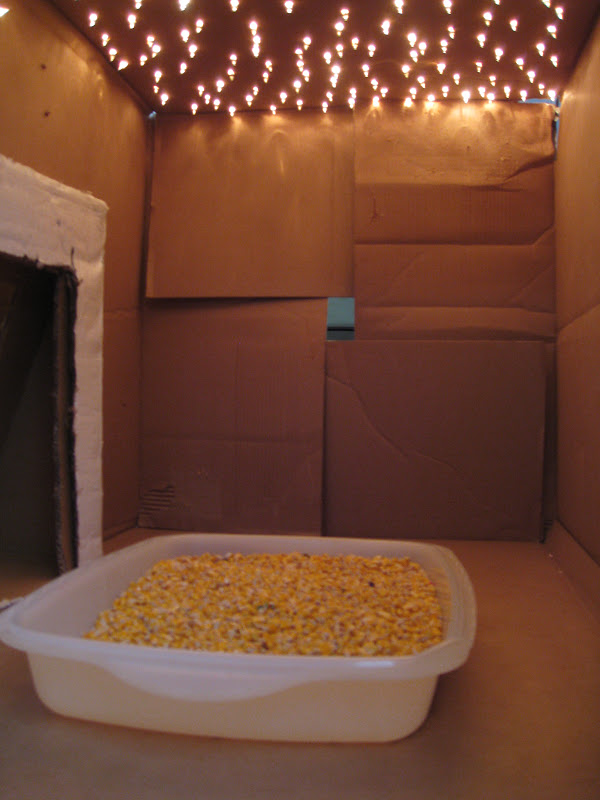
Today, I pulled out our bin of corn. The Big kids thought this was a really fun idea. They were so excited to put the corn in the light box.
The Sensory Lifestyle Handbook walks you through sensory processing information, each step of creating a meaningful and motivating sensory diet, that is guided by the individual’s personal interests and preferences.
The Sensory Lifestyle Handbook is not just about creating a sensory diet to meet sensory processing needs. This handbook is your key to creating an active and thriving lifestyle based on a deep understanding of sensory processing.
Colleen Beck, OTR/L has been an occupational therapist since 2000, working in school-based, hand therapy, outpatient peds, EI, and SNF. Colleen created The OT Toolbox to inspire therapists, teachers, and parents with easy and fun tools to help children thrive. Read her story about going from an OT making $3/hour (after paying for kids’ childcare) to a full-time OT resource creator for millions of readers. Want to collaborate? Send an email to contact@theottoolbox.com.
In this post, we are going to give you the basics of Ayres Sensory Integration. If you have never heard of it, continue reading for plenty of information and resources that will help you become more familiar with this practice. Or, if you are trained in sensory approaches and looking to refresh your knowledge, we have got you covered. Learn more about the sensory system and and sensory-based activities in this resource on Sensory.
WHAT IS Ayres SENSORY INTEGRATION?
You may have heard the terms Ayres Sensory Integration, of Ayres SI. Maybe you’re familiar with the term sensory integration. But what do these terms mean?
Sensory integration has many layers, but it can be made quite simple. In fact, everyone has experienced sensory integration! Think about your senses; the way you feel things on your skin, see bright or dim light, smell a cup of coffee, or feel dizzy on a rollercoaster. Your body senses a stimulus, for example, the feeling of your shirt against your skin.
After a few moments, you don’t think about how the shirt feels on your skin. You wear it all day long without feeling it touch you.
This is an example of sensory integration. That sensation – the touch of the shirt to your skin – was processed and organized by your nervous system, and the nervous system decided that it did not need to process it any more. In other words, it was integrated!
But what happens if the sensation is not integrated?
You may have heard of someone who can feel their shirt, particularly the tag of their shirt, all day long. It may bother them so much that they cut off those tags to avoid feeling that sensation.
It may be that somewhere along the sensory nervous system pathway, the signals for processing that touch sensation are blocked, or lost. Instead of being processed and integrated as, “You don’t need to feel this any more!”, it’s stuck in a processing limbo of, “what is this that I am feeling?”.
Much like how a sudden closure on the freeway means that you will have to find another way to your destination, those sensory signals need to learn where to go when their path is not clear.
Sensory integration therapy can help find a new path to that destination and turn off the signals that cause the over-response to the stimuli (in this case, the shirt).
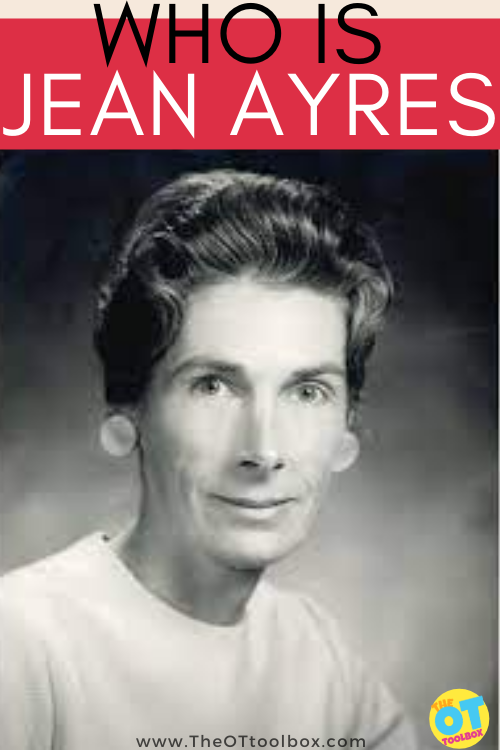
WHO IS Jean AYRES?
Dr. A. Jean Ayres, an occupational therapist, psychologist, and neuroscientist, developed this theory and practice in the mid 1970s. She recognized that a child’s sensory system can greatly impact how they perceive and interact with the world around them. Dr. Jean Ayres developed specific sensory integration interventions based on her research findings over the course of her career.
Since 2005, Ayres Sensory Integration (ASI) has been trademarked to differentiate this particular method from other sensory-based therapies. The term Ayres Sensory Integration, or ASI, encompasses the theory, assessments, and interventions that were developed by Dr. Ayres.
WHAT IS SPECIAL ABOUT Ayres Sensory Integration?
There are reasons why ASI is trademarked and other sensory approaches are not – so what makes Ayres Sensory Integration so unique? One reason why the trademark was necessary was to clarify to the public and the academic communities which evidence to correlate with ASI.
The evidence for sensory interventions were becoming increasingly mucky – it became difficult to discern if ASI worked because so many people were calling any sensory approaches ASI, even if they did not align with the principles (Parham et al., 2007).
To be considered true ASI, a trained practitioner must follow a specific protocol in their evaluation and treatment of their client. To start, the practitioner would evaluate their client using methods of naturalistic observation, conducting caregiver and teacher interviews, administering standardized testing, and performing clinical observations.
After the evaluation is complete, they will determine the ways in which sensory integration deficits may be interfering with the child’s functional performance.
Core Elements of Ayres Sensory Integration
After determining that ASI is an appropriate intervention method for a child, the trained practitioner will develop sensory interventions that fall within the core elements of the ASI approach:
Ensures physical safety.
Presents sensory opportunities.
Helps maintain appropriate levels of alertness.
Challenges postural, ocular, oral, or bilateral motor control.
Challenges praxis and organization of behavior.
Collaborates in activity choice.
Tailors activity to present the just-right challenge.
Ensures that activities are successful.
Supports a child’s intrinsic motivation to play.
Establishes a therapeutic alliance. (Parham et al., 2020)
DOES Ayres Sensory Integration WORK?
Sensory integration is an on-going research topic in the field of occupational therapy. Many recent publications have suggested that ASI can be used to improve occupational performance (Koester et al., 2014; Miller, Coll, & Schoen, 2007; Pfeiffer, Koenig, Kinnealey, Sheppard, & Henderson, 2011; Roley et al., 2015; Schaaf & Nightlinger, 2007; Schaaf et al., 2013, Schaaf et al., 2015; Watling & Hauer, 2015).
In other words, ASI is supported by research in it’s main goal: to increase a child’s participation in their daily activities.
ASI was originally developed as a measure to address the functional abilities of children with learning and behavioral concerns. The positive outcomes of ASI have since been well-documented for children with Autism Spectrum Disorder, as well as for children with learning disabilities, ADHD, developmental delay, regulatory disorder, and developmental coordination disorder.
The theory and practice has also been modified for use with other populations and age groups, too!
Who Uses Ayres Sensory Integration?
Most recent research estimates that up to 95% of children with developmental delays or disabilities have deficits in sensory functioning (AOTA, 2017).
Additionally, it is estimated that sensory processing difficulties occur in 5% to 14% kindergartners, 16% of elementary students, and 10% to 12% of people of all ages with no related diagnosis (AOTA, 2017).
In short, the relevance for sensory integration is huge, due the prevalence of sensory deficits in individuals of various populations.
To find out if an individual can benefit from ASI therapy, the Sensory Integration and Praxis Test (SIPT) would be administered, per the ASI guidelines. The SIPT was developed by Dr. Ayres specifically to test whether or not ASI is appropriate for an individual, and to highlight specific deficits in sensory processing.
RESOURCES on Sensory Integration
There are many great resources available for practitioners and families alike. See the options below to discover more about the sensory system, ASI theory, and sensory-based interventions.
If you are looking for even more ASI information, look no further than this video! Occupational therapist Ivan describes the sensory system and methods of intervention in a way that I believe any one can understand.
For a more advanced understanding of the neurological basis of ASI, check out this video.
Ayers Sensory Integration and Therapy
While Sensory integration (SI) refers to a theory developed by Dr. Jean Ayers in the 1960’s much has changed in the world since the conception of sensory integration therapy.
We have screens, online worlds, technology, fast paced lifestyles, full schedules, various educational models and programming types, changed environments, different home lifestyles, adapted parenting styles, and many other overall lifestyle differences since the 1960s.
The theory that our Central Nervous System (CNS) takes information from the outside world that has VASTLY changed, while our internal systems has not is an interesting one to chew on.
We’ve had to accommodate for these different and updated needs that our world has moved into.
What hasn’t changed is the nervous system’s ability t take information from the outside world, organize it, and use that information to produce purposeful and useful responses toward specific goals we have, physically, cognitively, emotionally, and behaviorally.
We are able to use that purposeful information in order to perceive incoming sensory information (the sensory systems of touch, movement, pressure, sounds, tastes, joint sense, sights, and internal information) in order to determine the quality of the responses of each sensory system as they work together as a whole.
It’s amazing when you think about it, right?!
Then, there is the vast amount of knowledge that we have as individuals. Today, we can access information, the use of AI, and we can share that information in seconds. Today, the awareness of tools and underlying reasons why we behave the way we do is available to every individual.
This might mean that sensory interventions can be used in not just the clinical setting anymore. Jean Ayres layed the framework for this knowledge and theories.
References on Jean Ayers Sensory Integration
The following are sources of information regarding Jean Ayers Sensory Integration.
For more in-depth information on Jean Ayres’ sensory integration theory and a comprehensive exploration of occupational therapy interventions based on her principles, I recommend referring to authoritative textbooks, academic papers, and professional resources in the field of sensory integration therapy. These references can provide valuable insights and guidance for those seeking a deeper understanding and effective application of Ayres’ groundbreaking concepts in occupational therapy practice.
American Occupational Therapy Association [AOTA]. (2017). Frequently asked questions (FAQ) about: Ayres Sensory Integration®. https://www.aota.org/- /media/Corporate/Files/Secure/Practice/Children/FAQAyres.pdf
Koester, A. C., Mailloux, Z., Coleman, G. G., Mori, A. B., Paul, S. M., Blanche, E., … Cermak, S. A. (2014). Sensory integration functions of children with cochlear implants. American Journal of Occupational Therapy, 68, 562–569. http://dx.doi.org/10.5014/ajot.2014.012187
Miller, L. J., Coll, J. R., & Schoen, S. A. (2007). A randomized controlled pilot study of the effectiveness of occupational therapy for children with sensory modulation disorder. American Journal of Occupational Therapy, 61, 228–238.
Parham, L. D.., Smith Roley, S., May-Benson, T. A., Koomar J., Brett-Green, B., Burke, J. P., Cohn, E. S., Mailloux, Z., Miller, L. C. & Schaaf, R. C. (2020). Development of a fidelity measure for research on the effectiveness of the Ayres Sensory Integration® intervention. American Journal of Occupational Therapy, 65, 133-142. https://doi.org/10.5014/ajot.2011.000745
Parham, L. D., Cohn, E. S., Spitzer, S., Koomar, J. A., Miller, L. J., Burke, J. P. … Summers, C. A. (2007). Fidelity in sensory integration intervention research. American Journal of Occupational Therapy, 61, 216–227.
Pfeiffer, B. A., Koenig, K., Kinnealey, M., Sheppard, M., & Henderson, L. (2011). Effectiveness of sensory integration interventions in children with autism spectrum disorders: A pilot study. American Journal of Occupational Therapy, 65, 76–85. http://dx.doi.org/10.5014/ajot.2011.09205
Roley, S. S., Mailloux, Z., Parham, L. D., Schaaf, R. C., Lane, C. J., & Cermak, S. (2015). Sensory integration and praxis patterns in children with autism. American Journal of Occupational Therapy, 69, 6901220010. http://dx.doi.org/ 10.5014/ajot.2015.012476
Schaaf, R. C., Benevides, T., Mailloux, Z., Faller, P., Hunt, J., van Hooydonk, E.,… Kelly, D. (2013). An intervention for sensory difficulties in children with autism: A randomized trial. Journal of Autism and Developmental Disorders, 44, 1493–1506. http://dx.doi.org/10.1007/ s10803-013-1983-8
Schaaf, R. C., Cohn, E. S., Burke, J., Dumont, R., Miller, A., & Mailloux, Z. (2015). Linking sensory factors to participation: Establishing intervention goals with parents for children with autism spectrum disorder. American Journal of Occupational Therapy, 69, http:// dx.doi.org/10.5014/ajot.2015.018036
Watling, R., & Hauer, S. (2015). Effectiveness of Ayres Sensory Integration® and sensory-based interventions for people with autism spectrum disorder: A systematic review. American Journal of Occupational Therapy, 69, 6905180030. http://dx.doi.org/10.5014/ajot.2015.018051
Sydney Thorson, OTR/L, is a new occupational therapist working in school-based therapy. Her background is in Human Development and Family Studies, and she is passionate about providing individualized and meaningful treatment for each child and their family. Sydney is also a children’s author and illustrator and is always working on new and exciting projects.
In this blog post, we are covering a very important sensory materials: sensory bin base ideas, or sensory bin fillers. You have probably seen a sensory bin activity here or there and thought nothing of it. But, did you know that the sensory material that is used to create the sensory bin is very much a part of the tactile sensory experience? Include these fillers in our easy sensory bin ideas to include themes or motivating activities.
Let’s explore various sensory bases as a tactile therapy tool.
Sensory Bin Materials
If you read our blog, you’ll see that we are both huge fans of sensory play. Sensory bins are such a fun way for kids to explore textures and the senses while learning about the world and themselves.
Sensory bins can be tailored to any learning theme and are just fun for exploration.
We wanted to put together a collection of sensory bin base ideas. These are the materials that you start your sensory bin with. Add letters, numbers, animals, sight words…the possibilities for sensory play is endless!
Usually, a sensory bin has several materials:
sensory base container (bin, basket, tub, baby pool, etc.)
sensory bin filler or sensory base material
sensory bin items to explore- these might be manipulatives or small objects
scoops, cups, funnels, tongs, spoons, or tools to pick up and move objects
Each component can be used to develop various motor skills. In this blog post, we’re covering the base material or the sensory bin filler that you first place in the sensory base container.
Why Use Different Sensory Bin Fillers
Children learn about the world through touch, and exploring different textures fosters their understanding of the differences between soft, rough, smooth, bumpy, wet, dry, and other tactile sensations.
Using different textures in sensory play, especially in a therapeutic context like pediatric occupational therapy, serves specific developmental and therapeutic purposes that can greatly benefit children’s growth and well-being.
As an occupational therapy provider, it’s important to know why we are using the therapy tools that we select for therapy interventions. Here are some reasons why different textures are important in sensory play, particularly from a therapeutic perspective:
Tactile Exploration and Confidence: Introducing a variety of textures allows children to explore and interact with different sensory experiences. This sensory touch exploration helps them become more comfortable with and confident in touching, feeling, and interacting with different materials.
Tactile Discrimination: Different textures challenge children’s tactile discrimination skills, enabling them to differentiate between various sensory stimuli. This enhances their ability to identify and understand the subtleties of touch.
Sensory Challenges and Desensitization: For children with tactile defensiveness, incorporating textures that might be initially challenging for children helps them gradually become accustomed to those sensations. Therapists can use this approach to address sensory sensitivities and aversions, gradually desensitizing children to certain textures.
Then, there are water-based sensory bin fillers. These include things like water, colored water, and soap. We have done many water bead sensory bins, too. Here are some more ideas:
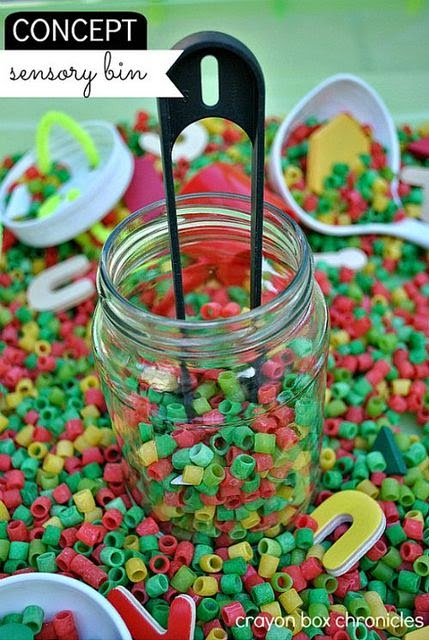
Add colored noodles to a bin and add cups, spoons, funnels, and more for fine motor play. Crayon Box Chronicles made this concept sensory bin in their dyed noodles sensory bin.
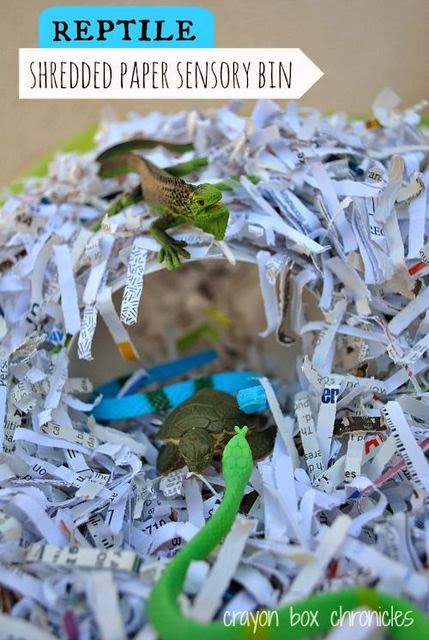
Shredded paper makes a great sensory base. Save the junk mail and send it through the shredder to make a shredded paper reptile sensory bin from Crayon Box Chronicles.
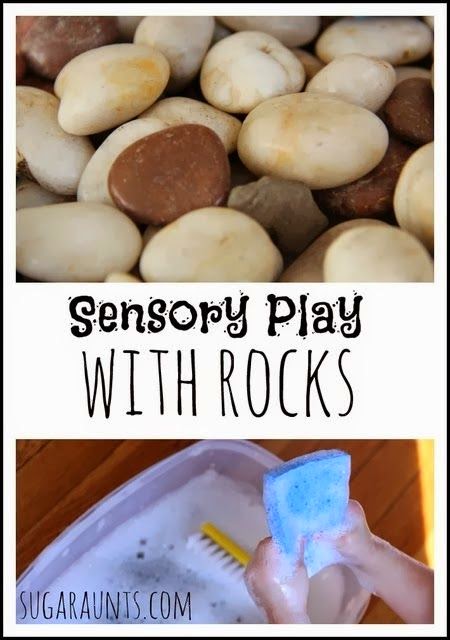
Something as simple as rocks can make a great base for a sensory bin. We make this rock sensory bin and explored the senses.
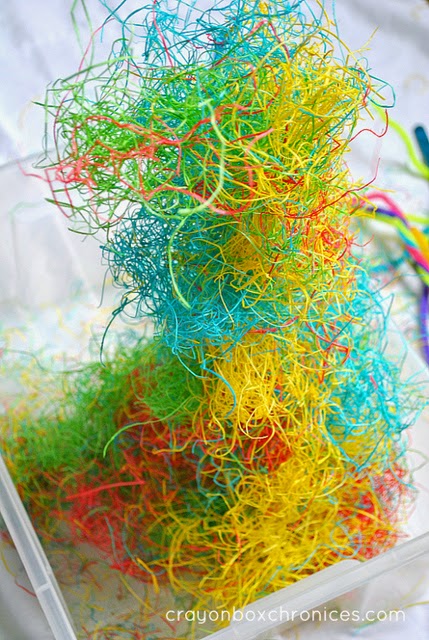
The dollar store has a vast amount of ways to incorporate learning into sensory bins. Crayon Box Chronicles made this colored hay sensory bin. How fun!
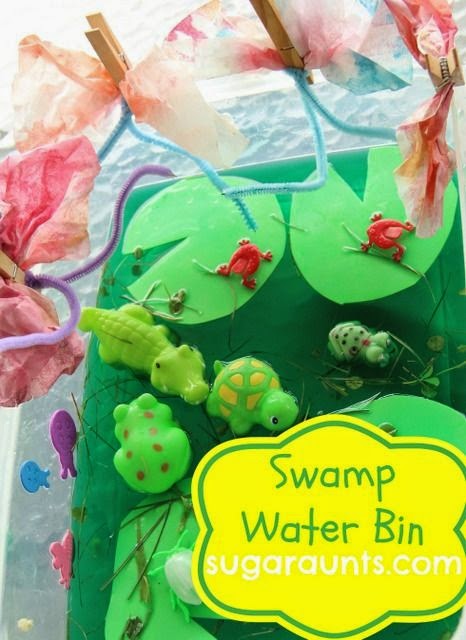
Colored water is an easy way to create a sensory bin. We made this dyed water swamp sensory bin and explored colors, animals, and more in a swamp theme.
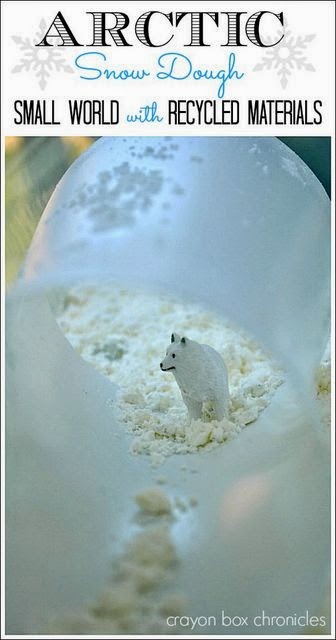
Have you ever made snow dough? Seriously the coolest stuff! This snow dough Arctic Circle sensory bin is one of my favorites from Crayon Box Chronicles .
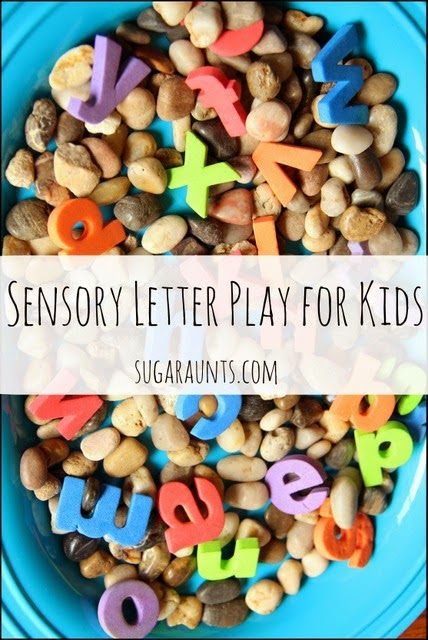
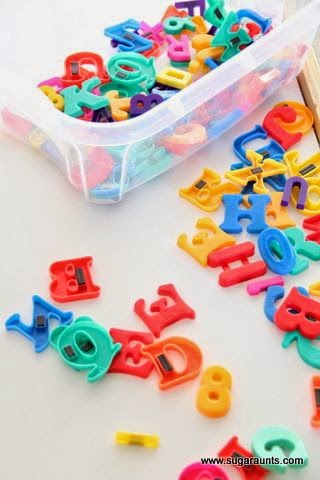
It doesn’t take much to make a sensory bin. This letter sensory bin required nothing other than the letters for learning and play.
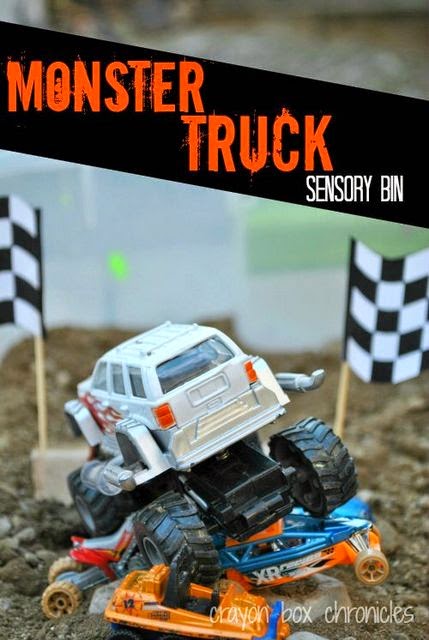
Dirt makes a great sensory bin base. How many ways can you think of to play? I love what Crayon Box Chronicles did with their dirt monster truck sensory bin.
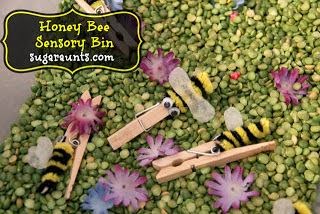
Many sensory bin bases can be found in your pantry. We used split peas as the base in our split pea sensory bin.
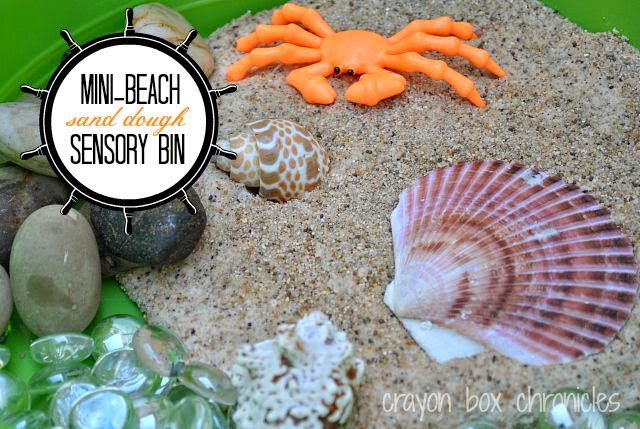
Sand is one way to create a simple sensory bin. A few ingredients is all it takes to make the sand into sand dough link in this sand dough beach sensory bin from Crayon Box Chronicles.
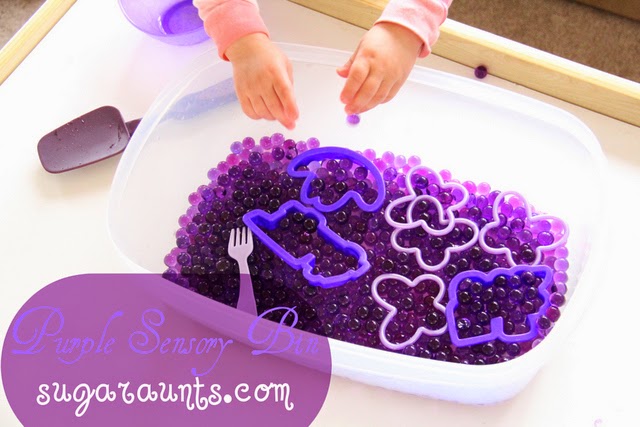
Water Beads can be found in the floral section of many stores. The non-toxic material makes a great base for sensory play. We had a blast with our purple sensory bin.
Jello is such an interesting material to eat…and to play with! The texture is perfect for sensory exploration. Crayon Box Chronicles used it to create this jello iceberg sensory bin.
What are your favorite sensory bin fillers?
Colleen Beck, OTR/L has been an occupational therapist since 2000, working in school-based, hand therapy, outpatient peds, EI, and SNF. Colleen created The OT Toolbox to inspire therapists, teachers, and parents with easy and fun tools to help children thrive. Read her story about going from an OT making $3/hour (after paying for kids’ childcare) to a full-time OT resource creator for millions of readers. Want to collaborate? Send an email to contact@theottoolbox.com.
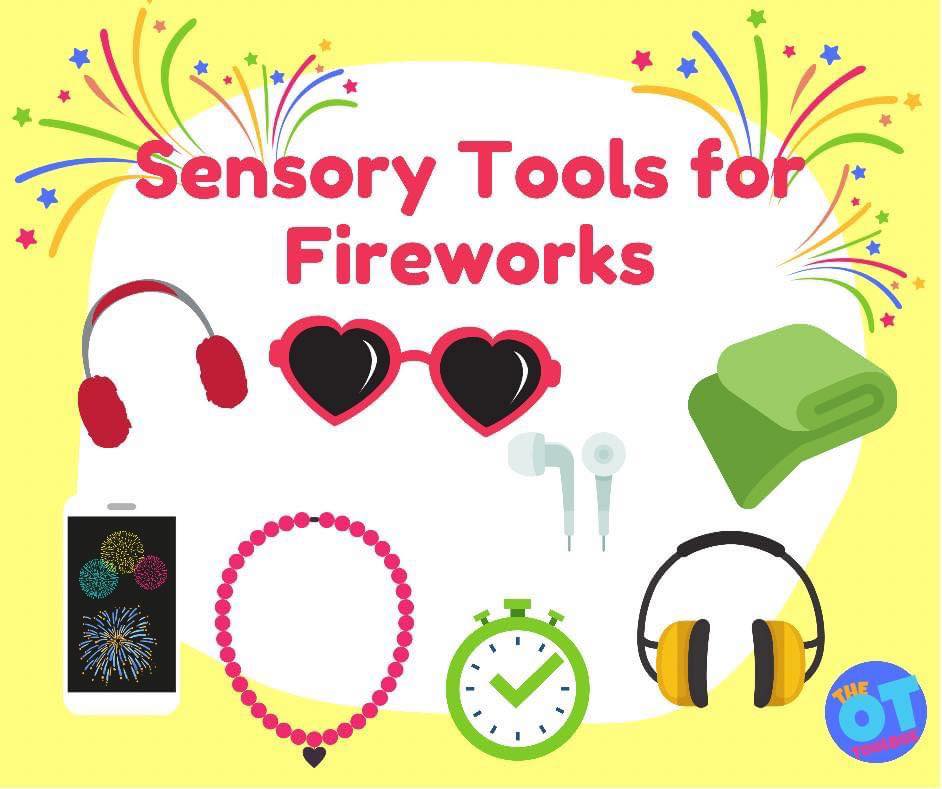
For children with sensory sensitivities, fireworks can be a real challenge. The days and weeks around the New Year or 4th of July can be a celebration that leads to loud and lengthy firework shows, but there can be isolated booms and cracks that come at all times of day or night. For the individual with auditory sensitivities, this is a huge detriment. Having a sensory diet or sensory solution to the auditory input can support sensory needs.
Sensory Solutions for Fireworks
The intense noise of fireworks can trigger sensory overload, leading to feelings of distress, anxiety, or even pain for these individuals.
The explosive nature of fireworks results in sharp, unpredictable bursts of sound, which can be overwhelming and disruptive to individuals with sensory sensitivities. The loud noises can cause discomfort, stress, and sensory discomfort, impacting their overall well-being. Plus, for the child or individual that has experienced this discomfort may be traumatized by the potential for booms and cracks of fireworks that seem to come out of nowhere.
Another sensory consideration when it comes to firework season which can impact sensory sensitive individuals is the crowd. Fireworks displays are often watched in very crowded environments like parking lots, plazas, stadiums, fields, neighborhood lawns, etc. The physicals closeness of a crowd adds additional sensory stimuli like bright lights and vibrations.
The combination of these factors can further intensify the sensory overload experienced by individuals with auditory sensitivities, making it hard to self-regulate, and can potentially leading to heightened anxiety and meltdowns. We may even see a season of sensory dysregulation.
How to support the child sensitive to fireworks
It is important to recognize and respect the needs of individuals with auditory sensitivities during fireworks events.
Creating inclusive environments that offer quieter alternatives, such as silent fireworks or designated noise-reduced zones, can provide individuals with auditory sensitivities the opportunity to enjoy celebrations without the overwhelming impact of loud sounds.
Some sensory solutions for fireworks include sensory strategies and physical or location-based tactics:
Preparing for the event- talking about what is going to happen at the fireworks event or celebration
Watching fireworks from a live streaming of the event or a TV/social media broadcast
Countdown from the start of the fireworks
Personal space away from crowds
When it’s time to sleep and the neighborhood is still celebrating, try:
White noise sound machine and blackout curtains
Music
Turn on a movie
“Camp out” in the basement for a fun adventure
Play a sleep app
By understanding and accommodating the challenges faced by individuals with auditory sensitivities, we can work towards creating more inclusive and sensory-friendly environments during fireworks displays, ensuring that everyone can fully participate in and enjoy these events. After all, we all have differing sensory needs, and sensitivities can look different for everyone.
Sensory Chaining Technique
One way to challenge sensory systems and trial tools and strategies in sensory situations is through chaining.
Occupational therapy practitioners are familiar with chaining. There are different types of chaining strategies to support development of skills:
Forward chaining- Forward chaining is a teaching strategy that is often used to help individuals learn and develop new skills, particularly in the context of behavior management and task completion. This approach breaks down complex tasks into smaller, more manageable steps, allowing individuals to master each step before moving on to the next one.
Backward chaining-Backward chaining is a teaching strategy that can be helpful for teaching new skills as well, however, this approach involves starting with the final step of a task and working backward to teach each preceding step until the entire task is mastered.
Sensory chaining- this type of skill development is typically used to slowly and strategically chain a picky eater’s diet from exremely limited and preferred foods to a more diverse food input. This occurs by slowly introducing foods that are similar in texture in a step-by-step process.
Similar to chaining foods, sensory chaining can be one tactic to increase tolerance to sensory input in the form of tactile sensations, textures, messy play experiences, and even auditory input, or types of sounds.
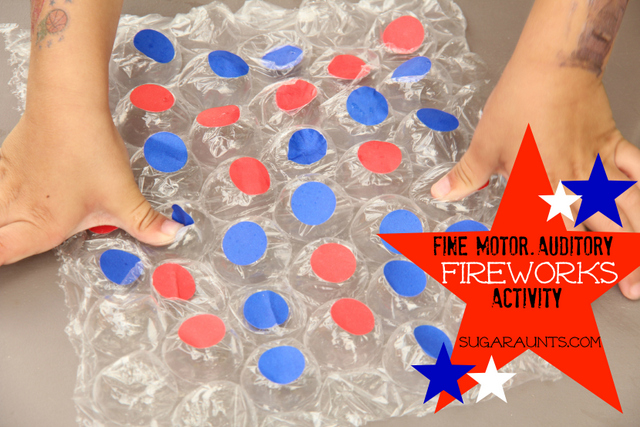
The bubble wrap fireworks activity we have described below is a chaining activity to support individuals who are sensitive to fireworks. The activity is hands-on, and led by the child. They can pop the “fireworks” on their own time and gain not only proprioceptive feedback through their hands, but control the “pop” sound.
This is a fun fireworks themed activity to support the needs of individuals with auditory sensitivities especially when it comes to fireworks being too loud or sudden noises that typically occur during fireworks season. If you have a child sensitive to noise, then fireworks can be auditory overload. Using a sound “safe” activity to prepare for fireworks can be part of a sensory chaining strategy to support children sensitive to loud noises like fireworks.
This bubble wrap fireworks craft is a “safe” sound!
Use this fireworks themed sensory activity to incorporate skills such as fine motor skills, fine motor strength, bilateral coordination, and eye-hand coordination with an auditory processing component that is perfect for the 4th of July, or any patriotic holiday! It uses bubble wrap and red, white, and blue colored stickers to make a sensory tool that kids will love.
You’ll need just a couple of items:
Bubble wrap
Blue stickers
Red stickers
I stuck a bunch of red and blue labeling stickers on large bubble wrap.
When Big Sister and Little Guy saw this, they were very excited!
The pop made a perfect firework sound for each color. It really did sound like the crack of little fireworks. We did a little listening activity, where I would tell them…”Pop red, then blue, then blue.” We did a few patterns and all reds, and then all blues.
Each little bubble gave a very satisfying crack!
And then there was a huge crack as a certain Little Guy jumped on the rest of the un-popped bubbles 🙂
To the child with sensory sensitivities, a family road trip can mean sensory overload. Summer break brings long car rides as the family road trip is an essential during the summer months. But how do you prevent sensory dysregulation on a long car ride? In this blog post, you’ll find sensory strategies for road trips including ideas for road trip tips for kids with sensory issues and an oral motor sensory break that helps with sensory needs during car rides.
Get ready for your next road trip while addressing sensory needs!
Sensory Strategies for Family Road Trips
Surviving a long family road trip when a member of the family has sensory sensitivities can make a long car ride challenging. For those with sensory processing disorder, Autism, ADHD or other neurodiversities, sensory sensitivities can make long car rides difficult.
Preparing in advance to support the sensory sensitive individual can make all the difference! In fact, the sensory strategies listed below can support any individual, as we all have differing sensory needs.
These sensory activities for car rides can be used for any age. This is a plan to have in place to prepare for the long car ride when sensory processing needs impact the ability to sit in the car to get to the destination.
Create a sensory story to talk about the trip in advance. Use the travel sensory story to guide use of sensory tools during the road trip.
Pack preferred sensory tools. These items can be placed in the vehicle or alongside the child while travelling so they can access the sensory tools during the roadtrip.
Movement breaks! Stopping in advance of breakdowns is critical. Plan out stops in advance so you know when the next stop is. If possible, plan out stops according to location. Use local playgrounds as areas to run and play during road trip stops.
Use a “crazy straw” in a cup. The smaller opening is great for oral motor input.
Make a sensory kit with fidgets or other sensory tools
Play “Simon Says” with mouth exercises: Suck cheeks in/puff cheeks out/Make a big “O” shape/Stretch out the tongue. You’ll find many on our Simon Says commands blog post.
Make a chewy snack holder (below) along with the kids to plan for sensory needs during the long car ride.
Use a partially deflated beach ball as a sensory cushion on the floor. The individual can move their feet on the wiggle cushion.
Oral motor sensory break for road trips
If you’ve ever taken a road trip with kids then you know how nerve wracking a long trip can be for the kids and the parents. Long road trips with the family are definitely fun. They are certainly stressful and chaotic times with sibling love and revelry, but definitely memory-making. Whether you have one child or 6, a road trip involves planning, especially when sensory needs are at play.
You prepare the books, the activities, the snacks, the music, or videos. You can prep it all, but no matter what, there will be craziness that only kids can bring. There are the potty emergencies that happen 20 minutes after you left the rest stop. There are the drink spills that saturate the car seats. There are spilled toys and fights that break out among sisters. But through it all, you’re plowing 65 miles an hour to memories.
But, when all of this chaos is happening, you can take mini-sensory breaks that will give the kids a chance to calm down the fidgets and the wiggles.
As an occupational therapist in the school-based setting, I often times made recommendations to parents and teachers for kids who needed to move during the span of a class or school-day.
Unfortunately, when you are travelling long distances in a car on a road trip, you can’t always stop and get out to move and stretch. There are definitely times that a rest stop is needed and those are the perfect times for kids to get out of the car and run a bit.
But, when you are stuck in a van or car for a while, sometimes kids just need to have a sensory break. This is true for typical kids or kids with sensory processing disorders (and parents, too)!
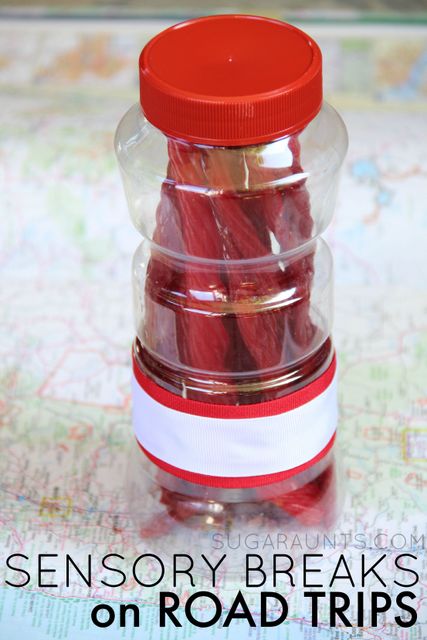
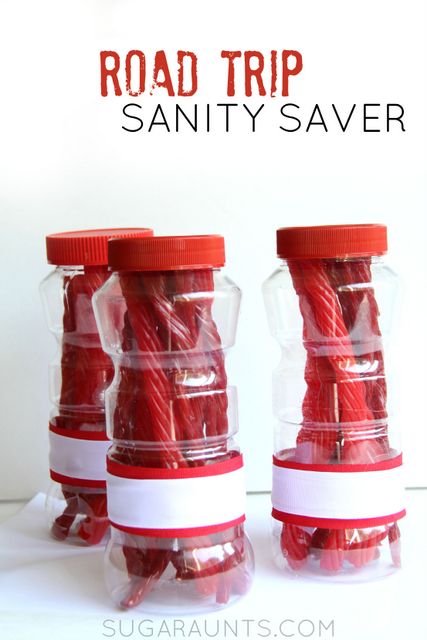
We made these snack bottles to help with calming sensory input using Twizzlers Twists.
Sensory Processing Disorder (and types of sensory needs, outlined in our Sensory Lifestyle Handbook) in children can present with many different sensory needs due to difficulties with modulating sensory input.
The long car ride of a family vacation can cause sensory overload or a lack of sensory input to kids who need help regulating input. Whether a child with sensory processing disorder is sensory seeking, under-responsive to sensory input, or sensory defensive, oral motor sensory integration activities like chewy beef jerky sticks, twizzlers, licorice chews, or fruit leather can help.
The repetition of chewing a licorice twist can help to calm and regulate sensory needs.
Related, please check out our resource on Ayres Sensory Integration for an understanding on the theory of what is happening in our sensory systems.
How To make a Road Trip Sensory Snack
With kids, a road trip almost guarantees a messy car with crumbs and spills. We wanted to create a container that would hold our Twizzlers or licorice twists and keep the mess on the lower end. A cute container is bonus, so we pulled out the ribbons and glue gun.
These snack holders will keep our Twizzlers or fruit chewsready for kids (and the parents) that need a quick sensory break during a long trip:
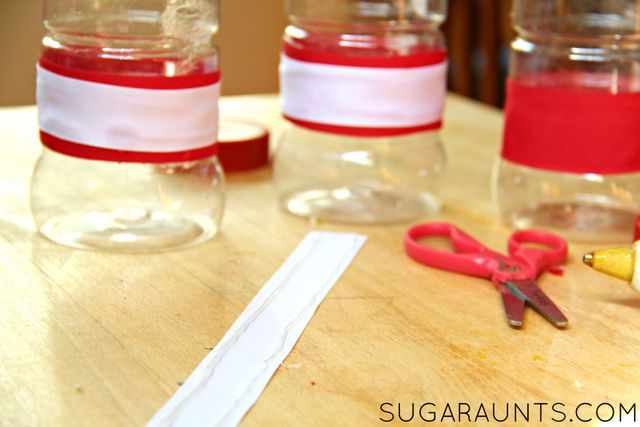
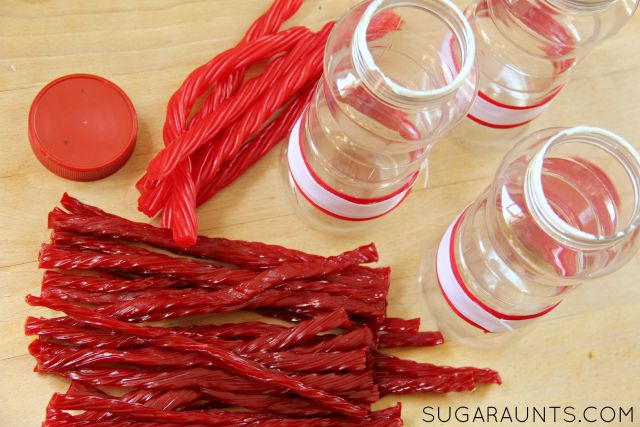
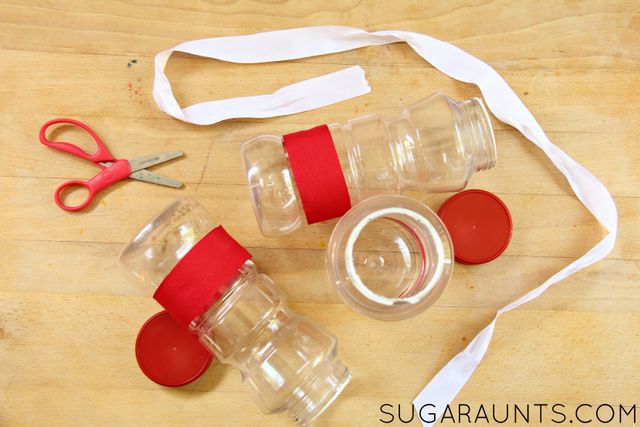
Gather a few tall plastic jars from the recycle bin. We used recycled peanut jars and loved that the lids coordinated with our Twizzlers Twists!
Grab a strand of ribbon and the glue gun to make these jars something special.
Cut the ribbon to fit around the jar. Using the hot glue gun, attach the ribbon. You can layer on colors, or get the kids involved in decorating by using decorative tape or even permanent markers to decorate the snack containers.
Now you’ll need Twizzlers candy. We grabbed our Twizzlers Twists and TwizzlersPull N Peels along with all of the other must-haves for our vacation.
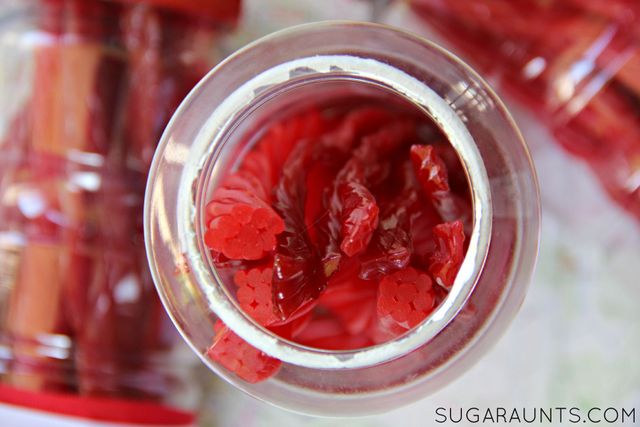
Fill the containers with Twizzlers Twists and TwizzlersPull N Peels. They are ready to grab and go on your next road trip with the family!
More Sensory Strategies for Road Trips
You’ll find more tools to survive Summer road trips with a sensory sensitive child that meet the interests of the child in our book, The Sensory Lifestyle Handbook. The book supports interests and motivating activities that occur naturally during the day to day tasks like a long car ride!
The Sensory Lifestyle Handbook is a comprehensive resource offering a strategy guide to create sensory diets and turn them into a lifestyle of sensory success!
Colleen Beck, OTR/L has been an occupational therapist since 2000, working in school-based, hand therapy, outpatient peds, EI, and SNF. Colleen created The OT Toolbox to inspire therapists, teachers, and parents with easy and fun tools to help children thrive. Read her story about going from an OT making $3/hour (after paying for kids’ childcare) to a full-time OT resource creator for millions of readers. Want to collaborate? Send an email to contact@theottoolbox.com.
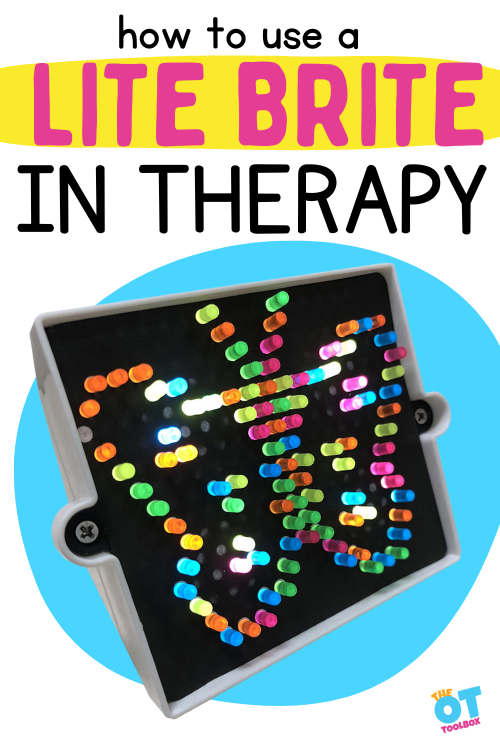
In occupational therapy, we target the occupation of play in kids, making toys one of the main tools like a Lite Brite toy to support and drive development. Pediatric OTs love to foster development through innovative and meaningful activities in therapy interventions, and the Light Bright toy is one fun toy that sparks creativity and sensory motor skills.
Today, we shine a spotlight on an iconic toy that has captured the imagination of generations: the (Amazon affiliate link) Light Brite. Known for its mesmerizing glow and colorful pegs, this beloved occupational therapy toy has found a special place in occupational therapy practices as an effective tool for enhancing fine motor skills, visual motor skills, and finger dexterity in individuals of all ages.
Amazon affiliate links are included in this blog post. As an Amazon Influencer, I earn from qualifying purchases.
Using a Lite Brite Toy in Therapy
In this blog post, we will explore the Light Brite toy and unveil how its simple yet engaging design can be leveraged by occupational therapists to promote development and foster therapeutic progress. We will explore the unique qualities of Light Brite (affiliate link) that make it a valuable asset in the pursuit of improved motor skills and coordination.
From the manipulation of the pegs to the coordination of visual input and fine motor control, Light Brite offers a multifaceted approach to therapeutic intervention.
Many therapy providers have a Lite Brite (affiliate link) in the therapy closet, but did you ever consider all of the ways to use this toy to foster development?
Light Bright Activities
There are many ways to use a Lite Brite toy to target specific skills.
Free Design Play: Encourage creativity by letting individuals create their own unique designs using the pegs and create vibrant, personalized artwork.
Shape Recognition: Use templates or stencils to guide individuals in creating specific shapes, helping them develop shape recognition skills. This is an actiity that fosters visual discrimination.
Sort the pegs: Sort the pegs by color and practice grouping them together on the Lite Brite board, enhancing color recognition abilities. This is a great sorting colors activity for preschoolers and toddlers.
Fine Motor Skill Development: Manipulating the small pegs and inserting them into the board helps develop and refine fine motor skills. You can foster fine motor milestone achievement by targeting various levels of fine motor development by grading activities with the pegs.
Hand-Eye Coordination: Practicing precise peg placement on the Lite Brite board enhances hand-eye coordination as individuals align their movements with visual targets.
Pattern Replication: Introduce patterns or designs for individuals to replicate on the Lite Brite board, fostering pattern recognition and visual-motor coordination.
Letter and Number Formation: Create educational activities by using Lite Brite templates to guide individuals in forming letters and numbers. Integrate the activities into other letter formation strategies.
Spatial Skills: Explore spatial awareness concepts by creating designs with varying levels of complexity, promoting spatial understanding and manipulation skills.
Counting and Math Skills: Use Lite Brite templates with numerical symbols or dots to engage individuals in counting, basic math operations, and number recognition. Fine motor and math are connected skills.
Storytelling Tool: Use the Lite Brite board as a visual aid to accompany creative storytelling activities, allowing individuals to bring their stories to life through illuminated scenes.
Graded precision: Utilize the pegs as a tool for various occupational therapy exercises, such as picking up and placing pegs to improve dexterity and finger strength. The pegs are a powerful tool in supporting graded grasp and release in dexterity.
Sensory Exploration: Engage individuals with sensory processing needs by incorporating different textured materials onto the Lite Brite board, providing tactile stimulation.
Pre-Writing Skills: Practice tracing shapes or letters on the Lite Brite board to promote pre-writing skills and hand control. One of the main pre-writing skills many kids don’t achieve is the fine motor aspect.
Collaborative Projects: Foster teamwork and social interaction by engaging multiple individuals in creating a larger-scale Lite Brite design together, promoting cooperation and communication. This can be a fun activity for group OT sessions or across a whole caseload.
using pegs for fine motor skills
One of the main ways to support fine motor skills with a Lite Brite is by using the pegs.
Picking up and manipulating the pegs offers strategies for skill development:
Eye-hand coordination- picking up the desired colored peg
Graded grasp and release- Aiming the hand and fingers to select a peg and placing it into a hole with the correct aim and force
In-hand manipulation- Moving pegs from the fingertips to the palm to hold the pegs. Then, moving one peg at a time to the fingertips to place the pegs into the holes of the Lite Brite board
Separation of the sides of the hand- Using the fingers on the thumb side of the hand (radial side) while using the fingers on the pinky finger side of the hand (ulnar side) to stabilize the hand for precision
Finger isolation- Moving use one finger to isolate a single peg in picking up the peg or placing it into the board.
fine motor peg activities
Some fine motor peg activities that use the Lite Brite pegs include:
Counting Game: Use three different colored pegs to play a counting game. Assign a specific number to each color, for example, red for one, blue for two, and yellow for three. Ask individuals to insert the pegs into the Lite Brite board, counting aloud as they go. They can create patterns or designs while practicing their counting skills.
Force Modulation- work on the amount of pressure needed to press the peg into the Lite Brite board by using different grades of paper. Consider tissue paper or construction paper. Each type of paper requires more force to push the peg through the paper. Or, you can add more resistance by laying an additional piece of paper on the Lite Brite board.
Color Patterns: Create a simple color pattern activity using three pegs. Start a pattern sequence using the three colors, such as red, blue, yellow, red, blue, yellow. Individuals can continue the pattern by inserting the corresponding colored pegs into the Lite Brite board. This activity helps develop pattern recognition and sequencing skills.
LIGHT BRIGHT FOR TODDLERS
While the small pegs of a Lite Brite toy might not be a great way to use this toy with toddlers, you can use the toy to foster development with young children.
We AGAIN used the dishwasher box that has been sitting in our living room.
(One cardboard box is so much better than a whole storage bin of toys! Consider DIY cardboard bricks!)
This box has been everything from a rocket ship to a barn in their imaginary play. It has been a corn cardboard sensory box, to a light tunnel for a Twinkle Twinkle little star party.
We’ve covered it with blankets to make a bear cave, and put it on it’s end, cutting a door and window into one side for a house.
After we cut the door into it, Baby Girl loved opening and shutting the door over and over and over again!
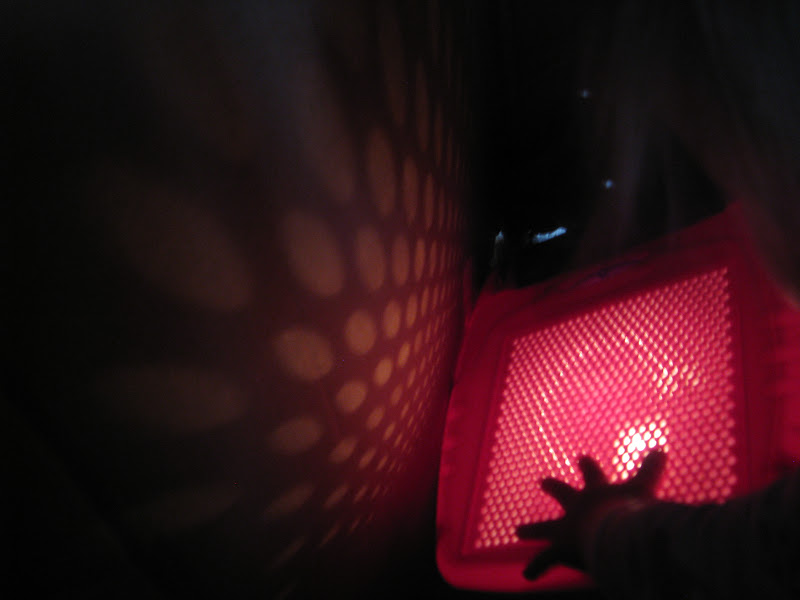
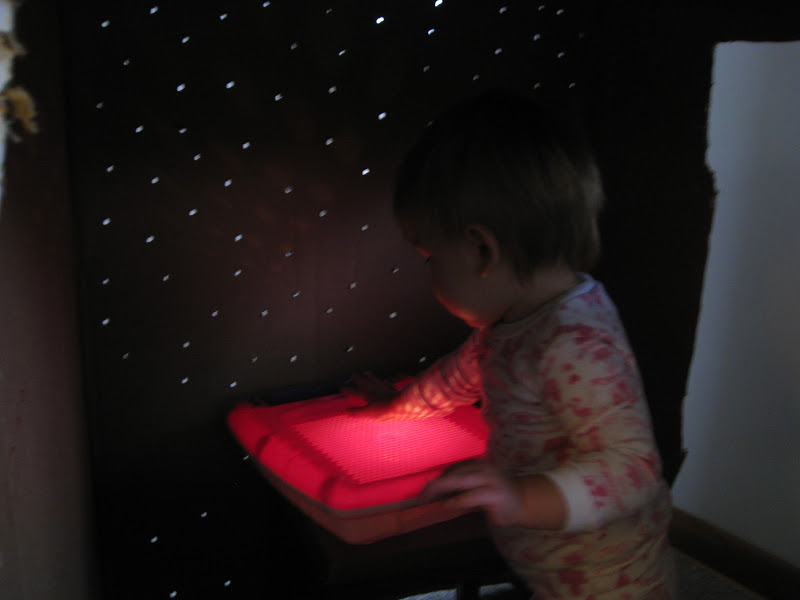
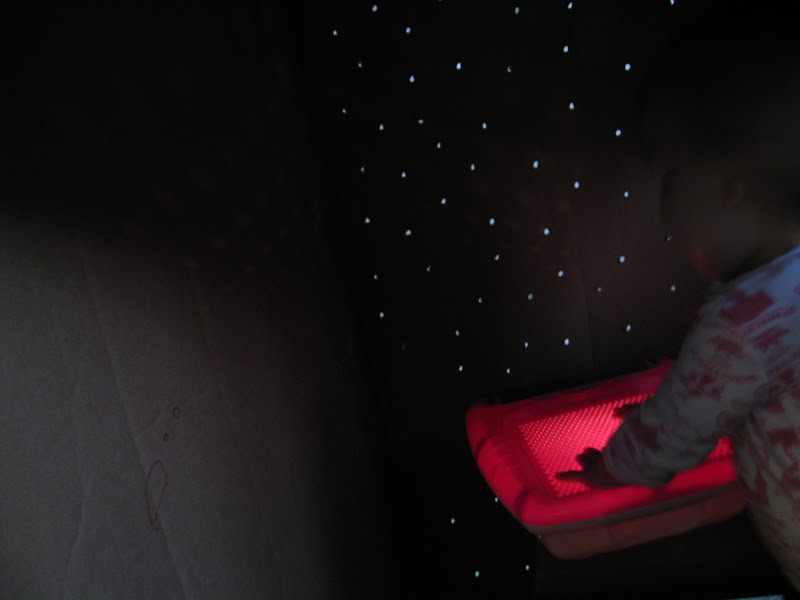
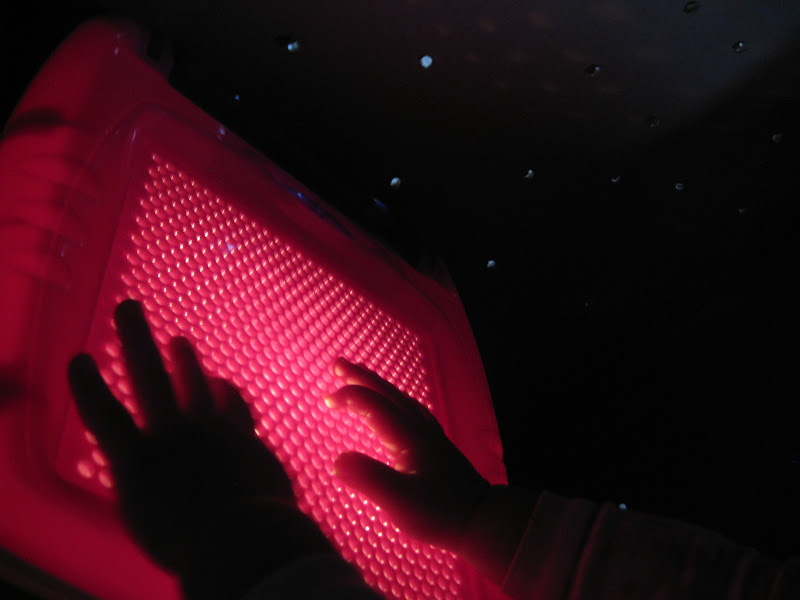
We used the Lite Brite in the cardboard box (without adding the pegs). It was a great sensory light that fostered many skills:
Crawling
Reach
Visual scanning
Intended reach (aiming)
Fine motor skills- making shadow puppets
Gross motor skills
Crossing midline
Tactile sensory play
Visual processing sensory play
This was one of Baby Girl‘s favorite games to play in the box. We took the Light Bright toy inside and had a blast checking out the lights, putting her hand over the light screen, touching the circle lights on the wall…
What a great sensory experience!
We’ll definitely be using the light bright again for sensory play. Poor box has seen the end of it’s time in our living room…There was a liiiiittttle rough play that destroyed it. Don’t worry, though. It will be used for some great art projects before it makes its way into the recycle bin!
~Colleen
Working on fine motor skills, visual perception, visual motor skills, sensory tolerance, handwriting, or scissor skills? Our Fine Motor Kits cover all of these areas and more.
Check out the seasonal Fine Motor Kits that kids love:
Colleen Beck, OTR/L has been an occupational therapist since 2000, working in school-based, hand therapy, outpatient peds, EI, and SNF. Colleen created The OT Toolbox to inspire therapists, teachers, and parents with easy and fun tools to help children thrive. Read her story about going from an OT making $3/hour (after paying for kids’ childcare) to a full-time OT resource creator for millions of readers. Want to collaborate? Send an email to contact@theottoolbox.com.
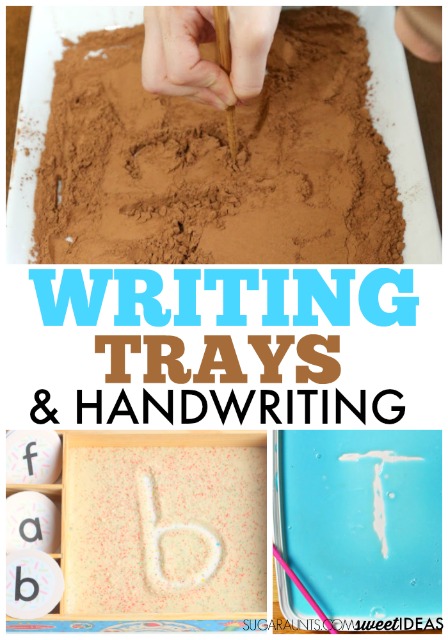
Writing trays are a fantastic way to help kids work on handwriting, letter formation, and pre-writing skills. There are so many benefits to a sand tray (or other sensory writing materials) in helping with letter formation and handwriting. There is a reason that writing trays are a popular way to encourage fine motor skills and an introduction to handwriting; They use a tactile sensory strategy to encourage movement in learning in a multi-sensory way. Writing Trays make letter formation fun and meaningful in a play-based manner.
Amazon affiliate links are included in this blog post. As an Amazon Influencer, I earn from qualifying purchases.
What is a writing tray?
I’ve used writing trays in my occupational therapy interventions and with my own kids for years. Writing trays are such a powerful tool to add a multi-sensory component and moveemnt to learning to write.
Writing trays are a dry or wet sensory material in a low tray or bin type of container. Children can use their finger or a tool such as a pencil, paint brush, or other item to draw, write letters, or form numbers into the sensory material.
Writing Trays are a creative way to help kids learn to write letters, numbers, shapes, and pre-writing strokes. There are a ton of different ways that writing trays can be set up and used in letter formation. Essentially, a writing tray uses a low container (or TRAY) and a medium that can be moved and shifted for writing.
Sensory writing trays can contain sensory fillers of any type. If you are able to move the material in a way that letters can be drawn in the tray, then the sensory writing tray is a success. With a sensory writing tray, children can write letters independently or copy letters from a visual letter card.
You can find them used in schools, clinics, preschools, early learning centers, and homeschool dinging rooms.
Writing Trays are filled with a filler that us manipulated and shifted so that letters or writing lines are visible. Some ideas for filling a writing tray include the sensory materials listed below.
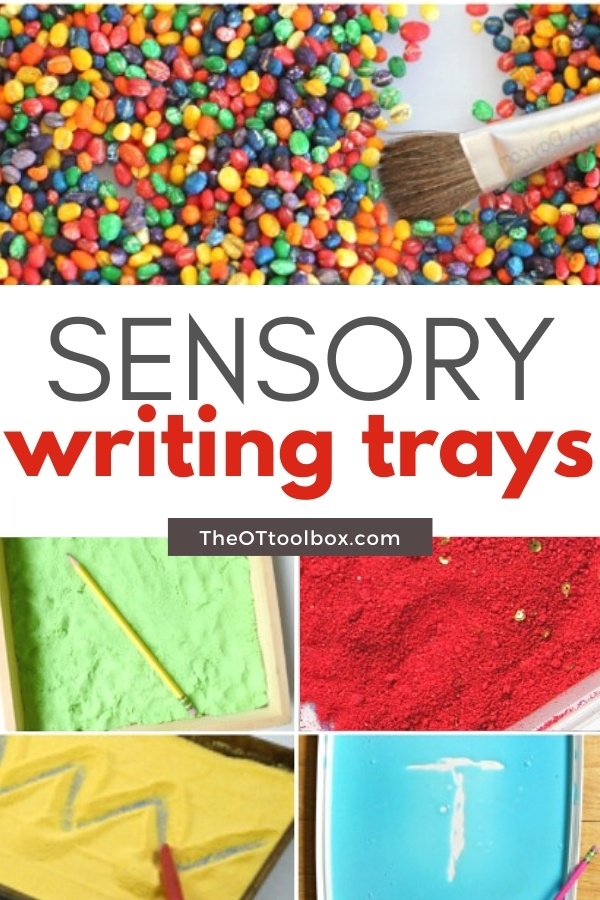
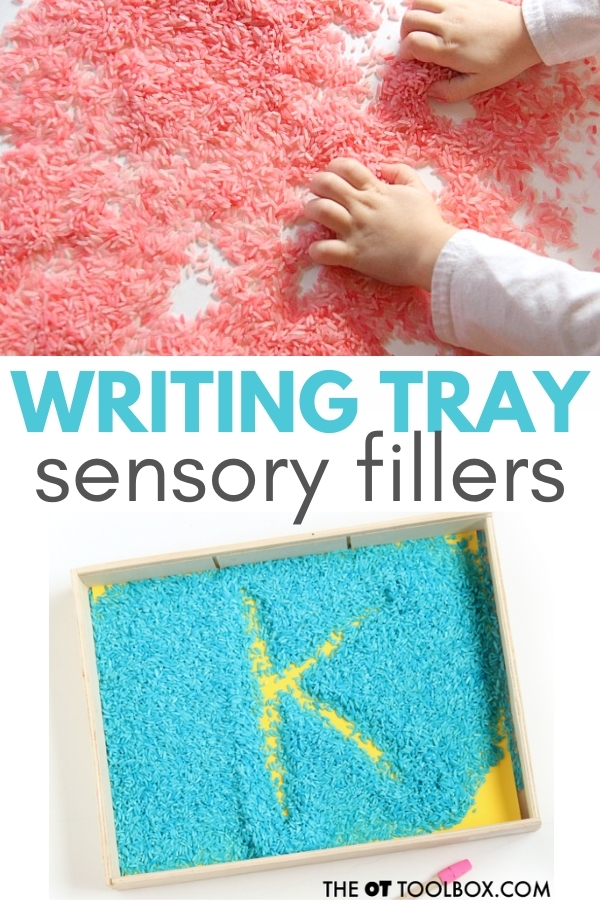
Sand (affiliate link) Colored Sand Rice Dyed Rice Salt Dyed Rice Play Dough (affiliate link) Other Doughs Sugar Flour Cornmeal Slime (Check out the fun we had with slime in a writing tray!) Spices (affiliate link) Crushed Chalk (affiliate link)
While sometimes, a child can use their finger to form the lines in their writing tray, a writing tool is typically recommended. (More on that below.)
Sensory Writing Tray Benefits
Kids can use writing trays to practice letter formation, or pencil control and stroke sequence in writing letters.
Typically, they will be provided with a visual cue or cue card for copying the letters/numbers/shapes.
Other times, kids can form the letter/number/shape independently when prompted to make a specific letter. This is a great way to work on visual memory and independent letter formation.
Be sure to verbally prompt children to form letters or build letters with correct stroke sequence. This is essential for carryover of accuracy with letter formation in handwriting.
Otherwise, the child is simply playing in the sensory tray and not effectively using the writing tray as a tool for improved handwriting.
Encouraging the child who is learning pre-writing strokes and beginning letter formation can use a writing tray as a base for forming letters independently. Try using visual and verbal cues to promote correct letter construction.
A few more must-dos when using a writing tray for addressing letter formation:
Make sure letters are not formed in parts. In other words, don’t allow kids to make a circle and then a line to form an “a”.
Make sure letters are formed from top to bottom.
Realize that the motor plan to form letters with your finger is different than the motor plan to form letters with a pencil or other pencil-like writing tool.
The nice thing about writing trays is that they are very versatile. Students of all ages can use writing trays to work on different levels of handwriting. Some ways to work on handwriting include:
A writing tray can be an effective tool in boosting fine motor skills. Kids can use their finger to form lines and letters while strengthening finger isolation and separation of the two sides of the hand, including an opportunity for the ulnar side fingers to tuck into the palm for a more effective pencil grasp when writing.
Children can also use a tool to form letters in a writing tray. This can be an opportunity to develop pencil grasp.
However. There are a few items that should be mentioned about using a writing tray to address pencil grasp and appropriate motor plan for letter formation.
Writing Trays are a common tool. But if you just place a writing tray in front of a child, you will likely see an inefficient writing activity. You will probably see most kids forming letters with an awkward grasp on the writing tool, a flexed and deviated wrist, an abducted shoulder, and generally ineffective positioning.
Positioning absolutely carries over to letter formation and handwriting.
A writing tray can be used to address pencil grasp and handwriting needs. However, it is essential to use the tray in a proper manner. There are a few ways to do this:
Place the writing tray on a slight slant. Try using a DIY slant board.
Use a low edged tray.
Use verbal, physical, and visual cues for appropriate positioning.
Position the writing tool in your child’s hand with an appropriate tripod or modified tripod grasp.
Show the child how to hold the tool at the end of the tool as if they were holding a pencil.
Once you’ve got your writing tray set up and positioning taken care of, it’s on to the fun stuff…making a writing tray!
How to make a Writing Tray
Making a writing tray to gain benefits of teaching sensory handwriting is easy. You can use materials found around the home.
The options are limitless when it comes to writing tray combinations! You can create a writing tray in any theme or to meet any need. You’ll need just a few items: a container, a filler, a tool, and letter cards.
Writing Tray Ideas
First, you’ll need a low tray, basket, bin, or other container. We’ve used a variety of containers in our sensory writing trays. You’ll want a container that will hold the sensory writing material within its edges.
In some cases, you can even scatter the sensory material on a flat surface like a table or a plastic table cloth on the floor. For example, we used dyed rice right on the kiddie picnic table for a pre-writing and hand strengthening activity.
Kids will be using a tool or their hands to write letters and the sensory material can scatter. Some specific ideas include:
Kitchen baking trays (jelly roll pan or cookie sheet with edges)
Food storage containers
Melissa and Doug wooden puzzle boxes
Cardboard boxes cut low on the sides
9×11 cake pan
Shirt box
Tray
Low basket
Writing Tray Tools
Next, you’ll need a tool to use to write the letters. This can be items found in the home as well. Some writing tray tools include:
Next, an important part of a writing tray is the letter model. As mentioned above, writing trays are great for copying pre-writing lines, shapes, letters, numbers, and words.
Cards can be used as a visual model for forming letters or words. Some cards include direction arrows. Others might include a sight word or spelling word for the child to copy. These cards can be positioned in different positions to address different needs.
Position the letter cards right in the tray for near-point copying.
Position the writing tray cards in a vertical position near the writing tray to challenge vision shift.
Hang the writing cards on a wall for far point copying to work on visual shift, visual attention, visual memory, and copying from a distance.
Writing Tray Fillers
You’ll also need a sensory material to act as a filler. This is the material that the child will actually “write” in. When we say “write”, they are using the tool to form letters as the sensory filler moves in the tray. They will not actually write a letter with a pencil or other marking device. Sensory filler material can be as creative as you let it. Some writing tray fillers include these materials:
Click each link for ideas on how to set up these creative writing trays.
As you can see, the ideas are limitless when it comes to sensory handwriting! Use a theme or materials that meet the needs of your child or client and are motivating and fun!
Colleen Beck, OTR/L has been an occupational therapist since 2000, working in school-based, hand therapy, outpatient peds, EI, and SNF. Colleen created The OT Toolbox to inspire therapists, teachers, and parents with easy and fun tools to help children thrive. Read her story about going from an OT making $3/hour (after paying for kids’ childcare) to a full-time OT resource creator for millions of readers. Want to collaborate? Send an email to contact@theottoolbox.com.
Sand Writing Tray
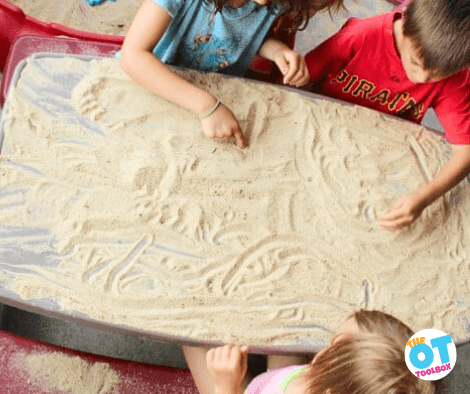
One very easy way to create a sand writing tray is to use a child’s picnic table placed either outside in a sandbox or over a tarp (or outdoor space where it’s ok that sand goes into the ground and lawn).
We loved using our kid’s picnic table in this way to make a sand writing tray.
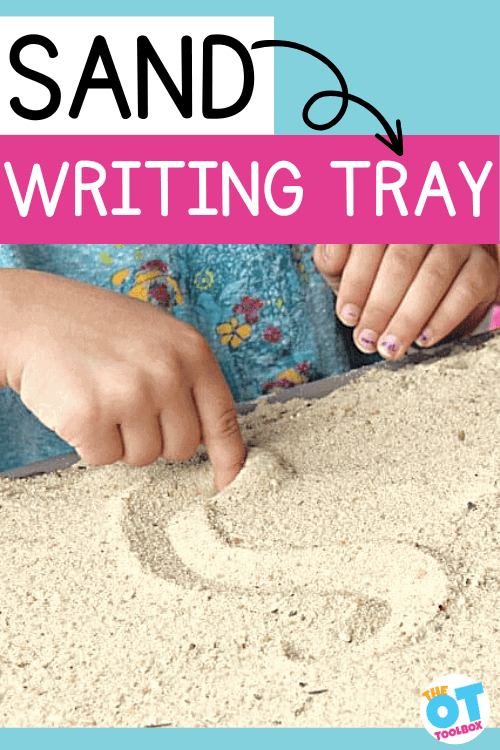
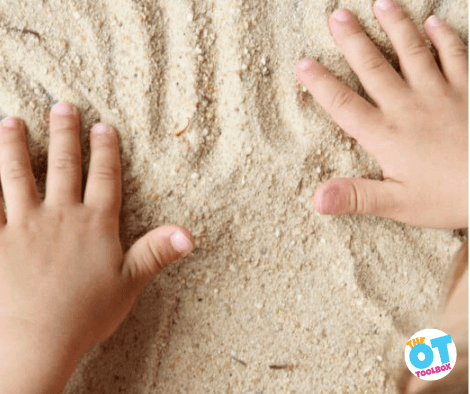
For this sand writing tray, we made it super simple and just dumped a thin layer of sand onto our (Amazon link) Little Tykes picnic table. Then, I invited the kids to all sit down and draw in the sand using their fingertips. This is a great exercise in finger isolation.
Practicing letters in a sensory surface like writing and drawing in sand on a picnic table surface is a motivating and fun activity for kids because it’s not something they typically do.
Kids learn new skills well with a multisensory learning experience and a sand writing tray is a great, inexpensive way to do just that.
To encourage vocabulary and verbal expression, tell stories on the table surface and ask questions that extend the story further. Then, while practicing lines and drawing shapes and figures, gently smooth the sand with the palm of your hand and start over again!
Preschoolers can practice pre-handwriting lines, while older kids can form letters and numbers in the sand. They can also copy and trace letters to improve their penmanship skills.
There are many sensory activities that can be used to dye Easter eggs. In this blog post, you’ll find several sensory ways to dye eggs. Whether you are using natural egg dyes, movement activities to dye eggs, or using a rice shake egg dye activity, the sensory egg activities are perfect for adding movement that meets sensory needs. Add these sensory egg ideas to your Easter occupational therapy ideas!
Sensory Egg Activities
These sensory egg activities are fun and use all the senses! First, let’s explore the various senses that can be used when coloring eggs. Start by reading our resource on sensory play. You’ll see that there are 9 sensory systems at work at any given time:
Take a look on Pinterest, and you can find SO MANY different ways to dye Easter Eggs. We didn’t see any collections that centered on Sensory Exploration while dying eggs.
These are some fun, creative ways to dye eggs with a Sensory twist.
Movement sensory egg ideas
These ideas use movement to dye eggs. When shaking an egg in a paint bag, or shaking an egg in a bag of glitter or shaving cream, kids can use several sensory components:
Vestibular input by jumping or shaking
Bilateral coordination to use both hands together in coordinated manner to shake a plastic bag
Tactile sensory input to utilize several textures.
Visual sensory input with bright and colorful visual input.
Craftaholics Anonymous made glitter eggs. You can use a hardboiled egg and use any egg dye kit. Place the egg in a plastic baggie of glitter and shake, shake, shake!
The Chocolate Muffin Tree used crayon shavings to decorate. Can’t you just smell the crayons by looking at this picture? Use the same plastic baggie technique listed above but add crayon shavings. This is just another benefit of coloring and reason why coloring is such a great activity for kids!
Martha Stewart shows us how to decorate with thread to make a textured egg. This is a great bilateral coordination activity when wrapping string around an egg. But is this a sensory activity?
When you consider the kinesthetic input of wrapping string around and egg, plus the other contributions: visual input, motor coordination, proprioception, then yes!
You could make melted crayon shaving eggs. These look so textured and fun!
Adding crayon shavings offers a specific scent, or olfactory input.
Creaative Green Living decorated patterned eggs using silks. This sensory egg dying technique offers tactile sensory input.
Lovely Indeed explores patterns and textures using Washi tape. Peeling tape adds fine motor proprioceptive input through the joints in the fingers. This is a great pincer grasp activity.
Add stickers to work on fine motor skills…pinching little stickers on the eggs. This site shares some natural dying techniques, too. There are many reasons why playing with stickers supports development. This is a great sensory egg activity!
Toddler Approved used baking soda and vinegar to make these fun eggs.
Explore those senses while dying eggs!
More sensory egg ideas for dying Easter Eggs
These ideas use tactile sensory input, movement (Vestibular sensory), visual sensory input. Each of these ideas are fun and creative was to color eggs!
Natural Dyes: You can use natural dyes to color your Easter eggs. For example, beetroot juice will give a pink hue, turmeric can give a yellow hue, and red cabbage can give a blue hue.
Kool-Aid: You can use Kool-Aid to dye your Easter eggs. Kool-Aid comes in a variety of colors and smells, and can be a fun sensory experience for kids.
Shaving Cream: You can create a marbled effect on your Easter eggs by using shaving cream. Simply apply a layer of shaving cream to a shallow dish, add a few drops of food coloring or liquid watercolors, and swirl the colors together with a toothpick. Then, roll your egg through the shaving cream and let it sit for a few minutes before wiping it clean. Then, use those toothpicks to work on precision and dexterity using our toothpick holder activity.
Glitter: You can add some sparkle to your Easter eggs by using glitter. Simply brush some glue onto your egg, sprinkle glitter over it, and let it dry.
Rice Shake: You can use rice and food coloring to create a sensory egg dyeing experience. Fill a sealable plastic bag with uncooked rice, add a few drops of food coloring, and shake the bag until the rice is evenly coated. Then, place your egg inside the bag, seal it, and shake it until the egg is evenly coated.
Many of these sensory activities for dying eggs can add sensory input to support self-regulation or to a functional sensory diet, and more!
The Sensory Lifestyle Handbook walks you through sensory processing information, each step of creating a meaningful and motivating sensory diet, that is guided by the individual’s personal interests and preferences.
The Sensory Lifestyle Handbook is not just about creating a sensory diet to meet sensory processing needs. This handbook is your key to creating an active and thriving lifestyle based on a deep understanding of sensory processing.
Colleen Beck, OTR/L has been an occupational therapist since 2000, working in school-based, hand therapy, outpatient peds, EI, and SNF. Colleen created The OT Toolbox to inspire therapists, teachers, and parents with easy and fun tools to help children thrive. Read her story about going from an OT making $3/hour (after paying for kids’ childcare) to a full-time OT resource creator for millions of readers. Want to collaborate? Send an email to contact@theottoolbox.com.
Check out the Christmas Tree Activities on this blog post for creative ways to incorporate a Christmas tree theme into occupational therapy interventions. Tis the season for Christmas tree crafts and festive holiday activities that develop skills and learning. A lot of these Christmas crafts and sensory ideas only require a few items to make and they can last for many years to come. Add these Christmas occupational therapy ideas to your therapy toolbox.
Christmas Tree Activities
These activities are listed below in sections, so you can pick and choose the holiday activities that meet the needs of the child you are working with in therapy (or at home as a parent).
Kids can work on fine motor skills, visual scanning, visual tracking, in-hand manipulation skills and grasp patterns with a holiday theme. The tree activities below develop skills through Christmas tree ornaments, garland and Christmas themed sensory bins.
Christmas Tree Crafts
These are fine motor crafts that build motor skills, coordination, planning, and hand strength with a Christmas tree theme.
Make a bottle cap Christmas tree
Bottle Cap Christmas Tree craft-Save those bottle caps and make a Christmas tree. Help you kids paint and arrange the bottle caps into a Christmas tree. This is a great fine motor eye- hand activity for kids.
Clothes pin Christmas tree
Christmas Tree Craft– Have some clothespins siting in a drawer? Gather those up with some paint, stickers and paperclips to make a fun craft for the holidays.
Christmas tree stamp art
Christmas Tree Stamp Art– have your child make homemade gift tags. This activity will work on fine motor skills (scissor skills and grasp patterns).
A Very Merry Occupational Therapy Christmas –This article provide a variety of activities focused around Christmas for the whole month! Scroll down to activity eight to make a craft of stringing cranberries and popcorn to make garland for your tree. Stringing items works on so many important skills. Bilateral coordination, visual tracking and visual scanning, fine motor skills and patterning.
Christmas tree made from egg cartons
Fine Motor Egg Carton Christmas Tree Craft-Save your egg cartons to make this fun Christmas tree craft. Grab some green paint and decorations to help your child make a table decoration.
Christmas Tree Fine Motor Craft– Grab a hold punch and paper and let your kids have fun by making Christmas trees with various amounts of holes. Can be used as a great way to count as well. The squeezing of the hole punch provides proprioceptive input and strengthening to the hands.
Christmas Tree Scissor Skills Craft– Use the same concept and have kids work on scissor skills with this easy cutting activity. These Christmas trees would look great on a holiday garland.
Make a pine cone Christmas tree and build fine motor skills.
Pine Cone Christmas Tree Ornaments-Take a walk outside and gather up pinecones. Grab some paint and glitter, pom poms and make these cute ornaments with your kids.
Christmas tree suncatcher
Christmas Tree Suncatcher Craft-what is better then seeing the sun in the winter? Having a beautiful sun catcher to see it through. This activity works on pincer grasp and in-hand manipulation skills.
Make a pattern Christmas tree with beads
Pattern Christmas Tree Ornament– This fine motor craft is a fun one to work on pincer grasp, tripod grasp, in-hand manipulation, and more.
Christmas Tree Sensory Activities
Christmas tree sensory play
Christmas Tree Sensory Play-make a fun Christmas tree with foam shapes and water. A fun sensory activity that works on cutting, patterning and sorting.
Christmas Sensory Bin–kids love playing in sensory bins. We used green peas and potpourri as the items in the bin. To make it a Christmas tree them use the green peas and add round ball for ornaments.
Christmas tree card to build fine motor skills
This Christmas tree card kids can make is a fine motor skill activity that builds scissor skills, hand strength, eye-hand coordination, and more.
Christmas tree drink wrap
Christmas Tree Oral Motor Activity– Did you know that drinking from a juice box offers kids heavy work through the mouth as they suck on the small juice box straw? This Christmas tree craft can be used with a juice box for a bit of calming sensory input through the mouth.
Christmas Tree Mindfulness Activity– Use this Christmas tree deep breathing activity as a sensory break to address self-regulation for sensory needs or emotional needs. Print and go!
About Christina: Christina Komaniecki is a school based Occupational Therapist. I graduated from Governors State University with a master’s in occupational therapy. I have been working in the pediatric setting for almost 6 years and have worked in early intervention, outpatient pediatrics, inpatient pediatrics, day rehab, private clinic and schools. My passion is working with children and I love to see them learn new things and grow. I love my two little girls, family, yoga and going on long walks.