Super Hero Craft for Skip Counting

super hero craft

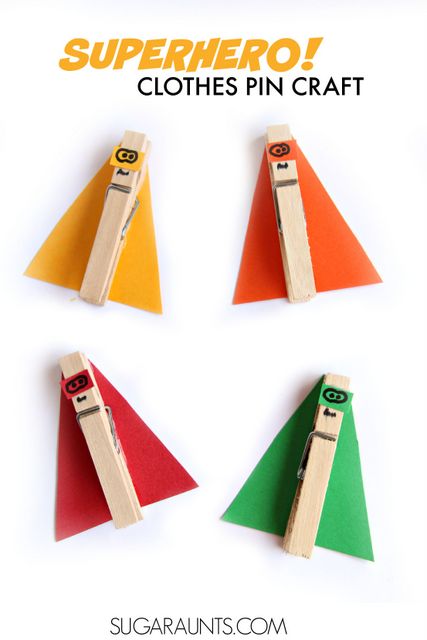
I have a fun occupational therapy craft to share today. This superhero craft is a SUPER way to help kids develop fine motor skills and hand strength. It’s a clothes pin craft, so when kids make these super hero clothes pins, they are really strengthening hand strength and endurance in the hands.

Add these superhero craft to these superhero activities:

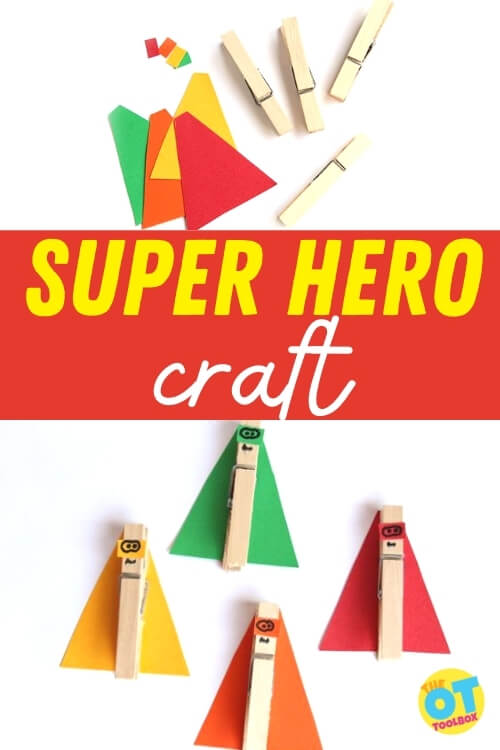
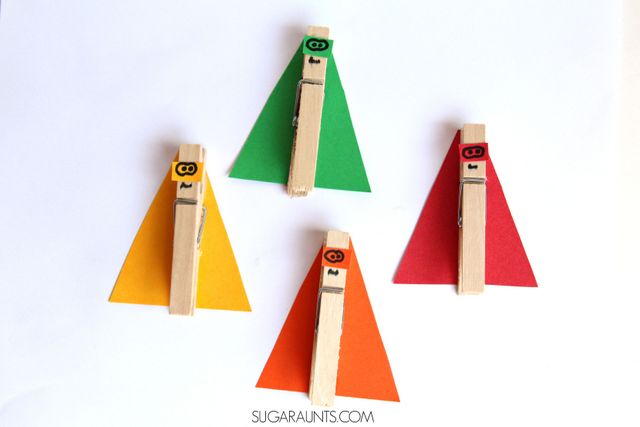
Make a super hero craft with clothes pins to work on fine motor skills with a super hero theme.

Super Hero Craft

Super hero craft made with clothes pins to help with hand strength and fine motor skills as well as teaching skip counting.

How to make a super hero craft 

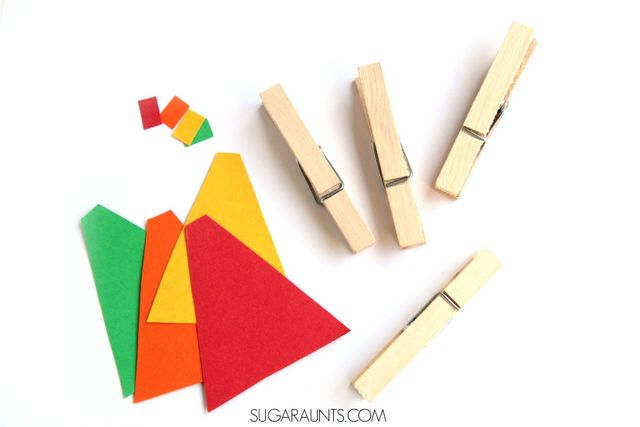
  Making the super heroes are part of the fun with this math activity.  We used a few items to create these super cute super heroes:  

  1. Cut the card stock into triangle shapes with a flat top.  Measure the size against the length of the clothes pins.  
  2. Glue the Triangle to one long side of the wooden clothes pins  with the narrow part of the triangle at the part that pinches.  The “head” of your superhero will be the part that pinches paper.  
  3. Cut small rectangles from the card stock to fit the width of the clothes pins.  These will become the superhero’s mask.  
  4. Glue the mask onto the clothespin about a 1/4 inch from the top of the clothes pin.  
  5. Use a marker or permanent marker to draw a smirk (or angry face, if you like) and eyes on the mask.  
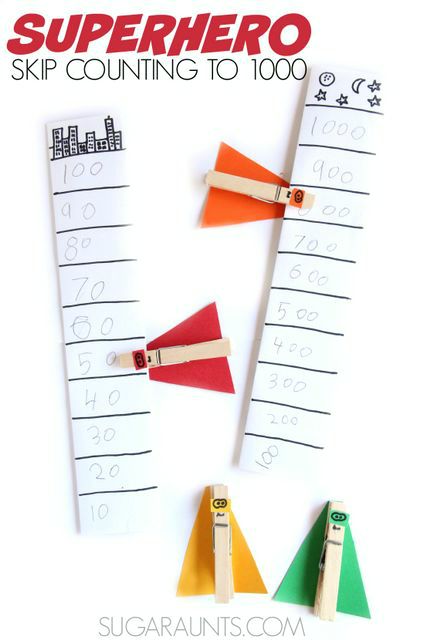
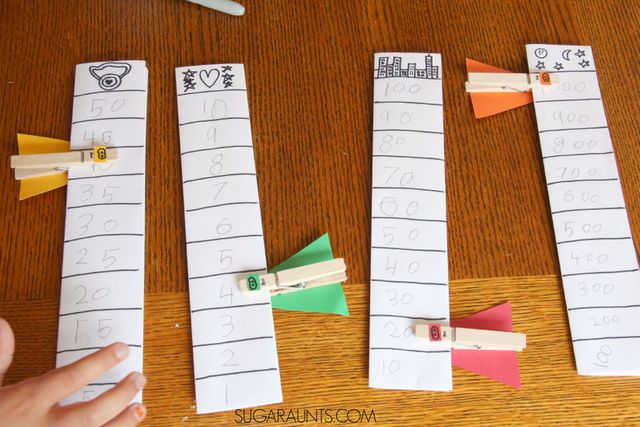
Superhero themed second grade math for place value, addition, and skip counting to 1000.

  This super hero craft is ready to fight math crime!

Super hero craft made with clothes pins.

Skip Counting by 1000

You may know that occupational therapists love hands-on learning. We love to seek multisensory learning and activities that kids can move and learn at the same time. This superhero craft does just that.

The school year is about to begin and we will have a second grader in our house.  HOW did that happen?? She loved math in first grade and I’m excited to see her growth and learning this year in second grade.  We do so many enrichment and homework extension activities and it is fun to come up with creative ways to practice what the kids have been learning in school.  

This Super hero Skip Counting Activity was a fun way to practice skip counting and basic addition up to 1000.  (Affiliate links are included in this post).  

For more fine motor math, grab our count and color worksheet to build many visual motor skills.

Use this super hero craft for hand strengthening and to teach skip counting to 1000.

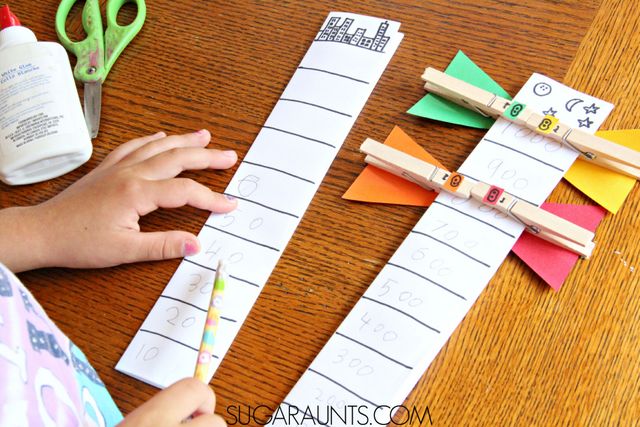
  Next, we used the printer paper to create strips of paper that became our math skip counting columns.  Simple fold the paper into quarters lengthwise.  Then, use the sharpie to draw ten horizontal lines.  You can draw a picture at the top of the strip of paper, like buildings, stars, a medal, or other superhero-ish pictures.

Superhero themed second grade math for place value, addition, and skip counting to 1000.

Multisensory Math- Skip Counting to 1000

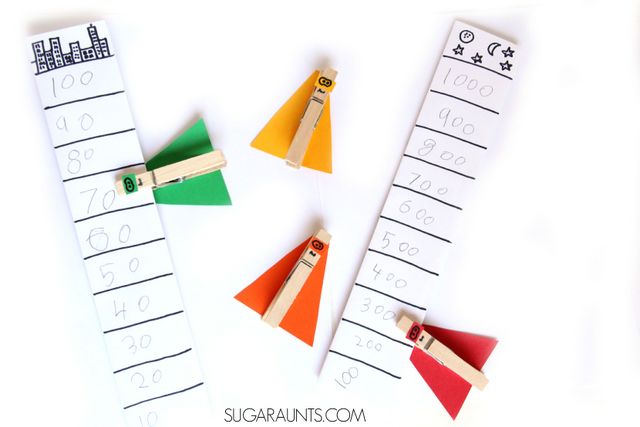
We made four strips of paper and my daughter wrote in numbers.  On one strip she wrote 1-10. On the second, she wrote 1-100 by tens.  On the third strip she wrote 5-50 by fives.  On the last strip, she wrote 100-1000 by hundreds.  

We then used the superheros to skip count up to 1000.  

She was able to use the various strips together to do basic adding by 1’s, 5’s, 10’s, and 100’s.  

One of the standards in second grade math is understanding place value.  Skip counting to 1000, and reading and writing numbers up to 1000 are important concepts in place value.  

You can position the hundreds strip next to the ones strip and easily note that the numbers 100, 200, 300, 400, 500, 600, 700, 800, and 900 refer to one, two, three, four, five, six, seven, eight, nine, or ten hundreds (and 0 tens and 0 ones).   There are so many ways to use these superhero skip counting strips and superhero counters.  

My daughter has been using them every day (and carting them around in her tote bag) to count out how many silly band bracelets she’s made.  She will slide the superhero counters up the strips one by one on the ones strip.  

Then when she reaches the 10, she slides the superhero up on the tens strip.  She’s got a long way to go to reach one thousand silly band bracelets, but she sure does have lofty goals (and a super fun superhero way to keep track)!    

Teach skip counting with this super hero clothes pin craft.
Superhero clothes pin craft for fine motor strengthening

These make a great fine motor strengthening activity, too.  Pinch these superheros on yarn or paper for superhero fine motor strength!   Looking for more Superhero themed ways to learn in second grade?  Try these from our Second Grade Blog Team:

Super Hero States of Matter from Look! We’re Learning!   
uperhero Pattern Stones from Rainy Day Mum   
Super Hero Reading Logs from 123 Homeschool 4 Me   

Superhero Contractions Memory Game from School Time Snippets   
Superhero Cityscape Art Project with Van Gogh from Preschool Powol Packets   
Create your own Superhero Comic-Photo-Strip from Crafty Kids at Home   
Super Hero Self Portrait from Still Playing School

More Multi-Sensory Math ideas you may enjoy: 

Bottle Cap Christmas Craft

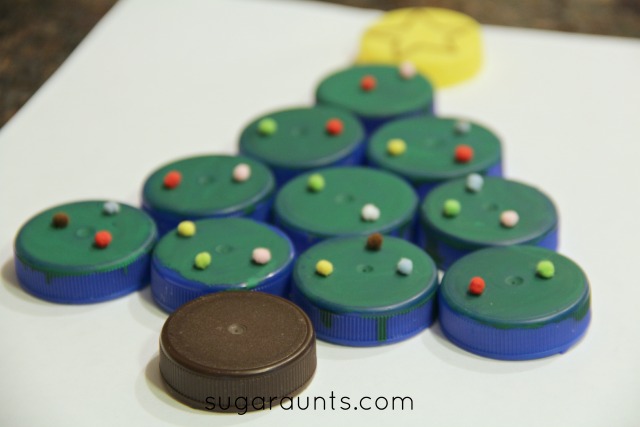
We love our Christmas play activities.  We’ve even put together a 25 Days of Christmas play list of fun activities we’ve done in the past.  This bottle cap Christmas Tree is fun to make and a cute Christmas craft that kids will love.  And, bonus is that the recycled caps are free!


Christmas Tree craft using recycled bottle caps. This is a fun craft for kids!


Christmas Tree Craft for Kids

This post contains affiliate links.
To make the Christmas Tree craft, you’ll need a few items:
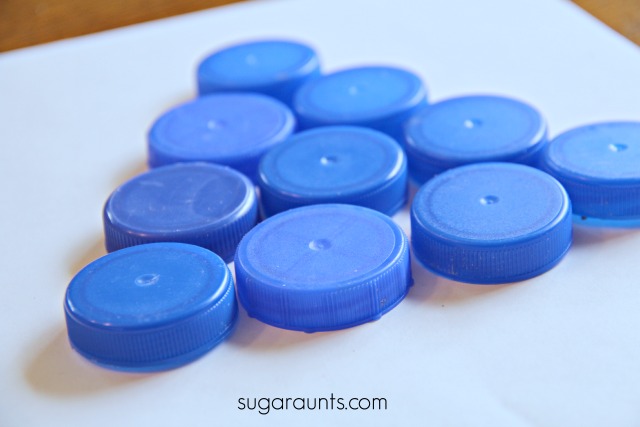
bottle caps (green, or use green acrylic paint) You will also need either brown and a yellow bottle cap, or brown and yellow acrylic paint
glue
tiny craft pom poms
marker

Arrange the lids in a tree shape to get an idea of how you want the tree to be on a page.

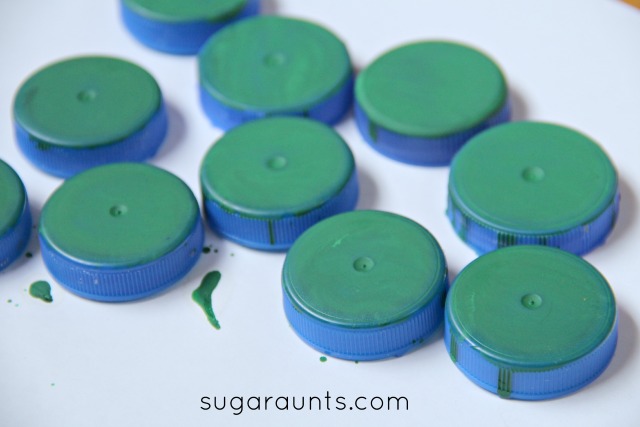
Use the acrylic paint to paint the tops green.  If you’re starting with green bottle caps, you can skip this part.


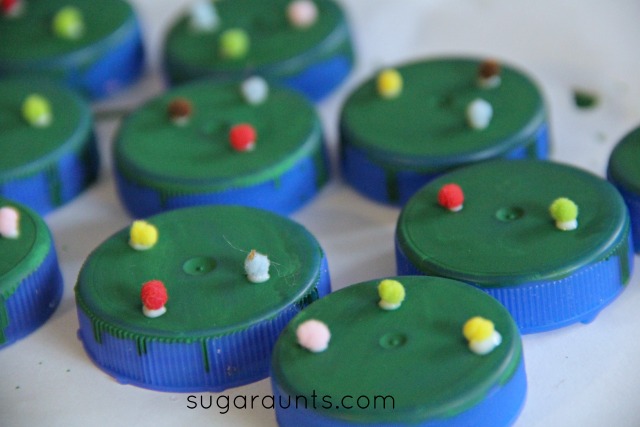
Dab a small amount of glue on the dried bottle caps.  The crafting poms we used were very small and great for fine motor skills.  A neat pincer grasp is needed to manipulate these itty bitty pom poms.


Glue the bottle caps into place on a piece of card stock or paper.  We drew a star on the top yellow bottle cap.  This is a fun puzzle for the kids, and a very cute craft for kids to create!

Christmas Handwriting Activities

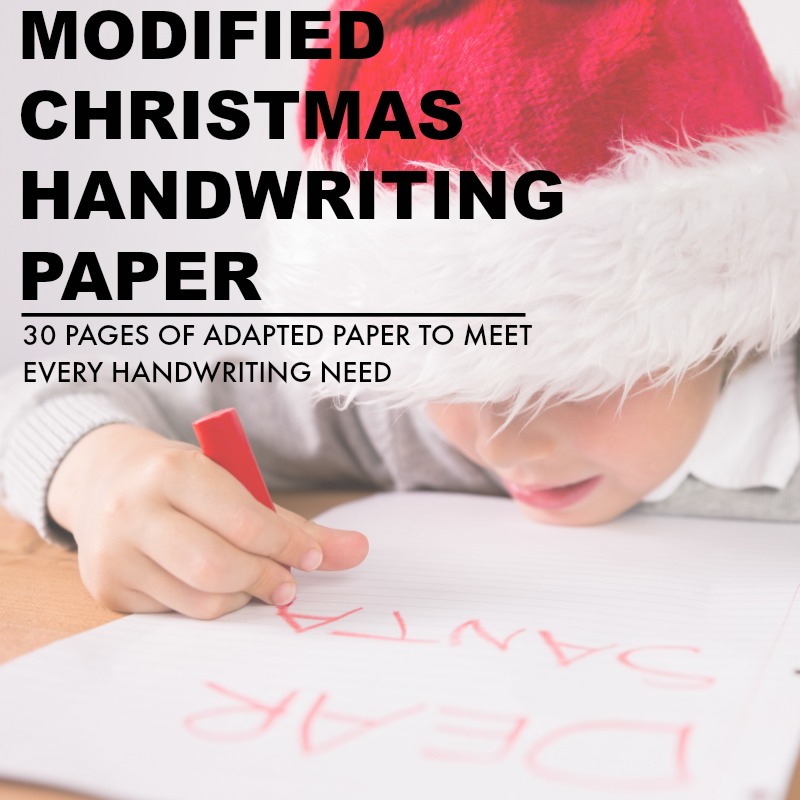
Writing out that Christmas wish list is a difficult task that brings out tears instead of holiday excitement.  I’ve got a solution for your kiddo with handwriting difficulties: a packet of modified paper for all of the Christmas handwriting tasks that come up each year.  Use this handwriting pack to help kids who struggle with handwriting to participate in holiday traditions while even working on and developing their handwriting skills!

Working on handwriting with kids this Christmas season? Grab your copy of the Christmas Modified Handwriting Packet. It’s got three types of adapted paper that kids can use to write letters to Santa, Thank You notes, holiday bucket lists and much more…all while working on handwriting skills in a motivating and fun way! Read more about the adapted Christmas Paper here


Tools in Fine Motor Skill Development

Fine motor skills can be developed with so many tools that you have around your house.  We love playing in creative ways to work on fine motor skills.  

Great tips to work on improving fine motor skills in kids with simple tools you can find around the house.


Tools for Fine Motor Skills


Work on scissor skills with a bunch of fun ideas from Living Montessori Now
Use broken crayons (Planting Peas) to work on a more mature grasp on the crayons when coloring which will then encourage a tripod grasp on the pencil when writing.
Something as simple as an eye-dropper can improve intrinsic muscle strength of the hand. This is so important for endurance in fine motor tasks like coloring.


Use stacking toys to work on precision, coordination, and opposition of the thumb to stack and build with graded movements


Some of our favorite ways to play and work on fine motor skills:
Fine Motor Play with Tissue Paper using tissue paper
Fine Motor Play With Crafting Pom Poms using crafting poms
Cereal Box Fine Motor Coordination Activity using a cereal box and straws
DIY Lacing Cards using styrofoam
In Hand Manipulation Ideas for Kids using water beads and recycled bottles
Manipulating Coins Fine Motor Skills using coins
Using Pipe Cleaners for Fine Motor Skills using pipe cleaners
Fine Motor Table Top Play with Tape with masking tape
Golf Tee Hammering with golf tees
Honey Bee Pinch Pins using clothes pins
Invitation to Scoop and Pour with spoons
Spring Themed Play Dough Press with cookie cutters


More tools to use in fine motor skill development:
tweezers
tongs
beads
toothpicks
hole puncher
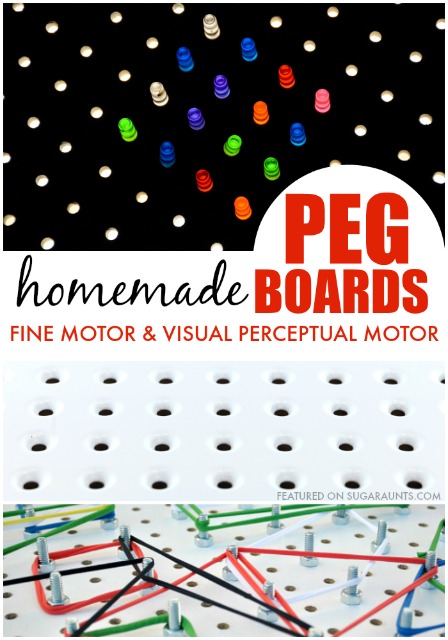
peg boards
lacing cards

How to make an easy Light Box for play and learning

We’ve made a DIY light box before and have loved playing and learning with light.  Light boxes are such a great way to encourage fine motor, sensory, visual perceptual skills, handwriting, language, creative thought process, and more.  We made another version of our Super Easy Light Box and when I say super easy…it doesn’t get much easier!


What is a light box used for? Sensory, learning, fine motor, and play


How to make an EASY light box

This post contains affiliate links.  Read our full disclosure here.

Make a light box easily for learning and play
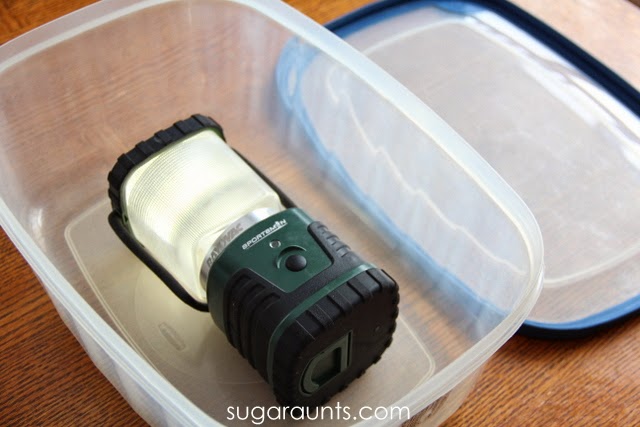
Start with a plastic bin with lid.  You’ll need your bin to be clear or see through. The size doesn’t matter, as long as it’s comparable to your light source.  We used our handy bright lantern.  This thing is heavy duty and we use it all the time.  The kids use this lantern for pretend play, outside play during summer nights, exploration adventures, Pirate explorers, ghost hunters…this lantern gets it’s run of play!  It fit pretty well in the bin that we used for our DIY light box, and the Bright LED light made a great light source.
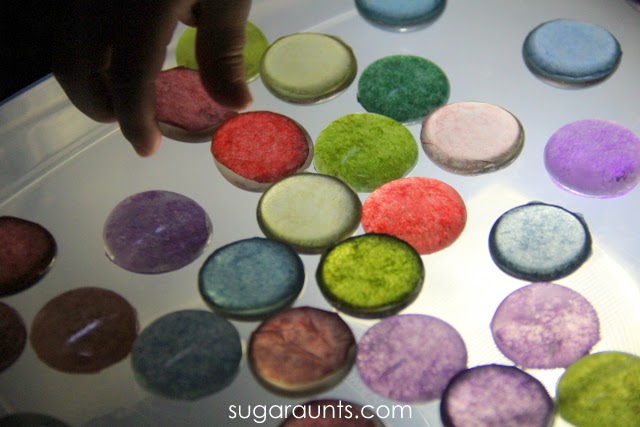
DIY light box for kids to learn and play

Pop the lid on the plastic bin, and your light box is done.  How easy is that??!  

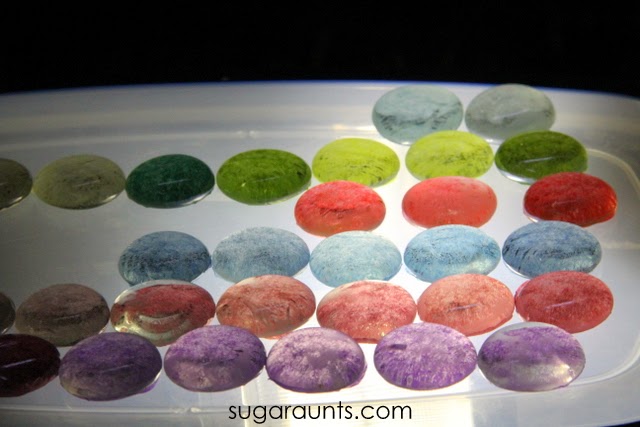
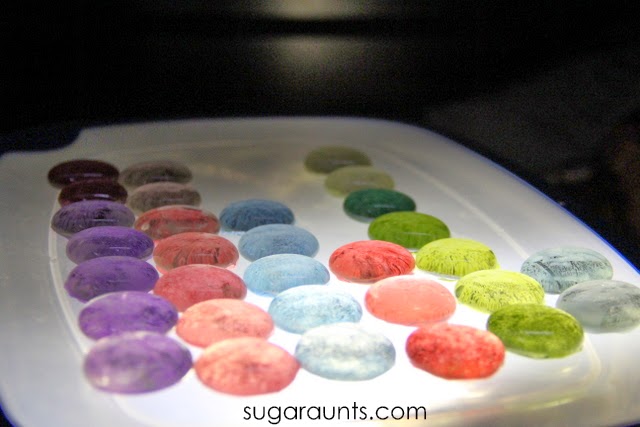
We used our DIY colored glass gems on the light box for sensory play.  These things are so easy to make and we’ve used them all the time for all sorts of fun activities.

Use a DIY light box for easy learning activities


Sorting, color patterns, math patterns, counting, number place values, adding, subtracting…this is light and math and fun all in one activity.

Use colored gems to learn patterns, counting with a light box

These look so good on the light box!  The best part is when the kids want to play explorer Pirates again, you just need to pop the lid off the bin!


We’re planning to use our glitter letter manipulatives on the light box next!

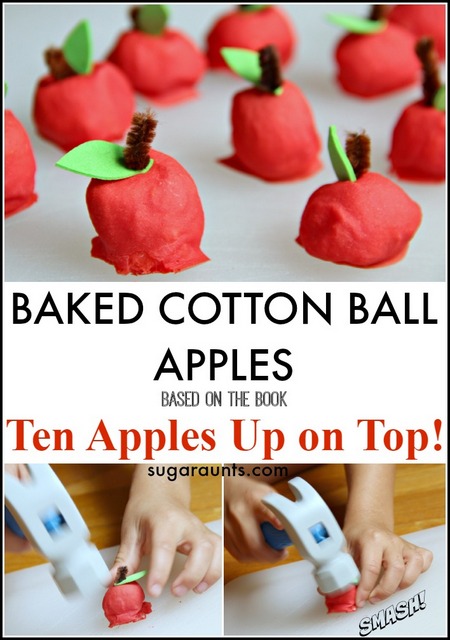
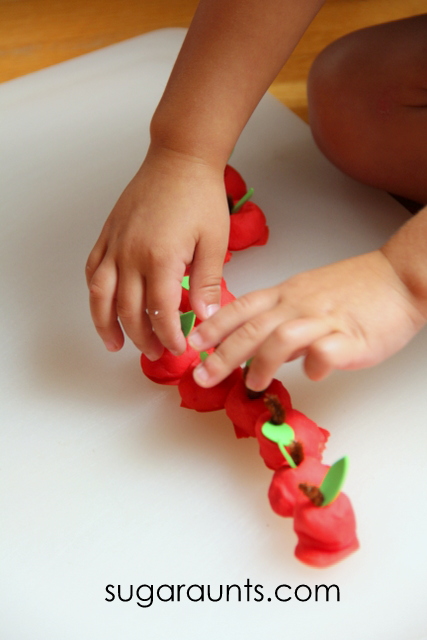
Baked Cotton Balls Ten Apples Up On Top Activity

This Ten Apples Up on Top activity was a huge hit with my kids, because they love the book, so making baked cotton ball apples was a fun way to play through the book. And as a pediatric OT, I loved the fine motor and heavy work input that was an added benefit. You can add this to apple activities that you are doing in occupational therapy sessions or at home. These baked cotton ball apples would be a great addition to our apple pie sensory bin, and they would be fun for hands-on play with our Fine Motor Therapy Kit for visual motor, handwriting, and fine motor play.

Here’s what we did…

Ten Apples Up on Top Activity

Did you ever do an activity with the kids that was such a hit, that the kids ask to re-do the activity over and over and over again?  This one is it for us.  There is rarely a day that goes by that I don’t hear about our smashing apples activity. Especially if we happen to see a hammer.  Oh, this baked cotton ball activity was a fun one for us! 
 
We’ve never made baked cotton balls before, but have had the idea bubbling for a while.  When we heard that the Preschool Book Club‘s book for this week would be Ten Apples Up on Top, we knew it would have to be an apple themed baked cotton ball activity.  We even made these waaaay before all of the other book activities in the second series of books.  
 
Like back in June.  If you’ve never made baked cotton balls before, this is a MUST-DO activity!


This post contains affiliate links.  


How to make Baked Cotton Balls

Are you familiar with baked cotton balls? This sensory tool is a DIY sensory material that kids love, and for so many great reasons. Actually, mixing up and making the baked cotton balls is as much of a therapy task as playing with them!

 
First read Ten Apples Up On Top! by Dr. Seuss.  This is such a fun book for counting and playing along with the story.
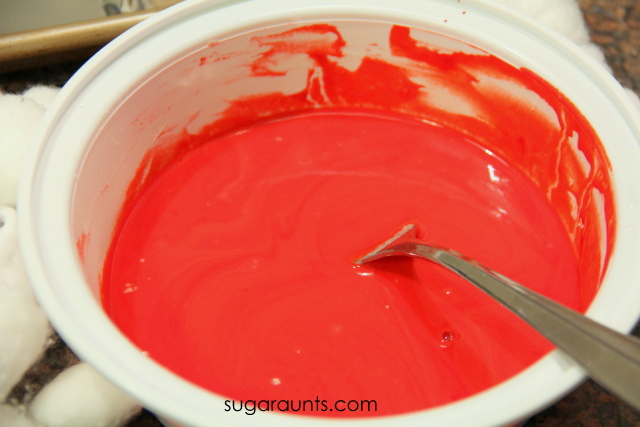
 
 
How to make baked cotton balls:
 
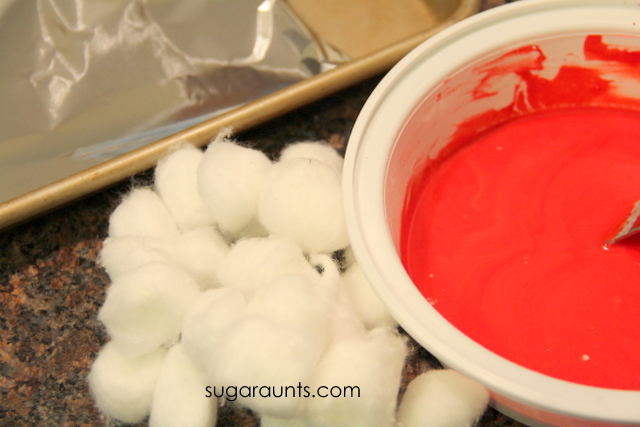
  1. Begin by mixing together one cup of flour and one cup of water.  This is a great activity for the kids.  Scooping, stirring, direction following, sneak tasting (my kids aren’t the only ones who go crazy for flour, right!??).
  2. Pour in a bunch of red food coloring.  We typically go with Wilton gel colors for all of our dying activities, but I knew I wanted a really deep red color.  It seems like red coloring requires SO much dye to get a good shade of red.  I ended up using a bottle from the dollar store and used about half of the bottle of food dye.  This was maybe 20 drops?  Add enough to get a nice red color.
  3. Mix in the food coloring.
 
 
4. Now is the cotton ball part.  Grab up your stash of cotton balls.
 
 
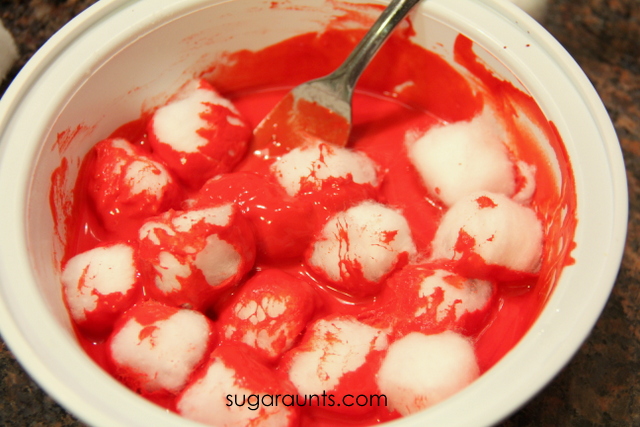
5. Mix them around to coat all of the cotton balls.  
 
 
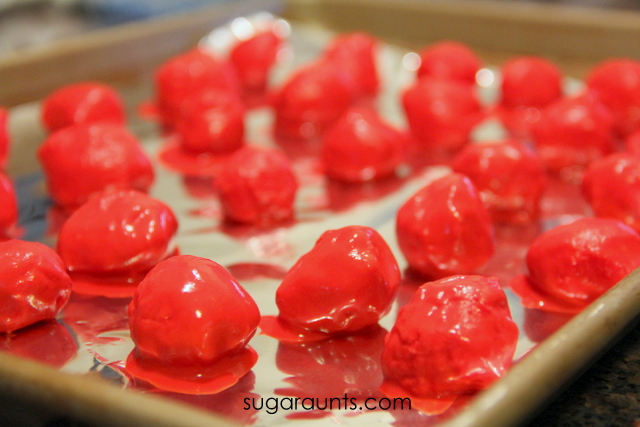
6. Place a layer of aluminum foil on a baking tray and place the cotton balls on the tray for baking.  I used two forks to pick up the coated cotton balls and was able to let excess flour coating drip off before placing the cotton balls onto the foil.
 
You’ll want to let as much excess drip off before putting them on the sheet to avoid the sharp edges and flat bottom once the cotton balls bake.
 
7. Pop the baking sheet into the oven for around 60 minutes at 300 degrees F.
 
 
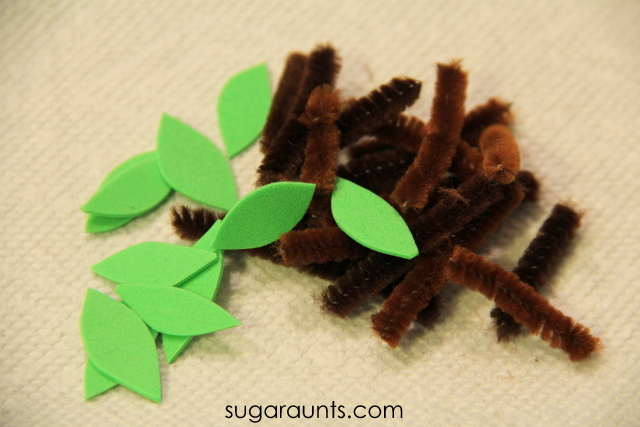
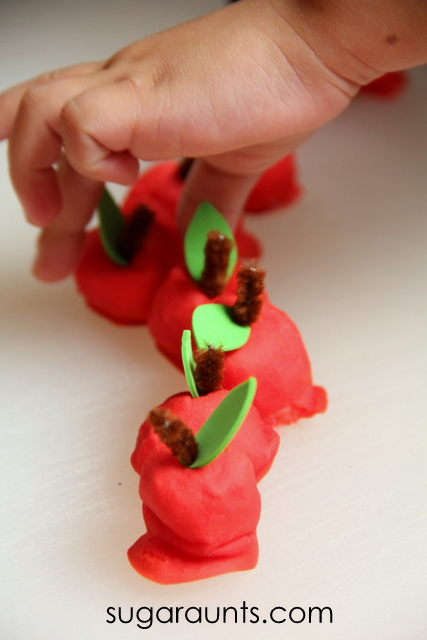
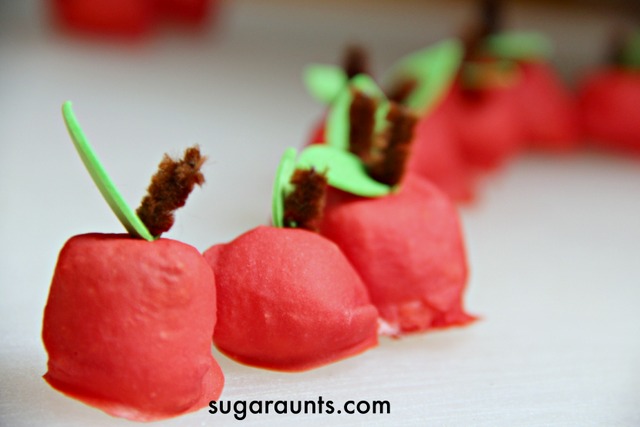
While the cotton balls are baking, snip up the leaves and stems for the apples.  We used brown pipe cleaners and green crafting foam.
 
 
When the apples are done, pull them out of the oven and let them cool for a bit. They will be nice and hard.  You’ll need to snip the bottom edges of the apples to remove any sharp edges that dripped to the base before baking.
 
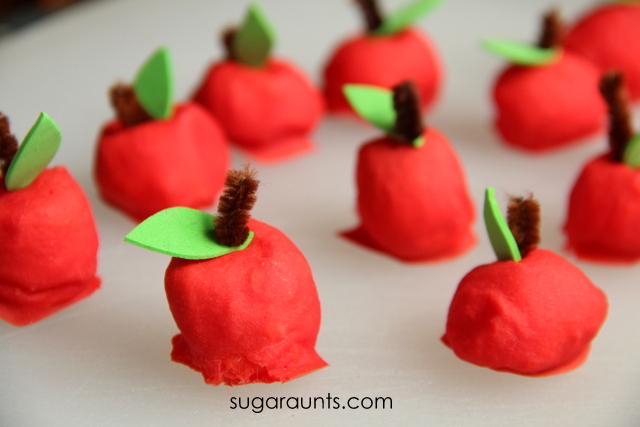
To attach the leaves and stems, lay the leaves on the apple top and poke the pipe cleaner through the foam sheet and into the cotton ball.  The kids were able to help with this part, but assisting with stem attachment did not allow this mama to take any pictures 😉
 
 
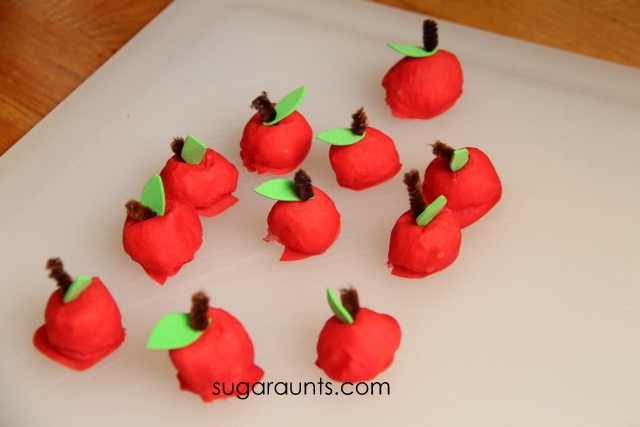
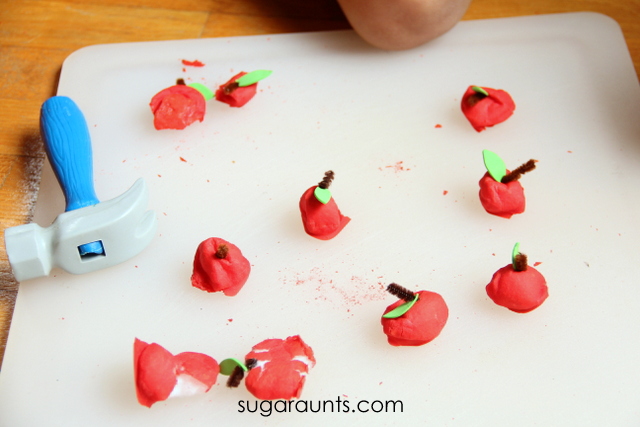
Our crop of apples were ready for playing with!
 
 
We followed along with the book as we read to stack up apples one by one.  What a great way to learn and play with math facts, counting, number order, and simple adding.  Little Guy LOVED this activity.


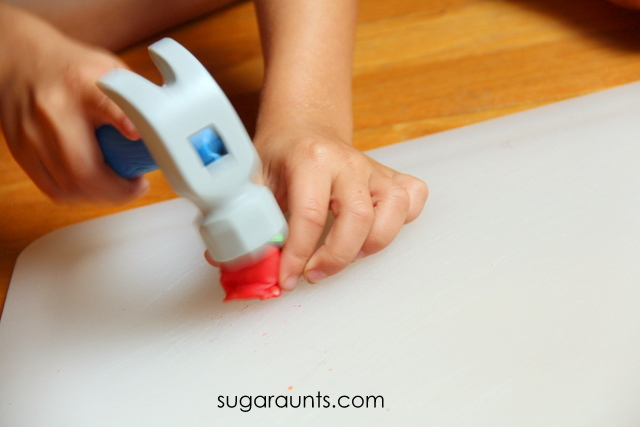
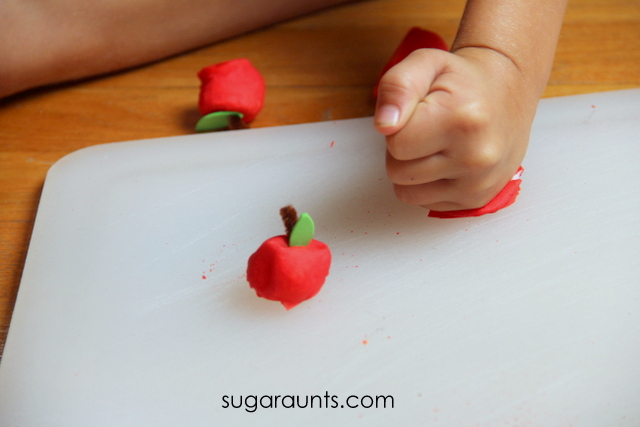
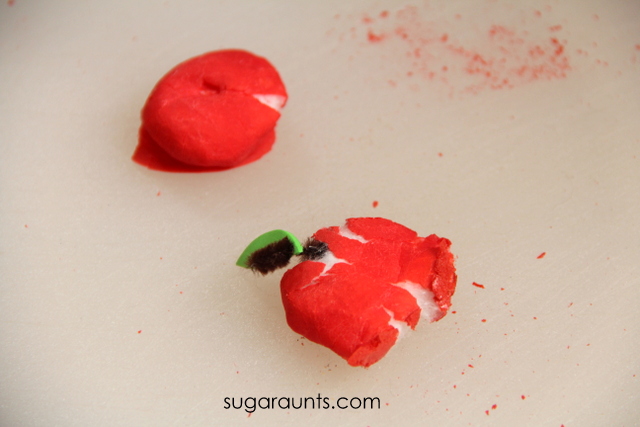
We got to hammering the cotton balls and this was the really fun part!  The baked cotton balls have a hard outer edge that allow for a satisfying crunch when smashed, and a squishy, cottony center.  What a fun way to explore and play.
 
We used a plastic hammer, but any hammer would do.
 
 
In fact, fists work just as well for smashing.


We had a smashing afternoon.


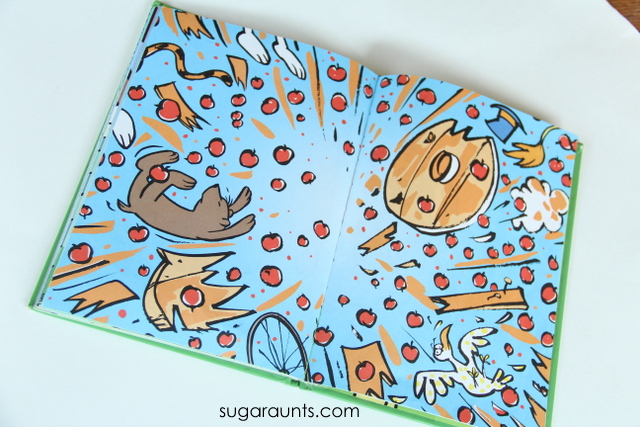
The remains of our cotton ball smashing reminded us of this page in the book.  Be sure to let us know if you make baked cotton balls!  We would love to hear about your experience with this sensory and fine motor activity!
 
Stop by the other Preschool Book Club bloggers to see their takes on Ten Apples Up On Top!
 
 
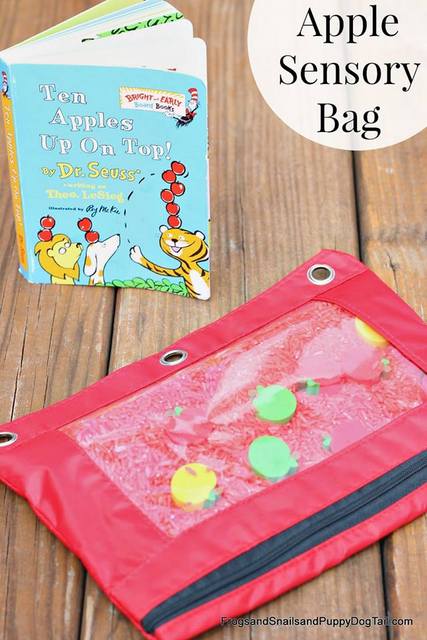
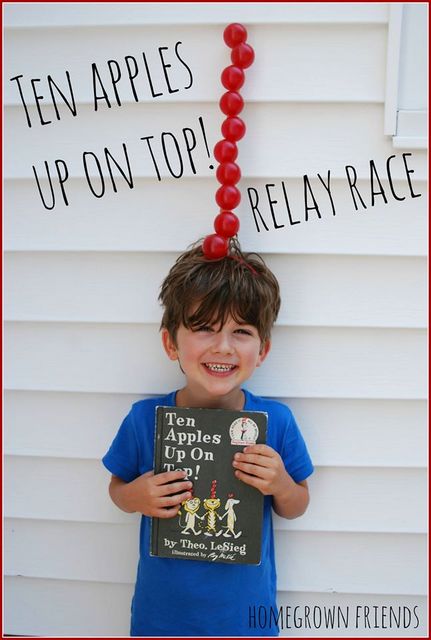
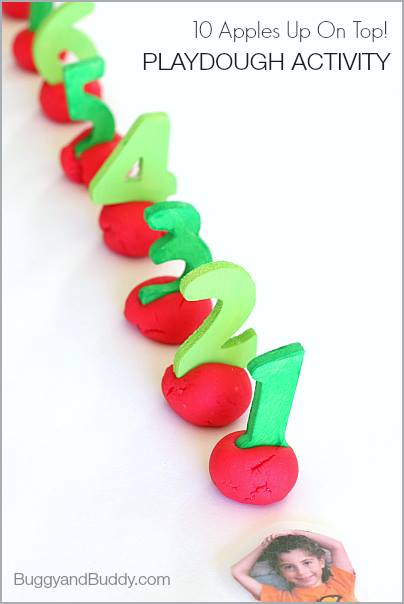
Sensory Bag from Frogs and Snails and Puppy Dog Tails | Relay Race from Homegrown Friends | Play Dough Activity from Buggy and Buddy


Colleen Beck, OTR/L has been an occupational therapist since 2000, working in school-based, hand therapy, outpatient peds, EI, and SNF. Colleen created The OT Toolbox to inspire therapists, teachers, and parents with easy and fun tools to help children thrive. Read her story about going from an OT making $3/hour (after paying for kids’ childcare) to a full-time OT resource creator for millions of readers. Want to collaborate? Send an email to contact@theottoolbox.com.

N is for Napkin Newt Craft

We love making cute crafts and our dining room wall can attest for that.  There’s a nice gallery of kid art going on on all four walls (and the ceiling, too!) and this cute newt craft is sure to make the wall!  


We’re joining bloggers from all over in the 31 days of ABCs series hosted by All Done Monkey.   Each day, a blogger has been publishing a blog post based on a letter.  We’re up next with N and our napkin newt.  
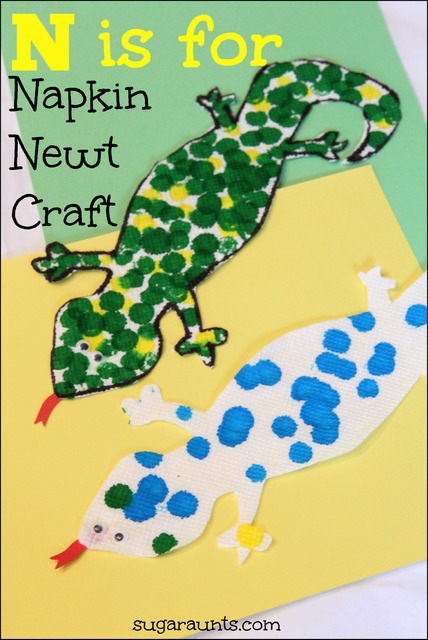
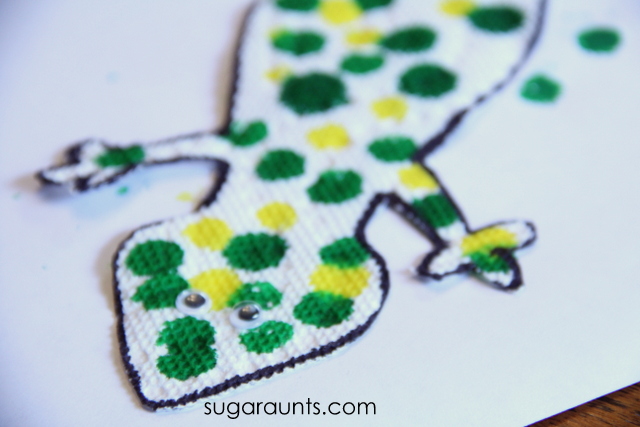
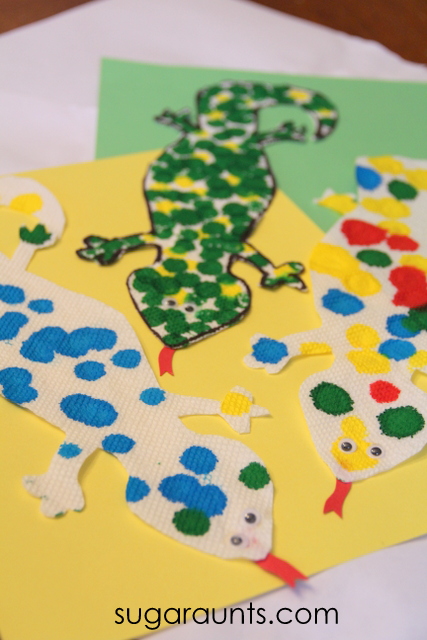
N is for Napkin and Newt!  Make a napkin newt with the kids.  So cute!

Newt Craft:

To make your newt, you’ll need a few supplies.  We used napkins, googly eyes, paint dab markers, glue, and red card stock.  We received the googly eyes and paint dab markers from www.craftprojectideas.com.  


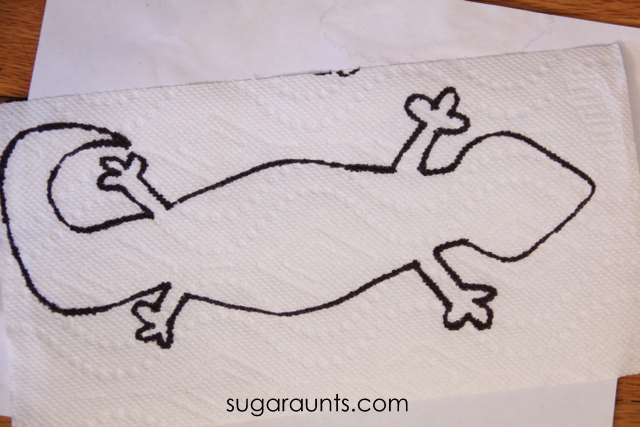
Start by drawing a simple newt shape on the napkin.  I used a marker, but a pen would work, too.

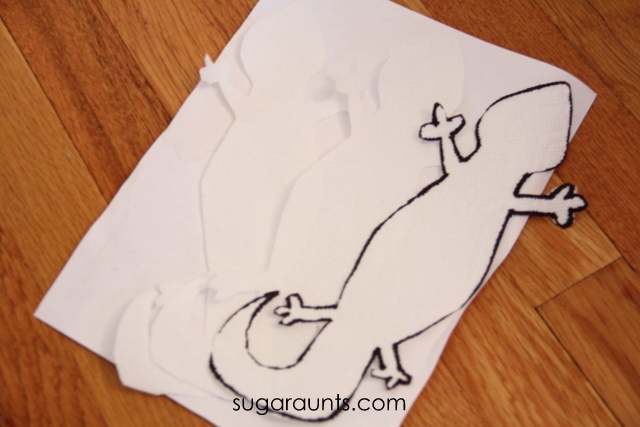
If you have a bunch of newts to make for a preschool class or siblings, stack up a few sheets of napkins.  Grab your sharpest scissors and cut out the newts.  This is a job for a parent, but an older child could cut this complex shape.  Hold the napkins together tightly as you cut around the toes.
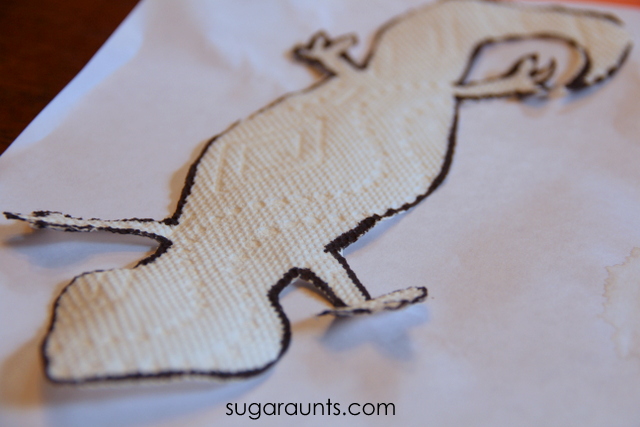
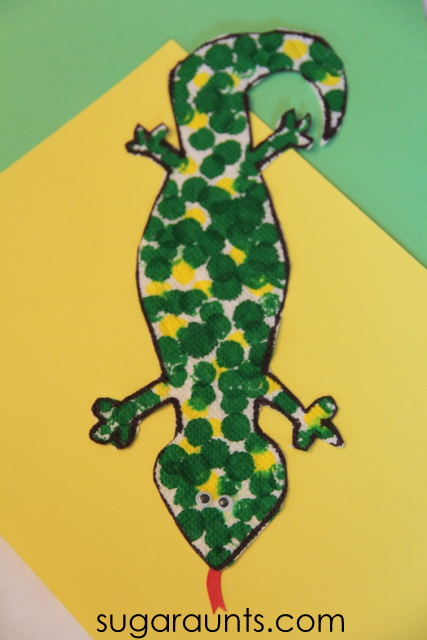
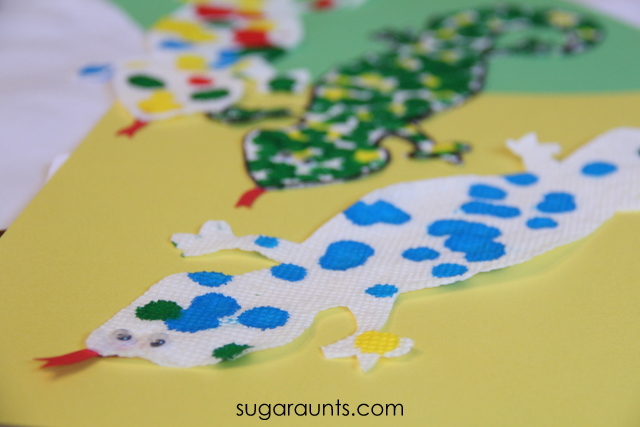
We liked how our napkin newt’s texture looked like scales.
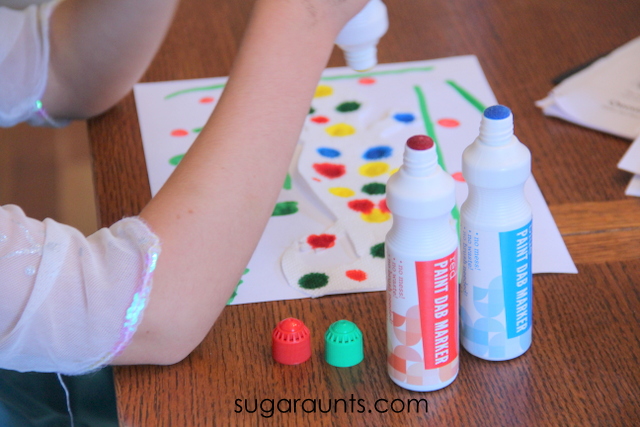
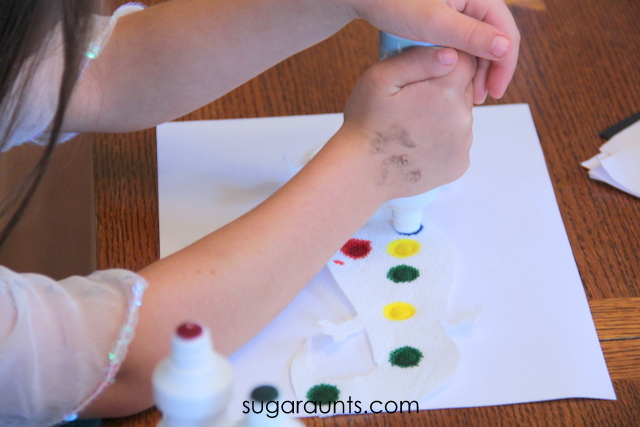
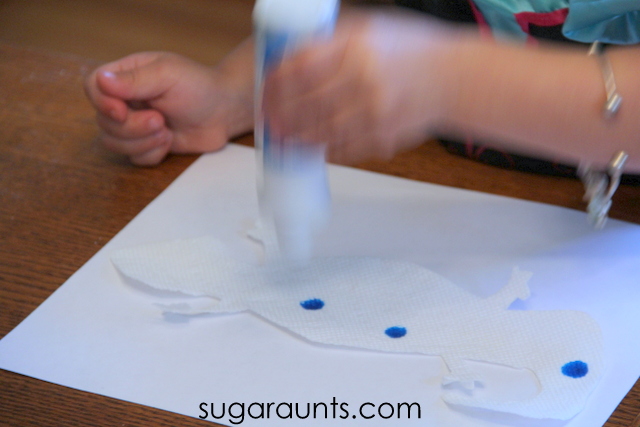
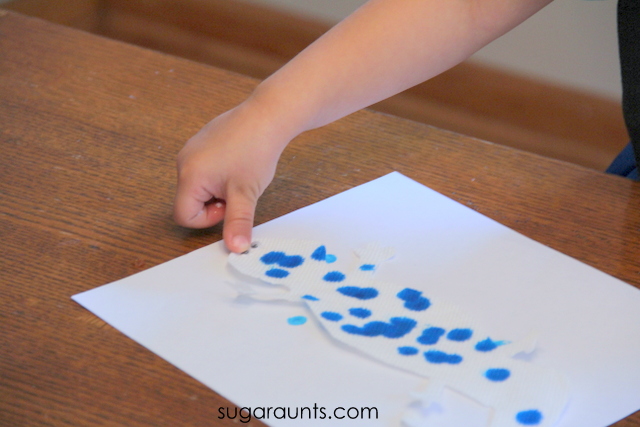
Next, use your paint dab markers to dab on spots.  We went with different colors, and each child made their newt differently.

It was fun to see my daughter’s personalities coming out in their craftiness.  Big Sister was deliberate and colorful with her painting.  

Baby Girl painted in typical Baby Girl fashion…fast and furious and with STYLE!

Next, glue on googly eyes.
These newts are almost done.  We talked about the letter N and how Newt and Napkin both start with “N”.  We said a bunch of other words that start with “n” as we crafted.
Snip tongues from the red card stock and glue to the back of the newts.  Super cute newt!
Paint Dabber Newt Craft.


Let us know if you make this craft.  We would love to see your version!  Stop by our Facebook page and tell us all about it.

Glow in the Dark Play Dough Silly String Dough

We’ve been having so much fun lately making all sorts of  play dough.  There’s so much to do with play dough…from pretending, to working on fine motor skills…play dough is one of our favorite ways to play.  And the fun ways to make play dough; Oh boy things can get crazy in the play dough workshop (aka my kitchen).  We’ve mixed up dough with everything from crayons to cola.  
This time, we were on a mission to create our very own Glow-In-The Dark play dough.  This was fun!!


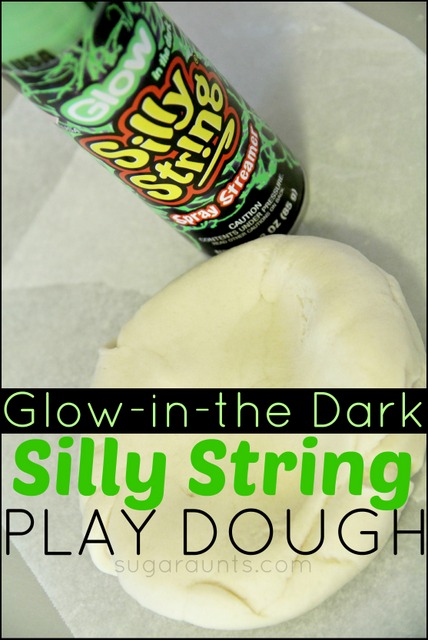
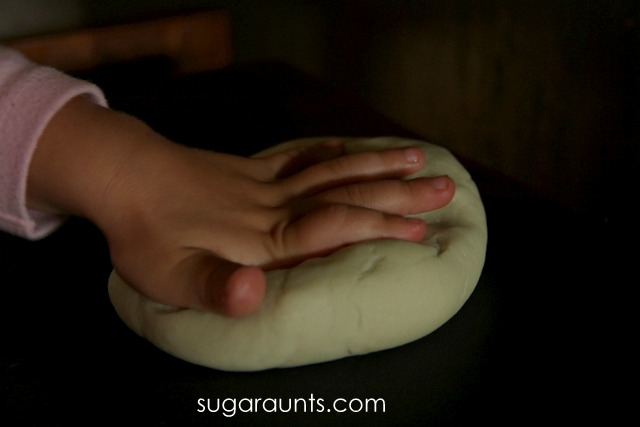
Make your own glow in the dark play dough using silly string! It really glows! This would be fun for a Halloween party.


This post contains affiliate links.  See our full disclosure policy.


Silly String Glow in the Dark Play Dough

This little experiment turned into a fun adventure with the kids.  We brainstormed all kinds of ways to turn our play dough into glowing dough.  Little Guy’s idea of lightning bugs was thoughtful, but a little yucky. And cruel to glowing bugs.  So where to start with making glowing dough??  We packed up the minivan and headed off to Target.


The sales clerk gave us the eyebrow when we said we needed anything that glowed.  But this was a mission for creativity.  We grabbed up glow in the dark stickers, duct tape, nail polish, and silly string.  


We were looking for things that could be added to dough to make a glowing dough.  While doughs that require a black light for luminosity are very cool, we don’t have a black light.  And, lots of parents out there don’t have the budget for a black light, so glowing dough was the way to go for us.


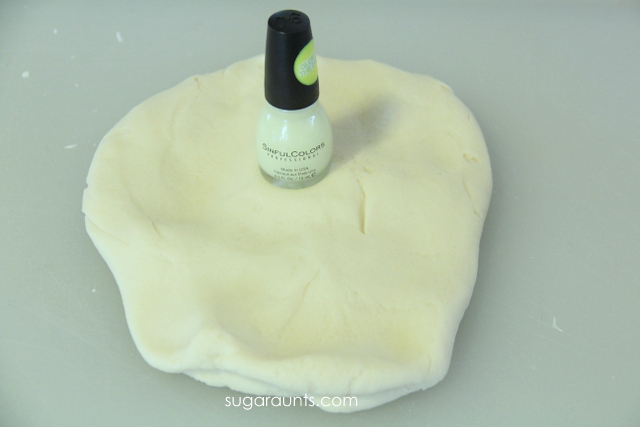
We started our experiments with the nail polish.

Please don’t make play dough with nail polish. Won’t glow.  And the fumes, yikes! Round two.


Silly String Play Dough~


We started by mixing up a batch of our homemade play dough recipe with a small modification.  We were out of cream of tarter, so I substituted a half cup of flour for the cream of tarter.  I also cut the recipe in half.  This is important for the glowing of the dough, as we only used one can of silly spray.  More dough would require more silly string for a glowing shade.  Our play dough ingredients were:


2 cups flour
3/4 cup salt
1 and half cup water
1 Tbsp oil

It’s important to note that different ingredients and temperatures/humidity will result in different play dough consistencies.  The most important part of this dough recipe is the kneading.  You’ll need to knead it a lot for smooth play dough.  Repeat that: Need to knead. Need to knead. 😉 If your dough is too sticky, add more flour.

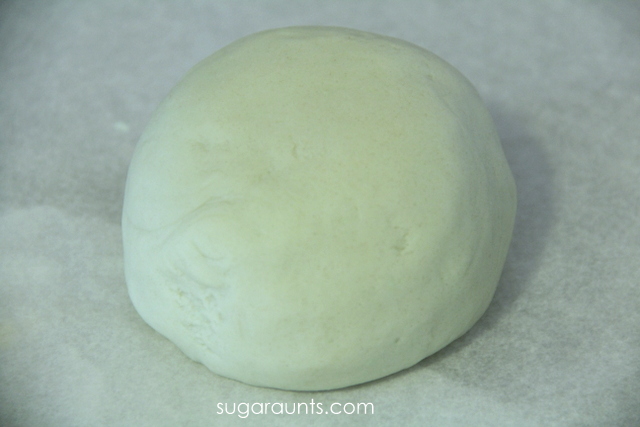
This is a no-cook dough.  The warnings on the Silly String say to keep away from heat.  I wan’t taking any chances with warm dough, so no-cook it was. Mix together the ingredients for the dough and knead, knead, knead.  When you’ve got a nice play dough consistency, it’s time for the fun part. Silly String!  (This link is not the brand we used, but should work.  We used a bottle of 3 oz glow in the dark Silly String found at Target).  Little Guy waited very patiently for this part.  If patiently means reminding mom that we need to spray the silly string, then it was patiently. 😉


Spread the dough out on wax paper and spray!  We sprayed to whole bottle onto the dough without any attempts to spray each other.  Success.


Roll the dough edges into the center and mix in that silly string.  we did not have any dying of skin with the silly string, but feel free to wear gloves if you like.  The nice part about the silly string is the non-toxic notice on the side.  Non-toxic=awesome.


We did not add any coloring to our dough.  The greenish shade of the silly string dough was enough, but it would be fun to experiment and see what a bright green food coloring would do to the dough.  You might want to add another bottle of silly string to your dough for a more vivid glowing dough.  If you add more silly string, you’ll need to add more flour to take away the stickiness.


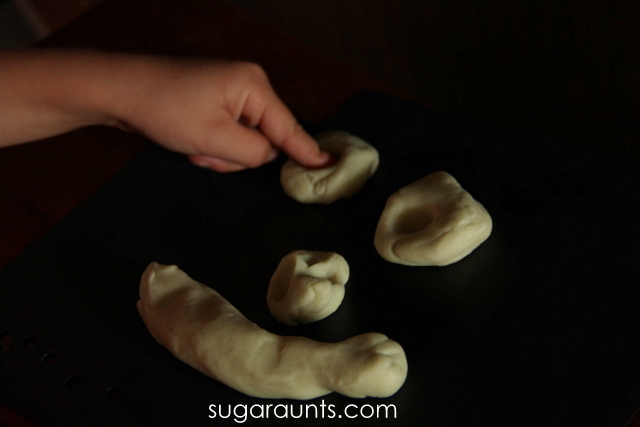
Once, mixed take that dough into a dark closet to check it out!  I did notice that our dough was more vivid if we “charged” under a light first.  This stuff was very cool!  The kids were pretty impressed with the glowing dough.

NOTE~ The “glow” is not extremely strong.  This dough would not be able light your way on a dark night.  It will be visible in a dark room.  It will not enable you to see across the room.  It will glow enough to see.  It will not turn your dark living room into a glow-in-the-dark disco party.  It will last about 2 weeks in a sealed plastic bag or container, with “charging” to get the glow.  It will not make a great flashlight on Halloween.  It will be very fun to play with!
Play dough recipe for glow in the dark play dough. This recipe uses Silly String! Too cool!
And when the dough gets stuck to the couch, you can now see it in the dark. Yay! 
😉

This post is part of the 12 months of sensory dough series

Pumpkin Thumbprint Craft

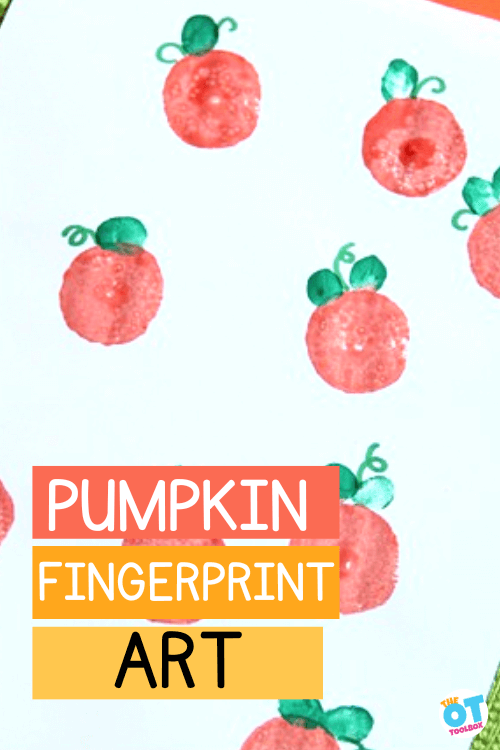
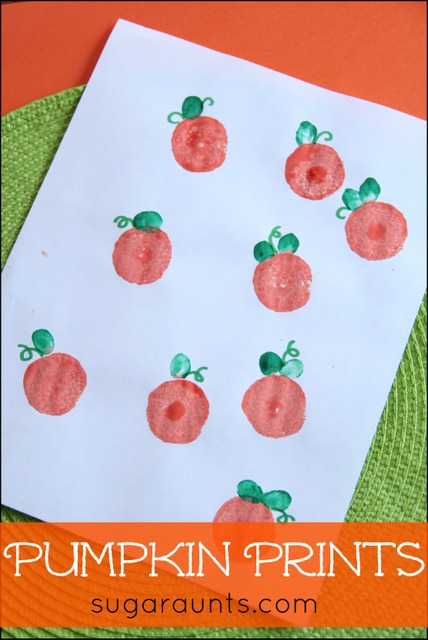
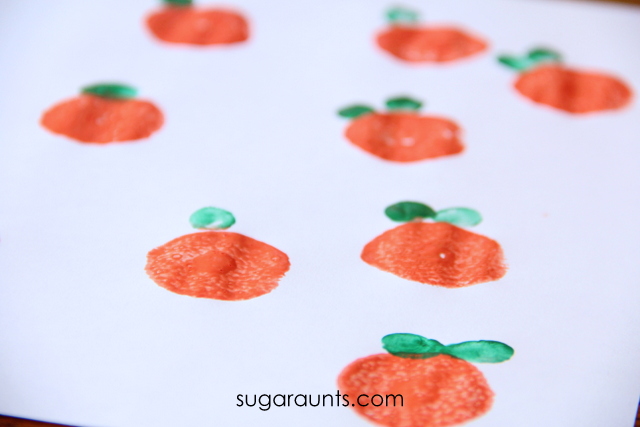
pumpkins made from orange fingerpaints

Many years ago (2014 was the original date of this pumpkin thumbprint craft!), we made a Halloween painting with thumbprint pumpkins. We actually included fingers too, and made the pumpkin patch painting with fingerprint pumpkins as well. This Halloween sensory activity was a fine motor powerhouse and one of our favorite Halloween occupational therapy activities. Let’s take a walk in the fingerprint pumpkin patch!

pumpkin fingerprint craft

This pumpkin fingerprint craft can be modified for different goal areas.

Thumbprint Pumpkins

If you need a quick and easy Pumpkin activity or craft for the kids this Fall, then this thumbprint craft is a sure winner.  We used a fine motor item from a previous post that you would never guess.  Get ready for a blast from the past with this Halloween craft for the kids!

Our thumbprint pumpkins are a bit different than many of the thumbprint or fingerprint painting activities you might find this time of year.

While using your finger or thumb to press paint onto paper to make mini pumpkins is a great sensory activity, we wanted to offer pumpkin fingerprint options for the individual that may be tactile sensitive to fingerpaints. Read up on our blog post on tactile defensiveness for more information.

However, you could expand this activity to meet the needs of all individuals.

Let’s explain…

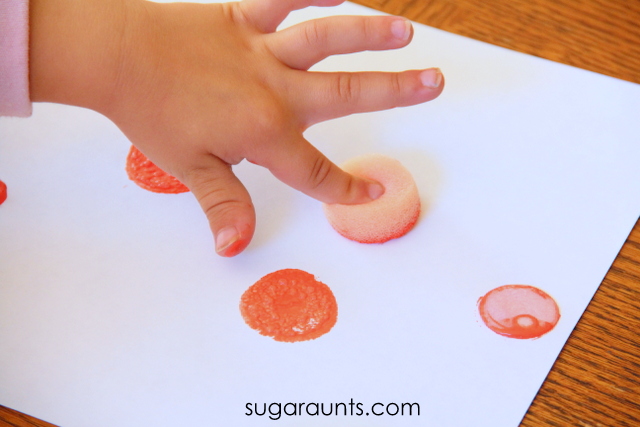
In the activity described below, we used a foam roller to press into paint and then onto the paper. This is a bit different than typical pumpkin fingerprint art. When you press the roller into paint and then onto the paper, you don’t get that messy sensory experience of finger print art.

Another benefit is cutting the foam material which is a scissor skills task, and working on force modulation by pressing down on the foam circle.

Pressing harder makes a bigger pumpkin stamp and pressing with less force makes a smaller pumpkin stamp.

However, there are SO many benefits to the way we used this activity…and you can definitely add the benefits of fingerprint art like we did to add details like the leaves of the pumpkins.

Why do a pumpkin fingerprint craft

Whether you use the modified version of this pumpkin thumbprint/pumpkin fingerprint art, or you press the fingers right into the paint and press them on the paper, there are so many benefits to using fingerprint art in building sensory motor skills.

Finger isolation– Pressing the fingers or thumb to make pumpkin fingerprint art supports finger isolation skills. You can target thumb isolation and mobility of the thumb joint or you can work toward individual finger isolation.

We cover this in more detail in our blog post on fingerprint art.

Separation of the sides of the hand– Separating the precision side of the hand from the power side of the hand supports fine motor work in using tools like scissors or writing with a pencil. With fingerprint art, pressing the fingers to the paper in isolation supports this skill by using the ulnar side of the hand in supporting the radial side of the hand. Fingerprint art where the pinkie and ring fingers are tucked into the palm while the pointer finger or thumb is used to press the paper, is when we see this in action.


Pumpkin Print Craft with Thumbprints for a Halloween Keepsake


Pumpkin Thumprint craft

 
This post contains affiliate links. 
 

To make our pumpkin thumbprint craft, we needed just a few materials:

  • Paint
  • Paper
  • Foam Rollers

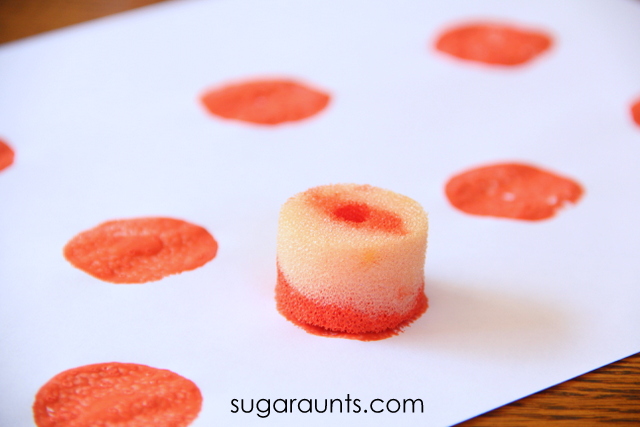
We started with foam “beads” that we used in our foam beading fine motor activity a while back.  

Did you use foam rollers back in the day?  We practiced scissor skills with these and used them to make our pumpkin stamps this Fall.  From curls to pumpkin prints…these rollers have come a long way!


I pulled out our orange paint and let Baby Girl stamp away.

 
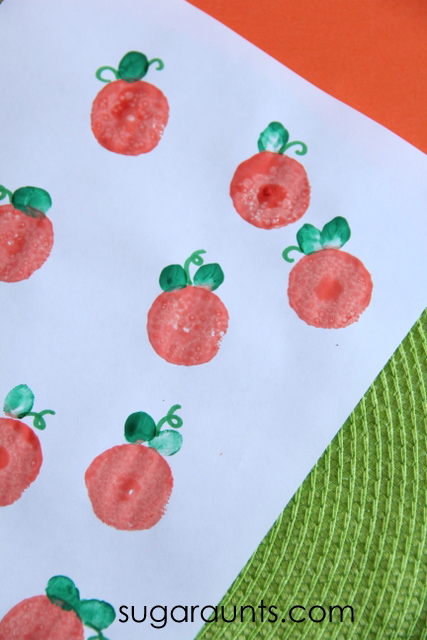
She pressed the foam pieces down on the paper pretty hard.  In fact, we weren’t even planning to make pumpkins, rather little circles.  Buuuut, pressing pretty hard on these circles make the hole in the center of the roller fill in with paint.  Perfect little pumpkins!
 
To make the leaves, we used green paint to stamp thumbprints.  Baby Girl loved doing this part!
 
 
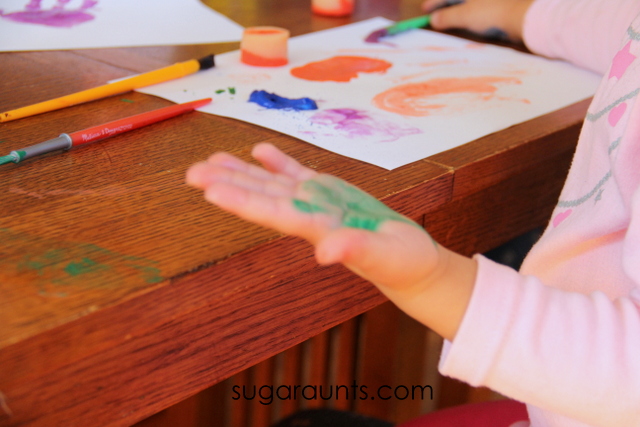
Every painting project evolves into hand painting.  Of course.
 
 
Looking pretty cute!
 
I added a few curly ques to each of the pumpkins for vines.
 
Pumpkin activity kit
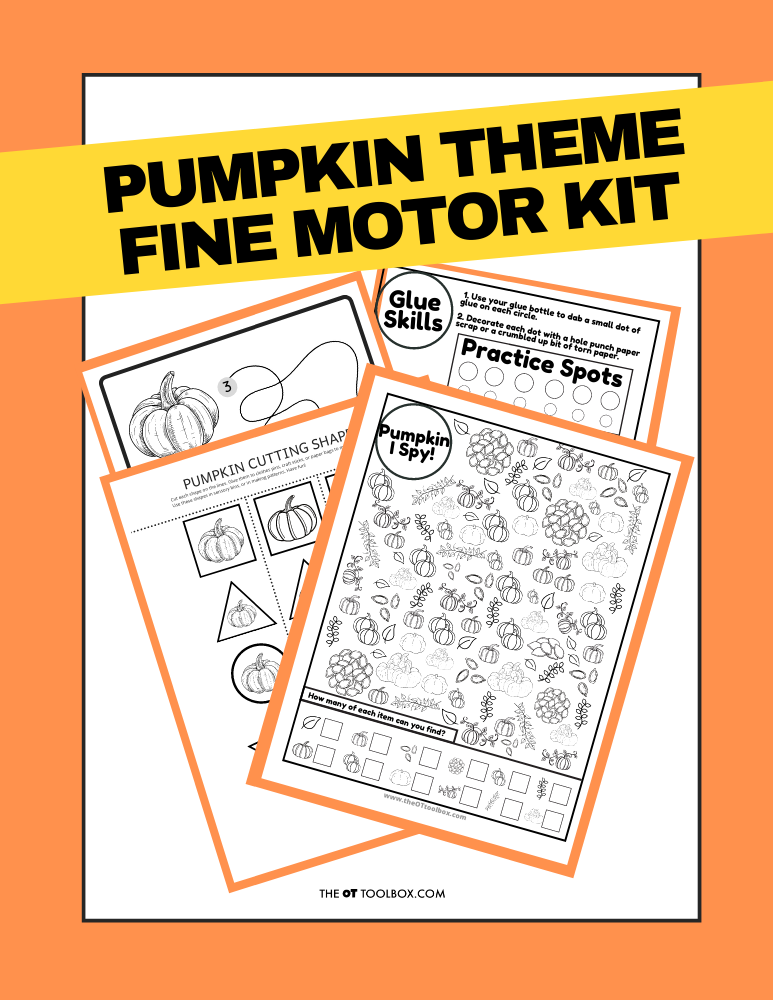
Pumpkin Fine Motor Kit

Grab the Pumpkin Fine Motor Kit for more coloring, cutting, and eye-hand coordination activities with a Pumpkin theme! It includes:

  • 7 digital products that can be used any time of year- has a “pumpkins” theme
  • 5 pumpkin scissor skills cutting strips
  • Pumpkin scissor skills shapes- use in sensory bins, math, sorting, pattern activities
  • 2 pumpkin visual perception mazes with writing activity
  • Pumpkin “I Spy” sheet – color in the outline shapes to build pencil control and fine motor strength
  • Pumpkin Lacing cards – print, color, and hole punch to build bilateral coordination skills
  • 2 Pumpkin theme handwriting pages – single and double rule bold lined paper for handwriting practice

Work on underlying fine motor and visual motor integration skills so you can help students excel in handwriting, learning, and motor skill development.

You can grab this Pumpkin Fine Motor kit for just $6!

Colleen Beck, OTR/L has been an occupational therapist since 2000, working in school-based, hand therapy, outpatient peds, EI, and SNF. Colleen created The OT Toolbox to inspire therapists, teachers, and parents with easy and fun tools to help children thrive. Read her story about going from an OT making $3/hour (after paying for kids’ childcare) to a full-time OT resource creator for millions of readers. Want to collaborate? Send an email to contact@theottoolbox.com.

Apple Math Counting and Adding Activity

We love using math concepts that are learned in school into playful activities at home.  Learning through play is a great way to strengthen concepts learned in the classroom.  We used apples to count, add, and learn one day, all in the great outdoors!
Be sure to use our free count and color worksheet for more fine motor math through play.

Kindergarten and Preschool students will enjoy this math activity using apples or other objects with chalk.  One to one correspondence, dice math, counting


Apple math activity for Kindergartners and Preschoolers

 
This post contains affiliate links.  If a purchase is made through these links, we receive a small percentage in payment at no cost to you.

We used Sidewalk Chalk and a
dice for this activity.  I took the kids outside to the sidewalk one afternoon and drew a bunch of apple shapes.  We were ready to play.


Note–you could also draw any shape for this activity: pumpkins, smiley faces, geometric shapes, simple houses…any thing would work.

To play the game, I had the kids roll the dice.  They had to count the dots on the dice, or simply look at the dots to determine how many dots there were.  Big Sister did a lot of dice activities last year in Kindergarten so she was able to glance at the dice and know how many dots there were.  Little Guy counted the dots.  This is a great early math skill for preschool aged kids.

Once they counted the dots on the dice, I had them color in the same number of apples to correspond to the number of dots.  

We used the squares of our sidewalk to wok on Kindergarten math concepts that Big Sister learned towards the end of her school year.  Some of the squares had two apples drawn on them, and others had four or more.


This was a great opportunity to review addition. 


She added the apples to make the total match the number of dots on the dice. 


Little Guy counted along with Big Sister to count the total number of apples filled in.

Coloring in the apples with the chalk requires use of the small muscles of the hand.  The sidewalk surface is resistive and the area they colored in was small.  This required precision to stay in the lines.  Not to mention, coloring in all of those apples really strengthened the hands!


This was such a fun way to review old math areas for the new first grader and introduce new math concepts to the preschooler. Like this math activity?  Try a few of these ideas: