Many years ago (Aug 26, 2014 to be exact!) we made this Harold and the Purple Crayon Play Dough activity because it was one of our FAVORITE books. My kids loved that book and the fact that there is now a movie…we are going to see this movie even though my kids are now teenagers! I loved this play dough activity because first, we made the homemade play dough recipe ourselves (it’s a version of our original crayon play dough recipe) and then, my kids worked those fine motor skills and visual motor skills to build creations, just like in the book, Harold and the Purple Crayon! Check it out…
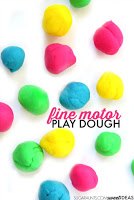
We used homemade purple play dough and then worked those fine motor skills to make creations! Play dough exercises improve hand strength and finger dexterity. The soft and squishy dough provides a tactile sensory challenge with proprioceptive sensory feedback. The bonus is the strengthening of the arches of the hands and precision of grasp. These are just some of the benefits of play dough!
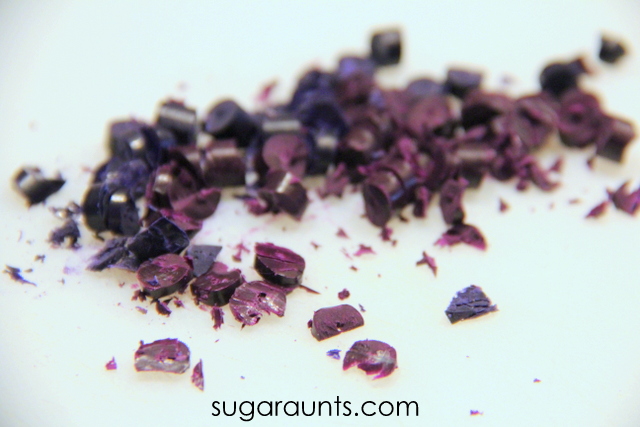
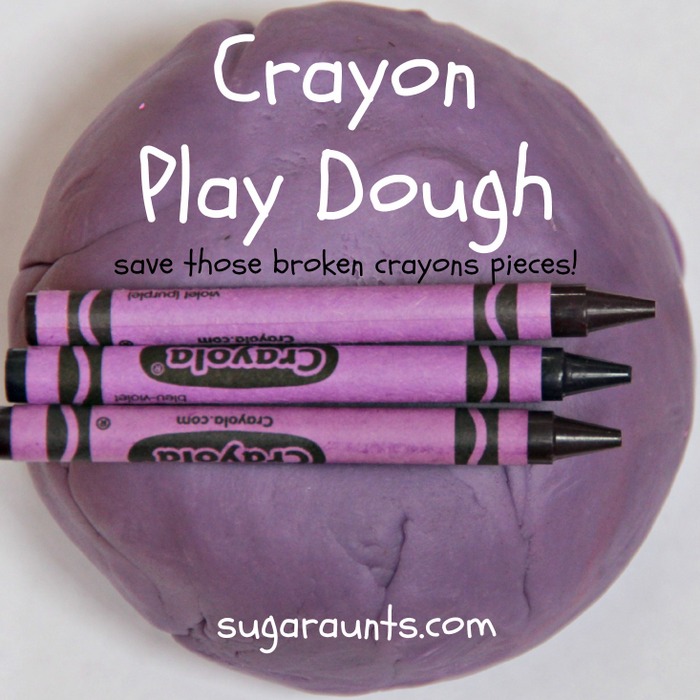
This installment of the Preschool Book Club was one of our favorite activities, by far. We made a batch of our play dough recipe, but added a twist. We wanted to incorporate not only the purple color of Harold and the Purple Crayon, but the crayon, too! This Crayon Play Dough uses real crayons in the play dough recipe and makes a silky smooth dough…perfect for creating, playing, manipulating, and more!
Crayon Play Dough Recipe
This post contains affiliate links.
Harold and the Purple Crayon Activity
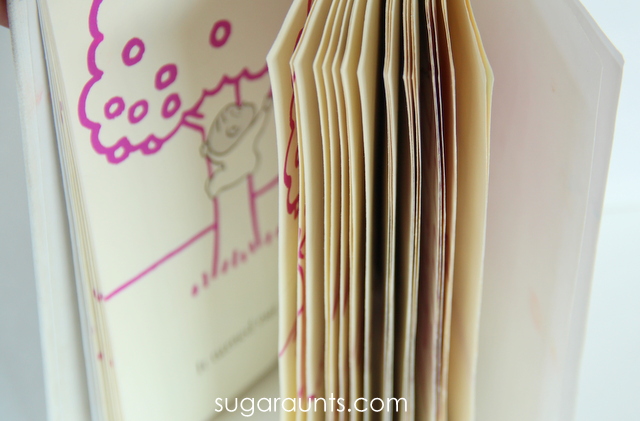
The book Harold and the Purple Crayon by Crockett Johnson is such a FUN book. It’s great for preschoolers, but grabs the attention of toddlers and school-aged kids, too. When we read this book, all of my kids were frozen as they took in the bold pictures and the imagination of Harold.
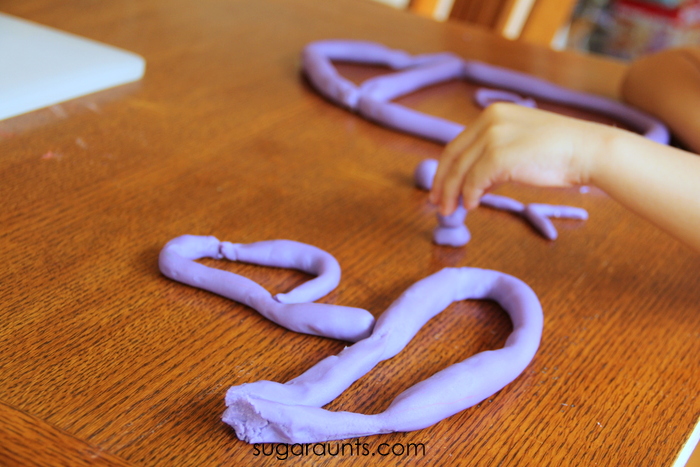
We had a blast re-creating parts of the book with play dough lines. Of course, we needed purple, CRAYON play dough to go along with the book!
We love making our own play dough. To make crayon play dough, you’ll need just a few adjustments.
1. First, chop up 2 and a half crayons. I’m not sure that these exact amounts matter. There are so many different brands of crayons with different wax make-ups. We used a few different types mixed together and the results were a silky smooth play dough.
2. In a large bowl, mix together the dry ingredients (3 cups flour, 1 1/2 cup salt, 2 Tbsp. cream of tartar)
3. Next, heat 2 tablespoons of oil in a pan.
4. Add the chopped crayons.
5. Stir until the crayons are completely melted. Slowly stir in 2 cups of water while stirring. Certain types of crayons will either make a clumpy purply goopy looking liquid. Other types will make a smooth liquid once the water is added. Either way is fine. Just keep stirring.
6. Slowly, stir in the dry ingredients. The dough will pull together in a ball over the heat.
7. Once the dough pulls together, dump it out onto a cutting board or counter. Let the dough cool until you can tolerate kneading.
8. Knead the dough for a few minutes until smooth. (Note~ The waxy texture of this dough will create a spa-like experience while kneading. This mama mixed up a few more batches of crayon dough and loved the mini-spa of kneading!)
Once cooled, you are ready to play.
Crayon play dough is so smooth and silky to play with! The color was very bold and bright. Just like the purple crayon in the book!
We read Harold and the Purple Crayon a bunch of times before returning to the library. Before it went back, we used our purple crayon play dough to make purple lines and “draw” them into shapes and pictures, just like Harold did in the book.
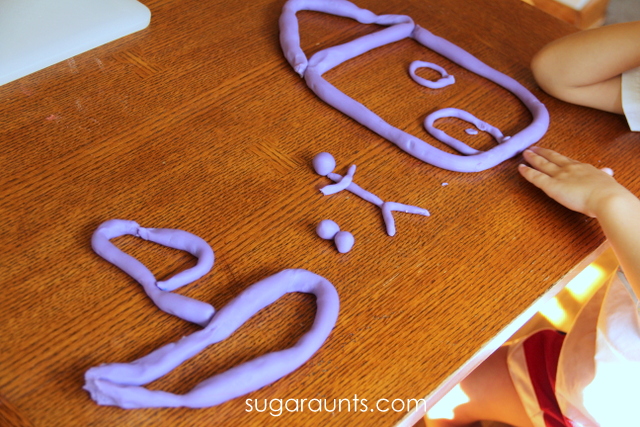
Harold’s house “drawn” with our purple play dough.
Little Guy made a boat, a Harold, and a snowman.
This was such a fun way to explore a great book.
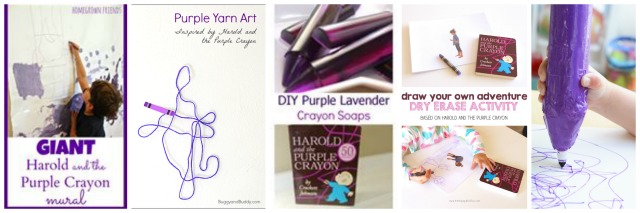
More Harold and the Purple Crayon Activities
Looking for more activities for the book, Harold and the Purple Crayon? Stop by and see what the other Preschool Book Club bloggers have done:
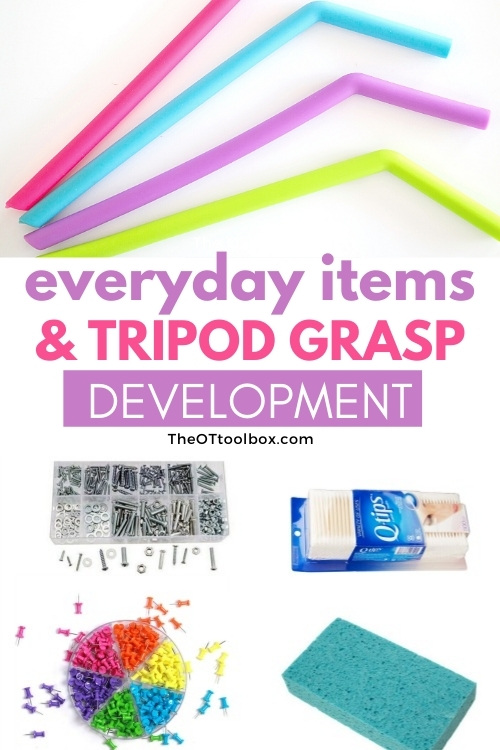
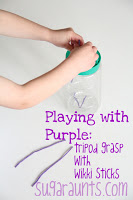
If you are a pediatric occupational therapy practitioner then you know all about tripod grasp and the role it plays in fine motor skills. This precision grasp is part of precision, finger dexterity, and coordination of the hands. Did you know you can work on tripod grasp using everyday items found around the home? There are so many ways to improve pencil grasp and the fine motor skills needed for strong hands using materials like cardboard boxes, straws, and other household items. Here, you’ll find fun ways to improve tripod grasp with the items you already have in your home. Also be sure to check out our blog post on grasp patterns, as understanding various grasps can make the process easier.
It’s the everyday items that help a household to run that are seen by children and experimented with in playful ways.
“How fast can I push this basket across the carpet?”
“Can I stab this spoon into the dirt of that potted plant?”
Kids experiment through play and while they are antagonizing the Spider Plant in the corner, they are learning so much. They are building and developing skills that they need for handwriting, buttoning, and cutting with scissors.
Sometimes it’s the everyday household objects that are so much more fun than toys!
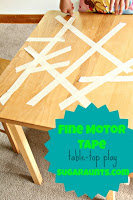
Today’s tips use everyday items to work on a fine motor skill that kids need for handwriting: tripod grasp! Recently, I shared with you a series of 31 Days of Occupational Therapy. It was a fun series, and I loved sharing tips using free or mostly free items. Today, I’ve got an activity that almost made the series, but I just ran out of days. This tripod grasp activity is a fun one in our house.
What is Tripod Grasp?
Let’s start with a definition of tripod grasp because this is a term you hear a lot in child development, and in school based occupational therapy, especially.
Tripod grasp is a grasp using the tips of the thumb, pointer finger, and middle finger. These are digits #1, #2, and #3 of the hand. Tripod means a three legged item like the three legs of a camera tripod, or the three legs of a stool. When talking about the tripod grasp, we mean the first three fingers of the hand used to manipulate objects like a pencil. We use the dominant hand primarily in tasks that utilize a tripod grasp, but you can make and use a tripod grasp with your non-dominant hand, too. (Think about the American Sign Language sign for the word “more”, for example.)
In the traditional tripod grasp used in pencil grasp, the thumb opposes the pad of the index finger and the shaft of the pencil rests on the side or pad of the middle finger.
Tripod grasp is part of the umbrella of fine motor skills. These fine motor milestones are the basis for everything our hands can do.
There are several underlying skills needed for tripod grasp.
Fine Motor Skills Needed for an Efficient Tripod Grasp
In order to use a tripod grasp with efficient motor planning and with endurance, there are several underlying areas that need to be present. These are the areas that we address in occupational therapy activities through play!
Those underlying skills include:
In hand manipulation
Open thumb web space
Separation of the sides of the hand
Arch development
Thumb IP joint flexion
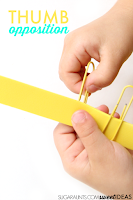
Opposition
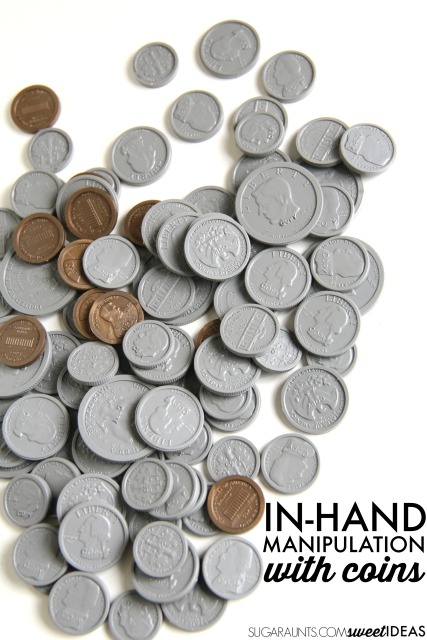
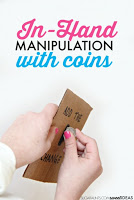
In-hand manipulation– In hand manipulation refers to the ability to manipulate objects within the hand. A tripod grasp supports this manipulation of objects. Manipulation of objects within the hand includes three aspects of mobility: translation, shift, and rotation of objects.
Open thumb web space– This fine motor skill occurs in many functional tasks and in order to have a tripod grasp, there needs to be separation of the two sides of the hand, which supports an open thumb space. The thumb web space is that space between your thumb and pointer finger that makes an “O” when you make the “OK” sign. In order to grasp small items with your thumb and index finger, you need to oppose the tip of your thumb to the tip of your pointer finger. Not only do the tips of the fingers need to touch, but the thumb must rotate at the joint closest to your hand. This opposition is needed to manipulate and grasp small items like shoe laces, buttons, and zippers, which requires a form of a tripod grasp.
Separation of the sides of the hand– We mentioned separation of the sides of the hand above, and when tripod grasp occurs, there is a natural separation of the sides of the hand into the precision side and the power side. Separation of the sides of the hand refers to the imaginary line drawn from your wrist directly down the middle of your hand and between your ring finger and middle finger, separating the precision side of the hand (thumb, pointer finger, and middle finger) with the power side of your hand (pinkie finger and ring finger). These two sides work together in skilled activities with precision and power grasp in functional activities.
Arch development– When tripod grasp is used, there is natural positioning of the fingers with slight flexion at the MCP joints and slight flexion of the PIP joint of the pointer finger and middle finger. This mostly extended position of the fingers puts the arch of the hand into a cupped position. Refinement of fine motor skills in the hand (the radial side) happens when the power half (the ulnar side) is stabilized. Separation of the two sides of the hand allow for more precise use of the thumb.
Thumb IP joint flexion– In a tripod grasp, there is thumb IP joint flexion which allows the thumb to oppose the pointer finger and the middle finger. When the IP joint flexion is absent, we see reduced precision and dexterity. The thumb interphalangeal joint is responsible for flexing or bending the end of the thumb. the joint allows us to pick up very small items in pincer grasp and enables a functional tripod grasp while holding a pencil.
Opposition– The thumb opposes the tip of the pointer finger and the middle finger in a tripod grasp. Opposition of the thumb means the tip of the thumb touches the tip of a finger, or the fleshy pad of the thumb touches the pad of a finger. When opposing the thumb to the fingers, small objects are able to be held and manipulated. When opposing, the thumb’s thenar muscles work to advancing and positioning objects.
There are many ways to work on tripod grasp through play!
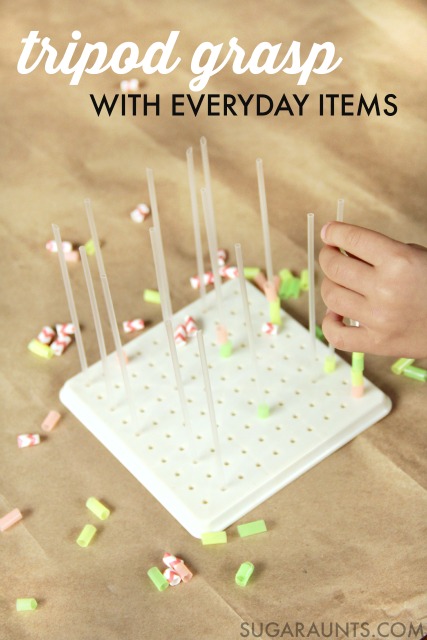
Tripod Grasp with Straws
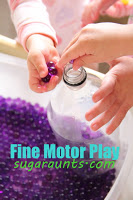
This post contains affiliate links. This tripod grasp activity was one that we put together one day while cleaning out a cupboard. I shared it over on Instagram recently.
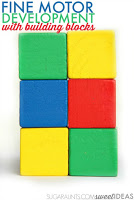
This Peg Board with 1000 Pegs is one that I’ve had in my OT treatment bag for 20+ years. It’s one of my favorite treatment tools for working on so many areas. Push small pegs into the holes to work on in-hand manipulation, tripod grasp, and pincer grip. Copy designs with pegs and work on hand-eye coordination, visual scanning, visual perceptual skills, form constancy, and more. Turn it over and use the back as a mini geoboard with string small loops. Tilt it on a slant and work on an extended surface. This little pegboard has been used by tons of kids working on so many skills. It really is one of my all-time favorite OT activities.
I love that I now get to share this pegboard with my own kids.
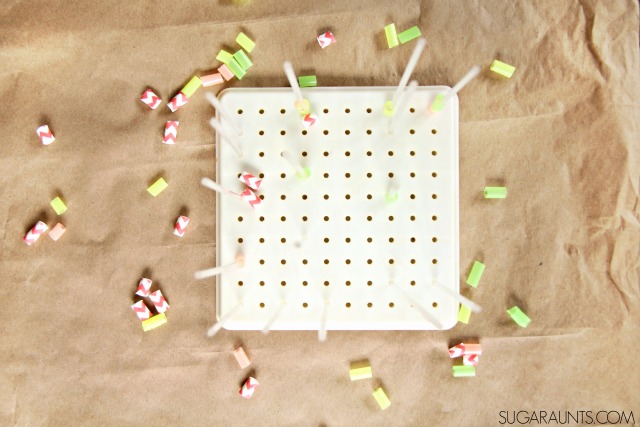
We pulled out a handful of straws from a box of juice drinks. These straws were left over from a party where we didn’t use the straws. You could save small straws like this from juice drinks and wash them out. I showed my daughter how to push the straws into the peg holes and she took over, arranging the straws over and over again. We then used cut up pieces of straws and threaded them onto the straw pegs.
Work on tripod grasp with straws
Using a material like straws to develop fine motor strength and dexterity is just one way to work on tripod grasp with everyday items.
Cut a straw into small pieces and thread them onto the juice straws. Picking up the small straw “beads” and threading them onto the juice straws is a great way to work on tripod grasp.
Using the thumb, index finger, and middle finger to pick up small items uses a tripod grasp. This efficient grasp is needed to hold a pencil effectively while handwriting. The small straw pieces require an open thumb web space and defined arches of the hands. What a fine motor workout this is!
Tripod Grasp Activities
Ok, so say you don’t have juice box straws to use in a pegboard. You can use a variety of other household items in a similar way to work on a tripod grasp.
Roll small balls of play dough with the tips of the fingers
Lacing string onto lacing cards
Fastening buttons
Holding and managing a zipper on a jacket
Pushing push pins into a bulletin board
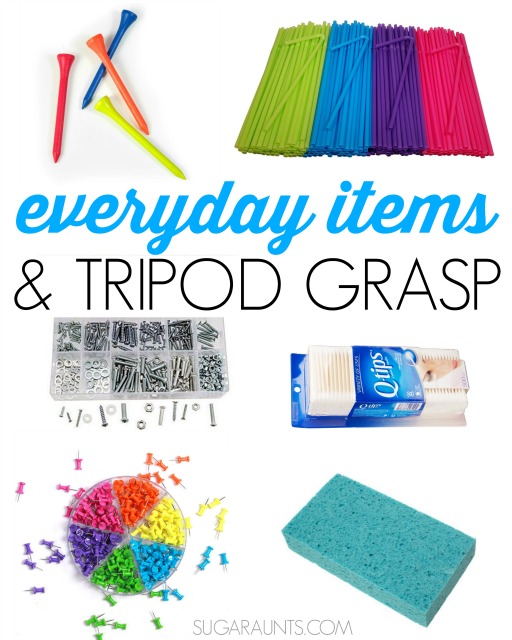
These are some of my favorite every day items to work on tripod grasp. You might find them in a junk drawer or in a closet somewhere. Use them to work on a tripod grasp and efficient handwriting:
These Colorful golf tees are bright and colorful, and perfect for pressing into stryofoam or thing cardboard.
Straws can be cut into small pieces and used as beads. Thread them onto pipe cleaners, string, or other straws.
Screws, nuts, and bolts are a great way to work on tripod grasp and other fine motor skills like in-hand manipulation and rotation.
Cotton swabs make a great writing utensil. Work on tripod grasp while painting with them.
Use Push Pins to work on tripod grasp like we did here. Watch the pointy end with younger kids!
Use a Kitchen sponge to work on a tripod grasp by cutting the sponge into small squares. Squeeze water to fill a container, or use them to paint.
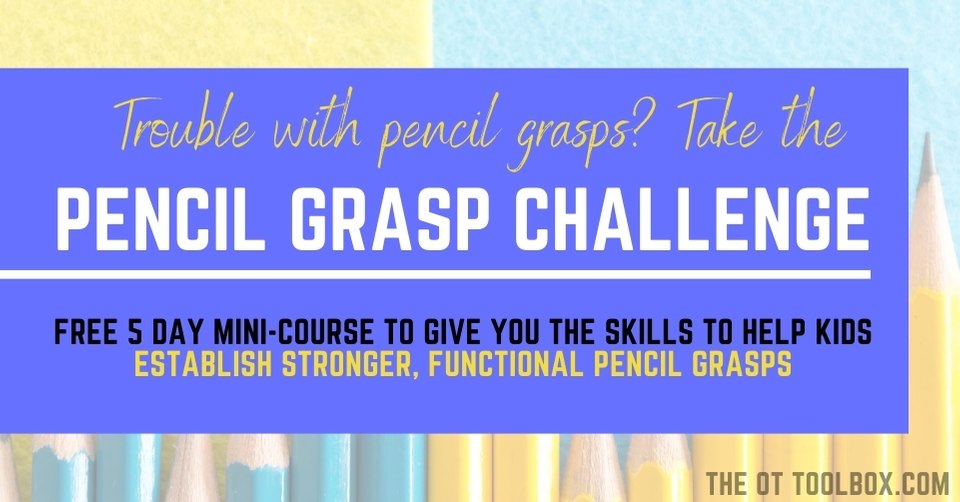
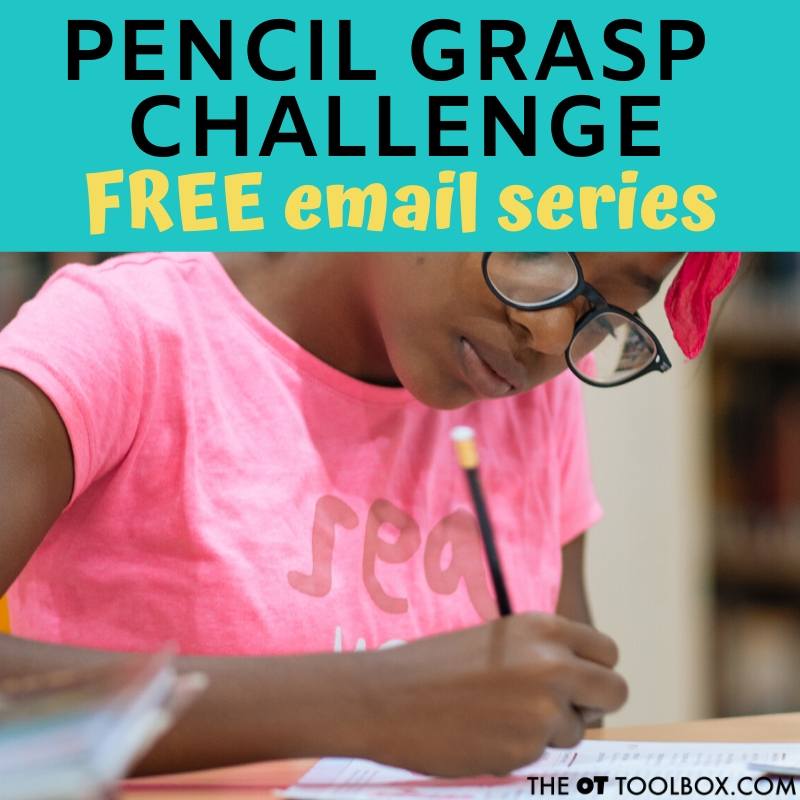
Want to know how to fix a problem with pencil grasps? Need help knowing where to start when it comes to immature pencil grasps or a child hating to write because their hand hurts? The Pencil Grasp Challenge in open for you! In this free, 5 day email series, you’ll gain information, resources, specific activities designed to promote a functional, efficient pencil grasp.
The pencil grasp challenge is a free, 5 day mini course and challenge. During the course of five days, I’ll be teaching everything you need to know about the skills that make up a functional pencil grasp. You’ll learn what’s going on behind the inefficient and just plain terrible pencil grasps you see everyday in the classroom, clinic, or home. Along with loads of information, you’ll gain quick, daily activities that you can do today with a kiddo you know and love. These are easy activities that use items you probably already have in your home right now.
Besides learning and gaining a handful (pun intended) of fun ideas to make quick wins in pencil grasp work, you’ll gain:
5 days of information related to pencil grasp, so you know how to help kids fix an immature pencil grasp.
Specific activities designed to build a functional pencil grasp.
Free printable handouts that you can use to share with your team or with a parent/fellow teachers.
You’ll get access to printable challenge sheets, and a few other fun surprises.
And, possibly the best of all, you’ll get access to a secret challengers Facebook group, where you can share wins, chat about all things pencil grasp, and join a community of other therapists, parents and teachers working on pencil grasp issues.
Colleen Beck, OTR/L has been an occupational therapist since 2000, working in school-based, hand therapy, outpatient peds, EI, and SNF. Colleen created The OT Toolbox to inspire therapists, teachers, and parents with easy and fun tools to help children thrive. Read her story about going from an OT making $3/hour (after paying for kids’ childcare) to a full-time OT resource creator for millions of readers. Want to collaborate? Send an email to contact@theottoolbox.com.
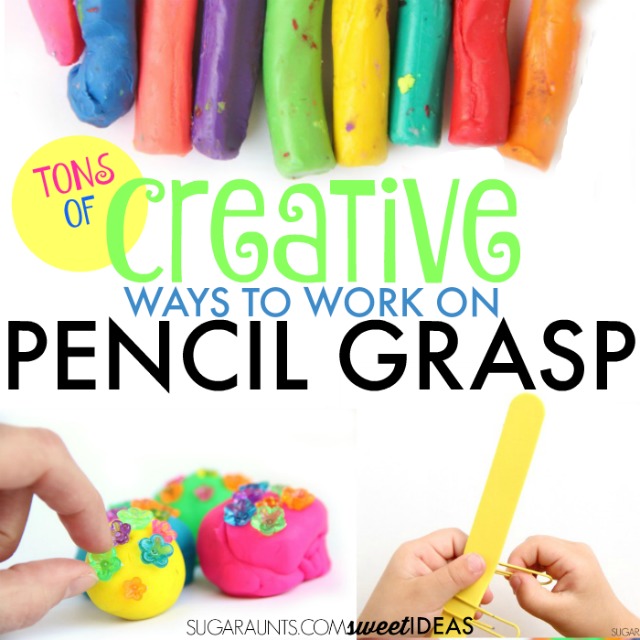
Helping kids with pencil grasp can be a complicated matter. Kids can hold the pencil too tightly or with an immature grasp no matter how many pencil grips you try. But, there is hope. These pencil grasp activities are fun ways to improve pencil grasp with fine motor play. By using play activities to help kids build a better pencil grasp, kids develop a grasp that is strong and dexterous in ways that carryover to holding a pencil. Try these tripod grasp activities to help kids with pencil grasp development. This is something that therapists want parents to know about pencil grasp development…that a functional pencil grasp might not look like a traditional tripod grasp…and that there are fun ways to work on grasp development!
That said…this is the place for all things pencil grip activities that actually make a difference!
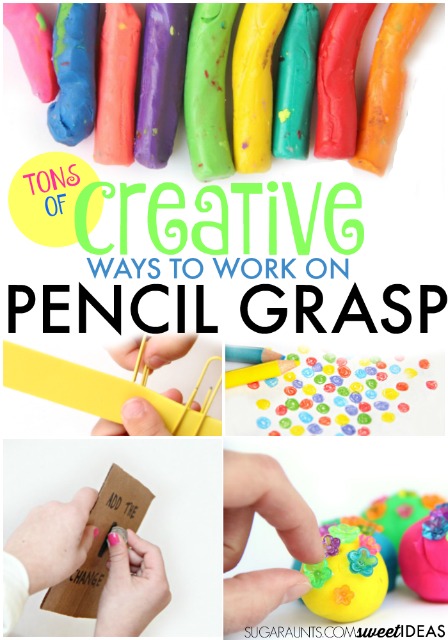
Pencil Grasp
I love to share easy tricks to work on things like fine motor skills. Working on pencil grasp and the fine motor skills needed for handwriting are two of my favorite ways to build functional skills as an Occupational Therapist. This blog post is a round up of some of the best pencil grasp activities and ways to develop a more functional pencil grasp through fine motor play activities. I’ve updated this resource to include more recent pencil grip occupational therapy ideas and grasp activities that I’ve shared.
A functional pencil grasp might not “look like” the traditional tripod grasp. One thing to read up on is grasp patterns, because this plays a huge role inholding the pencil.
Want to know how to fix a problem with pencil grasps? Need help knowing where to start when it comes to immature pencil grasps or a child hating to write because their hand hurts? The Pencil Grasp Challenge in open for you! In this free, 5 day email series, you’ll gain information, resources, specific activities designed to promote a functional, efficient pencil grasp.
First, if you’ve go questions about pencil grasp, check out this resource on building fine motor skills through play. You will find TONS of info about the fine motor “parts” of a functional grasp.
Fine Motor Play Activities to Improve Pencil Grasp
We love incorporating fine motor activities into our play. These posts are some of our favorites from the past year, and as a bonus, will help with the development of the small muscles of the hands. An efficient grip on the pencil uses a tripod grasp (thumb, index, and middle fingers) with an open space between the thumb and index finger. This grasp on the pencil allows kids to better form letters correctly and in a given small space using the fingers to make the pencil movements, vs. using the wrist or whole arm. If your child is struggling with their handwriting, look first at their grasp on the pencil and go from there. Try one of these activities for improved muscle strength and pencil control.
If you are interested in improving pencil grasp, and wondering about all of the fine motor skills that impact a functional pencil grasp, you will definitely want to join the pencil grasp challenge. This free 5 day email series explains everything you want to know about pencil grasp activities that have a powerful impact. Click here to join the Pencil Grasp Challenge.
So let’s get moving on some of the best pencil grip activities that actually make a difference in a functional pencil grasp.
Pencil Grip Activities
We have many pencil grasp tricks up our sleeve as school based OTs…but there are many ways that you can target specific needs with fun and engaging pencil grip activities! Most of these ideas don’t even use a pencil. They target the underlying skill areas like hand strength, dexterity, and precision. Other tasks DO use a pencil though!
While these wouldn’t be specified in a manual dexterity goal, you would target functional skills of handwriting. These ideas are the play-based strategies, or tools.
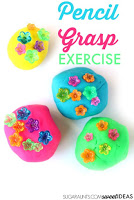
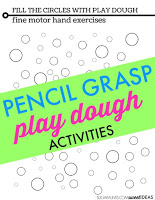
Pencil Grasp Exercises with Play Dough is fun with these mini fluted flower beads. They build a flexed thumb IP joint which is needed for an efficient pencil grasp.
In-Hand Manipulation: Two Activities In hand manipulation is necessary during pencil grasp to manipulate and advance the pencil while writing, as well as making adjustments with the pencil while erasing.
Fine Motor Play with Tissue Paper is a great way to build intrinsic muscle strength. Strength in the intrinsic muscles ensure a functional tripod grasp.
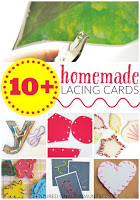
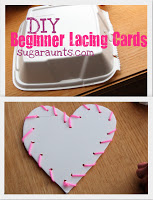
DIY Lacing Cards improves bilateral coordination, needed for holding the paper while writing.
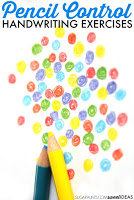
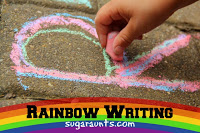
Rainbow Writing provides a resistive writing surface, providing proprioceptive feedback and a way to work on motor planning in letter formation, as well as tripod grasp on the pencil.
Tripod Grasp with Wikki Stix Pushing the wikki stix into the container works on tripod grasp and intrinsic muscle strength, as well as bilateral coordination.
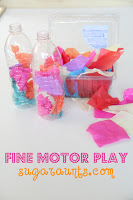
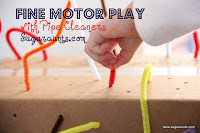
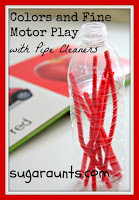
Using Pipe Cleaners in Fine Motor Play also improves intrinsic muscle strength and bilateral coordination with a brightly colored stick. Using the plastic bottle provides great auditory feedback.
Here is more information on pencil control and distal mobility in handwriting.
Colleen Beck, OTR/L has been an occupational therapist since 2000, working in school-based, hand therapy, outpatient peds, EI, and SNF. Colleen created The OT Toolbox to inspire therapists, teachers, and parents with easy and fun tools to help children thrive. Read her story about going from an OT making $3/hour (after paying for kids’ childcare) to a full-time OT resource creator for millions of readers. Want to collaborate? Send an email to contact@theottoolbox.com.
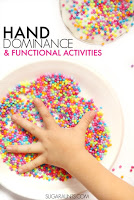
A while back, I started putting together lists of activities that require just one supply. These are items that you probably already have in the home. I wanted to put these activity lists together to help kids work on fine motor skills with little to no supplies. Some of the activity lists that we have so far include fine motor activities using paper clips, activities using just craft pom poms or cotton balls, and activities to improve fine motor skills with just playing cards. I have a lot more activity lists to come. These will all use just one item, and the fine motor ideas are great for building skills with limited supplies. Send a copy of these links to any friends or families looking for activities for kids to do at home to work on fine motor skills. They are also great for adding to teletherapy services and working on skills with kids as the families probably have these simple items in their home.
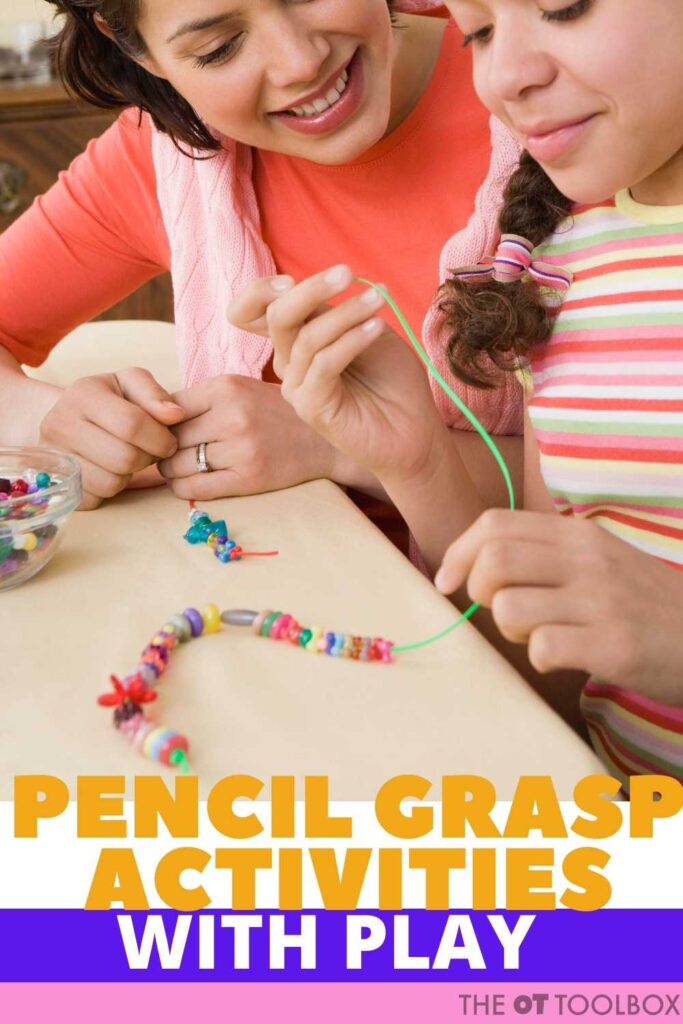
Occupational therapy as a profession was centered around crafts at it’s roots. Historically, OTs used crafting as a tool to support physical and social emotional recovery. It’s fun to think about how stringing beads and occupational therapy is stull a very functional craft that supports skill development!
For example, check out our empathy activity that uses bead stringing!
For now, let’s talk about fine motor activities that can be done using just beads! HERE are all of our fine motor activities in one place.
FINE MOTOR ACTIVITIES KIDS NEED
Kids need fine motor skills for school and play. The problem is when we see functional concerns that limit independence. We might see kids who really struggle with hand strength, dexterity, joint mobility, or precision. We may notice these issues in how a student grasps their pencil. We may see kids having trouble with buttons, zippers, or snaps because of the fine motor skills they really need to develop. Simple fine motor activities can make a real impact in working on these fine motor skill areas.
Activities using what you have in the Home
Here are some of the other OT activity ideas that I’ve created so far in this series:
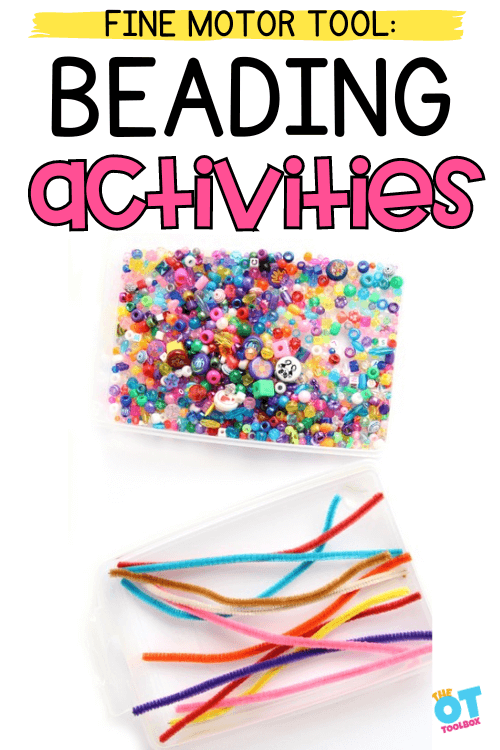
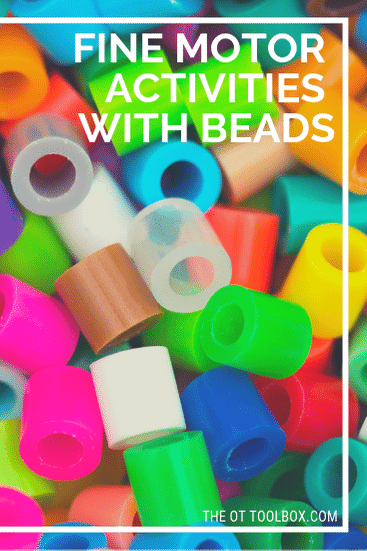
Now onto the fine motor activities that require just beads! Let’s talk about the WHY behind using beads as a fine motor tool in occupational therapy activities. There are several fine motor sill components that can be strengthened with beads.
Separation of the sides of the hand– Paperclips are the perfect small item to hold in the palm of the hand, engaging the ulnar side of the hand, while encouraging movement and precision with the pointer finger, middle finger, and thumb. This skill is so important for fine motor precision in tasks like pencil grasp and managing clothing fasteners or tying shoe laces.
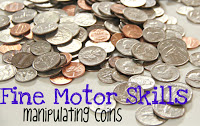
Pincer grasp– Paper clips are a powerful means of promoting the precision grasp between the thumb and pointer finger. This motor skill is essential for tasks that require strength and dexterity to manage small items like coins or turning pages in isolation.
In-hand manipulation– Paperclips can be used as a manipulative item for transferring from the palm to the fingertips or vice versa. This is an essential skill needed in pencil grasp and other functional tasks.
Finger isolation– Paperclips can be used in various ways to promote finger isolation needed for fine motor dexterity and functional tasks.
Eye-hand coordination– This skills is an essential fine motor precision skill needed for so many functional tasks. Craft pom poms can be a powerful way to work on this skill area.
Visual Motor Skills- Coordinating visual information with motor movements of the hands is essential for handwriting, cutting with scissors, and many other tasks. Manipulating lacing cards is an excellent way to address these needs.
Motor Planning- A motor plan is functional execution of a task which is viewed with the eyes and carried out with the hands in order to complete tasks, such as mazes, walking around obstacles, cutting along a line, and writing within a space on a form. Visual motor skills can be difficult for children with visual processing difficulties. Identifying and organizing information is in a motor plan works on problem solving skills.
This is pretty open-ended! Use what you’ve got on hand to really home in on the skills listed above. Some beads that would work include: pony beads, perler beads, pop beads, jewelry making beads, or even beads from an old necklace would work. The point is that you need small manipulatives that can fit into the palm of the hand and really challenge those fine motor skills.
Use beads to work on fine motor skills in the following ways:
Press beads into play dough
Stick toothpicks into foam. Place beads onto toothpicks.
Sort onto pipe cleaners by color
Thread onto string
Tape ribbons to an easel or wall. Slide beads up the ribbons from the bottom
Place beads and hair gel in a gallon size bag. Tape the top. Move beads with fingertips.
Drop beads into spice containers
Drop beads into recycled water bottle
Draw a large letter on paper and fill the lines with beads to form the letters. Use bubble writing to fill the space inside or place the beads right on the lines of the letter.
It’s not just about stringing beads on a pipe cleaner or string! You can work on other areas, too! Some ideas include:
Work on patterns with the beads
Copy a series of colors or bead types to work on visual motor skills
Use a variety of bead types to encourage fine motor skill work
Hide beads in theraputty and then use them to string the beads
These are just some of the ways to use beads in OT sessions! How do you incorporate bead activities?
Working on fine motor skills, visual perception, visual motor skills, sensory tolerance, handwriting, or scissor skills? Our Fine Motor Kits cover all of these areas and more.
Check out the seasonal Fine Motor Kits that kids love:
Colleen Beck, OTR/L has been an occupational therapist since 2000, working in school-based, hand therapy, outpatient peds, EI, and SNF. Colleen created The OT Toolbox to inspire therapists, teachers, and parents with easy and fun tools to help children thrive. Read her story about going from an OT making $3/hour (after paying for kids’ childcare) to a full-time OT resource creator for millions of readers. Want to collaborate? Send an email to contact@theottoolbox.com.
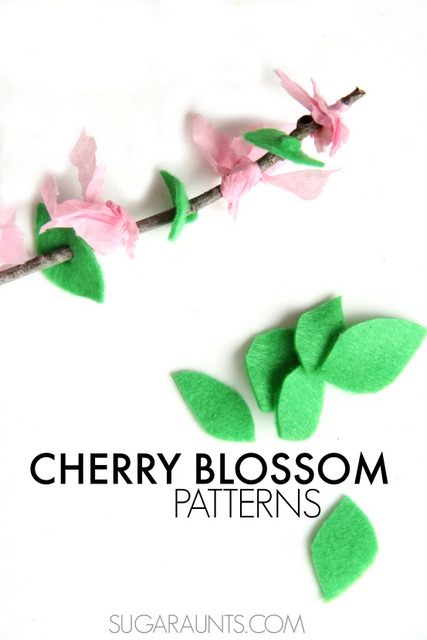
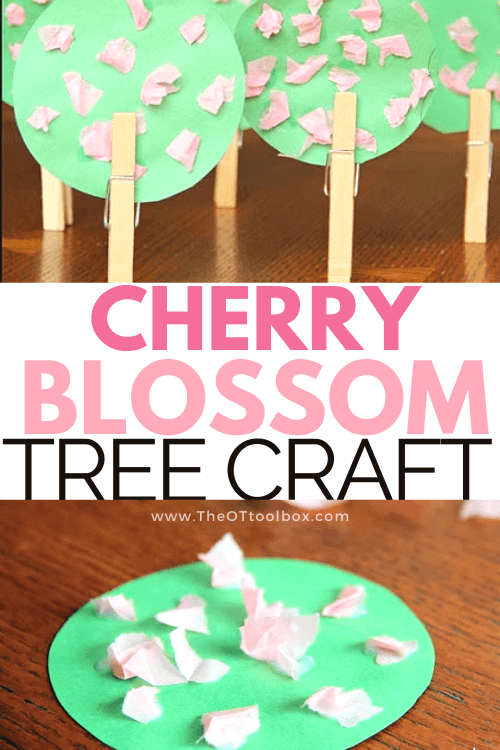
This cherry blossom craft is one of my favorites this time of year because it’s a fine motor power tool that supports so many areas of development with a single craft. We made the tissue paper cherry blossom tree many years ago, and it’s still a favorite when it comes to one craft that supports many areas! This is just one of the fun Cherry blossom crafts here on the site that promote fine motor skills, strengthening, and precision in big ways. Let’s explain…
Cherry Blossom Craft
We made these Cherry blossom trees one day as a Spring occupational therapy activity for kids. This was the perfect way to brighten up our dining room. We had a bunch of paper snowflakes hanging on our window and decided we needed to pull those down and make a few fun spring crafts! This Cherry Blossom Tree craft hit the mark!
Not only were our trees fun to make, they had a great fine motor component to them…and we love fine motor activities!
This post contains affiliate links.
Cherry Blossom Tree craft
We made this tissue paper cherry blossom craft using simple materials that we already had on hand:
Green construction paper
Pink tissue paper
Glue
Clothes pins
We also used scissors, a pencil, and a lid (to create the tree circle)
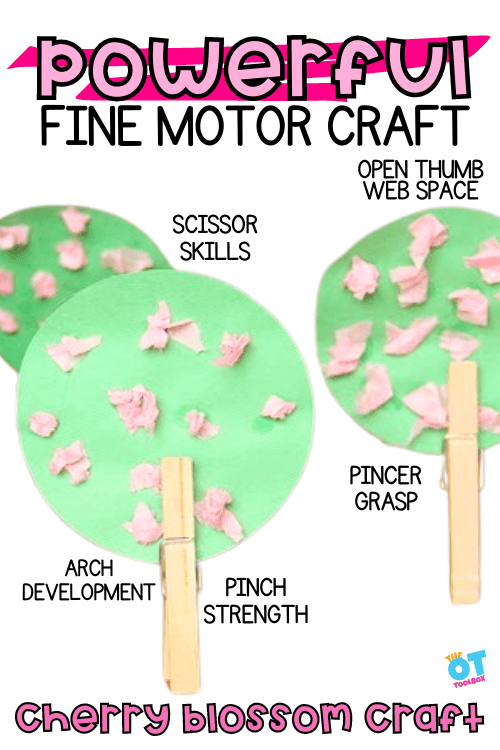
The craft is ideal because there are many skills that are addressed using these materials. We show them in the image at the top of this page, and they include:
Finger strength– needed to pinch the clothes pins as a trunk onto the tissue paper cherry blossom craft.
Arch development– crumbling the paper into small bits requires refinement of the arches of the hand
Pincer grasp– to pick up and manipulate the small crumbled tissue aper pieces and to place them onto glue spots on the tree
There are other skills that are used as well: tripod grasp, gross grasp, bilateral coordination, intrinsic hand strength, etc.
We started with green Construction Paper and a peanut butter jar lid. I traced a bunch of circles (and Baby Girl had to try her hand at tracing, too!)
Holding the lid and tracing around it is a great way to incorporate bilateral coordination and crossing midline. This is a nice precursor to the task of cutting out each circle.
To address scissor skills, consider using thicker paper or cardstock to make the cutting activity easier. Here are strategies for working on scissor skills and cutting accuracy.
These were cut out and we were ready to get started on our trees.
I put a bunch of dots of glue on the circles. Older kids could do this part. Squeezing the glue bottle is a great fine motor strengthening exercise for little hands.
For kids that need help working on graded resistance and grasp when managing a bottle of glue, practicing glue spots onto different sizes of circles like in a glue exercise is a good way to help with this functional task.
The Glue Spots worksheets in the Spring Fine Motor Kit is a good exercise for this activity.
Next, Big Sister pulled small bits of pink tissue paper from a big old sheet.
Tearing tissue paper is such a GREAT fine motor strengthening exercise for kiddos.
Crumbling those little bits works the intrinsic muscles of the hands (the small muscles that are in the hand and make up arches of the palm. Strength of these muscles is so important to endurance in handwriting and coloring, maintaining adequate pressure when coloring, holding the pencil accurately…the needs for defined arches of the hands could go on and on and on!
Crumbling tissue paper for crumbled paper art is a functional fine motor craft that kids can hang up and admire their hard work. You’ll find more Crumble Art crafts in the Spring Fine Motor Kit, including templates for 5 different crumble art crafts: flowers, mushroom, rainbow, and Easter egg crafts.
Pressing those little tissue paper crumbles into the glue required a tripod grasp. And, we had a ton of glue spots…so this was a good long activity!
Cover all of those glue spots!
Once our tissue paper/glue was dry, we clipped on clothes pin “trunks” onto our trees. Pinching those pins was another way to encourage hand strengthening. We had a whole forest of Cherry Blossom trees and got them involved on our train table, with the Little People stuff, with little dinosaurs. We played with these Cherry Blossom trees until they fell apart!
Be sure to check out this other cherry blossom fine motor math activity, where we used pink tissue paper to make cherry blossoms and worked on tripod grasp and eye hand coordination skills.
Spring Fine Motor Kit
Score Fine Motor Tools and resources and help kids build the skills they need to thrive!
Developing hand strength, dexterity, dexterity, precision skills, and eye-hand coordination skills that kids need for holding and writing with a pencil, coloring, and manipulating small objects in every day task doesn’t need to be difficult. The Spring Fine Motor Kit includes 100 pages of fine motor activities, worksheets, crafts, and more:
Colleen Beck, OTR/L has been an occupational therapist since 2000, working in school-based, hand therapy, outpatient peds, EI, and SNF. Colleen created The OT Toolbox to inspire therapists, teachers, and parents with easy and fun tools to help children thrive. Read her story about going from an OT making $3/hour (after paying for kids’ childcare) to a full-time OT resource creator for millions of readers. Want to collaborate? Send an email to contact@theottoolbox.com.
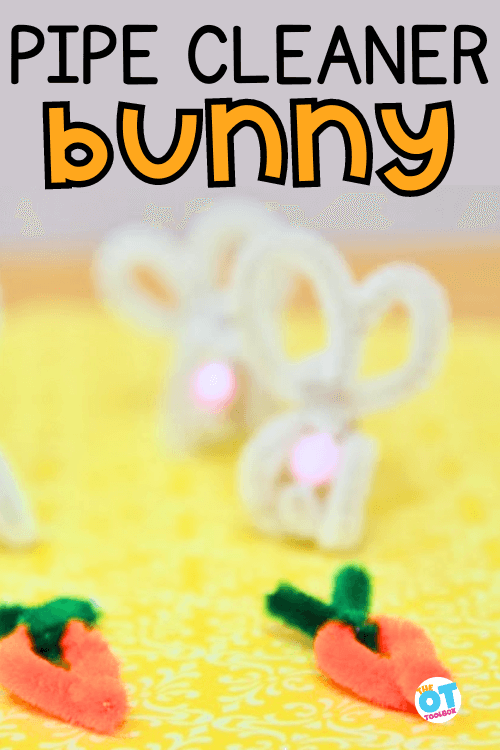
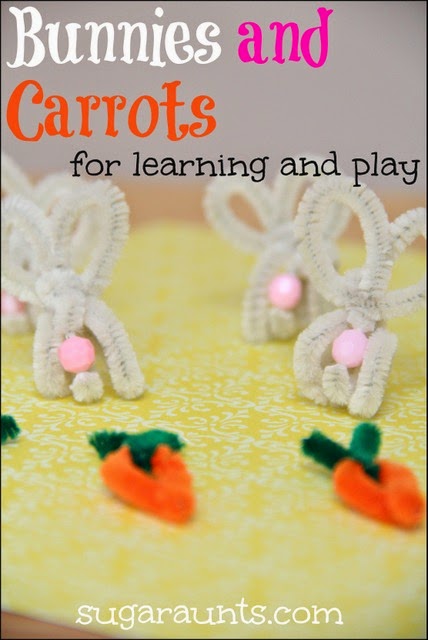
These pipe cleaner bunny crafts are a fun Easter craft that supports fine motor skills. We LOVED making these and then using them over and over again!
With Easter being right around the corner, these pipe cleaner bunny crafts and pipe cleaner carrots are a great way to add fine motor skills to your Easter occupational therapy line up. These bunny cuties were easy to make and have been seen a lot in our play time recently. This isn’t the first time that we’ve made Easter Bunny fine motor activity.
Pipe Cleaner Bunny and Pipe Cleaner Carrots
So WHAT is a manipulative?? (Even spell check doesn’t know, so maybe we should explain…) These cute little bunny manipulatives can be used for so many fun activities: counting, patterning, sorting, arranging…so much learning can happen with little objects that kids can manipulate.
So we love making fun kids crafts that double as a therapy tool. When you bend and fold pipe cleaners into shapes, you’re actually working on several skills:
I’ve caught baby Girl playing with these bunnies and carrots as she made them talk to each other. What a great way to work on language and conversation! Throw these bunnies and carrots into a sensory bin and you’ve got a sensory activity where the kids can explore textures and senses.
There are SO many ways these manipulatives can be used in learning and play.
How to make a Bunny with Pipe Cleaners
Here’s what we did to make the pipe cleaner bunnies…
First, you’ll want to gather your materials:
White pipe cleaners
Pink pony bead
Check out the directions to make the pipe cleaner bunny craft under each picture. We wanted to add a step-by-step visual.
To start, I created a handful of Easter Bunnies using off-white pipe cleaners. It’s not hard to do…
1. Bend the pipe cleaner to make two bunny ears.
2. Twist the pipe cleaner around and through the first “ear”, then through the second “ear”. The second ear is not a complete loop, so the tail end of the pipe cleaner doesn’t really go through the ear.
You’ll pinch the pipe cleaner so it stays put. See the next picture.
3. Pinch the “ears” in place and pull the long end strait down.
4. Thread a pink bead onto the pipe cleaner for the bunny’s nose.
5. Wrap the long end of the pipe cleaner straight up and around your thumb.
6. Repeat twice, making one loop to the right of the bead and one loop to the left of the bead.
7. Pinch it so it stays in place. You can kind of squash the bunny down to make it stay put.
Pipe Cleaner Carrot
The pipe cleaner carrots are just a piece of an orange pipe cleaner bent into a carrot shape and a small piece of green pipe cleaner twisted around to make a stem. Super easy to make.
Make a handful of each and you’re ready for counting, patterns, sorting, adding, and subtracting…
How many ways can you think of to learn and play with these guys?
Our bunnies have been found all over the house this last week. The carrots made their way into the Little People house and eaten by the Lalaloopsy friends. The bunny manipulatives have even been caught hanging out with a few Ninja Turtles!
Let us know if you make these bunny and carrot manipulatives. We would love to see how you’re learning and playing!
For more Easter fine motor activities, check out the Spring Fine Motor Kit.
Spring Fine Motor Kit
Score Fine Motor Tools and resources and help kids build the skills they need to thrive!
Developing hand strength, dexterity, dexterity, precision skills, and eye-hand coordination skills that kids need for holding and writing with a pencil, coloring, and manipulating small objects in every day task doesn’t need to be difficult. The Spring Fine Motor Kit includes 100 pages of fine motor activities, worksheets, crafts, and more:
Colleen Beck, OTR/L has been an occupational therapist since 2000, working in school-based, hand therapy, outpatient peds, EI, and SNF. Colleen created The OT Toolbox to inspire therapists, teachers, and parents with easy and fun tools to help children thrive. Read her story about going from an OT making $3/hour (after paying for kids’ childcare) to a full-time OT resource creator for millions of readers. Want to collaborate? Send an email to contact@theottoolbox.com.
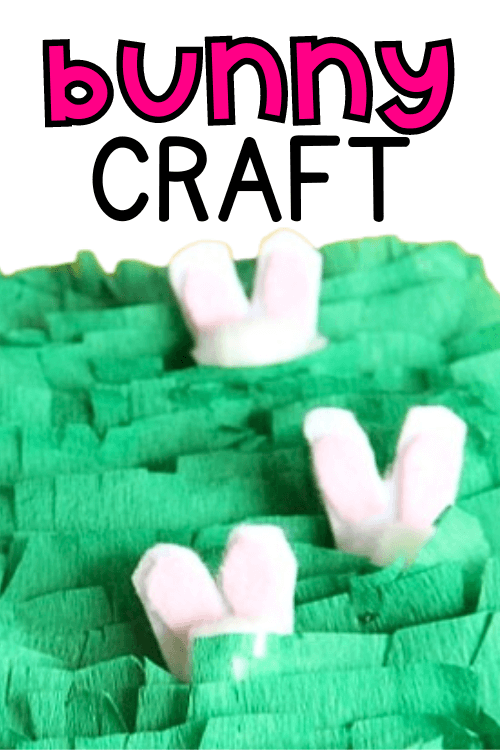
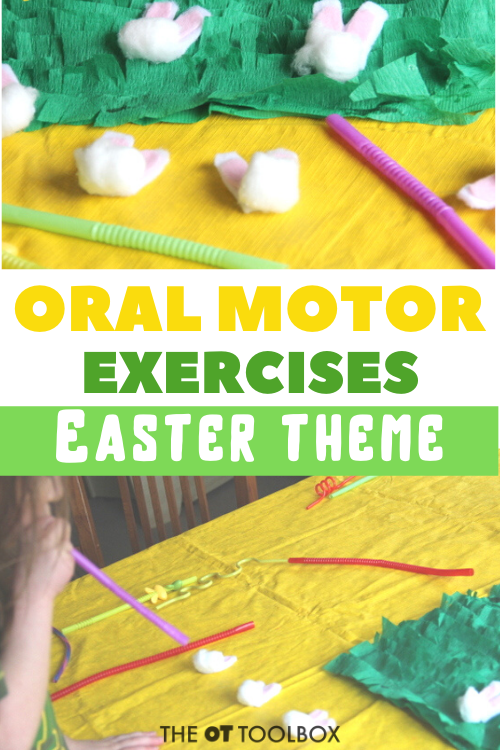
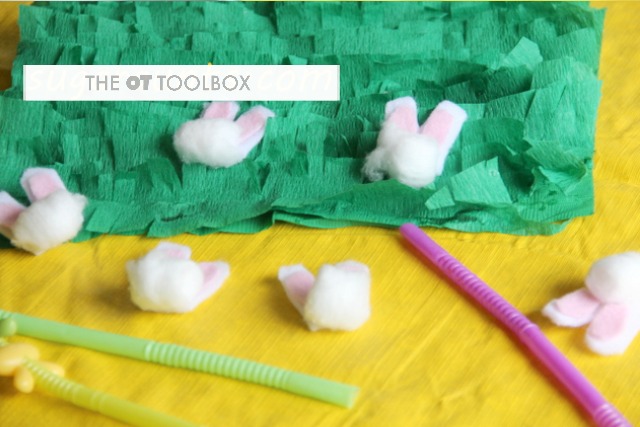
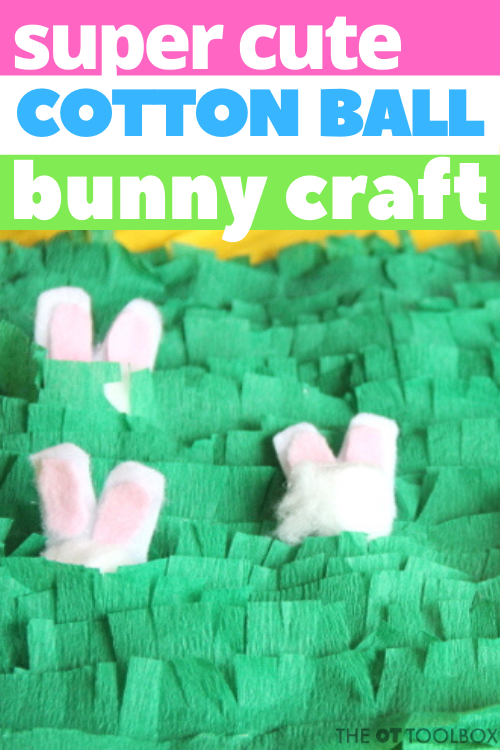
Working on oral motor exercises as a sensory processing strategy for self-regulation, or as an oral motor tool to address physical needs? Ok, so we made a cute little cotton ball bunny to use in an Easter sensory activity as a small world play area to work on fine motor skills with an Easter theme. However, using them in imagination play, but, there are so many oral motor benefits to using these little cotton ball bunnies, too.
It was so much fun with that little cotton ball bunny family that we turned it into a big old collection of bunnies! That’s not all…we used them in an oral motor exercise, with major self-regulation benefits. Here is a how to for this Easter craft for kids as well as a run-down on oral motor skill work with everyday items.
One thing I love about this is that we were blowing cotton balls with straws as a calming and regulating activity, but it was a lot of fun, too!
You’ll also want to check out our other Bunny Activities:
Oral motor skills play a big part of feeding. In fact oral motor problems and feeding can impact food preferences as well as ability to eat certain food textures. There is a lot of information on oral motor skills on The OT Toolbox.
Adding sensory work through the mouth in the form of proprioception is a powerful way to help kids recenter and gain input that is calming and regulating. That input “wakes up” the muscles of the mouth.
There is a mindfulness portion to this oral motor strategy, too. Taking deep breaths is so important in relaxation it brings awareness to your body. In this Easter oral motor activity, kids can blow through a straw to move the cotton ball bunnies while focusing on a static viewpoint at the end of the straw.
Did you know that blowing cotton balls with straws can do all of this??
Talk about centering and regulating! You can even ask the child to breathe in while you count to 5 and then breath out as they move the bunny with the power of their breath.
Oral Motor Exercises for Heavy work
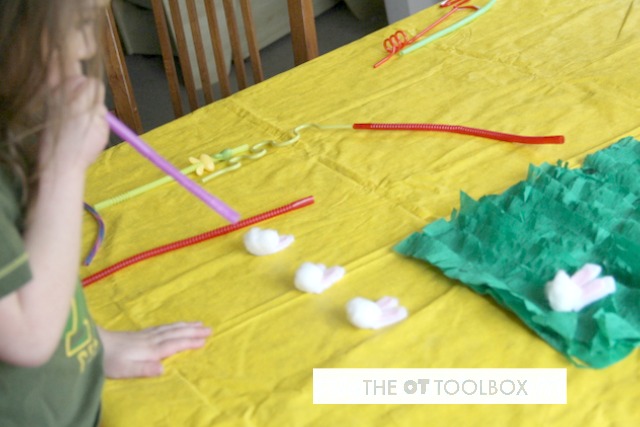
To do this self regulation activity, it’s actually pretty simple.
Line up a row of cotton ball bunnies on the table.
Give the child a straw and ask them to blow into the straw to push the bunny toward a target.
You can ask them to move a certain number of bunnies in a specific amount of time, or they can simply move all of the bunny family with their breath.
Oral Motor Exercise
I wanted to try a little Easter-themed game with Big Sister. (She didn’t know that it was actually an oral motor exercise that supports development!)
I put the cotton ball bunnies out on the table, along with the grass and some straws. She had to blow the bunnies into the grass using a straw.
Scroll below for instructions on how to make the DIY grass matt to use in sensory play activities.
To make the oral motor exercise easier or harder:
Try using different lengths of straws to change the breath power and amount of deep breathing they need to take.
You can also pinch the straw to require more effort in the oral motor therapy idea.
Try using different types of straws, too. Some ideas include using a large sports straw like we did in the pictures here, or a coffee stirrer straw.
The options are endless and can be means of grading this activity up or down to meet the specific needs of the child.
This is a fun exercise/game for kids with oral-motor problems including poor lip closure, stability of the jaw, or muscle development of the mouth, jaw, and tongue. Blowing through a straw can also help with sensorimotor integration.
Older kids who constantly put things into their mouth (pencils, clothing, fingers…) may be seeking oral input/sensorimotor input that their body needs.
This game is a fun way to work on any of these areas. Use fatter straws at first and work toward thinner straws for a graded exercise. If this activity to too difficult for your child with oral-motor or sensorimotor needs, try a smaller item such as a feather or a crafting fuzz ball.
You could also work on oral motor skills and the proprioceptive heavy work with this Egg Boat activity.
Oral motor exercises like these are beneficial to add heavy work input through the mouth and lips that is calming and regulating.
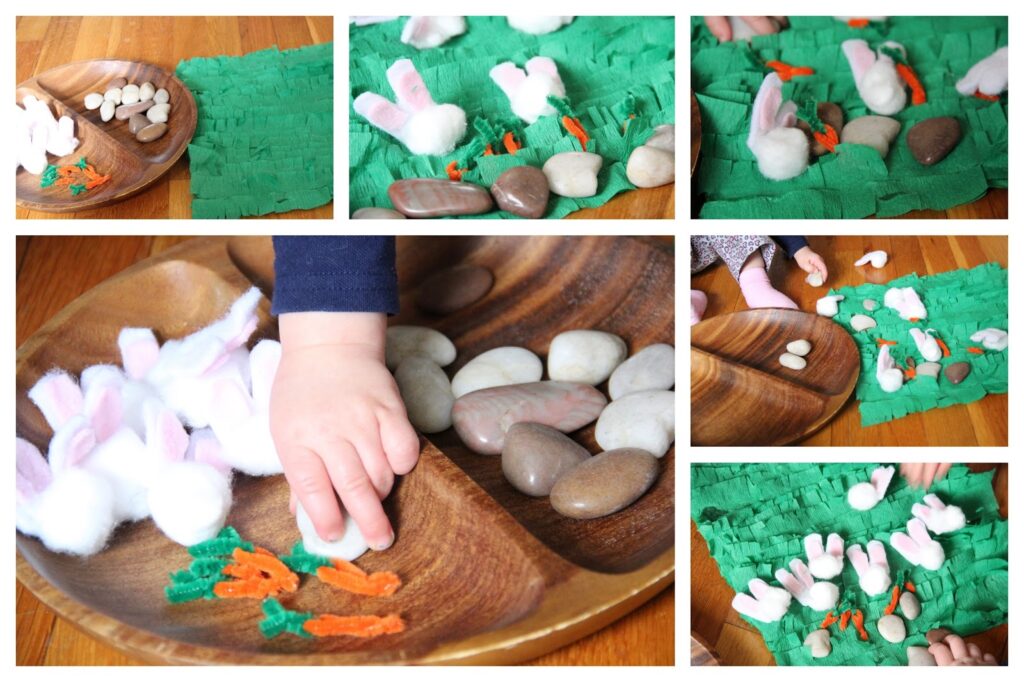
Fine Motor Skills Activity
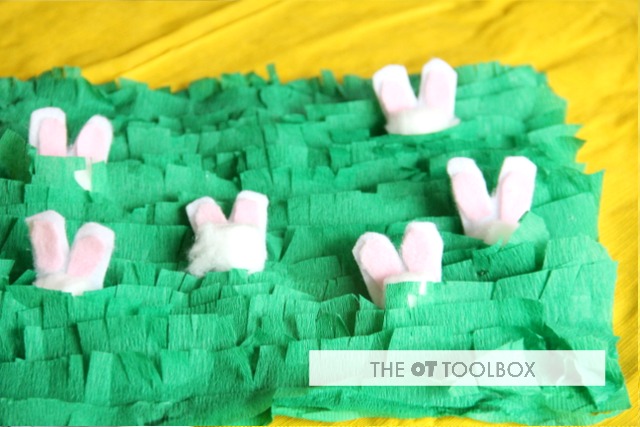
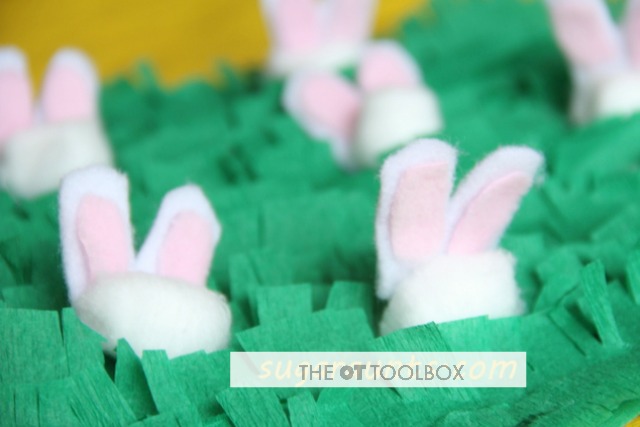
These little Easter bunny crafts were perfect to in a fine motor skills activity, too. With a tray, a handful of river rocks, and a DIY crepe paper matt, we made an Easter-themed small world to work on fine motor skills with my littlest one.
My daughter, who was a toddler in these photos, loved to explore and play as she picked up and moved the cotton ball bunnies, the rocks, and small carrots.
To make the grass matt, we used a roll of green crepe paper. It was glued on one side to a sheet of construction paper. I asked my preschooler to snip into the edges of the top side of the crepe paper, so it made a fringed edge. This was a great scissor activity for her.
This Easter play activity turned out to be a fun fine motor activity for toddlers and a fine motor ideas for preschoolers, too! I think the quote from my preschooler was… “Wow, this is cool, Mom!”
Easter Play IDEA
Play idea for toddlers- Baby Girl especially loved playing with the little bunnies in an Easter small world play set-up. She would move the bunnies, stones, and carrots one at a time from the bowl to the grass…and then back again.
Play idea for preschoolers- Big Sister had fun using the bunnies for imagination play, making them go into their garden, lining up the rocks, and making the bunnies steal the carrots.
Little Guy wanted nothing to do with any of this. I guess there were not any superheroes or bad guys involved. Cute little bunnies are not his thing 🙂
We are having a lot of fun with our little bunnies!
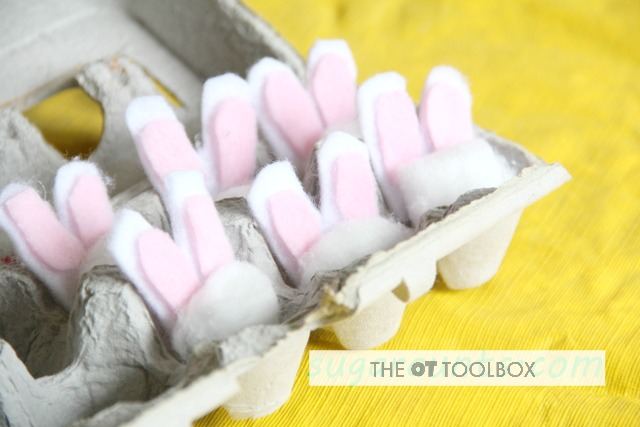
TO make the Cotton Ball Bunny Craft
Making this Easter bunny craft is super easy.
We used a glue gun to make sure the pieces were securely attached for sensory play with my toddler. However, regular craft glue would work as well.
You’ll need a cotton ball, white foam sheet, and a pink felt sheet.
Cut out two large white ears and two smaller pieces for the inner ear.
Use the craft glue to hold these pieces in place.
Add gentle pressure to make sure all of the pieces are securely attached.
This bunny craft came together fairly quickly, so I was able to create a whole set of the bunnies.
Then, use them to play!
Spring Fine Motor Kit
Score Fine Motor Tools and resources and help kids build the skills they need to thrive!
Developing hand strength, dexterity, dexterity, precision skills, and eye-hand coordination skills that kids need for holding and writing with a pencil, coloring, and manipulating small objects in every day task doesn’t need to be difficult. The Spring Fine Motor Kit includes 100 pages of fine motor activities, worksheets, crafts, and more:
Colleen Beck, OTR/L has been an occupational therapist since 2000, working in school-based, hand therapy, outpatient peds, EI, and SNF. Colleen created The OT Toolbox to inspire therapists, teachers, and parents with easy and fun tools to help children thrive. Read her story about going from an OT making $3/hour (after paying for kids’ childcare) to a full-time OT resource creator for millions of readers. Want to collaborate? Send an email to contact@theottoolbox.com.
It’s that time again! Easter is around the corner and so you may be searching for a few Easter activities. These spring activities are ones that have a movement and play component so that kids build skills they need while celebrating the season. Below, you’ll find Easter ideas, Easter crafts, egg activities, songs, and bunny games are all themed on Easters, eggs, and bunnies. Things like our Easter scissor skills activity are just part of the fun. So if you’re planning a few fun activities for the kids this Easter, look no further. We have got you covered on the bunny cuteness overload!
Easter Activities for Occupational Therapy
Sensory Input- Add sensory input for a functional sensory diet or self regulation needs using these sensory egg dying activities.
Visual Perception/Fine Motor– Work on visual discrimination, bilateral coordination, and hand strength with this color matching egg hunt.
Oral Motor Skills/Proprioception– Build oral motor skills and add calming proprioceptive input through the mouth with this bunny race activity.
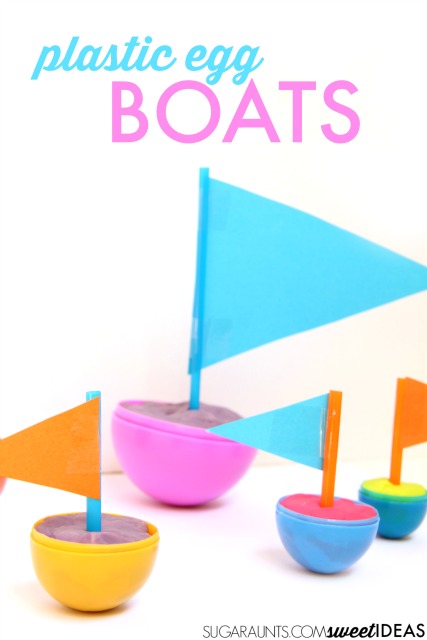
Oral Motor Skills/Fine Motor– Use plastic eggs to make boats that really float and are powered by breath, a great calming self-regulation activity. It’s a fun fine motor STEM activity, too.
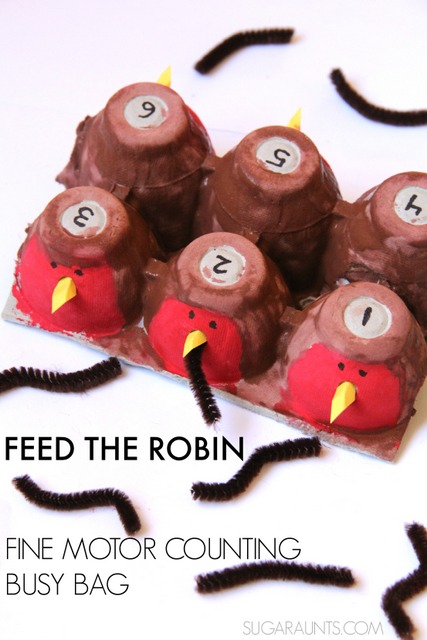
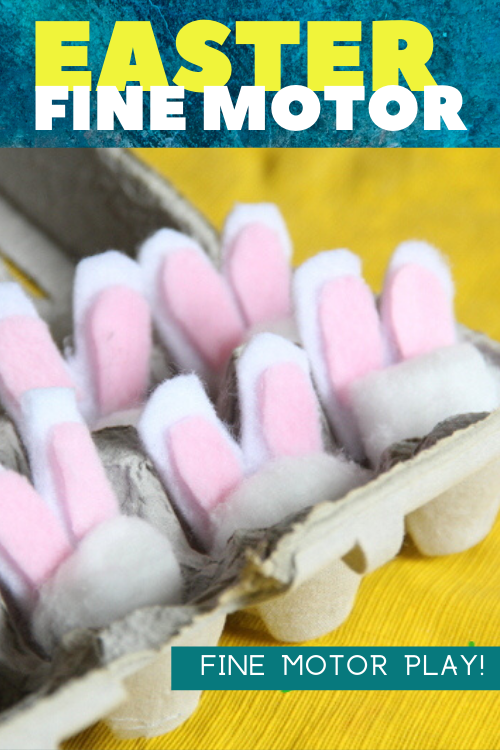
Intrinsic Hand Strength– After dying eggs, use the extra egg cartons to build in-hand manipulation and precision in dexterity with this fine motor activity.
This 5 Little Bunnies Finger Rhyme from Let’s Play Music is a great way to work on finger dexterity and coordination.
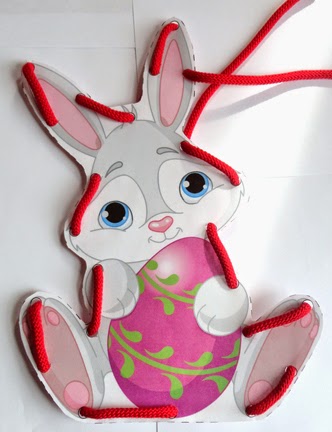
Easter Lacing Cards from Totschooling helps with bilateral coordination, eye-hand coordination, visual motor skills, and more. Here is more information on the benefits of lacing cards for kids.
Plastic Egg craft- Use plastic Easter eggs to make boats with a sensory benefit. It’s a calming sensory activity that kids will love.
Grab a handful of Easter eggs and use them to work on color identification in a color scavenger hunt.
Use this Easter egg writing activity to help kids work on pre-writing lines and pencil control, as well as coordination and visual motor skills.
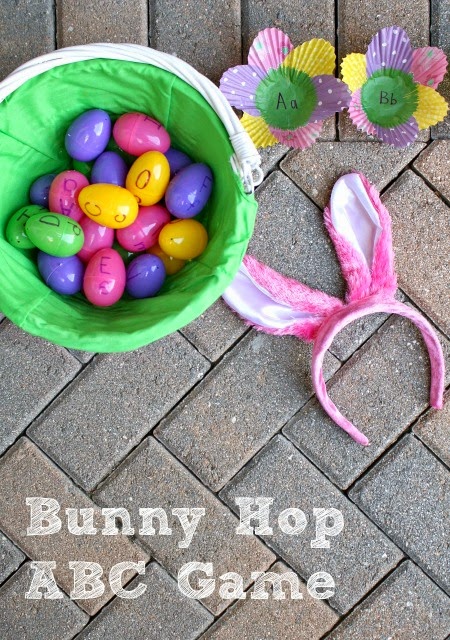
Try this Bunny Hop ABC Game from Fantastic, Fun, and Learning to add gross motor skills, motor planning, and coordination skills in outdoor play.
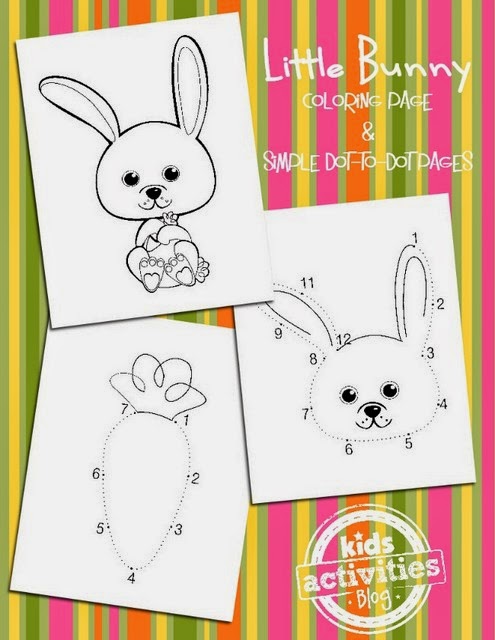
Try these Bunny Coloring Pages from Kids Activities Blog for visual perception, visual motor skills, pencil control, and more.
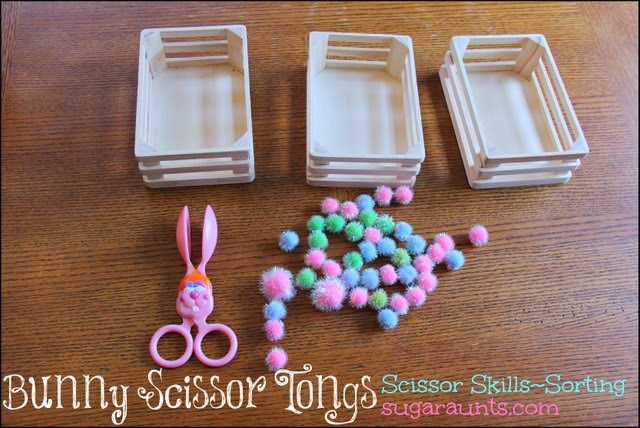
Grab a pair of Bunny Tongs from the dollar store for a fine motor Easter activity that builds scissor skills and eye-hand coordination.
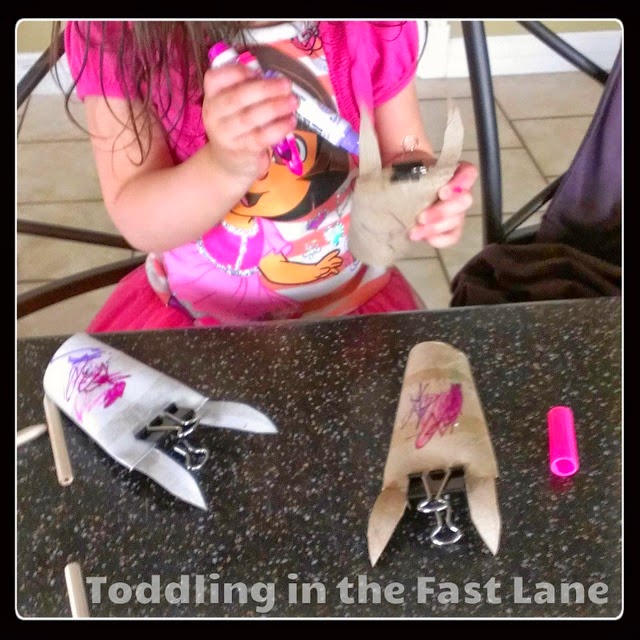
Make Toilet Paper Roll Bunnies like this Easter craft from Toddling in the Fast Lane for a fine motor workout with cute results.
Easy Easter Activities
Busy occupational therapy practitioners know that time is limited. So coming up with a few therapy activities that work with the whole caseload is key.
Here are some of my favorites:
Egg Decorating: Using stickers to decorate plastic Easter eggs. This activity supports fine motor precision, bilateral coordination, and hand-eye coordination.
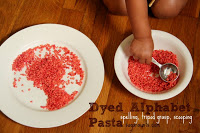
Egg Transferring: Use spoons to transfer small eggs from one basket to another. This activity works on visual motor skills and grasp precision. This is a nice activity if helping kids to hold a spoon and fork when eating.
Easter Egg Cutting: Draw a simple oval on paper and ask kids to cut out the shape. This activity focuses on scissor manipulation and hand-eye coordination.
Paper Easter Baskets: Children can cut out and assemble paper baskets by weaving strips of paper.
Egg Hunt Obstacle Course: This one is one of my favorites! Hide plastic Easter eggs in different places in an occupational therapy obstacle course. You can really focus on different gross motor skills as kids move through the course and collect eggs. Then, ask them to go back through the course and re-hide the eggs to work on memory skills.
Matching Games: Use the egg matching cards in the Easter Egg Therapy Kit and have your students connect two sides of plastic eggs to match the colors on the cards. The kit has pre-colored cards or you can use the blank template to have kids color their own color mix ups.
Easter Sensory Bins: Fill sensory bins with items like Easter grass, plastic eggs, and small toys, allowing children to explore different textures and sensations.
Egg Shakers: Fill plastic eggs with dry beans or beads and tape the eggs shut. Children can create their own egg shakers using plastic eggs filled with various materials like rice or beans, which provides auditory and tactile feedback.
Planning an Easter Craft: Encourage children to plan and execute an Easter craft, which can help develop their organization, sequencing, and problem-solving skills.
Easter Cooking Activities: Following a cooking with kids recipe to make Easter-themed snacks can enhance planning, sequencing, and task initiation.
Easter-Themed Yoga: Incorporate yoga poses inspired by Easter themes (like bunny hops or egg stretches) to help children practice self-regulation and body awareness. We have activities like this in The OT Toolbox Membership.
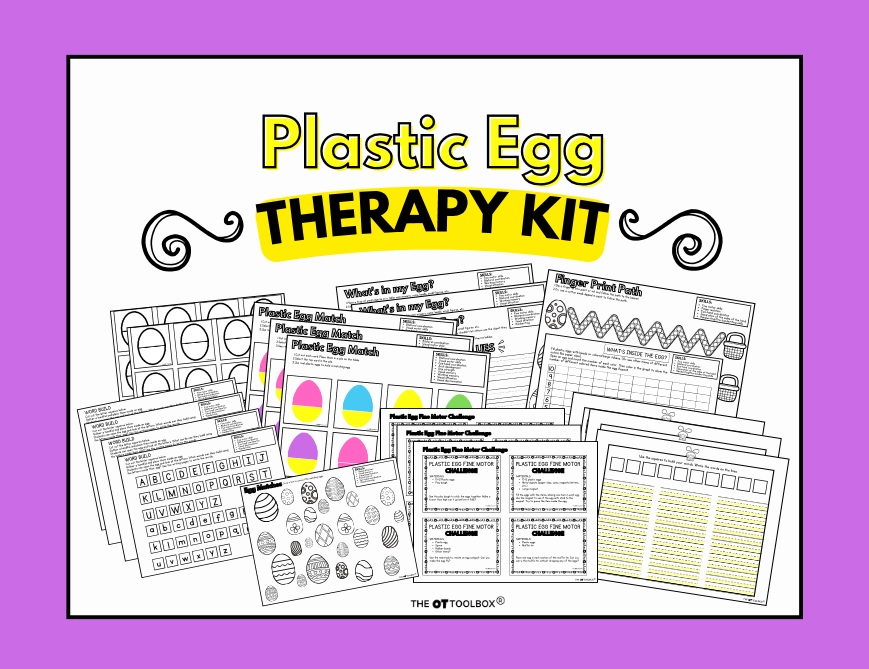
One resource we love is our $5 therapy kit…the Plastic Egg Therapy Kit! It has 27 printable pages of activities with an Easter egg theme. In the kit, you’ll find fine motor activities, handwriting prompts, letter formation pages, pencil control sheets, plastic egg activities, matching cards, graphing activities, STEM fine motor task cards, and more. There are several pages of differentiated lines to meet a variety of needs. This therapy kit has everything done for you.
Score Fine Motor Tools and resources and help kids build the skills they need to thrive!
Developing hand strength, dexterity, dexterity, precision skills, and eye-hand coordination skills that kids need for holding and writing with a pencil, coloring, and manipulating small objects in every day task doesn’t need to be difficult. The Spring Fine Motor Kit includes 100 pages of fine motor activities, worksheets, crafts, and more:
Colleen Beck, OTR/L has been an occupational therapist since 2000, working in school-based, hand therapy, outpatient peds, EI, and SNF. Colleen created The OT Toolbox to inspire therapists, teachers, and parents with easy and fun tools to help children thrive. Read her story about going from an OT making $3/hour (after paying for kids’ childcare) to a full-time OT resource creator for millions of readers. Want to collaborate? Send an email to contact@theottoolbox.com.
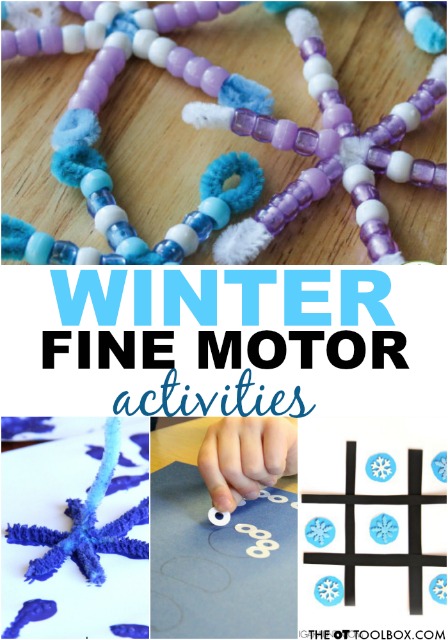
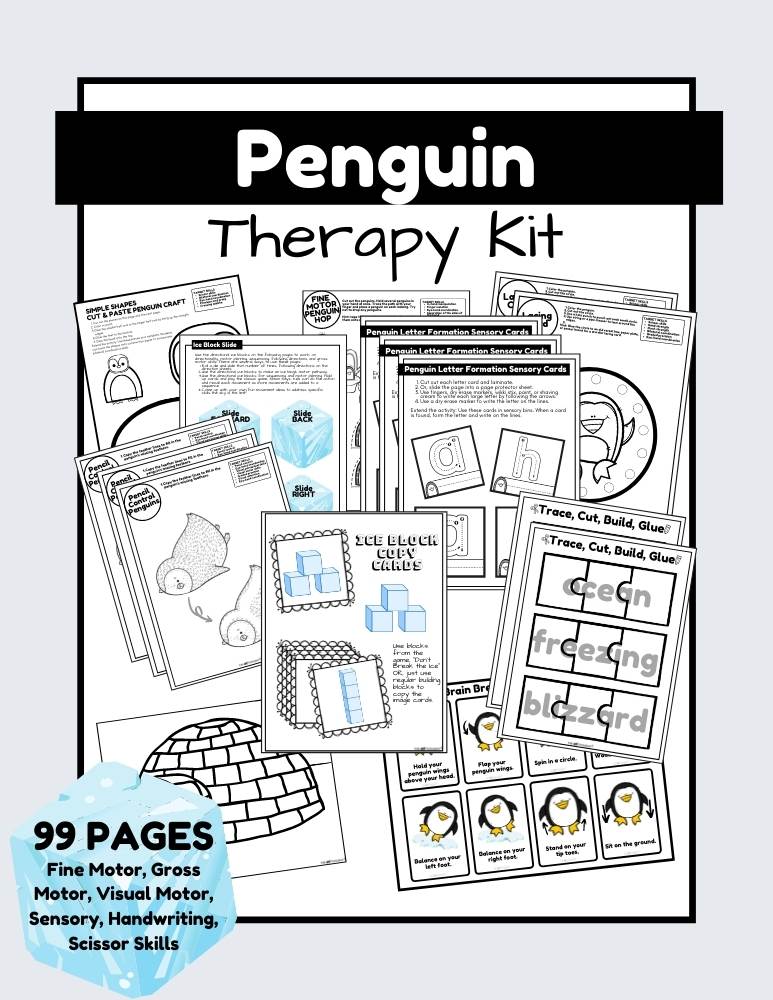
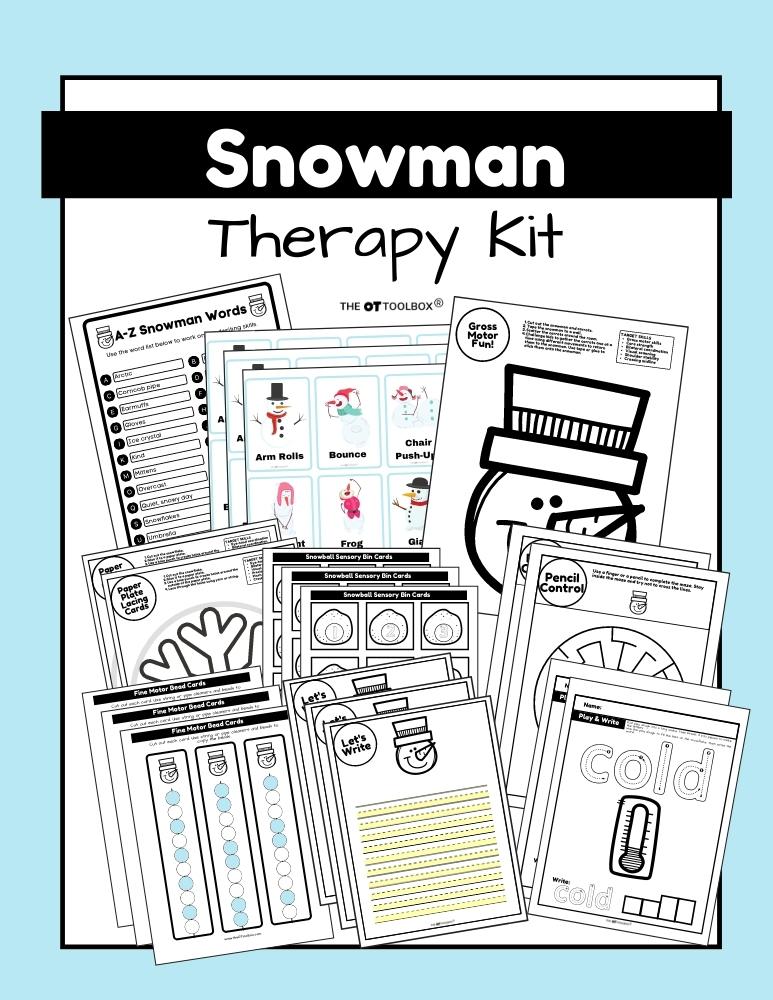
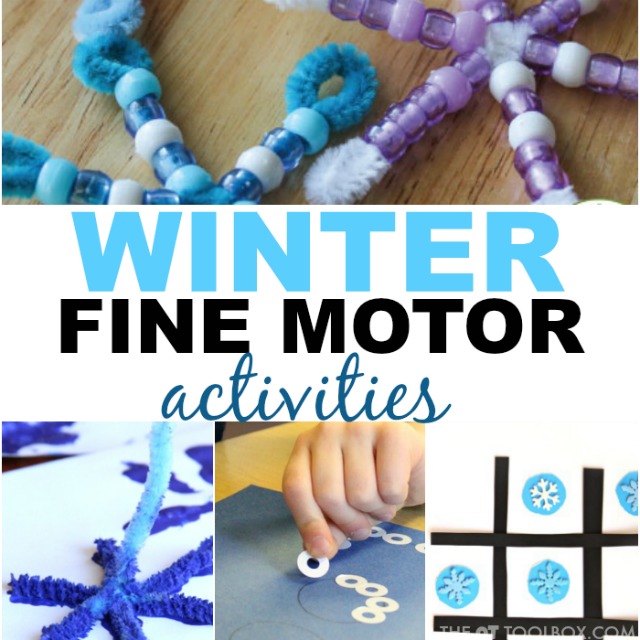
Looking for winter fine motor activities that boost the skills kids need? These fine motor ideas develop the skills that kids need for tasks like handwriting, pencil grasp, cutting with scissors, managing clothing fasteners, and more. You’ll find winter activities that boost hand strength, grasp, precision and endurance in the hands…all through play! We’ve even got a winter fine motor kit, loaded with resources, activities, crafts, and no-prep materials designed to help kids develop fine motor skills. So scroll on!
First, stop by our fine motor skills library for tons of ideas to work on the motor skills kids need.
It has been fun sharing winter activities this week! If you missed any of the posts, be sure to check them out below. We’ve talked about indoor recess ideas for winter, brain break ideas, and activities to address bilateral coordination skills, and even mindfulness! You will have ideas for a season of development!
Check out the Winter Activities on the site this week:
Winter fine motor activities are fun ways to build hand strength.
Winter Fine Motor Activities
Winter is a great time to work on fine motor skills. It’s so functional! You can help kids by getting those hands moving so they have the finger dexterity, pinch strength, and finger isolation to put on a pair of gloves.
You can address gross hand grasp, arch development, and bilateral coordination skills so kids can pull on a pair of boots. You can work on precision, separation of the sides of the hand, eye-hand coordination, and in-hand manipulation skills so kids can zipper and button winter coats. All of these are functional winter tasks!
We used those same hole reinforcer stickers to make a fine motor snowman craft that boosts skills like tip to tip precision, separation of the sides of the hand, and arch strength.
Many winter fine motor activities can be adjusted to meet the needs of the individual. For example, these snow globe letter puzzle cards can address fine motor skills to color and manipulate the cards. The winter-themed activity can be modified to meet the needs of the individual: using less or more cards, incorporating fine or gross motor input, and positioning the cards in different planes or surfaces to work on various levels of fine motor control. It’s just one more way to make therapy skills like fine motor dexterity fun with a winter theme!
Similarly, this snow globe deep breathing exercise can be modified to address fine motor skills. Ask users to point and trace the breathing lines to integrate finger isolation, separation of the sides of the hand, and eye-hand coordination. Then, they can “draw” the same shape on their palm using their finger to point as they breathe. It’s a bilateral coordination and fine motor task that addresses self-regulation, too.
Print off this mitten printable for fine motor skill work while developing other areas like eye-hand coordination, motor planning, precision, and more.
This winter clothing worksheet is focused on tracing numbers. But, this hands-on activity can address many fine motor skills, too. Ask kids to color the pictures. then, they can cut out each number strip to work on scissor skills. Then, ask them to write the winter clothing word. Finally, they can write the number to work on number formation skills. But what if you asked them to then roll the same number of play dough balls for each number? What a great way to work on hand strength. If you asked the child to place the correct number of mini erasers or coins on the table or in a slotted top, they can incorporate in-hand manipulation skills, too.
Another fine motor worksheet is our Also be sure to grab our new winter crossword puzzle. The printable can be used to support pencil control by circling words and individual letters. Or, use the end of a pencil as a stamp to stamp out the letters of the winter words for more fine motor fun.
This beaded snowflake craft from Early Learning Ideas encourages bilateral coordination, separation of the sides of the hand, precision, in-hand manipulation, and a tripod grasp…with pretty results!
Use paper hole reinforcers to improve precision and dexterity by forming letters and names like Fun-a-Day did.
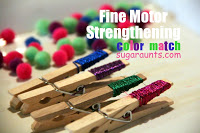
If you’re looking for another craft idea, then this clothespin snowman craft uses a clothespin clip to really work the muscles of the hand. Move that snowman around and clip him onto bags, coats, and books!
If you’re looking for a fine motor activity for kindergarten kids, then this sight word tic tac toe game is the ticket! Kids can make the game pieces, and move them around to play a game of tic tac toe while strengthening skills like tip to tip grasp, arch development, separation of the sides of the hand, and finger isolation.
For more craft ideas that boost fine motor skills, check out all of these winter bird crafts. You’ll find ideas for strengthening the hands and other fine motor skills while making cute bird crafts, bird feeders, and other activities.
If working on scissor skills is a priority, a paper snowflake is the way to go this winter. But what if you took the paper snowflake up a notch by cutting cupcake liners? This cupcake liner paper snowflake activity boosts hand strength with a pretty result!
Working on pencil grasp? You don’t need a pencil! Make this snowflake stamp art and promote the fine motor skills that are needed for a functional grasp: separation of the sides of the hand, arch development, and an open thumb web space for example. This creative winter painting idea has a sensory component, too.
Winter Fine Motor Worksheets
Worksheets can get a bad rap. But, for the occupational therapy professional that thinks outside of the box, it is possible to use a printable tool to address hands-on skills like in-hand manipulation, separation of the sides of the hand, and more than just handwriting or scissor skills.
Print off the pages that you need and you’ll never run out of fresh fine motor activities this winter!
To end out the Winter Week here on The OT Toolbox, I wanted to create a fine motor worksheets that are a true resource during the winter months. These fine motor worksheets that cover a variety of different fine motor abilities:
These reproducible activity pages include: pencil control strips, scissor skills strips, simple and complex cutting shapes, lacing cards, toothpick precision art, crumble hand strengthening crafts, memory cards, coloring activities, and so much more.
Play Dough Roll Mats- We’ve shared some free play dough mats before. They are perfect for developing fine motor skills and hand strength needed for tasks like coloring with endurance, manipulating small items, and holding a pencil. Kids can roll small balls of play dough with just their fingertips to strengthen the intrinsic muscles. The Winter Fine Motor Kit contains 6 winter play dough mats that can be used all winter long!
Pinch and Grip Strength Activities- Includes: glue skills page, tong/tweezer activities, lacing cards, finger puppets, 1-10 counting clip cards, 10 toothpick art pages, find & color page, 5 crumble art pages. TARGET SKILLS: Precision, pinch and grip hand strength, tripod grasp, arch development, bilateral coordination, open thumb web-space.
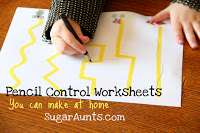
Pencil Control Worksheets- Connect the arctic animals or winter items and stay on the pencil path lines while mastering pencil control. Some of the lines are small and are a great way to strengthen the hands, too.
Arctic Animal Cutting Strips and Scissor Skills Sheets- Work on scissor skills to cut along lines to reach the arctic animal friends or snowflakes, snowmen, and mittens. This is a great way to strengthen the motor and visual skills needed for cutting with scissors. Also included are 7 scissor skills strips with graded precision designed for data collection and accuracy development, 2 color & cut memory cards, 4 pages simple cutting shapes in small/med/large sizes, 3 pages complex cutting shapes in small/med/large sizes, 2 small and 2 large cutting skills puzzles. These worksheets help kids develop graded scissor skill accuracy and precision, visual perceptual skills, eye-hand coordination, crossing midline, bilateral coordination.
Handwriting Sensory Bin Materials- You and the kiddos will love these A-Z uppercase and lowercase tracing cards with directional arrows, 1-10 tracing cards with directional arrows, 1-10 counting cards. Using the sensory bin materials can develop tactile handwriting, letter and number formation, finger isolation, crossing midline, sensory challenges.
“I Spy” Modified Paper- Includes: Color and find objects in two themes: winter items and arctic animals; 3 styles of modified paper for each theme: single rule bold lines, double rule bold lines, highlighted double rule. Use these pages to develop handwriting, pencil control, line and spatial awareness, legibility, visual perceptual skills, visual memory.
Fine Motor Handwriting Sheets- Try the 4 Find/Color/Copy pages in different styles of modified paper, rainbow writing pages in 3 styles of modified paper. These handwriting worksheets use the winter theme to help with handwriting, visual perception, pencil control, visual memory, visual attention, precision, pencil control, functional handwriting.
Write the Room Activities- Using a winter theme, these Write the Toom cards includes: 5 lowercase copy cards, 5 uppercase copy cards, 5 lowercase tracing cards, 5 uppercase copy cards, 6 cursive writing copy cards, 2 styles of writing pages. TARGET SKILLS: Letter formation, pencil control, visual motor skills, visual attention, visual memory, line placement, functional handwriting at all levels and stages.
Today, we have a fun fine motor activity set to build fine motor strength, dexterity, and coordination skills. It’s an Arctic Animal Fine Motor set that includes play dough or coloring mats and handwriting pages right on the same page, all with a Winter arctic animal theme.
This item is also found inside our Membership Club.
Looking for a consistent way to support fine motor skills all year? This yearlong fine motor system includes seasonal activity kits and monthly data collection tools to support planning and progress monitoring.
If fine motor planning and data collection feel overwhelming, you’re not alone. This done-for-you yearlong bundle organizes seasonal activities and monthly screening tools in one system.
Colleen Beck, OTR/L has been an occupational therapist since 2000, working in school-based, hand therapy, outpatient peds, EI, and SNF. Colleen created The OT Toolbox to inspire therapists, teachers, and parents with easy and fun tools to help children thrive. Read her story about going from an OT making $3/hour (after paying for kids’ childcare) to a full-time OT resource creator for millions of readers. Want to collaborate? Send an email to contact@theottoolbox.com.


.JPG)