Work on Tripod Grasp (and Pencil Grasp) with Everyday Items

Underlying skills needed for tripod grasp. Picture of a drawing of a hand holding a pencil and labelled areas needed for tripod grasp

If you are a pediatric occupational therapy practitioner then you know all about tripod grasp and the role it plays in fine motor skills. This precision grasp is part of precision, finger dexterity, and coordination of the hands. Did you know you can work on tripod grasp using everyday items found around the home? There are so many ways to improve pencil grasp and the fine motor skills needed for strong hands using materials like cardboard boxes, straws, and other household items. Here, you’ll find fun ways to improve tripod grasp with the items you already have in your home. Also be sure to check out our blog post on grasp patterns, as understanding various grasps can make the process easier.

Work on tripod grasp using everyday items found around the home.

It’s the everyday items that help a household to run that are seen by children and experimented with in playful ways.    

“How fast can I push this basket across the carpet?”   

“Can I stab this spoon into the dirt of that potted plant?”   

Kids experiment through play and while they are antagonizing the Spider Plant in the corner, they are learning so much. They are building and developing skills that they need for handwriting, buttoning, and cutting with scissors.  

Sometimes it’s the everyday household objects that are so much more fun than toys!  

Today’s tips use everyday items to work on a fine motor skill that kids need for handwriting: tripod grasp!   Recently, I shared with you a series of 31 Days of Occupational Therapy.  It was a fun series, and I loved sharing tips using free or mostly free items. Today, I’ve got an activity that almost made the series, but I just ran out of days. This tripod grasp activity is a fun one in our house.

What is Tripod Grasp?

Let’s start with a definition of tripod grasp because this is a term you hear a lot in child development, and in school based occupational therapy, especially.

Tripod grasp is a grasp using the tips of the thumb, pointer finger, and middle finger. These are digits #1, #2, and #3 of the hand. Tripod means a three legged item like the three legs of a camera tripod, or the three legs of a stool. When talking about the tripod grasp, we mean the first three fingers of the hand used to manipulate objects like a pencil. We use the dominant hand primarily in tasks that utilize a tripod grasp, but you can make and use a tripod grasp with your non-dominant hand, too. (Think about the American Sign Language sign for the word “more”, for example.)

In the traditional tripod grasp used in pencil grasp, the thumb opposes the pad of the index finger and the shaft of the pencil rests on the side or pad of the middle finger.

Tripod grasp is part of the umbrella of fine motor skills. These fine motor milestones are the basis for everything our hands can do.

Underlying skills needed for tripod grasp. Picture of a drawing of a hand holding a pencil and labelled areas needed for tripod grasp

There are several underlying skills needed for tripod grasp.

Fine Motor Skills Needed for an Efficient Tripod Grasp

In order to use a tripod grasp with efficient motor planning and with endurance, there are several underlying areas that need to be present. These are the areas that we address in occupational therapy activities through play!

Those underlying skills include:

  • In hand manipulation
  • Open thumb web space
  • Separation of the sides of the hand
  • Arch development
  • Thumb IP joint flexion
  • Opposition

In-hand manipulation– In hand manipulation refers to the ability to manipulate objects within the hand. A tripod grasp supports this manipulation of objects. Manipulation of objects within the hand includes three aspects of mobility: translation, shift, and rotation of objects.

Open thumb web space– This fine motor skill occurs in many functional tasks and in order to have a tripod grasp, there needs to be separation of the two sides of the hand, which supports an open thumb space. The thumb web space is that space between your thumb and pointer finger that makes an “O” when you make the “OK” sign. In order to grasp small items with your thumb and index finger, you need to oppose the tip of your thumb to the tip of your pointer finger.  Not only do the tips of the fingers need to touch, but the thumb must rotate at the joint closest to your hand.  This opposition is needed to manipulate and grasp small items like shoe laces, buttons, and zippers, which requires a form of a tripod grasp.

Separation of the sides of the hand– We mentioned separation of the sides of the hand above, and when tripod grasp occurs, there is a natural separation of the sides of the hand into the precision side and the power side. Separation of the sides of the hand refers to the imaginary line drawn from your wrist directly down the middle of your hand and between your ring finger and middle finger, separating the precision side of the hand (thumb, pointer finger, and middle finger) with the power side of your hand (pinkie finger and ring finger).  These two sides work together in skilled activities with precision and power grasp in functional activities.

Arch development– When tripod grasp is used, there is natural positioning of the fingers with slight flexion at the MCP joints and slight flexion of the PIP joint of the pointer finger and middle finger. This mostly extended position of the fingers puts the arch of the hand into a cupped position. Refinement of fine motor skills in the hand (the radial side) happens when the power half (the ulnar side) is stabilized. Separation of the two sides of the hand allow for more precise use of the thumb.

Thumb IP joint flexion– In a tripod grasp, there is thumb IP joint flexion which allows the thumb to oppose the pointer finger and the middle finger. When the IP joint flexion is absent, we see reduced precision and dexterity. The thumb interphalangeal joint is responsible for flexing or bending the end of the thumb. the joint allows us to pick up very small items in pincer grasp and enables a functional tripod grasp while holding a pencil.

Opposition– The thumb opposes the tip of the pointer finger and the middle finger in a tripod grasp. Opposition of the thumb means the tip of the thumb touches the tip of a finger, or the fleshy pad of the thumb touches the pad of a finger. When opposing the thumb to the fingers, small objects are able to be held and manipulated. When opposing, the thumb’s thenar muscles work to advancing and positioning objects.

Work on tripod grasp using everyday household items. Tips from an Occupational Therapist.

There are many ways to work on tripod grasp through play!

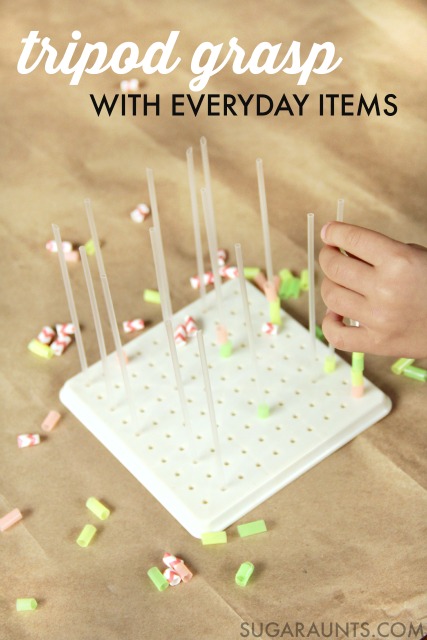
Tripod Grasp with Straws

  This post contains affiliate links.   This tripod grasp activity was one that we put together one day while cleaning out a cupboard.  I shared it over on Instagram recently.  

This Peg Board with 1000 Pegs is one that I’ve had in my OT treatment bag for 20+ years.  It’s one of my favorite treatment tools for working on so many areas.  Push small pegs into the holes to work on in-hand manipulation, tripod grasp, and pincer grip. Copy designs with pegs and work on hand-eye coordination, visual scanning, visual perceptual skills, form constancy, and more. Turn it over and use the back as a mini geoboard with string small loops. Tilt it on a slant and work on an extended surface.  This little pegboard has been used by tons of kids working on so many skills.  It really is one of my all-time favorite OT activities.   

I love that I now get to share this pegboard with my own kids.     

Work on tripod grasp using everyday household items. Tips from an Occupational Therapist.

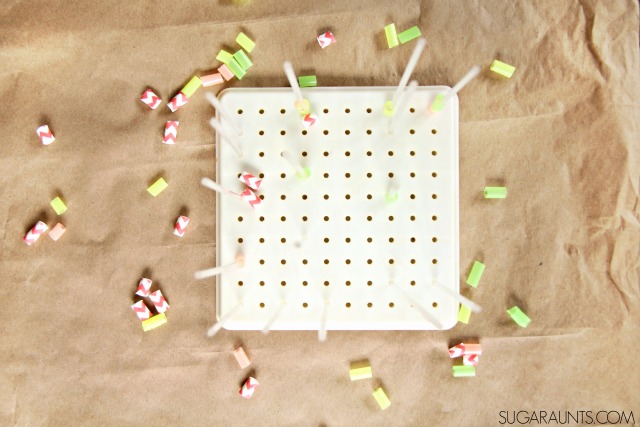
 We pulled out a handful of straws from a box of juice drinks.  These straws were left over from a party where we didn’t use the straws.  You could save small straws like this from juice drinks and wash them out.     I showed my daughter how to push the straws into the peg holes and she took over, arranging the straws over and over again.  We then used cut up pieces of straws and threaded them onto the straw pegs.   


Work on tripod grasp with straws

Using a material like straws to develop fine motor strength and dexterity is just one way to work on tripod grasp with everyday items.

Cut a straw into small pieces and thread them onto the juice straws.  Picking up the small straw “beads” and threading them onto the juice straws is a great way to work on tripod grasp.  

Using the thumb, index finger, and middle finger to pick up small items uses a tripod grasp.  This efficient grasp is needed to hold a pencil effectively while handwriting.  The small straw pieces require an open thumb web space and defined arches of the hands.  What a fine motor workout this is!  

Tripod grasp activities. Picture is a drawing of a hand holding a pencil.


Tripod Grasp Activities

 Ok, so say you don’t have juice box straws to use in a pegboard.  You can use a variety of other household items in a similar way to work on a tripod grasp.

  • Push toothpicks into a spice container.
  • Thread beads onto dry spaghetti poked into play dough.  (Work on color matching with this one, too!)
  • Thread cereal onto string.
  • Thread beads onto string
  • Push acorns into play dough.
  • Drop dry beans into small containers.
  • Press sticks into play dough.
  • Position washers onto screws.
  • Paint with small squares of cut up kitchen sponges.
  • Press push pins into a bulletin board or recycled containers.
  • Push golf tees into a shoe box.
  • Press game pieces into play dough.
  • Use tweezers to place small balls of tissue paper into a container.
  • Push small pieces of pipe cleaners into a cardboard box.
  • Color with small pieces of broken crayons
  • Roll small balls of play dough with the tips of the fingers
  • Lacing string onto lacing cards
  • Fastening buttons
  • Holding and managing a zipper on a jacket
  • Pushing push pins into a bulletin board

Work on tripod grasp using everyday household items. Tips from an Occupational Therapist.


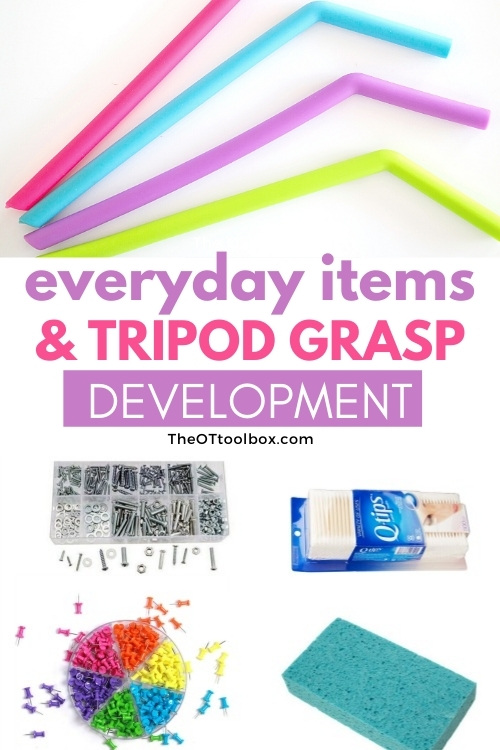
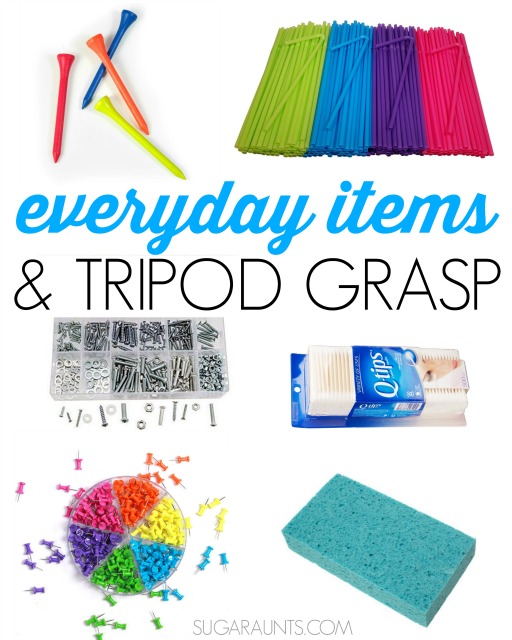
These are some of my favorite every day items to work on tripod grasp.  You might find them in a junk drawer or in a closet somewhere.  Use them to work on a tripod grasp and efficient handwriting:  

These Colorful golf tees are bright and colorful, and perfect for pressing into stryofoam or thing cardboard. 


Straws can be cut into small pieces and used as beads. Thread them onto pipe cleaners, string, or other straws. 


Screws, nuts, and bolts are a great way to work on tripod grasp and other fine motor skills like in-hand manipulation and rotation. 


Cotton swabs make a great writing utensil. Work on tripod grasp while painting with them.


Use Push Pins to work on tripod grasp like we did here. Watch the pointy end with younger kids! 


Use a Kitchen sponge to work on a tripod grasp by cutting the sponge into small squares. Squeeze water to fill a container, or use them to paint.

More tripod grasp activities you will love:


free pencil grasp challenge

JOIN THE PENCIL GRASP CHALLENGE!

Want to know how to fix a problem with pencil grasps? Need help knowing where to start when it comes to immature pencil grasps or a child hating to write because their hand hurts? The Pencil Grasp Challenge in open for you! In this free, 5 day email series, you’ll gain information, resources, specific activities designed to promote a functional, efficient pencil grasp.

The pencil grasp challenge is a free, 5 day mini course and challenge. During the course of five days, I’ll be teaching everything you need to know about the skills that make up a functional pencil grasp. You’ll learn what’s going on behind the inefficient and just plain terrible pencil grasps you see everyday in the classroom, clinic, or home. Along with loads of information, you’ll gain quick, daily activities that you can do today with a kiddo you know and love. These are easy activities that use items you probably already have in your home right now.

Besides learning and gaining a handful (pun intended) of fun ideas to make quick wins in pencil grasp work, you’ll gain:

  • 5 days of information related to pencil grasp, so you know how to help kids fix an immature pencil grasp.
  • Specific activities designed to build a functional pencil grasp.
  • Free printable handouts that you can use to share with your team or with a parent/fellow teachers.
  • You’ll get access to printable challenge sheets, and a few other fun surprises.
  • And, possibly the best of all, you’ll get access to a secret challengers Facebook group, where you can share wins, chat about all things pencil grasp, and join a community of other therapists, parents and teachers working on pencil grasp issues.

Click here to join the Pencil Grasp Challenge.

Colleen Beck, OTR/L has been an occupational therapist since 2000, working in school-based, hand therapy, outpatient peds, EI, and SNF. Colleen created The OT Toolbox to inspire therapists, teachers, and parents with easy and fun tools to help children thrive. Read her story about going from an OT making $3/hour (after paying for kids’ childcare) to a full-time OT resource creator for millions of readers. Want to collaborate? Send an email to contact@theottoolbox.com.

Ice Cube Jump and Smash

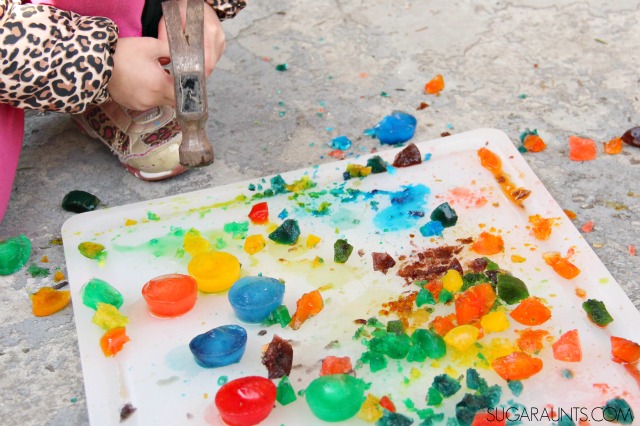
Image has colorful ice on a cutting board. A child's hands are holding a hammer and smashing ice. Text reads "sensory ice smash"

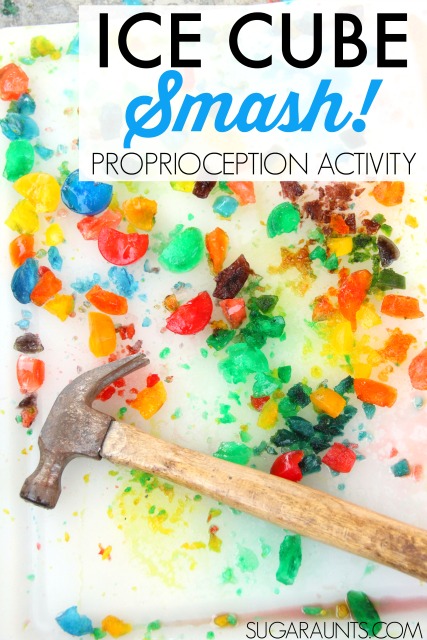
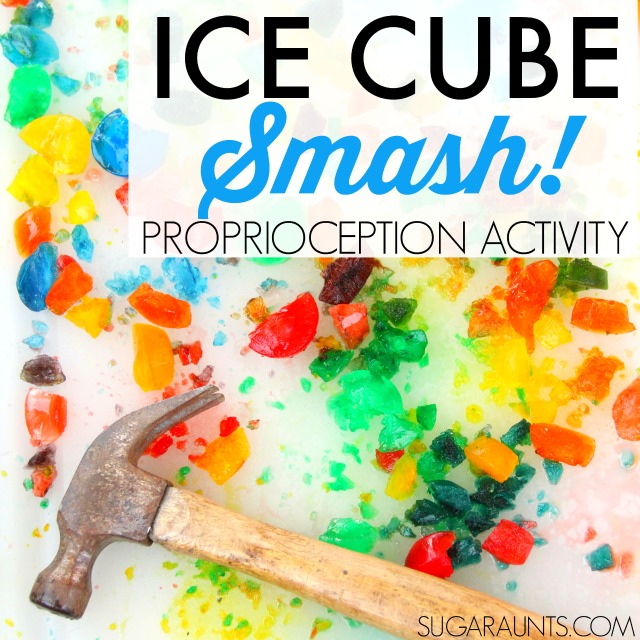
This ice cube jump and smash is a great ice play activity with major sensory benefits. The heavy work built through smashing ice cubes or jumping on ice cubes is huge! Plus, kids love the novelty of this sensory motor activity. Let’s break this activity down…

This was originally an activity we did during the cold winter months, BUT we also love adding a fun sensory ice smashing activity to our Summer occupational therapy idea list. Why? because during the hot summer months, smashing ice with a hammer is a fun activity to get kids moving.

Plus, this is a heavy work activity that supports emotional and behavioral regulation. You could even use colored ice that matches the colors of the Zones of Regulation.

Image has colorful ice on a cutting board. A child's hands are holding a hammer and smashing ice. Text reads "sensory ice smash"

Smashing ice with a hammer is a fun sensory activity for kids.

Ice Cube Jump and Smash

We’ve been sharing some fun sensory play activities recently, part of our January Occupational Therapy calendar.  The proprioception and vestibular activities linked up in the free calendar are sure to provide sensory experiences and input that will keep your child moving all winter long.  Hey, you can do most of these activities in warmer weather too, so be sure to save this one for hot summer days!  


This Ice Cube Proprioception Jump and Smash activity will provide proprioceptive input through movement and heavy work that can help with regulation of sensory seekers.  It’s also a great way to incorporate body awareness through proprioception. This happens when holding and moving that hammer to hit a target (the colorful ice cube!)

Try making these bright and vividly colored ice cubes and playing with sensory input today!

When you add hopping or jumping to smash the ice, like my kids did, you get the bonus benefit of the movement of jumping and hopping adds a vestibular activity component to this fun activity.

Another benefit is the eye hand coordination work from holding hitting with the hammer.

Ice Cube Proprioception and Vestibular Activity for kids that need sensory input. This is fun for typically developing children (and the adults) too!


Proprioception Activity with Ice Cubes

Full disclosure: This post contains affiliate links.  
 
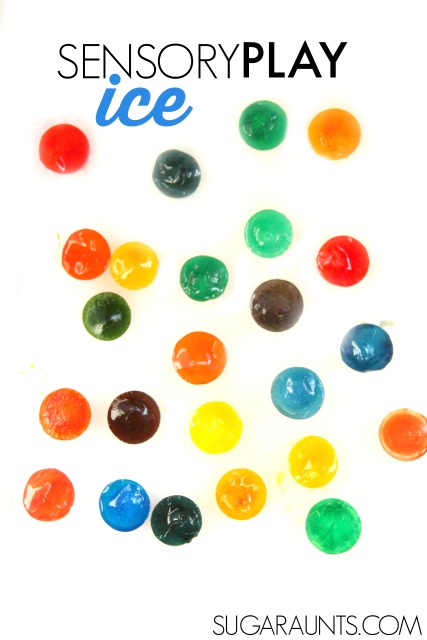
I used a couple of mini muffin tin to make colored ice cubes.  
Fill the tins with water and then add one or two drops of liquid food coloring to each section.  Kids love this activity and it is a real experiment of color mixing.
 
Use a toothpick to mix the colors and try to achieve various shades of color by mixing more or less food coloring.
 
Once the ice cubes are frozen, turn the muffin tin
over in the sink and run warm water.  The ice cubes will pop out after a moment.  
 
Place the colored ice cubes in a bowl or on a large cutting board and take them outside.  This is a messy activity and it will stain your floors, so take big precautions if you decide to do this one inside!
 
We kept the ice cubes on the cutting board and used a hammer to smash the colored ice cubes.
 
This activity was a huge hit with my preschooler.  She loved lining up the hammer and smashing the ice cubes into chunks.  
 
Using the hammer is heavy work for a child and she needed to use two hands to hold and use the hammer, but she was able to smash the ice easily.  
 
While smashing ice cubes, my daughter remembered a similar proprioception and strengthening activity we did last year using peanut shells.  It’s another messy, yet fun activity that is worth trying!
 
Be sure to clean up any ice pieces before they melt because the liquid food coloring will dye any surface.  You may want to do this activity in the grass. NOTE: For a mess-free option, use liquid watercolors to dye the water. The colors will wash away with soap and water.
 
Related Read: Find out more about proprioception here.
 
Ice Cube Proprioception and Vestibular Activity for kids that need sensory input. This is fun for typically developing children (and the adults) too!
 

Ice Cube Jumping

Get the kids moving with this outdoor vestibular activity.  Take the ice cubes outside and place them in the grass. Be sure to keep them away from sidewalks and driveways because the food dye will stain the surface until the rain and weather has cleared the dye away! 
 
Kids can jump on or over the ice cubes.  Ask them to jump up high with both knees bent.  For other vestibular challenges, have the child side jump or skip over and around the ice cubes.  
 
Ice Cube Proprioception and Vestibular Activity for kids that need sensory input. This is fun for typically developing children (and the adults) too!
 
Be sure to stop over and see the January Calendar for more sensory activities to do with the kids this winter! You can get it and all of our free resources by joining our newsletter subscriber list, found in the upper corner of this website.


Jellyfish Art and Craft Ideas

Image has four jellyfish craft ideas including a paper plate jellyfish, paper bag jellyfish, and others. Text reads: Jellyfish Crafts"

Looking for a few jellyfish art and craft ideas to create with a beach theme? Today, we’ve got a collection of creative jellyfish crafts, jellyfish handprints, and fun themed activities to build skills. Whether you are heading to the beach or planning a beach themed summer camp, these craft ideas are for you!

Add these ideas to your summer occupational therapy sessions.

Image has four jellyfish craft ideas including a paper plate jellyfish, paper bag jellyfish, and others. Text reads: Jellyfish Crafts"

Jellyfish crafts can include paper plate jellyfish, paper mache jellyfish, and recycled container jellyfish craft ideas.

jellyfish arts and crafts for kids.  make these before going to the beach!

Use jellyfish crafts in occupational therapy sessions to work on scissor skills and fine motor skills.

Jellyfish arts and crafts

Jellyfish crafts are maybe one of the cutest crafts to make during the summer. While the real creatures that you dodge while swimming in the ocean are not so nice, they sure are beautiful to watch in an aquarium.  

The jellyfish ideas below are just some ways to build skills through crafting. Consider kids crafts such as:

  • Jellyfish handprint
  • Jellyfish puppet
  • Cupcake liner jellyfish
  • Paper bowl jellyfish
  • Tissue paper tentacles
  • Pipe cleaner tentacles
  • Egg carton jellyfish
  • Cardboard tube jellyfish
  • Toilet paper roll sea life
  • Coffee filter jellyfish

As you can see there are many ways to make colorful jellyfish crafts using everyday materials! When building these fun crafts, you target several areas of development:

We put together a collection of jellyfish crafts with colorful tentacles and gorgeous summer colors. Now the question is, which of these to make first?

JELLYFISH CRAFTS TO MAKE WITH THE KIDS:

  1. J is for Jellyfish from Crystal and Co. supports fine motor skills by using a template to create jellyfish tentacles and other parts
  2. Paper bag Jellyfish craft from No Time for Flashcards works on bilateral coordination skills, scissors skills, and more.
  3. Paper Plate Jellyfish craft from Happy Hooligans is a great hand strengthening activity using a paper plate or paper bowl
  4. Easter Egg Jellyfish from Teach Beside Me Supports eye hand coordination skills

jellyfish art project Ideas

You can get messy with a few jellyfish art project ideas. This might involve things like using paper mache or using recycled materials in the art projects.

All of these ideas are full of ocean fun and a creative way to develop skills in kids!

Jellyfish Crafts in Occupational Therapy

I love using craft ideas like this because you can target specific skills with the kids you are working with, all while using one project idea. For example, I love to prep all of the materials and then use that craft with my whole caseload.

One student receiving OT services might have a scissor skills goal and another might have executive functioning needs. I have used crafts like this to work on specific skills based on the child’s needs. I might use straight cutting lines to help the student with a scissor skills goal to cut straight along the model line while holding the paper bag or paper plate with their assisting hand.

I might then grade that task lower or higher by using different materials. One student I worked with did very well cutting curved lines on the more resistive surface of a paper plate but struggled to cut curved lines on regular construction paper. That difference in resistance and feedback through the paper made all of the difference in slowing down the scissors to cut accurately.

I then asked them to cut larger curves on the construction paper to make the tendrils of the jellyfish. It worked out great as a graded activity and challenged the student in a “just right” level!

This is just one example of using our jellyfish crafts to work on skills in OT! How will you use these crafts to support your students?

Colleen Beck, OTR/L has been an occupational therapist since 2000, working in school-based, hand therapy, outpatient peds, EI, and SNF. Colleen created The OT Toolbox to inspire therapists, teachers, and parents with easy and fun tools to help children thrive. Read her story about going from an OT making $3/hour (after paying for kids’ childcare) to a full-time OT resource creator for millions of readers. Want to collaborate? Send an email to contact@theottoolbox.com.
Brain Break Games

Brain break Freeze Dance game

Brain break games are another brain break activity that is great for all ages. You can use movement games that are age-appropriate to meet the needs of preschoolers, middle schoolers, elementary school, students, high school students, and even beyond.

And this blog post will discuss games that act as brain breaks and can be used to incorporate Heavy work input, proprioceptive, sensory systems, vestibular, sensory input, visual input and more.

Also check out some of our quick brain breaks as they are easy to use in various game activities, too!

brain break games

Brain break games

One of the benefits of brain break games is that self-regulation is addressed, but also beyond emotional and social regulation is the ability to improve attention and focus.

So for these reasons, brain break games are a great activity for recess or for times when a classroom brain break needs to focus and pay attention.

Some brain break games are classic games that you and I know from our childhood. These are recess, games or party games that get kids moving, but also engage all of the sensory systems including proprioception and vestibular input.

As a therapist, I love to use brain break games as a warm-up for therapy sessions or a way to calm the child down before attend sending them back to the classroom. Not only that, but using a game version of a coping tool is so helpful for children. So let’s get on with our brain break break games for at each age

Brain break games for toddlers 

The toddler years are all about exploring, following directions gaining self-confidence and learning through experience.

These brain break games for toddlers, allow kids to improve gross motor skills and fine motor skills, but also explore and learn about the world around them. 

Try these brain break games for toddlers

  • Follow the Leader,
  • Catching a ball
  • Peek-a-boo
  • Sensory bins
  • Follow the leader (activities)
  • Dance parties
  • play blowing bubbles playing with Play-Doh coloring
  • Throwing a ball into a target
  • Reading a book
  • Snuggling
  • Tickling
  • Sensory play

Brain break games for preschoolers

During the preschool years, we love to see play as the main source of learning and skill development. Activities for preschool that engage, stronger hands and muscles also incorporating self-regulation is important for this age. Many of the fine motor activities for preschoolers that we’ve shared on the site are great movement activities for this age.

There is much social and emotional development happening during the preschool years, too so having self-regulation tools on hand is great because young children are not typically able to use these strategies just yet. Making it fun is key.

Some brain break games for Preschool include:

  • Animal walks
  • Duck duck, goose
  • Hot potato
  • Charades
  • Freeze dance
  • Red light, Green Light
  • Follow the Leader
  • The hokey pokey
  • Simon Says – Here are some great Simon Says commands in a variety of themes
  • Dance parties
  • Obstacle courses
  • Parachute
  • Sensory bins and sensory play

One last benefit for brain breaks for preschoolers is that when they play the games they are improving friendship skills, which is a great skill development in the preschool years.

Bring break games for elementary kids

We know the benefits of brain breaks in the classroom and adding some fun movement can help kids become engaged in because of the physical activity.

Some of these brain break games are great for recess or free time but also therapy sessions.

Brain break games for elementary start school students include: 

Brain break games for middle school

We know the benefits of brain breaks in the middle school. At this age kids are needing movement and activity, but also there is self regulation attention in organizational skill, emotional needs, mental health and wellbeing needs, as well as coping skills that need to be taught. 

Games for middle school include: 

  • Volleyball
  • Paper football
  • Dance break
  • Gaga ball
  • Flag football
  • Kickball
  • Floor hockey
  • Foursquare
  • Tag
  • Relay races
Charades brain break activities

Charades is an occupational therapy activity that can be used as a brain break.

Brain break charades games 

Kids of all ages love to play charades and nice thing about charades is that you can encourage variety of movements and activities. Not only that, but charades offers gross motor coordination, creativity, imagination and problem-solving. This is a great group activity for students. 

Charade games that encourage movement include: 

  • Pretend to be a tree
  • Pretend to climb a tree
  • Pretending to be a flower,
  • Yoga poses
  • Do a specific dance
  • Pretend to run
  • Pretend to go fishing
  • Pretend to make a snowman
  • Pretend swimming
  • Actions like hopping, leaping, or jumping jacks
  • Shooting a basketball
  • Throwing a football
  • Catching a ball
  • Or, act out themes or actions of specific lessons from the classroom
Picture of different animals like a monkey, turtle, horse, bear, snake. Text reads :Animal walk games for occupational therapy"

Animal walk games are used in occupational therapy.

Animal walk games for kids

It’s easy to incorporate activities like a balance beam, relay race, or obstacle courses into a motivating gamified activity. 

Simply create a challenge for kids, add a timer, and ask the students to beat a certain time. Or, you can race against the child on a scooter or by using specific gross motor coordination tasks that challenge motor skills. 

Try to use these animal walks in brain break games:

  • Crab walk
  • Bear walk
  • Elephant walk
  • Frog jump
  • Horse gallop
  • Duck walk
  • Snake slither
  • Gorilla walk
  • Penguin waddle
  • Butterfly fly
  • Bunny hop
  • Inchworm crawl
image with dancing people in different colors. Text reads: OT interventions Freeze Dance Game"

Freeze dance is a great occupational therapy game to target different skills.

Freeze Dance

One game that is fun for all ages (I love using this with preschool, elementary aged kids, middle school, high school, and even adults) is the good, old-fashioned freeze dance.

It’s a fun game for brain breaks because the individual gets to express a song through movements. You can use any song selection to play the freeze dance game. Basically, it works like this:

  1. Turn on the music. Everyone starts dancing.
  2. Turn off the music at random intervals. You can use a timer to turn off the music if you like.
  3. When the music turns off, everyone stops dancing and “freezes” in place.

Benefits of the Freeze Dance game

There are quite a few skills addressed by the Freeze Dance Game:

The game is great for working on skills like motor planning, impulse control and other executive functioning skills, gross motor coordination, receptive listening skills, auditory processing, and other skills.

Impulse ControlYou can use freeze dance games to work on executive functioning skills liked freeze dance. Freeze dance games help to work on impulsivity by challenging auditory processing skills. When the music stops, the student needs to stop immediately and freeze in the movement that they were doing. Sometimes, we’ll see students continue to move in order to get to a funnier position. This is a test of impulse control, and we can challenge our students to stop when the music ends no matter what positioning. To do this, try marking tallies on the board or on a piece of paper when the student stops completely when they hear the music stop. This is a great way to use the freeze dance game in supporting development of other areas like working memory, focus, and sustained attention. Here are more easy impulse control activities.

Auditory processing I love to use the freeze dance game at different volumes to challenge listening skills and receptive language. It helps the student to listen to a selected sound in the background, like an alarm (great for working on executive functioning skills like time management) as well as task management. We can also use background music and then ring a bell or other sound (there are so many apps that have sounds that we can use!) and when the student hears that specific sound, they can freeze their dancing. This is a great way to work on skills like listening and hearing a bell to change classes in middle school occupational therapy as part of transition services from elementary to middle school.

Motor Skills- using a game like freeze dance can really work on gross motor coordination and other motor skills, too. You can support crossing midline, bilateral coordination, copying skills, balance, core strength, and much more. Use the freeze game in occupational therapy sessions much like you would use Simon Says to target specific therapy goals.

Songs for Freeze Dance Game:

You can use any song you like! What’s nice is that you can go with a theme, or use party songs, dance songs, popular songs, age-appropriate songs…the sky is the limit here!

What are your favorite brain break games?

Colleen Beck, OTR/L has been an occupational therapist since 2000, working in school-based, hand therapy, outpatient peds, EI, and SNF. Colleen created The OT Toolbox to inspire therapists, teachers, and parents with easy and fun tools to help children thrive. Read her story about going from an OT making $3/hour (after paying for kids’ childcare) to a full-time OT resource creator for millions of readers. Want to collaborate? Send an email to contact@theottoolbox.com.
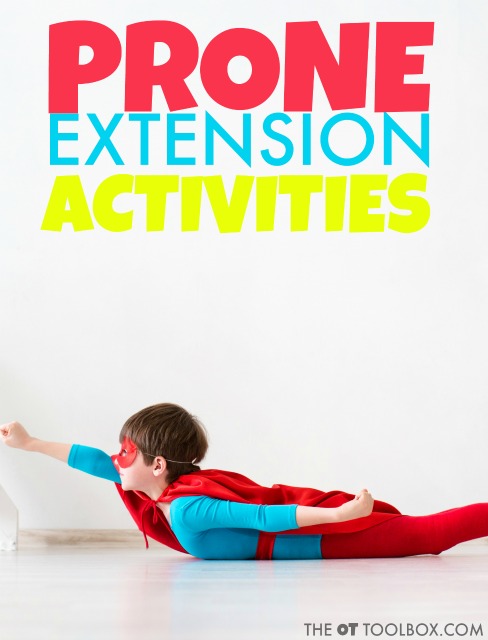
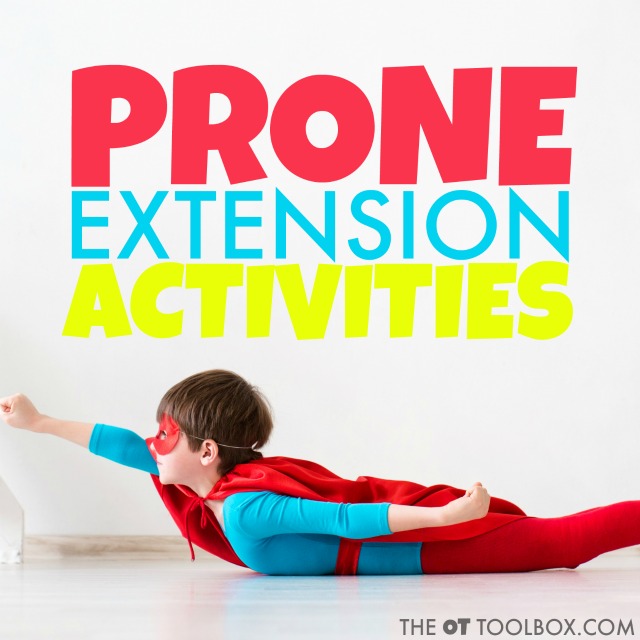
Prone Extension Activities

Prone extension… this is a topic that comes up often when talking about occupational therapy activities! So often, we see kiddos who struggle with sensory modulation, core strength and core stability, body awareness, endurance, sensory processing needs. Prone extension activities can help strengthen and address other areas like those mentioned, and more.

Below, you’ll find various prone extension activities that can be incorporated into occupational therapy treatment sessions and included in home programs.

Child in a prone extension position in a therapy tube

We also love to use these movement ideas in targeting gross motor coordination skills in occupational therapy obstacle courses.

Prone Extension Activities for Kids

Use the following prone extension activity ideas in games, play, and activities to improve skills like body awareness while providing proprioceptive and vestibular input. Many times, prone extension activities can be incorporated into learning activities too, or used to compliment other therapy goals such as visual memory or other visual perceptual needs.

What is prone extension?

Prone extension is the position that you probably know as “superman pose”. When a child lies on their stomach and raises their arms and legs off the floor, they are assuming prone extension. This means that the body is in a prone position on the floor and the arms and legs are in extension.

The superman pose is positioning in an anti-gravity movement that promotes and requires an both the sensory systems and motor skills to work in an integrated manner. A prone extension position can occur in other locations beyond the floor. For example, a therapy ball, mat, swing, etc. can all be valuable tools in promoting and eliciting this movement pattern.

When assuming a sustained prone extension position, there is fluent and effective use of both the inner AND outer core musculature.

Observation of this position as well as other motor patterns are typically looked at during an occupational therapy evaluation in order to assess strength, sensory and motor systems, body awareness, motor planning, bilateral coordination, as well as other areas.

Prone extension activities are a great way to encourage vestibular input as well as other areas mentioned above. Additionally, a prone extension activity can be an easy way to add proprioceptive input to a child seeking heavy work pressure.

To encourage longer periods of prone extension positioning, try adding additional activities such as games, puzzles, or reaching activities while in the prone position to encourage the hands and arms to reach forward for longer periods of time.

Examples of Prone Extension

Amazon affiliate links are included below.

Adding prone positioning into play can be easy. Try some of the ideas listed below:

1. Use a scooter board. Ask the child to hold onto a rope with “strong arms” as they are pulled down a hallway. To further extend this activity, ask the child to pull themselves along a length of space while lying in prone on the scooter board. Add additional resistance by using the scooter board on a carpeted surface.

2. While lying on a therapy ball or bolster, as the child to place bean bags or other objects into a bucket that is placed on a raised surface such as a scooter board. Move the scooter and bucket to various positions to encourage additional reach and extension. Once a bean bag makes it into a bucket, go in for a high five! What an encouraging way to promote that prone extension!

3. While lying on a mat or other surface, ask the child to toss rings onto a target area. This could be a hula hoop positioned on the floor or another type of target.

4. Using a chair or ottoman (couch cushions on the floor work well, too), show the child how to lay on their belly on the cushions. This provides an uneven surface. Some children will want to keep their toes on the floor to steady themselves. Others may want to lift their legs and feet for additional vestibular input. Ask the child to reach out and pop bubbles.

5. For the child that appreciates vestibular input, ask them to lay their belly on an office stool type of chair. Using their hands, they can push away from a wall to make the chair move backwards. Other children may like this activity on a scooter board.

6. Ask kids to lie on their stomachs as they use straws to blow cotton balls or craft pom poms into a target. This is an exercise in oral motor skills and deep breathing, too. Deep breaths in can promote the stability needed to sustain a prone extended position. However, breathing out in a lengthy, slow breath to move those cotton balls provides a chance to really engage those inner and outer core muscles.

7. Kids can hit targets (both high and low) using a pool noodle while in a prone position. Reaching forward with those hands to hit targeted areas promotes eye-hand coordination, while really engaging that core!

8. Add a home program with fun exercises that promote posturing, movement challenges, and activities.

 The options are endless when it comes to adding vestibular and proprioceptive input through prone extension positioning and activities. Think outside of the box to come up with fun and unique ideas that provide heavy work input while addressing all of the other areas kids so often need!

What are your favorite prone extension activities for kids?


Prone extension activities are great for adding vestibular input and proprioceptive sensory input through heavy work. There are so many other benefits of activities using prone extension in occupational therapy and in promoting development in kids!


Try these prone extension activities to help kids develop bilateral coordination, strength, motor planning, and other skills while getting sensory input in the form of vestibular and proprioception.
 

Colleen Beck, OTR/L has been an occupational therapist since 2000, working in school-based, hand therapy, outpatient peds, EI, and SNF. Colleen created The OT Toolbox to inspire therapists, teachers, and parents with easy and fun tools to help children thrive. Read her story about going from an OT making $3/hour (after paying for kids’ childcare) to a full-time OT resource creator for millions of readers. Want to collaborate? Send an email to contact@theottoolbox.com.

Actividades de integración bilateral

Actividades de Integración Bilateral-Recurso de Terapia Ocupacional en Español

La integración bilateral es un área que los niños necesitan para muchas tareas… pero no es un hito del desarrollo que destaque a menos que se note necesariamente un problema. Desde escribir y sujetar el papel, hasta sostener un proyecto artístico y cortar con tijeras, pasando por cerrar la cremallera de una chaqueta, coordinar ambos lados del cuerpo de forma eficiente es una habilidad necesaria para casi todo lo que hacemos.

La coordinación bilateral se desarrolla desde una edad muy temprana.

Actividades de coordinación bilateral- Recurso de Terapia Ocupacional en Español

Actividades de coordinación bilateral

Cuando los bebés empiezan a juntar las dos manos en la boca, se está viendo que empiezan los esfuerzos coordinados. Cuando el bebé empuja hacia arriba con ambos brazos mientras está tumbado en posición boca abajo, se producen los movimientos integrados de las manos y las piernas junto con la fuerza y el control.

Aquí encontrará actividades de integración bilateral que pueden incorporarse a distintas edades. Utilice estas actividades de coordinación bilateral para promover movimientos coordinados y eficientes en actividades significativas.


Estas actividades de coordinación bilateral son formas creativas de ayudar a los niños con la integración bilateral necesaria para las tareas de motricidad fina como la escritura a mano, el uso de tijeras y otras habilidades funcionales.


Actividades de integración bilateral 

En este post se incluyen enlaces de afiliación a Amazon.

En primer lugar, hablemos de algunas formas en las que el uso coordinado de los brazos y las piernas es necesario para los movimientos coordinados. Se trata de habilidades y tareas que pueden ser realizadas fácilmente por algunos niños.

Otros, que tienen dificultades con la planificación motora, la fuerza del núcleo, las necesidades posturales, la discriminación izquierda-derecha, las habilidades motoras visuales o muchas otras áreas pueden tener dificultades. Es fácil ver que el simple hecho de abordar algunas áreas no solucionará el problema cuando existe una preocupación subyacente.

Tareas que requieren una integración bilateral

¿Conoces a un niño (o adulto) que tenga dificultades con una o varias de las tareas que se indican a continuación? La integración bilateral puede ser un reto.

  • Escribir y mantener el papel en una posición estable
  • Cortar y mantener el papel firme y a una altura adecuada
  • Ponerse un abrigo mientras se sostiene una mochila (u otro artículo)
  • Atarse los zapatos
  • Subirse los pantalones y no perder el equilibrio
  • Ponerse los calcetines
  • Saltos con movimientos coordinados
  • Pasar una página y escribir o copiar el trabajo
  • Escribir en
  • Tocar un instrumento
  • Alcanzar objetos
  • Estabilizar un objeto con una mano mientras se manipula otro objeto con la otra
  • Saltar la cuerda
  • Atrapar una pelota
  • Montar en bicicleta
  • Natación

Para fomentar las habilidades necesarias para estas tareas, pruebe algunas de las actividades que se enumeran a continuación para promover la integración bilateral:

Lectura relacionada: Aquí tienes otras actividades de coordinación bilateral con temática invernal.

Actividades de integración bilateral para bebés

Proporcionar varios juguetes y objetos apropiados para los bebés pequeños. Incluya objetos de colores llamativos, como artículos negros, blancos y rojos, o colores contrastados, juguetes o imágenes en una manta o alfombra de juego durante el tiempo boca abajo. Este libro de cartón en blanco y negro se puede apoyar o utilizar en el regazo de un adulto.

Proporcionar un suave masaje al bebé durante y después del baño, y en todas las extremidades. Aquí tienes un libro de recursos sobre el masaje infantil.

Proporcionar juguetes y objetos adecuados a la edad para alcanzar y agarrar. Este mordedor con forma de plátano tiene unas asas moldeadas que lo convierten en un artículo ideal para la dentición de los más pequeños.

Proporcione juguetes para la dentición cuando el bebé se lleve las manos a la boca.

Proporcione juguetes apropiados para que se los lleven a la boca y que puedan sostenerse con ambas manos.

Proporcione juguetes de mano mientras el niño está sentado en una trona. Este tiene una base de ventosa para mantenerlo estable, pero tiene un anillo blanco y negro en la base que los bebés pueden agarrar con una mano mientras manipulan con la otra.

Proporcionar juguetes de diferentes pesos cuando se está sentado en posición vertical para proporcionar resistencia contra la gravedad y promover el fortalecimiento de las extremidades superiores. Los bloques, los anillos, los juguetes de clasificación o algo como este juguete de calidad para la dentición, hecho de materiales más pesados, pueden ser útiles para proporcionar variaciones de peso, al tiempo que permiten al bebé manipular el artículo.

Disponga de juguetes en la superficie de la trona o de la mesa a distintas distancias para que tenga la oportunidad de percibir la profundidad al alcanzar los juguetes y llevárselos a la boca.

Continuar con el tiempo boca abajo mientras se juega en prono para promover la fuerza y la estabilidad de las extremidades superiores

Actividades de integración bilateral para niños pequeños

Proporcionar juguetes que requieran que una mano estabilice una base mientras la otra manipula un objeto. Los clasificadores de formas son estupendos para esto.

Otros juguetes son:

Tablas de clavijas

Bloques- Estos bloques sensoriales de presionar y permanecer son perfectos para animar a usar una mano como estabilizador y una mano como

Plastilina

Dibujar/colorear- Aquí hay más información sobre los beneficios de colorear.

Actividades de integración bilateral para preescolares

Anime a los niños a participar en las actividades de cocina.

Utiliza la plastilina para recortar con tijeras y extender serpientes de plastilina o bolas de plastilina.

Las manualidades y los juegos de manualidades apropiados para esta edad son estupendos.

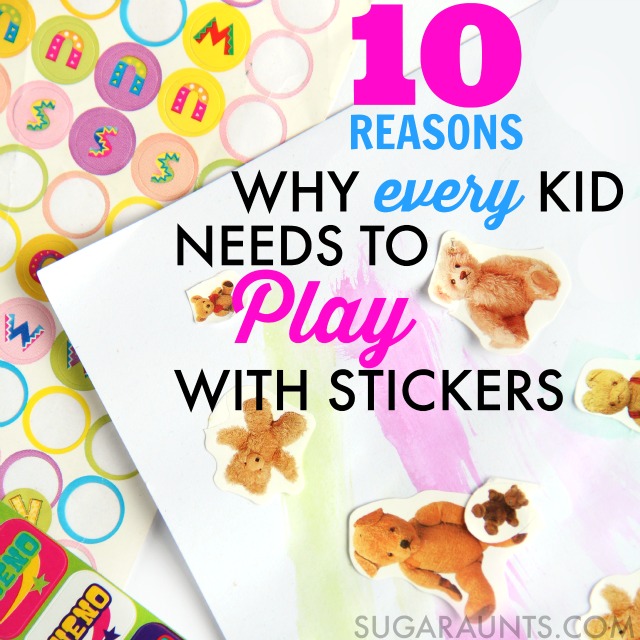
Juega con pegatinas de distintos tamaños.

Hacer “ángeles de nieve” en una alfombra o manta mullida

Simon Says es un juego estupendo para fomentar combinaciones motrices novedosas y variadas.

Realiza varios juegos de canciones y movimientos como el Hokey Pokey, Farmer in the Dell, etc. Aquí hay actividades de movimiento y canciones que se pueden utilizar en el tiempo de círculo, calentamientos, centros o en actividades de grupo. Todas estas canciones para moverse y bailar fomentan la fuerza y la estabilidad del núcleo.

Sube a las zonas de juego exteriores de los parques infantiles y a los árboles bajos.

¡Añadir sensorial! Prueba esta actividad de coordinación bilateral de mesa para dibujar formas.

¡Dibuja con las dos manos! Esta actividad del trébol de cuatro hojas es muy potente, ya que abarca una gran variedad de habilidades.

Actividades de coordinación bilateral para niños en edad escolar

El plegado de papiroflexia u otras manualidades de papel son estupendas a esta edad.

Prueba estos movimientos de motricidad gruesa con temática de dinosaurios con un juego de bricolaje.

Dobla aviones de papel.

Trabaja la correspondencia de letras y la coordinación ojo-mano con un juguete de superficie rodante DIY.

Construye con LEGOS u otros juguetes de construcción.

Pruebe con actividades artesanales como el abalorio, la fabricación de joyas o las manualidades con cuentas de perlas.

Construye y crea con Pop Tubes. Esta actividad de coordinación bilateral es divertida.

Actividades de tejido.

Actividades de encaje.

Intenta realizar esta actividad de tejido de coordinación bilateral.

Prueba estas actividades de integración bilateral e ideas de coordinación para promover el uso de ambas manos juntas en actividades como la escritura a mano, el corte con tijeras y tantas otras tareas.

Últimas reflexiones sobre el fomento de la integración bilateral

¿La mejor manera de fomentar y promover la integración de ambos lados del cuerpo? ¡Movimiento y juego! Haz que los niños estén activos, se muevan y experimenten varios planos contra la resistencia y con la exposición a todo tipo de experiencias sensoriales. La combinación de la información propioceptiva en una experiencia de juego que promueve el fortalecimiento de una manera divertida proporciona todos los beneficios que los niños necesitan para mejorar las habilidades de coordinación bilateral. Añade intereses personales a medida que el niño crece. Y por último, ¡diviértete!

Utilice estas actividades de coordinación bilateral para promover la integración bilateral necesaria para habilidades como escribir y sostener el papel y cualquier actividad que utilice una mano para manipular un objeto mientras se estabiliza con la otra mano.

Sensory Meltdowns

sensory overload and sensory meltdowns

Overcoming sensory meltdowns can be a real challenge. For parents in a household where sensory challenges are common, having an understanding of what’s really going on with self-regulation and sensory processing is even better. Today, I have information on sensory overload meltdowns as well as a powerful tool for addressing this sensory need in families, so that the child struggling has resources and strategies available to them. Understanding meltdowns is one of the first steps in addressing sensory challenges. A sensory meltdown is sensory overload in action! Another way to look at this is sensory dysregulation that has reached a point where the individual erupts.

sensory overload and sensory meltdowns

Sensory Overload

There is a lot to consider when it comes to sensory meltdowns. Think of it like a volcano that is building up under the ground. We might not suspect that below the surface, things are building up and brewing a storm where we see the explosion. Just like that volcano, sensory input might be building and building.

Then, there might be Overstimulation anxiety for potential overload…it’s a cycle!

We see sensory overload and then we have the meltdown.

Many things can led to sensory overload, especially in the school environment:

  1. Noisy classrooms
  2. Busy hallways
  3. Visual noise or visual clutter
  4. Fireworks
  5. Fire alarms
  6. Noisy buses
  7. Smells from the cafeteria
  8. Crowded spaces
  9. Bright or flashing lights
  10. Loud music or sound effects
  11. Strong odors (perfumes, cleaning products)
  12. Scratchy or uncomfortable clothing
  13. High-pitched noises (whistles, sirens)
  14. Sudden or unexpected touches
  15. Television or computer screens
  16. Chaotic environments (malls, playgrounds)
  17. Multiple people talking simultaneously
  18. Heavy traffic noise
  19. Vibrations from machinery or vehicles
  20. Intense weather conditions (strong wind, heavy rain)
  21. Sports crowds or pep rallies
  22. Cluttered spaces
  23. Physical constraints (tight spaces, restraint in seats)
  24. Unstructured play areas
  25. Overwhelming choices (large menus, toy options)
  26. High-demand situations (tests, performances)
  27. Interpersonal conflicts
  28. Physical exertion without breaks
  29. Changes in routine or unexpected schedule changes

Auditory sensitivities and sensory needs can impact learning because of sensory overload. This is where the school based OT comes in. Having a sensory diet or sensory solution to the auditory input can support sensory needs before meltdowns occur.

Sensory meltdowns, information on self-regulation and sensory processing, as well as questions that parents have about meltdowns.

Sensory Meltdowns

I’ve shared before the difference between a sensory meltdown vs a tantrum…but that defining line can be hazy when it comes to sensory overload.

I’ve also shared many meltdown tips and tricks to address sensory meltdowns in children, as well as coping tools and sensory strategies that can help children.

There are also many sensory diet tools and resources here on this website, which can be valuable resources for the child with sensory processing challenges.

But all of these self regulation strategies, resources, and tools can be inconsequential if you are missing an important piece of the sensory puzzle.

Understanding what’s really going on behind a meltdown is the key component to helping children who struggle with sensory overload.

There’s more; Once you’ve got a handle on really understanding a meltdown and the specifics on what might cause them, it’s important to know how to help the child that does launch into meltdown mode.

Because, even with all of the understanding in your back pocket, there will still be those moments where a meltdown is inevitable. So, having the resources and tools available to help a child debrief after a meltdown is crucial.

Debriefing with your child after a meltdown is such an important step for both of you. Having the ability to compose oneself following a meltdown and really understand what might have caused that overload empowers your child so that they can discover their own self-regulation strategies. What an empowering concept, right?

Not only that, but getting an understanding along with your child of that sensory meltdown gives you both specific strategies and tactics to help overcome those sensory meltdowns the next time they might occur. You can define and discover their triggers. 

All of this makes sense, right? But if working as a pediatric occupational therapist has taught me anything, it’s that addressing feelings of overwhelm with sensory processing take some time.

Parents often have questions about sensory meltdowns. Understand sensory meltdowns and resources to help.

Sensory Questions

There are so many common questions that parents have about sensory processing and sensory meltdowns. Below are listed some common sensory questions that parents have. Sometimes just knowing you are not alone in your questions and concerns is helpful! So, those questions that oftentimes come up include:

Parents often times feel overwhelmed or stressed with how to respond to their child’s meltdowns. If this sounds familiar, you might be questioning if your child’s behavior is sensory or if it’s defiant behavior. 

Parents wonder if the behaviors their child has is a temper tantrum or if it is a response to sensory overload and having a meltdown.

Many times, parents see meltdowns that seem to come out of nowhere. You can’t seem to figure out what the triggers are. Where do you even start?

Or, maybe you know your child’s meltdowns are sensory related, but nothing you’ve tried seems to work. You wonder if maybe you’re Googling the wrong things or if there is something you’ve missed.

Parents often feel like their child is just trying to get attention, and that it’s behavioral rather than sensory related.

Another question that parents often have is regarding the aggressive behaviors they see from their child. What can cause a child to act out so physically with hitting, spitting, head banging, biting, scratching, and yelling? These actions are physically and emotionally exhausting for both you and your child.

Still other questions that parents have regarding meltdowns is how to better understand their child and help them feel accepted?

Parents often wonder how they can better recognize the signs of sensory overload so they can prevent it from happening in the first place.

A big question parents have is how they can stay calm in the moment when their child is in the midst of a meltdown. How can they help their child without “losing it” themselves.

Sometimes, just knowing that others have the same questions is so helpful.

Overcoming Sensory Meltdowns

If any of these questions sound familiar, I’ve got a resource for you. The thing is that sensory overload is one of the leading causes of sensory meltdowns, but it is far from the only cause. And, actually, there are sound principles that can help children in the midst of a meltdown.

There are tools you can have in your back pocket so you can address meltdowns when they are happening, and can shorten the duration and intensity of a meltdown. You can even help your child to recognize what’s going on when a sensory meltdown occurs.

Part of the strategy to get the answers to better understand exactly what’s going on behind meltdowns is to get to the root of the sensory needs.

This course can help you feel confident and overcome meltdowns with proven sensory integration tips, tools, and strategies to help your student self-regulate and give you both a toolkit of ways to minimize sensory related issues and even catch them before they escalate.

Sensory Overload Meltdown

To better understand what’s happening in a sensory overload meltdown, it helps to understand sensory integration.

This refers to the organization of sensation for use within the brain and body. Our body and sensory systems give information to our brain on the body in the environment.

The brain organizes all of that information it gets from the sensations. When the sensations flow in a well organized manner, the brain forms all sorts of perceptions, behaviors, and learning can occur. We can participate in the world around us.

However, there’s more to it. The nervous system operates best at an optimal arousal state. This means that the nervous system is able to attain, maintain, and regulate that information so we can complete meaningful and functional tasks. When the brain is not able to organize the incoming sensory information, it can become too much for the brain and body.

As a result, we see sensory compensations. The body attempts to compensate for organizing the information in ways that look different, but work for the individual. There may be sensory defensiveness. However, sometimes neurodiverse responses to the information isn’t sustainable and we see overload. This is the sensory meltdown.

A few tools we have is a school sensory room, or a sensory diet to plan for sensory needs.

This is a very simplified explanation that explains a sensory overload meltdown.

Check out the blog comments below to discover common questions about about sensory meltdowns.

Sensory Meltdown Strategies

There are many ways to support the individual and their sensory needs before sensory overload and meltdowns occur.

  • Preparing for the event- talking about what is going to happen at the fireworks event or celebration
  • Using noise cancelling headphones or earbuds
  • Sensory diet tools like deep breathing exercises or weighted blankets to regulate and organize sensory needs
  • Sensory chaining techniques
  • Using sensory friendly clothing
  • Earplugs
  • Chewlery
  • Personal space away from crowds

Would you like to use some strategies designed to offer organizing input? Our sensory strategies resource has some great ideas.

Free Classroom Sensory Strategies Toolkit

    We respect your privacy. Unsubscribe at anytime.

    Colleen Beck, OTR/L has been an occupational therapist since 2000, working in school-based, hand therapy, outpatient peds, EI, and SNF. Colleen created The OT Toolbox to inspire therapists, teachers, and parents with easy and fun tools to help children thrive. Read her story about going from an OT making $3/hour (after paying for kids’ childcare) to a full-time OT resource creator for millions of readers. Want to collaborate? Send an email to contact@theottoolbox.com.

    Soap Shaving Bookmark Craft

    Picture of a child using a vegetable peeler to shave soap into soap shavings as a fine motor task.

    This is a fun activity we did many years ago, and I keep coming back to it. Using soap shavings as a fine motor tool can open the door to motor planning, bilateral coordination, and functional experiences for kids. At The OT Toolbox, we believe in hands-on activities that promote fine motor skills, sensory exploration, and creativity. As pediatric OTs, we know the power of using crafts to support development so this soap shavings craft is a great way to encourage these skills while making something functional and fun. Every parent, teacher, and therapist can benefit from having a collection of soap craft ideas to incorporate into play and learning.

    Picture of a child using a vegetable peeler to shave soap into soap shavings as a fine motor task.

    The cool thing about using a vegetable peeler on a bar of soap is that you can use the soap shavings projects to make wax paper bookmarks to other creative soap crafts, and at the same time, you are supporting the development of functional life skills cooking tasks by using the vegetable peeler. If you’re looking for an easy bookmark craft, this simple yet effective activity is a great way to build skills while creating something useful.

    Wax Paper Bookmarks

    Today I wanted to share a fun kids craft that supports life skill development: using an iron and ironing board. To make the soap shavings, we also used a vegetable peeler, so this is a great way to incorporate fine motor skills into kitchen tasks needed for using kitchen items like the vegetable peeler. We also worked on a few different skills with this craft: cutting with scissors, fine motor skills, bilateral coordination, and executive functioning. Be sure to check out our music bookmark craft as well.

    Make wax paper bookmarks using soap shavings to create soap shaving bookmarks.

    Soap Shavings Bookmark Craft

    Today we are incredibly excited to share this Soap Shavings Bookmark craft with you! 
     
    Soap Shaving Bookmarks with peeled soap, part of the book, Pop! Squirt! Splash! book for kids with soap, water, and bubbles


    Kids can get creative in their crafting using soap and a few materials from around the house.  We made these soap shaving bookmarks and had a blast creating!
    Soap Shaving Bookmarks with peeled soap, part of the book, Pop! Squirt! Splash! book for kids with soap, water, and bubbles
     
    This post contains affiliate links.


    To make Soap Shaving Bookmarks:

    You’ll need a few materials:

    This soap craft is as beautiful as it is simple.  Kids will love to use a vegetable peeler on bars of soap to create soap shavings.  

    Here are the steps to make this soap shaving bookmark craft:

    1. To make the bookmarks, lay a sheet of wax paper out on a hard surface like a cookie sheet or cutting board.  
    Use a vegetable peeler to create soap shavings

    Using a bar of soap to practice using a vegetable peeler is a great beginner step for kids learning to use kitchen tools, because the soap peels shavings much easier than an apple skin peels away from the apple.


    2. Show your child how to grasp a bar of soap and using hand-over-hand guidance, help your child to slowly peel shavings from the bar of soap. Encourage them to peel away from their body for safety. 

    This is important when teaching kids how to peel a potato or an apple, as well, so it’s great practice!

    3. Peel long strips of soap and small shavings, mixing the colors of the different bars of soap on the wax paper.  Managing the vegetable peeler and the soap is a great way to encourage bilateral hand coordination (the use of two hands together in a coordinated manner).  


    Children need bilateral hand coordination for functional skills like cutting with scissors, handwriting,  tying shoes, and managing clothing fasteners.  An activity like using a vegetable peeler on a soft bar of soap is a great way to work on using tow hands together effectively with a non-dominant assisting hand and a dominant hand with fluid and controlled motions.  


    4. Arrange the soap peelings on the wax paper and place the second piece of wax paper on top.  

    5. Carefully move the wax paper to an ironing board.  

    6. Place a dishtowel over the wax paper and using an iron heated to medium, slowly press down.  The soap will slightly melt and flatten under the heat.  

    7. Check often to see if the wax paper is adhering.  You can remove the dish towel and carefully heat the edges of the wax paper.  

    8. Cut the wax paper into rectangular book marks.  

    9. Punch a hole near the top of the book marks using the hole puncher.  

    10. Tie a piece of ribbon in the hole.  This bookmark will smell great and would make a lovely gift!

    Soap Shaving Bookmarks with peeled soap


    *Note: This craft should be done under close supervision of an adult.  Be careful with the use of a vegetable peeler with small children.  For younger children, provide hand-over-hand assistance with the vegetable peeler.  Adults may want to complete the peeling portion of this soap craft.  Adults or responsible older children should manage the iron.  As always, use judgement when it comes to completing this and any activity with your kids.

    Using the vegetable peeler and an iron to make our soap shaving bookmark makes working on IADLs fun and engaging. Life skills tasks like cooking is an essential Instrumental Activity of Daily Living that occupational therapy professionals address.

    Soap Shaving Bookmarks with peeled soap, part of the book, Pop! Squirt! Splash! book for kids with soap, water, and bubbles

    Alternate activities:

    1. Vary the scents and colors of your bookmarks with various soaps.
    2. Add a personal message or quote to the bookmarks.
    3. Add flower petals or scraps of paper to the soap shavings before ironing.
    4. Arrange the soap shavings in a mosaic or mandala pattern.
    Use a vegetable peeler on a soap bar

    Using a vegetable peeler to proactive the bilateral coordination and motor planning needed for peeling vegetables is a good way to grade down the activity because of the soft texture of the soap.

    Colleen Beck, OTR/L has been an occupational therapist since 2000, working in school-based, hand therapy, outpatient peds, EI, and SNF. Colleen created The OT Toolbox to inspire therapists, teachers, and parents with easy and fun tools to help children thrive. Read her story about going from an OT making $3/hour (after paying for kids’ childcare) to a full-time OT resource creator for millions of readers. Want to collaborate? Send an email to contact@theottoolbox.com.

    Music Bookmark Craft

    This music bookmark craft uses an old sheet of music and is a fun easy cutting skills craft that kids can give as a gift or can use in their music books! We actually have another fun soap shaving bookmark craft too, if you would like to check out that craft that builds skills as well!

    Music bookmark craft

    Music Bookmark Craft

    You’ll need just a few materials to make this music bookmark craft:

    • One sheet of music (We have several books found at a yard sale.  We used one sheet for this craft.)
    • Red card stock, cut into heart shapes
    • Glue
    • Scissors
    Music note bookmark craft

    To make the music bookmarks

    This musical craft is easy to make, which makes it an easy scissor skills craft for kids.

    1. Cut the sheet music along the space between each staff.  You’ll end up with several strips of music notes.  
    2. Cut the red card stock into heart shapes.  
    3. Glue the hearts to one end of the music strips.  As easy as that, your music bookmarks are done!
    Music note bookmark craft

    We made these bookmarks at the same time we made our DIY bottle xylophone, which is why the bottle of Coke is in the picture below.

    bookmark craft

    You could cut any shape and glue it at the top of the craft. We went with a heart because of our love of all things music.

    Heart and music gift that kids can make.

    This bookmark would make a great music gift that kids can make for music teachers!

    Other fun musical crafts and activities that we loved include:

    Colleen Beck, OTR/L has been an occupational therapist since 2000, working in school-based, hand therapy, outpatient peds, EI, and SNF. Colleen created The OT Toolbox to inspire therapists, teachers, and parents with easy and fun tools to help children thrive. Read her story about going from an OT making $3/hour (after paying for kids’ childcare) to a full-time OT resource creator for millions of readers. Want to collaborate? Send an email to contact@theottoolbox.com.