Laundry Skills

laundry checklist

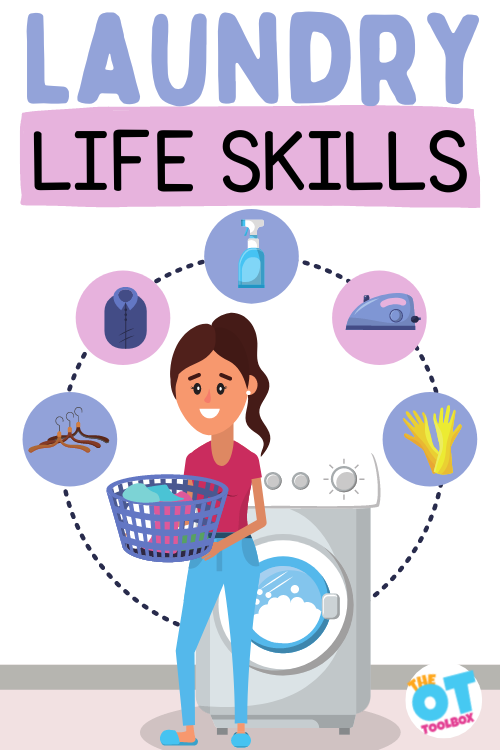
Today, we have a great life skills activity: specifically, laundry skills! In this blog post, we are discussing the life skill of laundry. Washing and drying clothes is an independent living task that anyone who manages their activities of daily living and instrumental activities of daily living must learn. Getting dressed each day requires clean clothing. And in order to manage and wear clean clothing, dirty clothes must be laundered! Whether you are looking for information on teaching laundry skills to teens, or working in a special needs classroom with special education students in a life skills classroom or group home, laundry skills are a part of occupational therapy interventions. You’ll also want to check out our cooking life skills activities for more ways to support IADLs.

Laundry skills

Laundry Skills

Don’t you just love those 12 seconds when the laundry is all done?  Laundry is the gift that keeps on giving.  Laundry life skills are necessary and inevitable. Unless you plan to do your kid’s laundry for the rest of their lives, start teaching laundry skills early. 

Teenager Laundry Schedule

Washing: 30 minutes

Drying: 30 minutes

Folding and putting away: 7-10 business days

How do you know when it is really time for your kids to learn laundry skills?

  • When half of the clean laundry ends up in the dirty basket unworn
  • When they wear like seven outfits a day
  • Clothes are so wrinkled in the drawers, they have to be rewashed to be worn
  • They ask you to do laundry so often because they only wear their favorite three things

Laundry Life Skills Learning Lessons

People learn by doing. They also learn by making mistakes. Suffering natural consequences versus being nagged at or scolded, is a better way for people to learn.  These are some valuable life lessons my teenagers learned while learning to do laundry properly.

  • Teenager claims they need more underwear and socks.  Turns out they are all just dirty
  • They shove so many clothes into the washer, the clothes are barely wet
  • Everything goes in the same load, creating lovely pink blobs on everything
  • The laundry stays in the washer for five days.  EWWW
  • The laundry stays in the dryer for five days. Has to be rewashed
  • Your kid looks like they dragged their clothes out of a garbage bag each time they get dressed
  • Your teen does not do laundry until the only option left is their prom dress!
  • Too much soap, not enough soap, hot water, you get the picture
Laundry life skills include executive functioning skills
All steps of laundry life skills include executive functioning skills.

Laundry Task Analysis

Doing laundry requires many underlying skill areas. We can look at these in a laundry task analysis.

First, let’s look at the areas needed for this life skill task. Because there are multiple steps to doing laundry, there are many aspects that go into laundry skills, there are many underlying areas of development that impact teaching laundry.

The underlying areas of laundering include:

  1. Fine motor skills: pinch and grip strength, coordination
  2. Gross motor skills: upper body strength, core strength, balance, coordination, posture, stability, range of motion
  3. Visual motor skills: eye-hand coordination,
  4. Visual perceptual skills: visual discrimination, visual scanning, visual figure ground, form constancy,
  5. Sensory motor skills: Tactile discrimination, proprioceptive input, vestibular input, visual processing, auditory processing
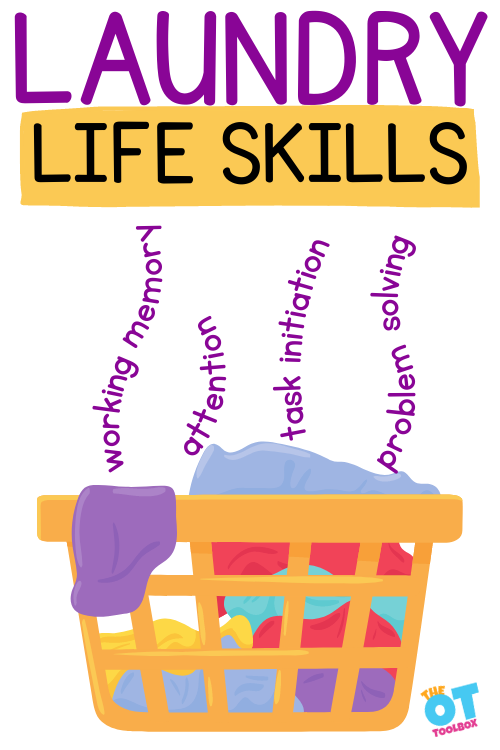
  6. Executive functioning skills: task initiation, task completion, working memory, attention, organization
  7. Cognitive skills: Direction following, problem solving, safety awareness

With all of these considerations it’s no wonder that laundry skills are a challenge for all ages!

We have a checklist of tasks that need to be done listed below. This is an important part of the task analysis, because the layout of the home, laundry area, and other environmental considerations will play a huge role in the laundry task analysis, especially for the motor skills involved.

Laundry Checklist

Laundry skills involves many steps. It’s because of this multi-step process, that sometimes the task “falls apart”. Laundry skills includes the following basic steps:

  1. Sorting clothing by light and dark colors or by fabric. For some individuals, starting with a sorting task is a great first step. Use these sorting colors ideas.
  2. Placing clothing into a hamper or clothes basket and emptying pockets.
  3. Carrying a full basket of clothes.
  4. Lifting a full basket to empty into a washer. Or bending/reaching to place dirty clothes into the washing machine.
  5. Pre-treating any stains.
  6. Adding the correct amount of detergent, the appropriate type of laundry detergent, and motor tasks such as: opening the detergent bottle, pouring the correct amount of soap, adding the soap to the correct place in the washing machine. 
  7. Using an appropriate load size for the washing machine and the clothing type.
  8. Selecting a water temperature appropriate for the clothing fabric type, such as using cold water for certain clothing fabrics and using warm water over hot water for others.
  9. Turning on settings for the appropriate wash cycle.
  10. Remembering to listen for the laundry machine buzzer or setting an alarm for the end of the washing cycle.
  11. Removing wet clothing and placing into a dryer.
  12. Removing any clothing that needs to air dry.
  13. Selecting the right amount of drying time for the clothing from the dryer’s settings
  14. Turning the dial to the appropriate setting.
  15. Using an appropriate dryer load size.
  16. Setting an alarm or remembering to remove dry clothing from the dryer when complete (task completion).
  17. Removing all of the dry clothing from the dryer.
  18. Folding clothing, including how to fold pants, shirts, and other types of clothing.
  19. Matching and rolling socks together.
  20. Putting away clothing.
  21. Hanging clothing on hangers when appropriate.

Each of these steps could potentially be a stumbling block, right? Especially when you take into consideration the various physical and cognitive skills needed for each task. Breaking down the tasks can be helpful.

For example, a shorter list of laundry tasks is as follows:

  1. Gather dirty laundry from around the house.
  2. Sort laundry into categories (e.g., lights, darks, delicates).
  3. Load the washing machine, being careful not to overload.
  4. Add laundry detergent.
  5. Select the appropriate wash cycle and temperature.
  6. Start the washing machine.
  7. Once the wash cycle is complete, remove clothes from the washing machine.
  8. Select the appropriate dryer setting.
  9. Start the dryer.
  10. Once dry, immediately remove clothes from the dryer.
  11. Put clothes away in their designated places.

Tips and Strategies for teaching Laundry Skills

These tips are helpful for all learning, not just laundry.

  • Break the tasks down into smaller chunks to make them more manageable. The learner may not be able to do all their laundry, but can probably stuff the items in a basket or washer.
  • Choose times for learning when there is not a rush.  Learners cannot work under pressure.
  • Set realistic expectations.  Your two year old might not be able to fold clothes properly.  That’s ok, they can put them in the basket.
  • Accept mediocracy.  Learn to accept the towels and sheets will not be folded correctly.  Be happy they are clean and in the closet.
  • Think first about any sensory/motor/logistical components of the task and problem solve before starting.
  • Backward or forward chain. Backward chain would be to do all of the work for your learner, then have them come in and finish the final step. This offers a sense of accomplishment.  Forward chaining is having your learner do the first step, before they become overwhelmed, then you finish for them.  This gives confidence that they can do some of the laundry task.
  • There are many laundry steps for a learner to remember during any life skills task.
  • Minimize distractions and sensory input prior to starting.
  • Stay calm and do not add more pressure.
  • Let your learner do for themselves, only intervening when they start to get upset. Do not rush to fix everything so quickly. They will not learn that there is a problem if we constantly fix the errors before they notice.
  • Give the learner opportunities to be independent, even at a small task.
  • If your learner has sensory related concerns, the OT Toolbox has a great resource called the Sensory Lifestyle Handbook, with checklists and strategies to weave sensory activities into your learner’s day

No wonder laundry skills are such a complex task!

“Sometimes you might feel like no one is there for you.  You know who is always there for you?  Laundry.  Laundry will always be there for you.” Author Unknown

Other Benefits of Doing Life Skills like Laundry

  • Allows more free time for parents to focus on other things
  • Instills a sense of responsibility for their belongings
  • Builds executive function skills – starting and finishing a project, time management, planning, prioritizing, and foresight to name a few.  The OT Toolbox has a FREE course on developing executive function and several resources on this valuable life skill.
  • The task can be adjusted to meet levels, whether developmental disabilities are present or specific areas of need: motor planning, executive functioning skills, physical abilities etc.
  • Sensory processing skills and self regulation. Heavy work is a great way to regulate the sensory system through proprioception. Laundry has built in heavy work from filling the laundry basket, pulling or pushing the basket, piling clothes into the washer, dragging wet clothes out of the washer, pushing them into the dryer, and pulling them out.  There are other senses alerted in a negative or positive way during laundry, such as smell of detergent, feeling the water on the clothes, the sound of the washer and dryer, or the warm feeling of clothes fresh out of the dryer. 
  • Builds independence and self reliance.

Laundry and Executive Functioning Skills

One of the biggest challenges with accomplishing laundry tasks tends to be the executive function component. I mean think about it: There are at least 17 steps to doing laundry…and if you use our simplified laundry list, there are still 11 steps!

Each of those 11 steps could potentially be it’s own task (sorting laundry. putting clothes in the washer. Folding. Putting away.) When you break down “laundry”, no wonder this life skill is so challenging when you add in difficulties with working memory, task initiation and completion, planning, prioritization, attention…It makes total sense!

One way we support these needs is by breaking down the huge task of “laundry” into steps. Then, we can come up with strategies for each component. This includes:

  • Using timers
  • Creating routines
  • Minimizing steps
  • Segmenting tasks

We actually made a handout on executive functioning hacks to assist with laundry. You can get a free copy of this in the form at the bottom of this blog post.

How to develop laundry life skills (or any other skills):

If you sit a seven year old down and ask them to do laundry, you will be met with either dread, frustration, or shutdown.  The task in entirety is too much all at once.  Not only can you break the task into measurable chunks, use the following adaptations to build laundry or any other life skills:

  • Print a laundry checklist with clear laundry steps and directions. Read here about visual schedules that can be used as a support.
  • Use a picture story sequence to walk through the task using real images of the individual completing the laundry task.
  • Make a social story about doing laundry so your learner gets a clear picture of the task ahead of time
  • Create a picture board with cards and velcro to move items from the “to do” to the “done” side.  
  • Create visual reminders in the laundry area to assist with the chore such as how much detergent, what temperature for the clothes
  • Adapt and modify the task as needed.  Determine what the barriers might be to making this task independent for your learner. Create folding boards to fold shirts, use laundry pods instead of measured detergent, wash all items on cold for ease, different colored baskets if sorting items, a clear system of where everything belongs, step stools if needed.
  • If you are hitting roadblocks when addressing life skills, there may be a motor or sensory component making skill acquisition more difficult. Problem solve these first, then move forward. The book, (affiliate link) Seeing Your Home and Community with Sensory Eyes is a great resource to problem solve and find solutions to everyday events such as going to bed, bathing, cooking, riding the bus, going to the dentist, doing chores, or the dreaded cafeteria.

After catching up on laundry this week, I am implementing prison rules. Each member gets one jumpsuit for the week.

Free laundry checklist and laundry hack sheet

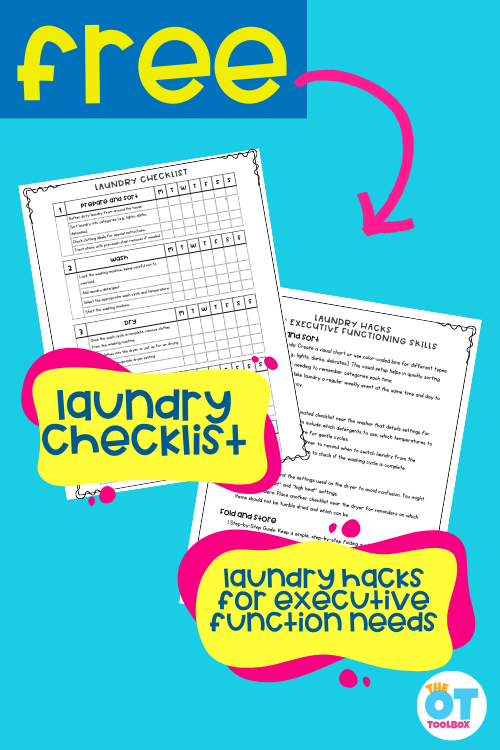
Free Laundry Checklist

One tool that I love to use, especially when practicing laundry life skills with pre-teens and teenagers, or when executive functioning skills impact the ability to stay on top of laundry tasks, is printable checklists.

I created a printable checklist of laundry tasks broken down into stages:

  1. Preparing and Sorting Laundry
  2. Washing Laundry
  3. Drying Laundry
  4. Folding Laundry
  5. Putting Away Laundry

Each of these four steps could be a stumbling block, which means that the laundry sits there in a wet and stinky lump in the washer for a week. Or, the dry and clean laundry sits crumbled in the laundry basket for a month. Breaking down the steps is a huge piece of the puzzle.

I also made the checklist with columns for days of the week. This way, you can sort the laundry on one day and wash and dry the laundry on the next day. Then, you can fold and put away the laundry on another day. Doing these tasks on the same day each week makes it not only manageable, but also part of a routine.

You can get this free printable by entering your email address into the form below. Plus, when you grab this printable, we also have a bonus- our list of executive function hacks for each step of laundry. These tips are great for targeting the working memory, attention, planning, and task completion of all of these steps.

FREE Laundry Checklist

    Are you interested in resources on (check all that apply):
    We respect your privacy. Unsubscribe at anytime.

    These resources, along with many other life skills tools and activities are also found inside The OT Toolbox Membership!

    Victoria Wood, OTR/L is a contributor to The OT Toolbox and has been providing Occupational Therapy treatment in pediatrics for more than 25 years. She has practiced in hospital settings (inpatient, outpatient, NICU, PICU), school systems, and outpatient clinics in several states. She has treated hundreds of children with various sensory processing dysfunction in the areas of behavior, gross/fine motor skills, social skills and self-care. Ms. Wood has also been a featured speaker at seminars, webinars, and school staff development training. She is the author of Seeing your Home and Community with Sensory Eyes.

    Raccoon Craft for Math and Fine Motor

    racoon craft

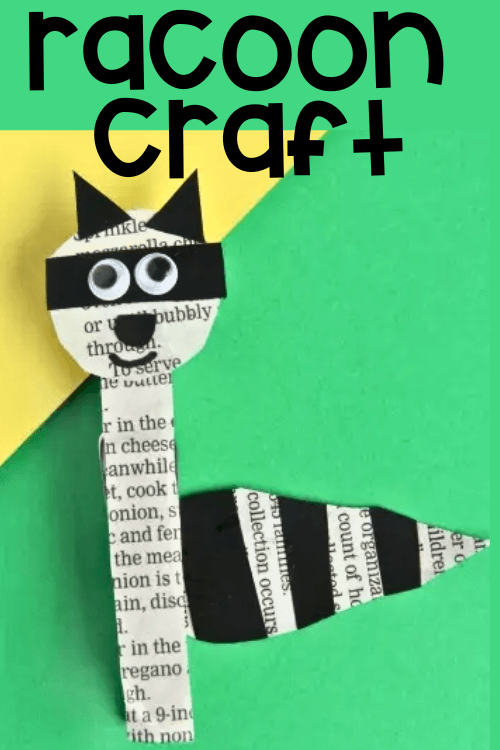
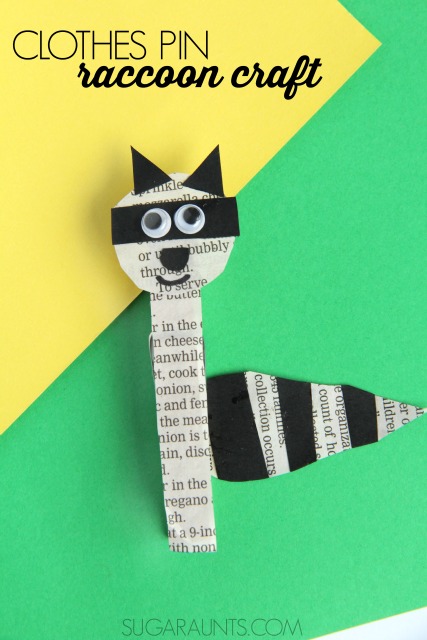
    We made this racoon craft many moons ago, when my oldest was in second grade. She’s now a sophomore in high school, and I have to say that those years went by like a flash. This post was originally written in October, 2015 and I’m just updating it now with some tips about how to use the racoon craft to support fine motor development. One thing is for certain; this fine motor math craft still remains as cute as it did all those years ago!

    This is a clothespin activity that supports development of many areas of motor skills AND learning regrouping in math!

    racoon craft

    Racoon Craft

    I love that this racoon craft supports fine motor skills. Not only by making the craft, but by playing with the racoon clothes pin, there are some big fine motor benefits. Plus, it’s a fine motor STEM activity that kids seem to love.

    There are so many benefits to using the clothes pin as a fine motor tool in math (and in kids crafts)!

    For example, when manipulating clothes pins, fine motor contributions include:

    Similarly, the fine motor contributions that are needed for threading beads includes:

    • Arch development
    • In-hand manipulation
    • Eye-hand coordination
    • Open thumb web space
    • Tripod grasp/pincer grasp
    • Finger isolation
    • Thumb opposition
    • Wrist extension
    • Dexterity
    • Bilateral coordination

    We made a video that shows how manipulating and pinching clothes pins promotes grasp development. Check it out here:

    In the video, we show how to use the clothes pins to work on pinch strength and grip strength. You can use your racoon clothespin craft to do these things!

    Regrouping Math Activity

    Second grade.  They say it’s the old third grade in public schools.  My second grader is our oldest, so I’ve no previous school years to compare the class work or curriculum to.  We are plowing through the first few months of school though.  We are well into a routine with schedules, homework, and have only missed the bus once.  (This is our best year so far in that area!)  

    While my second grader might be doing the stuff that third graders used to do, she is a trooper.  She works hard and she loves her teacher and her friends.  I mean, she even comes home from a long day of school and PLAYS school with her siblings.  While they have zero interest in regrouping addition problems, they are cooperative little students.

     
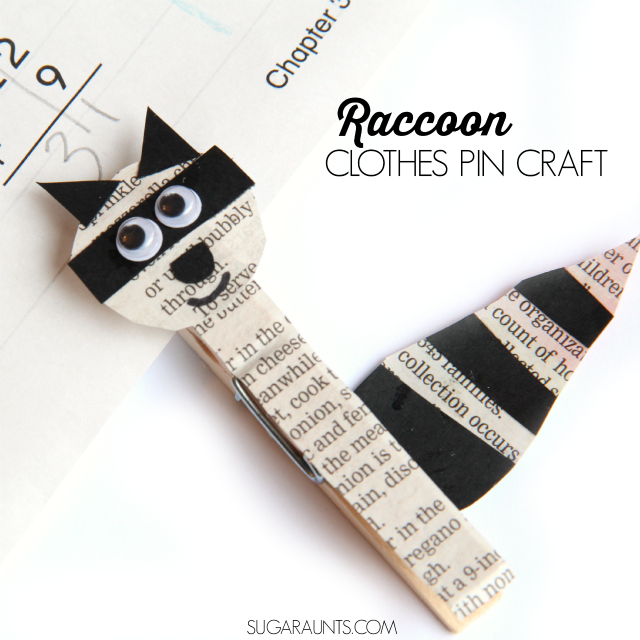
     Raccoon craft with a clothes pin for use in second grade math: this Regrouping Raccoon will help with regrouping double digit addition math problems!


    Raccoon Craft

    This Raccoon craft made the perfect tool to practice a math skill with my second grader: Regrouping Double Digit Addition Problems.  It was a fun craft to make alongside my daughter and turned out to be a pretty fun second grade craft, too!

    Raccoon craft with a clothes pin for use in second grade math: this Regrouping Raccoon will help with regrouping double digit addition math problems!


    What is Regrouping Double Digit Addition?

    So, we actually did a regrouping activity last year when my little future teacher was in first grade.  That activity was about regrouping single digits in addition.  Now, a whole year later, we’re regrouping double digits and feel like big shots.  Ok, not really.  But it IS a whole other column of numbers that we are adding, here! 
     
    Now, I’ve said it before.  I am not a teacher by trade.  In fact, I’m an Occupational Therapist.  So I don’t have a huge understanding of teaching techniques or educational standards and the like.  But, I do have the motivation that only a mom has when it comes to making homework fun, and easy.  I am so over pulling teeth to get homework done.  Let’s do a creative and playful activity to build on school-found skills and I’m good.  And really, when we pull in my OT-ness to the play and fun, it’s even better.  Fine motor skills, here we come!

    Ok, ok back to what is regrouping question.  

    Essentially, regrouping in math is borrowing or carrying a digit to aide in a math operation. In addition, digits from the ones column are added to the tens column to add single or double digits. 

    My second grader is adding double digit numbers.  When the ones column of those double digits add up to more than 9, there is another tens to add to the tens column.  

    Regrouping in Math Activity

    Now, to practice regrouping double digit addition problems, you could do page after page of worksheets.  But if your kiddo is like mine (and any other kid out there), that will not go over well.  We made this sneaky little raccoon clothes pin craft to practice regrouping in math practice.
     
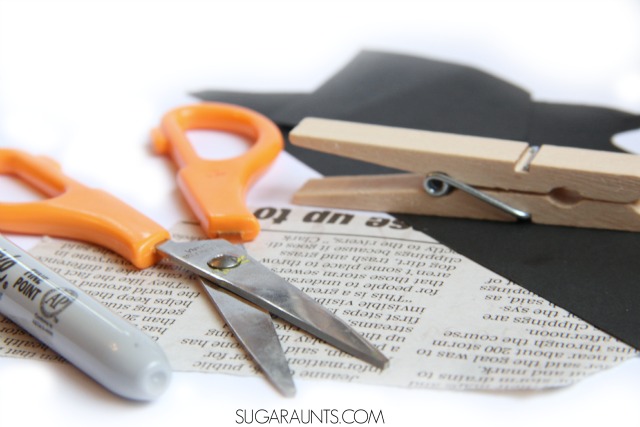
    It’s a pretty easy craft that your second grader will love to try.  You’ll need just a few materials: (These are affiliate links.)

    Raccoon craft with a clothes pin for use in second grade math: this Regrouping Raccoon will help with regrouping double digit addition math problems!
    Raccoon craft with a clothes pin for use in second grade math: this Regrouping Raccoon will help with regrouping double digit addition math problems!
     
    To make the racoon craft:
     
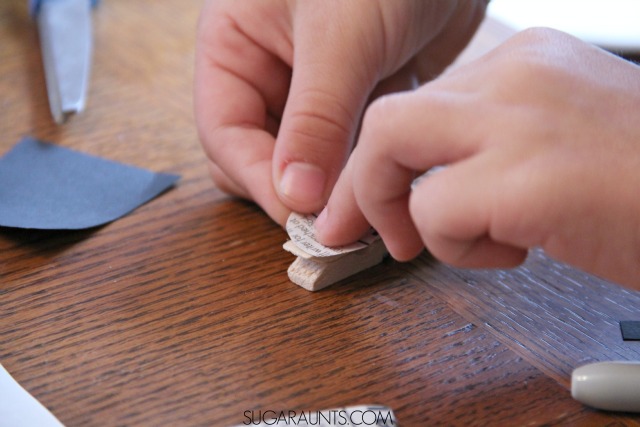
    1. Start by cutting a strip of newspaper to fit on the front of the clothes pin.  
    2. You’ll also want to cut a small circle for the raccoon’s head, and a tail-ish shape.  
    3. Glue the newspaper strip to the front of the clothes pin.  
    4. From the black cardstock, cut small strips to make the raccoon’s eye mask, tow triangle ears, and stripes for the tail.  
    5. Glue all of these paper pieces into place.  
    6. Add the googly eyes and draw on a cute little smile.  That raccoon is done and ready to help with regrouping. 


    Regrouping Raccoon and Double Digit Addition

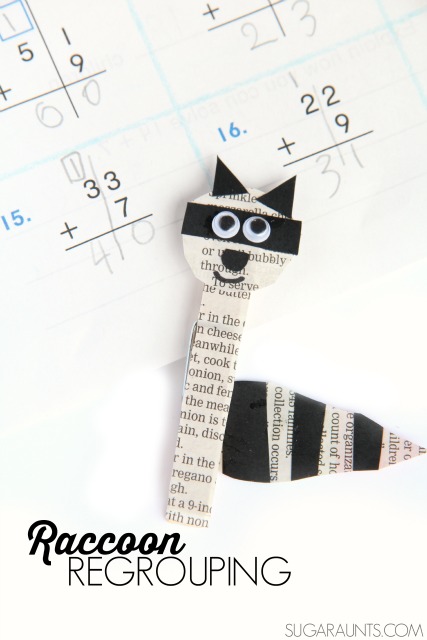
    We decided that since raccoons are pretty sneaky and sometimes steal garbage from trash cans, that our Regrouping Raccoon would be the perfect buddy for stealing numbers from the ones column and placing them over in the tens column.  We practiced with a problem or two and added up the ones column.  If the total had 10 or more, than that sneaky little raccoon helped us move the ten over to the tens column.  Fun, right?
     
    Now, grab a sheet of regrouping addition problems.  We used a homework page, but you could just write out problems on a piece of paper.  
     
    As my daughter did the double digit math problems, I had her clip the raccoon onto the edge of the paper if it was a regrouping problem.  For the problems that did not require regrouping, we just left the raccoon in place.  

    Raccoon craft with a clothes pin for use in second grade math: this Regrouping Raccoon will help with regrouping double digit addition math problems!
     
    We ended up making a few more raccoon pinch clothes pins and had a family of raccoons!
     
    Raccoon craft with a clothes pin for use in second grade math: this Regrouping Raccoon will help with regrouping double digit addition math problems!


    More second grade activities you will love:


    We have a few other resources that might help as well. These are free tools you can find on The OT Toolbox and all three include free downloads. These would go great with our racoon craft activity!
    forest sensory path

    Use the forest sensory path with our racoon craft to support self regulation needs.

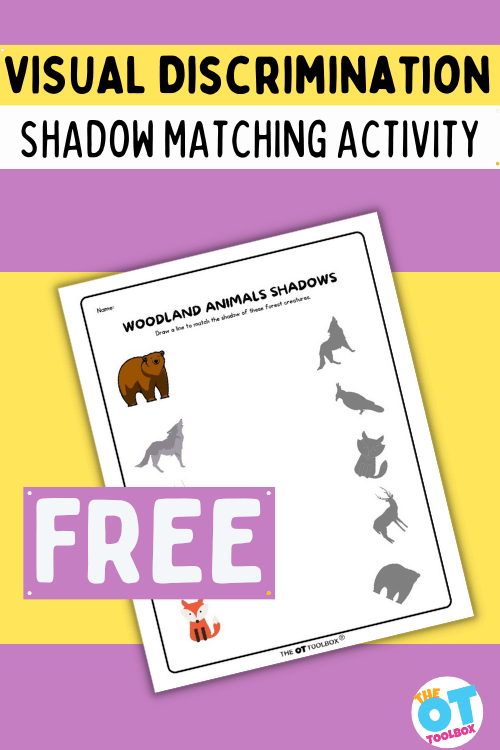
    shadow matching worksheet with forest animals theme

    Add our forest animal visual discrimination worksheet to your therapy toolbox to work on visual scanning, visual form constancy, and other visual perceptual skills.

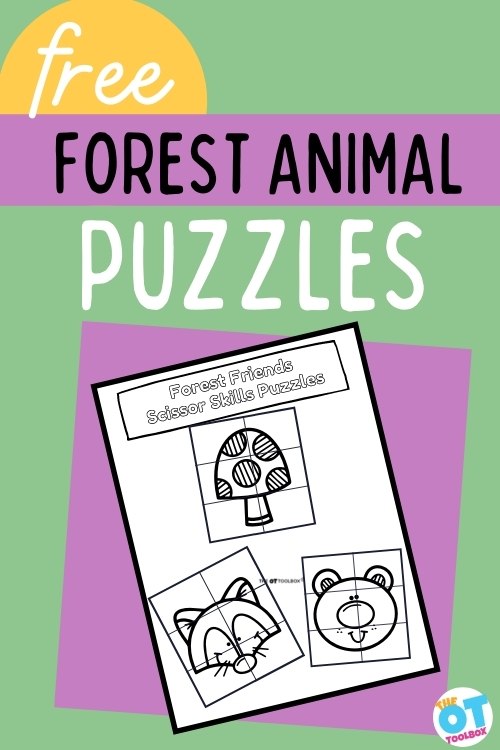
    free forest animal worksheets

    And, use our forest animal puzzles to work on scissor skills and visual motor skills.

    I hope the racoon craft and all of the tips in this activity supports development! Have fun!

    Colleen Beck, OTR/L has been an occupational therapist since 2000, working in school-based, hand therapy, outpatient peds, EI, and SNF. Colleen created The OT Toolbox to inspire therapists, teachers, and parents with easy and fun tools to help children thrive. Read her story about going from an OT making $3/hour (after paying for kids’ childcare) to a full-time OT resource creator for millions of readers. Want to collaborate? Send an email to contact@theottoolbox.com.

    Coin Activities for Kids

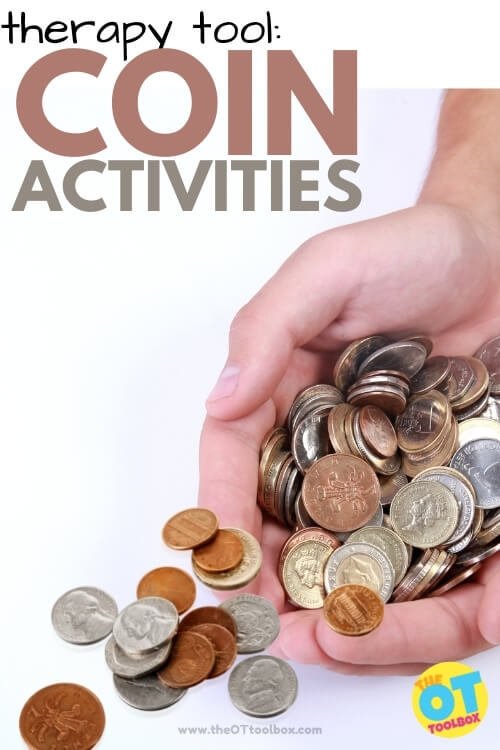
    These coin activities are fun ways to develop fine motor skills AND functional money skills. The fact is that coin sorting activities and counting coins activities are functional…they are tasks kids need to develop for daily living skills. But, did you ever stop to think about the fine motor benefits of playing with coins? There are a handful! So, grab a handful of coins and use these coin activities to help kids with fine motor skill development!

    Examples of coin activities for occupational therapy- dropping coins into a slotted container, counting money, stacking coins.

    Coin Activities

    This is an older blog post on the website, but one that has so many fine motor activities using just coins. You’ll find coin sorting activities, coin rubbing art, money counting skills, and counting coin activities that build math and money skills as well as fine motor skills.

    But, I also wanted to go into detail on the various ways kids can use a stack of coins to develop skills needed for fine motor tasks.

    You may have seen a previous blog post detailing the use of plastic gold coins to develop fine motor skills…today’s article covers real coins you have in your purse or pocket, and can be used for teaching money to kindergarten or first grade students.

    Coin activities for counting coins and sorting coins as an occupational therapy tool and a functional task for kids as they use money in IADLs.

    Coin Sorting Activities

    A warm-up activity with sorting coins is a nice start to the therapy session because it can help to connect with the child and that they are engaged in the process, using a functional task that is needed for IADLs.

    I made a video that shows different activities to do with just a handful of coins. These activities are:

    1. In-Hand Manipulation- Rotate a coin by turning the edges with the pads of the fingers. This movement is used to open a tube of toothpaste or to rotate a pencil.
    2. Pincer Grasp- Picking up coins by the edge and stacking them in a pile requires pincer grasp.
    3. Transferring Coins Fingertips to Palm- Transferring coins from the fingertips to the palm is an in-hand manipulation skill.
    4. Transferring Coins Palm to Fingertips- Transferring coins from the palm to the finger tips is another in-hand manipulation activity. Then push the coins into play dough for finger precision and strengthening.
    5. Pincer Grasp Strength- Pull coins out of play dough using only the tips of the fingers to work on finger dexterity and range of motion of the distal finger joints.

    These 5 fine motor activities to do with coins are the best from the perspective of a school based OT!

    We have even more ideas listed below, including how and why these coin activities are so powerful!

    fine motor activities using coins

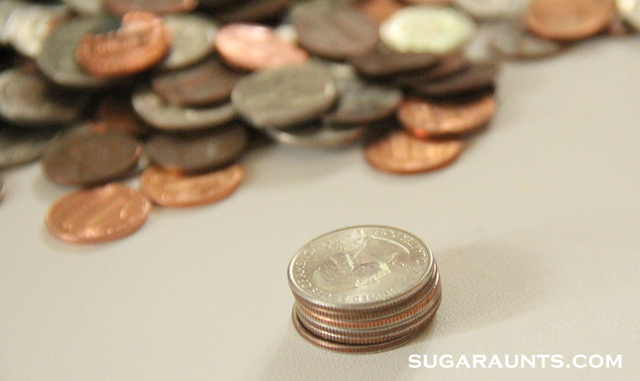
    Stack Coins Fine Motor Activity

    A nice warm-up to an occupational therapy session is this coin sorting activity: Once we’ve said hello and I have checked in with how my client is doing its time to ‘show me the money’.

    Place a pile of coins on the desk, and spend some time sorting coins into piles. I ask the child to show me the coins that match and we discuss what pictures we can see on the coins, what numbers we can see and how much the coins are worth.

    Sorting coins is a great task to work on a variety of skills:

    Sort Coins by Touch

    Once we have looked through all our coins I ask the children to place the coins in a pile in front of them and close their eyes. With their eyes closed they must pick a coin and show me which one they have collected.

    This activity targets Stereognosis, or the touch awareness related to identifying coins by touch, or by determining the coin by “feel”. When you sort through coins, you can find a quarter vs a penny by feeling the size of the coin.

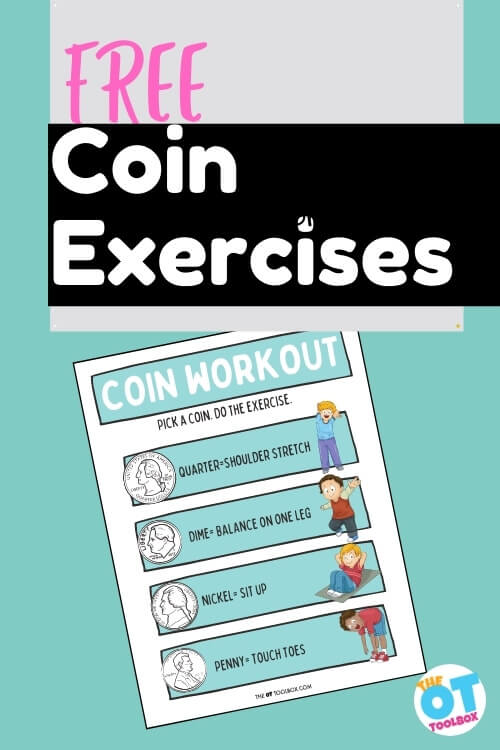
    I have a list of corresponding whole body, gross motor exercises that they must perform depending on the coin they have selected. These exercises will target specific gross motor goals that we are working on.

    The gross motor skills addressed with these coin sorting exercises include:

    Grab this handout by entering your email address into the form at the bottom of this blog post.

    Coin Activities for Fine Motor Skills

    Once we are all warmed up and feeling focused and attentive, we are ready to work on our fine motor skills. One aspect of money counting skills that can be difficult for children is the fine motor component. These coin activities take into consideration, all of the fine motor skills needed for counting and sorting coins.

    In-hand manipulation activities are a great way to boost fine motor skills needed for tasks like managing clothing fasteners, using a pencil when writing, manipulating items like coins or beads, and more. 

    The dexterity that is worked on when picking up coins from a flat surface is huge!  You need to pick up the edges with a tip-to-tip grasp and perform in-hand manipulation to “squirrel away” the coin into the palm of the hand. 

    In-hand manipulation is moving an object within the hand, without help from the other hand. This resource explains ways to work on in-hand manipulation with coins.

    Stacking coins is another great exercise.  We put the quarters into piles and counted out dollars.  But at the same time, we were working on translation of the coin from the palm of the hand to the tips of the fingers.  

    Translation is a type of in-hand manipulation that you use when moving an object from the finger tips to the palm and vice versa.  Stacking requires a lot of controlled dexterity!  

    Stack coins for a fine motor workout and to improve coin sorting skills.

    Why are these skills important? Kids need to refine their fine motor skills and in-hand manipulation in order to manipulate the pencil with slight movements while writing, erasing, and coloring. 

    They need the small motor control to manage fasteners like zippers, snaps, buttons, and shoe tying

    Using coins is a wonderful way to work on so many fine motor skills. You can target selective finger movements, tactile discrimination, in hand manipulation and finger strengthening

    For these fine motor coin counting activities, ask the children to count out a certain number of coins. I have been working with the number range between 10 and 20 depending on the child’s age. 

    1. Use plastic coins to build fine motor skills– This blog post includes a free printable handout detailing coin activities. This is a great home exercise program for parents.
    2. Count coins. Use these ideas to work on counting money and building fine motor skills. You can also use a paper coin wrapper to count coins.
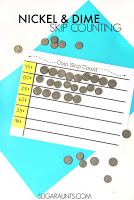
    3. Use coins to work on patterns and skip counting, but also finger isolation skills. This blog post includes a free handout to use in skip counting with coins.
    4. Coin road – line the coins up in a row as quickly as you can using only your right hand. The children enjoy competing with me during this task. Once completed ask them to perform this activity again using their left hand. 
    5. Coin flip – line the coins up in a row. Using only one hand flip each coin over starting at one end and flipping each coin until you reach the end of the row. Work from left to right to reinforce directionality. Repeat with the other hand.
    6. Coin stack – see how high you can stack your coins. Keeping going (and counting) until your stack falls over.
    7. Coin grab – using one hand see how many coins you can pick up and keep safe in your hand. Don’t drop any coins while you are collecting. 
    8. Coin counting – this requires a piggy bank or a parent to assist with making a simple money counting receptacle from a cardboard box or recycled container. See you many coins you can count within a time limit. 
    9. Playdough and coins – this activity requires the addition of playdough. Where this is available encourage children to make impressions of their coins with playdough, roll small balls of playdough and build coin sandwiches or roll snakes of playdough and stand coins in the roll to represent the scales. 
    10. Dice and coins – If your child has a dice available try the following activities. Roll the dice and see if you can pick up the number of coins the dice lands on. Roll the dice and set out your coins in the same position as the dots on the dice (re-create the dice number pattern).
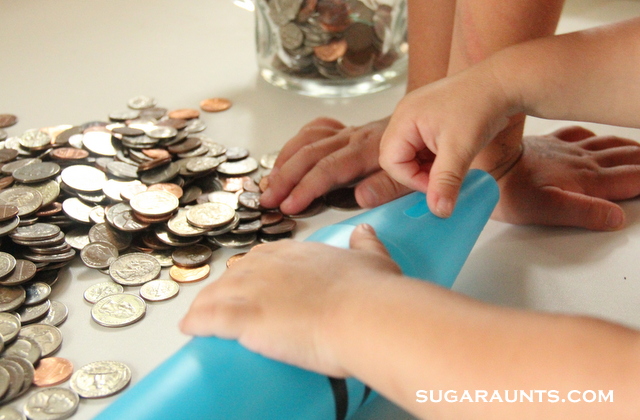
    11. Coin Rolling– Practice rolling the edge of coins on a flat surface using fingers. This activity focuses on finger strength and dexterity.
    Make coin rubbing art to work on learning coins, and building fine motor skills in kids.

    Coin rubbing art

    Coin rubbing art is a fine motor activity with huge benefits that you can add to your math art ideas. Rubbing the textures of coins onto paper builds so many fine motor skills: precision, bilateral coordination, pinch and grip strength, and eye-hand coordination skills.

    To make a coin rubbing, you’ll need a few materials:

    • A handful of coins
    • Paper
    • Crayons
    1. First place the coins on a table. Be sure to place some coins heads side up, and others tails side up. This helps children to identify both sides of the coin.
    2. Place a piece of paper over the coins.
    3. Use the side of a crayon to rub the texture of the coin through the paper. The image of the coin will show up on the paper.

    Work on holding the coin below the paper without moving the coin (bilateral coordination.

    Work on rubbing the crayon at the “just right” level of pressure (proprioceptive input)

    Read more about the benefits of coin rubbing art projects in this sight word crayon rubbing activity that we did.

    Coin Activities for Visual Perception

    An important part of money lesson plans is identifying different images on the coins, to enable counting and money use.

    But, visually discriminating between coin size and images can be very difficult for some children. Then consider that each coin has a different “heads” side and a different “tails” side. Then, consider that there are different versions of each coin. In the U.S. for example, each state has it’s own version of the quarter. This can make coin counting very difficult for children with visual perceptual skill challenges.

    Visual perception Coin sorting – this is a great way to work on visual discrimination. I ask my children to draw four or five circles on a piece of paper depending on the different denominations of the coins. Then we sort out pile of coins into the different denominations. Each circle is home to a certain denomination of coin.

    The coin whole body movement exercises listed in the form below is a fantastic way to work on discriminating between coin differences. Sometimes adding movement to learning is a game changer, and this multi-sensory learning activity is sure to be a hit.

    Coin activities for kids to improve fine motor skills, gross motor skills, pencil control, and visual discrimination.

    Teaching Money to Children and Pencil control  

    Finally, the following money activities incorporate the skill of pencil control. Right around kindergarten and first grade level, students are gaining more precision and finger dexterity with pencil control. Why not work on both coin sorting and coin identification AND pencil control for a doubled functional task?

    Managing coins may even be a manual dexterity goal because it’s very functional and relevant.

    Coin decorating – Ask your child to write their name in large letters and then place coins over each letter to decorate their name. This can be done with individual letters or numbers if you are working on number formation or letter formations

    Coin race track – encourage your child to draw a race track. Use the coin as a car and demonstrate how to drive the car along the track using an individual finger. Each finger can have a turn to drive the car. 

    Coin rubbings – place a few coins on the table and place a piece of paper over the coins. Rub over the coin with a crayon or pencil to produce the impression of the coin on the page.

    Free coin exercises or learning money with multisensory learning.

    More Activities for a Money Lesson Plan

    Occupational therapists know the value of multisensory learning and this list of coin counting and sorting activities are sure to build knowledge and functional skills in children. For a whole-body, movement based resource on learning coins, grab this coin exercise handout.

    Free Coin Sorting Exercises

      We respect your privacy. Unsubscribe at anytime.

      Be sure to wash hands after manipulating coins!  And as always, keep a close eye on your child when coins are part of fine motor play to ensure safety.

      Colleen Beck, OTR/L has been an occupational therapist since 2000, working in school-based, hand therapy, outpatient peds, EI, and SNF. Colleen created The OT Toolbox to inspire therapists, teachers, and parents with easy and fun tools to help children thrive. Read her story about going from an OT making $3/hour (after paying for kids’ childcare) to a full-time OT resource creator for millions of readers. Want to collaborate? Send an email to contact@theottoolbox.com.

      Sensory Tooth Brushing Tips for Brushing Teeth

      Is toothbrushing a nightmare in your house? Sensory related toothbrushing issues can be! Need some sensory tooth brushing tips? For individuals with sensory difficulties, toothbrushing challenges mean more than cavities, plaque build up, and gum sensitivities. Sensory toothbrushing issues can lead to meltdowns, anxiety, and daily struggles with nightly and morning routines. Does your child cry when it’s time to brush their teeth? Do you know, or suspect, that they have some sensory challenge with brushing their teeth? 

      sensory tooth brushing issues and tooth brushing tips by a pediatric occupational therapist

      sensory tooth brushing tips for kids

      Brushing teeth is an ADL that can be a challenge for many kids whether it’s from sensory processing challenges, challenges with routine, anxiety, or any other variety of reasons.

      This is an area that an occupational therapist (OT) can help you with, by helping you set up a home program to make brushing your child’s teeth easier. Check out the tips below to help make tooth brushing easier for your family! 

      These toothbrushing tips are interventions for making brushing teeth easier, or strategies for helping with sensory challenges that impact  tooth brushing.

      Teaching dental hygiene to preschoolers or older learners addresses a daily occupation.  Incorporate these tips and recommendations daily to impact independence with tooth brushing.

      Amazon affiliate links are included below.

      toothbrushing tips

      Tip # 1: Use a Visual Schedule 

      Adding a visual picture schedule can help reduce stress and anxiety during teeth brushing by providing clear expectations of what’s going to come next. It also helps to reduce the auditory input for following directions, helping your learner focus on the task at hand.

      Another perk of using a tooth brushing visual schedule is that it ensures that the same routine is used every time that tooth brushing occurs. This can also help to reduce stress and anxiety by ensuring that the child knows what’s coming next. Which brings us to tip # 2! 

      Tip # 2: Create and Use a Consistent Routine 

      Create a routine that works for you and your family! It can evolve over time, so don’t worry if it’s not exactly what you want it to be right away. Having a routine helps take away anxiety around the unknown, and establishes what to expect during the situation. 

      Once you determine what works, plan to utilize the same language, visuals, toothbrush and toothpaste every time you work on toothbrushing.

      It will also be helpful to complete this toothbrushing routine around the same time every day. It doesn’t have to be rigid in that you brush teeth every night at 5pm, but should always follow an event like a meal, or when you first wake up in the morning.

      Consistency and practice is key! 

      Bonus Tip! Make sure that when you’re done with the toothbrushing routine, follow it up with a fun activity like play or a preferred game.

      Tip # 3: Use a Timer 

      Similar to creating a routine, using a timer helps to take fear of the unknown out of the picture. It also helps your child see that there is an end in sight to the activity. (Amazon affiliate link) Timers, or counting, are great to pair with a visual schedule. This nighttime toothbrush schedule offers more tips.

      Tip # 4: Sing a Song 

      If a timer causes too much stress or becomes an object of fixation, you can play a song or count to 10 for each side of mouth, top and bottom.

      Brush to the tune of 1, 2, buckle my shoe or any other preferred tune or song that is easily broken into small chunks for brushing each quadrant of the mouth.

      Tip # 5: Use a Vibrating Toothbrush 

      For sensory seeking children, a vibrating toothbrush is a great way to engage them in toothbrushing! Not only do they get stimulation that they are seeking, they also get a thorough teeth cleaning with the vibration. 

      Using a vibrating toothbrush does not need to be solely at toothbrushing time. It can be used anytime during the day.

      There are cost-friendly options at most grocery stores and large box stores for families that are concerned with the cost of getting an electric toothbrush, or feel that their child won’t use it. 

      Tip # 6: Flavored Toothpaste 

      Flavored toothpaste brings an element of fun to a task that can feel like a chore (unlike household chores that kids can do!). To add an extra layer of fun, and to encourage buy in from your child, go shopping together for new toothpaste. Get a few different flavors to try, and to have on hand in a pinch if the “preferred” flavor becomes boring or there is resistance to using it. 

      Bonus Tip! Offering choices during an challenging activity such as brushing teeth, gives your child some sense of control of the situation. 

      Tip # 7: Mouthwash that Shows the Plaque 

      Like flavored toothpaste, mouthwash is another tactic to help get buy-in from your child. Listerine Smart Rinse or Plaque Disclosing Tablets are a couple of the many great products that help your child see where the plaque is.

      Once they see where the plaque is, make a game out of cleaning all the “junk” out of their mouth. For kids that are older, you can use the visual the mouthwash gives to start talking about cavities, and the effects of not cleaning your teeth. 

      Tip #8: Brush Only One Time Per Day 

      The American Dental Association recommends tooth brushing twice a day. However, for kids that this task is extremely distressing, sometimes one REALLY good brushing a day is a success, and is a great start, and can be built upon.

      The second time a day can, and should, still be attempted, but can have less focus on quality, as you build the child’s tolerance to the task.

      The second time a day may have more focus on going through the motions, such as talking about the steps, doing a dry run, or if your child is emotionally regulated enough, attempting to brush their teeth. 

      Tip # 9: Take Turns Brushing 

      Helping your child with tooth brushing can take away stress over the motor component of coordinating hand to mouth, and challenges with completing multiple steps needed for toothbrushing. 

      Taking turns during the tooth brushing process, your child brushing one time a day and you brushing their teeth the second time, can give back some control and insure at least one time a day is done thoroughly. This is a great way to incorporate turn taking lessons into functional performance of the essential life skill of brushing teeth!

      Find what works for you and your child! 

      Tip #10: Use a Water Pick 

      If a toothbrush is still causing too much frustration, stress and anxiety, a good option is to change the tool completely, and try to reset the routine and behaviors. This is where a water pick is really great!

      While the water jet can be overstimulating and noxious to some, others may find it less so than tooth brushing.

      Implementing Tooth Brushing Tips 

      These tips can help to break any negative behaviors or emotions that may surround your child’s tooth brushing routine, and give you a foundation to start a fresh routine. Start by trying one recommendation that you think will work for your child, give it a week and if it’s still not working try another. Working through toothbrushing challenges takes time and is a trial-and-error process. Hopefully you find these tips helpful!

      Using tools like a sensory brush or sensory diet tools can help depending on specific needs of the individual.

      Incorporate these hygiene and grooming tasks and recommendations:

      For specific ways to integrate sensory needs into a daily lifestyle, check out the Sensory Lifestyle Handbook. This resource uses not only a sensory diet strategy into daily activities, but it offers tools and resources to create a sensory lifestyle that uses motivating and meaningful daily tasks to offer much-needed sensory input so individuals can function throughout their day.

      Toothbrush Social Story

      Another tip that I wanted to add is using a brushing your teeth social story. I love using social stories with my kids because it makes the task relatable and meaningful. Ideally, the social story you create has pictures from the child’s bathroom and includes details about their personal lives, like morning routines or evening routines. This makes a social story about brushing teeth very powerful because it’s the child’s personal task in picture and word form.

      Some key components of a social story about toothbrushing might include:

      • In the morning and at night, I brush my teeth.
      • I use my toothbrush.
      • First, I rinse the bristles to get them wet.
      • Then, I squeeze just a little toothpaste on the brush. It should be about the size of a pea. If I squeeze too much toothpaste, it will fall off the bristles.
      • Then I brush my teeth up and down and forward and back.
      • I make sure to brush all the way in the back.
      • I also brush my tongue.
      • When I have brushed my teeth for (set amount of time), then I rinse my mouth with water. I spit the water into the sink.
      • Then I rinse the toothpaste off my toothbrush.

      Every social story will be slightly different, depending on the individual’s needs and routines. These basics can be used to create a toothbrushing social story that works for the individual.

      Brushing Teeth Story

      A social story that is individualized might work best, however, I have also seen kids use a picture book or a general story (social story or even videos) be very helpful too! For example, one individual that I worked with really liked reading a picture book just before bedtime. Then they would brush their teeth and the story in the book was part of that routine that they created before bed. One book that is great for this is Brush! Brush! Brush! (Amazon affiliate link) because it has simple wording and nice pictures to teach the steps of toothbrushing.

      We also made this video on the steps of toothbrushing. It’s a take on a social story because it walks through the steps, but it is more of a story. There are characters in the video: Tommy Toothbrush, Pasty Paste, and the Icky Plaque Monsters.

      In the video, as we brush teeth, Tommy Toothbrush is on a journey to battle the dreaded Icky Plaque Monsters and learn the importance of proper dental hygiene along the way. Kids can follow the storyline as Tommy and Pasty team up to fight off the pesky plaque monsters threatening their dental health. With the help of their trusty toothbrush and toothpaste, they’ll demonstrate the step-by-step process of brushing teeth while overcoming obstacles and learning valuable lessons.

      This video is perfect for parents or therapy professionals supporting kids who are learning to brush their teeth or for parents and educators looking for a fun way to reinforce good oral hygiene habits.

      One last toothbrushing tip that we mention is to earn superhero points toward a healthy brushing badge. You can use any type of reward system like a sticker chart or other visual reward chart for each time the child brushes their teeth. This is a great visual prompt for toothbrushing!

      This toothbrushing story is one of our first videos on life skills…more to come!

      If you can’t view the video, we have it on YouTube as well:

      YouTube video on a toothbrushing story

      Whether you are using a toothbrushing social story, sensory strategies, or some of the other toothbrushing tips we’ve listed, a routine will help with this life skill!

      Contributor: Kaylee is a pediatric occupational therapist with a bachelors in Health Science from Syracuse University at Utica College, and a Masters in Occupational Therapy from Utica College. Kaylee has been working with children with special needs for 8 years, and practicing occupational therapy for 4 years, primarily in a private clinic, but has home health experience as well. Kaylee has a passion for working with the areas of feeding, visual development, and motor integration.

      Finger Opposition

      finger opposition

      In this blog post, we’re covering an important piece to the fine motor skills puzzle: finger opposition! Finger and thumb opposition is a dexterity and precision skill that develops from a young age, and is very important in eye-hand coordination tasks that we complete every day. Let’s cover what this term means and how to support finger to thumb opposition skills.

      finger opposition

      Finger Opposition

      Have you heard of the term “opposable thumbs”? You probably heard it as a reference to the difference between human hands and other, less advantaged animals. However, many other animals have opposable thumbs which work much like ours!

      But what does it actually mean to have opposable thumbs? What are we talking about when we say “finger opposition”? Why is it advantageous? 

      What is finger to thumb opposition?

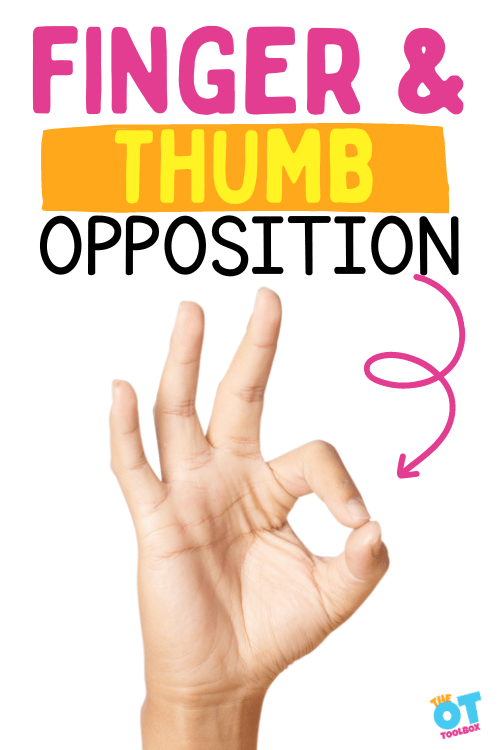
      Finger opposition, thumb opposition, and finger to thumb opposition all refer to the same thing. When we say these phrases, we are referring to the range of motion of the thumb (thumb ROM) as is rotates and flexes (or bends) to touch the pad of the thumb to the pad of the pointer finger.

      To break it down further, the word “opposition” refers to something being placed opposite of another. So, having an opposable thumb means one has the ability to place the thumb opposite to, or across from the other digits (the fingers).

      This thumb ROM is useful in order to grasp objects between the thumb and fingers.

      Many grasps involve the oppositional movement of the thumb, think: picking up coins, grasping a baseball, or turning the pages of a book. An occupational therapist can begin to assess for strengths and weaknesses in thumb opposition by asking their patient to tap their thumbs to the tip of each finger. 

      A hand assessment typically addresses the thumb ROM to oppose several areas:

      • Thumb to tip of each finger
      • Thumb to base of each finger

      These motions allow the hand therapist to assess the ability to flex the thumb CMC joint, the thumb MP joint, and thumb IP joint for functional use in picking up and handling objects.

      Also a major part of this assessment is a detailed look at finger ROM (range of motion). The following areas will also be assessed in a typical hand therapy evaluation:

      • Finger isolation
      • Range of motion of finger MP joints
      • Range of motion of finger PIP joints
      • Range of motion of finger DIP joints
      • Pinch strength
      • Grip strength
      • Sensation
      • Edema (swelling)
      • Pain
      • Coordination and precision skills
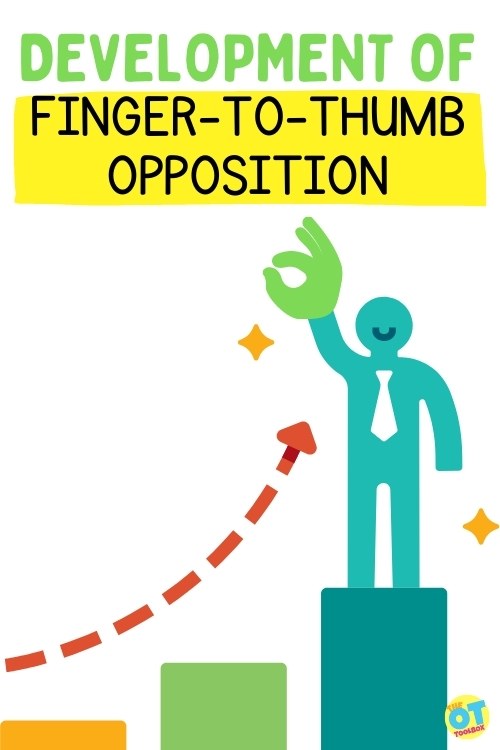
      Development of finger opposition to thumb

      DEVELOPMENT OF THUMB OPPOSITION

      We can follow the development of an infant’s thumb oppositional skills by observing their grasps on rattles, bottles, cheerios, or whatever they may have nearby. A typically developing infant is expected to go through this timeline of grasping skills:

      Newborn: Reflexive Grasp (Palmar reflex)

      • Newborns (up to 3 months of age) will reflexively hold whatever is placed in their hands. This reflex lays the foundation for a purposeful grasp in the baby’s life! 
      • Opposition? No thumb opposition yet, as the reflexive grasp focuses on the fingers curling in. 

      4-6 Months: Purposeful Palmar Grasp

      • Little ones this age are just starting to figure out how to reach for a desired object and grab a hold of it. They tend to hold the object between the palm and fingers, which is why this is called a “palmar” grasp.
      • Opposition? No thumb opposition just yet; the thumb may begin to move towards the palm, but is usually unused in the grasp, placed away from the hand, as in a “thumbs up”. 

      6-8 Months: Radial Palmar Grasp

      • In a radial palmar grasp, the thumb is secured along the side of the palm or the side of the index finger while the fingers hold the object in the palm. This demonstrates increased strength and precision of movement.  
      • Opposition? Here we can see the beginning of oppositional skill, but we aren’t quite there yet. 

      8-10 Months: Radial Digital Grasp

      • All of these grasp names sound confusing, but do you see how we went from “palmar” to “digital”? In other words, the thumb went from touching the “palm” to touching the “fingers”! 
      • Opposition? Ladies and gentlemen, thumb-to-finger opposition has officially begun. 

      10-12 Months: Immature and Mature Pincer Grasp 

      • First, the immature pincer grasp will develop. This is the grasp when a baby will hold a cheerio (or another small item) between the thumb and the side of the index finger. 
      • Later on, the mature pincer grasp develops which means that the thumb can oppose to the index finger! This is also known as a “tip” pinch, where the tip of thumb and the finger tip are together, much like the “okay” signal. 

      Over the next several months and years, the developing toddler will hone their fine motor skills to be able to oppose their thumb to each finger and coordinate their movements to complete tasks. To support these skills, age-appropriate toddler play activities are essential.

      In most cases, the development of thumb to finger opposition is considered “complete” around age five. The average five year old should be able to demonstrate certain movements that indicate developed hands, for example: a functional pencil grasp, stringing beads, zip/unzip, button/unbutton, and various in-hand manipulation skills. 

      To promote these skills during the ages of 3-5 (and if motor skills appear to be delayed), try some of these preschool activities for age-appropriate motor tasks to support development.

      WHY IS OPPOSITION USEFUL?

      This movement is essential for how we function with the world around us. For the koala (another member of the opposable thumb family), they are skilled climbers and tree-dwellers by use of their thumb wrapping around a branch, towards their other digits, as a way to secure their bodies for safety.

      Most humans are not quite as skilled in tree climbing, but will instead use our opposable thumbs for complex skills like playing guitar, tying our shoes, and handwriting. 

      For the able-bodied, one way to feel how we may function without the use of our opposable thumbs is to try to zip or button an item without using the thumbs…it is quite the challenge! 

      Delayed Finger to Thumb Opposition

      What happens when finger to thumb opposition is delayed or a challenge for kids? 

      There are some cases where finger-to-thumb opposition becomes challenging. This could be due to weakness, injury, muscle tone, weakness, range of motion difficulties, or malformation of the hand, fingers, thumb, or wrist.

      Really, anything that leads to reduced mobility of the thumb carpometacarpal joint (the point near the wrist that the thumb rotates on) can result in reduced thumb opposition. 

      When there is a lack of thumb opposition, one solution to increase function is to provide interventions for joint range of motion and muscle strength. This can be done in play-based ways that are therapeutic but tons of fun! 

      ACTIVITIES FOR Finger to Thumb Opposition 

      Craft and play-based activities are one great way to increase thumb to finger opposition in kids. The best part, though, is that you are increasing so many more skills at the same time! We’re talking fine motor strength and coordination, visual motor skills, bilateral coordination, social skills, and more! 

      Along with the many great activities below, check out our page all about Fine Motor Skills and our Fine Motor Checklist for more information on development of these skills. 

      Activities to Open Thumb Web Space – These activities open the thumb web space so a nice round circle is seen during thumb opposition. This enable precision of motor skills and a refined pincer grasp.

      Finger Play Songs– These opposition activities promote thumb ROM and coordination of the thumb and finger movements.

      Hand Eye Coordination Activity– Precision and motor planning go hand in hand with eye-hand coordination tasks. This is where you will see thumb and finger opposition in action.

      Finger Isolation Crafts– Isolating a single finger is a refined and graded motor task that enables opposition movements from the thumb to a single finger.

      Fine Motor Travel Box– This activity is a fine motor tool that makes working on thumb and finger opposition skills fun.

      Separation of the Hand Activity– The thumb is on the precision side of the hand and along with the pointer finger and middle finger is responsible to precise motor movements and dexterity in tasks. Finger to thumb opposition is a main piece of this.

      Play Doh Fine Motor – Opposable thumb activities like this one support strengthening and thumb ROM.

      Tongs Activities– Strengthening the arches of the hands allows for a stable and supportive base for thumb opposition in functional tasks.

      Stickers for Fine Motor – Stickers are a therapist’s best friend when it comes to finger opposition activities.

      The way we move our hands can be synonymous with the way we interact with our environment. For a lot of us, the use of our hands are the way that we function in daily life!

      Build finger to thumb opposition with these activities:

      Working on fine motor skills, visual perception, visual motor skills, sensory tolerance, handwriting, or scissor skills? Our Fine Motor Kits cover all of these areas and more.

      Check out the seasonal Fine Motor Kits that kids love:

      Or, grab one of our themed Fine Motor Kits to target skills with fun themes:

      Want access to all of these kits…and more being added each month? Join The OT Toolbox Member’s Club!

      Examples of finger opposition

      Recently, we posted a couple of videos on YouTube that show finger opposition. These are designed to highlight how the fingers and thumb move in opposition tasks. I love using these short videos as exercises, too.

      This video shows finger and thumb opposition where the tip of the thumb touches the tip of each finger. As the thumb opposes each finger, thumb flexion is occurring at a greater range to reach the ulnar side of the hand.

      Finger and thumb opposition exercise

      Next, I also created a video that shows opposition of the thumb to the pointer finger. We also fully extend the thumb. This is a great exercise for opposition because the thumb takes an extension break in between each repetition. You could pair this exercise with the first one, to fully extend the thumb before opposing each digit.

      Thumb extension and opposition exercise

      Lastly, I have another finger opposition exercise for thumb opposition with finger and thumb flexion and extension. This moves the thumb opposition through the full range of an open thumb web space to a closed thumb web space. This is a great exercise because it moves through the full range.

      Thumb opposition with finger and thumb flexion and extension

      Colleen Beck, OTR/L has been an occupational therapist since 2000, working in school-based, hand therapy, outpatient peds, EI, and SNF. Colleen created The OT Toolbox to inspire therapists, teachers, and parents with easy and fun tools to help children thrive. Read her story about going from an OT making $3/hour (after paying for kids’ childcare) to a full-time OT resource creator for millions of readers. Want to collaborate? Send an email to contact@theottoolbox.com.

      Pencil Grasp Activities with Fine Motor Play

      Helping kids with pencil grasp can be a complicated matter. Kids can hold the pencil too tightly or with an immature grasp no matter how many pencil grips you try. But, there is hope. These pencil grasp activities are fun ways to improve pencil grasp with fine motor play. By using play activities to help kids build a better pencil grasp, kids develop a grasp that is strong and dexterous in ways that carryover to holding a pencil. Try these tripod grasp activities to help kids with pencil grasp development. This is something that therapists want parents to know about pencil grasp development…that a functional pencil grasp might not look like a traditional tripod grasp…and that there are fun ways to work on grasp development!

      pencil grasp activities

      That said…this is the place for all things pencil grip activities that actually make a difference!

      Pencil grasp activities for kids

      Pencil Grasp

      I love to share easy tricks to work on things like fine motor skills. Working on pencil grasp and the fine motor skills needed for handwriting are two of my favorite ways to build functional skills as an Occupational Therapist.  This blog post is a round up of some of the best pencil grasp activities and ways to develop a more functional pencil grasp through fine motor play activities.  I’ve updated this resource to include more recent pencil grip occupational therapy ideas and grasp activities that I’ve shared. 

      A functional pencil grasp might not “look like” the traditional tripod grasp. One thing to read up on is grasp patterns, because this plays a huge role inholding the pencil.

      Want to know how to fix a problem with pencil grasps? Need help knowing where to start when it comes to immature pencil grasps or a child hating to write because their hand hurts? The Pencil Grasp Challenge in open for you! In this free, 5 day email series, you’ll gain information, resources, specific activities designed to promote a functional, efficient pencil grasp.

      Click here to join the Pencil Grasp Challenge.

      Pencil grasp challenge to help kids improve their pencil grasp.
      Pencil grip activities kids will love for playing while working on pencil grasp perfect for occupational therapy activities.

      Improve Pencil Grasp with Fine Motor Play Ideas

      First, if you’ve go questions about pencil grasp, check out this resource on building fine motor skills through play.  You will find TONS of info about the fine motor “parts” of a functional grasp.  

      Try these awesome activities to improve pencil grasp through play and fine motor development.

      Fine Motor Play Activities to Improve Pencil Grasp

      We love incorporating fine motor activities into our play.  These posts are some of our favorites from the past year, and as a bonus, will help with the development of the small muscles of the hands.  An efficient grip on the pencil uses a tripod grasp (thumb, index, and middle fingers) with an open space between the thumb and index finger.    This grasp on the pencil allows kids to better form letters correctly and in a given small space using the fingers to make the pencil movements, vs. using the wrist or whole arm.  If your child is struggling with their handwriting, look first at their grasp on the pencil and go from there.  Try one of these activities for improved muscle strength and pencil control.  

      If you are interested in improving pencil grasp, and wondering about all of the fine motor skills that impact a functional pencil grasp, you will definitely want to join the pencil grasp challenge. This free 5 day email series explains everything you want to know about pencil grasp activities that have a powerful impact. Click here to join the Pencil Grasp Challenge. 

      Pencil activities to help kids write with a functional grasp

      So let’s get moving on some of the best pencil grip activities that actually make a difference in a functional pencil grasp.

      Pencil Grip Activities

      We have many pencil grasp tricks up our sleeve as school based OTs…but there are many ways that you can target specific needs with fun and engaging pencil grip activities! Most of these ideas don’t even use a pencil. They target the underlying skill areas like hand strength, dexterity, and precision. Other tasks DO use a pencil though!

      While these wouldn’t be specified in a manual dexterity goal, you would target functional skills of handwriting. These ideas are the play-based strategies, or tools.

      Fine motor play idea that promotes pencil grasp with beads and play dough

      Pencil Grasp Exercises with Play Dough is fun with these mini fluted flower beads.  They build a flexed thumb IP joint which is needed for an efficient pencil grasp. 

      Strengthening activities for fine motor skills like handwriting activities

      Hand Strengthening Exercises are fun with tongs! They are an easy tool to  build so many handwriting skills.

      Fine motor play activity using tweezers made from craft sticks

      These Craft Stick Tweezers build muscle strength, an open web space, and tripod grasp.

      Use play dough and this free play dough mat to work on intrinsic muscle strength in the hands.

       Play Dough Strengthening Mat works on building the intrinsic muscle strength of the hands.

      creative ways to build and work on a functional pencil grasp
      Improve pencil grasp through fine motor play with blocks.

      Fine Motor Development with Blocks is a great way to build many skills needed in handwriting.

      Use coins to work on fine motor skills like in-hand manipulation

      In Hand Manipulation with Coins can help build skills needed for pencil grasp like manipulating the pencil during letter formation.

      Work on fine motor skills with paperclips to improve thumb opposition.

      Thumb Opposition is an important skill needed for an open thumb web space and functional and efficient grasp on the pencil.

      Mini Circles Pencil Control Exercises

      Mini Circles Pencil Control Exercises help with building small motor movements and tripod grasp through improved intrinsic muscle strength.

      Help kids with fine motor skills using small balls of play dough.

      Finger Isolation with Play Dough helps with minute movements of the hands and individual finger movements in managing the pencil. 

      Use clay to work on fine motor skills

      Clay Exercises can help strengthen the muscles of the hand for increased endurance of pencil grasp.

      Improve hand dominance using fine motor activities.

      Motoric Separation of the Hand is essential for managing the pencil while utilizing the ulnar, stability side of the hand.

      Kids can work on fine motor skills by playing with masking tape on a table surface.

      Fine Motor Table-Top Play addresses intrinsic muscle strengthening.

      Work on fine motor skills by playing with waterbeads

        In-Hand Manipulation: Two Activities In hand manipulation is necessary during pencil grasp to manipulate and advance the pencil while writing, as well as making adjustments with the pencil while erasing.  

      Fine motor play using tissue paper

      Fine Motor Play with Tissue Paper is a great way to build intrinsic muscle strength. Strength in the intrinsic muscles ensure a functional tripod grasp.

      Make DIY lacing cards to help kids with fine motor skills.

      DIY Lacing Cards improves bilateral coordination, needed for holding the paper while writing.


      Use pipe cleaners to work on fine motor skills.

      Pipe Cleaner Fun builds tripod grasp for use with handwriting.

      Use clothespins to work on hand strength.

        Fine Motor Strengthening Color Match works on increasing the intrinsic muscle strength of the hands.

      Make your own pencil control worksheets.

      Pencil Control Worksheets You Can Make at Home These worksheets build pencil control, line awareness, and spatial awareness during handwriting.


      Use dry pasta to work on fine motor dexterity

      Learning With Dyed Pasta provides a fun activity for building eye hand coordination.

      Play with coins to improve fine motor dexterity.

        Manipulating Coins for Fine Motor Development is a great way to work on in-hand manipulation needed for manipulating the pencil during handwriting.    

      Tracing letters with sidewalk chalk improves hand strength.

      Rainbow Writing provides a resistive writing surface, providing proprioceptive feedback and a way to work on motor planning in letter formation, as well as tripod grasp on the pencil.  

      Use Wikki Stix to build hand strenth

      Tripod Grasp with Wikki Stix Pushing the wikki stix into the container works on tripod grasp and intrinsic muscle strength, as well as bilateral coordination.  

      Use pipe cleaners and a plastic bottle to work on tripod grasp.

      Using Pipe Cleaners in Fine Motor Play also improves intrinsic muscle strength and bilateral coordination with a brightly colored stick.  Using the plastic bottle provides great auditory feedback.  

      Here is more information on pencil control and distal mobility in handwriting.

      Here are games to improve pencil grasp.

      Creative ways to work on pencil grasp

      tripod grasp activities

      Working on tripod grasp is fun when you add activities! Some tripod grasp activities that strengthen the intrinsic muscles of the hand include:

      • Tearing paper
      • Playing with tweezers
      • Dropping coins into a bank or slot
      • Rolling balls of play dough
      • Pushing paper clips onto paper
      pencil grip occupational therapy ideas for fine motor skills and pencil grasp

      More ways to support this skill include the ones below.

      developing pencil grip activities

      The ideas listed below are simple tasks you can do to help kids with developing pencil grip. These are the ideas OTs usually have on hand.

      Creative ways to work on pencil grasp
      Teaching pencil grasp? Use these fun fine motor activities to improve pencil grasp through play.

      Colleen Beck, OTR/L has been an occupational therapist since 2000, working in school-based, hand therapy, outpatient peds, EI, and SNF. Colleen created The OT Toolbox to inspire therapists, teachers, and parents with easy and fun tools to help children thrive. Read her story about going from an OT making $3/hour (after paying for kids’ childcare) to a full-time OT resource creator for millions of readers. Want to collaborate? Send an email to contact@theottoolbox.com.

      31 Days of Learning with Free Materials

      This blog post on learning at home with materials found around the home is a great resource for school based OT providers because many of the skills we work on in therapy sessions need to be carried over at home to ensure results. It’s the everyday practice that makes skills stick! Here you will find our top picks for DIY learning materials using items found around the home. These are great items for occupational therapy at home, too. The thing is that I love to share activities that build skills using everyday items.

      diy learning materials

      We are big fans of using free and recycled materials in our crafts and activities.  Many times, people ask: “How do you do so many fun activities without spending a fortune?!” Most of our learning, crafts, and activities involve using free or almost free materials.  While we are not a homeschooling family, we do SO many learning through play activities and homework extension skills that work on the skills that my kids are doing at school.  

      Some of our top picks using items found in the home include:


      We’re excited to join homeschooling bloggers with 31 Days of ideas for learning at home.  In this series, we share 31 days of Learning at Home with Free (or almost free) Materials.  Each day, we’ll bring you tips and ideas to use materials you already have in learning and school extension activities. Most of these materials are household items you may already have in the house and others will be recycled materials.

      Use these learning at home ideas using free materials or items already found in the home.

      All of the activities will be using free (or almost free) items to build on learning concepts that are age appropriate for our kids.  We will be sharing ways to use these items in different age ranges, as well.  

      These activities are sure to be a fun way to work on skills over the summer to prevent an academic “summer slide” and ways to creatively learn and extend on school homework and homeschool curricula during the year.  Be sure to stop by each day in July for creative learning ideas as we fill in our month with Free Learning!

       
      31 days of learning with almost free materials.  Learn at home through play with recycled and free materials.


      Learning with Free (or almost Free) materials at home:

      This series is about easy learning ideas that you can make your own.  Your child’s needs and interests will make these ideas work in your family.  My hope for the 31 Days of Learning with (almost) Free materials is to bring you creative ideas.  

      Start with these games with paper clips to use an everyday material found in most junk drawers.

      Creative & Playful Learning.  Be inspired.


      31 Days of Learning with Free Materials (items you probably already have):


      Click on the images below and the list of posts for our month of learning at home!


      Distance learning ideas for learning at home with free materials.

      More Learning at Home Ideas

      These learning with free materials ideas use items you probably have in the home right now to work on math or writing concepts, AND build fine motor skills. Try some of these learning ideas using items in the home, including:

      Colleen Beck, OTR/L has been an occupational therapist since 2000, working in school-based, hand therapy, outpatient peds, EI, and SNF. Colleen created The OT Toolbox to inspire therapists, teachers, and parents with easy and fun tools to help children thrive. Read her story about going from an OT making $3/hour (after paying for kids’ childcare) to a full-time OT resource creator for millions of readers. Want to collaborate? Send an email to contact@theottoolbox.com.

      Fine Motor Activities with Beads

      beading activities

      A while back, I started putting together lists of activities that require just one supply. These are items that you probably already have in the home. I wanted to put these activity lists together to help kids work on fine motor skills with little to no supplies. Some of the activity lists that we have so far include fine motor activities using paper clips, activities using just craft pom poms or cotton balls, and activities to improve fine motor skills with just playing cards. I have a lot more activity lists to come. These will all use just one item, and the fine motor ideas are great for building skills with limited supplies. Send a copy of these links to any friends or families looking for activities for kids to do at home to work on fine motor skills. They are also great for adding to teletherapy services and working on skills with kids as the families probably have these simple items in their home.

      Beading activities

      Having a small portable fine motor kit with beads and pipe cleaners can be a a great tool for supporting fine motor development. This is a great addition to the therapy bag for any school based OT.

      stringing beads occupational therapy

      Occupational therapy as a profession was centered around crafts at it’s roots. Historically, OTs used crafting as a tool to support physical and social emotional recovery. It’s fun to think about how stringing beads and occupational therapy is stull a very functional craft that supports skill development!

      For example, check out our empathy activity that uses bead stringing!

      fine motor activities using beads

      For now, let’s talk about fine motor activities that can be done using just beads! HERE are all of our fine motor activities in one place.

      FINE MOTOR ACTIVITIES KIDS NEED

      Kids need fine motor skills for school and play. The problem is when we see functional concerns that limit independence. We might see kids who really struggle with hand strength, dexterity, joint mobility, or precision. We may notice these issues in how a student grasps their pencil. We may see kids having trouble with buttons, zippers, or snaps because of the fine motor skills they really need to develop. Simple fine motor activities can make a real impact in working on these fine motor skill areas.

      Activities using what you have in the Home

      Here are some of the other OT activity ideas that I’ve created so far in this series:

      Activities using just a deck of playing cards

      Activities using just craft pom poms or cotton balls

      Activities using just paper clips

      Fine Motor Activities using Beads

      Now onto the fine motor activities that require just beads! Let’s talk about the WHY behind using beads as a fine motor tool in occupational therapy activities. There are several fine motor sill components that can be strengthened with beads.

      Separation of the sides of the hand– Paperclips are the perfect small item to hold in the palm of the hand, engaging the ulnar side of the hand, while encouraging movement and precision with the pointer finger, middle finger, and thumb. This skill is so important for fine motor precision in tasks like pencil grasp and managing clothing fasteners or tying shoe laces.

      Pincer grasp– Paper clips are a powerful means of promoting the precision grasp between the thumb and pointer finger. This motor skill is essential for tasks that require strength and dexterity to manage small items like coins or turning pages in isolation.

      In-hand manipulation– Paperclips can be used as a manipulative item for transferring from the palm to the fingertips or vice versa. This is an essential skill needed in pencil grasp and other functional tasks.

      Finger isolation– Paperclips can be used in various ways to promote finger isolation needed for fine motor dexterity and functional tasks.

      Eye-hand coordination– This skills is an essential fine motor precision skill needed for so many functional tasks. Craft pom poms can be a powerful way to work on this skill area.

      Visual Motor Skills- Coordinating visual information with motor movements of the hands is essential for handwriting, cutting with scissors, and many other tasks.  Manipulating lacing cards is an excellent way to address these needs. 

      Read more about visual motor skills.

      Motor Planning- A motor plan is functional execution of a task which is viewed with the eyes and carried out with the hands in order to complete tasks, such as mazes, walking around obstacles, cutting along a line, and writing within a space on a form.  Visual motor skills can be difficult for children with visual processing difficulties.  Identifying and organizing information is in a motor plan works on problem solving skills.  

      Read more about motor planning activities for kids.

      What kind of beads help with fine motor skills?

      This is pretty open-ended! Use what you’ve got on hand to really home in on the skills listed above. Some beads that would work include: pony beads, perler beads, pop beads, jewelry making beads, or even beads from an old necklace would work. The point is that you need small manipulatives that can fit into the palm of the hand and really challenge those fine motor skills.

      fine motor activities using beads and activities in the home

      Use beads to work on fine motor skills in the following ways:

      • Press beads into play dough
      • Stick toothpicks into foam. Place beads onto toothpicks.
      • Sort onto pipe cleaners by color
      • Thread onto string
      • Tape ribbons to an easel or wall. Slide beads up the ribbons from the bottom
      • Place beads and hair gel in a gallon size bag. Tape the top. Move beads with fingertips.
      • Drop beads into spice containers
      • Drop beads into recycled water bottle
      • Draw a large letter on paper and fill the lines with beads to form the letters. Use bubble writing to fill the space inside or place the beads right on the lines of the letter.
      • Add beads to a marble maze
      • Sort beads by color
      • Copy patterns on play dough
      • Place beads on shapes and lines
      • Press beads into slime for a fine motor workout.
      • Use beads as counters
      • Create arrays with beads on cardstock
      • Use letter beads to place on letters of spelling words
      • Write letters on the sides of some beads like wooden ones that we used in this fine motor activity.
      • Roll dice. Count out same number of beads
      • Use other items to create beads like this foam curlers activity.
      • Scoop and count beads into groups of ten
      • Use tweezers to pick up beads
      • Slide beads onto feathers
      • Line up beads on a craft stick placed on a table surface
      • Perler beads can be melted to create a pegboard like we did in a previous post.

      More fine motor activities

      Beading Activities

      It’s not just about stringing beads on a pipe cleaner or string! You can work on other areas, too! Some ideas include:

      • Work on patterns with the beads
      • Copy a series of colors or bead types to work on visual motor skills
      • Use a variety of bead types to encourage fine motor skill work
      • Hide beads in theraputty and then use them to string the beads

      These are just some of the ways to use beads in OT sessions! How do you incorporate bead activities?

      Working on fine motor skills, visual perception, visual motor skills, sensory tolerance, handwriting, or scissor skills? Our Fine Motor Kits cover all of these areas and more.

      Check out the seasonal Fine Motor Kits that kids love:

      Or, grab one of our themed Fine Motor Kits to target skills with fun themes:

      Want access to all of these kits…and more being added each month? Join The OT Toolbox Member’s Club!

      Colleen Beck, OTR/L has been an occupational therapist since 2000, working in school-based, hand therapy, outpatient peds, EI, and SNF. Colleen created The OT Toolbox to inspire therapists, teachers, and parents with easy and fun tools to help children thrive. Read her story about going from an OT making $3/hour (after paying for kids’ childcare) to a full-time OT resource creator for millions of readers. Want to collaborate? Send an email to contact@theottoolbox.com.

      How to make Sensory Bottles for Self Regulation

      sensory bottles

      This blog post on how to make a sensory bottle is an old one on the website. It was originally written February 21, 2015 and we updated it April 11, 2024. All this time later, the fact is that sensory bottles continue to be a valuable self regulation and calming tool for kids to use to calm down.

      sensory bottles

      We love to play with sensory bottles.  They are an amazingly simple way to explore, calm, and investigate.  If you are looking for a sensory play idea that is mess-free and can be used as a learning tool as well as a therapy tool, then sensory bottles are the way to go. 


      Sensory bottles for self-regulation, calming, and sensory input. How to make sensory bottles for learning and sensory.


      This post contains affiliate links.

      What is a sensory bottle?

      You can find many versions of sensory containers and bottles online.  So what is a sensory bottle?  They are tools to calm down and encourage self-regulation.  
       
      Sensory bottles are a visual and physical tool for calming and relaxing the body.  A child (or adult!) can use a sensory bottle when they feel anxious, overwhelmed, “wound-up”, or overstimulated and use the sense of proprioception as they shake the sensory bottle and watch the contents shift.  This visual cue is a great calming strategy for many children.

      Why do Sensory Bottles Work?

      One question that comes up a lot is how do sensory bottles work? How does a sensory bottle or sensory jar calm down a child, especially when they are in a fight or flight state? It has to do with the proprioceptive input paired with visual gaze. 

      Let’s break this down…

      A sensory bottle is a common tool used to support sensory processing needs that  impact behaviors and emotions. This type of tool is key when it comes to sensory dysregulation and meltdowns or regulation needs. We call this a sensory coping strategy.

      The jar or container has weight to it, offering heavy work, when held and shaken or information to the proprioceptive sensory system. Then, along with that input, the jar has a visually enticing “thing” inside, which might be sand slowly moving through objects, water and oil moving slowly up and down the bottle, or other item that catches the eyes. 

      Sensory Bottle and Polyvagal Theory

      The polyvagal theory is a newer area of study (at least since this blog post was originally written back in 2015!), but the concepts have always been there. The polyvagal theory says that there is a relationship between eye gaze, autonomic reactions, and cognitive performance. This article explains more about a research review related to polyvagal theory.

      The key here is to get the eyes into a gazing state. By that I mean the eyes should dilate as if staring off into the horizon or even something that is just 20 feet away. Did you ever sit on a beach and stare off at the horizon with a huge sense of calm and peace? Or have you ever looked off at a mountain pass and felt regulated? This is horizon gazing and we can use that calming strategy when using a sensory bottle as a calming tool.

      When you gaze off into a distance without really focusing on something, the pupils are converging. The cool thing is that you don’t need a horizon or something really far way for this to happen. You can just stare at the sensory bottle without really looking and focusing on any one thing. This can be especially helpful to blunt norepinephrine. 

      When we see these materials move within the bottle, we hold a gaze…AND feel the weight of the bottle…and add deep breathing exercises, this is where we get the calming state!
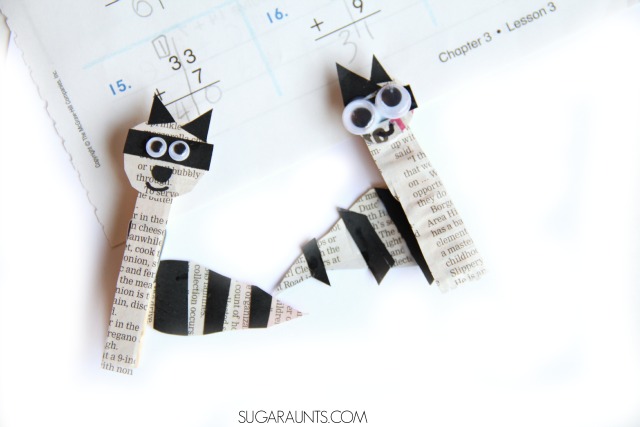
      We cover a lot about sensory strategies, including vision and interoception here on The OT Toolbox. This is important because of the role of the limbic system, the vestibular systemproprioceptive system, and overall sensory processing systems in functional tasks.

      A sensory bottle is a valuable support tool for these areas. They also serve as a hand-held mindfulness activities and can be added to a child’s “Regulation Toolbox.”

      When we use a sensory bottle in therapy sessions, we are focusing on the coping strategy that is used in conjunction with an emotions check in and feelings check in to support self awareness. It’s a self regulation activity that we love because you can use a variety of materials and kids can help make them. 

      Because of this, sensory bottles make a great addition to a budget sensory room in the school environment, or a calm down corner at home.

      RELATED READ: Sensory Play Ideas
       

      How to make a sensory bottle

      It’s not difficult to make a sensory bottle. Basically, you’ll use materials you already have on hand. 

      The sensory bottle as a coping strategy are so easy to create.  The possibilities are endless when it comes to additions.  
       
      In general, there are two types of bottles:
      1. Liquid sensory bottles
      2. Dry materials sensory bottles
       
      To make either type, the process is the same. You need a bottle of some type and items to put into the bottle. Grab a few plastic bottles, glue to secure the lid (Glue is the most important part!), and a few of these items:
       
      To make a liquid sensory bottle add:
       
       
      Add pieces to the liquid base:
       
      • toys
      • nature (acorns/leaves/flowers/sticks/rocks…)
      • beads
      • feathers
      • glitter
      • paper clips
      • pipe cleaners
      • crafting pom poms
       
      Or make a dry sensory bottle by skipping the liquid and just pouring in:


      After you add the items you want into the container, add a bit of glue to the lid and secure it onto the bottle. Allow the glue to dry before you use the bottle. 


      We’ve used sensory jars and bottles as a sensory tool many times. Along with crayon play dough, they are one of our favorite ways to to get proprioceptive input through play.

      How to make sensory bottles


      Sensory Bottle Ideas

      Some of our favorite sensory bottle ideas include ones that we had as much fun making as we did playing with!
      If you are looking for more creative sensory ideas, then you will love our favorite sensory bottle ideas: 

      Check out the baby sensory exploration bottles we made in this video below:

      Baby Exploration Sensory Bottles made with recycled spice containers.

      Have you ever made a sensory bottle? What did you add?

      Colleen Beck, OTR/L has been an occupational therapist since 2000, working in school-based, hand therapy, outpatient peds, EI, and SNF. Colleen created The OT Toolbox to inspire therapists, teachers, and parents with easy and fun tools to help children thrive. Read her story about going from an OT making $3/hour (after paying for kids’ childcare) to a full-time OT resource creator for millions of readers. Want to collaborate? Send an email to contact@theottoolbox.com.