Keyring Pencil Grasp Trick

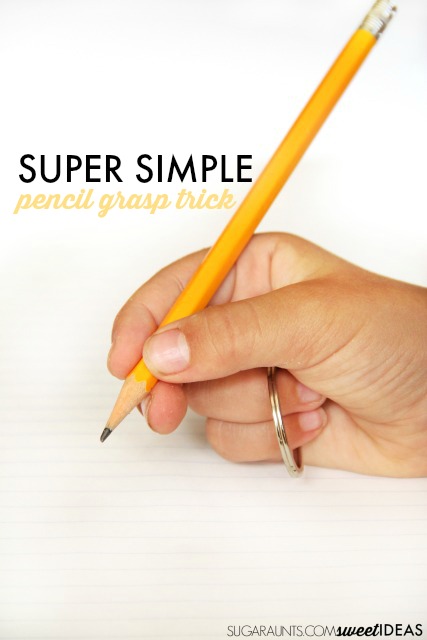
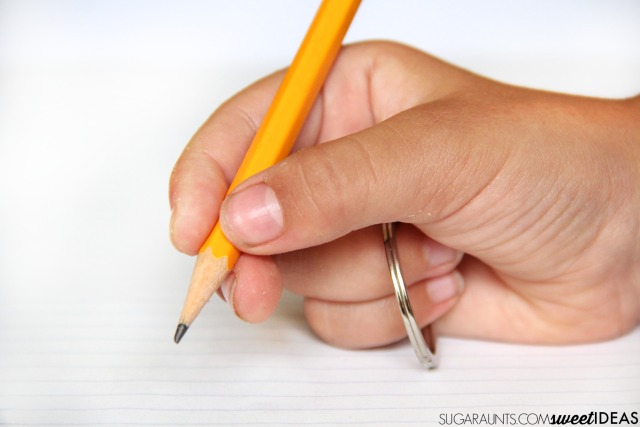
Hand holding a pencil with a keyring around the ring finger and pinkie finger for pencil grasp.

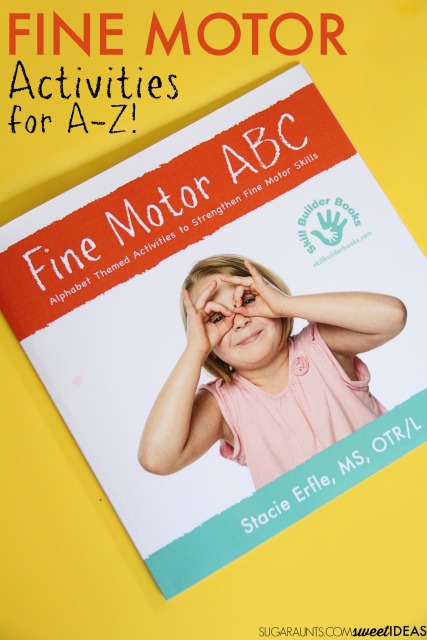
Today, I’m excited to share a fine motor skills book written by a fellow Occupational Therapist.  Fine Motor ABC is a book full of alphabet themed activities that are designed to strengthen fine motor skills that are needed for functional tasks such as handwriting.  We tried one of the activities and found a great way to encourage a tripod grasp on the pencil when writing with this super simple pencil grasp trick.  This would be a great addition to our post on creative ways to improve pencil grasp with fine motor skills.

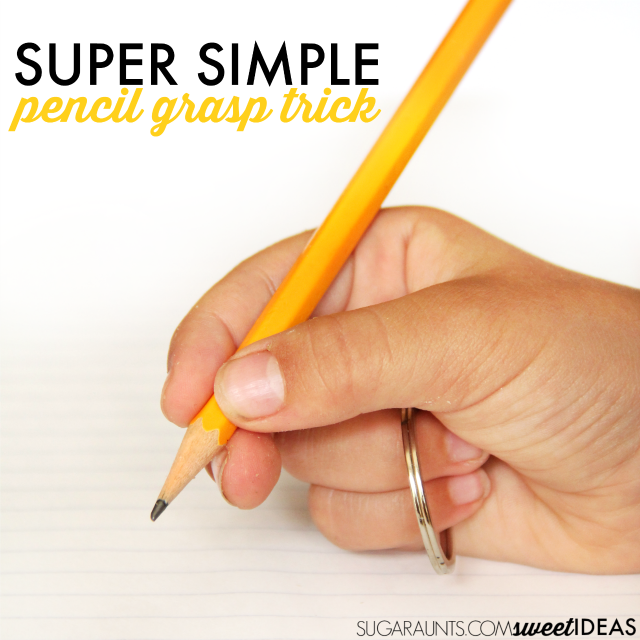
Hand holding a pencil with a keyring around the ring finger and pinkie finger for pencil grasp.

Easy Pencil Grasp Trick

One of my favorite ideas from (Amazon affiliate link) Fine Motor ABC is this super simple tripod grasp idea.  We tried a version using a keychain keyring loop to work on encouraging a tripod grasp.  What a simple pencil grasp trick!

Using the keyring loop is a fantastic way to separate the two sides of the hand with a tactile cue.  

To use the tool, simply shoe kids how to position the loop right over the ring finger and pinky finger.  

  • They can then tuck the keyring loop over the fingers or simply hold it in place in their palm.  
  • This tactile cue allows them to curve their fingers into the palm while stabilizing the ulnar side of the hand.  
  • The middle finger, index finger, and thumb are then free to manipulate the pencil with the precision side of the hand.  

FAQ: Using a Keyring to Support Pencil Grasp

Q1: Why would you use a keyring to help with pencil grasp?
A: The Pencil Grasp Trick is a simple method using ABCs to improve how a child holds a pencil, making writing more comfortable and effective.

Q2: How does using a keyring help with fine motor skills?
A: By engaging specific hand muscles and coordinating movements, the keyring trick strengthens the fine motor skills needed for writing and other tasks. It engages the precision side of the hand and separates the support side of the hand. See separation of the sides of the hand for more information.

Q3: At what age can kids start using the Pencil Grasp Trick?
A: Children as young as 3-4 years old can begin practicing this trick, but it’s beneficial for any child struggling with proper pencil grasp.

Q4: Can this method be used for children with special needs?
A: Yes, the Pencil Grasp Trick is adaptable and can be a helpful tool for children with special needs to improve their writing skills.

Q5: How often should my child practice the Pencil Grasp Trick?
A: Regular practice, even just a few minutes a day, can lead to noticeable improvements in pencil grasp and writing abilities.

Super simple pencil grasp trick using a keychain keyring loop that works to separate the two sides of the hand and encourage a tripod grasp while writing.

This post contains affiliate links.

Fine Motor Skills ABC Activities

We love the book, Fine Motor ABC because it has alphabet themed fine motor activities that make it perfect for teaching young kids while focusing on much-needed fine motor skills.

 Fine Motor ABC book

Fine Motor ABC is a great book for Occupational Therapists, teachers, and parents or anyone who works with kids.  This book is a resource of engaging activities that are designed to target the necessary skills needed for childhood functional tasks.  Each letter of the alphabet addresses a fine motor skill with a quick and easy description of the task.  There are big, bright images and corresponding hand signs for kids to copy.  The engaging description of the activities really had my kids interested in reading through the book.  

Following each lettered fine motor activity are through descriptions of the therapeutic reasoning for completing the task.  Fine Motor ABC is a book that would be well-used in any home, classroom, or therapy clinic.  

Stacie Erfle is an Occupational Therapist who has put creative ideas to work in her book and I’m excited to read the upcoming books on gross motor skills and sensory activities.  Read more about the books on the Skill Builder site.

Fine motor ABC activities for kids and designed for therapists, parents, and teachers for developing fine motor skills in kids.

Great ways to use Fine Motor ABC in therapeutic development of fine motor skills in the OT clinic, classroom, or home:

  • Use the alphabet-themed fine motor activities in order from A-Z.
  • Complete only a few of the letters, by spelling a word and completing those corresponding fine motor activities.
  • Spell out the child’s name by completing the fine motor activities that correspond with the letters in the child’s name.
  • Follow the sign language images at the top of each page.  Ask the child to copy the hand signs.  Don’t forget to ask the child to carefully turn the pages of the book to see the next sign!
  • Create a customized therapy home program using the themed fine motor tasks.
  • Act out the activities without using manipulatives for a different way to practice the fine motor skills.
  • Work through the book by doing the activities that have a purple border (or blue or orange border!) Next time do a different color.

There are so many ways to use this resource activity book with kids!

Super simple pencil grasp trick using a keychain keyring loop that works to separate the two sides of the hand and encourage a tripod grasp while writing.

More easy pencil grasp tricks for developing fine motor activities that you will love:


Super simple pencil grasp trick using a keychain keyring loop that works to separate the two sides of the hand and encourage a tripod grasp while writing.


 in-hand manipulation

Colleen Beck, OTR/L has been an occupational therapist since 2000, working in school-based, hand therapy, outpatient peds, EI, and SNF. Colleen created The OT Toolbox to inspire therapists, teachers, and parents with easy and fun tools to help children thrive. Read her story about going from an OT making $3/hour (after paying for kids’ childcare) to a full-time OT resource creator for millions of readers. Want to collaborate? Send an email to contact@theottoolbox.com.
OT Tips for Infant Feeding Therapy

occupational therapy infant feeding therapy. Image of a baby bottle.

One area of daily functional tasks that pediatric occupational therapy providers support family and caregivers, is by addressing infant feeding challenges. When we receive an occupational therapy referral for a newborn, we are definitely going to be addressing infant feeding therapy in both the evaluation and probably the OT interventions. This means we support new parents or caregivers with strategies to help a little one eat from a bottle or by breastfeeding. Or, we might support newborns that are not typically developing or have other physical needs to acquire the food intake that they need to grow and thrive. Ultimately, this is one step in self feeding. At this stage, the newborn is the client and so is the family unit, so we support, educate, and provide tips and tricks to help with newborn feeding needs. In this blog post, you’ll find information and resources to help with feeding a new baby.

occupational therapy infant feeding therapy. Image of a baby bottle.

Read through our article on feeding developmental milestones, because that is a good place to start to know what age a baby should be doing certain things when it comes to feeding skills. Also important to read and understand is infant oral motor skill development.

You’ll want to incorporate the feeding cycle in therapy sessions with baby play strategies that will help with digestion, visual motor skills, visual tracking skills, positioning, spatial awareness skills, and other skills that in turn actually help with feeding. This is all part of infant feeding in occupational therapy and when we support the family or caregiver, we do want to mention that feeding cycle which includes other things like sleep and play as part of feeding needs.

infant feeding therapy

The main thing to consider when it comes to infant feeding therapy is addressing the needs of the child, which might be different depending on the age, the stage, the family needs, and other input like diagnoses, birth complications, hospital or NICU stays, and other things that will be different for each baby. This is all going to be part of the intake in the occupational therapy eval.

The OT processionals on the therapy team may see a lot of caregiver burnout when there is a feeding need in babies. This happens because it’s such an exhausting period of time for new parents or parents of multiple kids. The caregiver has a lot on their plate and when the baby struggles with feeding and often times, infant sleep schedules as well, we have a big cause of that exhaustion.

Once you have that information, you’ll address the needs that impact food and liquid intake so that the little one can grow and thrive. Let’s break down tips for each stage, because that is one way to know how to support different age levels. Remember that you can adjust these recommendations depending on the developmental age and stage of the little one. They might be a one year old who is developmentally at a 6 month old stage, for example, and then you can pick and choose the strategies that work for that age range.

Feeding is one of the most crucial activities you will learn to do with your baby, and it can be an exciting milestone in your child’s development. Around 5-6 months old is typically when you can start introducing solid foods to your baby. However, it’s perfectly fine to start earlier, provided that your baby is ready. Here are some signs to look for to determine if your baby is prepared for solid foods:

  • Can they sit up on their own or with support?
  • Are they able to hold up their head and control its movements?
  • Do they open their mouth when milk is offered?
  • Can they swallow without spitting out milk?
  • Do they bring toys to their mouth?

If your baby can do these things, it might be time to start trying thin purees. While breastmilk or formula will continue to be their primary source of nutrition, introducing new foods now can help your baby develop feeding skills, get accustomed to different textures, and build the muscles in their mouth. Your baby will still need to be fed 6 ounces of breastmilk or formula 4 to 6 times a day.

Creating a feeding routine is essential for your baby’s development. Start by offering solid foods 1 to 2 times a day, ideally during family mealtimes. Sitting at the table with the family helps your baby learn that mealtimes are an important and regular part of the day. As you establish this routine, ensure that distractions like phones and televisions are minimized so that your baby can focus on exploring and enjoying the new foods in front of them. Eventually, work towards offering solid foods at breakfast, lunch, and dinner, giving your baby multiple opportunities to practice eating.

However, if your baby is having difficulty with feeding—whether it’s challenges with transitioning to solids, a newborn refusing to eat, or struggles with oral motor skills—occupational therapy can provide vital support. Infant feeding therapy, provided by an occupational therapist or an infant feeding specialist, is designed to address these challenges. This specialized form of occupational therapy focuses on developing the necessary skills for successful feeding, from improving oral motor function to addressing sensory sensitivities.

Here are some resources that help with this area:

Occupational therapy for feeding is not just about helping your baby learn to eat; it’s about creating a positive and effective feeding experience for both the baby and the family. An occupational therapist will work closely with you to develop a personalized plan that meets your baby’s specific needs. This might include hands-on guidance during feeding, strategies to enhance your baby’s comfort with new textures, and support for building the muscles necessary for eating solid foods.

If you notice that your newborn refuses to eat or struggles with feeding in any way, seeking out an occupational therapy service that specializes in infant feeding therapy can make a significant difference. By addressing these issues early on, you can help ensure that your baby receives the nutrition they need for healthy growth and development.

How to Feed your Baby: 0 to 6 Months Old

Note that we tried to create this blog post as a resource for parents, so the recommendations are things that you might tell a parent or a caregiver of the baby.

It might be hard to know what to do when you have your first child. Here are some tips that will help you learn how to parent your baby in a way that will help them grow up in a happy and healthy way.

Important tips for feeding your baby include:

  • Look at your baby while you feed them. This is a very special bonding time with them, and eye contact can help them develop healthy attachment to you as they grow up.
  • In a soft voice, talk to them and sing to them. This helps with their brain growth and early language skills. You can hum them a lullaby, tell them that they are cute and that you love them, or sing a song like “Twinkle, Twinkle, Little Star”.
  • Never force anything into their mouth. This may make them afraid to start feeding.
  • Instead, gentle introduce them to the nipple by gently brushing the cheek closest to the breast or the bottle, then lightly touch their lips to it.
  • DO NOT give your baby cow milk, corn syrup, or honey within the first year.
  • Everything in this article is based on typical child development. Consult your doctor if you have any questions or concerns about your baby’s progress. Use this child development checklist as a resource to find out more about your infant’s development!

How much and How Often to Feed Your Baby

Look for signs that your baby might be hungry such as: sucking on their fists, increased movements, opening their mouth, and turning towards breasts. Crying is a late hunger sign and they should be fed before they get to this point. You do not want to feed a baby while they are crying, so to prepare them for feeding you can put a clean finger against the roof of their mouth to stimulate the reflex.


Hold your baby in a position that is comfortable and where their head, neck, and body are in a straight line with their arms in the middle of their body. It may help to have them swaddled while they are feeding. Knowing the signs of when your baby is hungry, you will notice that they are typically feeding about as often as the chart below states and will drink approximately as much as is listed.

infant feeding schedule

Two Weeks

  • For the first couple of weeks of your baby’s life, it might seem like they are wanting to eat all of the time. That is normal! Even though every child is different, they will usually want to be fed about every 2 to 3 hours, day and night.
  • They will only eat up to about two ounces at each feeding.

Four Weeks

  • Your baby will still want to be fed about every 2 to 3 hours. They now may start eating 2 to 3 ounces per feeding to make up for the weight they lost during the first couple of weeks.

Two Months

  • Your baby will now be eating every 3 to 4 hours throughout the day and night. They will take about 4 to 5 ounces of milk at each feeding.

Four Months

  • Your baby will now start to eat 4 to 6 ounces every 3 to 4 hours. Remember to look at your baby and use feeding as a time to improve their vision skills. Find out more about that here!

Six Months

  • Your baby will not want to eat as often, usually wanting to be fed every 4 to 5 hours. They will now eat up to 8 ounces at each feeding.

How to Breastfeed

Your doctor will help you learn how to encourage your baby to latch to your breast while in the hospital, and it is common to work with a lactation consultant. For basic instructions about breastfeeding, click here. For ideas about positioning while breastfeeding, click here.


Its important that you keep track of how your baby reacts to your milk in relation to your diet. Sometimes the baby may react to what you are eating (like become more gassy if mom eats a lot of dairy), so keep this in mind to adjust as needed.

How to Use Baby Formula

If you choose not to breastfeed, don’t get discouraged! Many women feed their baby formula, which is a completely acceptable alternative that provides baby with many nutrients that they need for healthy development. Formula can be found at most grocery and department stores, and is provided for free by your local WIC agency. They can also help teach you how to properly feed your infant if you have any questions.


It is important to know that different types of formula exist for different needs, so talk with your doctor if your baby has a specific need.

Add water first. Use the measurer that comes with the formula and make sure that the scoop is not packed and flattened evenly. Use the guide on the formula to see how much of a scoop to add per ounce of water.

How to Burp a Baby

Burp halfway through their feeding. If you are breastfeeding your baby, burp them before switching to the other breast. There are different ways you can hold your baby while burping them.

Some of the most popular are:
Sit upright and hold your baby against your chest. Your baby’s chin should rest on your shoulder as you support the baby with one hand. With the other hand, gently pat your baby’s back.

Sitting in a rocking chair and gently rocking with your baby while you do this
may also help. You can put a burp rag over your shoulder to catch any spit up that
may occur.

Hold your baby sitting up, in your lap or across your knee. Support your baby’s chest and head with one hand by cradling your baby’s chin in the between your palm and index finger. Rest the other side of your hand on your baby’s chest, but be careful to grip your baby’s chin, not the throat. Use the other hand to pat your baby’s back.

How to Introduce Solid Foods to Baby

Introducing new foods to your baby follows a gradual pattern. As your baby’s mouth learns how to handle and swallow solid foods, you can slowly begin offering thicker and more textured foods.

It’s important not to start with hard foods, as your baby won’t yet know how to manage them and may be at risk of choking. Instead, begin with a thin puree and gradually progress through different foods and textures. Move on to the next texture only once your baby has become comfortable and proficient with the current one, which may take a few weeks or more.

Start each meal by first offering your baby a bottle of breast milk or formula to ensure they have some nourishment in their stomach. After that, place a small amount of puree on a plate or directly on their highchair tray so they can see and explore it. Don’t worry if they don’t eat much at first—they might simply touch the food, decide they don’t like the texture, and become upset. This is a normal and positive part of the feeding process!

Initially, your baby might only smell the new food, and that’s perfectly okay. The next time you introduce the same food, they might touch it, play with it, and even cry to have their hands wiped off. Provide a baby spoon for them to use during this exploration, though they will likely spit out the food initially, which is completely expected.

These steps, while they may seem small or even messy, are crucial as your child learns about new foods. Expect a bit of a mess—that’s a good sign! It may take time before your baby is ready to actually taste the food, so celebrate the slow but steady progress they are making in this new learning experience.

Baby Crying after Feeding


Starting around the age of about 6 weeks old, you may notice that your baby is crying a lot more, especially after feeding. Many people call this “colic”, when a baby cries many times throughout the day without seeming to be able to calm down.

The most common reason for this is that the baby’s tummy muscles are not fully developed, so sometimes the strong acids in the stomach will come up into the throat, and even cause them to spit up often.

To help prevent the milk from coming back up, keep your baby upright after feeding for 10 to 15 minutes or longer if your baby spits up or has GERD. But don’t worry if your baby spits sometimes, this is very normal.

One thing to remember is that feeding cycle that we should be using. This means we might follow a general schedule:

  • Baby wakes, crying
  • Feed baby
  • Change baby’s diaper
  • Tummy time or baby play time
  • Sleep

This schedule, with some adjustments…remember that at this stage of childhood, there is nothing regimented, can be used most of the time throughout the day.

Before bedtime, you may want to change the schedule slightly. This means that at the same time each evening, you start an evening schedule. It might looks something like:

  • Play time, tummy time
  • Bath
  • Dress baby, snuggle, swaddle
  • Read a book, quiet play like singing
  • Feed baby
  • Sleep

Resources on Infant Feeding Therapy

Jain, S. (2020, October 29). How often and how much should your baby eat? Healthy Children. https://www.healthychildren.org/English/ages-stages/baby/feeding-nutrition/Pages/How-Often- and-How-Much-Should-Your-Baby-Eat.aspx


Scott, J., & Land, S. (2016). The confident parent: A pediatrician’s guide to caring for you little one without losing your joy, your mind, or yourself. TarcherPerigee.

US Department of Agriculture. (n.d.). Special supplemental nutrition program for women, infants, and children (WIC). https://www.fns.usda.gov/wic

Colleen Beck, OTR/L has been an occupational therapist since 2000, working in school-based, hand therapy, outpatient peds, EI, and SNF. Colleen created The OT Toolbox to inspire therapists, teachers, and parents with easy and fun tools to help children thrive. Read her story about going from an OT making $3/hour (after paying for kids’ childcare) to a full-time OT resource creator for millions of readers. Want to collaborate? Send an email to contact@theottoolbox.com.
Learning with Dyed Alphabet Pasta

alphabet letter pasta

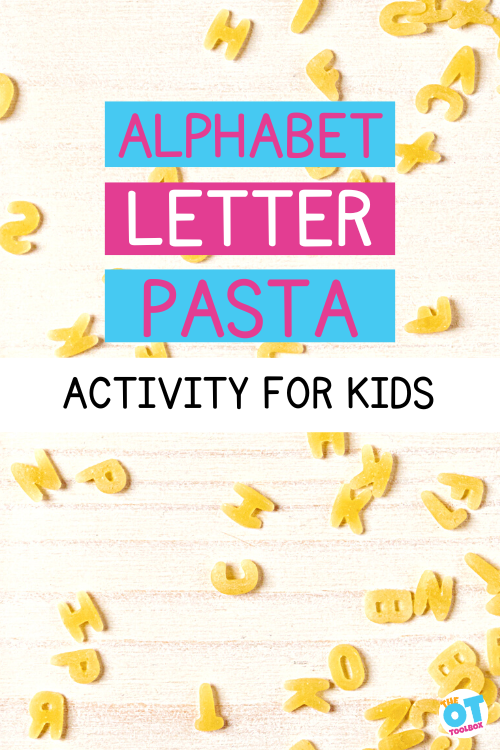
Grab a box of alphabet noodles for a fun multisensory learning activity that builds skills in many areas. We used letters pasta to create a sensory bin that incorporates fine motor skills and a letter learning activity.

alphabet letter pasta activity

Alphabet Noodles

You might remember eating alphabet noodles as a child in soup. But if you have a box of letter noodles on hand, it’s easy to create a sensory play activity that builds skills.

This easy dyed pasta activity combines learning with fine motor development.  From the scooping to the neat pincer grasp activity, this is a great way to build many skills!  Younger children can use scoops and spoons to develop coordination needed to scoop and pour while gaining exposure to letters.  What a fun way to build so many areas!

Alphabet Pasta Activities

So, in addition to the ideas we shared above, we love using dry alphabet pasta in other activities to support fine motor and visual motor skills. I love that you can incorporate the tactile sensory play in learning and skill development.

Some of my favorite ideas for alphabet pasta:

Alphabet Sensory Bin Search: Fill a sensory bin with dry alphabet pasta and small items like pom-poms, beads, or toy animals. Hide letter cards or small objects in the bin, and encourage kids to search for specific letters or objects. This activity helps improve pincer grasp and hand-eye coordination while engaging their sense of touch.

Letter Pasta Sensory Bottle: Create a “Alphabet Seek-and-Find” Sensory Bottle by filling a clear plastic bottle with dry alphabet pasta. Add a few small, colorful beads or buttons to make it more visually stimulating. You can also include a few small trinkets or themed charms to match a specific letter (e.g., a tiny apple for “A”). Seal the bottle tightly with glue to prevent any spills. Here are other sensory bottle ideas to use, like adding scrabble letter tiles to the sensory bottle as an I spy activity.

Pasta Art and Letter Matching: Have kids glue dry alphabet pasta onto construction paper to create letter art or spell out simple words. For an extra challenge, provide them with a printed word and have them match the letters using the pasta. This activity develops both fine motor skills and visual-motor integration as they match letters and manipulate the small pieces. It’s a great letter recognition activity!

alphabet pasta
 
This was such a fun activity!  I found a bag of alphabet pasta at a local grocery store on sale for a dollar and couldn’t pass it up!  We used a little from the bag and used the rest in wedding soup.  (Little Guy’s most often request and favorite meal!)  Because the only thing that makes wedding soup even more awesome is fun shaped noodles 🙂


How to dye alphabet Pasta


We dyed the pasta in a baggie…added a few drops of red food coloring and 2 Tbsp of vinegar.  We dyed this batch back in May and the color is still going strong.  The vinegar doesn’t leave an odor when playing with the pasta, but helps the coloring to “stick” to the pasta.
 
Have the kids shake the bag (or use a lidded plastic container for a fun auditory component!) and get their wiggles out.
 
alphabet pasta
 
I put up a few strips of masking tape on our easel and put out the bowl of pasta.  Baby Girl had the job of scooping letters from the bowl onto a plate.  She loved using my measuring spoons to scoop.  Toddlers seem to love scooping any little bits…peas/beans/rice/sand…and it’s such a great fine motor task for them. 
 
Pinching those little letters was a fun fine motor exercise for working on their tripod grasp and pincer grasp. 
 
I  positioned the tape strips high up on the easel to encourage an extended wrist.  This wrist position allows for efficient use of the fingers in such a small motor activity.  
 
Big Sister worked on locating letters as I told her how to spell words.
 
…Baby Girl couldn’t let her big sister do something and NOT get involved…
 
We also used the alphabet letter pasta to work on a little reading/spelling activity: I stuck on the -AT letters and asked Big Sister to find the letter we needed to spell different rhyming words.  Fun!
 

Alphabet letter pasta can be used in many ways! How do you use this sensory activity to learn and play?

Working on fine motor skills, visual perception, visual motor skills, sensory tolerance, handwriting, or scissor skills? Our Fine Motor Kits cover all of these areas and more.

Check out the seasonal Fine Motor Kits that kids love:

Or, grab one of our themed Fine Motor Kits to target skills with fun themes:

Want access to all of these kits…and more being added each month? Join The OT Toolbox Member’s Club!

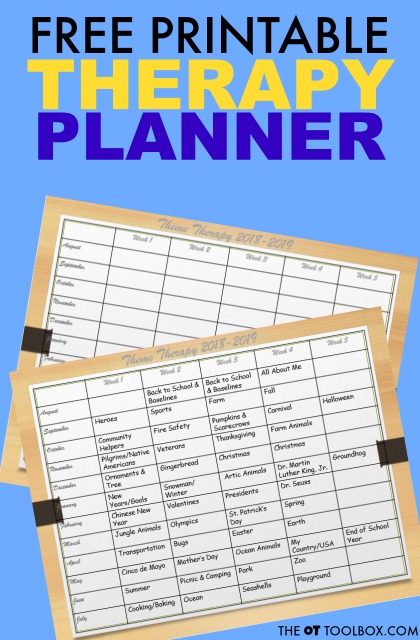
Free Therapy Planner for Back-to-School

back to school therapy planner

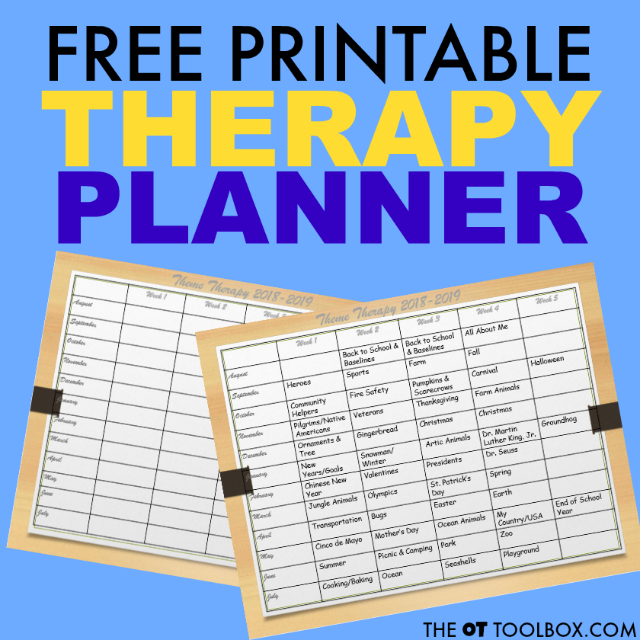
Below, you will find a free printable therapy planner calendar that is an awesome resource to add to your therapy planner. Use the planning calendar to dream up and create an action plan for occupational therapy themes during the upcoming school year. Just pop in themes from our weekly therapy themes list and make the planning each week fun and easy.

back to school therapy planner

This therapy planner is perfect for school-based OTs, but it can certainly be used in clinics or in homes, too!

Use this therapy planner to plan out occupational therapy sessions. It's an editable calendar that can be used over and over again.

Free Therapy Planner

During the summer months, many therapists start thinking ahead to planning therapy activities for the next school year. I know, I know. Summer just started. Some of us still have a car trunk full of hanging files, worksheets, a therapy ball, and pencil cases full of pencil grips. Is it really time to start thinking about planning for back to school?

We are right on the brink of a new school year and you’ll soon be gearing up for another year in the clinic or classroom!

Therapy Planning Calendar

For the new school year, I have included a fun bonus to this post that you will find below. It is an editable Therapy Calendar for the upcoming school year…so you can change out the themes and make it meet your needs and the needs of those on your therapy caseload.

Sometimes weekly themes can help you stay motivated AND make your life easier as a therapist while helping to keep children engaged in therapy activities from week to week.

Enter your email address below to get the free printable therapy planning calendar. Use it as a guide to schedule and plan themed occupational therapy activities throughout the school year. You’ll also get a blank therapy planning calendar so you can fill in special themes that may go along with your school’s calendar or planned activities.

Have fun planning out activities for this year’s therapy sessions!

Therapy planner that occupational therapists will love

Get the Therapy Planning Calendar

    We won’t send you spam. Unsubscribe at any time.

    Colleen Beck, OTR/L has been an occupational therapist since 2000, working in school-based, hand therapy, outpatient peds, EI, and SNF. Colleen created The OT Toolbox to inspire therapists, teachers, and parents with easy and fun tools to help children thrive. Read her story about going from an OT making $3/hour (after paying for kids’ childcare) to a full-time OT resource creator for millions of readers. Want to collaborate? Send an email to contact@theottoolbox.com.
    Crayon Play Dough Harold and the Purple Crayon Activity

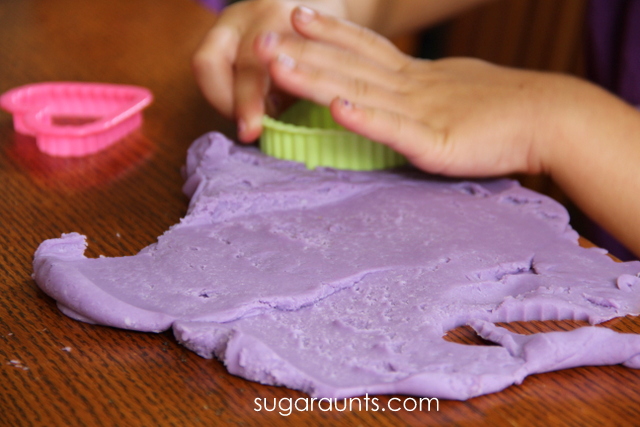
    Harold and the Purple Crayon play dough, child cutting purple play dough with a cookie cutter and purple play dough creations

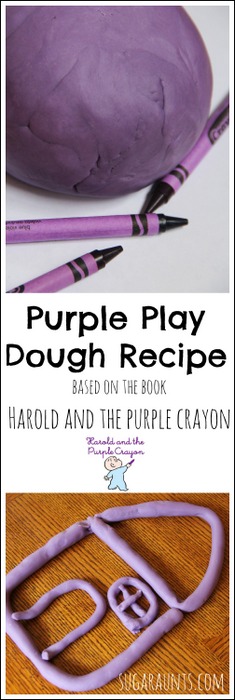
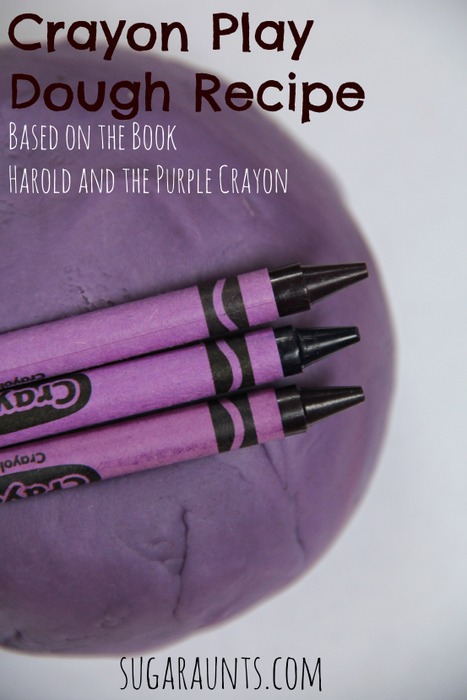
    Many years ago (Aug 26, 2014 to be exact!) we made this Harold and the Purple Crayon Play Dough activity because it was one of our FAVORITE books. My kids loved that book and the fact that there is now a movie…we are going to see this movie even though my kids are now teenagers! I loved this play dough activity because first, we made the homemade play dough recipe ourselves (it’s a version of our original crayon play dough recipe) and then, my kids worked those fine motor skills and visual motor skills to build creations, just like in the book, Harold and the Purple Crayon! Check it out…

    Harold and the purple crayon activity. Child pressing a cookie cutter into purple play dough and play dough creations using homemade purple play dough.

    We used homemade purple play dough and then worked those fine motor skills to make creations! Play dough exercises improve hand strength and finger dexterity. The soft and squishy dough provides a tactile sensory challenge with proprioceptive sensory feedback. The bonus is the strengthening of the arches of the hands and precision of grasp. These are just some of the benefits of play dough!

    Harold and the Purple Crayon Play Dough

    Working with play dough builds fine motor skills. You can really target pinch strength and grip strength by rolling play dough snakes, and that’s what this play dough activity is all about. In the book, the crayon is used to create wild creations…we did the same thing with playdough!

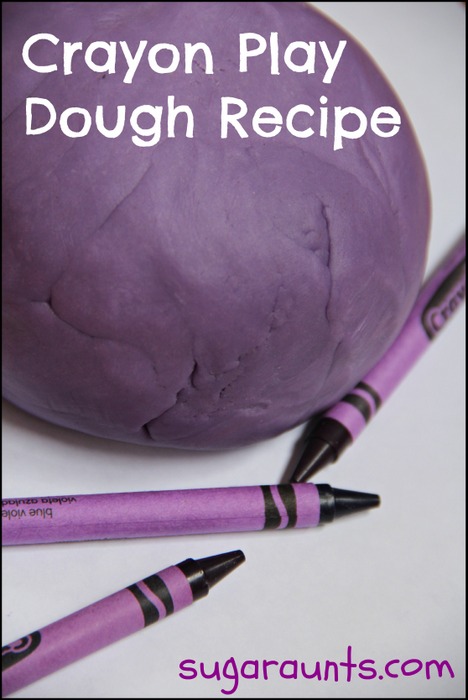
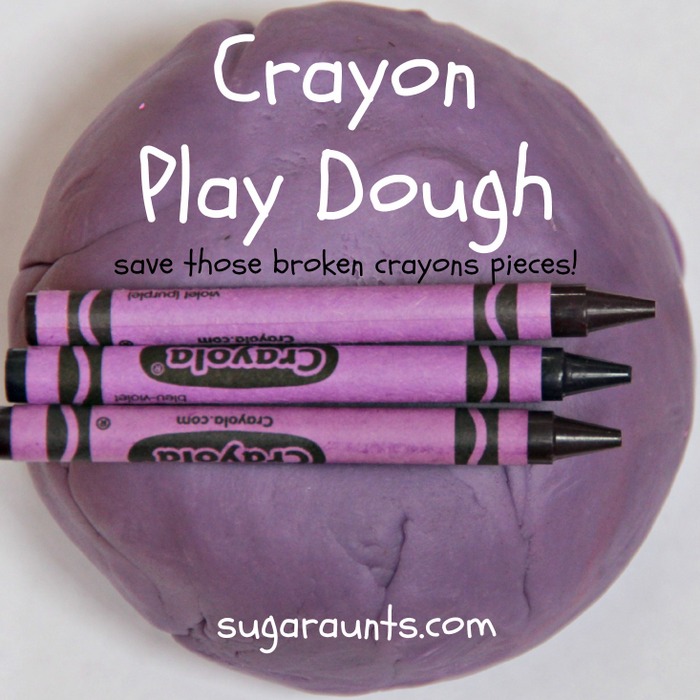
    This installment of the Preschool Book Club was one of our favorite activities, by far.  We made a batch of our play dough recipe, but added a twist.  We wanted to incorporate not only the purple color of Harold and the Purple Crayon, but the crayon, too!  This Crayon Play Dough uses real crayons in the play dough recipe and makes a silky smooth dough…perfect for creating, playing, manipulating, and more!


    Recipe for DIY play dough using crayons


    Crayon Play Dough Recipe

    Harold and the Purple Crayon activity with purple play dough
     
    This post contains affiliate links.  

    Harold and the Purple Crayon Activity

     
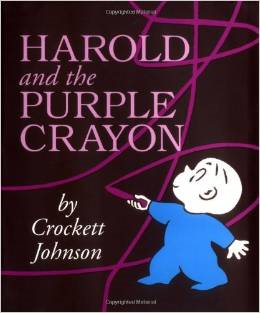
    The book Harold and the Purple Crayon by Crockett Johnson is such a FUN book.  It’s great for preschoolers, but grabs the attention of toddlers and school-aged kids, too.  When we read this book, all of my kids were frozen as they took in the bold pictures and the imagination of Harold. 
     
    We had a blast re-creating parts of the book with play dough lines.  Of course, we needed purple, CRAYON play dough to go along with the book!


    We love making our own play dough.  To make crayon play dough, you’ll need just a few adjustments.
     
     
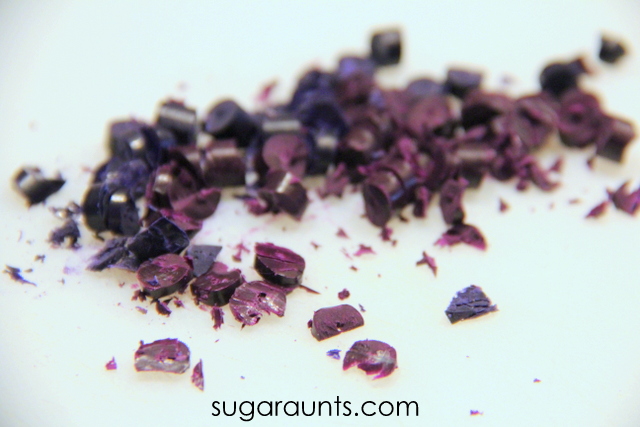
    1. First, chop up 2 and a half crayons.  I’m not sure that these exact amounts matter.  There are so many different brands of crayons with different wax make-ups.  We used a few different types mixed together and the results were a silky smooth play dough.
     
    2. In a large bowl, mix together the dry ingredients (3 cups flour, 1 1/2 cup salt, 2 Tbsp. cream of tartar)
     
    3. Next, heat 2 tablespoons of oil in a pan. 
     
    4. Add the chopped crayons. 
     
    5. Stir until the crayons are completely melted.  Slowly stir in 2 cups of water while stirring.  Certain types of crayons will either make a clumpy purply goopy looking liquid.  Other types will make a smooth liquid once the water is added.  Either way is fine.  Just keep stirring. 
     
    6. Slowly, stir in the dry ingredients.  The dough will pull together in a ball over the heat. 
     
    7. Once the dough pulls together, dump it out onto a cutting board or counter.  Let the dough cool until you can tolerate kneading. 
     
    8. Knead the dough for a few minutes until smooth.  (Note~ The waxy texture of this dough will create a spa-like experience while kneading.  This mama mixed up a few more batches of crayon dough and loved the mini-spa of kneading!)
     
    Purple crayon play dough
     
    Once cooled, you are ready to play.
     
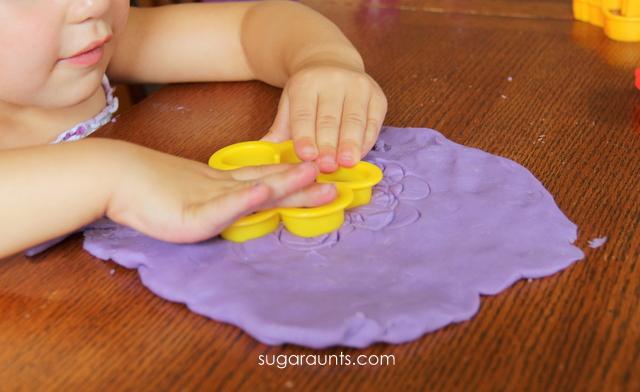
    Child playing with DIY play dough made from purple crayons
     
    Crayon play dough is so smooth and silky to play with!  The color was very bold and bright.  Just like the purple crayon in the book!
     
     
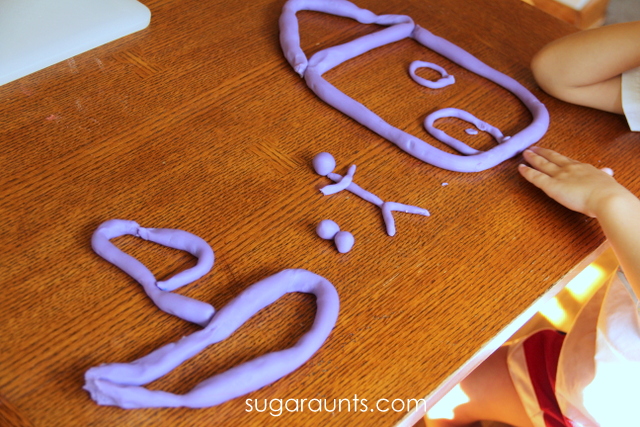
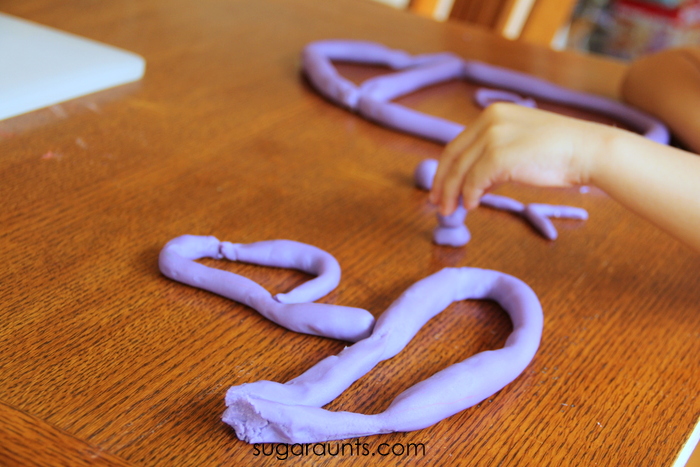
    We read Harold and the Purple Crayon a bunch of times before returning to the library.  Before it went back, we used our purple crayon play dough to make purple lines and “draw” them into shapes and pictures, just like Harold did in the book.
     
    Create an activity for the book, Harold and the Purple Crayon


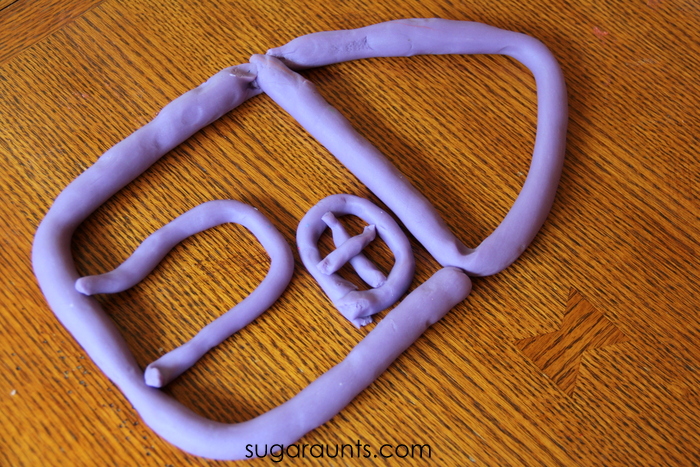
    Harold’s house “drawn” with our purple play dough.


    Little Guy made a boat, a Harold, and a snowman.
     
     
    Use crayons to make your own play dough!
     
     
    This was such a fun way to explore a great book.


    More Harold and the Purple Crayon Activities

     
    Looking for more activities for the book, Harold and the Purple Crayon?  Stop by and see what the other Preschool Book Club bloggers have done:
     
     
    Homegrown Friends: Giant Purple Crayon Mural
    Buggy and Buddy: Yarn Art
    Frogs and Snails and Puppy Dog Tails: Lavender Crayon Soaps
    Mama. Papa. Bubba. blog: Dry Erase Activity
     
     
    Be sure to make your own play dough with crayons and use all of the broken crayon pieces to make a rainbow of crayon play dough colors!
     
     
    hands-on activities to explore social emotional development through children's books.

    Love exploring books with hands-on play?  

    Grab our NEW book, Exploring Books Through Play: 50 Activities based on Books About Friendship, Acceptance, and Empathy, that explores friendship, acceptance, and empathy through popular (and amazing) children’s books!  It’s 50 hands-on activities that use math, fine motor skills, movement, art, crafts, and creativity to support social emotional development.


    Fine Motor Skills with Building Blocks

    Stacking blocks milestones

    As a pediatric occupational therapist, I’ve used wooden building blocks in occupational therapy many times. For my own children, I’ve used regular wooden blocks as a fine motor tool too! In fact, building with blocks is a fine motor skills that kids need in order to fine motor development many, many, (MANY) times. Wooden blocks are a tool that are used for development of goal progression in treatment activities and in assessment of fine motor developmental level.  They are used in visual perceptual skills, and are the perfect open-ended play item. 

    Fine motor skills with blocks

    Occupational therapy practitioners use block toys to support fine motor skills and visual motor skills.

    How to Support Fine Motor Skills with Blocks

    Also be sure to check out our activity using cardboard bricks as a tool for developing many areas.

    Fine motor development with blocks

    Blocks are a great toy for development because you can use different types of blocks for different ages.

    Many parents ask “is stacking blocks a fine motor skill?” The answer is YES!
    As a Mom and OT, I’ve made sure my kids have a lot of wooden blocks (and a couple of varieties of toddler large blocks of the foam and plastic blocks, too!)

    Today, I’m sharing how to use wooden blocks in fine motor skill development with kids…all while they play and don’t even realize their fine motor skills are being assessed or worked on! This is a great way to address skills for children and adults…anyone who needs to work on fine motor skill development.

    Fine motor skills building blocks for kids

    Stacking blocks supports grasp development with various grasp patterns.

    Fine Motor Skills and Building Blocks


    Full disclosure: This post contains affiliate links.

    Stacking blocks is a fine motor skill. And, when children stack blocks, they develop and refine fine motor skills. Check out the list of benefits of playing with blocks that are described below. Each area of development can be developed using a set of building blocks.

    Looking at various building blocks from the perspective of an occupational therapist, my favorite wooden blocks are Melissa and Doug Wood Blocks Set.  The set is huge and comes with a variety of bright colors in solid wooden blocks, which are sized just right to help kids build fine motor skills.

    Fine motor skills and building blocks go hand-in-hand…literally! There are SO many benefits to playing with blocks. Let’s break down all of the benefits of playing with blocks…

    Benefits of playing with blocks include development of fine motor skills, gross motor skills, visual motor skills, and more.

    There are many benefits of building blocks!

    Benefits of Playing with Blocks

    1. Building with blocks help kids develop grasp- From the time toddlers can grasp a block with their whole hand, grasp development begins. Blocks are a fine motor power tool when it comes to working on grasp development! Read below for the specifics of small kids playing with blocks. By picking up on block, manipulating it in the hand, and placing it on a stack of blocks, children progress from a gross grasp to a radial palmer grasp and then to a digital palmer grasp, followed by a tip-to-tip grasp using the pointer finger and thumb.

    Check out this developmental checklist for more information.

    2. Building with blocks helps kids develop graded fine motor skills- As small children progress through typical grasp progression, they begin to gain more control over those motor skills. This occurs on a stability basis (use of the core and shoulder to stabilize the arm) and on a dexterous basis (precise, small, and graded movements of the fingers). By gaining these skills, children are able to pick on one block from a stack without toppling the entire block tower. They are also able to place a block onto a stack of blocks without knocking over the entire tower. These graded movements are essential for precision and dexterity in functional tasks as children gain a sense of personal awareness and how their body moves through space in order to pick up and manipulate objects.

    This blog post on fine motor precision and graded release explains more on this skill and has a fun fine motor activity to develop graded precision in fine motor skills.

    3. Building with blocks helps children develop eye-hand coordination- From a very young age, when babies develop the ability to see and move their arm to reach for a block, those eye-hand coordination skills are beginning to develop. Visual motor integration is a main piece of the visual processing skills puzzle, and coordinating movements with visual information is essential for so many functional tasks in learning and play. Catching a ball, writing with a pencil, cutting with scissors, are just a few examples of eye-hand coordination tasks that rely on the baseline skills developed from a young age. Toddlers can manipulate and build with blocks while developing this skill through play. Stacking, knocking blocks over, building a block train, making towers, and using blocks in constructive play are powerful tools to developing eye-hand coordination skills.

    Like blocks, there are many toys to promote eye-hand coordination.

    4. Building with blocks helps children develop bilateral coordination– Establishing a hand dominance and laterality is an important fine motor skill that transfers to tasks like writing with a pencil and holding the paper with the nondominant hand. Another example is mastering a zipper while stabilizing the material with the other hand. Still another example of bilateral coordination is cutting with scissors while holding and manipulating the paper with the nondominant hand. All of these tasks requires one hand to manipulate objects with more precision and dexterity while the other acts as a stabilizer. Building with blocks builds bilateral coordination as children stabilize a stack of blocks with one hand and use the other hand to release a block at the top of the stack with graded precision.

    Here are more bilateral coordination activities that develop this essential motor skill.

    5. Building with blocks helps children develop motor planning skills– Motor planning is a physical action that requires observing and understanding the task (ideation), planning out an action in response to the task (organization), and the act of carrying out the task (execution). Building with blocks is a great way to build these sub-skills as kids attempt to build with blocks to construct with blocks.

    Here is more information on motor planning in kids.

    6. Building with blocks helps children integrate the proprioceptive sense– Proprioception is one of our sensory systems that focuses on awareness of how one’s body moves through space, and how much effort is needed to move in certain ways. The proprioception system receives input from the muscles and joints about body position, weight, pressure, stretch, movement and changes in position in space.  Our bodies are able to grade and coordinate movements based on the way muscles move, stretch, and contract. Proprioception allows us to apply more or less pressure and force in a task. Instinctively, we know that lifting a feather requires very little pressure and effort, while moving a large backpack requires more work.  We are able to coordinate our movements effectively to manage our day’s activities with the proprioceptive system.  The brain also must coordinate input about gravity, movement, and balance involving the vestibular system. Building with blocks is a great way to develop and refine this skill. How much effort is needed to pick up a block and place it in a specific spot without moving other blocks while building a tower of blocks or a block building?

    To take this a step further, use larger blocks that require gross motor skills, and more awareness of proprioception skills. Here are DIY cardboard blocks that we’ve made for this very purpose.

    Here is more information on proprioception activities.

    7. Blocks help children integrate midline awareness– Crossing midline can be developed from a young age when playing with blocks. This is a great way for babies and toddlers to work on crossing midline, by reaching for blocks, building, and creating.

    Here is more information on crossing midline.

    8. Blocks help children develop visual motor skills- Visual motor skills (and visual motor integration) are needed for coordinating the hands, legs, and the rest of the body’s movements with what the eyes perceive.  Visual  motor skills are essential to coordinated and efficient use of the hands and eyes. Visual motor integration is a skill we require for functioning. There is more that plays into the integration of visual motor skills into what we do and how we use our hands in activities. Building with blocks helps children develop skills in visual perception, eye-hand coordination, and visual processing skills play a part in the overarching visual motor skill development so we can perceive and process visual information and use that information with motor skills to manipulate and move objects in tasks and activities.

    By building with blocks, areas like form constancy, visual attention, visual discrimination, spatial relations, visual memory, visual sequential memory, and visual figure ground are developed in accordance with eye-hand coordination, and visual efficiency.

    Here is more information on visual motor skills.

    9. Building with blocks develops learning too! Beyond fine motor skills, building with blocks helps kids develop other skills too. What will your toddler learn by picking up Wood Blocks Set, placing them into a container, and stacking towers? (Among other skills):

    • Cause and effect
    • Problem solving
    • Spatial awareness
    • Copying a design or visual prompt
    • Problem solving
    • Math: patterns, sizing, spatial concepts
    • Literacy 
    • Manipulation
    • Depth Perception

    Here are more ways to use blocks to build skills in babies and toddlers.

    By stacking blocks developmental milestones are created in children.

    Did you know there are developmental milestones for stacking blocks?

    Building Blocks and Development

    From developing a palmer grasp transition to a radial grasp to a tripod grasp and precision with graded release of motor skills, building with blocks help kids develop so many skills.  For today’s activity, we pulled out the one inch square blocks from the set and we used classic Alphabet blocks.  (This set has been chewed on and played with by all four of my kids so they look well loved aka have chew marks!) 

    First up in developing fine motor skills with wooden blocks is the grasp. This is important in fine motor skills in toddlers. Blocks, for toddlers are a fine motor tool that builds on so many areas.

    Stacking blocks milestones

    There is a developmental progression of playing with blocks…aka stacking blocks milestones.

    Stacking Blocks milestones

    One resource that is helpful for occupational therapy providers and parents is knowing stacking blocks milestones. This is because we can help kids achieve fine motor and visual motor skills through play based on the level they are at and based on their age.

    We’ve listed the progression of stacking blocks and included the typical age after each task.

    The developmental ages of this progression are as follows:

    1. Grasps a block with whole fist, lifting it off a table surface without dropping: 5 months
    2. Grasps a block with all fingers: 6 months
    3. Drops one block when given another: 6 months
    4. Brings hands together when holding a block: 6 months
    5. Grasps a block between the thumb, pointer finger, and middle finger (radial-palmer grasp): 7 months
    6. Transfers a block from one hand to the other: 7 months
    7. Bangs to wooden blocks together with both hands: 9 months
    8. Grasps a block between the thumb, and the pads of the pointer and middle fingers with space between the block and the palm (radial-digital grasp): 11 months
    9. Places wooden blocks into a container: 11 months
    10. Builds a tower of three wooden blocks given a visual example: 15-16 months
    11. Copies and builds a tower of 5 blocks: 19-20 months
    12. Copies and builds a tower of 6 blocks: 21-22 months
    13. Builds a tower of 8 blocks: 25-26 months
    14. Copies a four block “train”: 29-30 months
    15. Builds a 10 block tower: 29-30 months
    16. Copies a three block pyramid or “bridge”: 31-32 months
    17. Copies a four block “wall”: 35-36 months
    18. Builds “steps” using six blocks: 51-52 months
    19. Builds a six block pyramid: 53-54 months

    Stacking blocks milestone development happens in natural play. Some ways to foster this skill include:

    • Modeling shapes and using them in floor play.
    • Using block creations in pretend play with small toys, and using toys that the child prefers like specific cars and figures.
    • Starting with easier block forms and then working up to more complicated forms.
    • Using a picture example of block forms (available in The Membership Club).

    The one thing to keep in mind about all of these activities listed below is to consider DIR Floor Time. Blocks are a natural tool to use in this technique because most often, blocks are used on the floor.

    Step 1- Make a block line.

    This might look like making a single line of blocks in a pretend play activity. You can tell the child that you are making a fence for animal figures or a house for doll figures. They might join in and help you build the line of blocks. If not, invite them! When you are making a line of blocks the goal is to make the blocks touch but not knock over or push blocks when setting them up. You also want to make sure there isn’t too much space in between the blocks or if the blocks don’t line up in a straight line. This is a great fine motor coordination activity and wonderful floor play.

    The block line is horizontal on the floor and there is not height to the line of blocks.

    Step 2- Stacking blocks: After you place blocks in a line you can work on stacking one block on top of another block. When you move to stacking two blocks, you have a few other components happening that require more developmental progression of fine motor and visual motor skills:

    • Grasp pattern and type on the block- As grasp is developed, you’ll see more precision and dexterity meaning more complex block designs and stacking.
    • Arch development for refined motor skills of the hand
    • Thumb web space which is needed for precision in grasp and release. If you see a child holding the block with a closed web space and little precision in the distal joints of the thumb and index fingers, you’ll see less graded precision in both placement and release of the fingers on the block.
    • Stable wrist needed for proximal support and distal mobility. When the wrist is in a flexed position, you don’t see as much dexterity and refined movements. The neutral wrist positioning with slight extension in the wrist is key.

    Step 3- Make a block train. To move from a line of blocks to creating a block wall in progression, we can ask the child to copy a block train. This is a combination of a line of blocks with two stacked blocks to create the stack of the train. Typically, you’ll want to do this step after stacking two blocks because of the combination of skills.

    Step 4- Begin stacking blocks. After you have a block train, you can create higher and higher stacks of blocks. The more blocks you add to the stack, the more precision skills and graded release of the hands (arch development, grasp, eye hand coordination, and open thumb web space). More blocks require more precision, because of the placement of the blocks on a higher stack of blocks. If the wrist isn’t stable or the distal joints of the fingers aren’t mobile, you’ll see less precision in placement.

    Step 5- Make a block wall. For this stage you want to stack up two or more lines of blocks to make a wall. Start with just two levels and work up from there. You can tell the child that you are making a wall for a castle or a house. The goal here is to stack the blocks with precision to place the blocks on top of one another and not over placing the block so that it’s not stacked up on the bloc below it. You also want to make sure their blocks are not going over the edge so that you end up with a leaning wall. This can be more challenging for little ones, especially when it comes to precision in placing the block and in graded release of the block in its place in the wall.

    Step 6- Make a block pyramid. For this stage of stacking blocks milestones this stage requires more complex fine motor precision and visual motor skills. There is a combination of placement of the blog in a line with aligning blocks to the one beside it as well as on top of the block below it in the stack. Additionally, there is placement of the blocks with shift to create steps on each side of the block pyramid.

    From here, we can create higher and higher block pyramids.

    Activities to Reach Stacking Blocks Milestones

    So, now that you know the ages that kids can typically stack blocks, let’s talk about how to support these skills with different block activities.

    We love using alphabet blocks because you can incorporate different areas of learning like letter identification, form constancy (different letter fonts are on the different sides of the blocks), and handwriting.

    Babies can develop the fine motor skill of a Radial palmer grasp with a wooden block

    A baby can hold blocks to work on grasp and release.


    This Radial Palmer Grasp of wooden block is a beginning grasp in toddlers.

    By playing with blocks from a young age, children can develop fine motor skills including a digital palmer grasp

    Older kids can use the same size letter blocks to work on in hand manipulation and eye hand coordination skills.


    After a radial palmer grasp, children progress to using a Digital Palmer Grasp of a Wooden Block. When children progress in development is the digital palmer grasp of holding a block, fine motor skill development speeds up fast.  By holding a block with the pads of the thumb and pointer and middle fingers, kids are working on the in-hand manipulation skills they will need for manipulating a pencil.  Make it fun while working on this area: Spin the block around with the tips of the fingers.  

    How does rotation in the hand help with functional skills?  You need simple and complex rotation to complete these tasks:

    • Rotating a pencil when re-positioning while writing
    • Opening a toothpaste lid
    • Turning a paper clip
    • Turning knobs
    • Rotating the dial of a combination lock
    These block stacking games and block activites can help kids develop skills.

    Use colored blocks in block stacking games in OT sessions.

    Block Stacking Games


    Now that you’ve read through the benefits of playing with blocks, and the stacking block milestones that impact fine motor skills in children, let’s cover ways to play with blocks while building these essential skills.

    While stacking blocks and knocking them down are a fantastic way to help small children build essential skills, there are so many more ways to play with blocks, too.

    These block stacking games and block activities can be used for fun block ideas while building skills at home or in occupational therapy sessions.

    1. With my toddler, we used the blocks to build small towers.  So, how can you make this a fun activity?  Usually, just playing with your kiddo and showing them how to build  a tower and knock down a tower makes building with blocks fun at this age. 
    2. These Alphabet blocks are great for working on rotation of the fingers.  Have your child look for specific shapes and letters on the sides of the blocks.

    3. Add small toys like animal figures.  Have the animals walk up and down the block steps. 

    4. Add play dough.  Have the child create “mortar” using the play dough between each block.

    5. Create a train track and push coins around a masking tape track.

    6. Build a wall to divide animal figures into a miniature zoo.

    7. Build a small bridge for small doll or animal figures.

    8. Build a pyramid and place a coin on each level.

    9. Sort the blocks into piles according to shape or color. Create patterns with colors or shapes. Make lines of the blocks and see which line has the most.

    10. Build blocks in water. Use foam blocks or plastic blocks in a low tray of water. How does the water impact stacking? Can you add soap foam? What happens then? There is so much cause-and-effect happening with water and block play! Here you can see how we used water and foam blocks for fine motor skills.

    Let your child use their imagination!  The best thing about blocks are the open ended-ness that happens when playing.  You can create houses, roads, animals, and any imaginative scene possible with just a set of blocks!

    Use these copying block designs occupational therapy activities to help kids develop skills

    Copying Block Designs in Occupational Therapy

    Beyond the fine motor skills listed above, there are visual motor skills that develop as well. This was covered briefly above, but to expand, copying block designs in occupational therapy is a skill that builds visual motor and visual perceptual skills needed for handwriting, reading, math, finding items like a utensil in a drawer, and so much more.

    When children copy block designs, occupational therapists are working on areas such as spatial awareness, visual discrimination, visual attention, visual sequential memory, visual memory, form constancy, position in space, and other areas.

    From top right and going clock-wise: 3 block pyramid or bridge, wall, pyramid, steps, and train.  

    You can also include the colored blocks to work on skills.

    Copying specific shapes works on the eye-hand coordination, grasp, precision, and visual perceptual skills needed for functional tasks like handwriting, cutting with scissors, manipulating small items, managing clothing fasteners, and tying shoes, among so many other tasks.    

    Development of fine motor skills using wooden blocks

    To make copying shapes with blocks fun, try these ideas:

    1. Build a block design alongside the child.

    2. Build a block design using only one color of blocks.

    3. Build a block design and then cover it with a small dishtowel. Can the child remember the design and build the same design?

    4. Build a design and describe the blocks positions. Is one color on top or next to another? Use positioning words like next to, above, below, beside, to the left, to the right, etc.

    5. Build bridge block designs and use small figures to cross the bridges.

    6. Use different types of blocks. Try using LEGO, duplo blocks, rock blocks, or other three dimensional shapes. The part to focus on is coping forms in the three dimensional aspect, regarding position in space. There are so many different types of blocks on the market that work well for developing these skills.

    7. Try building a small block form and then drawing it on paper.

    8. Play “What’s Missing”. Build a block design and ask the child to look at the design for 20 seconds. Then, cover the design with a small dishtowel and remove one or more of the blocks. Can the child then look at the block design and figure out what is missing?

    9. Make and build- Use colored paper to cut small squares that match the blocks you have in your set. Students can use the paper to “build” a two dimensional block design on paper or on the table top. Then, use real blocks to copy the paper design. This is an exercise in spatial concepts as students need to figure out any blocks that are out of view to hold up the block design.

    10. Build block designs in a window or in a sunny place where the design creates a shadow. A flashlight or small lamp could also work as well. Then, place a piece of paper alongside the block design. Ask students to trace the shadow outline.

    11. Create block forms that resemble real-life shapes, figures, and other relatable objects. Kids can copy block forms that resemble their favorite animals, people, and things like ice cream cones, presents, toys, vehicles, etc.

    Block activities for helping kids learn and develop motor skills

    Looking for more block activities?  

    Pair block building with a children’s book in this Ish Block Activity.

    This Fractions with KORXX Block activity is a great hands-on math activity using blocks to challenge children who are learning fractions.

    Use blocks and rubber bands to work on hand strength. Children can copy simple forms and connect them together using rubber bands.

    A Building Block Maze Activity focuses on gross motor skills and builds spatial awareness skills as well as body awareness and self-awareness to position in space.

    This Building Tens Castles is a nice way to help preschool and kindergarten aged students with the concept of tens and place value as they group blocks into groups of tens.

    This Word Family BINGO! challenges kindergarten and first grade students to build words by using blocks. It’s a hands-on learning activity that also develops visual perceptual skills, and visual scanning.

    A Building Block Addition Towers helps students with math concepts.

    Letter matching with this Superhero Alphabet Matching Activity uses blocks to work on letter awareness, recognition, as well as visual perceptual skills.

    This Sight Word ABCs with Blocks allows younger elementary school children to work on sight words as well as visual perceptual skills, eye-hand coordination, and motor planning.

    For a gross motor activity that gets kids moving, use blocks to work on letters and sounds with this Letter Sound Scavenger Hunt.

    Symmetrical awareness is a test of visual discrimination, form constancy, and visual memory. Work on symmetry with this Symmetry with Building Blocks activity.

    This word building activity focuses on Building CVC words with Blocks and challenges children with visual perception and visual motor skills.

    Working on visual attention, visual memory, and visual discrimination is easy with a block activity like this Making Patterns with Building Blocks idea.

    Our favorite block ideas: 

    How do you like to play with blocks?  Have you tried working on fine motor skills using wooden blocks?  Let us know!

    Colleen Beck, OTR/L has been an occupational therapist since 2000, working in school-based, hand therapy, outpatient peds, EI, and SNF. Colleen created The OT Toolbox to inspire therapists, teachers, and parents with easy and fun tools to help children thrive. Read her story about going from an OT making $3/hour (after paying for kids’ childcare) to a full-time OT resource creator for millions of readers. Want to collaborate? Send an email to contact@theottoolbox.com.
    10 Reasons Why Every Kid Needs to Play With Stickers

    benefits of playing with stickers

    In this blog post, originally written on November 13, 2015 and updated on July 18, 2024, we are talking all about the benefits of playing with stickers. Occupational therapy providers love stickers as a fine motor tool! Let’s break down the benefits of sticker play with kids…

    benefits of playing with stickers

    When you were a kid, did you have a sticker collection?   Maybe it was a Trapper Keeper binder with paper, or maybe it was a sticker book with themed pages.  Filling it’s pages were puffy stickers, scratch-and-sniff stickers, fuzzy stickers, and glossy glittery stickers.  


    Thinking back to those sticker collection can bring back memories of sticker trades.  All you cared about back then was a complete collection of all the Care Bears or a page full of sticker-y rainbows.


    But did you know that peeling all of those stickers has a bigger benefit that a full sticker book page? 


    Benefits of Playing with Stickers

    Occupational therapy providers always have stickers on hand in their therapy toolbox and there’s a reason why…playing with stickers has many benefits!

    Playing with stickers can help kids with so many skill areas!  They can even be an Occupational Therapist’s secret weapon. School based occupational therapy providers love them for so many reasons. Pulling a fresh sheet of stickers from the OT’s treatment bag can bring on big smiles from kids of all ages.  And the best news is, that the children don’t even realize they are working on important child developmental areas!


    Use stickers in Occupational Therapy and development of so many skills with kids: fine motor, gross motor, visual perceptual, handedness, and more.


    The Best Reasons to Play With Stickers

    Affiliate links are included in this post.
     
    When you see a sheet of stickers, what grabs your attention?  Maybe it’s the brightest sticker on the sheet, or maybe it’s a special character. Whatever it is that brings you sticker joy, they all are great for developmental areas.  
     
    10 Reasons Why EVERY Kid Should Play With Stickers:
     
    1. Neat Pincer Grasp. Stickers are a fine motor powerhouse.  Peeling the sticky little pictures requires a neat pincer grasp in order to pull up the edge of a sticker from a sticker sheet.  The very tips of the fingers are needed to grip such a small area.  For some kids, grasping just the edge of a single sheet of paper is quite difficult. Working with stickers is a great way to practice neat pincer grasp  for skills like picking up small beads, string, or a sewing needle.                                                                                                                                                        

    Extend the skill:  Work on pincer grasp by peeling stickers of different sizes.  Smaller stickers will be more difficult to peel. Place stickers on strips of masking tape and other surfaces and and peel the stickers up. Then, work on grasp by placing the stickers down on different surfaces. Stick the stickers on paper taped to a wall to encourage an efficient wrist position.

    RELATED ACTIVITY: STICKER SNOWMAN CRAFT
     
     
    2. Bilateral Coordination– It’s an essential skill for so many functional tasks.  Zippering a coat, cutting with scissors, and handwriting are all activities that require bilateral hand coordination.  Peeling stickers requires tow hands as you hold the sheet with one hand and peel with the dominant hand.  Both hands are involved in the work and doing different tasks.  
     
    Extend the skill: Use stickers to work on bilateral hand coordination by using very large pieces of paper and very small sheets of paper.  
    Show your child how to hold the sticker sheet in various positions. Here’s another Bilateral coordination activity idea.
     
    3. Visual Scanning. Visual scanning is required for skills like reading, writing, searching for an item in a crowded room, and visually scanning the environment.  Kids can scan a sticker sheet to peel off the sticker that they want.  
     
    Extend the skill:  Position stickers all over a page.  Ask the child to look for a specific sticker that you describe.  They can connect stickers with a crayon, or cut the paper along a line stickers.  Position stickers all over a wall and work on visual scanning on a large scale as they look for specific stickers.  Add in a flashlight and have the child scan for stickers with the light. 

     
    4. Spatial Awareness. Difficulties with spatial awareness can make reading writing, and functioning in all daily tasks practically impossible.  Kids may write with sloppy handwriting or have trouble with organizing their body in space.  Use stickers as a visual cue for spatial awareness.  Kids can see the sticker’s bright color and can use it as a visual cue for where to start writing on a page, how big to form letters, where to stop in the hallway of lockers, where to place folders in a desk, where to place coats in the closet.  The use of stickers in this area are limitless!
     
    Extend the activity:  Position stickers on the left margin of a paper for kids who need help with writing.  Stickers can provide a cue for letter size, too. Use stickers in a large scale maze by sticking them on chairs, walls, and floors.  Kids can hop or jump over stickers or go around, and touch stickers while working on spatial awareness.
     
    5. Sensory Exploration. Explore scents with scratch and sniff stickers.  Discover textures of smooth, puffy, scratchy, and fuzzy stickers.  Kids are very motivated by stickers, too.  A sticker can be used as a reward for a child who touches a messy sensory bin or participates in difficult therapy treatment activities.


    Extend the activity: Work on visual motor activity for learning with stickers. Use stickers in a mess-free sensory play activity.

    Use stickers in Occupational Therapy and development of so many skills with kids: fine motor, gross motor, visual perceptual, handedness, and more.

    6. Handedness. Kids often times have trouble learning which hand is which.  They will switch hands when writing and can put their shoes on the wrong feet.  Use stickers as a visual cue in learning left from right both on their body and off.  One sticker can be stuck to just one shoe to help a child learn to put their shoes on the correct feet.  You can put a sticker on the top of a child’s coat to teach them which way is up.
     
    Extend the activity: When practicing scissor skills, place a sticker on the side of the paper the child should hold.  
     
    7. Separation of the two sides of the hand.  Using the thumb side of the hand while bending the pinkie side of the hand in stability defines separation of the two sides of the hand.  This is needed for tripod grasp and in-hand manipulation as well as gross grasp and power grip hand strength.  Use stickers to work on this by placing a sticker in the child’s palm.  They can bend the pinkie, ring finger, and middle finger down to cover up the sticker while using the pointer finger and thumb in fine motor tasks.
     
    Extend the activity:  Place a small object like a cotton ball in the hand while using the thumb and pointer finger to pick up stickers.  
    Stack stickers in a pile by placing them on top of one another.
    Use a sticker on the tip of a pencil to show kids where to pinch the pencil when sing a tripod grasp.
     
    8. Hand Strength.  How can something as small as a sticker work on hand strength?  Children need strength in the small muscles of their hands in order to have endurance in coloring, using an open web space when holding a pencil, and when managing buttons and snaps on clothing.  Kids can use stickers to build the strength of the intrinsic hand muscles by peeling stickers from resistive surfaces. 
     
    Extend the activity:  Place stickers on cloth like couches or carpeting and ask your child to unstick the stickers without ripping them.  They will need to use the intrinsic muscles and defined arches of the hand to pull them up.
     
    9. Body Awareness. Toddlers can work on naming their body parts by sticking stickers on feet, and other parts.  Children with difficulty in sequencing might have trouble knowing if a sock or shoe goes on their feet first.  Use stickers to help with organizing and positioning on the body.
     
    Extend the activity: Place stickers on feet, hands, arms, and back.  Ask your child to touch certain body parts in a specific order.  Work on getting faster.  Toddlers can practice naming body parts by trying to peel off a sticker stuck to their wrist as you say “wrist”.
     
    10. Gross Motor Development.  Crossing midline, jumping, hopping, skipping, and jumping jacks are gross motor tasks that can be difficult or some kids.  Use stickers as a visual cue or obstacle in practicing these areas.
     
    Extend the activity: Place stickers on each knee.  Ask your child to touch the right knee’s sticker with their left hand and the left knee’s sticker with their right hand.  
    Stick stickers high on walls as they try to jump up to touch them with outstretched hands.


    MORE reasons to play with stickers:
    • Literacy
    • organization
    • sequencing
    • problem solving
    • self-confidence
    • language development
    • mathematics
    • creativity
    • sense of accomplishment
    • stress reduction
    • goal setting
    • socializing
     
    What are your favorite ways to play with stickers?  
     
    So, get your child involved with sticker collections to work on all of these developmental areas.  And, you’ll get to relive your childhood with the scratch-and-sniff, fuzzy, hologram, puffy stickers!
     

    Best Sticker Gifts for Kids

    We also have some ideas for sticker toys and sticker gifts that support development of these skills in kids.

    Use stickers in Occupational Therapy and development of so many skills with kids: fine motor, gross motor, visual perceptual, handedness, and more.


    I found some very fun sticker activities out there that I wanted to share.  Play with your child using these sticker activities as you work on 10+ functional areas:
     

    Every kid needs a sticker collection book! This My Sticker Album
    has illustrated pages for sticker collections. 


    Try this Re-Usable Sticker Book to stick and re-stick stickers.
     

    Need stickers to add to your collection book? The 1000 Stickers for Girls
    and 1000 Stickers for Boys should have you covered! (Although who says a truck sticker is just for boys? Nope! I would get both books for my kiddos!) 


    There are stickers for every theme, character, or interest out there. From Dinosaur Stickers, to Cupcake Stickers …there is something for everyone!  (including the Care Bears fans out there!) 


    I love these Alphabet stickers for name building, letter identification, and spelling word practice.


    What stickers do you need in your sticker collection?

     
    Use stickers in Occupational Therapy and development of so many skills with kids: fine motor, gross motor, visual perceptual, handedness, and more.


    You will love our recent 31 Days of Occupational Therapy series where we shared free and almost free ways to work on Occupational Therapy goal areas.  This post is a great way to work on functional skills using free or inexpensive items.  Most of us have a couple of stickers around the house.  Some of my favorite activities from the series include: 


    Day 14 Open Thumb Web Space Activities and Homemade Fuzzy Beads

    Day 15 Dinosaur-Sized Sensory Feelings and Proprioceptive Activities 

    Day 16 Handwriting Warm-Up exercises

    Day 17 Cardboard Tube Visual Tracking

    Working on fine motor skills, visual perception, visual motor skills, sensory tolerance, handwriting, or scissor skills? Our Fine Motor Kits cover all of these areas and more.

    Check out the seasonal Fine Motor Kits that kids love:

    Or, grab one of our themed Fine Motor Kits to target skills with fun themes:

    Want access to all of these kits…and more being added each month? Join The OT Toolbox Member’s Club!

    Colleen Beck, OTR/L has been an occupational therapist since 2000, working in school-based, hand therapy, outpatient peds, EI, and SNF. Colleen created The OT Toolbox to inspire therapists, teachers, and parents with easy and fun tools to help children thrive. Read her story about going from an OT making $3/hour (after paying for kids’ childcare) to a full-time OT resource creator for millions of readers. Want to collaborate? Send an email to contact@theottoolbox.com.
    Learn with Board Games You Already Own

    learn with game boards

    One of the ways that pediatric occupational therapy practitioners help their clients is by using everyday items and toys to support development. Sometimes, OT practitioners go into a setting and support skill achievement with whatever is available in the home or classroom. We love to do this in the environment the individual is in because it’s so meaningful! That’s why I wanted to pull together a few ways to use board games to support learning and development. This is an older blog post (originally written July 27, 2015) and updated July 15, 2024. These are classic games that are found in many home game rooms or therapy game closets, but there are many ways to adapt the games to support learning! Here are ways that we use games in OT…

    learn with board games

    Learning with Board Games

    It can be fun to introduce learning into a summer day or after-dinner evening with the family during Family Time.  Pull out board games that you’ve played a thousand times and add a learning component to them for a new twist on the game.  A math, literacy, history, or any educational spin can be made to board games to make them appropriate for your child’s age and interests.  See how we’ve made modifications to board games:


    Use board games like Guess Who, Kerplunk, Zingo, and more in learning  extension activities: math, literacy, and educational ideas based on your child's interests. Perfect for homeschooling, classroom, and home extension activities.
    Some games that we love to use in developing skills include: Zingo, Connect 4, Hedbanz, and more.


    Learn with Board Games

    There are so many ways to learn using board games. Occupational therapy providers love to use games and play as a facilitator to supporting skills. Try some of these ideas for example:

    Then there are games that use specific items that are found in the home. Using items like game pieces, paper clips, etc. are easy ways to make a DIY game that supports learning. Try these ideas:

    This post contains affiliate links.
     

    Board Games to Use in Learning Activities

     
    Let’s get specific with HOW to learn with board games! We pulled some of our favorite games from the closet and came up with different ways to learn and support skill development.
     
    Some of our favorite rainy day activities are board games.  When you play a game 500ish times, they can become boring (Board-ing Games?) and go back on the shelf for months before they are played with again.  
     
    We’ve got some ideas for extending the play with your favorite games to make them an appropriate (free) learning tool.
     
     
    Use board games like Guess Who, Kerplunk, Zingo, and more in learning  extension activities: math, literacy, and educational ideas based on your child's interests. Perfect for homeschooling, classroom, and home extension activities.
    You can use games like Guess Who to learn with board games you already have! 
     

    How to Adapt the Guess Who Game

    One way we LOVE to use a favorite game is to grab the Guess Who game. The recent versions have doors that open and a card that you slide in to change out the images behind the doors. We have one that has people on one side and pets on the other. The cool thing is that with this version, you can slide the cardboard in and out to change the options. When we play this game, however, I love to change it up even more. 

    Take the card out of the Guess Who game, and use it as a template to create a new background. I cut a piece of cardstock to fit the game. Then, I slid it into the slot and used a pen or a marker to write letters, words, numbers, etc. into the spaces behind the doors.

    We used it to practice letter formation and identifying letters. For example, I ask my student to find the “tail letter” that I’m looking for. They had to first find the tail letters that were on the board and then they had to describe the letters. It’s a great way to work on letter discrimination and to work on visual discrimination skills.

    You can change this version to meet any needs that you are working on!

     
    Practice Math with Guess Who (affiliate link):
    We added a piece of paper to our Guess Who (affiliate link)game.  Write numbers on the paper inside the windows and on the top.  Slide the sheets into both boards.  
     
    Game players can take turns asking questions like, “Is your number 3+3?” or “Is your number 17-4?”.  The first player to determine the other player’s number is the winner.  
     
    Adjust this game to meet any educational needs.  Learning presidents?  Write them in the windows.  Kids can guess the answers based on facts or dates.  
     
    Learning States, science, or historical facts?  Write them in and adjust the game based on the interests and needs of your child or student.
     
    Use Practice Sight Words with HedBanz (affiliate link):
    Simply write sight words on post it notes and stick them to the headband pieces.  Participants can act out the sight word.  
     
    Other options are molding the sight word out of play dough or drawing the sight word.  This game can easily be adjusted to meet any topic.
     
    Practice Math with the game, Zingo
    A fun way to introduce coding to kids is to create simple decoding activities.  
    Assign the card pictures from the game, ThinkFun Zingo (affiliate link)
    to specific letters.  Players keep the cards that they capture by playing the game with the game boards.  
     
    They then have to use the letters they’ve accumulated to form a word. 
     
    Literacy Practice with Ker Plunk Game (affiliate link):
    As the marbles drop in the game, say the letters of the alphabet out loud.
     
    It will be tricky to say all of the letters when the marbles fall quickly once the game goes on.
     
    Math with Checkers (affiliate link):
    We recently posted our favorite way to practice math with checkers.
     
    Math with Uno Card Game affiliate link)is played, add the numbers that are played.  Depending on the players ages, you can add just two cards together keep adding.


    Don't Break the Ice Occupational Therapy Game

    One game that we love to use in learning and building skills in OT is the game Don’t Break the Ice (affiliate link). Here are some ways we like to use this to work on specific areas:

    For example, here are creative ways to adapt the game “Don’t Break the Ice” to support various learning objectives:

    Self-Regulation- we covered how to use Don’t Break the Ice as a self regulation game in a post that has different ideas for other board games.

    1. Letter Recognition and Handwriting Practice
      Materials Needed: Letter stickers, paper, and writing tools.
      How to Play:
    • Place letter stickers on each ice block piece.
    • As players knock out a block, they identify the letter and then practice writing it on a sheet of paper.

    2. Number Formation/ Math Skills
    Materials Needed: Number stickers, math problems on cards.
    How to Play:

    • Put number stickers on the ice blocks.
    • As players knock out a block, they write the numbers or solve a math problem that corresponds to the number (e.g., addition, subtraction).

    3. Writing and Reading Sight Words
    Materials Needed: Sight word stickers or cards.
    How to Play:

    • Place sight words on each ice block piece.
    • When a player knocks out a block, they must read the word aloud and use it in a sentence.

    4. Color and Shape Identification

    Materials Needed: Color and shape stickers or drawings.

    How to Play:

    • Put different colors and shapes on each ice block.
    • As players knock out a block, they identify the color and shape and can match it to a chart.

    5. Handwriting
    Materials Needed: Vocabulary word stickers or cards, definition cards.
    How to Play:

    • Place vocabulary words on the ice blocks.
    • When a block is knocked out, the player must provide a definition or use the word in a sentence and then write it for handwriting practice.

    6. Social Skills
    Materials Needed: Emotion stickers or social scenarios.
    How to Play:

    • Place stickers showing different emotions or social situations on each ice block.
    • When a block is knocked out, the player must describe the emotion or how they would handle the social situation.

    7. Writing Prompts

    Materials Needed: Stickers with story prompts or characters.

    How to Play:

    • Place stickers on each block.
    • When a block is knocked out, the player writes a word describing the sticker.

    8. Fine Motor Skills
    Materials Needed: Small manipulatives or objects.
    How to Play:

    • Attach small manipulatives (e.g., beads, buttons) to the ice blocks.
    • Players must carefully knock out a block without dislodging the manipulatives, improving hand-eye coordination.

    9. Visual Memory Game
    Materials Needed: Pair stickers.
    How to Play:

    • Place pairs of matching stickers on the ice blocks.
    • Players must remember the position of each pair as they play, enhancing memory skills.

    There are so many ways to use games in learning activities! This is just the start. Hopefully this helps you think of more ideas to use the games you already have.

    This post is part of our month-long series: Learning with Free Materials series, where we share ideas to learn at home using free (or almost free) materials.  It’s part of the 31 Days of Homeschooling Tips as we blog along with other bloggers with learning at home tips and tools.

    Colleen Beck, OTR/L has been an occupational therapist since 2000, working in school-based, hand therapy, outpatient peds, EI, and SNF. Colleen created The OT Toolbox to inspire therapists, teachers, and parents with easy and fun tools to help children thrive. Read her story about going from an OT making $3/hour (after paying for kids’ childcare) to a full-time OT resource creator for millions of readers. Want to collaborate? Send an email to contact@theottoolbox.com.

    Emotional Regulation Games

    Don't Break the Ice game for self regulation. Ice cubes on the image say coping tools, worries, heavy work, brain breaks, etc.

    If you are looking for tools to support and develop self-regulation skills, then you are in the right place. In this post, you’ll find emotional regulation games for self-regulation and specifically, Zones of Regulation games. These children’s games for emotional awareness and self-regulation were selected because they are fun ways to support emotional regulation, self-control, and social emotional developmental milestone achievement through game play. And, importantly, they support and teach the Zones of Regulation program by playing games.

    Be sure to check out our comprehensive list of children’s books to teach the Zones of Regulation, and calm down toy suggestions, too!

    Emotional regulation games to support emotional awareness an self-regulation and teach Zones of Regulation or other regulation curriculum.

    Emotional regulation Games

    Using over-the-counter games as emotional awareness tools is a cheap and creative way to foster the engagement of children in the learning process of emotional awareness and self-regulation. 

    Children love playing games and using them in this manner provides a great therapeutic tool for kids to practice these important skills. 

    Granted, some games do help children work on self-regulation naturally while others need just a little adaptation to make them worthy of being called self-regulation and emotional awareness tools.  

    You’ll also want to check out our self awareness games as additional supports for developing these skills.

    How to use games to support emotional regulation

    How exactly do you use over-the-counter games to help children learn about feelings and emotions?

    Think about how the simple playing of a game or just a slight adaptation to the game can create the just right therapeutic activity to help children work on identifying and expressing feelings and emotions. Maybe just adding simple facial expressions, emojis, or even a descriptive word to the board, tokens, spinner, or the game cards could give the ‘just right’ challenge for a child. 

    How exactly do you use over-the-counter games to help children learn self-regulation skills

    Think about how playing these games naturally can help children to practice emotional regulation skills:

    • Recalling the rules
    • Keeping their focus
    • Attention to game play and the play of others
    • Accepting and coping with winning and losing
    • Flexibility of thinking as they play against an opponent
    • Inhibition of impulses during play

    These are all necessary skills that are directly related to self-regulation. 

    Zones of Regulation Games

    Take the time to consider how you may be able to adapt or modify an over-the-counter game allowing game play to incorporate regulation and emotional awareness programs such as, The Zones of Regulation®, The Alert Program®, and SuperFlex…A Superhero Social Thinking Curriculum®.

    Maybe just adding the colors from these curriculums like red, orange, yellow, green, and blue might be all you need to do to easily add-in learning of these curriculum concepts during play. 

    Adapted Over-the-Counter Games

    Over-the-counter games are a great go-to and others have taken the time to do just what is discussed here.  Read on to discover some of the fun ways that others have used to address these important skills with children of all ages.

    Don't Break the Ice game for self regulation. Ice cubes on the image say coping tools, worries, heavy work, brain breaks, etc.

    One game we love to use as a self regulation tool is Don’t Break the Ice. It uses the regular game, but we adapt it to meet the needs of the individual, whether that be brain breaks or specific coping tools.

    Amazon affiliate links are included below.

    Use the game, “Don’t Break the Ice” in a Coping Skills activity- We love the idea of using Don’t Break the Ice to work on coping strategies. You can print off labels or even use round label stickers and put one on each ice block. Write out actions like deep breaths, mindful breathing, wall push ups, etc. Then when kids pound on the ice cubes, they can do the actions that are on the ice cubes that fall. This game can be used to help children learn and discuss coping strategies by having them perform the techniques or discuss strategies that are printed on each ice block. Makes a wonderful self-regulation game by simply just writing on the blocks – easy! 

    Grab Don’t Break the Ice HERE. (affiliate link)

    Use the game, “Don’t Break the Ice” in a Worry activity- Another way that we love to use the game Don’t Break the Ice, is to target worries. When kids pound an ice cube out from the game, they can name a worry or a stressor. This opens up communication with action of moving the hammer to remove ice pieces. How easy is that? Makes it a unique way to have children share about worries, what happens in their bodies, gain some understanding, and learn helpful coping strategies. 

    Grab Don’t Break the Ice HERE. (affiliate link)

    Connect 4 Emotions: This game is adapted by simply placing emotions stickers on the red and yellow chips and when a player picks up a piece to place it, they must share a time that they have felt that emotion. This can easily be used to identify emotions or even identify an appropriate coping strategy to deal with an emotion.

    Grab Connect 4 HERE. (affiliate link)

    Emotions Twister: This is a super fun way to work on emotions while using the Twister mat and incorporating the Zones of Regulation® colors by drawing facial expressions on the dots! Makes for a great supplement to the curriculum! 

    Grab Twister HERE. (affiliate link)

    Emotions Uno: Using a deck of Uno cards, children talk about the emotions related to the card colors with an adult providing subject prompts. Children can talk about experiences and the emotions they felt during those times.

    Grab UNO HERE. (affiliate link)

    Feelings Jenga or Exploring Emotions Jenga: This is a fun way to help children explore and talk about feelings and emotions by having children answer questions related to specific emotions. Makes a great tool to use in small groups!

    Grab Jenga HERE. (affiliate link)

    Feelings Mancala: This old-time game has been turned into a game for emotional awareness and development. Facial stickers are placed into the bottom of each hole on the board and then the game is played with each player sharing about a time they felt a particular feeling or emotion. 

    Grab Mancala HERE. (affiliate link)

    Another idea is to simply use the Jeepers Peepers Guessing Game Glasses or the Hedbanz Headbands with cards from the Superflex curriculum. Children don the glasses or headbands from these games and then place the Thinkable or Unthinkable cards (affiliate link) onto the glasses or headbands and have a child try to describe them.

    Grab Headbanz HERE. (affiliate link)

    Classic Games to teach emotional regulation

    How about trying some of the classic games or even classic toys that we all know and love but that do not require the use of a board game?  That’s right.  Enjoy these fun ideas designed for children to learn about emotions and feelings as well as self-regulation and coping. 

    Feelings Matchbox Cars Parking Lot: Kids love Hot Wheels and Matchbox Cars and there are cars designed for every child’s interest.  But have you thought about using them to park in spots of a feelings and coping parking lot? Makes an easy DIY activity using some classic toys! 

    Grab Matchbox Cars HERE. (affiliate link)

    Hopscotch: This is a super easy gross motor activity that kids can use to identify and discuss emotions and feelings.  Makes a classic turn into a newbie! 

    Grab this Portable Hopscotch Board (with Zones Colors) HERE. (affiliate link)

    Hula Hoops and Zone of Regulation: Everyone loves to try using a Hula Hoop!  Kids and adults alike will pick one up and try to play with it.  This activity uses this fun classic toy by helping children identify the different zones and what makes one be in that zone. So, they are learning about the feelings while also learning about curriculum concepts. 

    Grab a Hula Hoop set in Zones colors HERE. (affiliate link)

    Zones of Regulation Lego Towers: Kids enjoy building with Legos and they have been a core toy for years and years. Children see Legos and they immediately go to them and begin creating something fun! Try using them to create some fun Lego Towers that helps children identify emotions, feelings, and coping strategies. Makes for Lego love on a whole new level! 

    Grab DUPLO blocks HERE. (larger blocks- affiliate link)

    Grab LEGO blocks HERE. (Smaller blocks for hand strengthening- affiliate link)

    Social Emotional Games

    Maybe you have the money to spend on actual board games that address the skills of emotional awareness and self-regulation.  If so, take a look at these fun games designed just for that purpose!

    BBQ Emotions (affiliate link)- This game has large skewers that help children to recognize and manage 10 different emotions. Children will discuss them and how to deal with them as if they are ingredients. This makes for a fun game that can be played individually or in a small group. 

    Grab BBQ Emotions HERE. (affiliate link)

    Emotion-oes – This fun domino game helps children to recognize and identify emotions by matching the pieces just as they would if playing regular dominoes.

    Emotional Roller Coaster (affiliate link) – This anger management game helps children learn coping and calm down strategies when they are experiencing the feeling of anger.

    Grab Emotional Roller Coaster HERE.  (affiliate link)

    Emotions Bingo (affiliate link)- This simple bingo game helps children to recognize and identify emotions by scanning and matching the pieces just as they would if playing regular bingo. It helps kids to talk about how to handle feelings in a healthy way.

    Grab Emotions BINGO HERE. (affiliate link)

    Grab Emotions BINGO for Teens HERE. (affiliate link)

    My Feelings Game (affiliate link)– This game has 280 scenarios that help children to express their feelings and how to cope with them appropriately. 

    Grab My Feelings Game HERE. (affiliate link)

    Social Skills Board Games (affiliate link)– This is a set of board games designed to help children work together to improve their overall social skills and can help children to learn about their feelings and the feelings of others. One particular board game is designed to show emotions and how to manage them.

    Grab this 6 Pack of Conflict Resolution Games HERE. (affiliate link)

    No Waries (affiliate link)– This game is a social emotional card game that helps children to learn about and understand emotions and in turn, helps them to acquire important social emotional skills.

    Grab No Waries HERE. (affiliate link)

    So, get brave and use your over-the-counter OT eye to find a game or toy that you can use to help a child build or develop important social-emotional skills while having some creative fun!

    Regina Allen

    Regina Parsons-Allen is a school-based certified occupational therapy assistant. She has a pediatrics practice area of emphasis from the NBCOT. She graduated from the OTA program at Caldwell Community College and Technical Institute in Hudson, North Carolina with an A.A.S degree in occupational therapy assistant. She has been practicing occupational therapy in the same school district for 20 years. She loves her children, husband, OT, working with children and teaching Sunday school. She is passionate about engaging, empowering, and enabling children to reach their maximum potential in ALL of their occupations as well assuring them that God loves them!