Teach Bike Riding: Tips from a Therapist

teach bike riding

One play-based skill that most parents struggle with is dealing with teaching their child how to ride a bike. In this blog post, we cover how to teach bike riding, based on the underlying skills that are needed for balancing and pedaling a bicycle. We’ll address how to ride a bike without training wheels, and how to support your child’s specific needs when it comes to learning to ride a bike. Summer occupational therapy activities include working on the skills kids WANT to get better at! So, if you’re starting with a balance bike, then you are in the right place, because we love to use balance bikes to teach bike riding skills! We’ll cover how to teach balance bike riding as well.

Let’s get started!

teach bike riding

Teach Bike Riding based on underlying skills

One of the best tips for learning to ride a bike a therapy provider can suggest is to target the underlying skills that impact balance, sitting on a bike, pedaling, steering, and braking a bicycle. Considering the skills needed for riding a bicycle pertains to children with neurodiverse needs, typically developing children, and even adults learning to ride a bike!

Pediatric occupational therapists work with children to help them accomplish functional tasks, from play, to self-care, to learning, to day-to-day activities. Riding a bike is just one of those areas that an occupational therapist can work with children and families to facilitate function and ability.

When children struggle with riding a bike, there may be underlying issues happening that impact the successful transition to independent bike riding. Those areas might be as a result of an injury or diagnosis, or it might be a weakness in a specific area like strength, coordination, or balance.

This post was originally part of our giveaway series in the Therapy Toys and Tools Giveaway series. (Giveaway now closed.)

How to teach kids to write a bike using a balance bike.

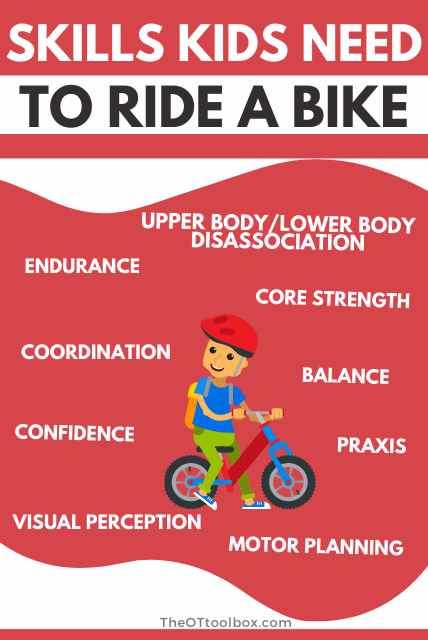
Skills needed for bike riding

When occupational therapy professionals work with children to achieve the functional task of riding a bicycle, they can help kids achieve independence with areas that are needed for bike riding:

  • Core strength
  • Motor planning
  • Balance
  • Sequencing
  • Postural praxis
  • Upper body/lower body disassociation
  • Motivation
  • Body awareness
  • Visual convergence
  • Visual scanning
  • Coordination

All of these areas can be achievable by working on underlying areas through therapy.

There are many skills that kids need to ride a bike. Use these therapy tips to help teach bike riding.

How to Teach a Child to Ride a Bike

These are the general steps to follow when teaching a child to ride a bike.

Select the appropriate bike: Riding a bike requires visual skills, motor skills, and cognition. Determining the best bike to support these needs is pivotal. For the young child who is gaining more refined control of motor skills, or the individual requiring greater motor support, it may be best to start with a tricycle bike.

Others may benefit from a balance bike (see below) or a bike with greater back support. The great news is that there are many options out there to support specific needs.

Some of the adaptive equipment or modifications that can aid the child in maintaining balance while riding a bike include:

  • Specialized seating
  • Handlebar adaptations
  • Foot support options like rear box, pedal toe cages, wider pedals, platform pedals, or pedal straps
  • Bike height
  • Back rest
  • Three-wheeled bike options
  • Trunk support
  • Stabilizer wheels
  • Thigh supports
  • Safety training handle

One tip that is beneficial to all new bike riders is to ensure that the bike that fits them well. Sizing a bike to fit the rider means that the bike height should allow the rider to comfortably touch the ground with their feet when seated.

Teach a child how to balance on a bike

When working on a preferred task like learning to ride a bike, a therapy professional will look at several things that contribute to the ability to balance and sit on a bicycle.

These are the skills that are needed for balance and coordination to sit on a bicycle and maintain balance:

  • Core strength/stability
  • Bilateral coordination
  • Visual gaze up (looking out in front of the bike, not down at the pedals)
  • Separation of upper body/lower body (Upper body/lower body disassociation)
  • Seated balance
  • Muscle strength
  • Visual processing skills
  • Hand-eye coordination
  • Range of motion
  • Endurance
  • Motor planning

Once the balance is in place, then you will start to see the ability to move the pedals and steer as an integrated process. This all happens through practice and experience in bike riding, but before one can move the bike, they need to have the basic ability to sit upright on the bicycle frame and place feet onto the pedals to start pushing.

One way to address the balance aspect is to use a balance bike which has no pedals and allows the child to focus on maintaining balance and steering.

Balance tip: When teaching balance on a bike for the first time, try finding a flat lawn. The grass offers more resistance which is greater feedback through the pedals than a relatively smoother surface of a parking lot. Plus, the grass is a better place to land compared to the asphalt of a street or parking lot.

To teach kids to have and maintain balance:

  • Consider balance exercises off the bike: The physical therapist will design exercises and activities to target the child’s balance and stability. This may include activities such as sitting on a therapy ball, balancing on a wobble board, or performing dynamic movements while seated.
  • Teach them to scoot: Encourage your child to straddle the bike with their feet on the ground. Demonstrate how to push off with their feet and glide, using their legs to maintain balance. This helps them get comfortable with the motion of the bike.
  • Work on pedal motion: One of the main pieces of balance is getting those pedals moving. When the pedals are moving, the bike is balanced (including the upper body balance as well). To support pedal use, there are contributing factors: bilateral coordination, gross motor coordination, force modulation, holding the foot in place without pushing too hard, holding the foot on the pedal platform, and using pedal brakes.
  • Verbal prompts- Use consistent prompts for pushing pedals: “push down” and “raise up”. Encourage the learner to always start with their stronger foot too, using their dominant foot to start the pedals and to push on the break.
  • Physical prompts- Start by holding onto the handle bars as a physical prompt. Then move to holding onto the seat. A seat extender can help too.
  • Braking- Getting the hang of steering helps with balance. Sudden stops can impact balance so working on smooth motor planning.

Therapy Tips for Bike riding

Use a bike without pedals to work on balance.

Address pre-bike riding skills by breaking down the skills that kids need for bike riding, including coordination of both legs, core strength, etc.

Work on core strength with activities like animal walks, donkey kicks, bicycle leg pumps, standing on one foot to build balance.

Use a balance bicycle to work on fears related to balance by allowing kids to glide feet along the sides of the bike.

Work on motor planning by stopping and starting the pedal-less bike and picking feet up/running feet along the bike, and stopping the balance bicycle.

Address core strength and endurance with yoga.

Address balance and upper body/lower body disassociation by pushing feet down and lifting feet up to practice gliding and balance.

Address vestibular issues by practice getting on and off the balance bicycle with both feet down on the floor and then just one foot down on the floor.

Work on vestibular input and balance, coordination by working on lean with a balance bicycle.

Build confidence in young bicycle users by instilling confidence in riding a bike without pedals.

Using a bike without pedals offers so many opportunities to work on all of the areas needed for bike riding, and core strengthening, motor planning, balance, and sequencing can help children become successful in helping them reach this goal.

Balance Bike for teaching bike riding skills

There are so many reasons why as an occupational therapist, I love the use of a balance bicycle to help children learn to ride a bike. I would love to share those reasons for using a bike without pedals in teaching bike riding. Here, you’ll also find bike riding tips and reasons that a balance bicycle helps children with balance and bike riding skills.

balance Bike for Kids

Balance bikes are nice to work on some of the skills that impact overall bike riding:

  • Balance without the pedal aspect
  • Navigating obstacles
  • Steering
  • Using a helmet
  • Encouraging disassociation of two legs in pedal motion without the pedals- the balance bike requires legs to “run” alongside the bike. This is a great precursor to pedaling.

At this stage, teaching kids to use a balance kid for 2 year old children can involve pre-bike riding skills. These can involve things like breaking down the skills kids need and working on the areas listed above.

In all of these ways, bikes without pedals are so helpful for teaching bike riding, from 2 years old and older!

Balance bike from Radio Flyer

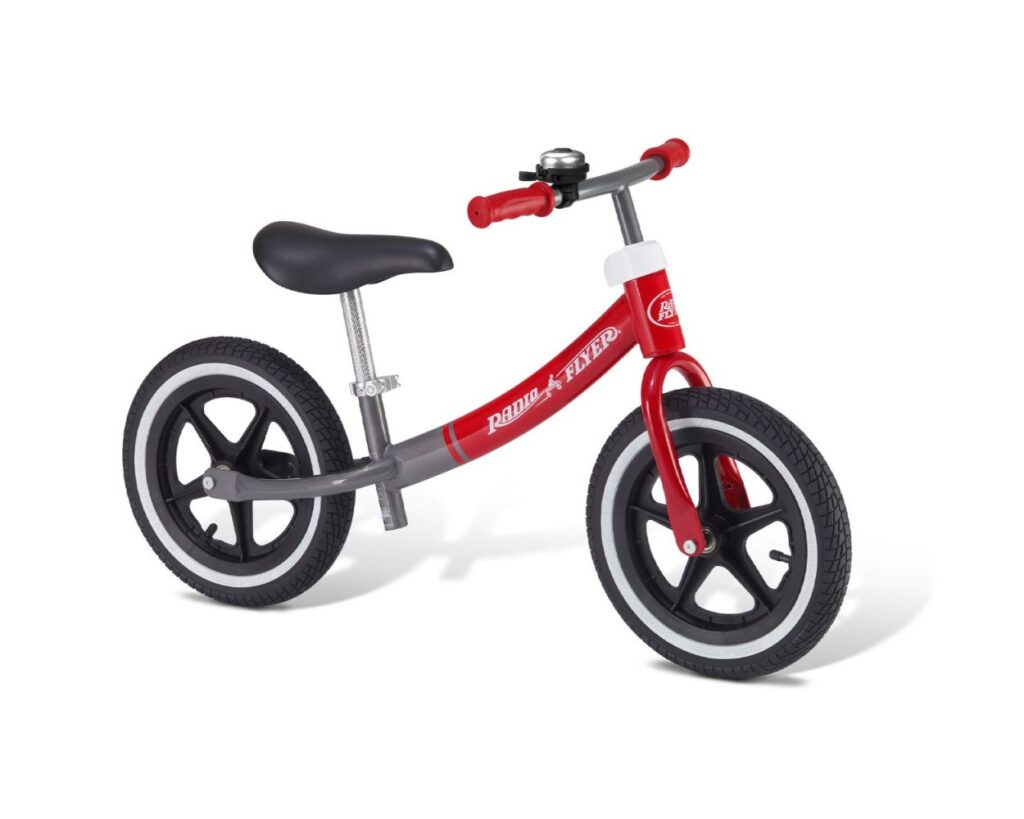
Radio Flyer Air Ride Balance Bike

Want to add a bike without pedals to your toolbox? Let’s get kids moving and building skills!

The Radio Flyer Air Ride Balance Bike is a great tool to add to your therapy toolbox or to use in your home to teach young kids to ride a bike! The Radio Flyer Air Ride Balance Bicycle is a pedal-less bike that allows kids to build balance and other bike riding skills.

Check out the comments below, for ideas on how readers would use the balance bicycle to teach a child to ride a bike!

Colleen Beck, OTR/L has been an occupational therapist since 2000, working in school-based, hand therapy, outpatient peds, EI, and SNF. Colleen created The OT Toolbox to inspire therapists, teachers, and parents with easy and fun tools to help children thrive. Read her story about going from an OT making $3/hour (after paying for kids’ childcare) to a full-time OT resource creator for millions of readers. Want to collaborate? Send an email to contact@theottoolbox.com.

Summer Handwriting Practice

Summer handwriting practice

This list of summer handwriting practice ideas is an older blog post that we thought needed some light of day again, especially with the summer months upon us! If you have a kiddo that has been working on handwriting goals ALL school year, only to go the whole summer without picking up a pencil (or crayon, marker, etc…), then summer handwriting needs fun Try some of these *actually fun* summer writing activities that keep kids moving toward visual motor, fine motor, and sensory motor handwriting goals. These are great ideas to add to your summer occupational therapy activities.

Summer handwriting practice

Summer handwriting practice

Practicing letter and number formation can become dull.  There are creative ways to work on handwriting, for certain.  I’ve shared a ton of fun handwriting activities that can make practicing writing tasks a little more fun.  

But, sometimes it can be hard to carry the skills learned in individual activities over to letters, journals, and homework lists.  Your child/student/client might be able to form all of the lower case letters in the morning, but then turn in a sentence that is totally illegible that afternoon.

Kids who hate to write will love these authentic and natural ways to work on their writing and handwriting this summer.


Summer Handwriting Activities

Natural handwriting tasks are those happen during real writing tasks: writing an address on an envelope which holds a letter to a friend, writing out a birthday wish list, or jotting down a quick to-do list.

 They are authentic writing tasks. What makes these natural writing experiences legible is carrying over skill that have been practiced in isolation.

The summer months is the perfect time to practice handwriting skills.  But, most kids are not going to want to spend their carefree summer with a pencil and paper, much to parents with best-intentions.


These handwriting ideas are ways to practice written work in natural and care-free ways, making them perfect for summer writing.


Try these natural handwriting experiences with your kids this summer:

  • Write a note to a friend.  Drop it off in a mailbox.
  • Send a postcard while on vacation.
  • Make a weekly Summer-Fun to-do list.
  • Start sending letters to a pen-pal.
  • Form letters in a slime writing tray
  • Write a simple journal- Try using just one sentence to describe each day.
  • Write a vacation packing list.
  • Look at the clouds. Write a letter for shapes that you see.
  • Make cookie cutter letters.
  • Make a scavenger hunt. Write out the clues.
  • Write out the weekly grocery list.
  • Make play dough letters
  • Take handwriting on the go with a portable  A-Z list.
  • Write out a checklist of back-to-school supplies.
  • Write out family member’s names in chalk on the sidewalk or driveway.
  • Create a sensory writing tray
  • Send a letter to a relative.
  • Write a collaborative story- Start a collaborative story where you and your child take turns adding a sentence or a paragraph to the story. 

  • Write a thank you note to thank someone for something special.

  • Write a letter to a Disney characters.
  • Write a story.  Add new parts each day.
  • Play handwriting games: Play writing-based games like Yahtzee, “Story Dice” or “Write Your Own Adventure” where your child rolls dice with images or chooses story elements to incorporate into their writing.

  • Create a heart-to-heart back and forth journal with a parent.
  • Write a play.
  • Write about an interest.
  • Write a messy play recipe-Kids can write their own recipes for messy creations like homemade slime, goop, or even mud pies. They can experiment in the kitchen or the yard, write down the ingredients and steps, and even create their own messy cookbook.

  • Find more authentic handwriting activities here.
  • Use the Letters Fine Motor Kit

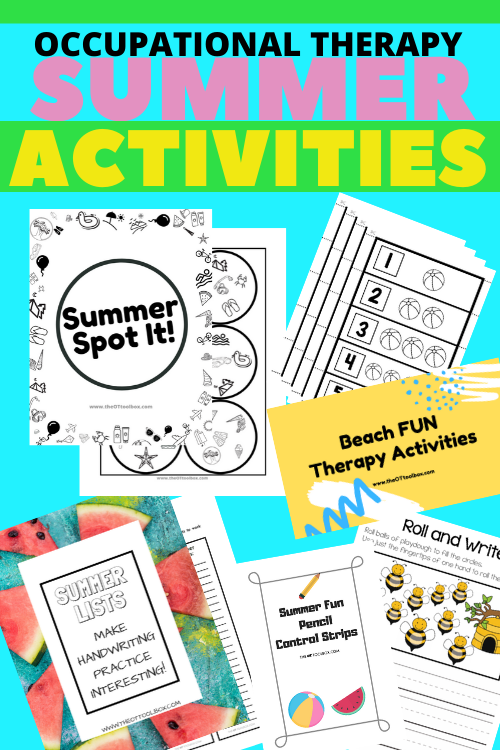
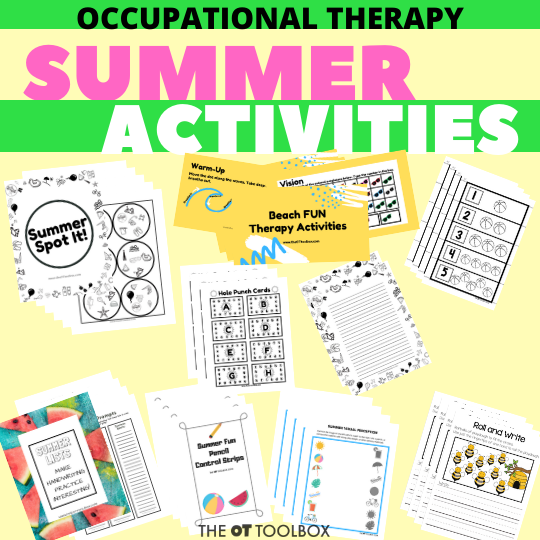
You’ll also be interested in our new Summer Occupational Therapy Activities Packet. It’s a collection of 14 items that guide summer programming at home, at school, and in therapy sessions. The summer activities bundle covers handwriting, visual perceptual skills and visual motor skills, fine motor skills, gross motor skills, regulation, and more.

You’ll find ideas to use in virtual therapy sessions and to send home as home activities that build skills and power development with a fun, summer theme. Kids will love the Summer Spot It! game, the puzzles, handouts, and movement activities. Therapists will love the teletherapy slide deck and the easy, ready-to-go activities to slot into OT sessions. The packet is only $10.00 and can be used over and over again for every student/client!

Grab the Spring Occupational Therapy Activities Packet HERE.

summer occupational therapy activities for kids


Kids who hate to write will love these authentic and natural ways to work on their writing and handwriting this summer.


More handwriting ideas you will love:


Want to take summer play to the next level? Be sure to grab your copy of the Summer OT Activities Bundle!

Summer activities for kids

Visual Motor Skills By Age

visual motor skills by age

This resource includes visual motor skills by age and lists visual motor integration developmental milestones. Visual motor development is part of hand eye coordination skills that happen from a very young age. From shaking a rattle and reaching for baby toys, to holding a pencil and writing letters, the developmental milestones are something to guide functional skill achievement! Let’s explore these visual motor developmental milestones!

Visual motor developmental milestones

As an Amazon Influencer, I earn from qualifying purchases.

Visual Motor Skills by Age

If you’ve followed along with us here at The OT Toolbox, then you know that I love to pull my background as an occupational therapist into posts.  The crafts and activities that we do are more than just fun and cute.  There are important skills that a child develops through play.

Visual Motor Skills are needed for many functional tasks like handwriting and pencil use, scissor use clothing management, and many more tasks. 

How does Visual Motor Integration develop in kids?  We put together this list of  developmental milestones  for a general idea of development and so parents can tell when a problem might be present.  

It is important to note that every child is different and every child develops differently.  These milestones are organized by developmental stages.  Be sure to contact your pediatrician for medical advice. If occupational therapy is needed to assist with delays in visual motor integration, an assessment from a licensed occupational therapist is necessary to determine individual needs and treatment.

This hand eye coordination activities for toddlers post has more ideas.

What is visual motor integration?

Visual motor integration is often times presented a Hand eye coordination.  It is the ability to use your hands and eyes together in a coordinated manner.  


However, visual motor integration has some difference: The visual perceptual skills that are necessary for the visual component of visual motor skills play a major part in perceiving and interpreting visual information.

With skill achievement comes greater precision and finger dexterity, as well as the motor planning needed in order to accomplish more difficult tasks.

Visual motor development is needed for many functional tasks:

  • Shake a rattle
  • Reach for toys
  • Bring toys to the mouth
  • Reach for a face when held (babies)
  • Pick up food from a high chair tray
  • Reach for a bottle or cup to the mouth and putting it back down
  • Releasing objects or toys (babies dropping things from their high chair continuously and love seeing someone older pick it up and put it back so that they can drop it again reinforces this skill)
  • Coloring with crayons- progression of coloring skills happens with age along the milestone achievement
  • Scribbling
  • Playing with toys- shape sorters, puzzles, cause and effect toys, etc.
  • Holding a pencil and drawing shapes, forming letters- This level of visual processing is necessary for copying forms and identifying inconsistencies in written work. It plays a part in letter reversals and letter formation.  
  • Cutting with scissors
  • Navigating stairs
  • Throw a ball
  • Catch a ball
  • Pouring and scooping
  • Using utensils- progression from spoon, to fork, to knife- Check out this resource on how to hold a spoon and fork for specifics.
  • Riding a bike
  • So many more tasks that require visual motor skills!

In eye-hand coordination specifically, the eyes and hands work together to move the pencil, catch a ball, thread beads on a pipe cleaner, or other tasks that require the eyes and hands to fluently coordinate in actions.

You can see how, with development of both the eyes and motor skill dexterity and strength of the hands, feet, core, and legs allows for progression of skills.

The visual component and the motor skills begin working together at a very young age and continue to develop in efficiency as a child grows.  This is visual motor development!

Visual Motor integration and developmental milestones
Visual Motor and Developmental Milestones
visual motor skills by age

Developmental Milestones for Visual Motor Integration 

These visual motor developmental milestones are listed by age of typical development, however, these are general guidelines of development. There can be many other considerations impacting skill achievement. If a child hasn’t achieved a skill by the dates listed below, it’s not a huge issue. It could be that the path to skill progression is varied, and that’s ok!

If you have questions about these milestone skills and dates, especially if it seems there are many skills that aren’t being achieved within months of the dates listed below, it may be beneficial to seek out input and individualized evaluation from a pediatric occupational therapy professional.

Resources may include our parent toolbox, getting started with OT, and what you need to know about child development.

Visual Motor Interventions for Baby

A lot of the activities listed below can help you to drive therapy interventions. As an OT working with a child, we have to pick and chose the activities that are “just right“. That means selecting an OT intervention that is just above the child’s ability that will be a challenge for them, but not too difficult. This is part of skilled OT!

For example, if I’m working with a baby on motor skill development, vision comes into play big time! I will come up with some activities that support development and hold an interest.

Visual motor activities for a baby in early intervention might include:

  • Using texture books with soft pages
  • Stuffed animals, rattles, or toys to encourage them to reach and touch the toy. Use it to encourage visual scanning and tracking with their eyes as you move the toy in front of their field of vision.
  • Activities to strengthen core, positioning, and trunk strength. This includes tummy time!
  • Encourage supine positioning with gaze stabilization and visual fixation. Use toys and overhead mobiles for this.

A lot of the activities for baby involve the parent or guardian in play activities. This is important for occupational therapy providers to educate the parent on.

Visual Motor Therapy for Toddlers

When we get to the toddler stage, we can definitely still be using the activities listed above. It again goes back to that “just right” level and each child we work with in OT sessions will be different.

Other toddler activities might include:

  • Eye-hand coordination activities like a shape sorter
  • Color sorting activities– Use anything you have on hand! I like using colorful balls, or even just sorting toys by color. I also like to use colored popsicle sticks because it’s a novel item. For example, we did this block sorting activity and used the containers that the blocks came in.
  • Use color sorting activities along with a scavenger hunt. This color scavenger hunt is one fun idea.
  • Roll a ball to the child and have them roll it back along the floor or table. Have them keep their eyes on the ball as it rolls.
  • Tracing cars along a race track on the floor. Then make masking tape roads on the wall for more tracing work with work on gross motor skills and crossing midline as they visually track the car.
  • Stacking toys
  • Pouring and scooping activities in a sensory bin. This is a great way to work on functional visual fixation and gaze stabilization.

Visual Motor Integration Activities for Preschool

At the preschool age, we see more organized play, play with peers, and play on sports teams like T-ball or a preschool soccer team. A lot of kids this age do dance classes, too. These are great activities for preschoolers because they really challenge motor planning, motor coordination, AND visual motor skills!

Some ways that I like to work on visual motor integration with preschoolers are with these occupational therapy interventions:

  • Flashlight tag- Preschoolers get a kick out of this game!
  • Go through a picture book and find all of the letter A’s or objects that are a certain color.
  • Put a glow in the dark bracelet or glowstick in a balloon. Tie the balloon in a knot and then play balloon volleyball. They have to visually track the balloon in all ranges.
  • Roll and catch a ball in different planes or in different positions- laying on the floor, sitting, sitting on an unstable surface, kneeling, etc.
  • Mazes
  • Marble mazes
  • Bouncy balls and throw at a target

Visual motor activities for School-aged kids

For our kids receiving occupational therapy who are school-aged (elementary and higher), we can work on more complex fine motor activities as well as board games that involve executive functioning skills. Some ideas I like to use are:

  • Play UNO
  • Spot It games
  • Perfection
  • Rush Hour or Rush Hour, Jr.
  • Word searches
  • Connect the dot activities
  • Geoboards
  • Cut stacking activities
  • Tangrams
  • Drawing on graph paper- make a symmetry picture

Visual Motor Skills By Age

Below is a list of visual motor milestones that kids typically move through.

ONE MONTH:

  • Tracking a rattle while lying on back                
  • Tracking a rattle to the side                

TWO MONTHS:

  • Infant regards their own hands
  • Tracks a ball side to side as it rolls across a table left to right and right to left
  • Tracks a rattle while lying on back side to side

 THREE MONTHS:

  • Extends hands to reach for a rattle/toy while lying on back

   FOUR MONTHS:

  • Reaches to midline for a rattle/toy while lying on back
  • While lying on back, the infant touches both hands together.

SIX MONTHS:

  • Brings hands together to grasp a block/toy while sitting supported on an adult’s lap
  • Extends arm to reach up for a toy while laying on back

   SEVEN MONTHS:

  • Transfers a block/toy from one hand to the other while sitting supported on an adult’s lap.
  • Touches a cereal piece with index finger
  • Bangs a toy on a table surface while sitting supported on an adult’s lap

NINE MONTHS:

  • Claps hands together

TEN MONTHS:

ELEVEN MONTHS:

TWELVE MONTHS:

  •  Turns pages in a board book
  • Imitates stirring a spoon in a cup

THIRTEEN MONTHS:

  • Imitates tapping a spoon on a cup
  • Begins to places large puzzle pieces in a (Amazon affiliate link) beginner puzzle (affiliate link)

FOURTEEN MONTHS:

  •   Scribbles on paper

SIXTEEN MONTHS:

  •   Imitates building a tower of 2-3 blocks (affiliate link)

NINETEEN-TWENTY MONTHS:

  •  Builds a block tower, stacking 4-5 blocks (affiliate link)

TWENTY THREE-TWENTY FOUR MONTHS:

TWENTY FIVE-TWENTY SIX MONTHS:

  • Removes a screw top lid on a bottle
  • Stacks 8 blocks (affiliate link)
  • Begins to snip with scissors

TWENTY SEVEN-TWENTY EIGHT MONTHS:

  • Imitates horizontal strokes with a marker
  • Strings 2 Beads (affiliate link) (read about fine motor skills with beads for more ideas to support this development)
  • Imitates folding a piece of paper (bending the paper and making a crease, not aligning the edges)

TWENTY NINE MONTHS:

  • Imitates building a train with blocks
  • Strings 3-4 Beads (affiliate link)
  • Stacks 10 blocks (affiliate link)

THIRTY ONE MONTHS:

  • Builds a “bridge” with three blocks (affiliate link)

THIRTY THREE MONTHS:

  • Copies a circle

THRITY FIVE MONTHS:

  • Builds a “wall” with four blocks (affiliate link)

THIRTY SEVEN MONTHS:

  • Cuts a paper in half with scissors

FOURTY MONTHS:

FOURTY TWO MONTHS:

  • Cuts within 1/2 inch of a straight line
  • Traces a horizontal line

FIFTY MONTHS:

  • Copies a square
  • Cuts a circle within 1/2 inch of the line
  • Build “steps” with blocks (affiliate link)

FIFTY FOUR MONTHS:

  • Connects two dots to make a horizontal line
  • Cuts a square within 1/2 inch of the line
  • Builds a “pyramid” with blocks (affiliate link)

FIFTY FIVE MONTHS:

  • Folds a piece of paper in half with the edges parallel
  • Colors within lines
 
 
What is Visual Motor Integration?  This blog has a lot of information on visual motor integration developmental milestones and activities for kids.


This post contains affiliate links.  You can read our full disclosure here.


Activities to help develop visual motor integration

When it comes to play, visual motor integration is part of every play activity. Some informative resources that include the sensory motor integration of visual input and motor output include the underlying skills that are all related.

These specific activities will support visual motor skills and visual motor skills play a pivotal role in these areas:


Developmental milestone achievement in children occurs through play. Use these play ideas to get you started on building skills:

Some more of our favorite OT activities for supporting development of visual motor skills includes:

Blue-Themed Sensory Play for Babies and Toddlers

Fine Motor Play with Tissue Paper

Baby Brain Building

Invitation to Scoop and Pour

Baby Ice and Bath

Playing With Color

Learning Apples and Red

Learning Colors Cup Play

Cups and Spoons

Tracing Letters: Letter Formation Handwriting Practice with Chalk

Tracing Lines with a DIY Light Box

Pencil Control Worksheets You Can Make At Home

Christmas-Themed Pencil Control Activities-DIY Worksheets for Pencil Control

Line Awareness with Beads 

Scissor Skills: Activities for Kids

Improving Scissor Skills with Play Dough

Cutting Foam Beads

Using  Stickers to Help with Scissor Skills

Finger-painting Fireworks for Scissor Use

Icicle Winter Scissor Skills Activity

Bunny Tongs Scissor Skills Activity

Color Sorting Scissor Activity

Use the fine motor kits to support development of visual motor skills and visual perception development through hands-on, play-based activities:

Working on fine motor skills, visual perception, visual motor skills, sensory tolerance, handwriting, or scissor skills? Our Fine Motor Kits cover all of these areas and more.

Check out the seasonal Fine Motor Kits that kids love:

Or, grab one of our themed Fine Motor Kits to target skills with fun themes:

Want access to all of these kits…and more being added each month? Join The OT Toolbox Member’s Club!

Sensory Brushing

sensory brushing

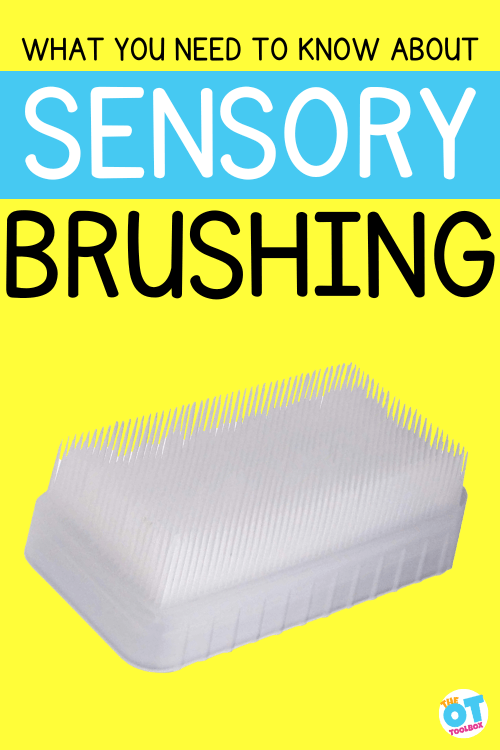
If you’ve looked for sensory strategies, you may have considered Sensory brushing as an option. This post will describe what sensory brushing means, why it is used, and what the potential benefits can be. 

When faced with a new or complicated list of symptoms and behaviors, there are several techniques that may be offered or trialed by occupational therapists.  One of the more popular and widely used programs is sensory brushing.  Therapeutic techniques are definitely not one size fits all, therefore, researching, trial and error, and professional judgment are advised when trying any new technique.

sensory brushing

As an Amazon Influencer, I earn from qualifying purchases.

What is sensory brushing?

Sensory brushing is a layperson’s term for the Wilbarger Deep Pressure and Proprioceptive Technique (DPPT) & Oral Tactile Technique (OTT). 

In the past it was simply referred to as the Wilbarger Brushing Protocol, or the Wilbarger Protocol.  The DPPT refers to the specific sensory modulation techniques developed by Patricia Wilbarger, MEd, OTR, FAOTA. 

Patricia Wilbarger is an occupational therapist and a clinical psychologist who is also known for coining the phrase “sensory diet.”  She is a leading expert in the area of sensory defensiveness (the over-responsiveness of the protective responses of the nervous system).  

Wilbarger, P. & Wilbarger, J.  (1991).  Sensory  Defensiveness in Children Aged 2-12: An Intervention  Guide for Parents and Other Caretakers, Avanti  Educational Programs: Santa Barbara, CA.

Based on the theory of Ayres Sensory Integration, the DPPT, or sensory brushing technique, uses a prescribed method of providing stimulation through pressure touch massage, to help the mind-brain-body self-organize. 

The protocol also includes a series of joint compressions that are always used in conjunction with the brushing to enhance joint perception and feedback. This is based on proprioceptive input through the joints and deep input through the skin.

The Wilbarger Protocol is designed to be used in conjunction with an individualized sensory “diet” based on the specific needs of the child and carried out under the guidance of someone familiar with the protocol and trained in sensory integration theory and practice. 

Check out this sensory processing disorder chart on the OT Toolbox for more information on sensory processing.

 Please note: training in sensory brushing is absolutely necessary before attempting to use this technique in practice, otherwise harmful or ineffective influences may be the result.  Be sure to receive the most up to date brushing protocol training as it has changed over the years.

When to trial a sensory brushing program?

There are several situations that may be a predictor of using a sensory brush in occupational therapy as a tool to support sensory needs.

  • Tactile defensiveness – fear and discomfort of being touched, touching things, or having something touch the skin. The brushing program can reduce tactile defensiveness and oversensitive responses
  • Sensory seeking – adding extra deep pressure and sensory input can help the body regulate sensory information
  • Difficulty with self regulation – including paying attention, transitioning between activities, motor coordination, functional communication, safe behaviors

sensory brush benefits

What does a sensory brushing do?

Sensory brushing can do several things, and depending on the individual and their sensory preferences or sensory needs, there can be different results following use of a sensory brush.

  • Improved ability to transition between tasks
  • Decreased discomfort from being touched, or touching
  • Improved self regulation with less behavioral outbursts
  • Decreased picky eating
  • Ability to wear more of a variety of clothes, and engage in different textures
  • Satisfy the need to explore and touch everything
  • Self awareness, self control, handling new situations easier
  • A sensory brush may support tactile processing differences.
  • Sensory brushing can be calming or organizing when used in a sensory diet
  • Use of a sensory brush can support tactile resistiveness

The tactile system sends information into the touch receptors from our skin.  There is much to consider when thinking about touch.  Pressure (light versus heavy), texture, (rough, sticky, soft, wet, dry, silky, smooth, bumpy) temperature, (hot, warm, cold), and emotions regarding texture, (will I be able to wash my hands?) People react differently to different types of touch depending on their system. 

Children with difficulty integrating the tactile system tend to look like this:

Oversensitive (defensive):

  •  Does not like to be dirty
  • Avoids touching food
  • Fingers splayed after touching object
  • Anxious about being messy
  • Avoidant
  • Irritated by tags or types of clothing
  • Doesn’t like grooming (hair cutting, shampooing, tooth brushing, fingernail cutting)
  • React negatively to touch (pulling away, hitting, or crying)

Under-responsive:

  • Always dirty
  • Constantly touching objects or people
  • Doesn’t mind being messy
  • Doesn’t notice when hands or face are messy

wilbarger brushing protocol

What do I need to know before starting the Wilbarger brushing protocol?

Because of the ready availability of (affiliate link) sensory brushes on Amazon, it can be easy to get your hands on one (and feel the effects of a sensory brush on your hands!) But, before you start using one, it’s important to consider specific things you should know about sensory brushing or the DPPT.

  • The sensory brushing program, when performed correctly, can have some great benefits.  If performed incorrectly, there may be negative effects, or be ineffective
  • There is a specific brush to use for the brushing program – in order to be consistent and effective, look for a (Affiliate link) Willbarger approved brush.  There is a basic and a (affiliate link) deluxe model.  The deluxe model has a larger handle for comfort and control, but is not necessary.  Other brushes, hair brushes, paint brushes, etc. are not consistent in the pressure they provide
  • Apply firm consistent pressure – light pressure will disorganize the system or cause increased arousal
  • Do not brush the stomach or chest.  Brushing the stomach may affect digestion, and the chest may affect respiration.  
  • Stay away from the face when brushing.  It is too sensitive an area.  Instead use a washcloth, or warmed lotion
  • Sensory brushing is more effective over bare skin, however if brushing over clothing pull the clothing tight and eliminate bumps
  • Follow brushing with joint compressions
  • Sensory brushing should not cause pain. It might take some practice and effort to complete the cycles, but it will be worth it!
  • Use the most updated sensory brushing protocol
  • Best practice is to brush every 90 minutes to 2 hours, stopping at least 2-3 hours before bedtime, as brushing can increase arousal level.  Aim for at least six brushes daily
  • Include brushing into daily routines such as diapering, toileting, dressing, transitions between activities
  • Complete two to three weeks of this intense brushing, then discuss fading with a therapist

What to watch for when using a sensory brush:

Sensory brushes, like any sensory tool can have detrimental side effects. For this reason, it’s important to consult an occupational therapy professional trained in use of these tools.

  • Negative side effects such as difficulty eating, sleeping, worsening of behavior, digestive issues, moodiness, etc.  If these occur, advise spreading out the brushing until the learner’s system accommodates to it
  • Positive behavioral changes – encourage caregivers to keep a record or chart to track behaviors

A word about evidenced based practice

Governing agencies strive to produce techniques that are backed by evidence and research.  While there is evidence that the brushing program can be effective, it is inconsistent.  All sensory treatment is, unfortunately, based on trial and error. 

Because the treatment does not occur in a bubble, it is difficult to get definitive results and research.  What works one day, may not work the next.  Much like the use of weighted blankets and compression garments, there is evidence found in the literature, and there is skilled experience from professionals.

A treatment protocol that seems to be working may be influenced by diet, the weather, mood, concurrent techniques, and 57 other variables.  Because the program (generally) does not cause harm, it is worth trying.  

Personal Therapeutic Experience with Sensory Brushing:

I have used the brushing program personally, and in practice during the past 25 years.  It has worked for some, but not all.  Personally I found it difficult to keep up with regimen of brushing. 

Even though it was only 3-5 minutes each cycle, remembering to do it every 90 minutes was tough.  In addition, when I was feeling better, I could not be sure it was the brushing that was affecting me.  It could have been a sunny day, my mood was elevated, I had a good night’s rest, and had a good breakfast.  It did not harm me, and even if it was a placebo, it was worth it to feel better. 

Give parents some leeway as they incorporate this into their busy lives.  Remind them it is only for a couple of weeks.  Like adding an antibiotic, it is tough at first, but will be over soon.  If caregivers can only get four cycles in a day, that is better than nothing.  If they are not doing it consistently enough to gauge progress, it might be better to wait until they are able to commit to this program before starting. 

Sensory brushing, as with any other techniques is definitely not one size fits all.  My philosophy is to offer the least restrictive or invasive option first.  Start with a sensory diet, play based activities, and therapeutic activity before jumping straight into sensory brushing or DPPT.

Victoria Wood, OTR/L is a contributor to The OT Toolbox and has been providing Occupational Therapy treatment in pediatrics for more than 25 years. She has practiced in hospital settings (inpatient, outpatient, NICU, PICU), school systems, and outpatient clinics in several states. She has treated hundreds of children with various sensory processing dysfunction in the areas of behavior, gross/fine motor skills, social skills and self-care. Ms. Wood has also been a featured speaker at seminars, webinars, and school staff development training. She is the author of Seeing your Home and Community with Sensory Eyes.

Occupational Therapy Documentation Tips

soap notes

If you are an occupational therapy practitioner you know all about the dreaded “d” word called documentation. It’s part of the daily life of a therapist, and writing SOAP notes to address the goals of an IEP or 504 accommodations can sometimes seem like it’s all we do. Let’s break down this dreaded task with some occupational therapy documentation tips and look at the positive side of documentation in therapy! You’ll find information on SOAP notes in occupational therapy as well as COAST notes and how to combine SOAP notes with COAST notes for client-centered occupational therapy documentation.

soap notes

As an Amazon Influencer, I earn from qualifying purchases.

Occupational therapy documentation

Daily documentation (along with the dreaded productivity) is not the most fun or anticipated aspect of the occupational therapy profession, but it is a necessary part of it in order to fully appreciate and understand the need for our service and determine if it is making a difference in our client’s life.  Also, we need to do it to get payment for our service and well, let’s face it, make a living!

When it comes to completing all of the daily tasks involved in a therapists’ day, documentation requirements can impact productivity. Here are therapy productivity hacks that can help with getting it all done.

So, with all of that being said, let’s talk about treatment documentation and the necessary components of such to provide evidence for the need of OT services while simultaneously providing a record of client progress and needs. But first, let’s start with taking the negativity out of the process and fill in the blanks with positive ways to view this time-consuming act.

Ok, here we go…

D – Declare OT’s awesomeness

O – Optimistically state potential outcomes

C – Celebrate client’s small successes                                                  

U – Uncover next steps no matter how small

M – Mention “make a difference” engagement

E – Eagerly show client’s need for achievement

N – Narrate your client’s accomplishments

T – Thoughtfully share challenges and how OT can help push through

A – Affirm client’s desires

T – Tactfully explain OT’s unique plan for overcoming obstacles

I – Identify OT as an essential partner in client’s therapy plan

O – Openly communicate earnest client responses

N – Notably inform of client strengths for goal achievement

How’s that for bringing the positivity to occupational therapy documentation?

occupational therapy notes

Treatment documentation needs to be provided to share all about your hard work as a therapist and how you make an impact and a difference in the lives of your client’s and their families. There are many ways a therapy practitioner approaches documentation for treatment sessions.

In the 20+ years I have practiced O.T., I have changed my documentation strategies and approaches in a myriad of ways. Every year I tend to change a little more based on experience and the need for clarification of O.T. as a valuable treatment service in the lives of my clients.

doubletimedocs
soap notes

Occupational therapy Soap Notes

Occupational therapy SOAP notes cover all aspects of documentation using an easy to remember acronym. Most therapy practitioners utilize the SOAP note format developed by Lawrence Weed, M.D. which originated from his original problem-oriented medical record.

The SOAP note acronym provides the necessary components for treatment documentation that meet the requirements of reimbursement agencies while providing the necessary information to document progress and regression and make a plan for further service.  

Here is a brief review of the S.O.A.P note format:


S is for subjective information which is what the client/family states or presents as relevant to therapy, (think of it as your client’s current status, behavior, or answers to your questions),

O is for objective which is what you and the client did together to address their goals, (think of it as measurable, quantitative, and observable actions during the session)

A is for assessment which is how the client did or how they responded during the treatment, (think of it as adding validity and interpreting the information written in the S and O section), and

P is for plan which is what you intend to do next time to address how the client responded this time such as next steps, revisiting of steps, etc., (think of it as your treatment plan for next time).

Soap notes in occupational therapy documentation

COAST Documentation

A new goal writing method called the C.O.A.S.T. method which was developed by Crystal A. Gateley, PhD, OTR/L and Sherry Borcherding, MA, OTR/L. Coast notes can also provide a solid approach for occupational therapy documentation within the a S.O.A.P. note format.  In the COAST method of note-writing, documentation is client-centered, beginning with the task completed, based on occupations, and includes clear guidelines for documenting levels of assistance, conditions the client performs the tasks within, and time-centric.

When goals are written using the COAST format, it can be easy to stay on target with client-centric goals and interventions. Here is a brief review of the C.O.A.S.T. method for goal-writing:

C is for client. Identify the client being worked with in the treatment session.

O is for occupation. Identify the functional task or goal being addressed in the session.

A is for assist level. What level and type of of assistance is needed for the client to perform the task?

S is for specific condition. What conditions are necessary for the client to achieve the tasks.

T is for time. By when is the goal expected to be achieved?

COAST notes for occupational therapy documentation

SOAP NOTES + COAST NOTES

Joining these two acronym structures can generate a solid treatment note which can provide reimbursement agencies with the necessary information to justify your service while demonstrating the client’s needs and progress.

Following the SOAP note format while interjecting COAST note components will ensure you look at the whole client and provide client-centered documentation validating your service while pushing forward with the treatment to make sure your client achieves their goals so they may live their best life.

These acronym structures can also help you, as the practitioner, in your future paperwork needs for progress reporting, re-assessment, and goal writing that is specific to each of your clients.

What are definite attributes of writing therapy treatment notes? Let’s take a peek here:

1.  Be client specific

2. Be legible and clear

3. Be consistent and organized

4. Be thorough

5. Be timely

6. Be value-based

7. Think positively about OT documentation (refer to acronym DOCUMENTATION above)

The next time you start to sit down and write your treatment notes, visit the DOCUMENTATION acronym above for achieving a positive frame of mind and remember that this is the time to let your skills shine, demonstrate OT’s value in your client’s life and show your client’s progress and needs for an occupation-based service that can help lead to health, well-being, and quality of life.

The use of SOAP notes in occupational therapy allows for organized and reliable documentation of the patient’s progress and treatment plan, ensuring effective and comprehensive care. Working on efficient SOAP notes for OT session documentation is a great strategy as a professional!

Occupational Therapy Documentation Software

One way to save time with documentation is to use an OT documentation software. There are many therapy documentation software tools out there specifically designed for Pediatric Speech and Language Pathology, Occupational Therapy and Physical Therapy documentation.

The software is essentially designed specifically for purchase by school districts, contract companies, and pediatric clinics, and it allows for the therapy providers to write their evaluation reports and progress notes quickly.

Therapy documentation software has different formats, including multiple choice, fill in the blank, and short answer responses that are individualized and uses strategies such as templates, word prediction, cutting and pasting.

One such tool is (affiliate link) Double Time Docs.

Double Time Docs is nice because it has various features designed to make life easier and save time for therapy providers:

  • It has a questionnaire feature for caregiver and teacher questionnaires. This can save a significant amount of time because after the person responds, the therapy provider can log in and click the answers. 
  • DTD can be used by a therapy provider even if the clinic or school district uses a different documentation software. DTD generates an evaluation report by answering the questions, download their report, and cutting and pasting it directly into their district software such as IEP Direct, EASY IEP, SESIS, Frontline, etc.
  • Reports done in a fraction of the time.
  • A therapist can be more productive by focusing on planning, treatment, and consultations.
  • Reports are written to the standards of the district.
  • Consistency between therapists – new/old and district/contract
  • Teaching tool for new grads
  • Data collection
  • One template for initials/triennials/observations
  • Reduces common errors such as wrong name, pronouns, etc.

Have questions about trialing and using Double Time Docs to make documentation easier? Just click here.

Regina Allen

Regina Parsons-Allen is a school-based certified occupational therapy assistant. She has a pediatrics practice area of emphasis from the NBCOT. She graduated from the OTA program at Caldwell Community College and Technical Institute in Hudson, North Carolina with an A.A.S degree in occupational therapy assistant. She has been practicing occupational therapy in the same school district for 20 years. She loves her children, husband, OT, working with children and teaching Sunday school. She is passionate about engaging, empowering, and enabling children to reach their maximum potential in ALL of their occupations as well assuring them that God loves them!

Differences Between IEP and 504

differences between IEP and 504

If you have a child who has specific needs and are new to the school supports or are a new school-based OT, knowing the differences between IEP and 504 is a pivotal piece of getting started with a team approach to support in the school system. This post aims to unravel what is a 504, an IEP, and what is the difference between them. Be sure to check out our resource on how to request a school based occupational therapy referral. Also check out the occupational therapy scope of practice as a good start.

differences between IEP and 504

Differences between IEP and 504

School services are full of confusing terms and acronyms. IEP and 504 are two of those support services terms. So, which is it that a particular student needs…an IEP or 504? What are these, who qualifies for them, and what assistance do they provide students? 

It’s important for the school based occupational therapy professional, parents, and the whole intervention team to understand differences between the IEP and a 504 plan.

It is difficult enough to be faced with enrolling your child into school.  Now imagine knowing, or finding out they have a disability.  This adds to the confusion and angst, especially when trying to make sure they have all of the help they need for success.  There are many options for learners with disabilities including an IEP or 504 plan.  

Similarities between an IEP and a 504

Both an IEP and a 504 are plans that must be upheld. They are documents that are created for specific reasons. Both documents are created by a team who meet the individualized needs of the student.

For example, a student might need to use the school sensory room and this can be included in the IEP or 504 plan.

how is an IEP different than a 504

What is an IEP?

According to the DO-IT program (Disabilities, Opportunities, Internetworking, and Technology) “The Individualized Educational Plan (IEP) is a plan or program developed to ensure that a child who has a disability identified under the law and is attending an elementary or secondary educational institution receives specialized instruction and related services”. 

The IEP provides special education and services to a student whose disability is negatively impacting their ability to receive academic instruction. 

Students on an Individualized Education Program (IEP) are entitled to a range of supports and services to ensure they receive an appropriate education that meets their specific needs. The entitlements of students on an IEP can vary depending on the laws and regulations of the specific country or educational system.

Here are some common entitlements often provided to students on an IEP:

  • IEP development by a team of professionals, including parents, teachers, and special education staff
  • Modification of curriculum
  • Classroom accommodations to support their access to the general education curriculum
  • Specialized instruction in small groups, one-on-one, repeated instruction, or other instruction methods
  • Related services such as occupational, physical, and speech therapy that support the student’s education
  • Transition Planning: Students with an IEP who are approaching the transition to adulthood are entitled to receive transition planning services. This includes assistance in developing goals and plans for post-secondary education, vocational training, employment, independent living, and community participation.
  • Regular Progress Monitoring: Students on an IEP have the right to have their progress regularly monitored to ensure they are making appropriate academic and developmental gains. Progress may be measured through assessments, observations, and data collection to inform instructional decisions and make adjustments to the student’s program as needed.

It’s also important to note that the specific entitlements and rights of students on an IEP can vary by state so be sure to refer to the laws and regulations in your specific area for a comprehensive understanding of student IEP entitlements.

The written IEP “plan” includes sections such as:

  • Present levels of performance – This article on the OT Toolbox provides great information about highlighting student strengths on an IEP
  • Goals – here is a great post about setting goals
  • Services offered – therapy, frequency, duration, service model
  • Benchmark performance (standardized testing or data gathered)
  • Least restrictive environment – students should be provided services in the least restrictive environment, providing inclusion into mainstream education as tolerated
  • Assistive technology – description of any technology a student needs in order to participate in school work
  • Accommodations and modifications to the environment or curriculum to promote success
  • Discussion of options for extended school year if appropriate
What is a 504

What is a 504?

The 504 Plan is a plan developed to ensure that a child who has a disability identified under the law and is attending an elementary or secondary educational institution receives accommodations that will ensure their academic success and access to the learning environment.

In order to qualify for a 504 plan, a student’s diagnosis must restrict one or more major life activities (attention, class participation, test taking).  Simply having a diagnosis does not mean a student needs a 504 plan.

The 504 plan can provide extended time or small group administration for testing.  It allows for accommodations like frequent breaks, fidgets, sensory accommodations, preferential seating, or modified homework assignments.

NOTE: the student is not eligible for direct related services such as physical, occupational, or speech therapy services through a 504 plan.

The IEP and 504 are similar in that they both:

There are several main differences when deciding between an IEP or 504 plan:

  • Parents have fewer rights, and schools have less legal obligations under a 504 plan
  • Mandated by law – an IEP is required under the Individuals with Disabilities act, whereas the 504 is part of the rehabilitation act that guarantees certain rights to people with disabilities
  • IEP Qualification – based on 13 disability categories versus a 504 which is based on a record of impairment.  More than 13 disabilities qualify for 504 plans, often including students who do not qualify for assistance under an IEP but still require accommodations
  • Contents – IEP plans have to be in writing, 504 plans do not. IEPs require formal written goals and objectives, and evidence of growth
  • Parental involvement – IEP requires that schools make efforts to insure parent participation including notice of meetings.  504 plans do not require notice of meetings
  • Placement – IEP requires parental involvement before a change in placement, 504 does not
  • Expulsion – students with a 504 can be expelled for behavior that is not related to their disability, where those with an IEP are still entitled to a free and public education
  • Funding – states receive funding for students with an IEP, but do not receive additional funding for those on a 504 plan

There are also Subtle Differences when deciding between an IEP or 504 plan:

  • Not all students who have a disability require an Individualized Education Plan or 504.  Their disability must be impacting their education in some way for them to qualify.
  • An IEP requires evidence and documentation of growth, where a 504 is more of a loosely formulated plan
  • Students with a 504 do not need specialized instruction, but accommodations to ensure they are able to access their environment and curriculum
  • An IEP is more legally binding and specific than a 504 plan

IEP or 504 resources

Though the road can be long and tricky when navigating special education, there are resources available for parents and other caregivers:

If you are wondering about how an IEP and/or 504 plan works because you think a child might need OT services, check out our resource on how to request an OT evaluation in schools. That blog post has a lot of information from the perspective of a school based OT who has seen how this process works!

Victoria Wood, OTR/L is a contributor to The OT Toolbox and has been providing Occupational Therapy treatment in pediatrics for more than 25 years. She has practiced in hospital settings (inpatient, outpatient, NICU, PICU), school systems, and outpatient clinics in several states. She has treated hundreds of children with various sensory processing dysfunction in the areas of behavior, gross/fine motor skills, social skills and self-care. Ms. Wood has also been a featured speaker at seminars, webinars, and school staff development training. She is the author of Seeing your Home and Community with Sensory Eyes.

How to Write a Social Story

how to write a social story

Before getting to how to write a social story, it is important to discover the “what and why” of social stories. This post will discuss the importance, relevance, and mechanics of using a social story. Whether needed for sensory needs, executive functioning skills, or cognitive considerations, neurodiverse individuals of all ages can benefit from the visual components of a social story.

how to write a  social story

As an Amazon Influencer, I earn from qualifying purchases.

What is a social story?

Social stories are a powerful tool.

Carol Gray, the creator of the social story describes a social story in a unique way: A social story is defined as “a social learning tool that supports the safe and meaningful exchange of information between parents, professionals, and people with autism of all ages”.

While Ms. Gray uses the Autism diagnosis as her platform for social stories, they can easily and effectively be used with persons having other diagnoses.  These might include, but are not limited to; sensory processing disorder, social skill interventions, attention deficit disorder, intellectual impairment, anxiety disorders, or any variety of neurodiversity.

One example is this going to the dentist social story. A trip to the dentist can bring about many fears, uncertainties, sensory input, and anxiety. Having a social story about this event can be a great way to identify needs and supports that might be needed during the visit, before being in the actual situation of a dentist appointment.

Another social story example is our wearing a mask social story. When children all over the world were required to suddenly start wearing masks, this was an unprecedented event. Having a social story about the situation helped many.

Why does one need a social story?

Learners create a sensory movie to guide their day. This is not scientific, but more a mechanism to understand how people create an inner monologue.

Some people do this naturally as they navigate through life. For these folks, new events, preferred, and non-preferred activities, are experienced without undue stress or discomfort.

Sensory Story

For learners on the spectrum, or neurodivergent, processing information may pose more of a threat.  These learners rely on creating a “sensory story”, or a “sensory movie” to make sense of what is about to happen.  Just like a regular movie, a sensory story is like a movie which has a plot, scene, actors, costumes, props, etc.  

A Sensory Story Example: Going to the Park

Just like a movie or a story of a family going to the playground or park, you can identify characters, a scene, plot, and various aspects of the scene. These variables can change, but others do not no matter what happens that day at the park.

  • Plot – going to the park with friends. Swinging, climbing on playground equipment, running laps around the park, sitting for a packed lunch, going home
  • Scene – a warm sunny day with a little wind. Some grass and sand, with a little mulch mixed in. Playground equipment in a large colorful structure. Children laughing and screaming.
  • Actors – mom and learner, three friends, and 14 strangers
  • Costumes – shoes to keep the sand out, a sun hat, shorts, t-shirt
  • Props – sunscreen, water bottle, cooler, lunch food, toy trucks

These are a lot of variables for a short outing to the park.

The important thing to note is that this is a ton of information to process all at once to make sense of, and enjoy this day trip.  All of these variables can cause dysregulation, emotional distress, anxiety, and behavioral challenges while learners try to untangle this web.  

To better understand this concept, I have published a good resource, including chapters that break down all of these life events.  Check it out on Amazon (affiliate link). 

As a side note, imagine what happens if Mom suddenly decides it is rainy, and they are headed to the mall instead.  All of a sudden the movie changes drastically.  The plot, scene, characters, props, and costume have to be adjusted. Some learners are able to rapidly make this shift in plans, while others have to rewrite their whole movie. 

The social story was born!

For learners who have difficulty making this mental shift, or creating their sensory movie, social stories help bridge the gap. 

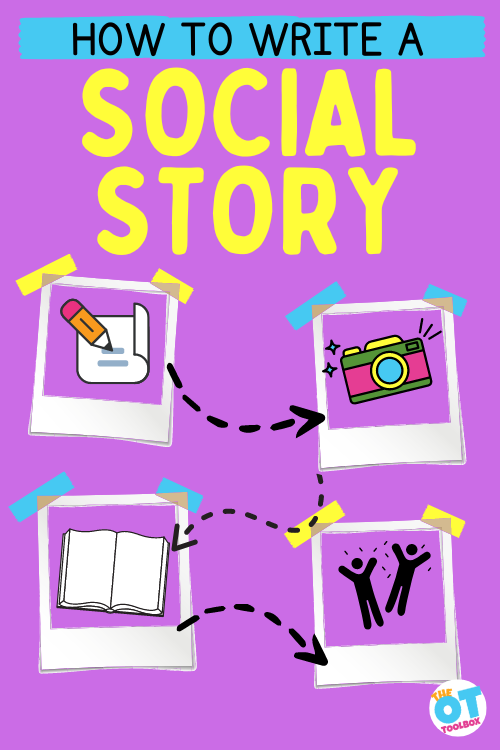
How to Write a Social Story

Writing a social story is a process, but it’s important to incorporate all of the components to create a tool that supports the individual in a meaningful way.

A social story has ten critical elements to help the learner make sense of, prepare, and anticipate an upcoming event.  It is essentially a written script to assist learners in making their sensory movie.

According to Carol Gray, each social story has ten critical elements to make it effective and purposeful.  These include:

1. The Social Story Goal- The information should follow a process to
share accurate information that is meaningful to the user and includes individualized content, voice, etc. A social story shares social information with a learner.  It applauds achievements.

When writing a social story, identify the goal, environment, and situations that impact the overall goal.

2. Two-Step Discovery- The social story uses the goal of the verbiage and understands the reader or the user and has a topic that is relatable to the reader.

3. Title, Introduction, Body, Conclusion- A Social Story has a relatable title, introduction to the story, text that makes up the body of the social story and adds detail, and a conclusion that summarizes the story.

4. Format- The Social Story format is tailored to the individual reader and is written to their individual abilities, attention span, interests, and learning style.

5. Voice and Vocabulary- A Social story is written in a voice that is patient and understanding to the reader.

  • It’s written in first-person or third-person perspective
  • The tense may be written in past, present, and/or future tense
  • It has a positive tone. Uses positive language.
  • It is accurate in format and meaning to the individual

6. The story is written with Wh-Questions- The text of the social story answers relevant ’wh‘ questions that describe context. This includes:

  • place (WHERE)
  • time-related information (WHEN),
  • people (WHO)
  • facts or cues (WHAT)
  • basic activities or events, behavior, statements (HOW)
  • reasons or rationale behind them (WHY)

7. A social story uses sentences- Descriptive sentences are used to describe aspects of the context of the story. It may contain individually tailored illustrations to enhance the story such as actual photos of the event.

8. A social story describes more than directs. Is tailored to the abilities and interests of the audience and is accurate. It offers options to situations that might arise.

9. Refined- A social story is always able to be edited, and revised.

10. Thorough process- The process to create a social story follows a series of development

A social story meets all of the social story criteria and is always individualized.

When learning how to create a social story, incorporate what you have learned about a sensory movie.  Add details related to the plot, characters, setting, scene, and costumes. 

Tips for Writing a Social Story

Here are some key details on how to write a good social story

  • Think of all of the sensory systems and how they will be affected during the upcoming event.  What will be seen, heard, felt, tasted, or smelled.  
  • Incorporate these sensations into the story.  Examples: it may be loud at the park, there may be wind and hot temperatures, we are going to have yummy lunch.
  • Talk about the positive and negative aspects of the event. What will your learner like about the dentist?  What will they find annoying or upsetting? By incorporating positive and negative, your learner will have a more realistic picture of the upcoming experience.
  • Add real life pictures if you learner has difficulty generalizing their experience from a generic picture. Visuals are important, and visual social stories that contain pictures of the individual in the setting described are especially helpful.
  • Add key details in relation to all of the variables; plot, characters, setting, scene, costumes, and props.  Having to wear sunscreen may be the one trigger that ruins the entire day.
  • Tailor your story specifically for the ability of your learner.  Some learners may need a series of pictures without much narrative, where other learners are able to understand a story in paragraph form.
  • Use a format that meets the interests and needs of the individual. Some ideas include:
    • using slides on a tablet, laptop, or phone
    • a single laminated sheet of paper
    • A paper booklet stapled together

How to use a social story

Once you have written, downloaded, borrowed, bought, or otherwise obtained the social story, implementation is the key to success. 

Some learners will only need to hear/see the story once before an experience to understand the upcoming event. 

Other learners will need this story repeated several times in the days/hours leading up to the event, in order to fully prepare for it.  Larger events such as a trip to Disney may need more than one social story, or multiple reviews before the trip. 

Social stories can be used for anything.  A visit to the dentist, outing at the zoo, first day of school, a bus ride, vacation, birthday party, a playdate, or any upcoming event that may be out of the norm.

Where to find social stories

When you are about to head out to a new event, think about your sensory movie, given all that you already know. Now imagine the experience as if you had never done it before, or had no knowledge of what might be about to unfold. This is the daily struggle for learners with challenges.  A little planning and forethought will go a long way.

Victoria Wood, OTR/L is a contributor to The OT Toolbox and has been providing Occupational Therapy treatment in pediatrics for more than 25 years. She has practiced in hospital settings (inpatient, outpatient, NICU, PICU), school systems, and outpatient clinics in several states. She has treated hundreds of children with various sensory processing dysfunction in the areas of behavior, gross/fine motor skills, social skills and self-care. Ms. Wood has also been a featured speaker at seminars, webinars, and school staff development training. She is the author of Seeing your Home and Community with Sensory Eyes.

Creative Storytelling

creative storytelling

In this blog post, we created used a few creative storytelling ideas including a fun story telling area in the living room using couch cushions and toys to encourage reading with babies and toddlers. This was a fun creative storytelling idea, and used movement-based and sensory-motor learning activity for young children, encouraging motivation and fun during story time!

story telling area

story telling area

A story telling area in the home is a creative reading idea that doesn’t need to be fancy!

Creating a storytelling area in your home using couch cushions or blankets is a wonderful way to engage children in imaginative play and foster a love for stories. The best thing is that babies and toddlers can crawl over those couch cushions and pillows, encouraging crawling!

You can do this right in the living room or you can set up a designated storytelling corner in the home. This would look like a section of the living room, bedroom, or playroom, or even a cozy nook in any room of the house. This helps create a dedicated space for storytelling activities.

Try using some of these items found around the home to set up a storytelling area without spending any money:

Cozy seating: Arrange couch cushions or pile up soft blankets to create a comfortable seating area for both parents and children. This will make the storytelling experience more enjoyable and relaxing.

Blanket fort or tent: Use blankets and chairs to build a simple fort or tent structure. Drape the blankets over the chairs to create a cozy enclosure where the storytelling can take place. Children will love the sense of adventure and the enclosed space for immersive storytelling.

Imaginative props: My children love reading to their favorite stuffed animals and baby dolls! Gather household items that can be used as props to enhance the storytelling experience. These could include:

  • pillows
  • stuffed animals
  • hats
  • scarves
  • items that can be repurposed as imaginary objects in the story

Soft lighting: Adjust the lighting in the area to create a warm and cozy ambiance. Dim the overhead lights, use fairy lights or battery-operated candles, and allow natural light to filter in through curtains or blinds. Soft lighting adds to the enchantment of storytelling.

Sound effects: Utilize your voice and objects around you to create sound effects that bring the story to life. Mimic animal sounds, use different tones and pitches for characters, or use household items to create simple sound effects (e.g., tapping two spoons together to create the sound of horse hooves).

Storytelling prompts: Use a basket or container to hold visual prompts such as pictures from magazines, postcards, or nature photographs. These prompts can spark storytelling ideas and inspire children to create their own tales. These can be used in visual schedules too.

Theme-based storytelling: Change the storytelling area to match the theme of the story. For example, if you’re telling a story about a pirate adventure, add some toy props, draw a treasure map, or create a “ship” out of cushions and blankets. Use some of the ideas in our therapy themes to get you started with movement-based activities, sensory play ideas, crafts, and more.

Take it outside: A picnic or snack lunch, reading in a tree or even on the playground is fun. Use our outdoor sensory swing idea for a calming and organizing reading opportunity.

No matter how simple or complex the storytelling area is, the most important aspect of storytelling is the connection and engagement between parents and children. Select the ideas that work for you and use these storytelling space features to encourage creativity, engagement, and a love for reading.

 
Today was our first day back into routine after the holidays.  The husband was back at work and my nephew Baby Boy, (who, along with Baby Girl, probably need new “names” since they definitely Think they are big kids…but in reality, really are Toddlers, not Babies…But I’m not ready for that yet.  SO, Babies they will stay!) was back with us as everyone went back to work…we resumed our routines.
 
 
I had this little play area set up today for an invitation to read.
 
creative storytelling with baby dolls and stuffed animals


Of course, Big Sister jumped right into the role of teacher/librarian.  She loves being the boss Big Kid who can tell the littler kids all about life at pre-K, dance class, and every other place that only she know about since she is the Big One in the family.  You know, how life is on the Pre-K streets 😉

creative storytelling-kids can read to toys
 
Storytelling at it’s finest!  She was reading to all of her “students” from a book that she wasn’t too familiar with.  Sometimes, if we’ve read a favorite book maaaaaaaany times, she can memorize the words and story lines of a whole book.
 
Doing the rote memory thing is great! It is so empowering…allowing them to gain confidence, learn beginning/middle/end transitions, and lets them test voices, feelings, and  sound effects.
 
A step beyond memorization reading is when they build a story based on the pictures they see in a book.  They can elaborate on experiences and use their imagination to follow the pictures.  At this stage, a child is testing their confidence in concepts of beginning/middle/end, depicting feelings, dialogue, and transitions.  Big Sister throws out a lot of reeeallly excited “And THEN”s as she turns the pages 🙂
 
It is really fun to see where the story goes when she reads to her students.  There is a lot of switching roles, changing focus (getting distracted by details in a picture), and stories based around the girls in the pictures 🙂
 
creative storytelling- let kids read to their toys
 
Baby Girl is a willing “student”!


She also loooves doing what the Big Kids do…


Baby Boy is a little tired from all these stories!  It’s nap time for this guy.


Creative storytelling ideas

experimental storytelling

We came up with the term experimental storytelling when thinking about how to keep little ones engaged longer. You could also call this creative storytelling. So, what are some ways to “Experiment with Storytelling” and get creative with reading time?

Experimental storytelling refers to innovative and unconventional approaches to narrative creation and presentation. It involves breaking away from traditional storytelling techniques and experimenting with different forms, structures, and mediums to convey a story or evoke a particular experience.

These ideas push the boundaries of storytelling conventions, challenging the audience’s expectations and inviting them to engage with narratives in new and unexpected ways. Another way to express this is with the term, creative storytelling!

For young children, it might involve switching things up in an age-appropriate way:

  • A different storytelling environment using creative reading areas listed above
  • Taking the reading outside to a picnic reading
  • Involving multisensory learning
  • Using different voices to read
  • Acting out a story with toys or figures to represent the characters

Some examples of experimental storytelling include:

  1. Change the order of the story: Experimental storytelling may involve non-linear storytelling structures, where the story is not presented in a chronological order. It may employ flashbacks, flash-forwards, or fragmented narratives to explore different perspectives or create a sense of mystery. You can ask the child to fill in different results, actions, or details to the story. Think MadLibs with a story!
  2. Multi-sensory approach: Experimental storytelling often incorporates elements from various artistic disciplines, such as visual art, music, theater, dance, technology, and interactive media. Taking a multisensory approach combines different mediums to enhance the narrative and create a more immersive experience.
  3. Interactive elements: Get those readers moving! Add gross motor actions to the story or incorporate fine motor tasks with book themed crafts. Or, make a sensory bin based on the story. All of these interactive activities encourage participation and interaction.
  4. Innovative use of technology: Kids know a lot about technology…it’s part of their daily life! Consider how you can take traditional storytelling and add a bit of tech to bring the story to life. Consider creating Google slides, tablet drawings, videos, virtual reality (VR), interactive websites, or video games to include technology in a unique and immersive narrative experiences.

creative storytelling

Getting creative with telling stories makes things fun and engaging. Try these ideas:

  • Use a puppet to tell the story, quiz the children on colors, ask ‘what happens next’, pique their curiosity, question emotional states.
  • Play the Director Game: The child tells the story as Mom/Dad writes it down. Draw pictures to go along with the story.  Read it together.  Save it forever 🙂
  • Tell a story about this morning’s experience.  Recount details/characters/feelings.  Add surprise endings for fun.
  • Act out a favorite story using super hero figures, Little People…whatever in on hand and a favorite in your house.
  • Tell a story based on one of your child’s drawings.  Scribbles are detailed drawings, too 🙂
  • Invitation to play storytelling: Set up an invitation to play like ours!  You could also sit on a big comfy blanket with lots of pillows and start reading to yourself. 
  • Use fun voices and sounds…See how long it takes for little kiddos to climb up into your lap.
  • “Choose Your Own Adventure” books, where young and older readers can make choices that determine the story’s direction.
  • Act out the story with gross motor actions
  • Paint or draw while listening to the story

What are some creative storytelling ideas that you’ve used with little ones?

Mental Dexterity: How to Battle Brain Fog

mental dexterity

Did you know there is a thing called mental dexterity? It’s true! Battling brain fog in children (or teens and adults!) impacts everyday executive functioning skills. Do you ever feel like your brain is in a cloud? Maybe you have trouble concentrating or can’t seem to think clearly. Your mind may wander or just completely drift off. In either case, you’re not alone – many people struggle with maintaining mental dexterity in their daily lives. This is what we often call “brain fog”, and it can be improved!

Mental dexterity

What is Mental Dexterity?

First, let’s break down what mental dexterity is.

Mental dexterity is the ability to think quickly and adapt to new situations. It involves cognitive processes such as problem-solving, decision-making, attention, and memory. When you have good mental dexterity, you’re able to process information efficiently, make decisions effectively, and respond to changing circumstances with ease. Those with strong mental dexterity are flexible thinkers and not over-thinkers. 
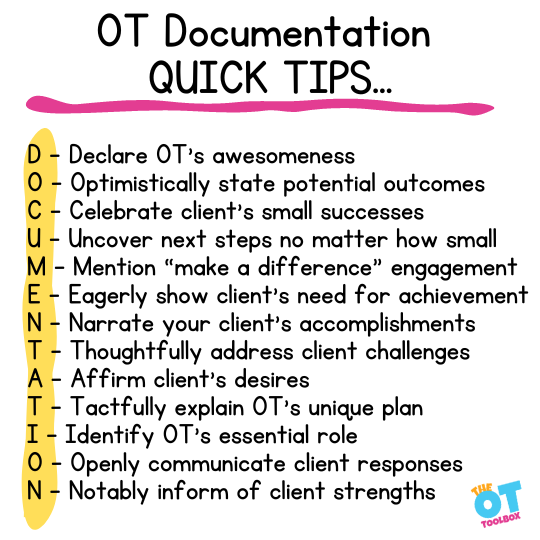
Quickness of Thought

One aspect of mental dexterity is quickness of thought. This refers to the ability to process information rapidly and respond to it in a timely manner. Quickness of thought is essential in many areas of life, from sports to business to social interactions. When you’re able to think quickly and respond to situations on the fly, you may be more likely to succeed.

Executive Functioning and Mental Dexterity

Executive functioning is another key component of mental dexterity. We have broken down executive function in several posts on the site, and you can check them out here:

The executive functions include a set of cognitive processes that enable us to plan, organize, and carry out tasks. When our executive functioning is strong, we’re able to prioritize tasks, manage our time effectively, and make decisions based on our goals and values.

There are several key components of executive functioning that impact mental dexterity, including:

Working memory: the ability to hold information in your mind, keeping it readily accessible 

Inhibition: the ability to control your impulses and resist distractions

Task initiation: the ability to start a task efficiently without excessive procrastination

Planning and organization: the ability to develop a plan and carry it out in a systematic way

Selfmonitoring: the ability to reflect on your performance and make adjustments as needed

improve mental dexterity

How to Improve Mental Dexterity

Brain fog is a common experience for many people, but improving mental dexterity is possible.

Brain fog in ADHD or brain fog in teens is not an actual medical condition, but rather, a way to describe an experience that often pairs with other factors. It can be caused by a variety of factors, including stress, lack of sleep, and the result of certain medications. When you’re experiencing brain fog, it can be challenging to maintain mental dexterity and quickness of thought. 
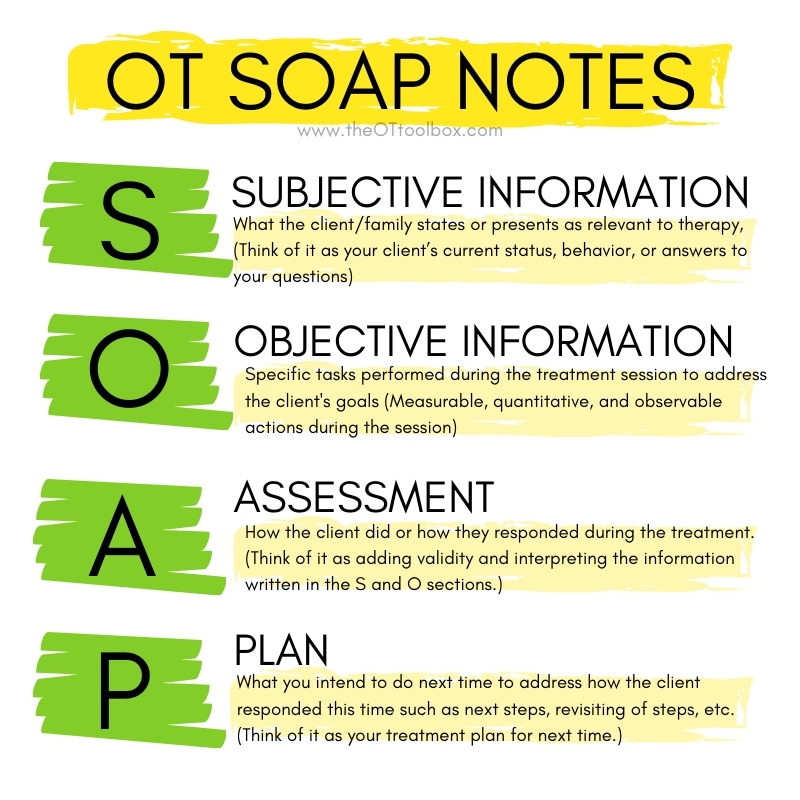

Fortunately, there are several strategies you can use to improve mental dexterity and boost your brainpower:

Get enough sleep: Aim for at least 7-8 hours of sleep per night to help your brain recharge and function at its best. Sleep hygiene is important for all ages.

If you have trouble sleeping, try shifting habits in your nightly routine. The American Academy of Sleep Medicine recommends several tips to help you get the sleep your brain needs, including keeping a consistent sleep/wake schedule and only using your bed for sleeping. Bedtime relaxation strategies are one tool to use to help with falling and staying asleep.

Practice mindfulness: Mindfulness exercises such as deep breathing, journaling, and meditation can help calm your mind and improve your focus.

To start out on a mindfulness journey, try asking friends or family what works for them. Watch videos or read books on small ways to introduce mindfulness into your daily routine. Add journaling to your morning coffee or observe the world around you through your senses when you are walking your dog. 

Exercise regularly: Physical activity has been shown to improve cognitive function and reduce brain fog.

Find an exercise that works for you, shooting towards at least 30 minutes of physical activity each day – or whatever your doctor recommends. Bonus points if you can do something mindful, like yoga, for your exercise! 

Target specific executive functioning skills: Target aspects of executive functioning skills that are noticeable detriments to quickness of thought. This might be areas like attention or organization, planning ahead, or foresight. The Impulse Control Journal is a great way to foster individual skills.

Take breaks: When you’re working on a task for an extended period of time, take breaks to give your brain a rest and recharge your mental energy. Your brain fog may be your mind telling you it’s had enough for today! 

You can use the 20-20-20 rule if you are sitting at a computer for a large stretch of the day. Every 20 minutes, look at something 20 feet away for at least 20 seconds. This give your eyes a rest and helps increase your focus. When you take your “eye break” check in with your body and see if a stretch, a glass of water, or a snack may be necessary. 

Stay hydrated: Dehydration can lead to brain fog, so be sure to drink plenty of water throughout the day.

Hard to remember to hydrate? Try adding fruit, lemon juice, or fresh mint to your water for an extra satisfying kick. Or, maybe sparkling water is more your speed? It may be worth investing in a large water bottle so that you can use it to measure water intake! You can also use a sports bottle as a self-regulation tool to regulate the bottle while getting the hydration needed. This is a must for all ages, not just kids.

Final Tips for Mental Dexterity

And if none of that is helping with mental dexterity and battling your brain fog, there may be another factor to address like medication, nutrition, or overall mental health. It will be worth speaking to your doctor about your concerns. 

Overall, mental dexterity is a crucial skill for success in many areas of life. Don’t worry if you don’t always feel on top of your game – we all need a “brain break” at times! Find what works for you to improve your executive functioning, and you can boost your brainpower and adapt to new situations with ease.

Sydney Thorson, OTR/L, is a new occupational therapist working in school-based therapy. Her
background is in Human Development and Family Studies, and she is passionate about
providing individualized and meaningful treatment for each child and their family. Sydney is also
a children’s author and illustrator and is always working on new and exciting projects.

Looking for more ways to get your mind organized while developing essential executive functioning skills? Try our Impulse Control Journal. This printable workbook is designed for all ages and supports skills across the executive functioning spectrum!

Impulse Control Journal the OT Toolbox

The Impulse Control Journal…a printable resource for helping kids strategize executive functioning skill development. When saying “calm down” just isn’t enough…

When a child is easily “triggered” and seems to melt down at any sign of loud noises or excitement…

When you need help or a starting point to teach kids self-regulation strategies…

When you are struggling to motivate or redirect a child without causing a meltdown…

When you’re struggling to help kids explore their emotions, develop self-regulation and coping skills, manage and reflect on their emotions, identify their emotions, and more as they grow…

Grab the Impulse Control Journal to build organizational strategies, planning, prioritization, habits, and mindset in kids.