IEP Goals for Self Regulation

Self regulation IEP goals

Writing IEP goals, (especially IEP goals for self-regulation needs) can be tricky.  The tricky part is knowing what to measure, and how to measure it. In this post we will review IEP Goals for Self Regulation.  Sensory goals are especially difficult to write and measure as they are often dealing with behaviors instead of skills.  It is easy to formulate a snipping with scissors goal, or stacking cubes, as they are easily measured.  Not so much for the IEP goals for self regulation.  Check out the OT Toolbox archives for more self regulation strategies.

Self-Regulation IEP goals

Writing IEP Goals for Self Regulation

If you ask parents or teachers what behavioral improvements they would like to see in their students, they often give a broad idea;  “I would like them to behave in class”;  “I want them to learn”; “I want them to be like the other kids.” 

We all do. 

That is not the question, nor is it a measurable goal that would show up on an IEP or 504 plan

The question is how do we get there, what does self-regulation look like now (how are regulation needs impacting learning and participation in the school environment?) where is the child in social emotional development by stage, and what will it look like when this student achieves this goal?

SMART IEP Goals for Self-Regulation

Before talking about writing IEP goals for self regulation, we need to review the basics of writing good goals.  Anyone can write a goal, but is it SMART? Like any IEP goal, they need to be SMART as we have reviewed in previous posts.

  • S: specific – did you detail what it is you want to achieve? 
  • M: measurable – how are you going to measure success?
  • A: is this goal attainable or too lofty?
  • R: is this goal realistic?  
  • T: timebound – Do you have a set timeframe for this goal to be measured?

First decide if the goals are SMART.  Are the goals specific and measurable, or too general?  Are they actually attainable and relevant? 

Four traps to goal success: 

  • People don’t set clear goals
  • They feel discouraged
  • They feel overwhelmed
  • They are not ready to change

The examples above are not SMART.  You will find yourself at the next IEP meeting saying you sort of made progress, and things are kind of better.  Mostly you will be confused about their current level of function, and feel like a failure for not being able to document it effectively.

Self-Regulation Goal Example one:   I want him to be normal like the other kids.

  • Specific – what is “normal”?  How do the other kids act that you are trying to get your student to emulate? 
  • Measurable – because we can’t really define normal, how can we measure it? How will you know he is more “normal” than last month?
  • Attainable: Is this student who can not sit in class for 30 seconds going to behave like typical students by the end of the IEP period?  Probably not yet. Maybe not ever.  Setting too lofty of a goal does not look great for the student or their therapist. It is better to break down the goal into more attainable pieces
  • Realistic: Is this student with a diagnosis of X,Y or Z going to be like neurotypical peers even with all the right intervention?  In some cases yes, but more often they will be better, but not typical
  • Timebound: IEPs inherently have time frames.  This one is easy. Do you want to just set one goal for a year, or have smaller objectives to measure as well?

How can you use these factors to create a self-regulation IEP goal for the student that can be more specific, measured, achieved, is realistic, and by a certain point in time?

Self-Regulation Goal Example two: I want them to behave in class.

  • Specific: what does “behave” look like?  Your idea of great behavior might look different than the teacher’s expectations.  This is the same as telling your child to be good in school.  It is too general.
  • Measurable: without defining what “behave” is, how will you know if you have achieved it?  
  • Attainable: maybe, but you won’t know because it is not specific or measurable. It might be attainable to achieve better behavior in a year, but if they are significantly impaired or young, they might not be able to reach this lofty goal.
  • Realistic: again it might be, depending on the student and the expectations. Without specifics, it is hard to tell. 
  • Timebound: based on the nature of IEP parameters, 12 months is probably set into the goal.

How can you create a self-regulation IEP goal on regulation-based behavior that is specific, measured, achieved, is realistic, and by a certain point in time?

Let’s break this down into more specifics and then come up with some great self-regulation IEP goal examples…

How to write IEP goals for self regulation

In general, we all want our students to behave in class and act like typical children.  How can you write a measurable SMART goal that works toward these goals?

By (Date), student will demonstrate improved self regulation skills by attending to a teacher directed task for 3 minutes with less than 4 redirections back to the task from a baseline of one minute as measured by occupational therapist and/or teacher.

  • S: attending for 3 minutes with less than 4 redirections, from a baseline of one minute
  • M: number of minutes, number of redirections, behavior: attend
  • A: three minutes is not a long time to work toward if the current time is one minute.  Four redirections in that time is generous
  • R: For this particular student it is realistic
  • T: specific date is mentioned

By (Date) student will improve self regulation by following teacher instructions 50% of the time without maladaptive reactions including hitting, biting, refusal, crying, or elopement from a baseline of 25%  as measured by occupational therapist and/or teacher.

  • S: follow teacher instructions 75% of the time without maladaptive reactions such as….
  • M: percentage of class time, evidence of behaviors
  • A: hopefully.  This particular student needs to improve compliance from 25-50%.  It could say from 25-30%, or whatever progress you believe is attainable
  • R: if the goal is written accurately, it should be realistic that this student can achieve it
  • T: yes
Self-regulation IEP goal examples

self regulation iep goals examples

Next, we put what we know from reading the process above to create a process. Use the SMART process to target any emotional regulation need. Some self regulation iep goals examples include…

By (date) student will improve self regulation by following completing a non preferred 4 minute task without maladaptive reactions including hitting, biting, refusal, crying, or elopement from a baseline of 2 minutes  as measured by occupational therapist and/or teacher.  

In this goal we are specifically tracking the behavior.  Notice it does not say anything about how much assistance, seating options, adaptations, cues, or what the task is.  You can add those to make it more specific, or leave as a general goal just to work on compliance

By (date) student will improve self regulation by selecting a calm down option from a field of three when presented with choices 50% of trials from a baseline of 20%…..  You can modify this goal by: 

  • student will alert teacher that they need a sensory break X% of the time they are having a meltdown
  • Student will recognize that they are out of sync and ask for a specific sensory break X% of time
  • The student will pick an appropriate calm down option from the provided 10 cards 75% of trials. You can decide if all of the options are appropriate, or there are some that are irrelevant in order to improve accuracy (add eat broccoli, or something that the student most likely does not want)
  • When visibly demonstrating maladaptive behaviors (crying, biting, self injury, hitting) student will touch picture cards on desk to indicate a sensory break, three of five trials
  • Use words to say they are upset/sad/angry instead of biting or hitting others more than 3x daily from a baseline of zero
  • Reduce maladaptive behavioral reactions in a one hour time slot 50% from 10 to 5 or less.

These goals take time to measure to get a baseline and gather data. When negative behaviors are present, monitoring and measurement is critical.  Otherwise it feels like the behaviors are not getting any better, when in fact they might be.

More measurable self regulation IEP objectives

  • Stay on 2 foot carpet square for X minutes with less than x redirections back to spot
  • Remain in seat during X minute activity without eloping more than x times
  • Sit in a group activity for X minutes, touching peers less than X times
  • Complete a provided fine motor activity with less than 5 reminders back to task
  • Calm down from upset within 5 minutes of start (with or without sensory strategies)
  • Participate in a group task for X minutes with less than 4 maladaptive responses, such as touching others, aggression, destruction of property, or outbursts

Other Ideas for IEP Goals for Self Regulation

Rather than specifically targeting self-regulation, part of the underlying components are social emotional skills. You can foster self-regulation by targeting the various components of emotional regulation. We cover these areas in specifics in our blog post titled, social skills checklist. Consider the areas of social emotional development:

  • Conversational Skills
  • Interpersonal Skills
  • Emotional Skills
  • Social Play
  • Emotional Development
  • Emotional Regulation
  • Peer Interactions
  • Self-Awareness Skills
  • Self-Confidence
  • Social Awareness
  • Self-Management
  • Relationship Skills
  • Responsible Decision Making

There are many other ways to target self-regulation skills in interventions. Some of these interventions can be identified in self-regulation IEP goals, depending on the needs of the individual:

  • Consider the individual. Check out our list of student strengths for IEP writing.
  • Pick one or two target behaviors you want to reduce or add to a plan.
  • Consider social emotional learning as a class-wide or school-wide concept.
  • Decide what you want them to do, that they are not doing now (following directions, attending to task).  Usually the behavior is preventing them from participating in some way.
  • Figure out how to measure this goal. Will you have a chart, a timer for 30 minute intervals, just measured during your therapy sessions, or over the span of a week?
  • Make small adjustments in behavior. Many children are not going to comply overnight. It is better to make small adjustments, then modify them, rather than setting lofty goals that are not met.
  • Add in sensory supports if needed – given adaptive seating, weighted vest, headphones, sensory breaks every three minutes, etc. I add a list of these possible accommodations in the IEP. “sensory supports as deemed effective including x,y,z.  I keep these broad as I generally don’t have a magic formula of what is going to work each time.
  • Decide if you are focusing on the behavior, the task, or both.  Is the goal to complete a worksheet without 17 redirections? Is it just to stay at the table?
  • When creating goals, consider how you will achieve these targets. Can you include interventions such as: emotional regulation games, self-regulation books, or even parent education on co-regulation needs. Getting specific can have big results.
  • Work on interventions by using a few self awareness games for building skills through play.

By taking a wider view at self-regulation and social emotional needs, we can impact learning, peer interaction, and participation in the educational environment in big ways.

Ultimate Guide to Goal Writing

Goal Writing for Pediatric Practitioners, by Krupa Panchmatiya Kuruvilla, OTR/L is available in The OT Toolbox Shop. This e-book is like having an experienced OT mentoring you as you navigate goal writing.

Victoria Wood, OTR/L is a contributor to The OT Toolbox and has been providing Occupational Therapy treatment in pediatrics for more than 25 years. She has practiced in hospital settings (inpatient, outpatient, NICU, PICU), school systems, and outpatient clinics in several states. She has treated hundreds of children with various sensory processing dysfunction in the areas of behavior, gross/fine motor skills, social skills and self-care. Ms. Wood has also been a featured speaker at seminars, webinars, and school staff development training. She is the author of Seeing your Home and Community with Sensory Eyes.
Cylindrical and Spherical Grasp Development

cylindrical grasp and spherical grasp development and activities

A cylindrical grasp and a spherical grasp are important parts of grasp pattern development, and are functional grasps needed for many daily tasks. In this blog post, we’re covering everything you need to know about cylindrical grasp development and spherical grasp development. You’ll also find spherical grasp activities and cylindrical grasp activities. Let’s get started with these fine motor skills that play a pivotal role in functional grasp!

cylindrical grasp and spherical grasp activities and development

Cylindrical Grasp and Spherical Grasp

In everyday activities, we use our hands in myriad ways. From holding a toothbrush, to turning a key in a door, to typing, tying shoes, jotting down a note, or pouring our morning coffee…all of these tasks involve grasping objects in a variety of dynamic patterns. Fine motor skills are necessary for every task that a child completes.
Today, we’re talking about cylindrical grasp and spherical grasp.

Both of these grips require and utilize underlying skills:

From play, self-care, to managing clothing fasteners, and coloring, motor skills like spherical positioning of the hands and cylindrical positioning development is needed for every aspect.

Grasp skill development is essential to pencil grasp and handwriting. Fine motor skills make up a huge part of learning and the school day (Read about the various fine motor skills needed at school.)

Fostering development ensures functional use on objects such as hair brush, toothbrush, holding a spoon and fork or other food utensils, managing food, toys, and many other objects, including those used in play.

For example, building and stacking with regular blocks is an exercise in fine motor development. Manipulating blocks uses these grasp movements. However, typical building blocks do not provide the unique grasp development of the cylindrical grasp of the hand. 

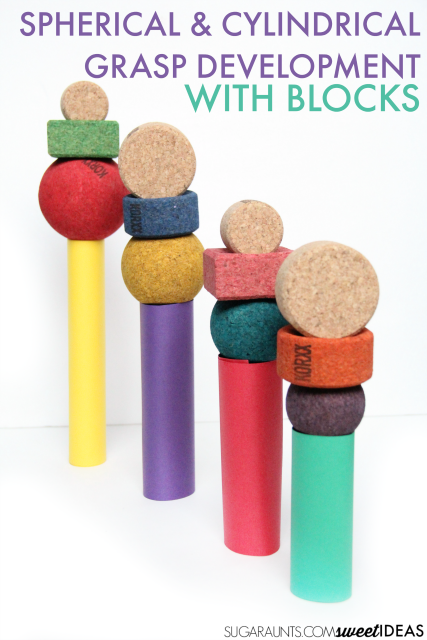
When I saw my kids using the Cork Sphere Stacking Tower to make some pretend ice cream cones, I was inspired to encourage fine motor skills like cylindrical and spherical grasp development.  If you are looking for creative ways to encourage development of grasp, then read on!


Spherical and cylindrical grasp development with KORXX cork building blocks


Help kids develp their Spherical and cylindrical grasp with KORXX cork building blocks


This post contains affiliate links.
 
cylindrical grasp

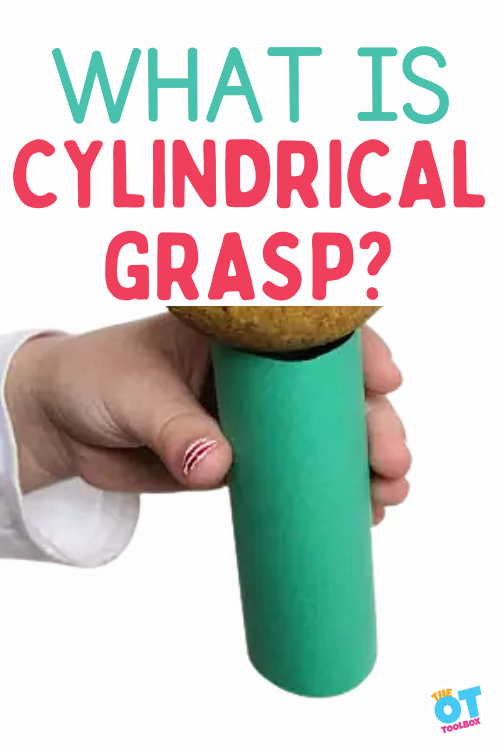
What is a cylindrical Grasp?

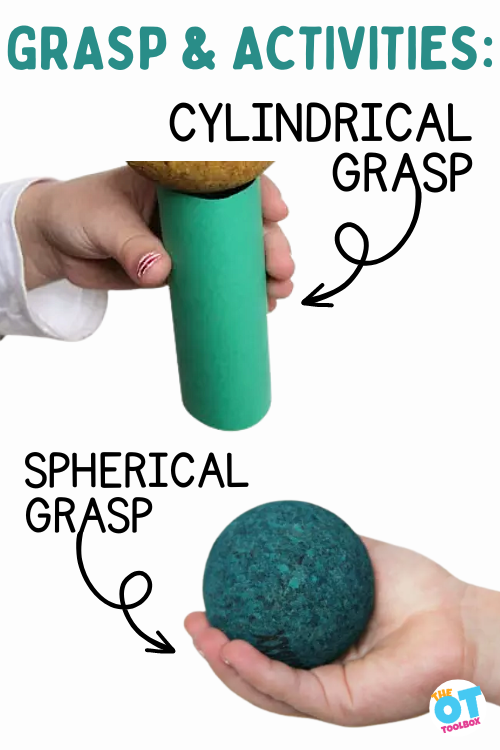
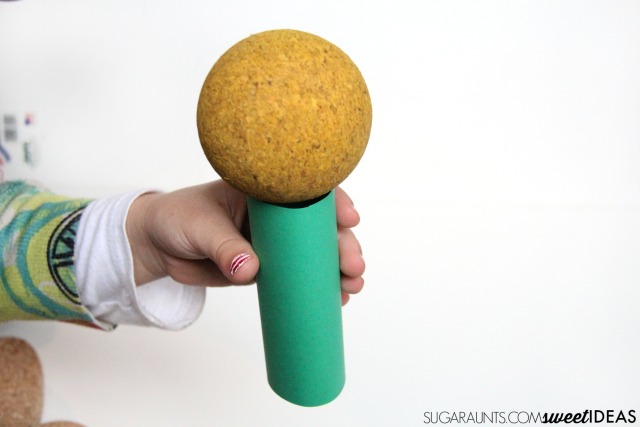
A cylindrical grasp is one in which the whole hand is in contact with an object, and curved with thumb opposition.  A common term for this grasp is gross grasp.  You can find more information on gross grasp development and strengthening with objects that we’ve done in the past.  

When a cylindrical grasp pattern is used, the entire palmar surface of the hand and fingers grasps a cylindrical object, such as a can of soda, or a cup. the thumb is rotated and opposed around the curve of the object. 

Without the thumb’s involvement in the cylindrical grasp, the object would fall to the ground. Unlike in a hook grasp, where the thumb may or may not be involved, the fingers require pressure against the thumb to hold a cylindrical shaped object.


A cylindrical grasp requires use and strength of the extrinsic muscles and intrinsic muscles of the hand in order to flex the fingers around curved objects.  The thumb is positioned in flexion and abduction.  A cylindrical grasp is needed in order to hold a broom handle, baseball bat, and ice cream cone.

Cylindrical Grasp Development 


Typically, the cylindrical grasp develops early in childhood, beginning with the palmer grasp at around 12 months of age.  This grasp is precursor to fine motor development and is an early pre-writing grasp.  

This grasp pattern evolves into the cylindrical grasp with thumb abduction and fluctuations in finger abduction. 

Cylindrical Grasp Activities

Encouraging development of the cylindrical grasp is easy with fun activities:

  • Use a paper tube! Roll a piece of paper (or cardstock for a more sturdy tool) into a tube. Tape the edges and use it to hold a ball
  • The spheres in the Limbo var C KORXX cork building blocks set are perfect for helping kids develop fine motor skills.
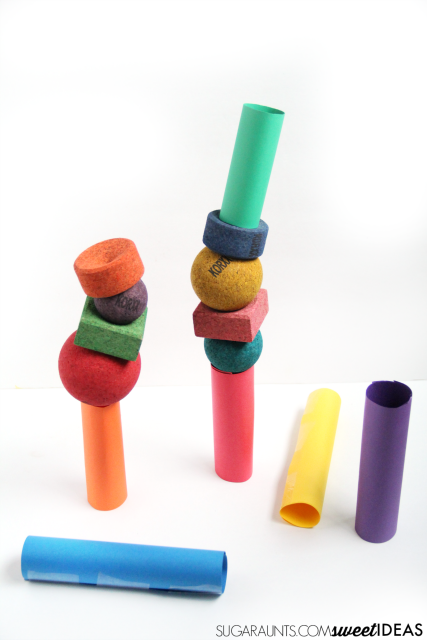
  • Stack paper tubes in a fine motor STEM activity.
Spherical and cylindrical grasp development with KORXX cork building blocks

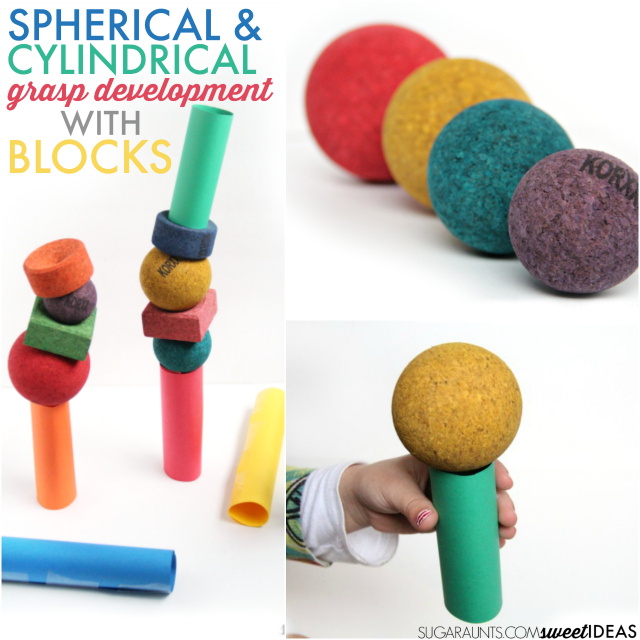
The KORXX cork building block set that we have has small cylinder shapes and we were able to encourage promotion of this grasp pattern by using them AND by creating paper tubes.  

This is a perfect extension of my kids’ imagination as we used them to make colorful ice cream cones with the KORXX spheres.  

Holding the paper tubes allows further development of the cylindrical grasp from a power grip to one of precision.  In order to hold the paper tube, one can not squeeze with all of their strength.  Otherwise, the paper will crush in their hands.  The same is true when holding a cake-type ice cream cone or a paper cup.  If precision of the cylindrical grasp is not developed, the cone or cup will crush in a child’s hands.  


NOTE: There is a difference between holding a cake type ice cream cone which is a tube shape and a sugar ice cream cone which would be conical in shape.  These are different grasp patterns.


We used the paper tubes to stack, build, and create lots of ice cream cones of various sizes.


To make the paper cones, simply use colored cardstock and tape.  Cut the cardstock into different sizes and then roll it into a tube.  We found that packing tape worked well to maintain the shape of the tube. 

Spherical grasp

What is a Spherical Grasp?

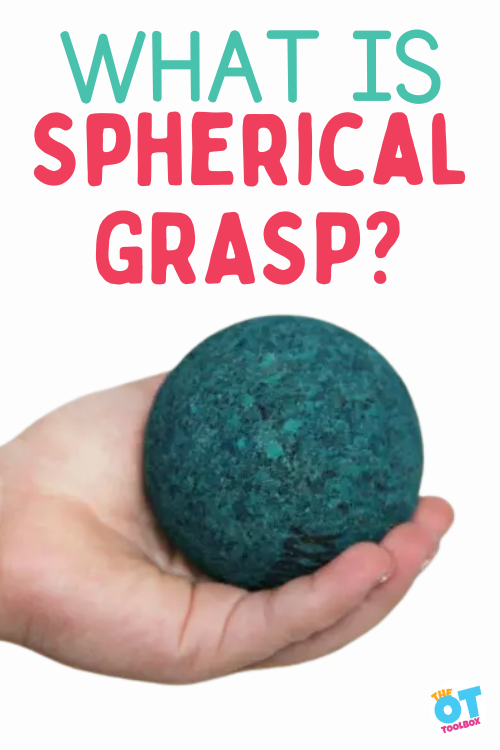
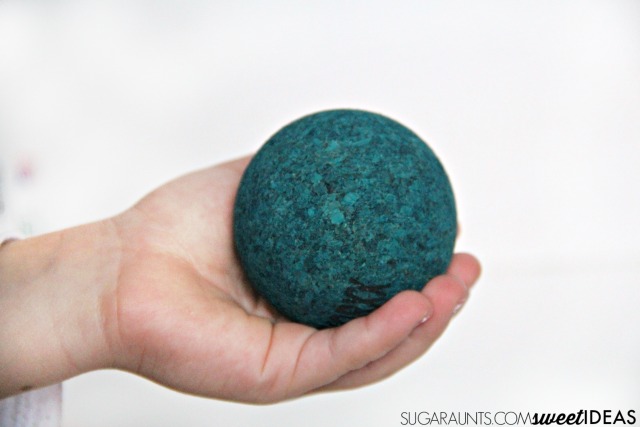
A spherical grasp is one in which the hand curves to hold a round or sphere-shaped object. This grasp is used to hold round items in the palm of the hand. Other examples include:

  • Holding a ball in the palm of the hand
  • Curving the hand to hold water in the palm
  • Holding an apple, orange, or other round fruit
  • Turning a doorknob

A spherical grasp changes in relation to the size of the spherical object. Holding a ball depends on the size of the curve of the ball. A baseball would require more precision and curvature of the palm than the grasp required to hold a basketball.

The intrinsic muscles of the hands play a big part in this grasp.  In order for the hand to curve, the metacarpal phalangeal joints need to abduct.  Involved in this action are the interossei muscles and the hypothenar eminence.  

The interossei include the palmer interossei and the dorsal interossei.  

Spherical and cylindrical grasp development with KORXX cork building blocks


These allow the fingers to abduct and adduct in order to grasp smaller and larger sphere shaped objects.

The hypothenar eminence includes three intrinsic muscles that allows the pinkie side of the hand to flex, rotate to oppose the thumb, and create the bulk of the pinkie side of the palm when curving around shapes like spheres. 


Spherical and cylindrical grasp development with KORXX cork building blocks


Spherical Grasp Development


Spherical grasp develops beginning at around 18 months.  Smaller objects require a smaller curved palm with opposition and larger objects such as an apple require increased adduction of the metacarpal phalangeal joints.


Spherical Grasp Activities

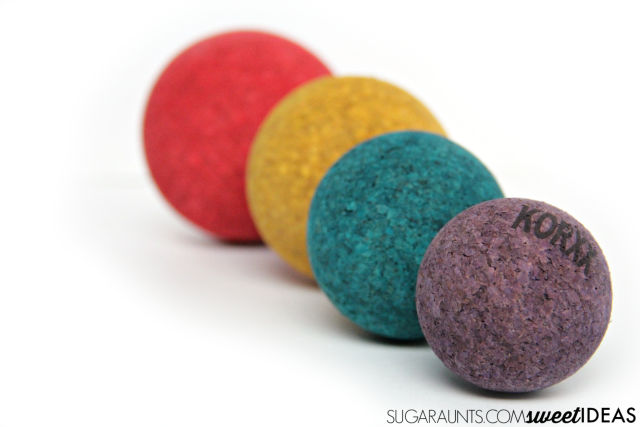
We used our KORXX cork building blocks to practice various grasp and release of the spheres.  This block set is unique in it’s varying sphere sizes.  Placing the spheres on the paper cones allowed for precision of this grasp pattern.


How fun is this building activity.  The spheres and cups of the Limbo var C KORXX cork building set inspires stacking to new heights with balance.  

  • Building and creating towers using balls of various size is such a powerful way to encourage precision, grasp, and control of small motor movements of the hands.

  • This balls in a muffin tin activity is a fun way to foster spherical grasp development. Ask the child to hold the ball in the palm of their hand.

KORXX cork building blocks

We love our KORXX cork building blocks.  They are right there in the bin of blocks and have quickly become a favorite go-to toy.  I love them for all of the open-ended play ideas that my kids have been creating with them.  

Using them to boost developmental skills through play is super easy, too.  (See how we used them to work on visual motor integration development recently.)

 
  • KORXX building blocks are made from natural cork harvested without harming the trees.
  • They are soft and silent, stable and safe, and light cork blocks.
  • KORXX’s blocks are a natural material free of any harmful contaminants. The cork material provides excellent stability without slippage. Unlike typical cork used for other products, it is also safe for even the smallest of children.
  • KORXX pressed Cork contains no harmful substances (phthalates, dioxins, formaldehyde) and has no other sensory emissions. The product adheres to the guidelines for children’s toys (under 3 years) and the harmonized standard DIN EN 71.
 
Cylindrical and spherical grasp development and KORXX blocks


More activities to foster fine motor development, including spherical and cylindrical grasps:

Working on fine motor skills, visual perception, visual motor skills, sensory tolerance, handwriting, or scissor skills? Our Fine Motor Kits cover all of these areas and more.

Check out the seasonal Fine Motor Kits that kids love:

Or, grab one of our themed Fine Motor Kits to target skills with fun themes:

Want access to all of these kits…and more being added each month? Join The OT Toolbox Member’s Club!

cylindrical grasp and spherical grasp handouts

Spherical Grasp and Cylindrical Grasp Handout

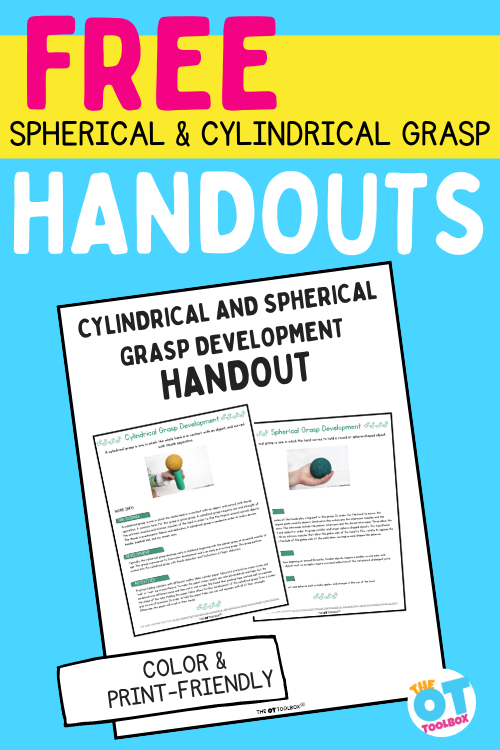
Would you like a printable version of this blog post to use in educating parents on the benefits of targeting the fine motor skills needed for a cylindrical grasp and spherical grasp? We have you covered! You can grab a printable handout that covers these areas by entering your email address into the form below.

This printable is also available inside the Member’s Club, along with thousands of other printable tools, including handouts and educational materials. Plus, you’ll love the printable activities and Therapy Kits designed to foster development of grasp skills and fine motor strength. (All of the Therapy Kits listed above are in the Member’s Club, for example!)

Enter your email address here for the printable handout:

FREE Spherical Grasp and Cylindrical
Grasp Handouts

    We respect your privacy. Unsubscribe at anytime.

    Colleen Beck, OTR/L has been an occupational therapist since 2000, working in school-based, hand therapy, outpatient peds, EI, and SNF. Colleen created The OT Toolbox to inspire therapists, teachers, and parents with easy and fun tools to help children thrive. Read her story about going from an OT making $3/hour (after paying for kids’ childcare) to a full-time OT resource creator for millions of readers. Want to collaborate? Send an email to contact@theottoolbox.com.

    Expressive Language

    expressive language

    This blog discusses the importance of expressive language and how it impacts development, how learning new words directly correlates to a child’s behaviors, and expressive language activities to support infants, toddlers and preschoolers. Let’s go deep on the effect of expressive language development on behavior as well as these other concepts. You’ll see in this blog how communication through visual cues, verbal and gestures impact behavior. Related, is receptive language. Together these language types impact auditory processing and attention and play a huge role in overall language in social skills.

    Expressive Language

    What is Expressive Language

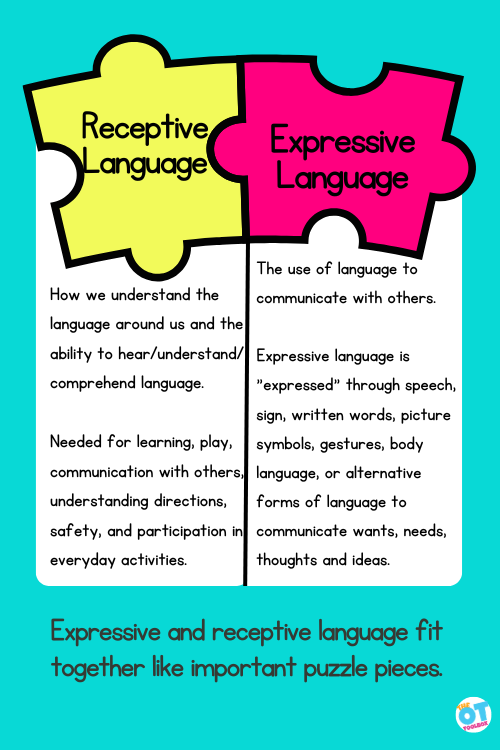
    Expressive language refers to how we communicate our thoughts, feelings and desires with others. Expressive language is needed for learning, play, participation in activities and engaging with the world around us. As we develop new ways to communicate (visuals, gestures and spoken words) we are able to get our needs met in a timely fashion.

    Expressive Language Development

    Expressive language develops through a continuum, beginning at birth.

    Babies- As soon as a baby is born, they are able to communicate with others through their whimpers and cries. Mom’s tend to know the difference between an infants “cry for hunger” and the “cry for tired.”

    As babies continue to develop their motor skills, they are able to reach for, grab at and point to items they want. These gestures are non-verbal ways to communicate helps others understand what the infant and toddler is requesting. It’s the beginning of functional hand-eye coordination and where we see the beginning of the development of hand-eye coordination.

    Toddlers- As infants turn into toddlers, they start to babble, use jargon and eventually imitate words. As children develop, reaching motor, feeding and cognitive milestones, they are able to use a variety of words, to communicate with adults and peers. As they continue to master the sounds in words, more people are able to understand them. 

    As children reach new ages, they are able to communicate in new ways. According to this article, the following are expressive language milestones that typically developing children reach from birth through age five:

    0-3 months

    • Your baby smiles at you when you come into view. 
    • They repeat the same sound a lot and “coos and goos” when content. 
    • Cries differentiate, meaning that the baby uses a different cry for different situations. 

    4-6 months

    • Gurgling sounds or vocal play occur while you are playing with your baby 
    • Speech-like babbling includes many sounds including bilabial (two lip) sounds: “p,” “b,” “w” and “m.”
    • Uses sounds and gestures to tell you that they want something or want to do something. 

    7-12 months

    • Babbling includes more consonants, as well as long and short vowels. 
    • They use speech or other sounds (other than crying) in order to get your attention and hold on to it. 
    • Single words start to emerge like: “mama,” “byebye,” “no.” 

    1-2 years

    • Uses one to two word phrases like “where ball?”, “what that?”, “more cookie?”, and combine two words in other ways to make a variety of statements. Words become clearer as more initial consonants are used. 
    • 18 month olds typically have 15-20 words.
    • 24 month olds typically have 50-75 words.

    2-3 years

    • Utterances are often one, two or three words long and family members can usually understand them. 
    • Every week they gain more words.
    • By the time they are 3, children typically have 300-500 words.

    3-4 years

    • Sentences are becoming longer as your child can now combine four or more words. 
    • They talk about things that have happened away from home and are interested in talking about pre-school, friends, outings and interesting experiences. 
    • Speech is usually fluent and clear and other people can understand most of what your child says.

    4-5 years

    • Children speak clearly and fluently in an easy-to-listen-to voice.  
    • They can construct long and detailed sentences (e.g., “We went to the zoo but we had to come home early because mommy hurt her foot”).

    Older children- As children start to use more words and string words together to form sentences, they may be hard to understand. This is called the intelligibility of speech sounds.

    As children articulate words, they may make some errors, such as forgetting some sounds in words, omitting the sounds off the beginning or ending of words, and sometimes leaving out sounds in the middle of words (like “elphant” instead of “elephant”).

    As children continue to practice words, they become easier to understand.  Different letter sounds develop at different ages, so sometimes you will hear children use certain sounds in the place of others. Here is an awesome sound development checklist from Kid Sense Child Development Site:

    “0-6 ms:

    • The baby makes cooing sounds (e.g. ‘oo’, ‘ee’, ‘ah’), turns towards sounds and gives eye contact when they hear an adult speaking or making sounds

    6-12ms

    • At 6 months the baby starts
      to babble and repeat sounds (e.g. ‘mamama’)

    1-2 years

    • The child is able to say
      the following sounds in words- /p/, /b/, /m/, /n/, /t/, /d/
    • The child is able to say
      the following sounds in words – /p/, /b/, /m/, /n/, /t/, /d/

    2-3 years

    • The child is able to say the following sounds in words- /p/, /b/, /m/, /n/, /t/, /d/
    • The child is able to say the following sounds in words – /p/, /b/, /m/, /n/, /t/, /d/

    3-4 years

    • The child is able to say the following sounds in words – /p/, /b/, /m/, /n/, /t/, /d/, /k/, /g/, /f/, /s/, /y/, /h/
    • Speech may be unclear to adults who don’t know the child well

    4-5 years:

    • The child is able to say
      the following sounds in words – /p/, /b/, /m/, /n/, /t/, /d/, /k/, /g/, /f/,
      /s/, /y/, /h/, ‘sh’, ‘ch’, ‘j’, /z/, /l/, /v/

    5-6 years

    • Speech should be mostly
      clear and easy to understand, but some immaturities may still be noted(e.g. with ‘r’ and ‘th’ sounds)”

    If you have concerns about your child’s development, or want to confirm they are on track in developing their early speech sounds, this website from National Institute on Deafness and Other Communication Disorders includes an early communication checklist from birth through age five.

    After completing the checklist, if you still have concerns and your child is younger than 3, seek out the Early Intervention Program in your area. This program evaluates and supports children with developmental delays in language, cognitive, motor, self help and self care areas of development.

    If your child is older than 3, please speak to your child’s pediatrician or your local school district to request a speech evaluation. 

    expressive language activities

    Expressive Language Activities

    Here are five simple ways to ensure your kids are learning new words:

    1.Use visuals.

    When you are looking through books, have your child point to pictures in the book and say label them. If they don’t know the word, you can say it. As they grow, add in more descriptive words (ex big red car.)

    Resources like visual schedules are support tools in daily functional tasks.

    2.Narrate play.

    As children are playing different games, describe what they are doing using a variety of words. For example, “You are pushing that red truck down the ramp. It is going so fast. Oh no, it flipped over!” As children hear you describe what is happening, they are learning new words in real time and understand how multiple words can be put together. This includes using past tense, present tense, plurals and more.  

    3.Give your child time to imitate new words.

    If your child is having a hard time saying a word, repeat it once then wait for thirty seconds to see if they are able to repeat it back to you. 

    The wait period works for non-verbal situations, as well. You can engage with a child and follow their lead in a non-verbal conversation through play. This is a piece of the DIR Floortime play strategy where time is given for response.

    4. Sing songs that include hand motions. 

    Gestures are a huge part of communication. When you sing songs that include fingerplays, children learn new gestures as they are hearing new words. This allows children to fall back to using the gesture if they need to. Some great gestures to include is “stop” “up” down” “happy” and “sad.” Find some great nursery rhymes and other rhymes with hand motions and some wonderful finger songs that children love. Hand clapping games are another way to foster engagement through movement and rhyme.

    5. When children are young, start introducing basic sign language.

    Early ASL is a wonderful way to help infants and toddlers communicate as they develop their verbal sounds. Some popular early ASL sings include “more,” “all done,” “eat,” and  “help.”

    We have several sign language resources and tools available inside The OT Toolbox Members Club.

    Expressive Language and Tantrums

    Sometimes tantrums occur due to inability to communicate effectively. We’ve covered this in our resource on determining the difference between a tantrum and a meltdown.

    The thing to consider is that when expressive language, or the inability to express ones needs or desires through oral language leads to a breakdown of some kind, it is itself, a sensory issue, as the ability to utilize sounds effectively is part of the olfactory sensory system.

    There are many reasons why preschoolers become upset or throw a tantrum. Sometimes it is due to not having the words to communicate their wants to needs in the moment.

    It takes a lot of time for children to think of a word and say it, especially if they are feeling frustrated, overwhelmed, hungry or tired. When they are upset, overwhelmed and uncooperative, give them the tools to settle down.

    Once a child has calmed down, support them by helping them find the words they are looking for to tell your or the other child what they are feeling and what they need from them.

    This could include phrases such as “I want a turn; I need space; I’m tired; or I need help” When you determine which phrase they are struggling with using, practice that phrase throughout the days and weeks ahead, so they are able to recall it next time they become overwhelmed.

    Other strategies may include:

    Expressive language vs receptive language

    expressive language Impacts Development

    Just like receptive language, expressive language impacts a variety of areas of child development. As teachers and parents, when we slow down and support expressive language skills, all other areas of a child’s life will benefit.

    As early as birth, singing, talking and reading to children help develop neuron and synapses development in the brain. 

    Encourage your children to take part in a variety of play based language activities that support imitation, gestural communication, visual supports and language recall. As children develop new skills and have exciting opportunities to practice the language skills they know, they will be able to communicate with the world and others will be able to understand them. If your child is struggling with new speech sounds or developing new words, seek out language help early to give your child guidance and support needed to master language.

    Don’t forget to check out all of the great resources on the OT Toolbox, including the Auditory Processing Tool Kit.

    The resources support listening skills, auditory memory strategies, and includes games and activities to foster auditory processing during functional tasks.

    Get your copy of the Auditory Processing Kit here.

    Auditory Processing Kit

    Jeana Kinne is a veteran preschool teacher and director. She has over 20 years of experience in the Early Childhood Education field. Her Bachelors Degree is in Child Development and her Masters Degree is in Early Childhood Education. She has spent over 10 years as a coach, working with Parents and Preschool Teachers, and another 10 years working with infants and toddlers with special needs. She is also the author of the “Sammy the Golden Dog” series, teaching children important skills through play.

    Theraputty Exercises

    theraputty exercises

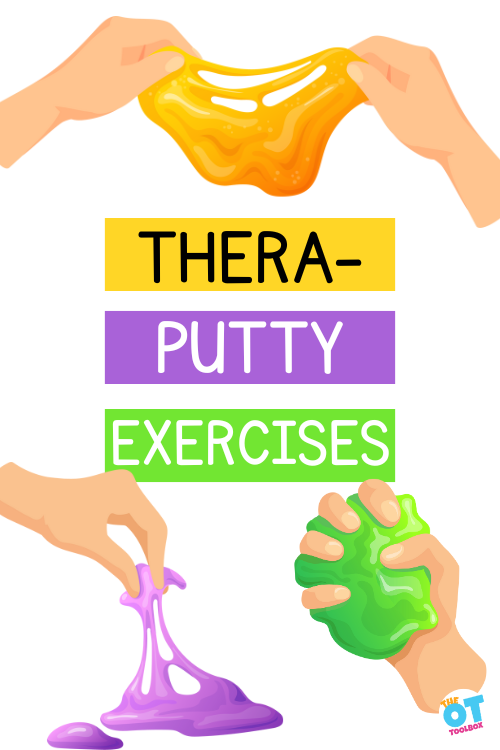
    In this blog post we’re covering all things theraputty exercises! Therapy putty, or theraputty, is a resistive putty material that occupational therapy providers intertwine with play to create a hand strengthening exercise that kids LOVE. You can also target specific aspects of fine motor work to specifically incorporate finger strength exercises in a play-based manner. (i.e. using the theraputty to make play dough snakes, putty snails, or other fun putty shapes!)

    You’ll also want to check out our favorite slime exercises for strengthening pinch and grip strength, with a tactile sensory touch aspect.

    Theraputty exercises

    TheraPutty Exercises

    Finger strength is important for children when they perform daily living activities such as eating, dressing, writing, bathing, oral hygiene, school tool management, technology use, and many other daily tasks.

    Children need to be able to perform these tasks as independently as possible so that they feel confident and prepared for their daily routines.

    As children age, more expectations make hand and finger strength essential.

    One way to build these skills is with a therapy tool called theraputty.

    Therapy putty is a resistive material, much like silly putty, that has a range of resistances, depending on the color of the putty.

    Theraputty is an excellent tool that can be utilized by all ages. It helps to provide a fun way for children to work on strengthening the muscles of the fingers, hands, and forearms. 

    Just keep in mind that in general, therapy putty exercise progress can be gauged by beginning with 10 repetitions for each exercise that the child needs to work on and have them work up to 3 sets of 10 reps for each exercise before you switch them to the next resistance level. 

    Putty Exercises: These grip strength exercises are some of the ways to encourage stronger hands in functional tasks. These exercises target the intrinsic muscles of the hands.

    Finger hook is a putty exercise in which a ball of putty is in the hand and the child hooks their fingers around it and presses their fingers deeply into the ball. This is a great exercise for targeting a hook grasp.

    Thumb press is an exercise in which a ball of putty is placed in the palm near the base of the thumb and the child grips and presses their thumb deeply into the ball.

    Full hand grip is a complete hand exercise in which a ball of putty is in the palm of the hand and the child slowly squeezes the ball making it ooze out around the fingers and thumb.

    Piano fingers is an isolated finger exercise in which a log of putty is in the palm of the hand and the child slowly squeezes one finger at a time into the log. 

    Pancake stretch is a whole hand exercise in which a pancake piece of putty is placed on the tips of the fingers and thumb and the child slowly spreads their fingers outward stretching the putty out while doing so. 

    Finger pinch is an isolated finger to thumb exercise in which small balls of putty are placed between each finger and the thumb, one at a time, and the child squeezes each ball as flat as possible between each finger and the thumb.

    Scissor fingers is completed by inserting a 1” thick ball of putty between each pair of fingers and the child attempts to squeeze the fingers together as close as possible.

    Log press is completed by making a log of putty and placing on the table top. The child follows by inserting each finger one at a time into the putty.

    Pancake pinch is completed by making a pancake of putty and placing on the table top. The child follows by inserting their fingers into the putty and pulling the putty upward with pinching motion making the putty appear more like a pyramid. 

    Thumbs-up extension is an exercise in which a loop of putty is placed around the thumb and then the child pulls their thumb upward stretching the putty slowly as they do so. 

    Fingers-up extension is an exercise in which a loop of putty is placed around each finger, one at a time, and then the child pulls their fingers upward stretching the putty slowly as they do so. 

    Theraputty Activities

    Therapy putty is engaging and its use can be very a versatile therapy material with minor changes implemented to make it appealing to multiple ages. For younger children, therapy putty activities are preferable, because the activity is motivating and engaging. For some kids on my OT caseload, theraputty activities are some of the most engaging!

    • Bury beads in theraputty- For instance, if children bury fun beads into the putty, they are working on finger strength and dexterity as they bury and retrieve those beads by digging them out. This is a great activity for younger kiddos who are not yet ready to engage in direct putty exercises. Extend the activity by using letter beads. When kids find the letter, they can write it on paper to practice handwriting skills. Then ask them to write a word or a sentence using that letter for more advanced writing tasks.
    • Press stamps into theraputty- A few other fun young kiddos activities could be pressing picture stampers into the putty to make fun animal scenes.
    • Create putty animals- Another would be creating therapy putty animals such as a building a caterpillar, porcupine, or a cute snail. They can be creative and come up with their own ideas too! 
    • Make theraputty flowers- Another could be inserting small pony beads into a putty blob or putty pancake for a child to create cute flowers. Simply just think about these terms while having a child engage in putty activities: squeeze, press, poke, stretch, pinch, twist, and roll. All of these can help build hand and finger strength. 
    • Push coins into theraputty- One activity I love is to push coins into the putty in a key grasp to build in-hand manipulation skills needed for managing coins, much like those needed for pushing a coin into a vending machine.
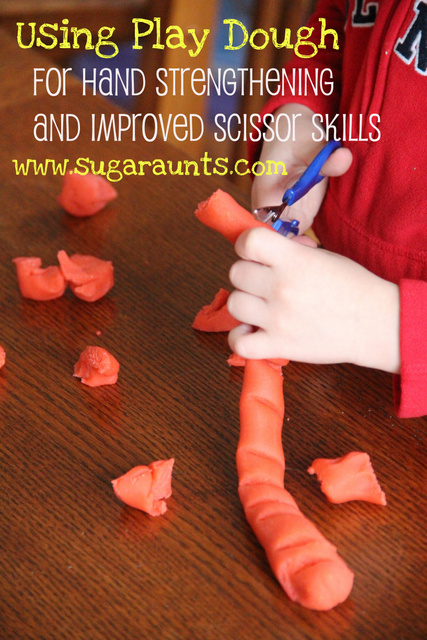
    • Make a putty snake- Creating a play dough snake only with putty is nice because of the added resistance offered by therapy putty.

    That is a quick review of younger kiddo activities. Now, let us look at some actual therapy putty exercises for older kiddos that can help them build hand and finger strength as well as endurance which are some of the foundational skills needed to help them be successful in their everyday life functions. 

    how to remove theraputty from clothes

    Therapy putty is a fun and stretchy means for building hand skill as well as strength and endurance. But here is a warning to you, DO NOT get putty on fabrics as it is very difficult, if not impossible to get out. This has been learned the hard way and one of us has a bright red blob of putty on their favorite pair of jeans! UGH!

    So, watch it as it is being used and keep threads of putty and pieces of small putty off clothing and other fabrics (like furniture and carpet, etc.) it will ‘melt’ its way into it and then it is over as you will have a new colorful embellishment! You should also watch where the theraputty is being placed on the table. If it’s too close to the edge of the table, the putty will “melt” over the sides and onto the floor or anything in it’s way.

    To get theraputty out of clothes or fabrics when the situation arises, try these strategies:

    • First, scrape the putty away from the clothing or fabric using your fingernail or edge of a spoon.
    • Then, pat and quickly pull a ball of putty into and away from the spot on clothes to remove as much as you can by attaching the putty to the putty ball.
    • When you’ve removed as much as you can from the fabric, spot clean the area with Isopropyl Alcohol or hand sanitizer. Dab the alcohol solution onto a cotton ball or rag. Hold it over the spot for about thirty seconds. Then rub and try to scrape off the putty material.
    • You can also try a material like Goof Off on the spot.

    Theraputty Tips

    You can purchase therapy putty from Amazon or from therapy supply stores that specialize in these products. 

    A quick note, if you do purchase the putty, it will allow you to pick your resistance levels from extra soft to hard and give you a better way to show a child’s progress in hand and finger strength when writing progress notes. 

    Some other general therapy putty advice that will help prolong the use of the putty:

    • Have client wash their hands before and after using to keep it clean and avoid any cross contamination.
    • Use a clean table top surface free of any fabrics. 
    • If a child has difficulty touching the putty due to the feel of it, place it inside a plastic baggie for them to manipulate the putty as much as they can. Try to build their tolerance. 
    • Always supervise a child while using to prevent eating by a child or even a pet!  Keep the putty away from hair, clothing, rugs, and carpet. It is a sneaky little thing that tries to blend away sometimes. 
    • Usually yellow, red, and green putty resistance levels are used with kiddos, but a few kiddos need something different.  Just be sure to check each companies’ resistance levels to be certain of what you are buying to support your caseload or kiddos. 

    For more hand strengthening exercises, also try these handwriting warm-up exercises:

    Hand strengthening exercises can be paired with theraputty exercises to build hand strength.

    Members of The OT Toolbox Member’s Club can get access to all of our hand strengthening tools including:

    • Fine motor plans
    • Hole punch activities
    • Clothes pin activities
    • Play dough paper clip activities
    • Push pin activities
    • SO much more

    Join The OT Toolbox Membership today!

    Regina Allen

    Regina Parsons-Allen is a school-based certified occupational therapy assistant. She has a pediatrics practice area of emphasis from the NBCOT. She graduated from the OTA program at Caldwell Community College and Technical Institute in Hudson, North Carolina with an A.A.S degree in occupational therapy assistant. She has been practicing occupational therapy in the same school district for 20 years. She loves her children, husband, OT, working with children and teaching Sunday school. She is passionate about engaging, empowering, and enabling children to reach their maximum potential in ALL of their occupations as well assuring them that God loves them!

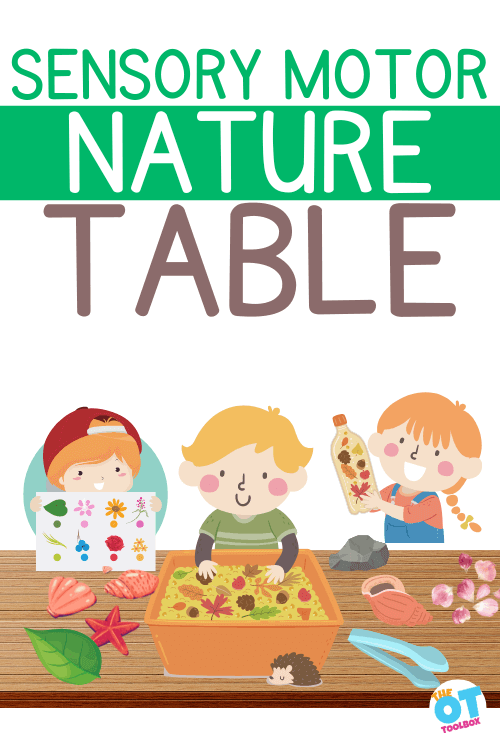
    Nature Table

    nature table

    Young children love to explore nature, but have you ever really explored and learned through play with a nature table? We all love to learn about the world around us, and a nature table is one way to foster that appreciation! Today, we’re taking the concept of a nature table a bit further and dissecting the skill development that you can also foster with a nature space: fine motor skills, object manipulation, tool use, self-regulation, executive functioning skills, empathy, and more!

    Be sure to check out our nature adventure for a starting point.

    nature table

    What is a Nature Table?

    The idea of a nature table is to provide children with a physical connection to the natural world around them and it provides a curated space that represents the local surroundings and seasons. It essentially represents the diversity of life that exists in the local environment and gives hands-on interaction to the natural landscape.

    A nature table can be an indoor activity or an outdoor activity.

    Essentially, a nature table is a play space that allows children (and adults, any age can explore a nature space, really) to explore nature using primarily their senses of sight, touch.

    • A nature table can be as simple as a picnic table loaded with pinecones, acorns, leaves, twigs, and pebbles!
    • Other spaces can include a large bin and small creatures like potato bugs, caterpillars, or toads and a makeshift environment with leaves and grass (followed by release of the creatures back into the wild.
    • Or, a nature space can be brought indoors to explore and learn through play.

    Through this nature examination, children can foster a love for their environment, as well as various skills:

    Appreciation for nature: The table can help a child explore what is naturally in their surroundings and it can give them the opportunity to learn respect and admiration for what is found in their local environment. 

    Sensory Exploration: They utilize all their senses while engaging with the elements on the table making it a true sensory experience ideal for the therapeutic setting. Nature items bring easy engagement while providing a natural sensory experience while targeting considerations such as tactile discrimination or other aspects of sensory touch.

    Beyond the tactile and other sensory inputs that exploring nature up close allows, we know that the research tells us outdoor sensory play has many benefits.

    Fine Motor Skill Work: Exploring items from nature is a natural and motivating way to foster fine motor dexterity needed to hold and explore items from nature. Think about the poking, prodding, and manipulation skills needed to manipulate nature objects and materials.

    If you add in tools such as tweezers, a magnifying glass, microscopes, scissors, or other items, the motor skills compound.

    Social Emotional Skills: This might not be an obvious benefit of playing at a sensory nature space, but if you think about the social and emotional connections, they are huge benefits of nature play! Playing with and exploring nature has calming and self-regulating aspects and this can be monumental when it comes to interacting with others.

    Additionally, exploring nature offers opportunity to interact in objects from the world around us, giving a chance to develop empathy and consideration for our environment.

    Despite the obvious fun that a nature table brings while exploring the elements, it is a wonderful way for children to begin finding a greater connection to the world they live in and to the environment that surrounds them.

    How Do You Create a Nature Table?

    As an occupational therapy practitioner, think about a nature similarly to a sensory bin. How many different elements can you add without being overwhelming to the child. If you do not have a free table- top, its ok, just use a tray, a box, a plastic bin, or even a blanket or rubber mats on the floor!

    • This Fall water table added leaves, acorns, and pinecones to water for more exploration.
    • You could even add a dandelion activity or other weeds to a nature sensory table or nature bin.

    Basically, a nature table offers a space to learn and explore nature. It is really that easy!

    Find items to put on a Nature Table

    Want to take a fieldtrip into nature? Summer is the perfect time to take a nature walk and visit some trails in your area! Do not have a trail nearby? That’s ok try finding a park instead.  Just simply get outdoors and start a seek and find activity with kiddos. Go outside and find all the different objects in nature that could help build a nature table for hands-on exploration.

    You can even grab a nature scavenger hunt (inside the Member’s Club for Level 2 members) to help guide you in your hunt.

    But keep in mind that ANY change in seasons is always a great time to refresh a nature table with new explorative elements. 

    Nature Table Tips

    • Nature tables can come in many different forms, but the primary thing to keep in mind is not to overcrowd the table as this creates visual clutter making it visually overwhelming for some children.
    • Place items with good separation and variation.
    • As you feel the need to add items once first presenting the table, replace old items with new ones which will keep the table remaining fresh and open for an inviting appeal to children. It is an invitation to play so to speak.

    What Items Do You Include on a Nature Table?

    What exactly can you put on a nature table for exploration? If you are like many people building a table with a theme is always fun, but you do not have to do that just go outside and grab what you see to add to the table.

    Here are some fun ideas:

    • Rocks
    • Feathers
    • Acorns
    • Tree bark
    • Dirt
    • Empty birds’ nests
    • Seeds
    • Pinecones
    • Pine needles
    • Leaves
    • Moss
    • Branches or twigs
    • Snail shells
    • Grass
    • Hay 
    • Cattails
    • Flowers
    • Flower petals
    • Shells 
    • Sand
    • Clay
    • Plants
    • Seeds
    • Water
    • Mud
    • Snow
    • Icicles
    • Gourds
    • Pumpkins
    • Herbs
    • Chestnuts
    • Fruit/veggies (be aware of any poisonous fillings that a fruit or veggie might have)
    • Live insects in bug catchers or vented jars

    Nature tables are a great way to not only explore things with use of the senses, but toss in a few fine motor tools and you’ve provided a fun way to build important hand skills too! 

    Nature Table Supplies

    The previous was a brief list of natural items you can present on a nature table, but let’s take a look at basic supplies and filler items that you can add with your OT eye that really looks at tools of the trade for our profession:

    • Water droppers
    • Tweezers or tongs for sorting or counting
    • Scissors for cutting petals or cutting leaves
    • Recycled cardboard tubes to create a memory game or just for exploration
    • Paint brushes for painting
    • Magnifying glass to look more closely
    • Recycled egg cartons or ice cube trays for sorting or creating a nature treasure box
    • Paper with pencils and crayons for tracing, drawing, writing, or rubbing
    • Themed craft or prop items (fake plants, toy accessories, etc.)
    • Clips for clipping or picking up items
    • Rubber bands for wrapping around items
    • Sticky tape or glue for table creations in play
    • Cardboard for nature pictures or drawing
    • Essential oils and nature sounds or music to enhance the experience
    • Sticky contact paper for collecting nature
    • Plastic needle and string for pattern threading
    • Hoops or frames for weaving with yarn or string 
    • Containers with different ways to open and close
    • Twist ties and baggies and plastic baggies for storage
    • Play dough or clay for creating fun impressions or building of animals, etc.
    • Spoons, scoopers, spatulas for creative use

    How Do You Extend the Use of the Nature Table?

    Once items begin to age or it becomes time to change out the table with new elements, consider allowing children to be creative and use some of the items to make fun creations that they can take home or even display in the classroom or therapy clinic.  Look at some of these fun and creative ideas:

    These provide kiddos not only a tangible creative product that can be gratifying for them to complete and call their own, but the creations provide for even further skill development such as hand skills, tool use, visual skills, and problem-solving. 

    Following play at the nature table or prior to engagement at the nature table or even both, consider having kiddos walk the fun forest sensory path that provides the opportunity for them to perform gross motor, deep breathing, and crossing midline activities with a fall nature-type theme. 

    A Final Note About Creating a Nature Table

    As a special note or warning, please consider items that may be unsafe for any child to handle or to play with during table exploration. Keep in mind that some items may have pieces that could break off making them unsafe for little ones or even pets. Some items do look like edible food, but they can be dangerous if consumed, please consider this when creating a nature table for kiddos who put things in their mouths. Also, keep an eye out for rotting items like gourds, pumpkins, berries, and more.  Always have children wash their hands following engagement at the table and it is always best to provide adult supervision while children are interacting with the items on the table to be very aware of what each child is doing.

    Regina Allen

    Regina Parsons-Allen is a school-based certified occupational therapy assistant. She has a pediatrics practice area of emphasis from the NBCOT. She graduated from the OTA program at Caldwell Community College and Technical Institute in Hudson, North Carolina with an A.A.S degree in occupational therapy assistant. She has been practicing occupational therapy in the same school district for 20 years. She loves her children, husband, OT, working with children and teaching Sunday school. She is passionate about engaging, empowering, and enabling children to reach their maximum potential in ALL of their occupations as well assuring them that God loves them!

    Toilet Paper Roll Stamp

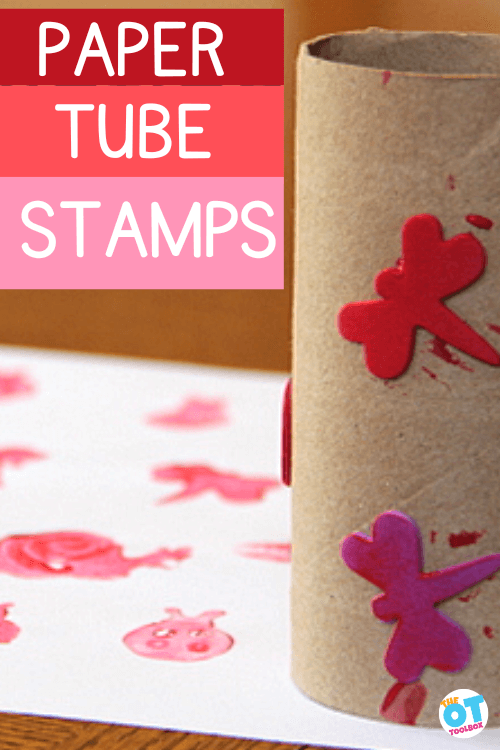
    Toilet paper tube with foam stickers and paper with stamps Text reads Paper Tube Stamps

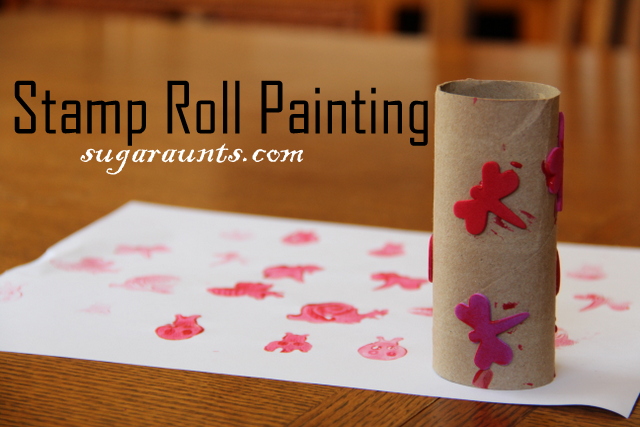
    This toilet paper roll stamp art is a fun creative painting activity we’ve had on the website for many years. Kids love the messy sensory fun of painting with a toilet paper roll. Therapy providers love using the recycled materials in building skills like bilateral coordination, motor planning, and more!

    toilet paper roll stamp

    toilet paper roll stamp

    Therapy materials are expensive, so using items that you typically throw away are wonderful! That’s where this toilet paper roll stamp comes into play. All you need are a few toilet paper rolls or paper towel tubes and some foam stickers to get started.

    We’ve painted paper rolls and used toilet paper tubes in crafts before but have you ever painted with a toilet paper tube?

    How to make a toilet paper roll stamp

    To use a paper tube into a stamp, you’ll need just a few items:

    • Recycled paper tube (toilet paper roll or the inside of a paper towel roll)
    • Foam stickers
    • Paint
    • Paper
    • Paint brush- this item isn’t necessary unless you want to paint the foam stickers to extend fine motor skill work.

    To set up the painting with stamps activity, ask your child to help you stick the foam stickers all around the paper roll. There are so many benefits of playing with stickers and this part of the activity is another skill-builder.

    Why?

    Because when kids position stickers on a paper tube, they are building several motor areas:

    After positioning the stickers onto the paper roll, pour some paint onto scrap paper or in a low tray.

    1. Show users how to roll the paper tube into the paint. This is a great exercises in graded pressure, or proprioception. If they press too hard, paint covers the whole paper tube. If they don’t press hard enough, paint will not evenly cover the foam stickers. This awareness carries over to pencil pressure when writing.
    2. Or, paint the foam stickers with a paint brush. This is a great way to work on pencil grasp with extended wrist, which pulls the muscles of the hand and wrist into an optimal position for pencil grasp through a play activity.
    3. Then, roll the paper tube onto paper. This again supports awareness of proprioception as well as bilateral awareness. If they press too hard, the paint images are squished and you can’t tell what the stamp is. If pressed too lightly, the paint doesn’t transfer to the paper. Using both hands together with equal pressure is a bilateral coordination skill that transfers to functional tasks.
     
    We love any painting play in this house.  Big Sister was really into this project.
     
    We stuck foam stickers onto an empty paper roll and she got busy painting them.
    (I love her concentration here…)


    After the foam stickers are painted, roll away!


    Pretty Prints!


    An easy and fun little painting craft!
     

    Working on fine motor skills? Grab one of our Therapy Kits for printable activities that build finger dexterity, fine motor strength, and coordination needed for tasks like using scissors or pencil grasp.

    Working on fine motor skills, visual perception, visual motor skills, sensory tolerance, handwriting, or scissor skills? Our Fine Motor Kits cover all of these areas and more.

    Check out the seasonal Fine Motor Kits that kids love:

    Or, grab one of our themed Fine Motor Kits to target skills with fun themes:

    Want access to all of these kits…and more being added each month? Join The OT Toolbox Member’s Club!

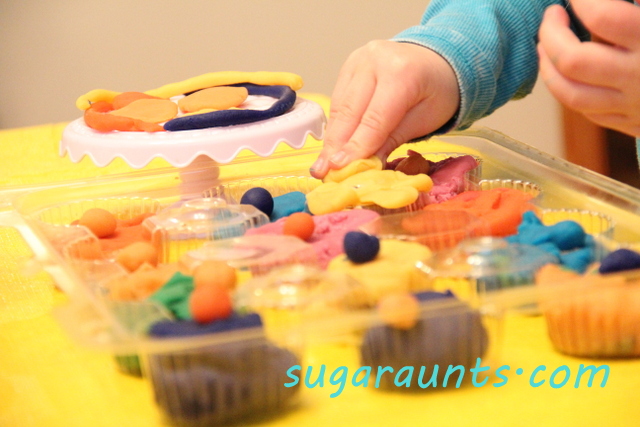
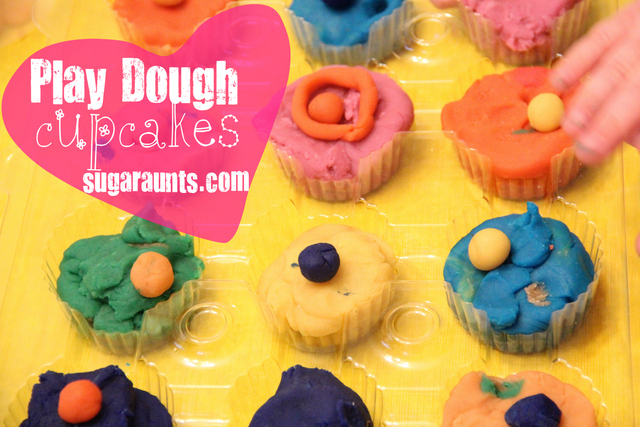
    Play Dough Cupcakes

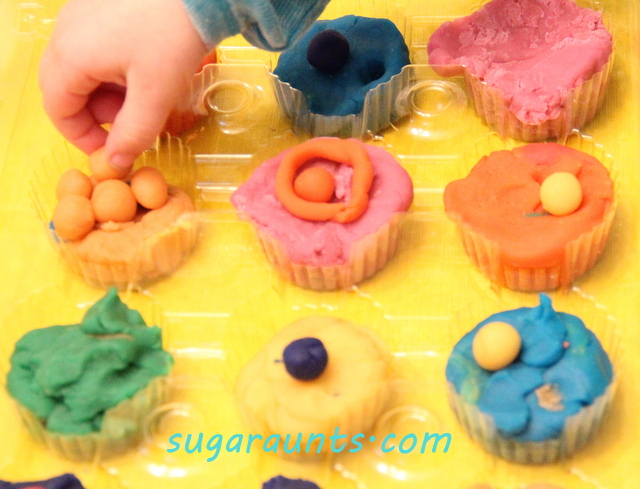
    play dough cupcakes in a plastic cupcake holder. Text reads play dough cupcakes

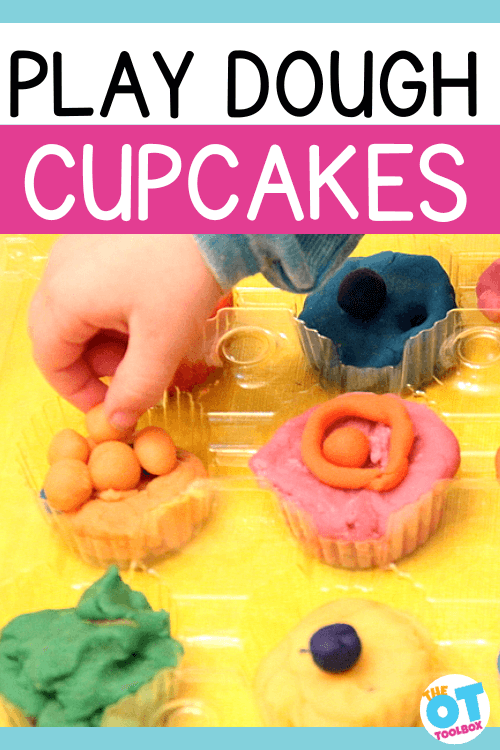
    These playdough cupcakes are one of our all-time favorite play dough activities! Occupational therapy providers know the incredible power of using play dough in therapy activities, so a fine motor activity like making pretend cupcakes with play dough is not only fun and engaging, it’s a fun dramatic play activity, too. The therapy providers love the benefits of motor skills, fine motor strength and coordination, too! Let’s make playdough baked goods!

    play dough cupcakes

    Playdough Cupcakes

    All you need is a clean, recycled cupcake container and a few containers of play dough to make a batch of the best fine motor tools around. We love using our crayon play dough recipe to make colorful batches of play dough, but you can use any type of store-bought or homemade playdough.

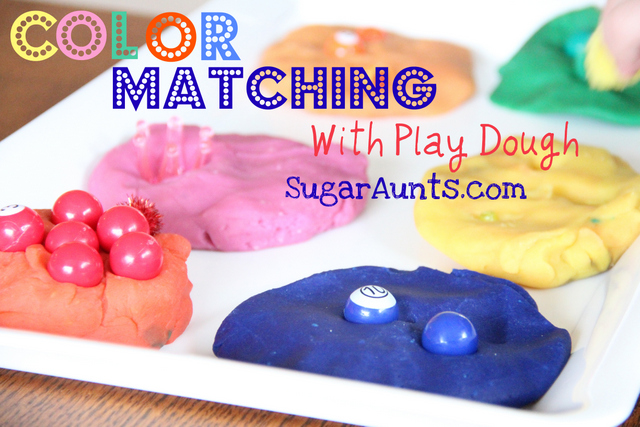
    Best of all, with different colors of dough, you can mix and match the cupcakes while building skills. Color matching with play dough is a fun way for preschoolers and toddlers to learn colors and so much more.

    Why make Playdough Cupcakes?

    One of the benefits of playing with play dough is the creativity that the material inspires. Playing with playdough is a great way to inspire fine motor STEM while building strength in the hands:

    A stable and strong wrist is a powerful way to improve endurance in the hand during functional tasks.

    How to Make Play Dough Cupcakes

    The recipe to make play dough cupcakes is simple!

    1. Pull palm-sized balls of playdough from the container- this is a great way to improve intrinsic hand strength.
    2. Roll the ball of play dough between the palms.
    3. Press the ball of play dough into the cupcake container.
    4. Use small pieces of play dough to form imaginary decorations: sprinkles, icing, cherry, birthday candles, etc.

    Using the fingertips of the hands to make these various small decorations really improves precision skills and dexterity in the hands.


    We play with play dough so much around here.  This was one fun activity that we have enjoyed over and over again.  
     
    We had a plastic cupcake holder from a recent bakery trip.  After the cupcakes were gone, we used the container to bake up some Play Dough cupcakes.  
     
     
    Pinching play dough, rolling little play dough cherries and icing rolls, pressing the dough into the cupcake sections…there is some great fine motor play going on here!


    Your cupcakes are served! 
     
    Need more Play Dough play activities? 
     
    Try making a play dough snake to work on skills like bilateral coordination and graded precision skills. 


    Sensory Solutions for Fireworks

    ear muffs, sunglasses, blanket, ear buds, necklace, ipad, text reads sensory solutions for fireworks

    For children with sensory sensitivities, fireworks can be a real challenge. The days and weeks around the New Year or 4th of July can be a celebration that leads to loud and lengthy firework shows, but there can be isolated booms and cracks that come at all times of day or night. For the individual with auditory sensitivities, this is a huge detriment. Having a sensory diet or sensory solution to the auditory input can support sensory needs.

    sensory solutions for fireworks

    Sensory Solutions for Fireworks

    The intense noise of fireworks can trigger sensory overload, leading to feelings of distress, anxiety, or even pain for these individuals.

    The explosive nature of fireworks results in sharp, unpredictable bursts of sound, which can be overwhelming and disruptive to individuals with sensory sensitivities. The loud noises can cause discomfort, stress, and sensory discomfort, impacting their overall well-being. Plus, for the child or individual that has experienced this discomfort may be traumatized by the potential for booms and cracks of fireworks that seem to come out of nowhere.

    Another sensory consideration when it comes to firework season which can impact sensory sensitive individuals is the crowd. Fireworks displays are often watched in very crowded environments like parking lots, plazas, stadiums, fields, neighborhood lawns, etc. The physicals closeness of a crowd adds additional sensory stimuli like bright lights and vibrations.

    The combination of these factors can further intensify the sensory overload experienced by individuals with auditory sensitivities, making it hard to self-regulate, and can potentially leading to heightened anxiety and meltdowns. We may even see a season of sensory dysregulation.

    How to support the child sensitive to fireworks

    It is important to recognize and respect the needs of individuals with auditory sensitivities during fireworks events.

    Creating inclusive environments that offer quieter alternatives, such as silent fireworks or designated noise-reduced zones, can provide individuals with auditory sensitivities the opportunity to enjoy celebrations without the overwhelming impact of loud sounds.

    Some sensory solutions for fireworks include sensory strategies and physical or location-based tactics:

    • Preparing for the event- talking about what is going to happen at the fireworks event or celebration
    • Using noise cancelling headphones or earbuds
    • Sensory diet tools like deep breathing exercises or weighted blankets to regulate and organize sensory needs
    • Sensory chaining techniques (see below)
    • Earplugs
    • Chewlery
    • Watching fireworks from a distance
    • Watching fireworks from a live streaming of the event or a TV/social media broadcast
    • Countdown from the start of the fireworks
    • Personal space away from crowds

    When it’s time to sleep and the neighborhood is still celebrating, try:

    • White noise sound machine and blackout curtains
    • Music
    • Turn on a movie
    • “Camp out” in the basement for a fun adventure
    • Play a sleep app

    By understanding and accommodating the challenges faced by individuals with auditory sensitivities, we can work towards creating more inclusive and sensory-friendly environments during fireworks displays, ensuring that everyone can fully participate in and enjoy these events. After all, we all have differing sensory needs, and sensitivities can look different for everyone. 

    Sensory Chaining Technique

    One way to challenge sensory systems and trial tools and strategies in sensory situations is through chaining.

    Occupational therapy practitioners are familiar with chaining. There are different types of chaining strategies to support development of skills:

    • Forward chaining- Forward chaining is a teaching strategy that is often used to help individuals learn and develop new skills, particularly in the context of behavior management and task completion. This approach breaks down complex tasks into smaller, more manageable steps, allowing individuals to master each step before moving on to the next one.
    • Backward chaining- Backward chaining is a teaching strategy that can be helpful for teaching new skills as well, however, this approach involves starting with the final step of a task and working backward to teach each preceding step until the entire task is mastered.
    • Sensory chaining- this type of skill development is typically used to slowly and strategically chain a picky eater’s diet from exremely limited and preferred foods to a more diverse food input. This occurs by slowly introducing foods that are similar in texture in a step-by-step process.

    Similar to chaining foods, sensory chaining can be one tactic to increase tolerance to sensory input in the form of tactile sensations, textures, messy play experiences, and even auditory input, or types of sounds.

    The bubble wrap fireworks activity we have described below is a chaining activity to support individuals who are sensitive to fireworks. The activity is hands-on, and led by the child. They can pop the “fireworks” on their own time and gain not only proprioceptive feedback through their hands, but control the “pop” sound.

    This is a fun fireworks themed activity to support the needs of individuals with auditory sensitivities especially when it comes to fireworks being too loud or sudden noises that typically occur during fireworks season. If you have a child sensitive to noise, then fireworks can be auditory overload. Using a sound “safe” activity to prepare for fireworks can be part of a sensory chaining strategy to support children sensitive to loud noises like fireworks.

    This bubble wrap fireworks craft is a “safe” sound!

    Use this fireworks themed sensory activity to incorporate skills such as fine motor skills, fine motor strength, bilateral coordination, and eye-hand coordination with an auditory processing component that is perfect for the 4th of July, or any patriotic holiday! It uses bubble wrap and red, white, and blue colored stickers to make a sensory tool that kids will love.

    You’ll need just a couple of items:

    • Bubble wrap
    • Blue stickers
    • Red stickers


    I stuck a bunch of red and blue labeling stickers on large bubble wrap.
     
    When Big Sister and Little Guy saw this, they were very excited!


    The pop made a perfect firework sound for each color.  It really did sound like the crack of  little fireworks.  We did a little listening activity, where I would tell them…”Pop red, then blue, then blue.”  We did a few patterns and all reds, and then all blues.
     
    Each little bubble gave a very satisfying crack!
     
     
    And then there was a huge crack as a certain Little Guy jumped on the rest of the un-popped bubbles 🙂


    Activities for Auditory Learners

    Auditory learner

    Here, we are covering activities for auditory learners, but you’ll also discover types of learners (an auditory learner is just one learning style!) and how to best support students with specific listening needs. Let’s get started with auditory processing activities to support auditory learners. For students with auditory sensitivities that impact learning and participation in the classroom, understanding the auditory learner is essential.

    Auditory learner

    What is an Auditory Learner?

    Learning styles are the manner in which we best learn and process information. 

    Examples of learning styles include auditory learners, kinesthetic learners, and visual learners.  Each of us has a preference (either obvious or less obvious) to one style of learning or another.  As children develop, they can progress through different stages and preferences of learning.

    Kids can succeed with a variety of learning styles.  One strategy is to address the sense of hearing when teaching new concepts or reinforcing older concepts. 


    There are many characteristics of a student who is an auditory learner. A few indications include the children who can’t seem to stop talking, the child who repeats verbal information out loud, or the child who prefers discussion in classroom activities.  


    Read below to find more characteristics of auditory learners and activities for auditory learners in the classroom or at home.

    You may have heard the term “audio learner” used as well. An audio learner is another phrase that means auditory learner, and refers to someone who learns best through auditory sources of information.

    Audio learners/auditory learners are individuals who prefer to process information through listening, speaking, and hearing. They have a natural inclination towards absorbing and retaining information through sound and auditory input.

    This means that for them, sources of information such as lectures, discussions, audio recordings, podcasts, and verbal instructions are the best ways to absorb and retain information.

    Audio learners tend to excel in activities that involve spoken language, such as participating in group discussions, engaging in debates, or listening to audiobooks. They often have strong listening skills and can easily grasp concepts by hearing them explained or discussed aloud. To optimize their learning experience, audio learners may benefit from using techniques like reading aloud, engaging in conversations, recording and replaying lectures, or utilizing mnemonic devices that involve sound and rhythm.

    Auditory Memory

    Auditory memory, or audio memory is another concept that should be covered. 

    Auditory memory (aka audio memory) refers to the ability to remember and recall information that has been heard or listened to. It is a component of auditory learning and involves the retention and retrieval of auditory stimuli or information.

    People with strong audio memory can remember and recall spoken words, conversations, lectures, music, or any other auditory input with relative ease. This type of memory can be advantageous for individuals who learn best through auditory means, as they can remember information more effectively when it is presented in an audio format.

    auditory memory

    To improve auditory memory, try strategies such as:

    • repetition
    • verbal rehearsal
    • mnemonic devices
    • voice recordings
    • audio notes

    Using these tools can assist in reinforcing and retaining information for individuals with a preference for auditory learning.

     
    Try these strategies to help kids who are auditory learners in the classroom or at home.


    Characteristics of Auditory Learners

    Not all children who are auditory learners will experience all of the characteristics below.

    • Prefer listening in the classroom
    • Like to talk
    • Repeats directions
    • Can’t concentrate when there are noises in the environment
    • Can’t fall asleep to music or a television
    • Benefits from repetition of directions
    • Learns best when listening
    • Learns well from videos
    • Easily recalls songs, poems, and phrases
    • Talks out decision processes
    • Remembers facts in detail when hearing them
    • Prefers to hear all of the facts when learning something new
    • Hums or talks to self
    • Easily can identify differences in pitch or tone of sounds
    • Follows verbal instructions better than written instructions
    • Prefers smaller groups in the classroom (limits the auditory distractions)
    • Remembers facts better after repeating them
    • Talks or moves lips while they write
    • Recalls a person’s tone of voice when remembering a conversation
    • When reading or writing, written information may not make sense until it’s been read aloud
    • Writes with light pencil pressure
    • Children who learn best through the auditory sense may benefit from auditory strategies.  
    • May have auditory sensitivities in the classroom

    Try some of the activities for auditory learners that are listed below:

    Activities for auditory learners

    Activities for Auditory Learners

    For individuals who are auditory learners, an auditory learning style of specific activities can support intake and retention of information.

    • Read homework directions out loud
    • Record facts on video and then replay it.  A mobile phone or tablet works well for this strategy.
    • Sing facts to a tune
    • Work on commonly misspelled words like those words with similar diagraphs. Use hands-on, multisensory activities to support auditory needs. 
    • Write a song when memorizing facts or spelling words
    • Teach to other students or even to stuffed animals
    • Practice in front of a mirror
    • Try a whisper phone
    • Listen to books on tape using headphones
    • Rhyme facts
    • Spell words out loud in different pitches and tones
    • Use noise eliminating headphones in the classroom or during tests
    • Find a quiet space for homework
    • Turn off distractions. Consider televisions, phones, or even fans
    • Use mnemonic devices to memorize facts
    • Listen to audiobooks
    • Use oral reports for classroom projects
    • Allow students to record portions of homework or projects onto devices
    • Make flashcards and read them out loud
    • During classroom lessons, clap or speak louder during important parts
    • Speak in syllables


      What are your best strategies to help auditory learners?
    strategies to help kids who are auditory learners in the classroom or at home.

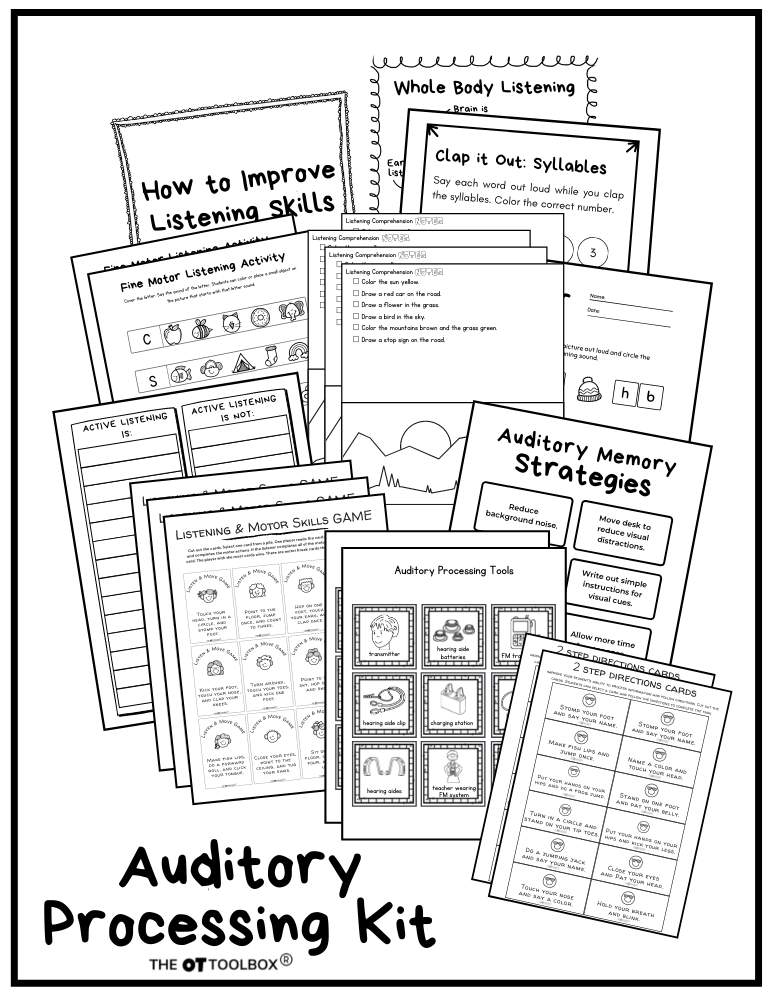
    The Auditory Processing Kit is a printable packet to address listening skills, whole body listening, listening comprehension, active listening, and auditory processing needs. This printable packet contains active listening activities, hands-on strategies, activity cards, visual cards, handouts, and more.

    Auditory Processing Kit

    The Auditory Processing Kit is a tool to support learners by building skills in listening comprehension, auditory processing needs, and much more. The tools offer support to learners with hyper-responsive or hypo-responsive auditory systems. Therapists love the hands-on activities to support learning and active listening through play and handwriting tasks.

    • Listening Comprehension
    • Fine Motor Listening Skills
    • How to Improve Listening Skills Poster
    • Clap It Out Syllables Orthographic Activities
    • Beginning Sounds Letter Activity
    • Rhyming Words Activity
    • Activity Listening Activity
    • Hearing Skills Activity
    • Auditory Memory Strategies
    • What Does Active Listening Look Like?
    • Whole Body Listening Activity
    • Whole Body Listening Poster
    • Listening and Motor Skills Game
    • 2 Step Direction Cards
    • How to Support Hyper-Responsiveness of the Auditory Sense (handout and info sheet)
    • How to Support Hypo-responsiveness of the Auditory Sense (handout and info sheet)
    • Auditory Processing Tools Cards
    • Auditory Processing Speed -2 Digit Numbers
    • Auditory Processing Speed -3 Digit Numbers
    • Auditory Processing Speed -4 Digit Numbers

    Use the handouts and posters to teach about the auditory system and auditory sensitivities, with strategies to support individualized needs. Get your copy of the Auditory Processing Kit today.

    Colleen Beck, OTR/L has been an occupational therapist since 2000, working in school-based, hand therapy, outpatient peds, EI, and SNF. Colleen created The OT Toolbox to inspire therapists, teachers, and parents with easy and fun tools to help children thrive. Read her story about going from an OT making $3/hour (after paying for kids’ childcare) to a full-time OT resource creator for millions of readers. Want to collaborate? Send an email to contact@theottoolbox.com.